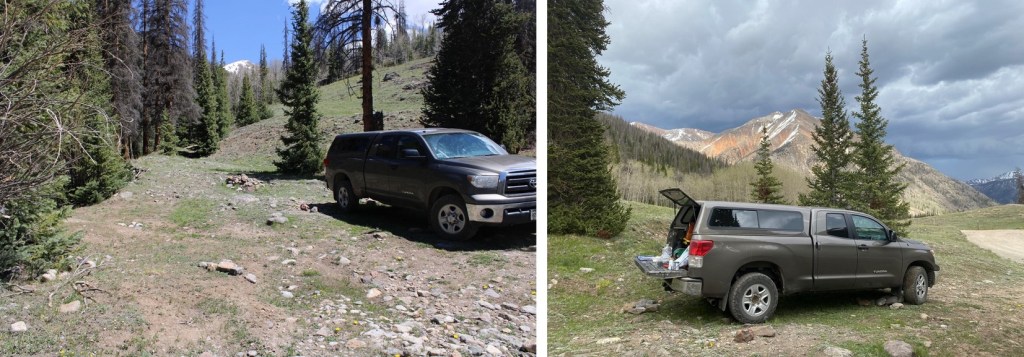
I’d been parked for a couple of days at Cooper Creek, dispersed camping and hiking. I woke up to rain, so I decided to hit the snooze button on my alarm and just lie there in the bed of my truck and wait it out. Within 15 minutes the rain stopped, and I was on my way. This is a very straightforward hike, mostly above treeline, with little route finding (although there is some bushwhacking along Rock Creek).
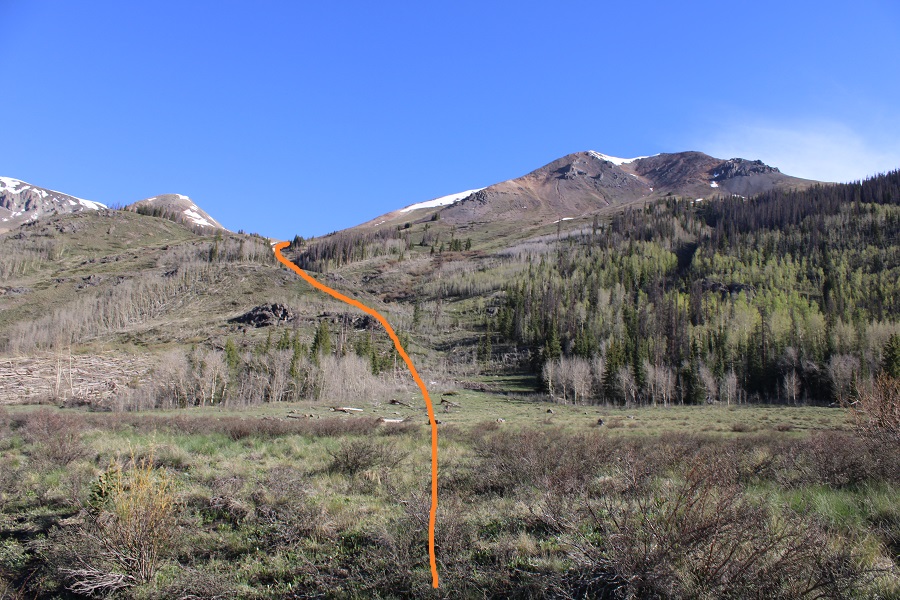
I followed CR 30 for about a third of a mile, and then ascended Rock Creek, sticking to the right side of the creek
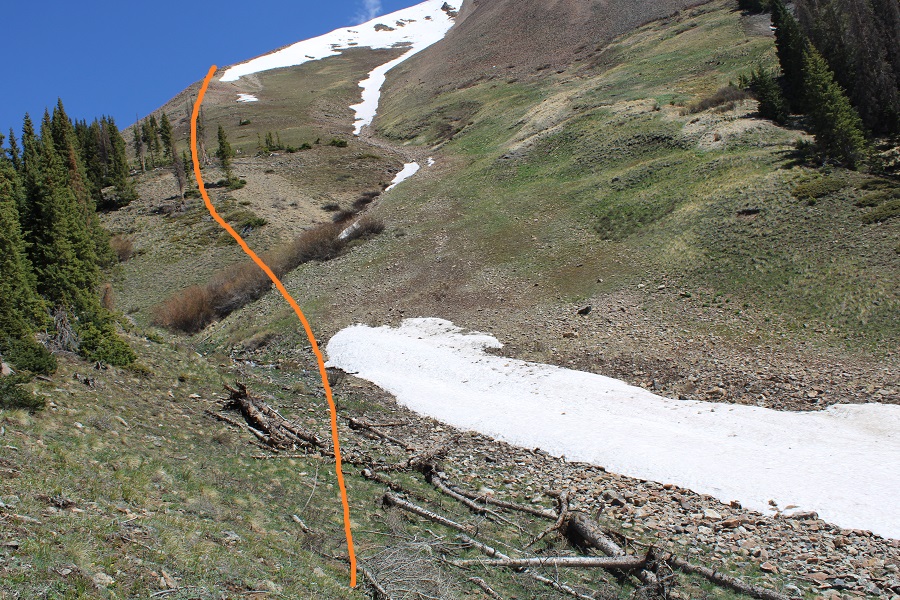
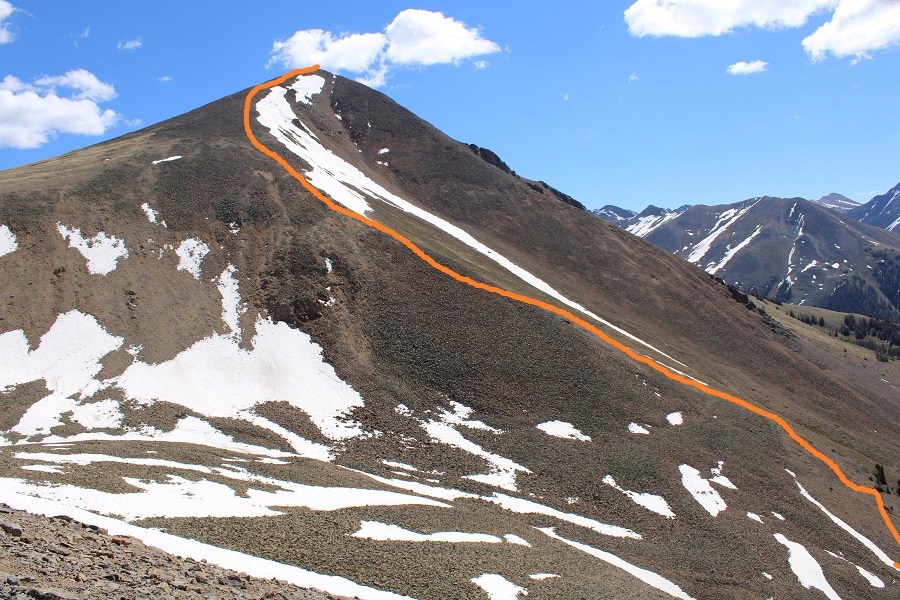
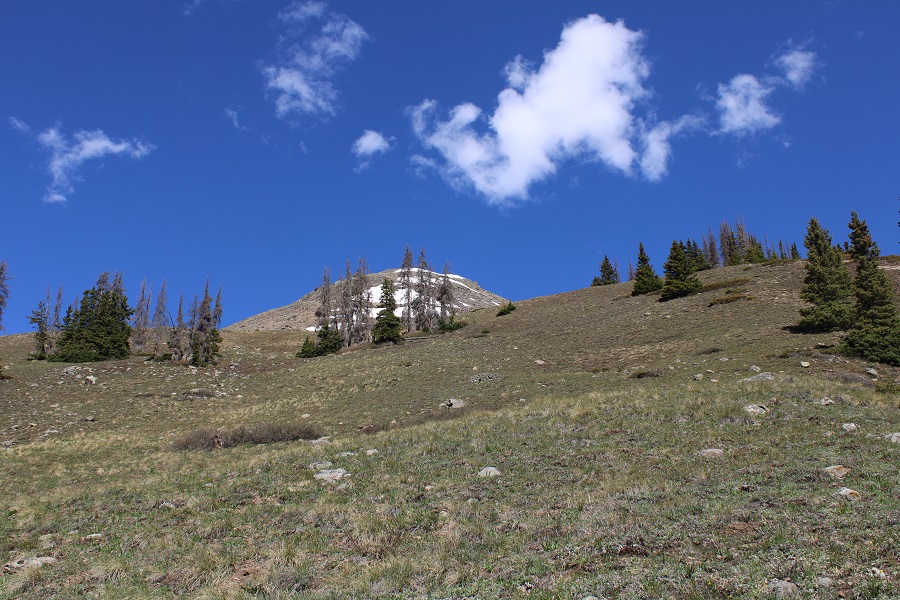
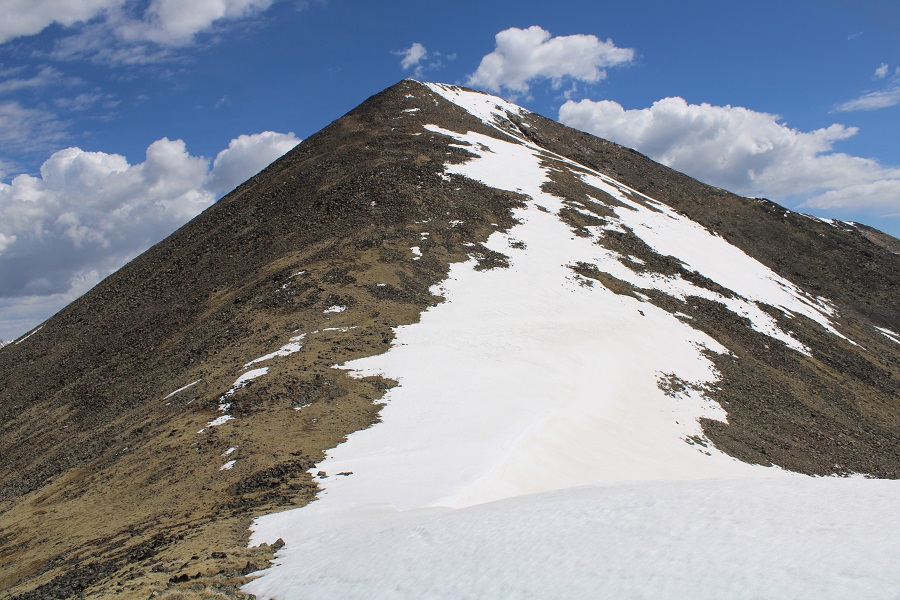
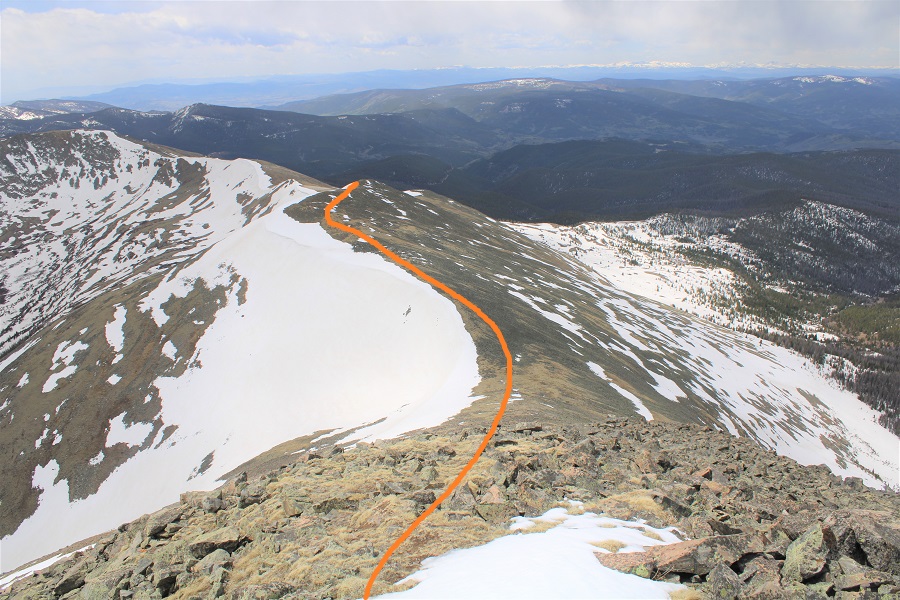
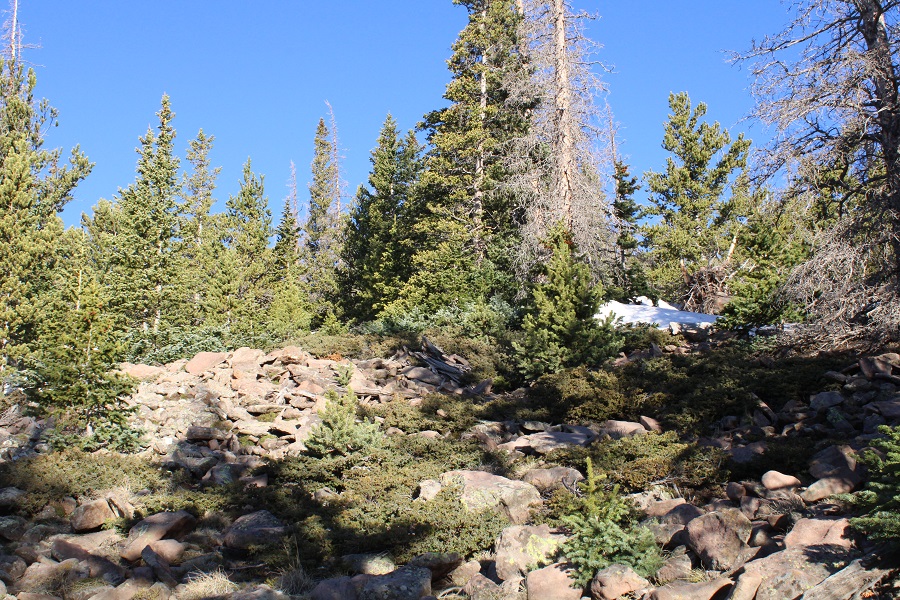
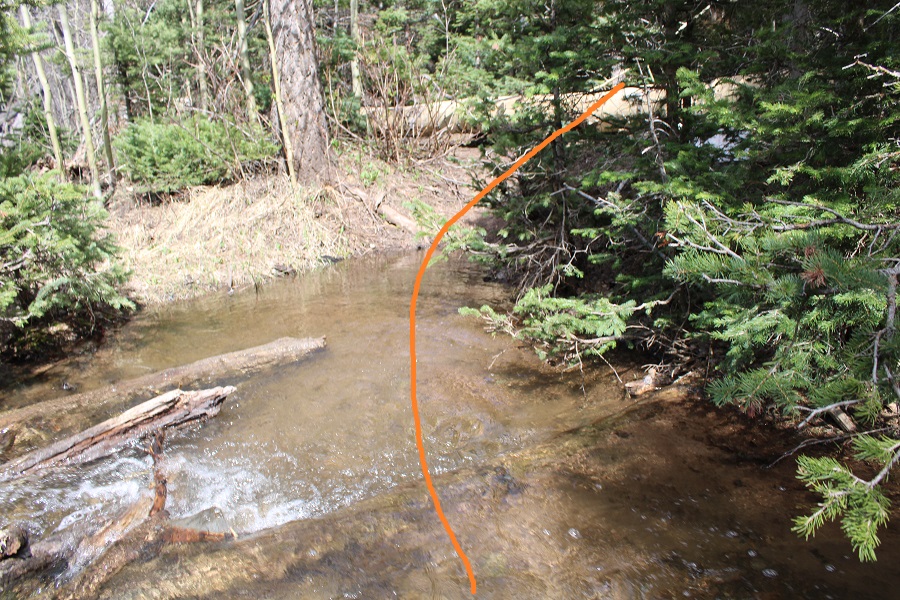
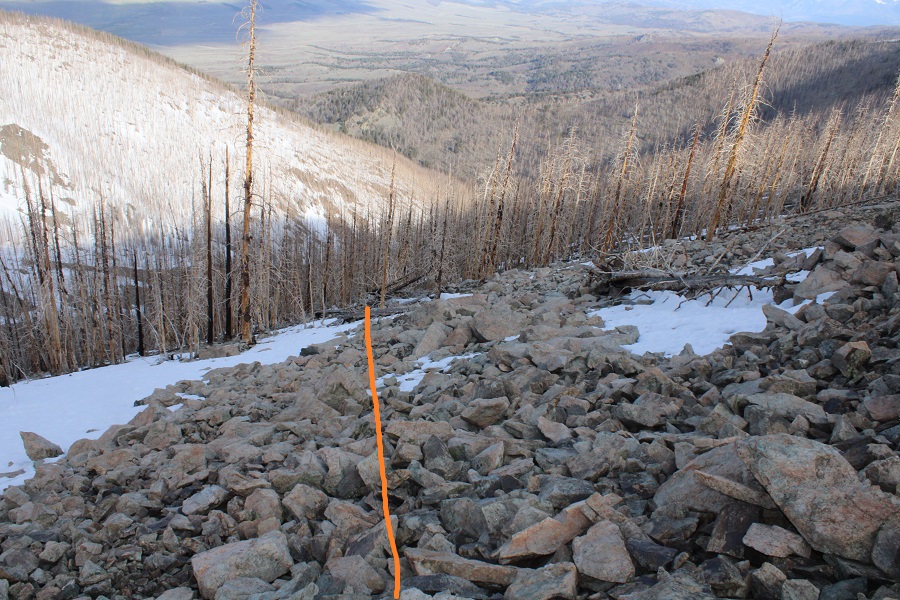
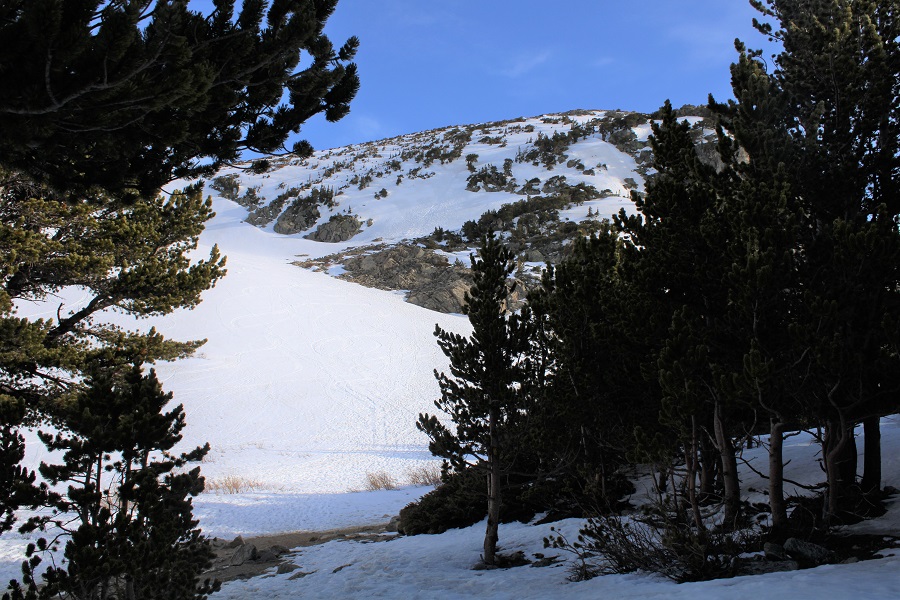
Just before making it to the basin, at after 1.5 miles and at around 11900’, I left the creek and started heading east, up the west ridge of the peak.
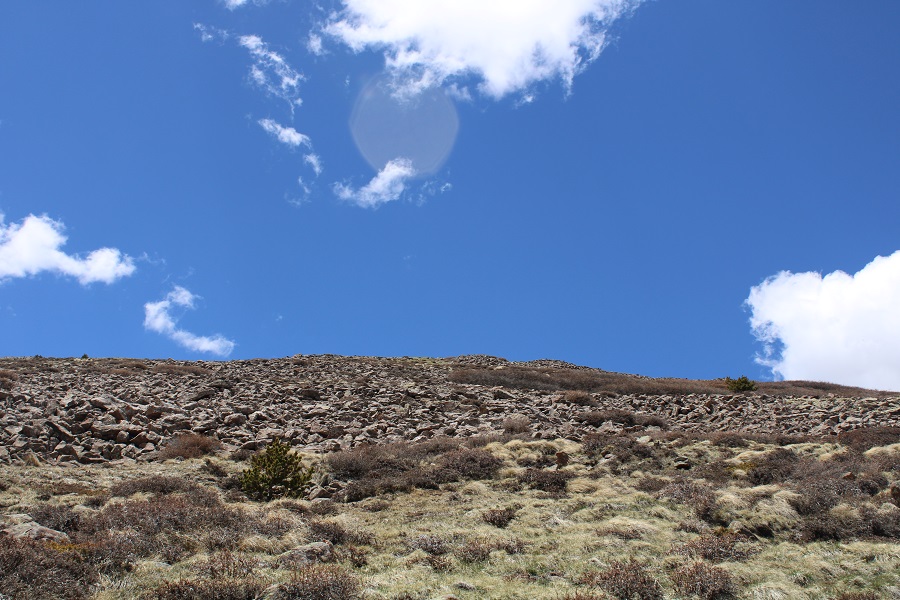
While straightforward, this area was steep. It started out with scree, then turned to rocks the size of microwaves, and then smaller rocks the size of softballs. I just kept following the curve of the mountain as it climbed northeast.
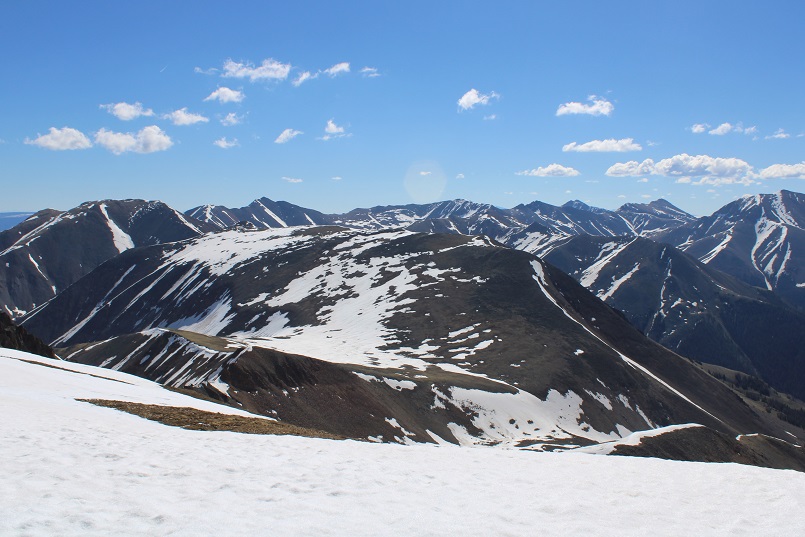
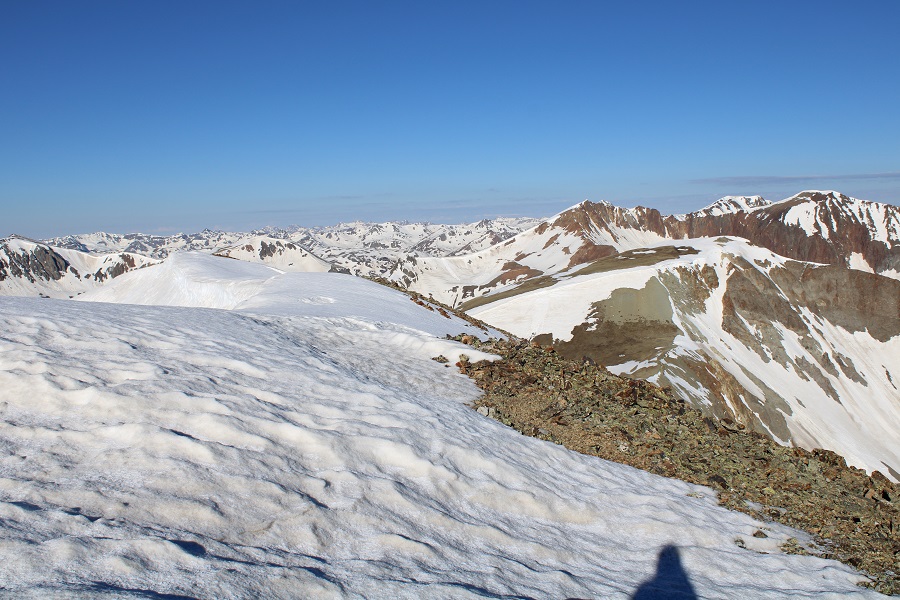
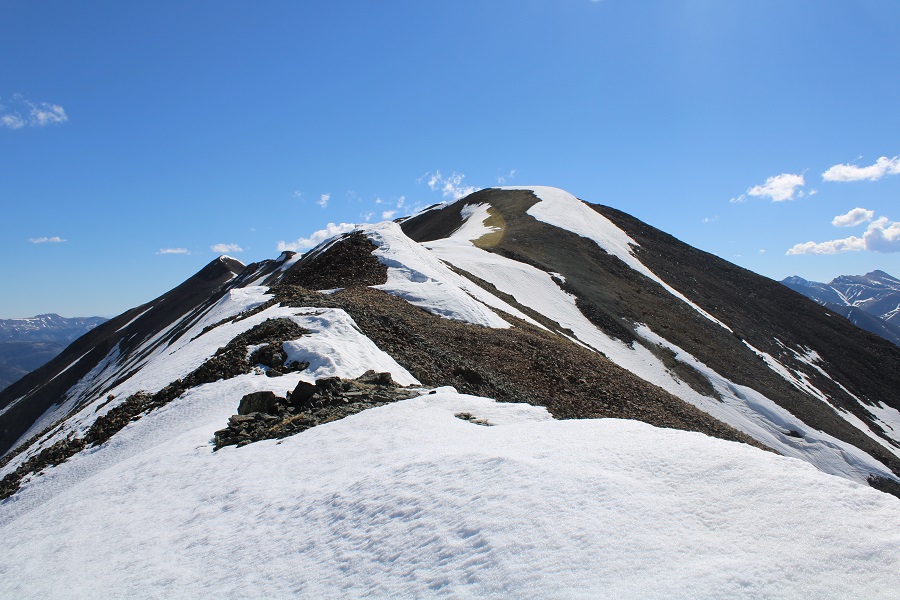
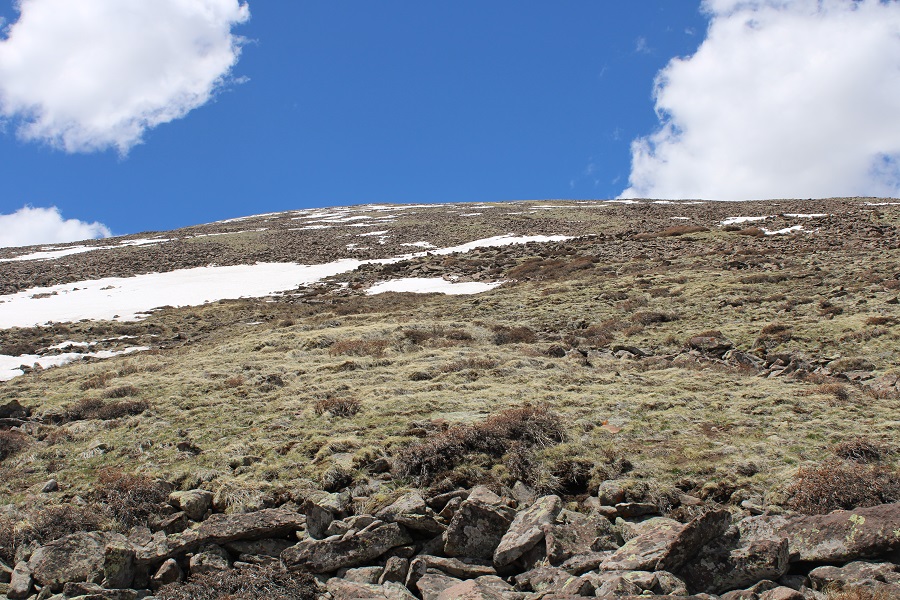
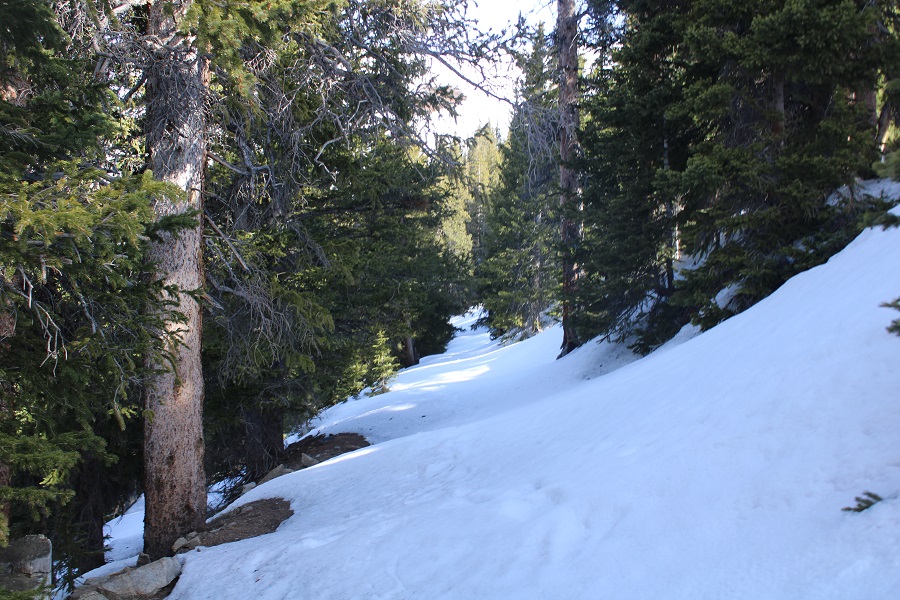
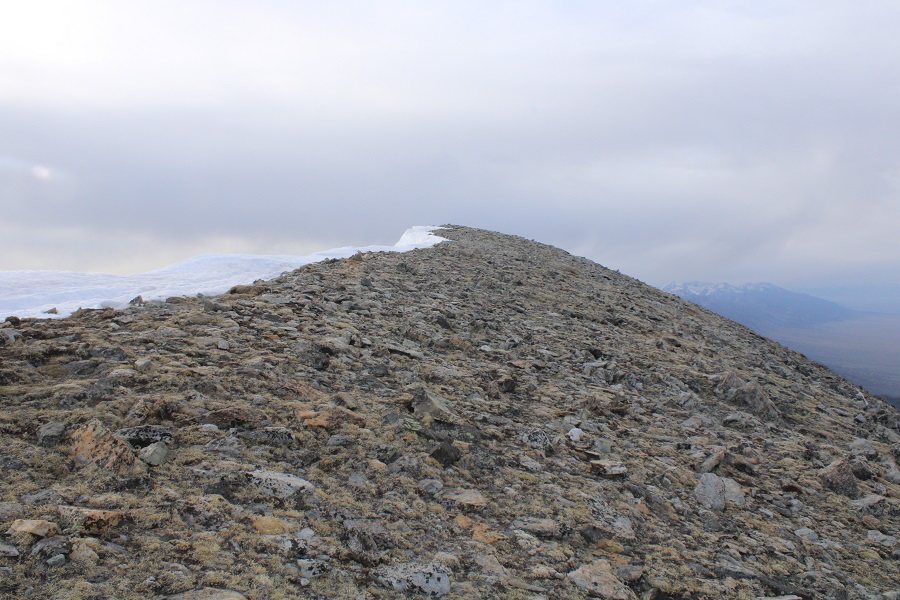
Once I made it to the ridge, the elevation gain evened out. I followed the ridge for .75 miles northeast, all the way to the end, to the summit. 95% of the snow was avoidable.
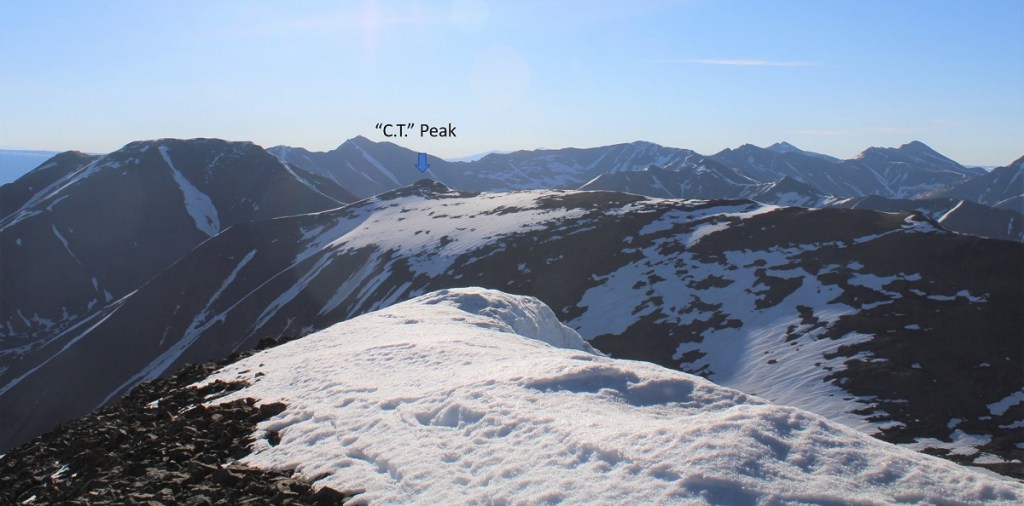
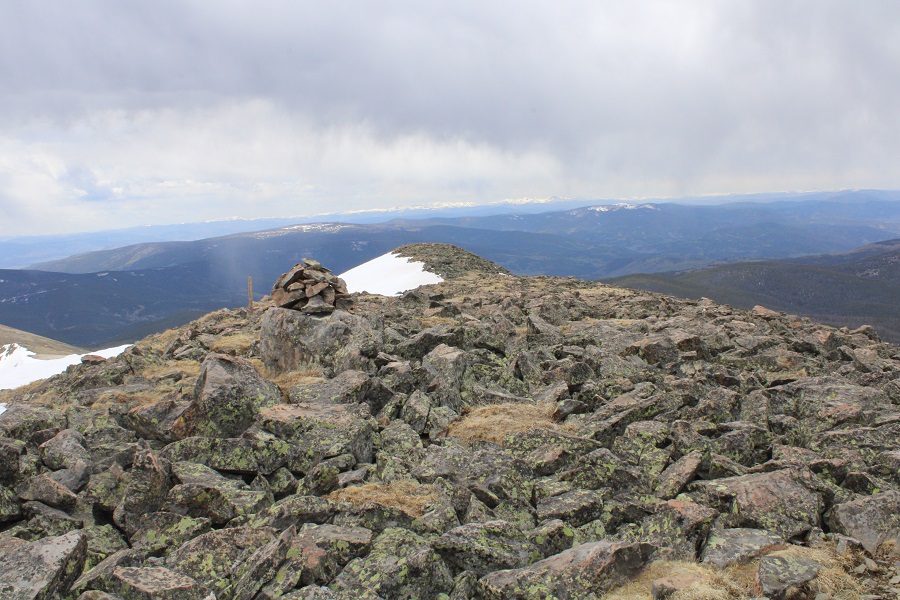
I summited “C.T.” Peak at 6:15am
“C.T” Peak:
There was a summit register. It was still early, and it had been my intent to continue on to “Gudy Peak”, but the traverse was covered in snow, and I knew from yesterday’s hike how quickly the snow turned dangerous, so I opted to wait for it to thaw out and come back another time, knowing there’s be snow in the Cooper Lake Basin as well. I turned and headed back the way I’d come.
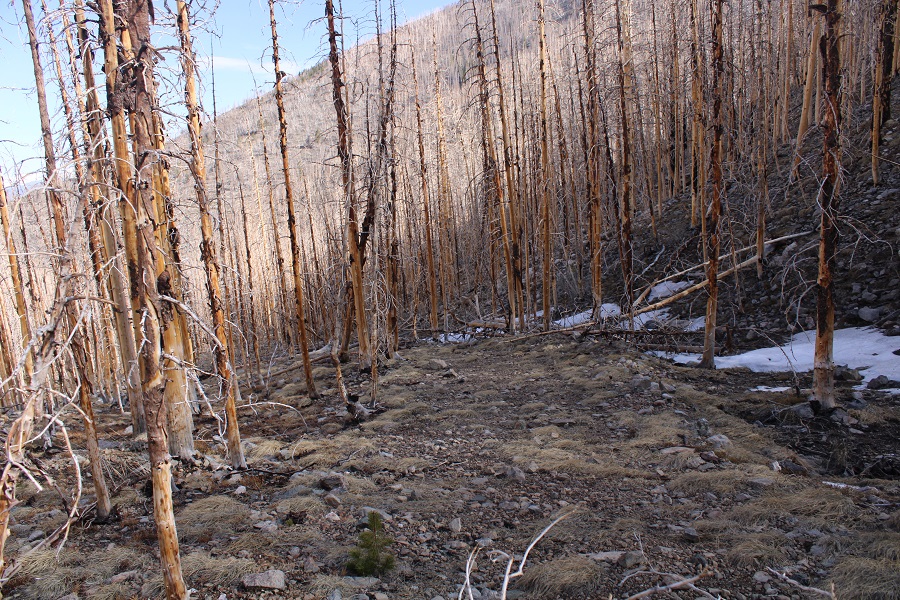
Back down the ridge
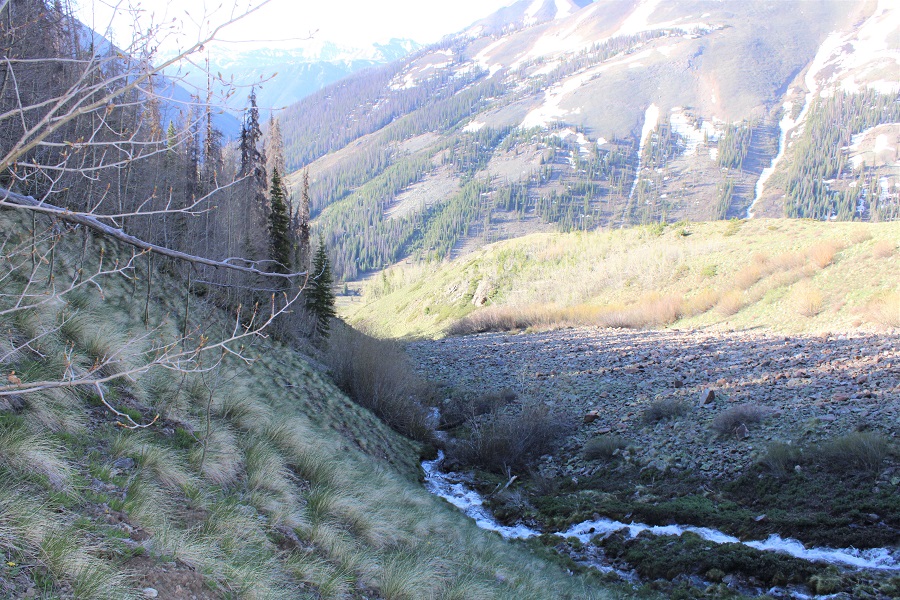
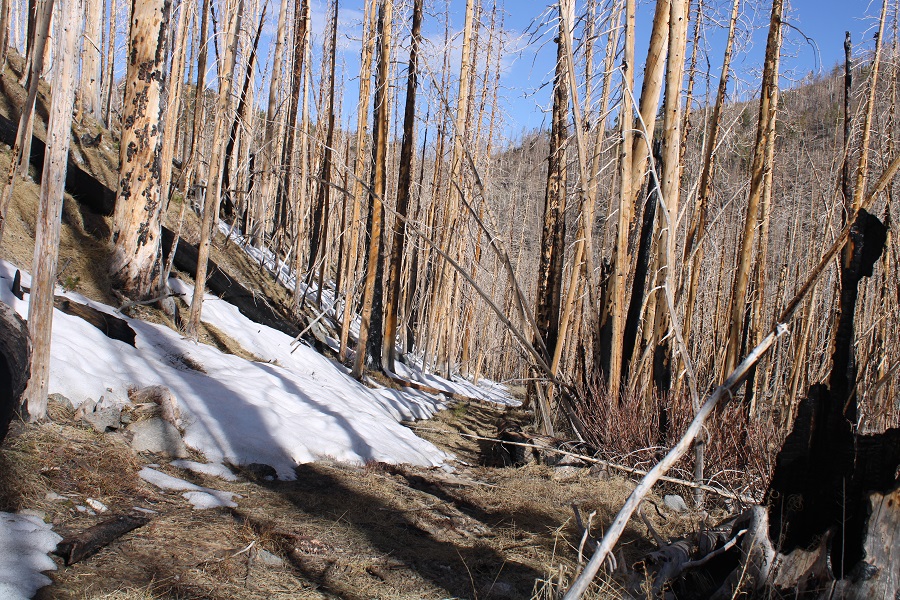
Until I met up with Rock Creek and followed it back to CR 30
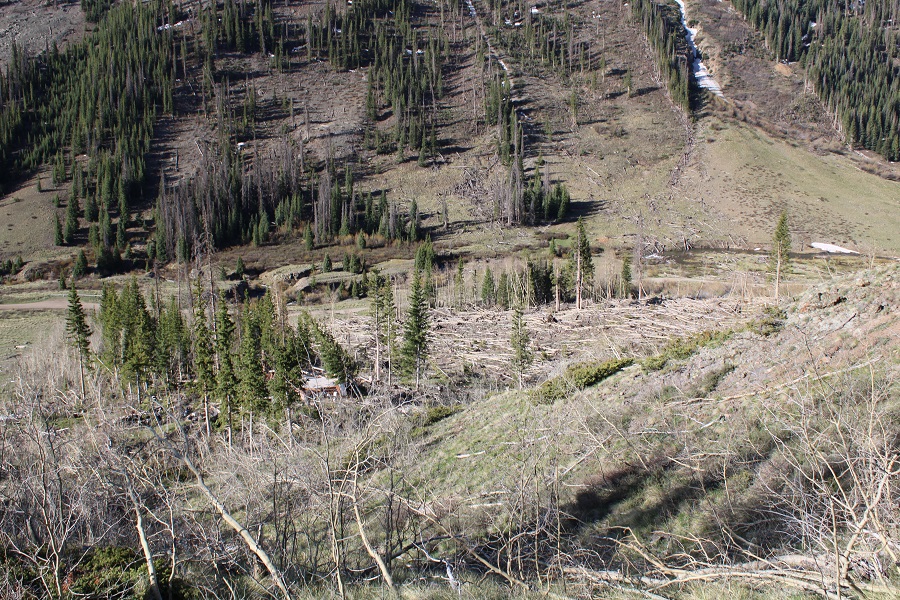
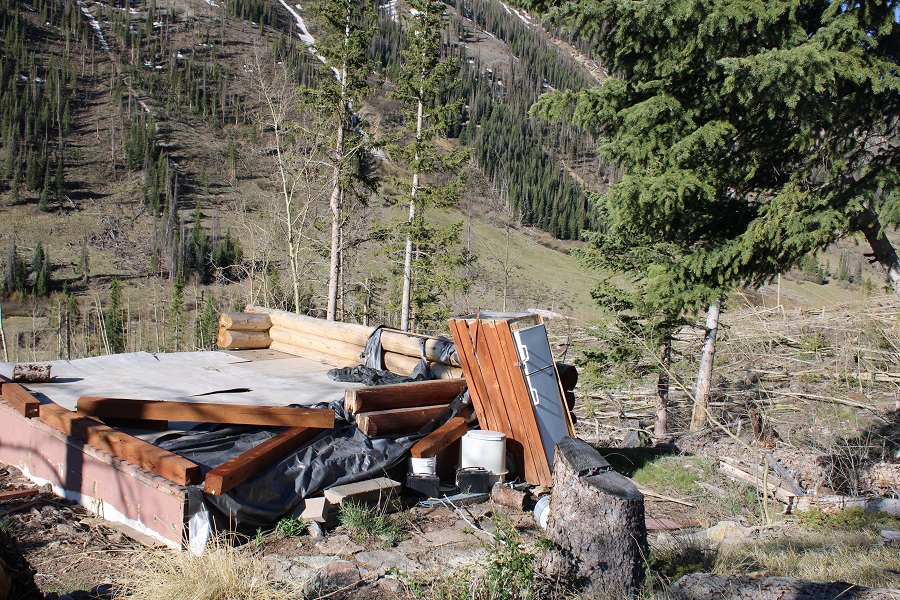
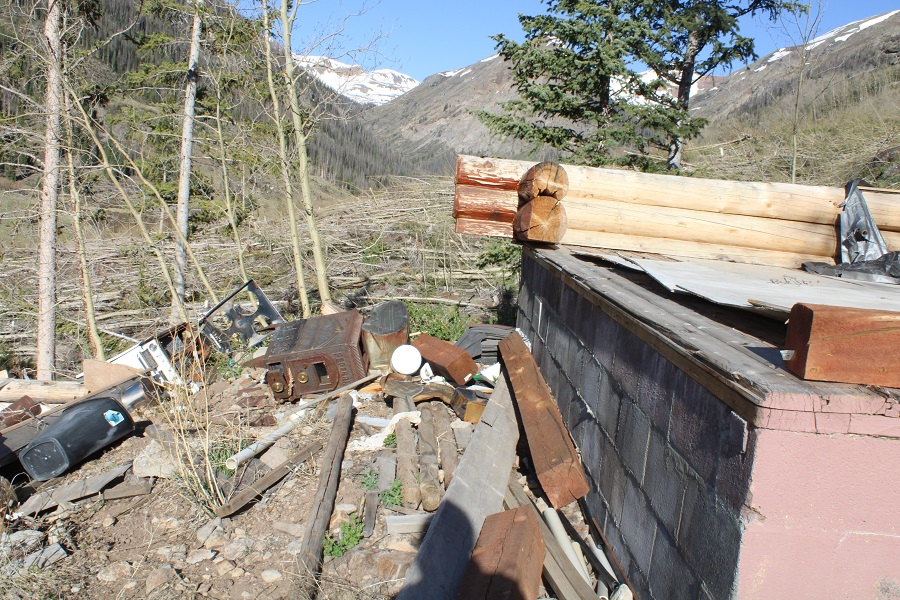
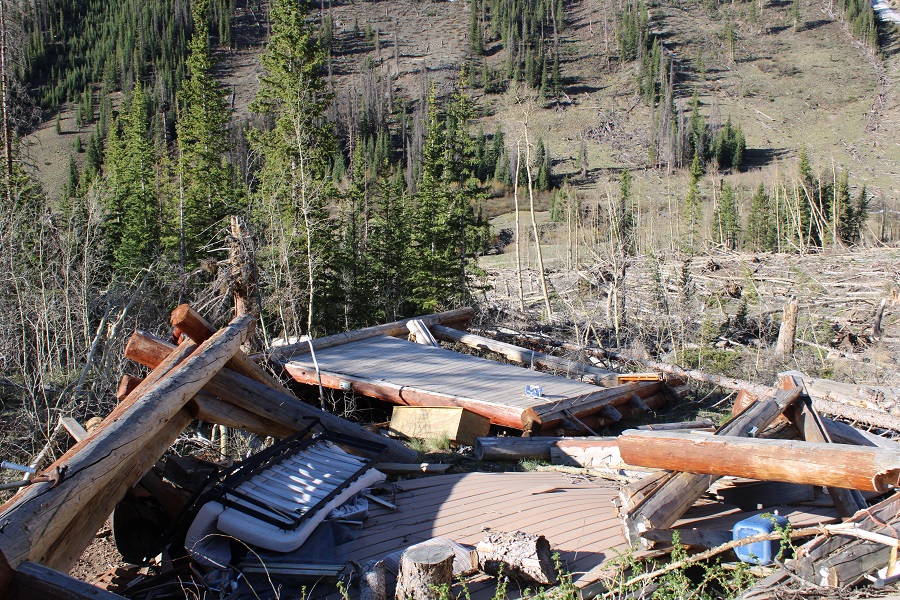
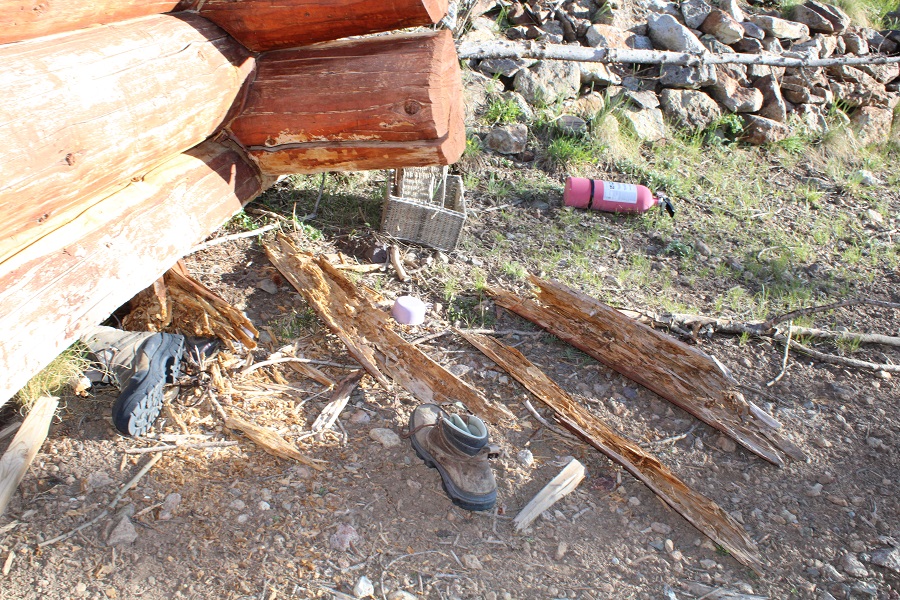
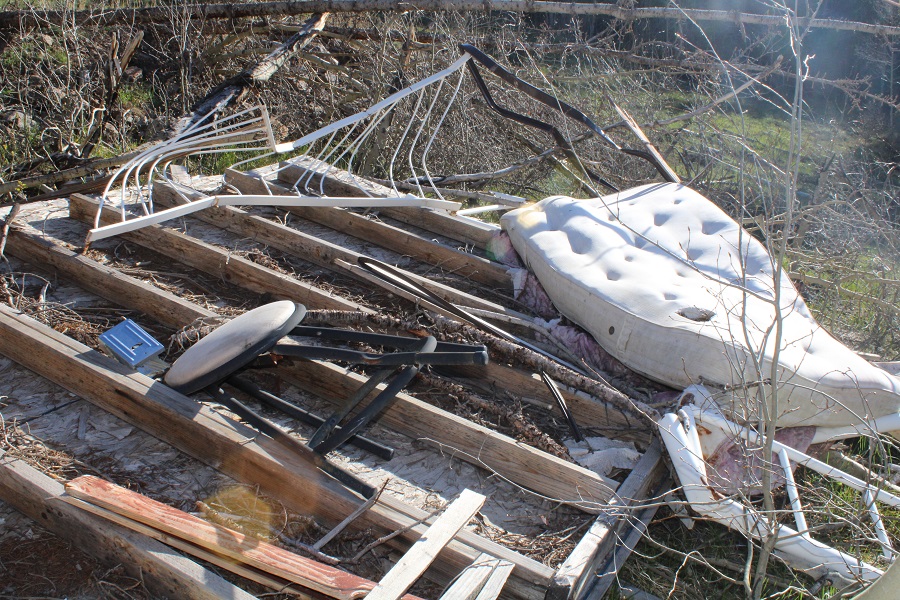
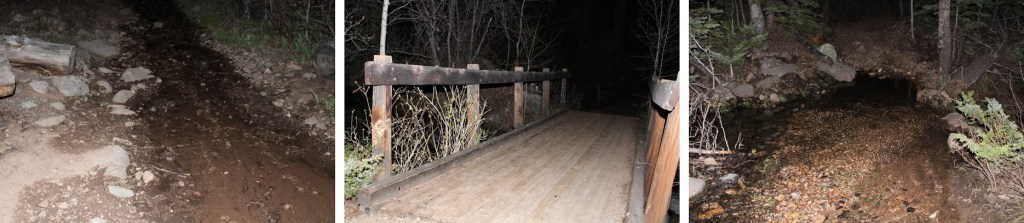
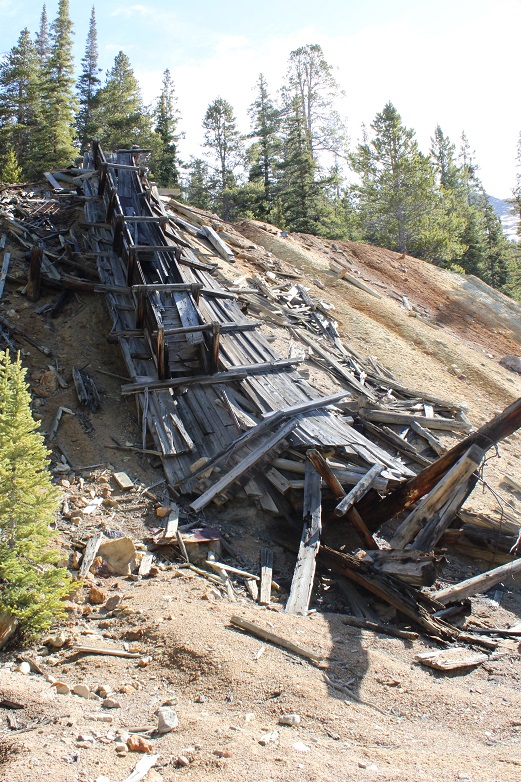
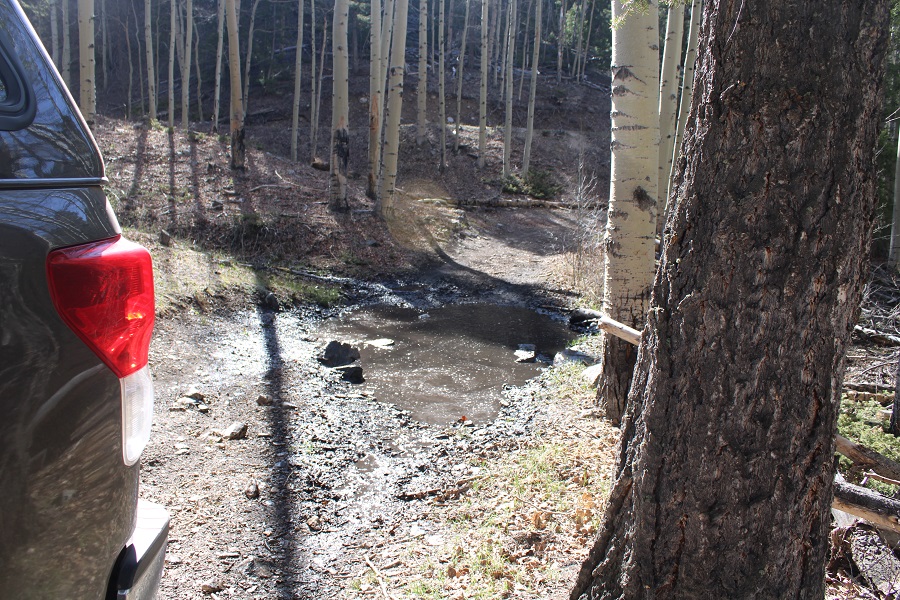
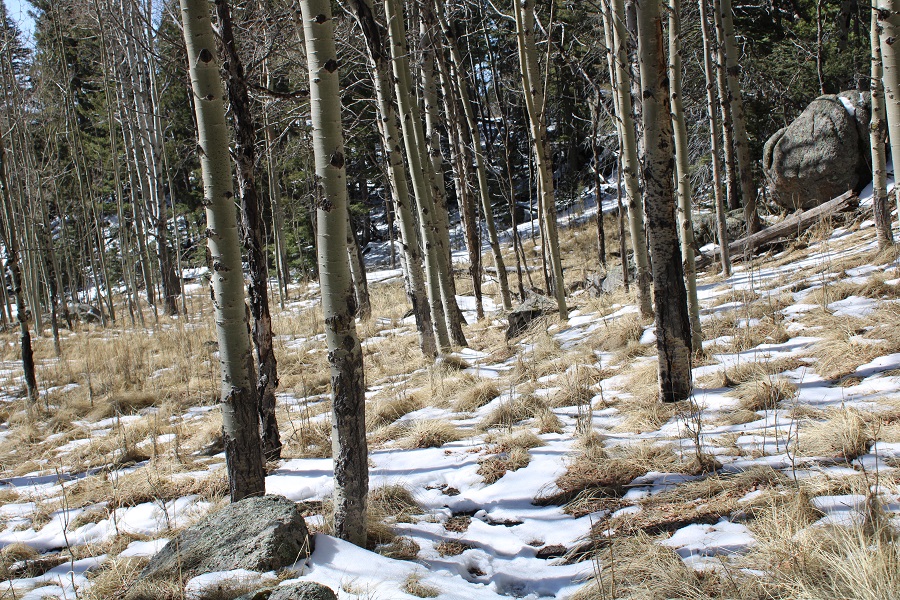
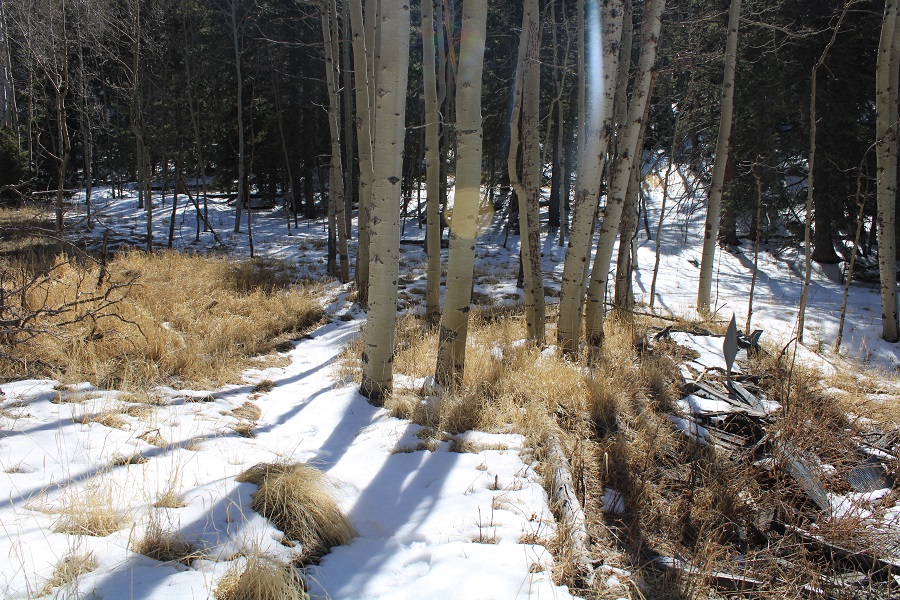
It was still really early in the morning, so I decided to spend some time investigating the avalanche site. It looked recent (this winter?). The house was scattered all over the area, with the roof several hundred feet from the closest level of the house (it looked like at least a 2-story house). Beds were still made, but the fridge was empty, indicating the house had been closed up for the winter. There were hiking boots in great condition, bed frames torn to pieces, propane tanks, wood burning stoves, and daily household items lying around, even a full bottle of laundry detergent. There were camp chairs, still in good condition, folded and lying under fallen aspens next to what could have been a porch.
After abut a half hour of wandering around I made my way back to the road and followed it back to my truck.
I made it back to my truck at 8am, making this a 6.21 mile hike with 2925’ of elevation gain in 4.5 hours.
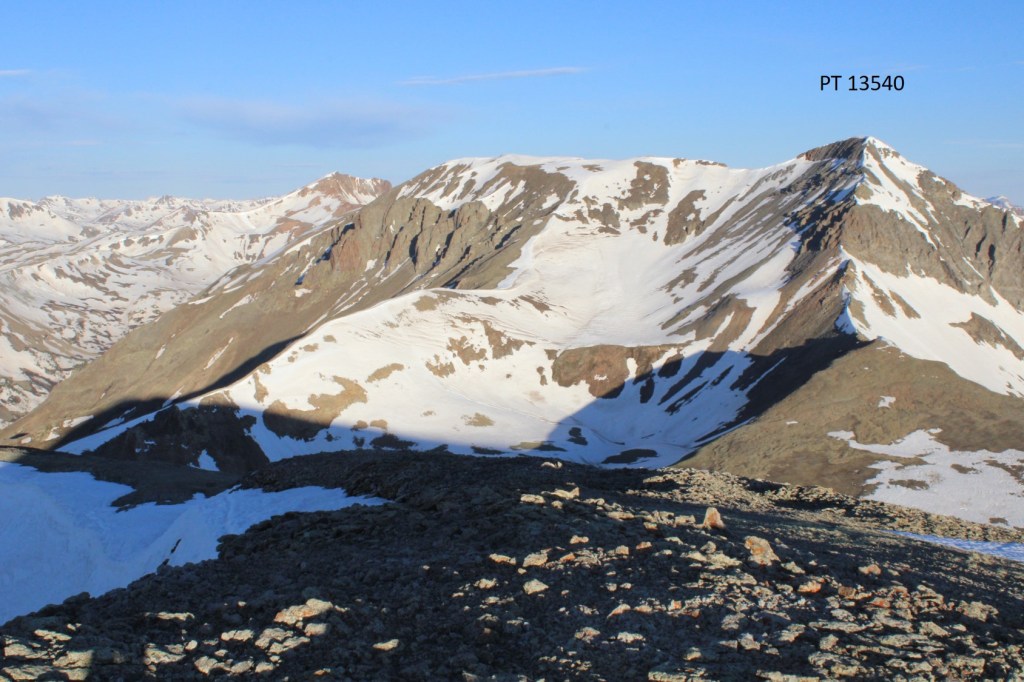
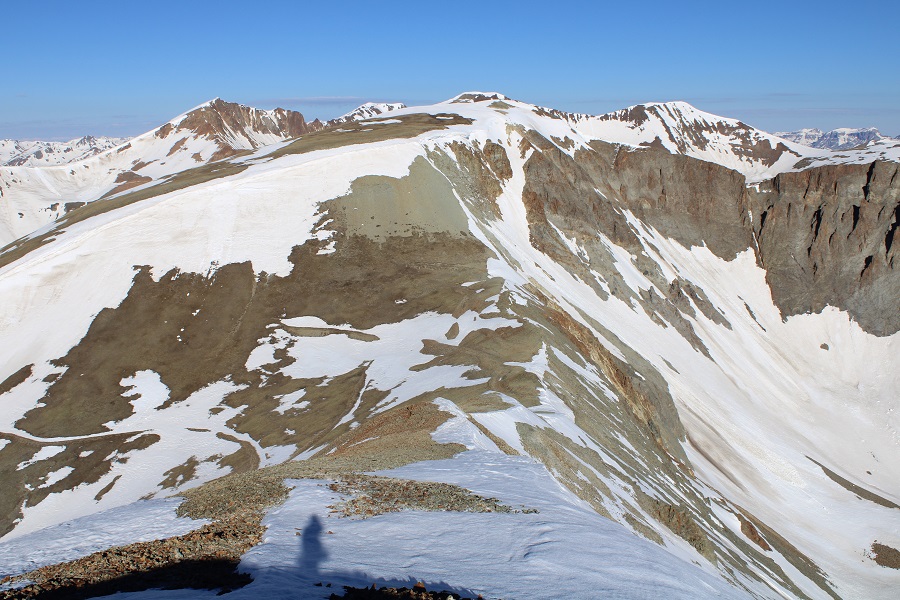
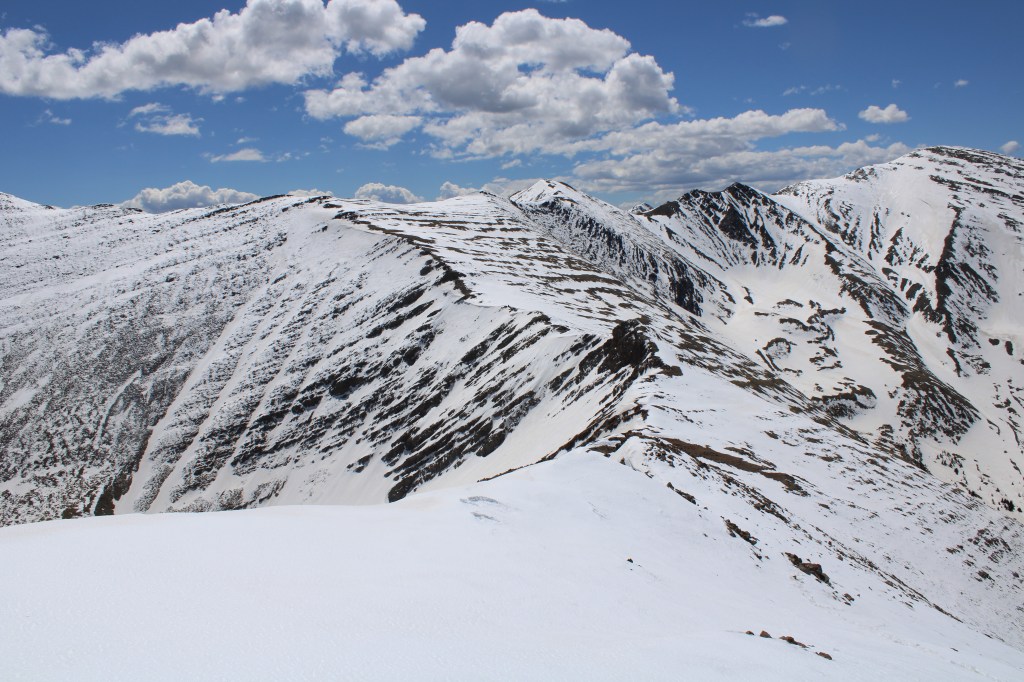
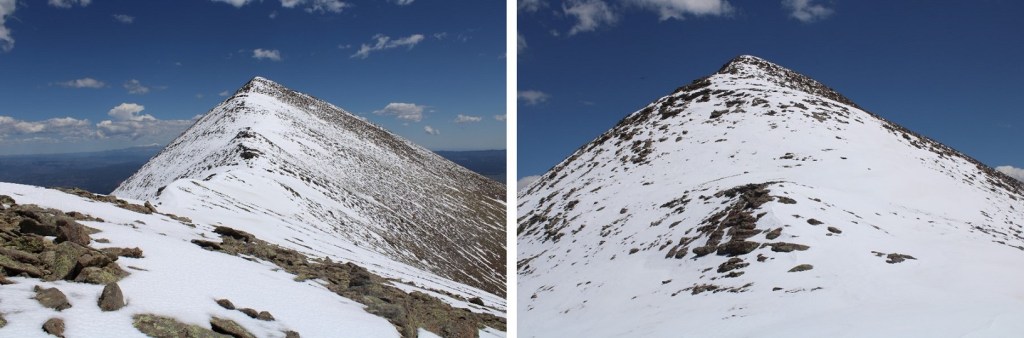
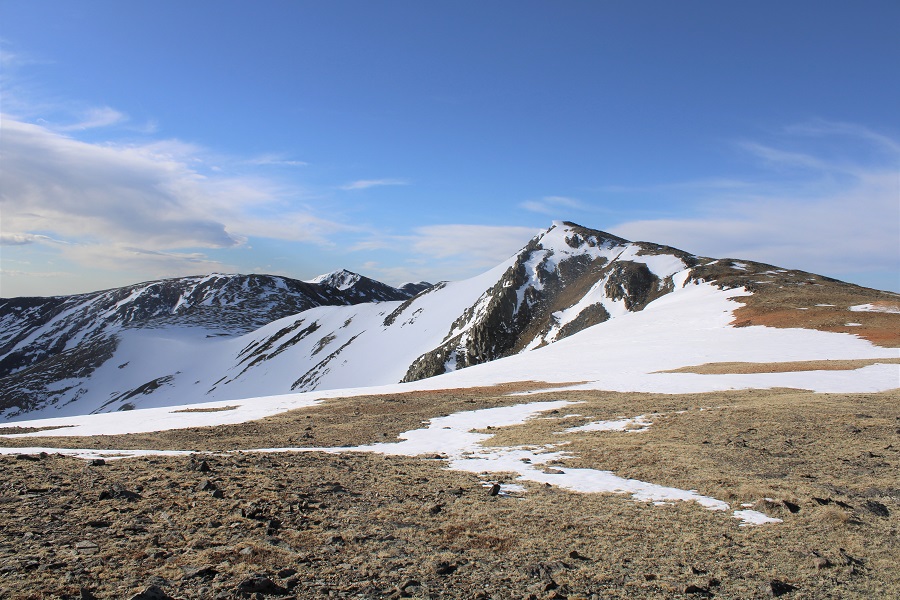
Here’s a view of the ridge route from PT 13540
And a look up the ridge from the PT 13540 ridge
It was still early, so I decided to take a nap for a few hours. I woke up, finished reading the book my daughter lent me, as well as a biography on Calamity Jane, and decided this finishing hikes early and just relaxing had its’ benefits. I hiked around for a bit, started a campfire, sipped some whiskey, and thought how wonderful dispersed camping, and life in general, can be.
CR 30 has had some work: the road was much nicer to drive than it was last year. No more potholes! At least the firsts 11 miles or so. The last 5 were still a little rough.
I parked near Cooper Creek and settled in for some dispersed camping. There was a storm rolling in I and I got to listen to the thunder roll as I ate dinner (Pho, which was awesome) and read a little. After a while campers set up across the way. I went over and talked with them: It was a father and son duo from Alabama, road-tripping because the son had just finished college. Very cool father/son time.
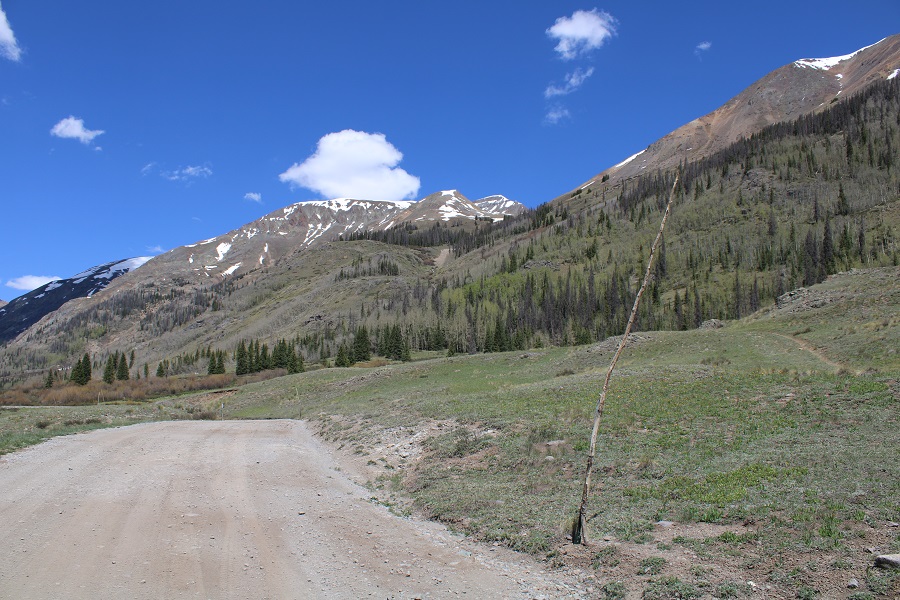
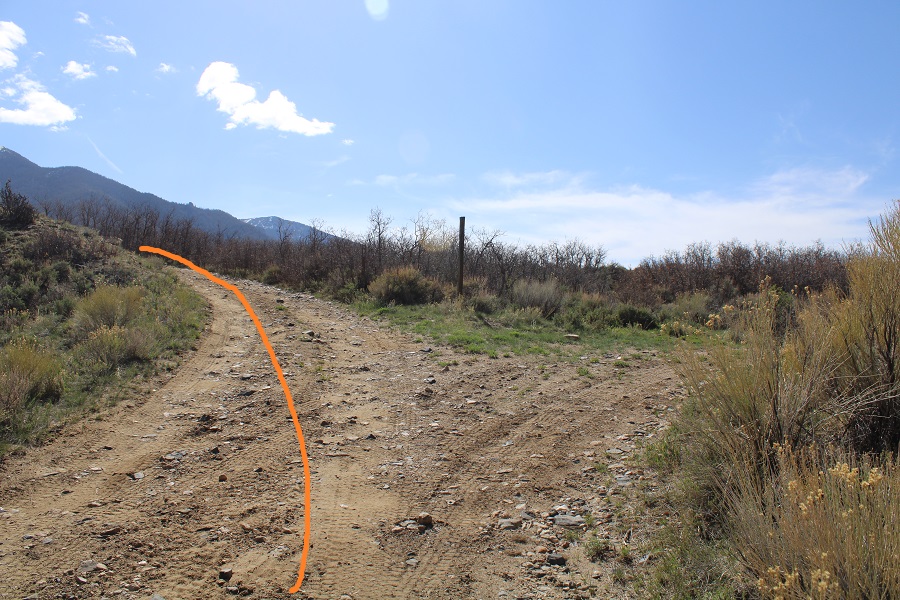
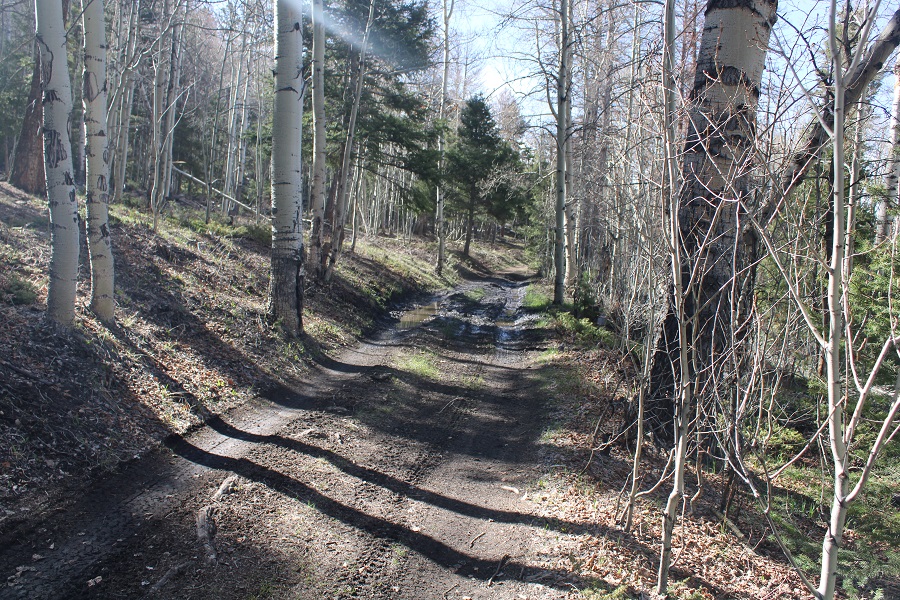
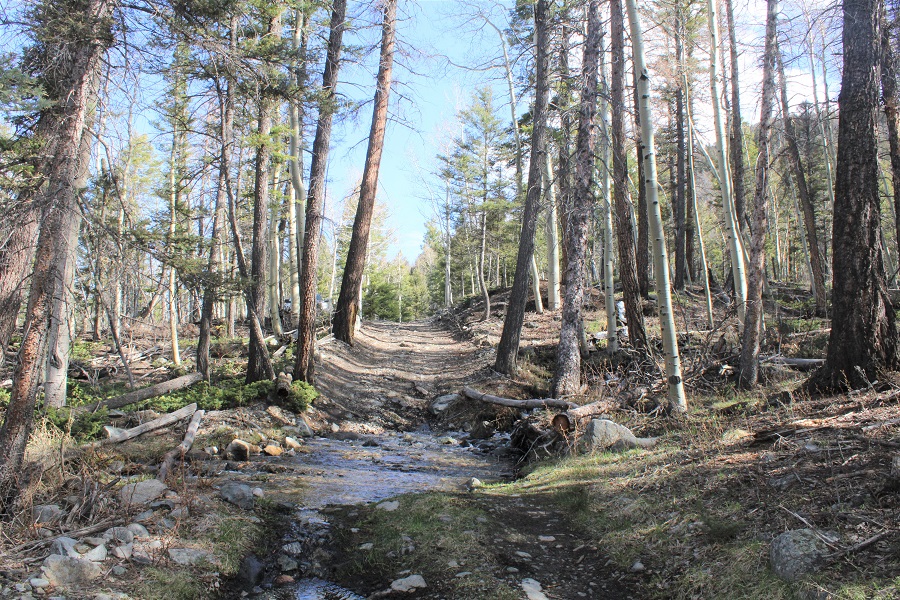
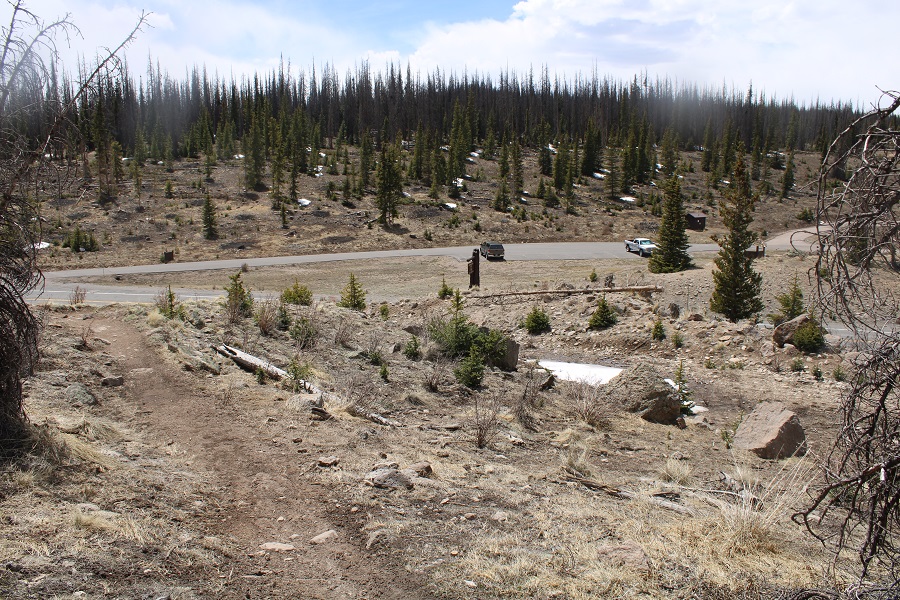
I made it an early night, sleeping until my alarm went off at 3am. I hit snooze and was on the trail by 4am. The route starts out following CR 30 west for about a third of a mile, then I left the road and followed the drainage/Rock Creek northwest.
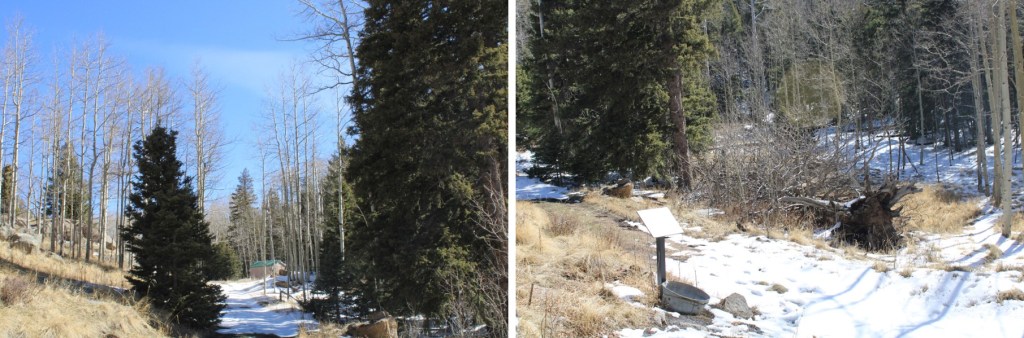
The area where you leave the road is also the site of a recent avalanche: a house was destroyed, and there are pieces of the house, roof, furniture, shoes, etc. strewn about the area for about 100 yards.
I followed Rock Creek into the upper basin, staying to the left of the creek (but hugging the creek the entire way).
Once in the basin I followed it as it curved northwest.
There was a lot more snow here than I’d expected: I put on my microspikes and climbed into the upper basin.
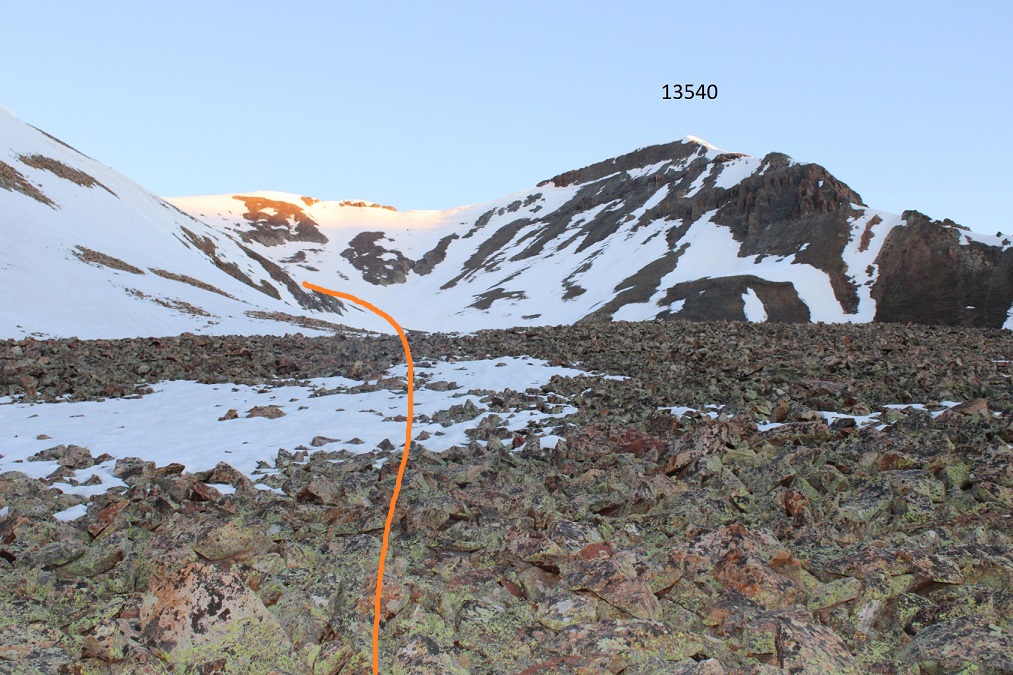
Once in the upper basin there was even more snow. Microspikes were still ok at this time, but I knew I’d want to take a different route down, as the sun was going to warm up this snow quickly and there was no telling how deep I’d be postholing. I aimed for the ridge, and once on the ridge, followed it west to a kind of saddle
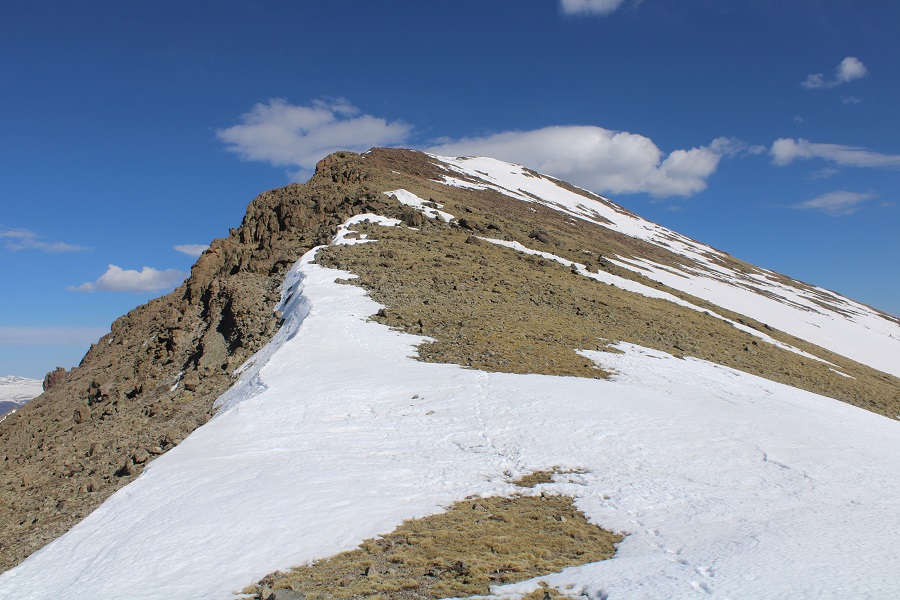
At the saddle I turned right and followed the ridge northeast to the summit of 13540.
There was a class 2 rocky section to navigate. I just went up and over this.
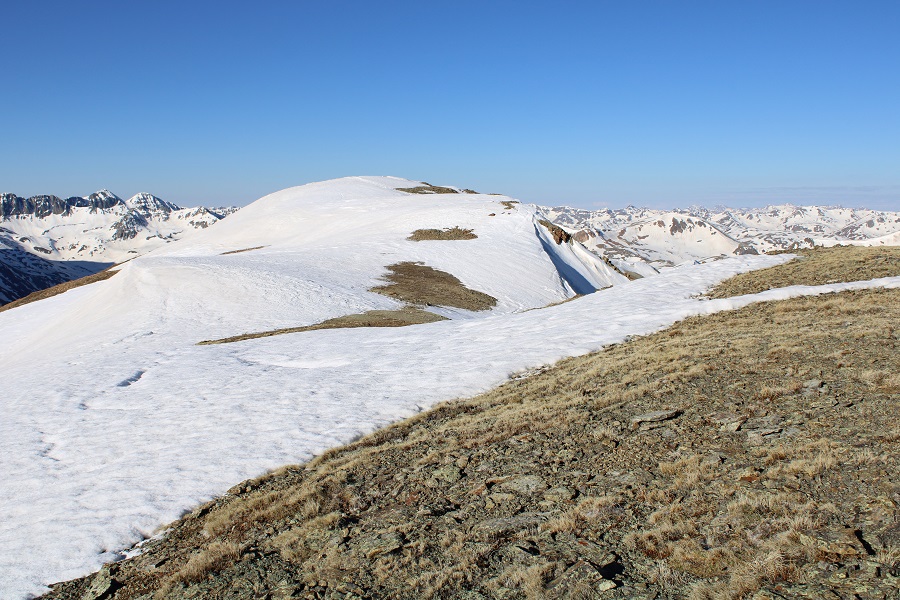
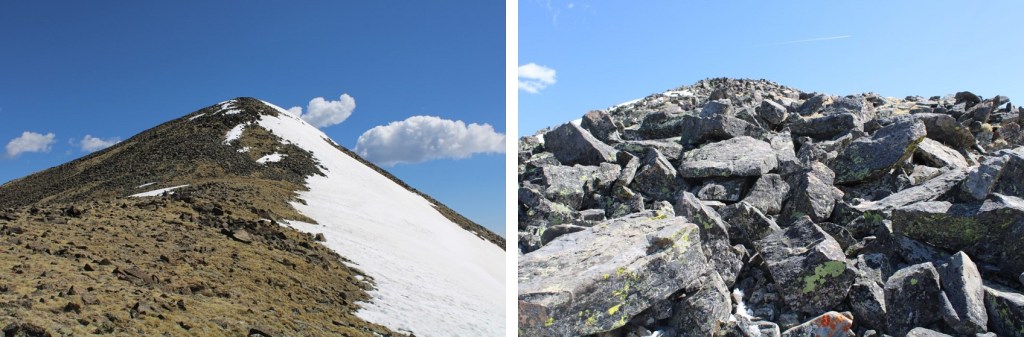
Here’s a look at the summit
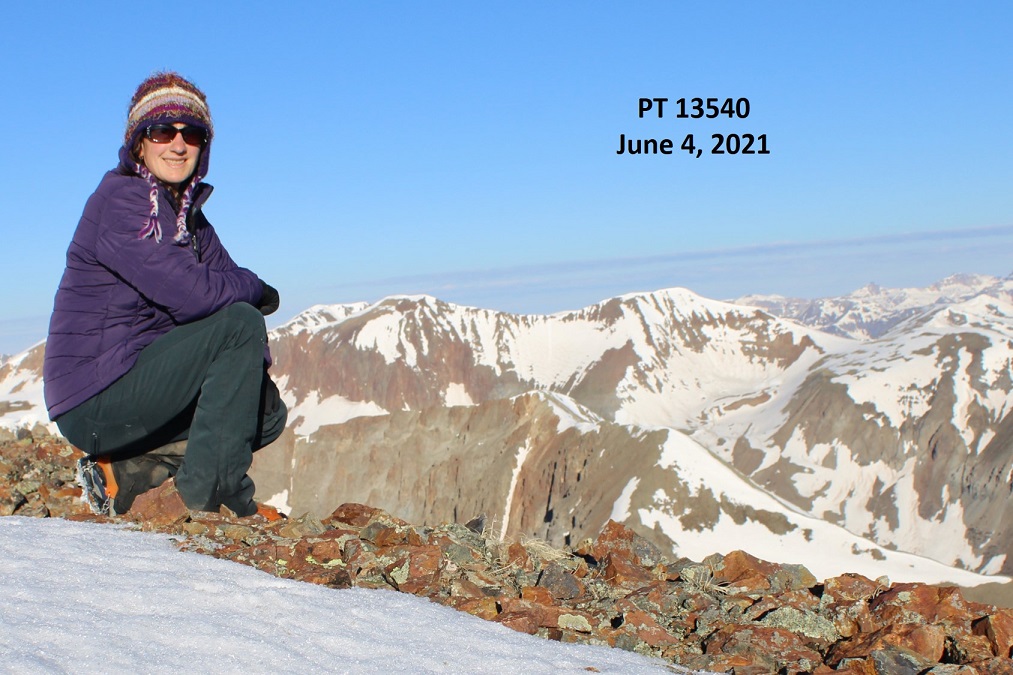
I summited PT 13540 at 7am
PT 13540:
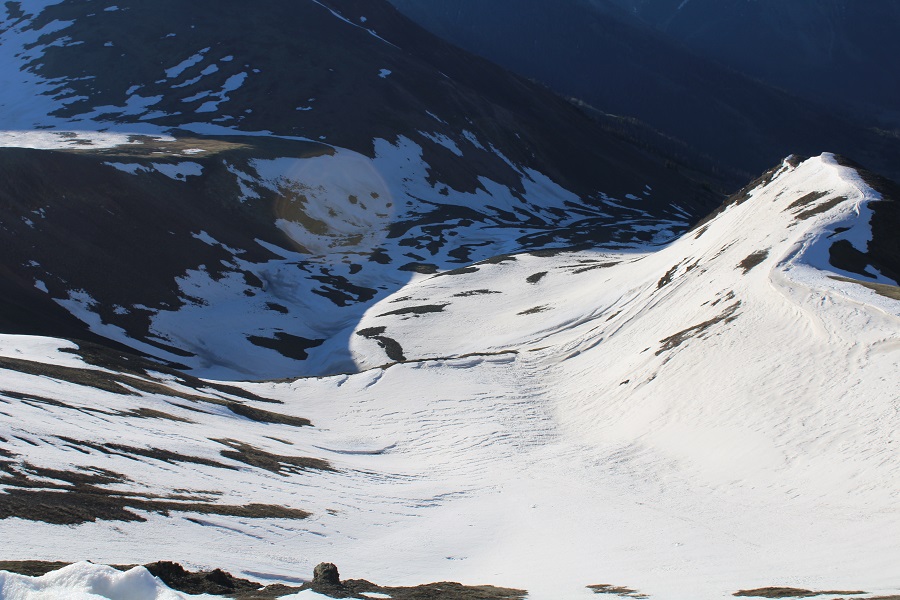
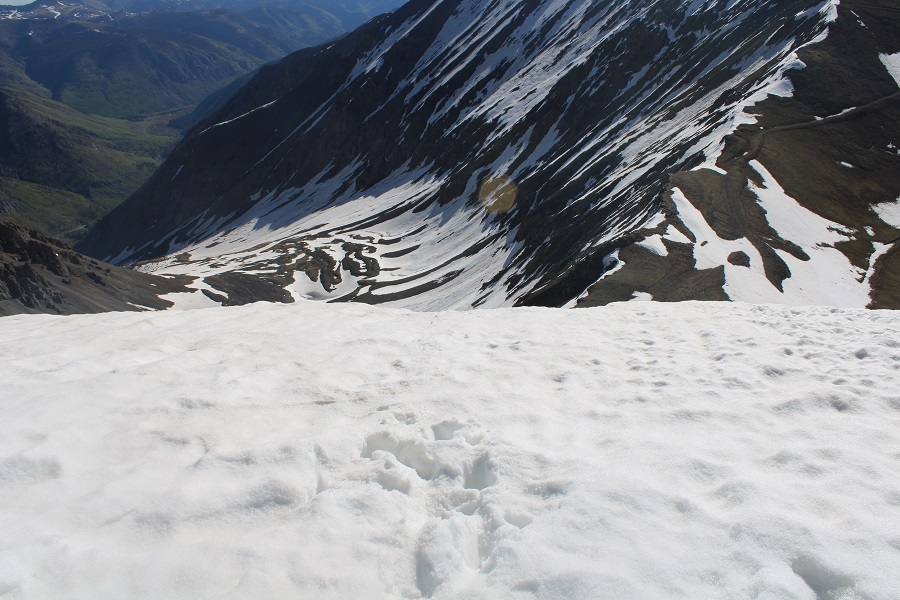
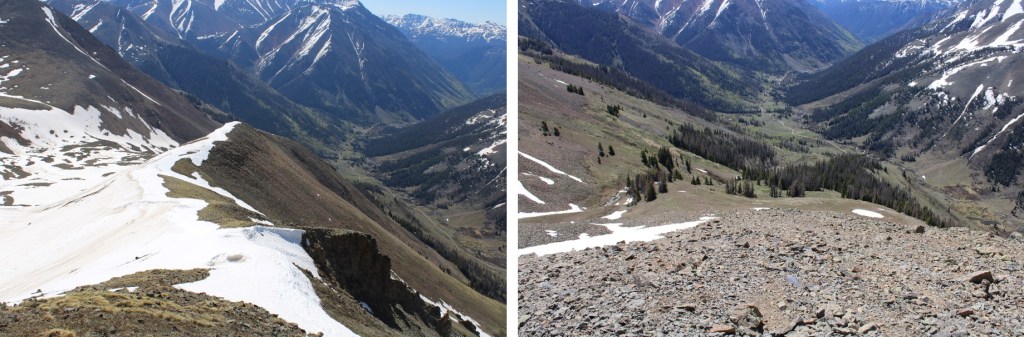
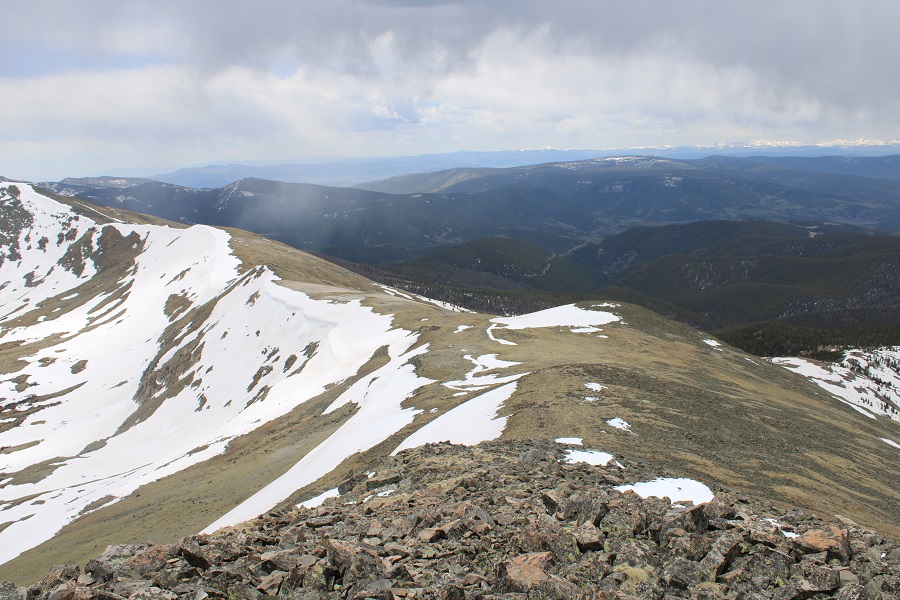
Here’s a look back down at the upper and lower basins.
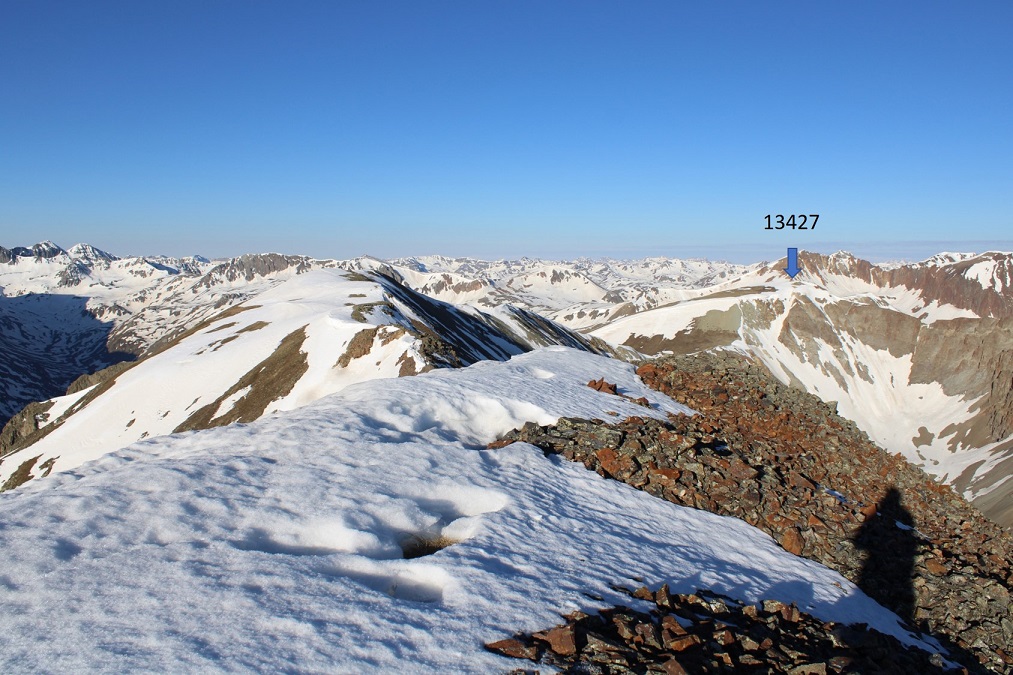
My next objective was PT 13427
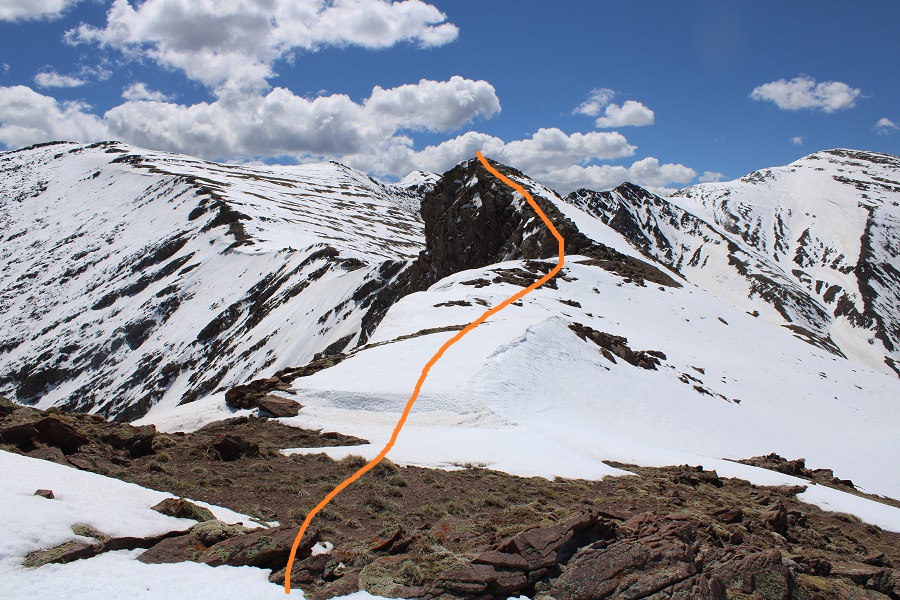
Here’s the route to get there
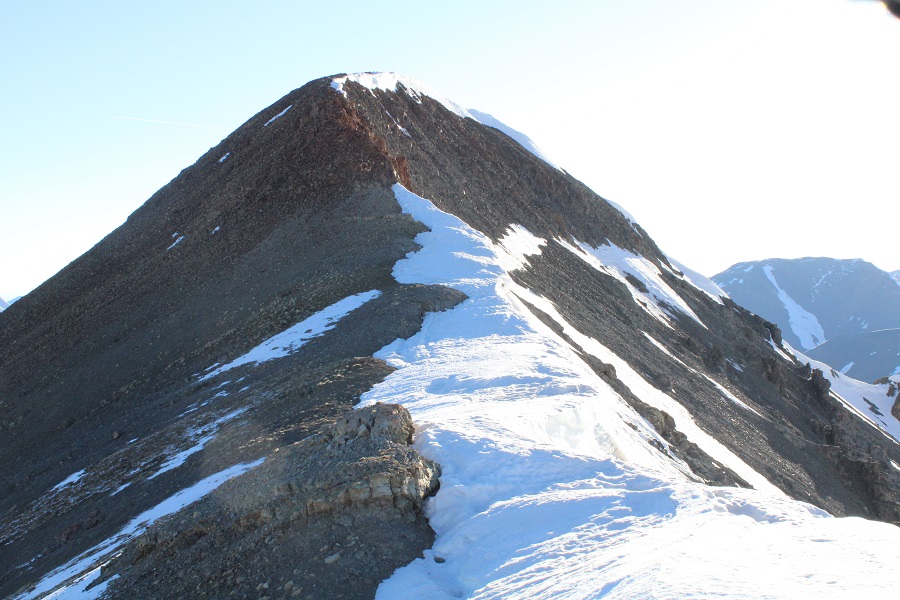
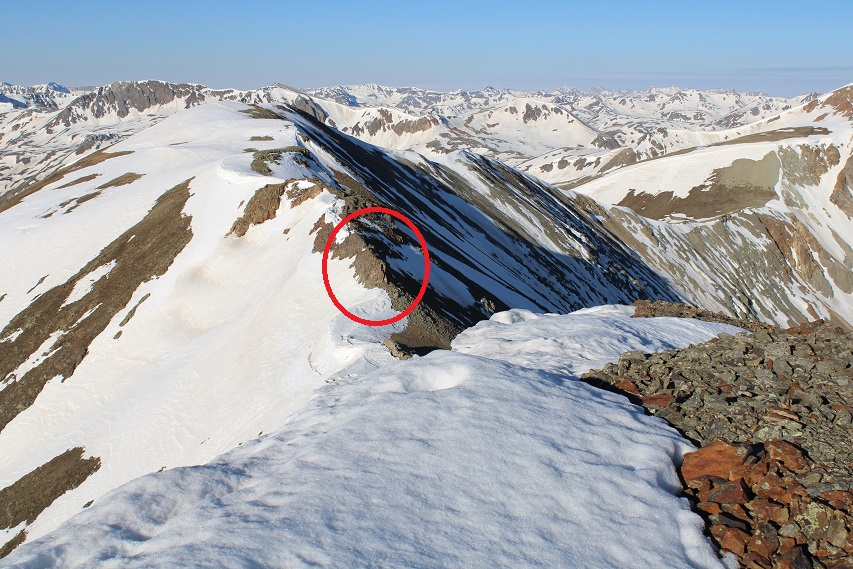
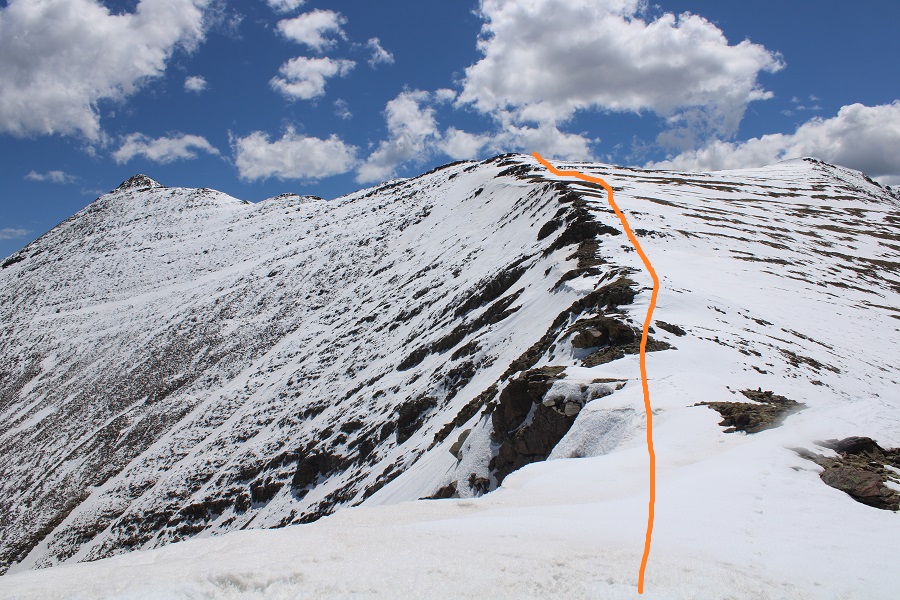
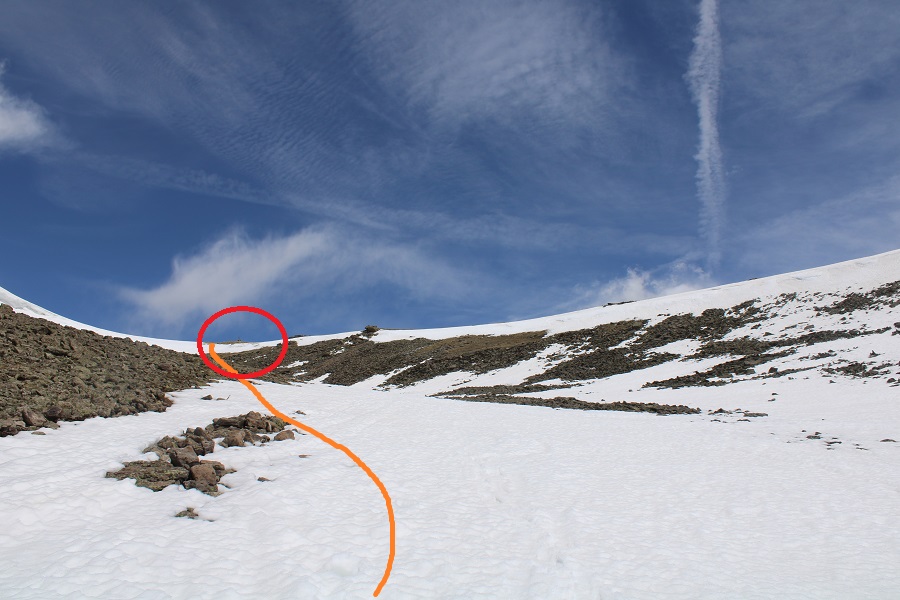
I turned and followed the ridge southeast. Here are some step by step pictures
The area in the above picture, circled in red, is pictured below. I skirted this to the right
Then followed the ridge, glad I’d put on my microspikes
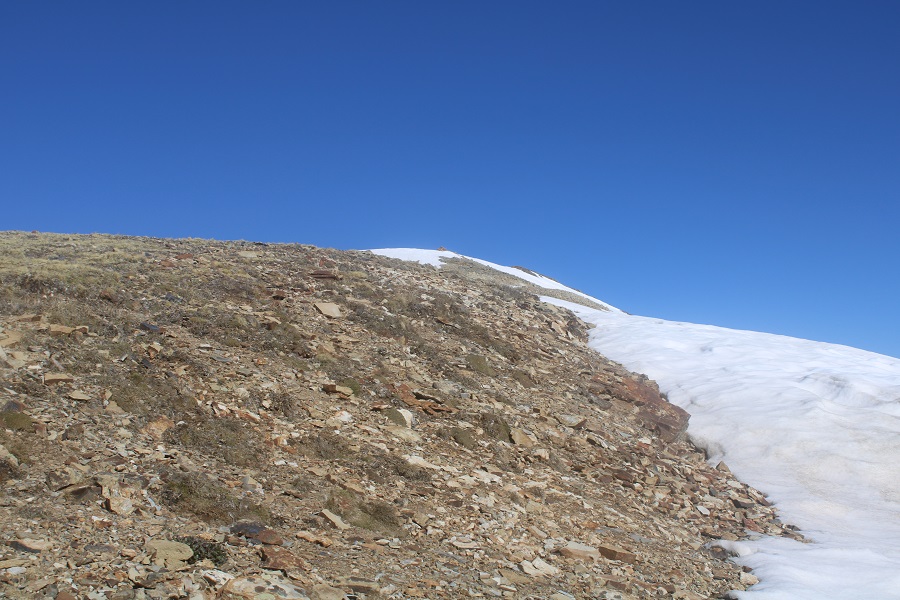
Eventually I came to an area where I started losing elevation. The snow was largely avoidable by sticking to the left on the ridge. I was a little worried about that cornice in front of me however
I lost about 475’ of elevation to the saddle
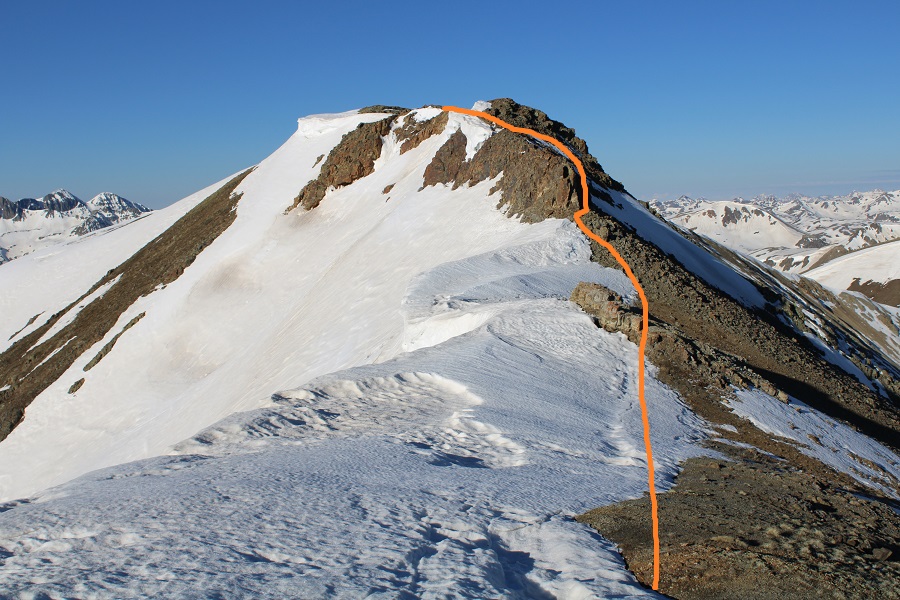
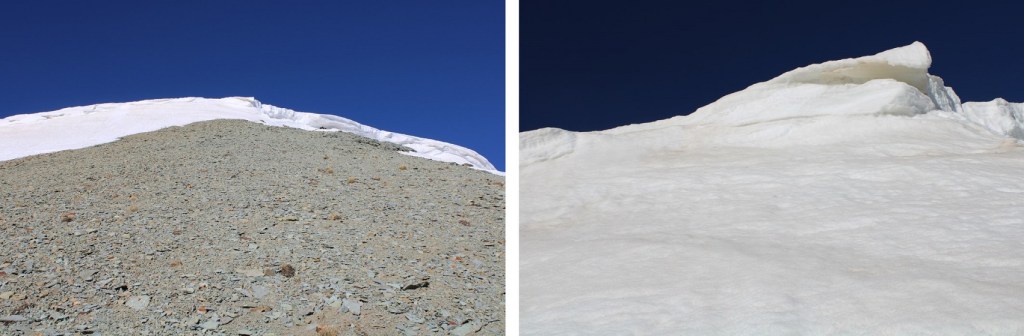
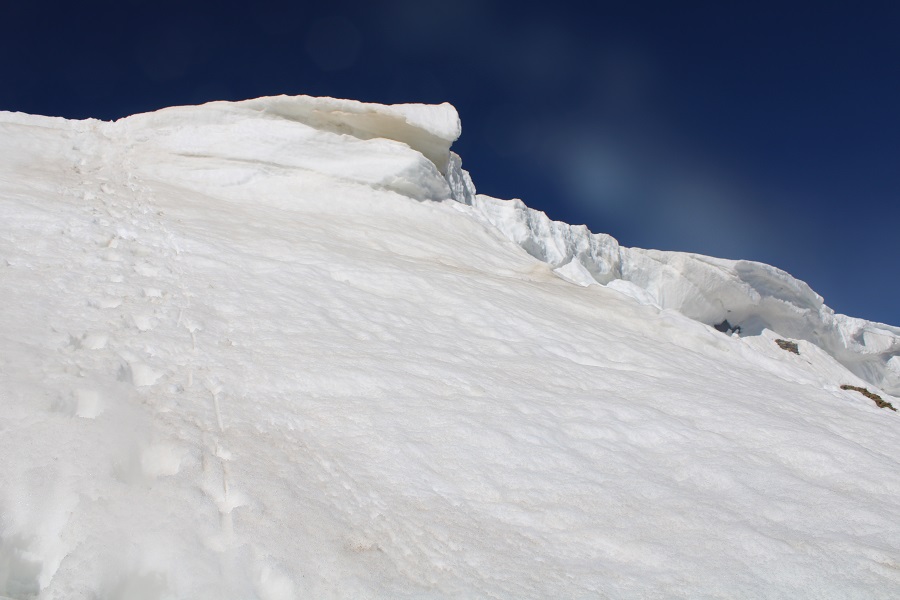
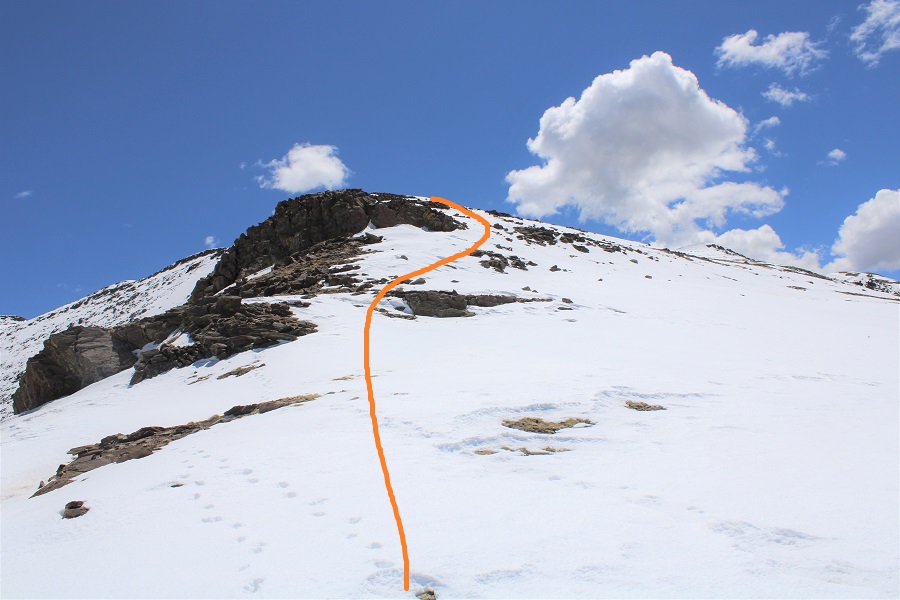
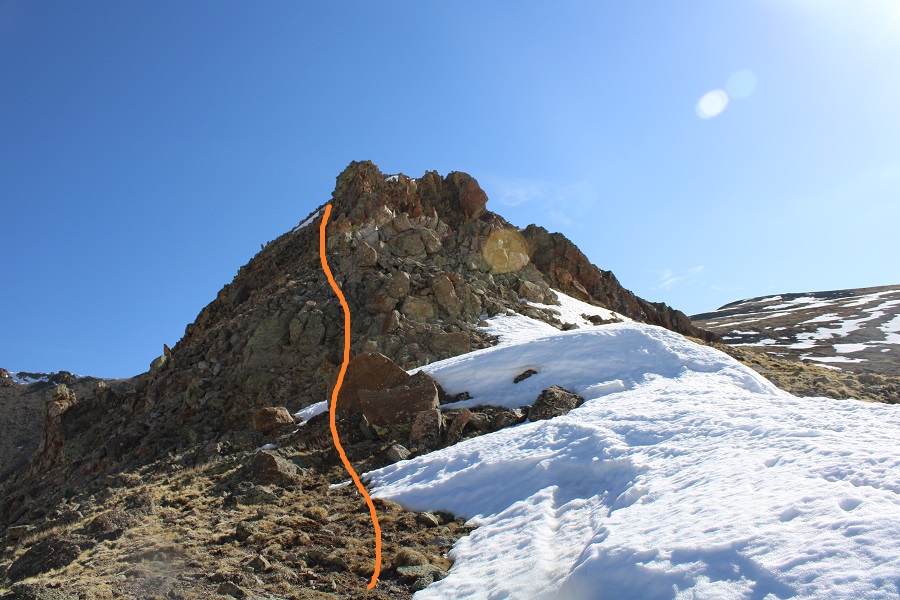
Then started up the east slope. This area was covered in scree, and quite steep. I kept eyeing the cornice, trying to find the best way to ascend. While I had snowshoes, I didn’t have crampons, so my microspikes would have to do if it came down to it. Here’s the path I chose to take to the summit, looking for a stable but accessible part of the cornice to climb.
When I got to the cornice, I was able to kick in steps with just my microspikes, although, lacking in forward facing spikes, they needed a little creative help from my ice axe at times.
Towards the top I started postholing as the cornice leveled out, and had to slide on my belly the last few feet to make it to the tundra. Once over the cornice the summit was obvious, to the north
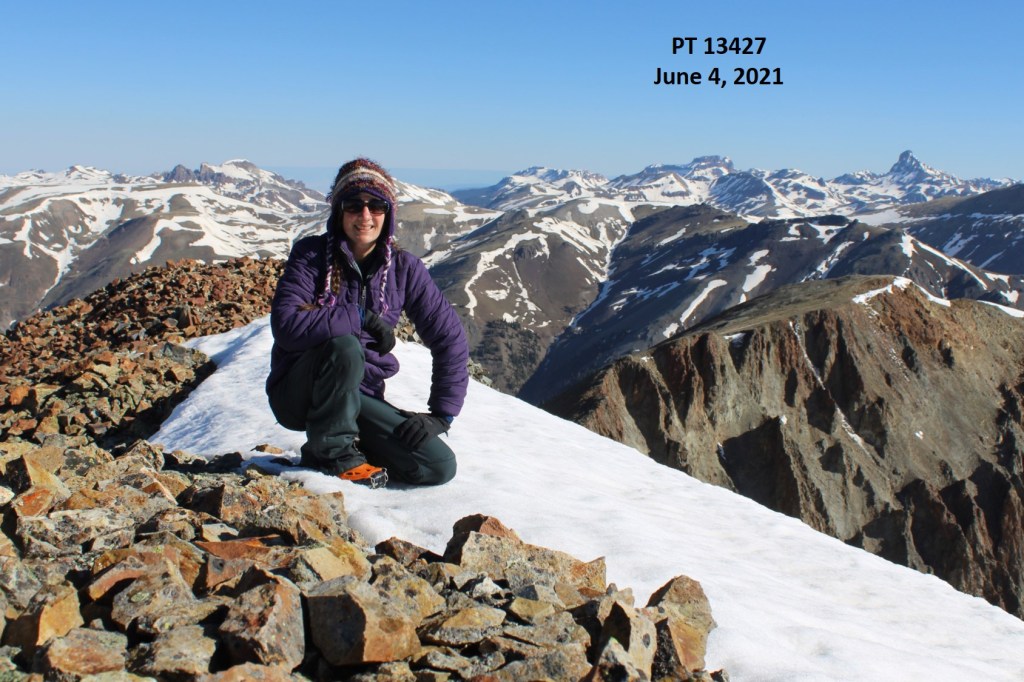
I summited PT 13427 at 8:30am
PT 13427:
Here’s a look back on PT 13540
It was still morning, but the snow was softening up quickly. I wanted to get back over that cornice asap. I turned and headed back towards the cornice
It was easy to find my entry/exit point, as I could still see the marks from where I army crawled a few minutes ago.
I did the same thing again, facing the mountain and using the steps I’d kicked in earlier. It was rapidly warming up: the tip of the cornice was now steadily reedripping water.
Here’s a look at the ridge back up towards PT 13540
I slid down the scree and followed the ridge back.
The snow was mostly avoidable until I made it to where the ridge kind of levels out for a while. From then on it was posthole city
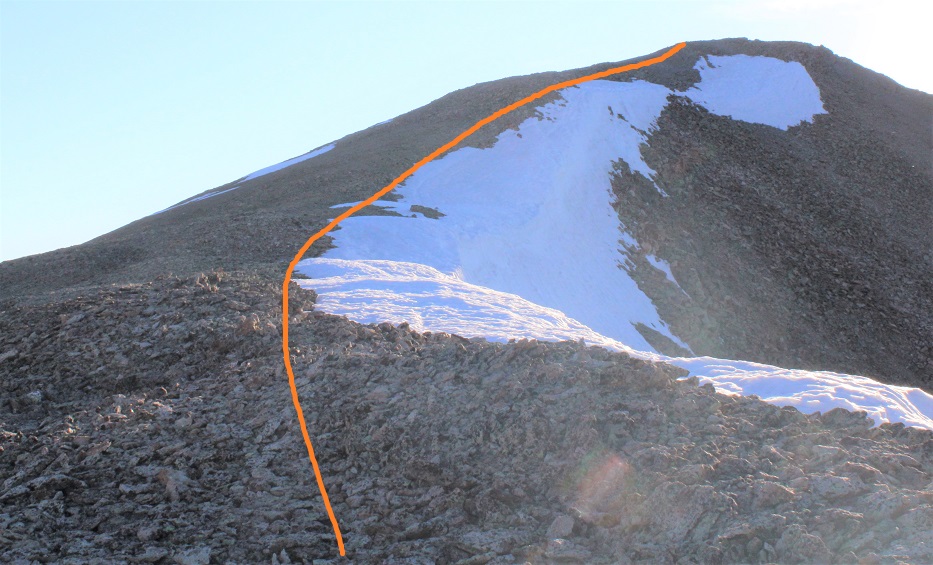
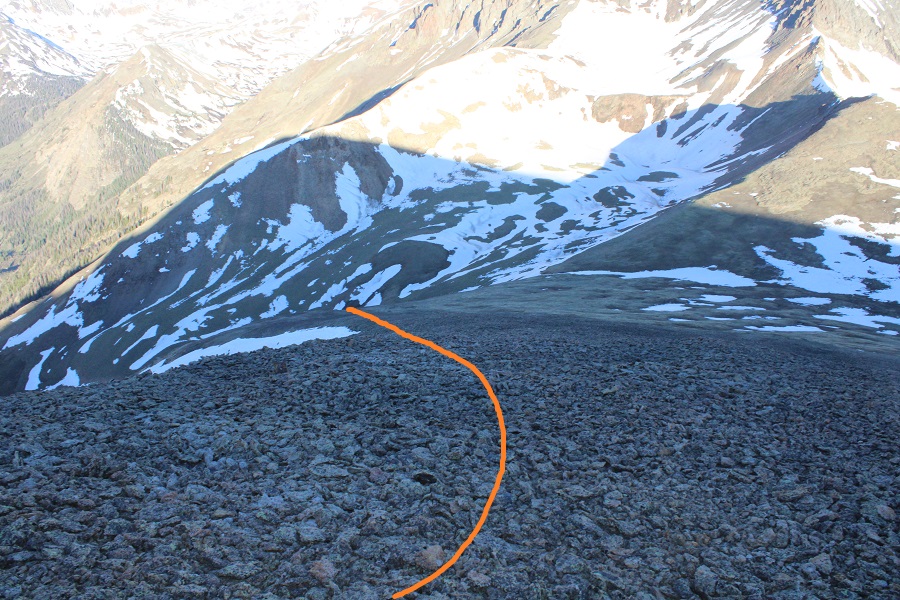
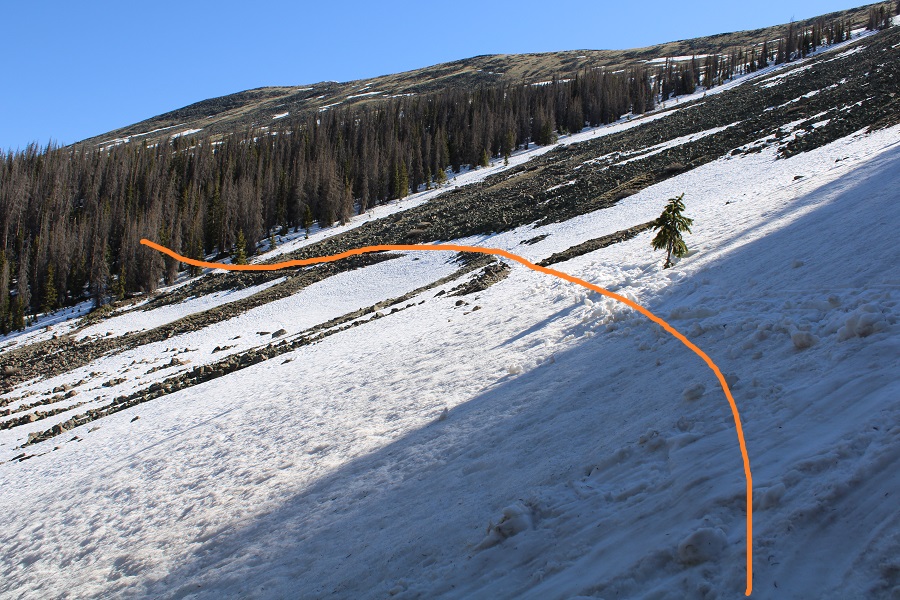
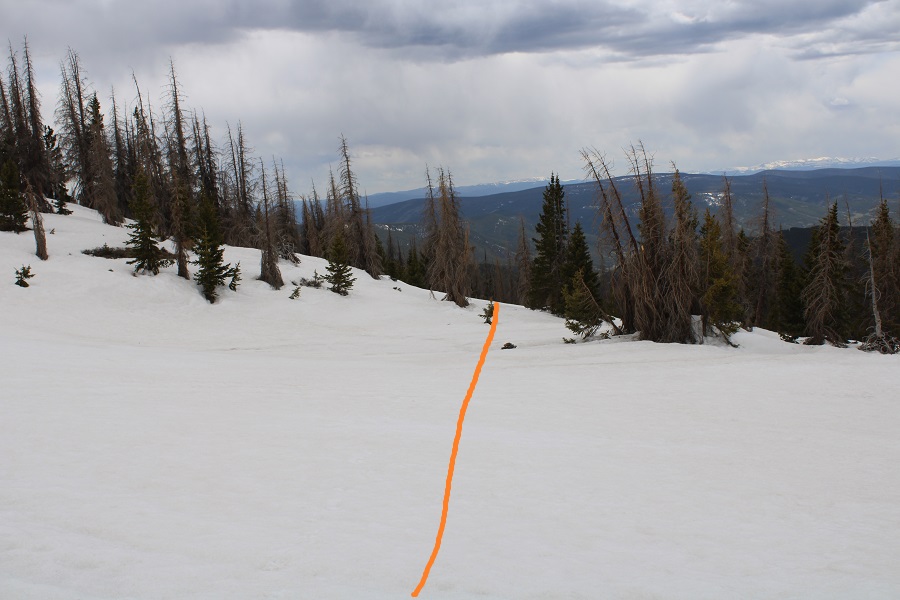
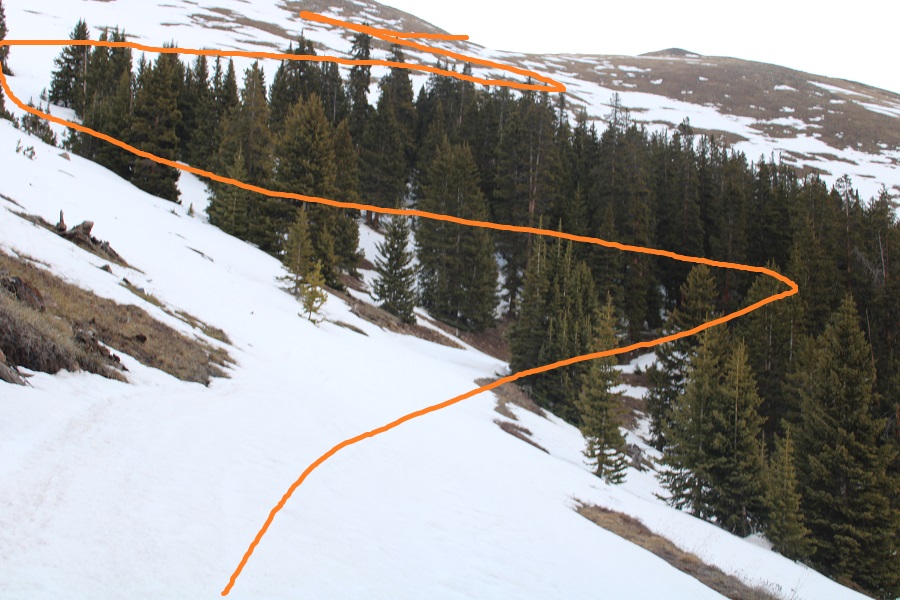
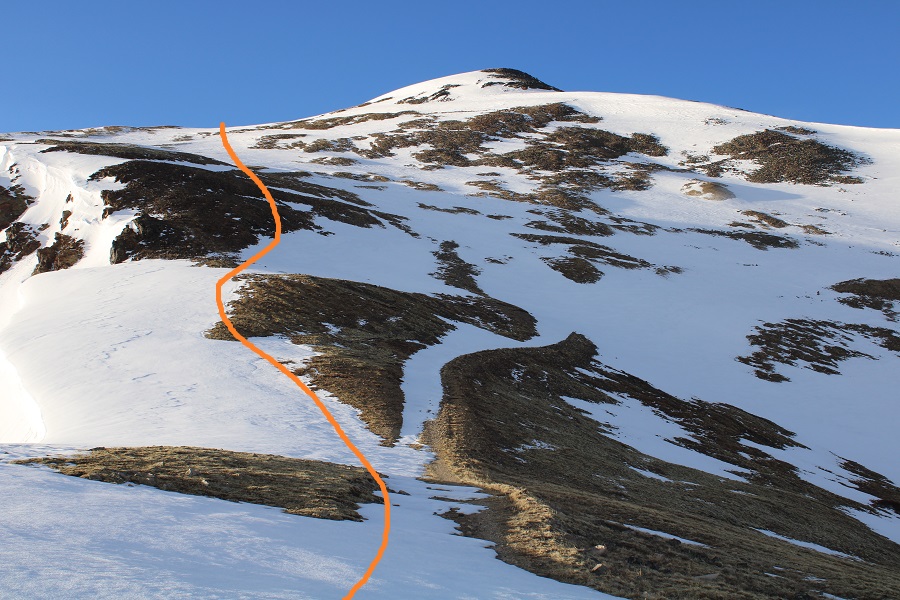
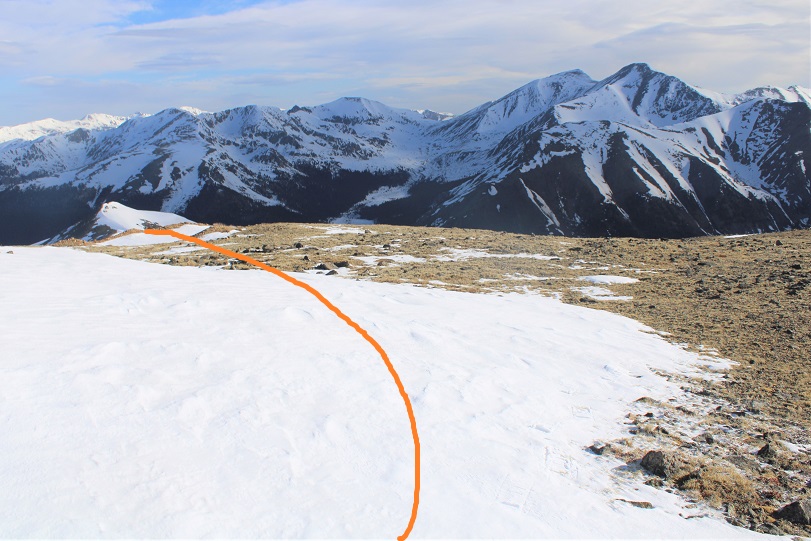
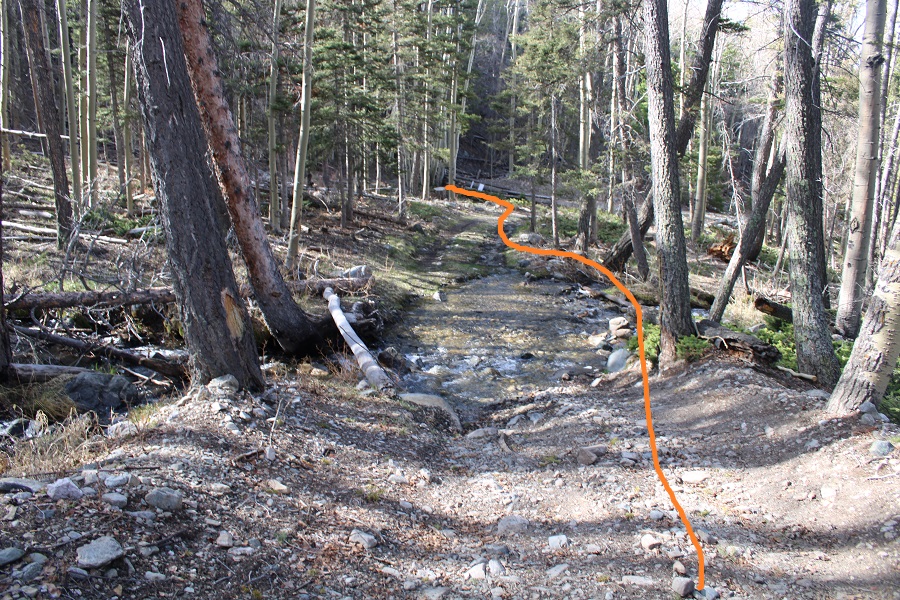
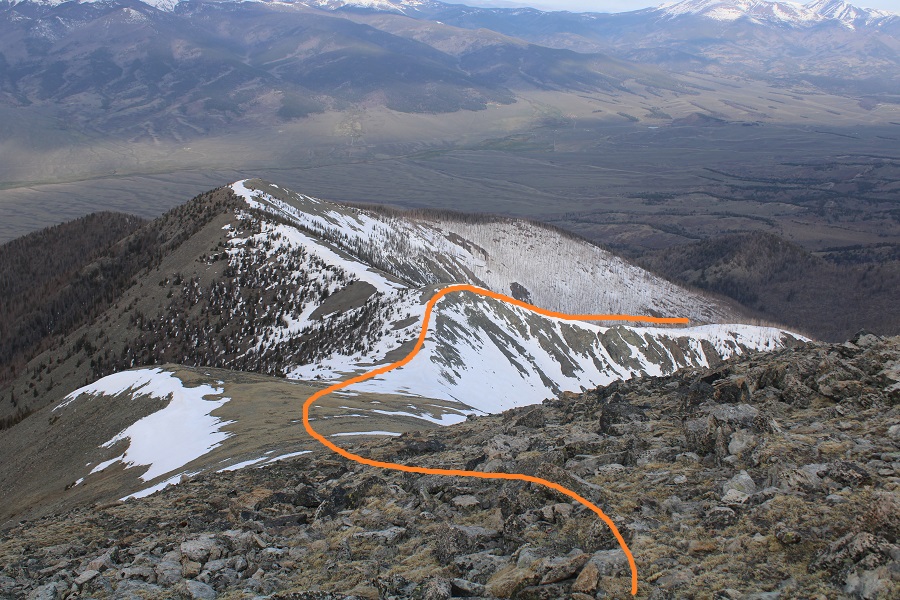
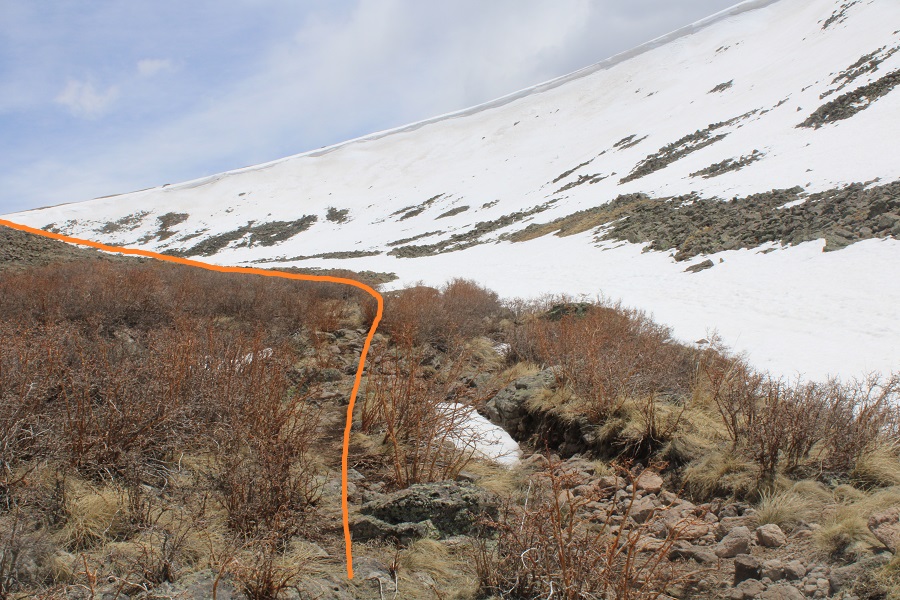
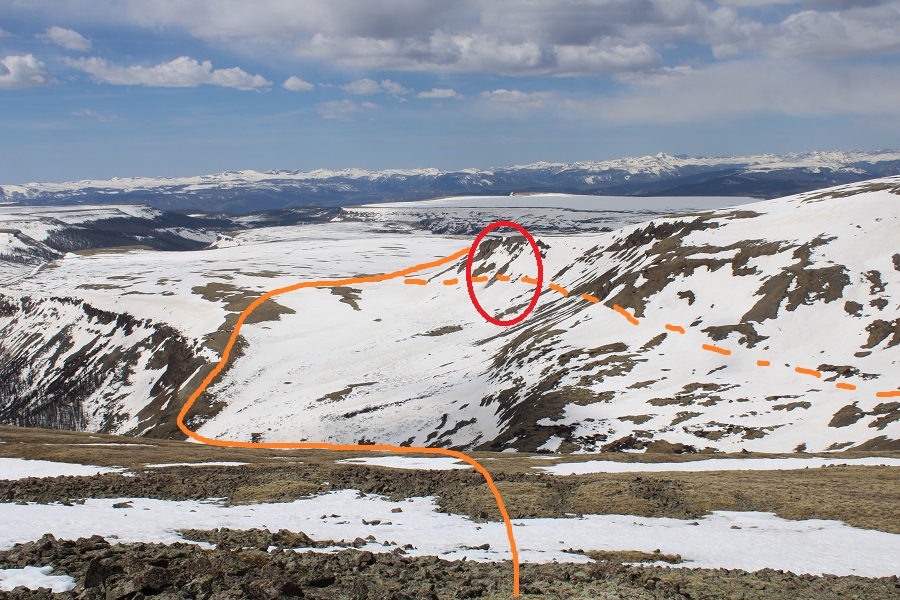
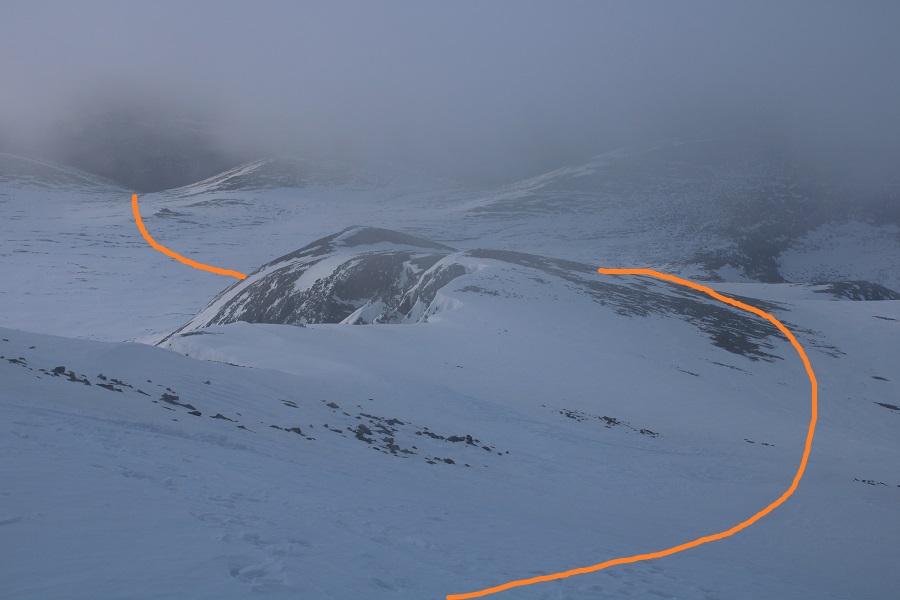
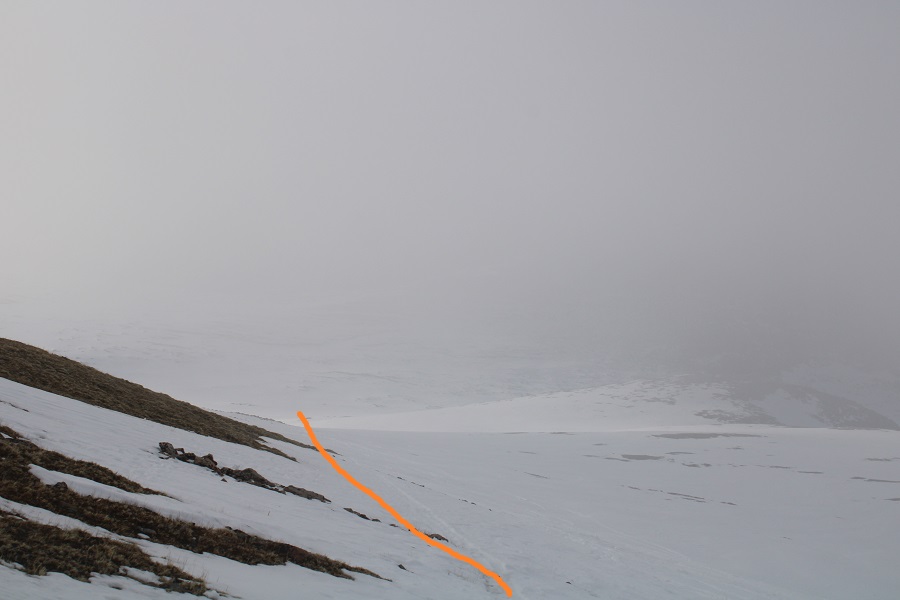
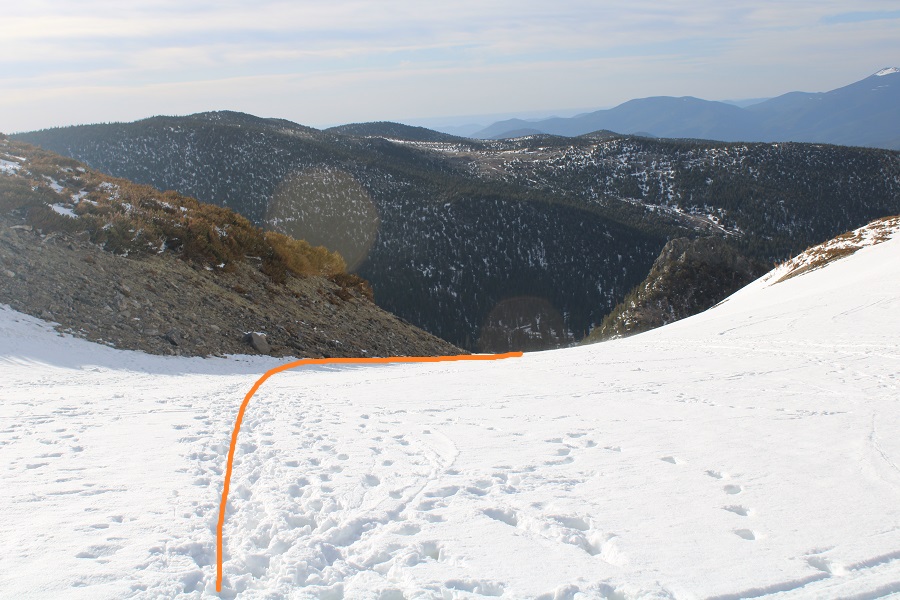
I knew there was no way I wanted to re-enter those basins, so I decided to take the southeast ridge down. It parallels the basin, and while there was snow, a lot of it was avoidable. Where it wasn’t I was postholing. I had snowshoes, but was too stubborn to put them on. Here’s the overall route out
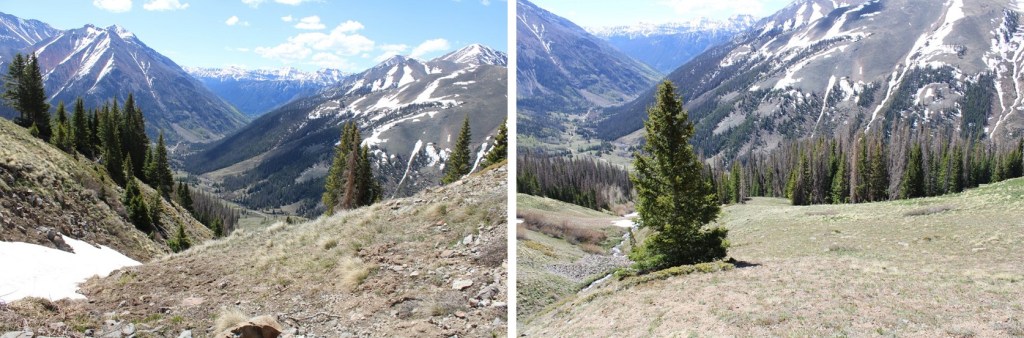
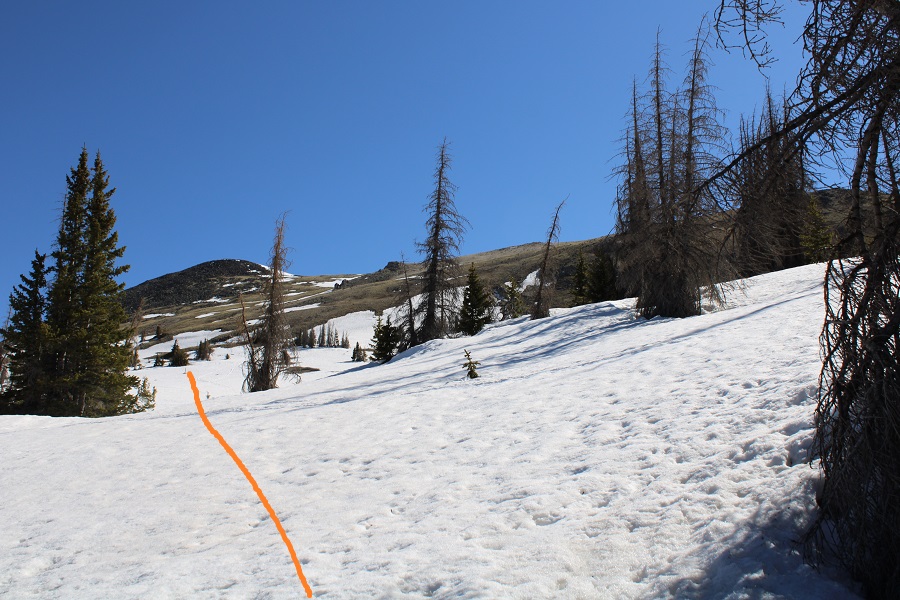
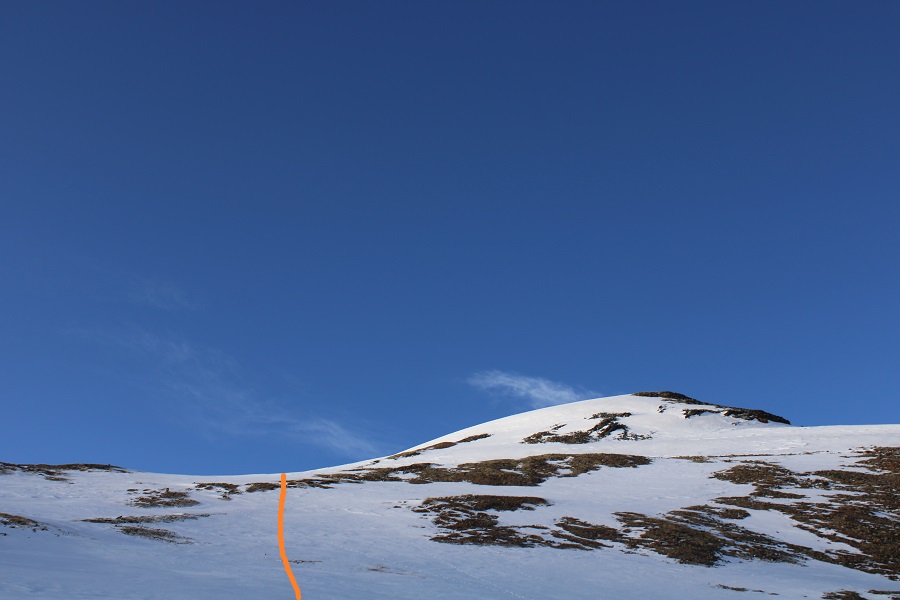
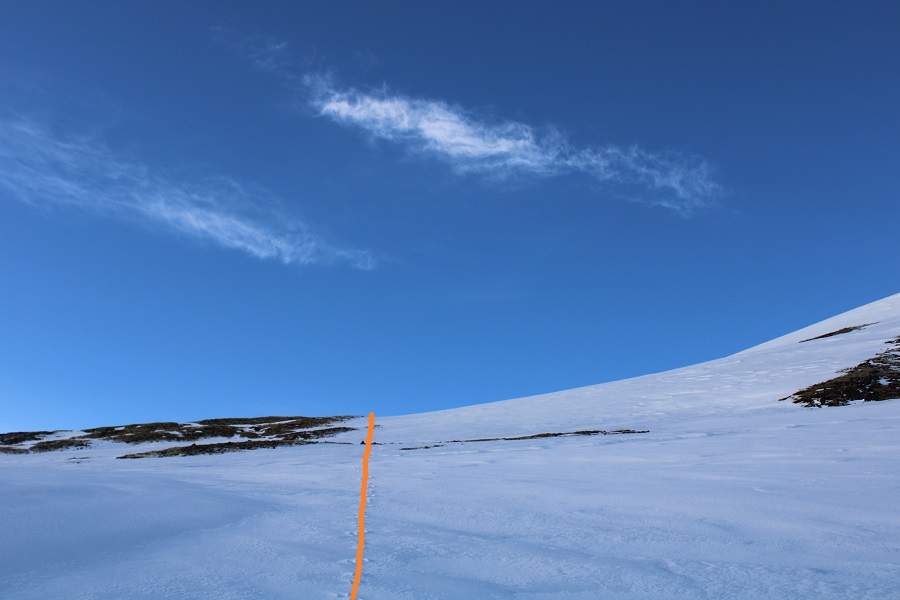
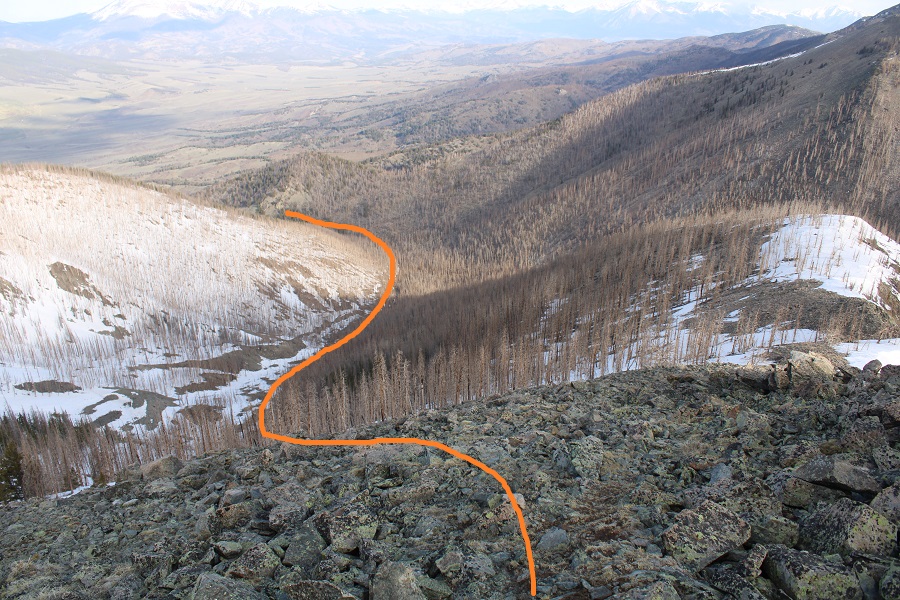
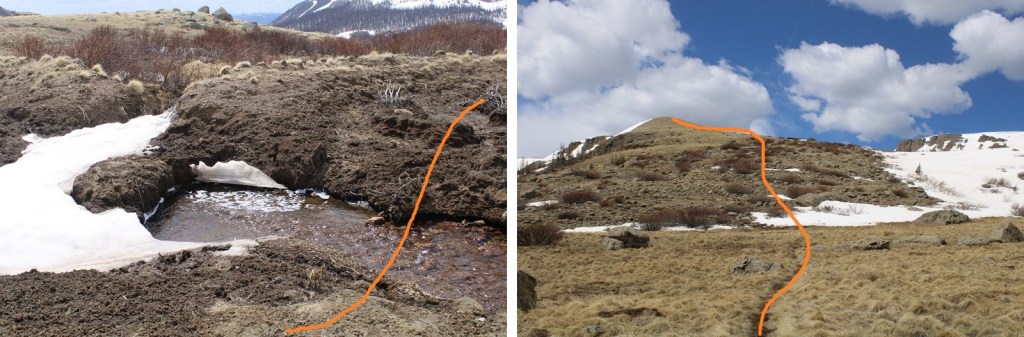
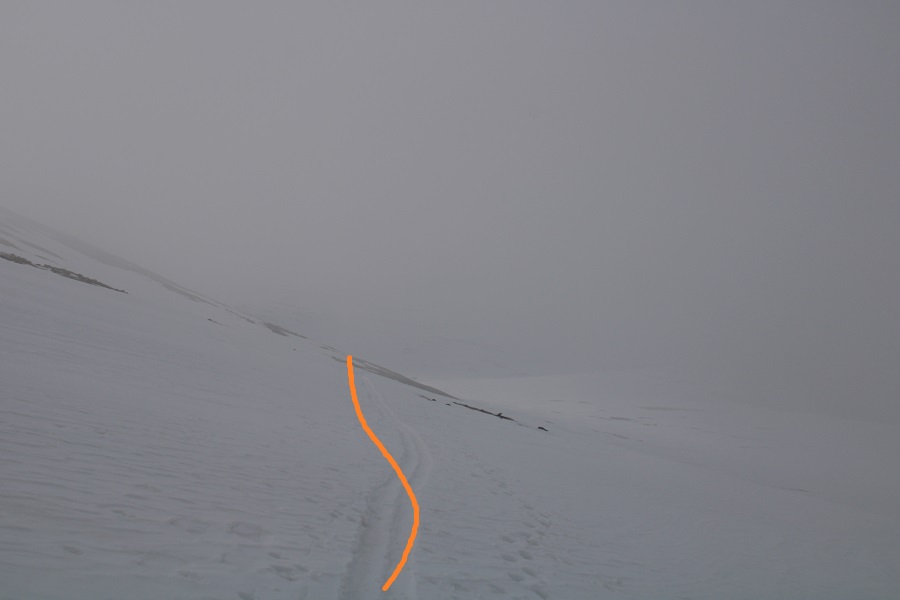
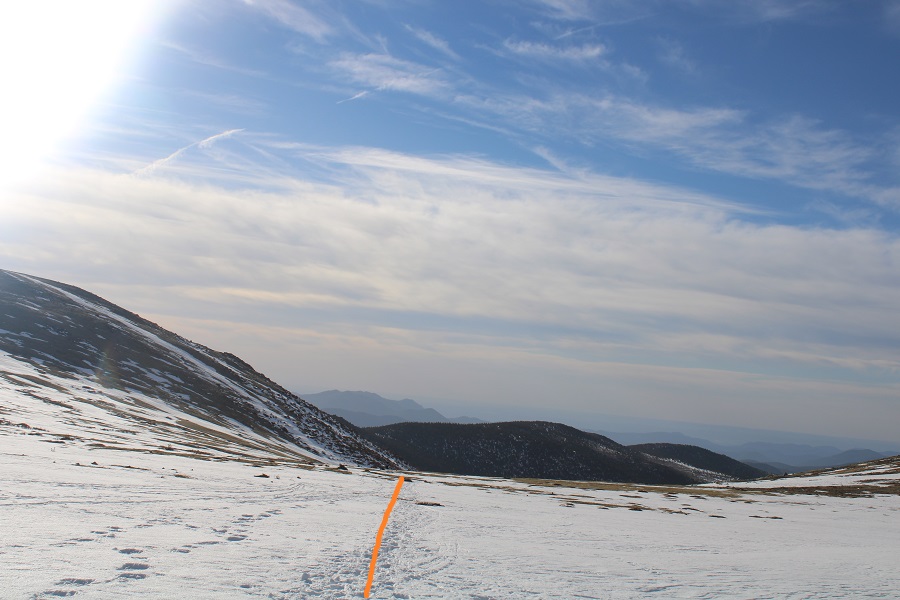
And step by step, first down the ridge
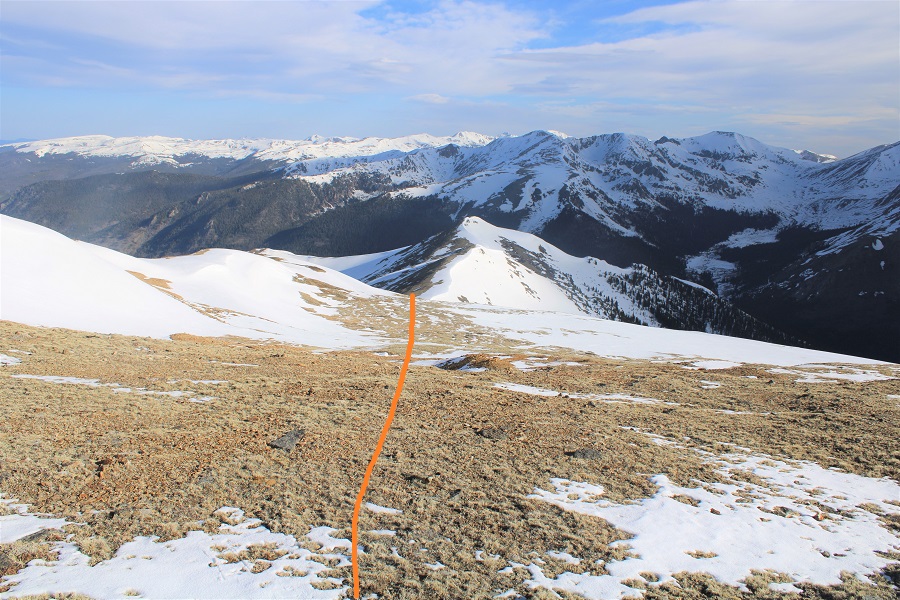
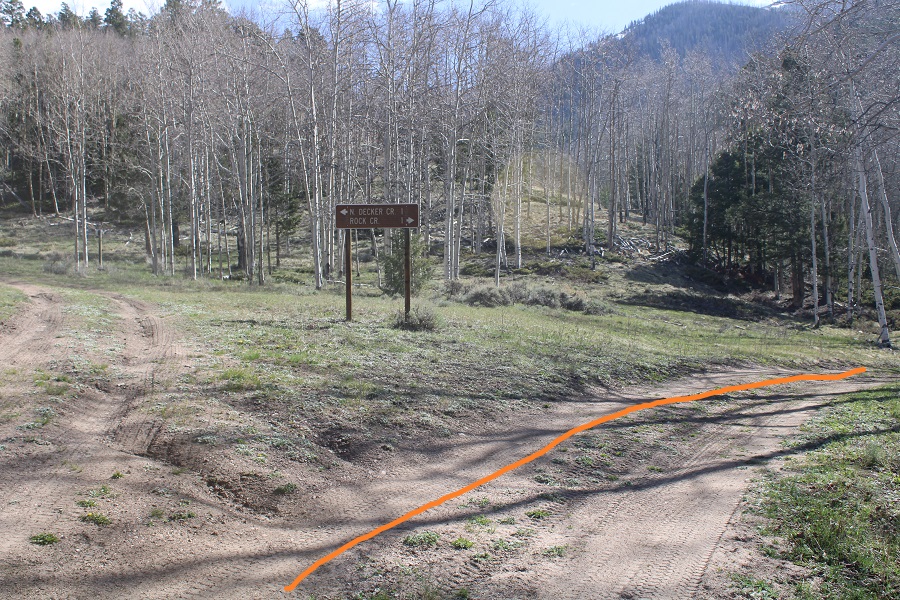
Then following Rock Creek back to CR 30
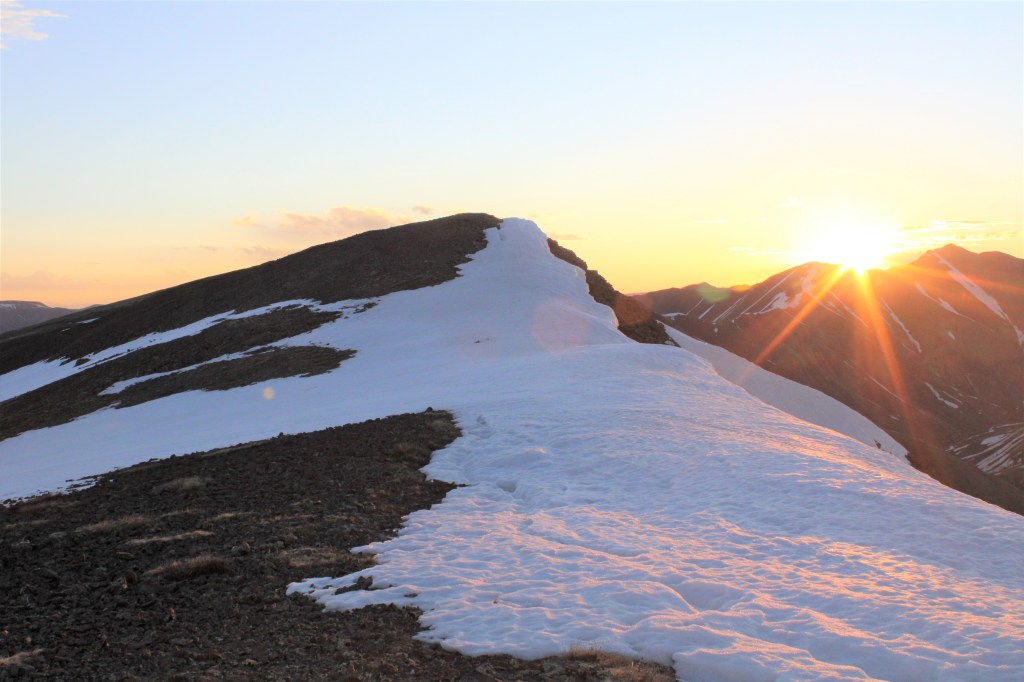
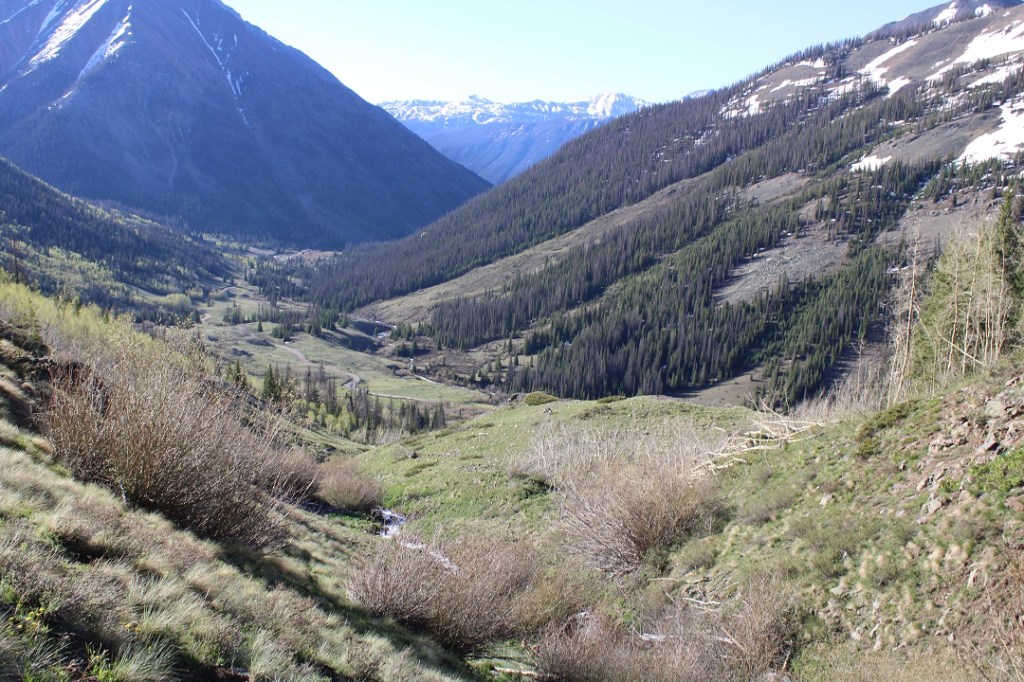
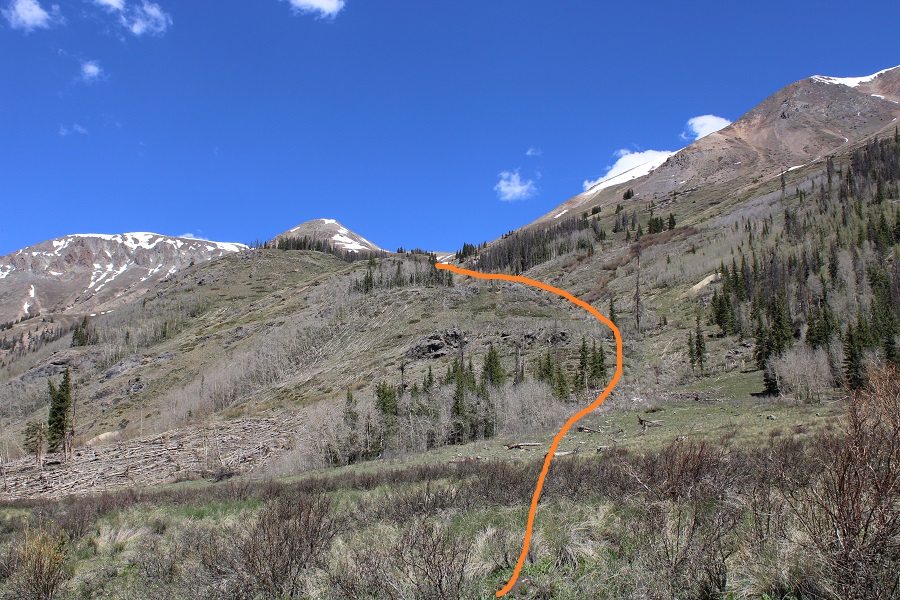
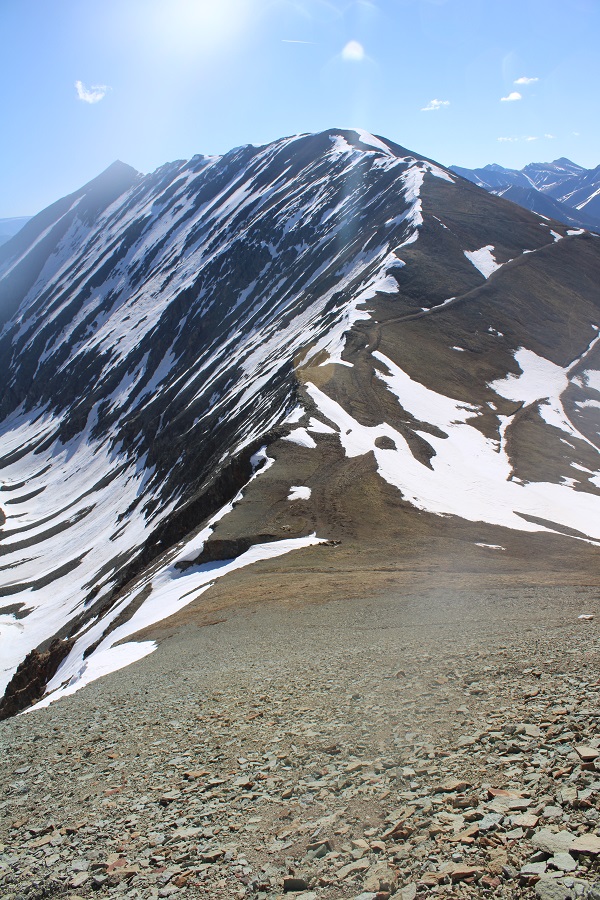
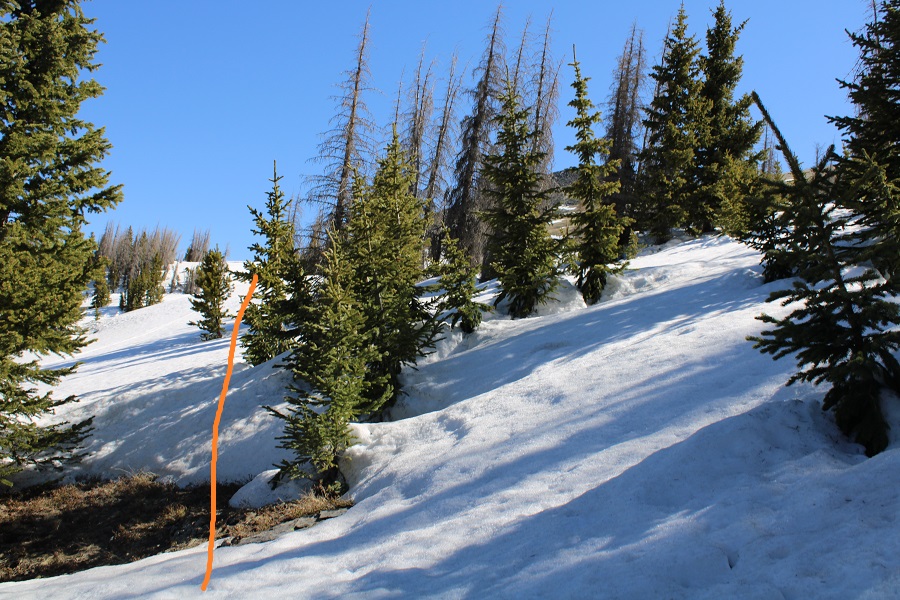
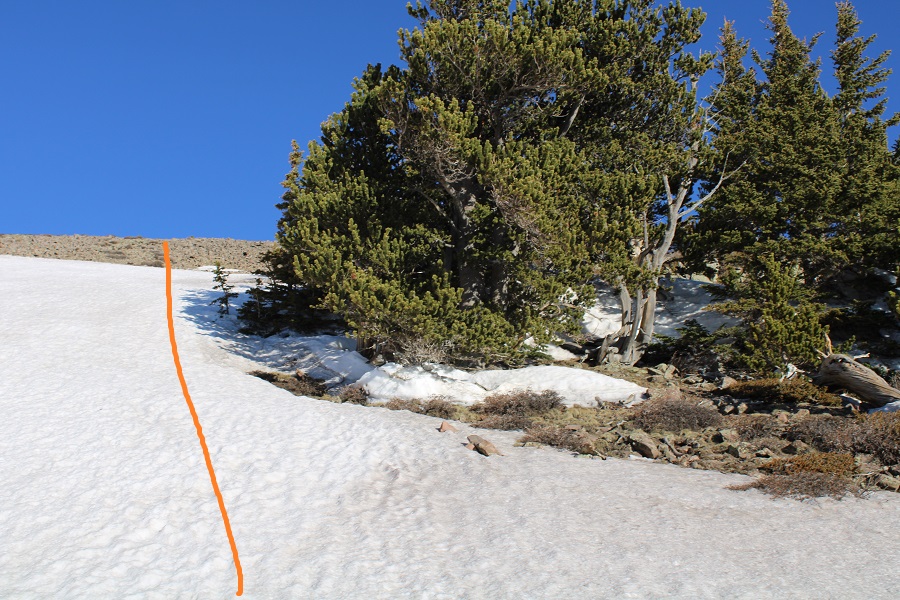
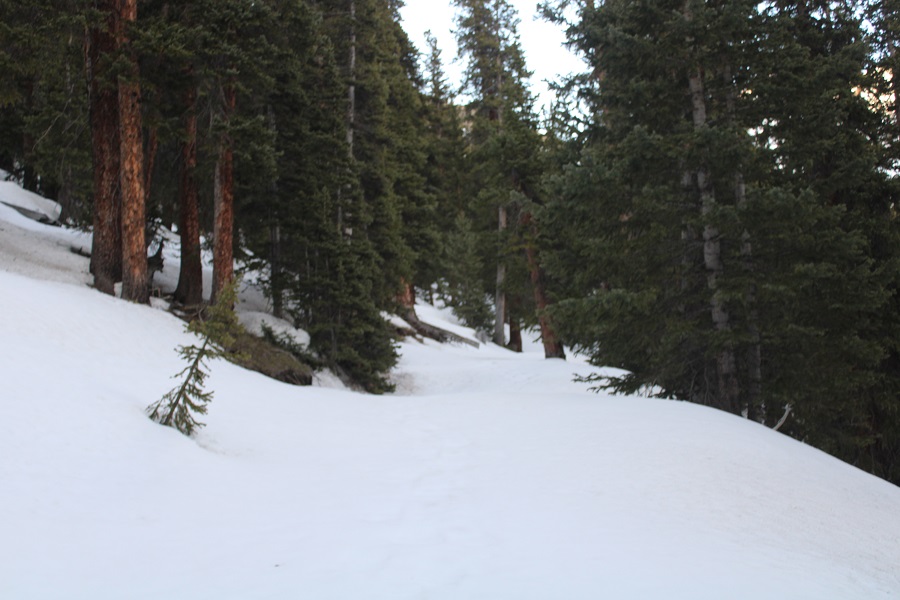
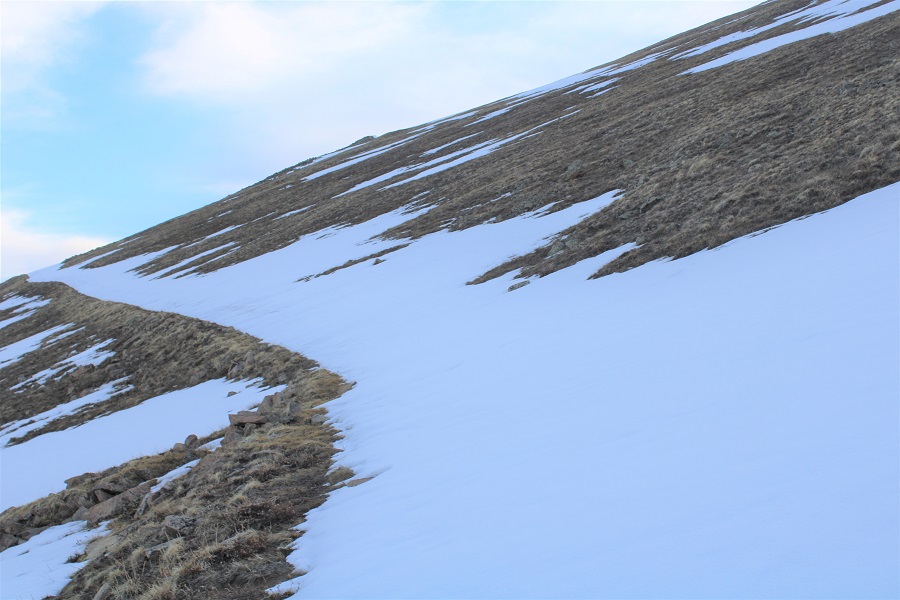
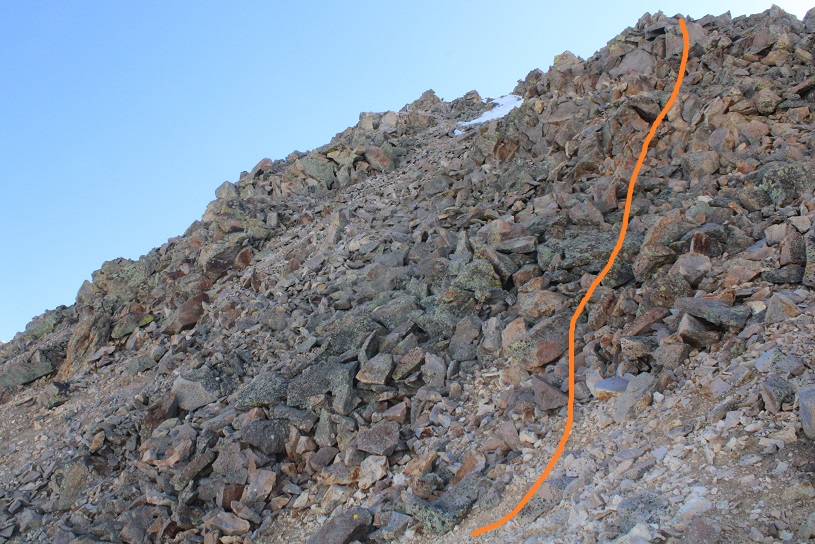
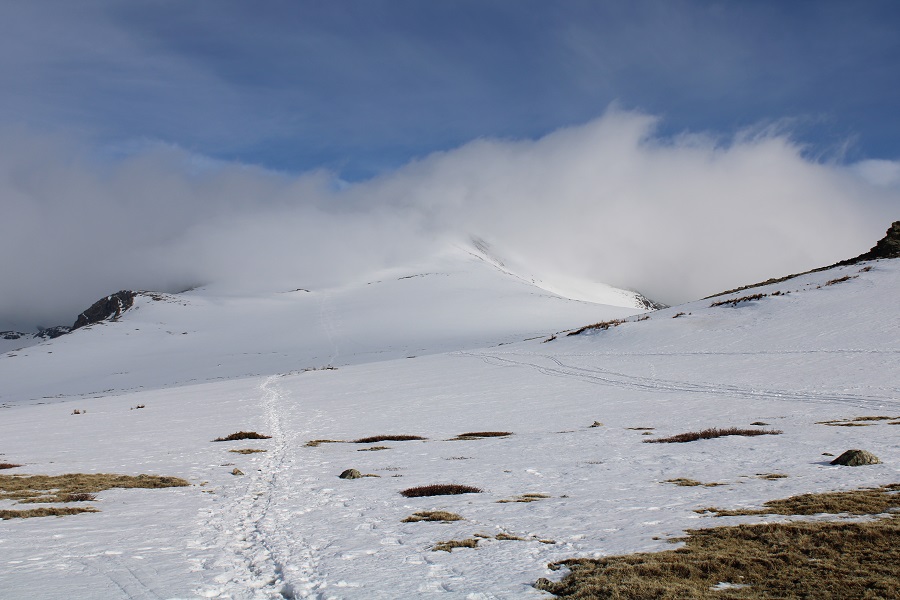
Here’s a picture looking up the ridge (in case you want to take the ridge up)
I came to the avalanche area, and it was then I realized a house had recently been destroyed (more on this in my next trip report on “C.T.” Peak).
I made it back to the road and followed it back to my truck
I made it back to my truck at 11:15am, making this an 8.95 mile hike with 4206’ of elevation gain in 7 hours, 15 minutes.
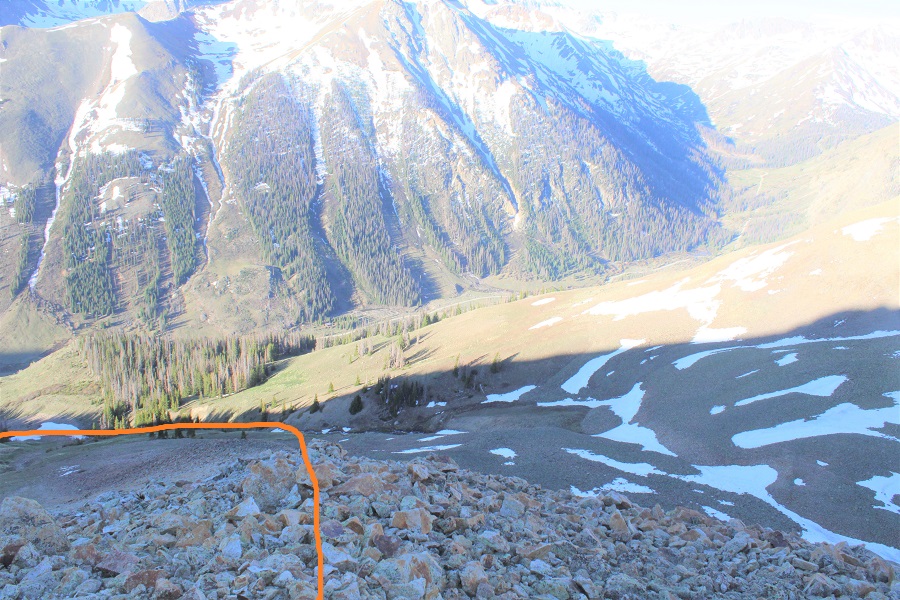
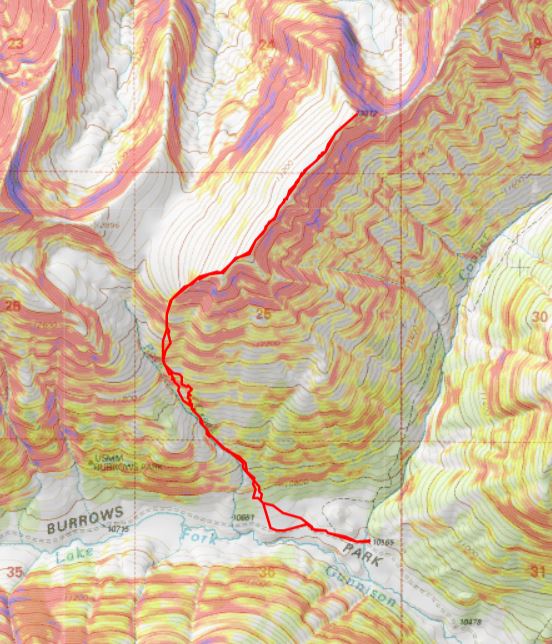
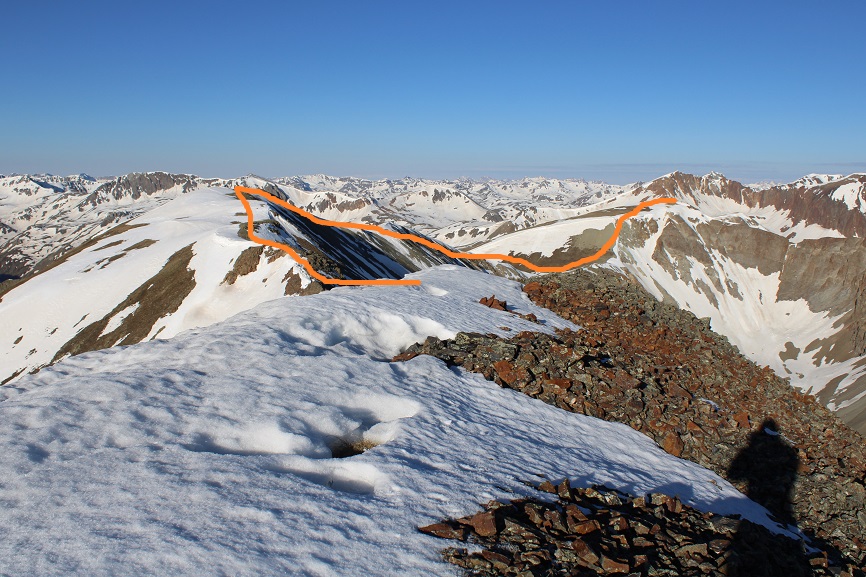
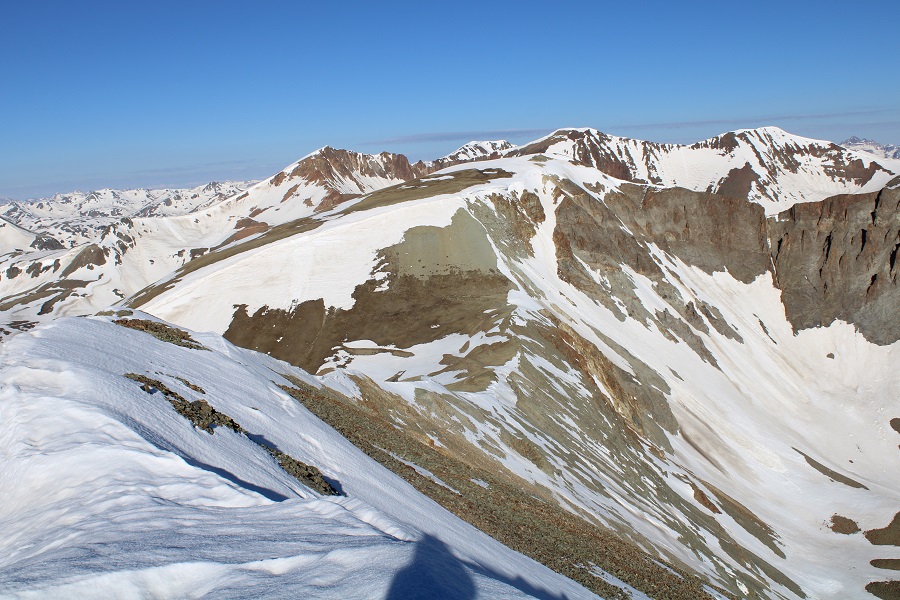
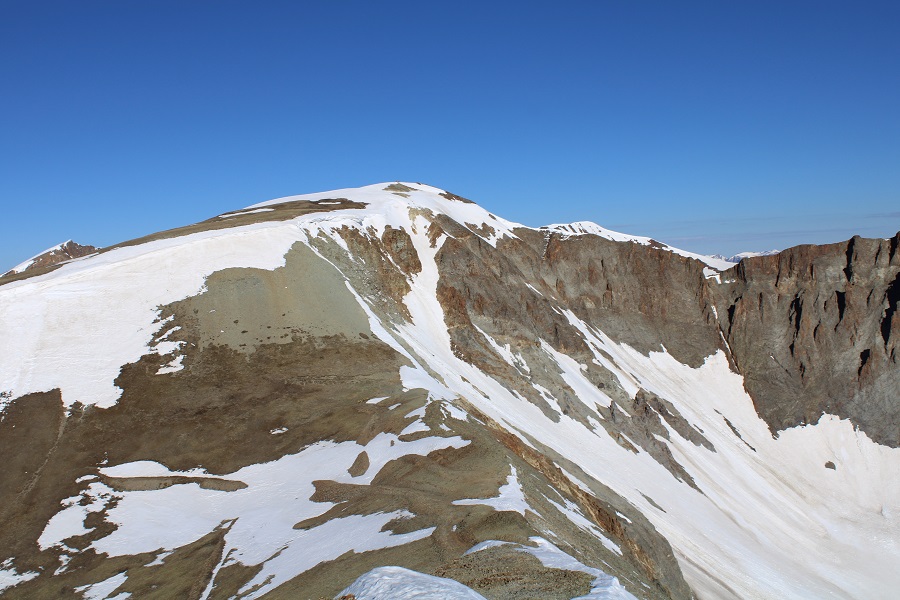
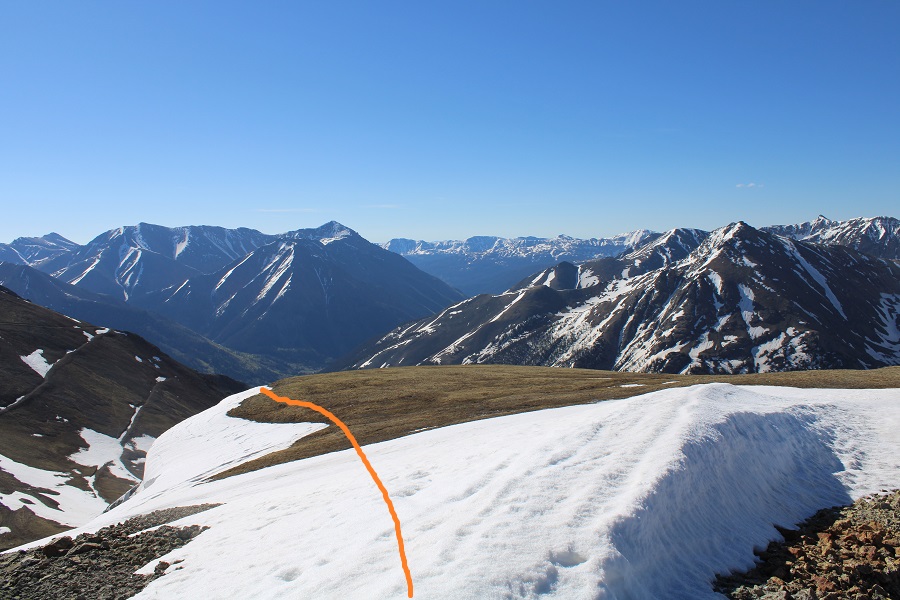
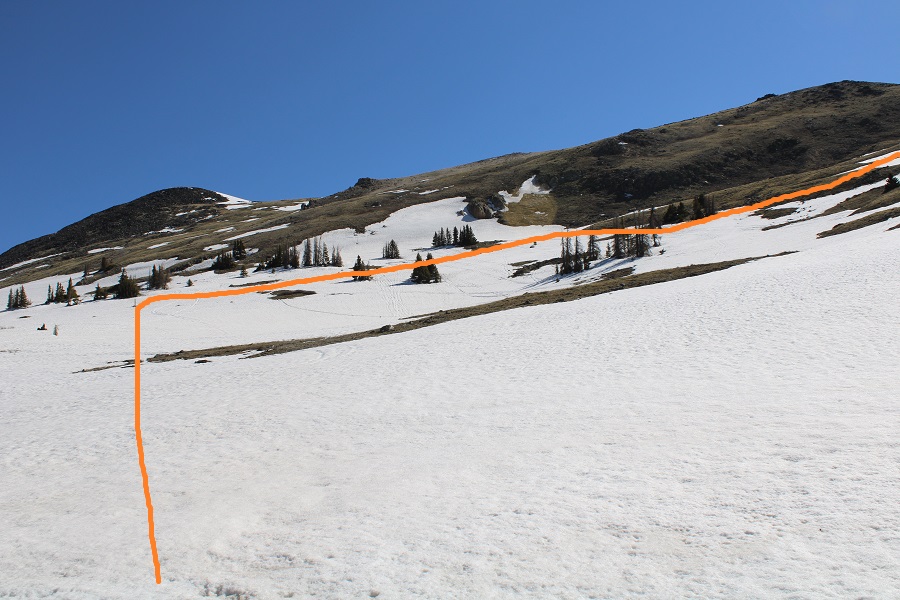
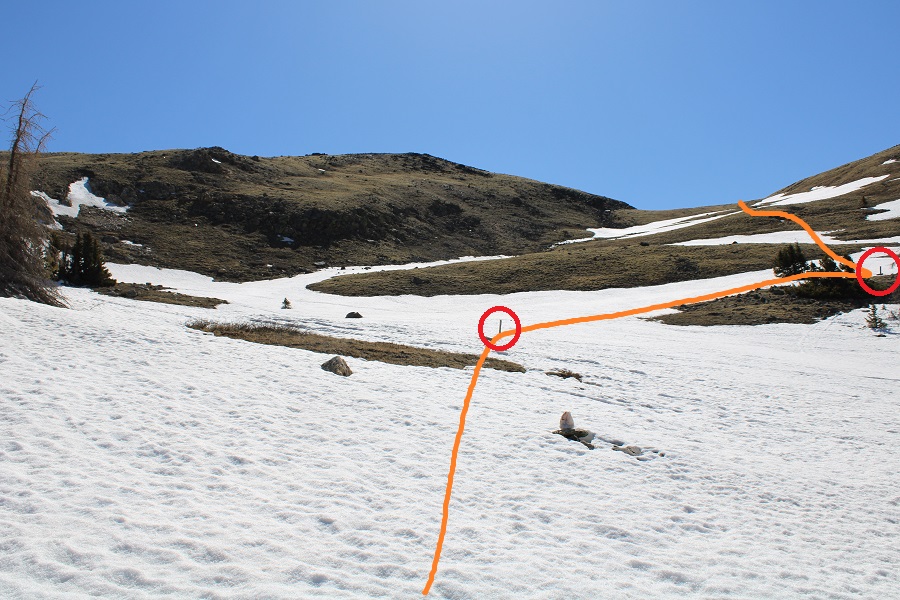
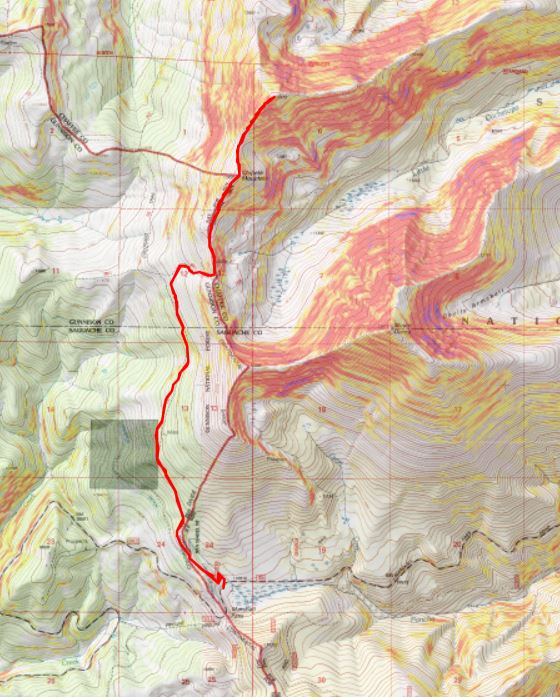
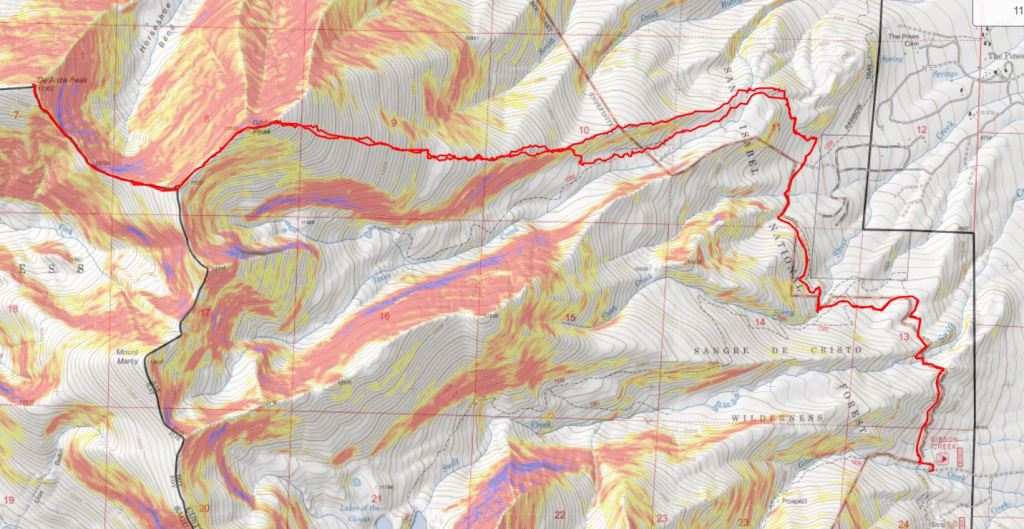
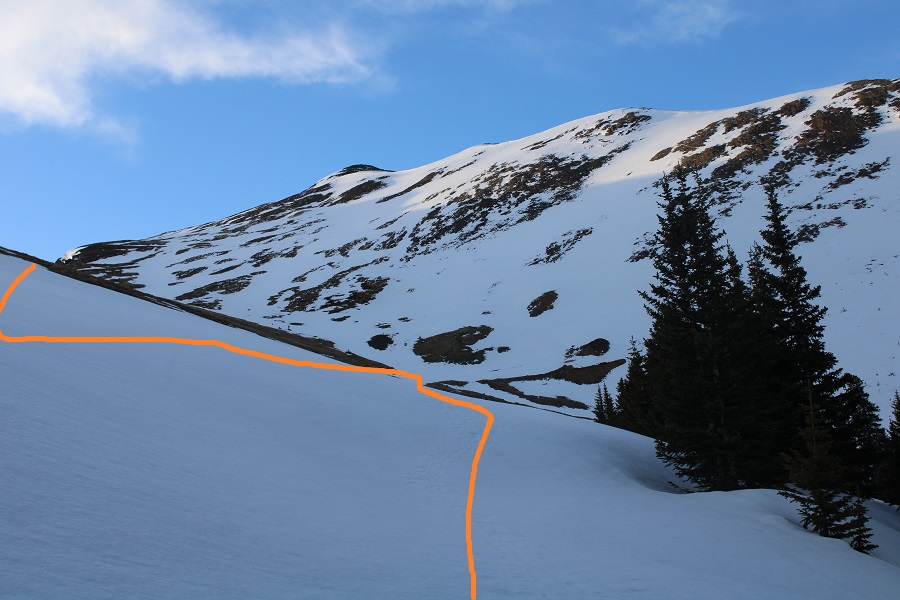
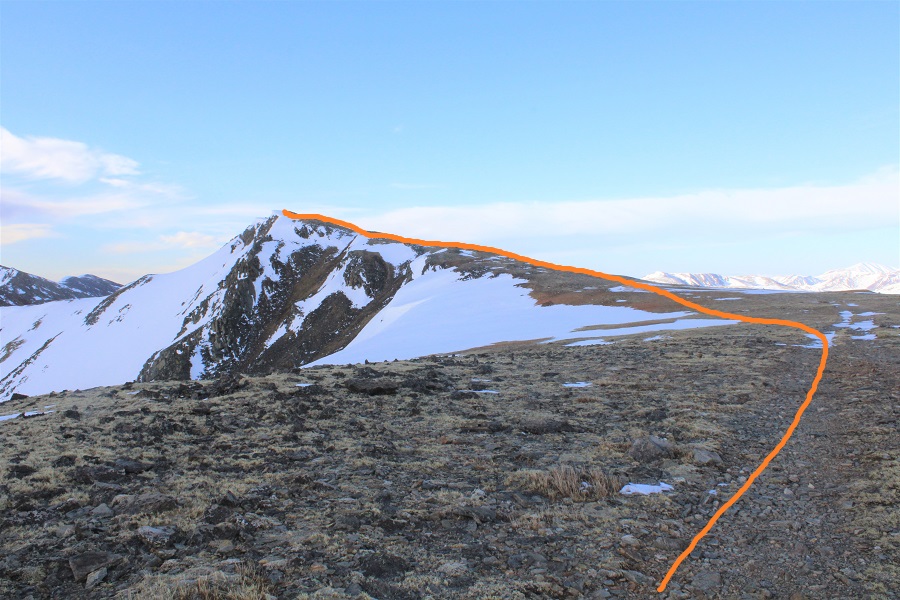
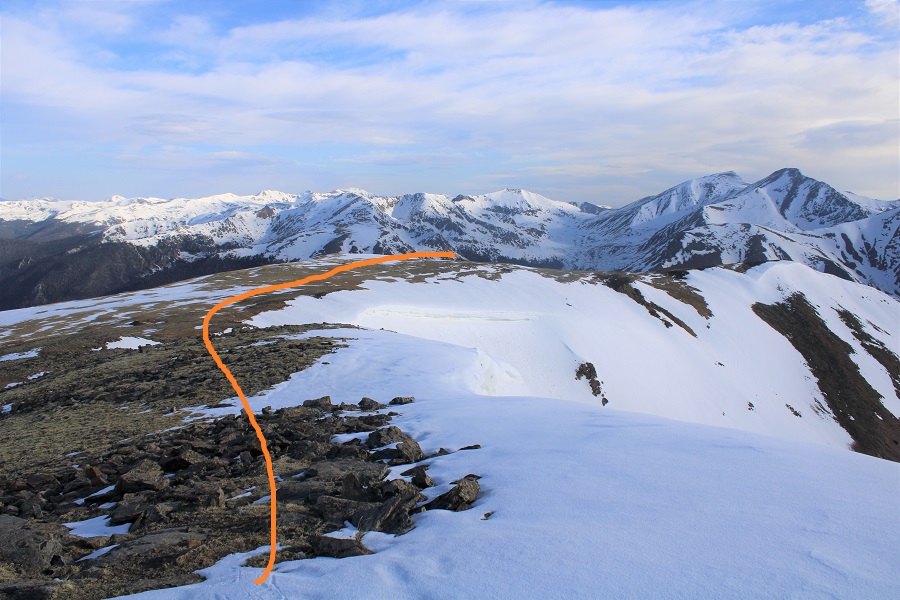
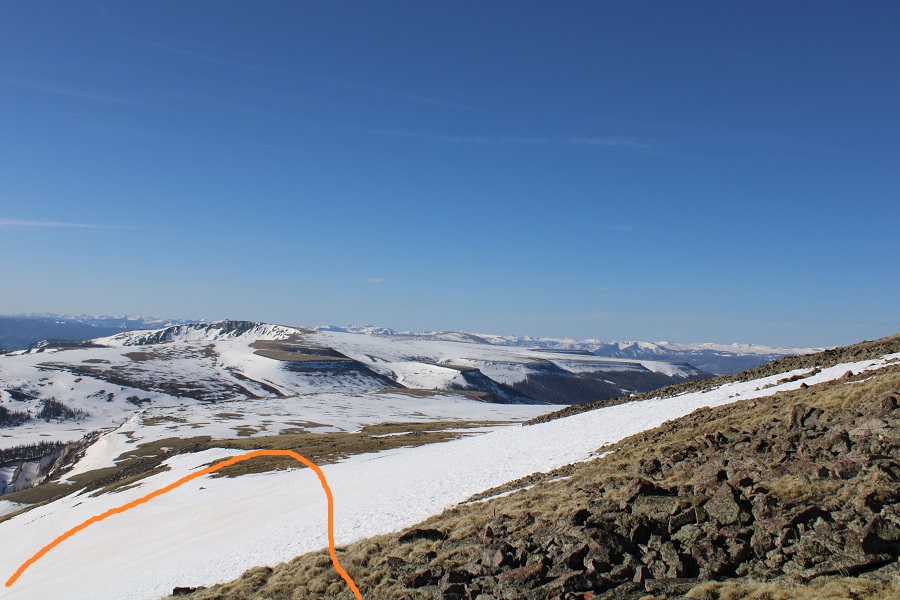
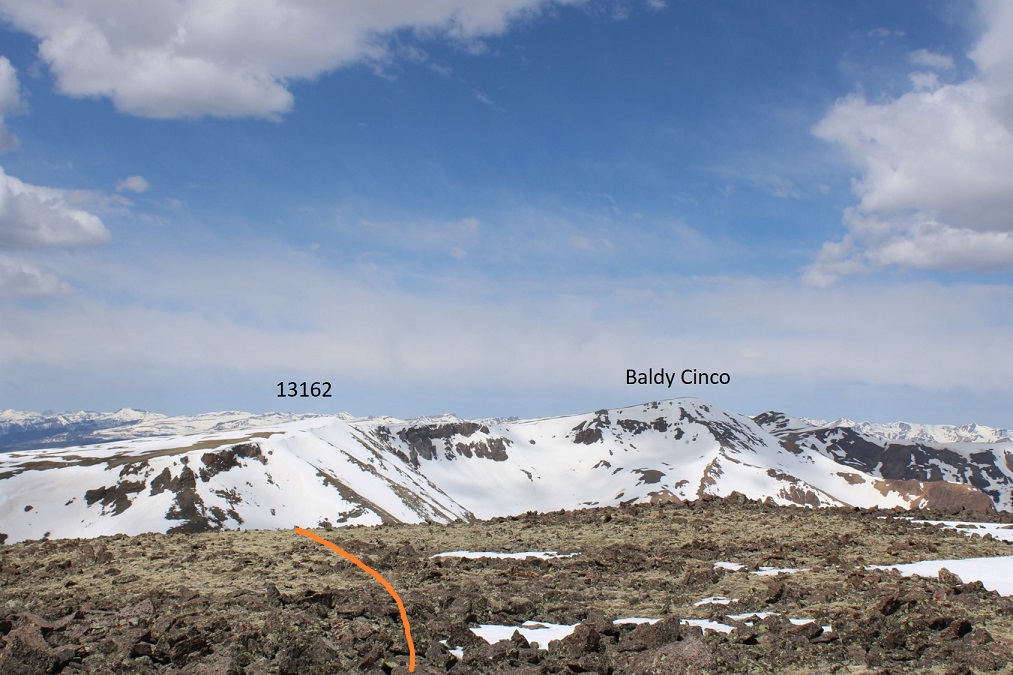
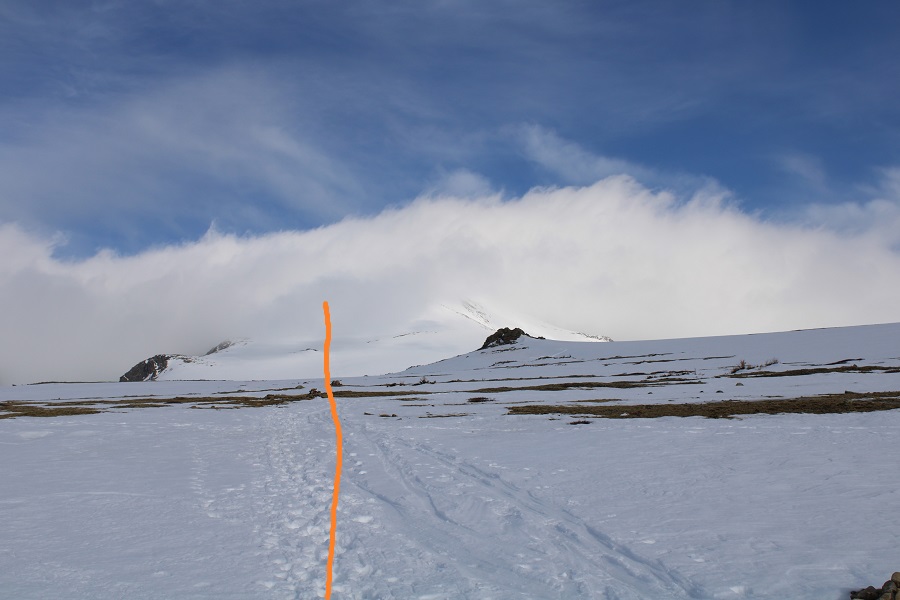
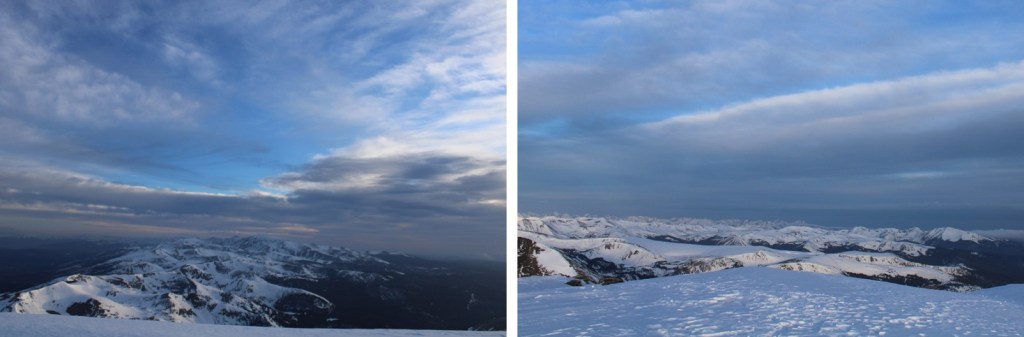
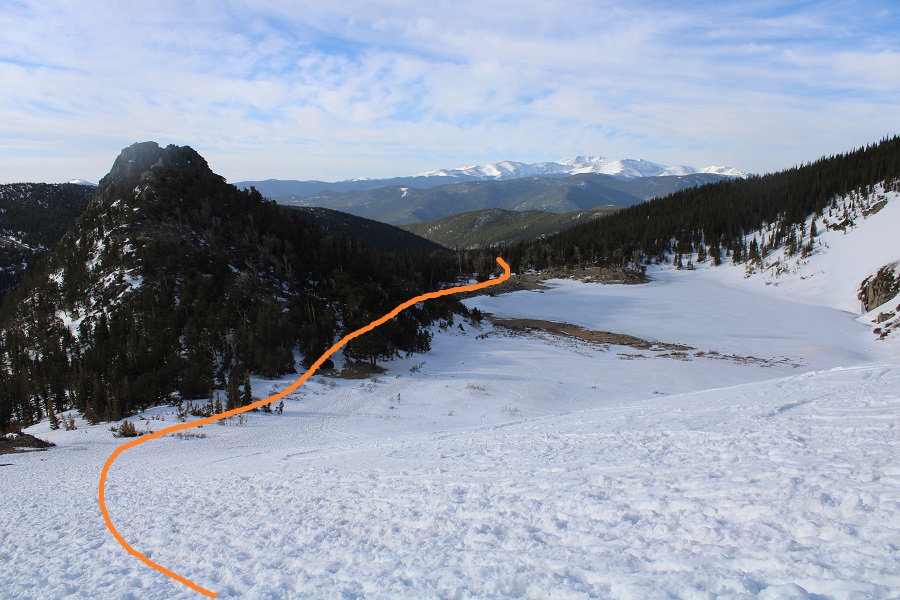
For reference, here’s a look at my route up to PT 13540 (solid line) and down (dotted line), as seen from the west ridge of “C.T” Peak.
It was still early: I’d initially intended to add “C.T” Peak on today as well, but didn’t want to re-enter the basin with the way the snow was warming up, so I switched my plans and was going to do that peak tomorrow. Instead, I got out a book my daughter just finished reading and was eager for me to read as well so we could discuss it together. I walked around Argentum, found some old structures hidden way up in the hills behind my campsite, relaxed, and sipped whiskey. Dinner was a block of white cheddar cheese and some bacon. I had new neighbors, so I welcomed them, and then made it an early night. It rained.
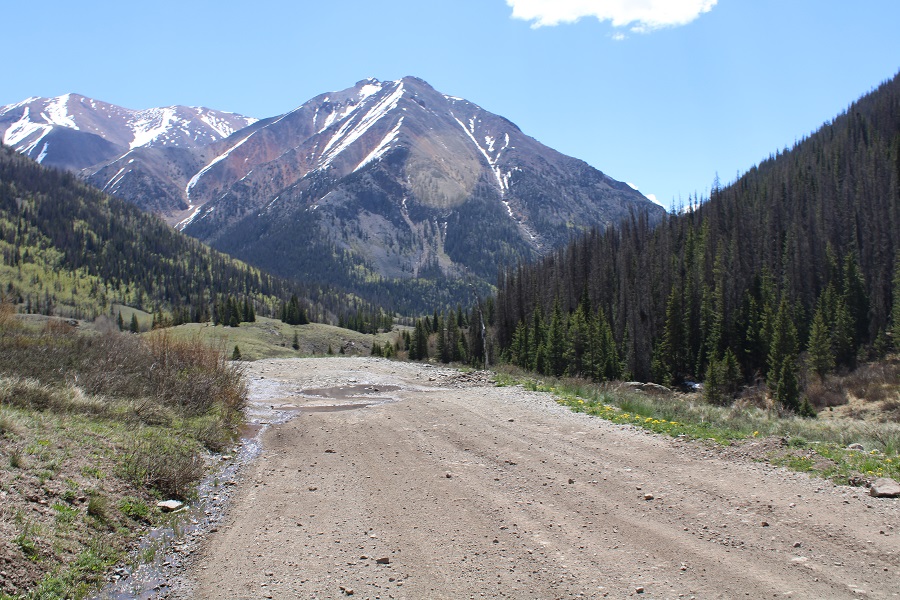
This was my third attempt at Chipeta Mountain this year. The first time I drove out the road was open but impassible due to snow. The second time the road was clear, but the gate was closed. I saw several videos/pictures of people on the pass this year, but later found out they were part of a mining operation and the only ones allowed to access the road. The road formally opened on May 28. Today was May 29. It had already been a long morning: I’d woken up at the Gibson Creek trailhead, intent on hiking a few 13ers in the area (also not my first attempt these peaks this year), but after about 1000’ of elevation and deteriorating snow conditions I decided to make today a ‘me day’. I hiked back to my truck, chugged a beer, and came up with a new plan: I was going to drive to Marshall Pass, see if it was open, spend a day relaxing, and then tackle Chipeta Mountain tomorrow.
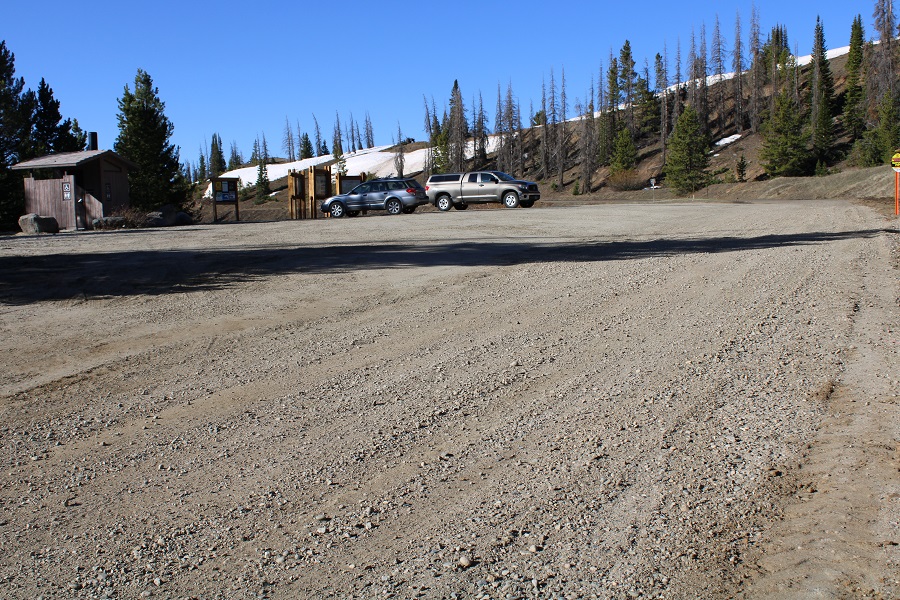
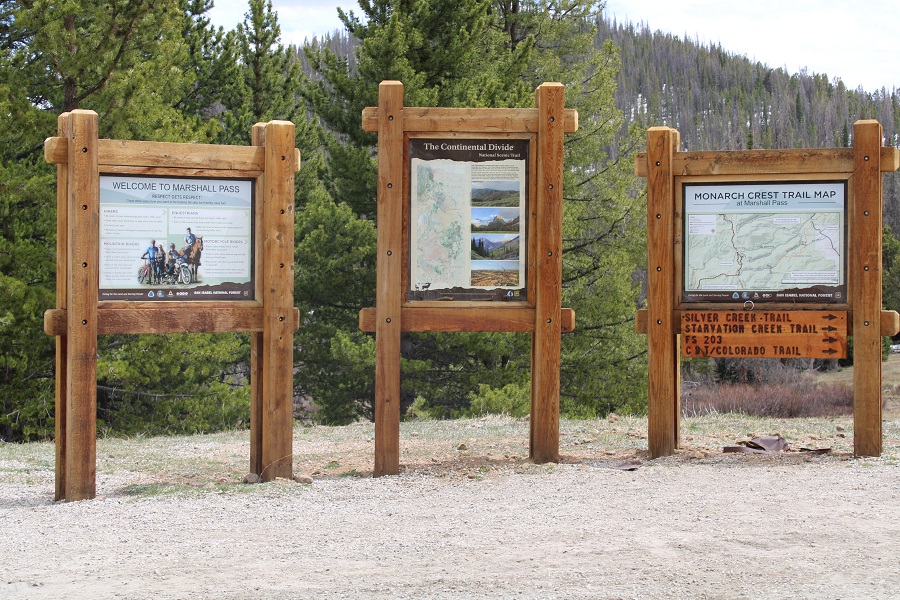
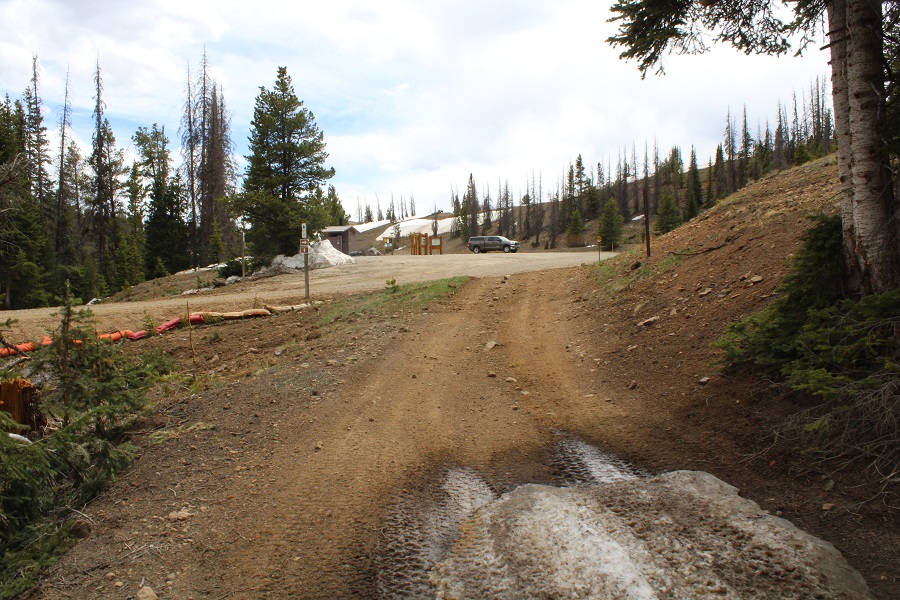
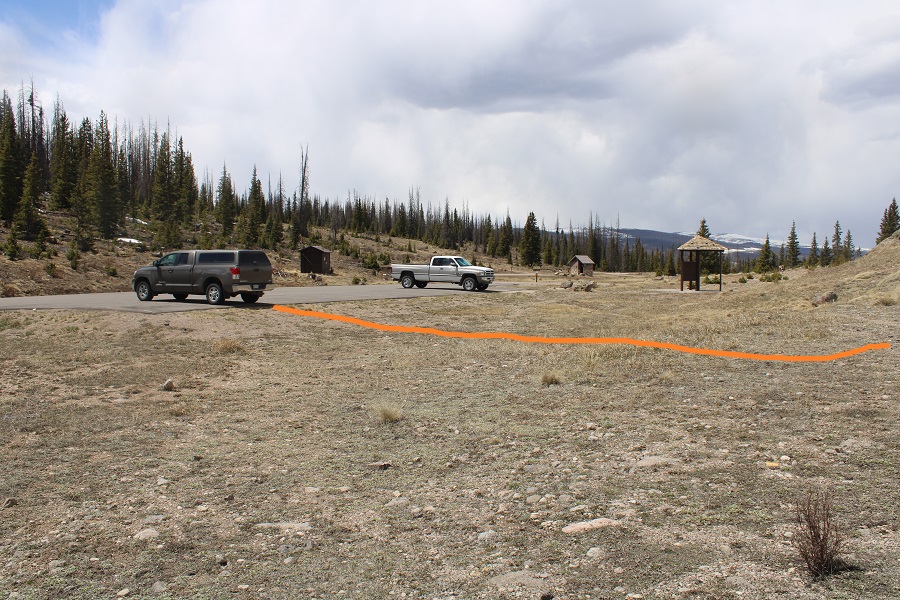
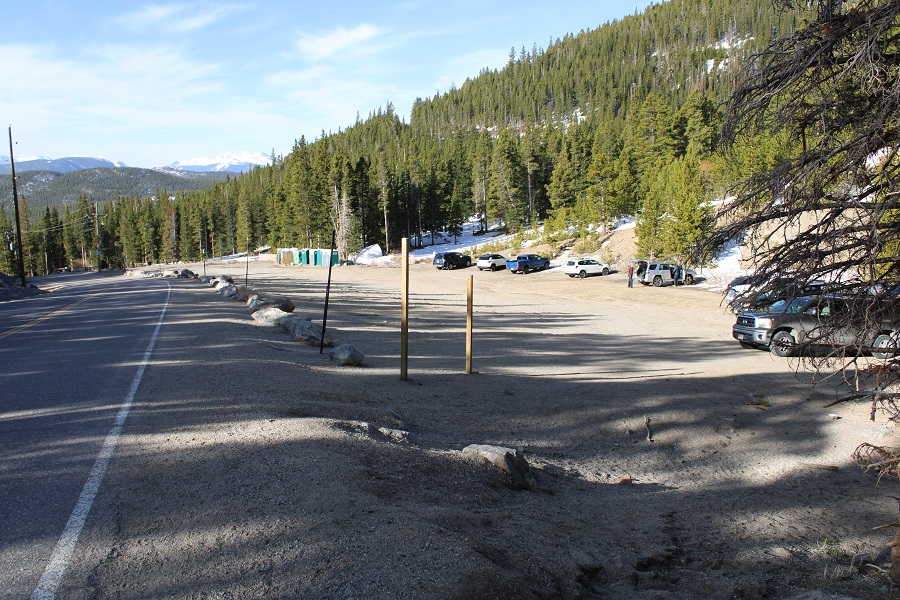
Marshall Pass was open and snow/mud free to the pass. I was surprised at how few people were dispersed camping this Memorial Day weekend. I parked near the bathrooms and information signs.
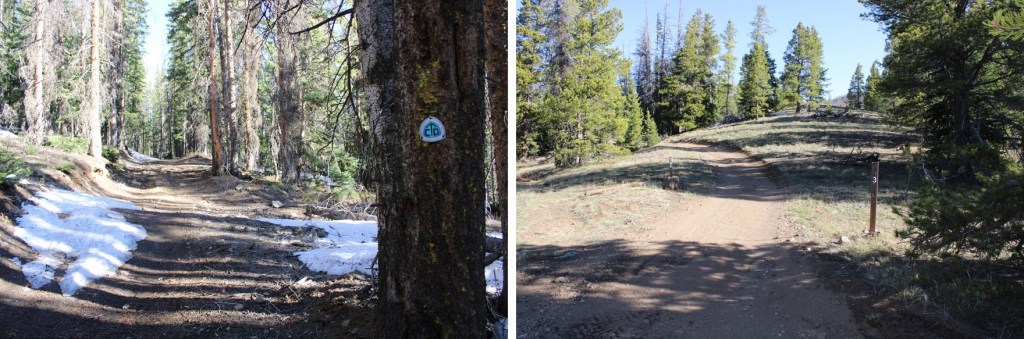
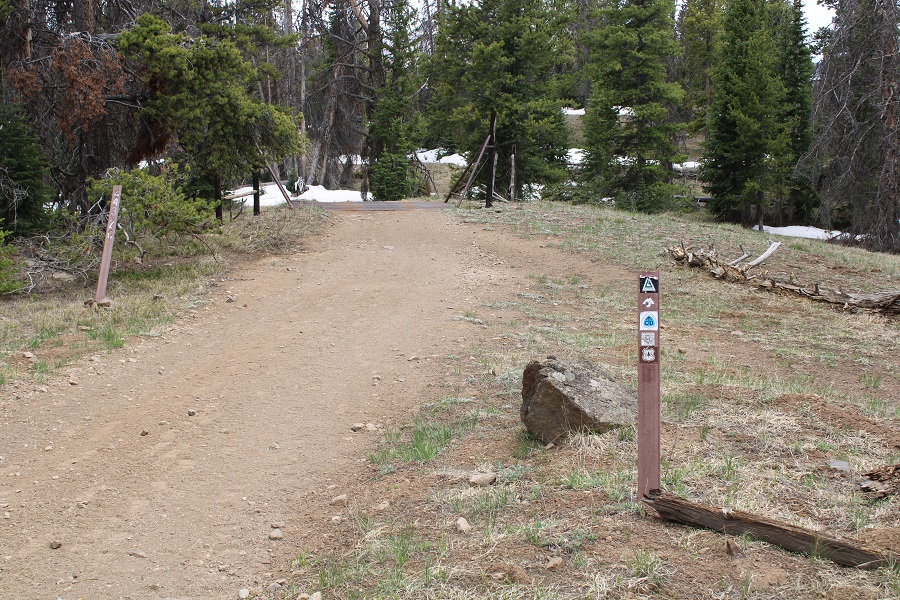
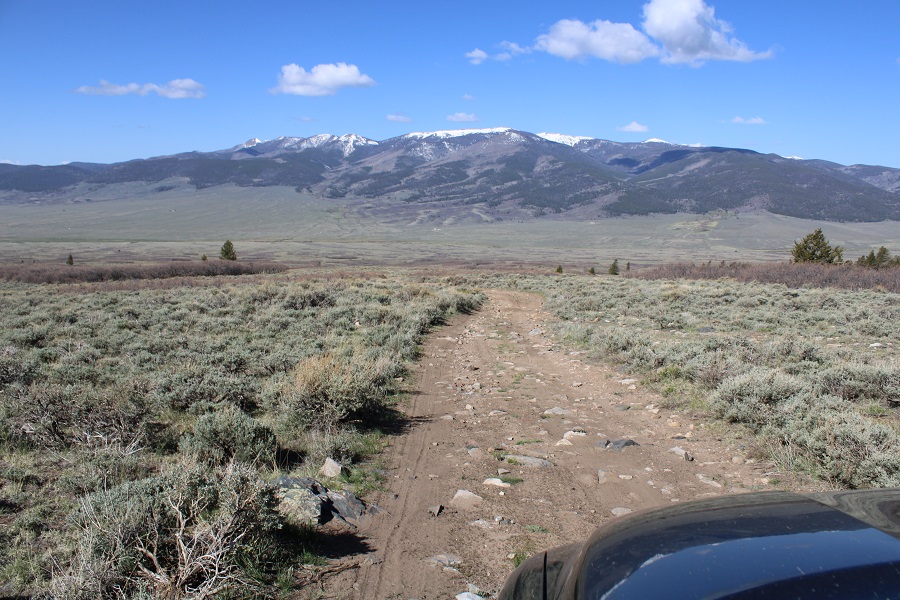
I checked the weather, and it wasn’t supposed to rain until 5pm tonight. I did the math, figured I had plenty of time to get in a hike before weather set in, gathered my gear, and was on my way. I was on the trail at 8am. The usual trail from the trailhead has a sign saying it’s no longer in use, so I took the very short bypass and started along the road instead. This is road 243G, located at the north end of the parking area. If was a bit muddy to begin with.
It was obvious from the start motorized vehicles hadn’t been on the trail yet this year, as there were numerous downed trees at the beginning (not much after a mile in, however).
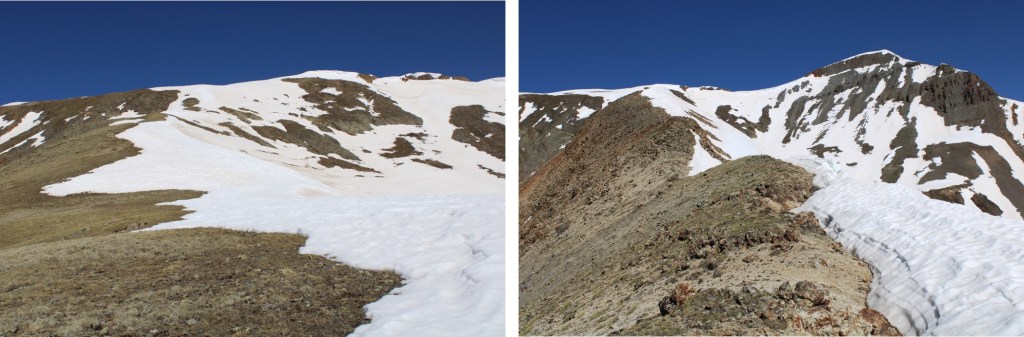
I was following the Continental Divide and Colorado Trails north, along the west side of the mountains.
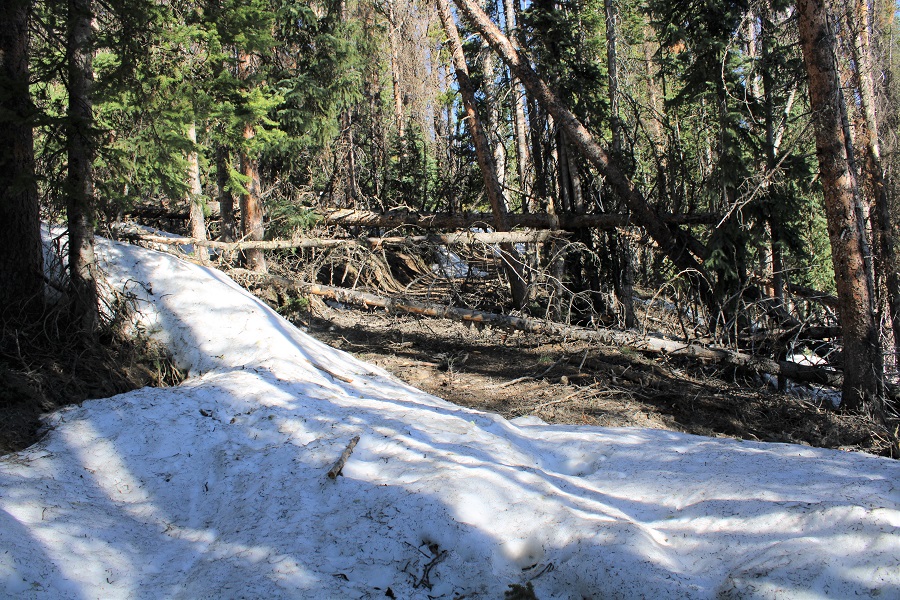
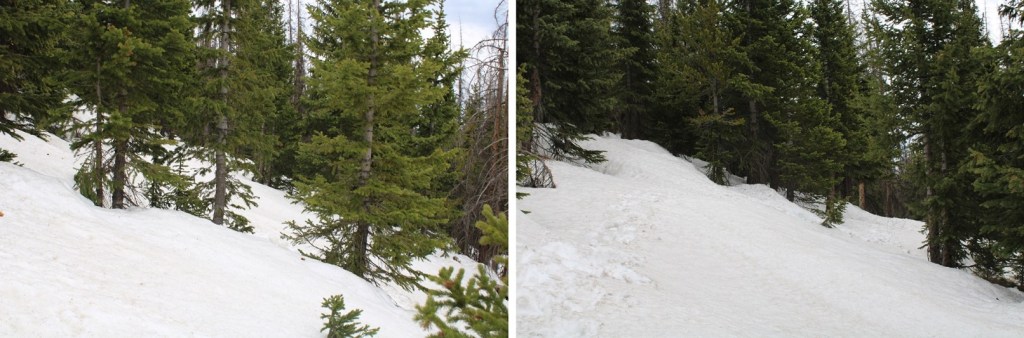
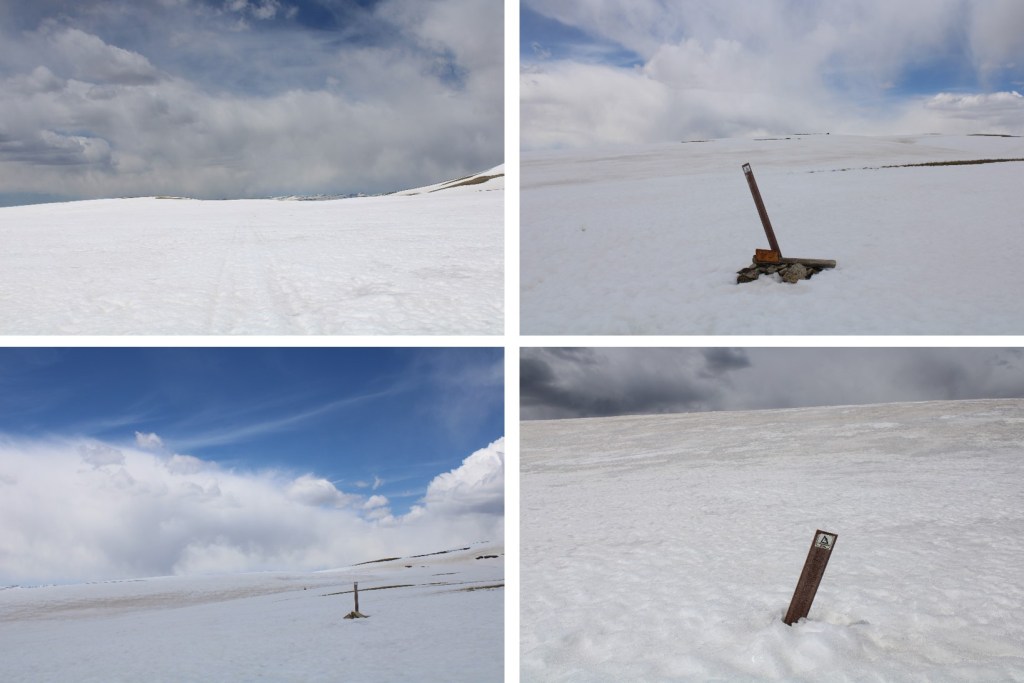
After hiking for 1.7 miles snow started covering the trail. Luckily, this snow wasn’t quite mashed potato snow, and I could get by hiking over it with just microspikes (on the way in),
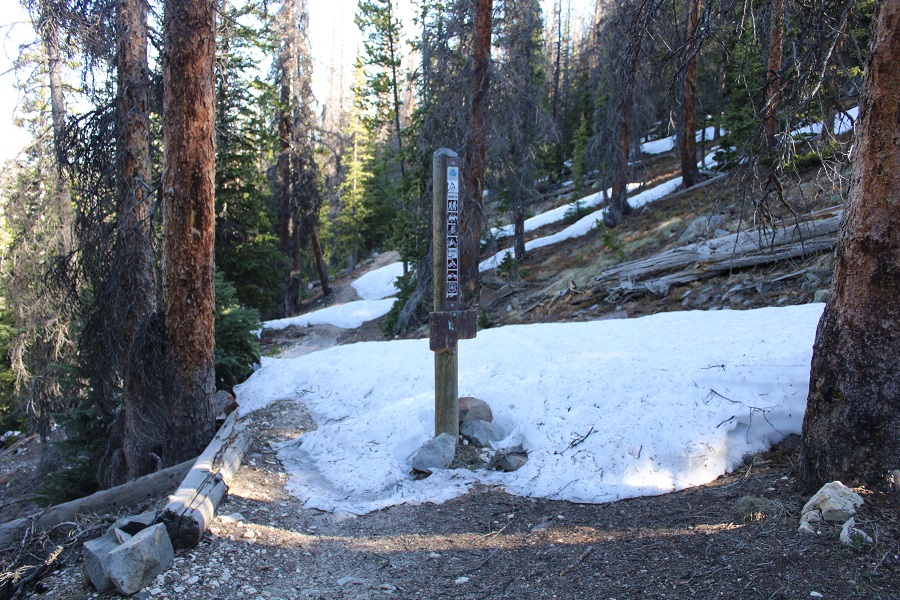
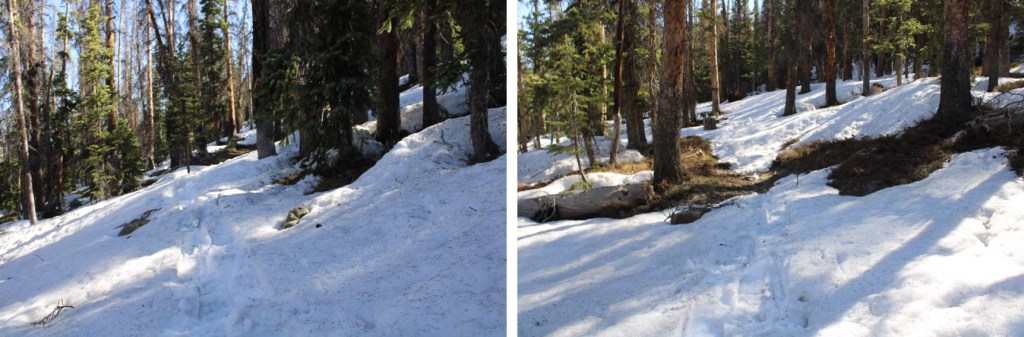
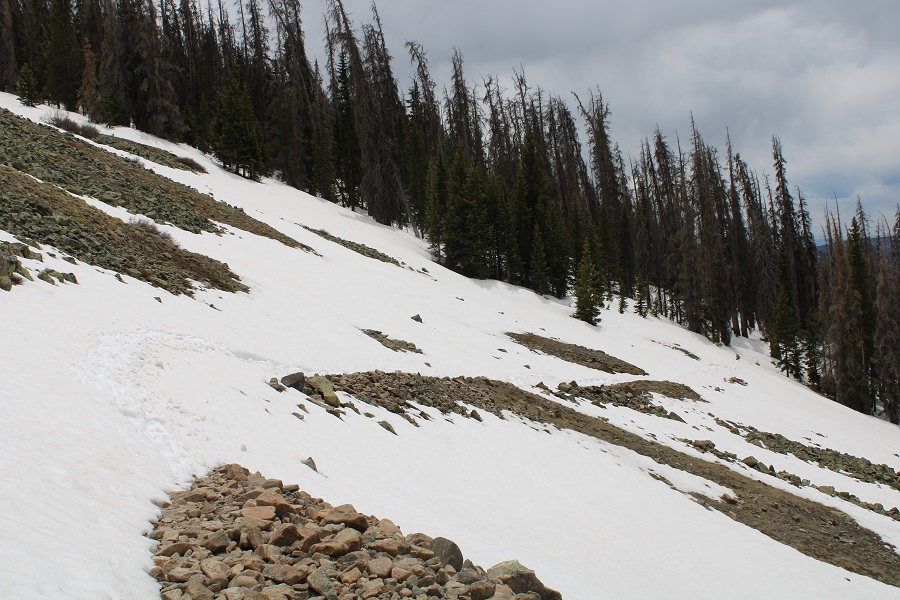
After hiking for a total of just over 3 miles I turned right and headed east up the slope. A map will tell you this is trail 484.1, but since it was covered in snow I headed east, and once I saw them, I followed the posts to the saddle.
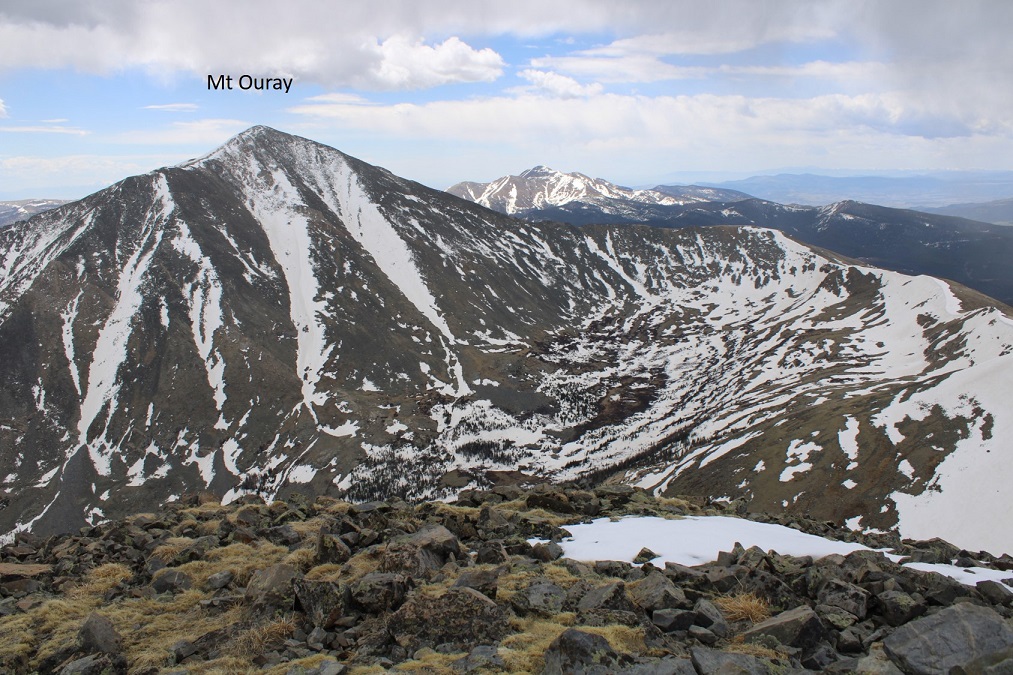
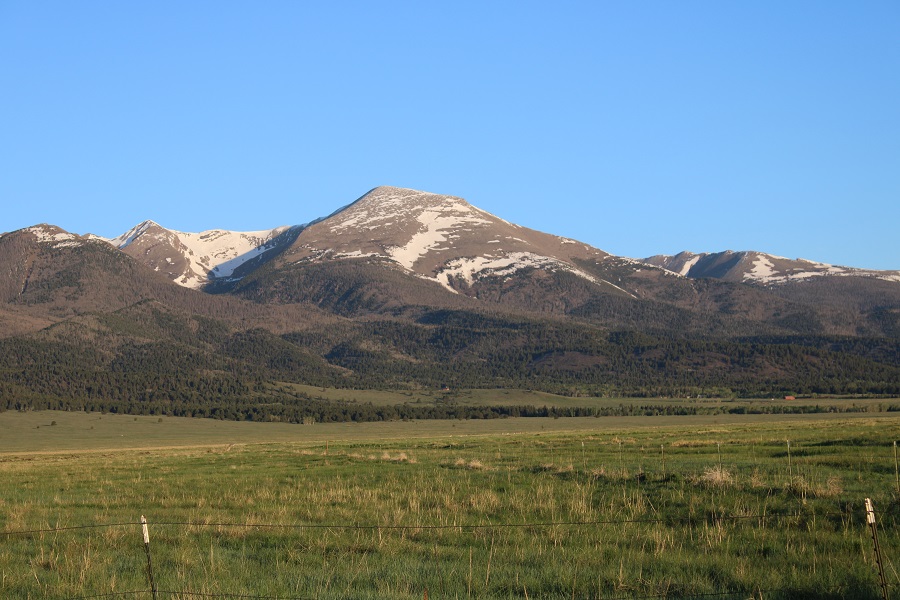
Once at the saddle I had a great view of Mt Ouray. I turned left and headed north along the ridge.
Here an obvious trail picked up (the trail only lasted to the top of this hill).
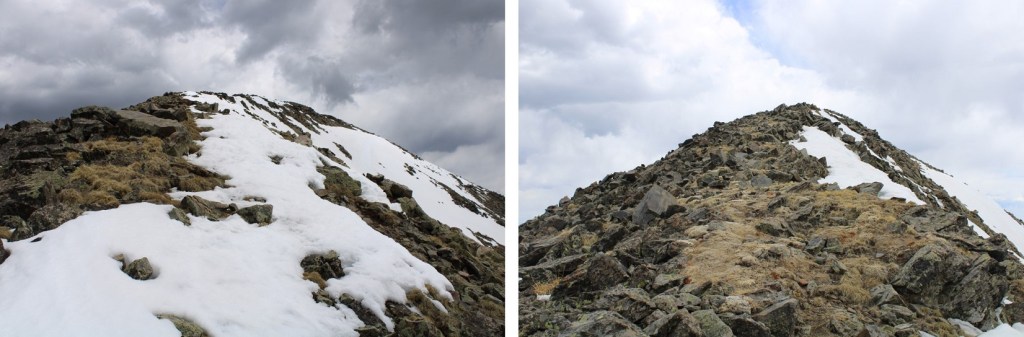
From here you can see the rest of the hike: it’s a straightforward ridge hike that starts out with tundra, and ends with a lot of loose rocks the size of tires. Note: The drop from South Chipeta Mountain to Chipeta Mountain is more drastic than this image would indicate.
Here are some step by step pictures of the ridge.
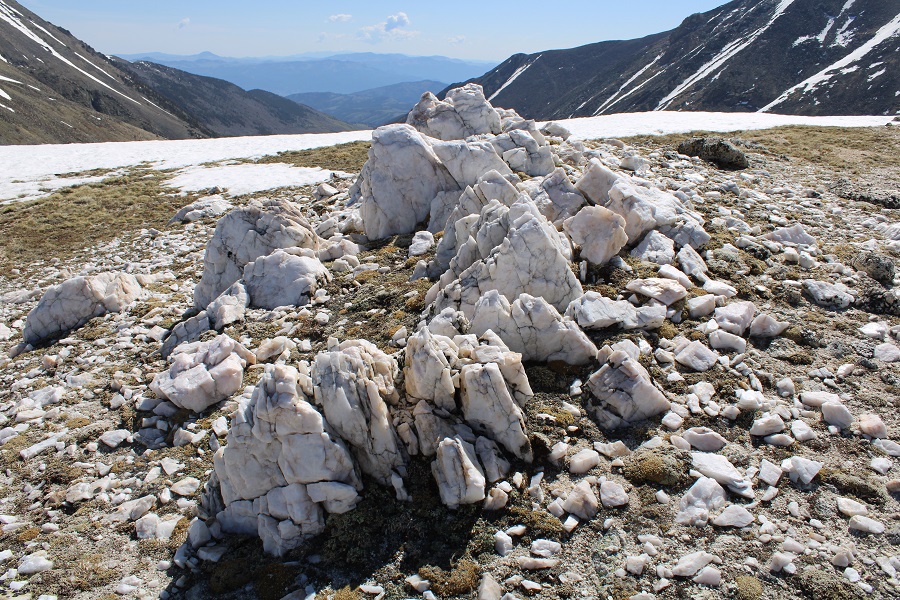
There’s a cool Quartz formation, with a lot of interesting rocks lying around
Then it’s on to South Chipeta Mountain
It’s rockier than it looks towards the top
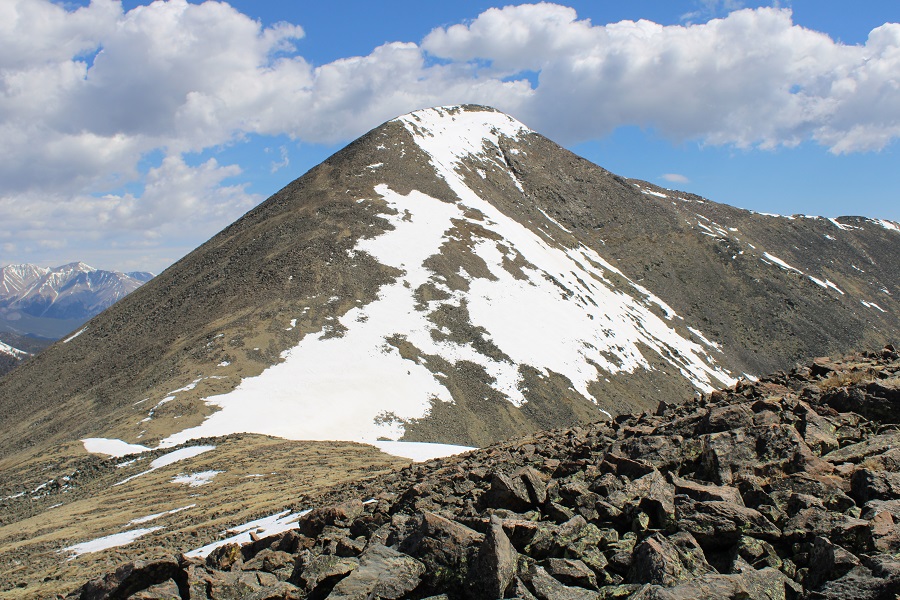
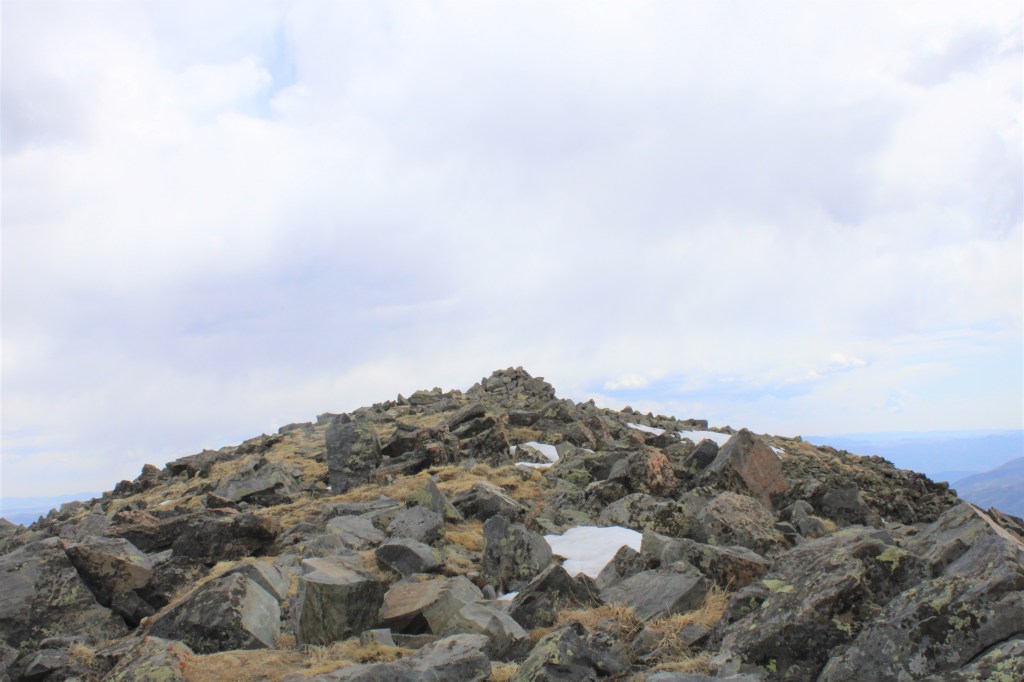
From the top of South Chipeta Mountain (12850) you can clearly see the route to Chipeta Mountain (13472). From South Chipeta you will lose 200’ of elevation, and then gain 825’ of elevation to the summit of Chipeta Mountain.
This is also a simple ridge hike, but it takes time and careful foot placement because the rocks aren’t stable and tend to roll. Nothing above class 2 however.
Weather unexpectedly started coming in early as I neared the summit of Chipeta
I summited Chipeta Mountain at 11:15am, after just over 3 hours of hiking
Chipeta Mountain:
Here’s the view of Mt Ouray from the summit of Chipeta
I didn’t like the look of the clouds, and there was virga in the direction I was headed, so I didn’t stay on the summit long. I retraced my steps back over South Chipeta Mountain to the saddle.
At the saddle I turned right and headed back down to the Continental Divide / Colorado Trail
At this point I needed snowshoes. Strapped them on and followed my tracks from this morning south
I made it back to the trailhead at 2pm, making this a 10.58 mile hike with 3281’ of elevation gain in 6 hours.
I was still intent on taking a ‘me day’, so I decided to sleep in my vehicle here overnight. Around 5pm a couple drove in, saying they were planning on backpacking part of the CDT/Colorado Trail. The had along their dog, and a ferret on a leash (the woman had a ferret fanny pack as well, for when needed). I asked them if they had snowshoes? The woman slapped the man across the chest and said “See? I told you so!” They didn’t have snowshoes but headed out anyway. When I woke up at 5am their vehicle was gone, so I’m guessing they didn’t end up staying the night, which was a good idea, considering there was a storm coming in. I’m not sure what a wet ferret smells like, but it’s probably not ideal.
I drove to the Gibson Creek trailhead the night before, concerned I wasn’t going to get a spot to park on Memorial Day weekend. Imagine my surprise when I was the only one there. Two more vehicles would join me later, but I was genuinely amazed the trailhead wasn’t more crowded: there’s great dispersed camping here.
Bonus: no mosquitoes! I spent the next few hours relaxing, making dinner, sipping whiskey, and reading, before making it an early night.
(It was, in fact, a long night, full of nightmares. I’ll spare you the details, but let’s just say they involved frantic mothers holding their decapitated babies, pleading for help and saying there was a horrible accident, and a demon that took over the body of a frail child: the demon needed to die, but doing so hurt the child. Not fun when you’re camping all alone. I woke up around 2am and knew if I went back to bed my nightmare would continue, so I tried to think about other, happier things before starting out on my hike in the dark. What’s happier you ask? I have 3 kids. I told myself when I got a divorce in 2012 I wasn’t going to date seriously until my youngest was 18 and had graduated High School. Well, she graduated this week, and is off to college, so I spent the next hour trying not to think about the nightmare I’d just had, and instead thinking about what I was going to do about dating, whether or not I really want to at this point, and realized I haven’t ‘dated’ since the 90s, and it’s certainly changed. It’s weird to be 40 years old and an empty nester. So, how y’all dating now?)
But I digress. Knowing it was going to be a long day, I was on the trail at 3am.
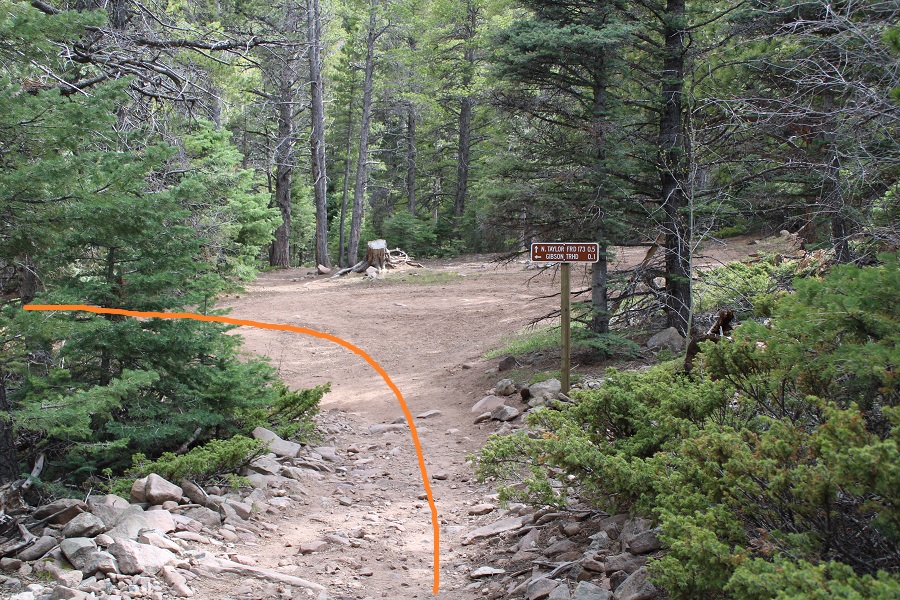
The trail starts at the north end of the parking area, and heads west for .1 miles before turning right and following Rainbow Trail 1336 north.
I followed Rainbow Trail as it wound around the east side of the mountain for 3.25 miles, crossing several creeks along the way. One creek crossing even had two bridges to make the crossing easier (the other areas had shallow enough water where bridges weren’t necessary). There was about a mile of the trail deep in spring conditions, with runoff covering the trail.
After 3.25 miles I came to a junction, and took Trail No. 1350 left (west) towards Texas Creek Basin. This is where my flashlight went out and I was glad the sun was starting to rise.
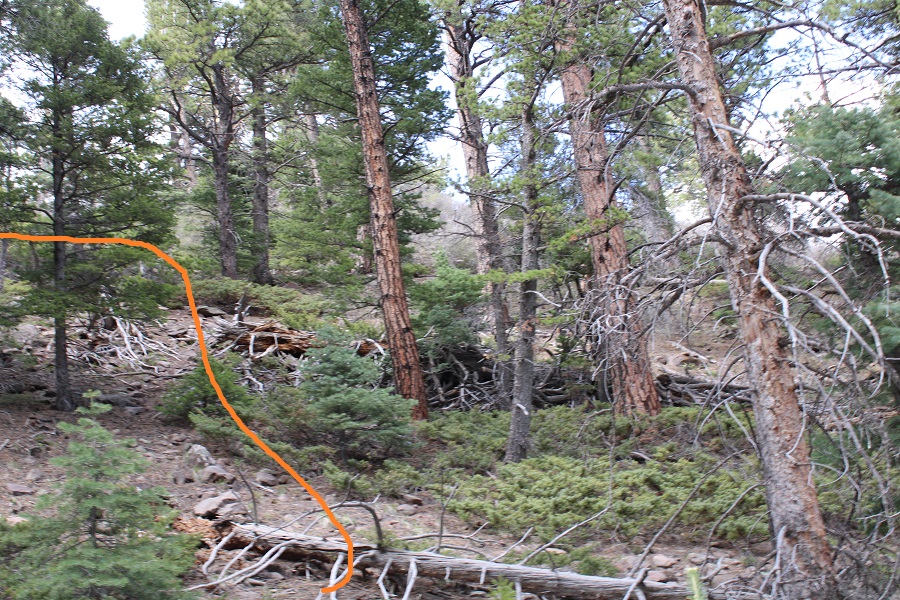
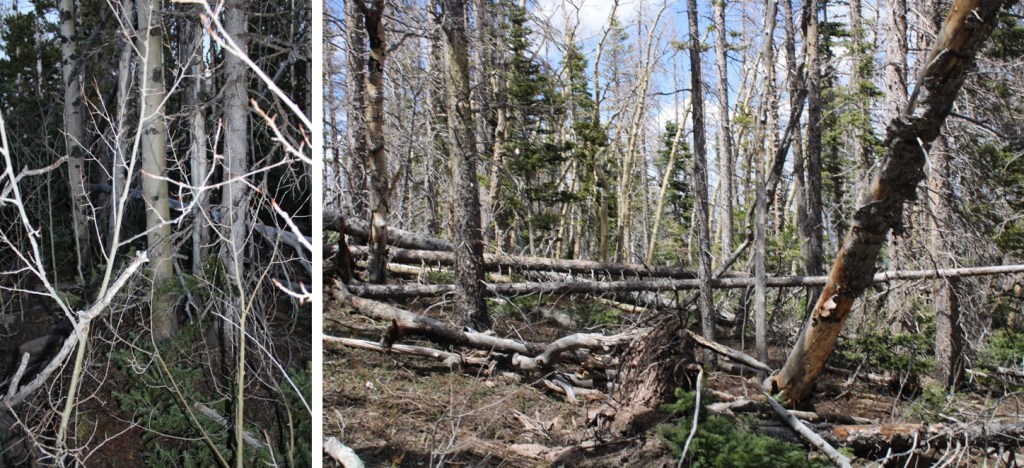
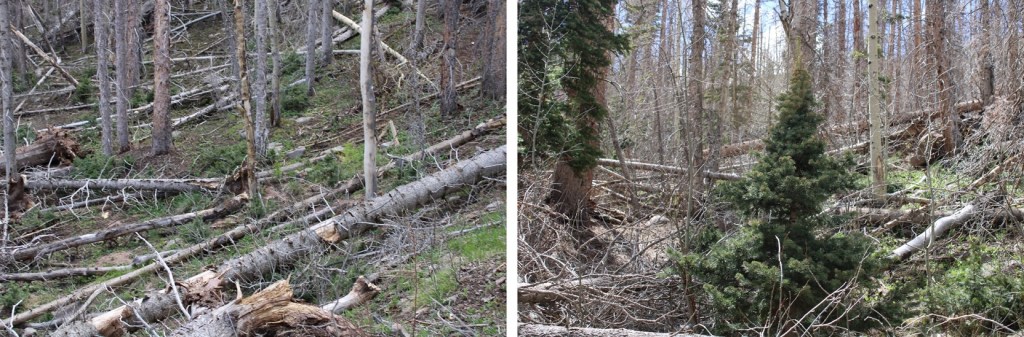
Note: Trail 1350 is not a maintained trail. I was hiking it in the dark at this point, and there were so many downed trees I kept getting off route trying to go around them (going over them wasn’t always practical). It wasn’t much better in the daylight. I decided to gain the ridge as quickly as I could, and follow it west to treeline.
It took me 2.75 miles, and 2000’ of elevation gain to make it to treeline. It was here I experienced the worst and most extensive bushwhacking I’ve ever encountered. It was like hiking up through avalanche debris (although it was obvious the wind had knocked the trees down). The ridge was either dense with new growth, or a jungle gym of downed trees. I would not recommend this route, and I told myself I’d take Texas Creek on the way down (note: I later realized I would not recommend the Texas Creek route either). There was a small but raging creek to ford early on, and then it was straight up the ridge.
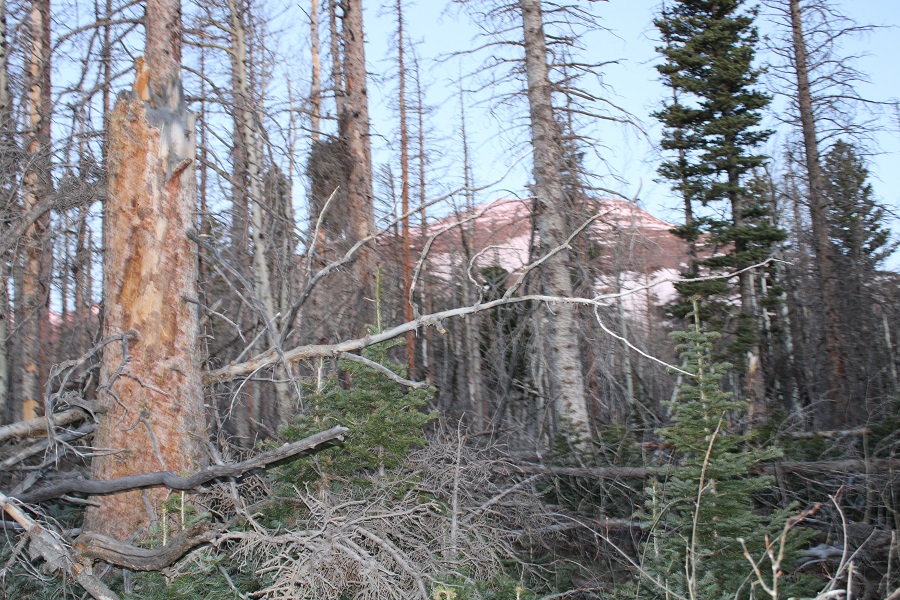
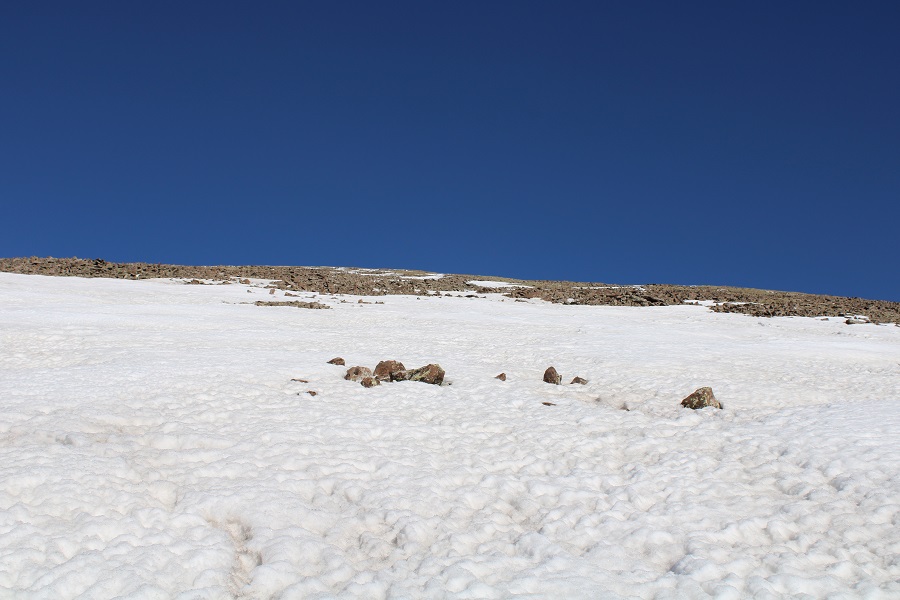
After hiking for a total of 6.75 miles I came upon 100 yards of mashed potato snow. I strapped on my snowshoes and kept heading west towards treeline. The snow kept starting and stopping again. On my way up I kept my snowshoes on. On my way down I misremembered how long the snow section was and kept taking the snowshoes off, just to need them again.
Once at treeline there was a small amount of snow to navigate, and then I was able to avoid most of the snow to the summit.
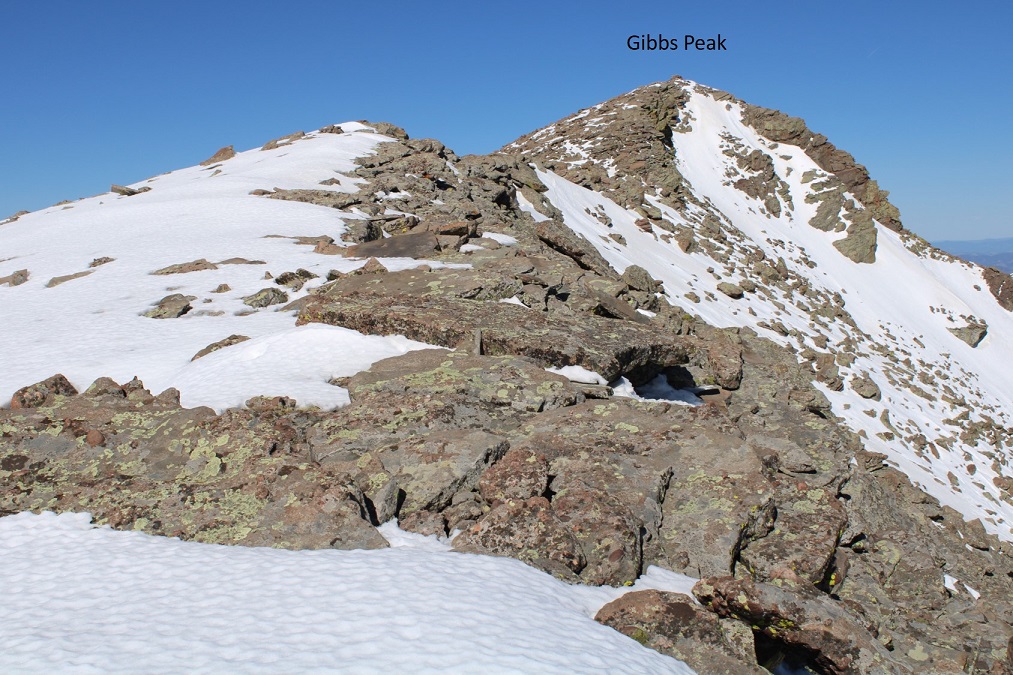
One good thing about the hike above treeline: there are no false summits to Gibbs Peak. What you see is what you get. As long as you keep heading west and gaining elevation, you’ll make it to the summit.
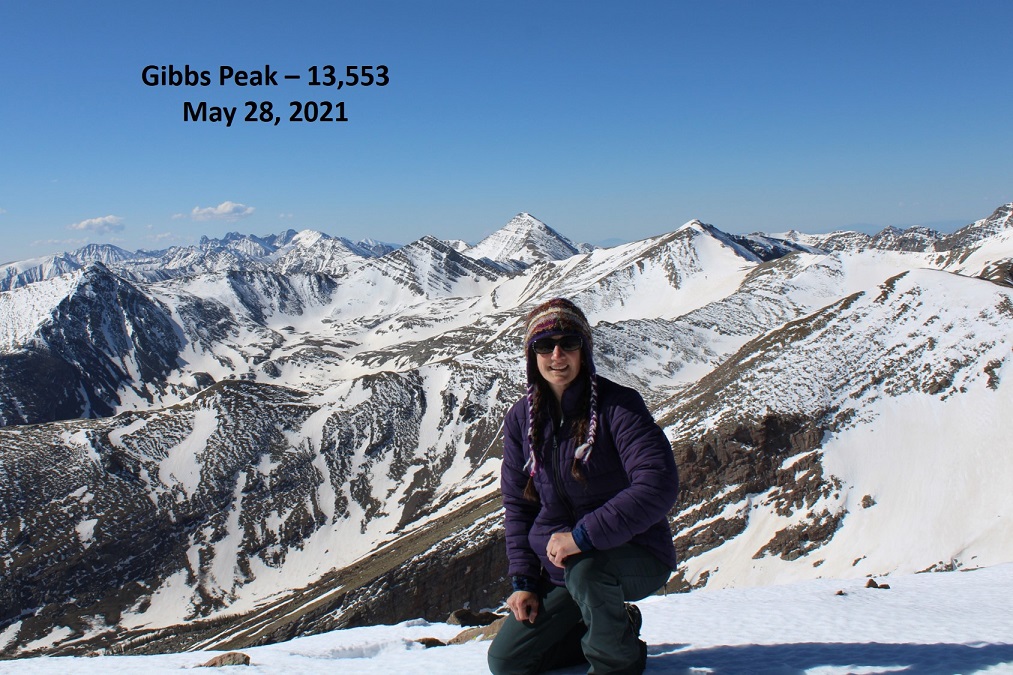
I made it to the summit of Gibbs Peak at 9am, after 6 hours and 8.25 miles of hiking.
Gibbs Peak:
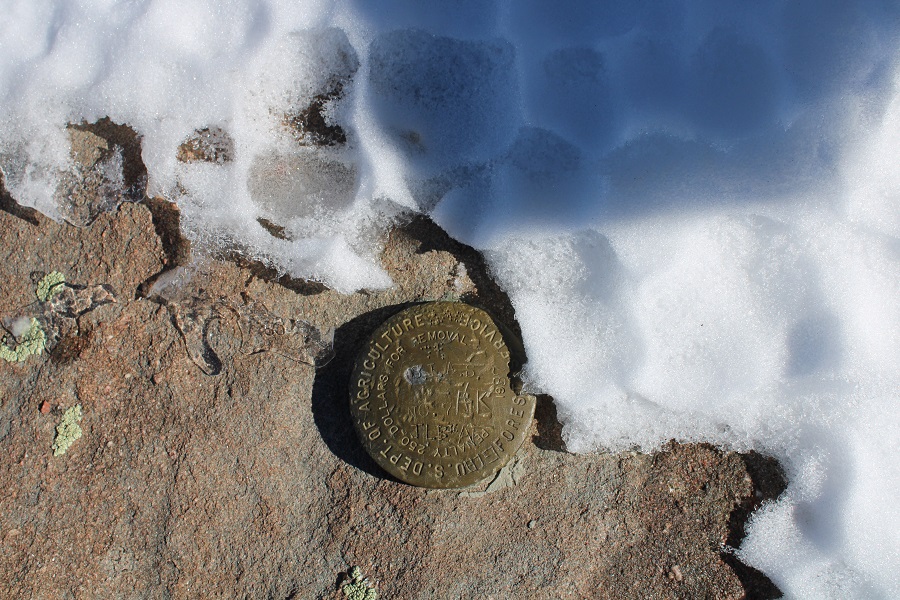
There was a benchmark on the summit. I took off my pack and realized I’d lost my water bottle somewhere. That’s what I get for not strapping it in. No matter, there was plenty of snow if needed. I’d have to look for my water bottle on my way back down.
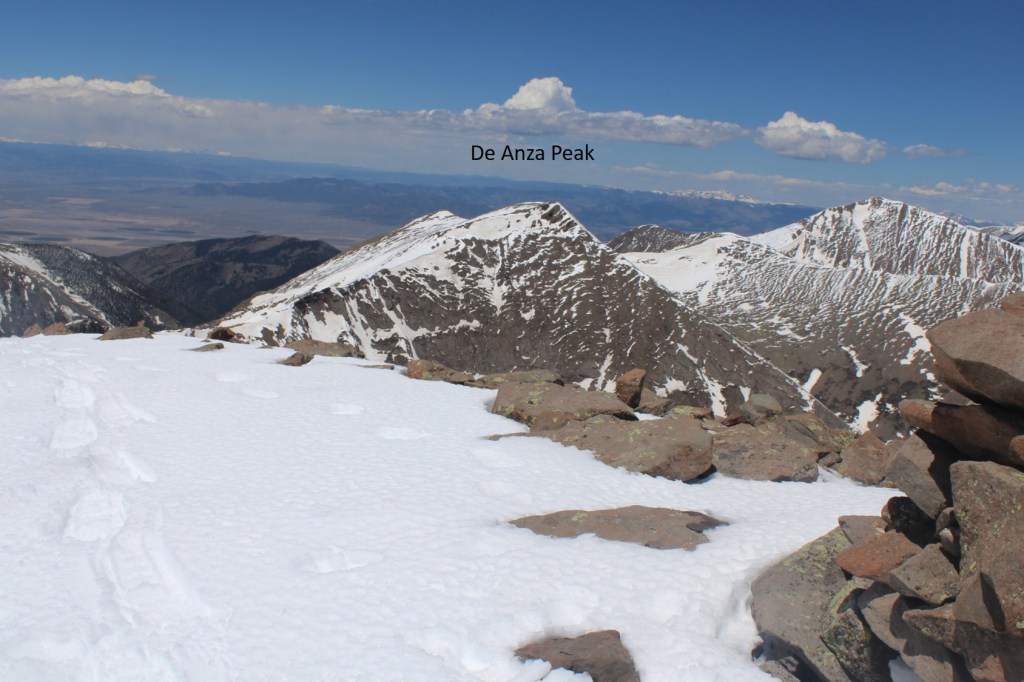
There wasn’t a summit register, so I left one. I had a great view of De Anza Peak to the northwest.
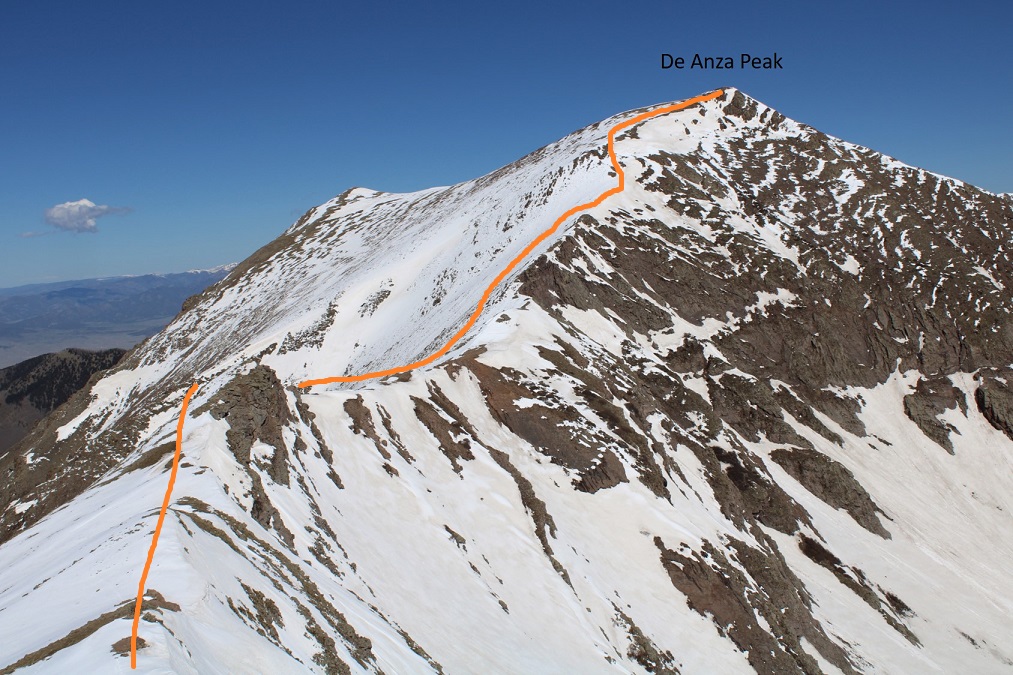
In order to get to De Anza Peak I had to head southwest to point 13227, and then northwest to the summit of De Anza.
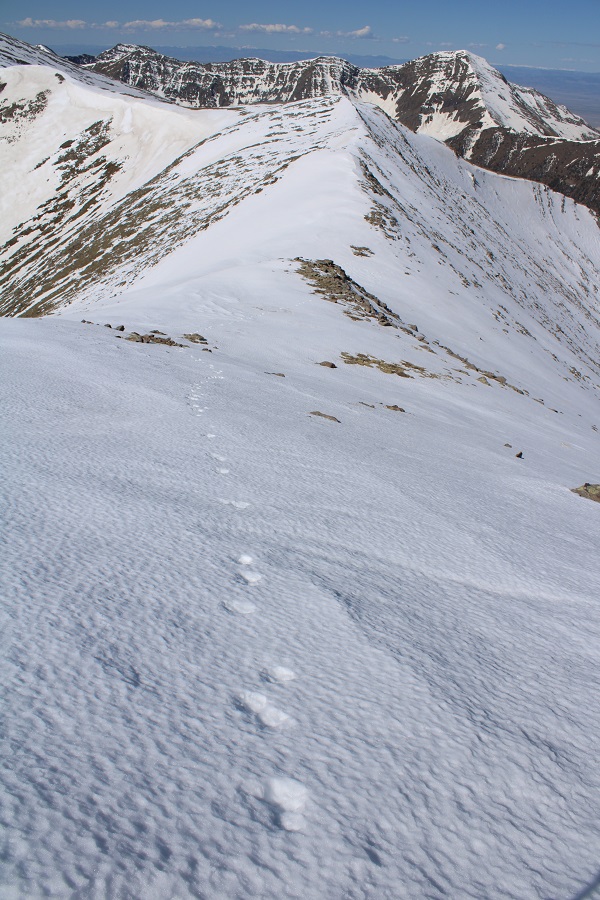
This part of the hike was actually quite fun, as I was now losing elevation, getting a little bit of a break, and following animal tracks the entire way.
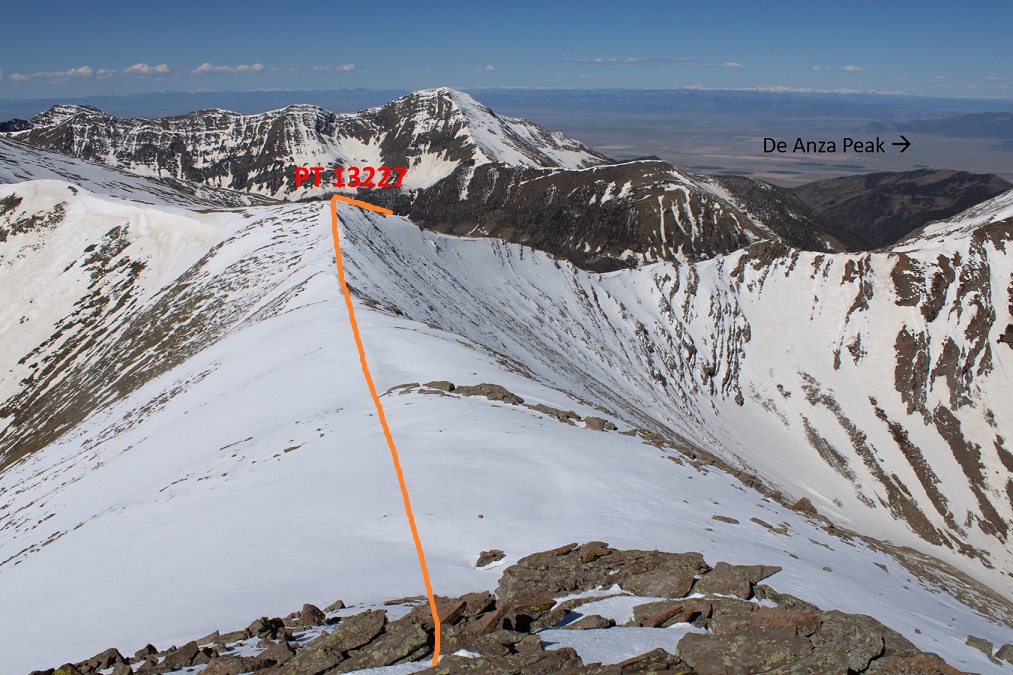
When I made it to PT 13227 I turned right and headed followed the ridge northwest. You can’t tell from these pictures, but I was actually downclimbing a bunch of rocky areas. On the way back I stuck to the areas covered with snow, as climbing up the rocks, especially in snowshoes, was a little too spicy for me without a helmet.
There was still more elevation to lose however. Here’s an overall view of the route to the summit
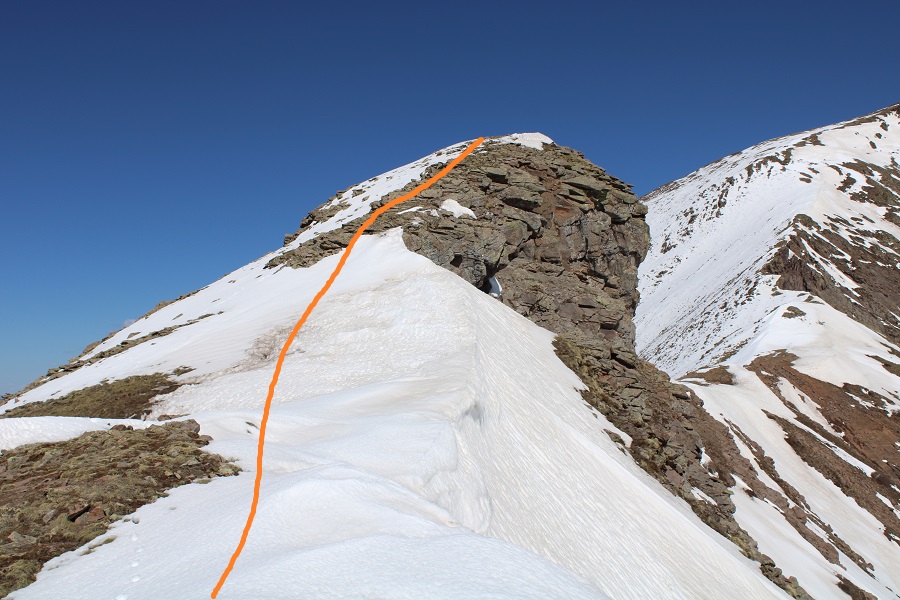
From this point on I needed snowshoes, as I began postholing up to my waist. I strapped them on and followed the ridge. Here are some step by step pictures. I went straight up and over this hump
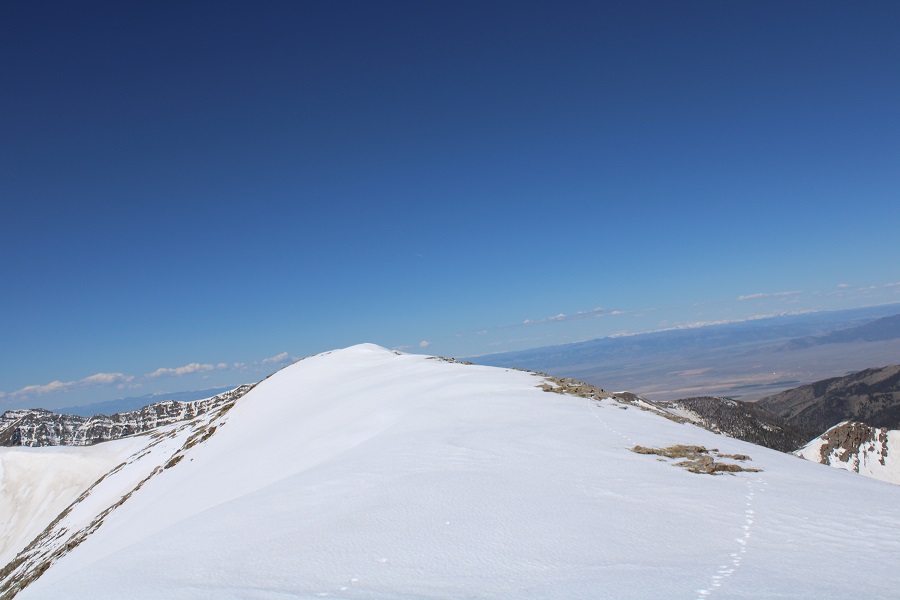
Then mostly stuck to the ridge, aiming for the gullies to my left just before the summit
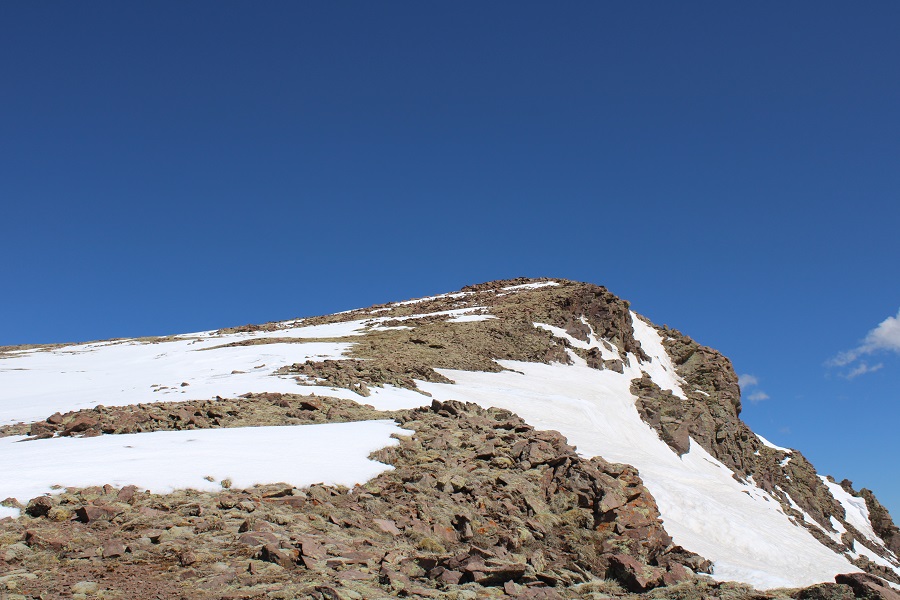
Once up the short (30-40 feet or so) gullies I followed the windswept ridge to the summit
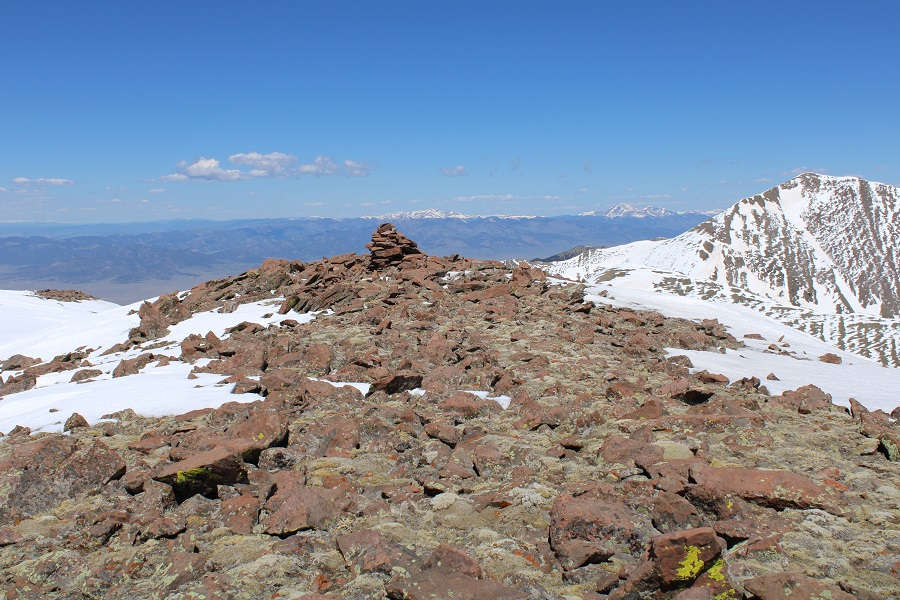
I summited De Anza Peak at 10:40am
De Anza Peak:
Here’s looking back at the route from Gibbs Peak
I left a summit register and started back. While it looks like a simple ridge hike back to Gibbs Peak, the areas without snow are actually rock formations, and I needed to skirt them on my way back.
I made it back down to the saddle, and went up and over the bump in the ridge again
Then skirted the rocks to the right, staying on the areas with snow
Then it was a simple ridge hike back to the summit of Gibbs Peak
I re-summited Gibbs Peak, then followed the ridge east back to treeline. I looked for my lost water bottle, but was unable to find it. (If you find it, it’s yours!)
This time, when I entered the trees, I stayed right. It was my intention to avoid all the bushwhacking I’d one on the way in by taking trail 1350 out. I once again encountered the mashed potato snow at treeline
And at 10,600’ I descended towards Texas Creek.
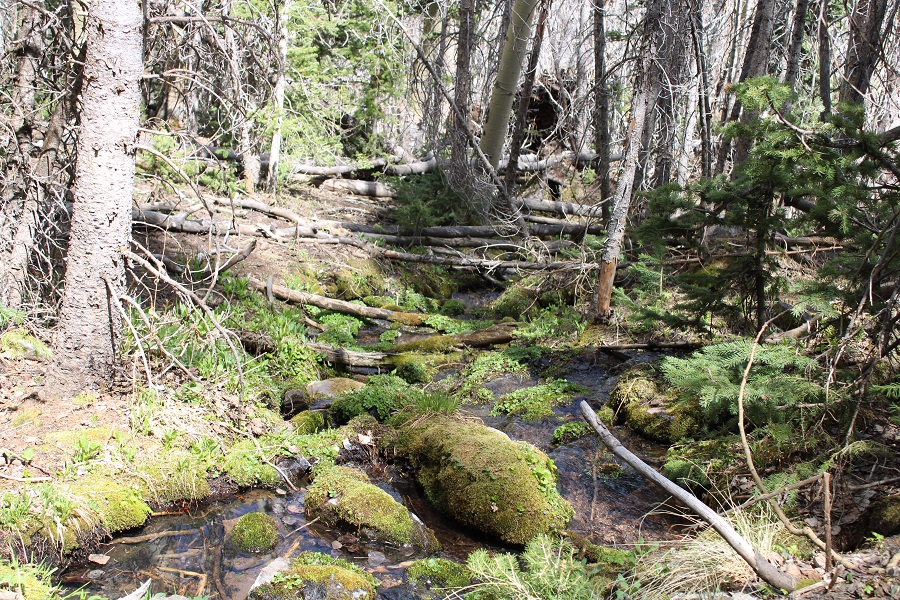
I was highly disappointed to find this area was no better than the way I’d taken on my way in. In fact, it may have been worse: at least when I was on the ridge, I had a sense of direction. Now I was unable to find a distinguishable trail, so I followed the creek east out of the basin.
At one point I realized the creek was actually the trail, or what used to be the trail.
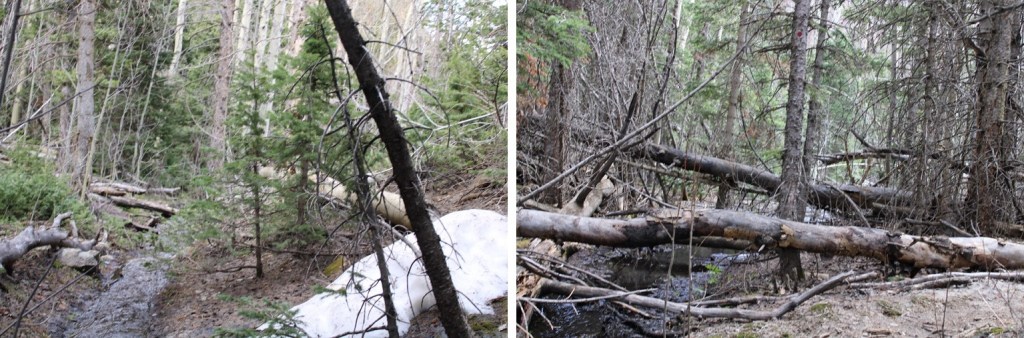
Eventually the trail became a bit more distinct, although still covered in water and downed trees. Just know if you’re following the creek east, you’re going in the right direction.
I had to eventually cross the creek, and to do so I needed to take off my shoes. I crossed the creek, and here the trail picked up again. From the creek crossing Trail 1350 was much easier to follow; there wasn’t any water on the trail, but there were still downed trees.
From the creek crossing it was just over a half mile to the Rainbow Trail / Trail 1350 junction, where I picked up the Rainbow Trail again and followed it back to the trailhead.
I made it back to my truck at 5pm, making this a 20.02 mile hike with 7343’ of elevation gain in 14 hours.
So, which approach is better, the ridge or the creek? If I had to go with one, I’d say the ridge, just because I had a better sense of direction. Both were miserable.
I needed a quick hike today before picking my mom up from the airport, and since this one is kind of close to I70 and the weather was nice I decided to go for it. I kind of wanted to do this as a loop with a few other 13ers in the area, but any excuse to get out and get another hike in the same area is good enough for me (I’ll be back).
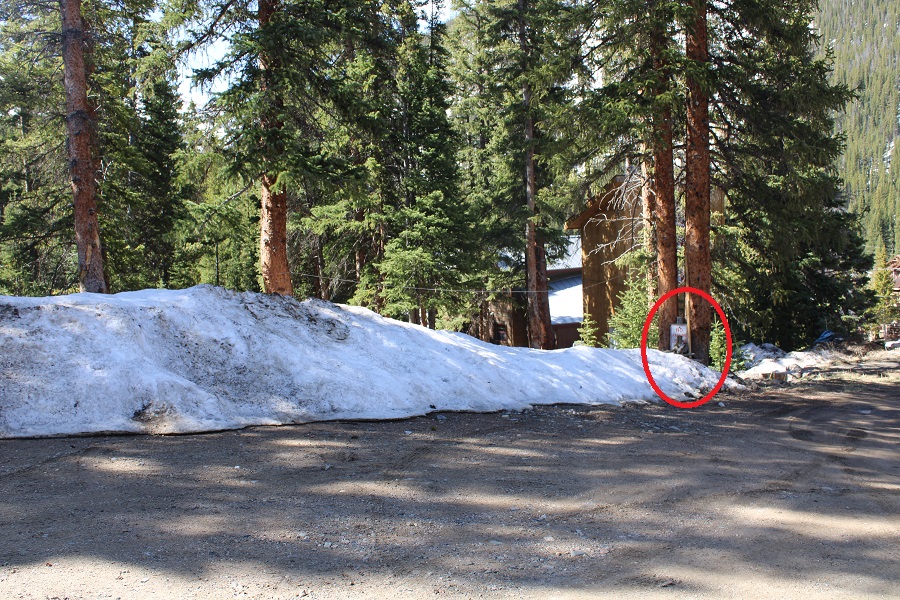
I’ve heard a lot about the town of Montezuma and its lack of parking. Yes, there is a lack of parking. So, my advice is to do this hike on a weekday, or arrive early (or both) to secure a legal parking spot. Please respect private property owners’ rights.
When driving through Montezuma, and turning down 3rd street, on your right you’ll see this area, that looks inviting to park. DON’T PARK HERE! It’s private property. There are signs (covered in snow no doubt most of the time) asking you not to park in this area. I’ve circled one in red. Note, when you drive in, the sign is behind you, so it’s difficult to see. When I left the owner of the property was watching me from his window. It’s probably a game to him. So, don’t park here.
Instead, continue about 10 yards pasts this sign for 4WD road 264. (Also note, the black and white sign says ‘highway legal’ vehicles only.
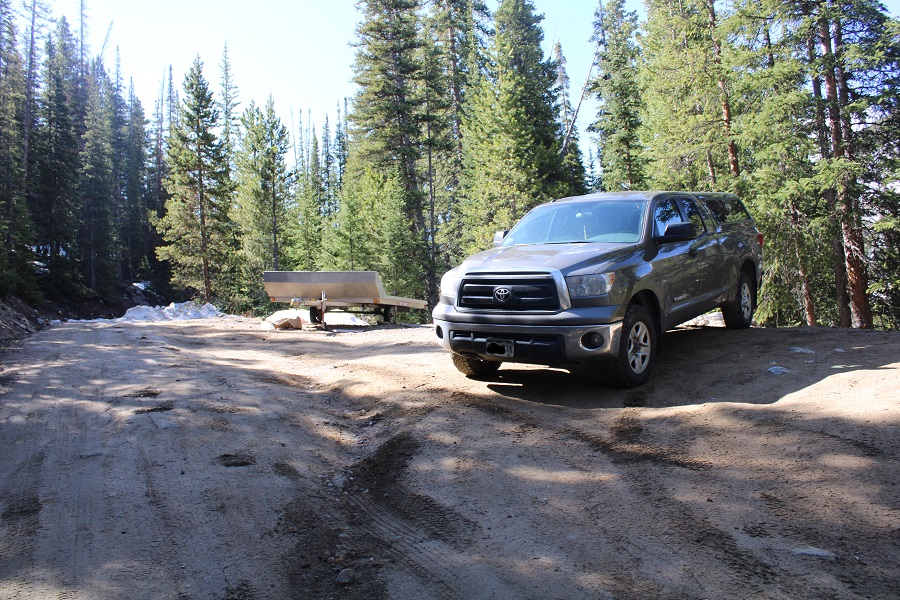
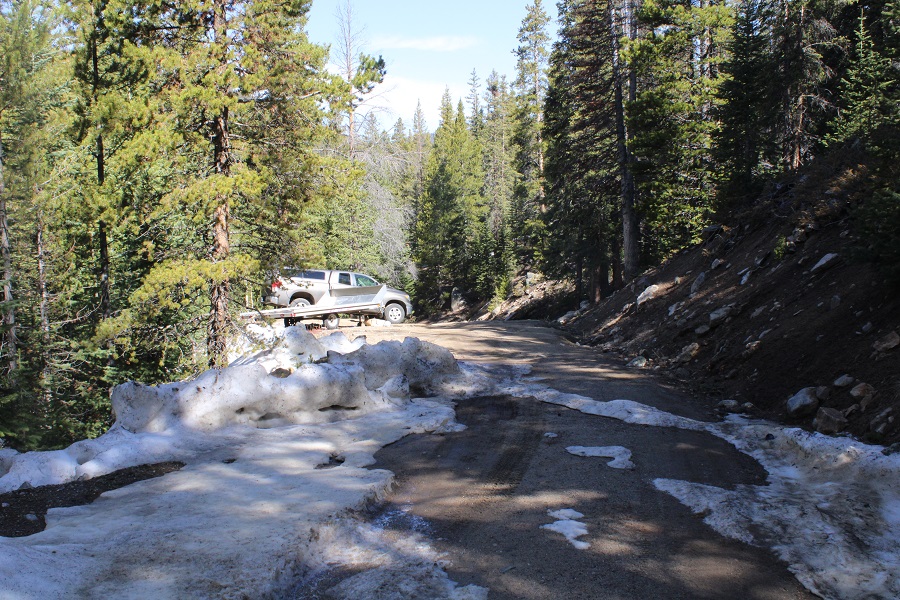
Here you will find a small pull-off area where you can park. Only about 3-4 vehicles can park here if you all pull in nicely, so if you’re first, set the example. This is Public Land. From here on out, it goes back and forth between public and private land, and it can get confusing. The road also narrows and there are a lot of downed trees in the area, so it’s not really worth it to try to drive further. Especially in winter conditions (like today).
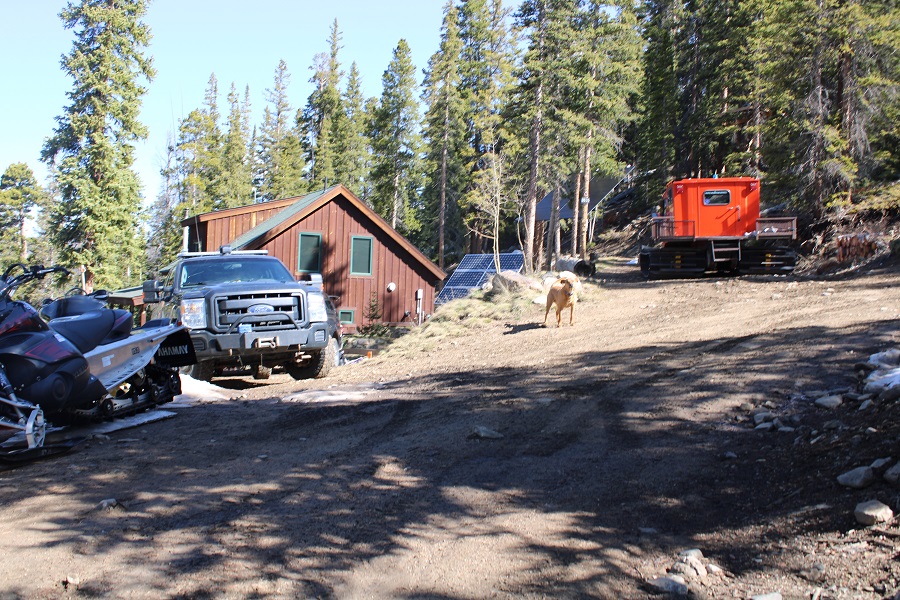
Just an FYI: There’s a house/structure around 10,800’. They plow the road themselves, but it’s still ‘iffy’ to drive to that point, and they currently have an unfriendly dog. I wouldn’t drive past the staging area, even if you feel you can.
After some careful maneuvering (my 4WD is still out and there were some deep ruts) I backed into a spot, gathered my gear, and was on my way at 5am. It was around 37 degrees outside, and the snow hadn’t consolidated overnight, so almost immediately I started post holing.
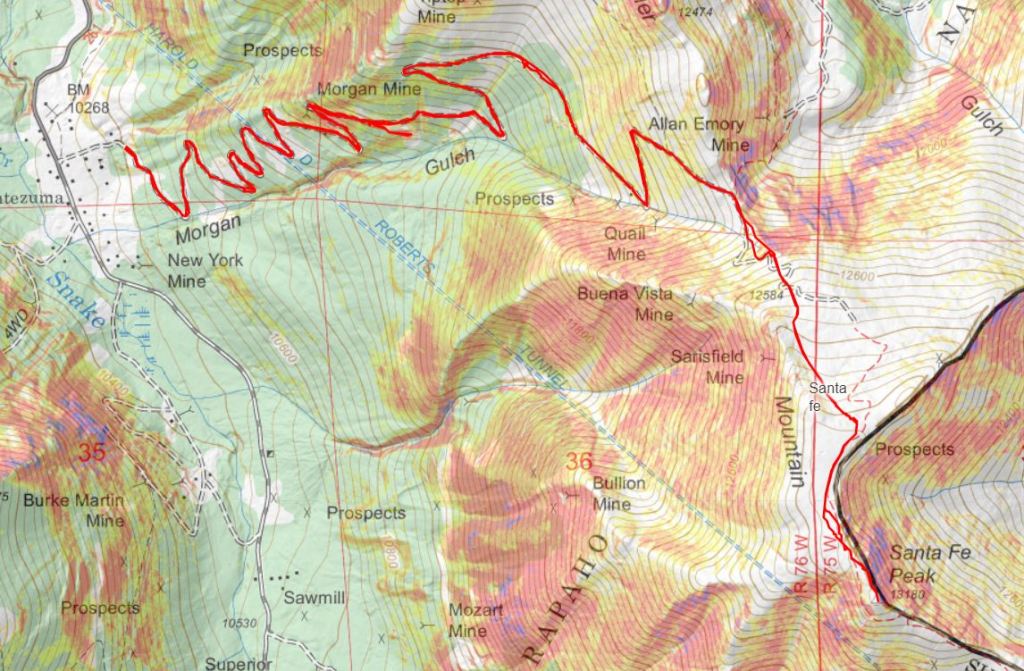
I’m stubborn, so it took me 1.5 miles to put on my snowshoes. I should have put them on right away. I followed 4WD road 264 for 3.7 miles to the saddle of Morgan Peak and Santa Fe Peak
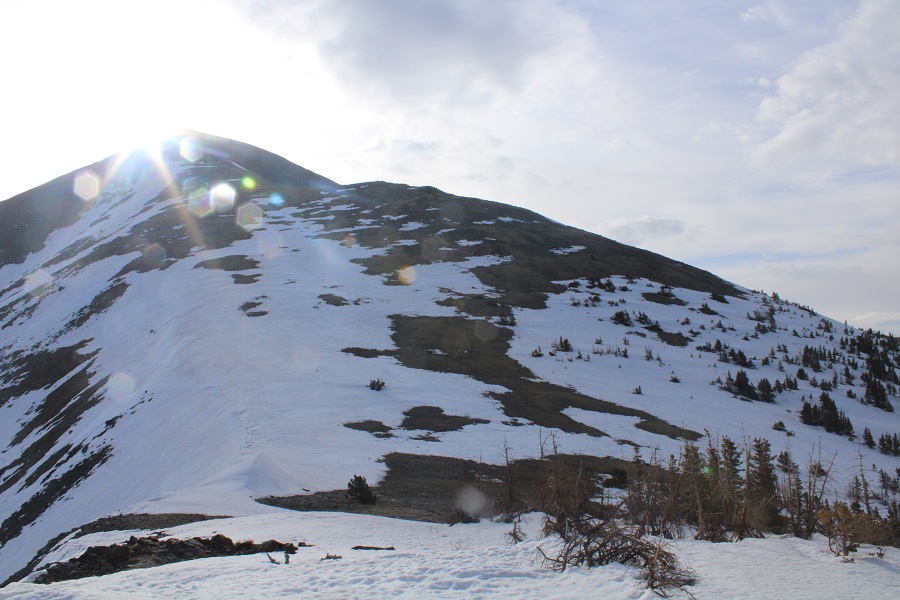
Once at the saddle there was still a road, but it was difficult to discern with the snow, so I just headed southeast to the ridge
Here are some step by step pictures
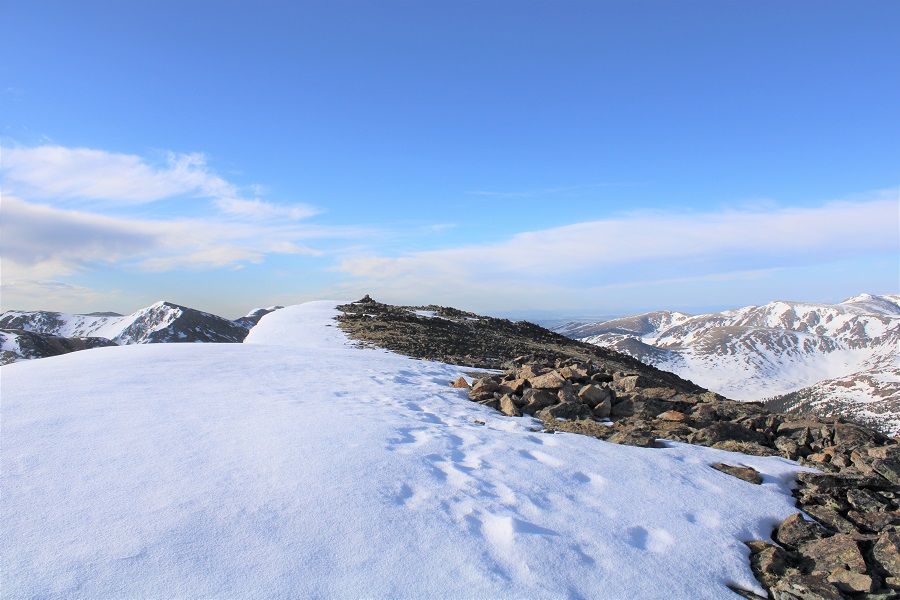
Once on the ridge I could see Santa Fe Peak. I’d need to go right and follow the ridge southwest to reach the summit. The wind picked up here, and all that postholing I did earlier came back to haunt me: the snow I’d obtained in my socks from postholing had melted and now was freezing back into ice again: my socks and toes as a direct result were now frozen.
The ridge was easy to follow, and windblown.
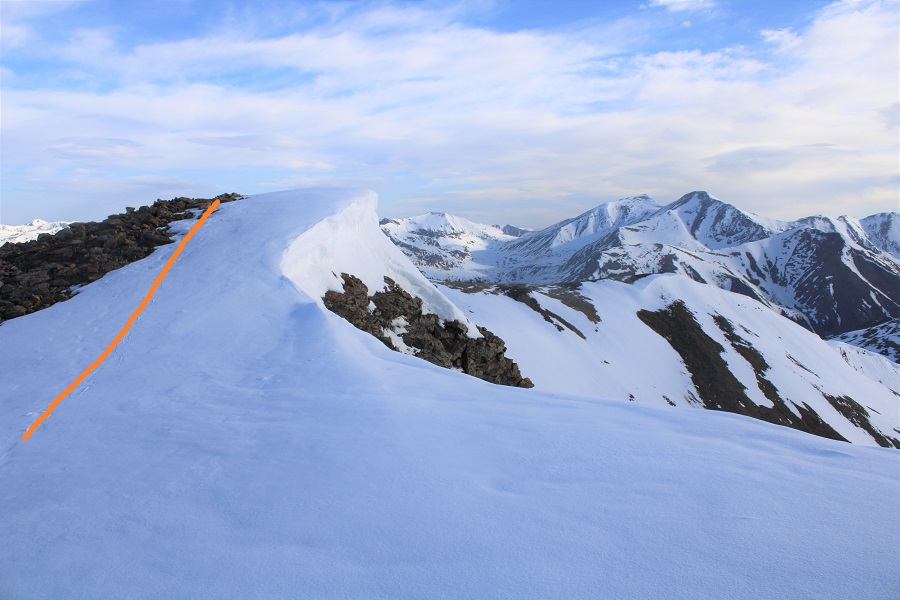
There was one cornice, but it was easily avoidable, and made for a kind of ‘false summit’ (pic on the way back).
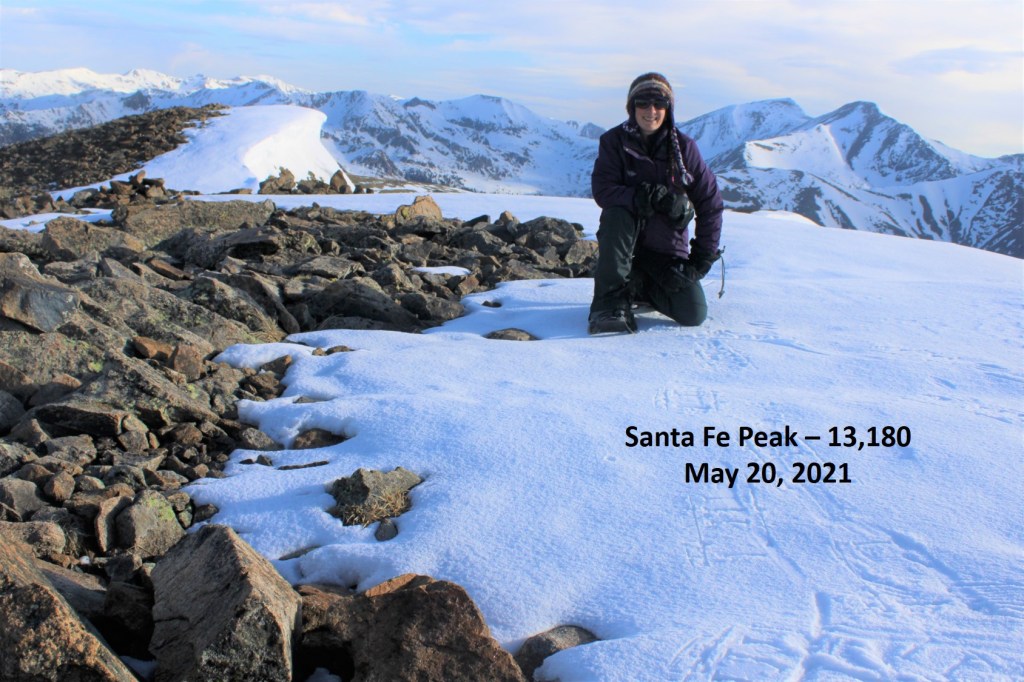
I summited Santa Fe Peak at 7:30am
Santa Fe Peak:
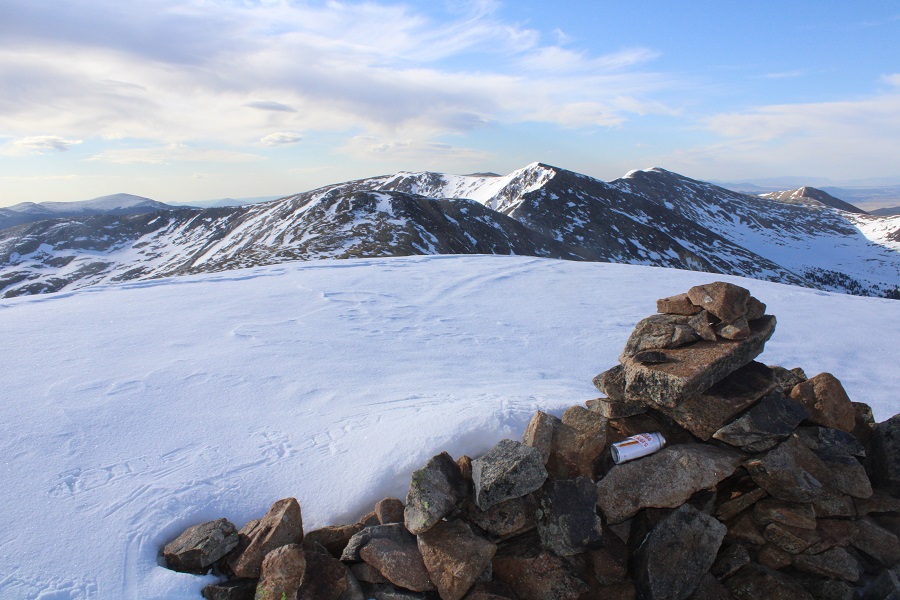
I didn’t see a summit register, so I left one. Here’s a look back on the other 13ers in the area. If it wasn’t so windy… if my socks and toes weren’t solid ice, and if I didn’t have to pick up my mom from the airport I’d be making this a loop, as the conditions looked perfect (sigh).
I turned and retraced my steps back over the cornice, along the ridge, to the saddle
It was interesting: I could see tire tracks, but due to downed trees on the road in, it’s probably been a while since vehicles have been up here
From the saddle I followed the 4WD road back to the trailhead, glad I’d decided to put my snowshoes on, as I came across my morning post-holing adventures
When I finally took the snowshoes off, I accidentally took a wrong turn, and ended up at the old Morgan Mine. I took a quick picture and re-traced my steps (probably private property so I didn’t investigate further than a quick photo).
When I made it to a bend in the road around 10,800’ I could see the residence/office (etc.) and immediately a dog rushed out and started barking at me. This is right where the Harold Roberts Tunnel is (short information on what that is and why it’s cool here).
I’d heard about this dog, and was a little bit apprehensive. However, I held my trekking pole in my right hand, and my Ruger in my left hand inside my coat pocket. I’d hate to actually hurt an animal, but if it attacked, I was ready. Luckily, this dog was all bark and no bite: It barked viciously, but never left his/her side of the road. I kept walking like I was supposed to be there, and nothing came of the encounter.
I continued following the road back to my truck.
I made it back to my truck at 9:30am, making this a 9.36 mile hike with 2894’ of elevation gain in 4.5 hours.
As I drove out, I stopped to get pictures of the trailhead, parking/no parking areas, etc. for a trip report. The owner of the house nearest the parking area stood in his window and watched me the entire time with a scowl on his face.
I’d attempted this peak last week (along with 2 others), but the gate had been closed just off the highway, just as the gates for the other two peaks had been. I was super bummed, and since all 3 of my potential peaks for the day had been shut down, I went home. (I leave my plan a, b, and c on the counter and if they all fail I go home because I solo and want to make sure someone knows where I’m at when I’m adventuring).
The gate to Hunts Peak said it was subject to seasonal closures, but didn’t have a reopen date. All the other gates said they were closed due to Sage Grouse mating/nesting/hatching season, and opening on May 15th, so I crossed my fingers the gate would be open today (May 16th).
I didn’t have a plan b today (mainly because I had a short window: my youngest has prom tonight), so I was thrilled to find the gate open.
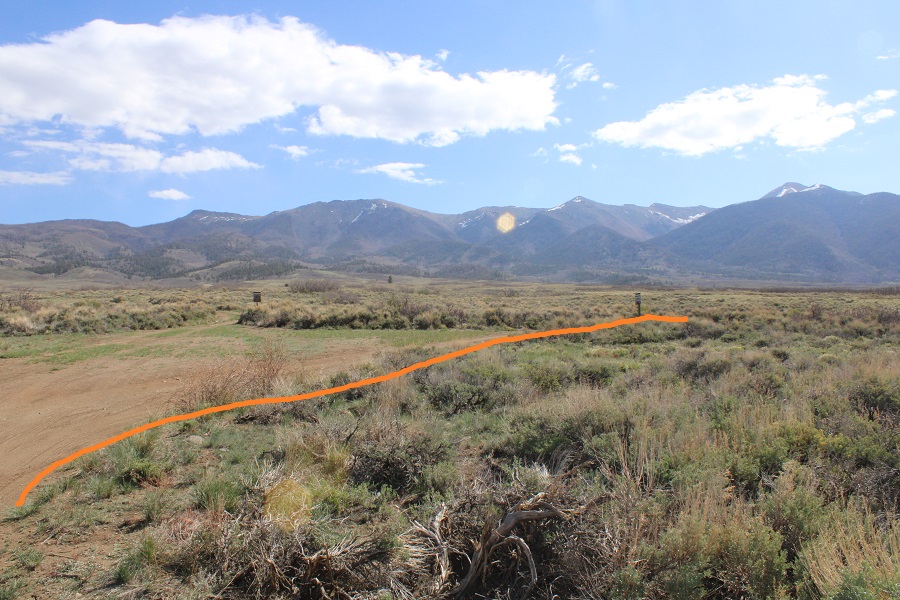
From 285 it’s a 3.65 mile drive east on 980 to the good campsite. There are a few potential turn offs, but stay on 980.
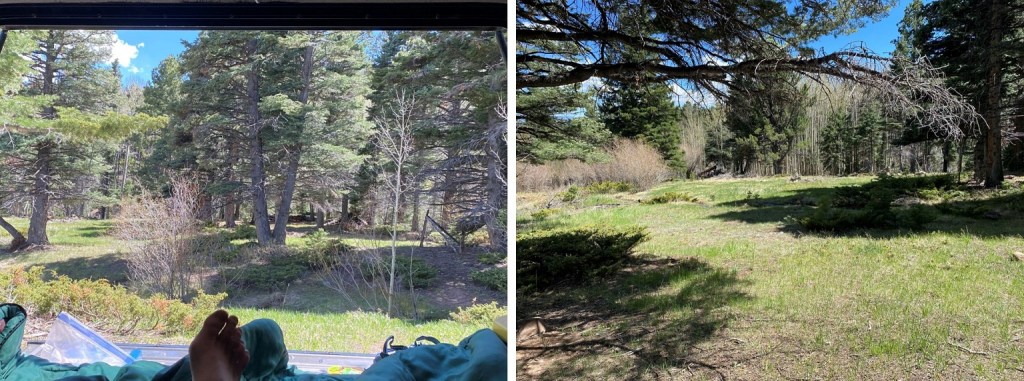
At the junction of 980 and 982 you can either camp, or drive the .6 miles southeast and park just before the trailhead. Here’s the sign where the camping area is, and a view of the camping area (on the right).
Notes about this section if you choose to drive further: it’s narrow, there isn’t a spot to turn around/let someone pass, it can be muddy, and only 2 vehicles will fit at the parking area at the hill above the trailhead, so choose wisely depending on the day of the week you’re there and the time of day you’re entering. I have a 4WD vehicle, but didn’t need to put it into 4WD (good thing too, because my 4WD is currently out and I have a new truck on order that unfortunately won’t be here until the middle of summer: this seriously messes with my mountaineering plans!). Here are some pictures of the road
I parked my truck just before the second stream crossing at the top of a small hill. I’d advise doing this, especially if you don’t have 4WD (when I arrived it was dark and I didn’t want to chance it in my truck’s current condition). I parked and was on the trail around 4:40am. This was by far the warmest start to a hike I’ve had so far this year: 45 degrees at the trailhead! I opted not to put on my snow pants and was on my way (something I’d regret later). It was a short distance to the trailhead, and the creek was easy to cross.
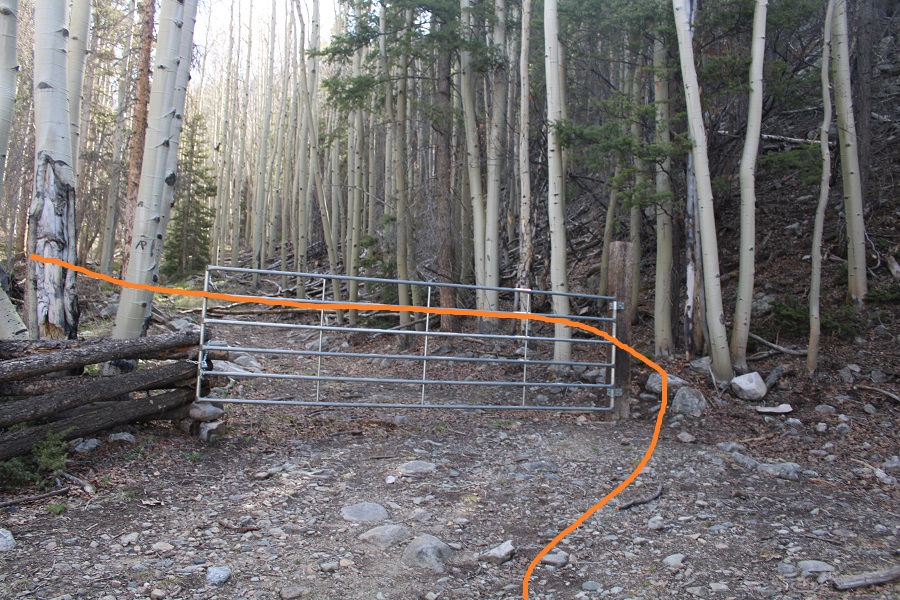
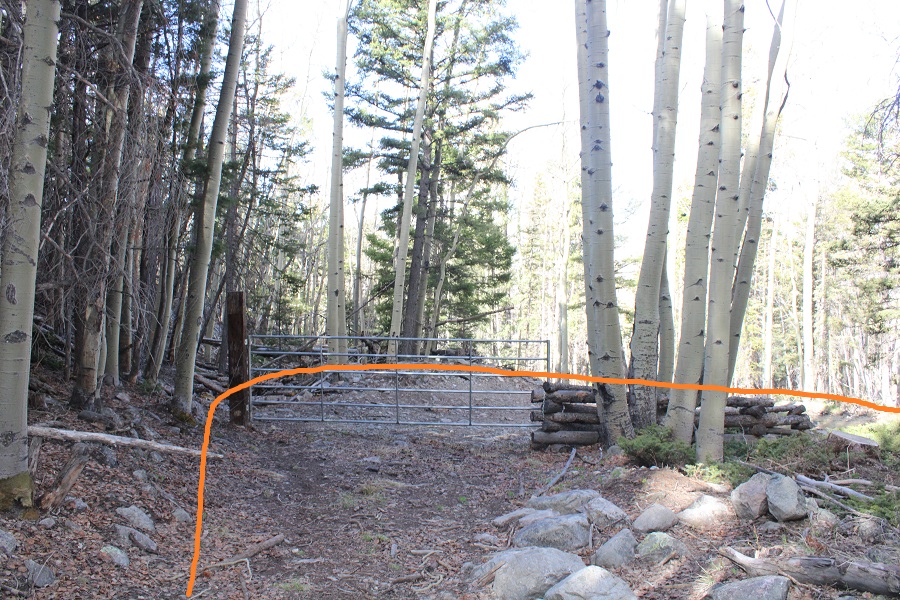
I walked around the closed gate and followed the old road.
The road was easy to follow northeast
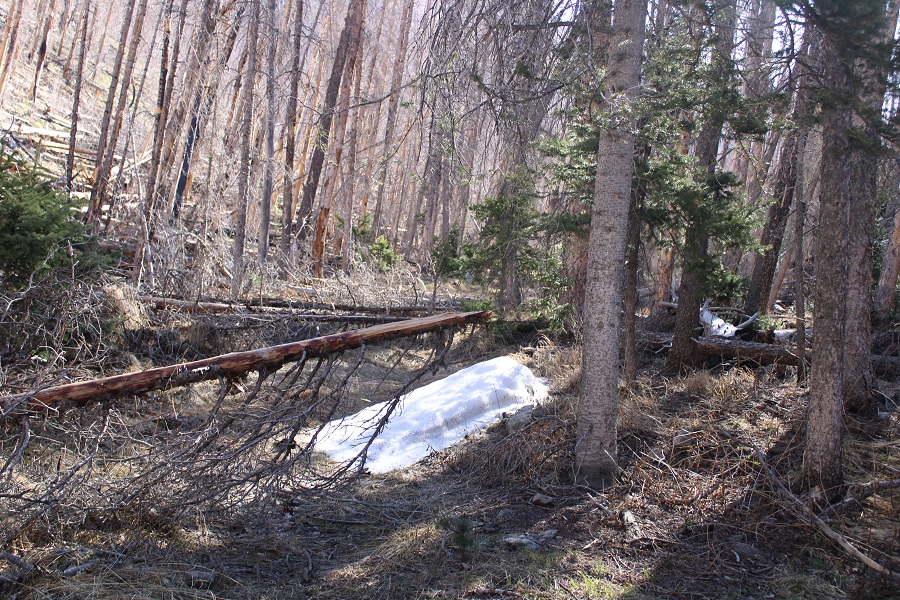
It was obvious this road hasn’t been used by vehicles since the fire, because there were downed trees all over the road. There was a little bit of snow as well, but totally manageable without traction.
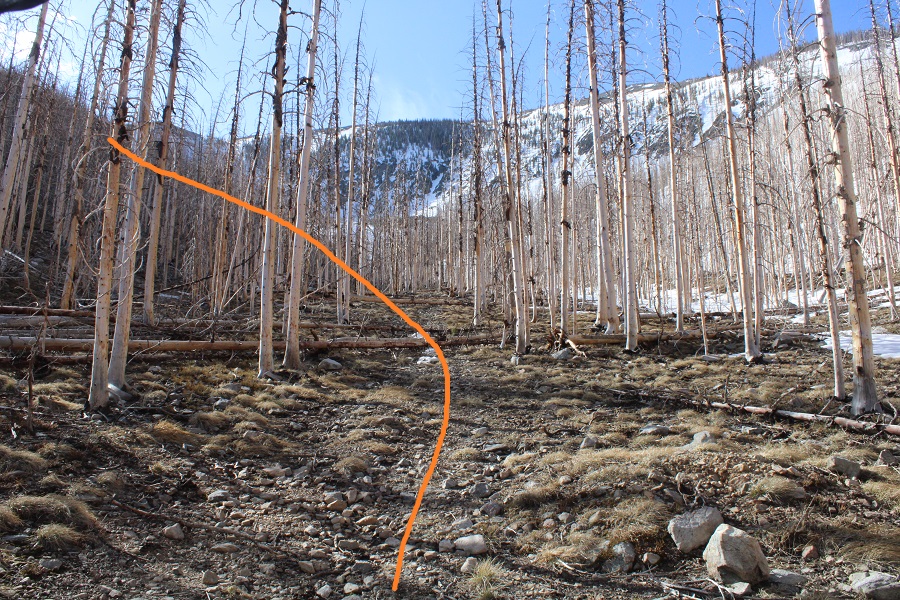
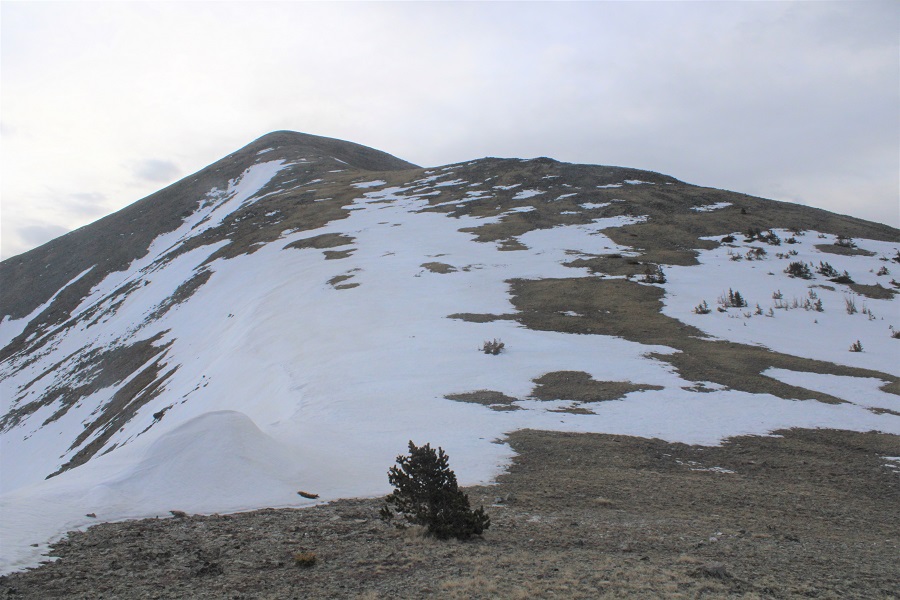
Eventually the ‘road’ fizzled out. I followed the contour of South Rock Creek and then the mountainside as it headed east. In the daylight the route to the ridge is easy to see
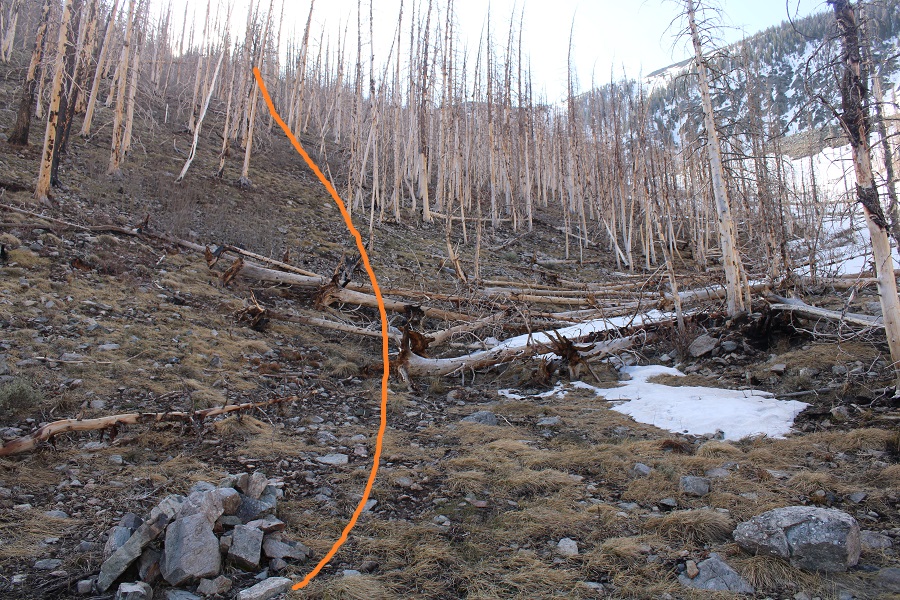
I followed the drainage as far as I could, then headed east to gain the ridge. This was steep, but the bushwhacking was minimal due to the fire
I gained the ridge, and followed it southeast over this hump
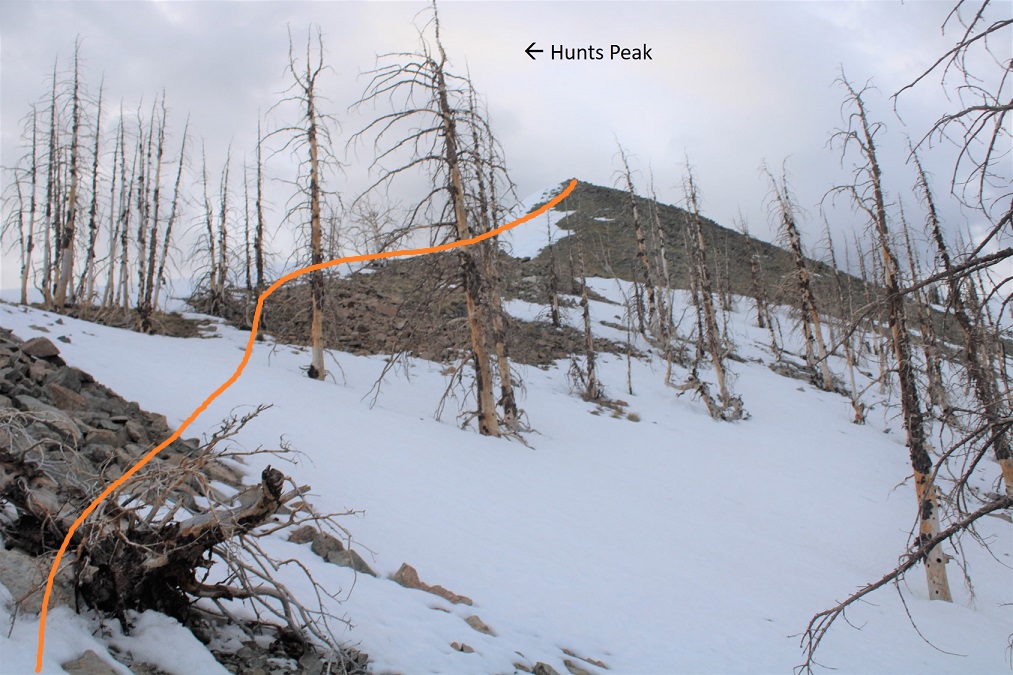
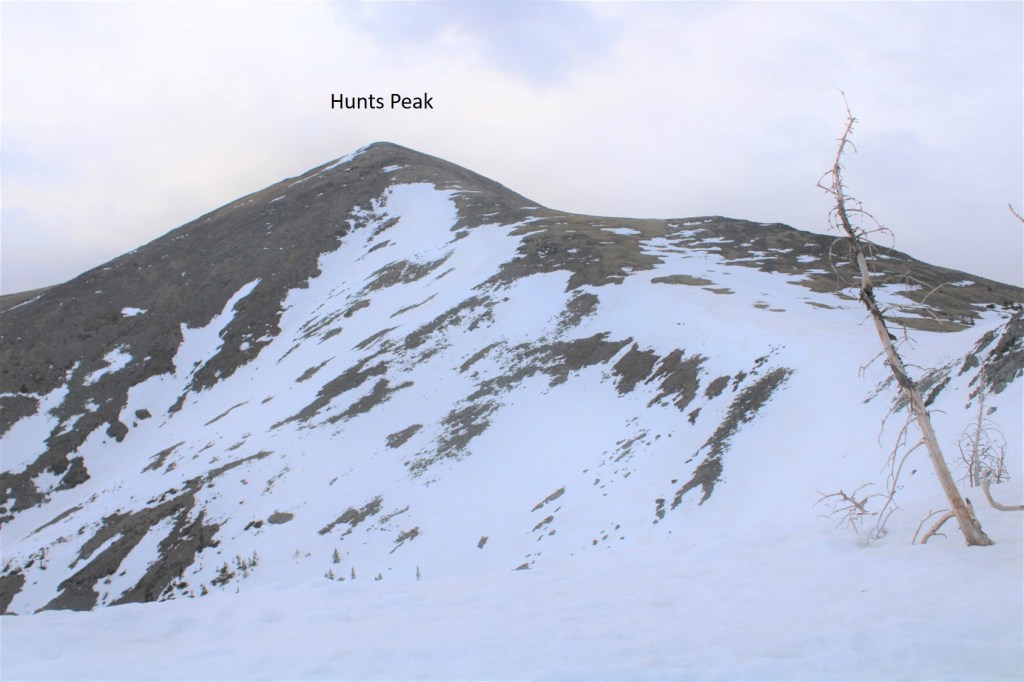
I had a good view of Hunts Peak at this point
The rest of the route was straightforward: I went southeast over the hump, and then followed the ridge east to the summit
It was easy to avoid most of the snow, and what was unavoidable was consolidated
There was a short trek southeast to the actual summit
I summited Hunts Peak at 7:10am
Hunts Peak:
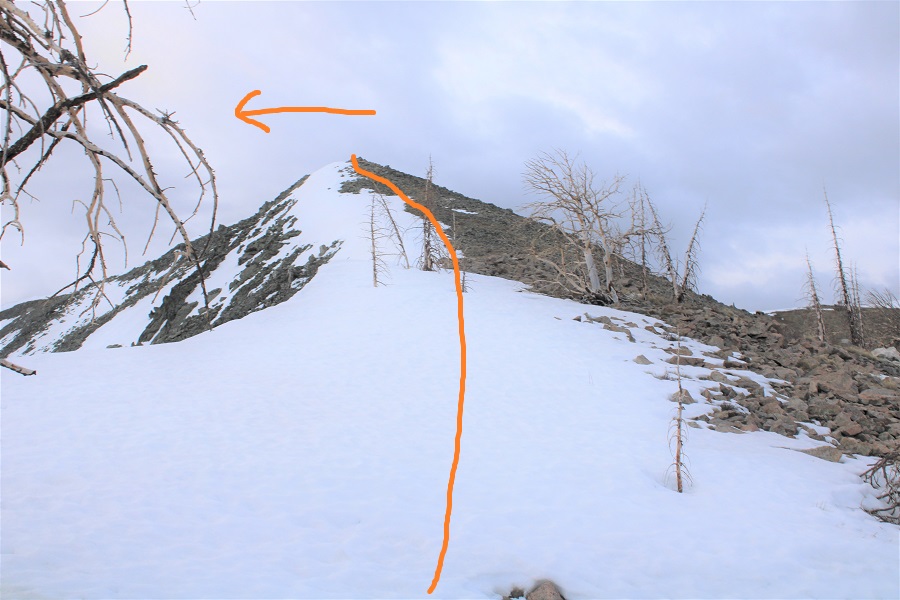
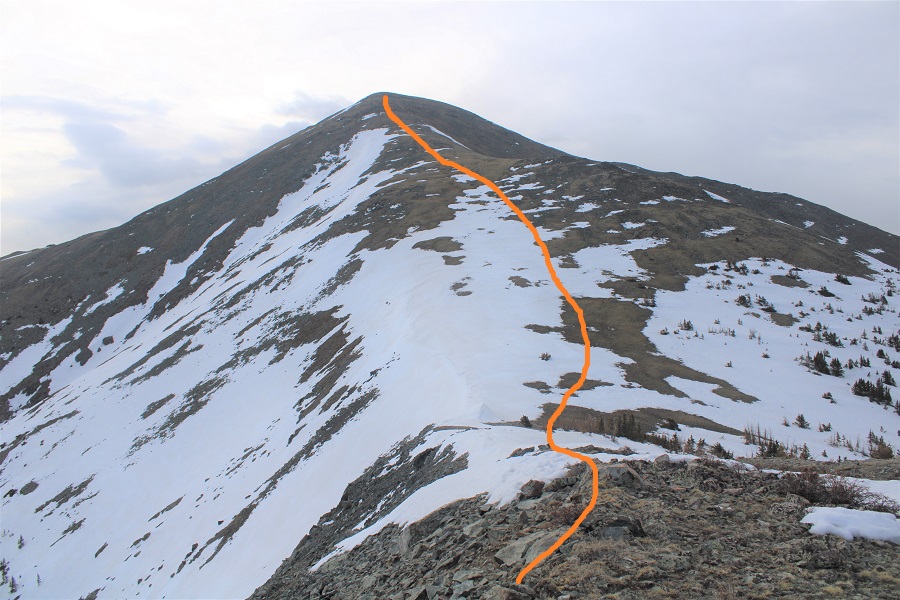
It was very cold and very windy. I regretted not wearing my snow pants now. Pulsing my fingers, I descended the way I’d hiked in. Advice here: the ridges look similar, especially if you’re summiting in the early morning/dark. Be sure of your route down! Here’s the route back
Back over the bump
Here was where I encountered the most snow of the day. It was mostly consolidated, with the odd postholing up to my thigh
Now it was back down the ridge and down the gully, back to the old 4WD road.
Once back on the 4WD road it was easy to follow it back to the gate, keeping South Rock Creek to my right
At the gate I turned right and followed the road back to my truck.
I made it back to my truck at 9am, making this a 6.79 mile hike with 3582’ of elevation gain in 4 hours, 20 minutes.
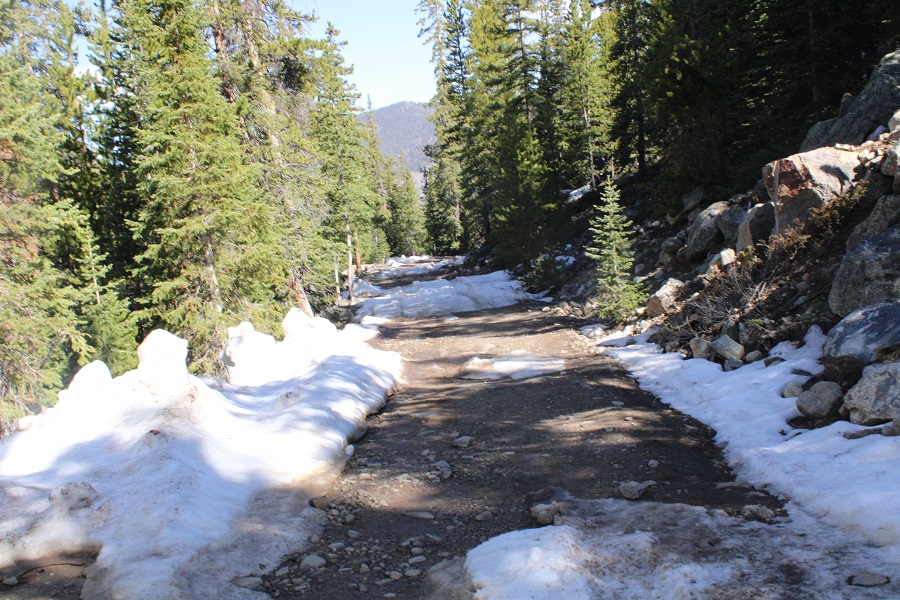
Here’s the easy part of the dirt road on the way out. I didn’t see another person/vehicle/grouse all day. I did see a few antelope though.
On my way to the Spring Creek Pass Trailhead I was the only one driving on the road. Probably because it was 1am. I did have to slow down for a moose who wanted to jaunt back and forth across the center line, and a herd of elk I surprised as I drove by (they’d been lying down by the side of the road). I made it to the trailhead before 1:30am and decided to get some sleep before starting out. My truck was the only vehicle in the lot. I love my heater.
I was on the trail at 4:30am. There are several ways to get to the snow mesa. Last time I was here I took the snowmobile route
This time I decided to take the Colorado Trail/Continental Divide Trail/813 trail. This is the one I’d recommend without snow on the trail. If there’s a groomed snowmobile track, take that instead. The trailhead is directly across from where I parked my truck.
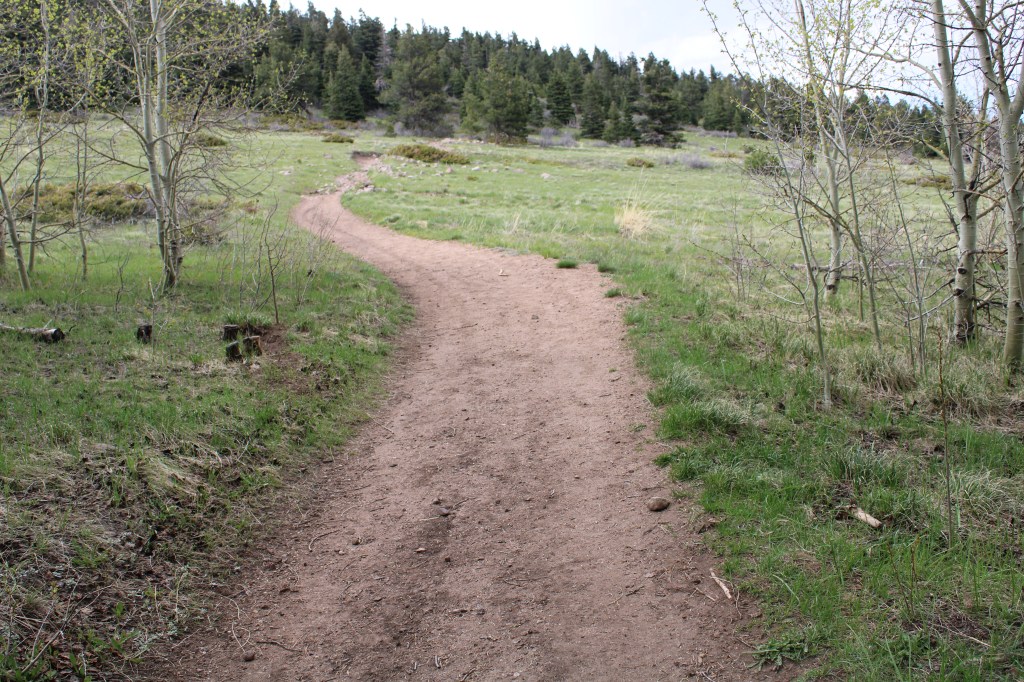
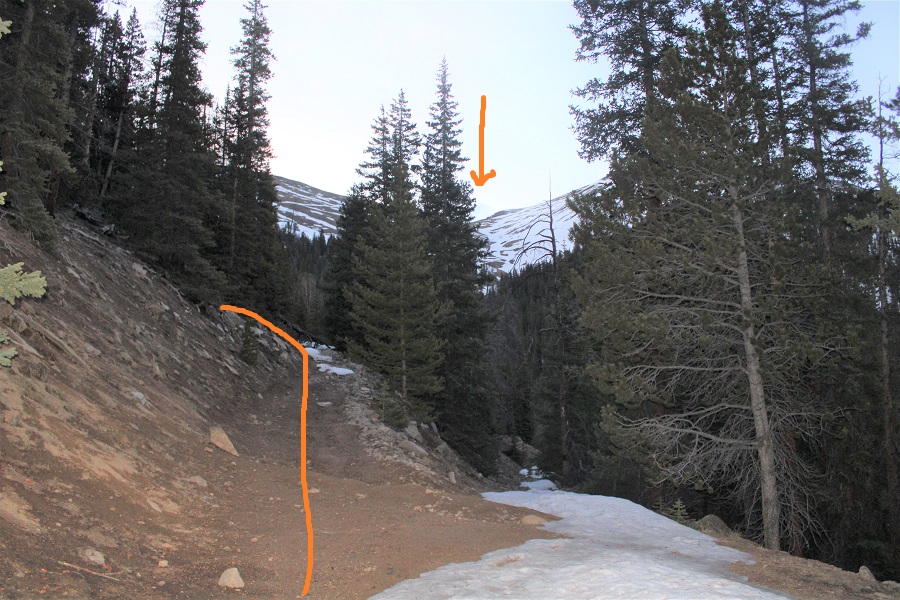
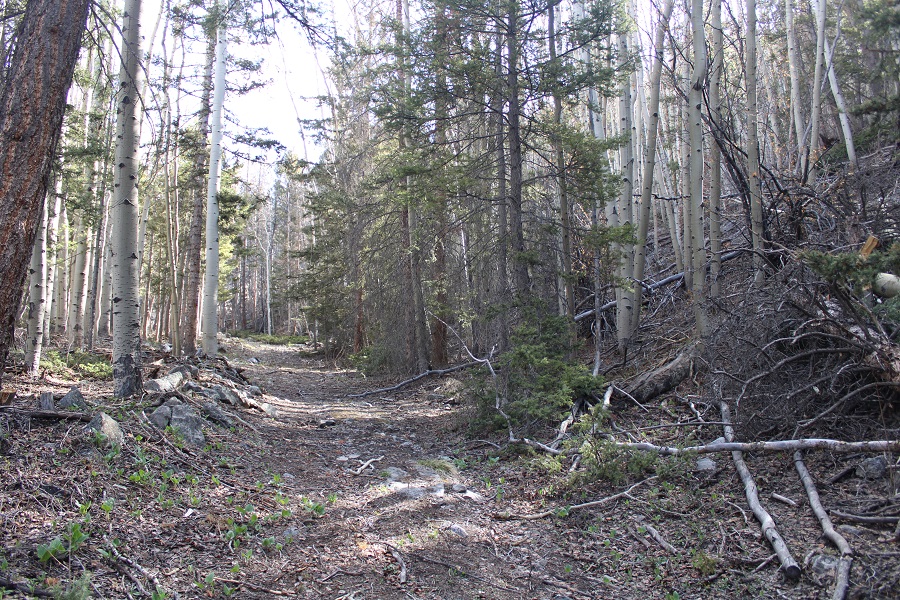
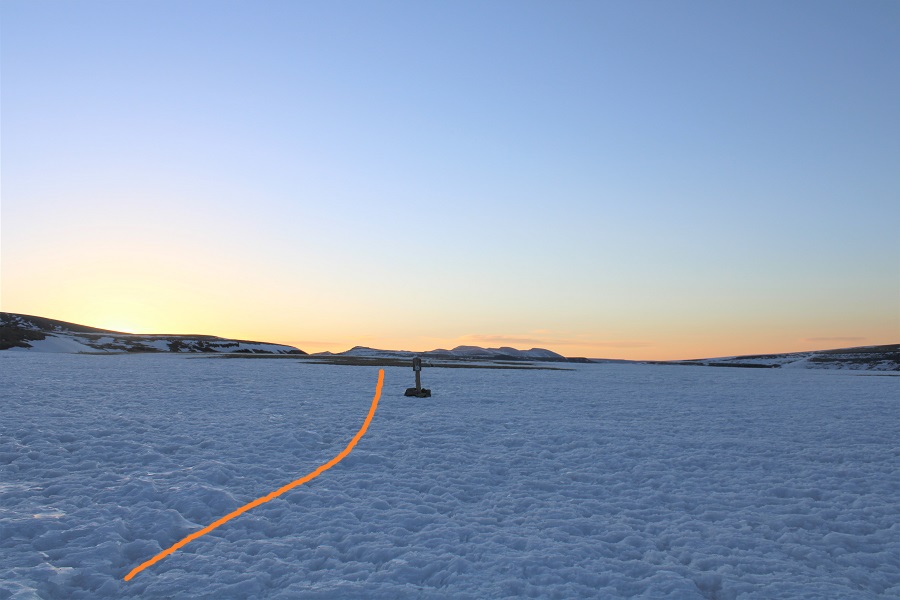
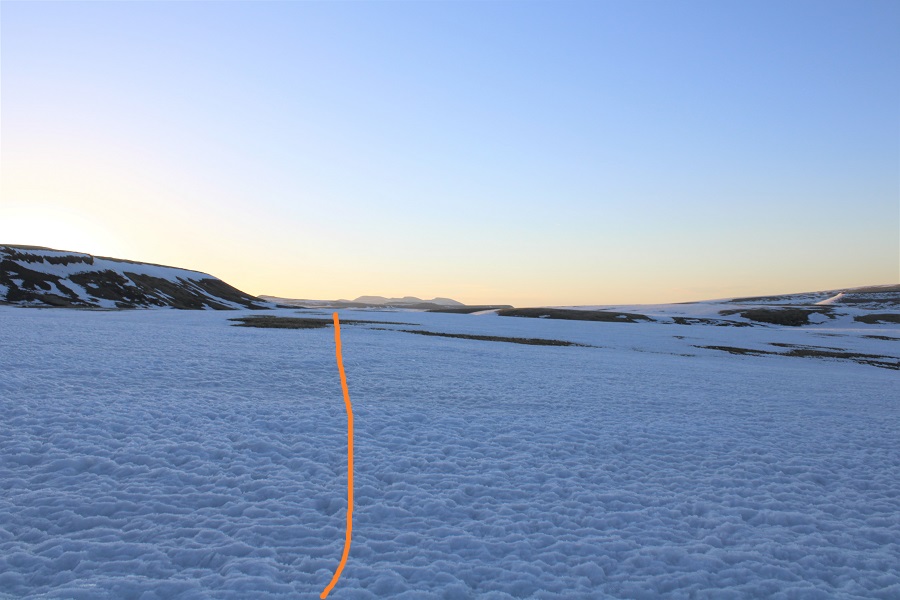
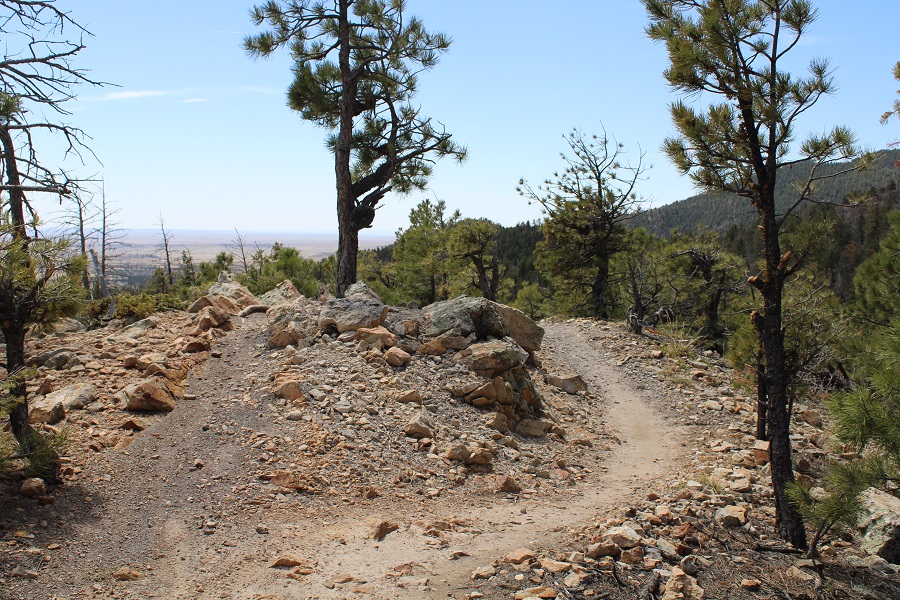
From the trailhead it’s a nice uphill hike for about 2 miles to the mesa, heading east and southeast. Here’s an overview of where you’re headed
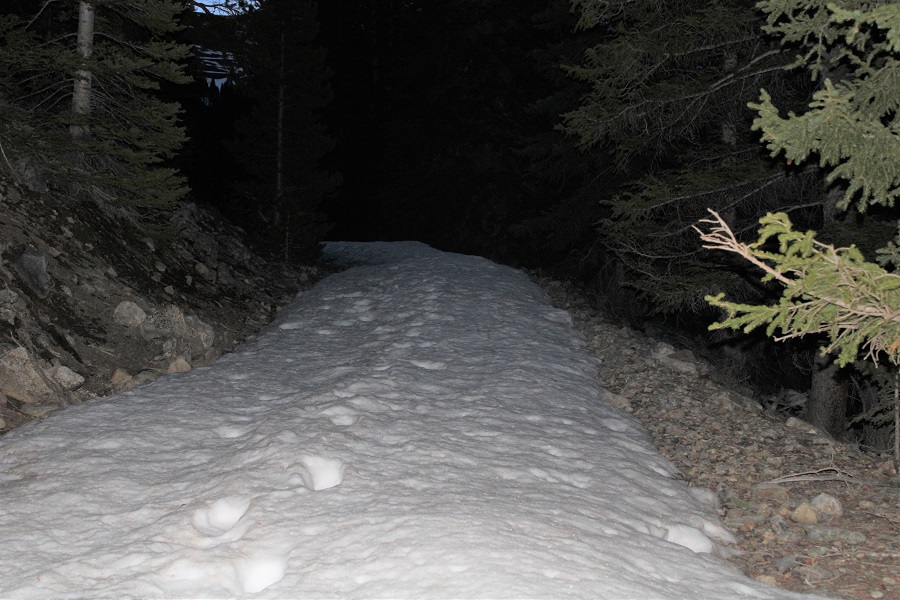
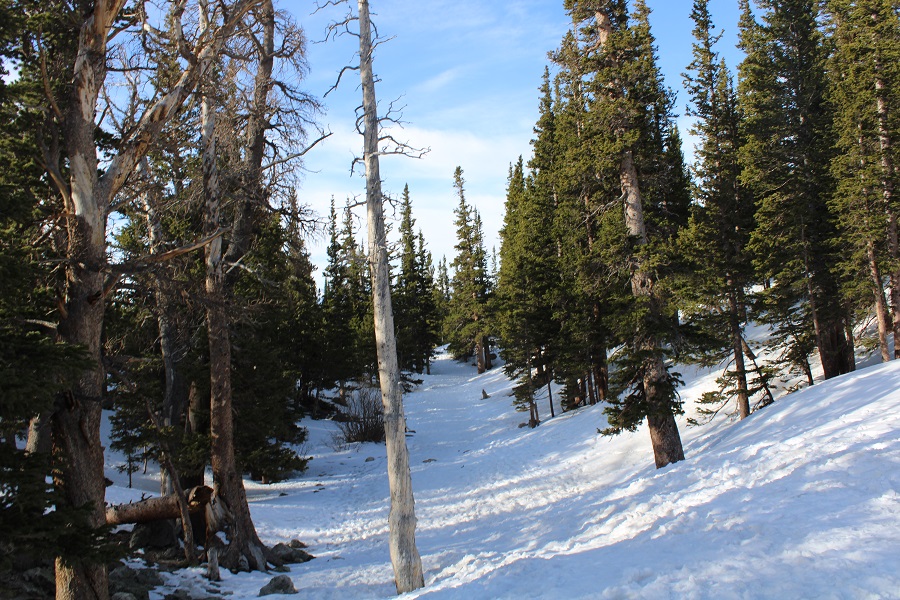
And what the trail looks like
You’ll know you’re getting close to the mesa when you parallel a gully to your right.
Be careful here in winter conditions: the cornices fall. Luckily for me, today there was a lot less snow than last year. I didn’t need traction to ascend into the mesa. From below, you can see a Colorado Trail marker. Aim for the marker. This is also where my flashlight ran out of batteries. I was glad it was starting to get light out.
Once on the mesa I followed the Colorado Trail / Continental Divide Trail markers for 3.3 miles. These markers are great most of the time. In the summer the trail is well defined and not needed. When I was here last they were covered in snow and useless. Today they were nice benchmarks, keeping me on track since there were no tracks. In the morning, the snow was firm (not so by noon). The trail initially looks flat, but you’re really losing and gaining elevation all the time. This was especially frustrating on the way back.
After a total of 5.1 miles since the trailhead I came upon a junction and continued heading north on 813. Note: The trail looked doable when I started. If doing this in winter conditions, I’d recommend taking the lower route (the one I took back, via 787). However, I wanted to stay high to avoid losing and re-gaining elevation, and I had all the necessary gear (snowshoes, crampons, ice axe, etc.) so I decided to go for it. Also, from the junction vantage point, all looked good. Here’s the route I took
Unbeknownst to me, there was a slide area directly on the trail. This area is prone to cornice falls/slides. I felt comfortable crossing the area so early in the morning, but wouldn’t advise taking this route later in the day. I knew immediately I wanted to take a different route back.
Here’s a look back on the slide area
After the slide area there was another solid area of snow. I decided to descend a bit to make this more manageable. I brought out my ice axe and traction here.
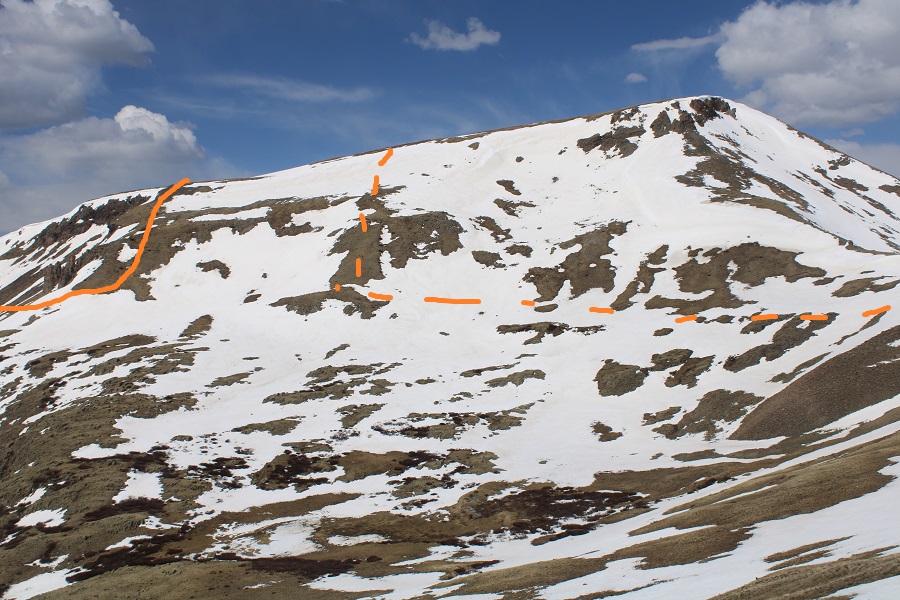
I was still ‘following’ the trail (under snow), and as soon as I started heading north it was time to head up the east side of PT 13162. Here’s what that looks like (as seen later in the day from point 13020). Solid line is path up, dotted line is the route I took down and across to the 13162/13510 saddle. I was just doing my best to avoid the snow.
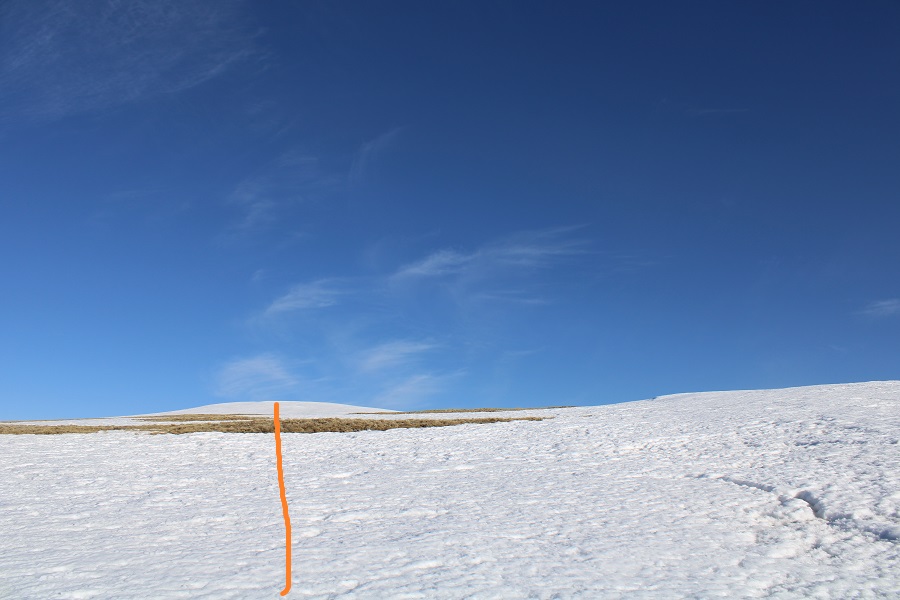
When not covered in snow this area is covered in tundra. It’s steep, but an easy ascent.
I just kept heading west, until I was at the ‘ridge’, where I started heading northwest to the summit
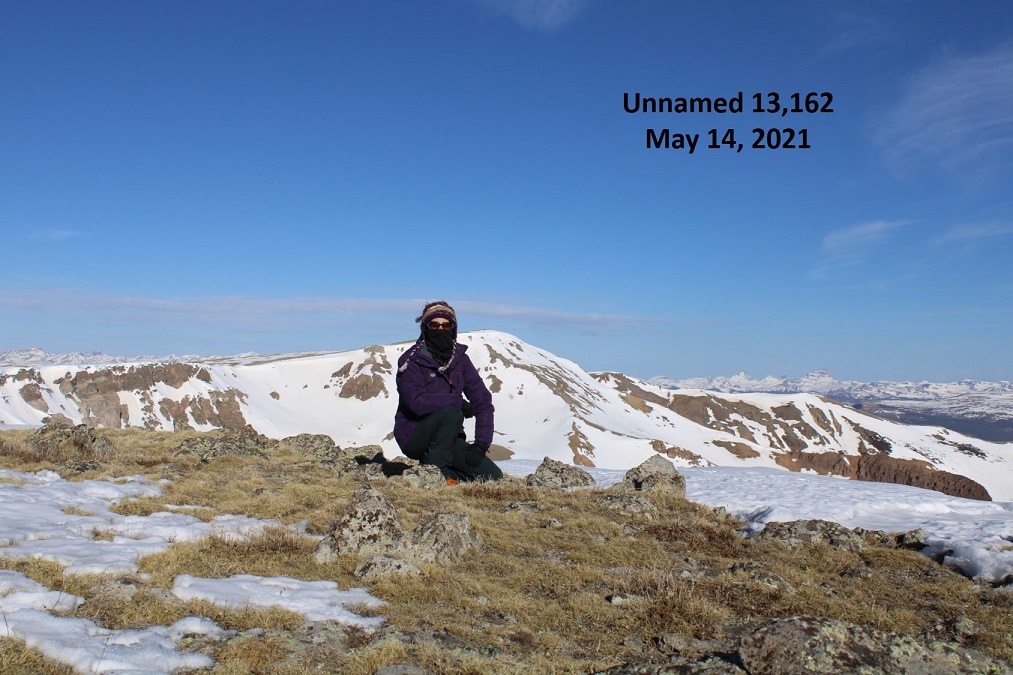
I summited Unnamed 13162 at 7:45am
Summit of 13162:
From here I could see the summit of 13,510 to the northeast. It looks like it should be a simple ridge hike to get there, but unfortunately, there’s a steep section in the way, so I re-traced my steps back to scenic trail 813.
There was one section I was worried about after the 13162/13510 saddle. I was hoping I could just go straight over the area, and not around. (Note, when I first wrote this report, I thought what I labeled below was PT 13020, but it’s actually further east… in the same general direction, but it’s actually the small peak just above the saddle in this picture).
Ok, back to trail 813 and to the saddle of 13162/13510
Here’s the rest of the route to 13510
I made it to the saddle and the rocky area looked climbable. It didn’t get any harder than difficult class 2. The gullies in this area were either snow free, or the snow was avoidable. I stuck to the ridge, dipping to the left (west) when necessary.
The rock here was loose, but once again, difficult class 2
I gained the ridge and looked back at 13162. I’ve circled the area I was trying to avoid on my way down, and detailed my route down.
The rest of the route to 13510 was an easy ridge hike. The snow was either consolidated or avoidable.
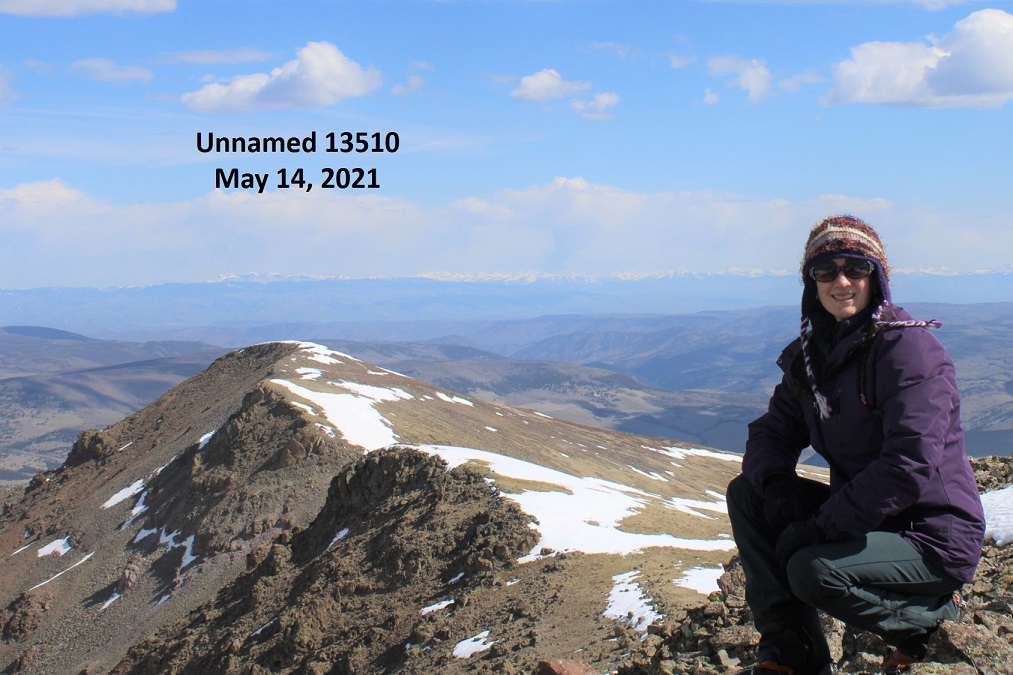
I summited PT 13510 at 9:40am
Summit of 13510:
Interestingly, there had been a summit register on 13162, but there wasn’t one on 13510, so I left one. There were also a lot of crow droppings. I even saw a few flying around.
From the summit of 13510 I had a clear view of PT 13020 (unranked). I decided to go for it before heading back down. Here’s the route
Here’s looking back on the route I took from 13510
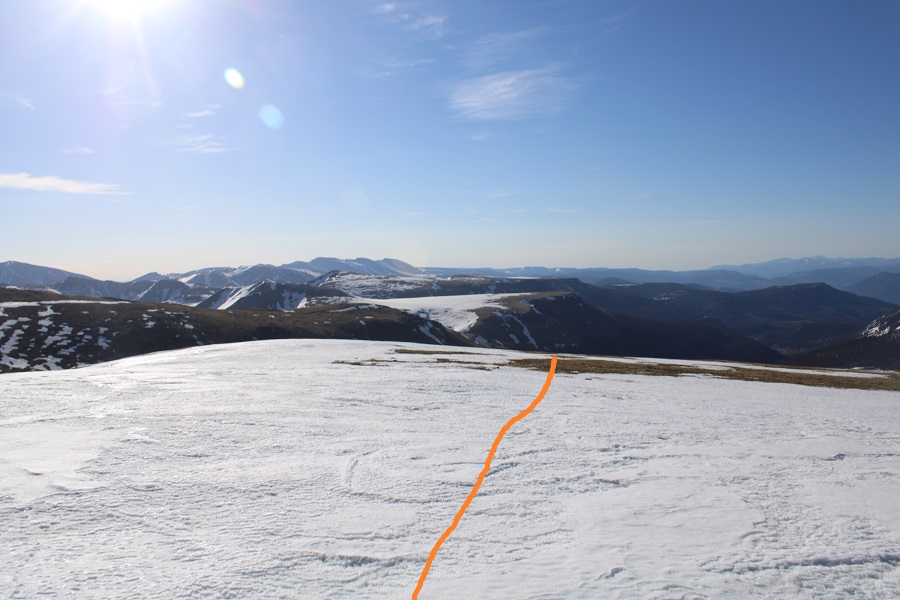
Time to head back. I didn’t want to take the way I’d hiked in back out because of deteriorating snow conditions and possible slide activity. Instead, I hiked directly down into the basin, heading southwest. Here’s a view of the route I took down from 13020, as seen from my way to 13162. I just did my best to avoid the areas of snow when possible (and the willows at the bottom).
From the summit of 13020, here’s the route back to Trail 787
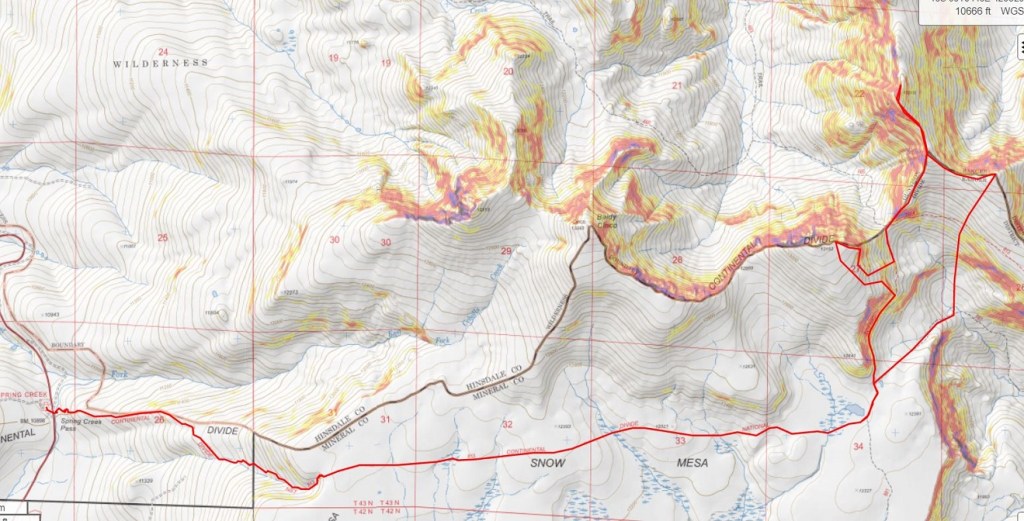
Here I’ve outlined the route I took in (dotted line) and the route I took out (solid line). Trail 787 was dry on the ridge/elevation gain back to the snow mesa. I could see it from the summit, and aimed there, doing my best to avoid snow on the way down. I’ve circled the small slide area.
The snow wasn’t totally avoidable however, and I did posthole through the section of willows. From down in the basin, here’s a look back at my route down.
I hopped a small creek, then took trail 787 southwest to the snow mesa and the Colorado/Continental Divide/813 trail.
Here’s another look at the slide area. It’s small, but the trail goes right through it. Also note the cornices above.
Once on the mesa I followed the trail posts across the snow. The snow had softened up considerably, so I had to put on my snowshoes. Even with them I was postholing up to my knees. It was a very long 3.3 miles back.
Here’s a look at the decent route off the snow mesa.
And the trail back to the trailhead. At this point the snow was mostly avoidable, so I took off my snowshoes.
I made it back to the trailhead at 2pm, making this a 17 mile hike with 4750’ of elevation gain in 9.5 hours
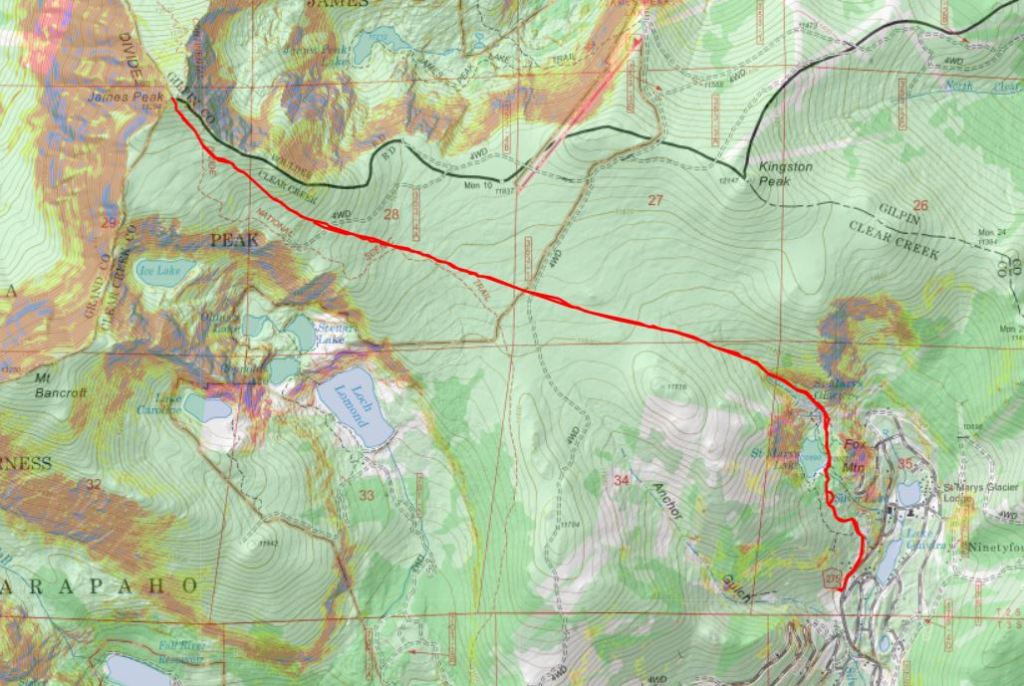
When I got back to my truck I was a little disappointed, as Strava hadn’t engaged. Luckily, most of this route was done on established trails, so it was easy to hand draw this topo route (just note it is hand drawn, and I don’t have a GPX file to share for this one).
I needed a win. The past 7 (yes, 7) trailheads I’ve tried to access have been closed due to snow, Sage Grouse mating / nesting season, and/or calving season. Note: these were trailheads to obscure 13ers, so there wasn’t a lot of information on them in the first place, especially for this time of year. One trailhead was open, but not passable due to snow. I tried it again the next week, thinking the snow would have melted out by then. It had, but now the gate was closed. Ugh.
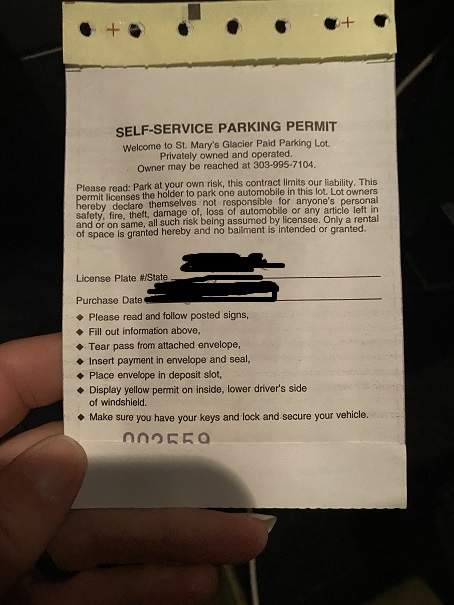
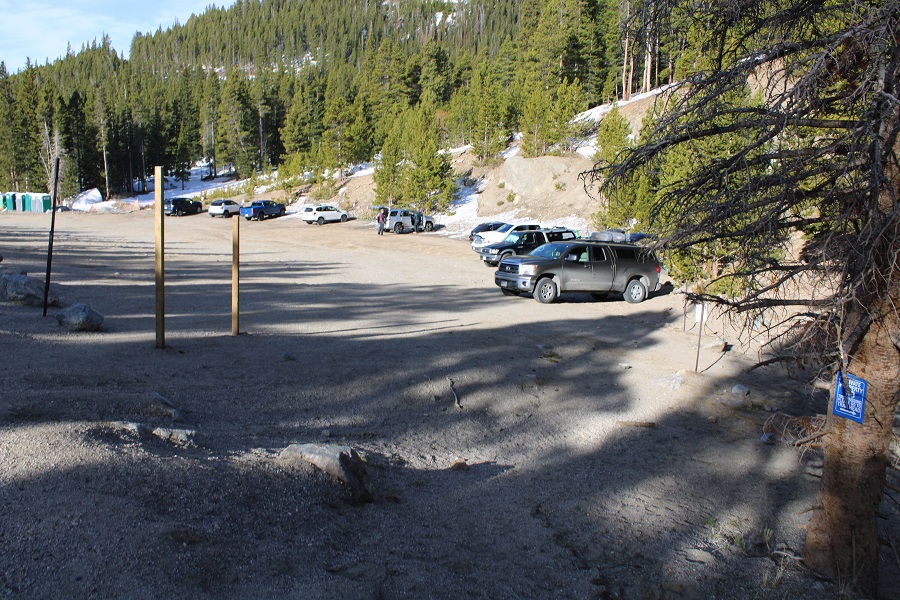
So, even though there was a $5 parking fee, like I said, I needed a win. I arrived at the St Mary’s Glacier/James Peak trailhead at 3:30am, the first vehicle in the lot. I paid the $5 at the self-pay station (located near the porta potties) and was on the trail before 4am.
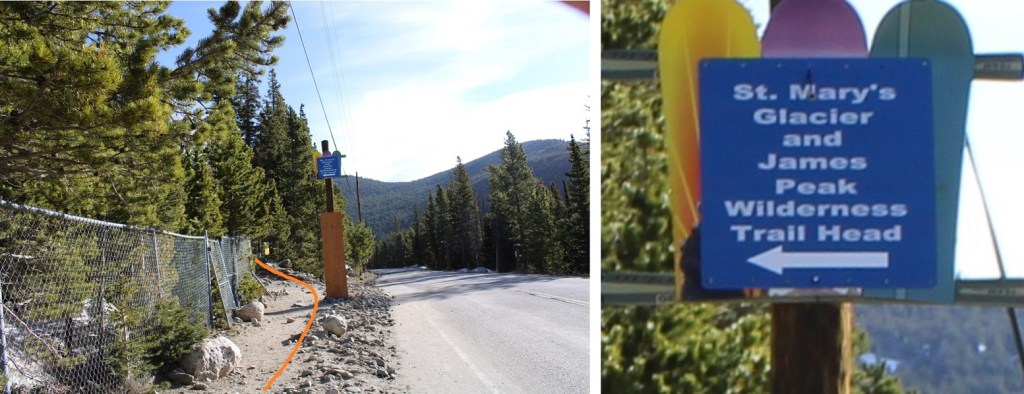
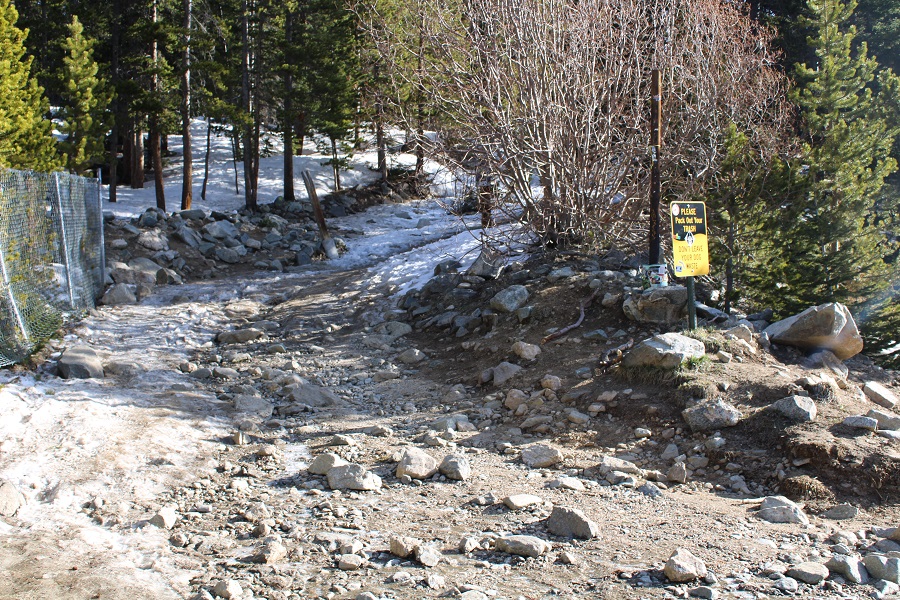
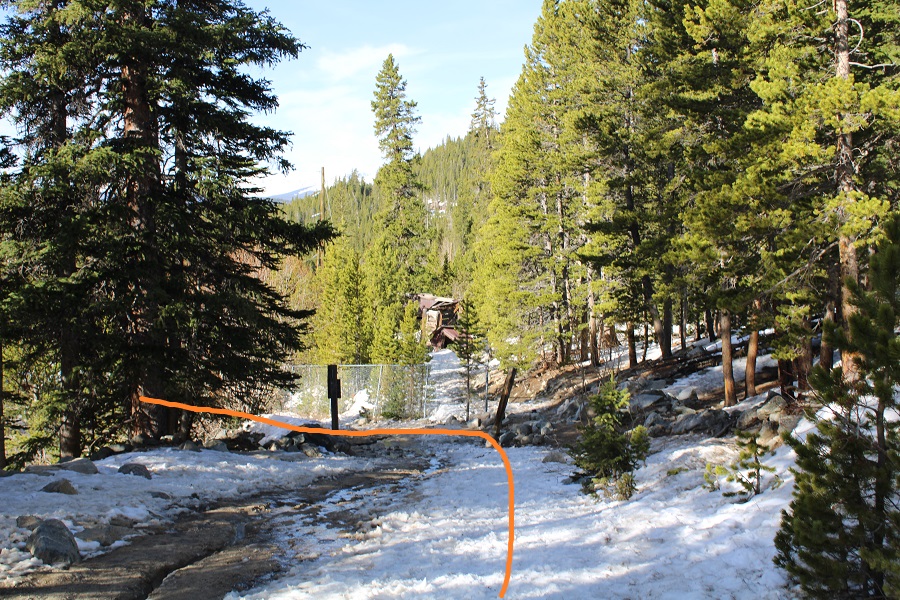
The trail starts at the north end of the parking area, and follows the road shortly before turning left and heading into the trees. There’s good signage here.
The trail started out a mixture of rocks, ice and snow, and eventually became mostly ice-snow. I quickly put on my microspikes and wore them for the rest of the day.
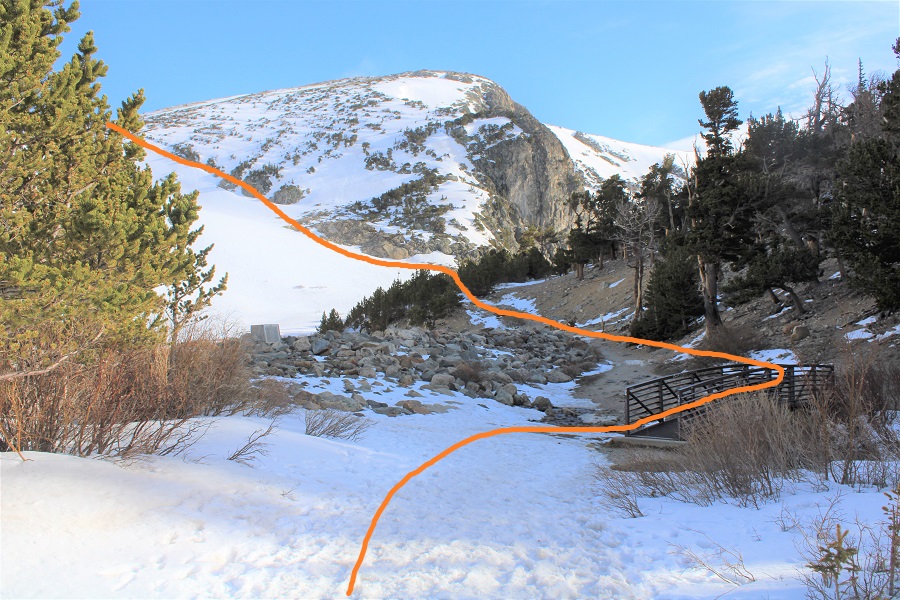
After hiking for .75 miles I came to St Mary’s Lake. It’s covered in snow right now, and to the left of this picture. St Mary’s Glacier is directly in front. Here’s the route I took, crossing the bridge, skirting the lake, and then heading up the slope.
Here are some step by step photos to the top of the slope.
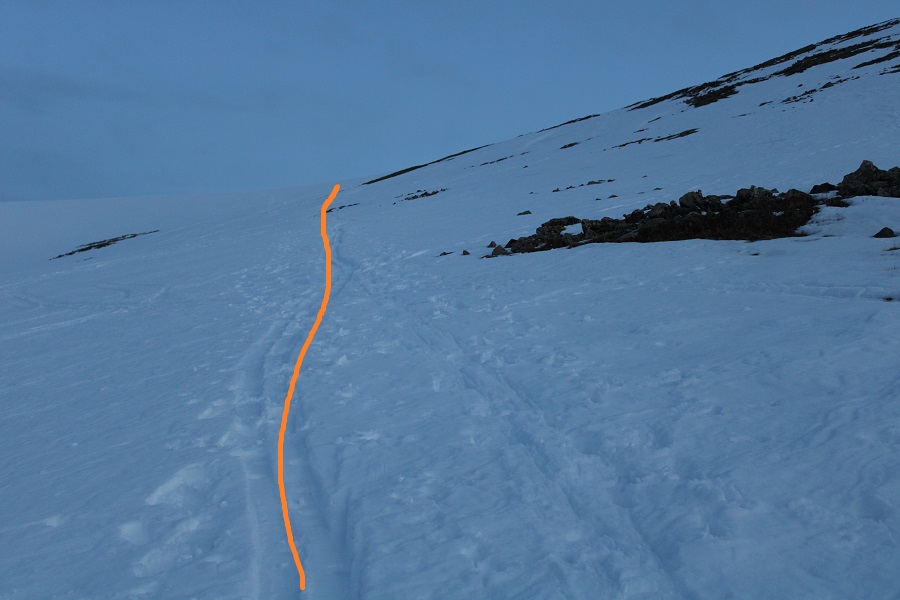
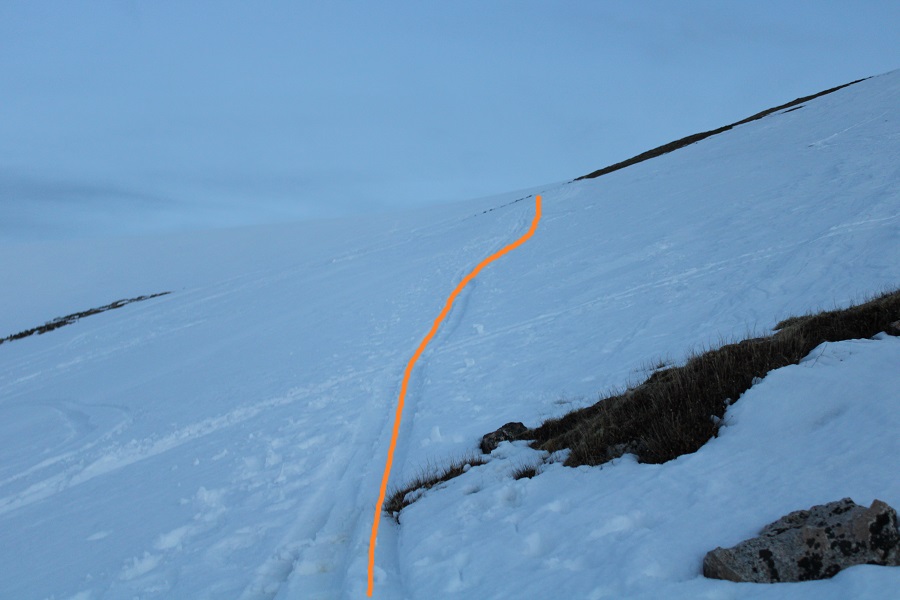
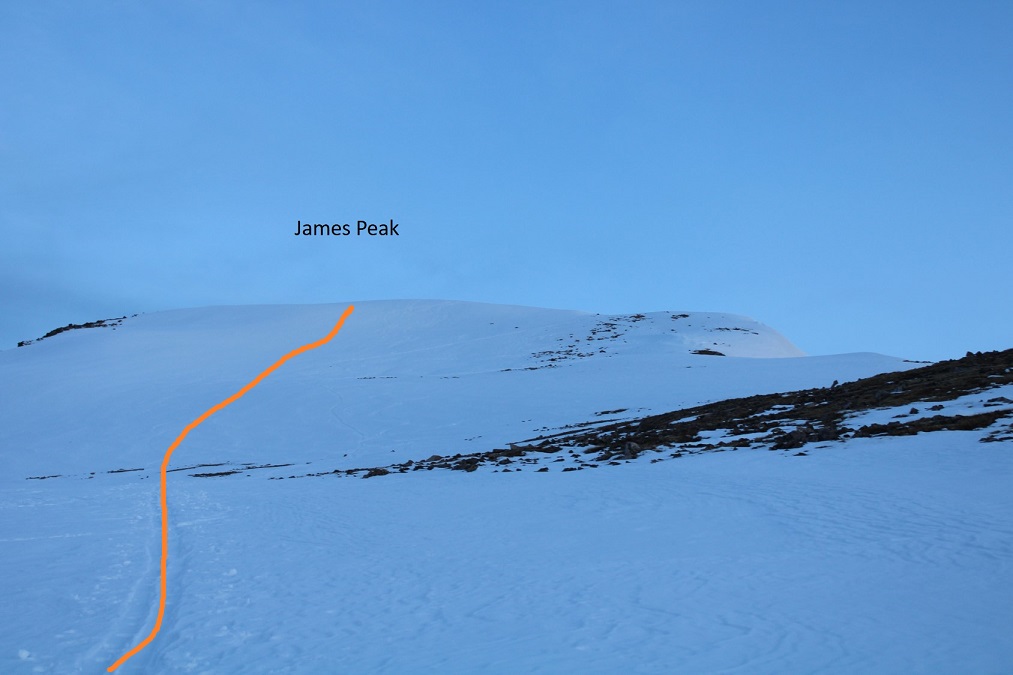
Once at the top I came to a plateau, and could see James Peak in front of me. Well, I couldn’t really in the morning, as it was still dark, but I could tell it was a clear morning by the shooting starts I kept seeing (that was about to change). At the top of the slope, just head northeast.
This is where the wind started. The wind never stopped, and in fact just got more intense as the morning went on. I put on my balaclava and headed northeast. Here are some step by step pictures
The very last part of this hike included turning north and heading up this slope. I did not need crampons/ice axe on my way up (microspikes were fine) but I did use my ice axe on the way down. This could have been prevented by zig-zagging the slope (dotted line), but I felt it was better to get in some glissading practice.
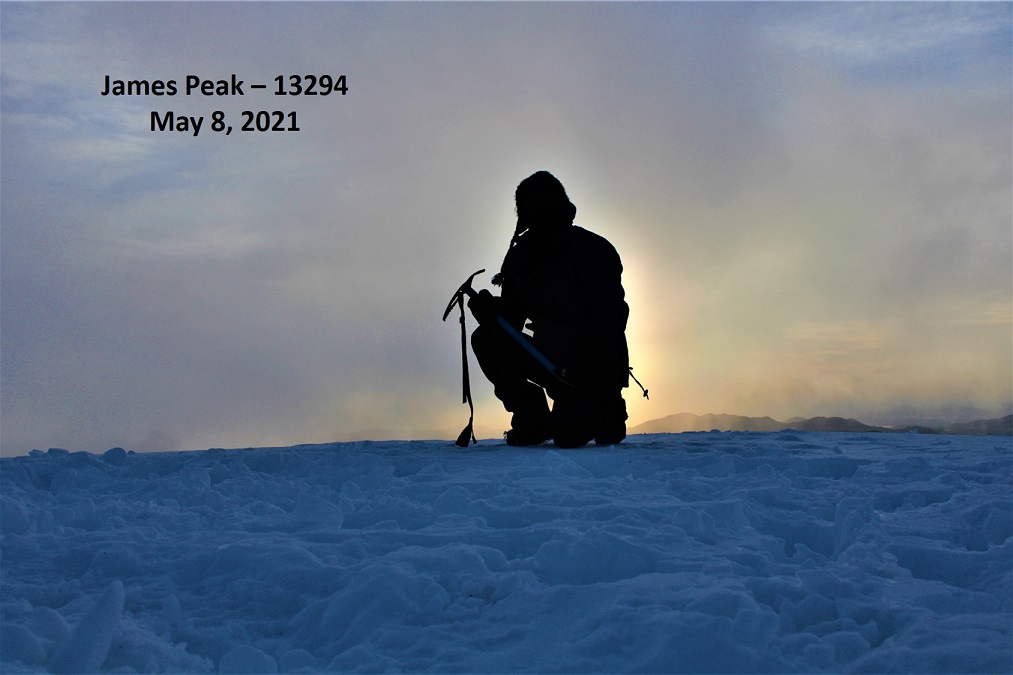
I summited James Peak at 6:25am
James Peak:
I was surprised at how fast the clouds were coming in: The wind was stronger here on the summit, and soon I lost most visibility.
I headed back the way I’d come, careful to follow my footprints as it was getting increasingly difficult to see. I faced the mountain and used my ice axe for the initial descent, then turned and glissaded for a bit. Here’s an overall view of the route back down to the lake
And step by step, once I got out of the clouds
The wind never stopped, but the clouds stayed up by the summit, making it for a clear morning down below (by afternoon it was snowing).
It was still morning, but the snow was already turning to slush, and the steps I’d put in earlier were now ice. I kept slipping and couldn’t figure out why? I had on my microspikes, but they weren’t catching me like they usually do (it wasn’t until I made it back to the truck and took the spikes off I realized in the dark I’d put one on inside out, and the spikes were facing the sole of my boot. Whoops!). Here are some photos of the way down the slope and back to St Mary’s Lake
And over the bridge, back on the trail that led to the street.
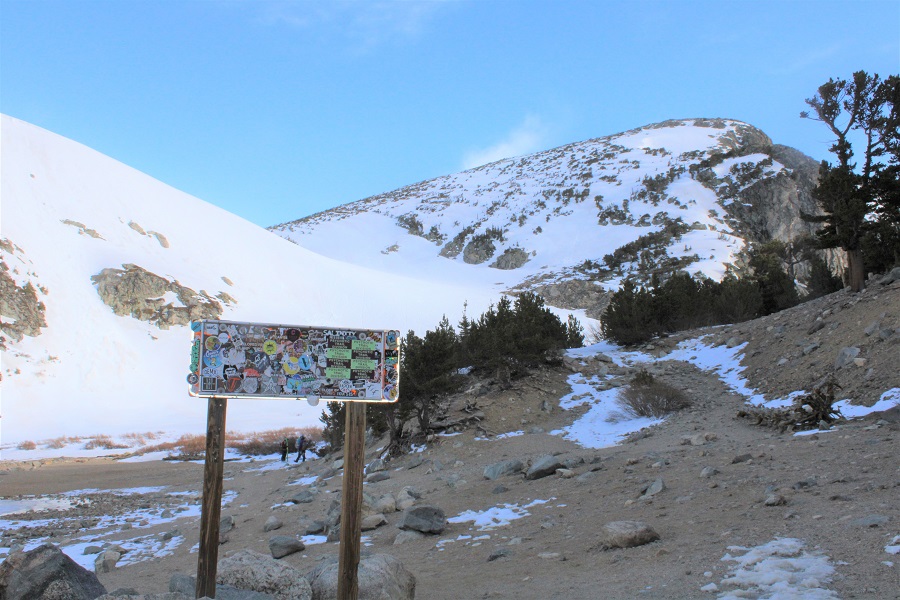
There was a sign near the bridge. I’m guessing it said “St Marys Glacier” or “James Peak Trail”, or something like that, but it was covered in stickers and useless. I thought to myself I should have brought some 14er Fireside Stickers. Oh well, I’ll be back to make this a ridge hike, or at a minimum get some 12ers in the area: I’ll bring stickers then.
It was less than a mile on the trail back to the parking area. Note: Some parts of the trail were slick, as skiers and snowboarders have smoothed down the trail.
I made it back to my truck at 8am, making this a 7.84 mile hike with 2974’ of elevation gain in 4 hours.
I’ve been asked to write up a trip report on the Dixon Trail from a few different people, but I was waiting until the conditions were right to take this hike. Contrary to popular belief, the Dixon Trail DOES NOT go to they top of Cheyenne Mountain: a reporter erroneously stated it did when the trail first opened, and the falsehood unfortunately stuck. This reporter obviously never hiked the trail before writing their article.
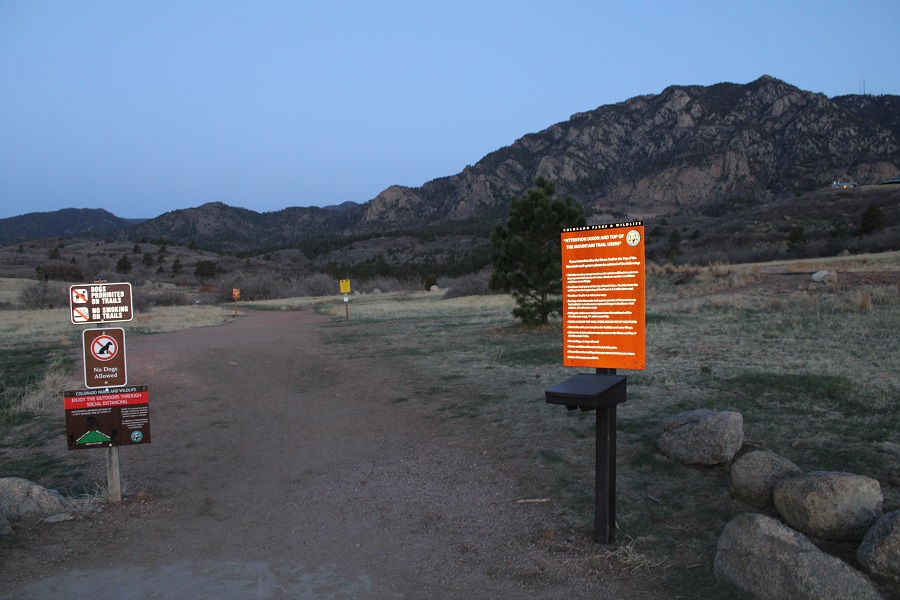
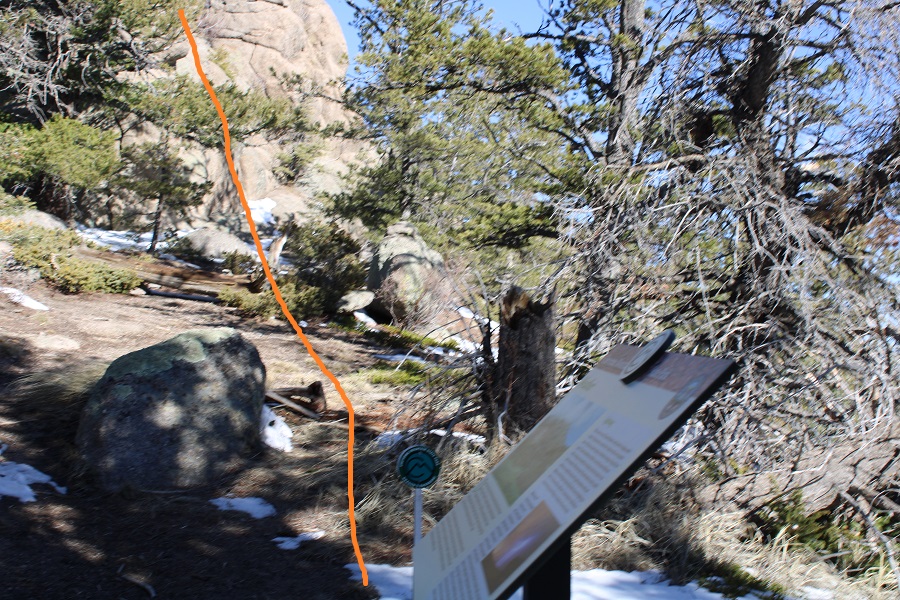
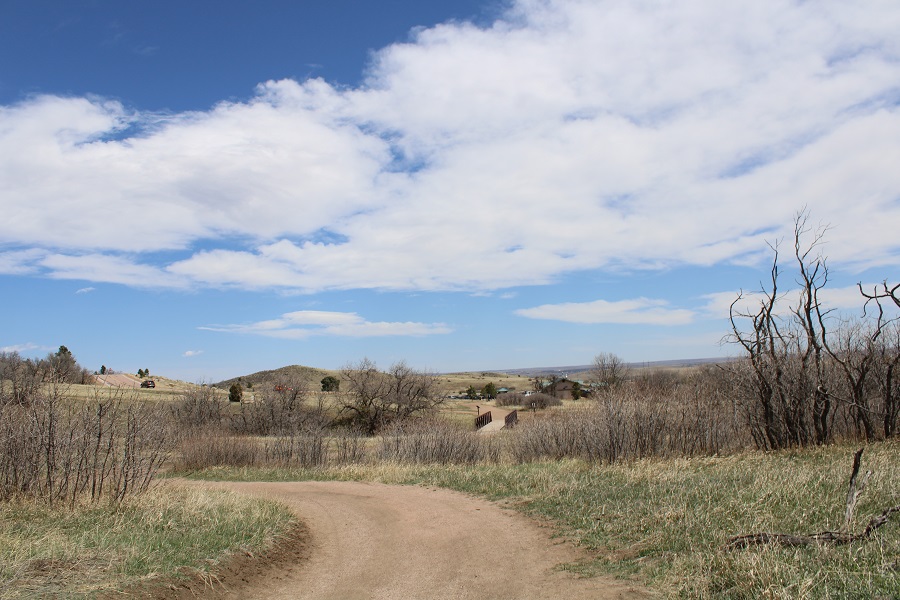
To start this hike I paid the $9 State Park entrance fee at the ranger station, and parked in the Limekiln parkin area of Cheyenne State Park. There was only one other vehicle parked in the lot when I arrived. I was on the trail at 6am.
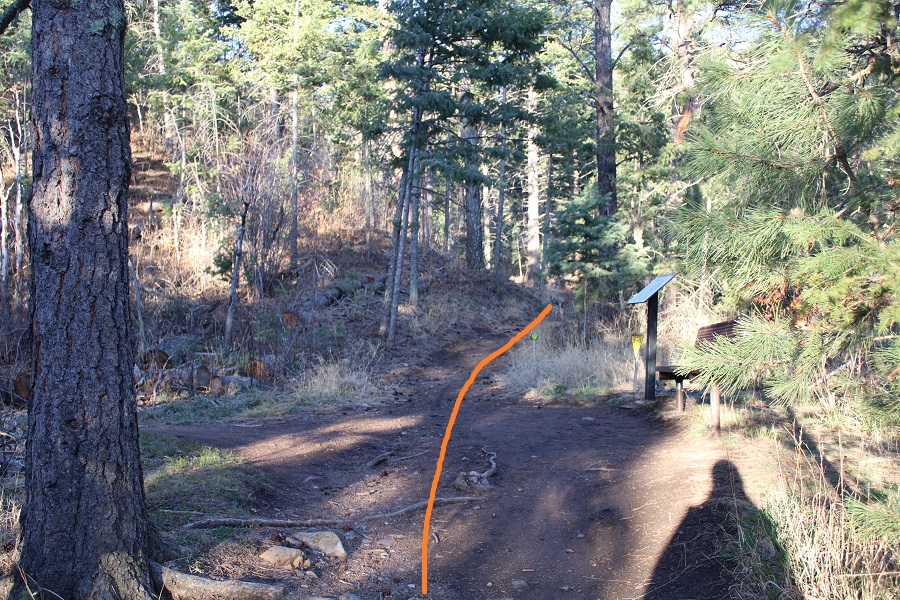
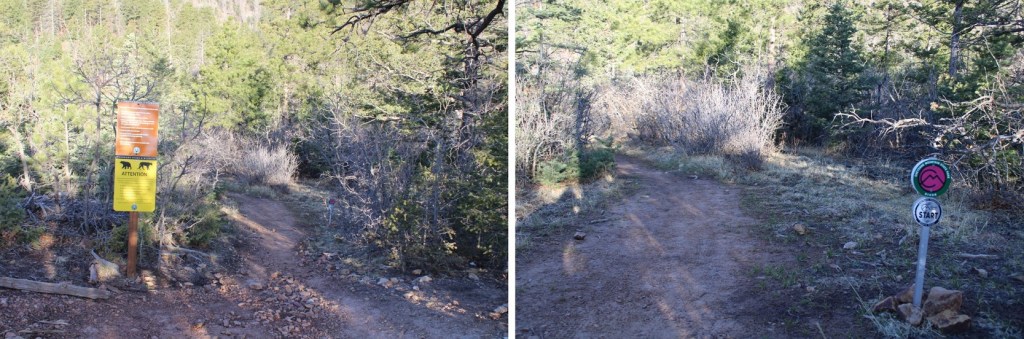
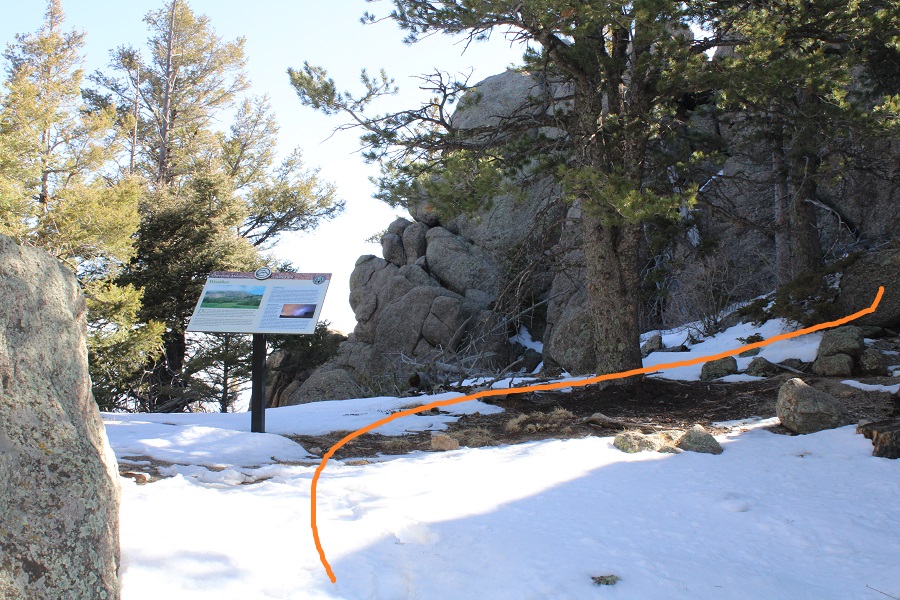
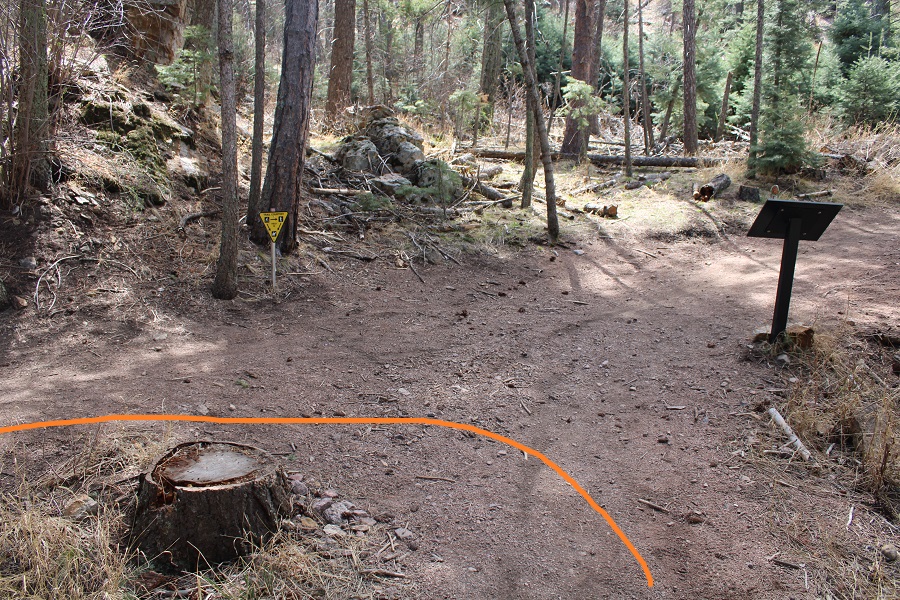
The trail starts at the west end of the parking area, in between the bathrooms and information sign. I could immediately tell this was a mountain bike friendly park: there was even a station to fix bike tires.
At the start of the trailhead there was a register specifically for people hiking the Dixon Trail.
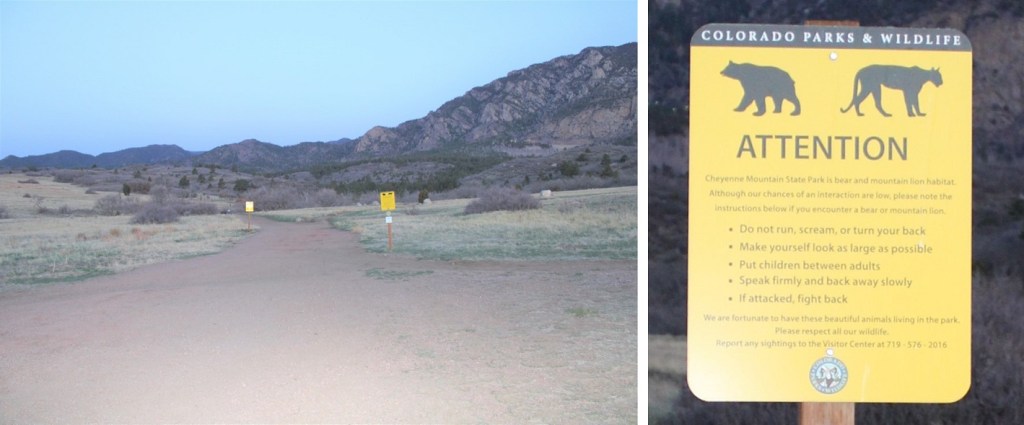
And a lot of signage. This park has tons of signs…
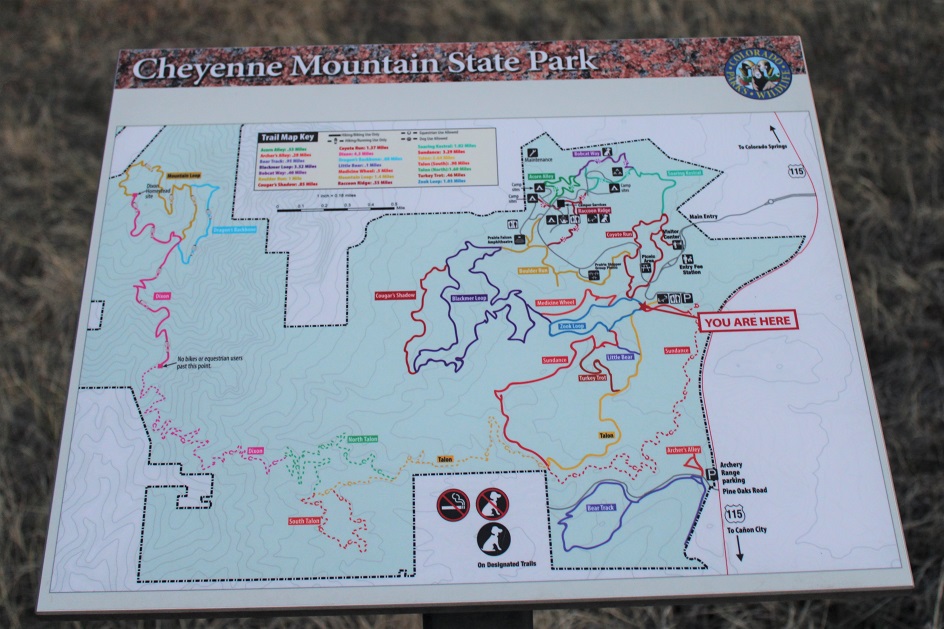
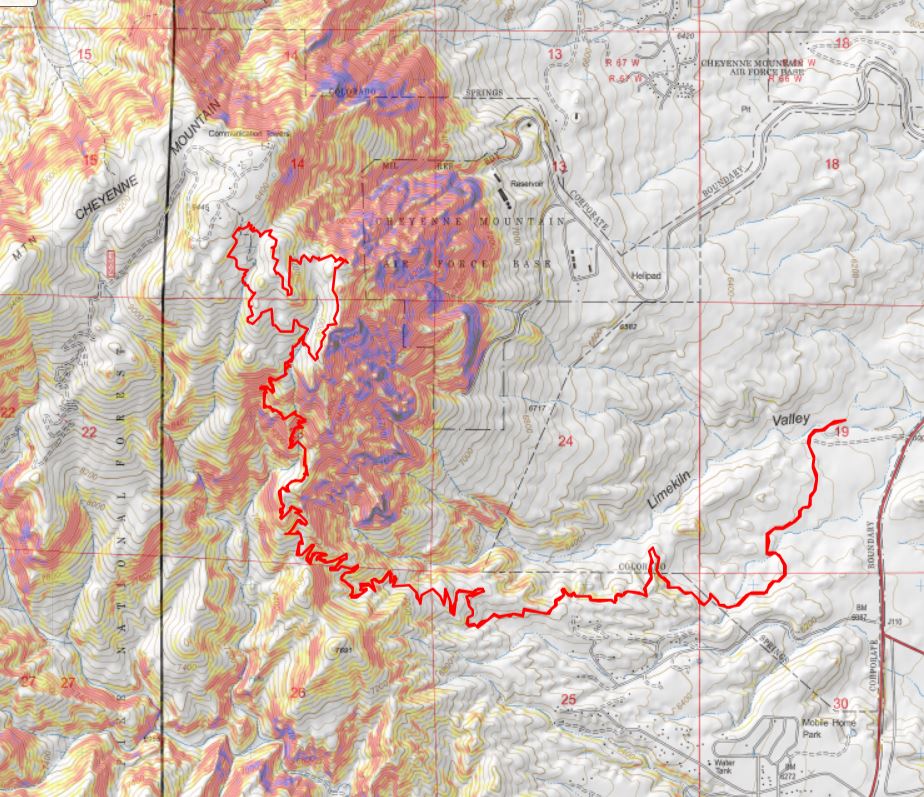
A word of advice: Even though this park has tons of signage, it’s obvious the area was designed for mountain bikers and not hikers: The trails aren’t efficient, and instead meander and do not take a direct line to the intended destination. It’s a good idea to have a GPX file for this route (message me if you need one) because, while overall you want to head west to gain the ridge, you’ll often times be heading south or north instead.
There are many ways you can get to the Dixon Trail from the Limekiln parking area. This is the route I took:
Yellow / Talon Trail
Green / North Talon Trail
Pink / Dixon Trail
Teal / Dragon’s Backbone Trail
Orange / Mountain Loop Trail
Pink / Dixon Trail
Followed the trail back via Green then Yellow trails
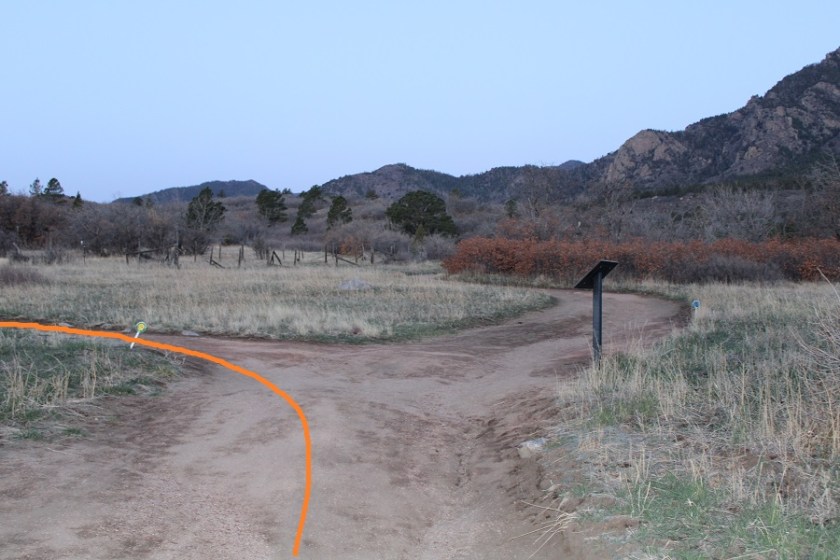
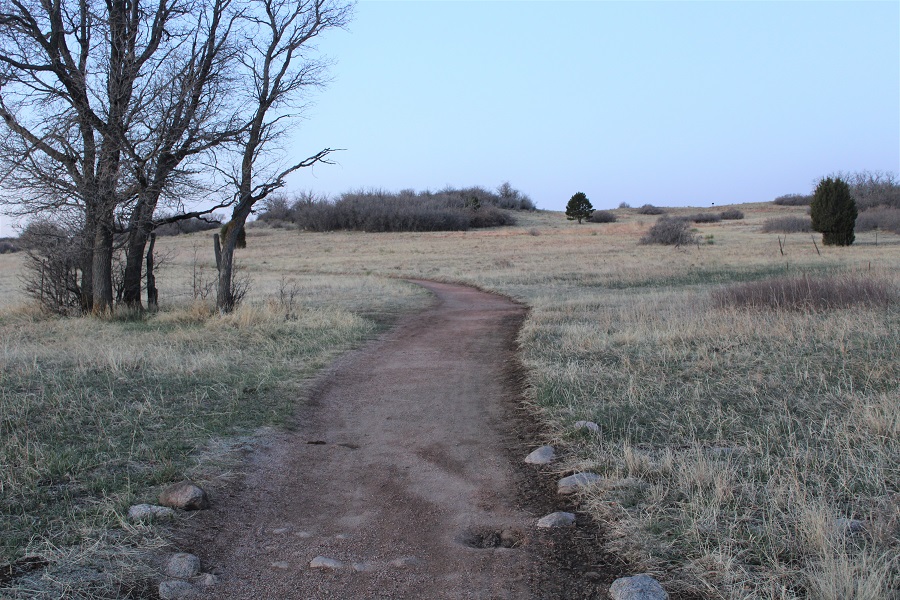
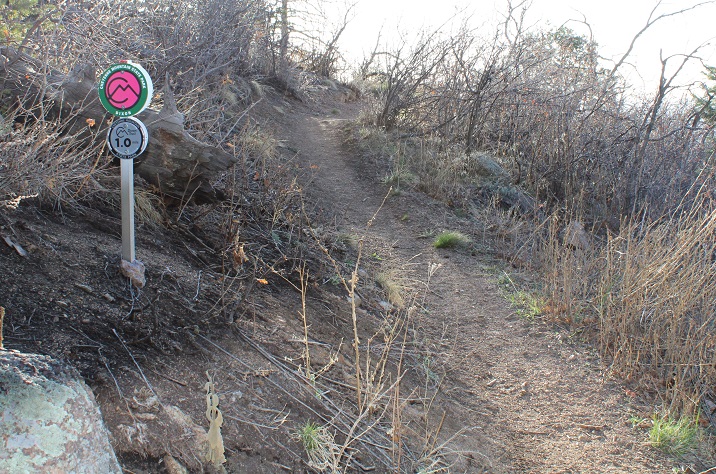
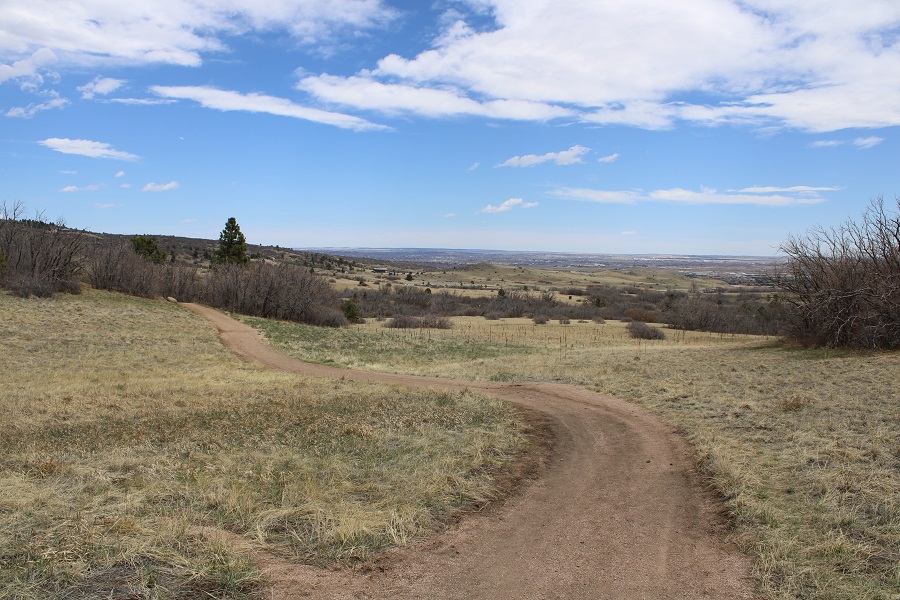
There are trail markers the entire way, indicating which route you’re on. I started by crossing the bridge, and following the Yellow / Talon Trail
Here’s a look at the Yellow/Talon Trail
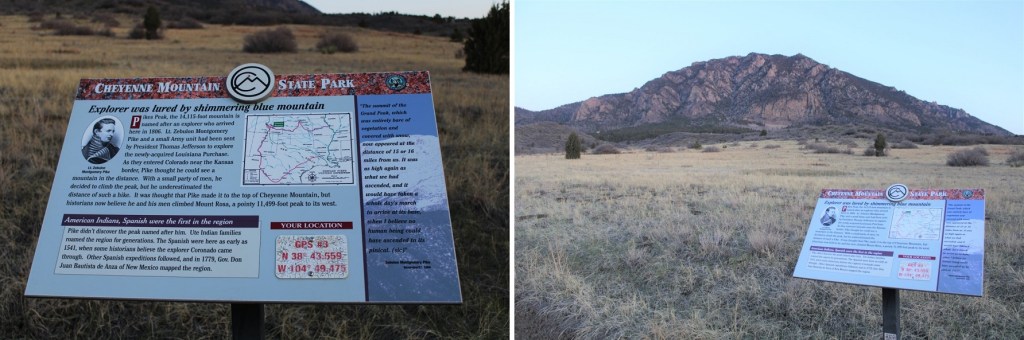
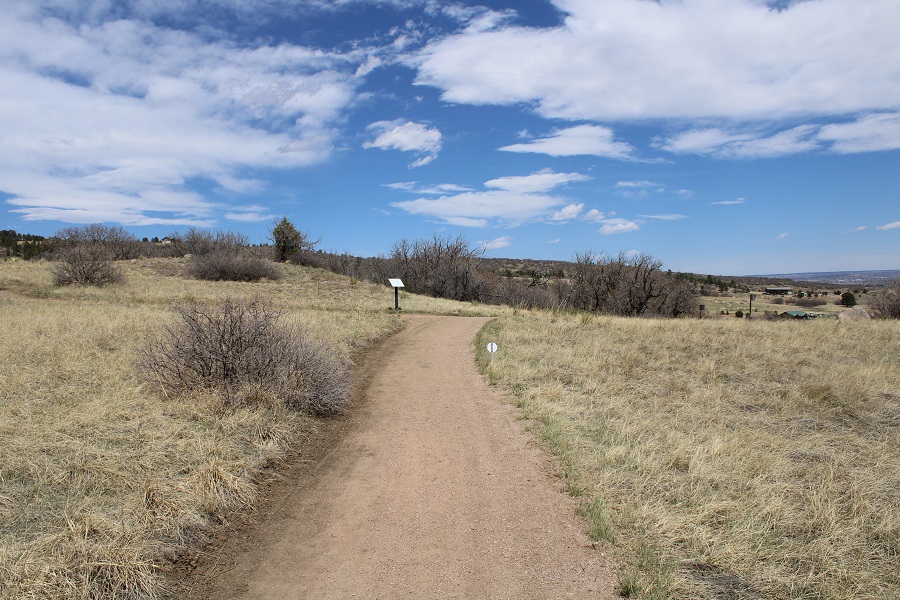
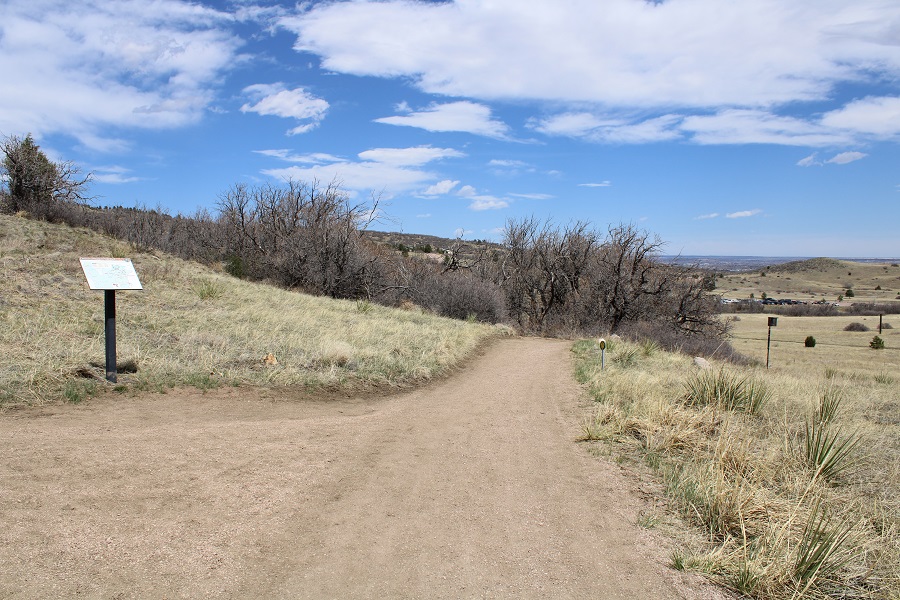
There were a lot of information plaques
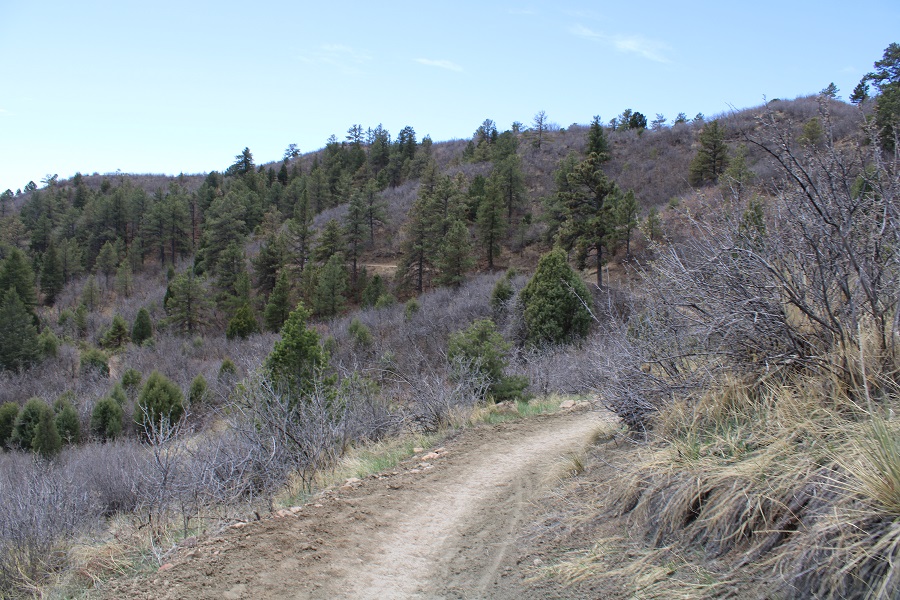
The terrain changed from prairie to scrubland and eventually to evergreen
After hiking for 2.75 miles I turned right onto the Green / North Talon Trail. There’s a 3 day junction here, where the yellow trail ends and the red and green trails begin.
I continued following the Green / North Talon Trail for about half a mile until it came to the Pink / Dixon Trail. This is where the switchbacks start, and unfortunately, don’t let up.
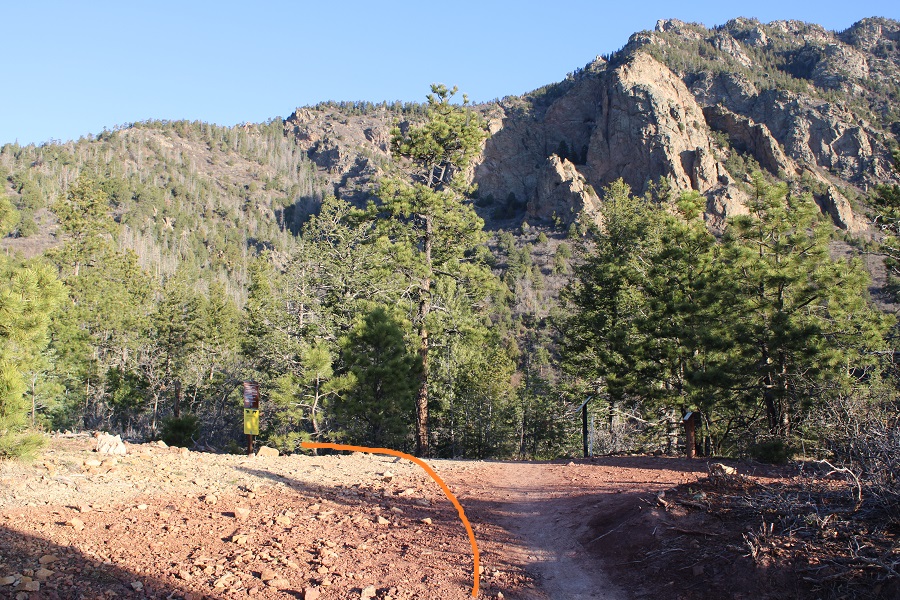
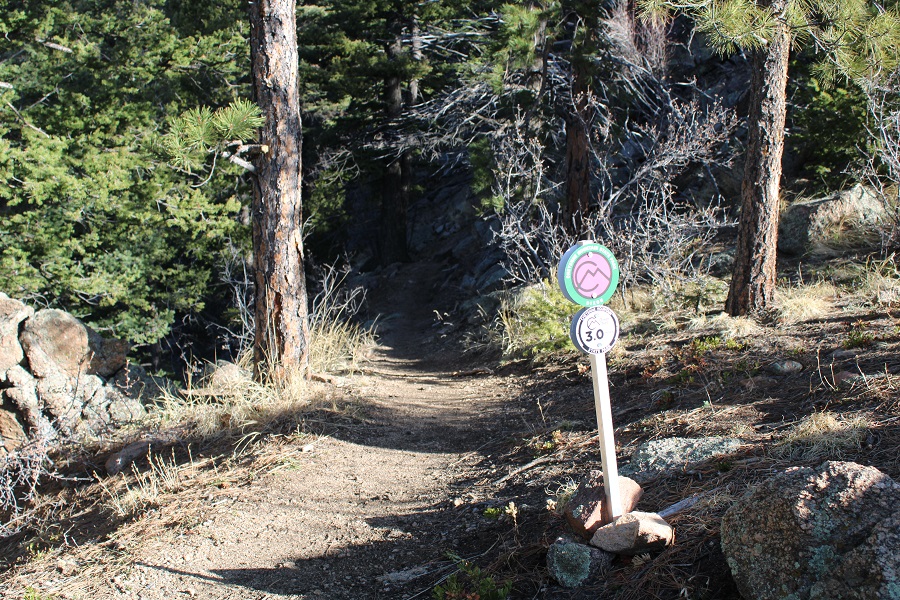
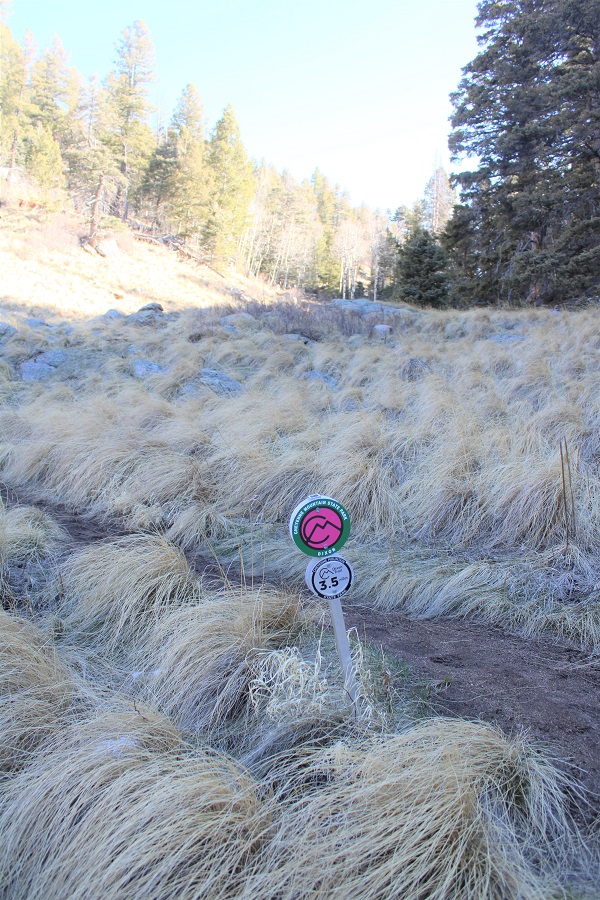
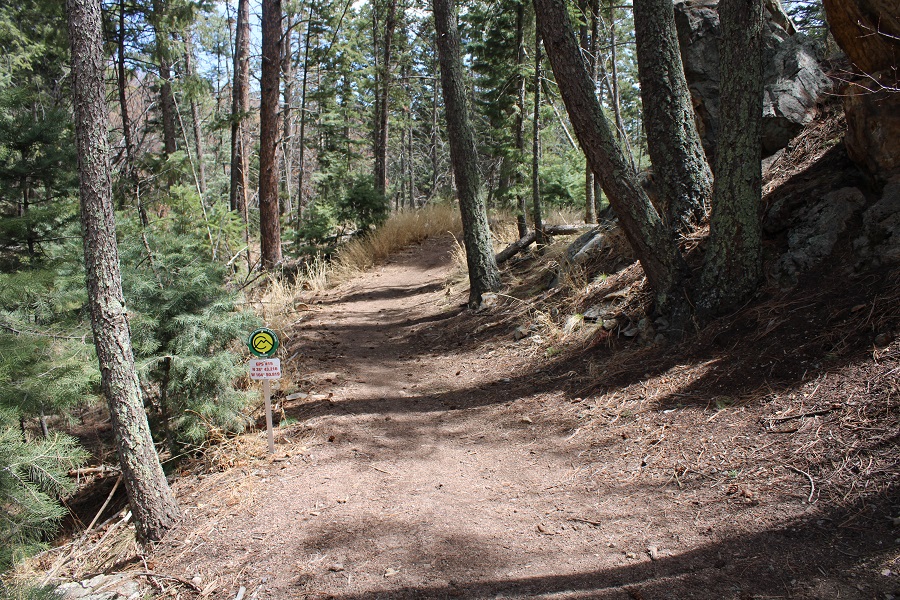
I hiked a total of around 3.5 miles to get to the start of the Dixon Trail. Here’s the start of the Dixon Trail
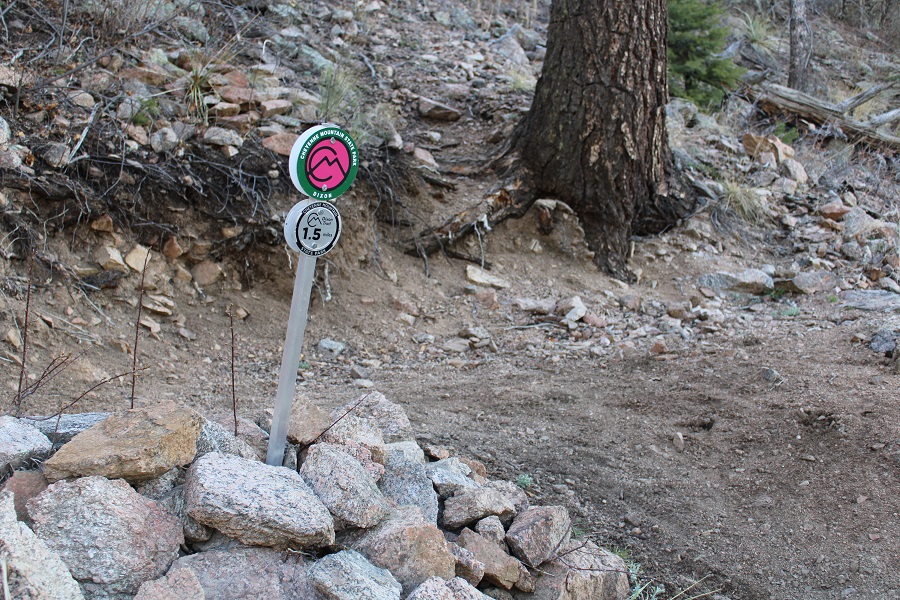
The Dixon Trail is 4.5 miles long (each way), and conveniently has mile markers every .5 miles.
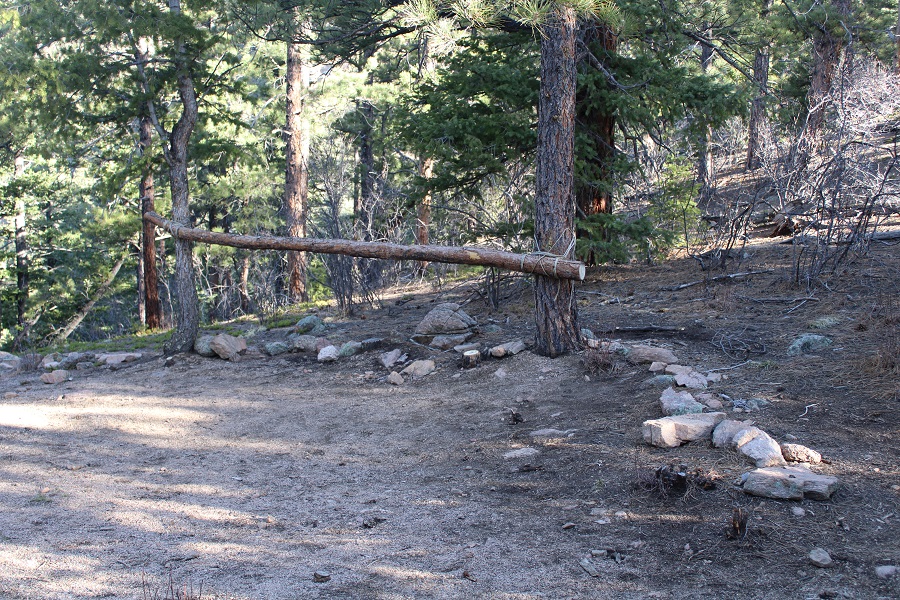
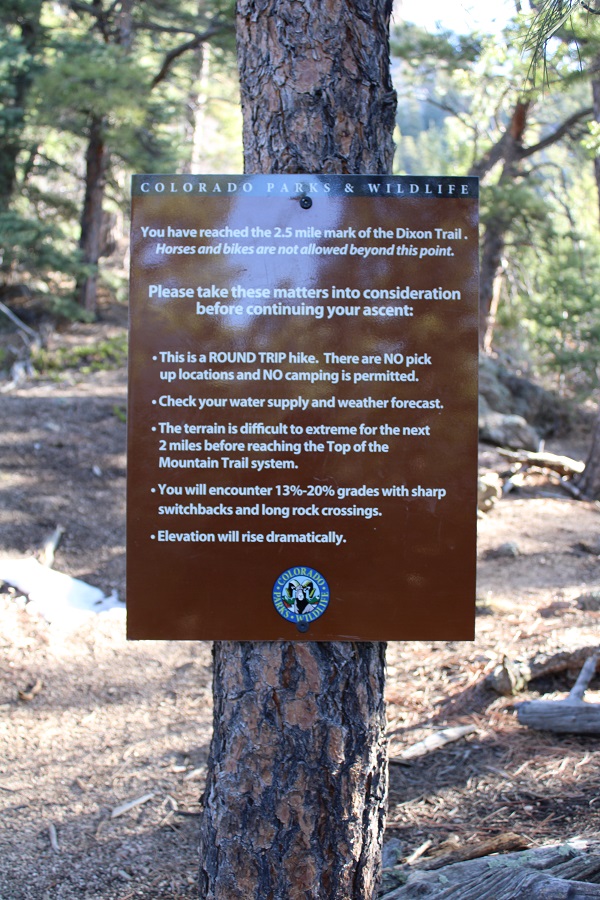
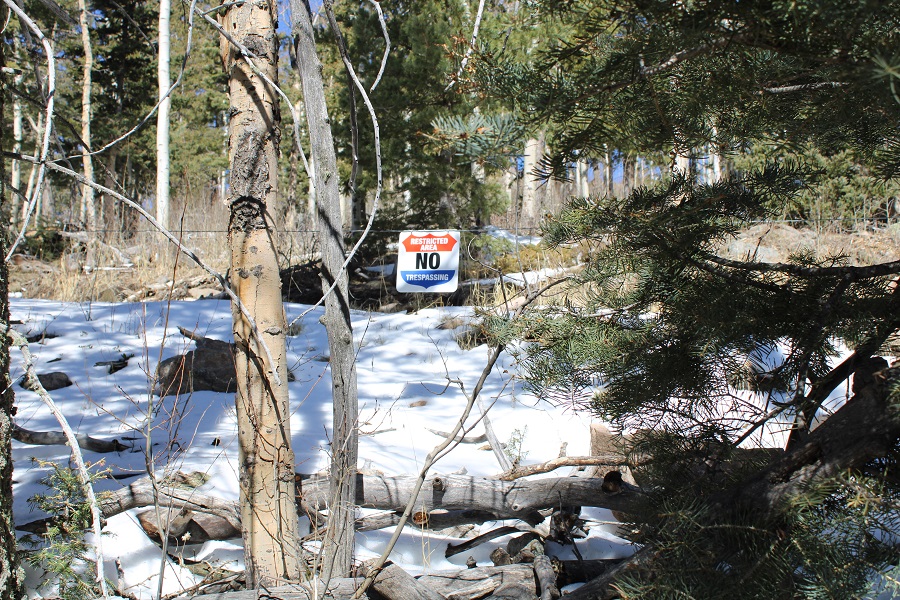
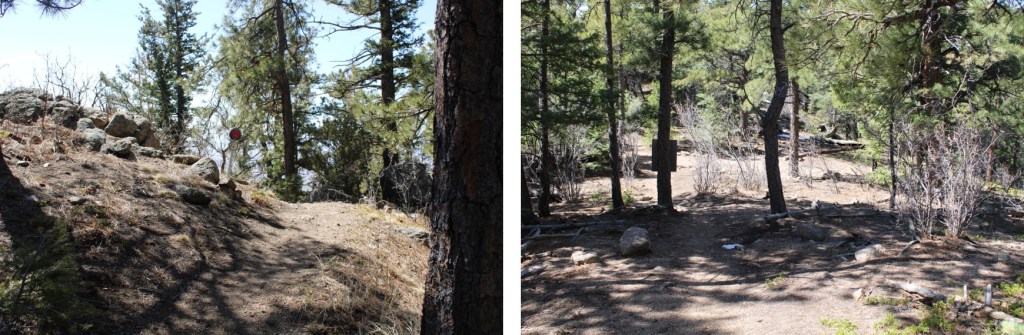
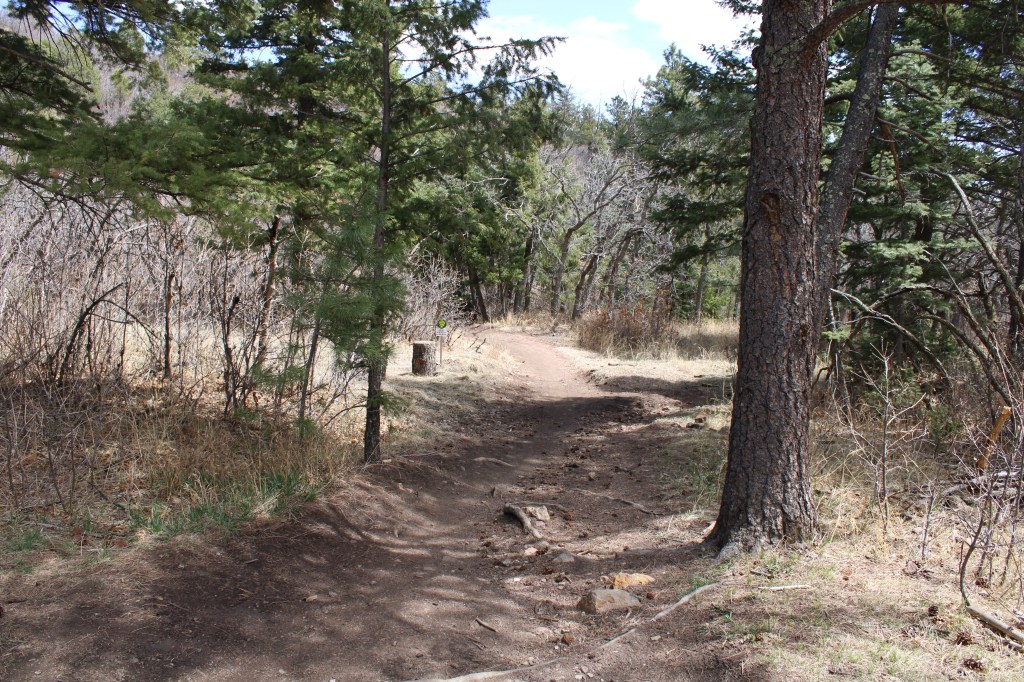
After hiking for 2.5 miles on the Dixon Trail I came to what I initially thought was a camping area. Once I read the sign however, I realized it was a place to park your bikes/horses, as they aren’t allowed any further on the trail.
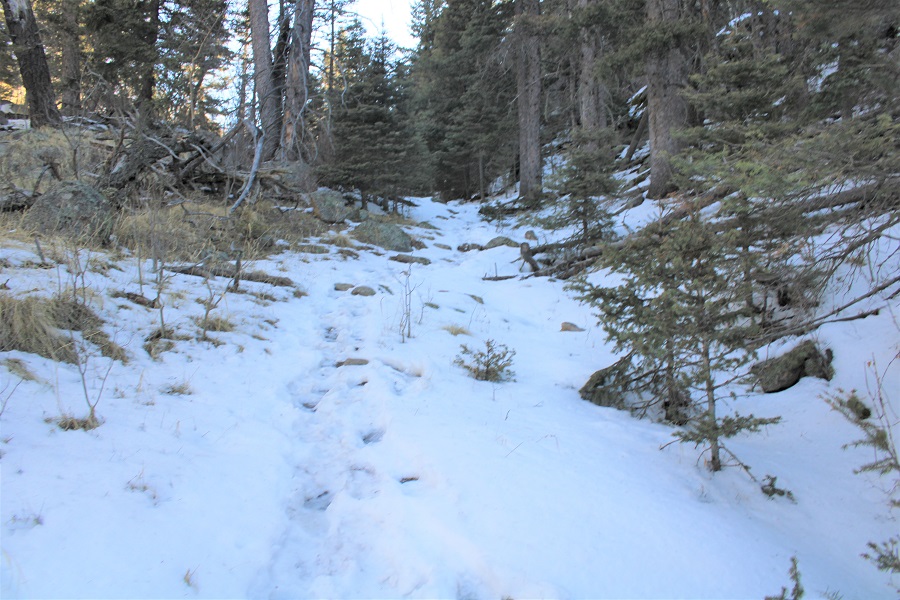
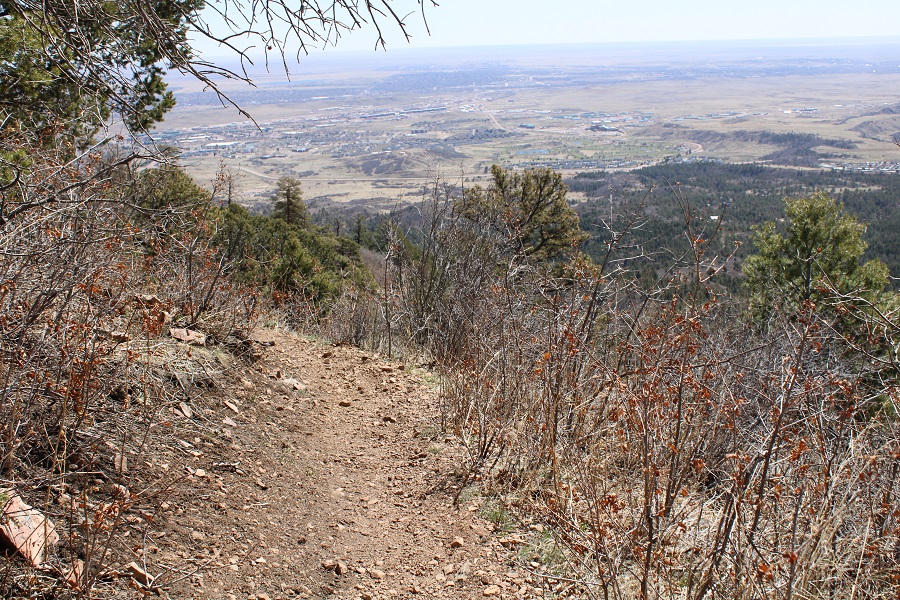
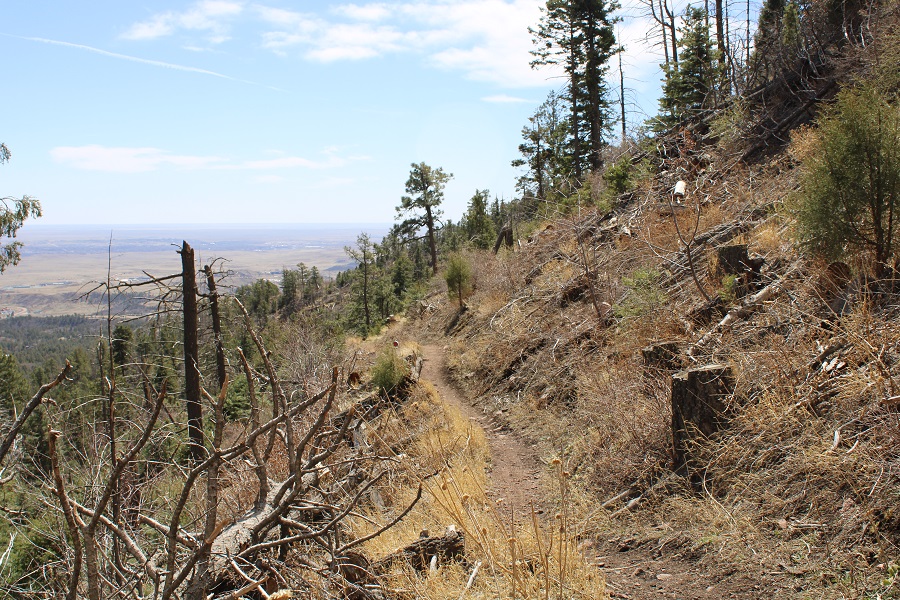
This sign makes the hike sound harder than it is. There are so many switchbacks and it’s mostly in the shade, so it wasn’t actually that difficult
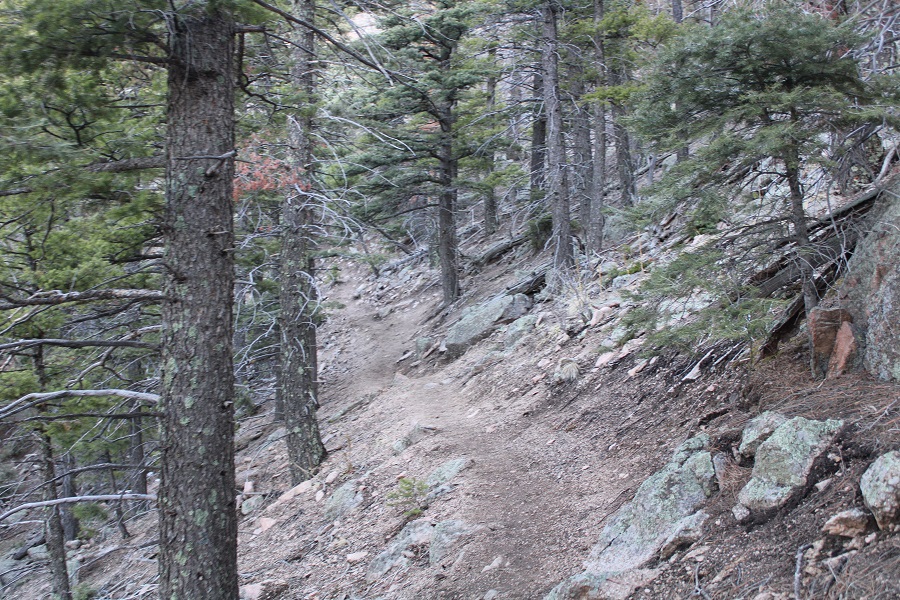
The rest of this hike takes place in the pine trees.
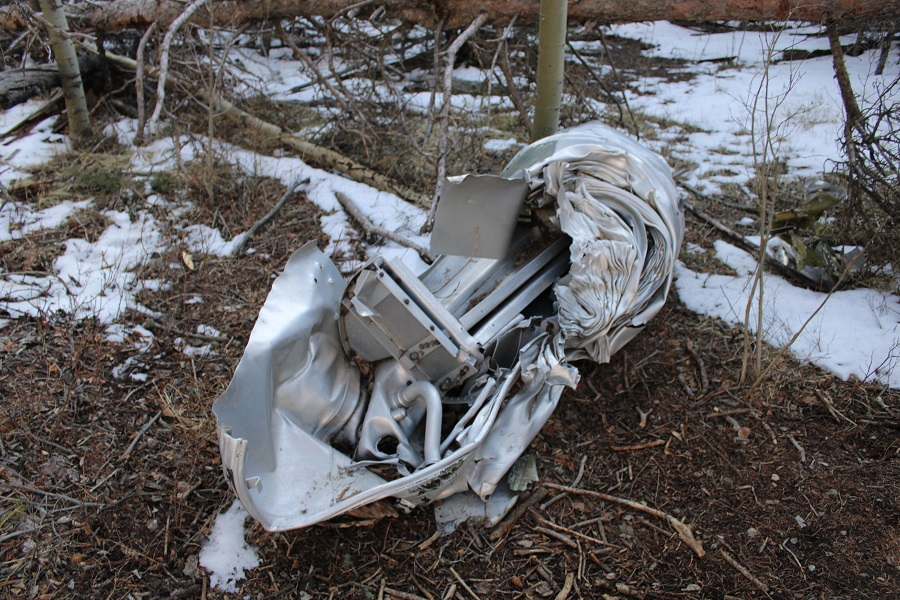
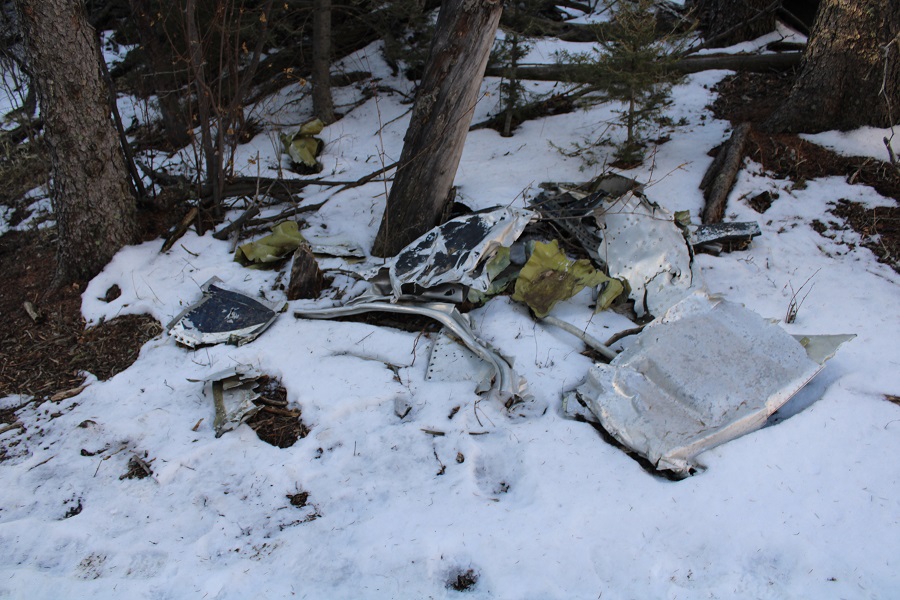
Between markers 3-3.5 miles on the Dixon Trail I came upon pieces left over from plane wreck in 1957
There were bits and pieces of the plane strewn about the area. I was surprised no one had taken them, as some were easy enough to carry.
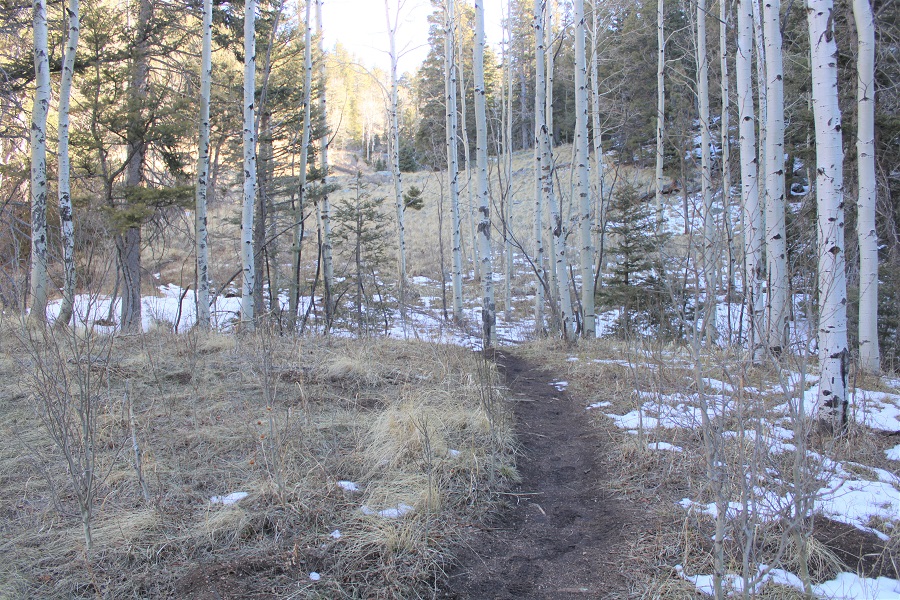
I continued following the trail north, through an aspen grove
The snow on the trail started picking up, and would be present for the rest of the hike
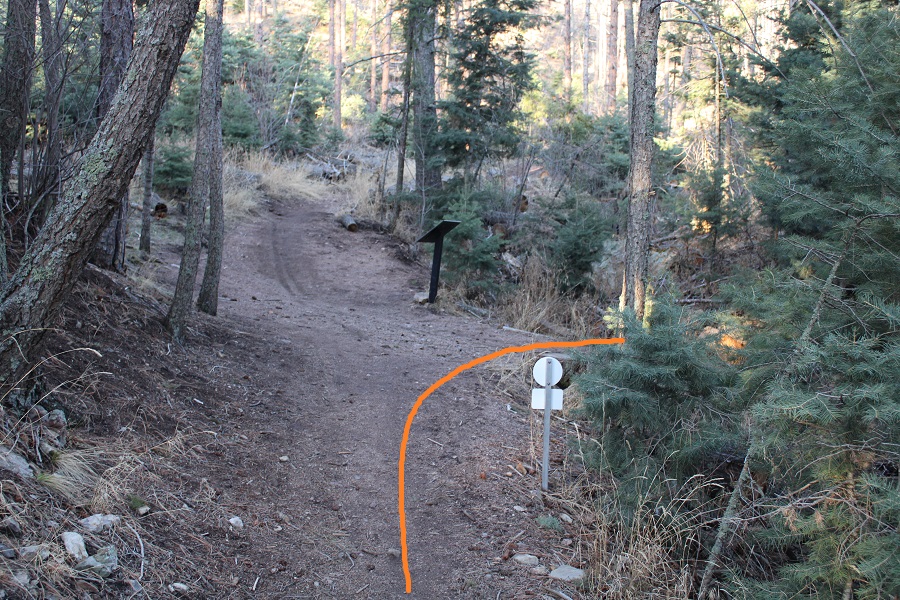
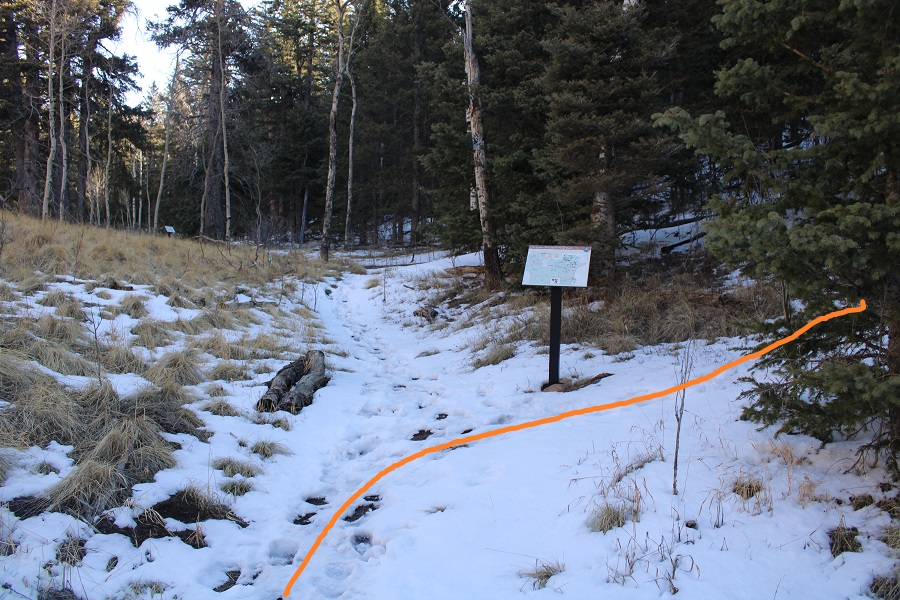
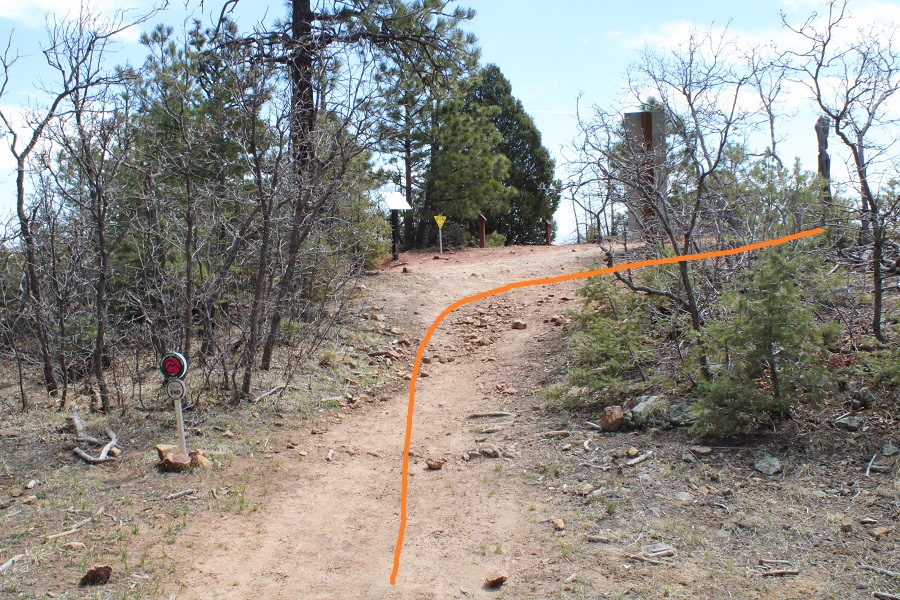
It was my goal today to take the Teal / Dragon’s Backbone trail. Here’s the cutoff
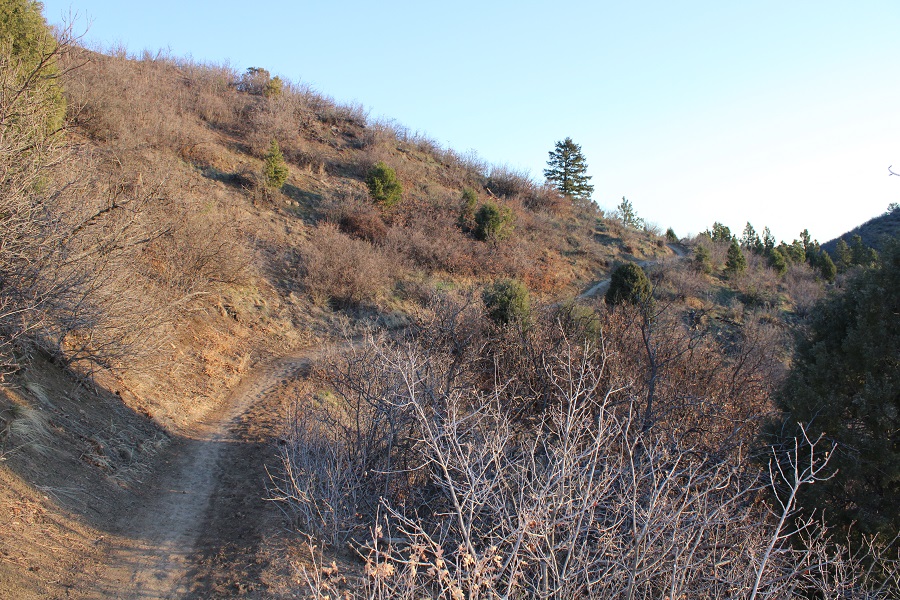
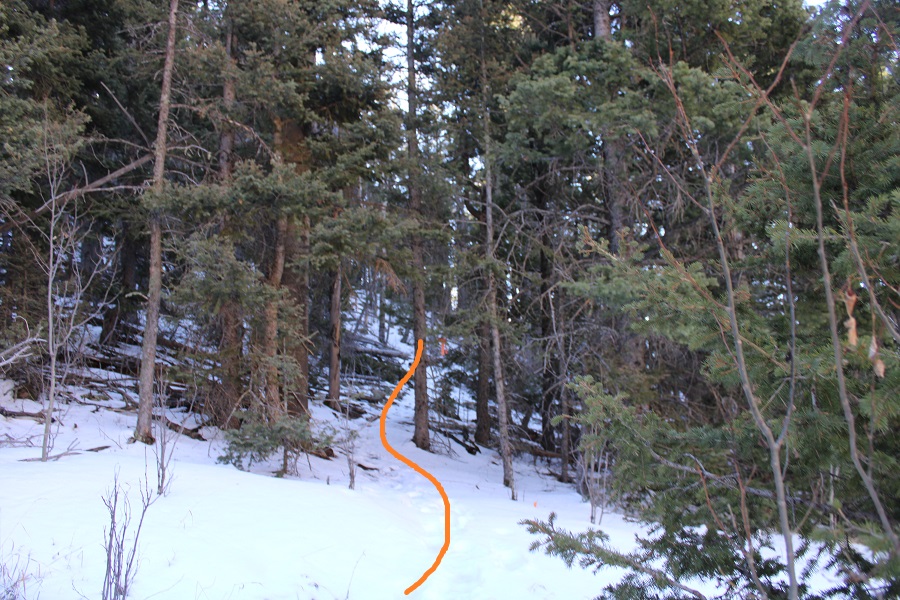
From here on out there were still signs, but there was also pink surveyor’s tape on the trees, making this an easy route to follow.
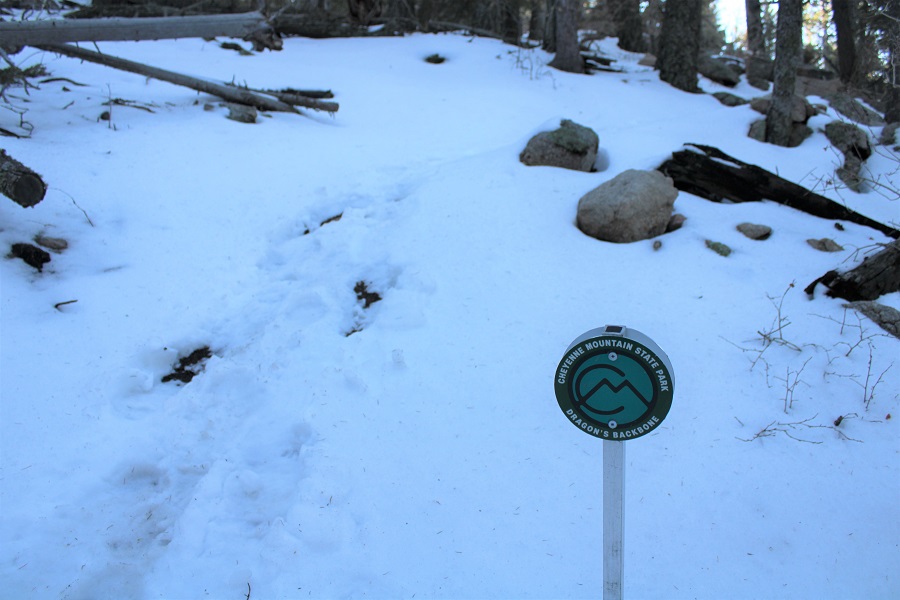
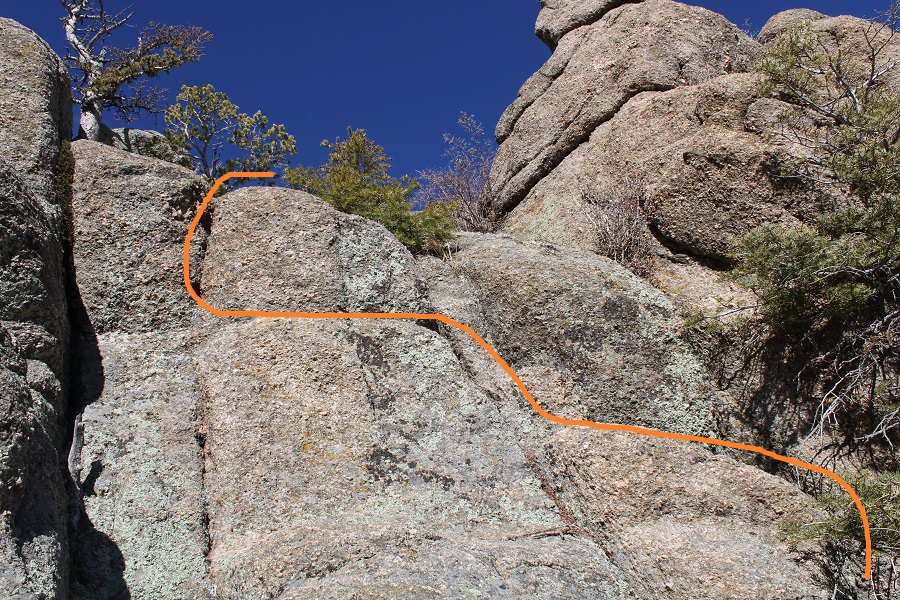
I gained the ridge and immediately came upon “Dragon’s Backbone”, an unranked peak
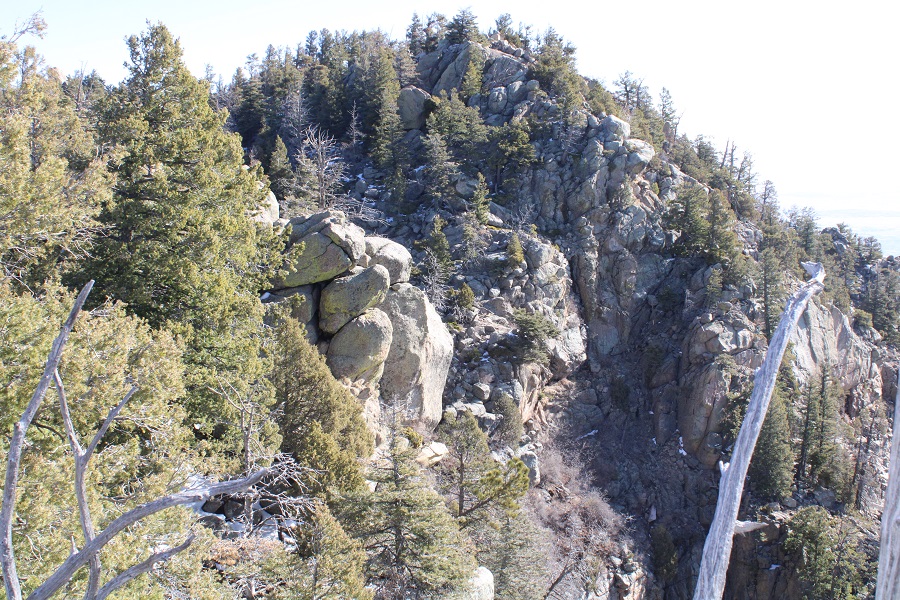
From there, I followed the ridge north, towards “Robbers Roost”, another unranked peak. There was a trail the entire way, with signs and markers indicating the route.
I came upon this sign (which talks about weather, lightening, etc.), turned east (right) and scrambled to the top. I’d consider this a quick but committing class 4 scramble, especially with snow.
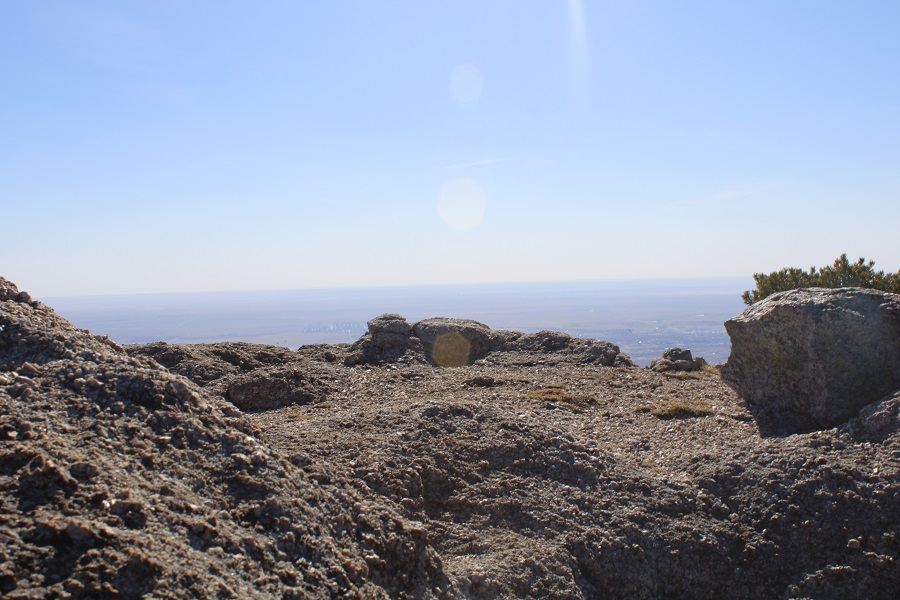
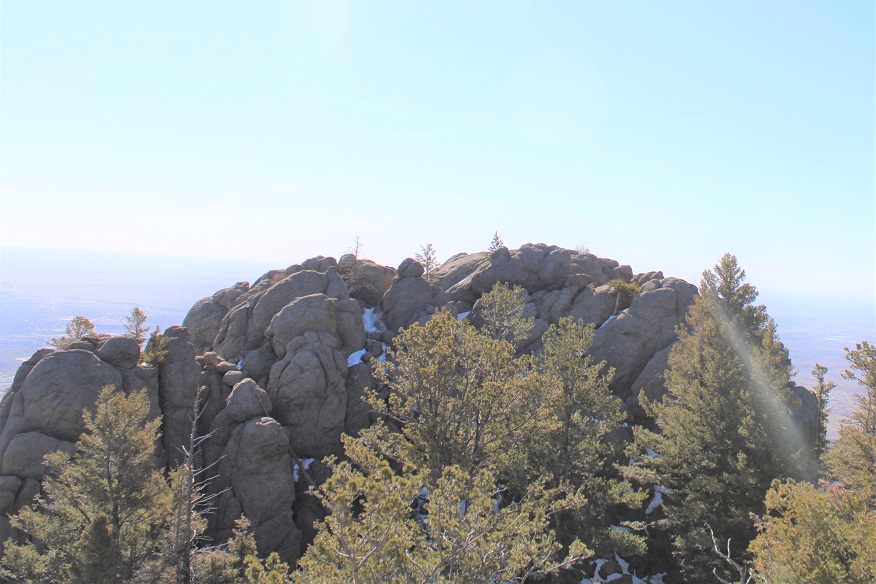
The top is flat
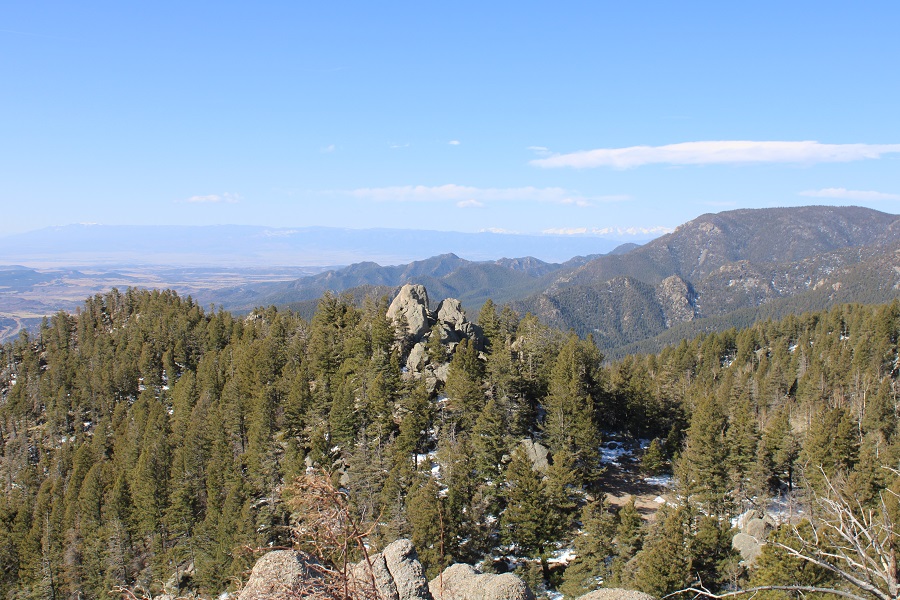
And has some great views!
Here’s looking back on the Dragons Backbone Trail
I climbed back down, grabbed my stashed gear (I hadn’t worn my pack for the short climb to the top) and decided to climb another outcropping to see if it was higher (it wasn’t).
I did get a good view of “Robbers Roost” though
I climbed down and continued heading north on the trail, making this a loop.
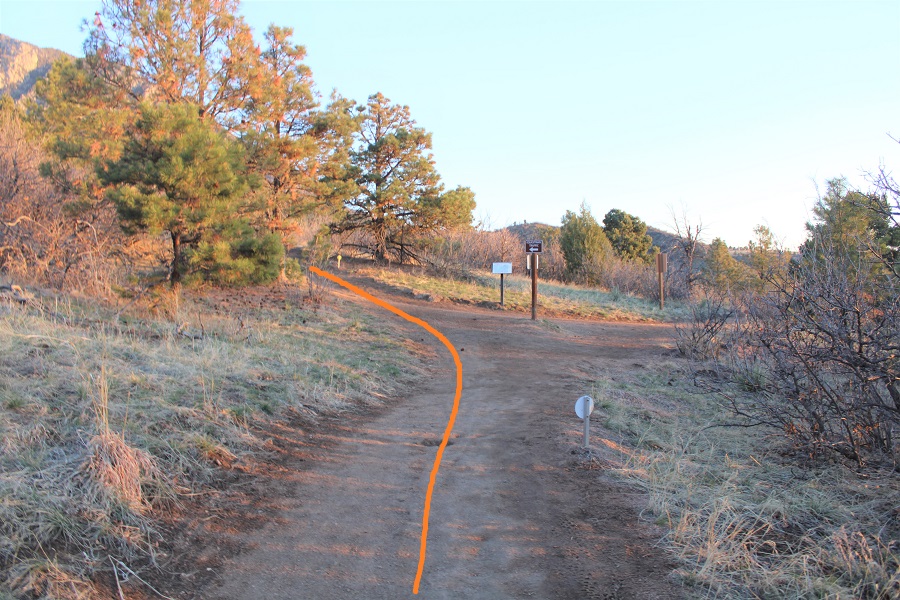
I decided to take the Orange / Mountain Loop Trail
This gave me a little extra elevation, and mileage
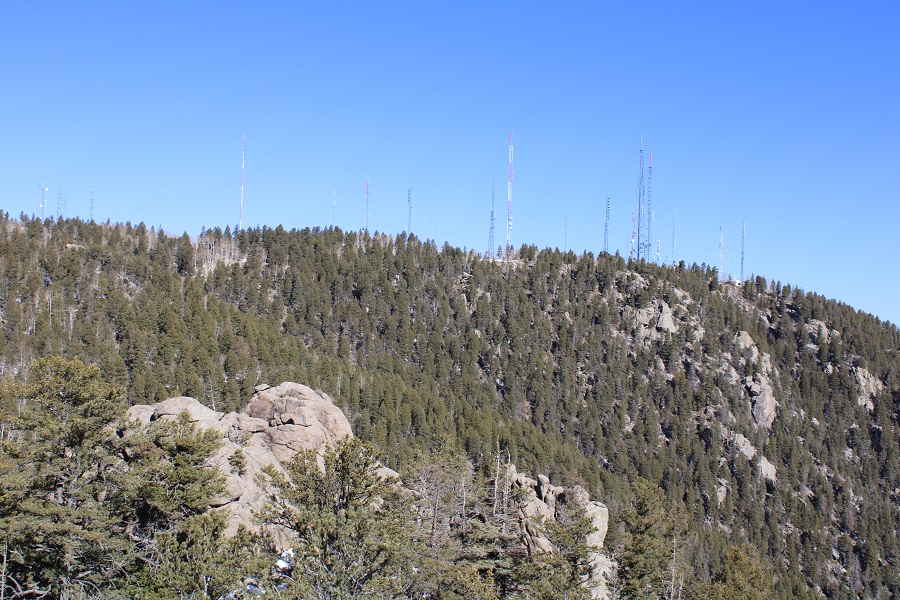
They obviously don’t want you going by any of the communications towers
I circled back around to some aspens
And the end of the Mountain Loop Trail, the beginning of the Dixon Trail (or end, depending on how you look at it) and the Dixon Homestead site.
I followed the Dixon Trail back to the crash site
And continued following the Dixon Trail back the way I’d hiked in. Here are some pictures of the way back
Then back to the green trail
And the yellow trail
I took the Yellow / Talon Trail back to the trailhead
I made it back to the (now full) trailhead at 12:30pm, making this a 17.42 mile hike with 4099’ of elevation gain in 6.5 hours