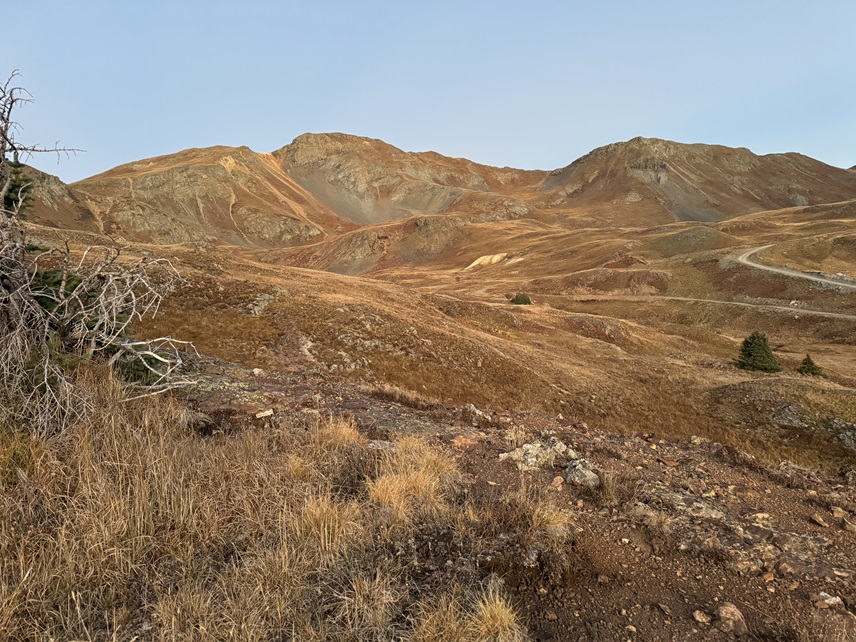
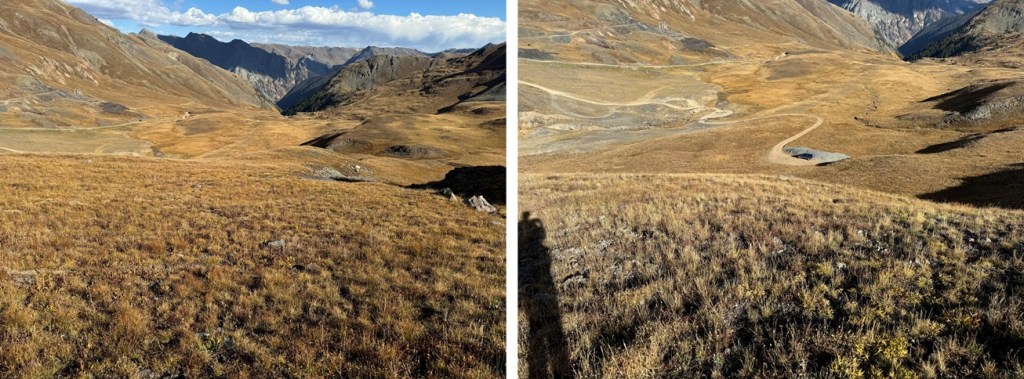
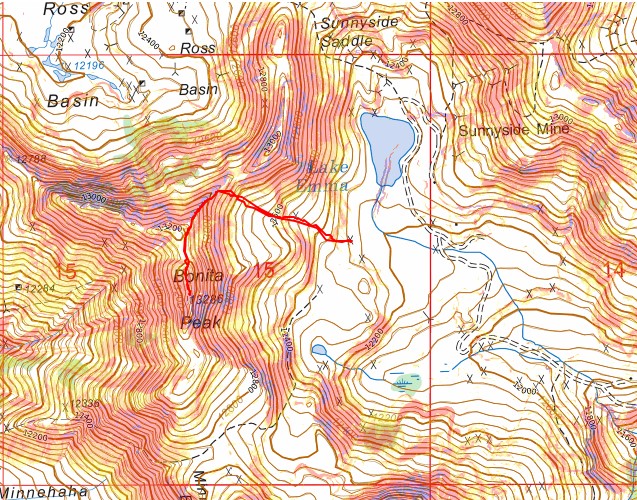
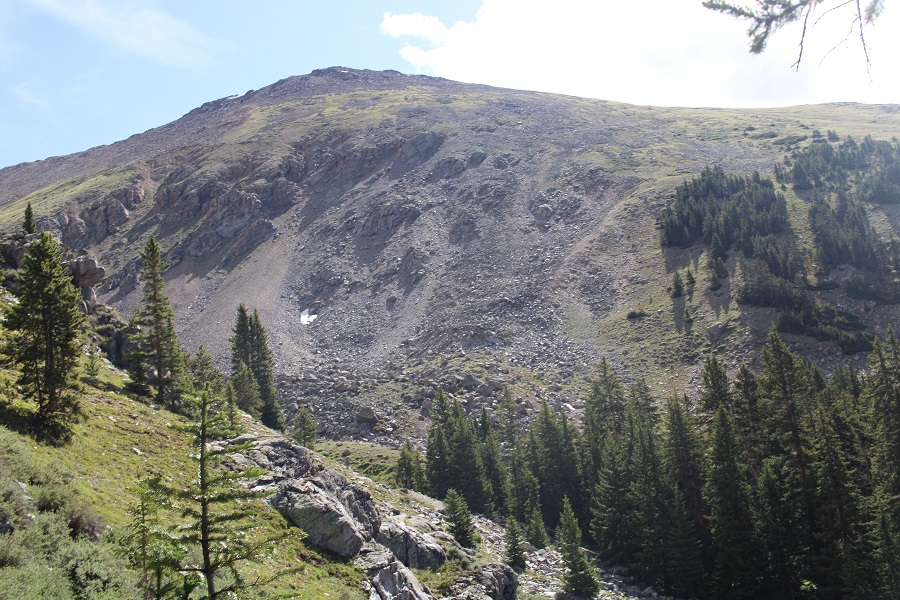
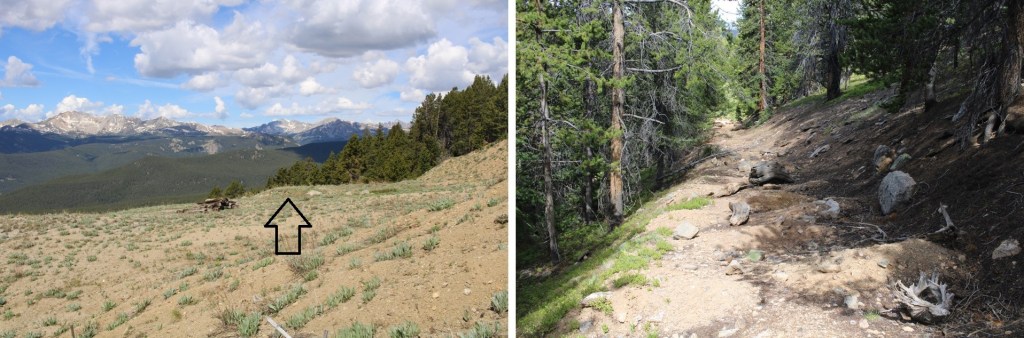
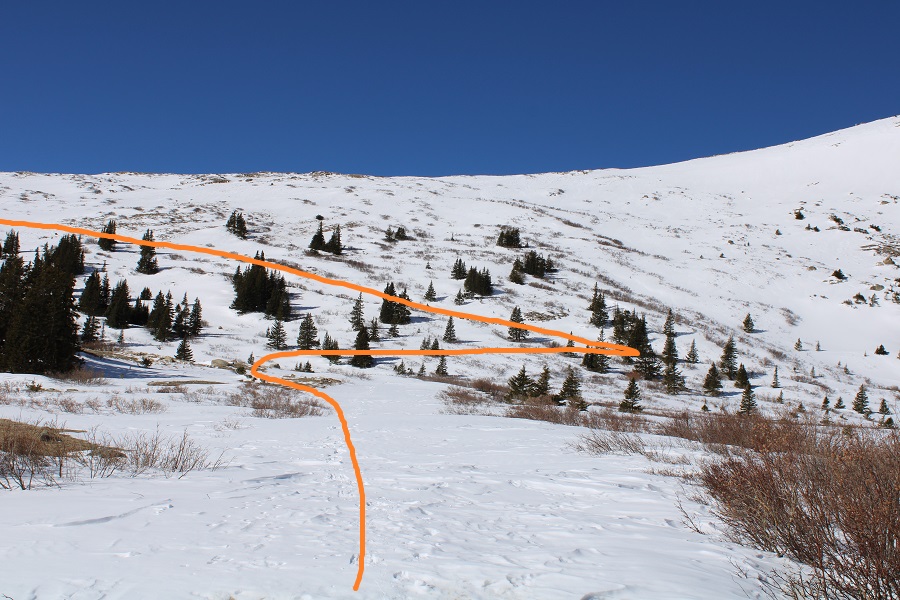
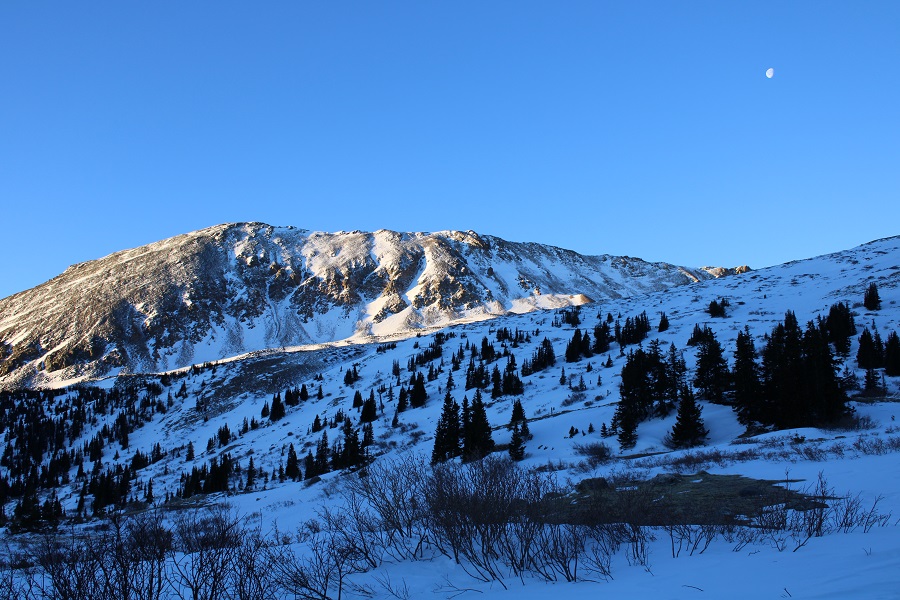
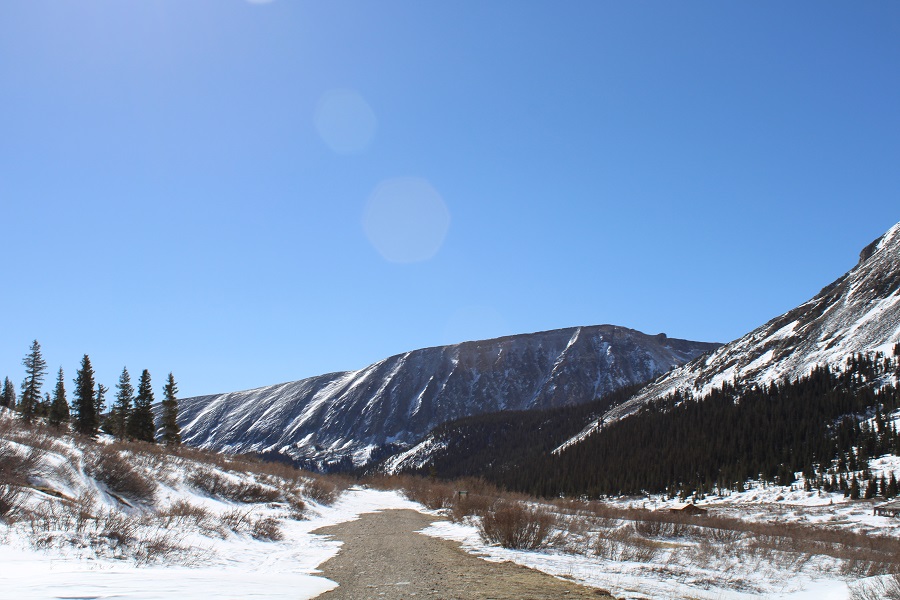
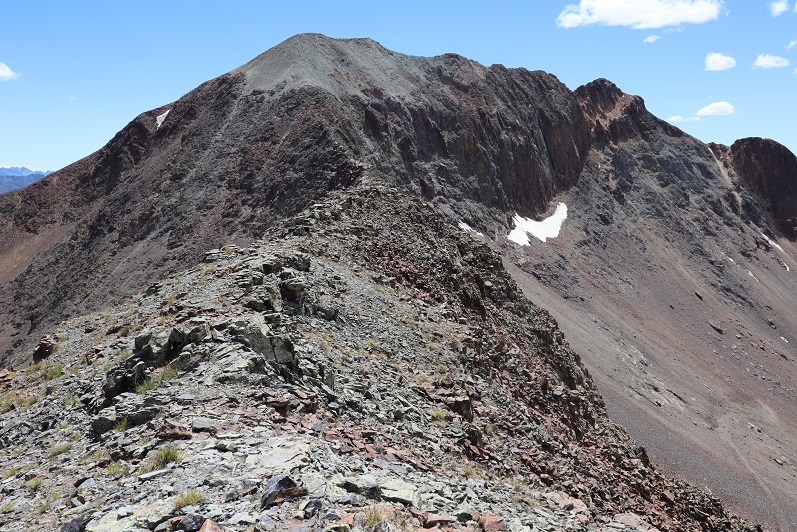
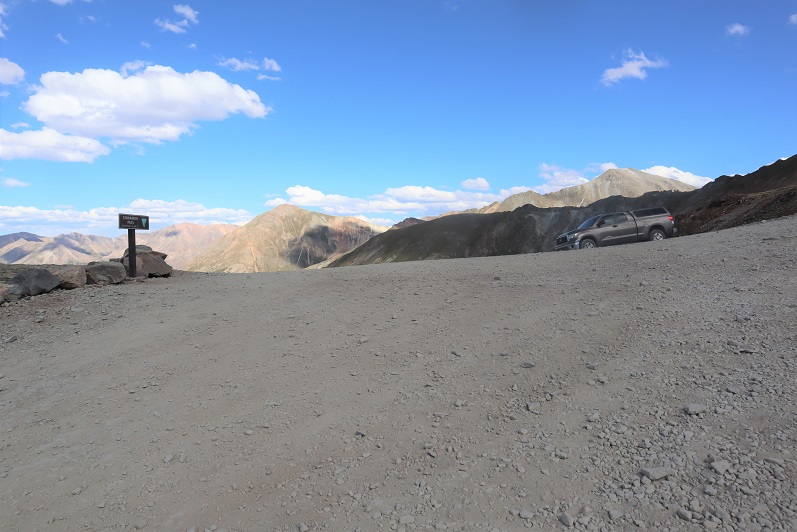
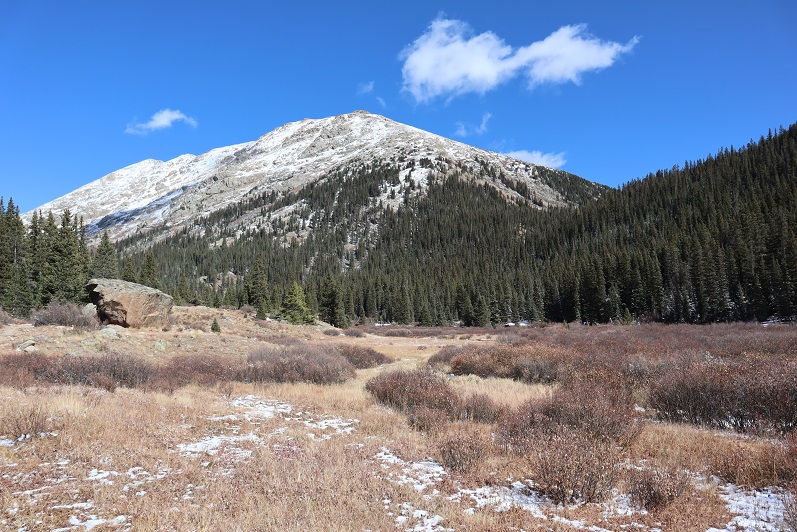
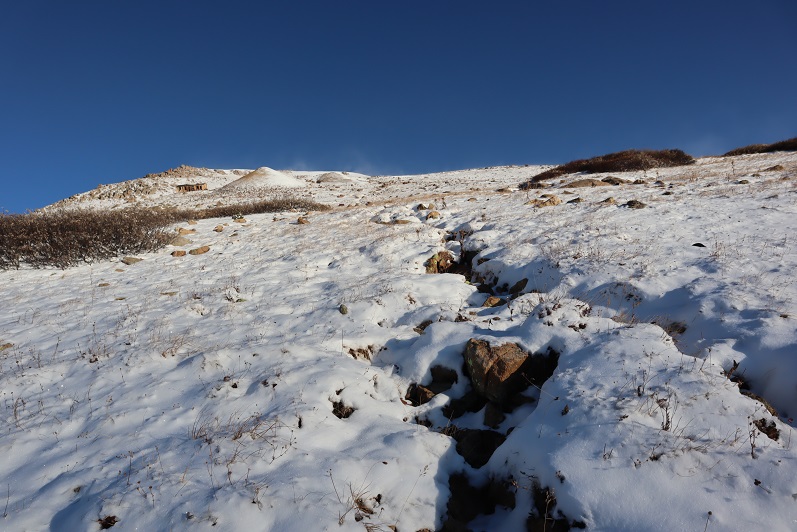
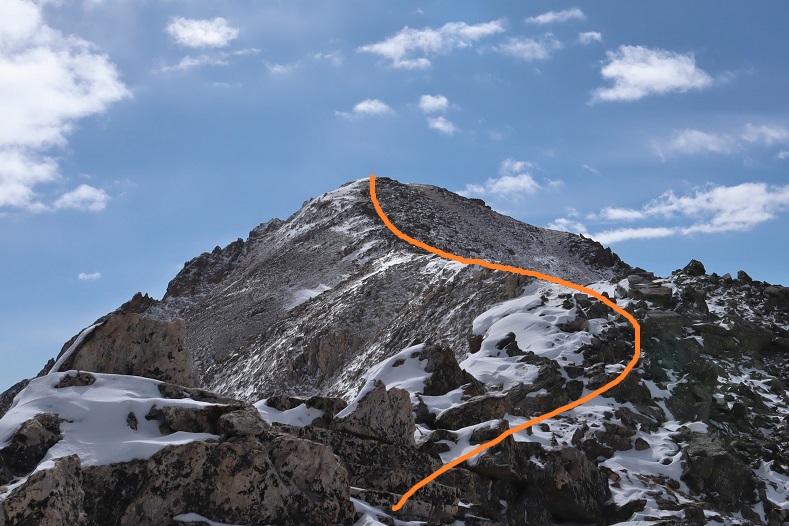
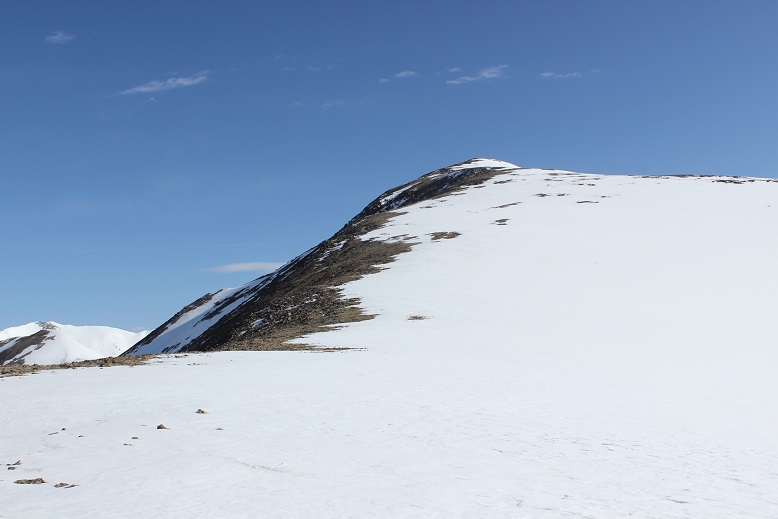
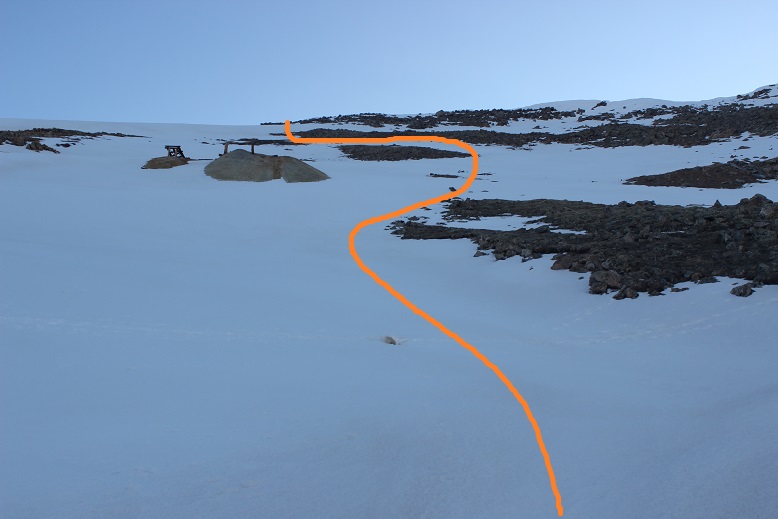
I drove up Eureka Gulch on a 4WD road. This is a dirt road, but a high clearance 2WD can make it all the way. I parked at 12275’ and was on the trail at 3:15pm. This was a quick and easy hike. From the parking area I could see the peak.
I know I’d already summited V5 earlier that morning, and after heading to town, putting together a trip report, hassling with Verizon being down and having a few work meetings (which luckily were over Zoom, not a phone call), I drove to the next trailhead. When I got there it was 3pm, and I noticed how quick the summit route looked. I bet I could get it done in an hour or so, and why put off for tomorrow what I could do today? I put on my hiking boots and went at it.
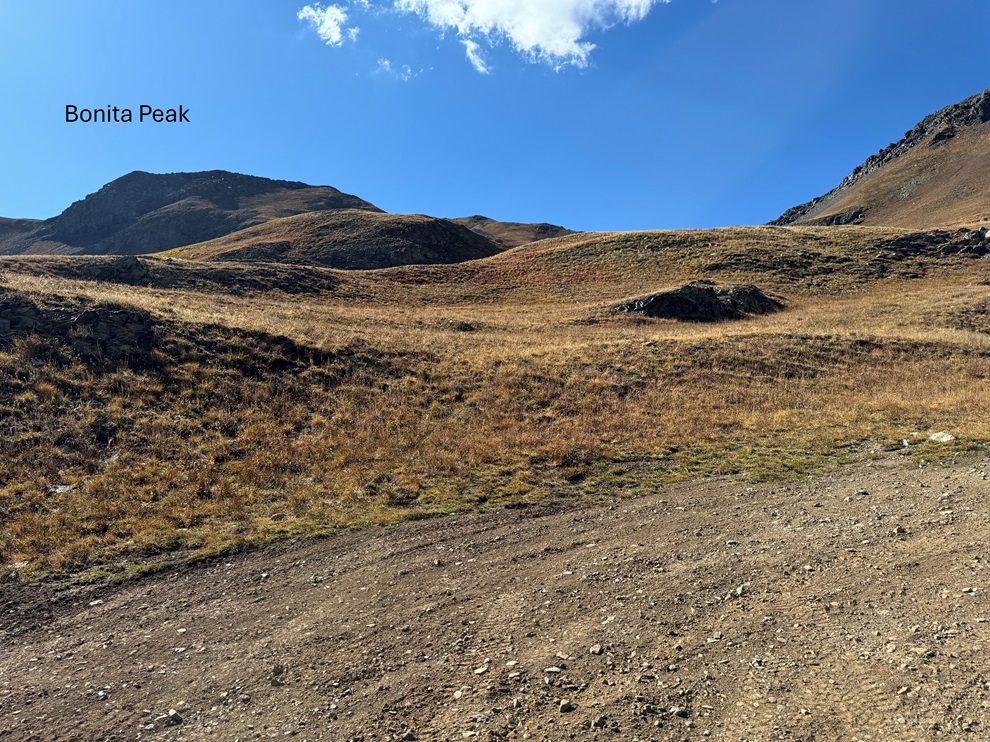
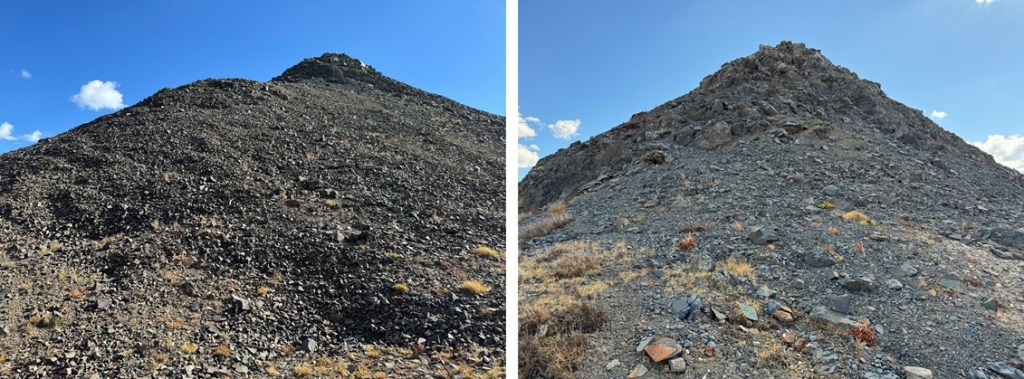
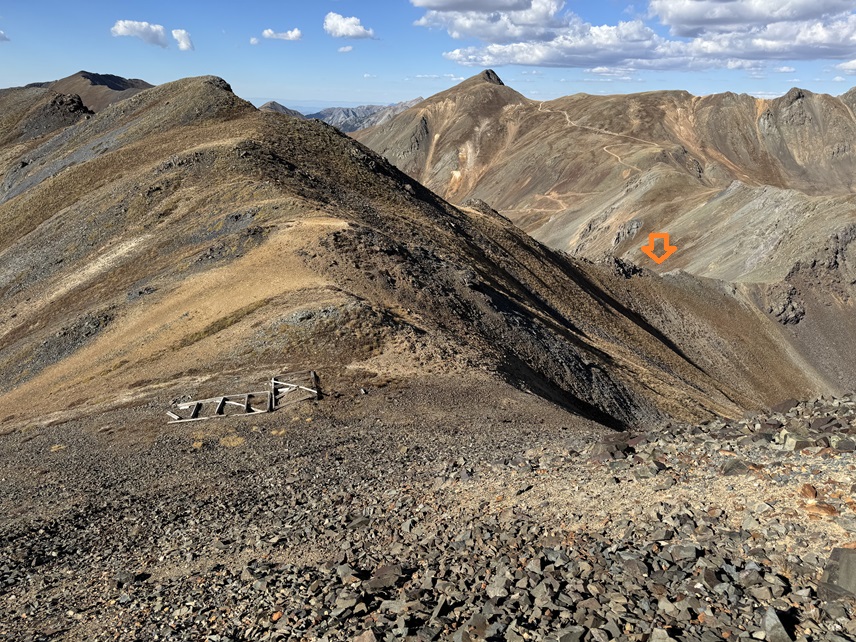
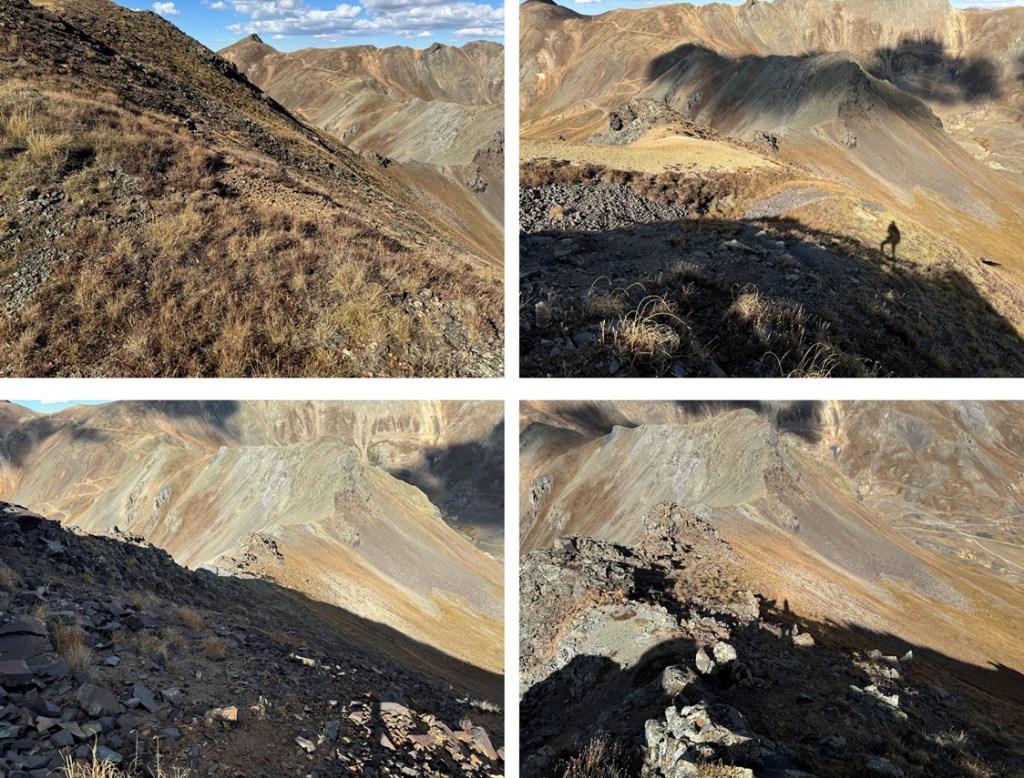
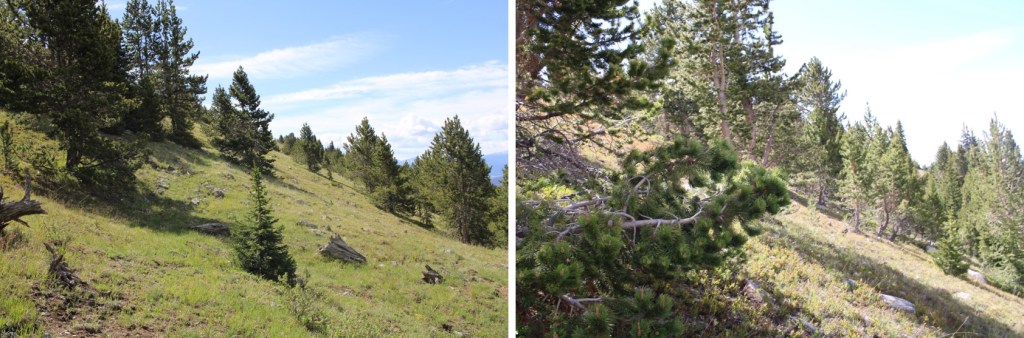
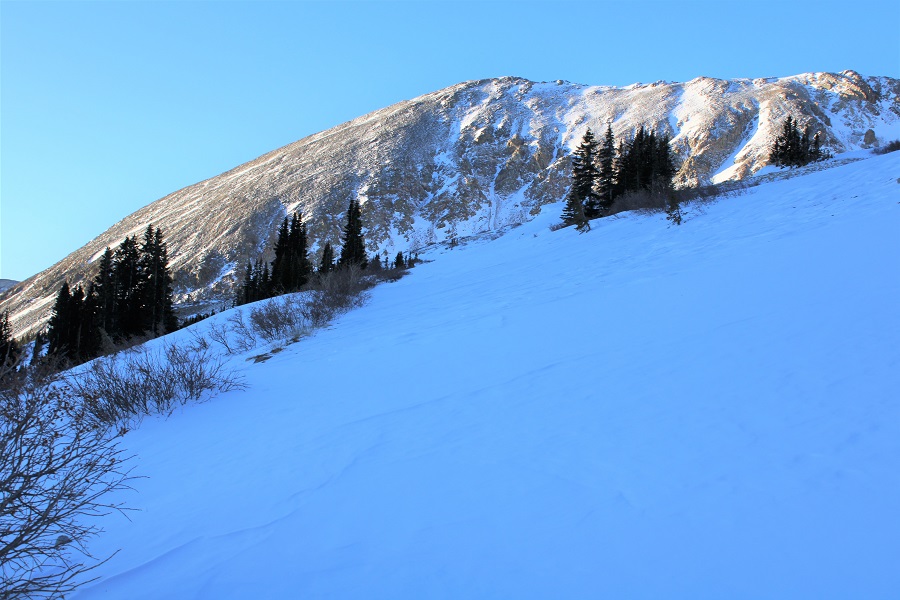
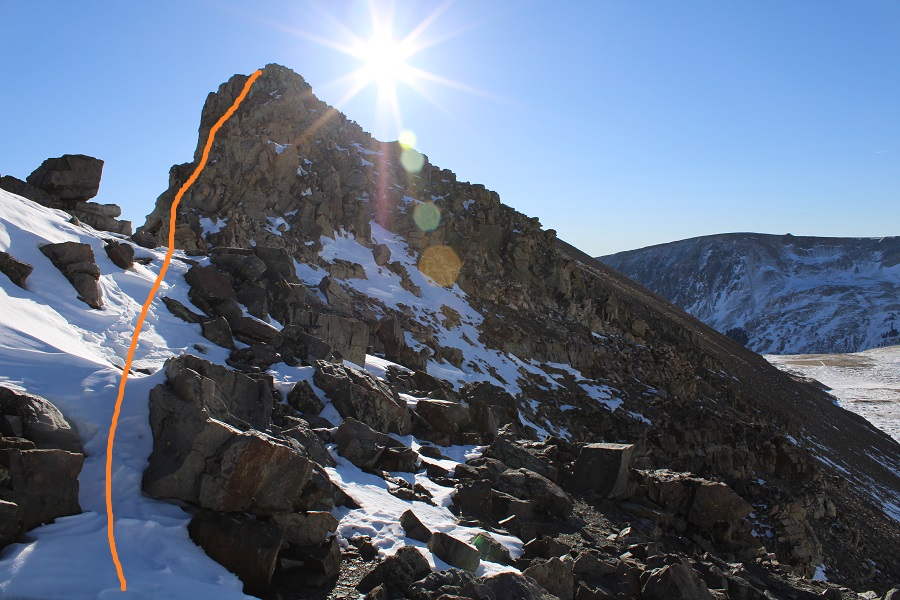
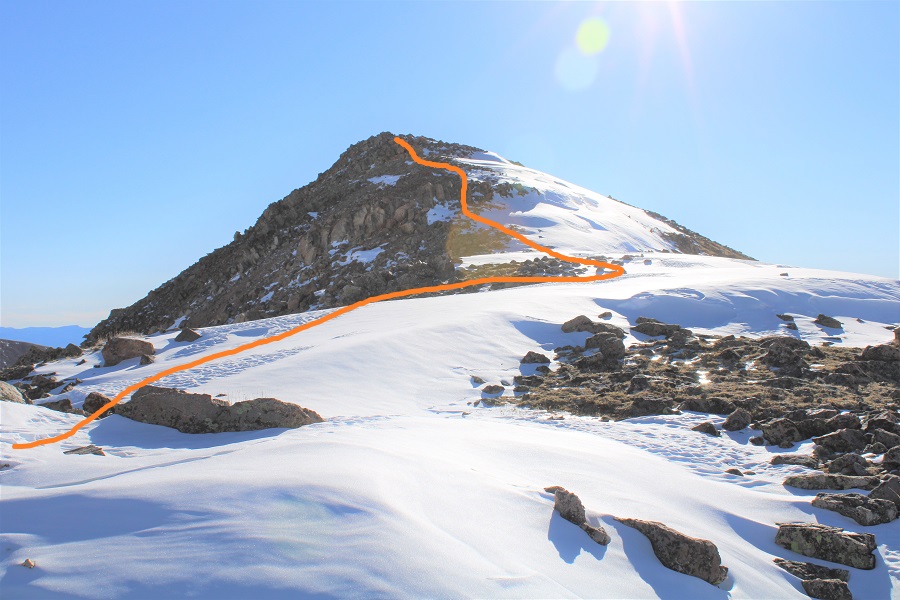
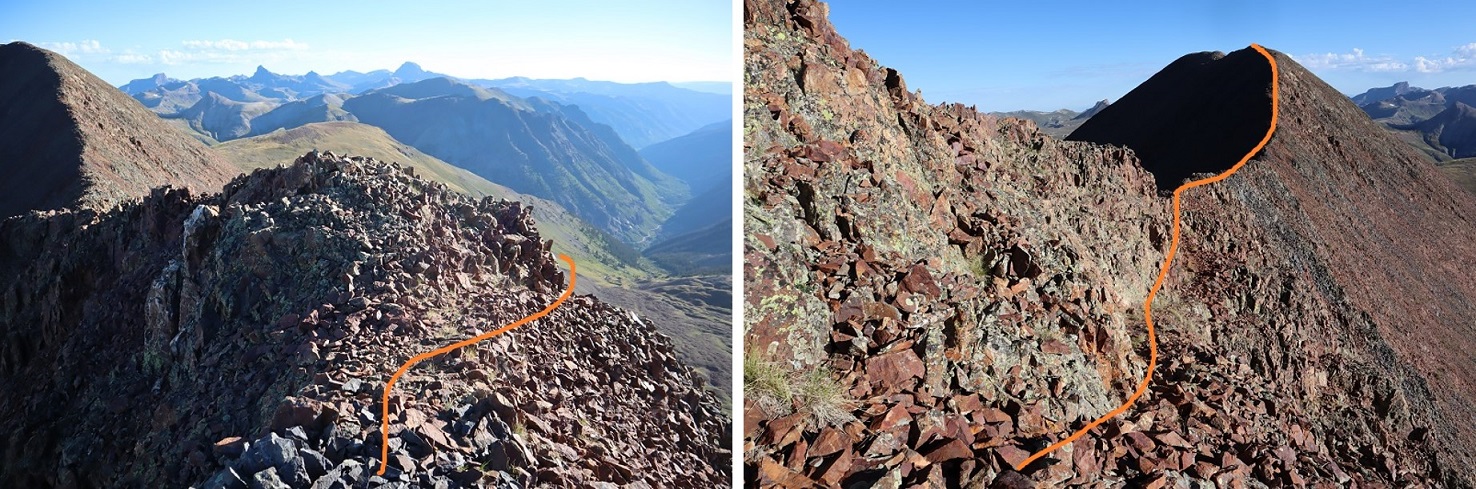
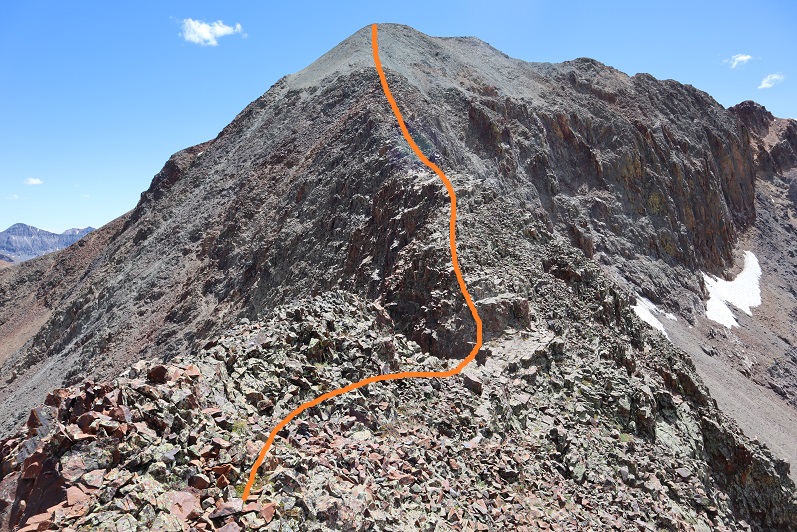
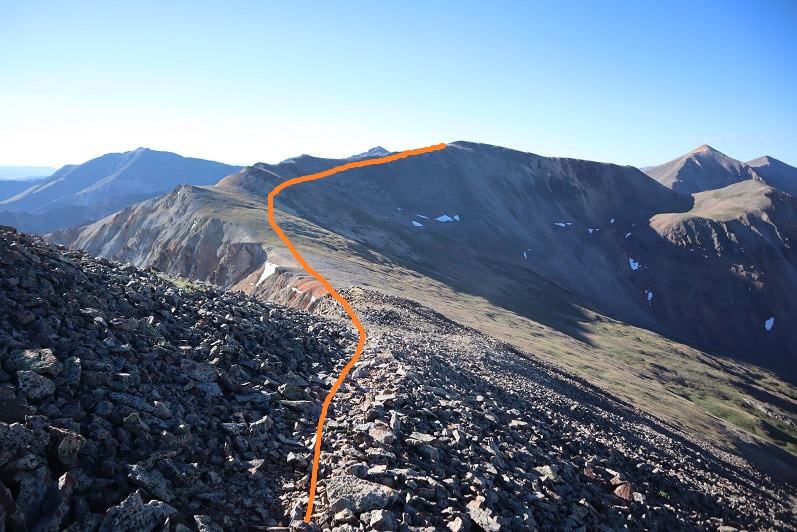
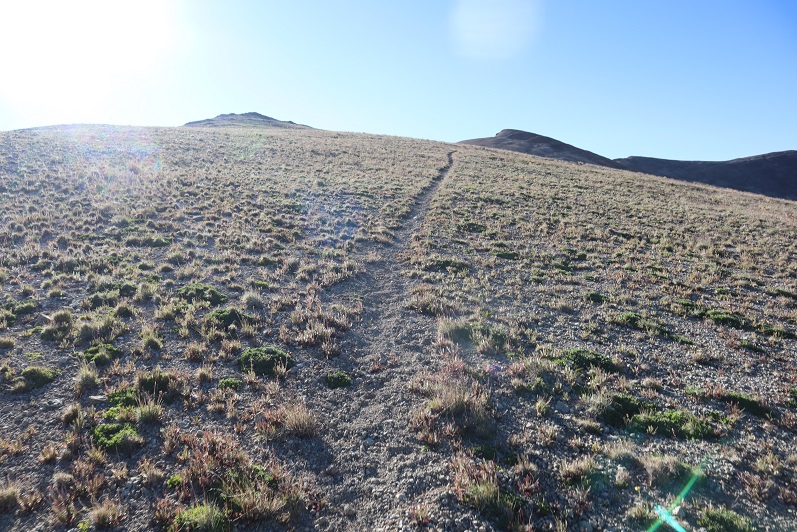
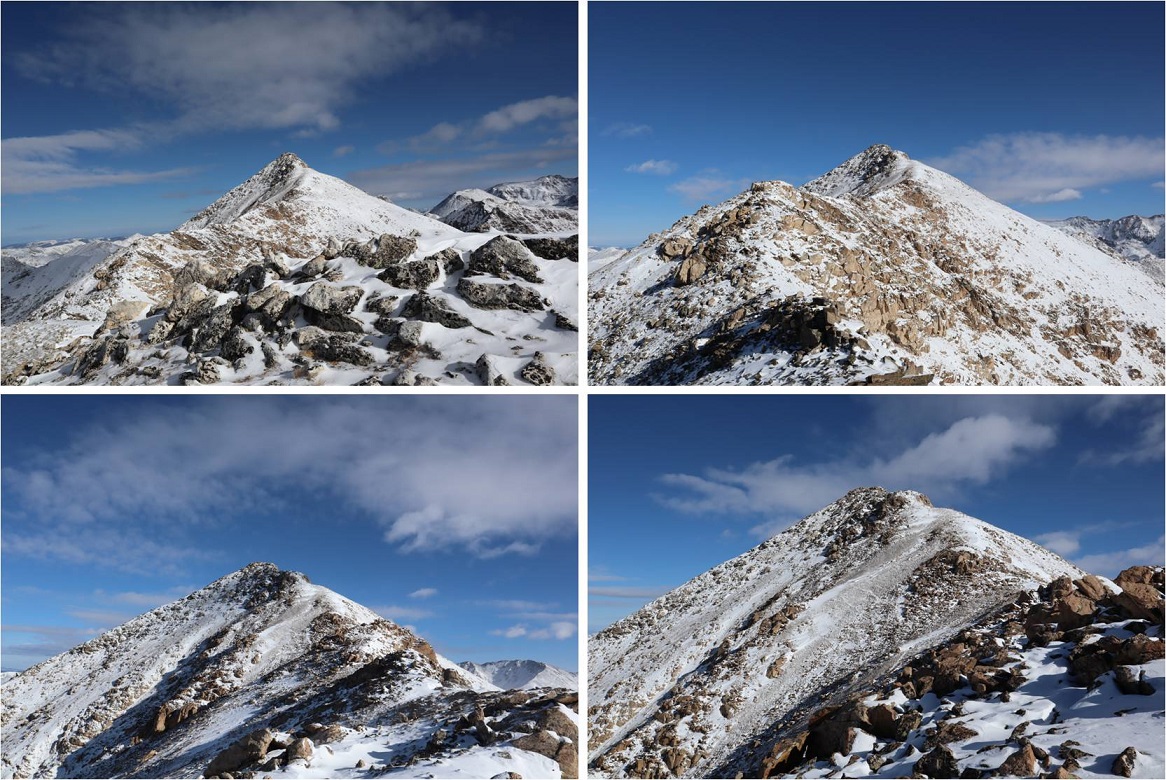
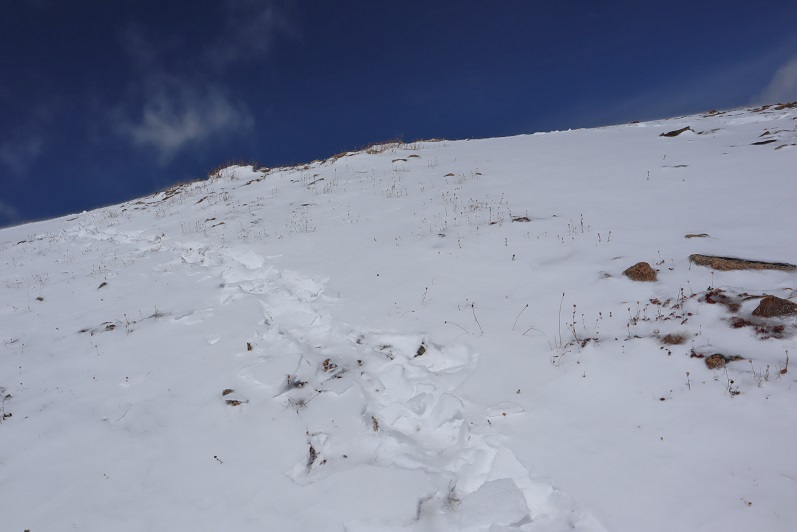
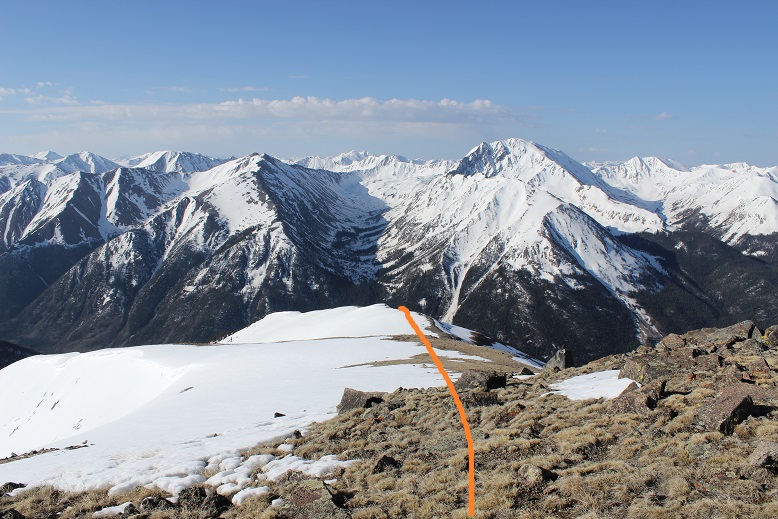
I started by heading west up the tundra to the ridge
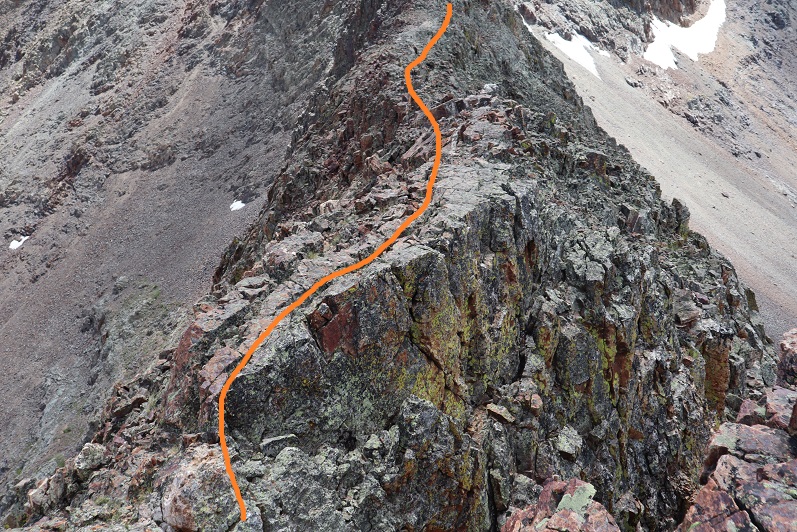
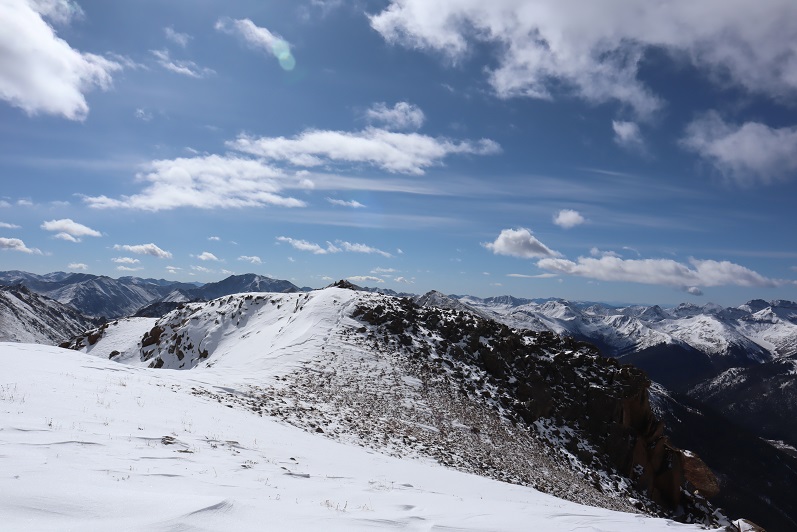
Once on the ridge I turned left and followed it south to the summit. The ridge started out with game trails below the rock outcroppings, and then turned rocky, but this entire hike was class 2.
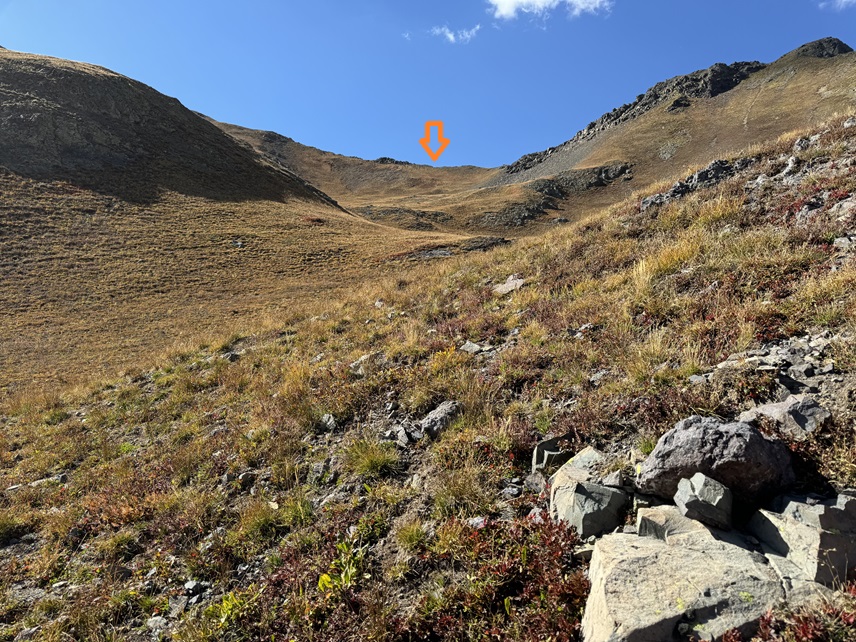
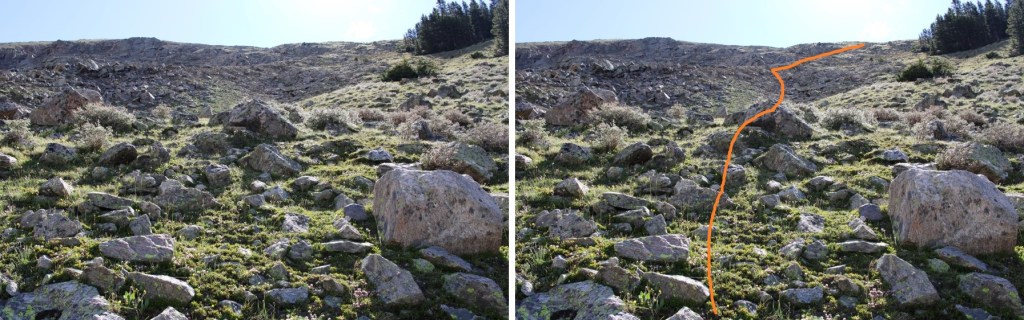
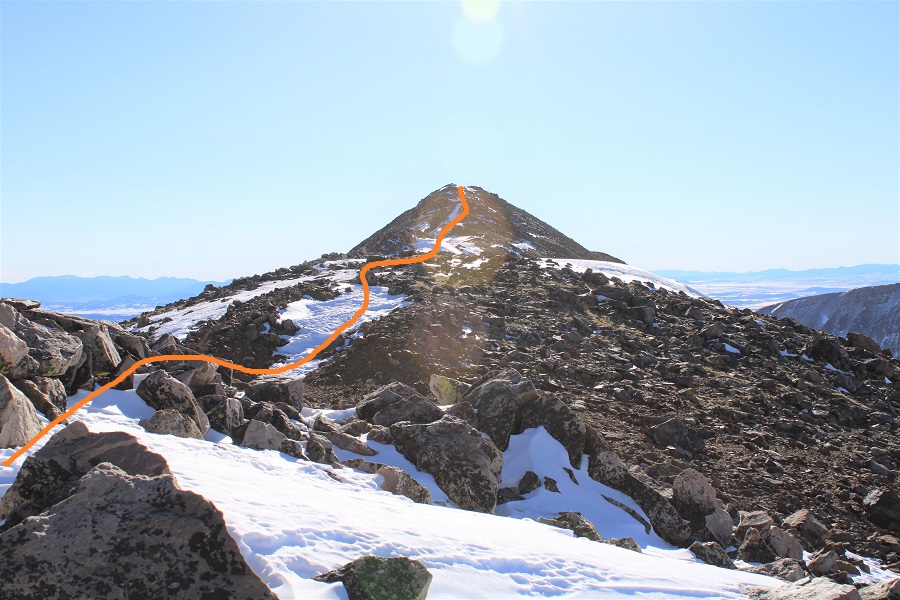
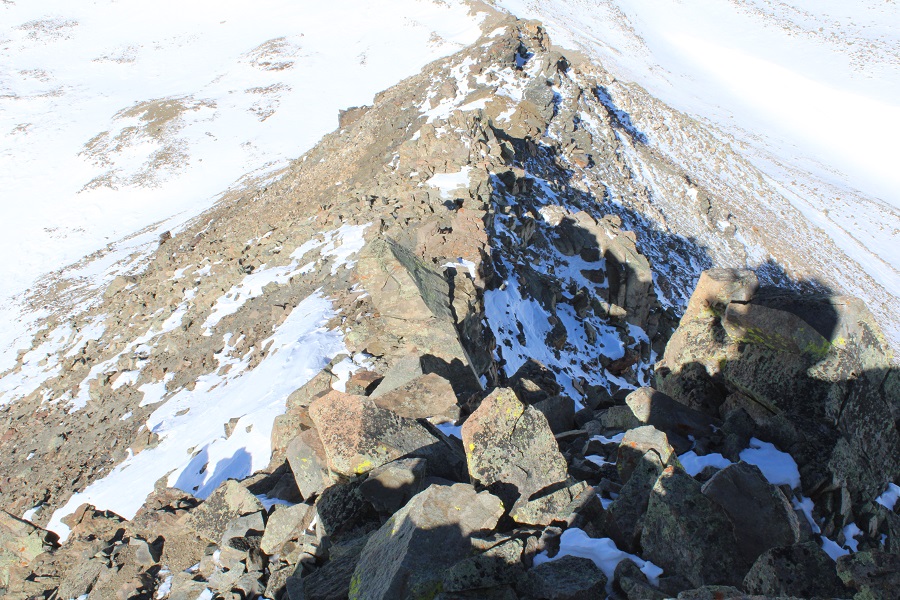
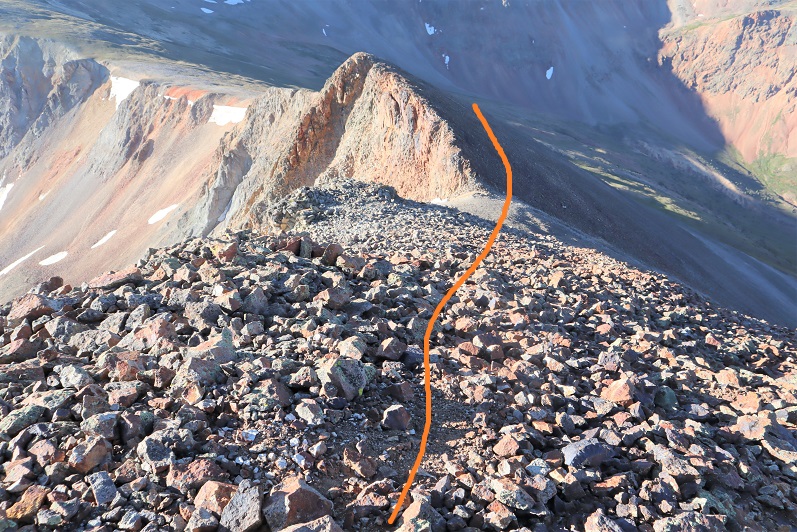
I came to an area filled with scree and headed straight up.
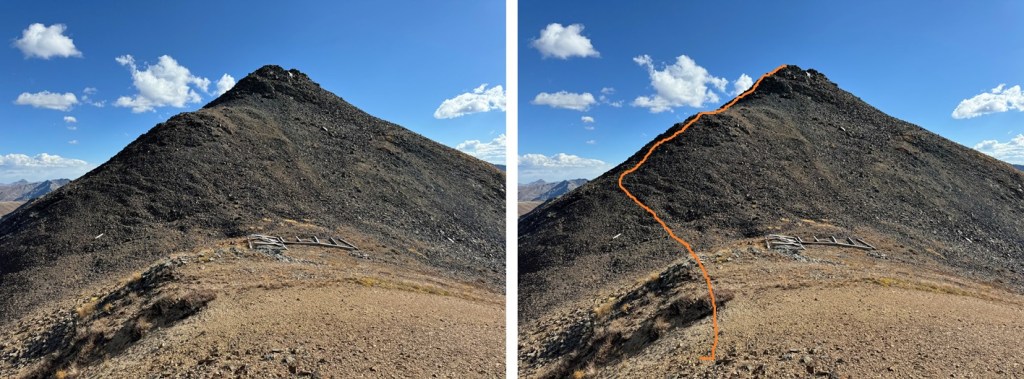
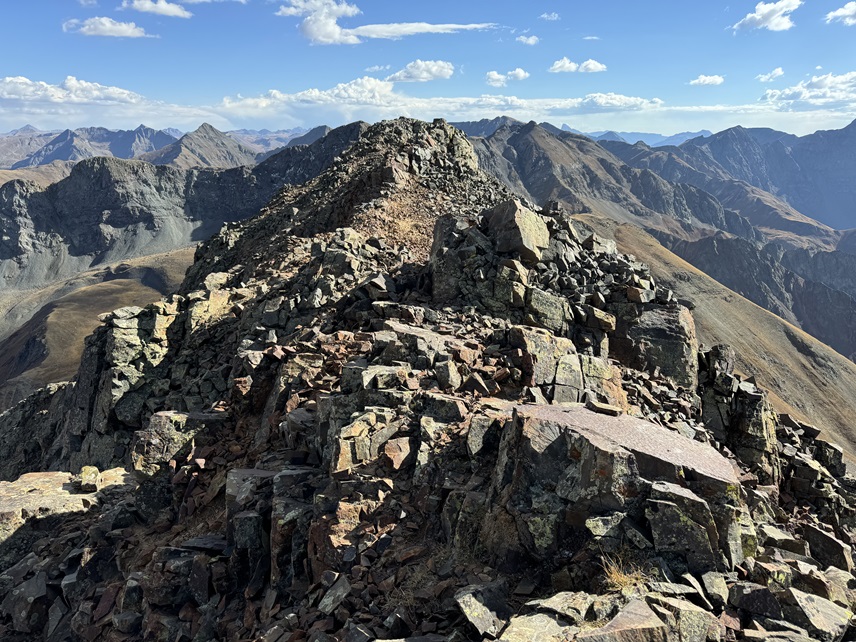
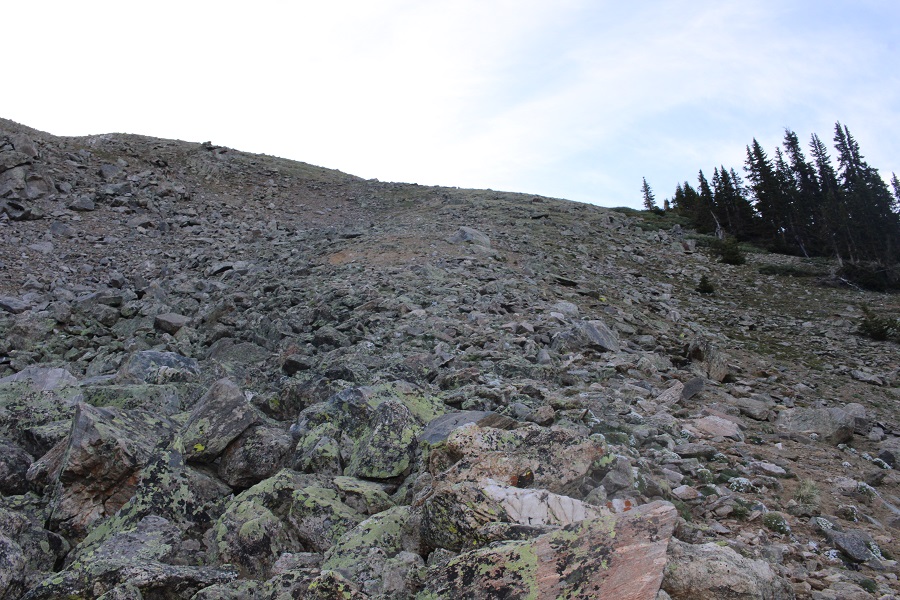
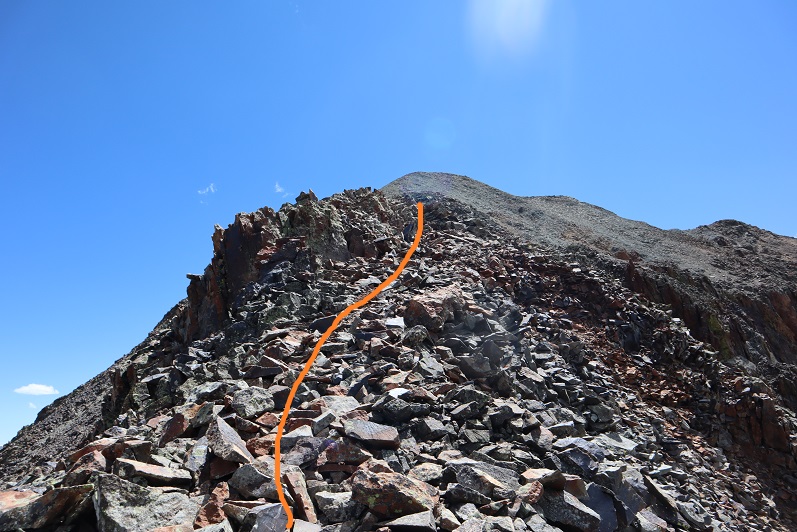
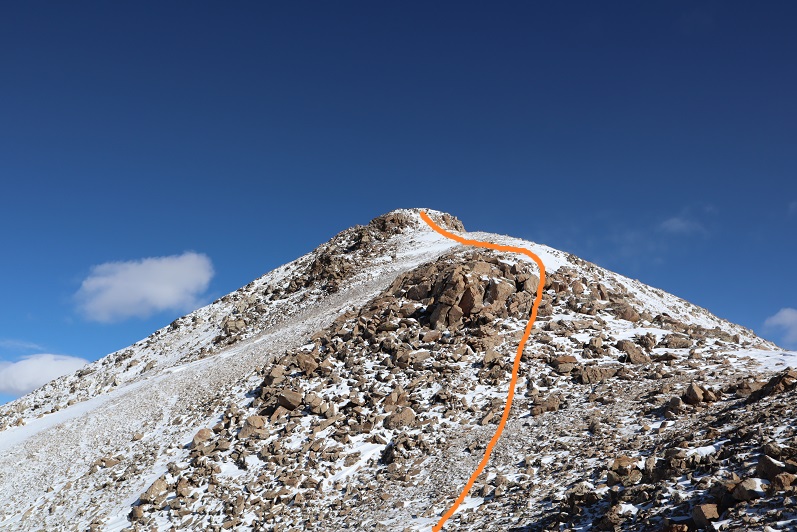
This is where the terrain became rocky (still class 2). I followed the ridge south to the summit
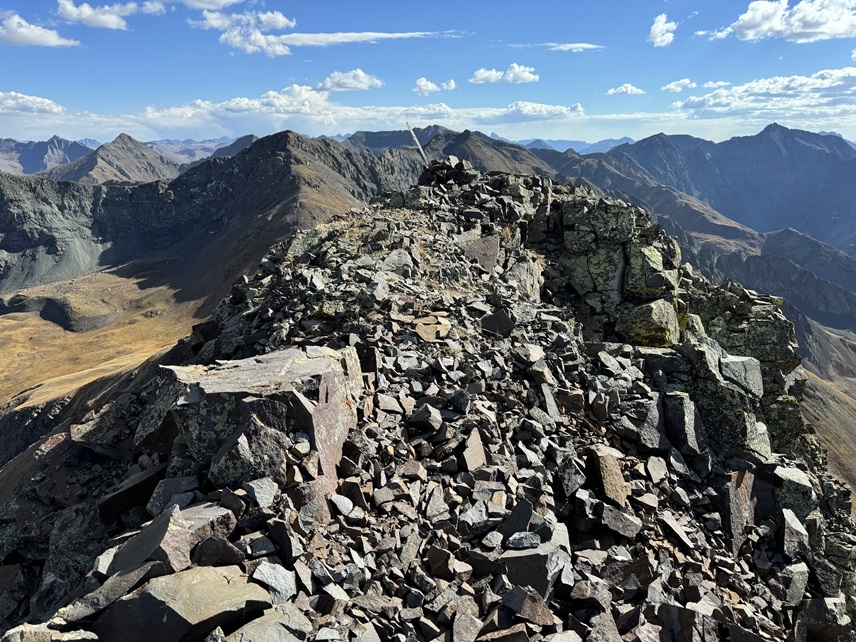
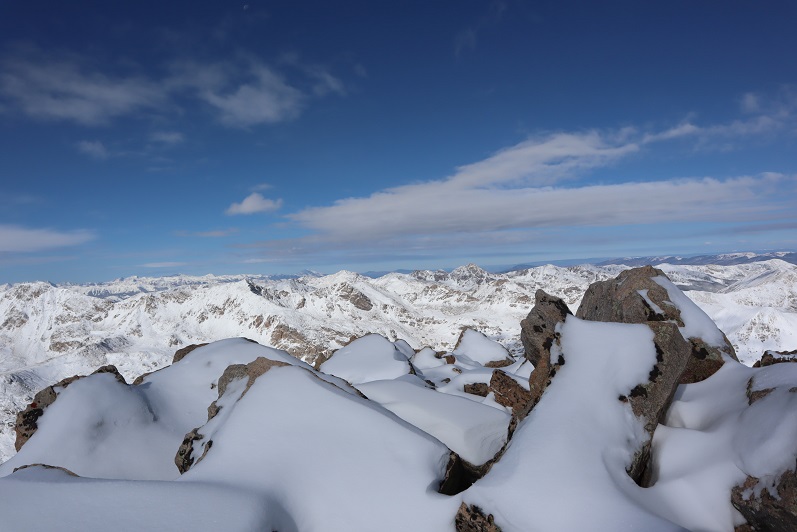
I summited Bonita Peak at 3:55pm
Bonita Peak:
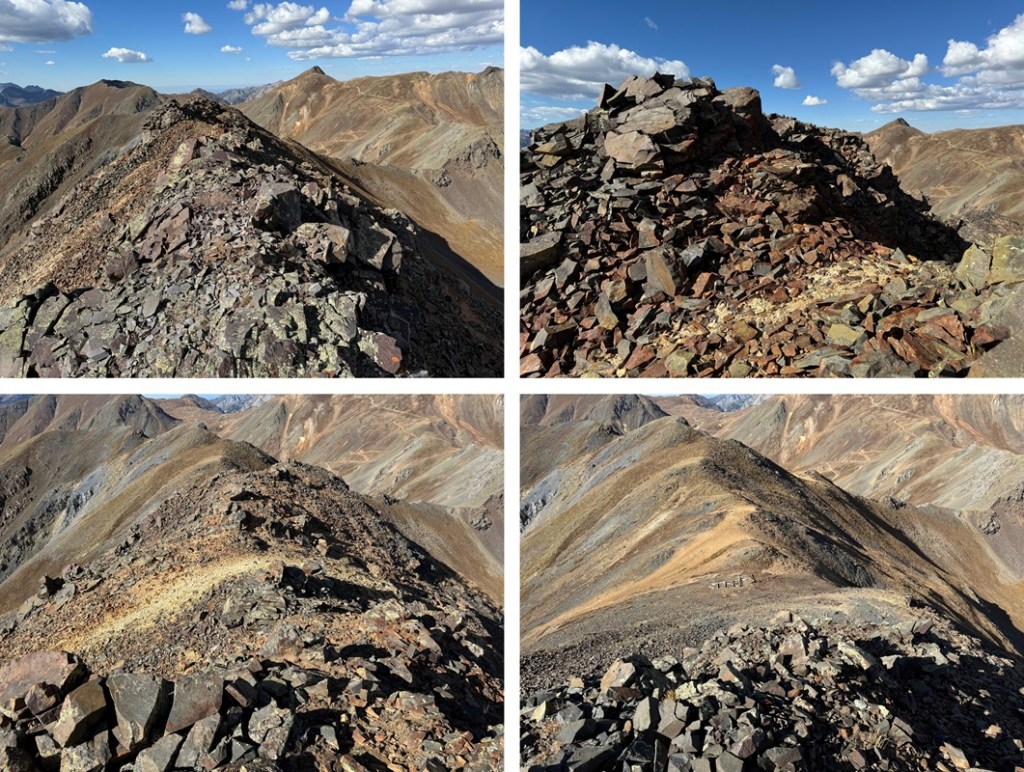
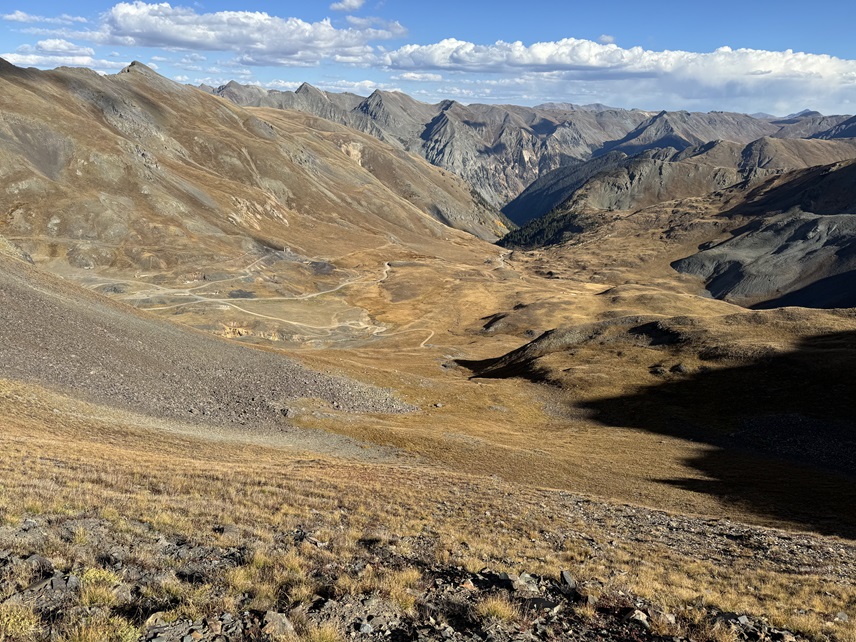
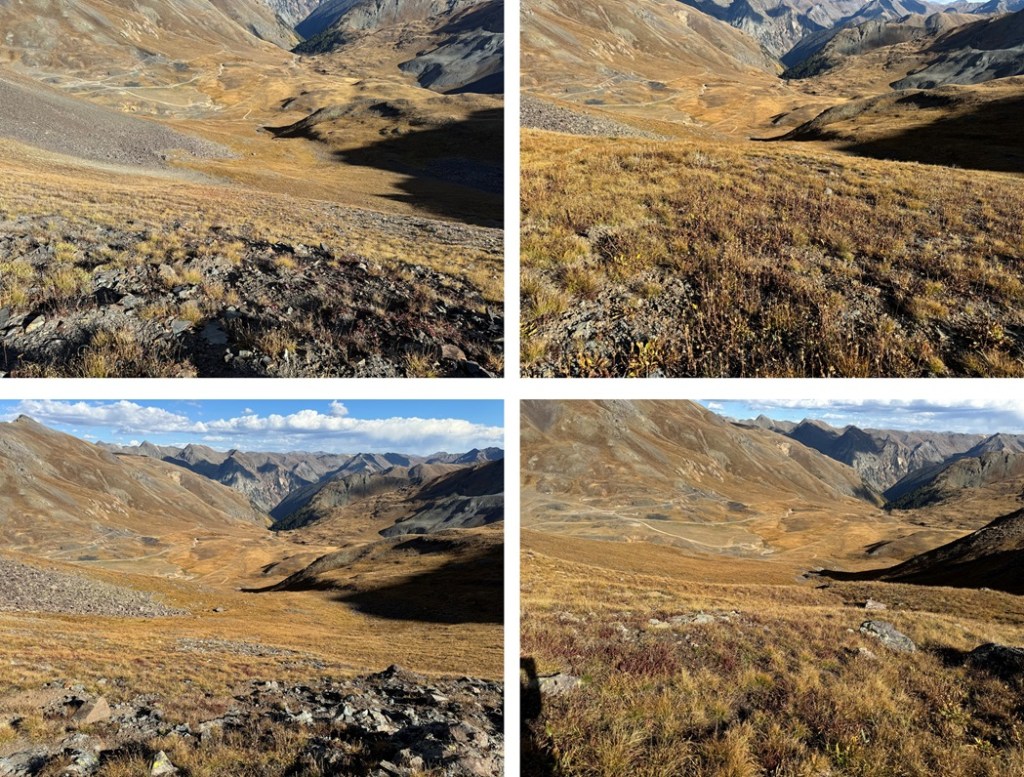
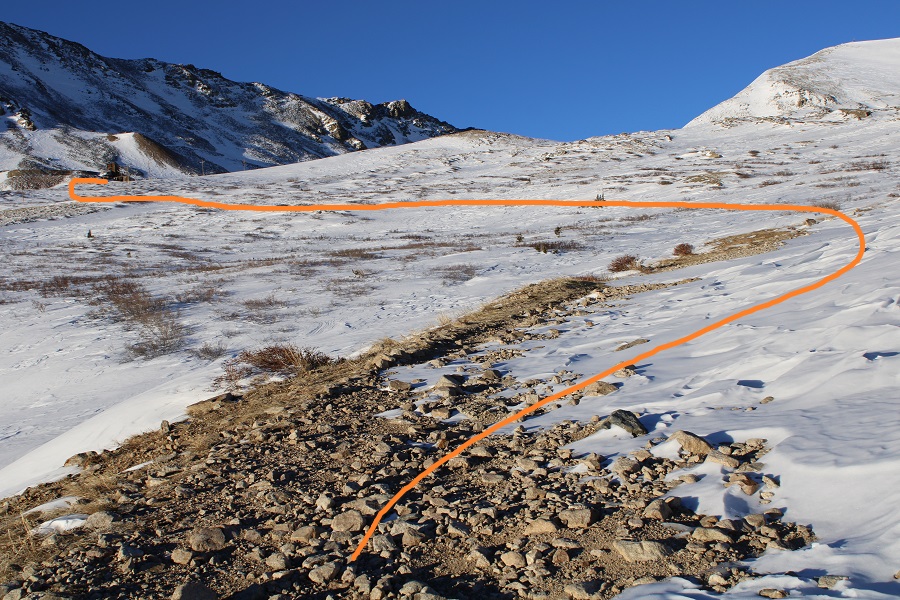
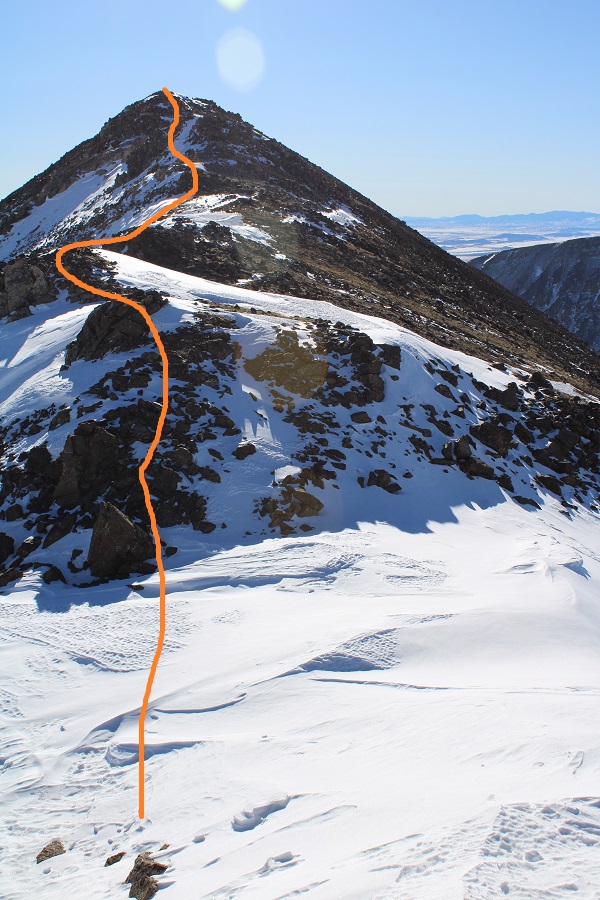
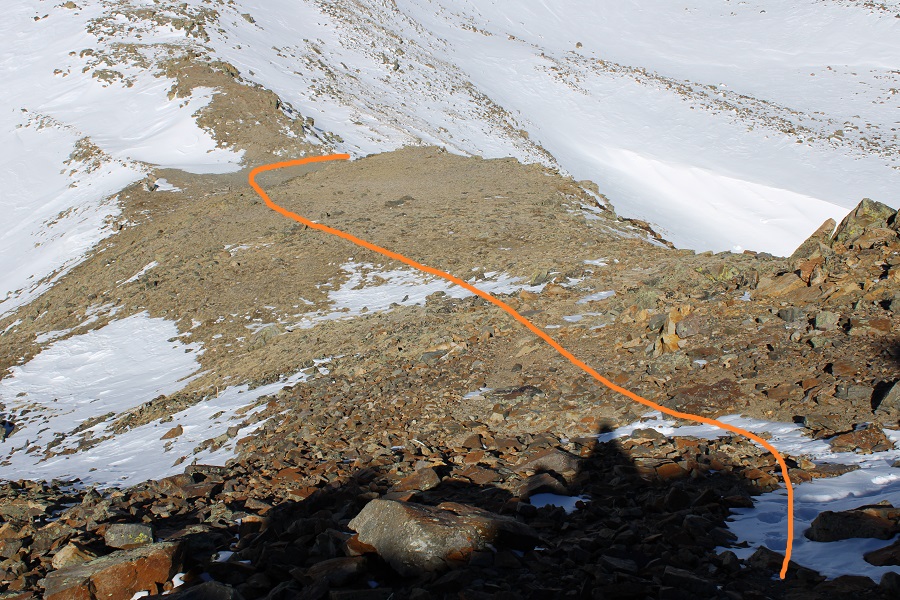
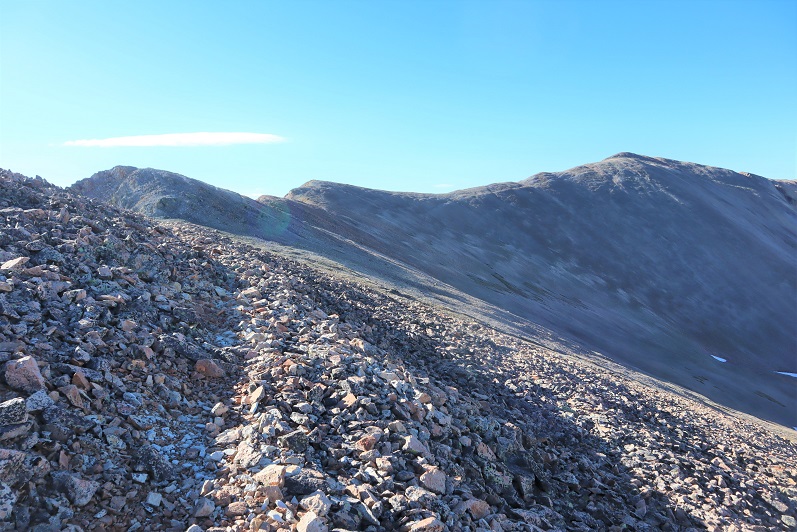
Now to head back down. I followed the rocky ridge north
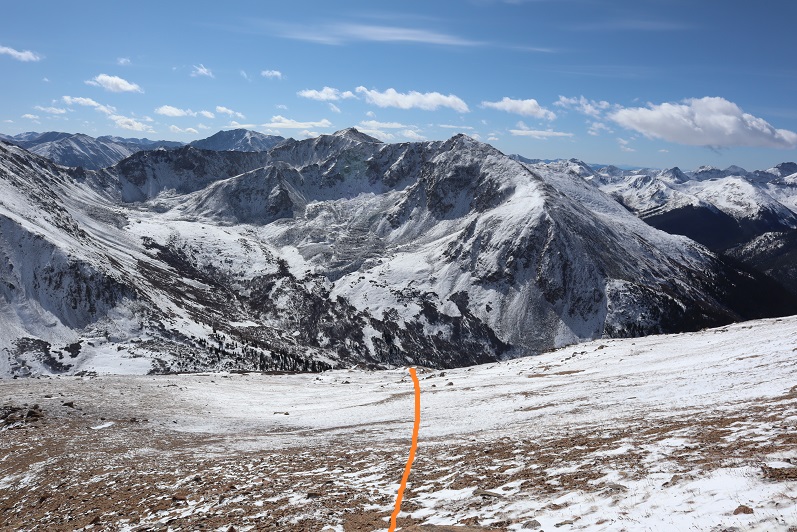
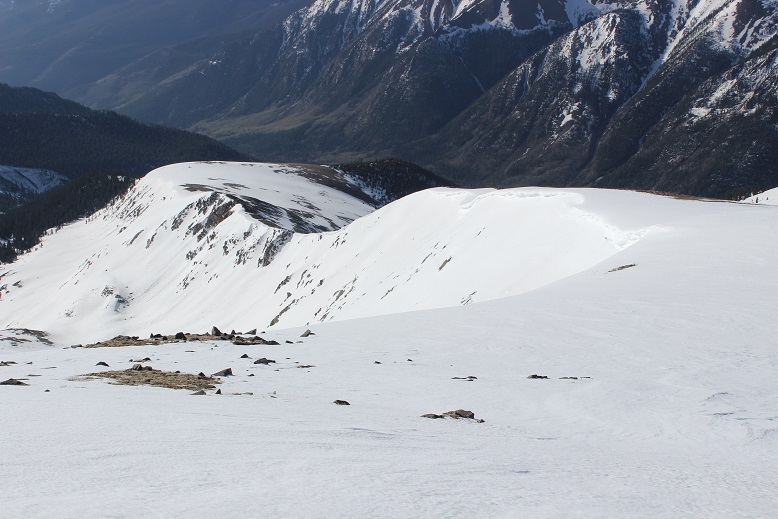
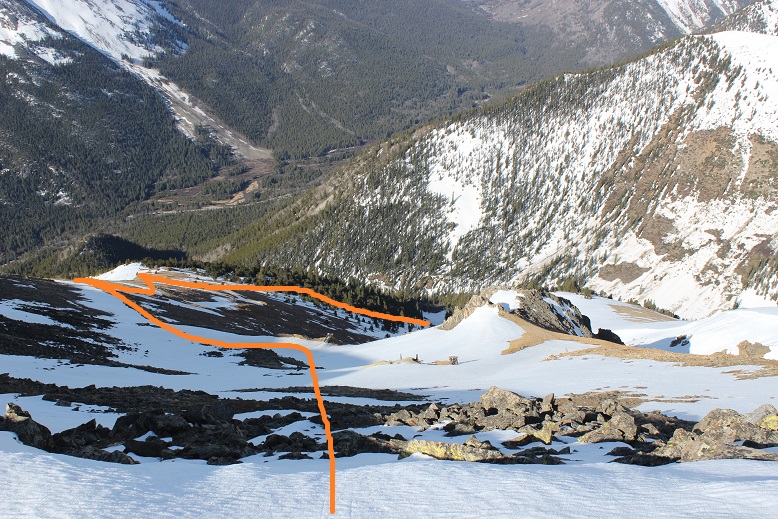
I continued following it as it turned to tundra. Here’s where I descended:
And then to descend down the ridge, heading east back to my truck.
I made it back to my truck at 4:20pm, making this a 1.62 mile hike with 1009’ of elevation gain in 1 hour, 5 minutes. Yep, it was a quick and easy hike.
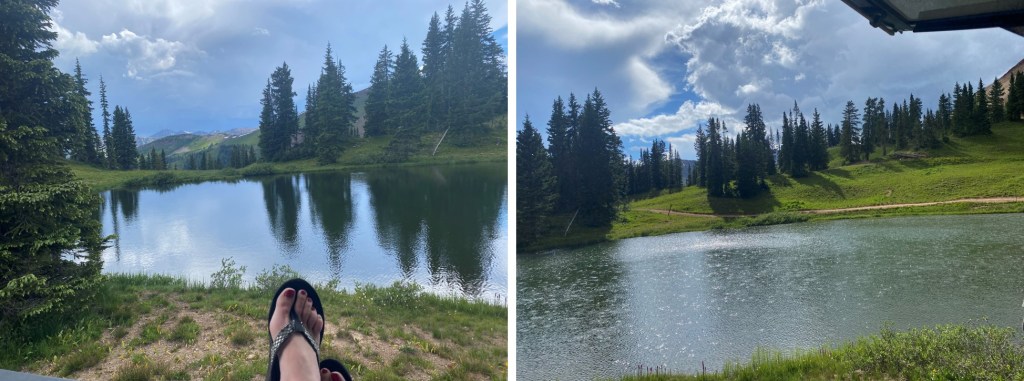
I made it to the Yule Pass Trailhead the night before, driving in on a well maintained, 4WD shelf road. I’m pretty sure a 2WD vehicle could have made it to the top, but passing other vehicles was a problem. Several times on the way in and out either I, or the other vehicle, had to back up on some pretty steep roads and squeeze into the mountain so the other could pass by.
It was a Thursday around 3pm, but all the dispersed camping spots were already taken. I later learned there were several friends camping together, and each felt they needed their own campsite. No worries though, as I was able to park by a small pond.
I was able to relax and read as a summer storm passed by, listen to my neighbors yelling at each other from across campsites (“DO YOU HAVE THE MATCHES?!?”, “WHAT????” , “I SAID, DO YOU HAVE THE MATCHES???” “I THINK IT RAINED WHILE WE WERE GONE” , “WHAT???” “RAIN! I SAID I THINK IT RAINED!!!” – they probably should have shared a common site) and visually planned out my route for the next morning.
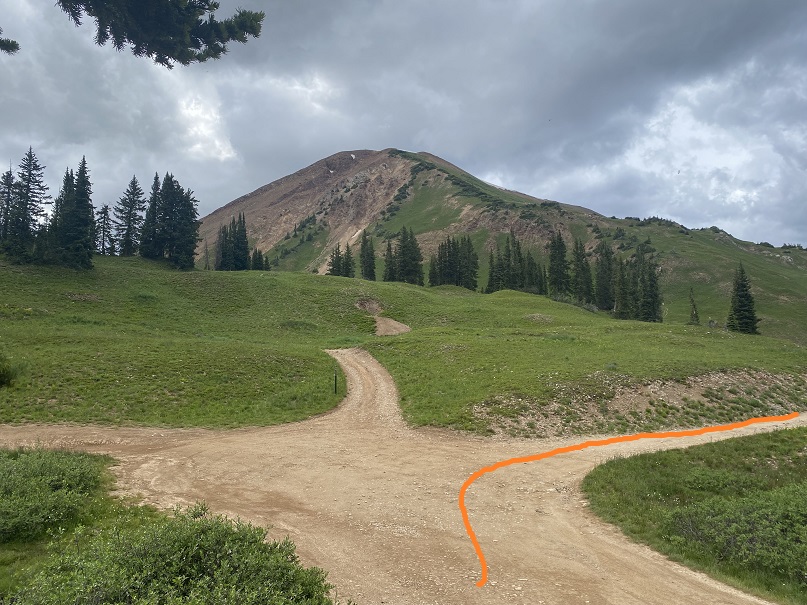
From my parking spot, there were several forks in the road. This is the correct one for Yule Pass
I contemplated hiking the 12er Cinnamon Mountain before bed, but the thunder and lightning didn’t stop until it was too late to make an attempt, so I made it an early night, and was on the road at 3:30am, in an effort to finish my hike before the early afternoon storms materialized.
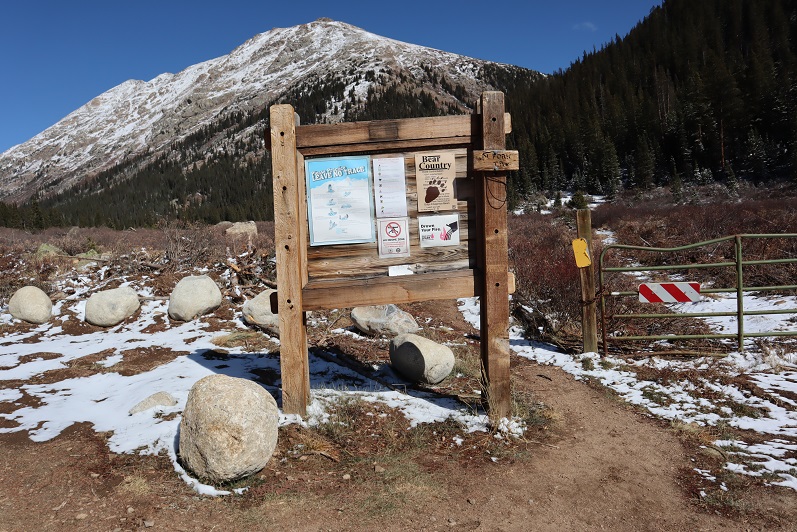
I followed the 4WD road to the Yule Pass Trailhead, Yule Pass Trail #576
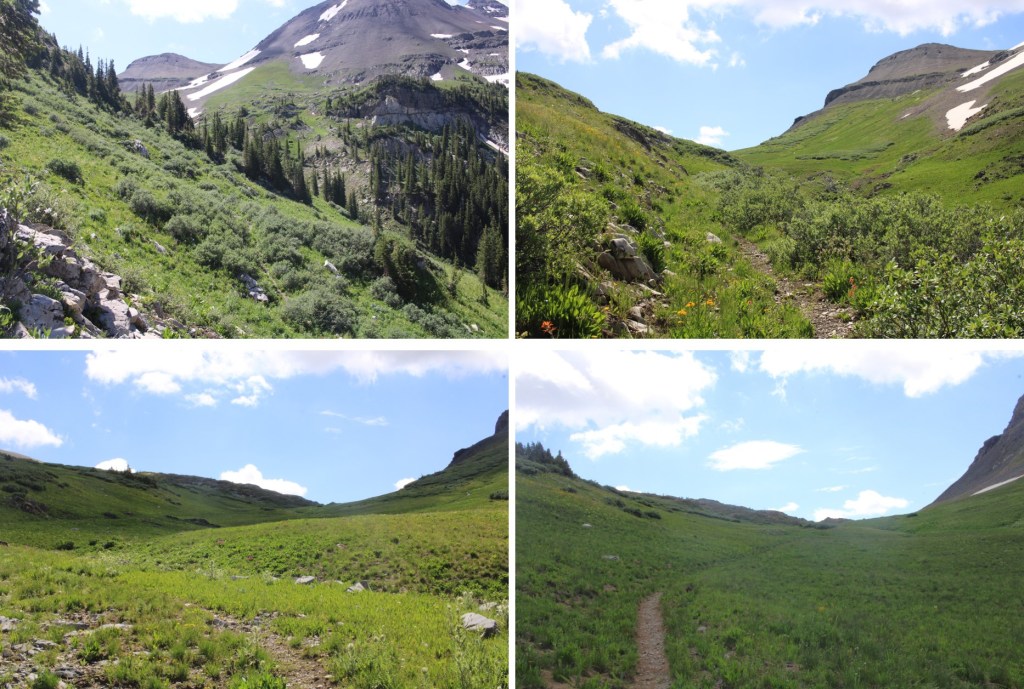
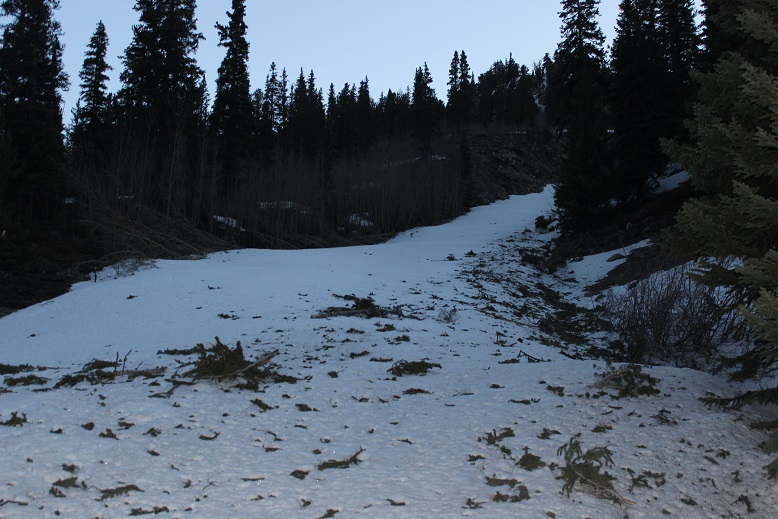
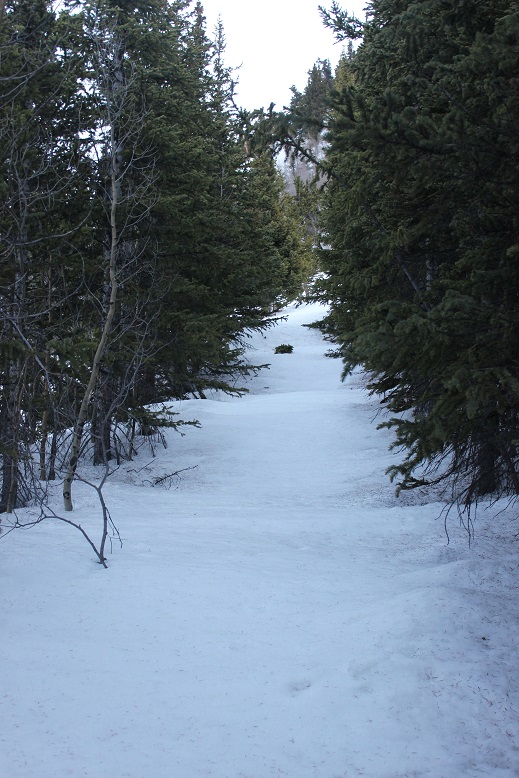
From there, I followed Yule Pass Trail to northwest. This trail used to be a mining road, but the mountain has re-claimed it and is healing its scars. In a lot of areas it’s impossible to tell there was ever a road around this mountain. Some areas were steep, but the runnels were all crossable.
After hiking for 2.5 miles, I came to a gully just before Yule Pass. I would use this gully to access Treasury Peak. Also note the snow covering the trail to the left. I was unable to see this in the dark on my way in, and it proved a problem on my way out. I had to re-trace my steps, but I was able to stay safe by exiting down the same gully I ascended.
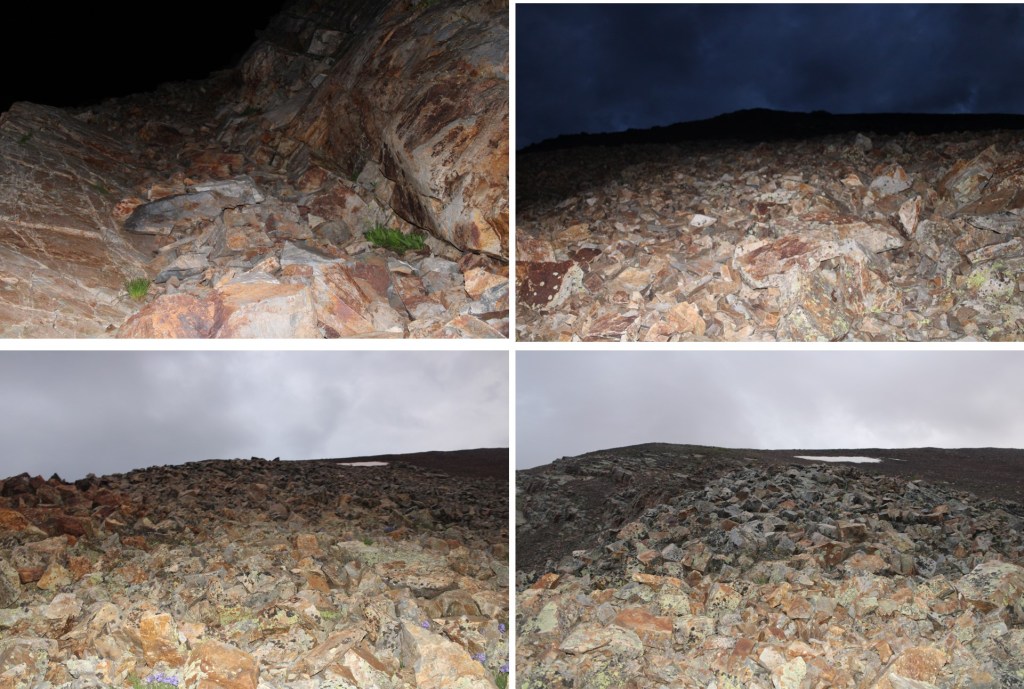
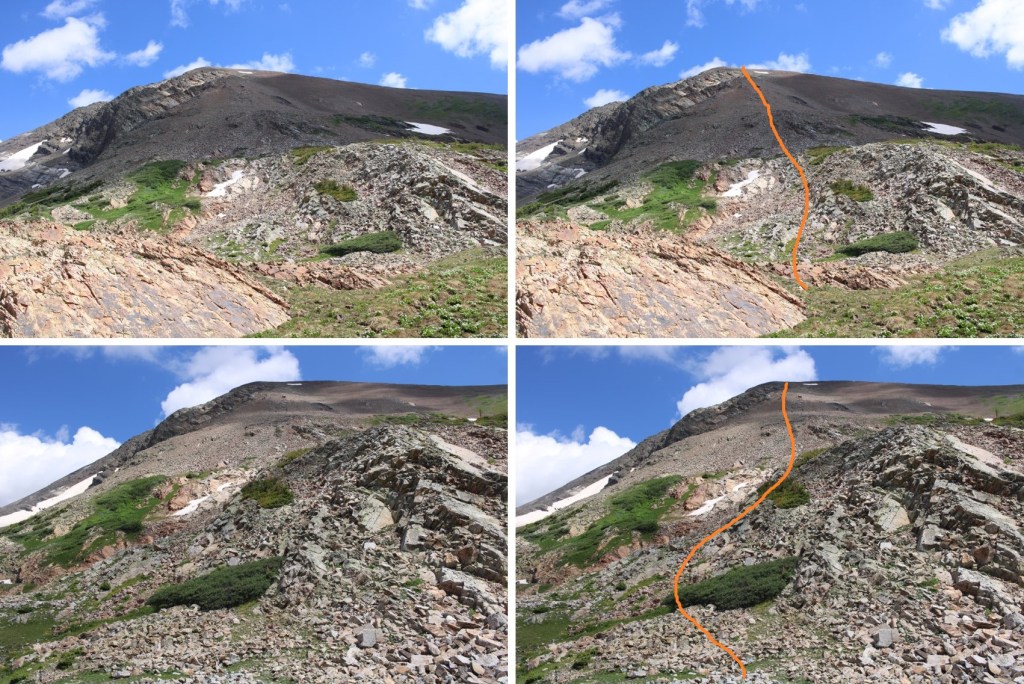
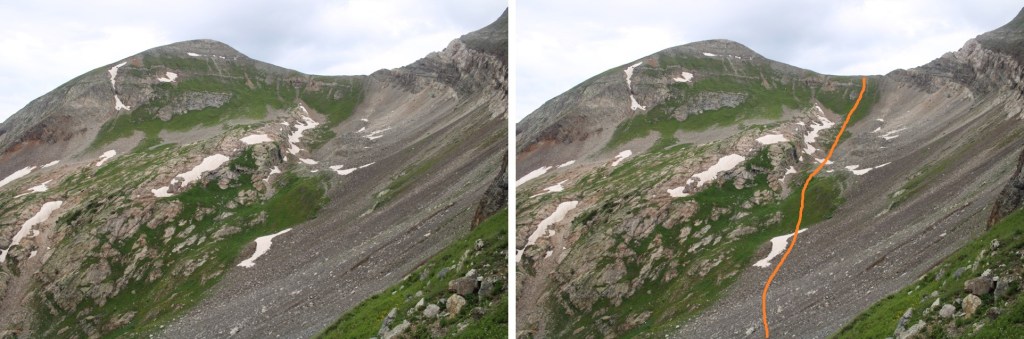
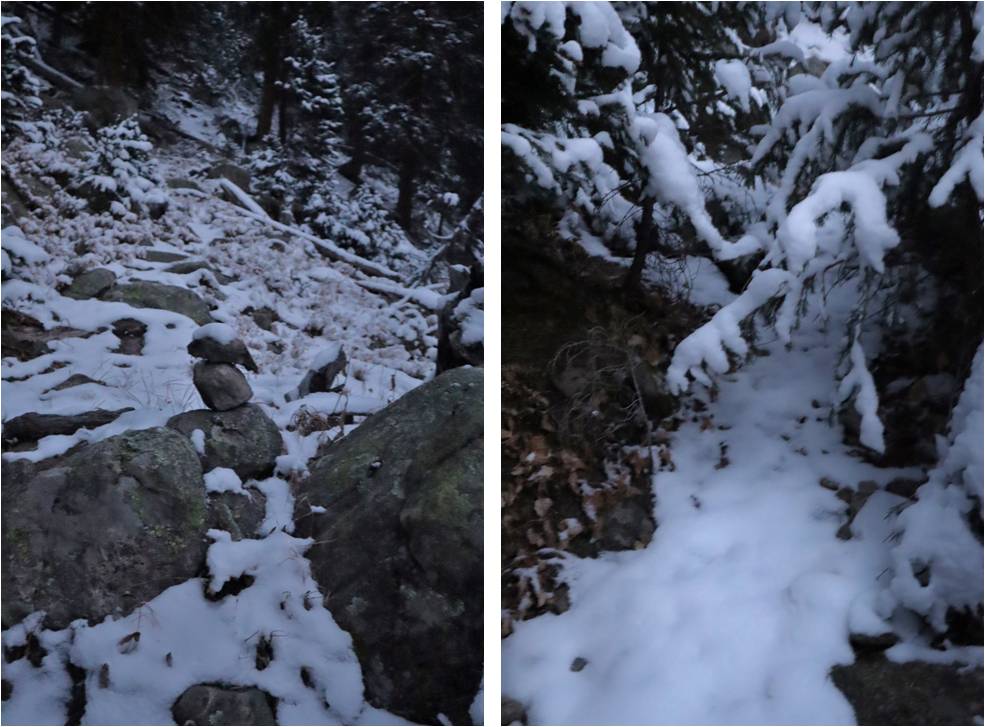
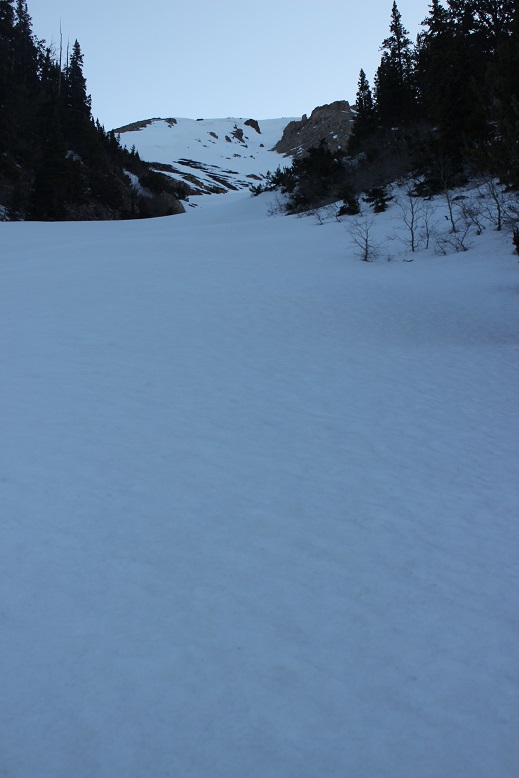
I’d made great time, and it was still dark. I couldn’t see much, so I waited for 20 minutes for the sun to rise. There were a lot of clouds in the sky, and the sun refused to make a timely arrival, so I continued on. Here’s what my ascent looked like
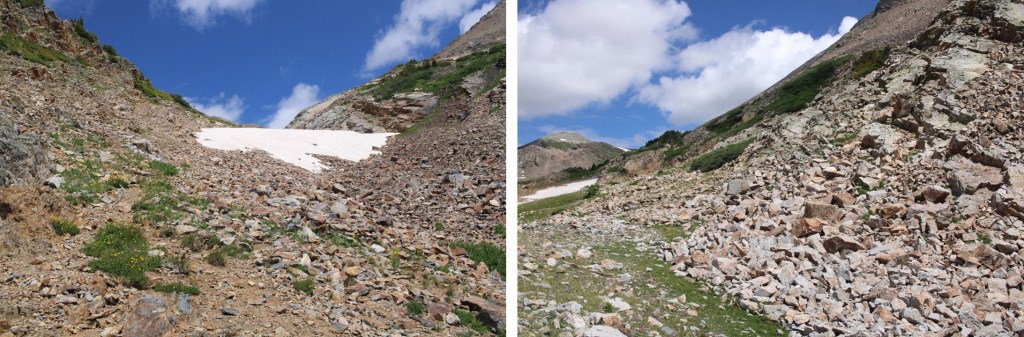
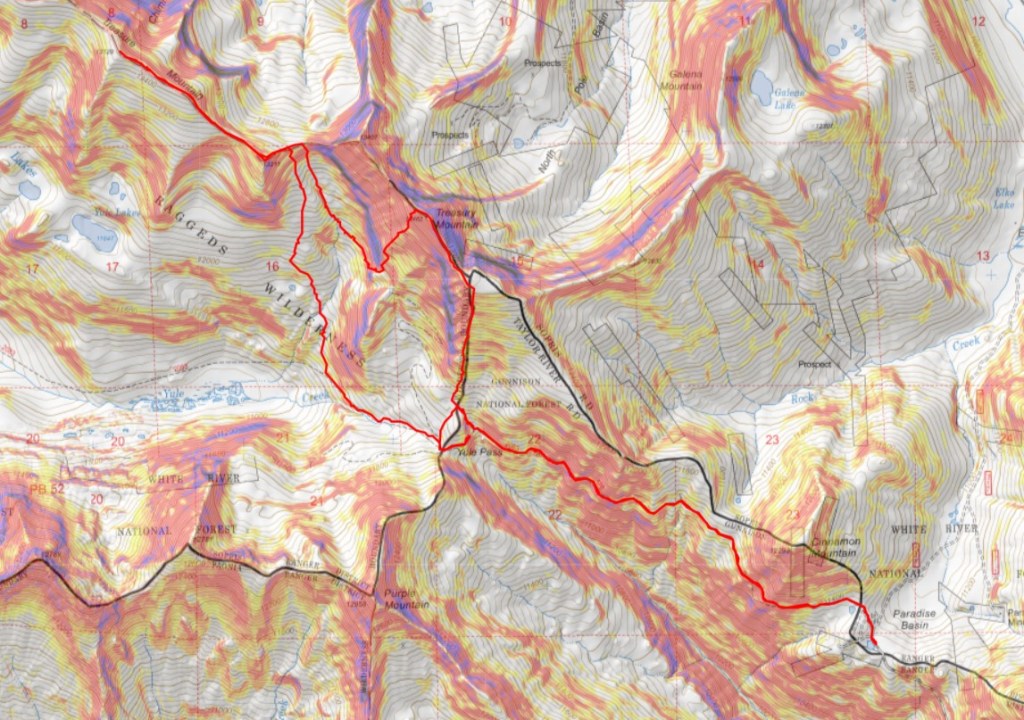
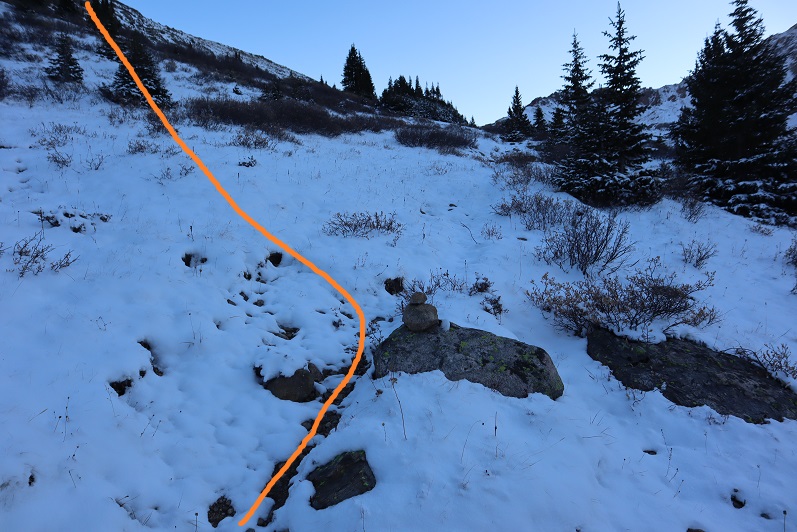
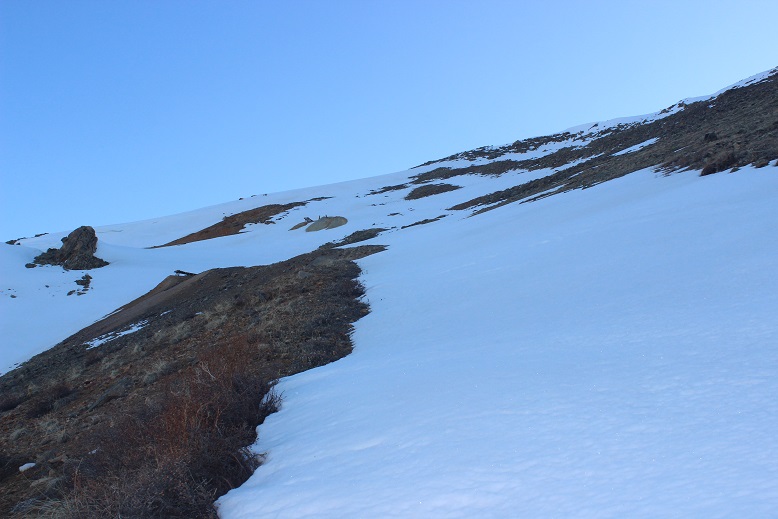
I know those pictures weren’t helpful, so, from later in the day, here’s a visual of how I ascended the ridge to Treasury Mountain
The terrain was full of loose rocks and smooth slabs, which gave way to smaller loose rocks and scree. No worse than 2+. I wore a helmet, and stuck to the runout until I made it to the ridge.
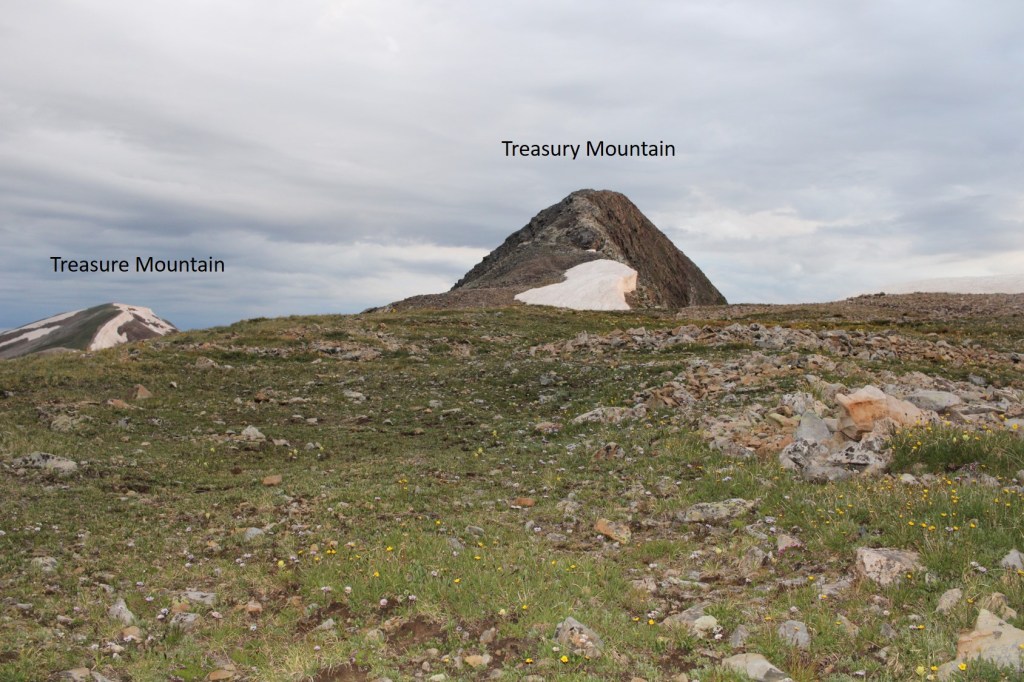
Once on the ridge, I could see Treasury Mountain to the northwest
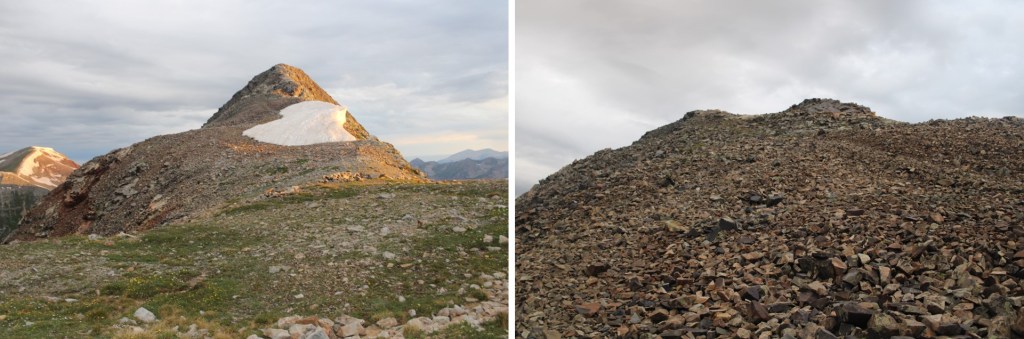
This was a straightforward ridge hike, until the last bit, where the ridge became a series of slabs. These would have been sketchy if they were wet, or if my shoes were lacking traction, but I was able to take the smooth rocky ledges to the summit. There’s a class 2 bypass below if needed.
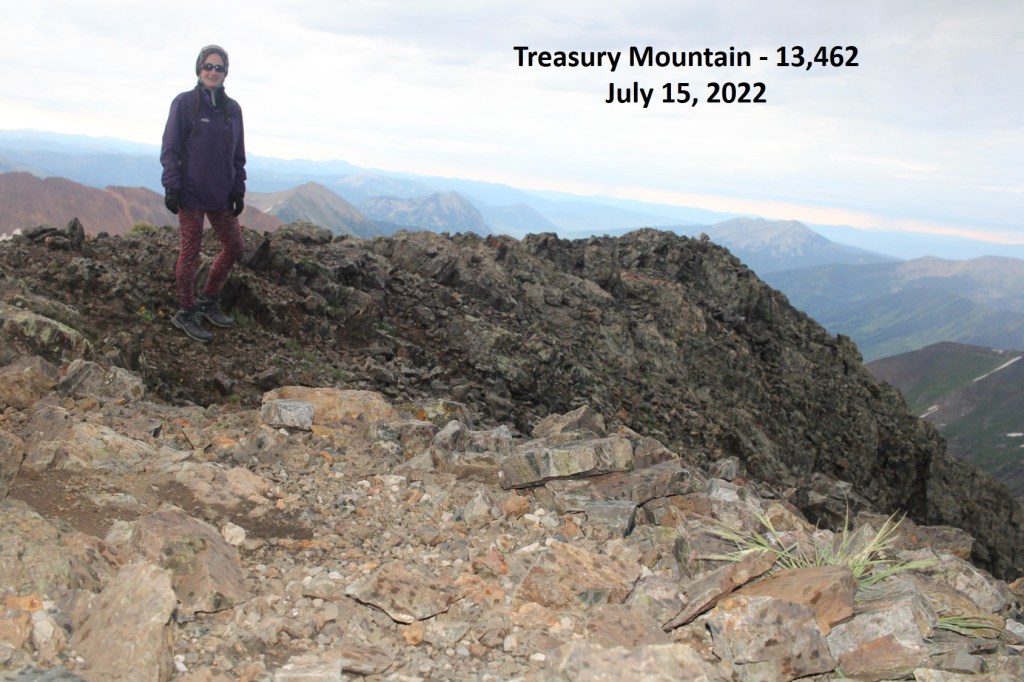
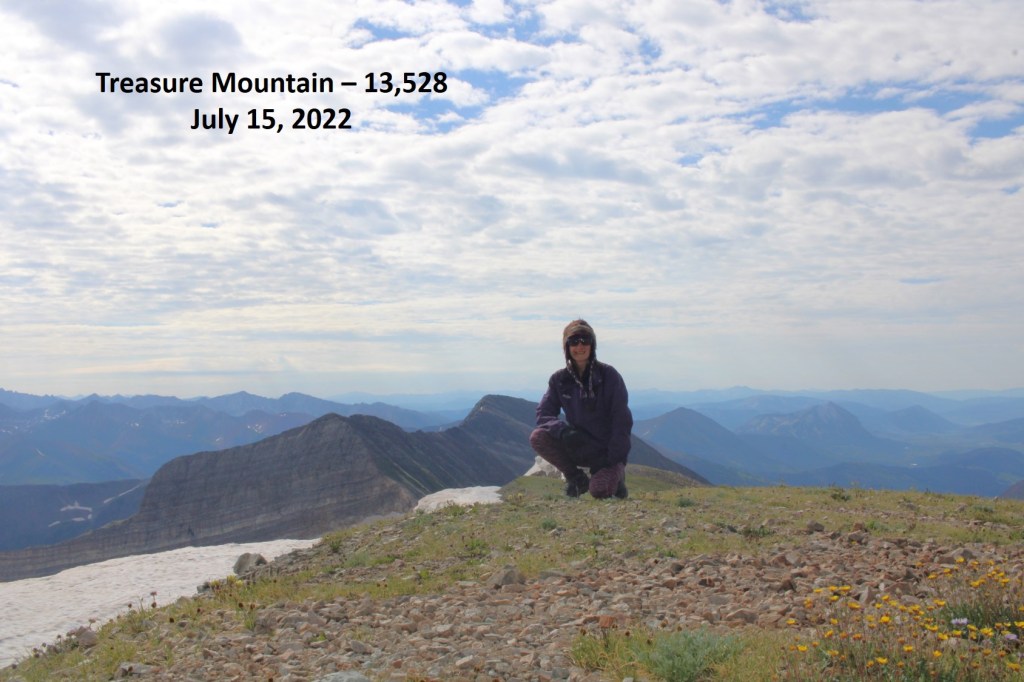
I summited Treasury Mountain at 6:20am, just as it started to rain
Treasury Mountain:
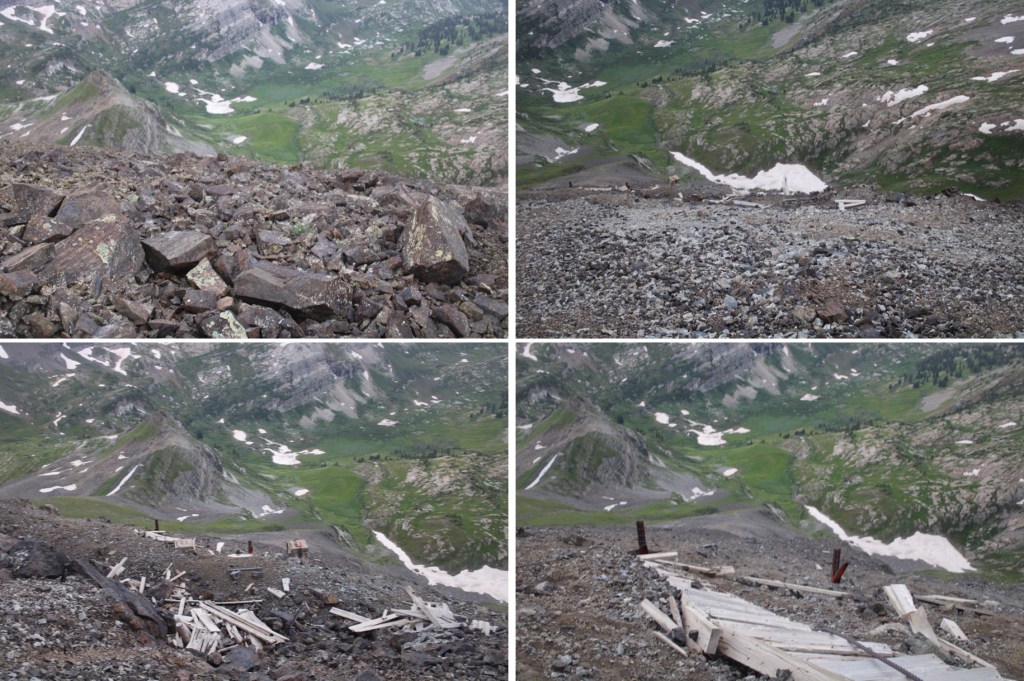
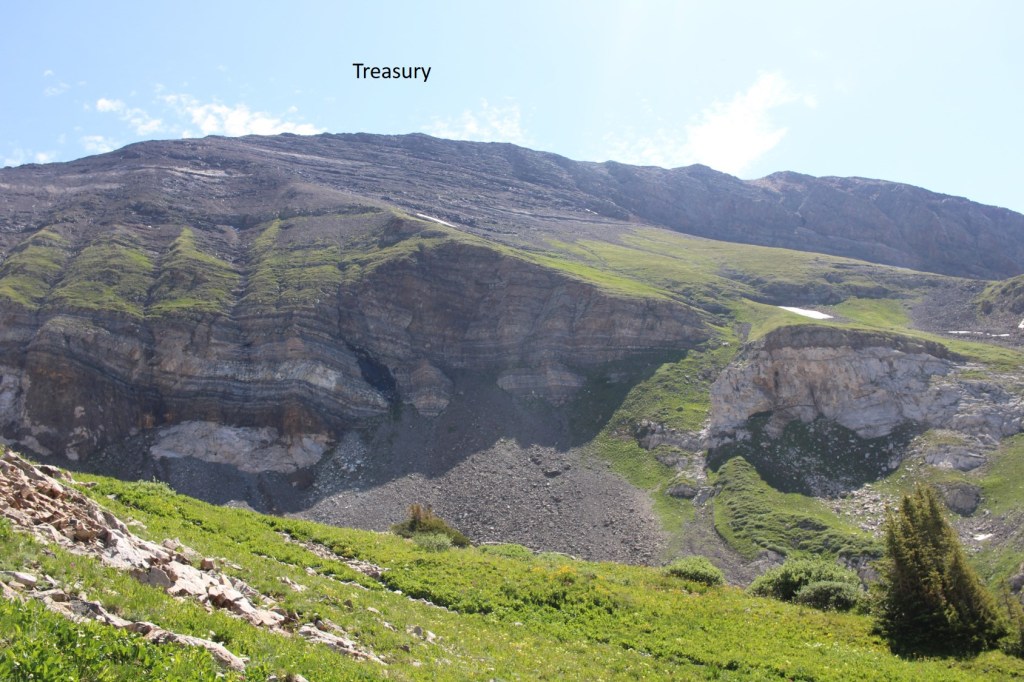
I was glad I didn’t have to downclimb those slabs, as when wet they would have been a challenge. Instead, I continued on towards Treasure Mountain, following the ridge for a bit to the northwest, then dropping down once I could see the defunct mine below. From the summit of Treasury, it looks like the ridge goes all the way to Treasure, and it does, most of the way, but the area circled in red isn’t climbable without rope. It’s part of a band of rock in the mountain that spans its whole side, so I would need to descend 1370’ to avoid this area.
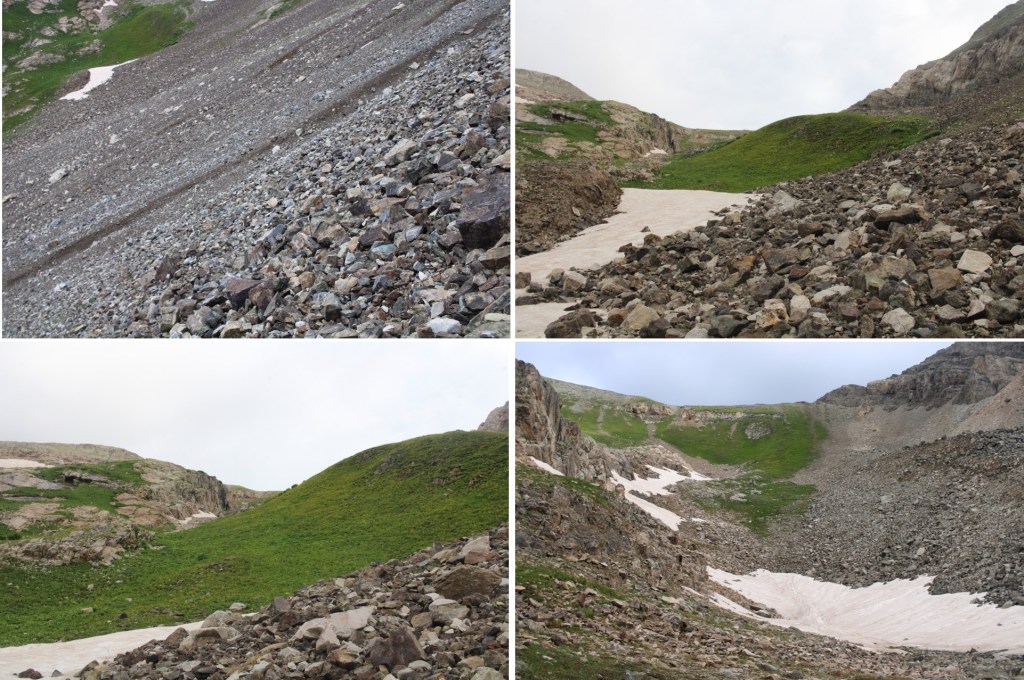
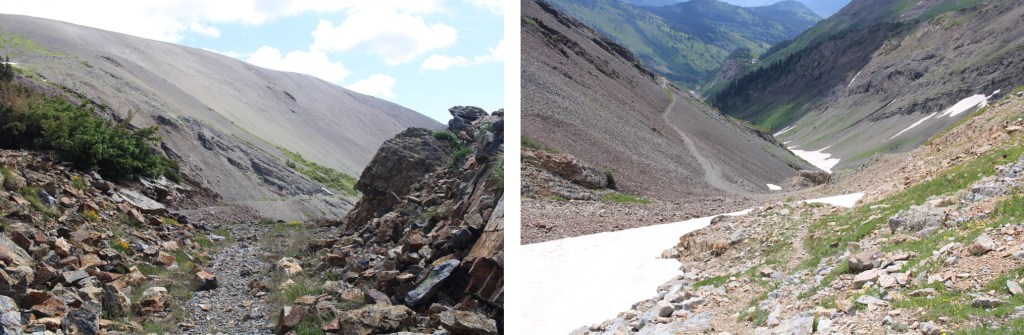
I put on my microspikes and descended on scree past an old mine (not much is left)
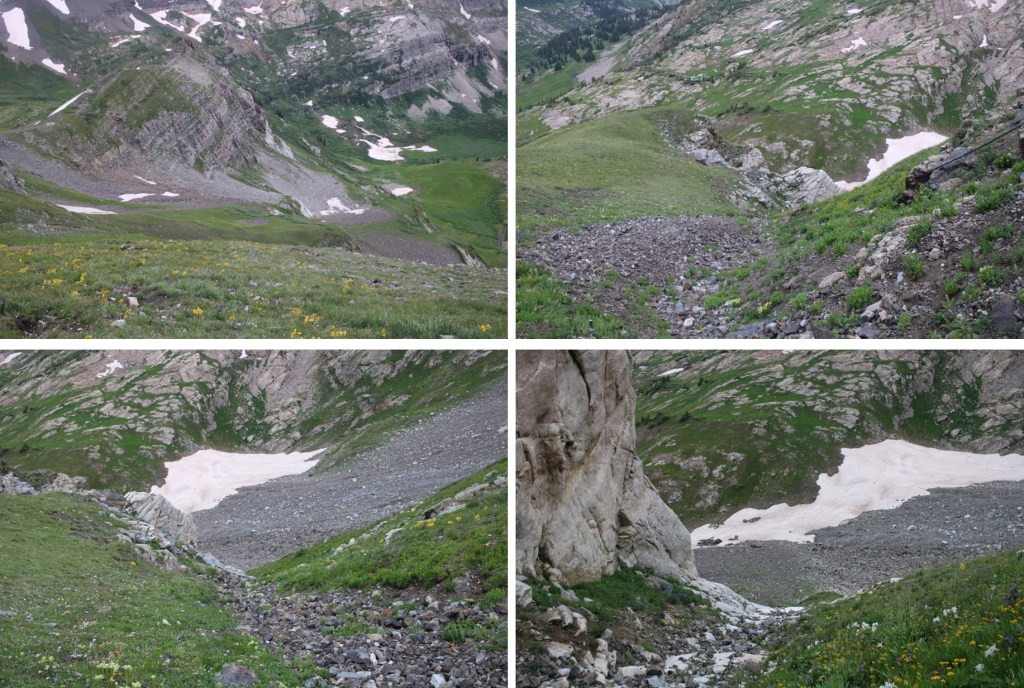
I descended to 12400’, to a gully I’d descend to put me in the basin below. The gully was class 2, and easier to navigate if I kept to the right.
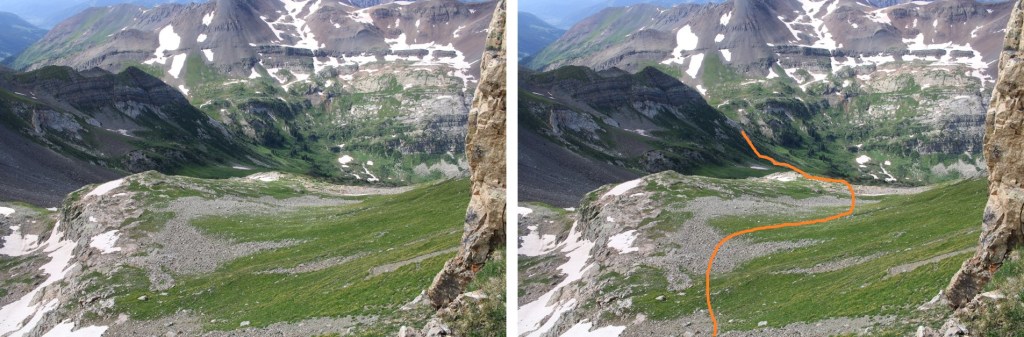
At the base of the gully I could see the route before me I needed to take, to gain the ridge. This was all class 2. I lost several hundred more feet of elevation on my way, then gained it all back making it to the ridge
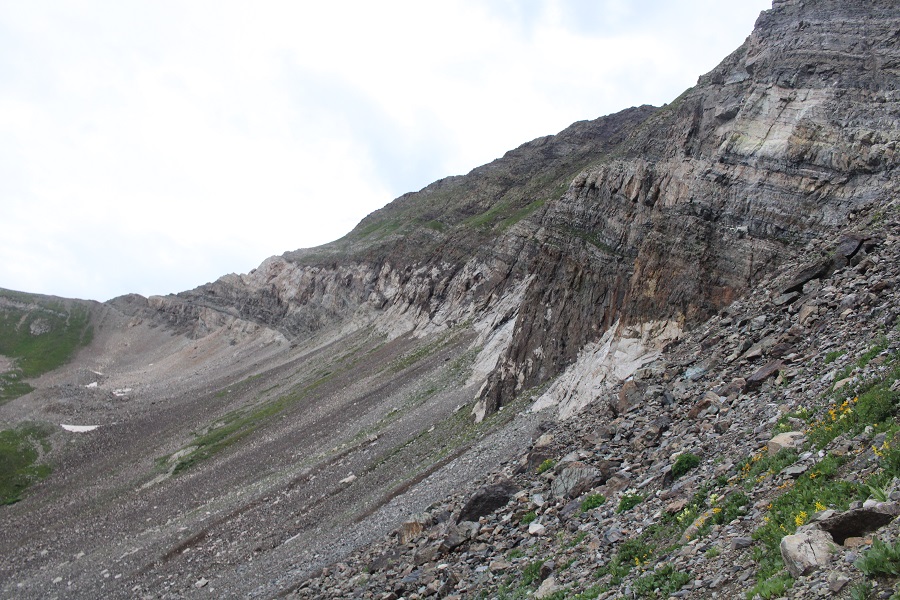
Here’s that rock band I was trying to avoid that all cliffed out
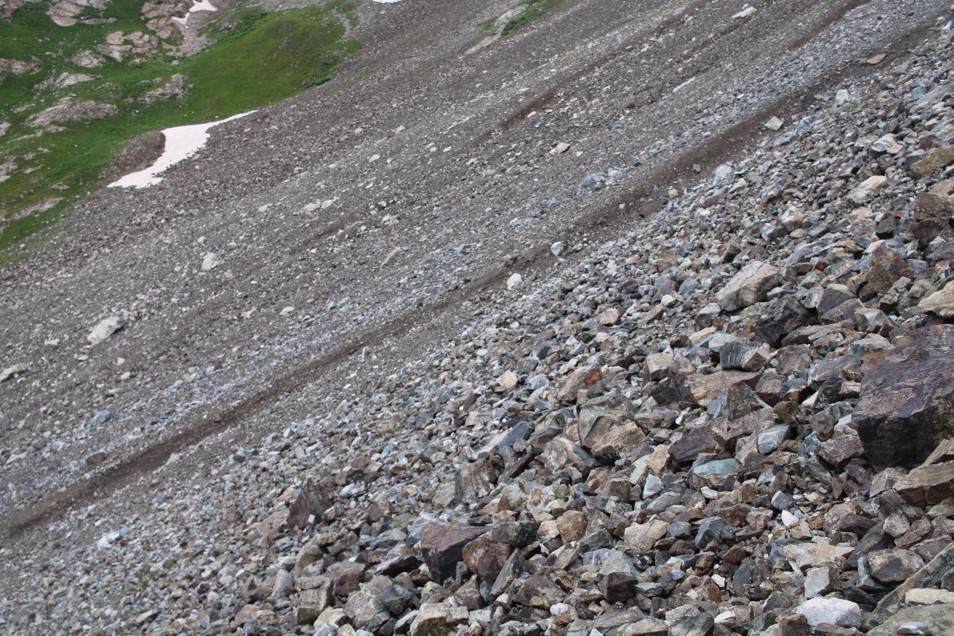
Here’s looking back up at the gully I descended
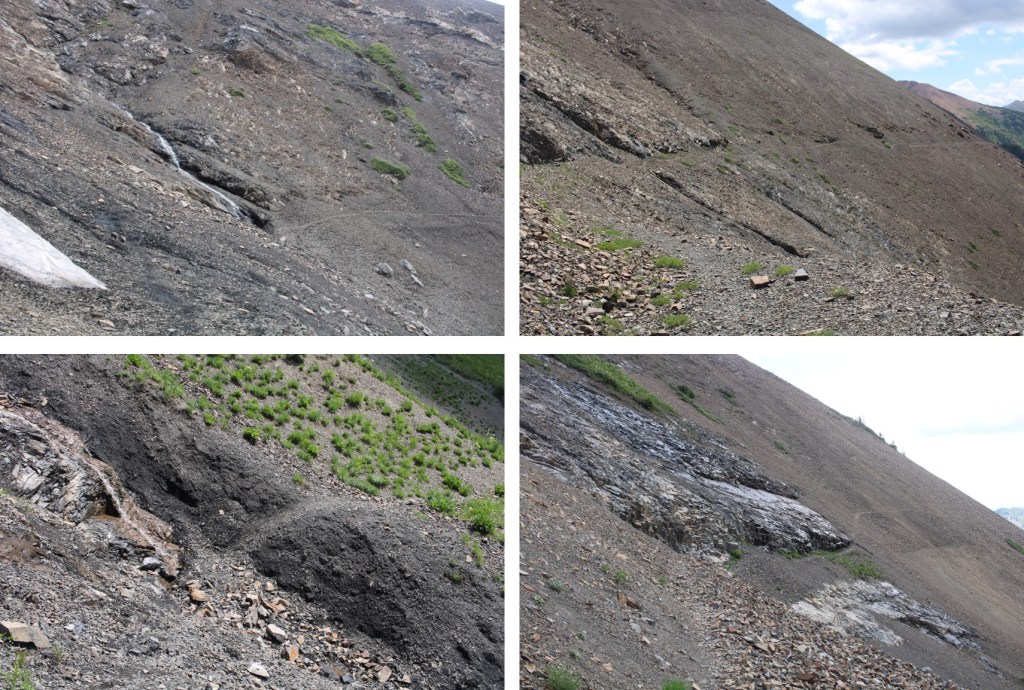
And now to gain the ridge. Here are some step-by-step pictures of the terrain
Once on the ridge, to my left I could see the part of the ridge I was trying to avoid
I turned left and headed west along the ridge
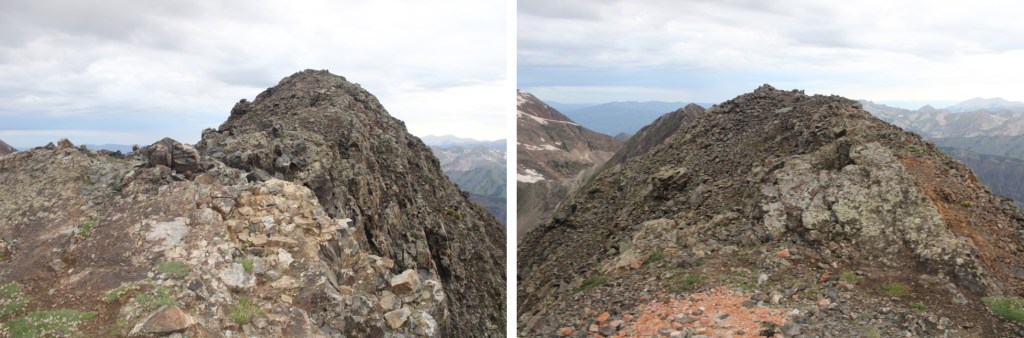
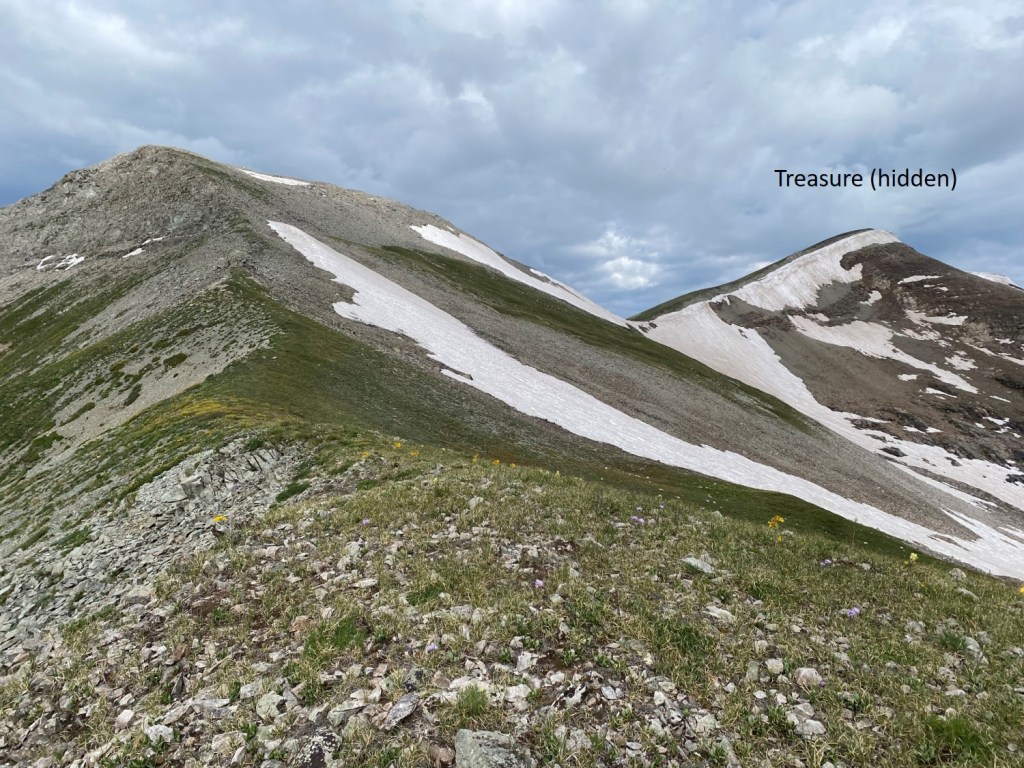
Here are some close-ups of the ridge. There are a couple of false summits, but if you got a good view of Treasure from Treasury, you already know this
I summited Treasure Mountain at 9am
Treasure Mountain:
Now to head back to the saddle. I was going to descend similarly (but different) to the way I gained the ridge
Once back on the saddle, I aimed for this gully, put on my microspikes, and descended through it
Once down the gully, I stayed right of the rock rib, but headed back towards Yule Pass.
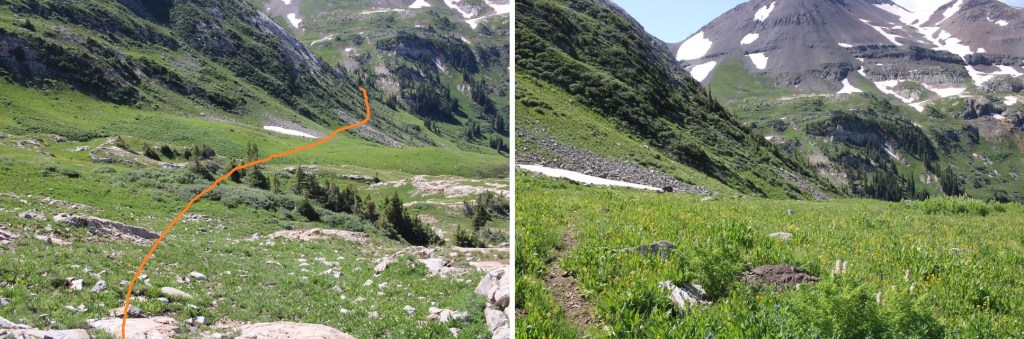
Here are some step-by-step pictures. I stayed above the small marshy area
Here’s another view of the gully I took down from Treasury
Eventually, I was able to see a game trail below, which led me to the actual trail
I then took the trail back up to Yule Pass
Once there, I should have been able to take the road back to my truck, but there was snow still covering it, even in mid-July, so I retraced my steps and took the first gully of the day again, but you should be able to take the road back all the way. If not, it’s an easy and obvious workaround.
I now followed the road back to my truck
I made it back to my truck at 12pm, making this a 12.89 mile hike with 4689’ of elevation gain in 8.5 hours.
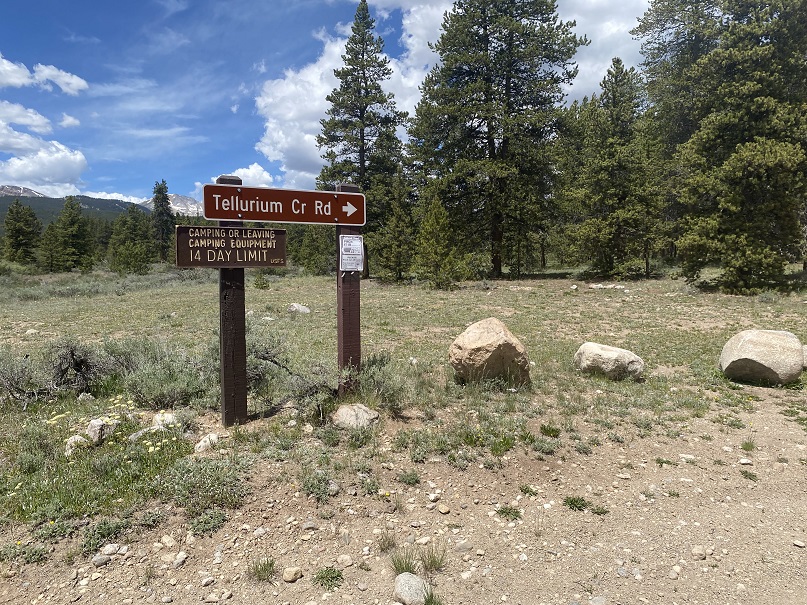
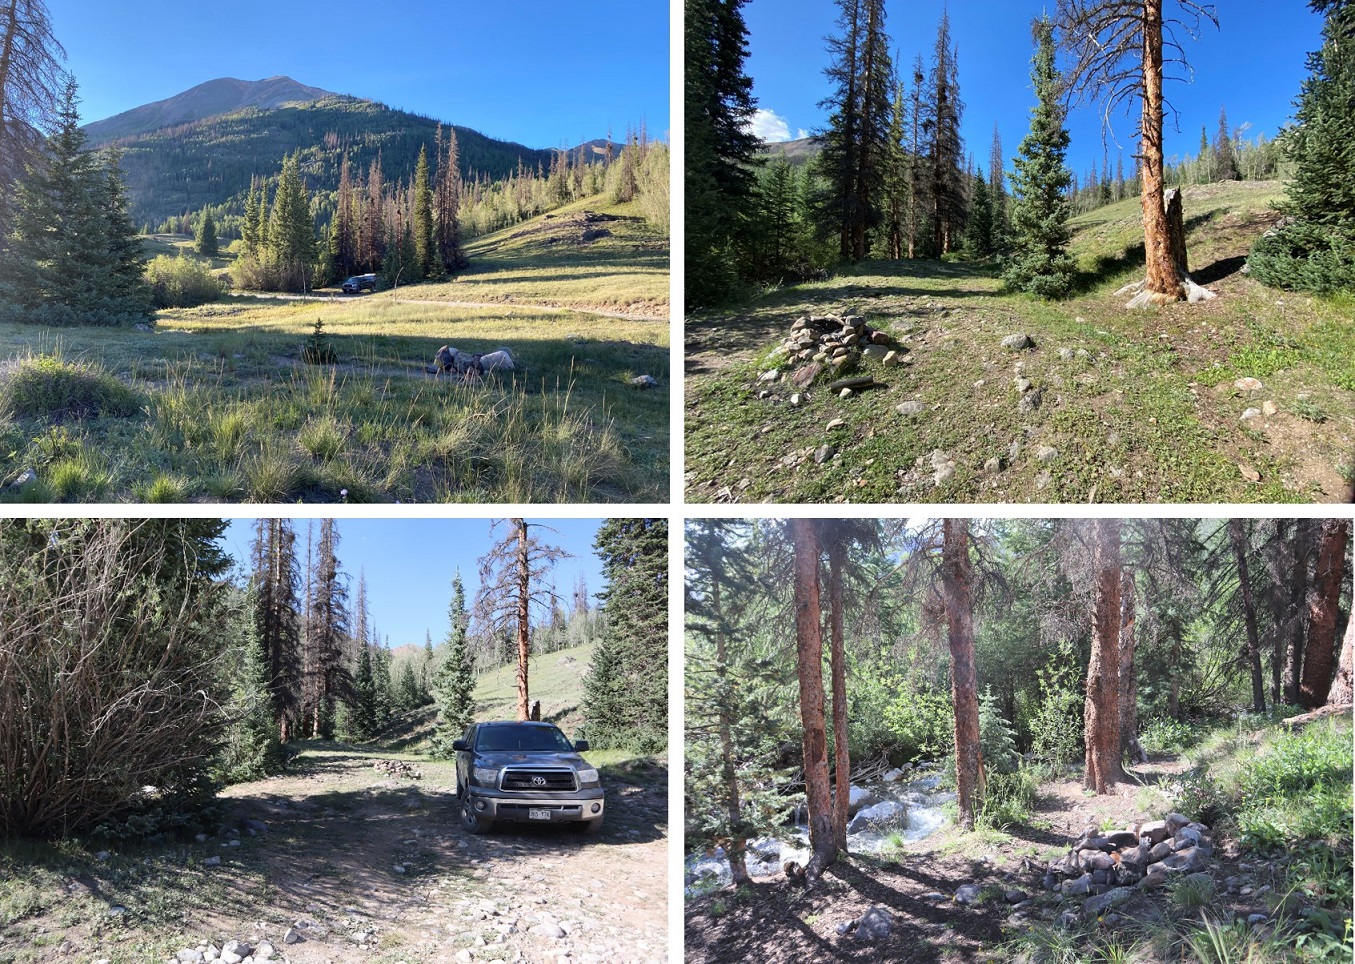
There is a ton of camping at the Tellurium Trailhead, so that’s where I spent the night.
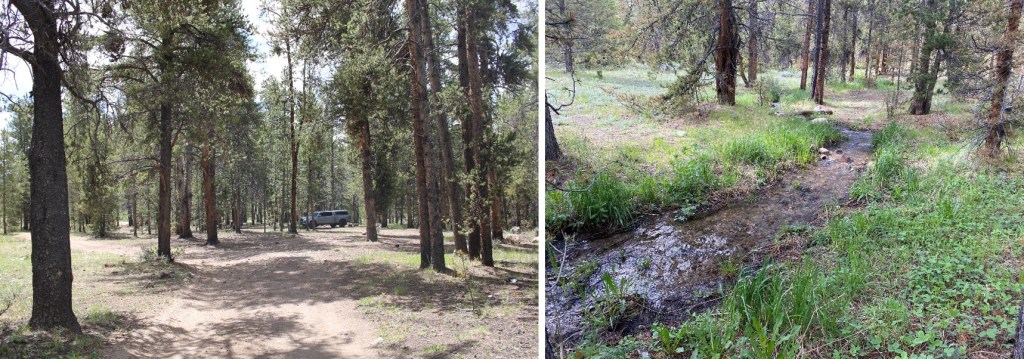
I was parked next to a small stream, and had the entire area to myself. Not bad for a Friday and Saturday.
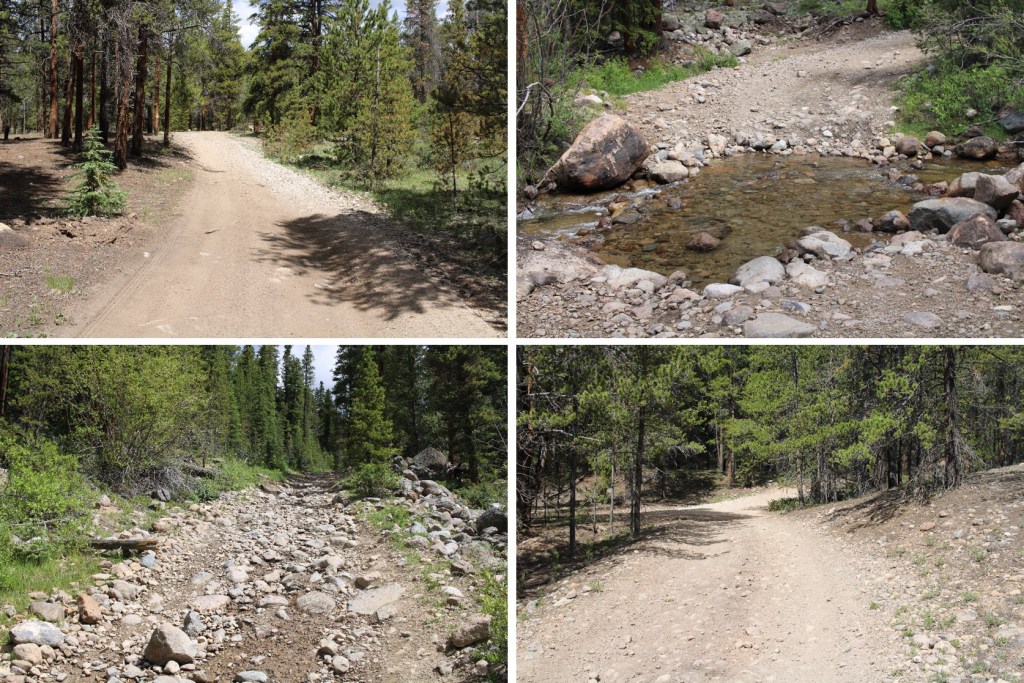
I was up and on the trail at 4:30am, following the 4WD dirt road 584 north for just under 1.5 miles. There were a lot of dispersed camping sites along the road. I was glad I’d parked where I did and hiked in.
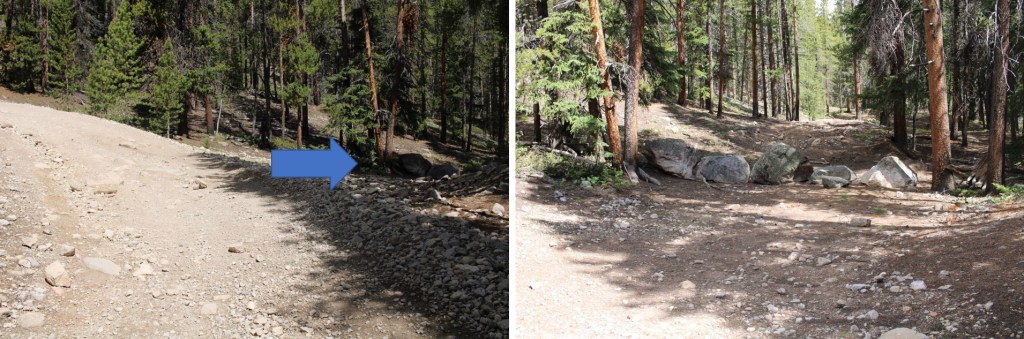
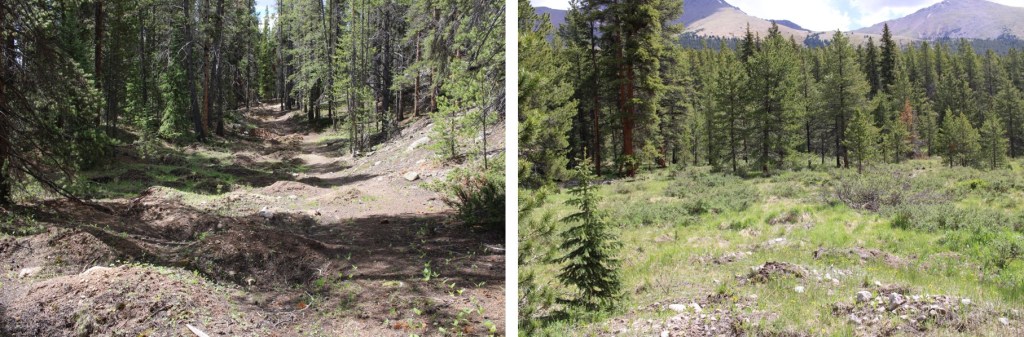
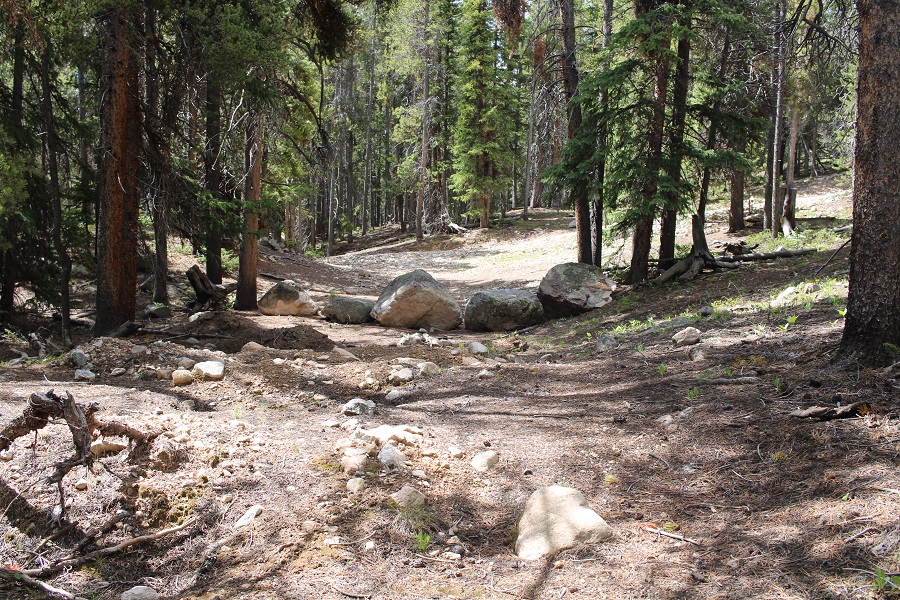
After hiking for just under 1.5 miles I came to an old dirt road that has been blocked off. It was on the right, and wouldn’t have been obvious in the dark. There is no parking there.
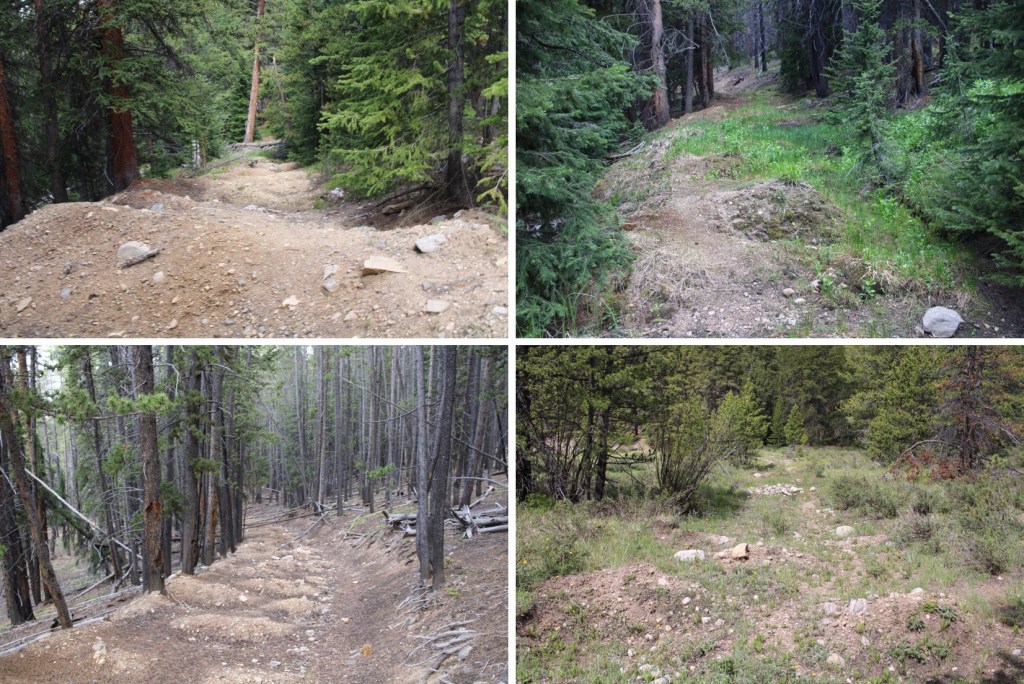
This was a road someone had tried to make unusable. It made hiking interesting, as I could not hike in a straight line. The road was obvious and easy to follow however.
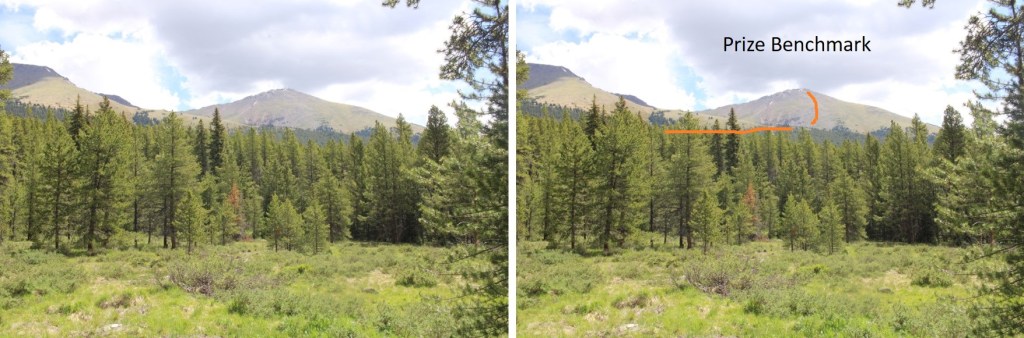
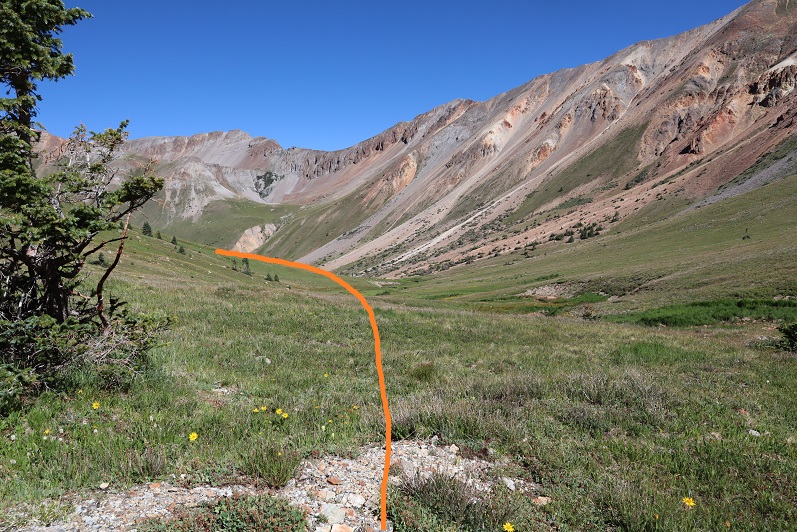
When you come to the meadow, if it’s light out, get a good look at Prize Benchmark. This is the route you’re going to want to take. Notice there’s a ridge? You’re going to want to parallel that ridge, then dip into a basin before ascending Prize. This will make more sense later.
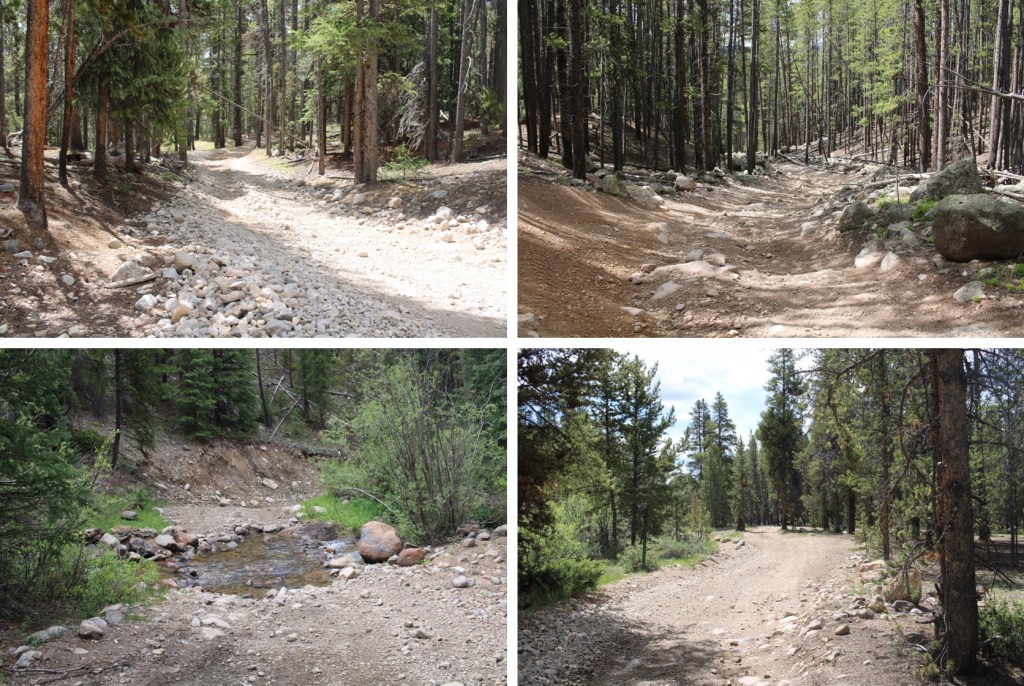
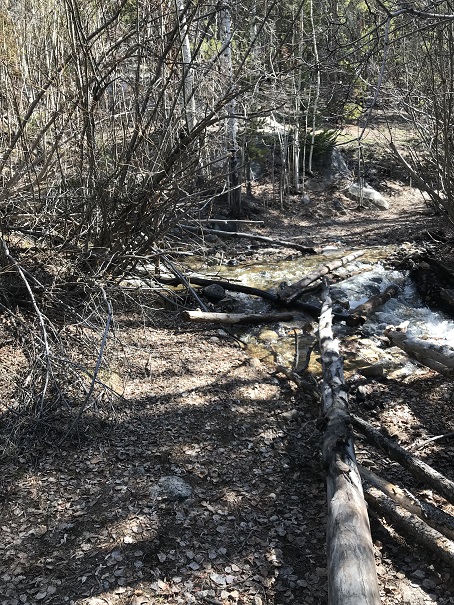
There were two creek crossings I did not need to take off my shoes to cross
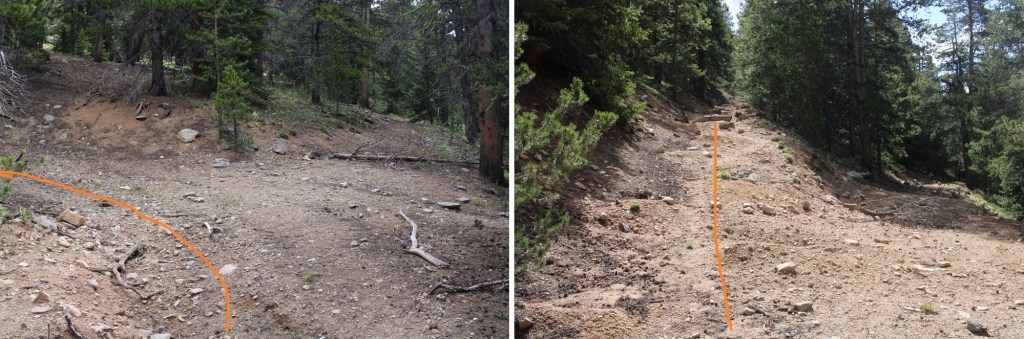
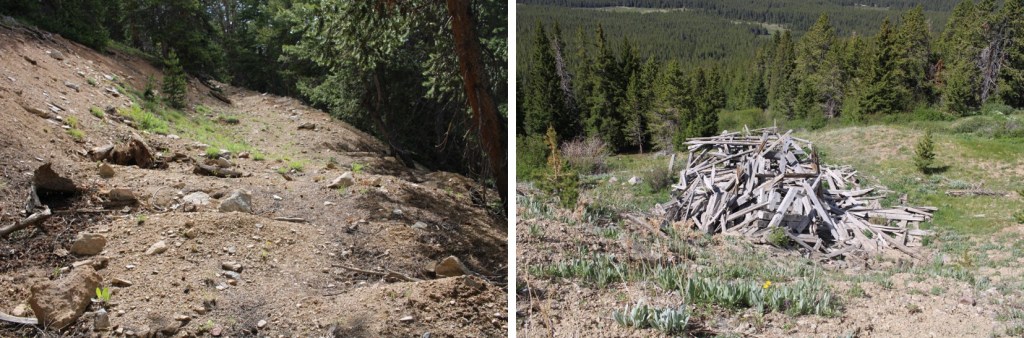
There were a few side roads that went to old houses and mining operations. Every time I had an option to turn I kept left (twice). I followed this road all the way to the Enterprise Mine. There’s not a lot left…
Here’s where I messed up. I went over the ridge. Don’t do that. Instead, try to stay parallel with the ridge, as you’ll want to cross it at a low point because you’ll be descending into a basin. There is no trail here, but don’t try to ascend the ridge, stay at about 11800’.
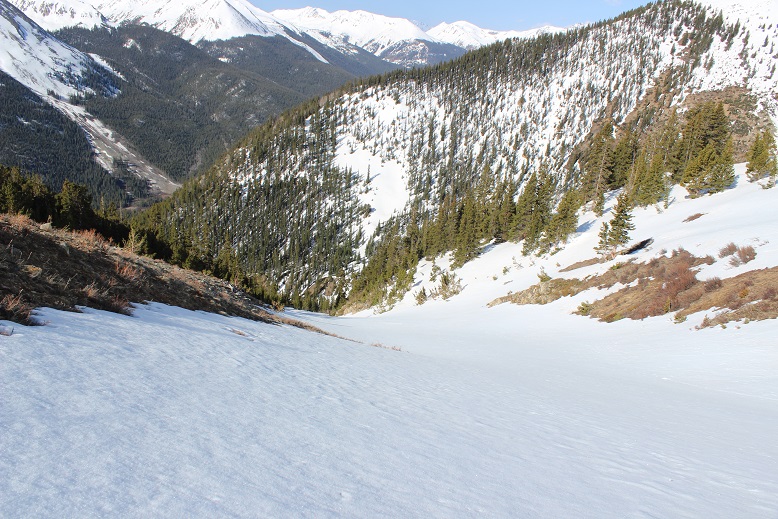
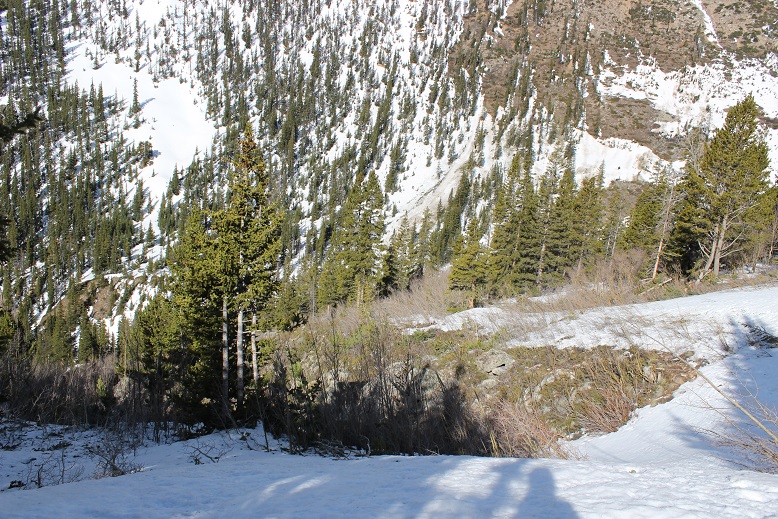
When you can see east, it’s time to descend into the basin. There are a few game trails here. Yes, you’ll be headed back into the trees.
I just kept heading east.
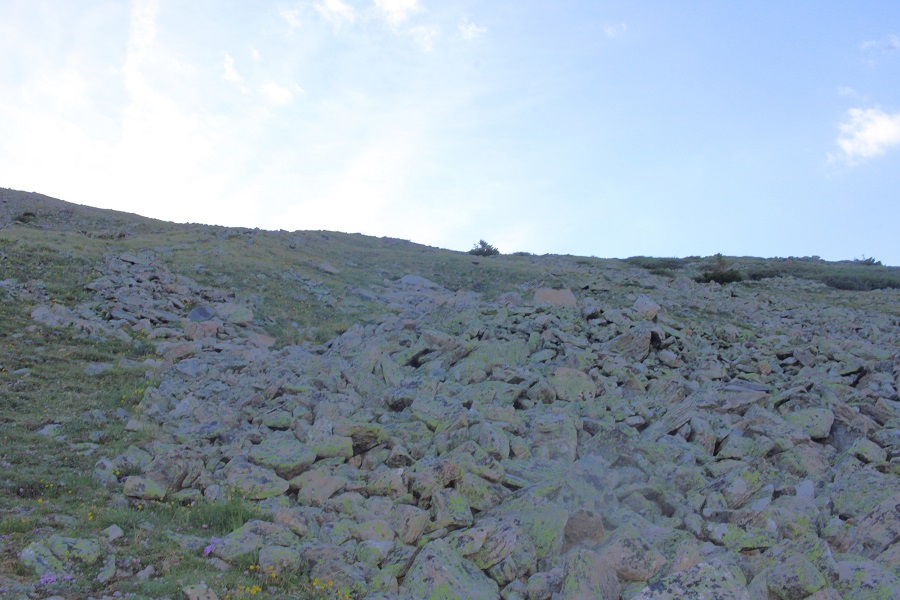
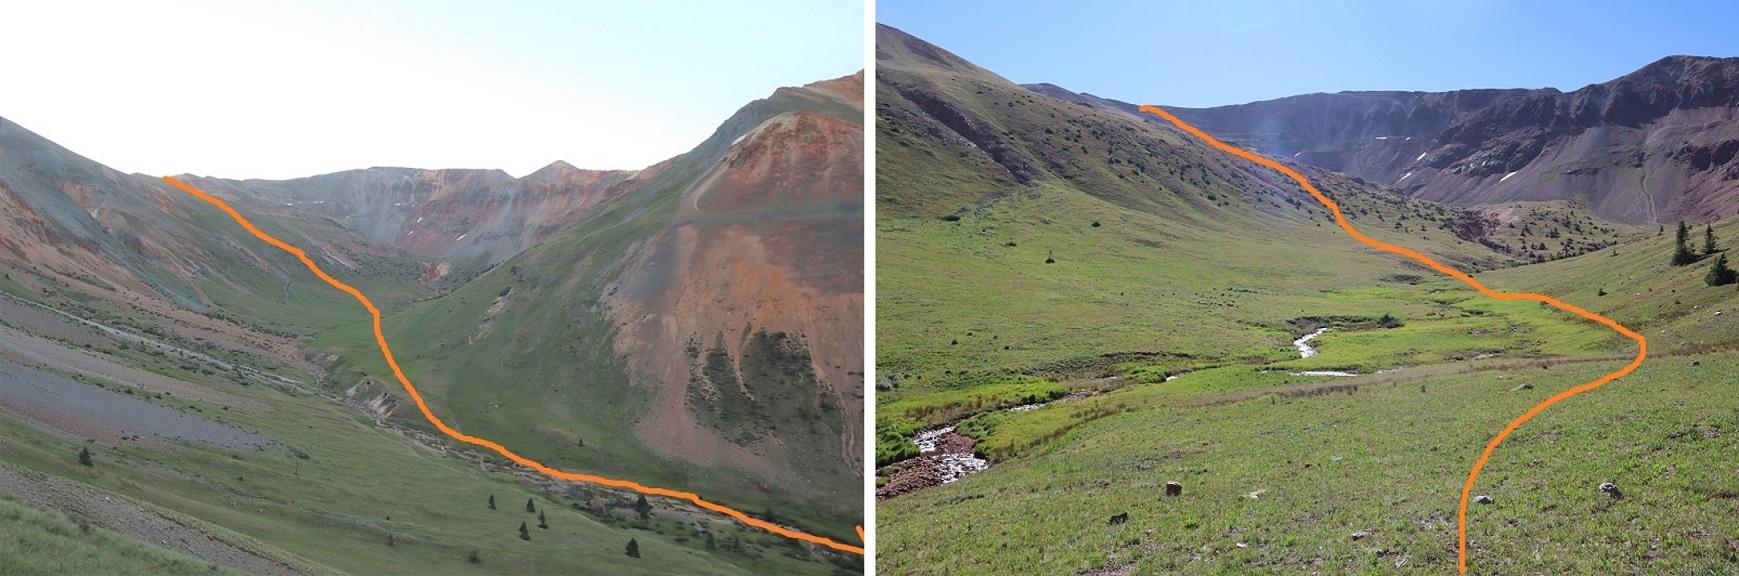
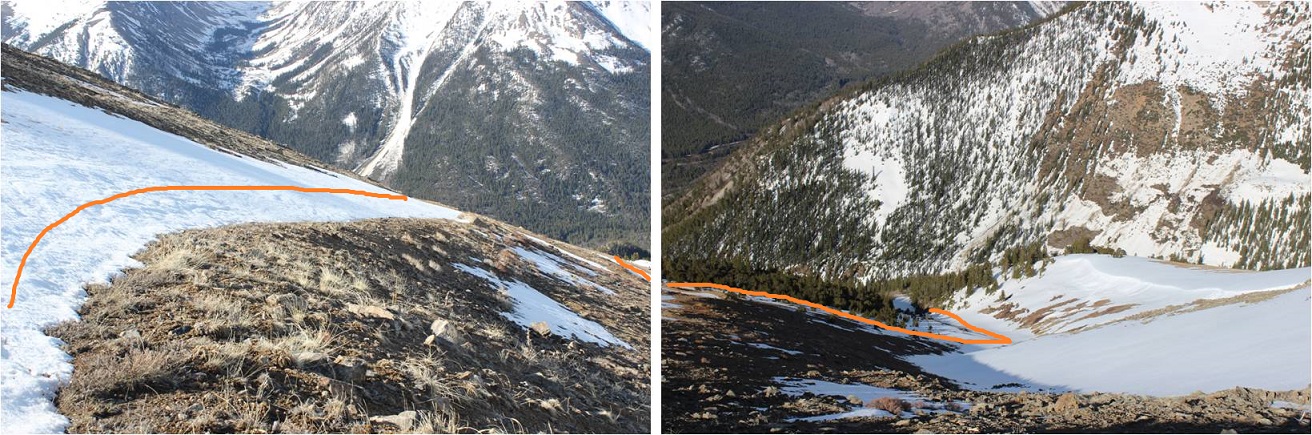
I could see a grassy band I wanted to take to the ridge, and thought the easiest way to get there was over a pile of rocks. It wasn’t. The rocks weren’t stable, and more than once I seriously considered heading back. This is the way I’d recommend ascending
Here are some pictures of the way up the ramp. I stayed to the left of the trees.
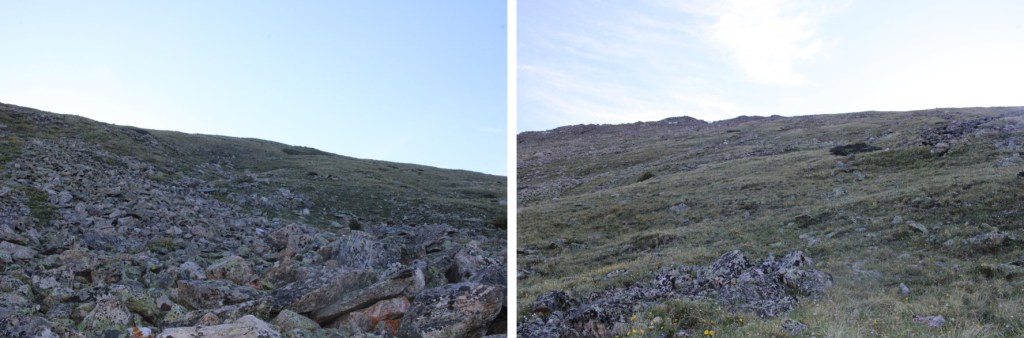
Then I followed the tundra east to the ridge
As I was heading east, and the sun was trying to rise, I notices a small herd of elk to my right. They were sharing the tundra, and after a while the mamas woke their babies and trotted off.
I continued hiking east.
As I was trudging up the tundra, I heard what sounded like a bark. At first I thought it was a coyote, but they don’t bark. Then I thought maybe a dog, but it was unlikely there was a dog all the way out where I was. I heard a single bark every two minutes or so. One time, when I turned around, I saw an elk, and realized the ‘bark’ belonged to her
Elk barking:
I figured she’d gotten separated from her herd, and was calling them. On I trudged. I reached the ridge, and turned left.
This was all class 2. I navigated the rocks to the left
And then could clearly see the summit
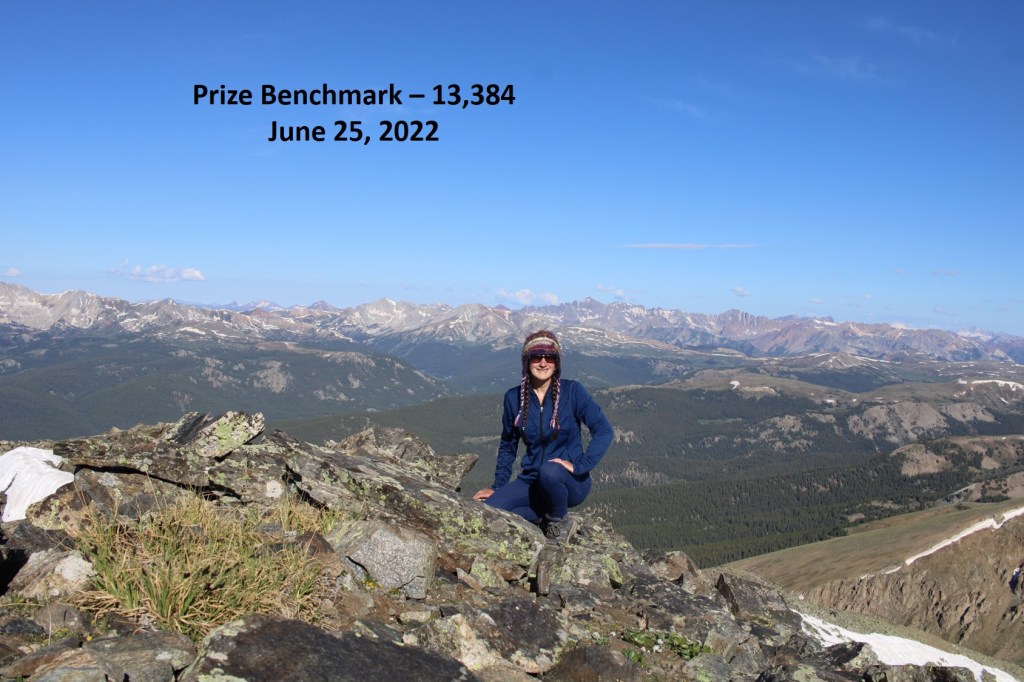
I summited Prize Benchmark at 8:15am. I could still hear that elk barking, but watched as it went in the direction of the herd.
Prize Benchmark:
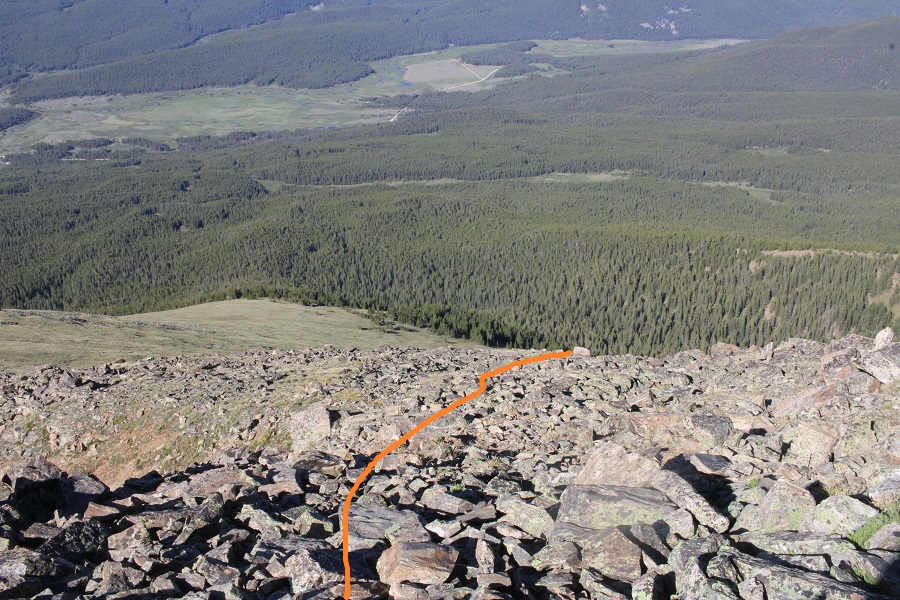
I turned and re-traced my steps, thinking to myself how much easier this route had been rather than doing this from the other side with Booby and 13460. I aimed for the tundra below.
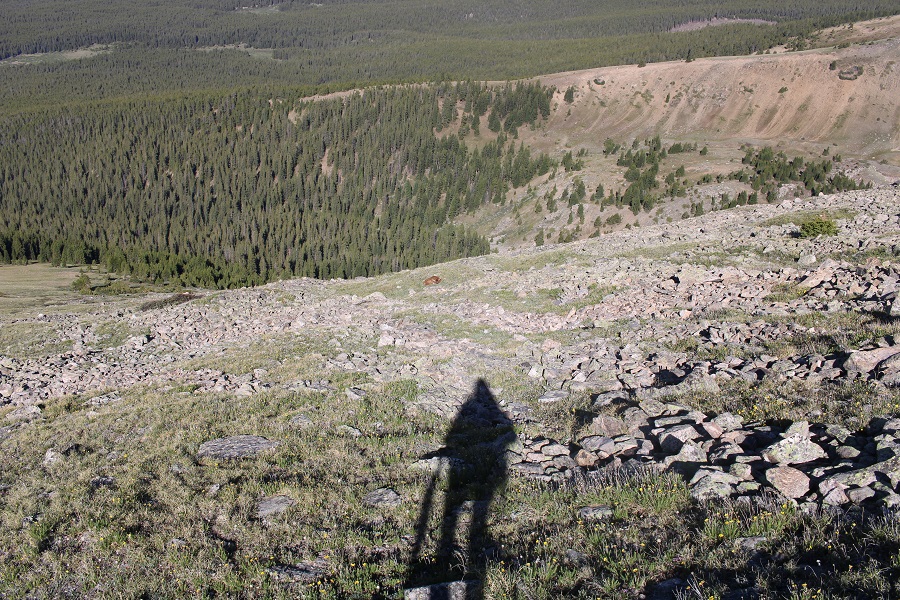
This time I stayed to the right of the trees, aiming for the grassy rib and gully below
As I was hiking down, I saw something that didn’t fit with the terrain. It was small and brown, and even from a distance, I thought it was an elk calf. IF was curled up, and I was worried it was dead, but seriously hoped it was a misplaced piece of wood.
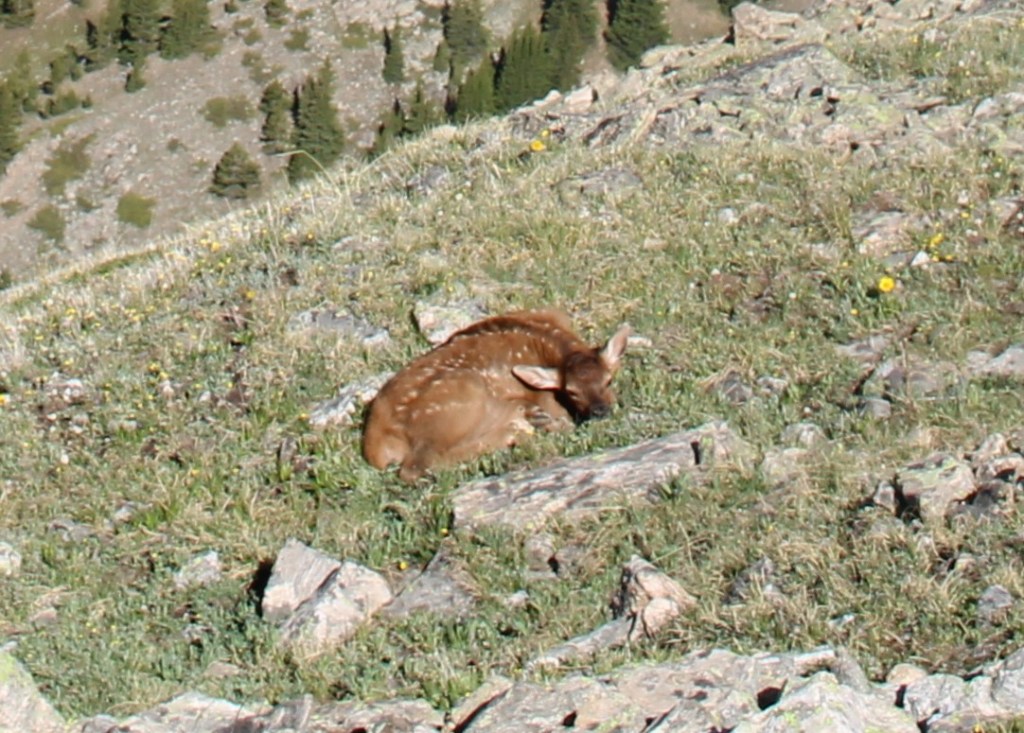
As I got closer, it was obvious this was an elk calf, and I was sure the elk I’d heard earlier was looking for her baby.
Then, suddenly, the calf popped up and stood on all fours, looking at me straight in the face. I was relieved it was alright, then went into mom mode: I chastised the baby, saying “Your mom’s looking for you! I know you heard her, because I heard her for over half an hour. Go back to your mama!” I pointed to where the mom had gone off to, and the calf ran in that direction.
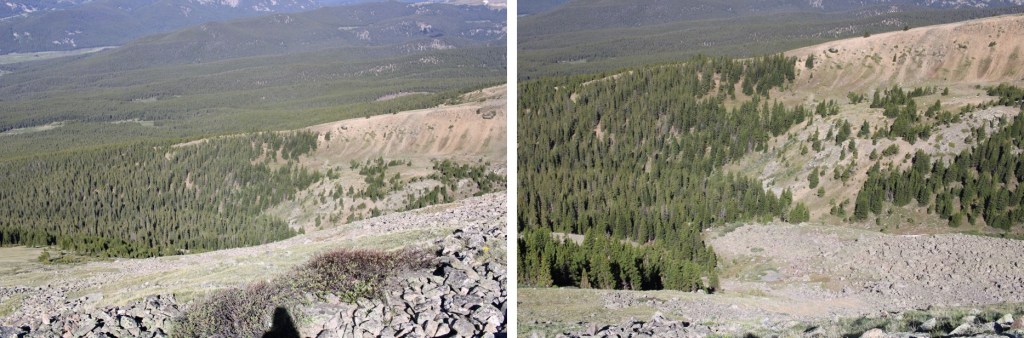
Now to continue on back to the basin
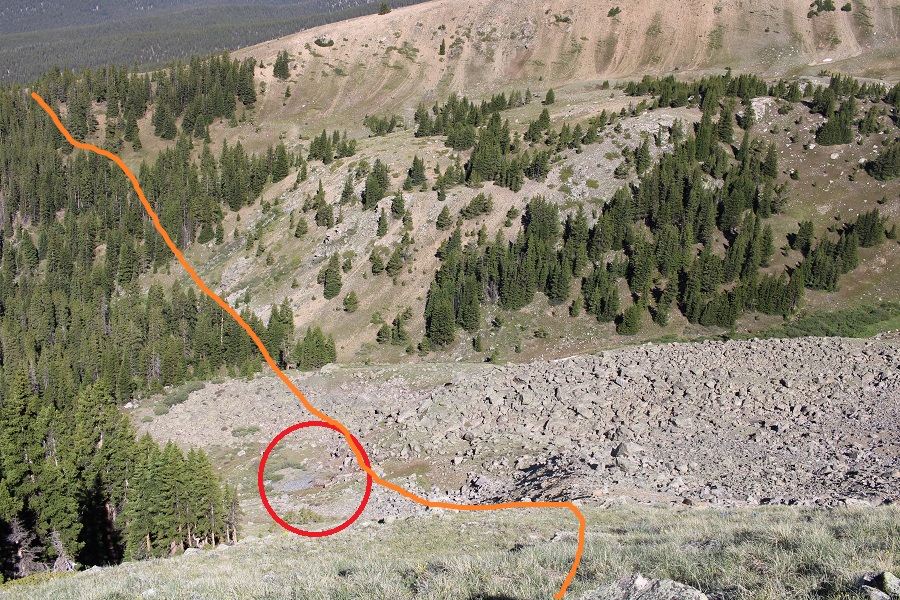
Here’s the route I took out of the basin. While taking this route, I saw something I hadn’t on my way in: remnants of a mine (circled in red). I was going to explore when I made it down there.
There wasn’t much to see. It looked as if the opening was entirely covered by snow… or a large boulder had been placed to cover the entrance.
I took a few pictures and continued on. Now to regain the ridge.
Once on the ridge I stayed level at 11800’ and aimed for the Enterprise Mine, which I could clearly see while on the ridge
Once at the mine I followed the destroyed road back to 584
I then followed 584 back to my truck
When I got there, I stopped my tracker, only to find it had gone all wonky, right at about the time I’d seen the calf, so my mileage was taken from my iPhone (which is usually pretty close to my tracker) and the elevation gain from CalTopo. I made it back to my truck at 11am, making this a 10.4 mile hike with 3996’ of elevation gain in 6.5 hours.
I was looking for another quick summit this week, and was halfway to the trailhead before I remembered the road to Mosquito pass would most likely be snowed in, adding about 5 miles to the hike. Oh well, I should still be able to make it an early day. I made it to where the road for Mosquito Pass and 12 meet and due to previous experience with this road in winter decided to park at this junction. I could have driven about a mile up Mosquito Pass road, but eventually the drifts would have made it necessary to find a place to park. By parking below I’d be getting in some extra mileage (if not much elevation gain).
I parked, gathered my gear, and headed up Mosquito Pass road at 6am.
I was excited to try out my new camera. I tend to go through cameras quickly, as I put them through a ton of use in extreme conditions. The last time I purchased a camera I bought one that was less expensive, reasoning since I buy them so often I’d like to spend less money. I found out the hard way cameras that are point and shoot don’t operate well when it’s less than 30 degrees outside.
The past few weeks I’ve been using a stylus with my iPhone, but I’ve found when it’s extremely cold out even the stylus doesn’t work (although warming the stylus up in my mouth sometimes helps). After my climbing accident at Garden of the Gods last week where I not only came out road-rashed and bruised but also I crushed my stylus, I decided to just purchase another DSLR. Yes, they’re heavy, but they withstand the cold.
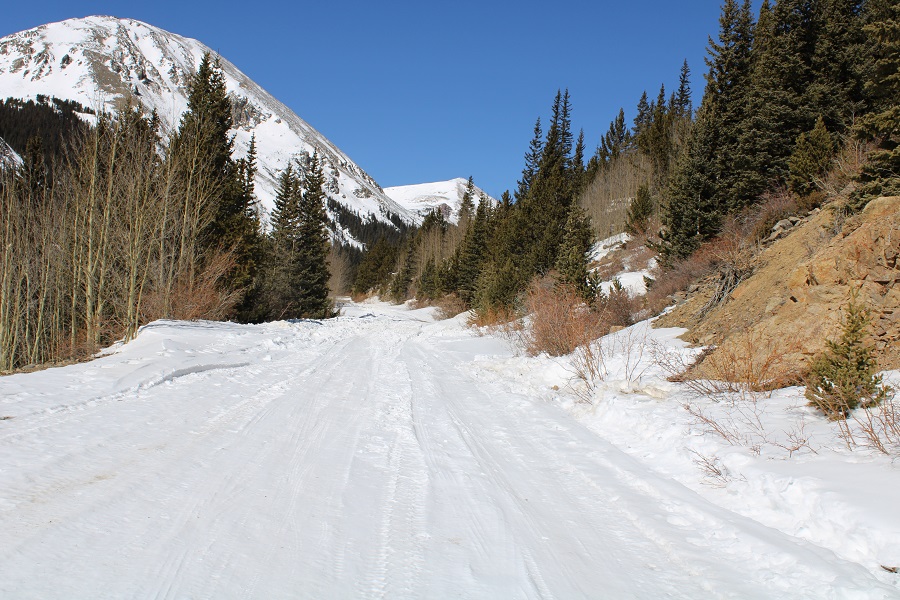
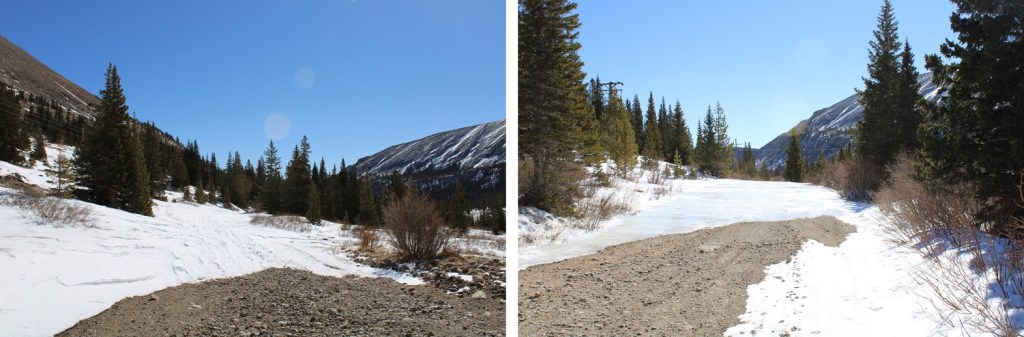
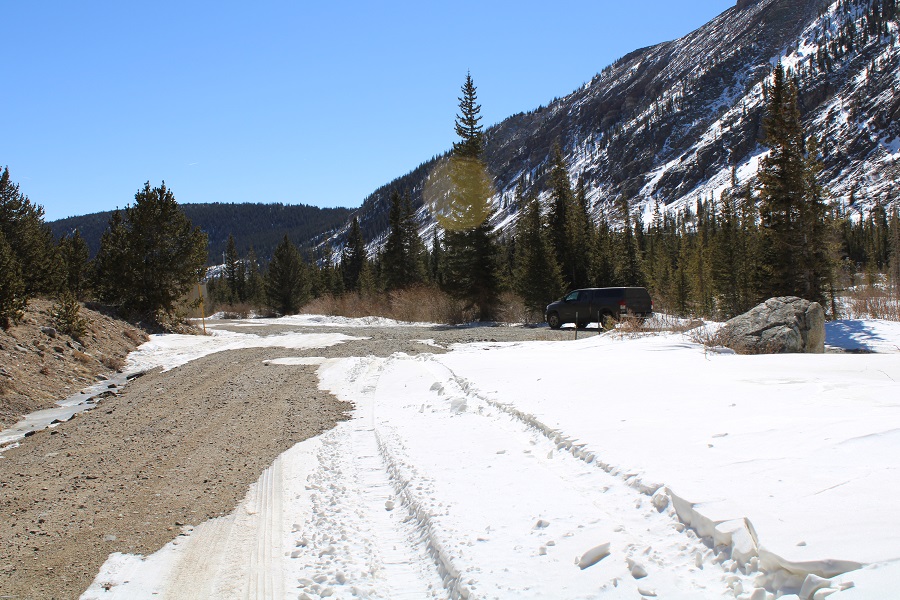
I hiked along the dirt road for 2.5 miles. The conditions were varying, and I was glad to have worn my microspikes.
About a mile in was the furthest anyone has been able to drive recently
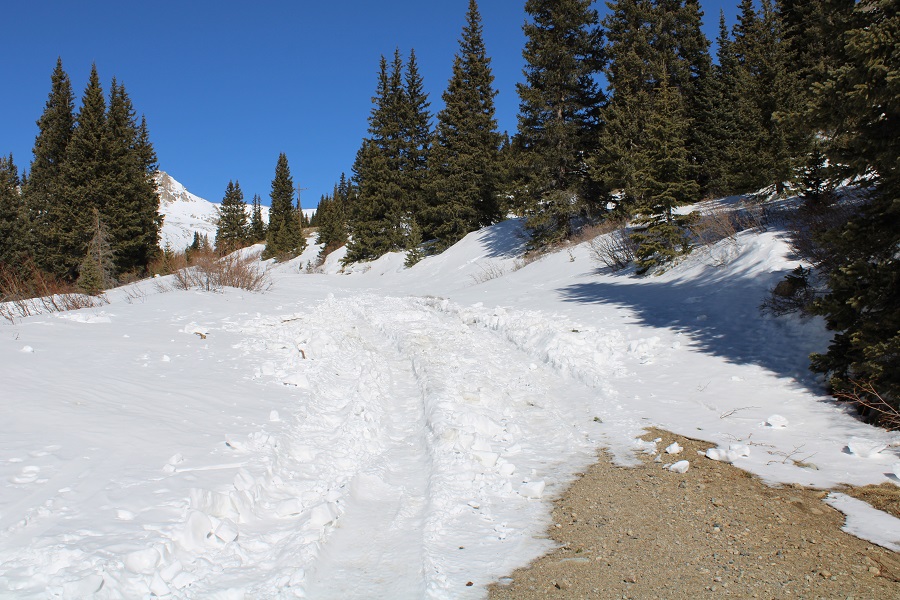
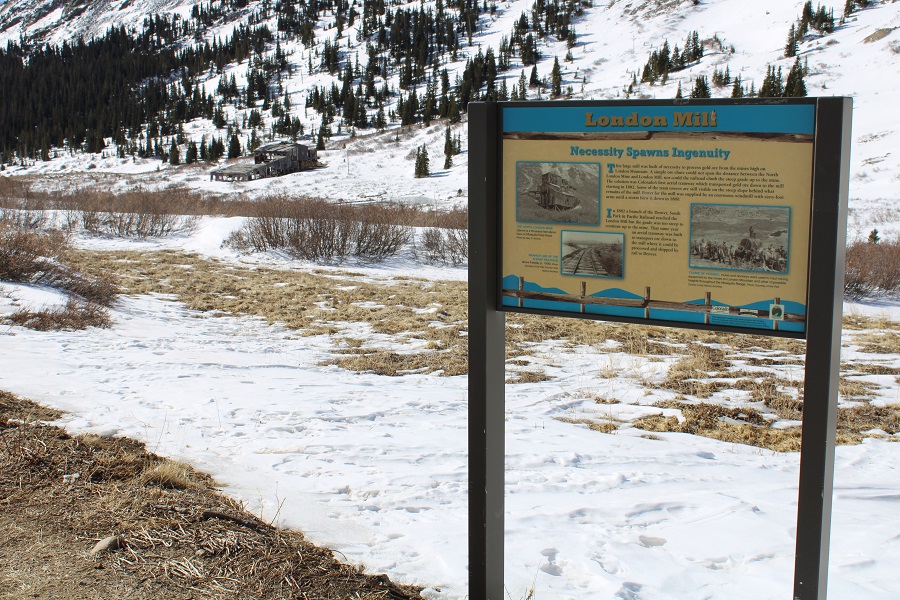
I passed North London Mill
After passing North London Mill I turned left at the junction
It was here the sun began to rise and I started trying out my new camera
It was also here I started postholing more than I could stand. I decided to put on my snowshoes, and wore them until I made it to the Mosquito/London saddle
I followed the road up to London Mine
At times the road was completely covered in drifts
The road was covered in snow as I got closer to the mine, so I just had to kind of wing it.
The moon was just going behind the ridge as I reached the mine
I continued past the mine, heading west
And followed the road to the saddle. From a distance this road looks mild, but I’ve taken this route in winter before, and the drifts can get pretty steep and go down quite a ways into the drainage (the pictures don’t do the drop offs justice). It’s a good idea to have traction and an ice axe for this part in winter
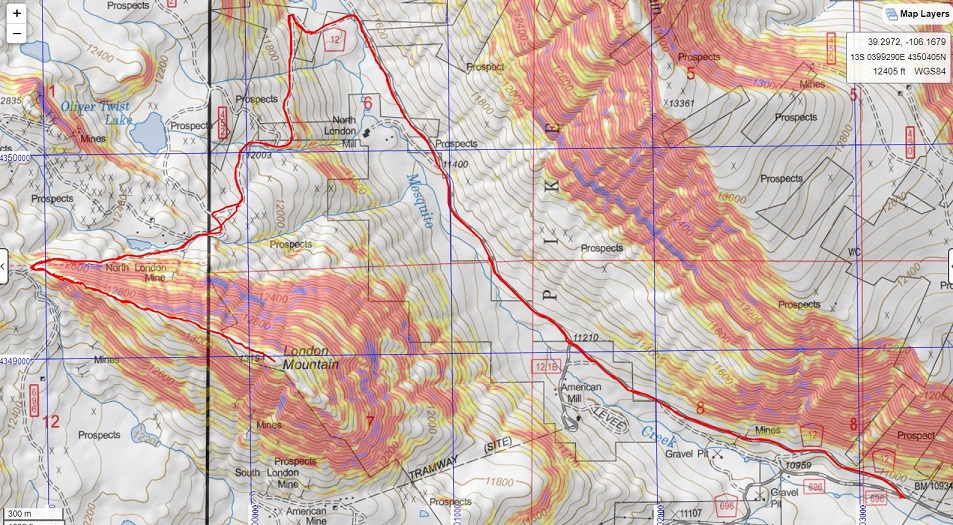
I made it to the London/Mosquito saddle and took off my snowshoes, turned left, and followed London’s ridge southeast.
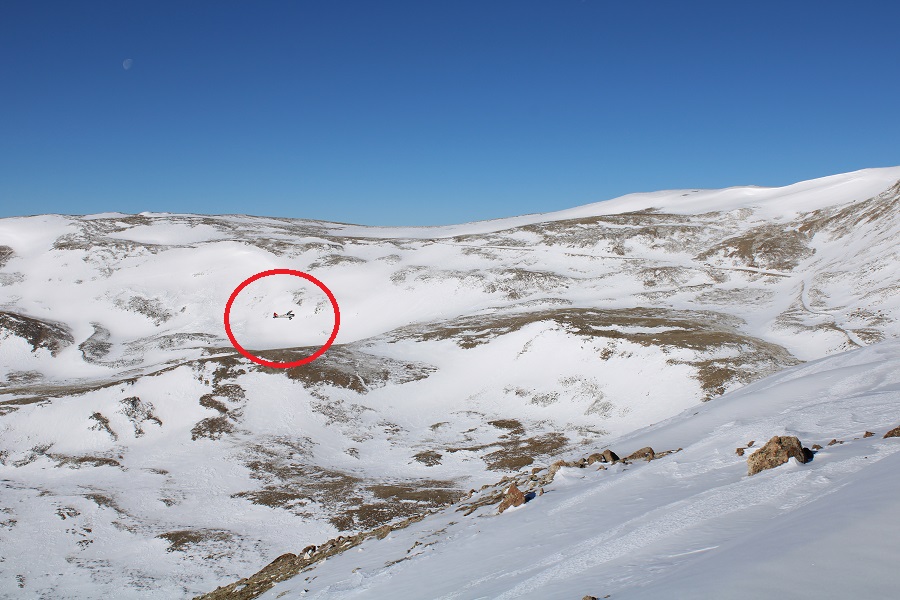
This ridge goes for almost exactly a mile. After initially skirting to the right, I was able to stick to the ridge proper the entire time, and only postholed a few times in the snow. This is all class 2, with the snow making it an easy class 3 in just a few areas. Also, I didn’t remember it until I got back home and looked at my pictures, but the one drawback of this camera are the sun spots when directly facing the sun. I know what causes them, I just need to be more diligent in the future against preventing them. Here’s the ridge route, with a bunch of false summits:
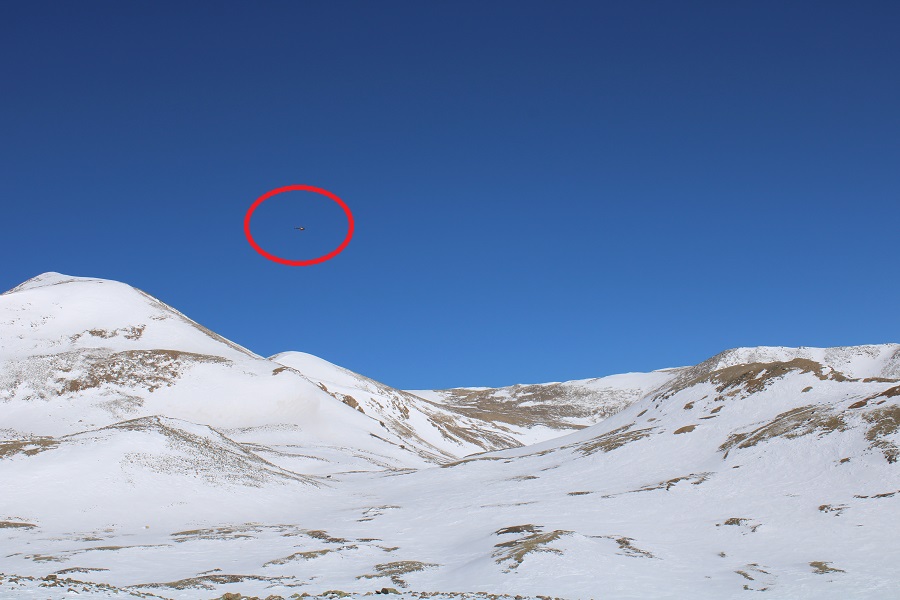
About halfway along the ridge I heard a loud buzzing, looked around, and saw a biplane flying very low. I watched it go around the mountains and through the passes. So cool! I wanted to wave, but didn’t think they could see me, and also worried they might think I needed help if I did.
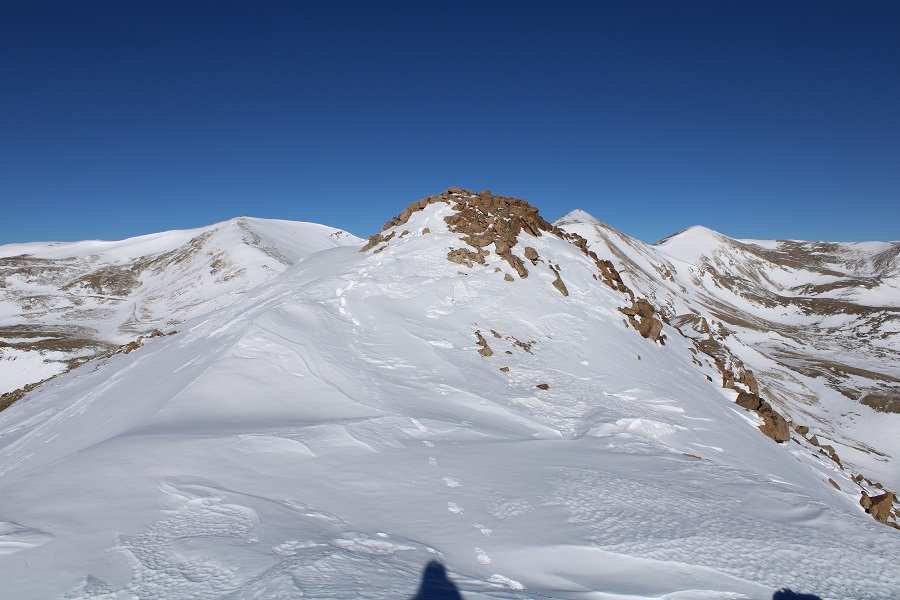
Here’s the final trek to the summit
I summited London Mountain at 8:30am
London Mountain Summit
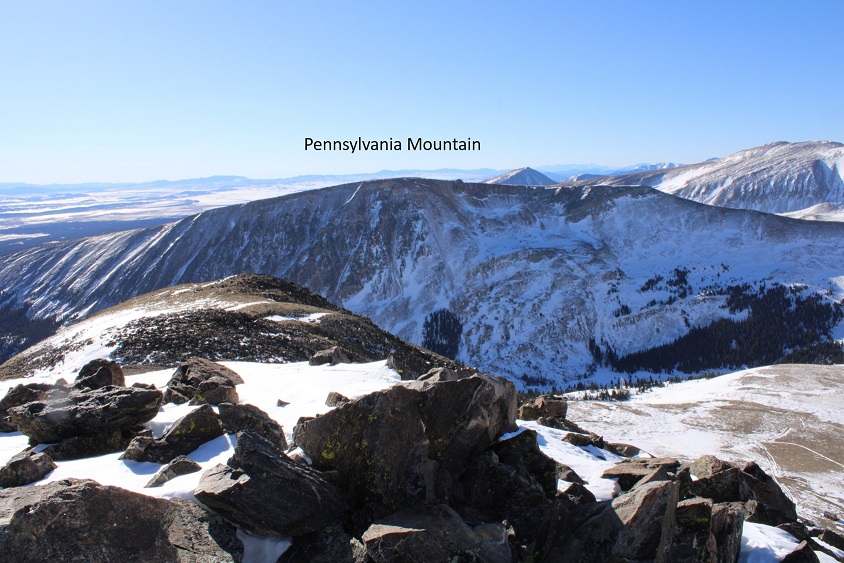
I had a good view of Monday’s summit: Pennsylvania Mountain
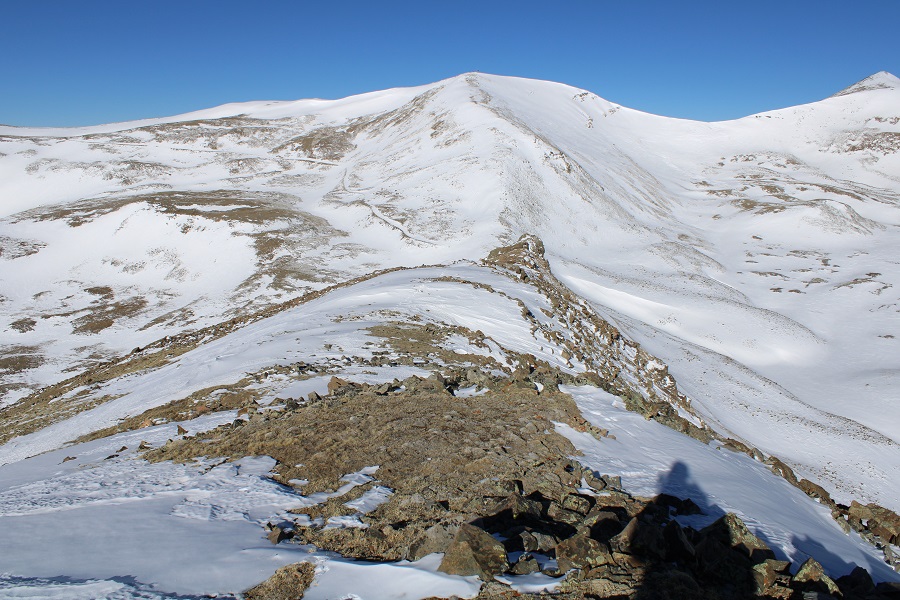
Here’s the trek back down the ridge
Yes, this is all class 2/easy class 3 to avoid snow
And back towards the mine
Here I heard another loud buzzing and saw a helicopter fly overhead. It didn’t look like a rescue helicopter.
Here’s the path the road takes back down
I made it back to where I’d put on my snowshoes, took them off, and turned right onto 12 and followed it back to my truck. About halfway back my microspikes broke, both of them, so I guess it’s time to get out the needle nose pliers again. I made echoing clanking sounds as the chains scraped the dirt as I walked the rest of the way back.
I made it back to my truck at 10:45am, making this a 10.63 mile hike with 2305’ of elevation gain in 4 hours, 45 minutes
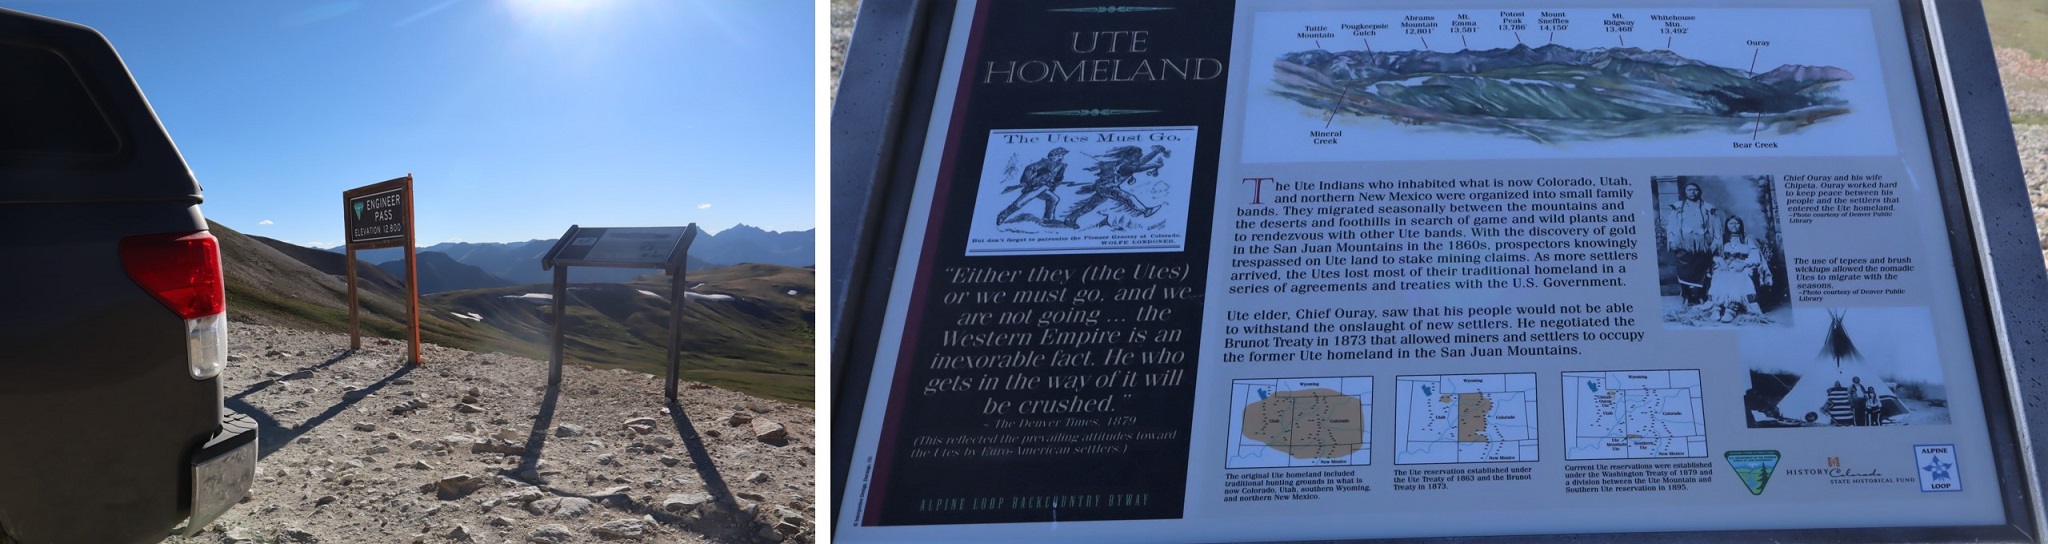
I left Cinnamon Pass after hiking some bicentennials in the area, intent on driving to the Henson Creek Trailhead that leads up to Hurricane Basin. I put together a gpx file on CalTopo which had me taking Road 5 to 2, which is the road that goes over Engineer Pass. However, I wasn’t going to take the pass, I was going to take another road that cut down to 21. I was all excited about this until I drove to the cutoff. At the cutoff all that was there was a sign that said no going off road. Also, the road ended. Hmmm. OK, so there was no road here (or at least, not anymore) so I turned around and drove over Engineer Pass to the trailhead.
I have a stock Tundra, and it handled Engineer Pass just fine. I did see a couple in an OHV, a man in his 40s driving and his wife white as a ghost sitting next to him, clutching her purse as if it were a life vest. She was scared beyond belief, he was having the time if his life…lol! Luckily, since it was after 5pm there weren’t too many other drivers on the road, so I didn’t have to pass too many people. In fact, I didn’t see another vehicle once I went over the pass.
That being said, I wouldn’t recommend driving over Engineer Pass to get to this trailhead: Instead from Lake City take 20 to 21.
I found a nice dispersed campsite near an old cabin.
I walked around for a bit but honestly didn’t stay up long: it had been a long day and I was beat. I ate dinner on my tailgate and had a rather brave chipmunk and Canada Jay beg for food from me. It looked like they’d been conditioned for this behavior. Around 3am I heard what sounded like a wrapper being manipulated by a small rodent. I figured it was the chipmunk from last night fooling around. I thumped on the side of my truck a few times and it left, only to come back again a few minutes later.
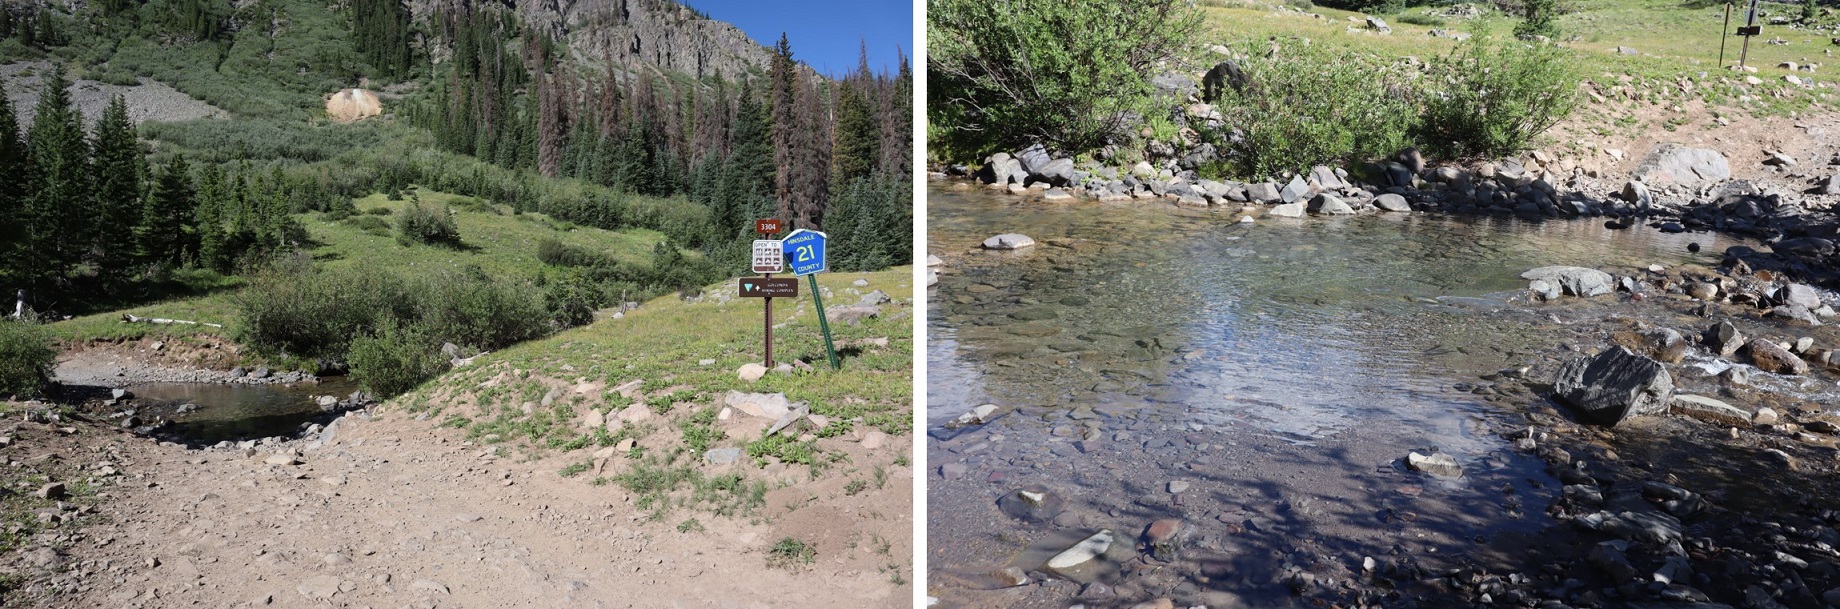
I was finally on the trail at 5am. From my campsite I walked down CO Rd 21
I crossed Hensen Creek and changed out of my sandals and into my hiking boots. (I walked the area the night before and figured since it was a short distance to the creek I’d start off in my sandals and change after the creek to save time).
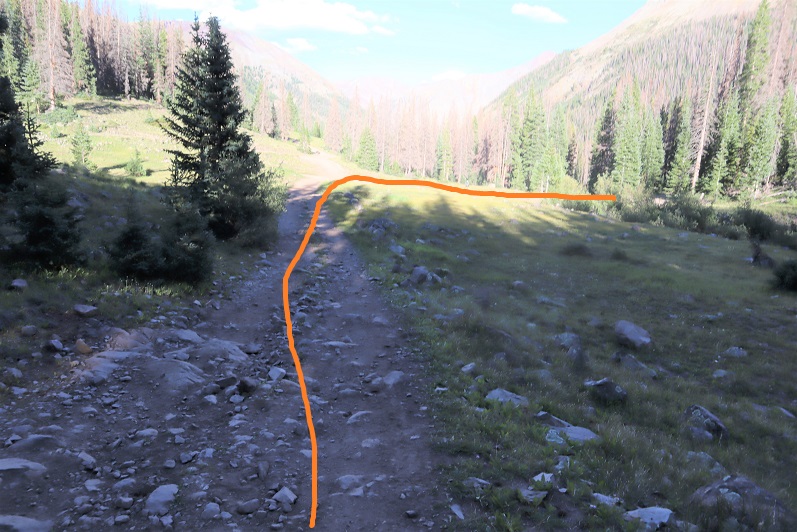
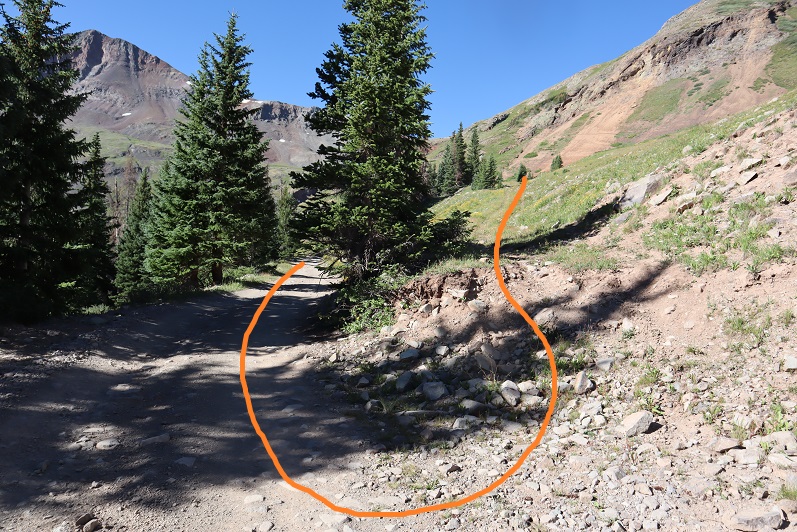
I followed the 4WD road for a very short distance and came to a fork in the road. I went left first, thinking I was supposed to follow the creek, but I ended up coming to private property with ‘no trespassing’ signs. In fact, I should have gone right and followed the road (this is counter-intuitive, but the road actually winds up the mountain).
After backtracking I followed the 4WD road for 2.75 miles, all the way to Hurricane Basin.
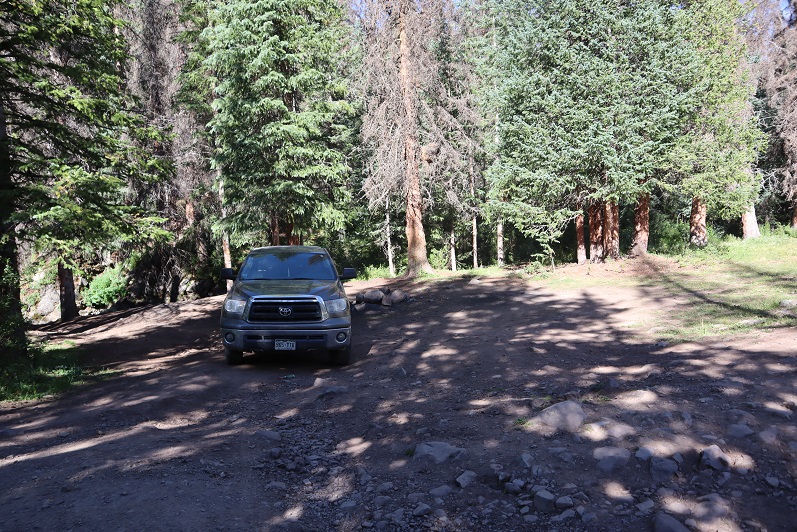
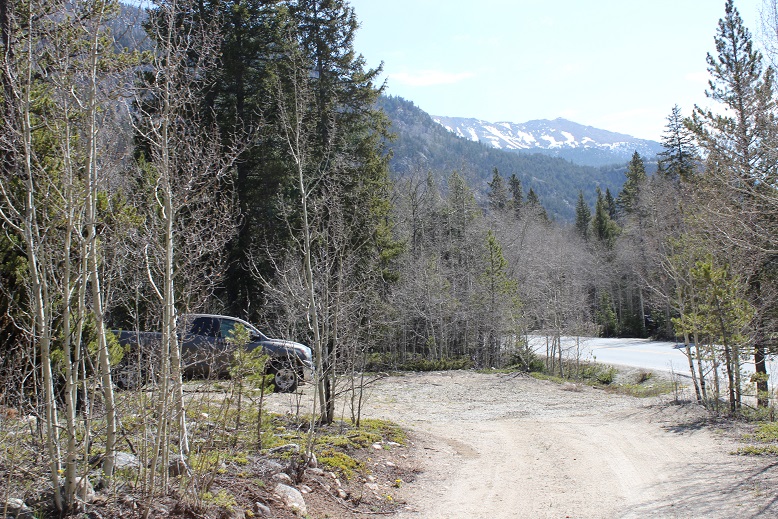
Note: my truck could have made it all the way to the mine, but I would have run into trouble if I’d needed to pass someone. There are only 2 passing points on this road, one at the first switchback, and one just before leaving the trees (which also happens to be a campsite, pictured below). If you choose to drive this road note other drivers coming up/down, and realize if they’re already on the road you need to let them drive the entire way before proceeding, as there’s no place to pass.
Just before making it to Hurricane Basin the road forked and I took a left
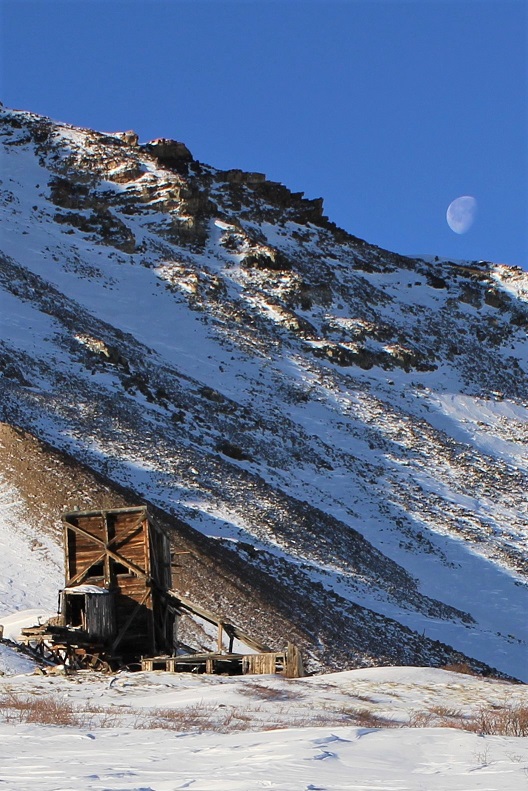
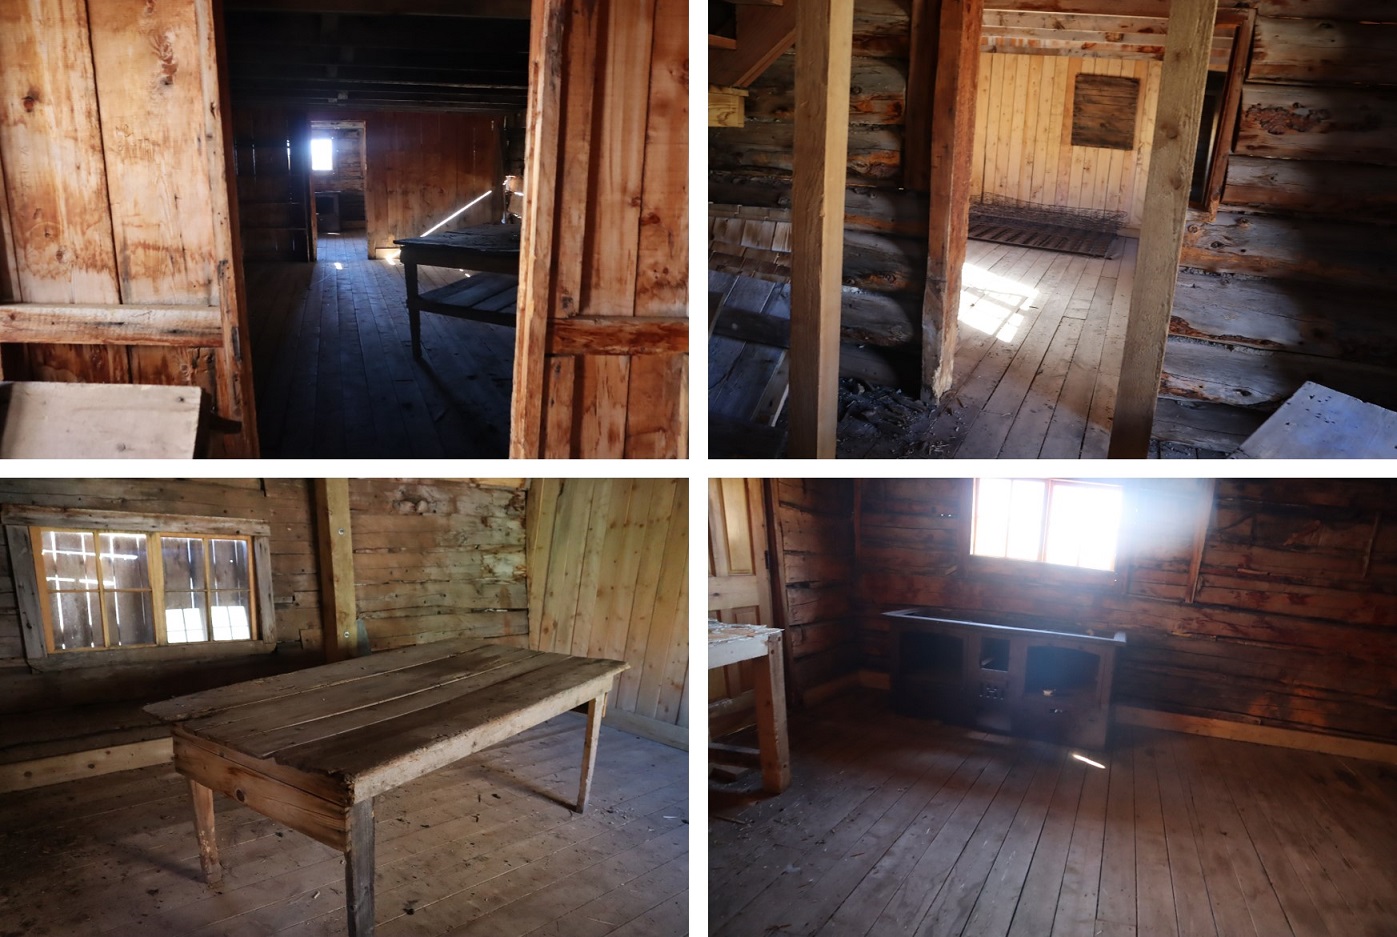
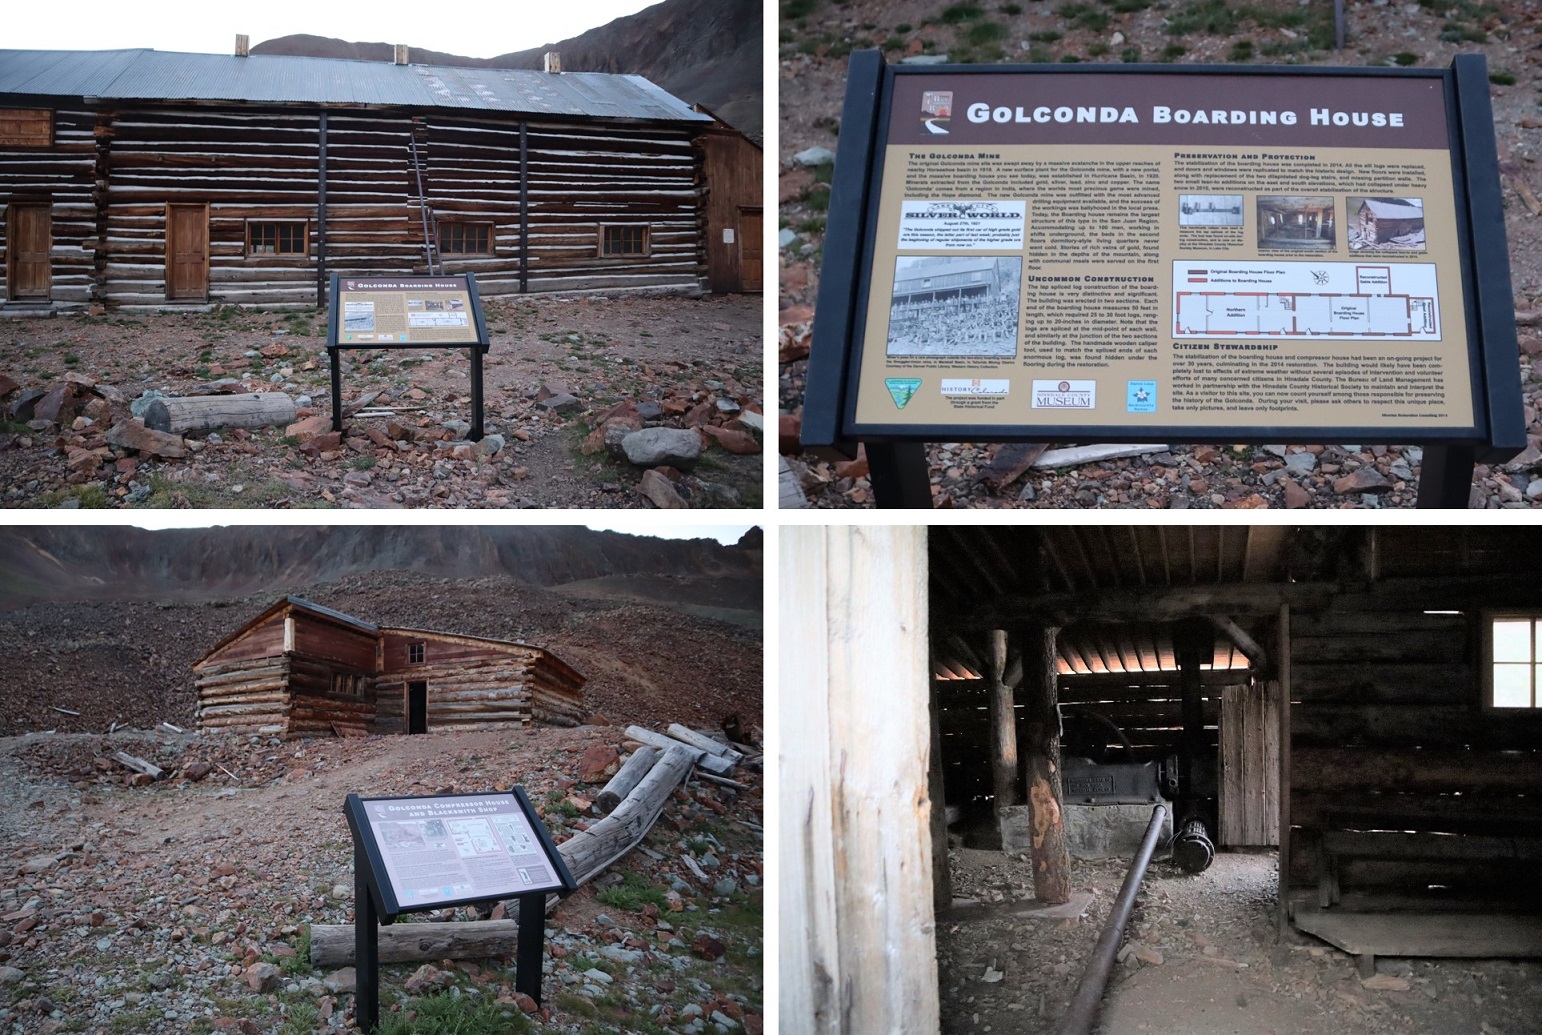
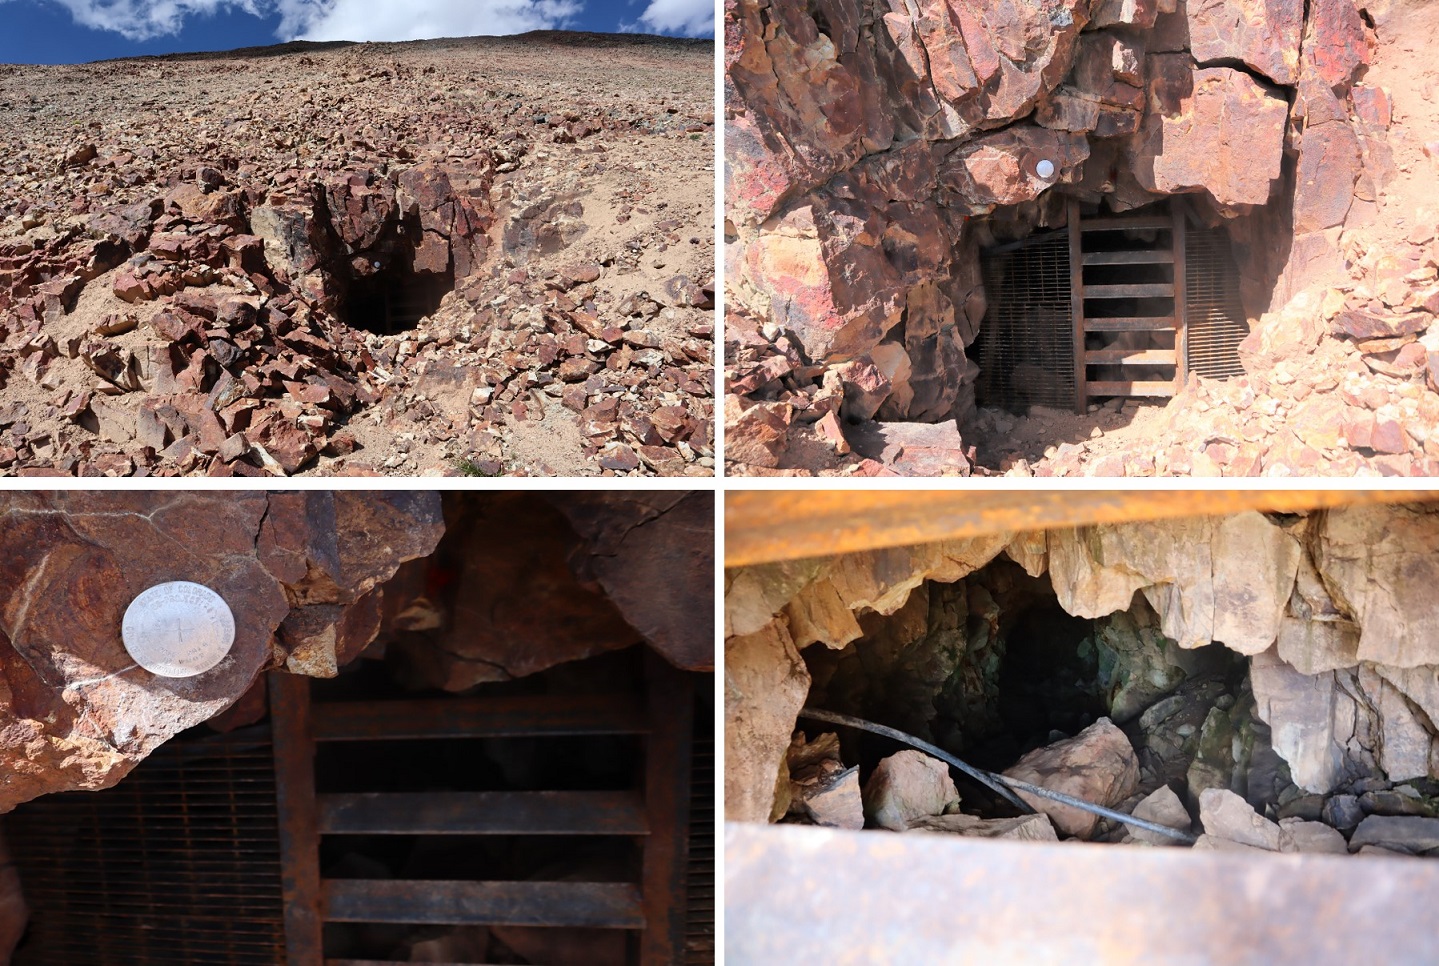
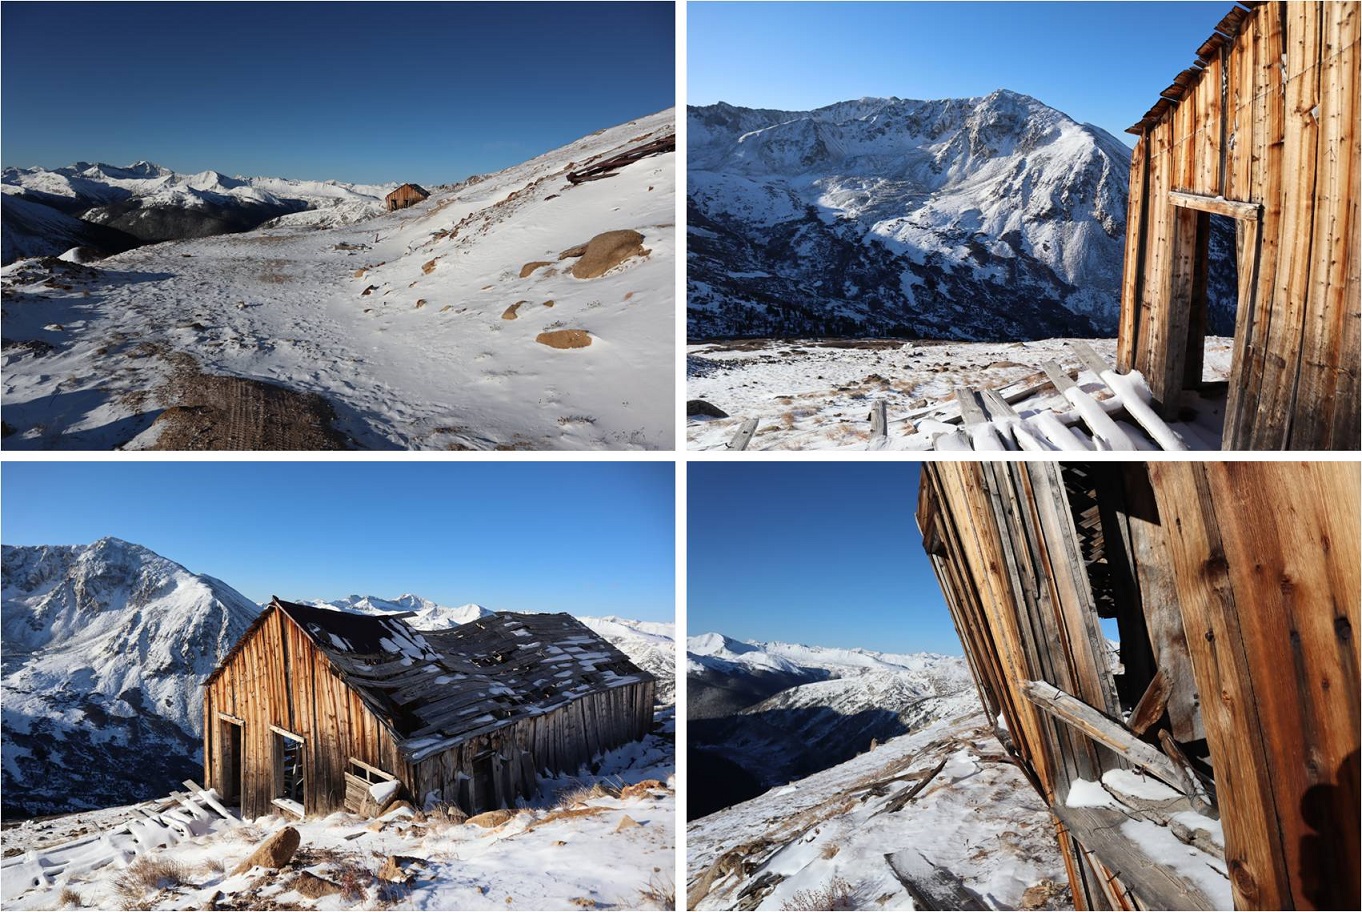
And followed the road all the way to the Golconda Mine. This area is pretty cool, and if you have some extra time I’d suggest you check it out. The mine was refurbished in 2014 but already needs more work, as nature is insane, especially above treeline. The doors open, and you can see some of the original items inside. There’s a blacksmiths’ hut as well, and a lot of leftover ‘trash’ from over a hundred years ago.
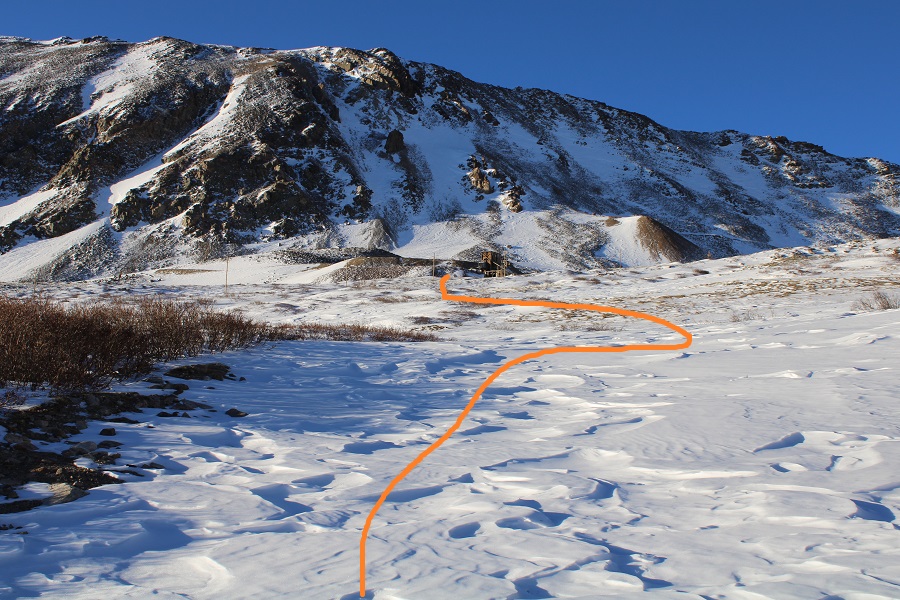
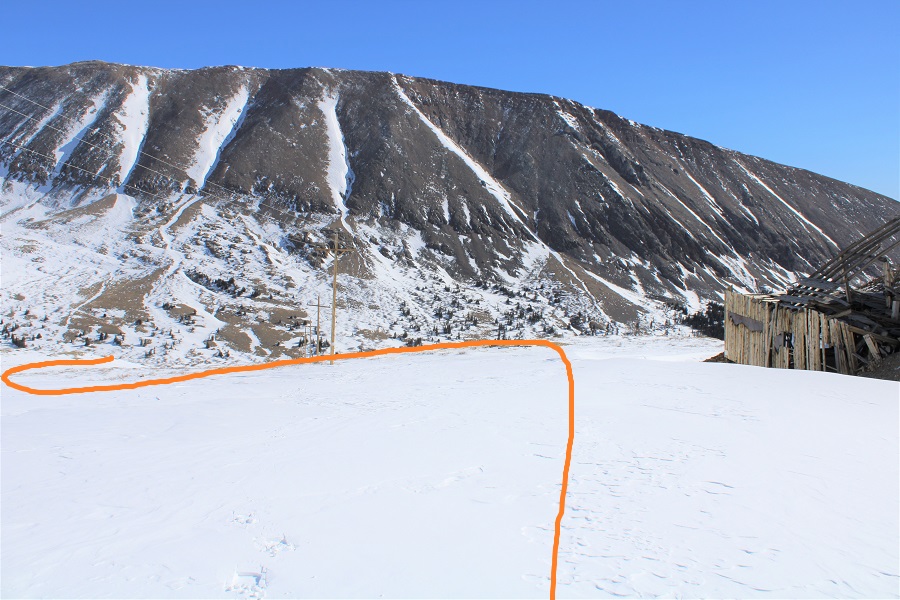
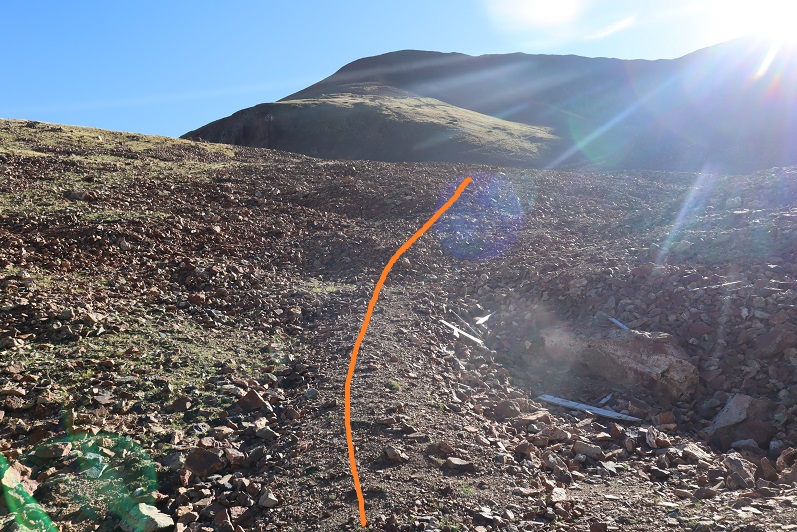
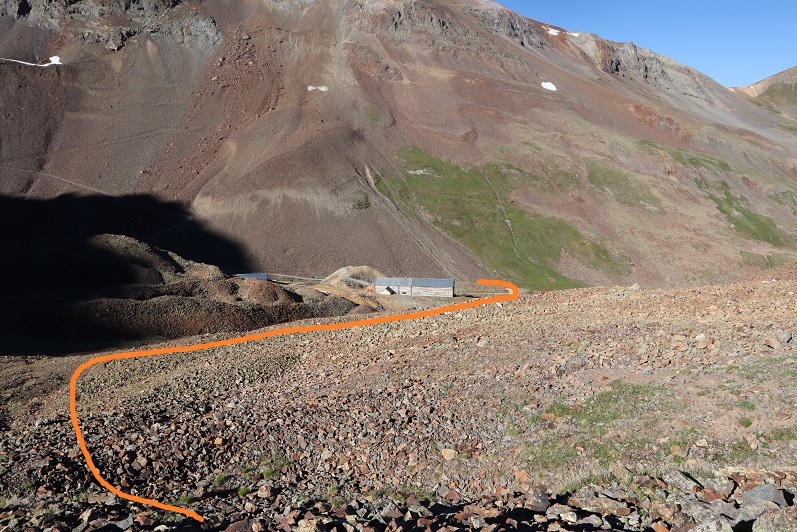
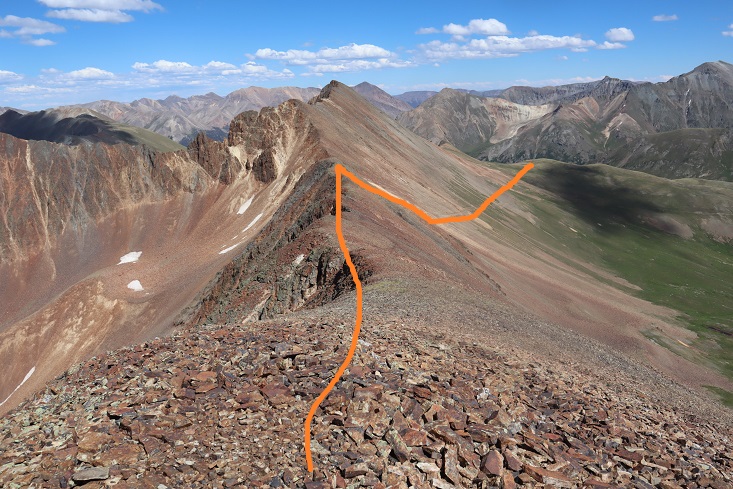
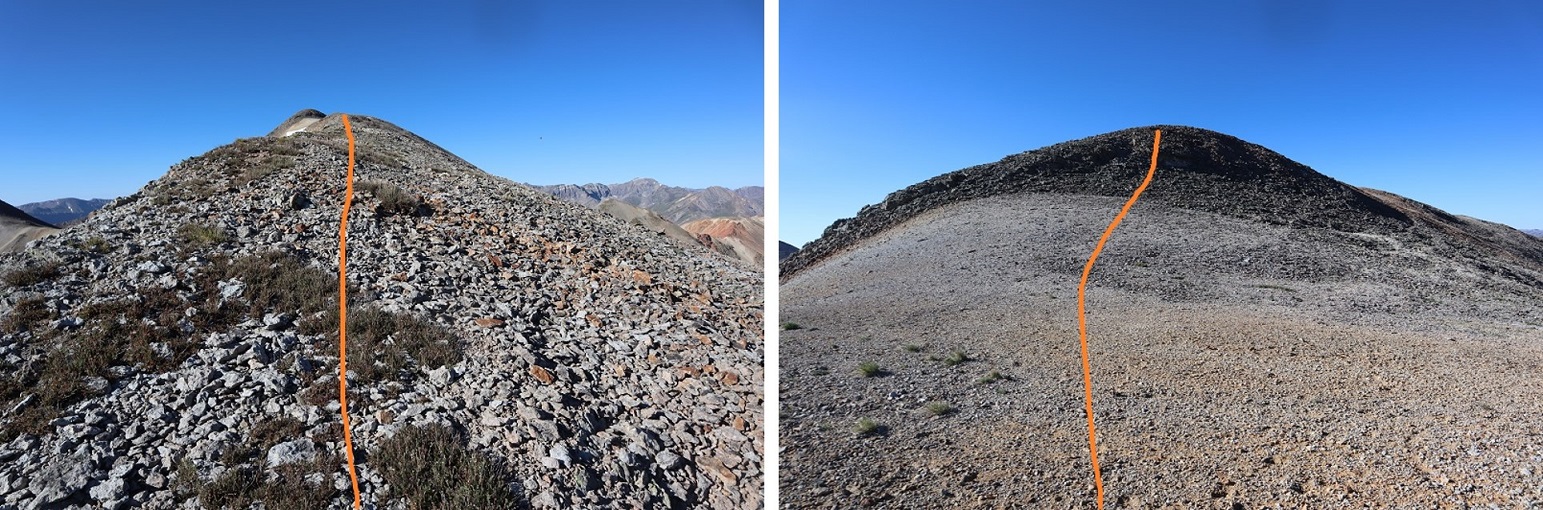
The trail to the summit starts behind the Golconda Boarding House. Well, there’s no defined trail, but that’s the way to start your trek up the mountain. Here’s an overview of the route:
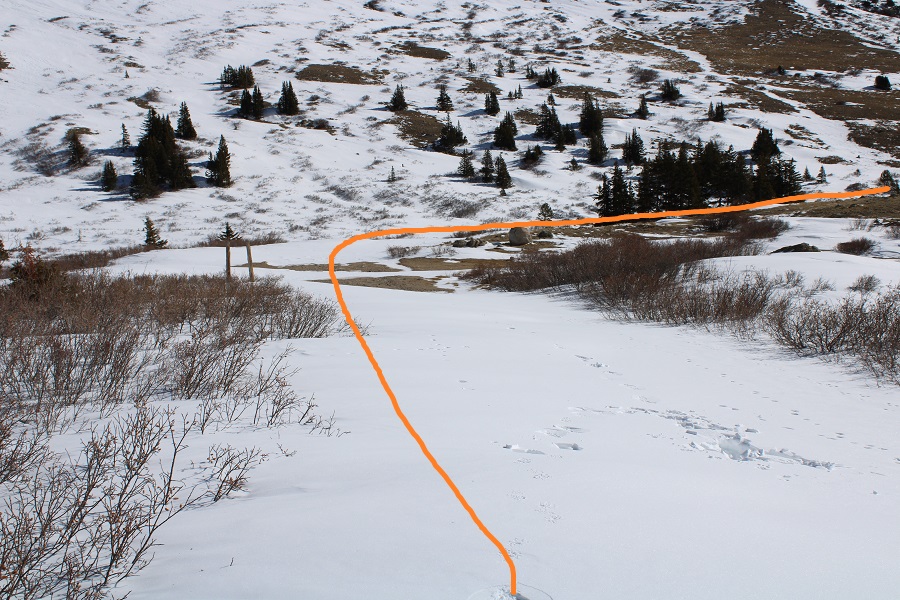
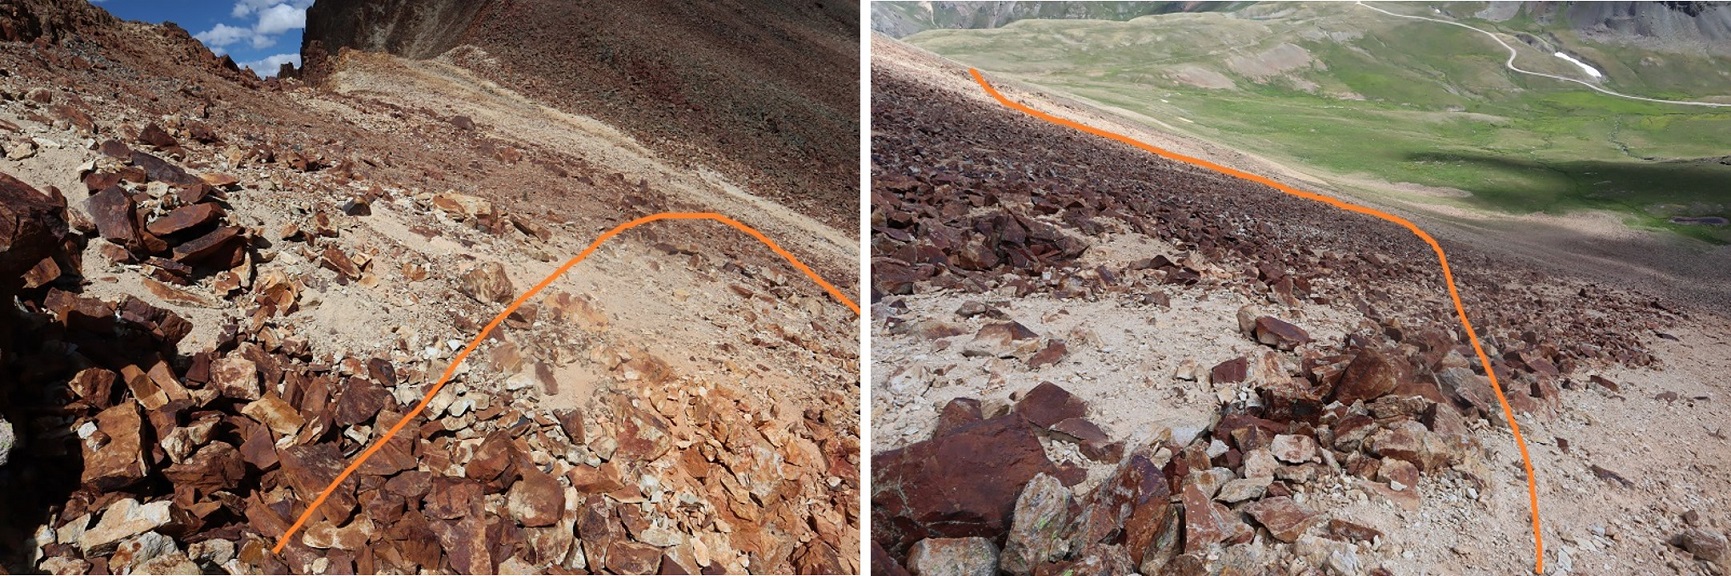
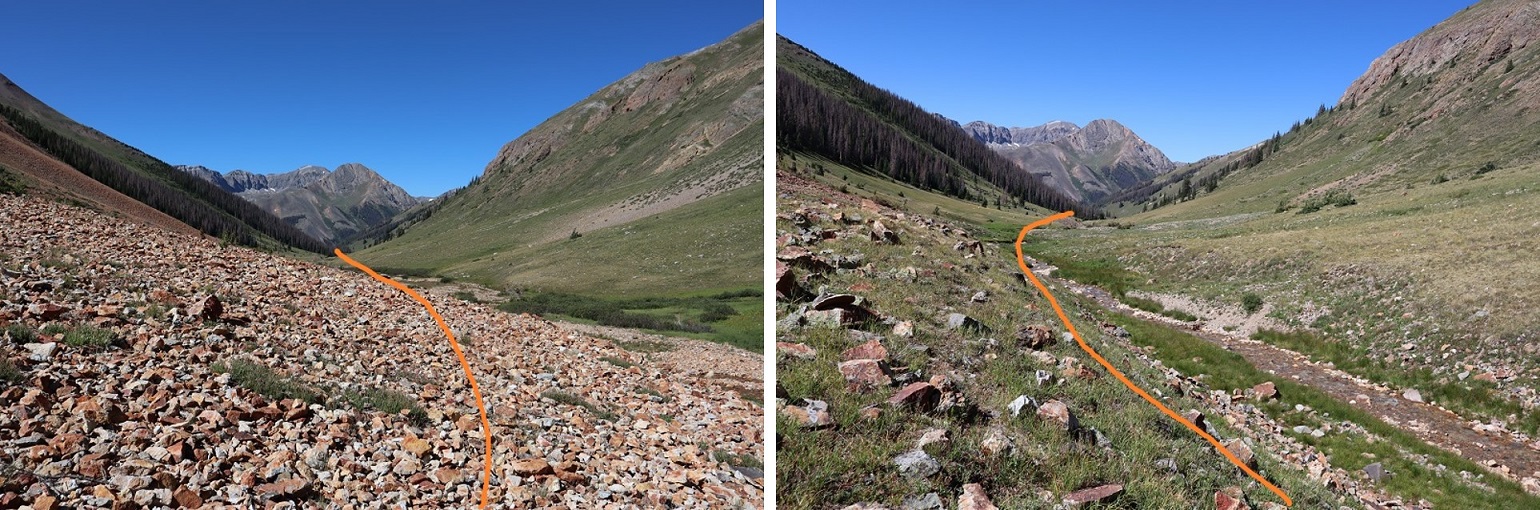
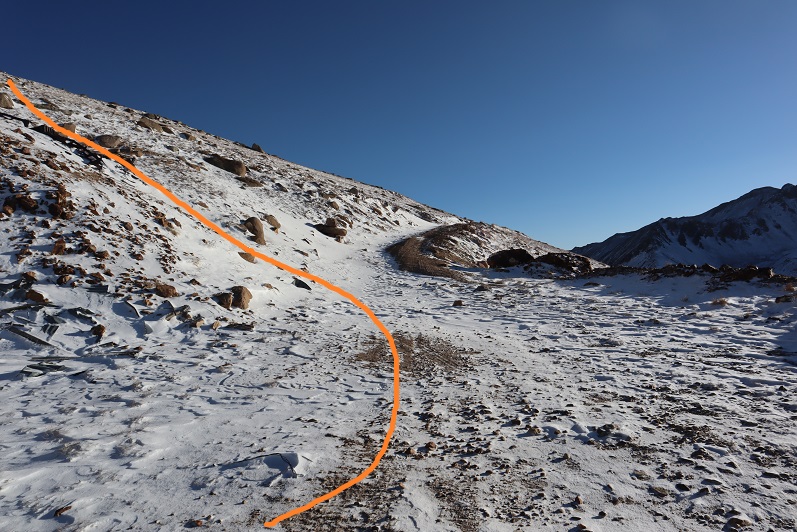
The route starts out in mining rubble
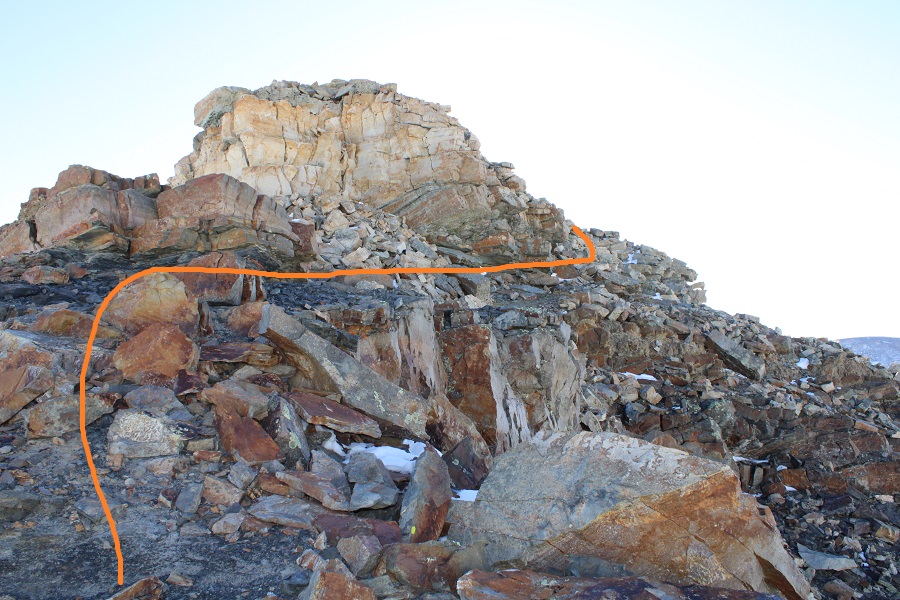
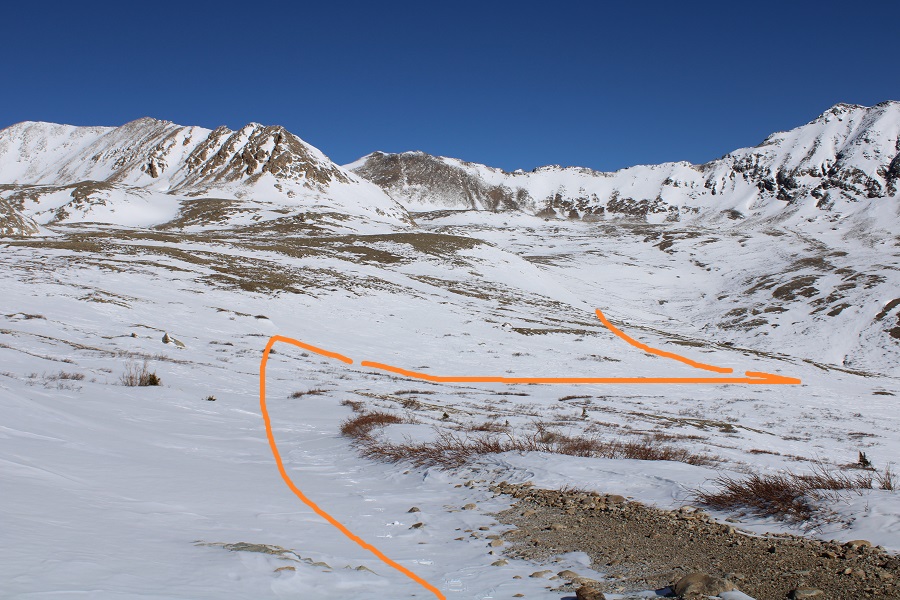
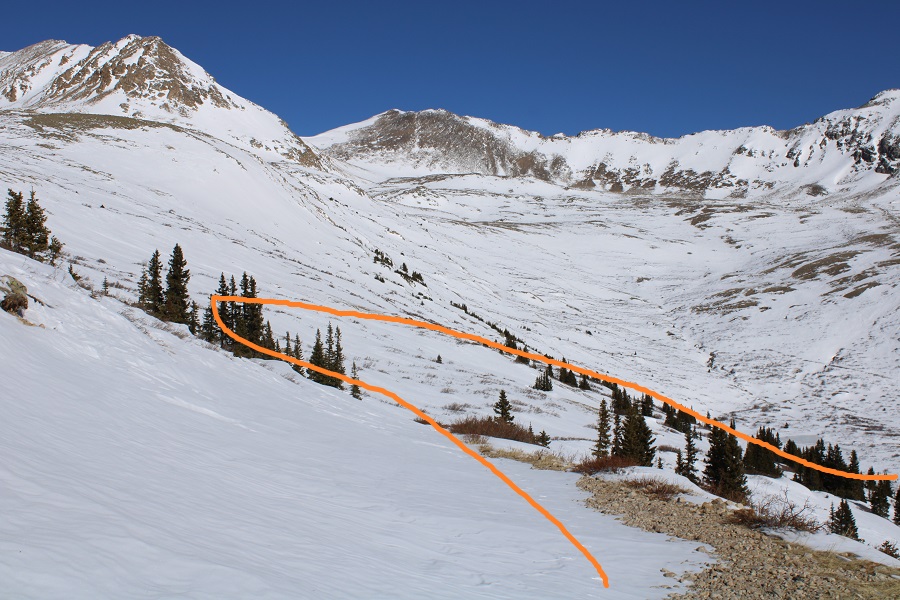
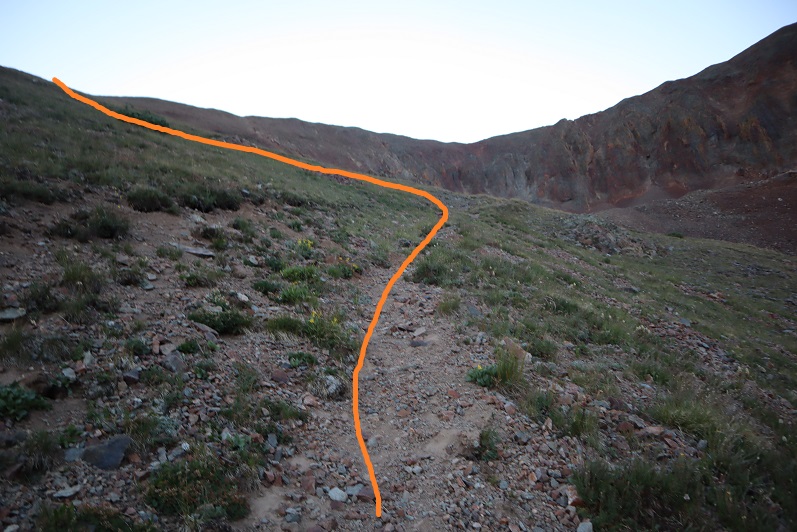
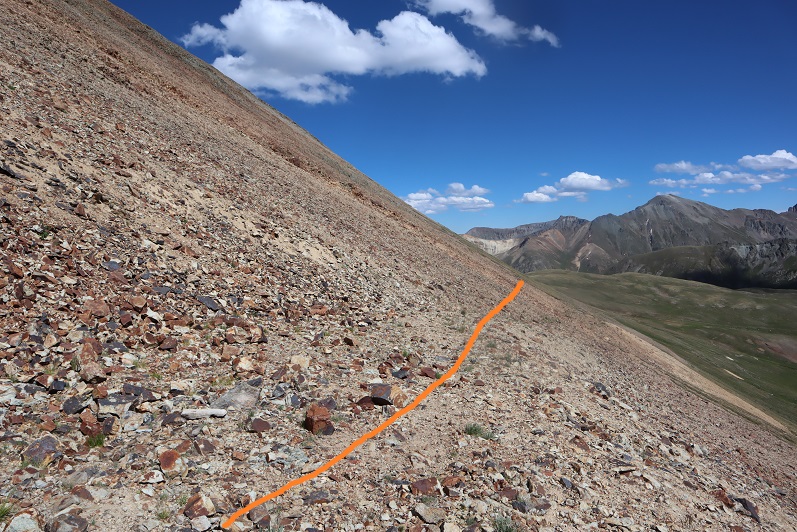
And then changes to tundra. There’s a brief trail here you can pick up and follow for a bit before heading northwest up the mountain
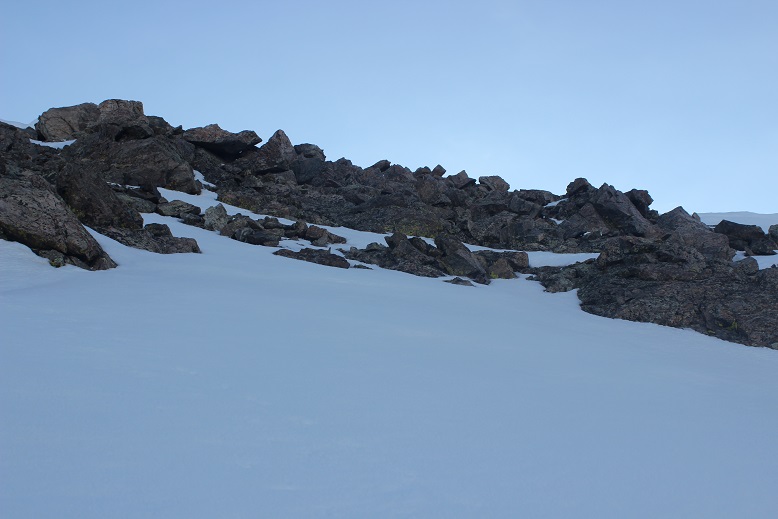
After the tundra came the rubble. There were faint game trails that went up the rubble. On my way down I pushed in steps into the rubble and scree to make more of a defined trail.
I summited unranked Gravel Mountain at 7:10am.
Gravel Mountain:
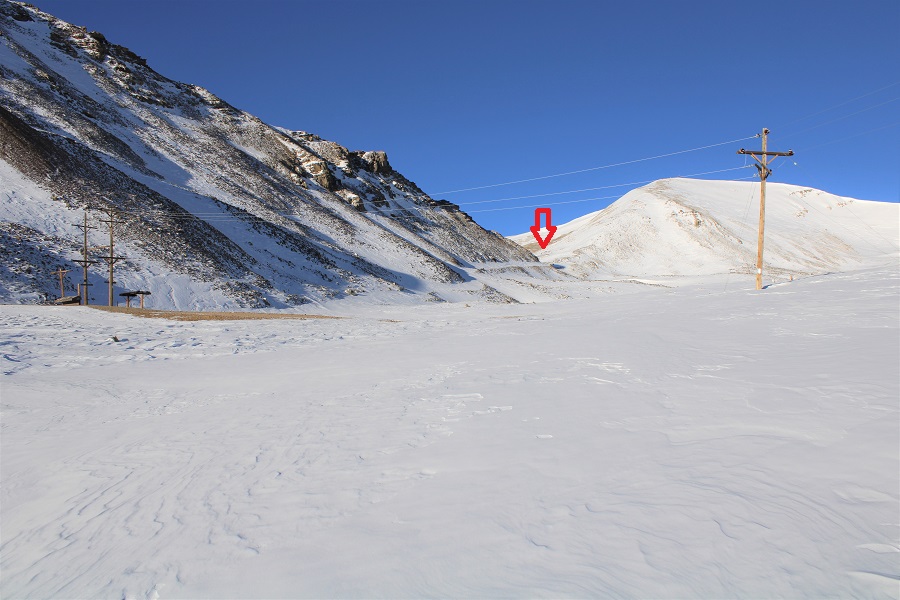
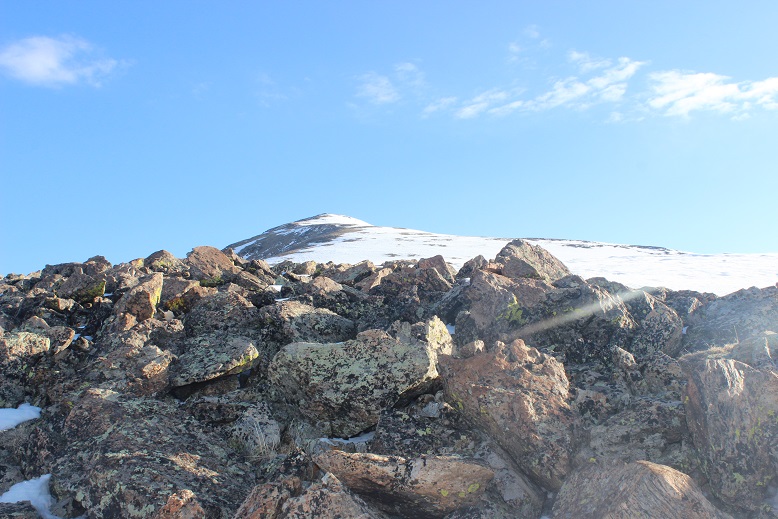
From here PT 13688 is an easy ridge hike away
The route is obvious and easy class 2. Here are some highlights:
On the way down I did my best to establish a trail in the scree/rubble
Once at the mine I just followed the road back to my campsite
On the way down I was able to see the ‘road’ I’d intended on driving down to the trailhead. It didn’t look like it’d been used in decades. So, long story short, take 20 from Lake City, and not Engineer Pass (unless you have an OHV).
I made it back to my truck at 9:30am, making this an 8.66 mile hike with 3042’ of elevation gain in 4.5 hours.
I got back to my truck, opened the back to shuffle things around, and found mice droppings lining the edge of my sleeping bag! Ugh! At that moment I realized 2 things: 1) it wasn’t the squirrel last night making noise, and 2) the moth balls don’t work. Ugh. So. Not. Cool. A mouse had made its way into the bed of my truck and was looking around for food. At least I didn’t have any food accessible. I was a bit bummed though the hundreds of moth balls I had lining my truck hadn’t deterred a small mouse (and by the looks of the droppings it was a small mouse).
I had another day free to hike, but chose to drive home to spend it with my youngest instead (who was just accepted into her first college this week: in less than a year she’ll be off to college, and I want to spend as much time with her as possible before she leaves).
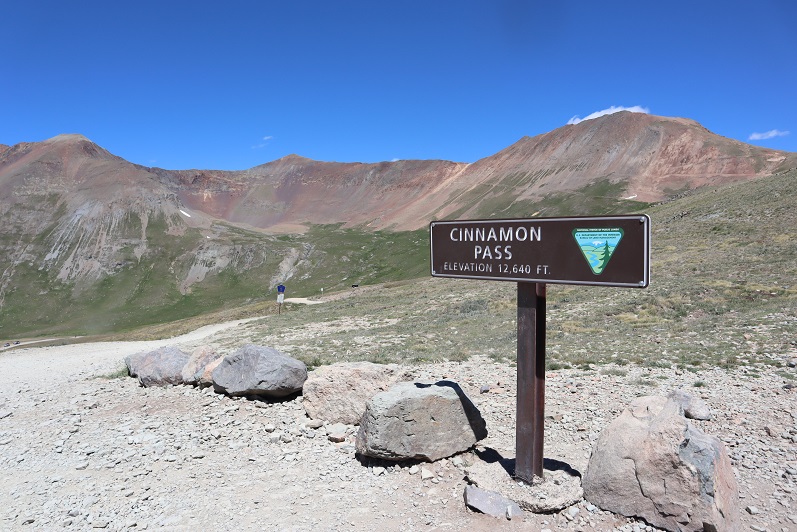
After hiking Every Mountain and Cooper Creek Peak I still had some energy left, so I decided to drive up to Cinnamon Pass and get in a few more peaks today. There were a bunch of OHVs in the parking area when I arrived. Mine was the only truck/non OHV there.
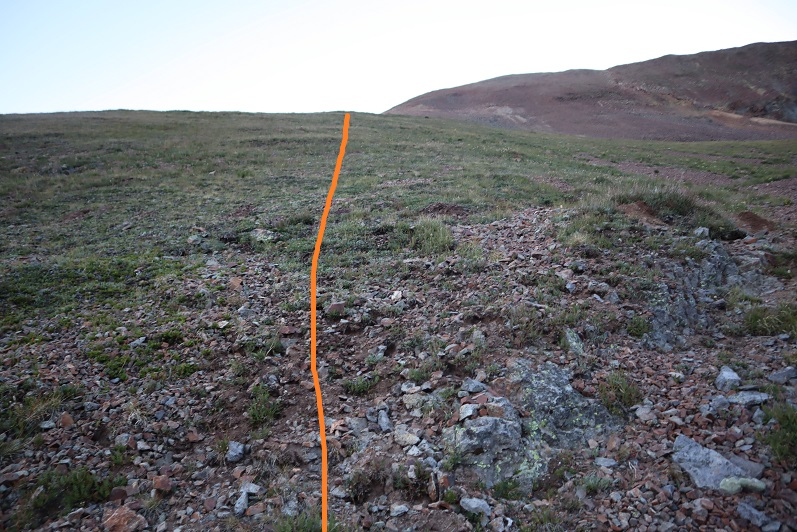
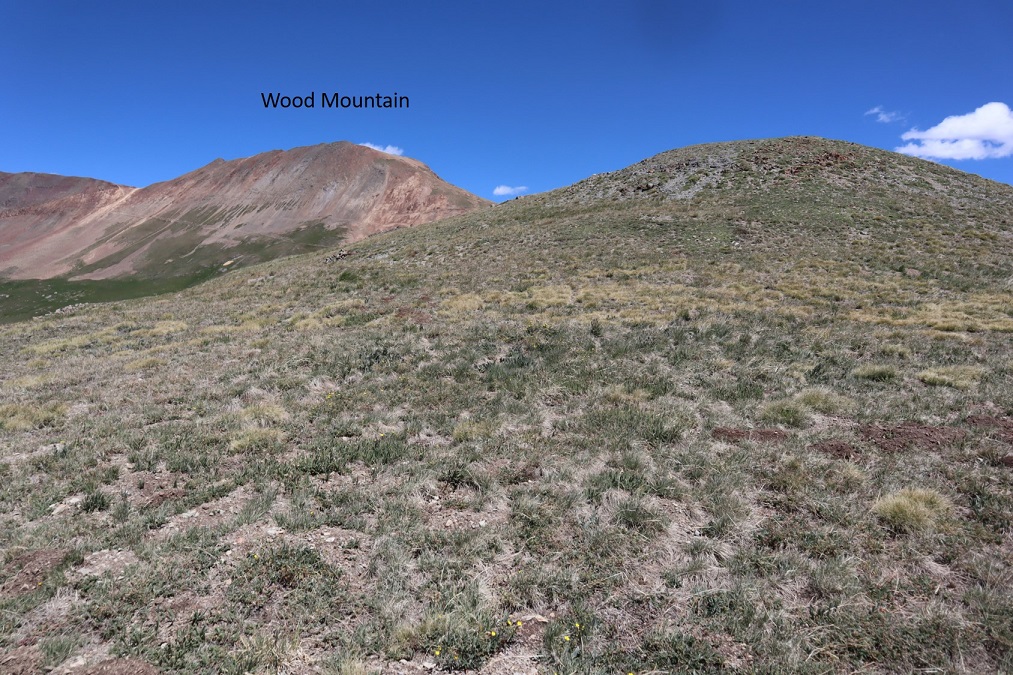
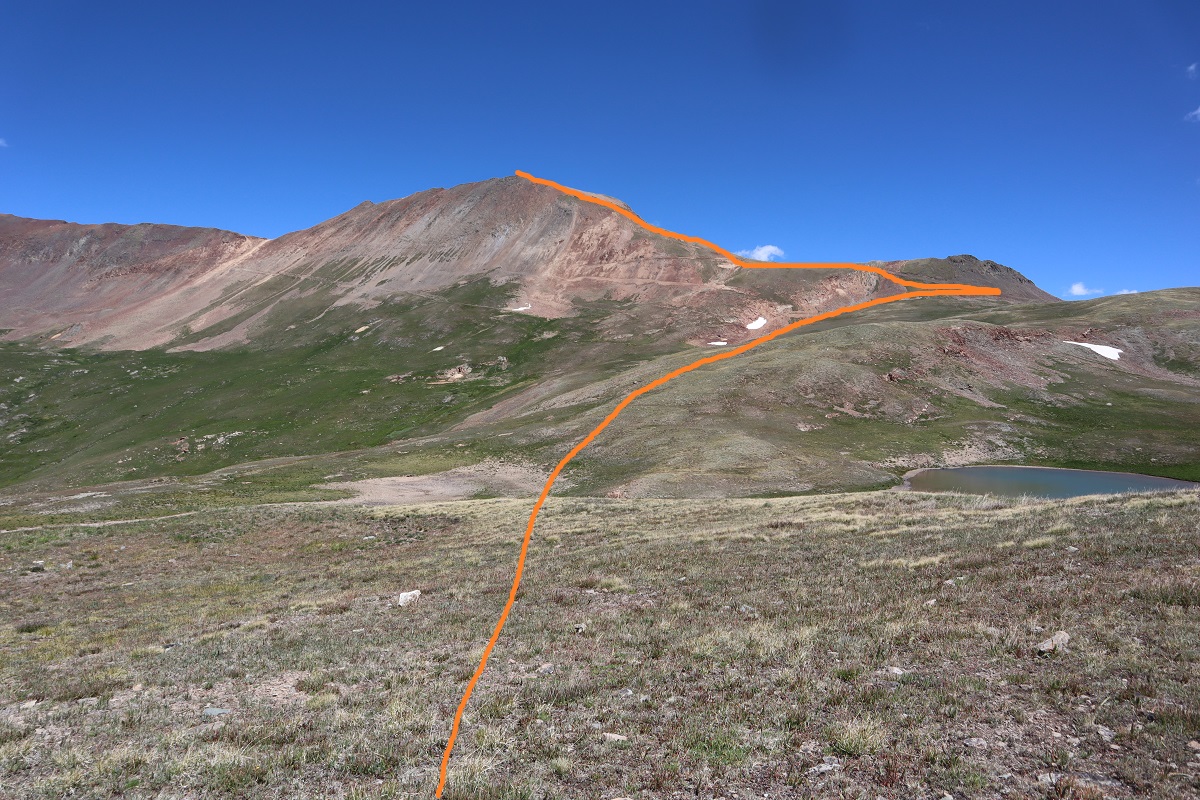
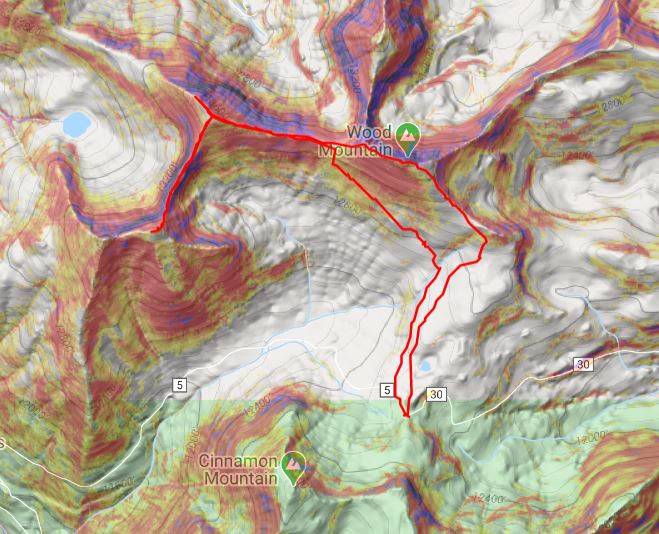
I gathered my gear and started out at 12:30pm. I began by heading north towards Wood Mountain
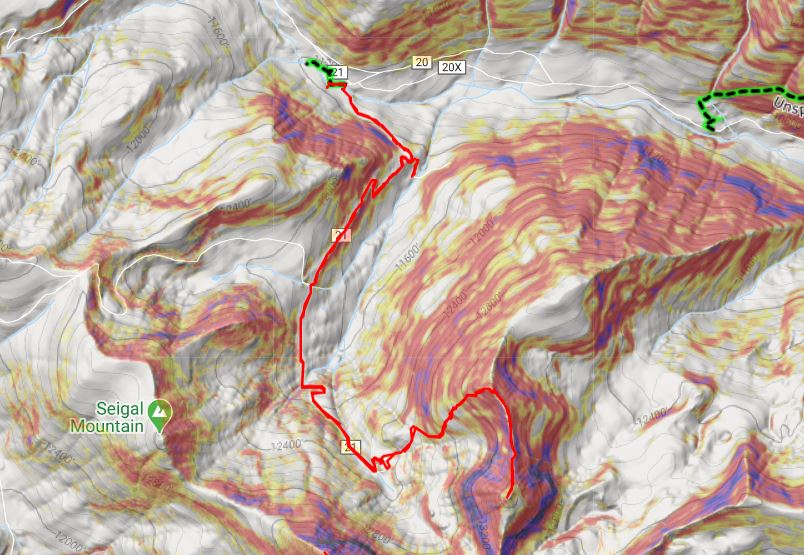
Here’s an overall view of the route
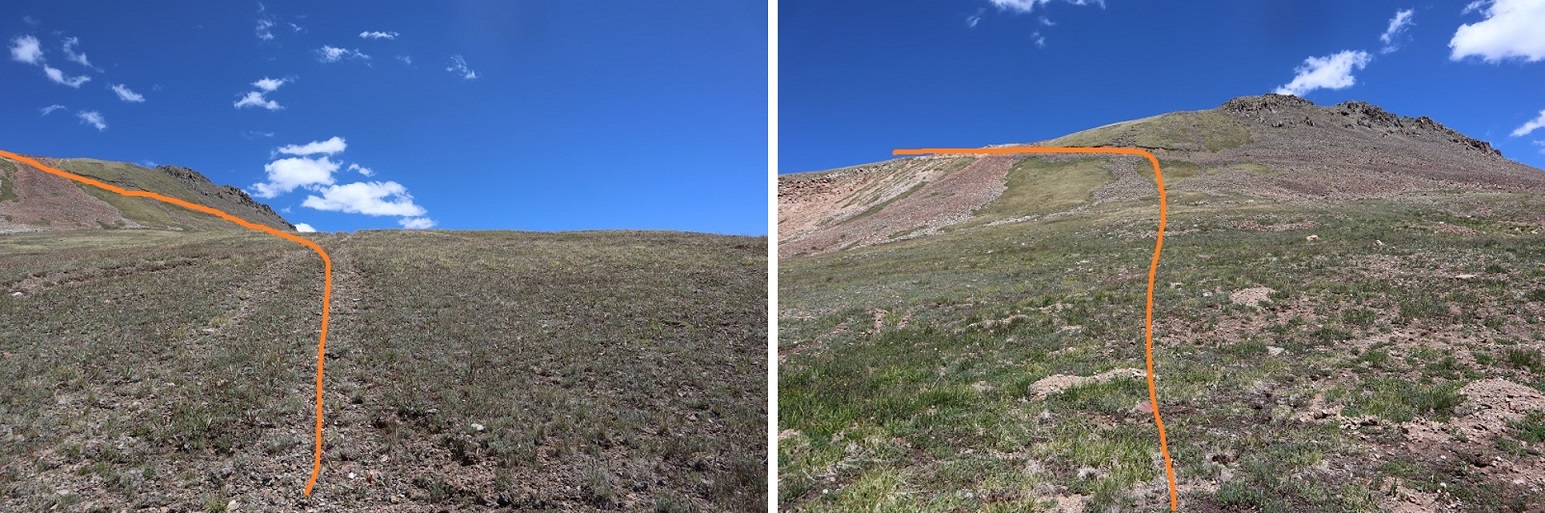
As I was hiking I came across a faint road and followed it up to the ridge
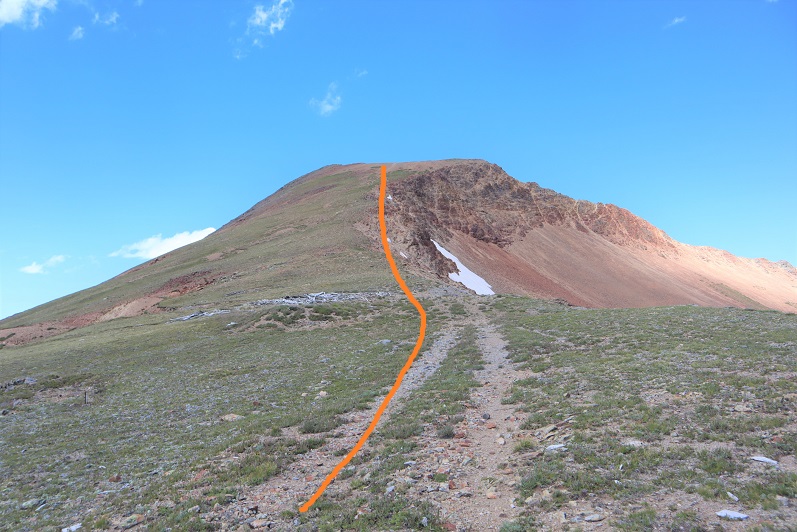
The road ended at what used to be a structure. From there I just hiked up the side of the mountain
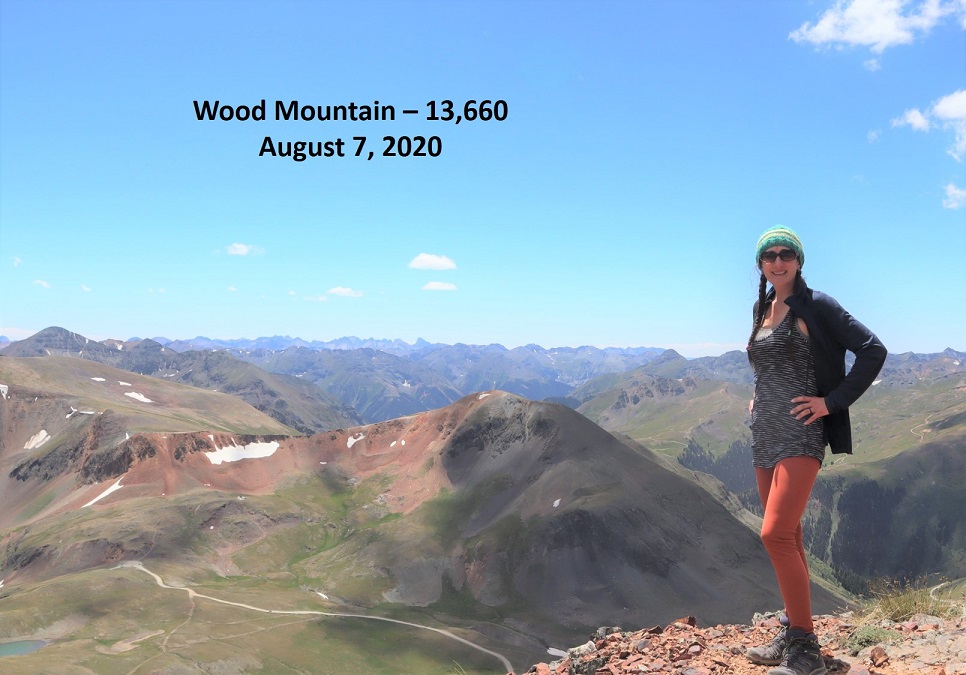
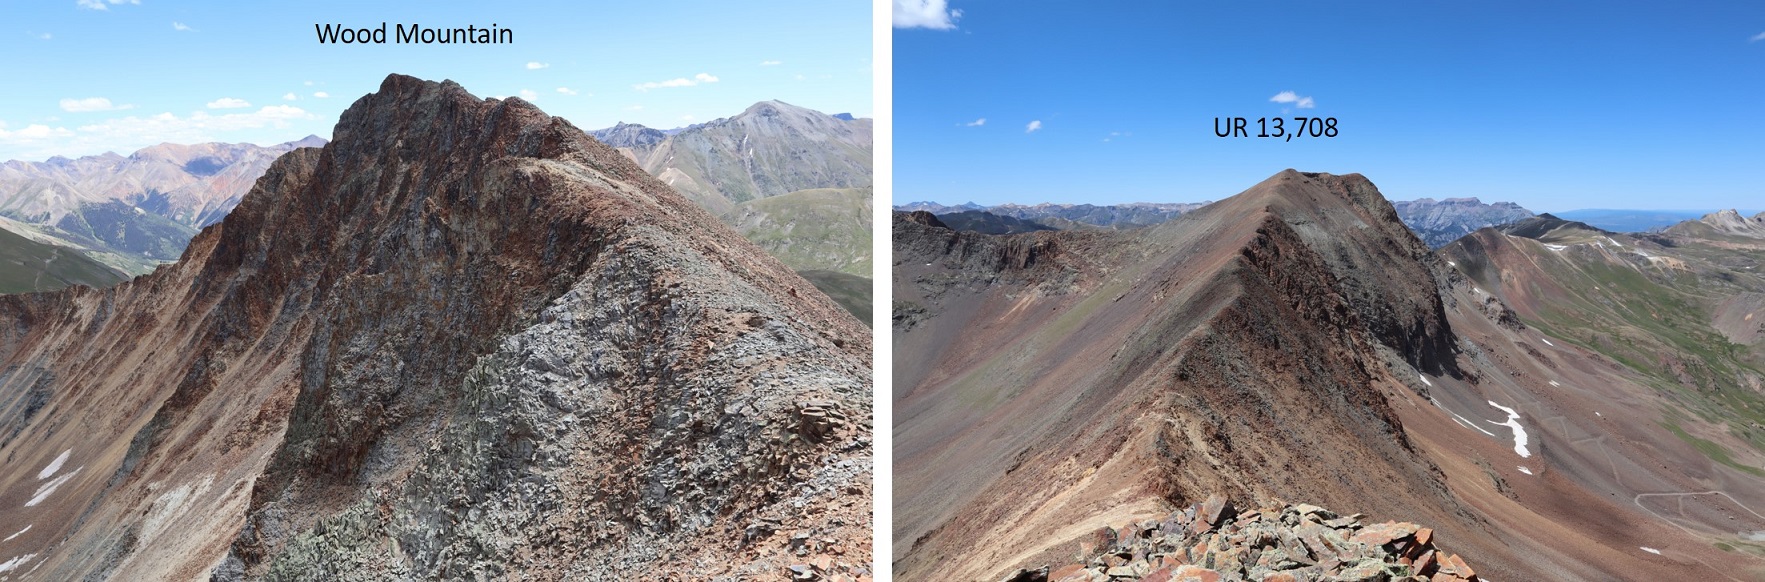
I summited Wood Mountain at 1:15pm, and while I was a little slow/tired from my hike earlier today, I couldn’t believe how easy this summit had been!
Wood Mountain:
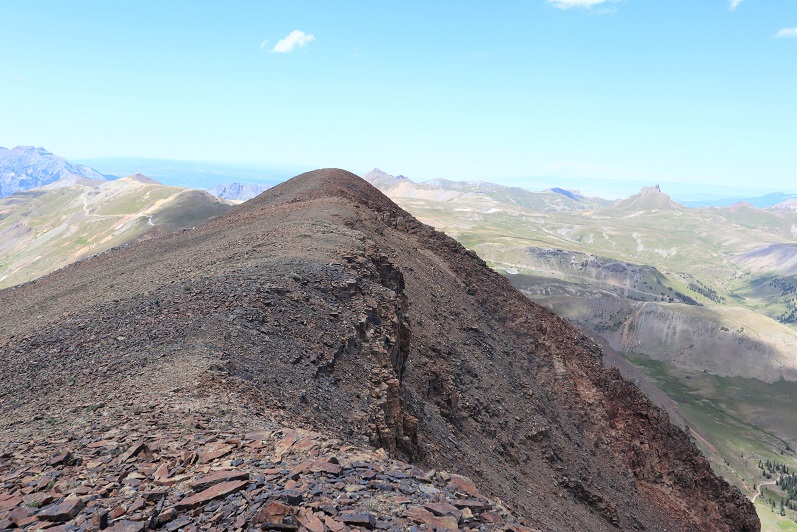
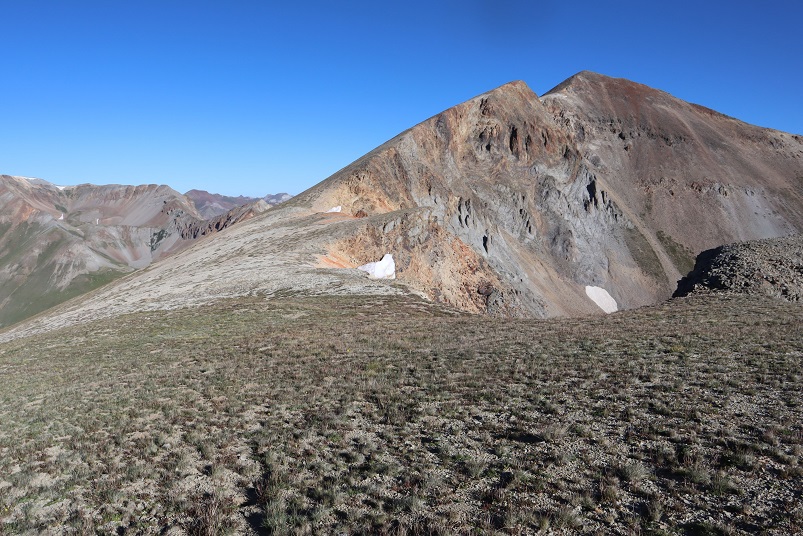
Here’s looking back down the ridge I’d just hiked up
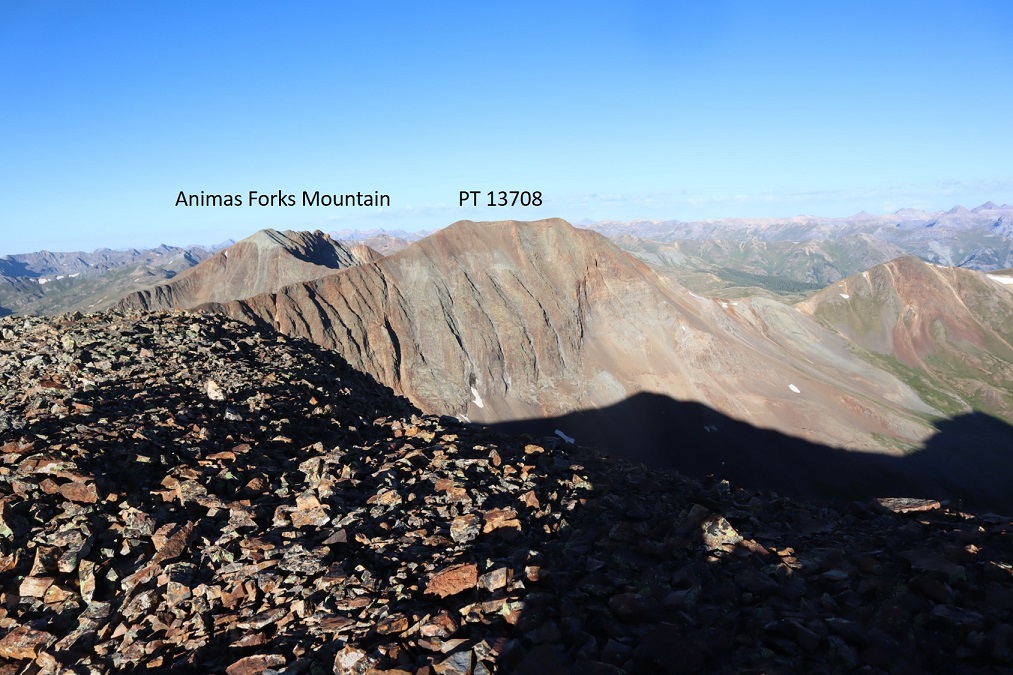
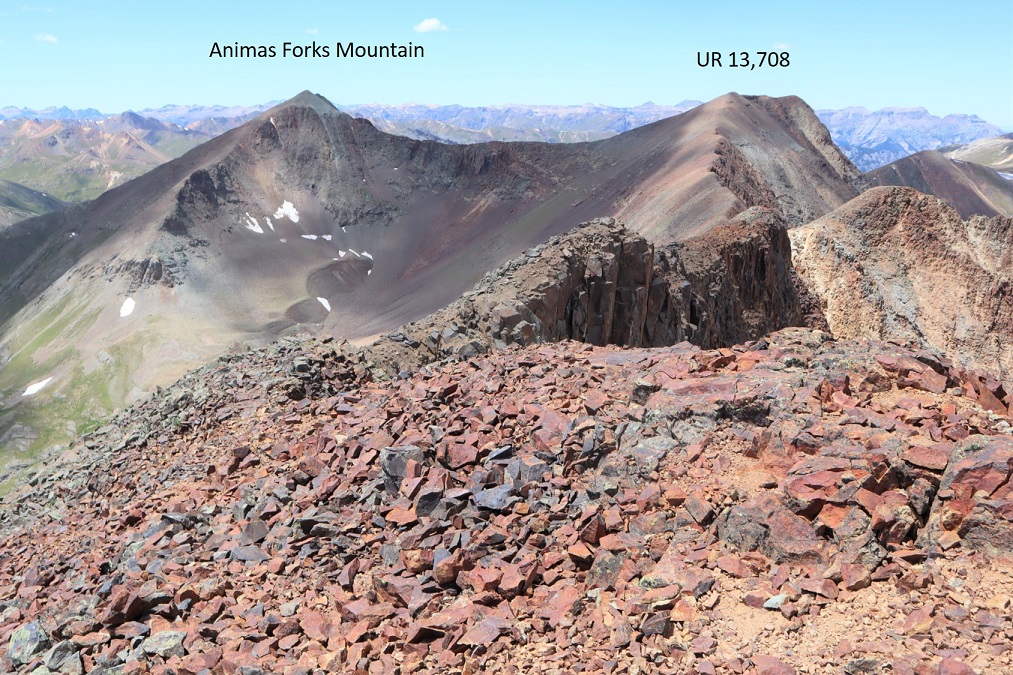
From Wood Mountain you can easily see the other two peaks I’d be hiking today: UR 13,708 and Animas Forks Mountain
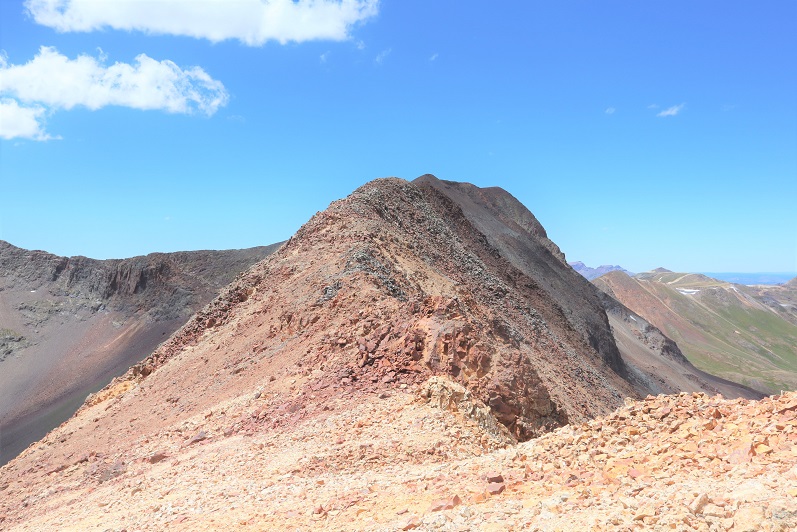
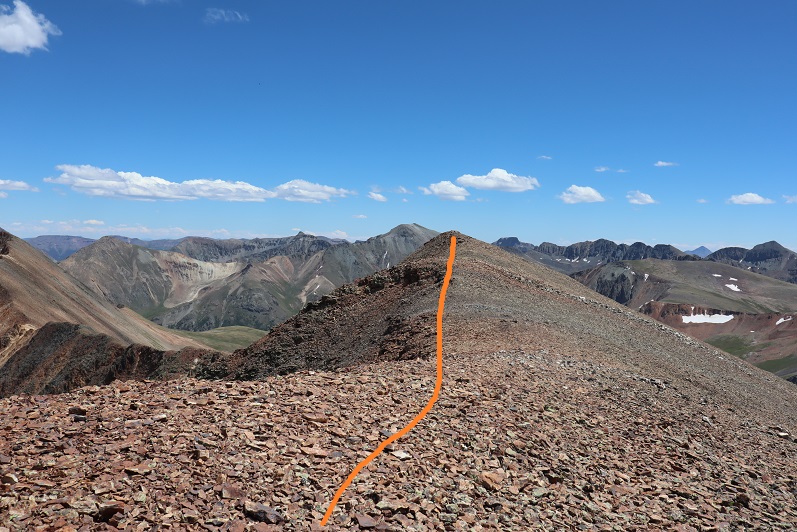
There wasn’t a trail to follow, but this was a simple class 2 ridge hike over to UR 13,708
From the saddle, here’s looking back at Wood Mountain and up towards UR 13,708
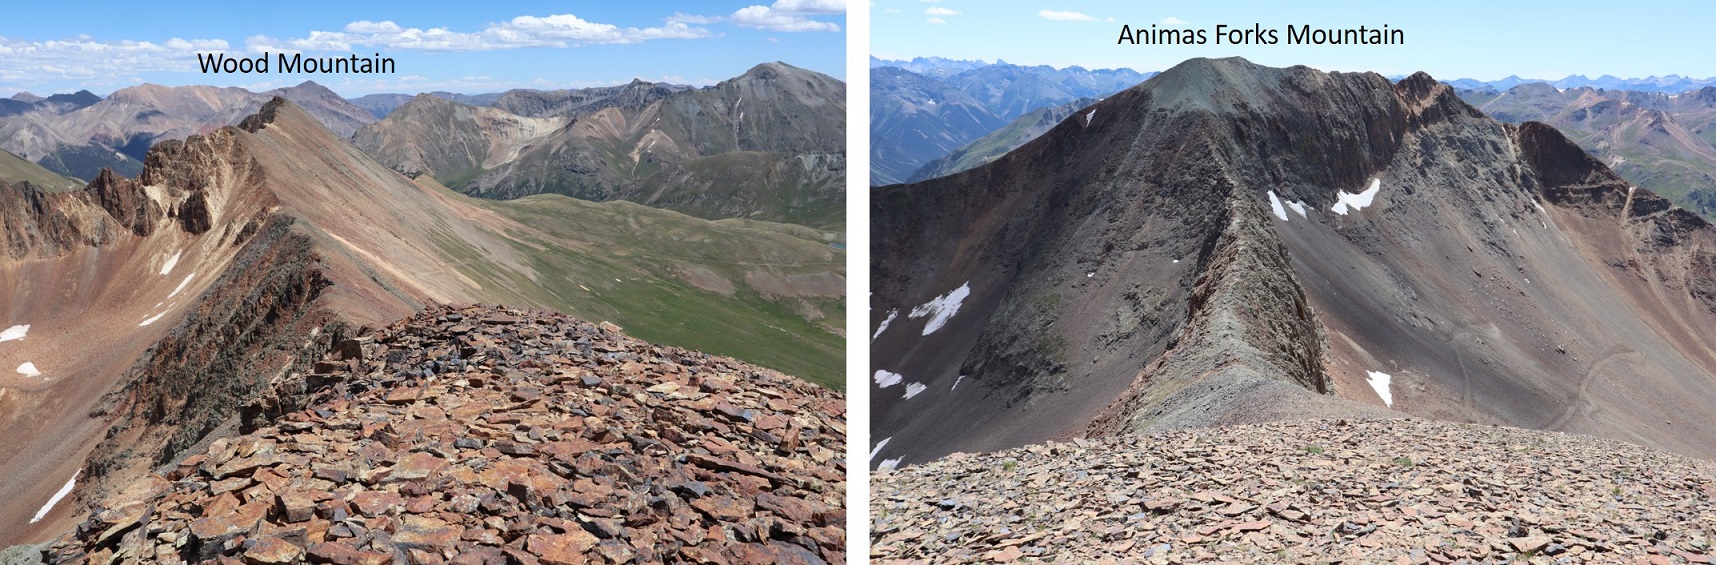
And a good look at the ridge to Animas Forks Mountain
The rock here was loose rubble, but the ridge was easy to follow to the summit
I summited UR 13,708 at 2:15pm. Once at the summit I wasn’t sure I was actually there, so I walked the short distance north to the next point.
Once there I got out my altimeter and determined the first point was actually the highpoint, so I hiked back.
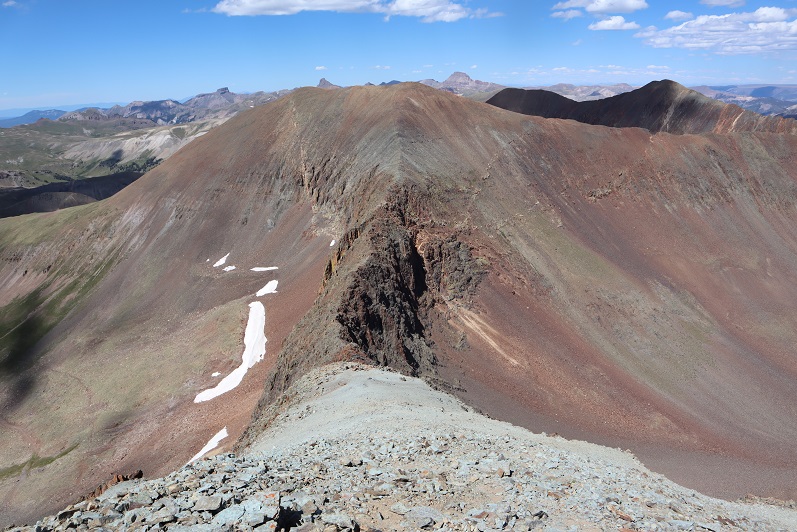
I once again stood on the summit of 13,708 and looked over at Wood Mountain and then over at Animas Forks Mountain
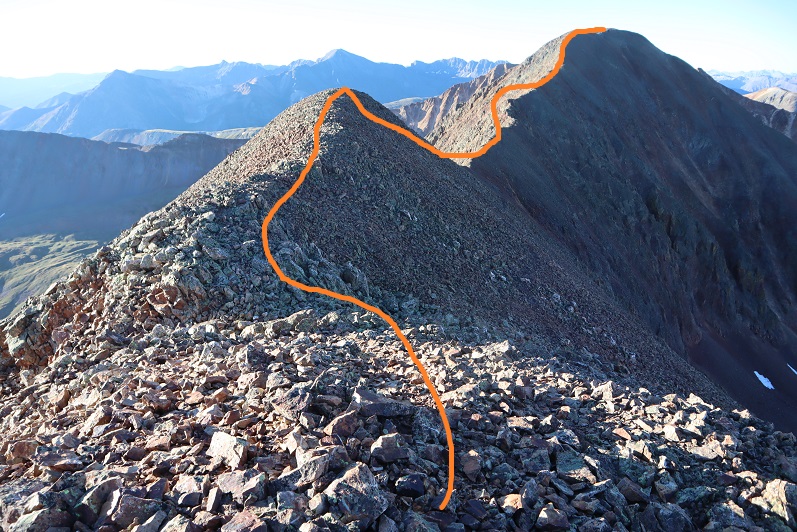
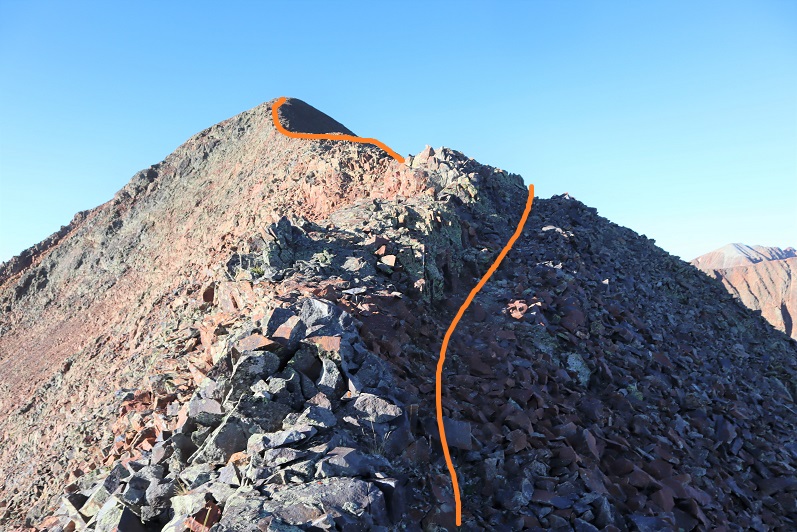
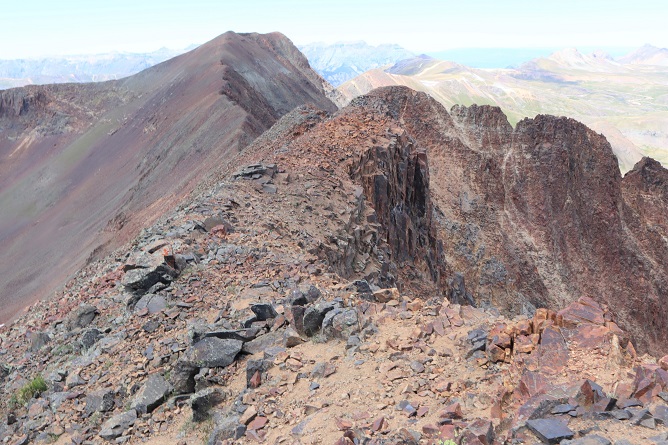
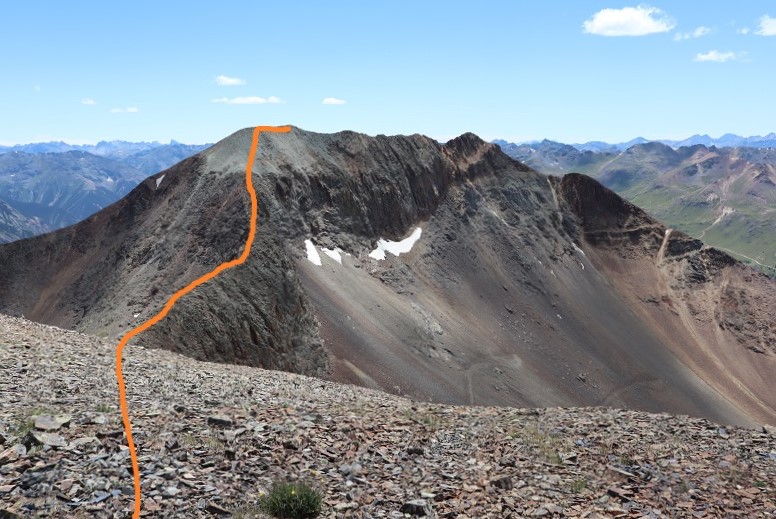
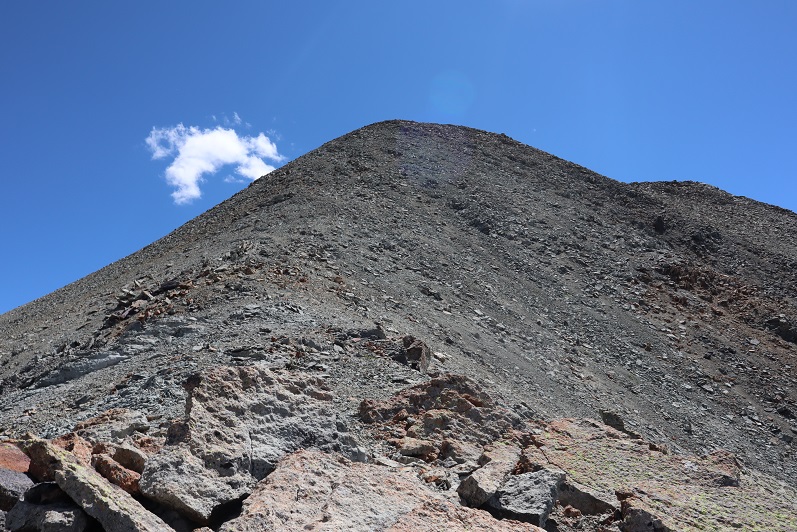
Here’s the route up to Animas Forks Mountain
The ridge looked like more than class 2, but if you just follow the ridge it stays at class 2, just with some added exposure.
The rock is pretty solid until the very end, where it becomes loose just before it turns to gravel
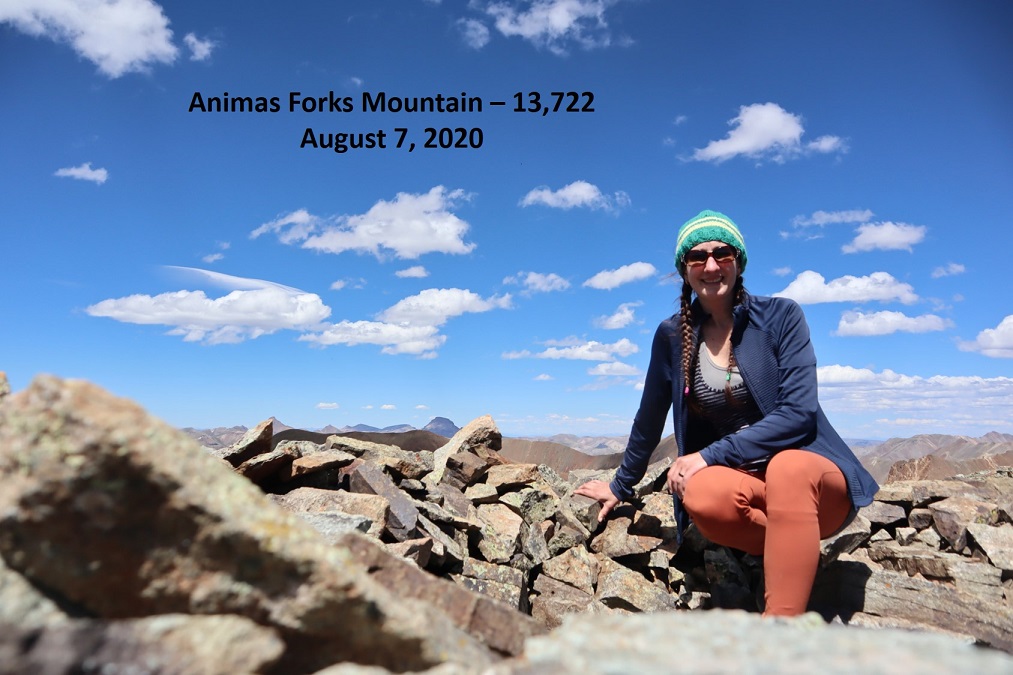
I summited Animas Forks Mountain at 3pm
“Animas Forks Mountain”:
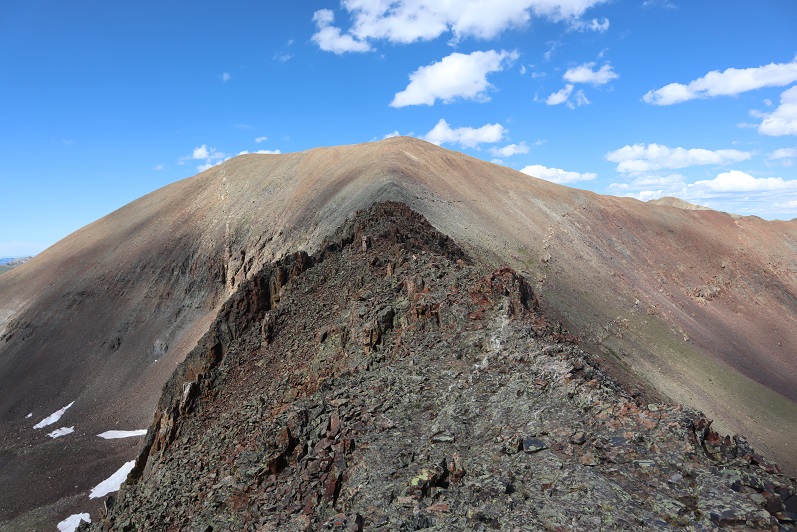
From the summit you can see an easy way to make this hike a loop, just follow the ridge down to the road and hike the road back to Cinnamon Pass.
However, there were some mines I wanted to explore below Wood Mountain, so I decided to retrace my steps back UR 13,708. Also, when I’d taken a video at the summit of 13,708 I’d said I was at Animas Forks Mountain, and I wanted a new video with the correct name. Here’s the route back to 13,708
I re-summited UR 13,708 at 3:45pm
UR 13,708:
From here I made my way back to the 13,708/Wood Mountain saddle
Once at the saddle I followed the sand and rock gully down until I hit up with an old mining road
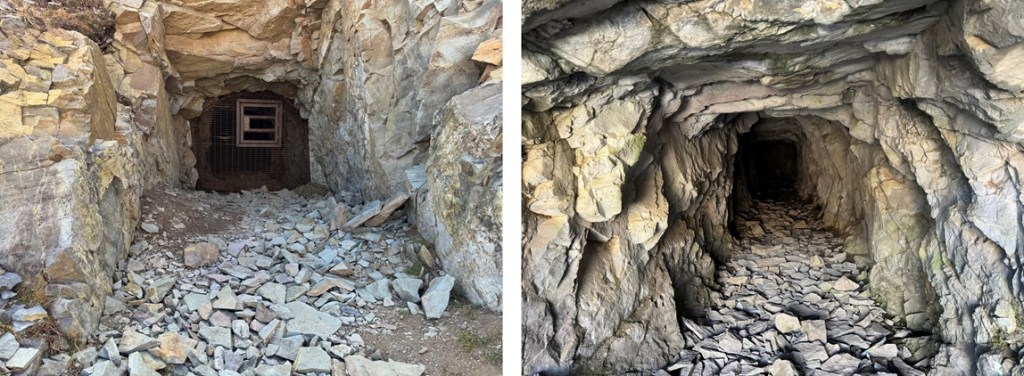
I followed the faint road until I came across a mine
The mine was completely boarded up, without even a gate/lock that would open. It was still neat to peer inside. It looked like they’d collapsed the inside.
I continued following the road southeast until I came across another mine, this one not boarded up
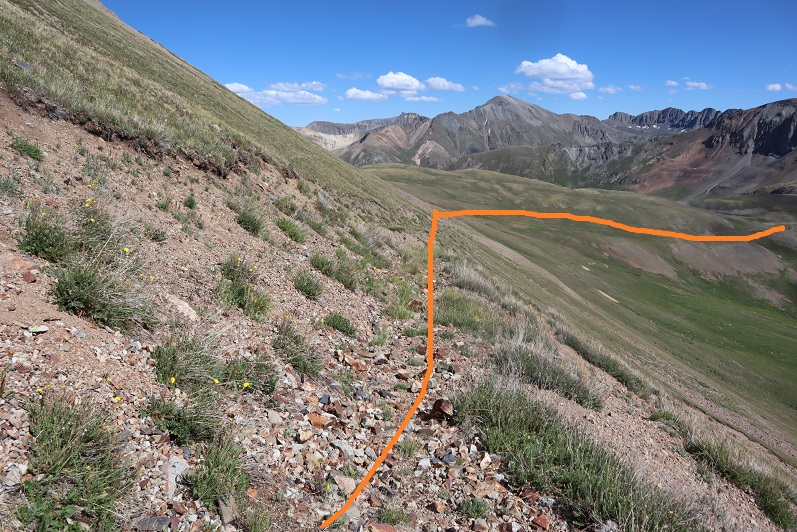
From there it was an easy hike back to Cinnamon Pass
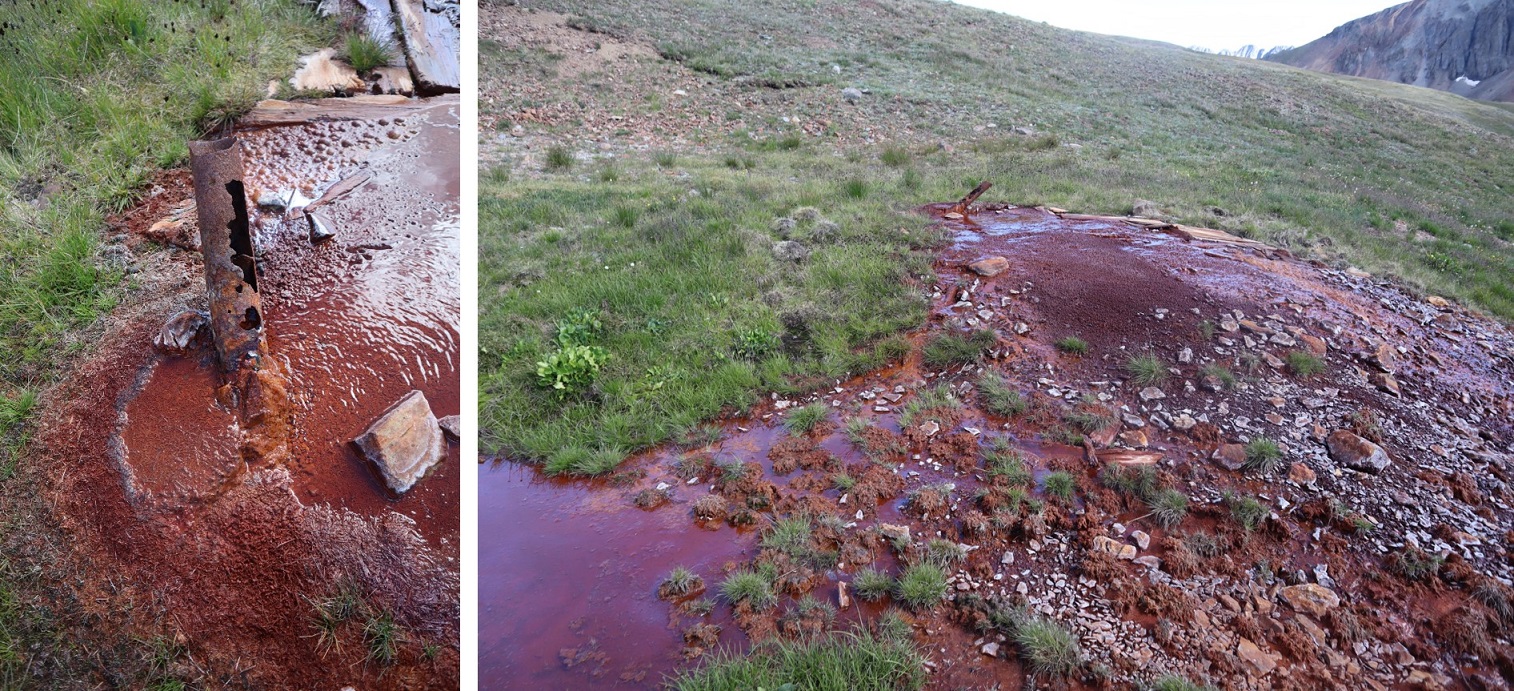
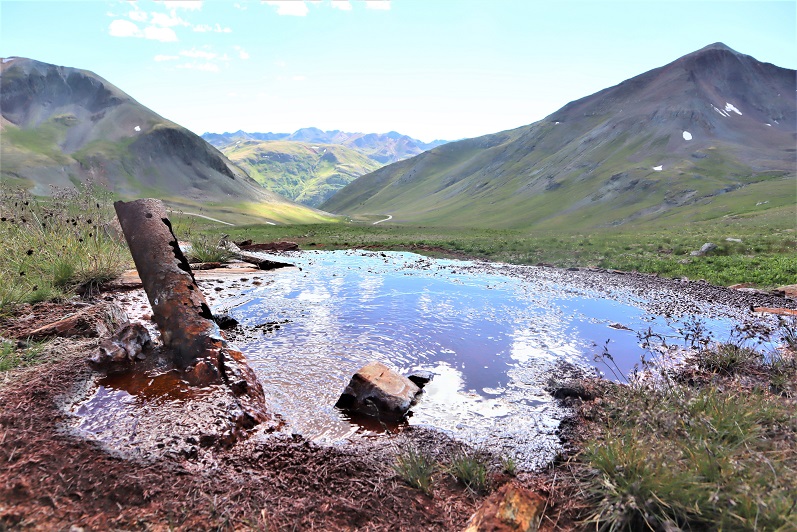
I passed some water coming out of a pipe that didn’t look fit to filter. The water was more red in color than orange, and made me wonder if that’s how Cinnamon Pass got its name?
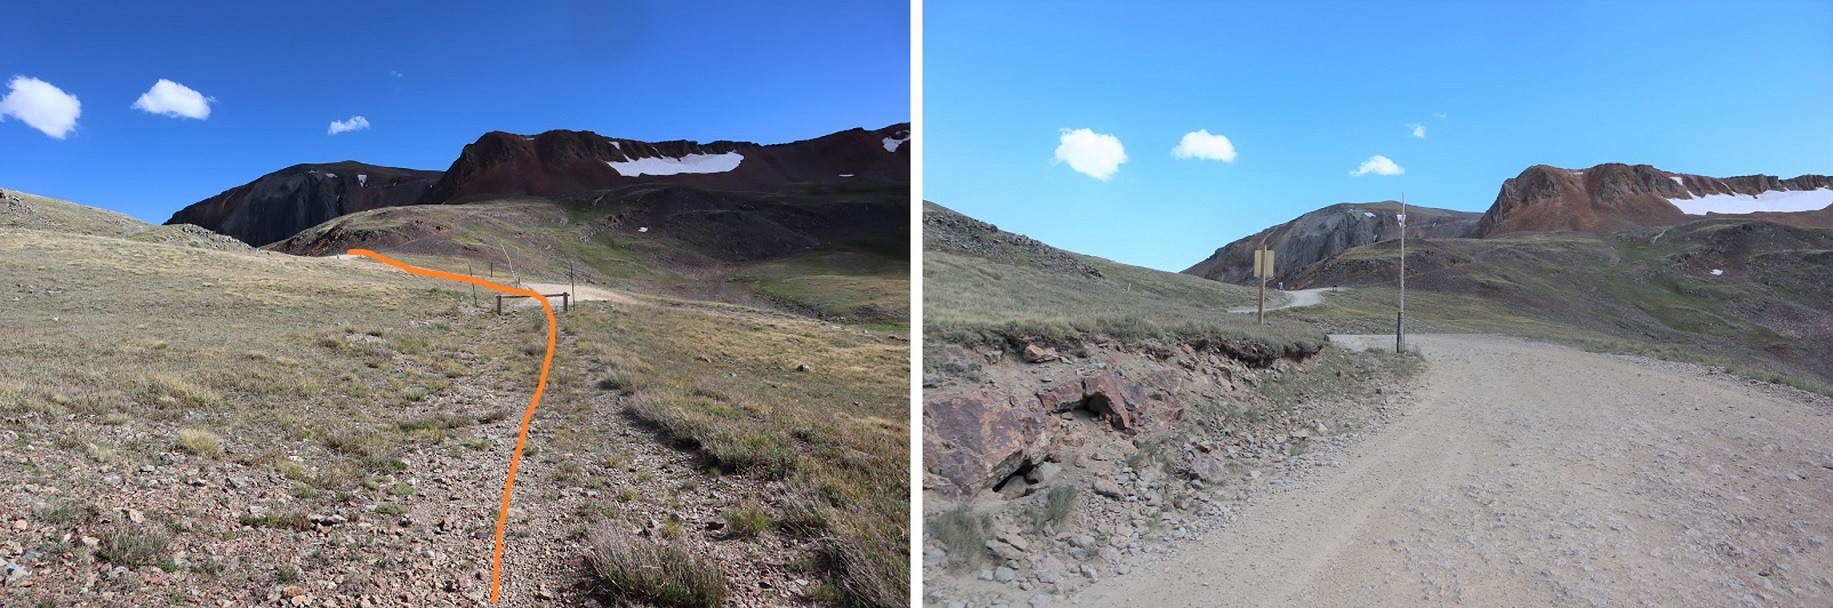
Eventually I connected back up with the road and followed it to my truck. My truck was now the only vehicle in the lot
I made it back to my truck at 4:50pm, making this a 6.53 mile hike with 2270’ of elevation gain and lots of time exploring mines in 4 hours, 20 minutes.
I decided to drive to the next trailhead, eat dinner, and get some sleep. It ended up being an eventful and unplanned drive over Engineer Pass.
The Cooper Creek Trailhead is located about a mile past the Silver Creek/Grizzly Gulch trailhead on 30 past Lake City. There were cars parked and camping at the trailhead, so I parked at a dispersed camping spot right next to Cooper Creek.
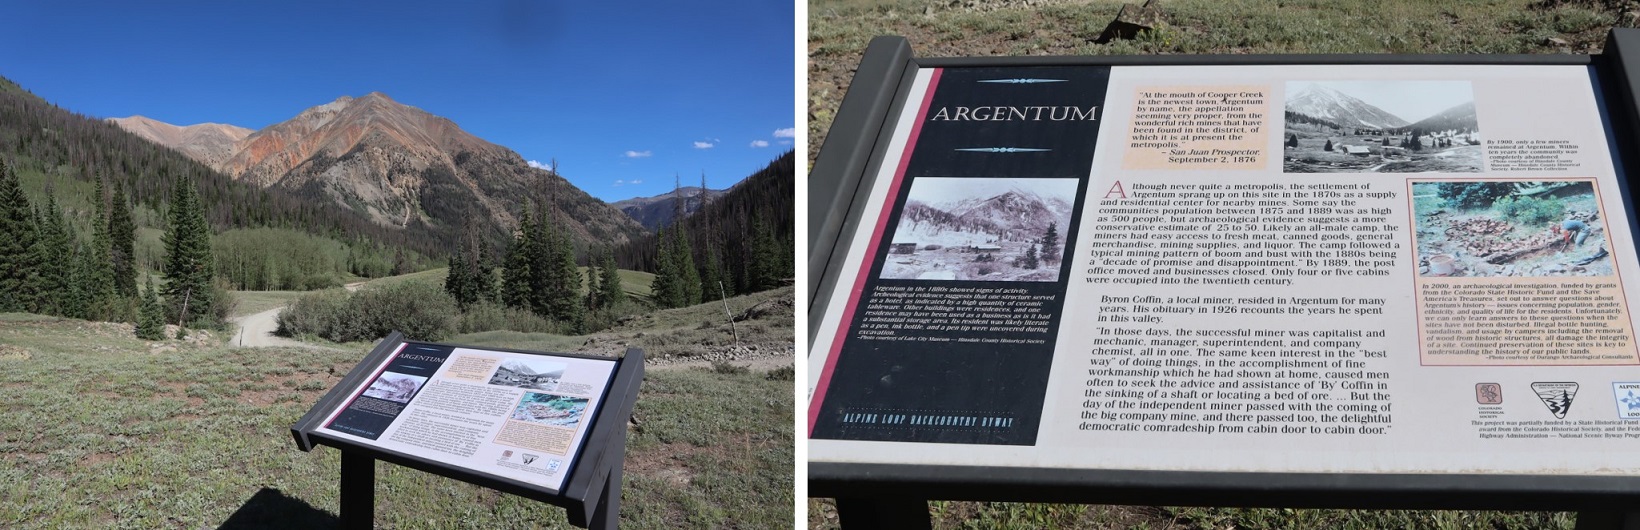
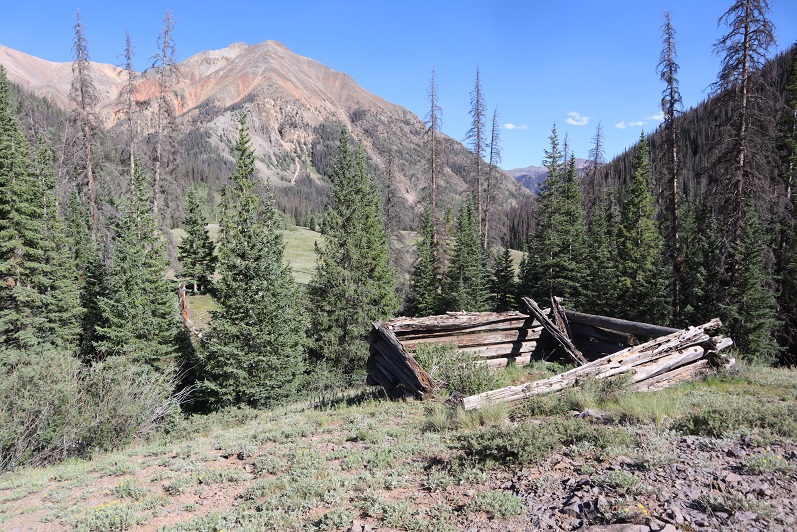
It was still early so I decided to take a look around. The Cooper Creek Trailhead is located in the historic town/settlement of Argentum, and there were still some old structures in the area.
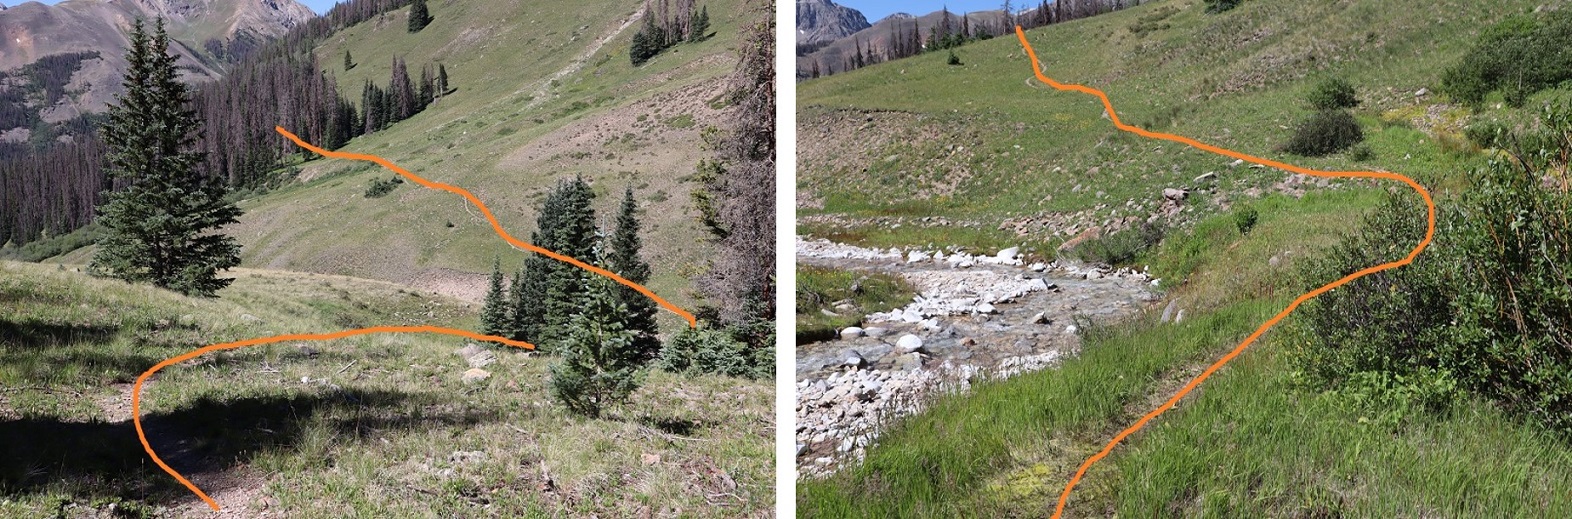
It was an uneventful night. I slept soundly until midnight, when campers at the spot across from me returned from their outing. They weren’t loud, but they did wake me up. I went back to bed and didn’t wake up again until my alarm went off. I was on the trail at 5am. The Cooper Creek Trailhead is just to the west of Cooper Creek, visible from the road.
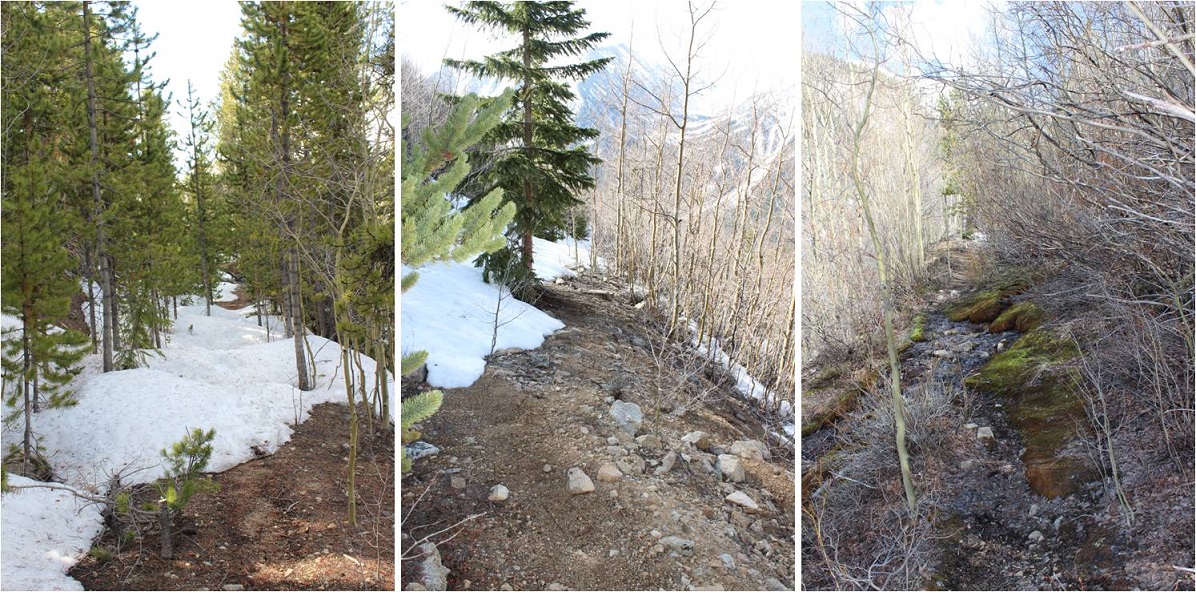
The trail is class 1 for the first 3 miles, and seems to follow an old mining road.
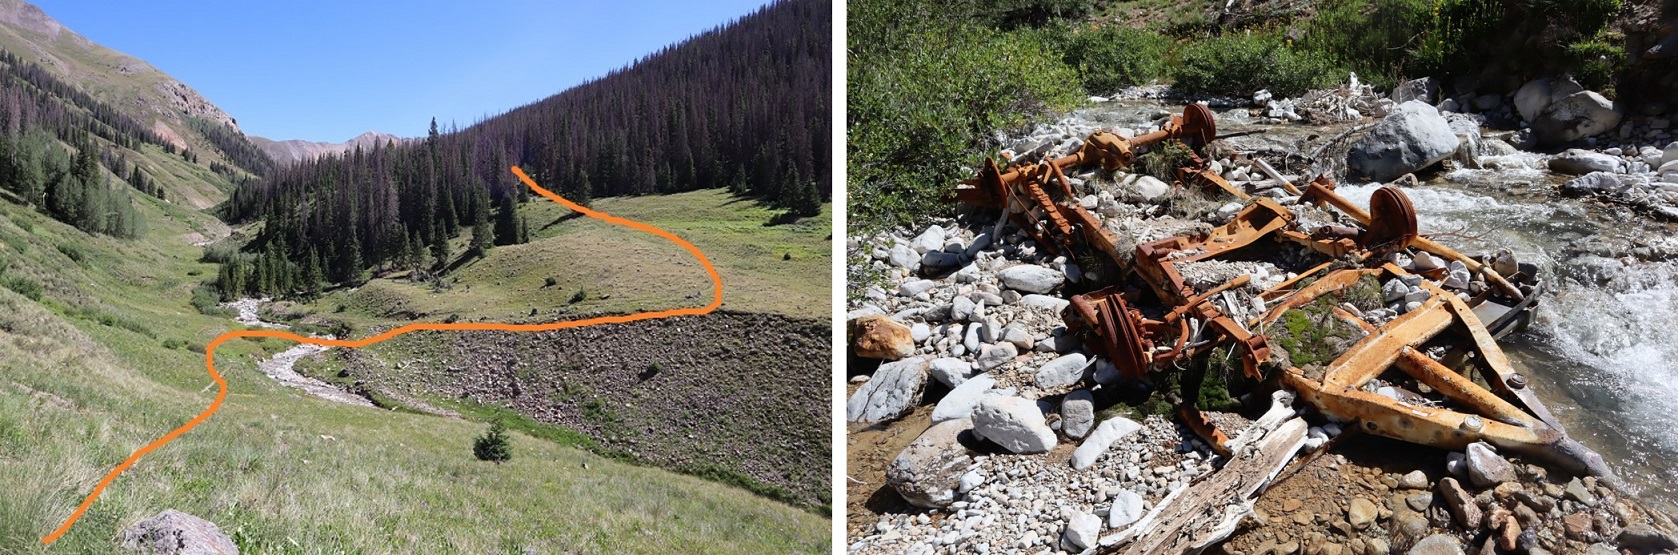
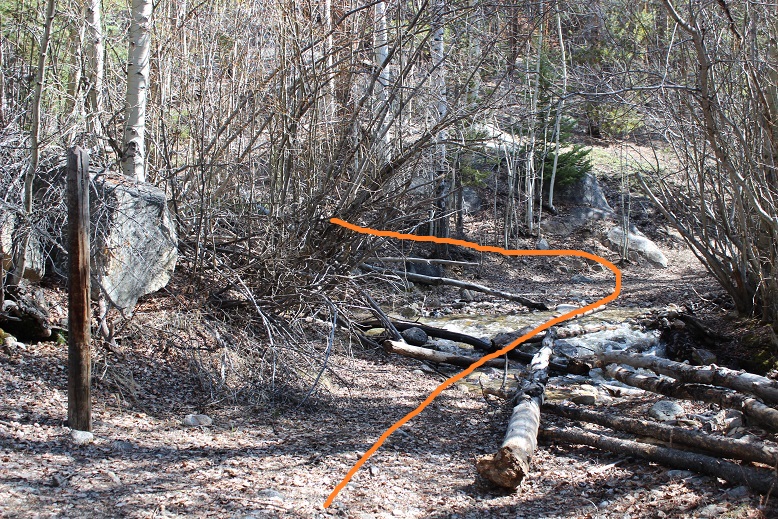
After hiking for 1.5 miles the trail crosses Cooper Creek, just where an overturned trailer sits in the water. It looks like it’s been there for a long time.
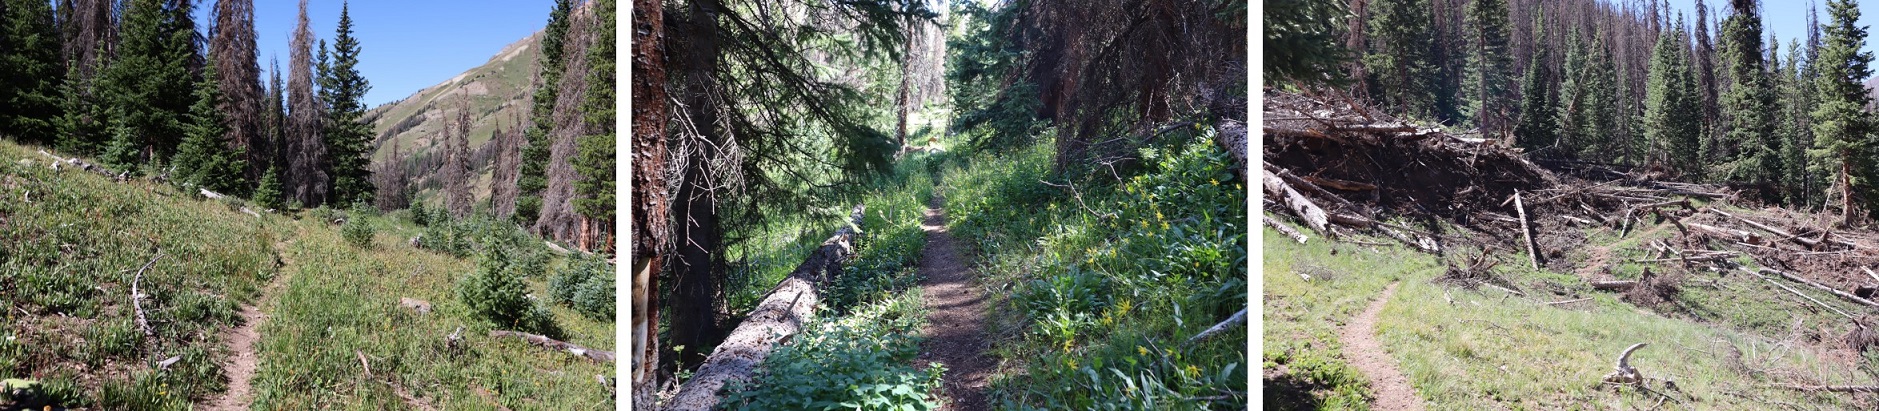
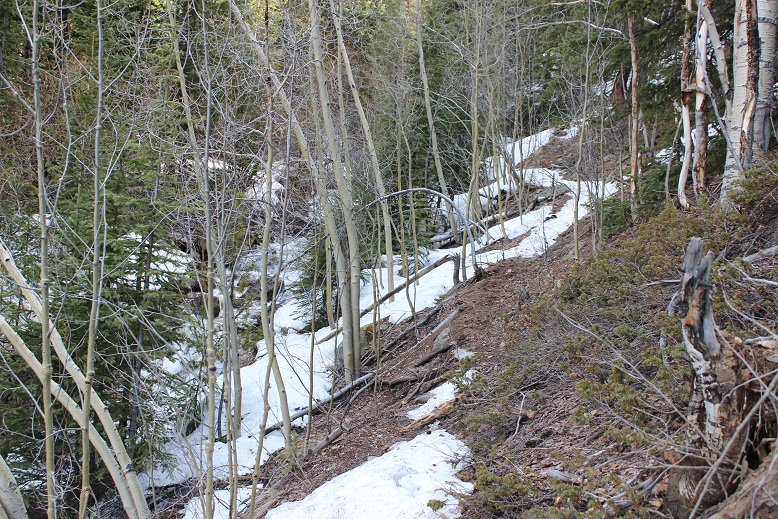
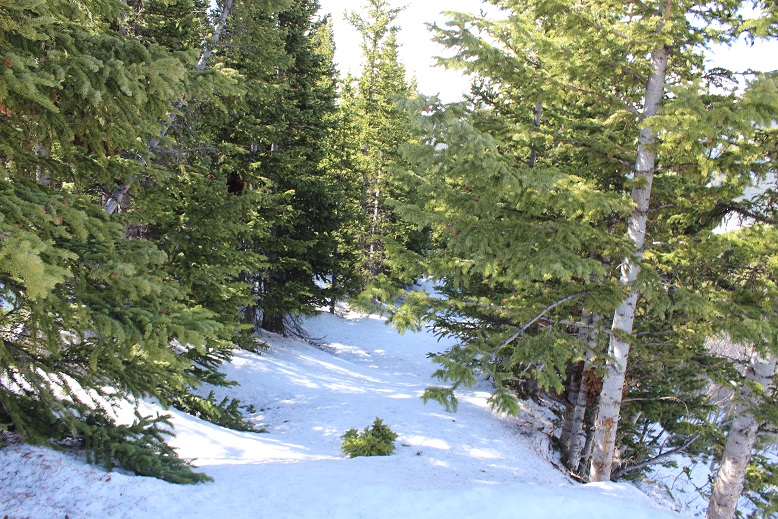
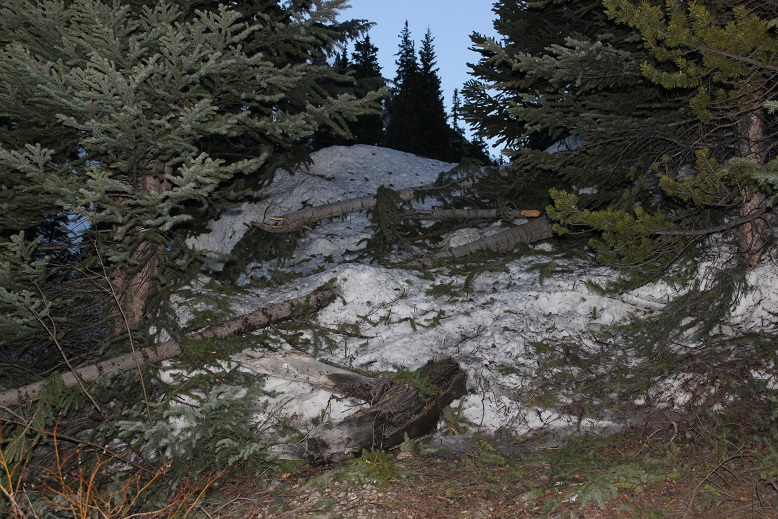
The trail continues to follow the creek up to the basin, passing a fresh avalanche area (there was still snow under the trees, but there was a clear path to follow)
After 3 miles of hiking along this class 1 trail it abruptly stopped. I crossed the creek and headed northeast along the mountainside, eventually picking up another class 1 trail (I’m not sure where it had started, as I crossed the creek at a couple of cairns and must have missed the trail)
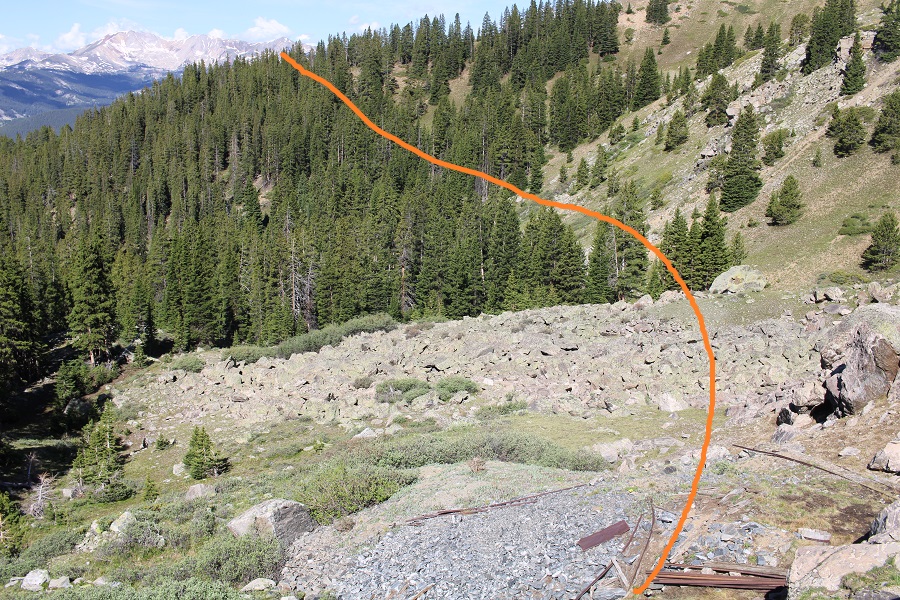
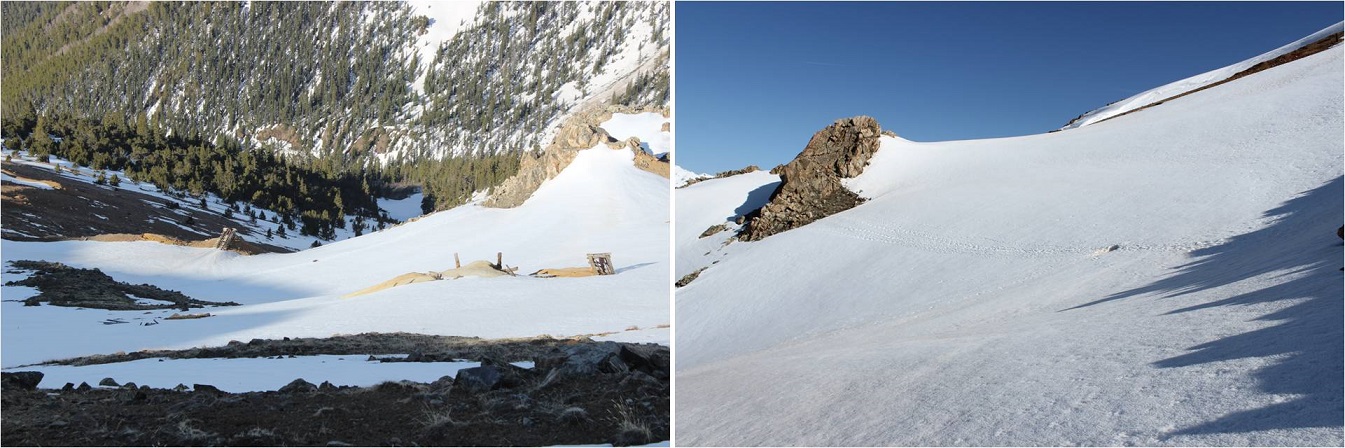
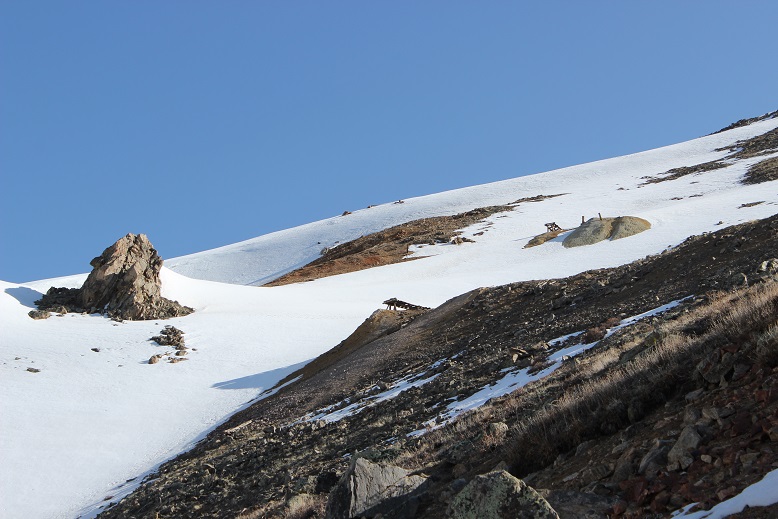
The trail eventually leads to a lake in the upper basin (going left), but I didn’t follow it that far. Instead I crossed Cooper Creek one more time and headed towards an old mine to check it out. If you don’t want to check out the mine, here’s the overall route to gain the ridge.
The creek crossing was simple
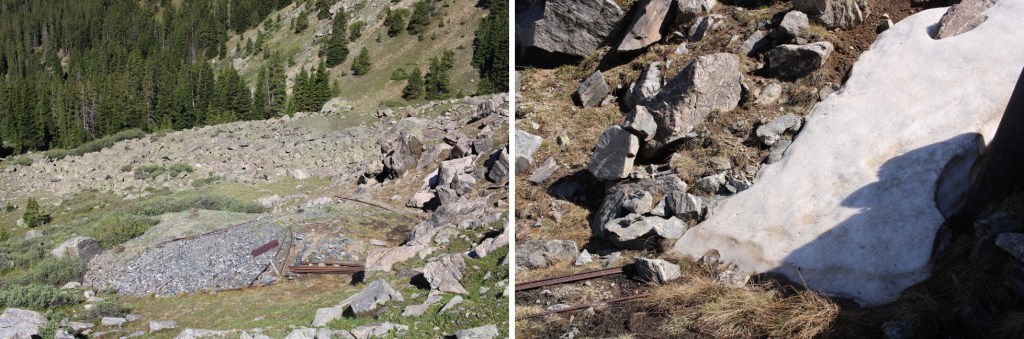
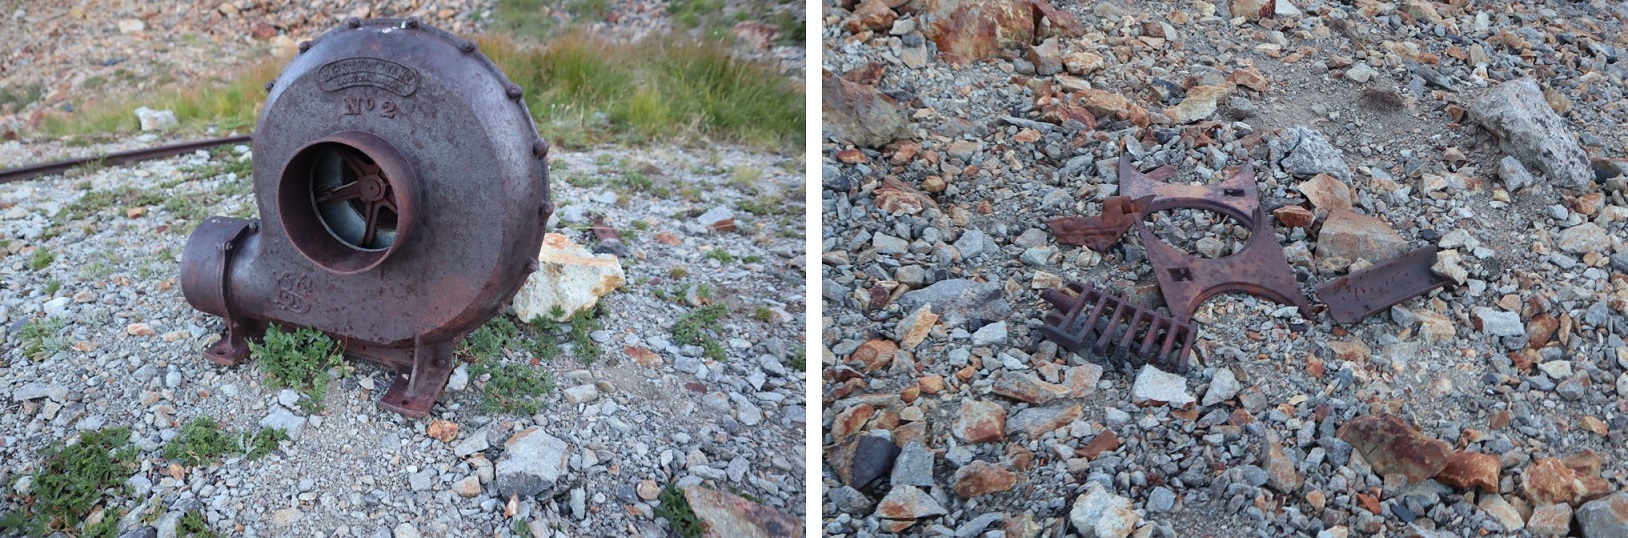
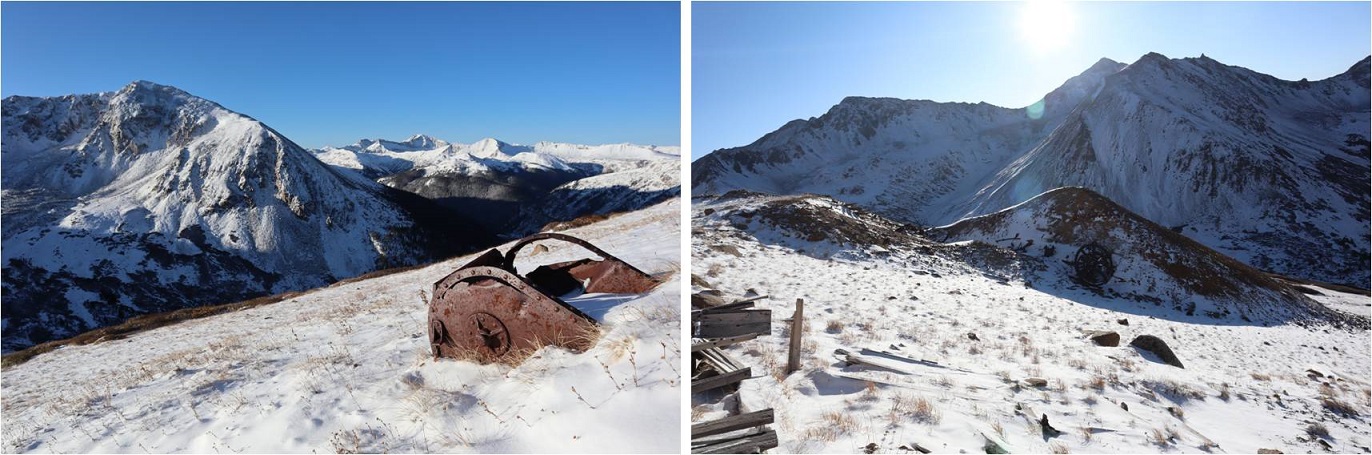
The mine was filled in, but there were some pieces of equipment lying around.
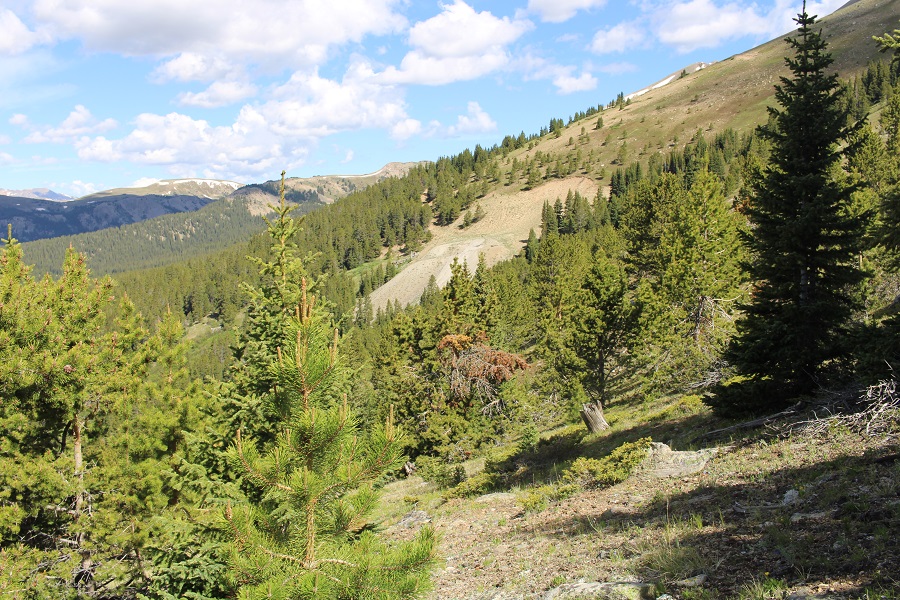
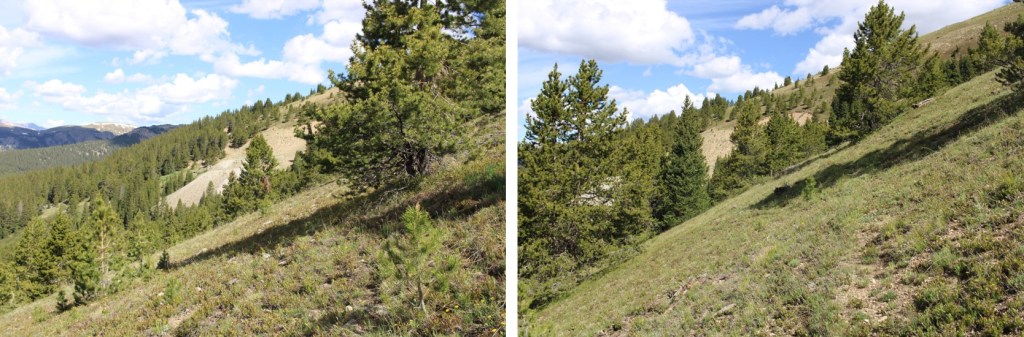
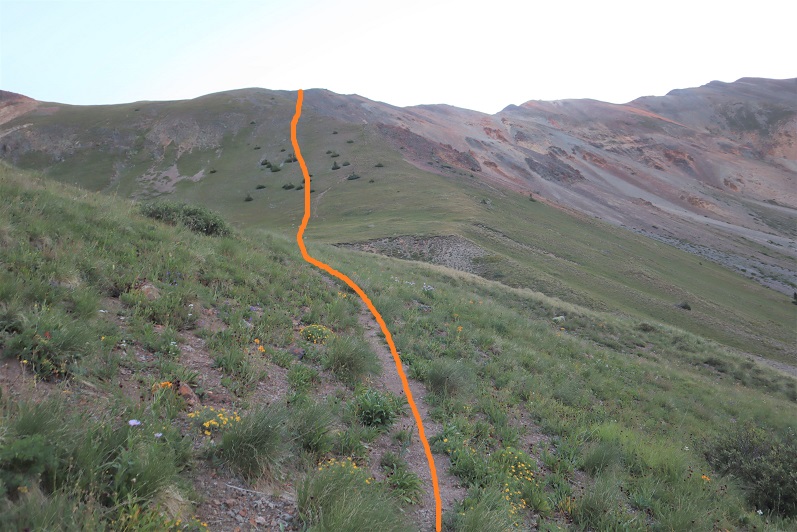
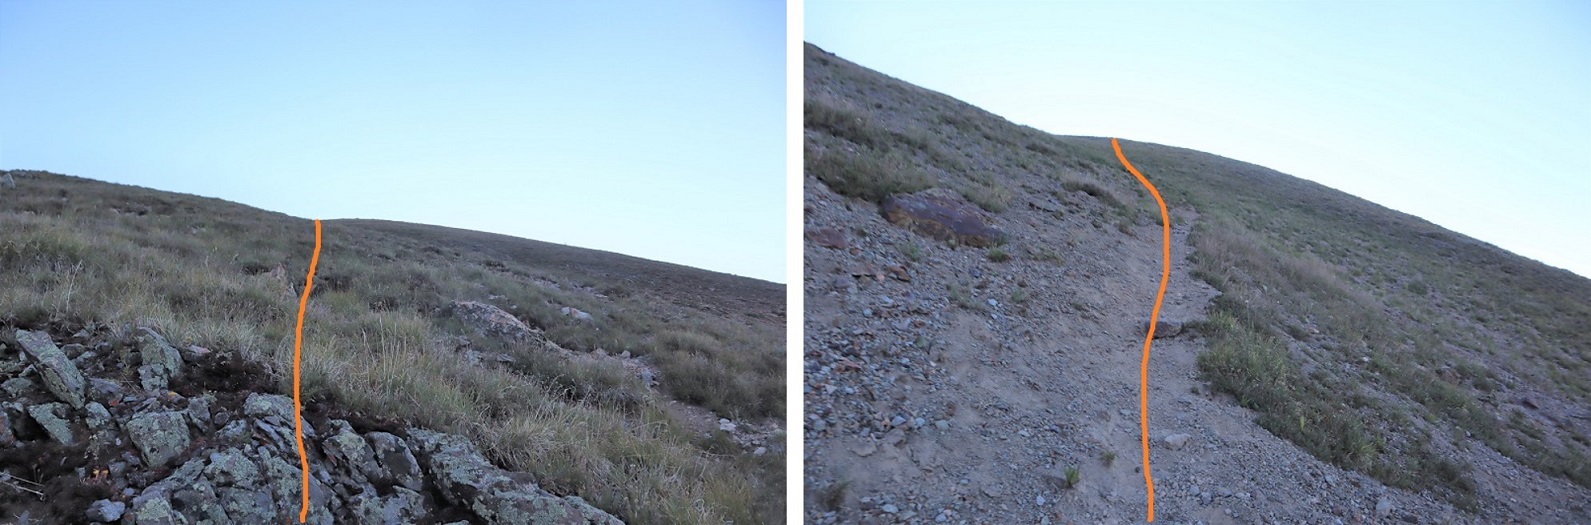
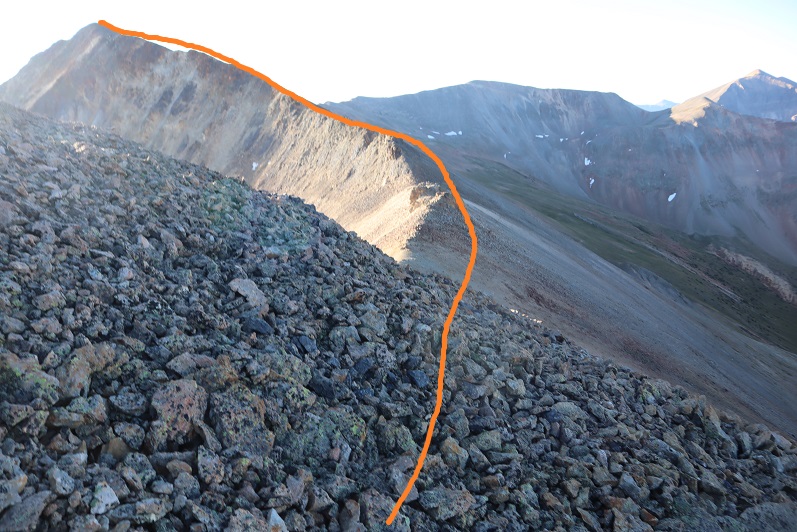
I turned around and noticed 2 tents set up along the trail that leads to the lake and a couple other 13ers in the area. It was just starting to get light so I decided to be quiet as I gained the ridge. Eventually I found a trail here that led to the ridge as well (it actually goes up and over and down into the basin on the other side of the ridge)
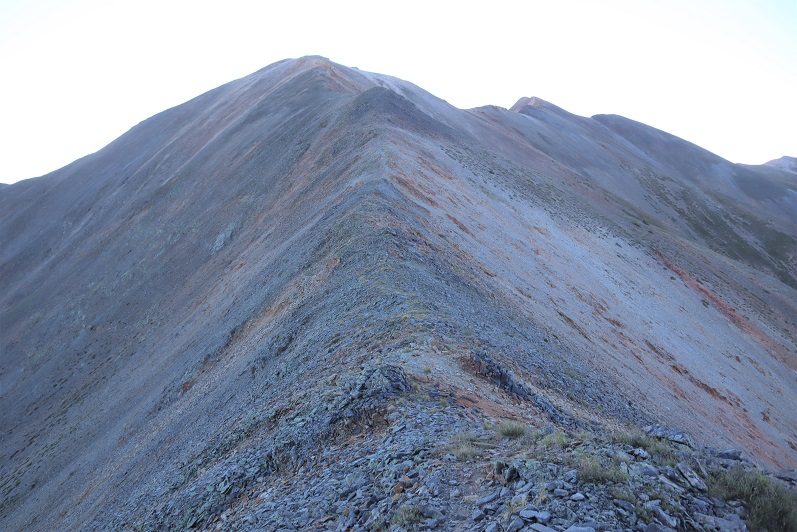
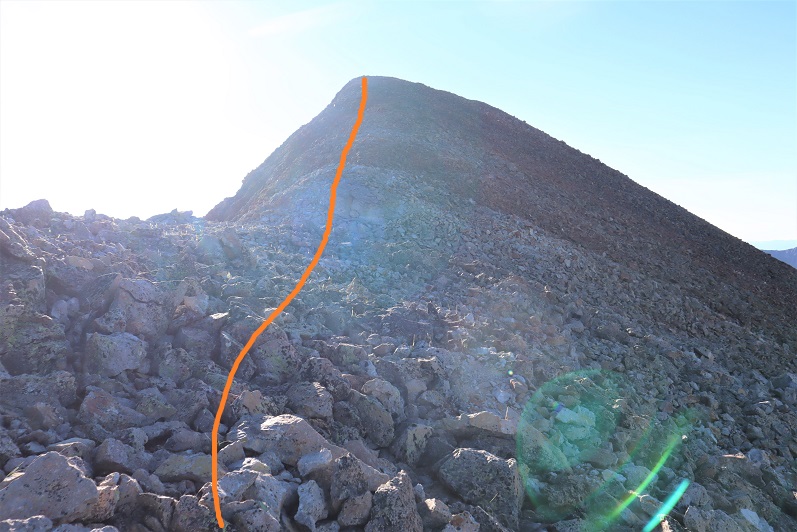
Once I gained the ridge I turned right (east) and followed the ridge towards a false summit.
After reaching the false summit it was a half mile hike along the ridge to the actual summit. This was class 2, with no real obstacles to overcome.
I made it to the summit of Every Mountain at 7:55am
“Every Mountain”
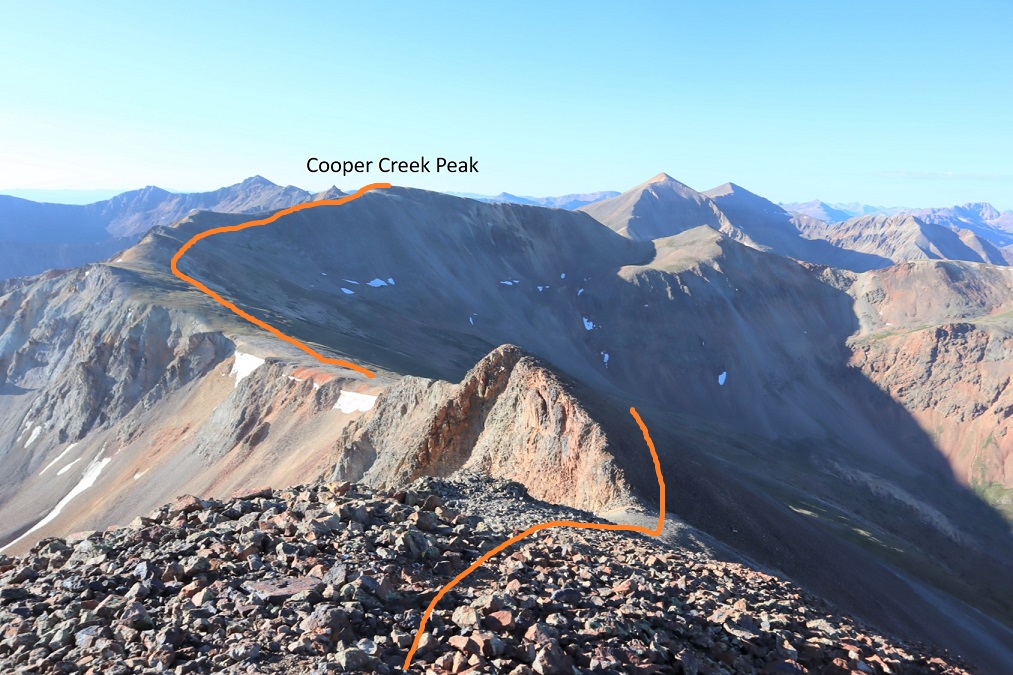
Here’s a look back at my route in
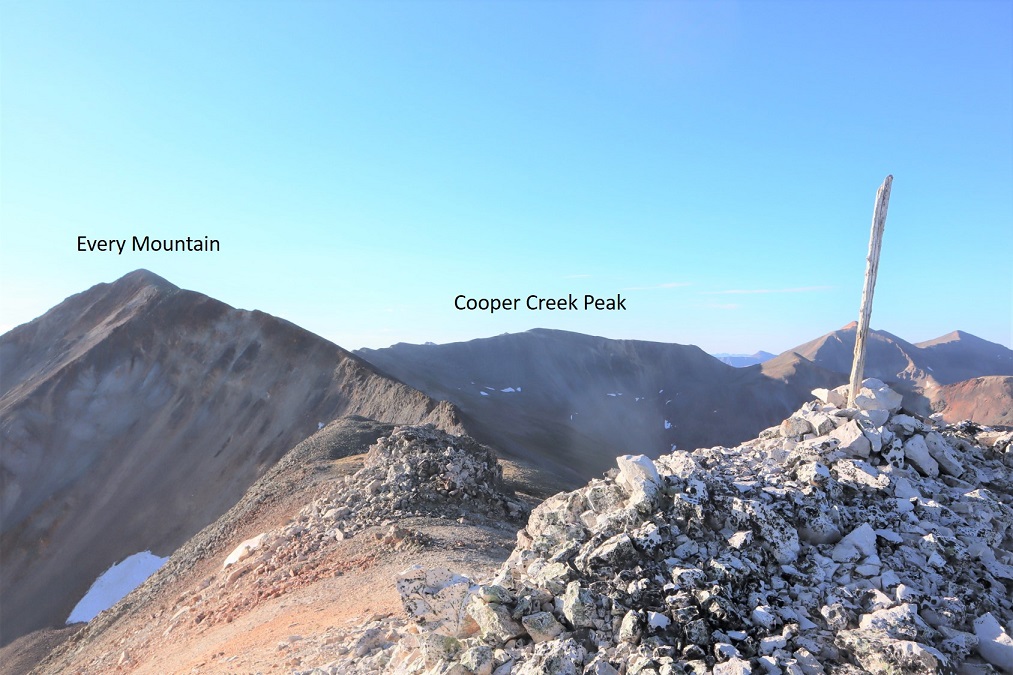
Here’s a look at the route over to Cooper Creek Peak
This was another easy class 2 ridge hike without any difficult obstacles. At times there is even a trail. Actually, there are quite a few game trails here.
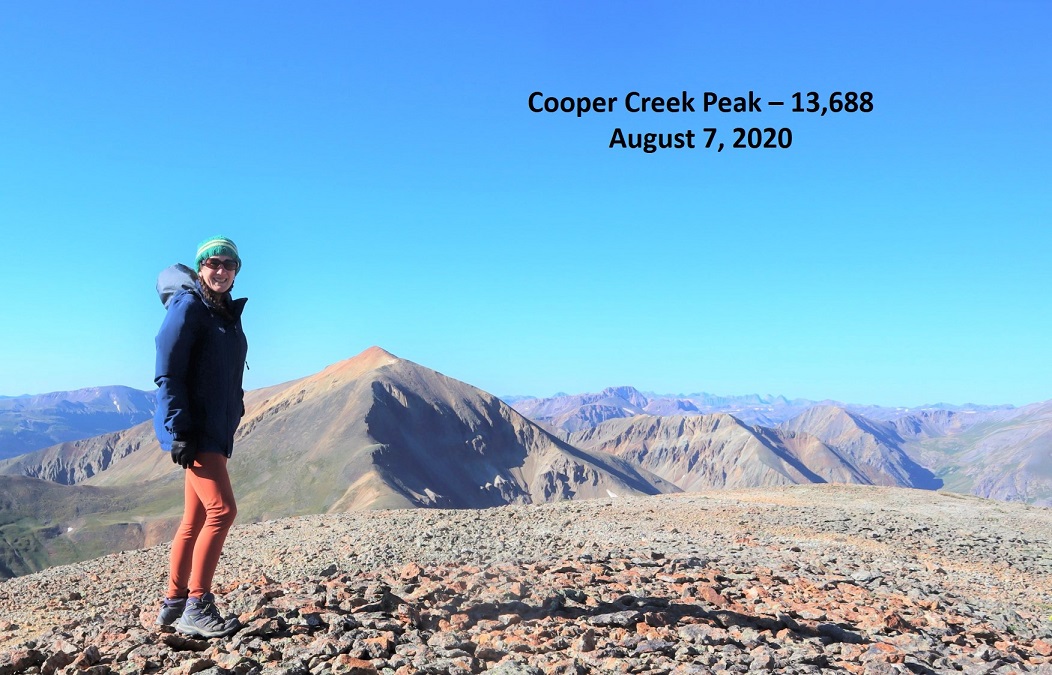
I summited Cooper Creek Peak at 8:50am. It was very, very windy.
“Cooper Creek Peak”
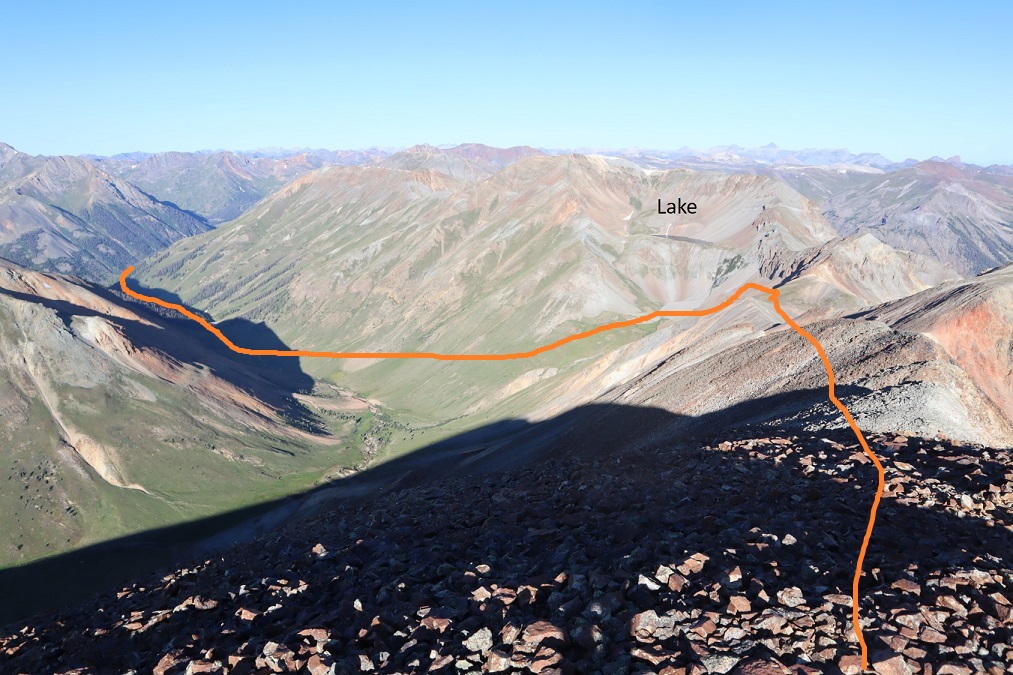
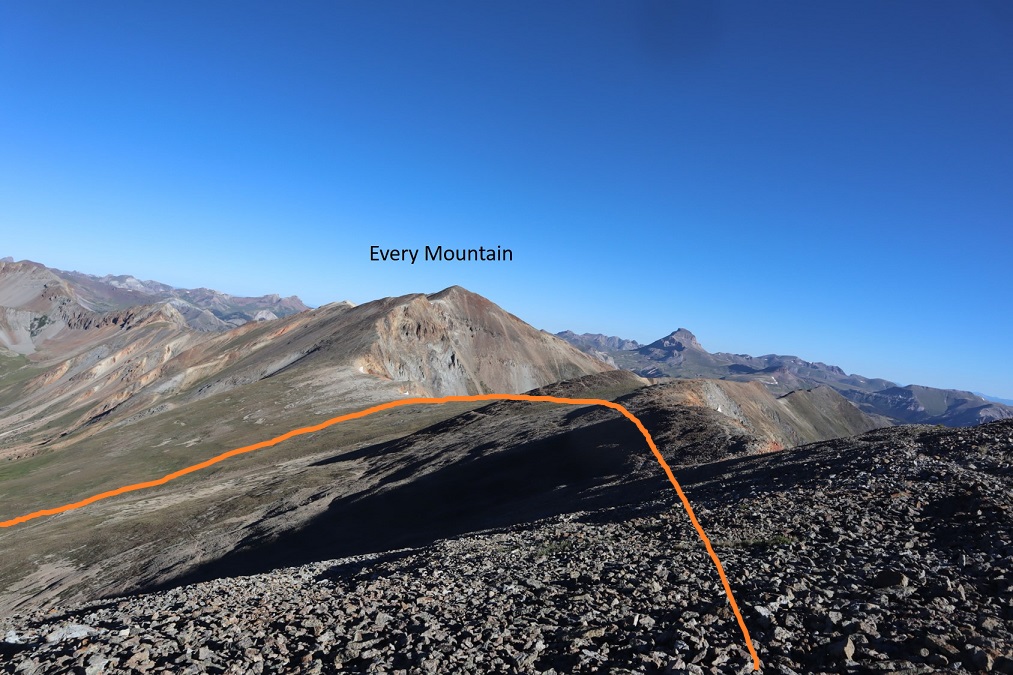
Because it was windy it was also cold, so I didn’t stay long on the summit. Instead I headed back down to the Every Mountain/Cooper Creek Peak saddle and from there down into the basin
Here’s the overall route
I hiked down the grassy slope, aiming for the creek. I then crossed the creek and stayed a little high to avoid the muddy areas
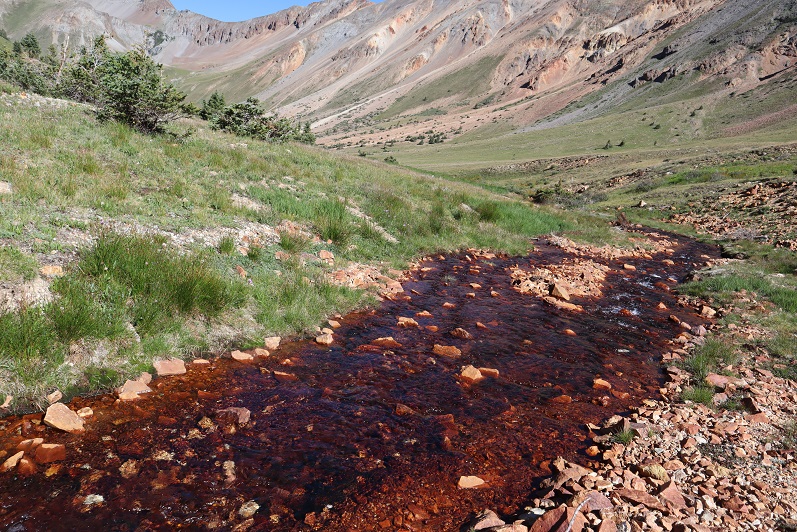
The creek didn’t look like it had water fit for filtering
Still, I followed it back to the trail
Here’s a look back at my way down the basin
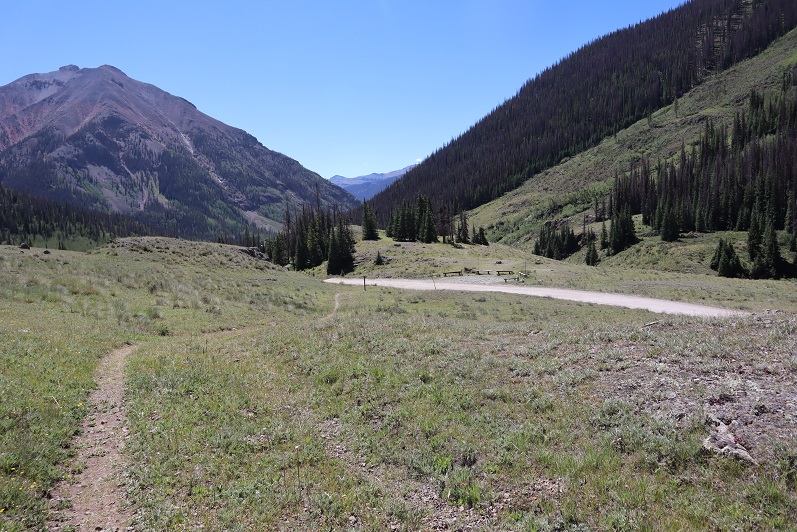
And the route back on the class 1 trail
Back across the creek
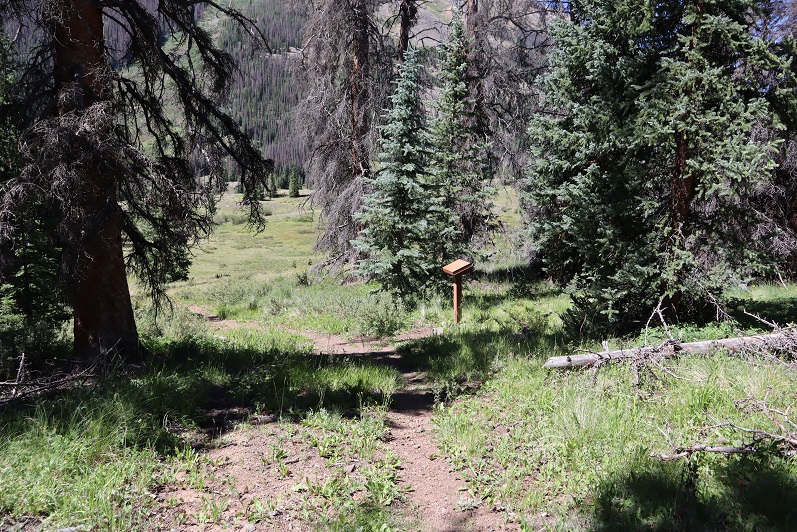
And back to the trailhead. On my way out I noticed a trail register I hadn’t seen on my way in
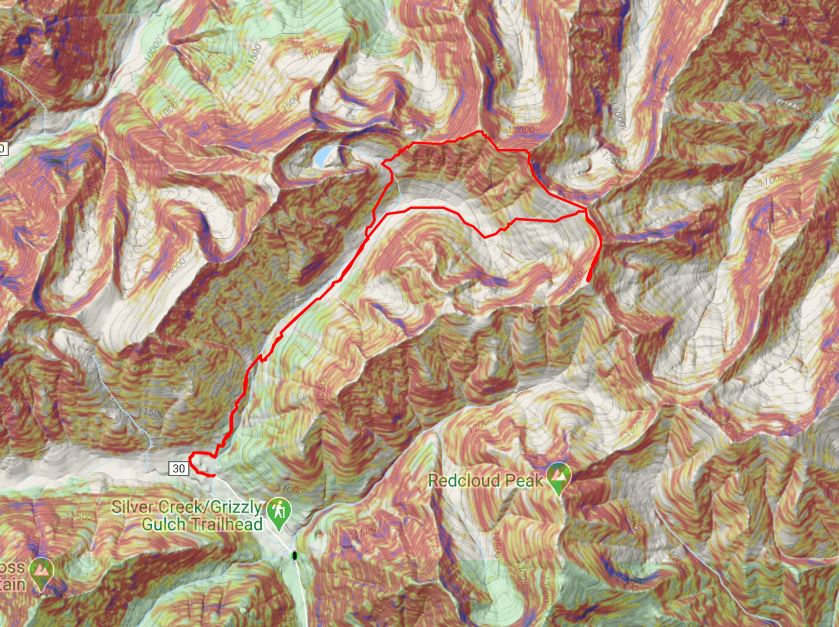
I made it back to my truck at 11:10am, making this a 12.93 mile hike with 3987’ of elevation gain in 6 hours, 10 minutes. Here’s a topo map of my route:
It was still early and I wasn’t yet tired, so I decided to drive to the next trailhead and get in a few more peaks for the day…
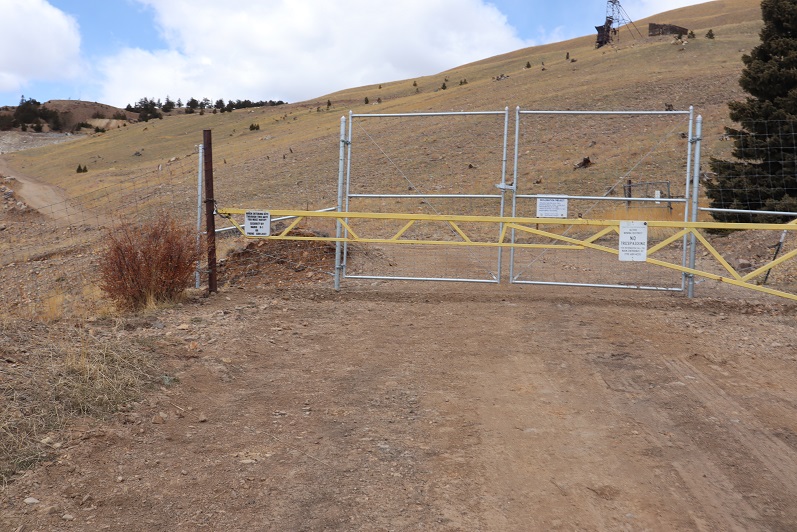
Turns out this one’s illegal. We knew once we arrived at the trailhead and saw what was before us our chances of summiting were slim, but we decided to try it anyway.
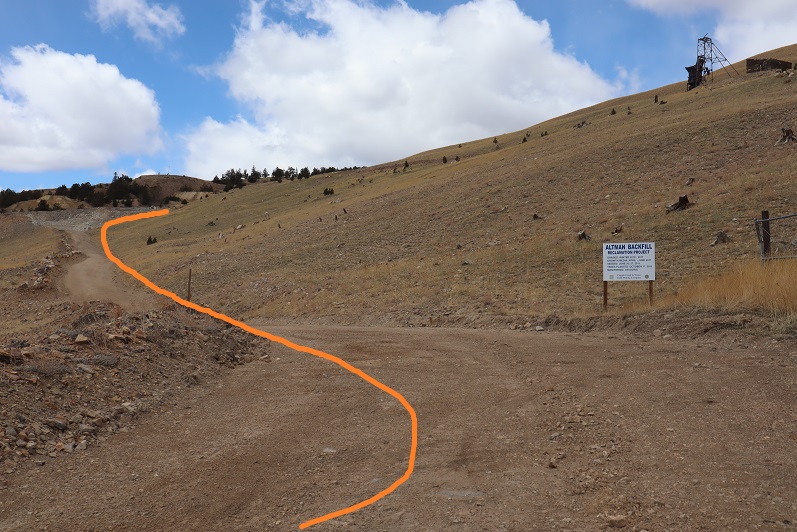
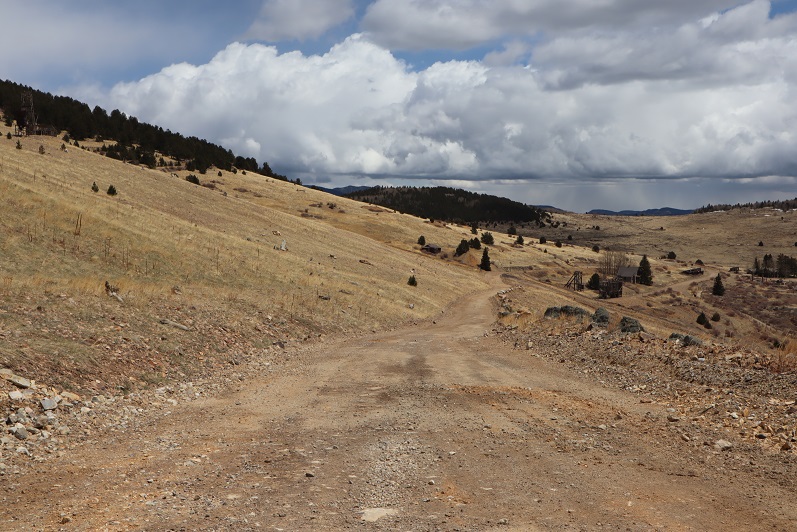
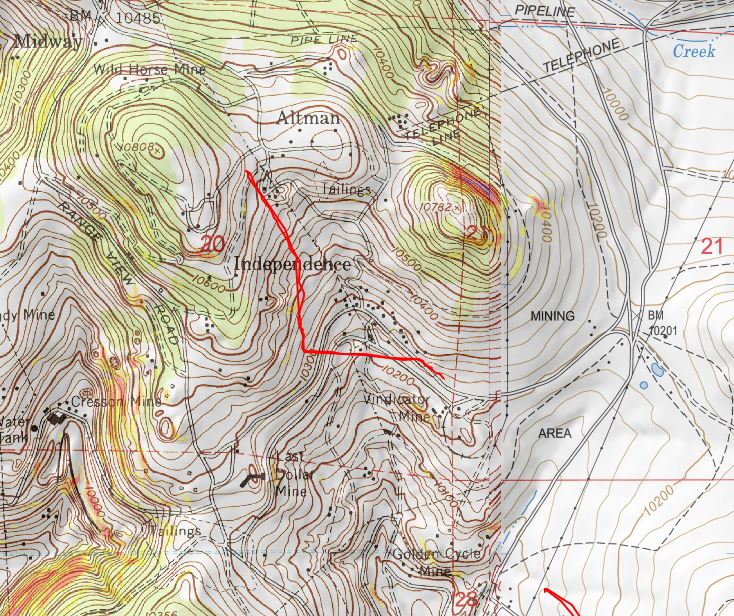
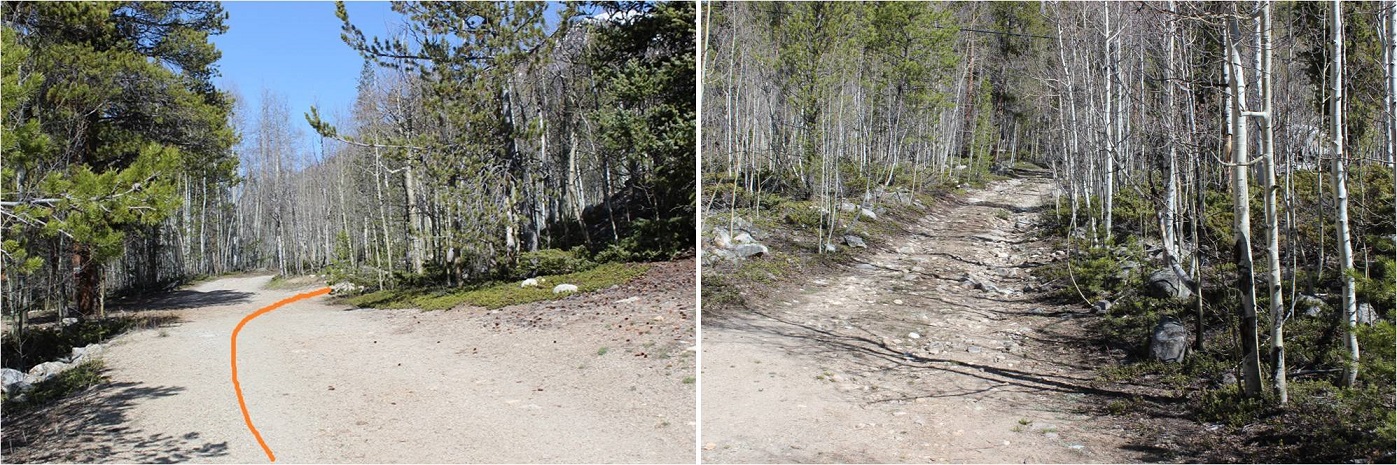
The gate was unlocked so we passed through and started our way up the road. It was supposed to be a quick, 1 mile hike on a road and then a short distance to the summit. We walked about a third of a mile and turned right
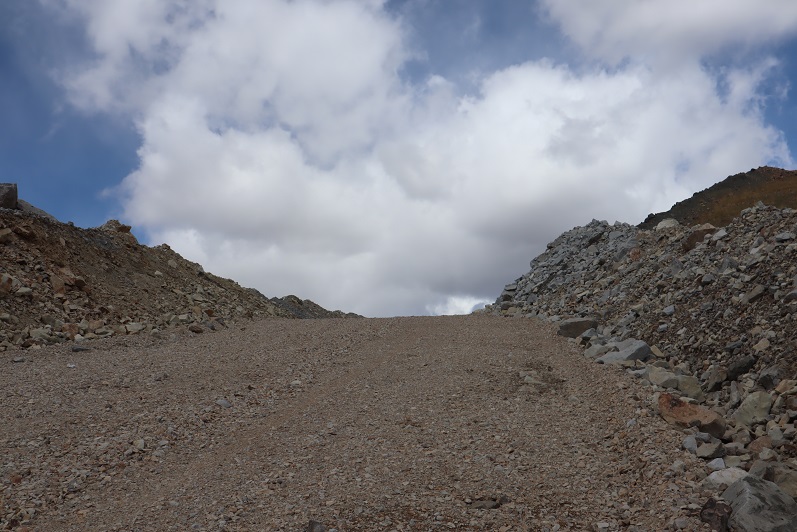
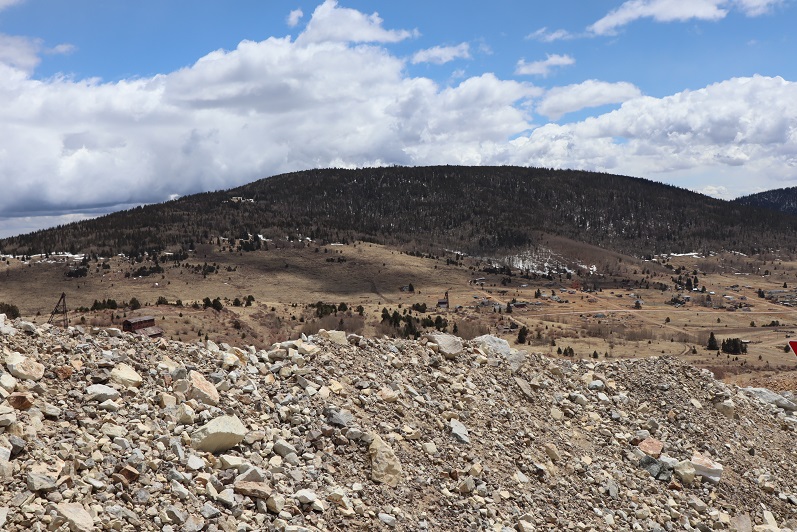
And headed up a wide, rocky road
We had a great view of Big Bull, the mountain we’d just climbed a few minutes ago
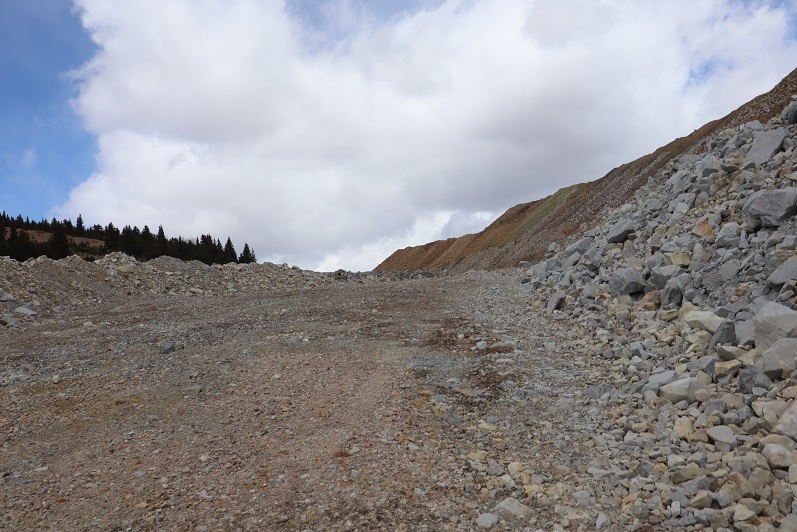
As we were walking along the road we heard a loud rumbling and saw a dump truck the size of a house drive past us, full of rocks. We were on an active mine, and immediately began to worry we were going to get in trouble for being here. We saw a water truck drive by, and then after hiking along the road for eight tenths of a mile we saw a white pickup truck with lights coming towards us. We asked the man in the truck for directions to the summit, to which he very politely told us we weren’t allowed to hike here and asked us to turn around. He said we could try to summit another way, on the other side of the fence (but we knew that wasn’t possible because the fence went all around). He actually offered to drive us back to the gate, but we declined. He sat in his truck and watched us hike the entire way back. I’d wanted to take more pictures, but figured he wouldn’t appreciate my doing so.
We had a gpx file for this route, and that person either a) made the file on CalTopo and never actually hiked it, b) hiked it illegally, or c) somehow got permission. There are no trip reports on this hike with more information. I’m thinking b is the most likely option, but I’m not going to name names.
We made it back to my truck and pondered how we were ever going to hike this ranked summit? Legally that is. I’m sure this mine is operating 24 hours a day, 7 days a week, 365 days a year. There was a phone number listed on the gate. I’m going to try to call that number and get special permission to hike. I don’t have high hopes that will work, but I’m going to give it a shot anyway.
I really wanted to get in this hike before they close Colorado 82 for the winter, and this weekend seemed like a great opportunity: The weather had a nice forecast so I decided to go for it. I made it to the trailhead and was on the trail by 6am. My truck was the only vehicle in the lot, and there was frost on the ground and glittering in the moonlight on the willows. It had snowed 3-5 inches the night before and right now it was cold, cold, cold!
I’d just started out when I heard the loudest sound of tires screeching I’ve ever heard. I turned around and saw a truck’s headlights stopped in the distance. In the dark the driver had missed the last turn before ascending up to Independence Pass and had driven about 40 feet off the road. They were very lucky this part of the road was relatively flat! I watched the truck as it backed up, stopped, backed up again, stopped, and backed up a third time to make it back to the road. Once they were successfully on their way so was I.
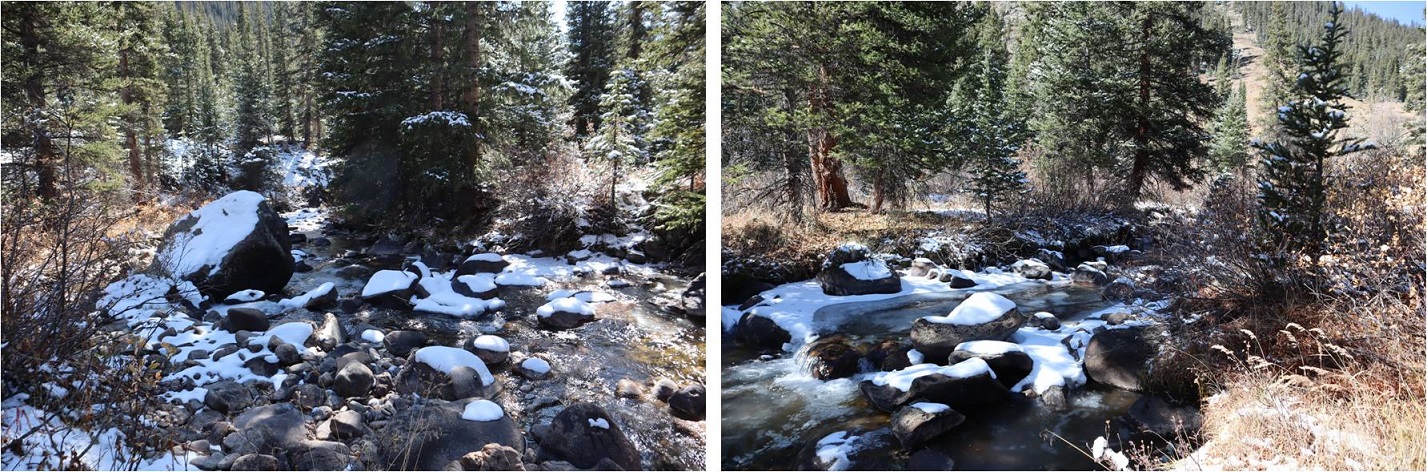
I’ve been in this area before and the instructions I’d put together said to follow Lackawanna Gulch. So I did, but I had difficulty with the frozen stream crossings. The usual areas had more water than I’d expected so I had to walk up and down the banks of the creek to find a place to cross. I didn’t feel comfortable taking off my boots and fording the stream with all that ice. I ended up turning back and starting over again when I came to an area I didn’t recognize. Yes, I’d been here before and I knew the way I was going would get me to the gulch, but I wasn’t headed the way I’d left instructions I said I was going, so I backtracked and crossed the creek again and headed northeast until I came across a cairn, which led me to another cairn and another and I knew I was on the correct trail.
The snow was fresh and I used my trekking pole to knock it off the trees when they were covering the path.
The sun started to rise and through the trees I could tell the views today were not going to disappoint.
The trail was faint but easy to follow, even in the snow, until I made it to the avalanche area.
Here the trail ended so I followed some fresh deer tracks through the debris and into the trees. Keeping the creek to my right I made my way west.
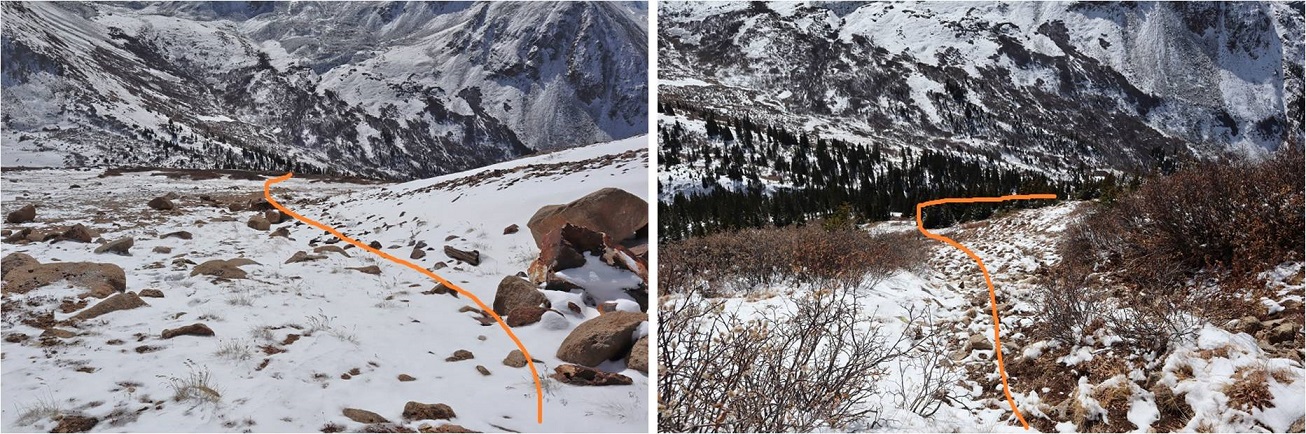
There are a bunch of game trails here, and they all lead in the correct direction. Just before making it to the creek again I found a cairn and turned left (north) and headed up Champion’s east ridge.
There was no trail here, or if there was it was covered in snow. I followed a steep rocky drainage up the slope and towards a mine.
Once at treeline the wind picked up a bit, but stayed at the forecasted 20-30mph. I made it to a 4WD road and decided to do some exploring of the Champion Mine as an excuse to get out of the wind for a bit.
There was old equipment littered about the area
I stayed here for about half an hour taking pictures. I didn’t spend too much time inside because in the wind it didn’t feel too stable. There was a lot of creaking going on. I headed back to the road and continued heading northeast up the side of Mt Champion.
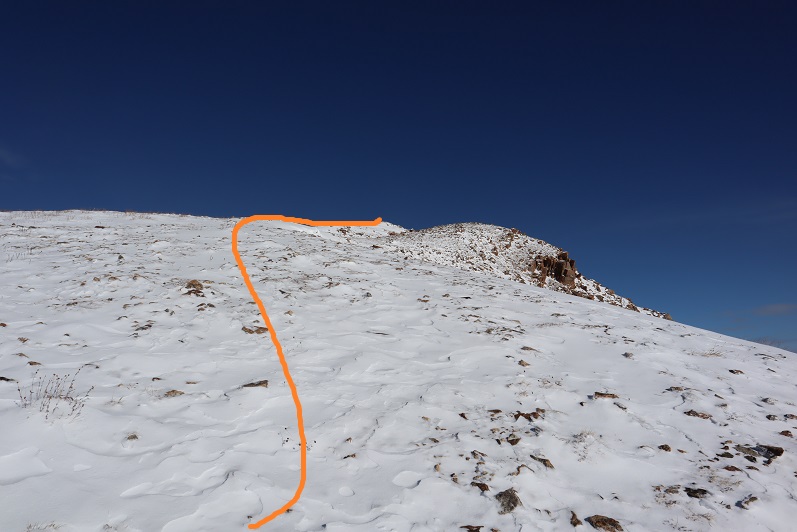
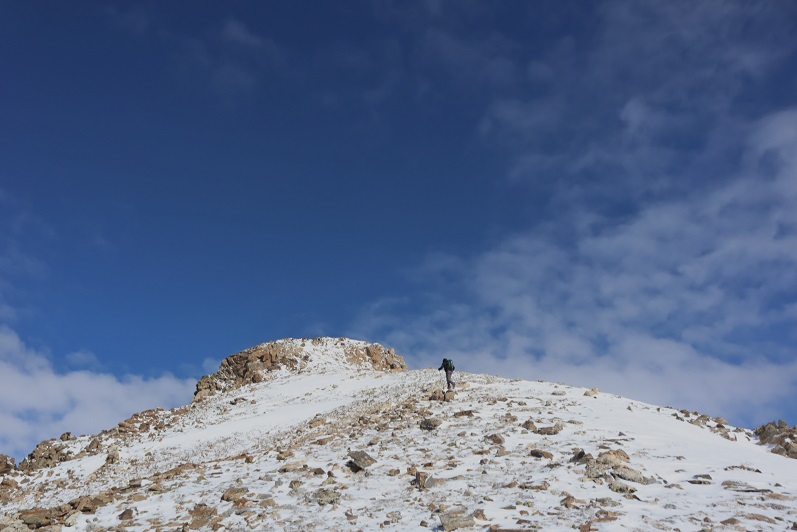
This was by far the most difficult part of the hike for me. It wasn’t technical at all, but I haven’t hiked in snow for many months and I was using muscles in my calves and quads I haven’t used for a while. I’d brought snowshoes and seriously considered putting them on, but in the end didn’t because I felt they would be overkill in such little snow and this was actually good conditioning for the months to come. The snow was about 6-8 inches deep in its deepest spots, and at times there was bare dirt. I aimed for the ridge and followed it up. Note: this is not the summit
But it’s close. This is the true summit
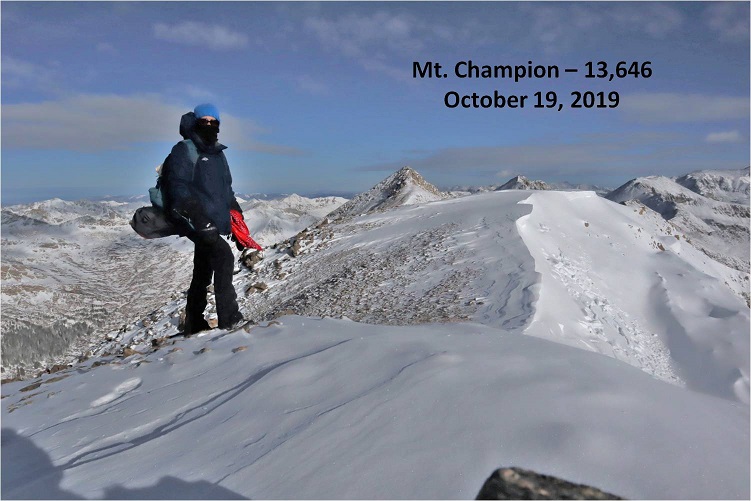
The summit was marked with a cairn and summit register (which I didn’t touch).
I was surprised to find a cornice already beginning to form on the summit. Surprised because this was the first snowfall here of the season.
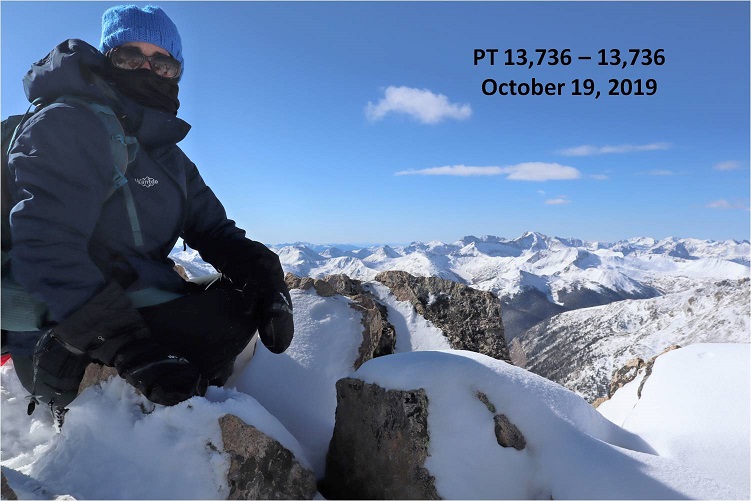
I was quite cold and debated heading over to PT 13,736: that last bit of elevation gain after the mine had worn me out! Did I mention the views? Absolutely amazing!!!
Of course I decided to continue on (I wasn’t that tired, just a bit out of hiking-in-snow shape). The trek over to PT 13,736 is a straightforward scramble along the ridge
I had to be careful because some of the rocks were large and the spaces in-between them was often covered in snow and my feet could fall between the cracks if I wasn’t paying attention. I probably took more time on this ridge than it required, but I didn’t slip, fall, or twist an ankle. Microspikes didn’t seem necessary, my boots provided enough traction here.
Once again, windy, but with the balaclava and hat it was tolerable
Here’s the last push to the summit
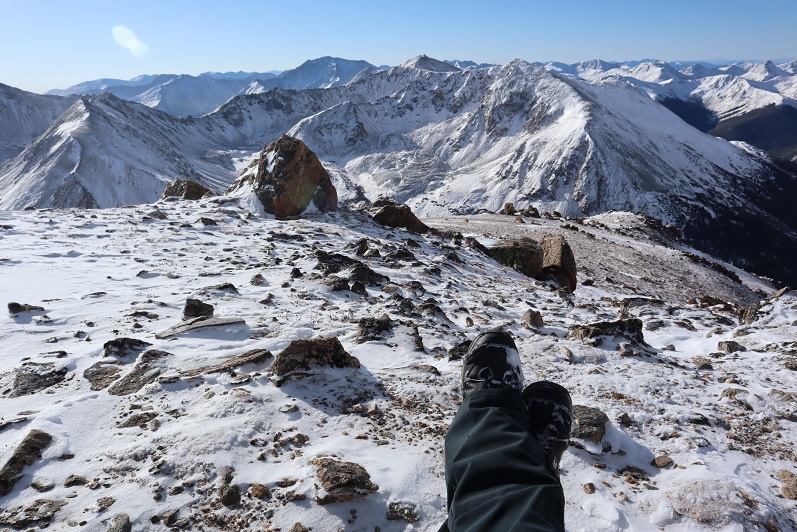
The summit was small and full of large, snow covered rocks.
I set up my camera, sat on a snow covered rock and took 1 picture of myself. I was super glad when I got home and saw the picture turned out ok because it was the only one I took (logistics made it difficult to take a picture of myself on this summit). I didn’t see a summit register, but it was probably buried under the rocks and snow.
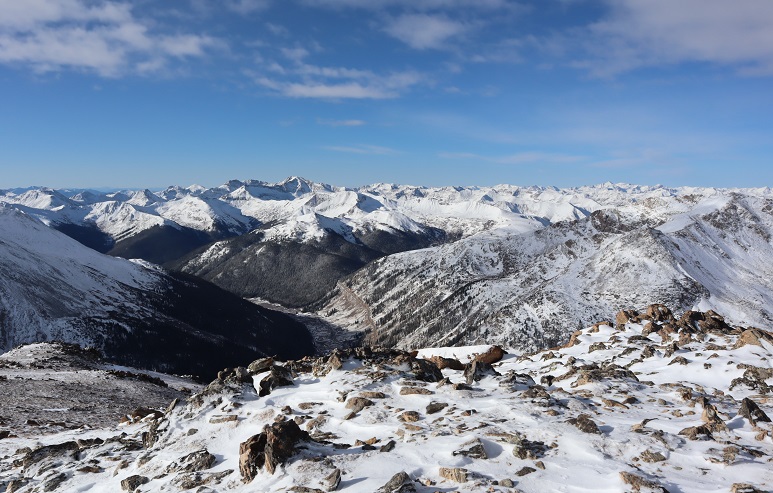
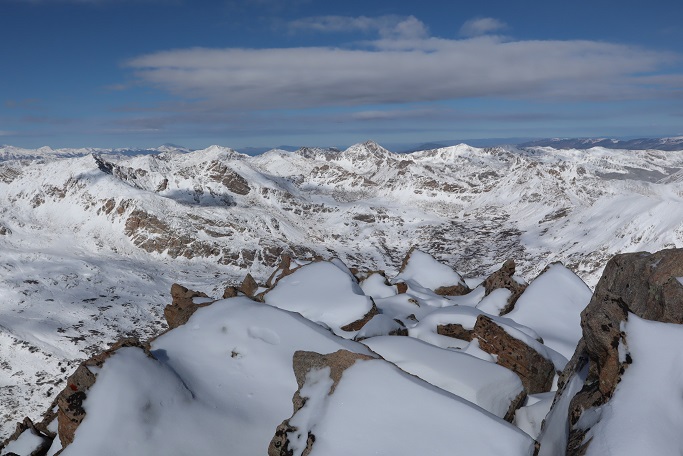
The views from here were as equally amazing as from Mt Champion
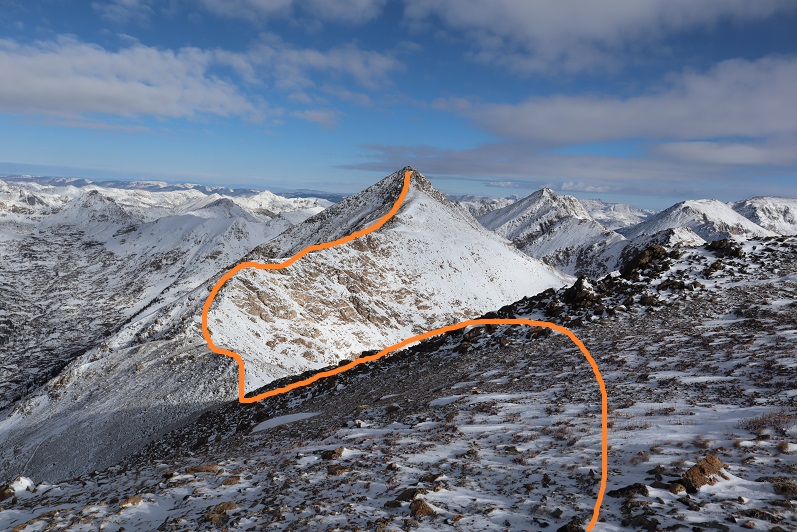
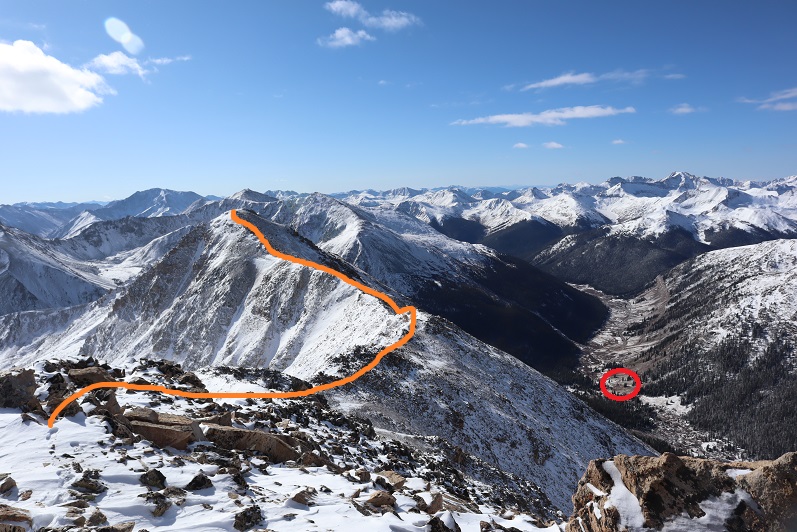
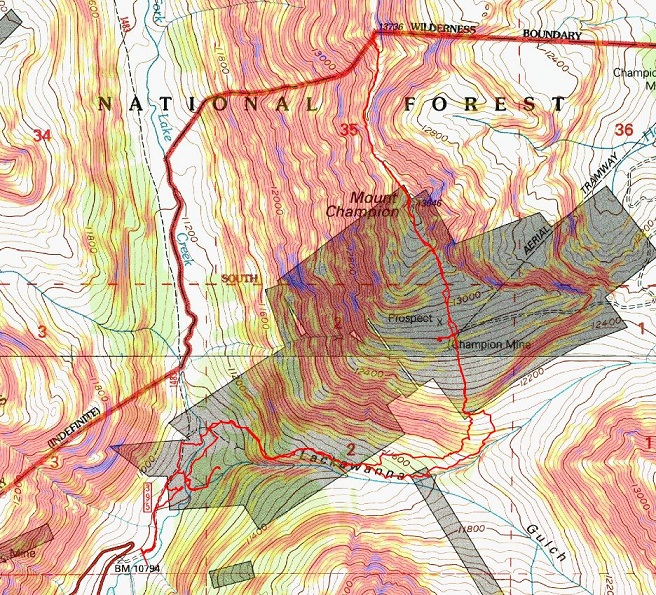
Here’s the route back to Mt Champion, and the North Lake Creek trailhead is circled in red.
A short way down from the summit I met another hiker! I was very surprised to see anyone else out here today. We talked for a short while, but I don’t do well standing still in the cold so I was probably a little quick to end the conversation. He said he might be headed over to French Mountain after this, and had taken the road in. I wished him luck and was on my way
Re-summiting Mt Champion was easier than I’d thought it would be: I wasn’t nearly so tired after taking the ridge. Heading back was a breeze as all I had to do was follow in my previous footsteps.
Here’s the route down from the summit of Mt Champion
By now the sun was warming up the snow and it was getting slippery, but I still didn’t feel I needed traction
I found the rock drainage again and followed it back down the mountain
I slipped here. Twice. Turns out snow covering moss that’s still green is slippery when the sun warms it up.
On my way out of the gulch I stayed higher in the trees than on my way in because I found a cairned trail. I followed it until it disappeared and then followed game trails to the avalanche area.
Where I linked up with the trail I’d followed in and followed it back out. The sun had already melted out a lot of the snow from this morning.
The creek crossing was much easier to navigate in the daylight and I found an easy place to cross
From here I could see the dirt road, so I aimed for it and followed it back to the trailhead.
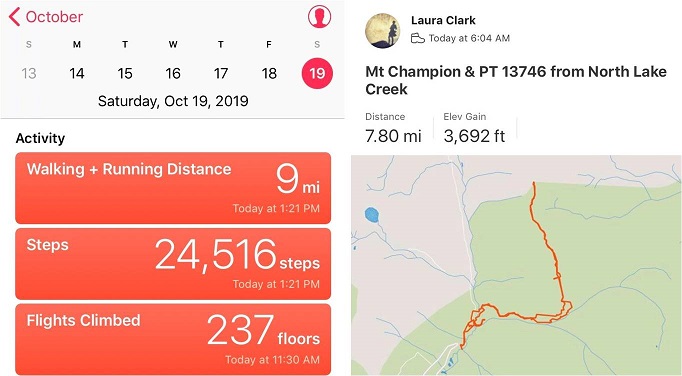
I made it back to my truck at 1pm, making this an 8 mile hike with 3692’ in elevation gain in 7 hours. I was surprisingly but pleasantly sore from such little mileage/elevation gain.
I picked Bull Hill because I needed something easy for today so I could be home by noon to meet a friend. The weather forecast was perfect (no wind, 50s at the summit) and I was tired from Friday’s climb but didn’t want to waste a great opportunity to get out and hike.
This was my third attempt at Bull Hill this year. The first time I got turned around before making it to the trailhead due to unexpected heavy falling snow and a road closure. The second time I had no problem making it to the trailhead, but even after a hard freeze I was postholing up to my waist and couldn’t find the trail. I ended up turning around shortly after the creek crossing. Today I learned what a great choice that had been!
The trailhead is easy to get to but difficult to find. It’s located at exactly 12.5 miles down the 82 from Granite. Turn right and there’s a small parking lot that will hold 4 cars if you all play nice.
I started at 4am. From here walk about 10 yards and turn north on an unmarked trail.
This trail is super easy to follow, as it’s an old 4WD road. There’s quickly a stream to cross that gave me some pause in the dark. I couldn’t tell how deep it was and it seemed to be flowing pretty fast. I walked up and down a bit, looking for a better area to cross, but this was it.
I decided I was wasting too much time on this: I had on winter climbing boots, so I decided to just walk across the stream. I started out the hike with wet feet but they quickly dried. The trail followed the stream, and here was where the “fun” began
And by fun I mean postholing. This was by far the worst experience I’ve ever had postholing. Every step I took on snow for about 2.5 miles I postholed. Over and over and over again. I knew this was a possibility going into this hike (it had happened to me last time, even with a hard freeze) and I just gritted my teeth and continued on, sinking to my knees with every step. Yes, I was wearing snowshoes, which helped, but they weren’t needed 100% of the time.
They were needed just enough to make taking them off not worth it
I followed the ill defined (due to the snow) trail to a gully, and took switchbacks up the south ridge. The switchbacks seemed unnecessary.
OK, so postholing isn’t fun, and I was getting tired of it. I came to an unexpected avalanche (although this year they seem to be the norm) and considered what to do?
It looked like this area went straight up the slope, but I wasn’t entirely sure the path was safe, so I continued on for another few switchbacks, the snow getting deeper and the postholing getting more aggressive as I went.
I switchbacked over to the gully once again and took another look.
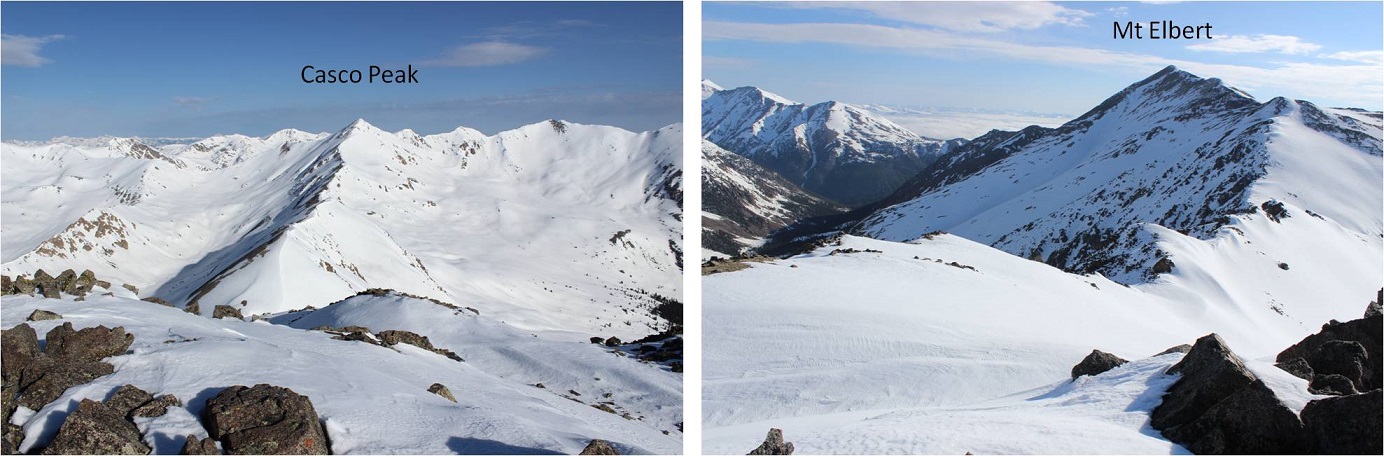
This time it looked like it went all the way to the mine, and the snow in the gully was very consolidated. It didn’t take me long to pick consolidated-snow-gully over postholing-switchbacks. Yes, this was the way to go! I turned to look back over my shoulder and thought this was a cool view of La Plata and Ellingwood Ridge
I took the gully until it met up again with the road below the mine. The road here was covered in snow, but not a lot of the surrounding terrain had snow.
I stopped for a bit at the mine to rest. My quads were killing me! That type of postholing had been the 4 letter word type of postholing. I was not looking forward to a repeat of that on my way down. After applying sunscreen (yes, I did get sunburned on Friday’s climb of Thunder Pyramid) I took a look at my next step: To gain the ridge in front of me. I decided it was best to keep my snowshoes on and looked for a line that would get me to the ridge
There was just one rocky area to climb over
And by looking left I could see the rest of the route before me
This was by far the easiest part of the entire day. The slope was gentle and had enough snow for me to keep my snowshoes on.
The only downside was a false summit that took me by surprise, but it was close to the actual summit so I didn’t mind too much.
I was amazed at how calm everything was! There wasn’t any wind, which was amazing. This is the first summit this year I haven’t needed to wear snow clothes to hike, but where there was still a ton of snow!
I turned to head back down, making sure to stay right (the ridge to the left goes the wrong way and has a massive cornice, but they look similar, so stay right)
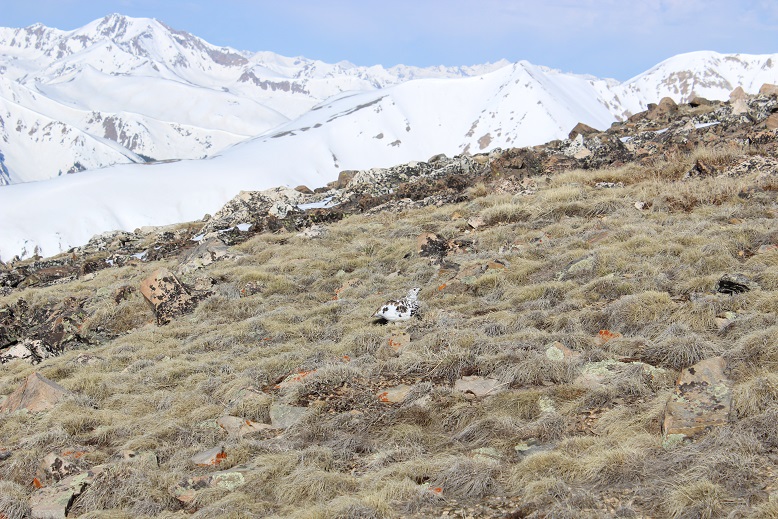
Halfway down the slope I made a new friend! Ptarmigans have great camouflage.
From the ridge here’s a look back down at the mine and the route I took back to the gully
There was a busy marmot running to and from its den
I decided to have a little fun at the Last Chance Mine, just because I could and I knew I had postholing to look forward to (ok, I was stalling)
Doesn’t it look like a lot of fun?
I again followed the snow covered road back to the gully
And hiked back down to where I’d entered the gully earlier
I briefly considered taking the gully all the way back down to the stream, but wasn’t sure if it went the entire way. I found out it didn’t, so if you plan on taking the gully instead of the switchbacks you need to wait until the last set (see map)
The postholing was actually a little better on the way down because I could re-step in my previously made postholes, which meant more stability. The creek crossing wasn’t too bad in the daylight. My feet got wet again but I was close to my truck and warm socks so I didn’t mind.
I made it back to my truck at 9:30am, making this a 7 mile hike in 5.5 hours: I blame it on the excessive postholing and the Last Change Mine. You should be able to complete this hike in much faster time.