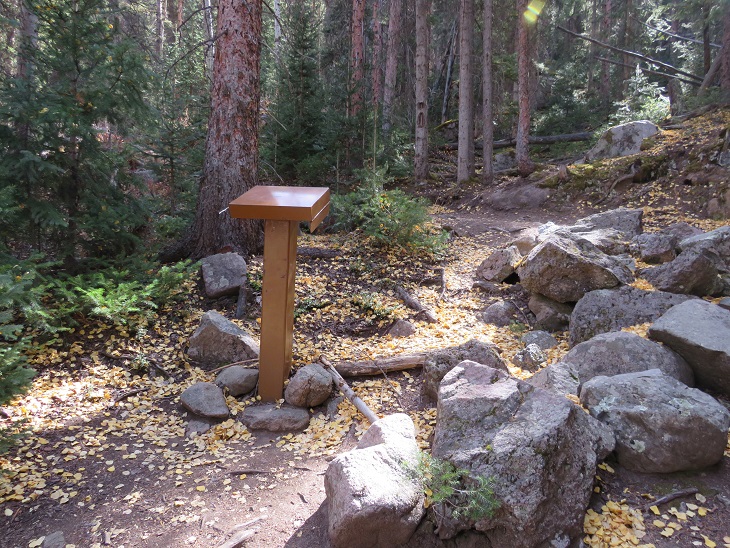
Click on a menu, or use the search feature to access hundreds of trip reports. Contact me if you'd like more information about a hike, or a GPX file
Author: Laura M Clark
Laura has summited over 500 peaks above 13,000' solo, including being the first woman to solo summit all of the Colorado 14ers, as well as the centennials. After each hike, she writes trip reports for each one and publishes them on her blog, which is read by fans all over the world. Author of Wild Wanderer: Summiting Colorado’s 200 Highest Peaks, which is available to purchase on Amazon.
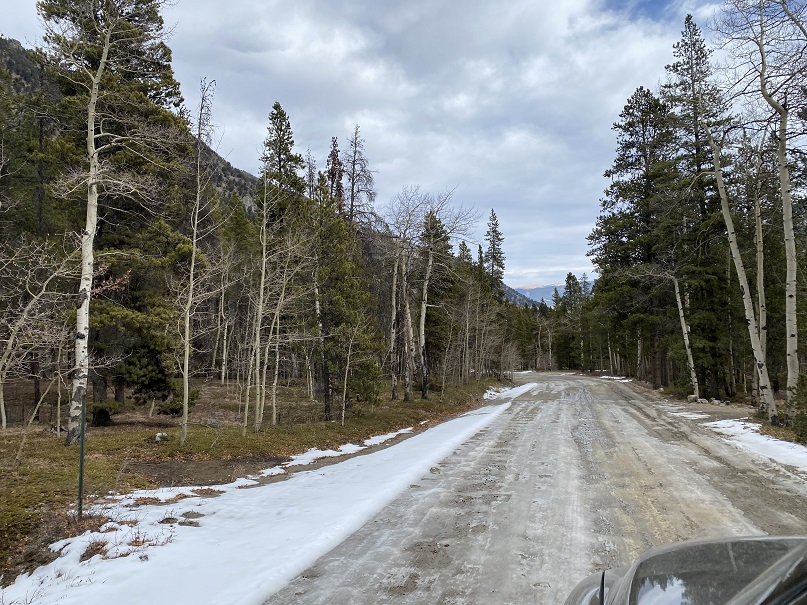
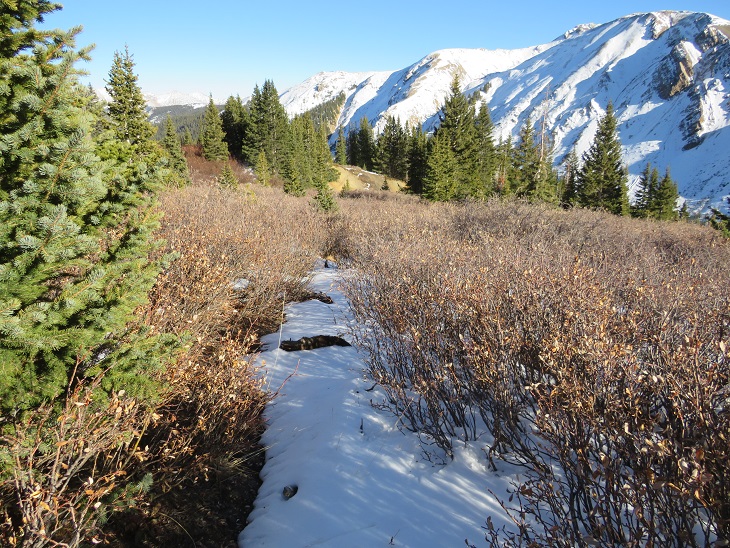
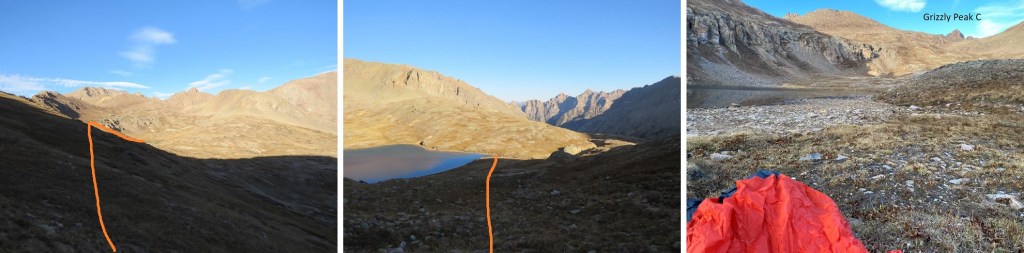
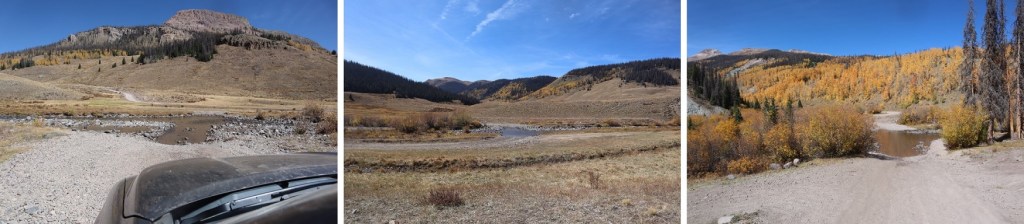
There was a storm predicted for this weekend, so I set out to try to get this loop in before the snow hit. I had no trouble driving the 2WD dirt road all the way to Winfield, even though it was icy in spots.
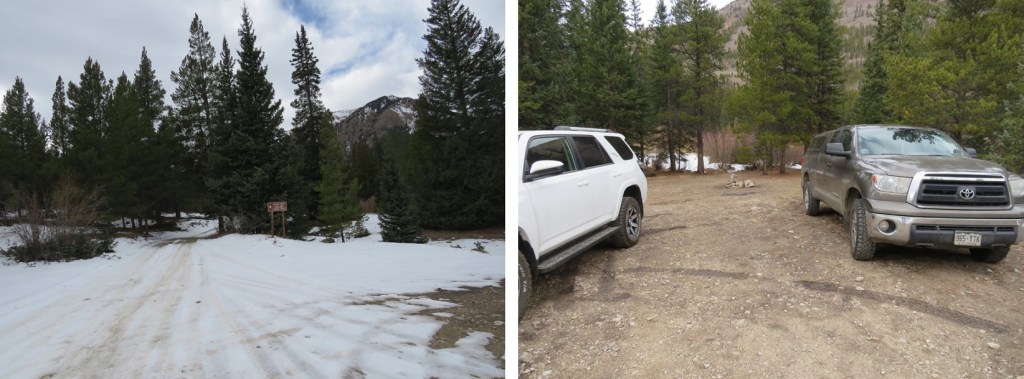
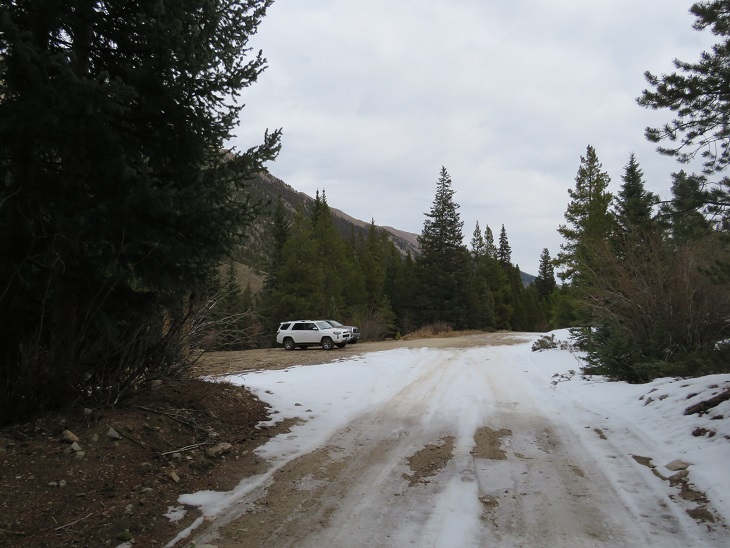
Once I made it to the 4WD road it became icy. I decided to park in the dispersed camping area and hike along the road. There are several dispersed camping areas here, and plenty of parking.
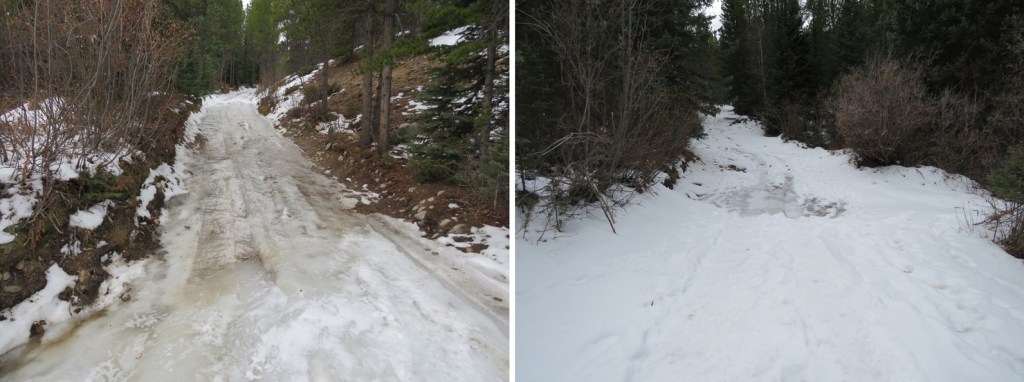
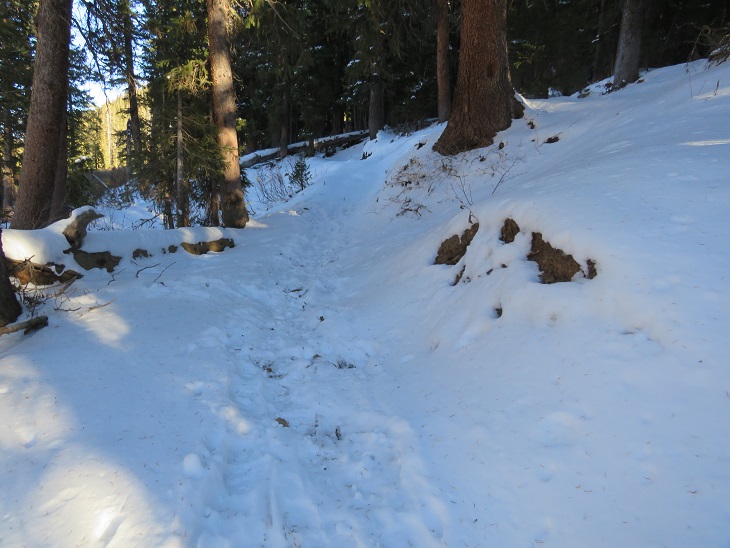
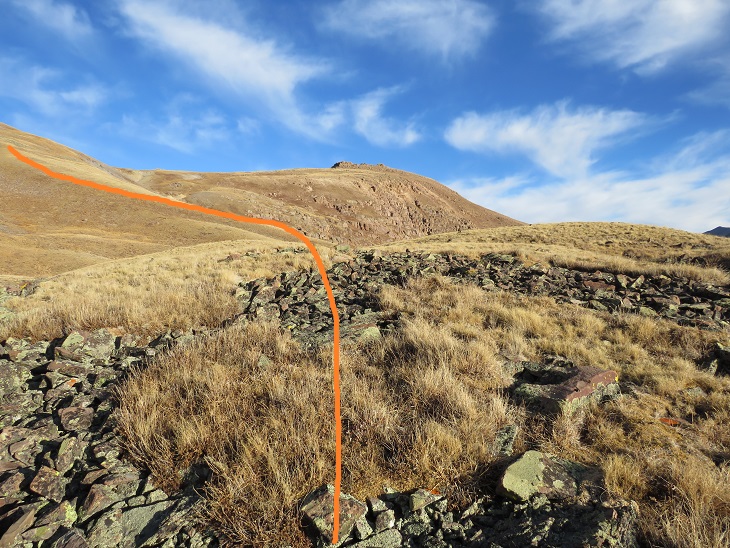
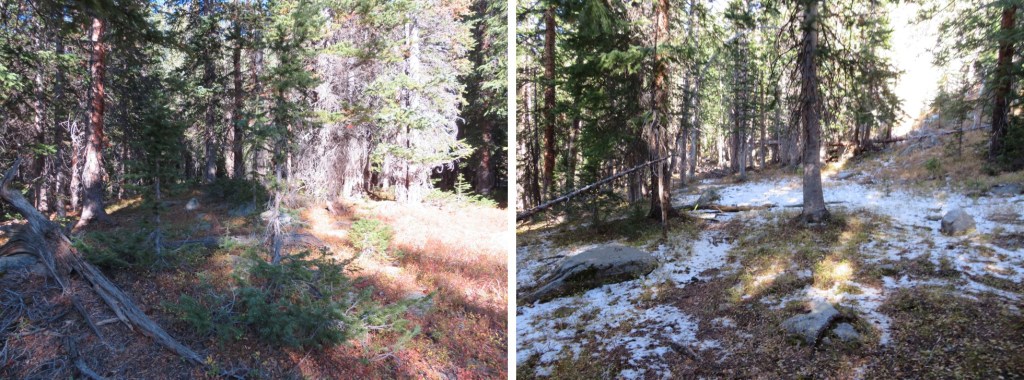
I put on my microspikes at the truck and didn’t take them off the entire hike (although they were overkill for over half of the hike). I started out following the 4WD road southwest. It quickly became icy and I was glad for the spikes. I could also hear owls on either side of the trail. They were hooting, calling to each other back and forth. We’ve recently had an owl take up residence in our backyard and the calls were similar, so I’m guessing they were great horned owls. I also heard a chirping in-between calls. I’m not sure what animal the chirping belonged to, but it happened every time an owl’s call ended, and before the next one began. In any event, the sounds kept me occupied as I hiked in the dark.
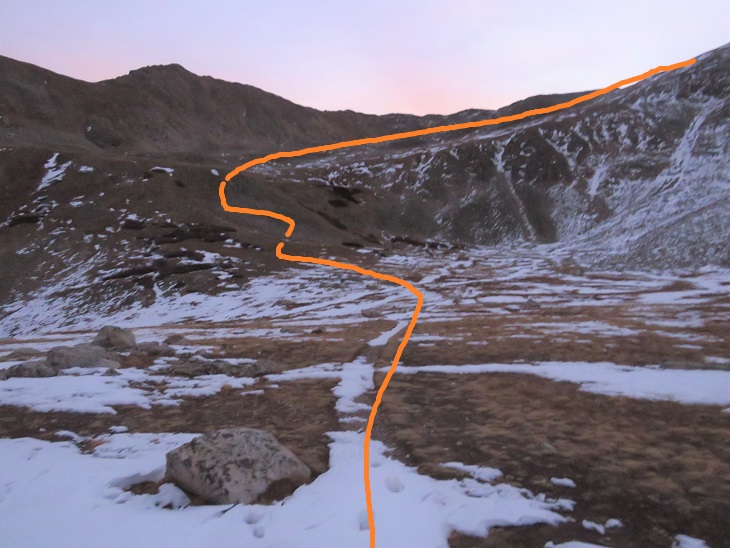
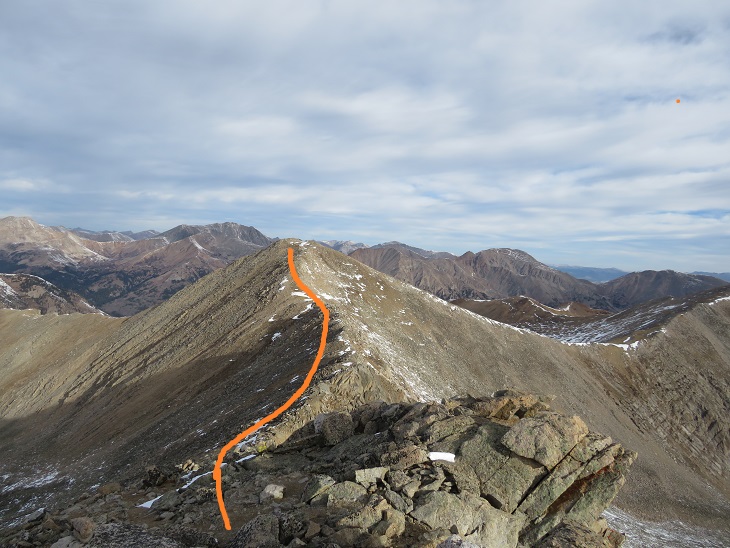
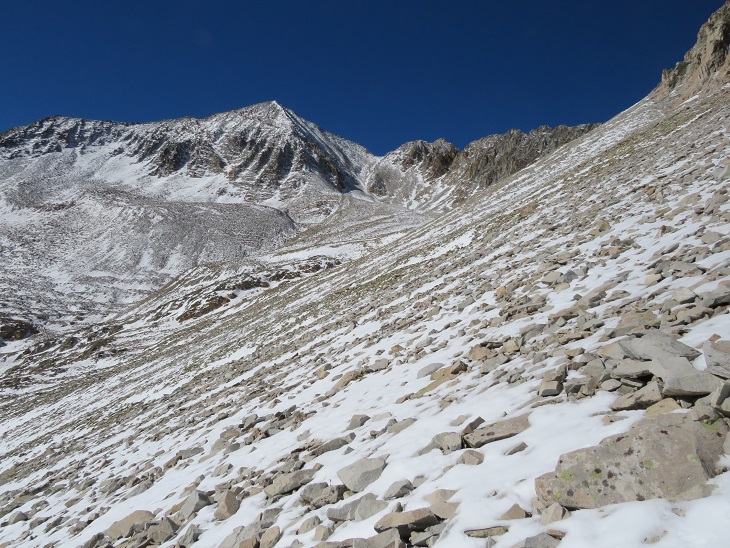
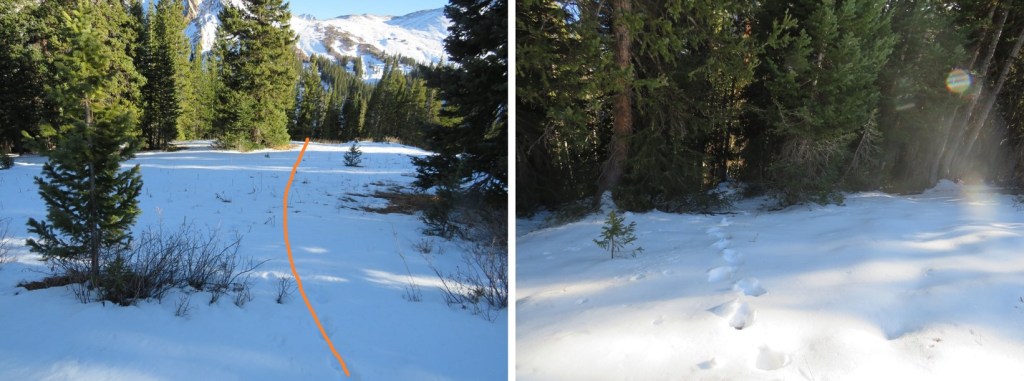
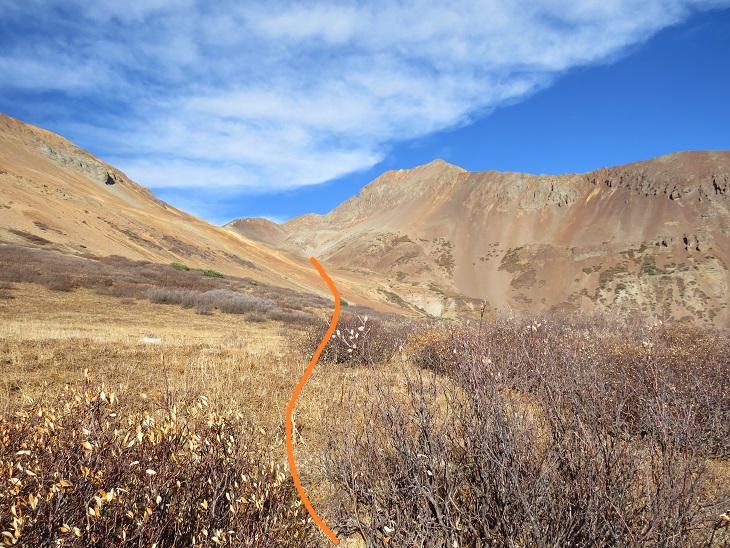
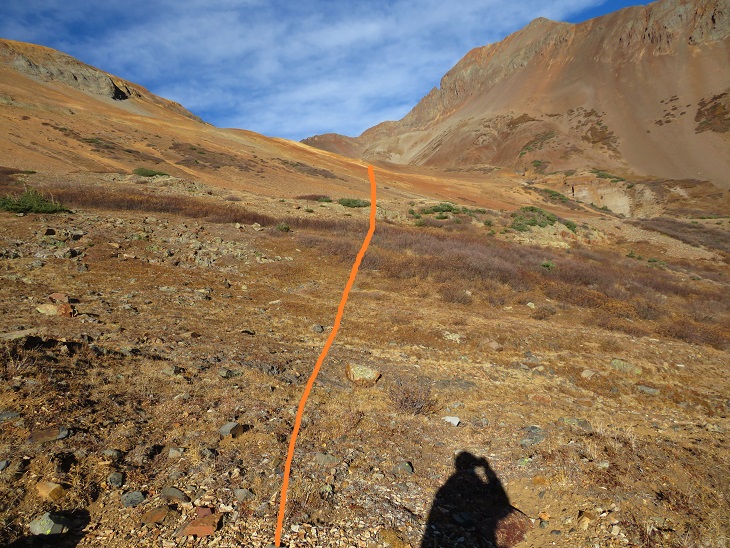
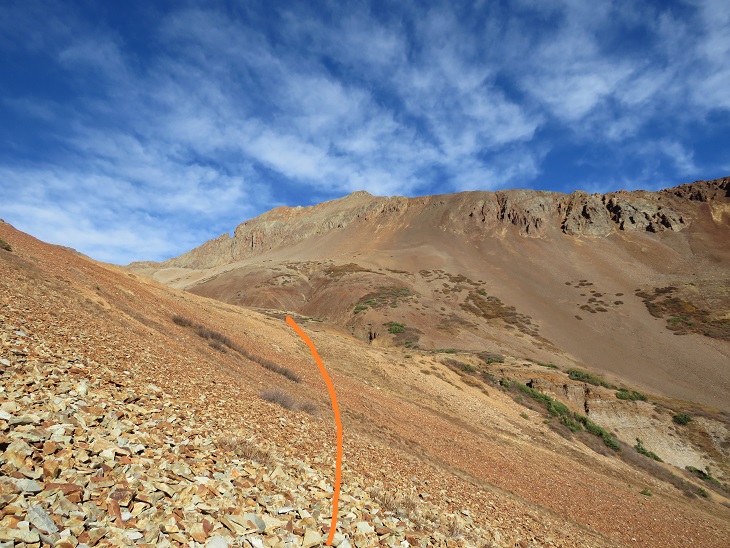
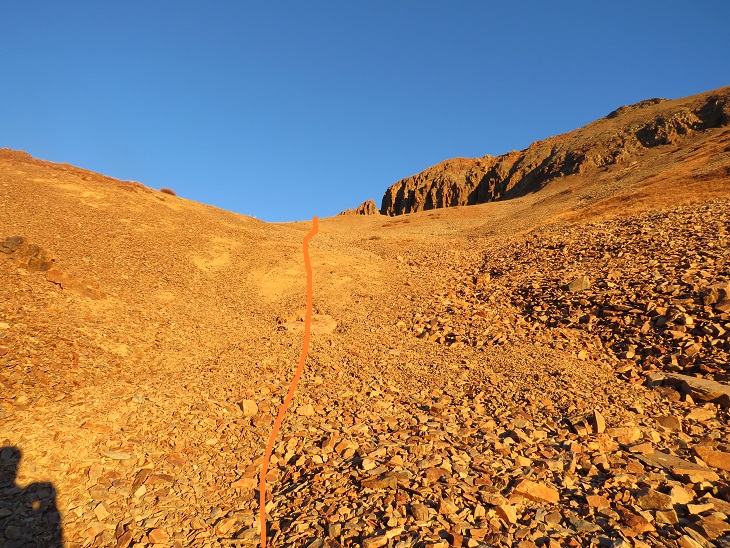
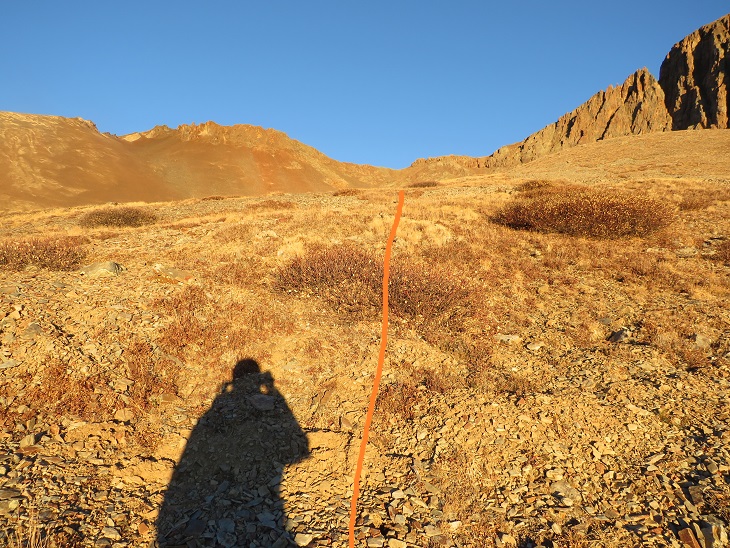
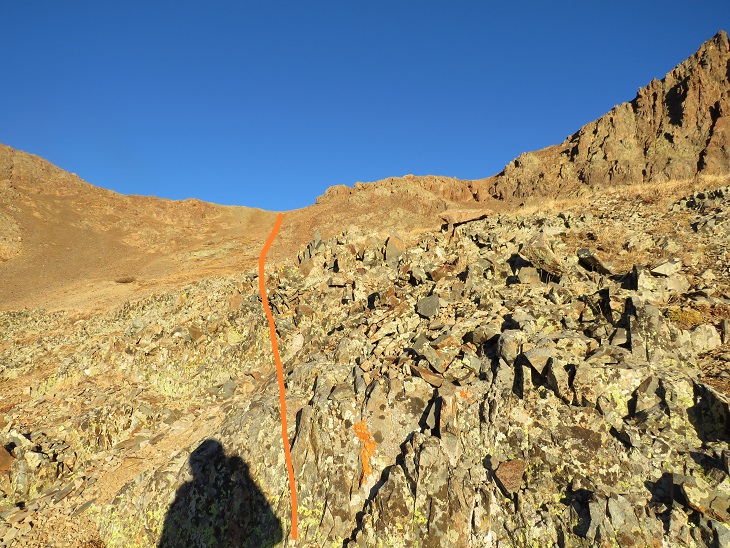
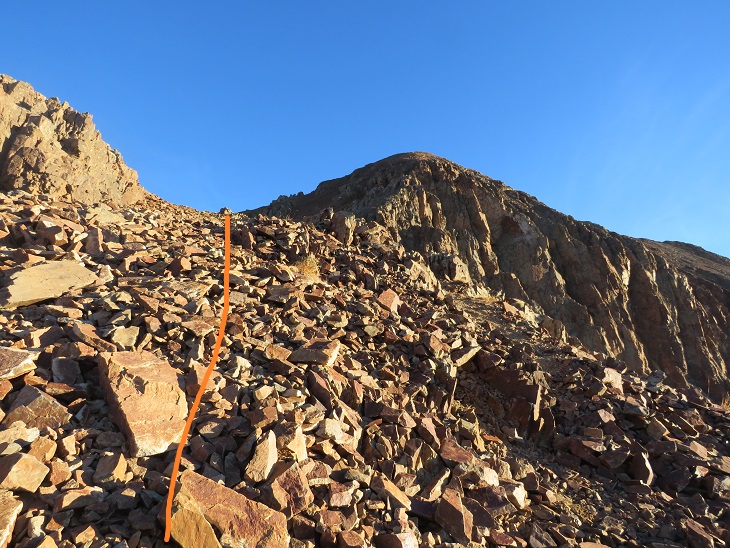
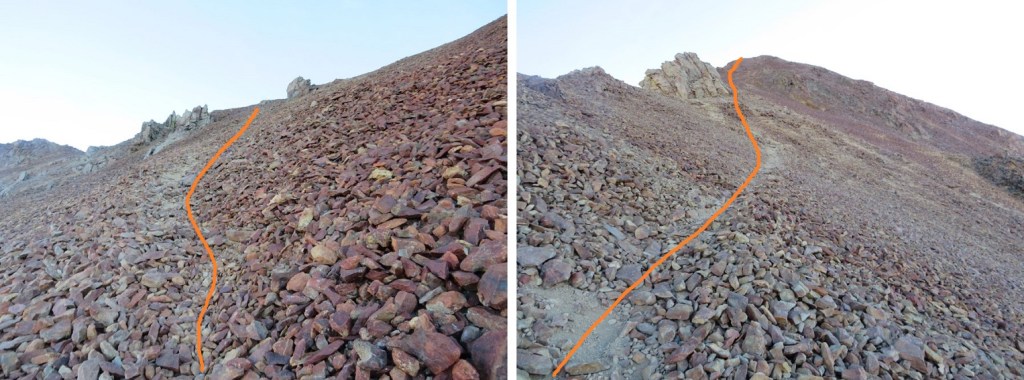
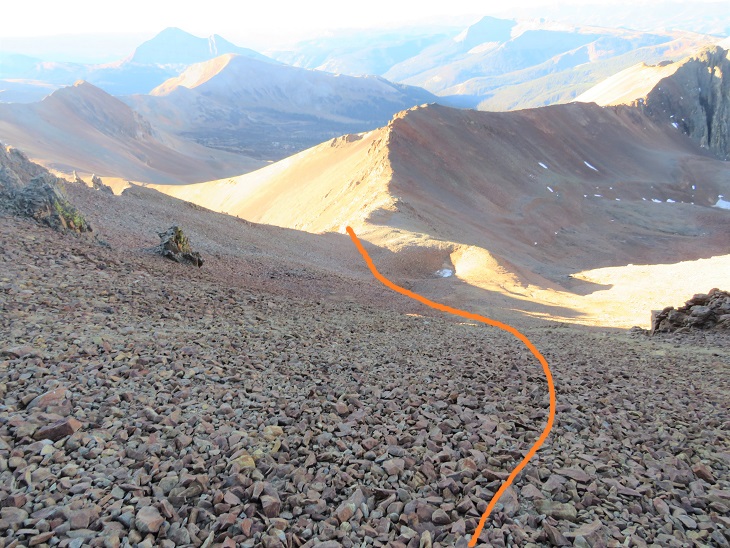
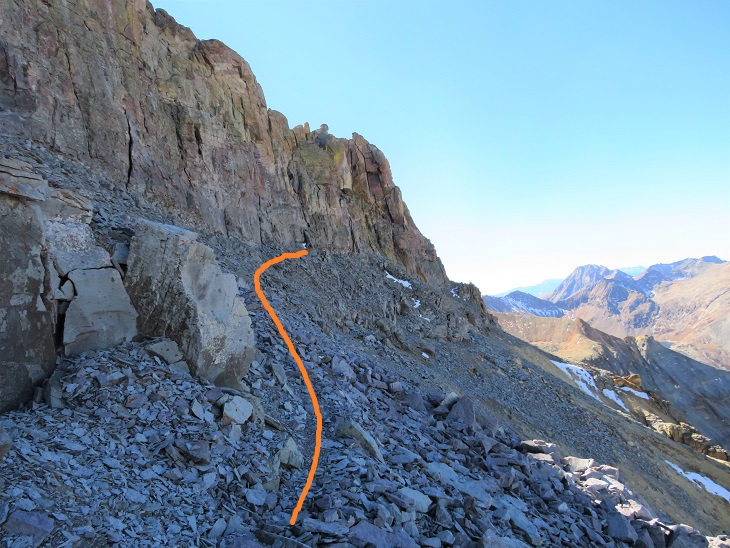
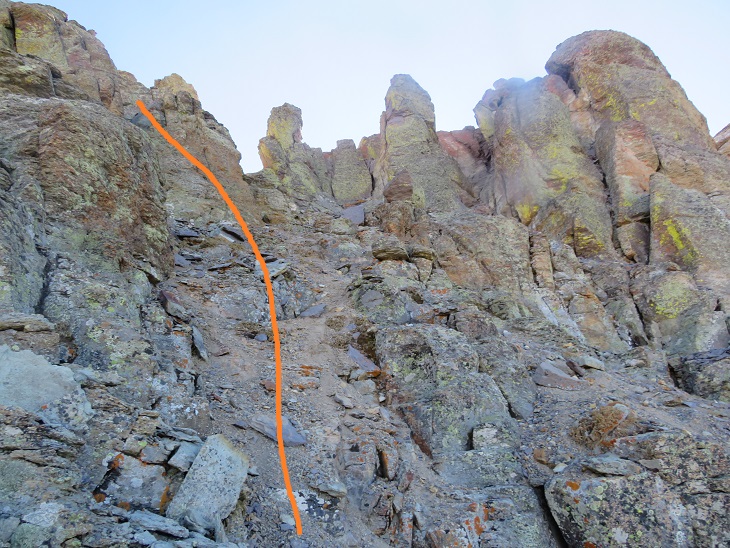
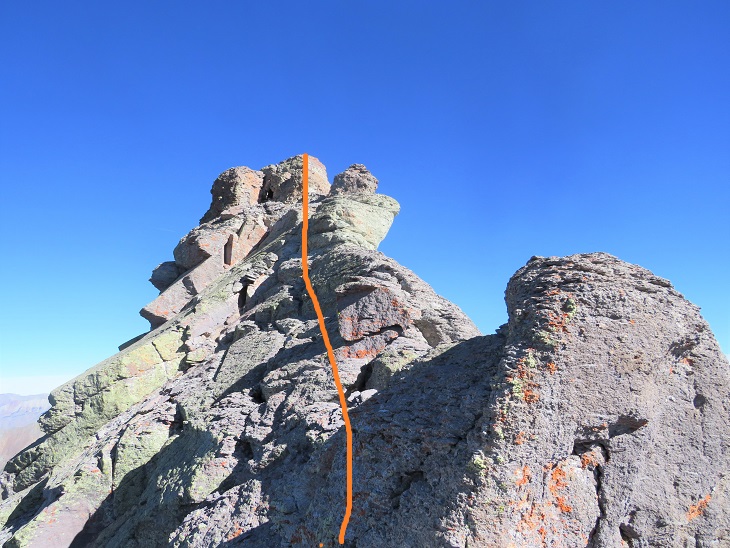
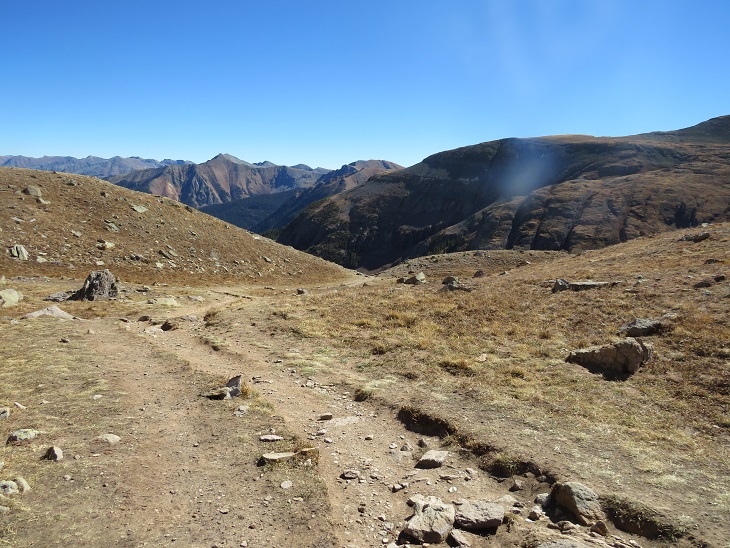
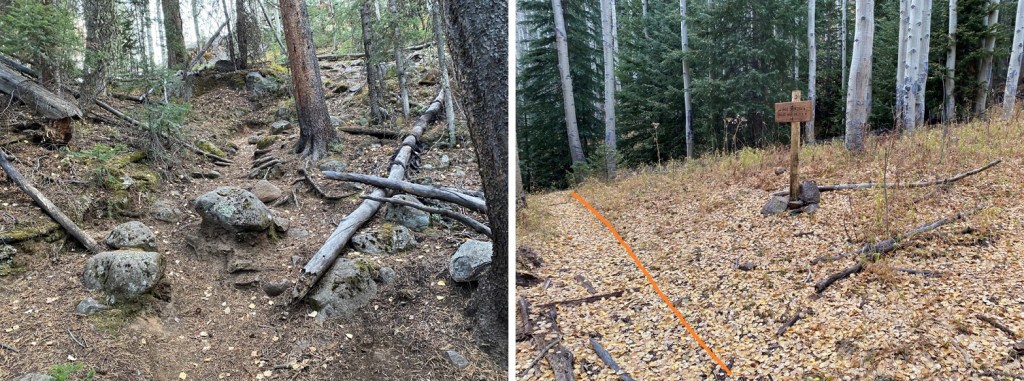
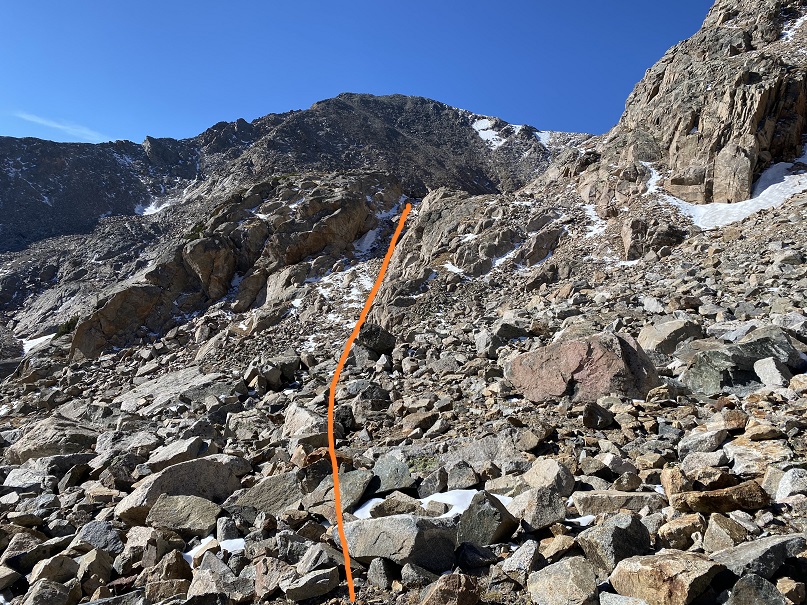
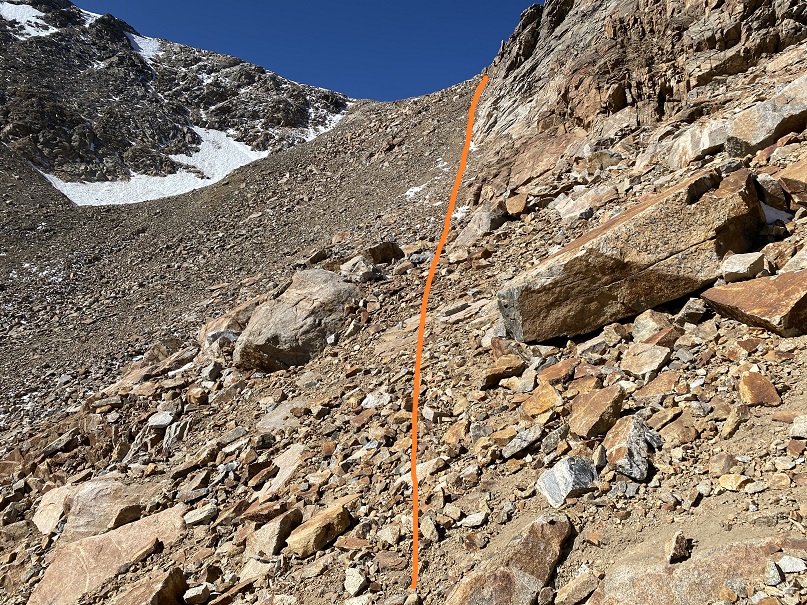
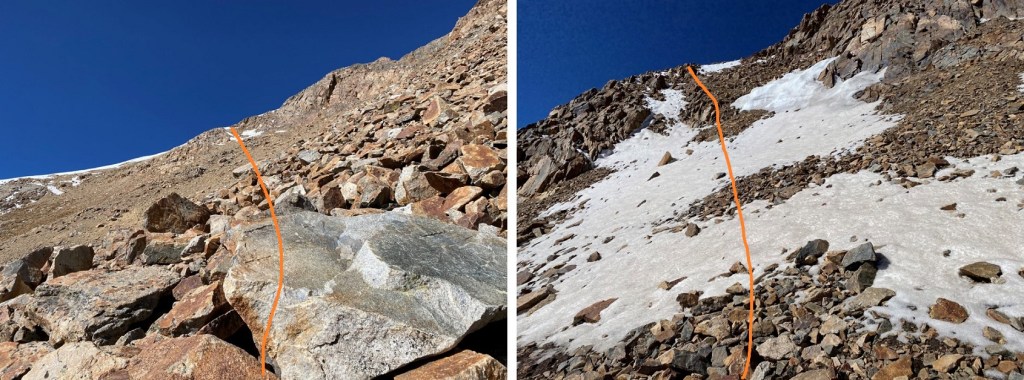
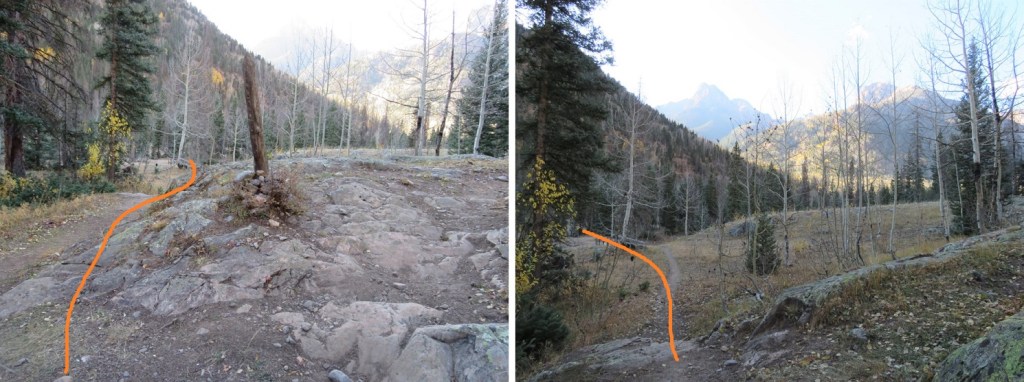
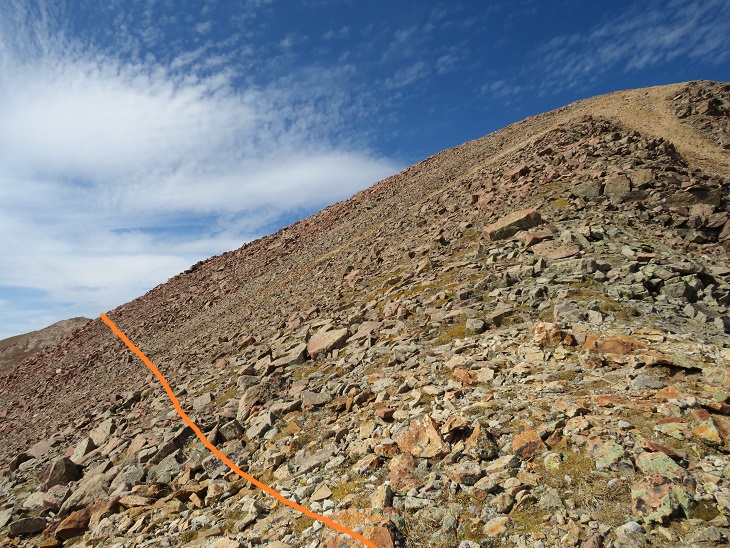
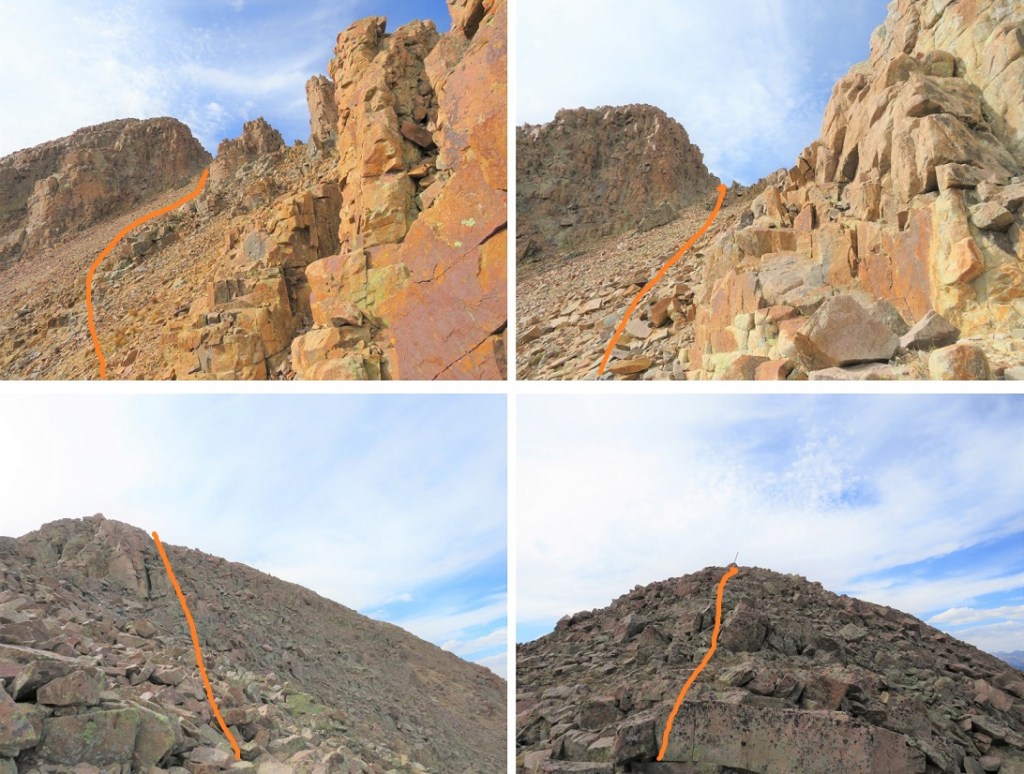
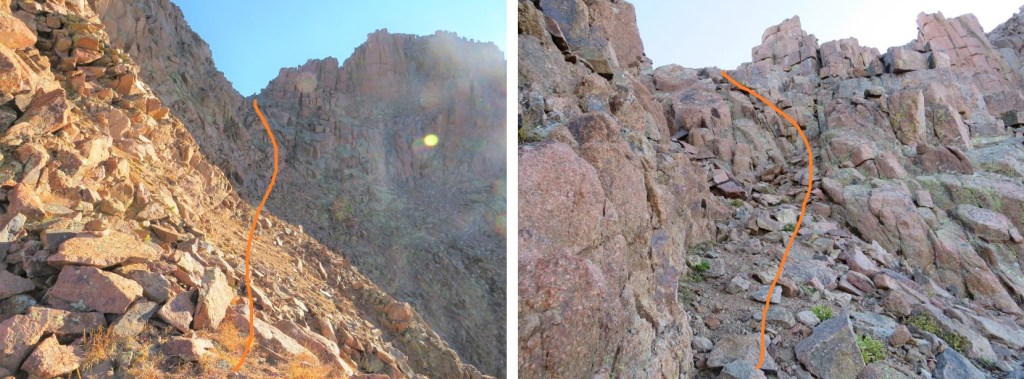
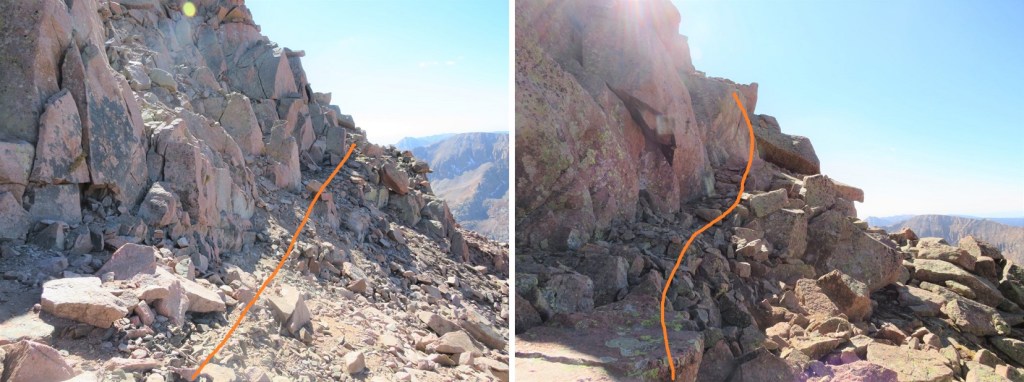
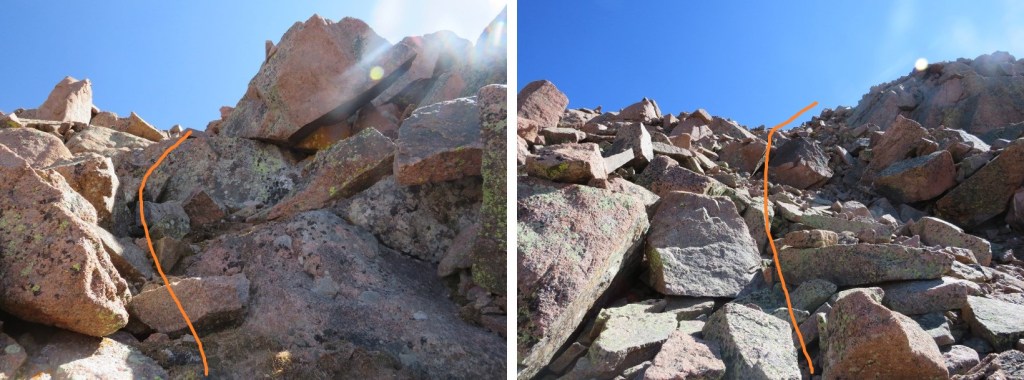
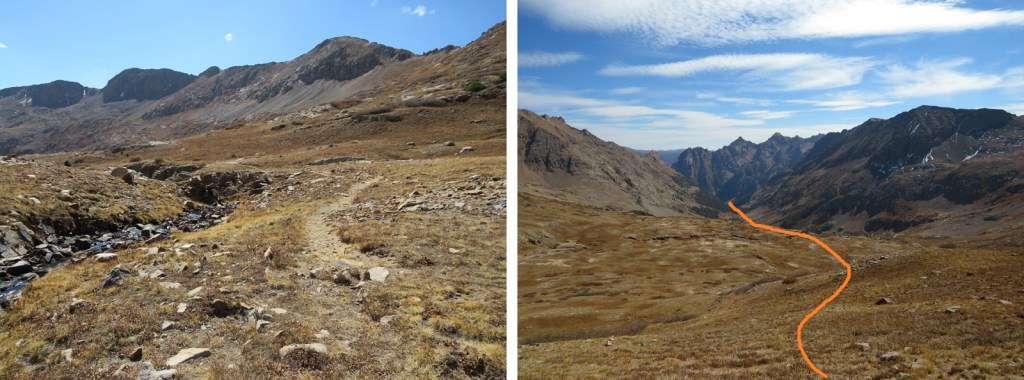
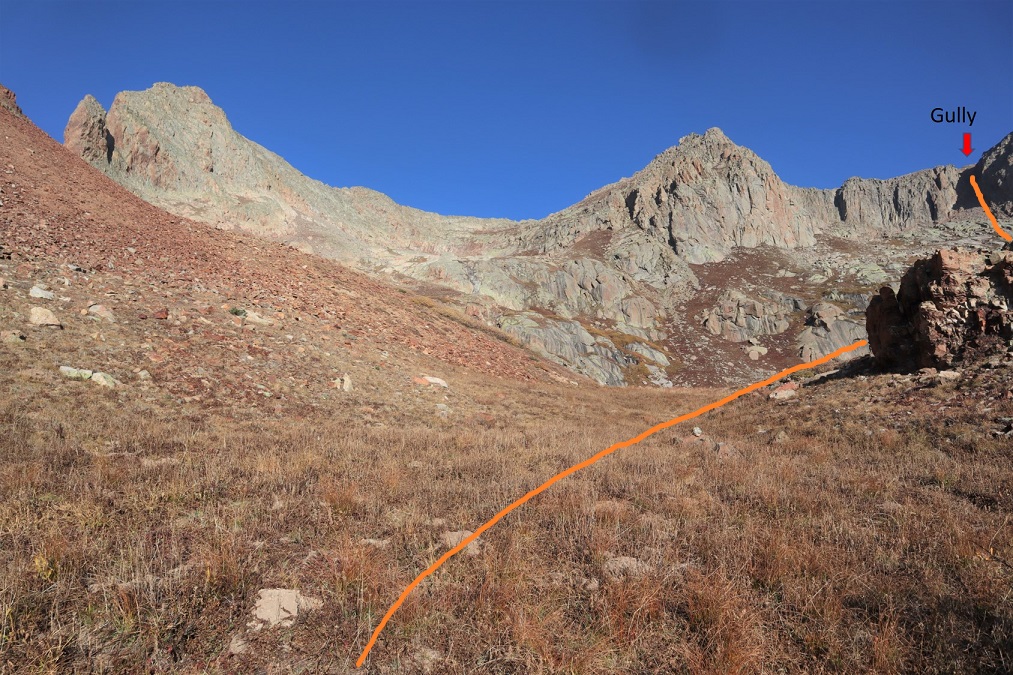
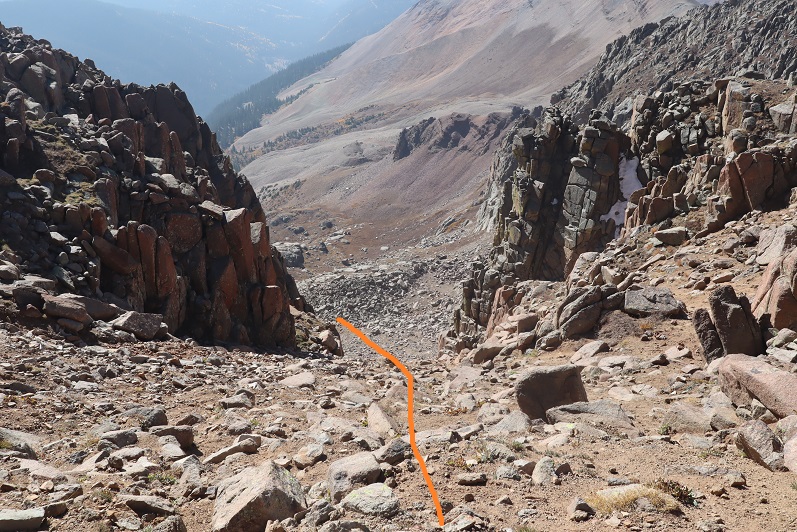
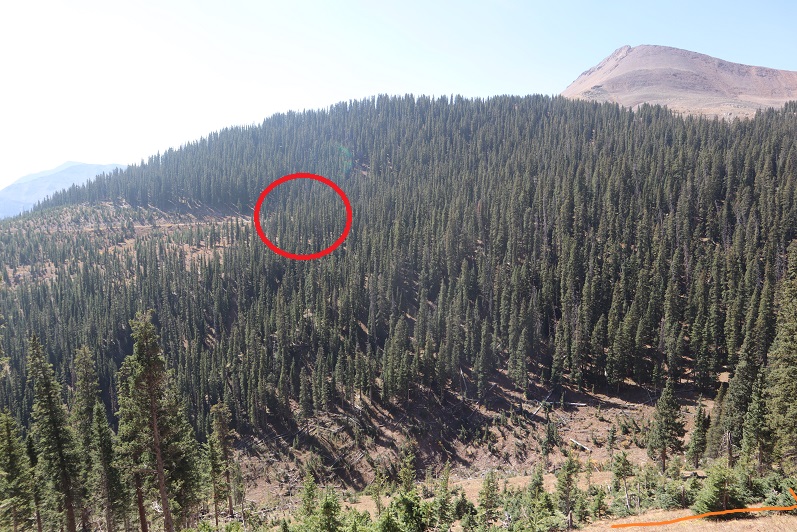
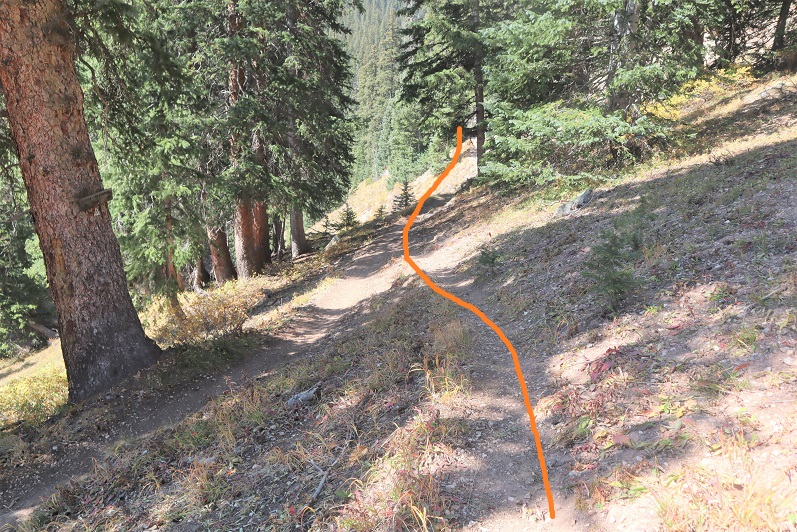
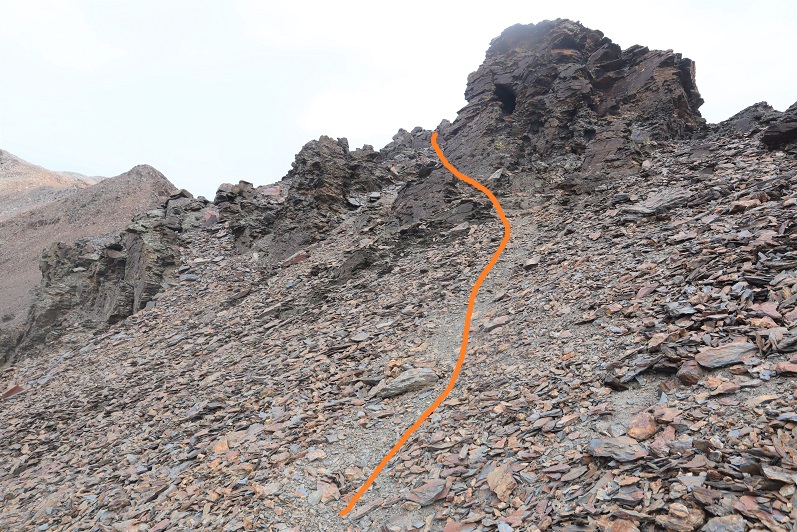
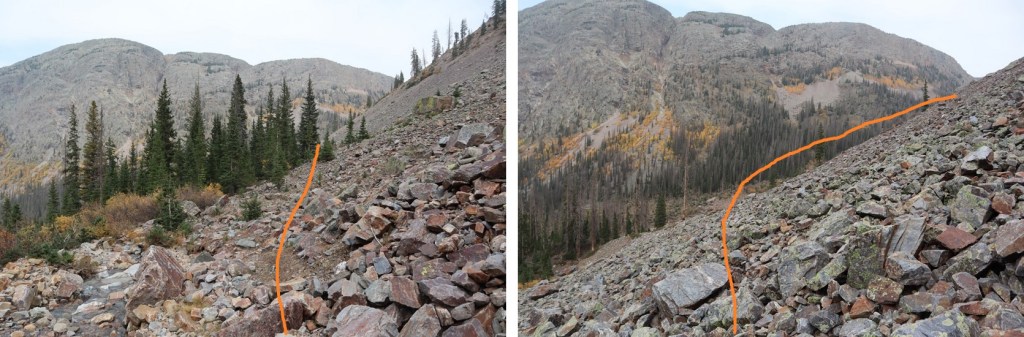
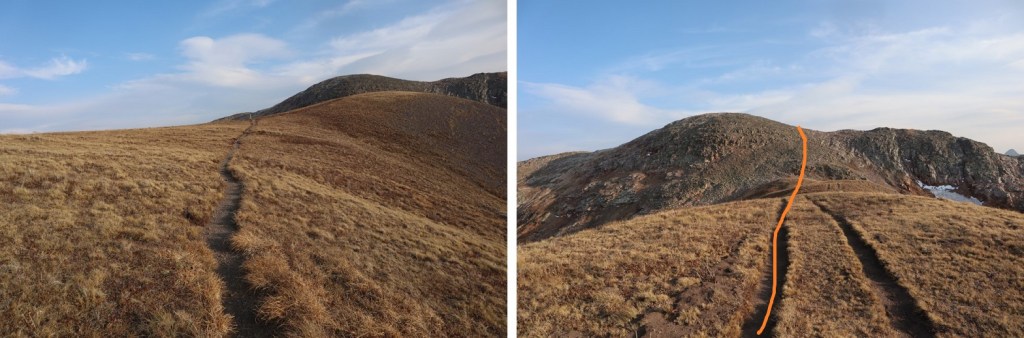
I followed the 4WD road for 2 miles to the upper trailhead (Lake Ann). Here the trail splits. I took the well marked ‘Huron Trail’ that went left up the mountainside.
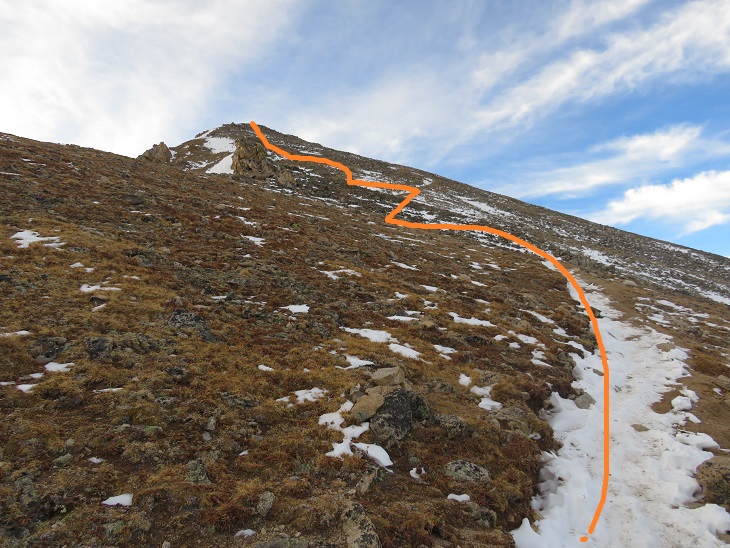
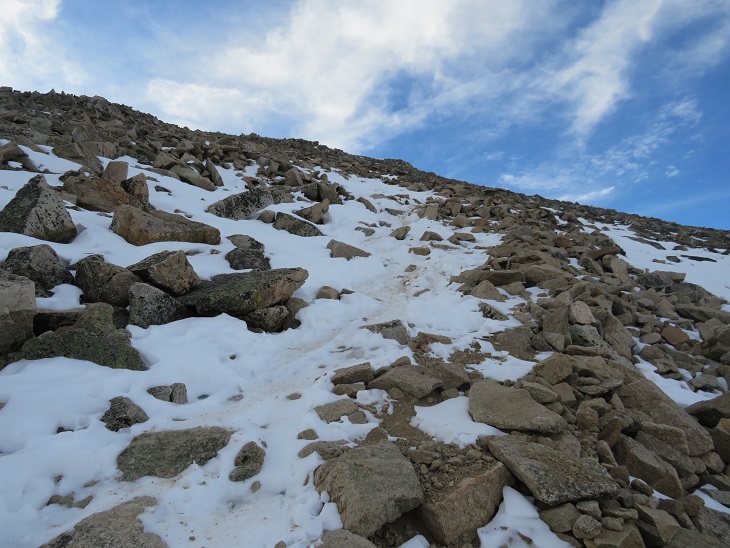
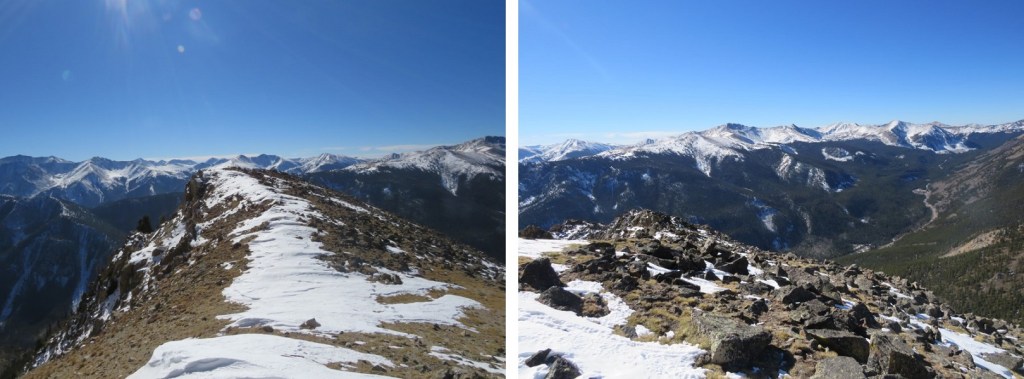
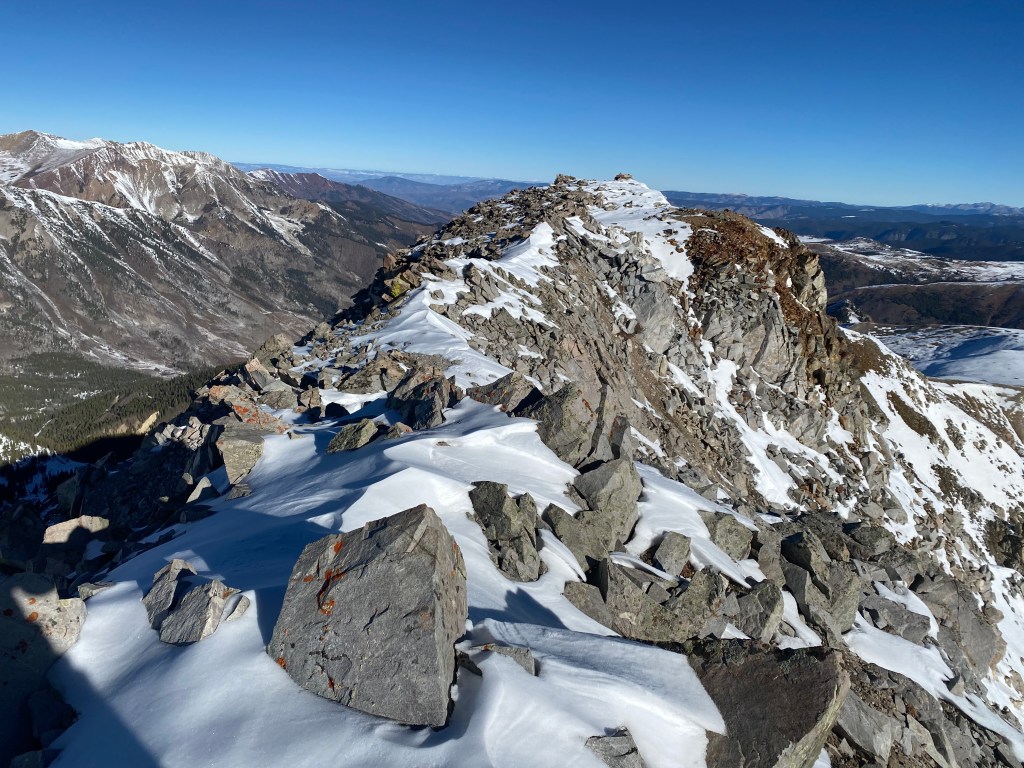
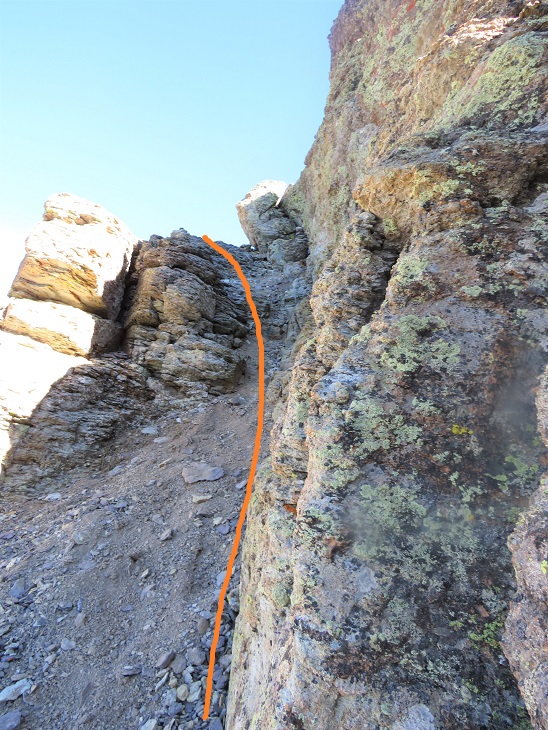
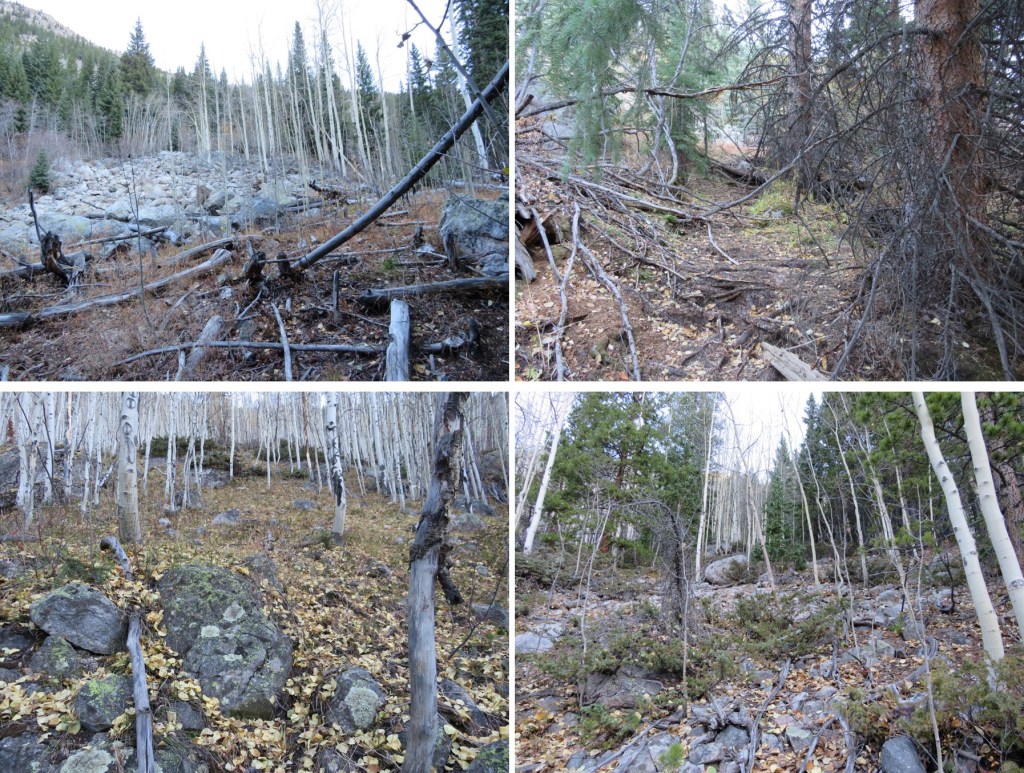
The Huron Trail is a well marked and easy to follow class 1 trail that takes you all the way to Huron Peak. This is also a well documented trail, so I’ll just add a few photos.
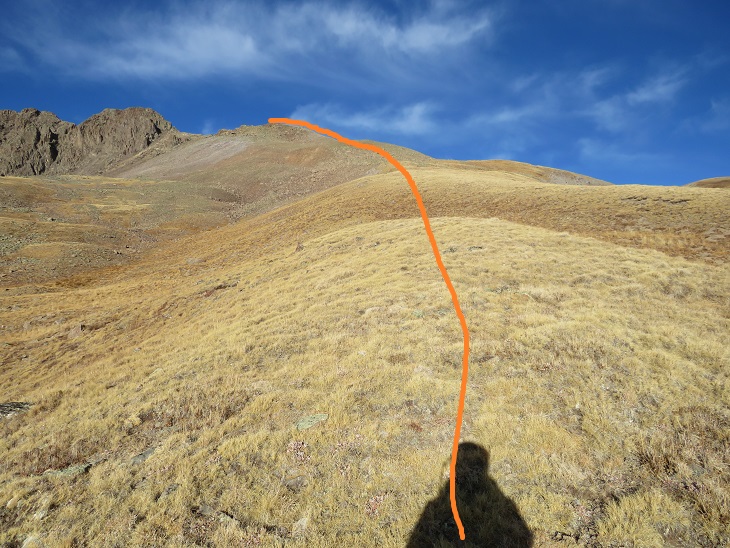
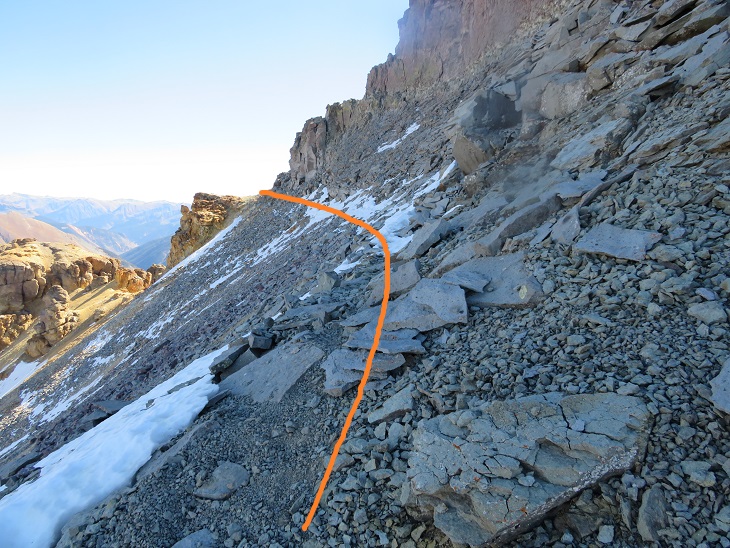
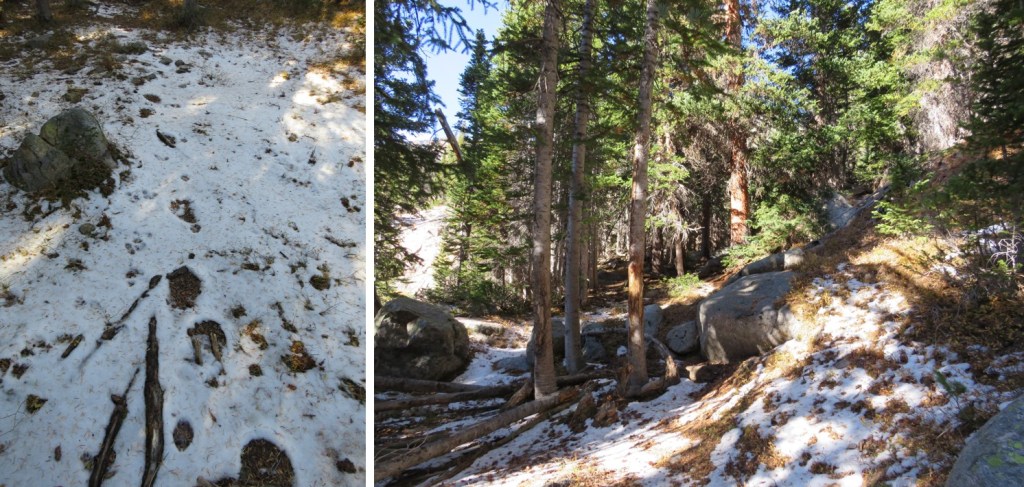
Once at the saddle the trail became increasingly icy, and I was glad to be wearing my microspikes. Also, one of them broke (I continued to wear it anyway. The other one broke as well later on, but microspikes are easily fixable so I wasn’t too worried).
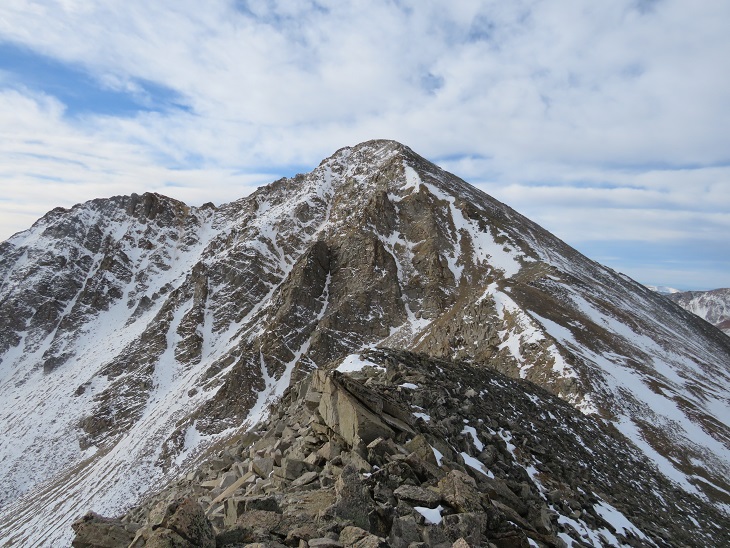
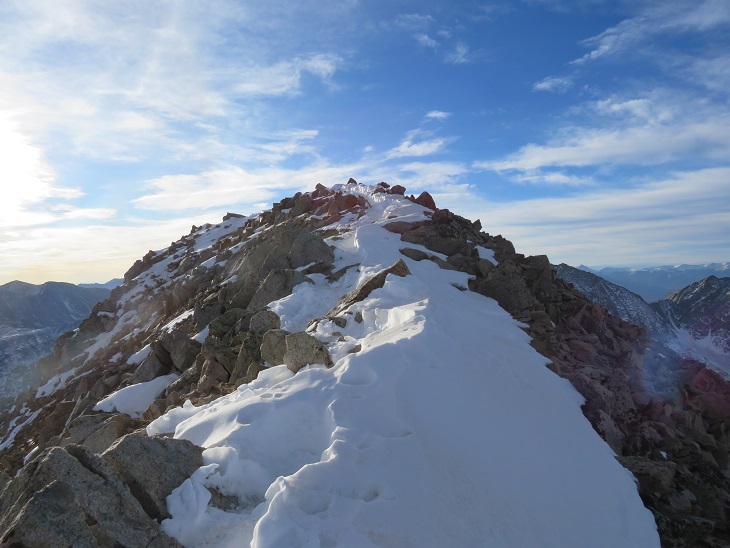
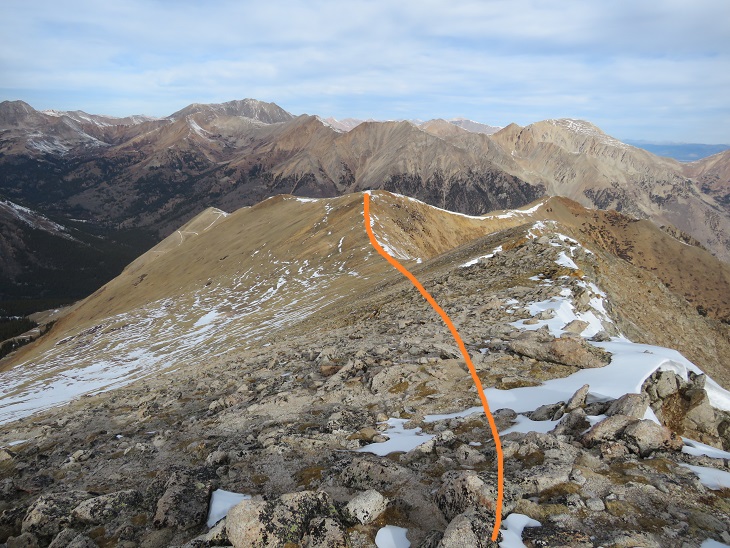
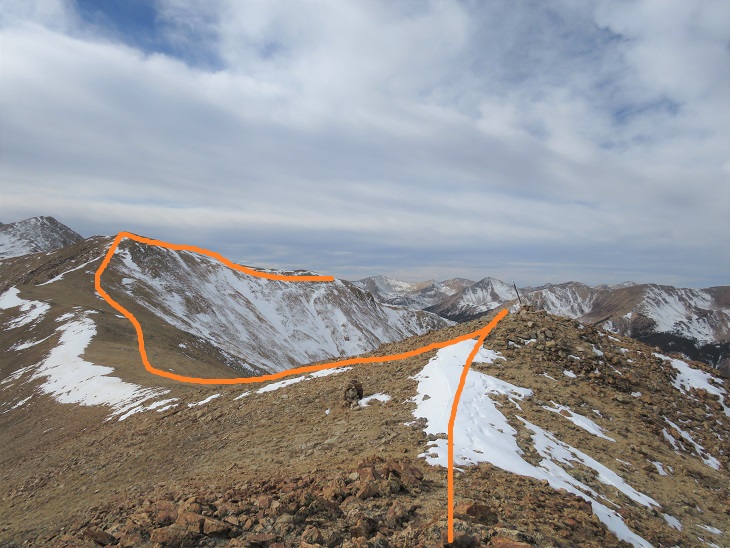
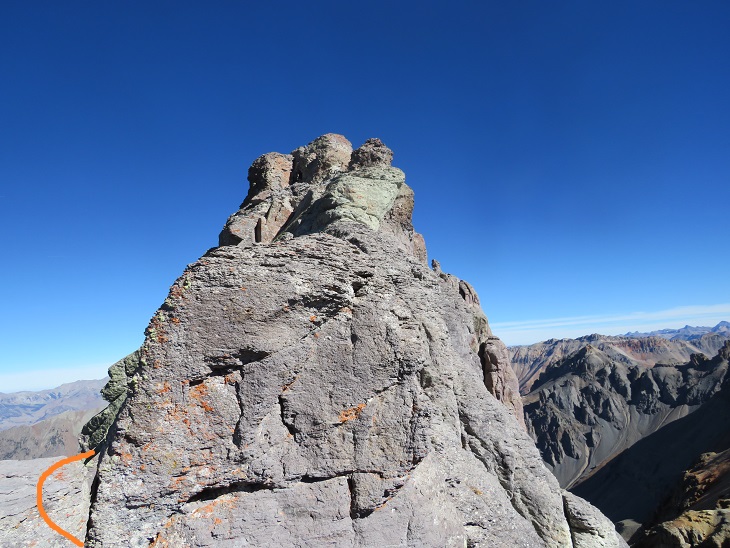
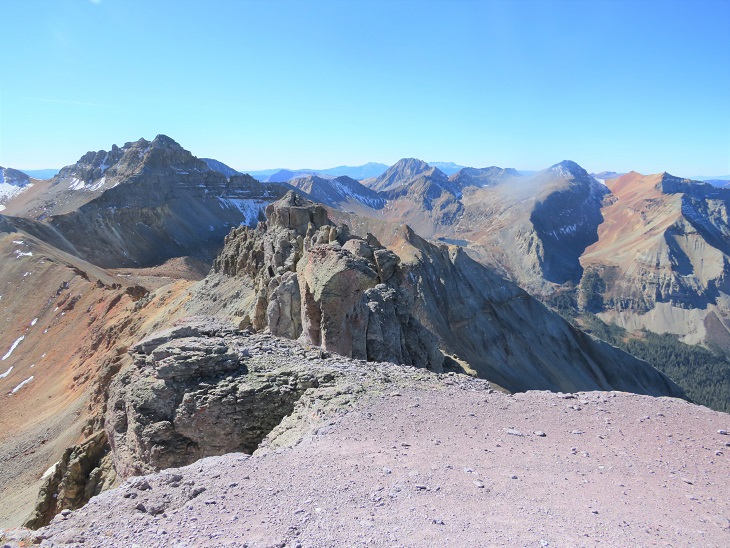
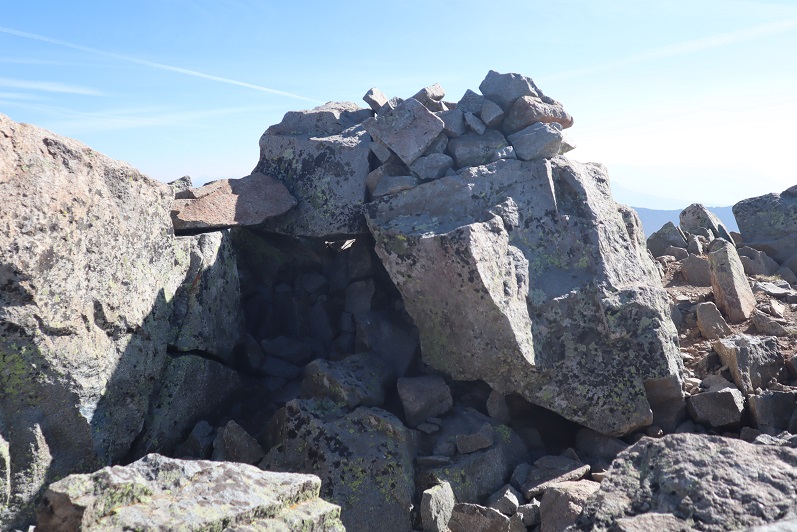
I summited Huron Peak at 7:45am
Huron Peak:
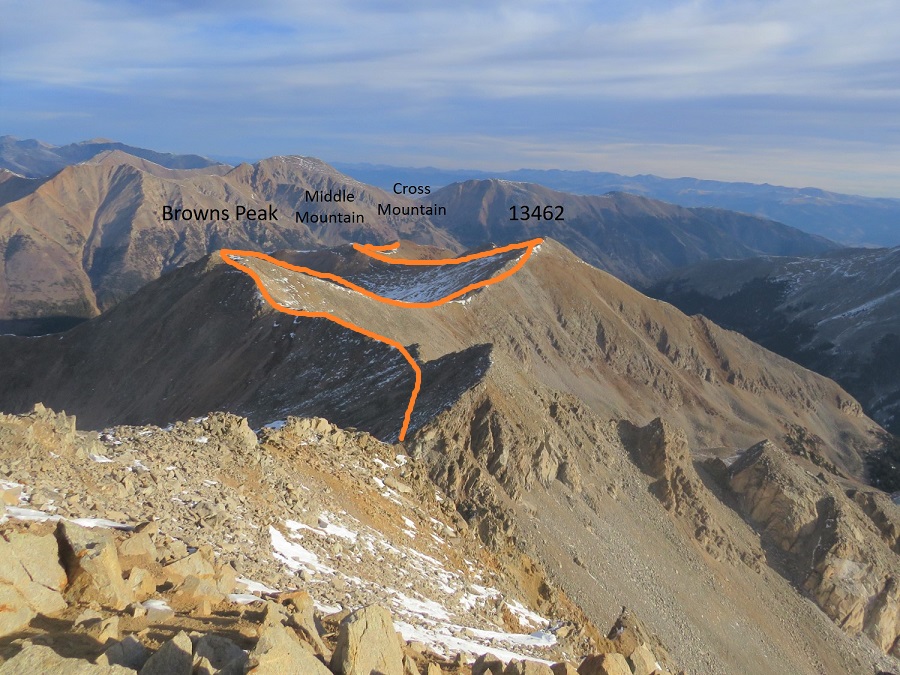
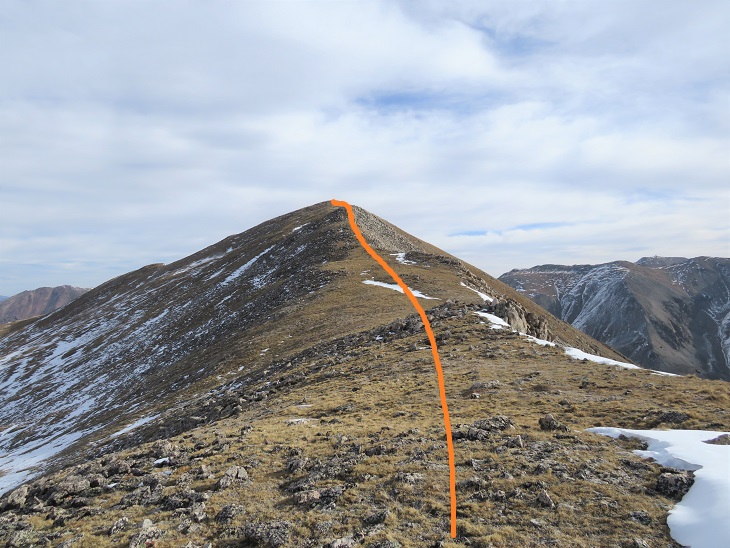
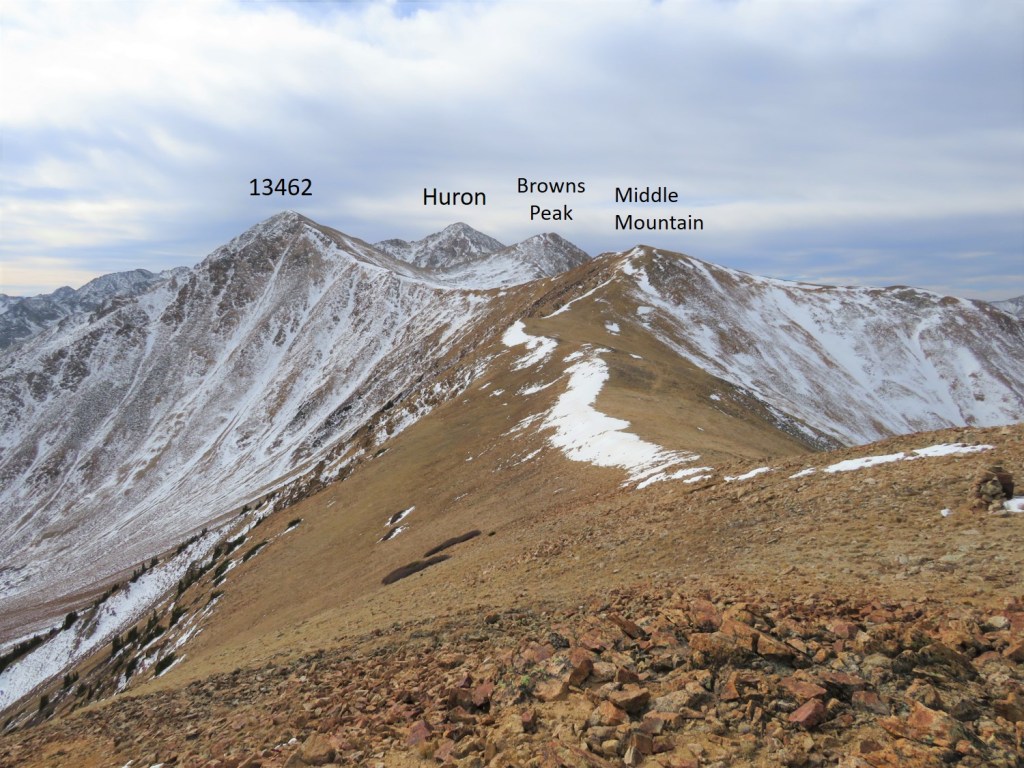
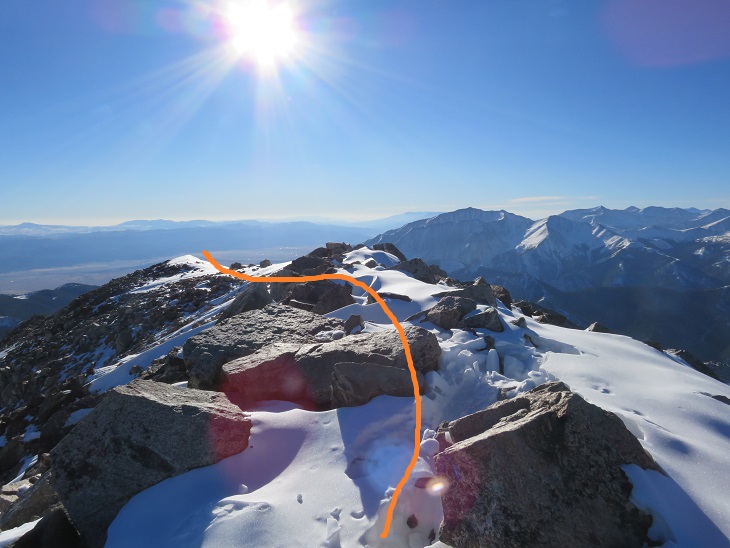
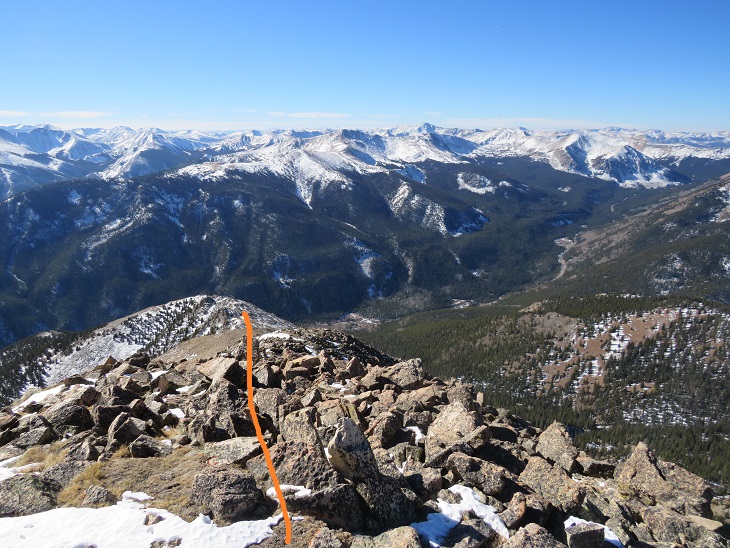
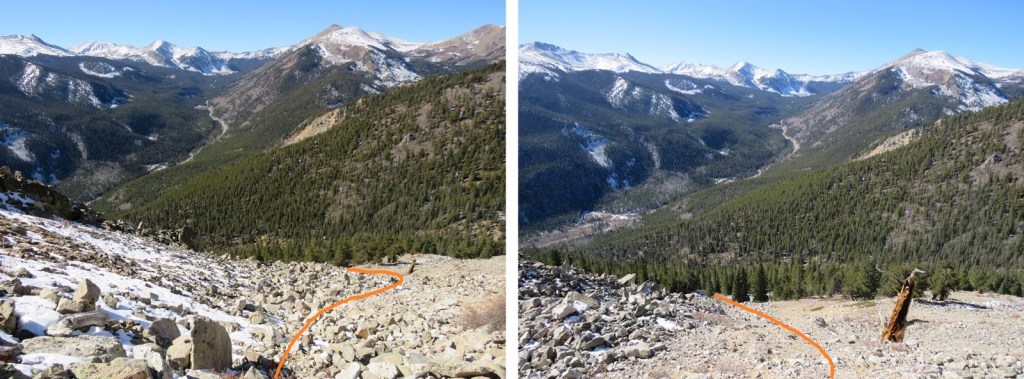
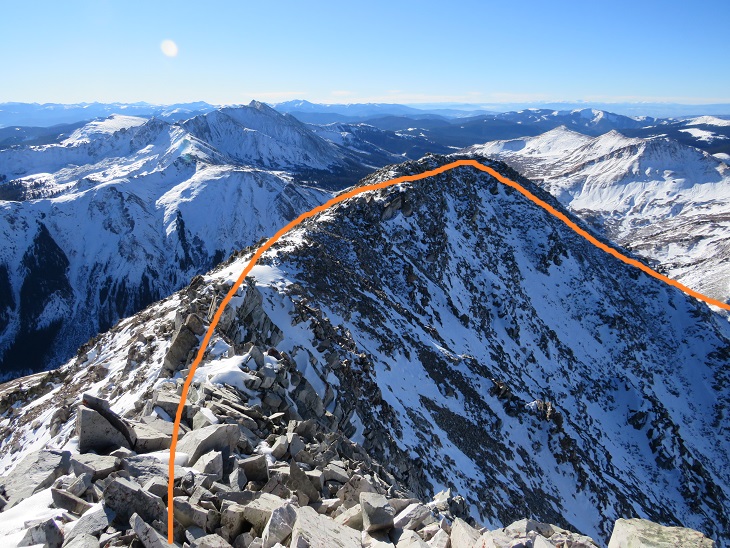
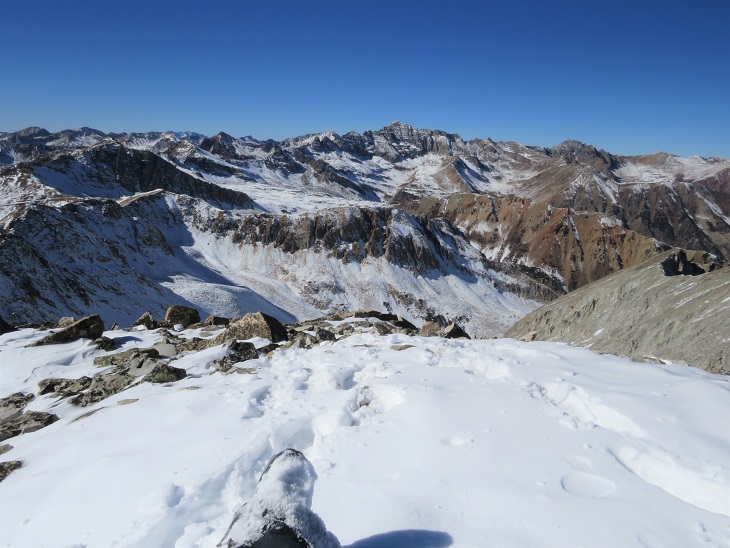
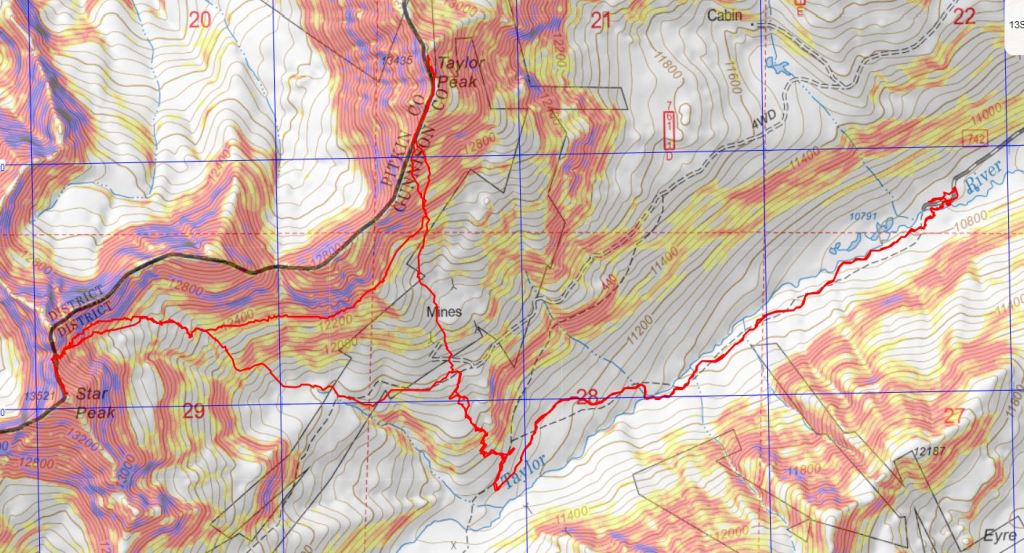
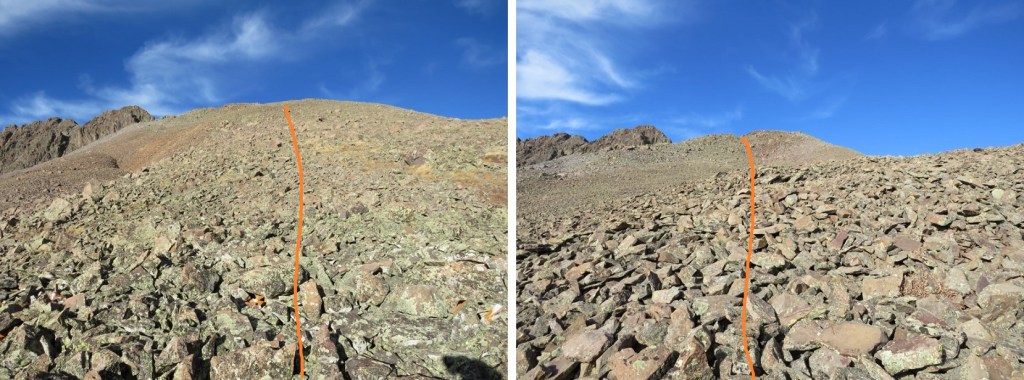
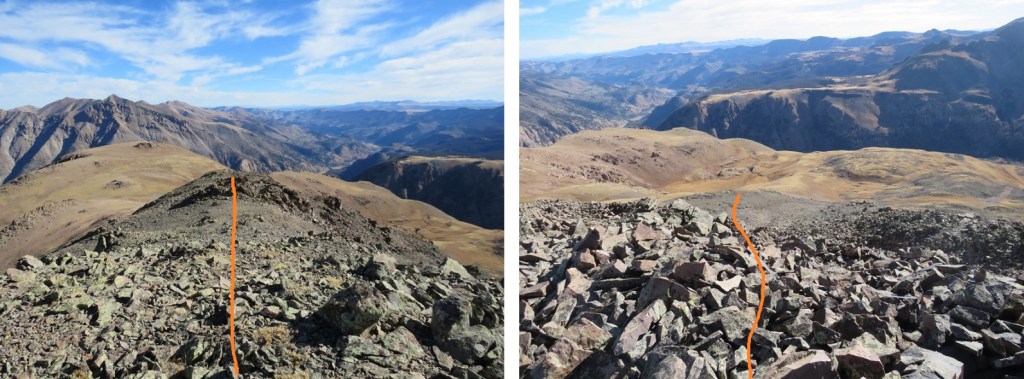
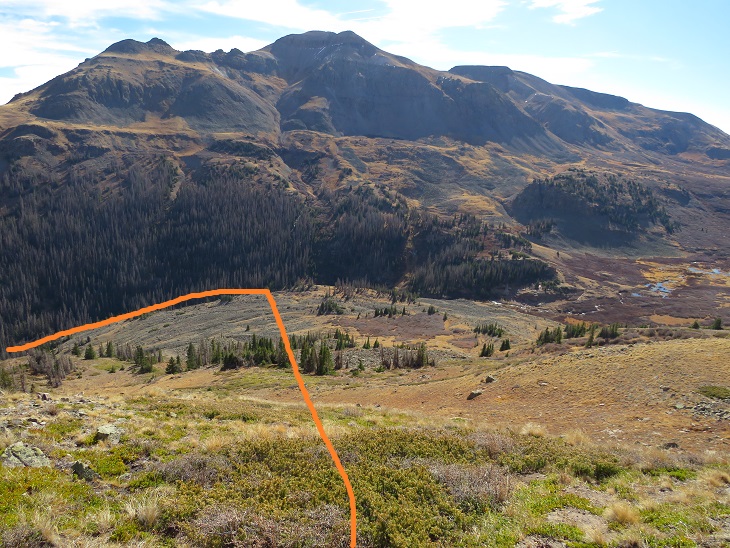
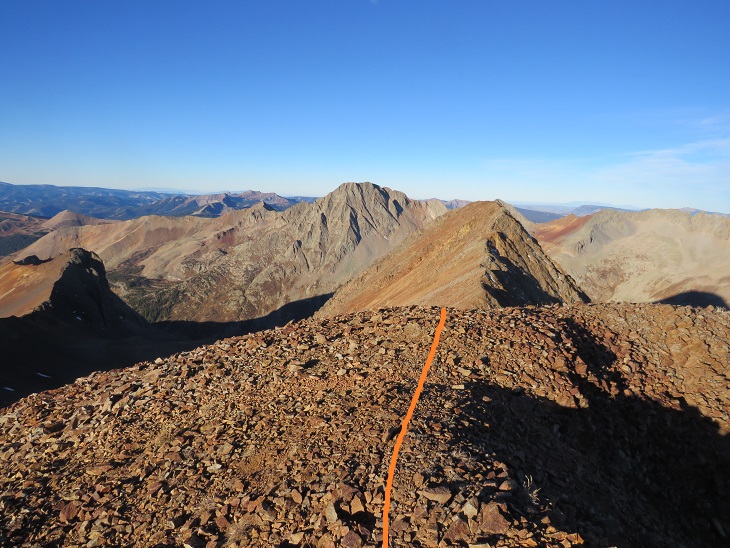
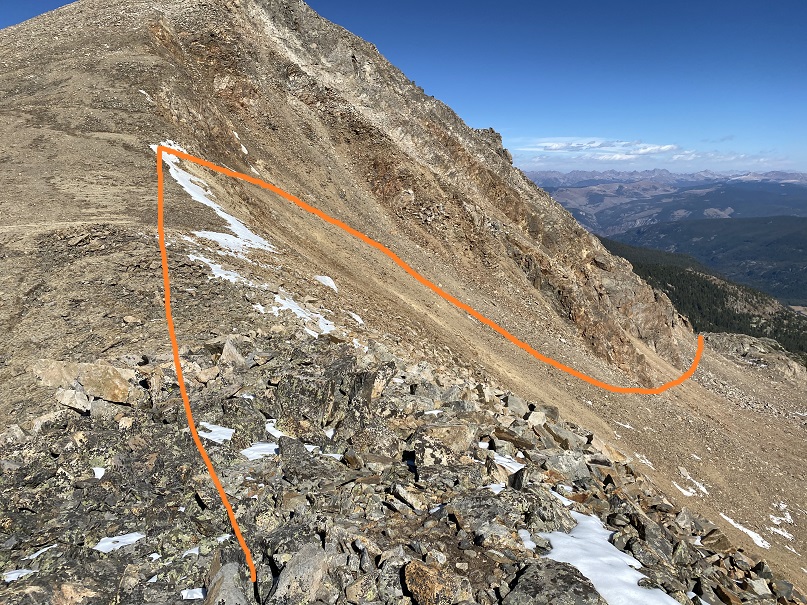
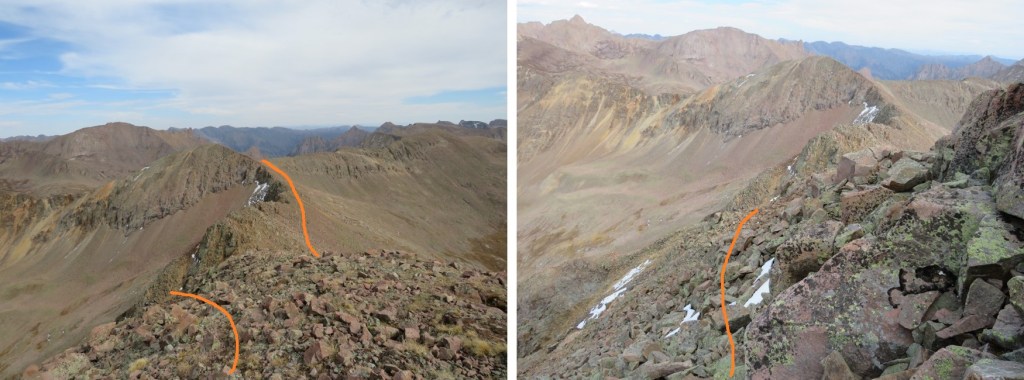
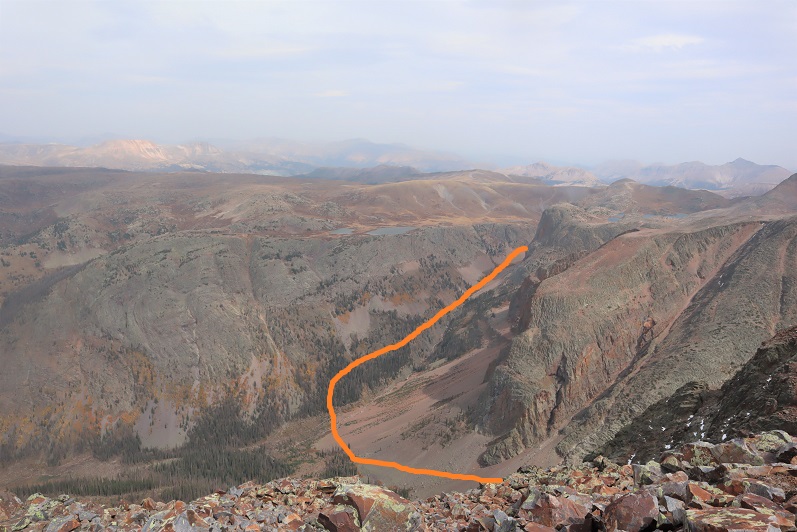
From the summit I had a great view of all the other peaks I intended to hike on this loop. Here’s the overall route, which consists of a nice ridge hike
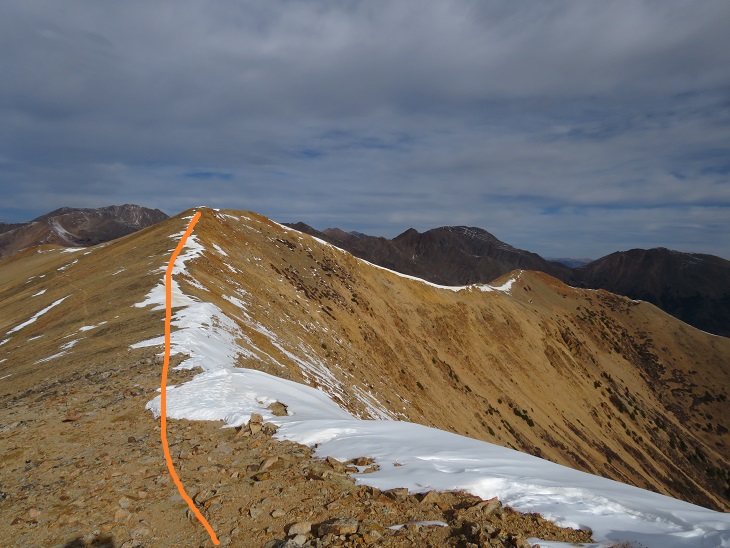
I turned around and headed back to the Browns/Huron saddle, and then over to Browns Peak. I summited the point here on my way over to Browns, but that’s unnecessary, as it’s not ranked and just adds elevation (the elevation part was why I summited the point)
I summited Browns Peak at 9:10am. Browns Peak is unranked.
Browns Peak:
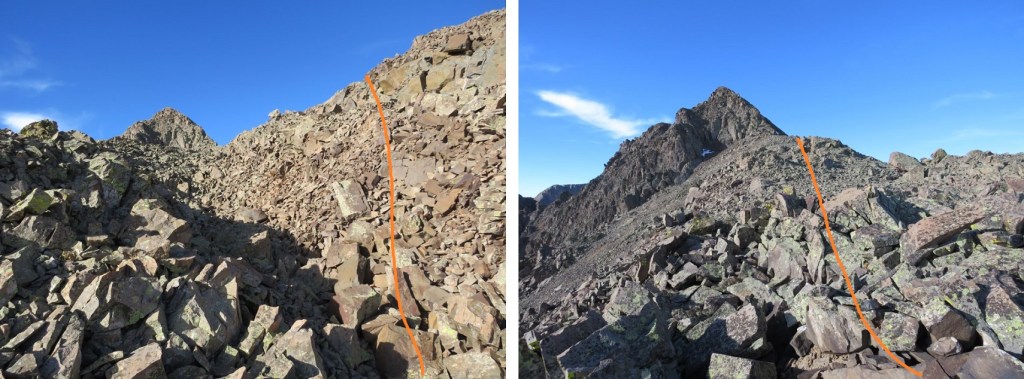
Here’s a look back on the route to Browns from Huron
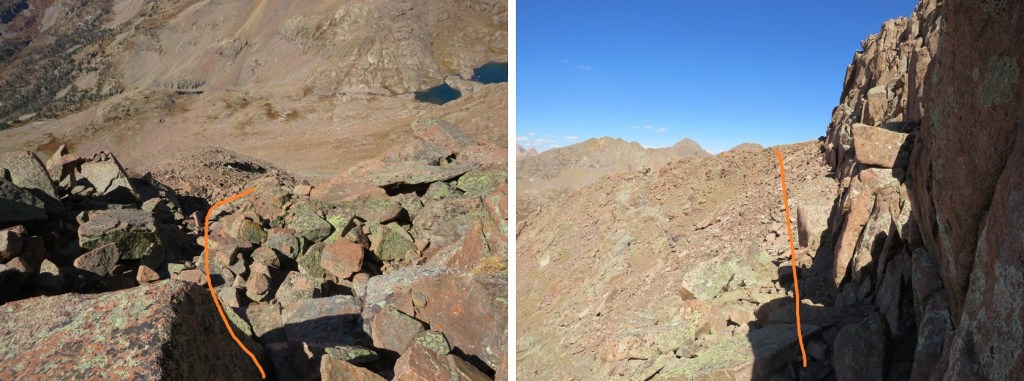
From the summit of Browns I could see my next 3 summits, as well as the trail I intended to take back down
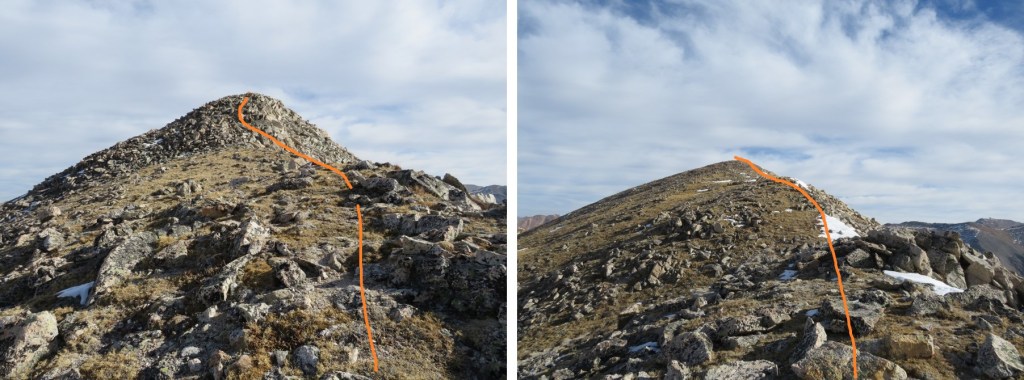
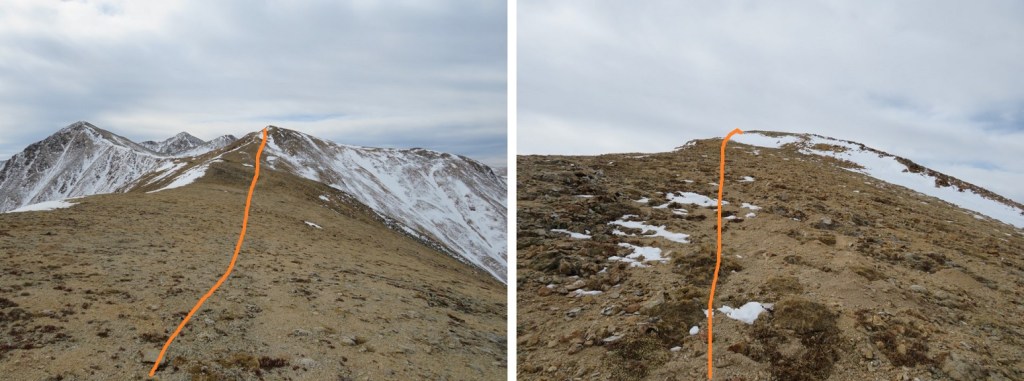
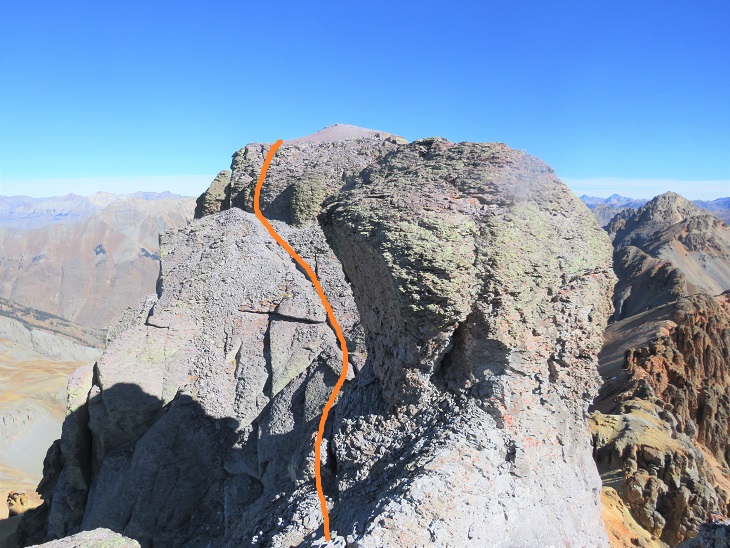
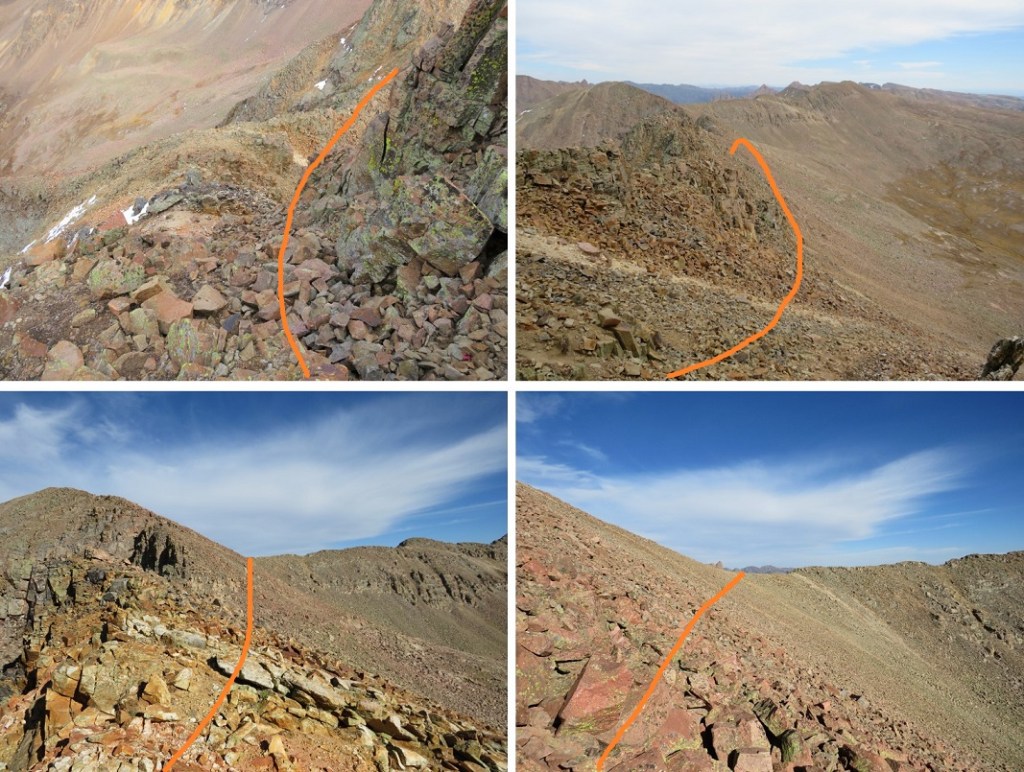
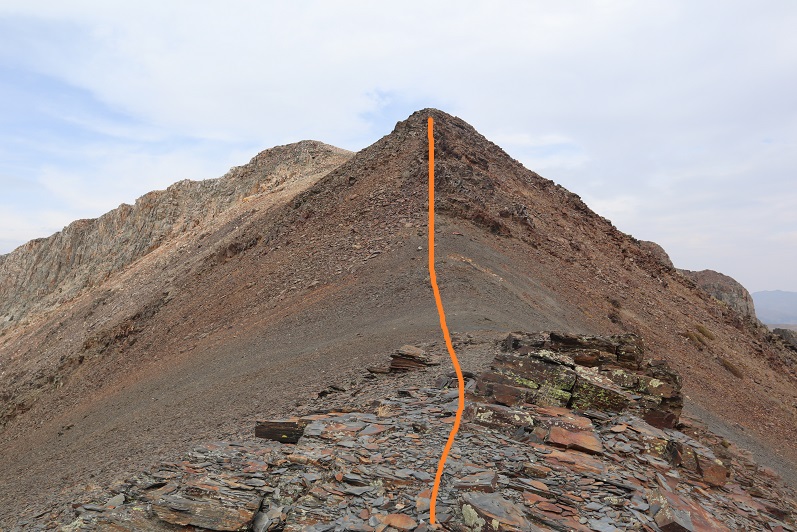
It was a simple ridge hike to the saddle and then back up to PT 13462
There was a small false summit before the actual summit
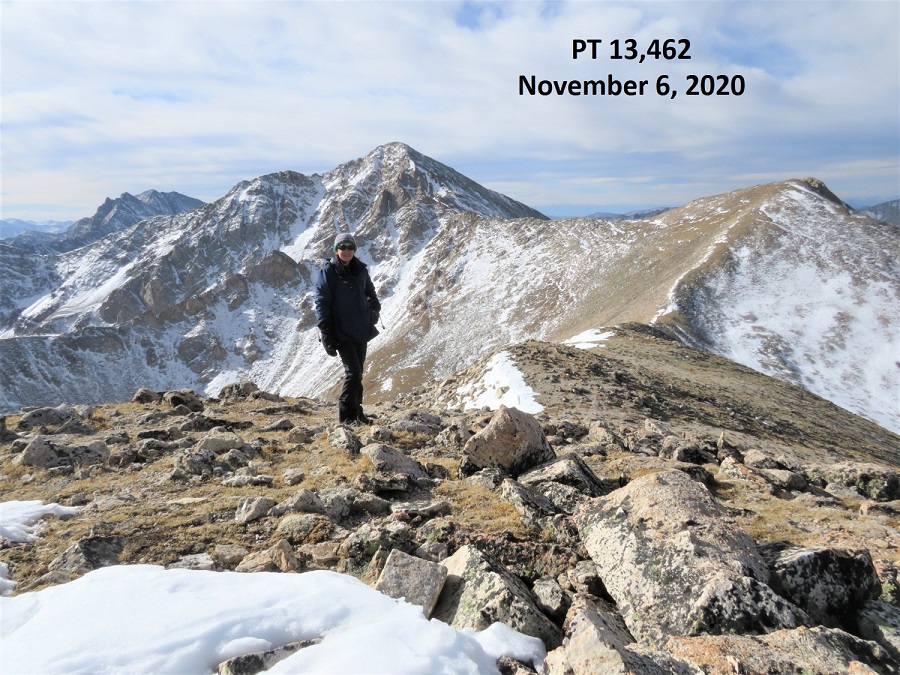
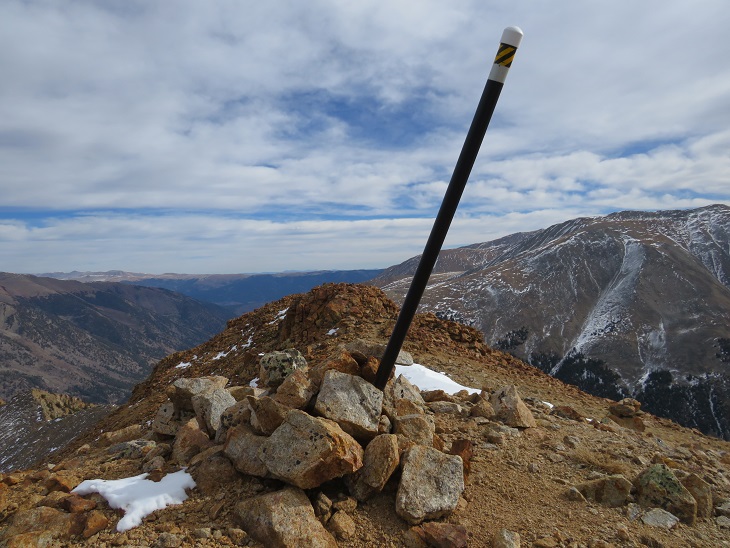
I summited PT 13462 at 9:40am
PT 13462:
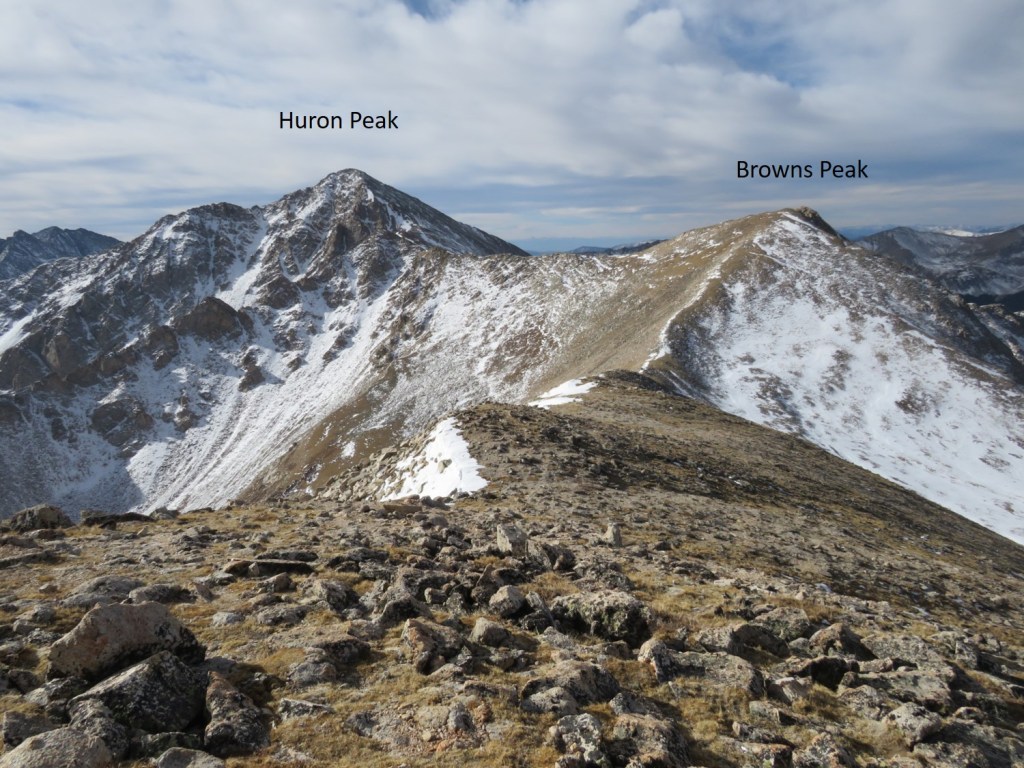
Here’s looking back at Huron Peak and Browns Peak
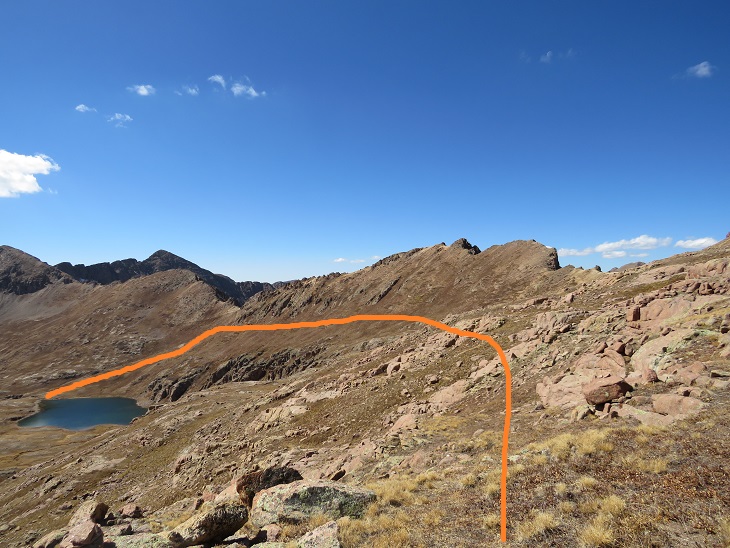
The hike over to Middle Mountain B was also a simple ridge hike. Here’s the route
I summited Middle Mountain at 10:10am (also unranked)
Middle Mountain:
Here’s looking back on the route so far
It was still early in the day so I decided to head over to Cross Mountain. This is another unranked peak, but it’s named, so I didn’t want to leave it out on today’s hike. It was a quick and easy hike northeast over to Cross Mountain.
I summited Cross Mountain at 10:35am
Cross Mountain:
Here’s a look back at the other peaks I summited this morning
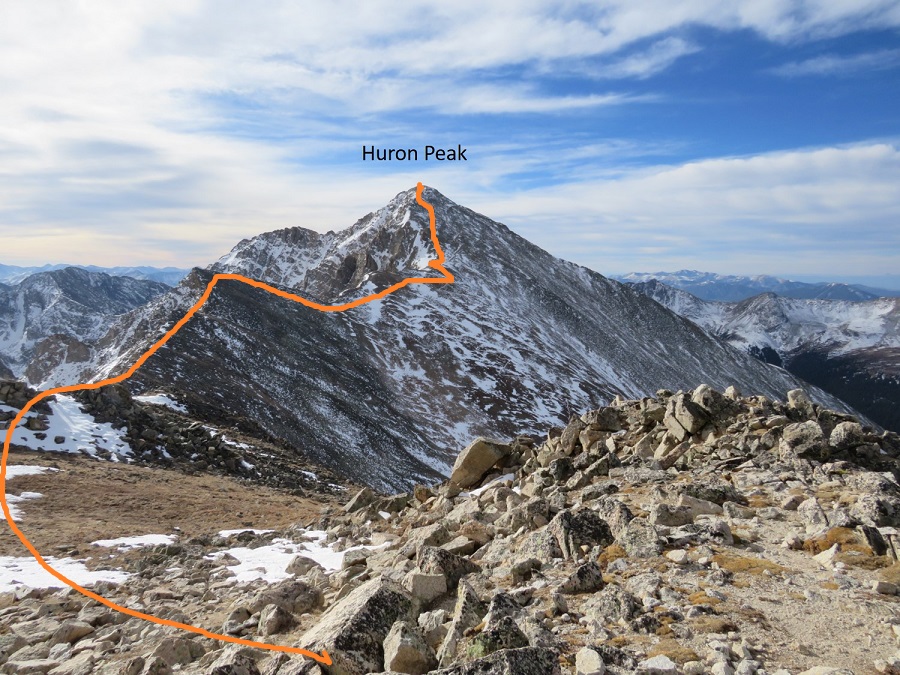
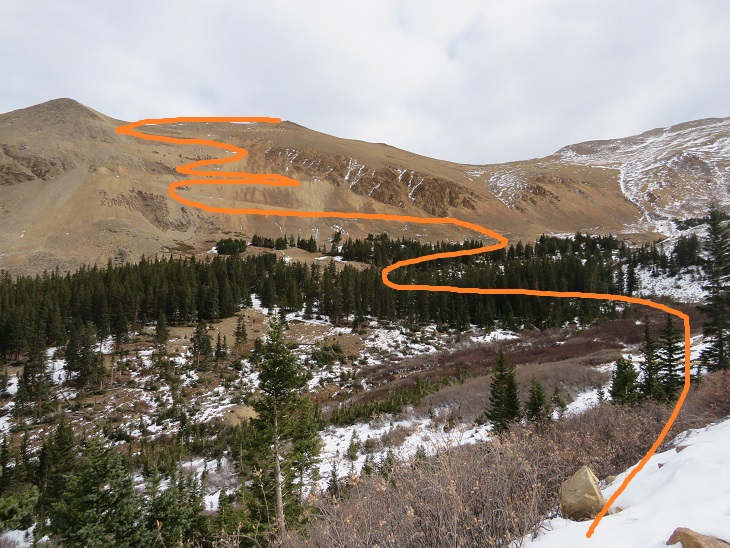
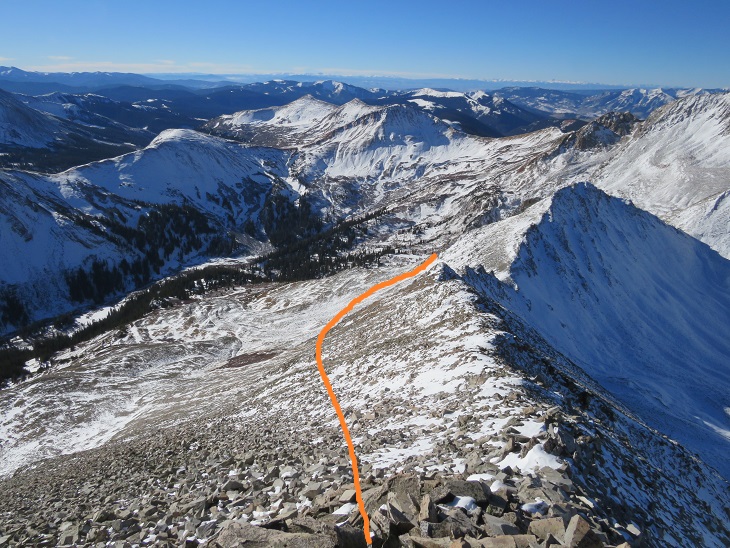
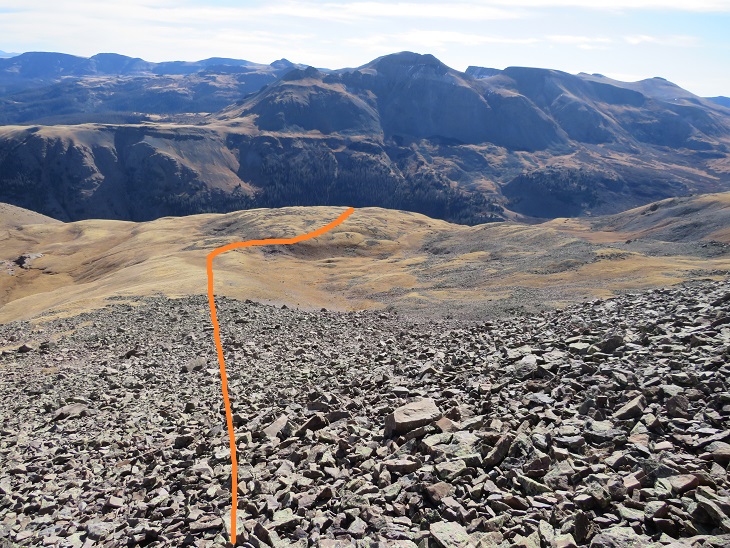
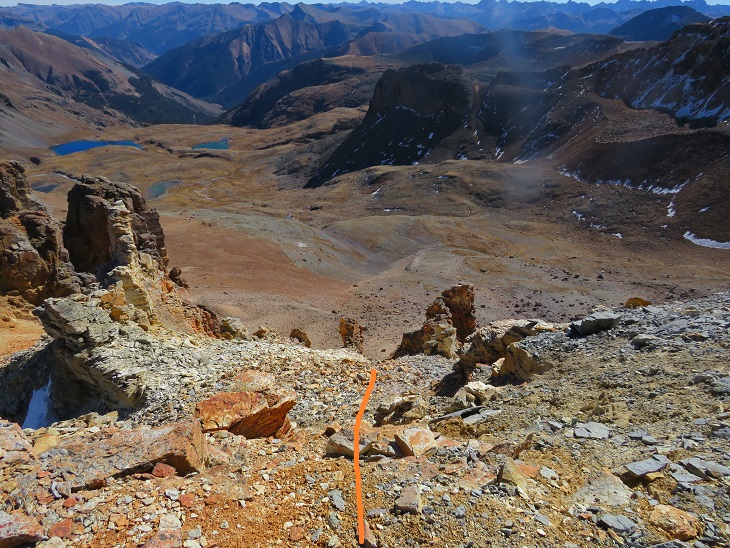
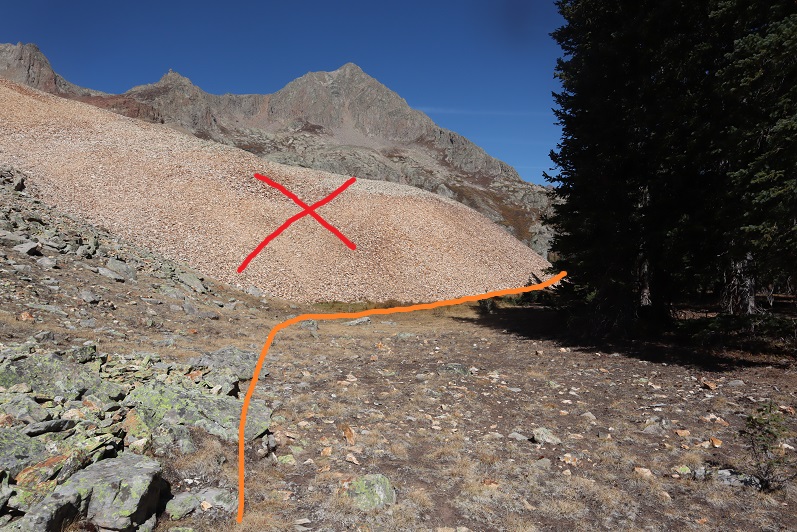
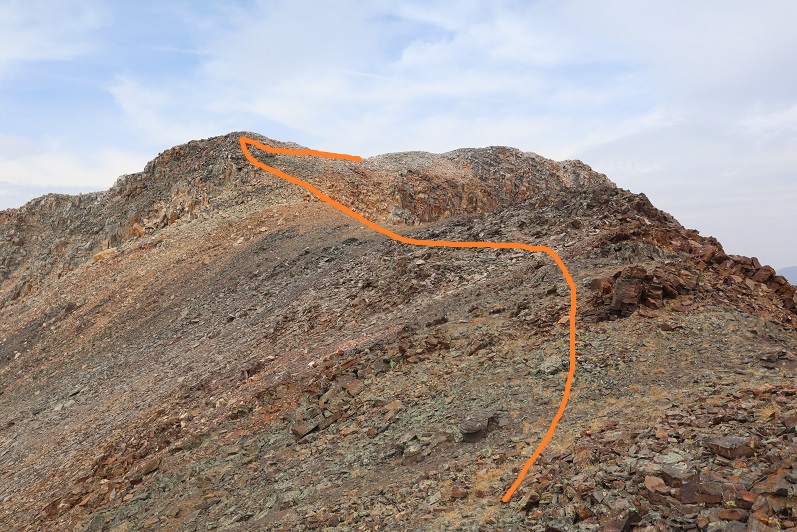
I was making this a loop, which meant I needed to re-summit Middle Mountain, turn right and head northwest down the ridge to the 4WD road. Here’s an overview of the route
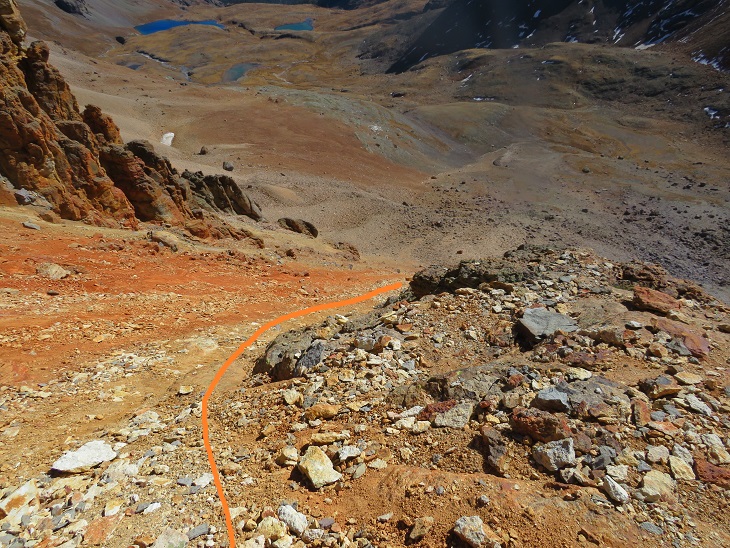
First, I made my way back to Middle Mountain
Once I’d re-summited Middle Mountain I turned right and headed northwest down the ridge, aiming for the 4WD road
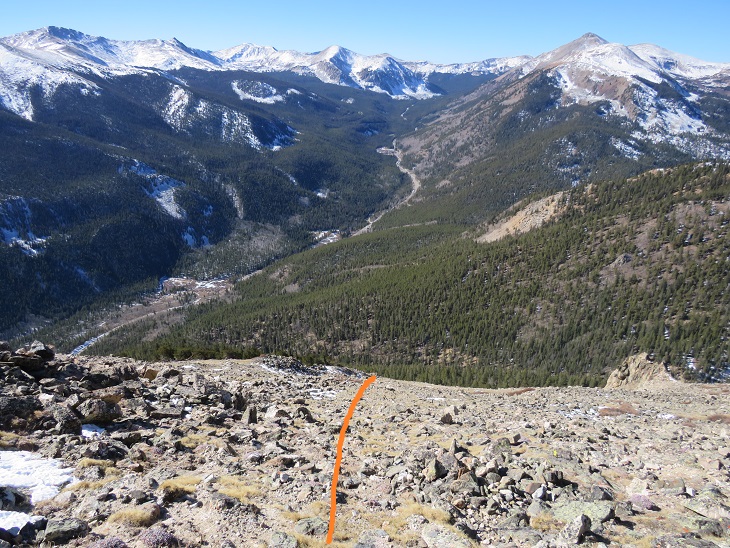
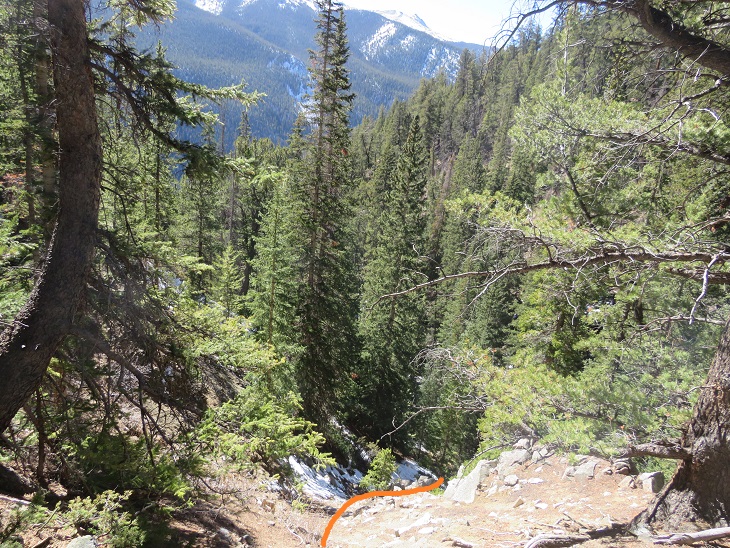
Then I followed the road back to my truck. Here’s an overview:
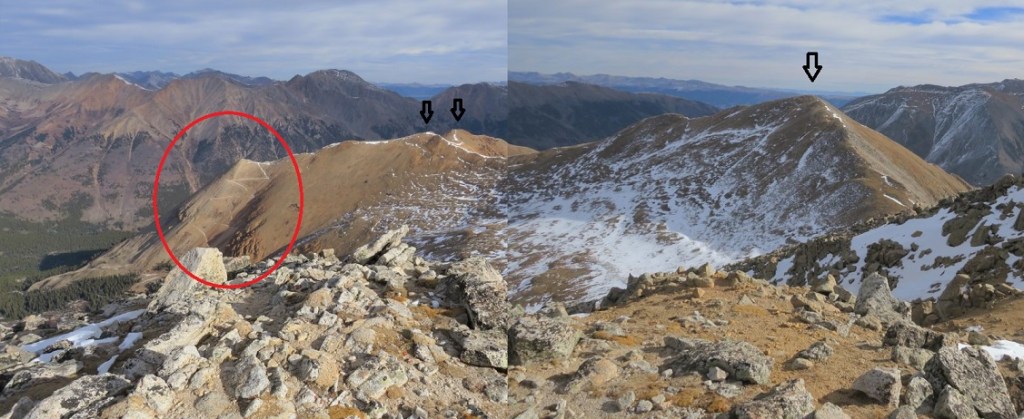
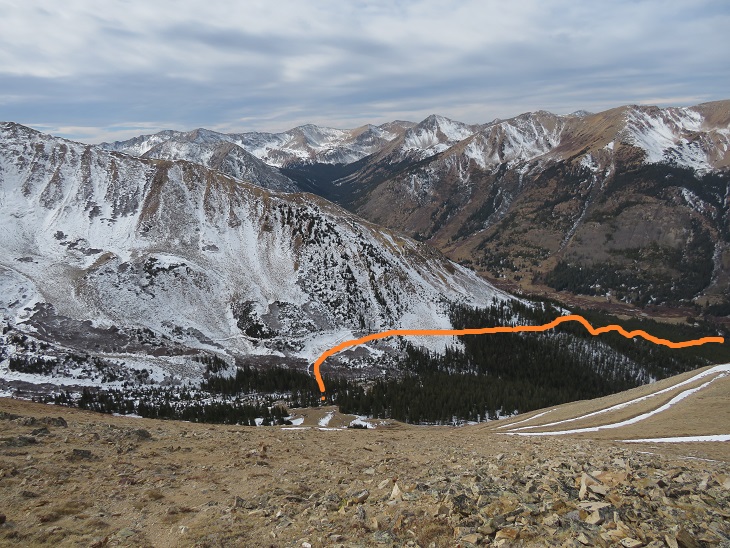
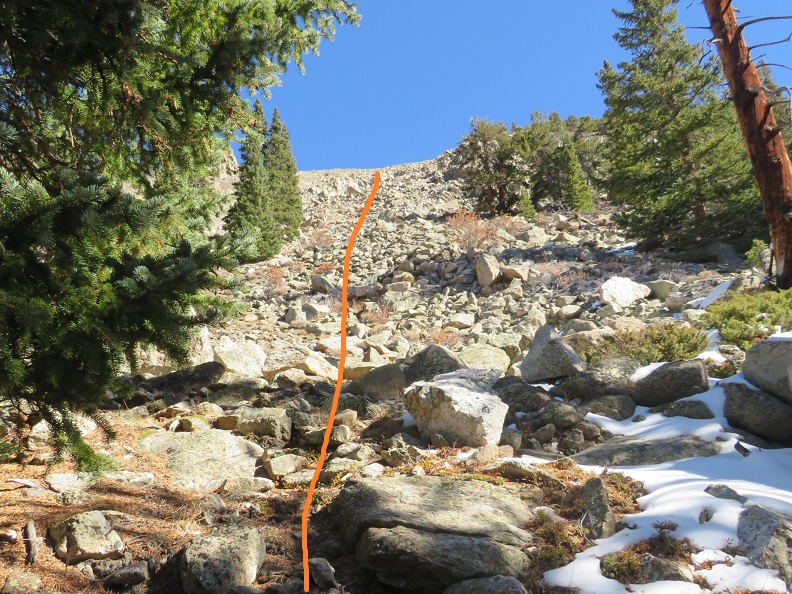
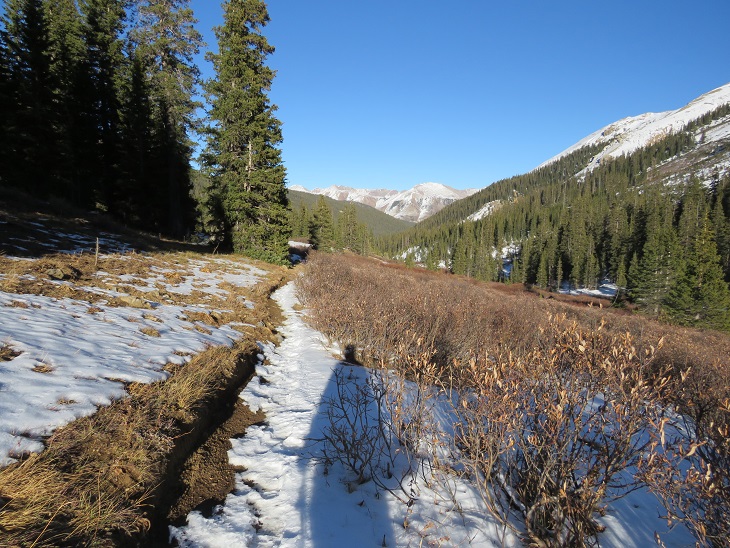
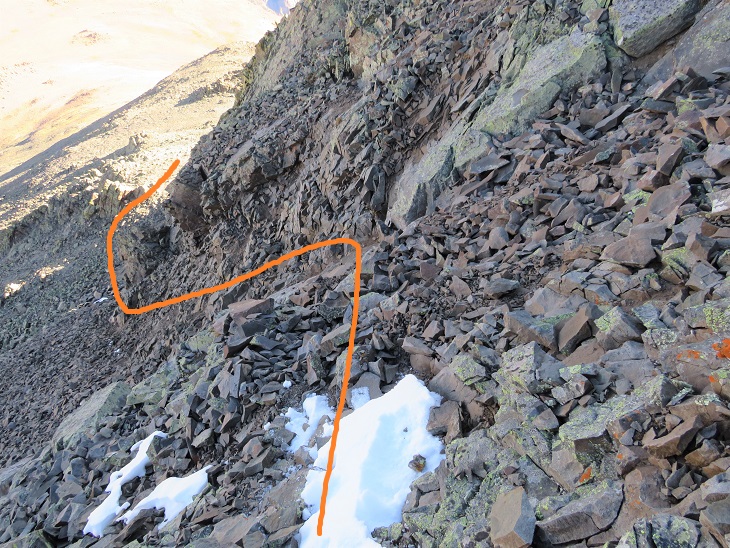
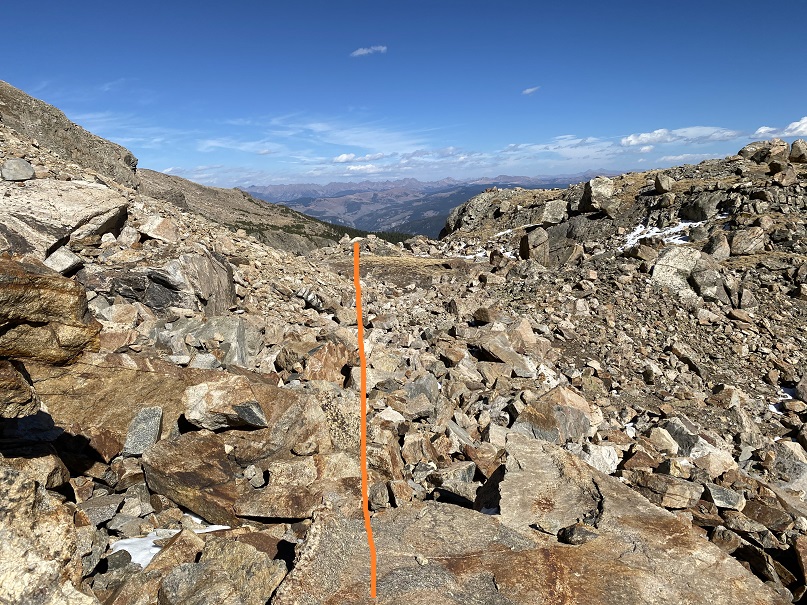
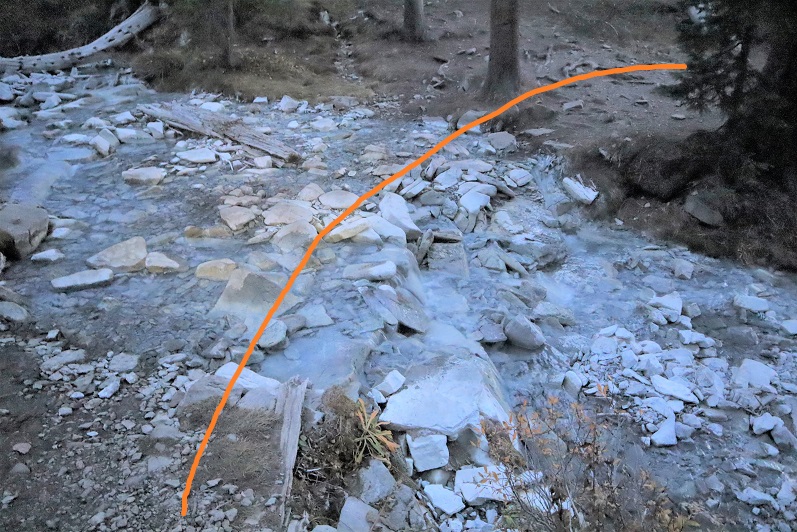
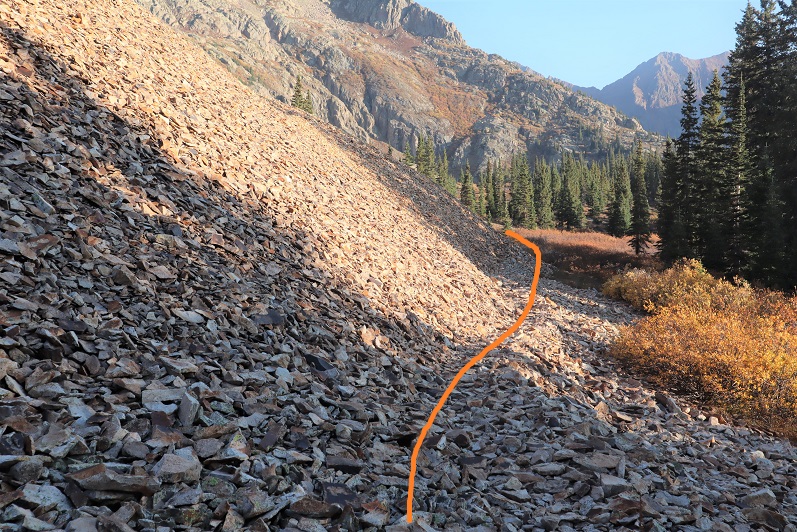
A word of caution here: the 4WD road isn’t truly a road for most of the way up the side of this mountain. It looks to be an old mining road that hasn’t been used in many years, and has experienced rockslides and avalanches, turning the road into more of a trail down the mountain and into the gulch. In other words, if you have a 4WD vehicle, or even a motorcycle, don’t plan on driving it up this road. Evidence:
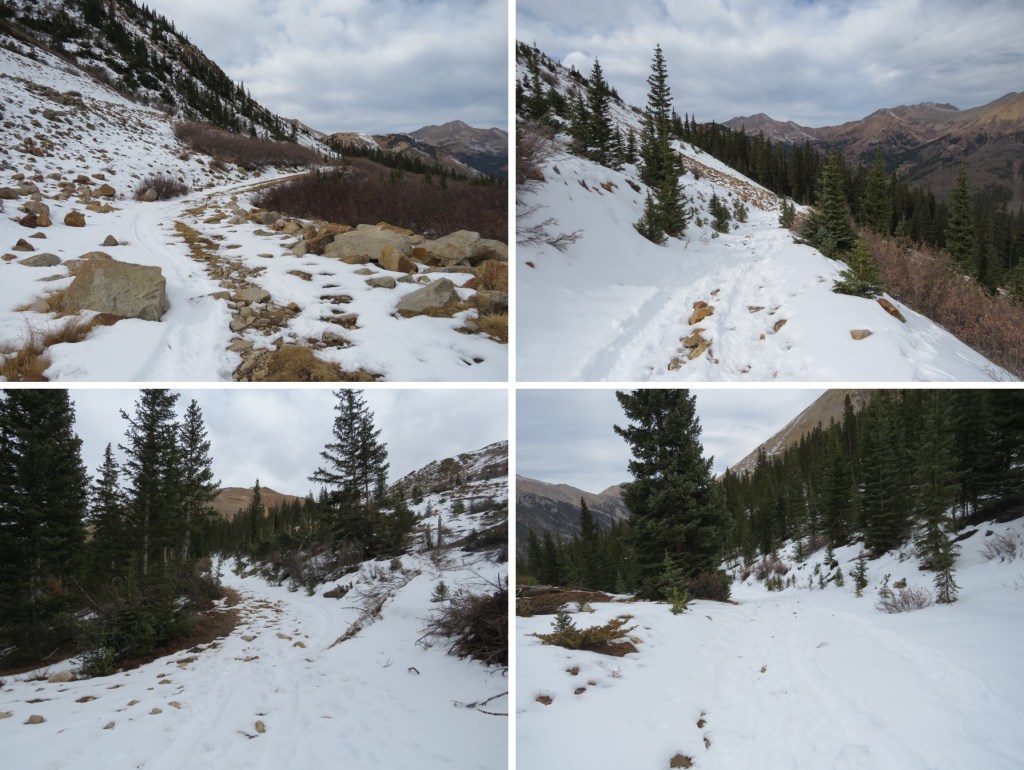
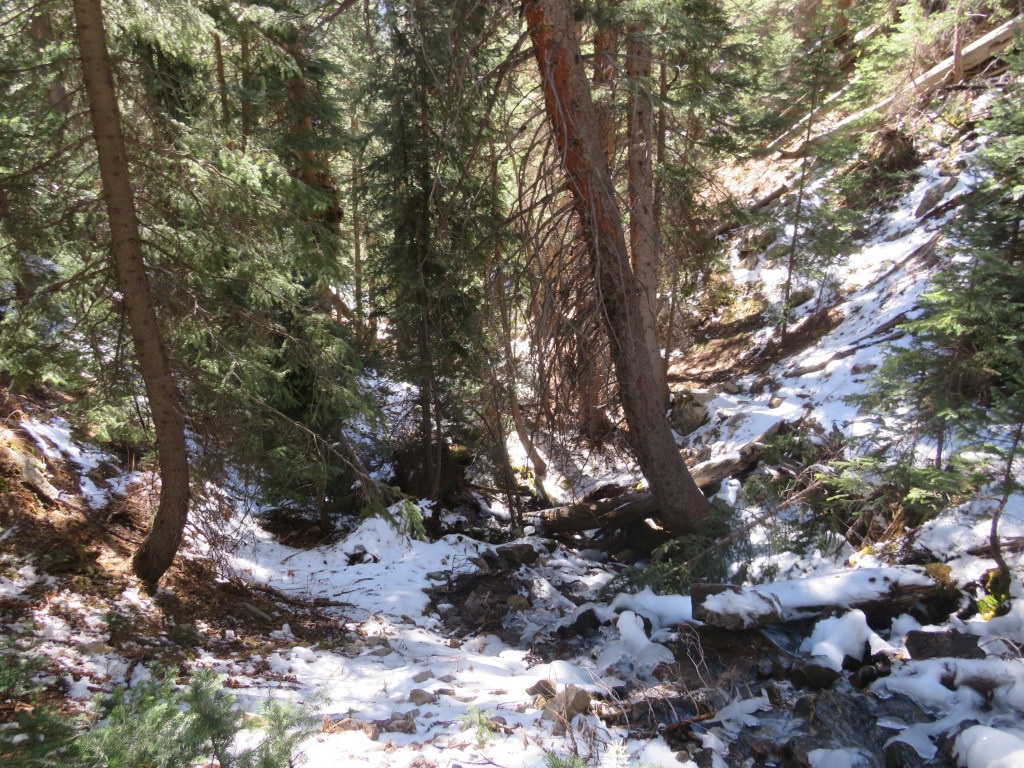
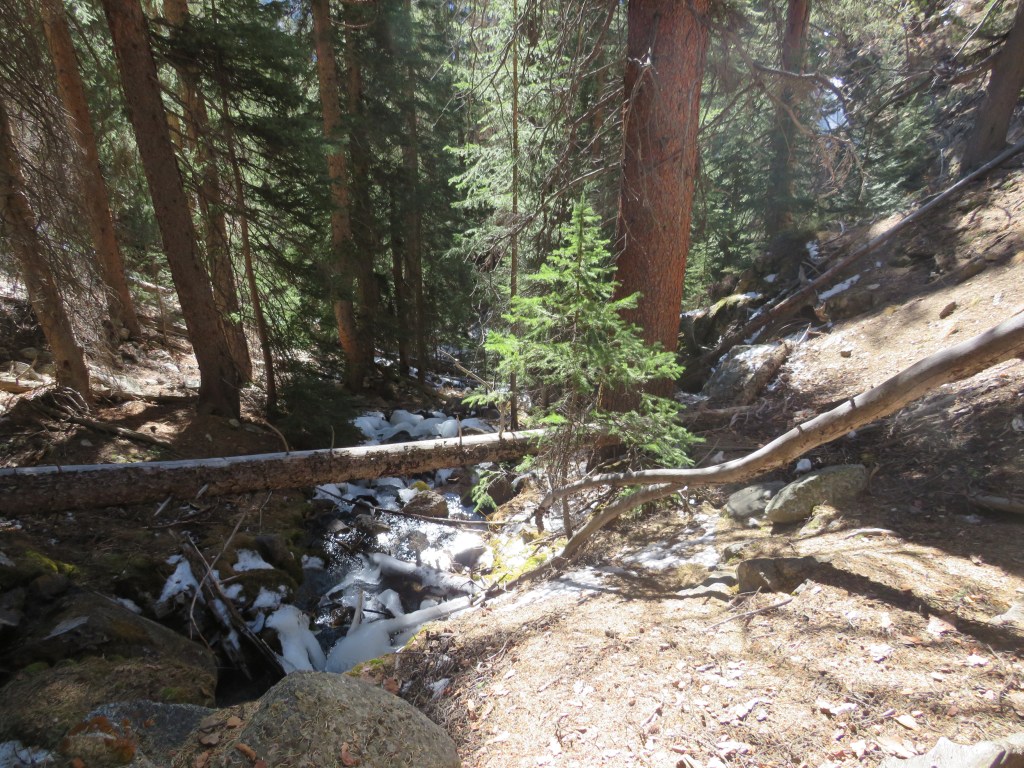
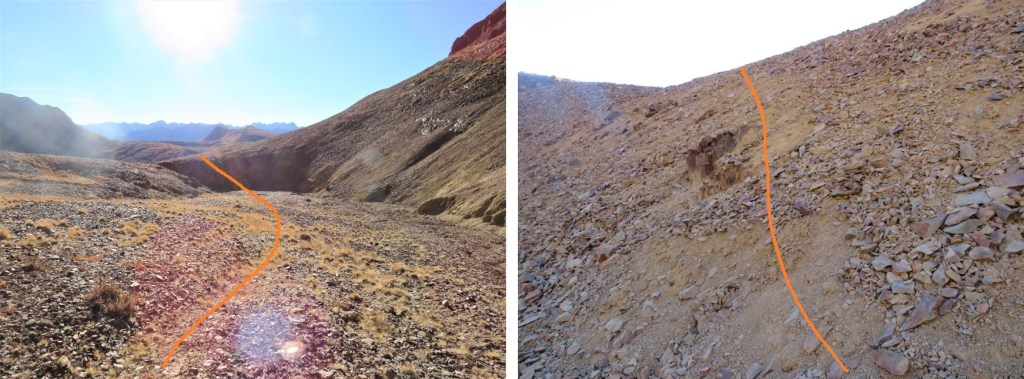
Once down in Lulu Gulch the 4WD road picks up again, and is easy to follow.
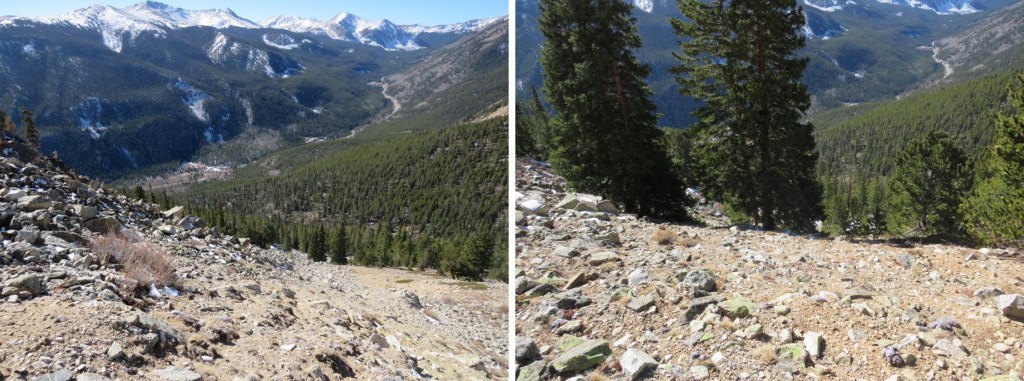
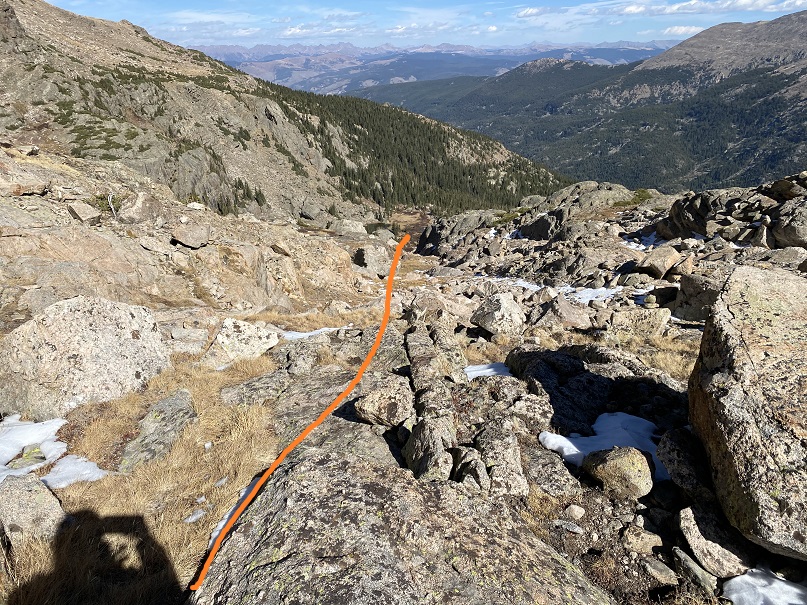
Here’s a look at the hike down from the ridge
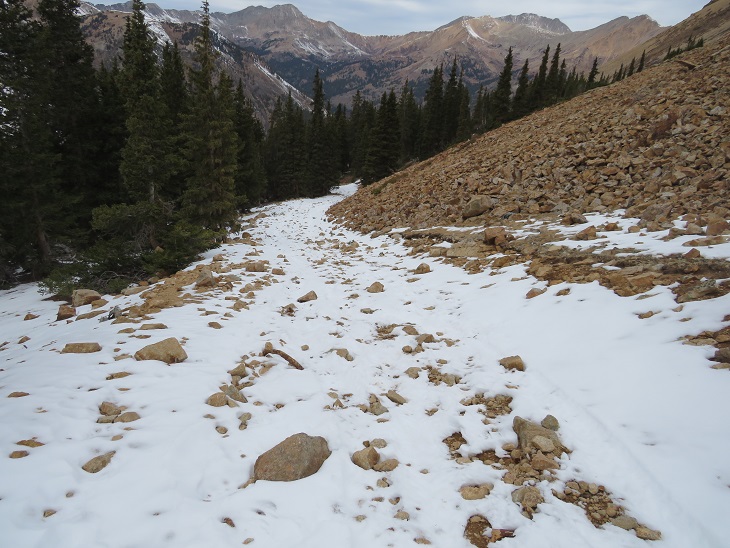
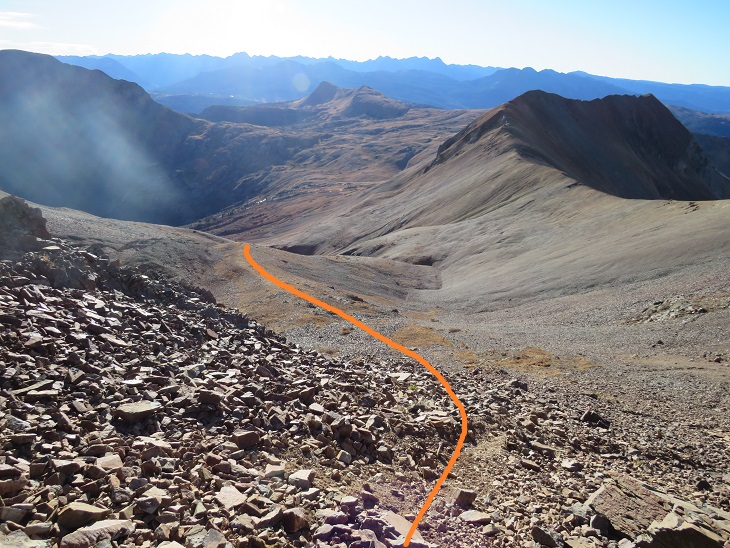
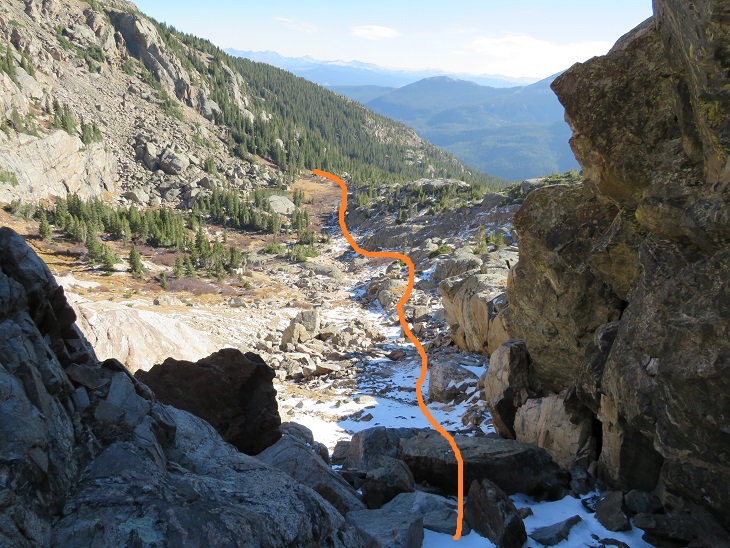
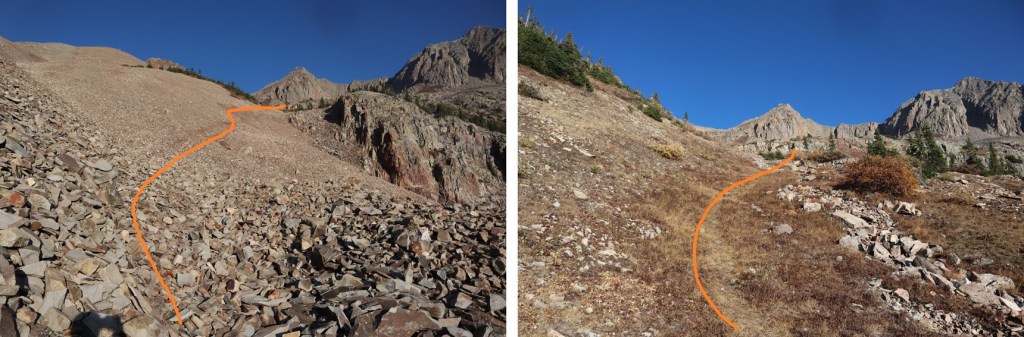
The 4WD road was indeed easy to follow, but it seemed to go on and on. And on. And on. I was very happy with my choice to summit Huron first today, as this was a very long slog back to the main 4WD road and I would have been terribly bored following this road as it switchbacked (needlessly?) down the mountainside. It kept going, and going, and going. I seriously wanted to just cut the switchbacks and make it a straight line (but didn’t)
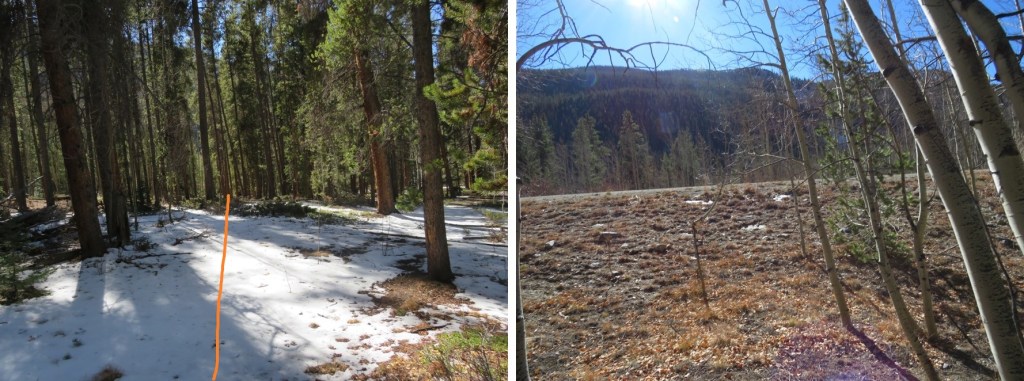
I was thrilled when I reached the main road
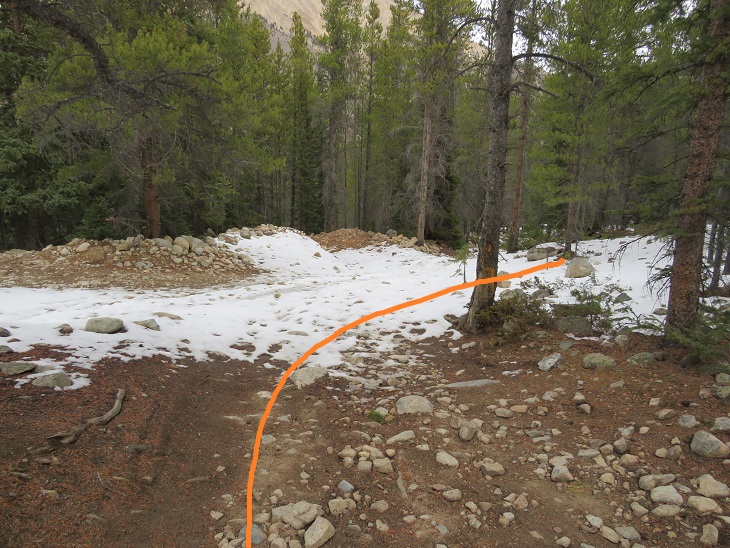
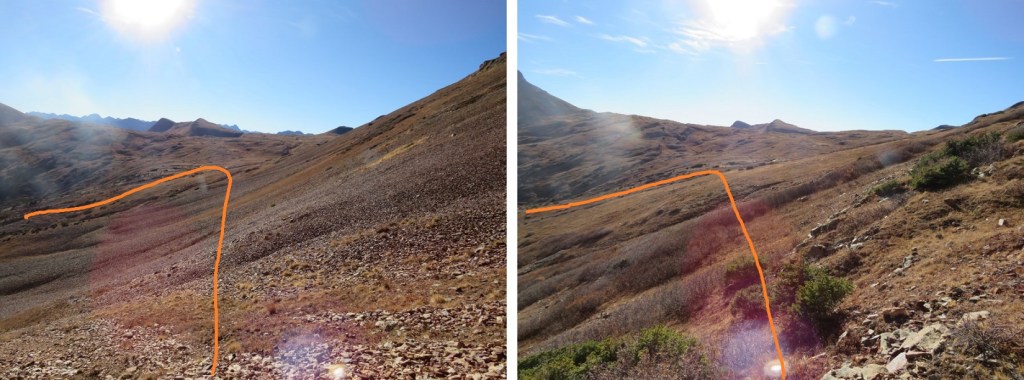
Here’s looking back at the turnoff (this is what you see when hiking in, you can go straight to the Huron Trail or left to follow the mining road and summit Middle Mountain first)
I followed the icy 4WD road back to my truck, thankful for my microspikes
I made it back to my truck at 12:15pm, making this a 13.83 mile loop with 4811’ of elevation gain in 8 hours, 15 minutes.
Note: I do not recommend doing this hike in reverse.
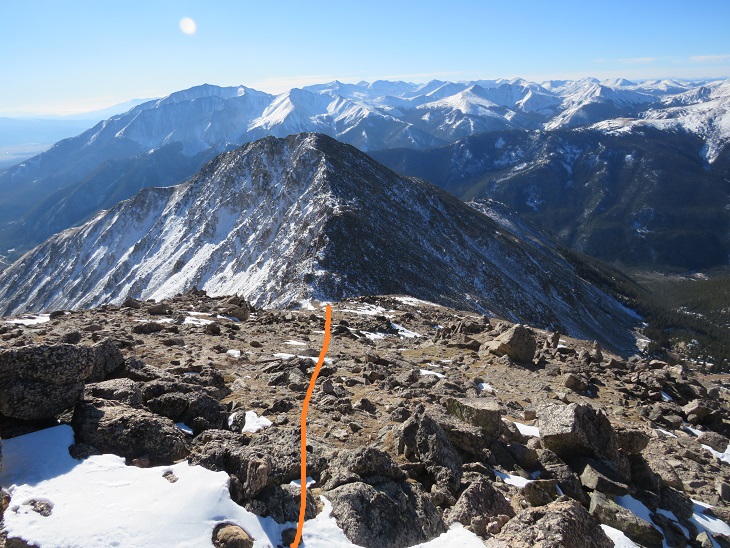
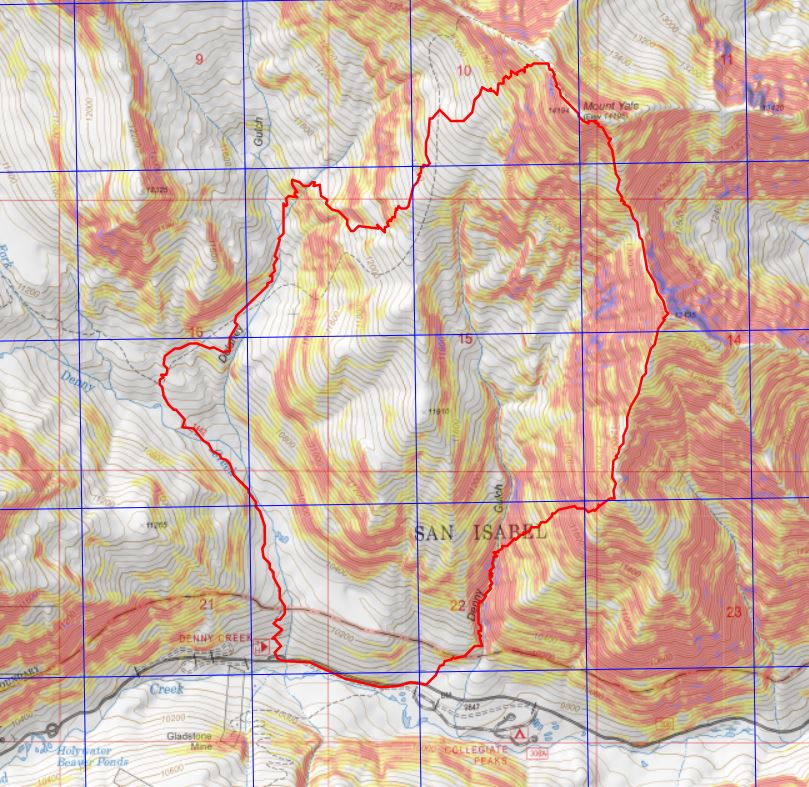
Two days before this hike I’d driven down Cottonwood Pass and noticed the route for Mt Yale and Mascot Peak looked virtually free of snow, whereas the other peaks in the area seemed to be holding a lot more snow.
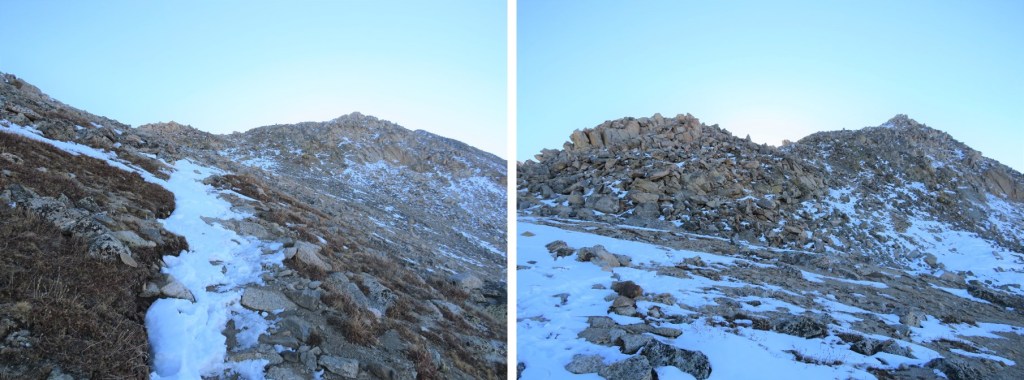
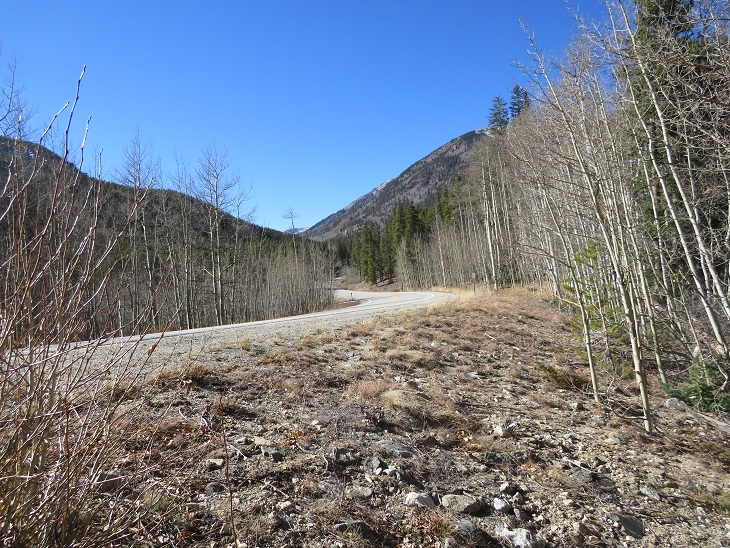
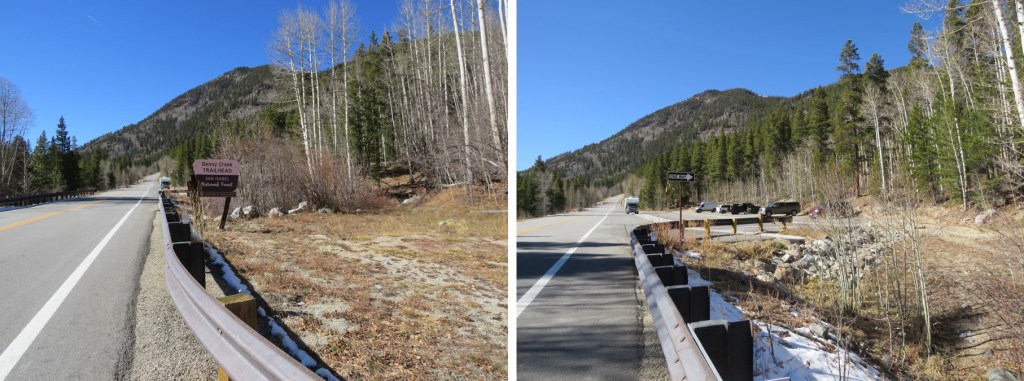
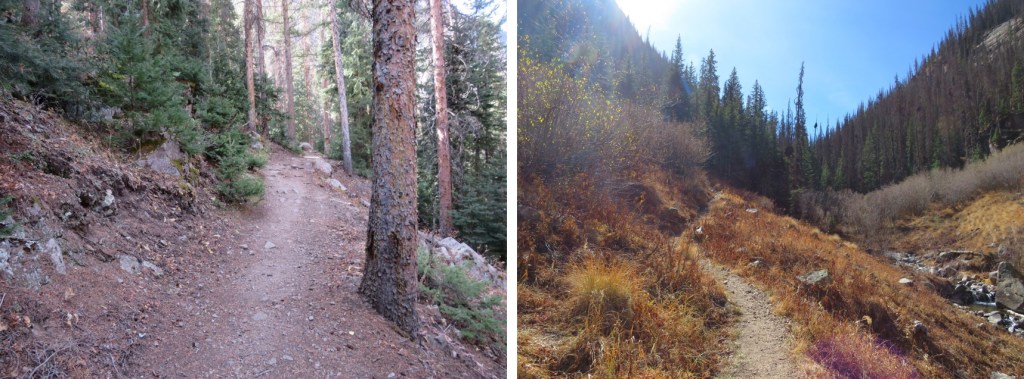
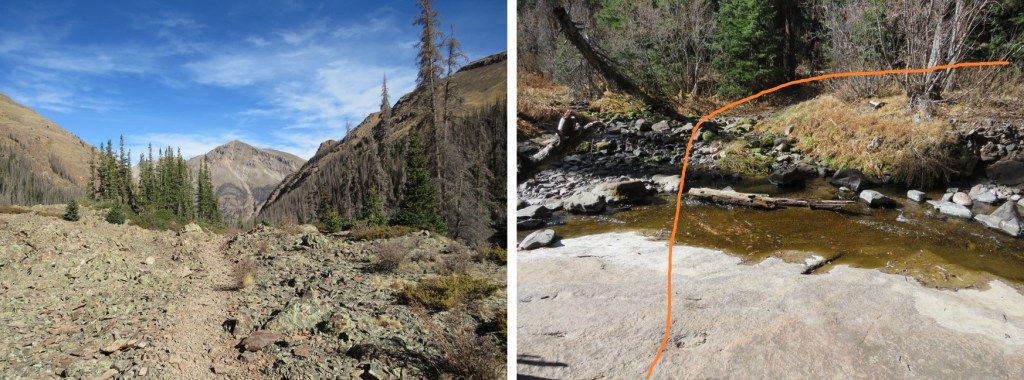
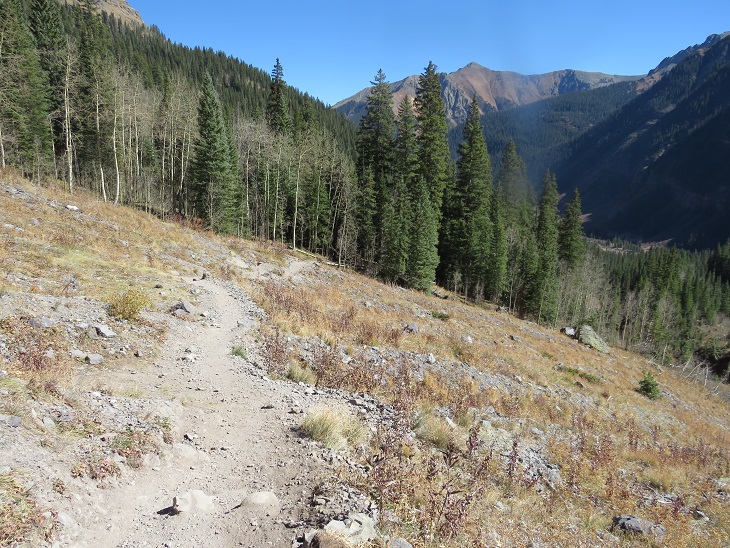
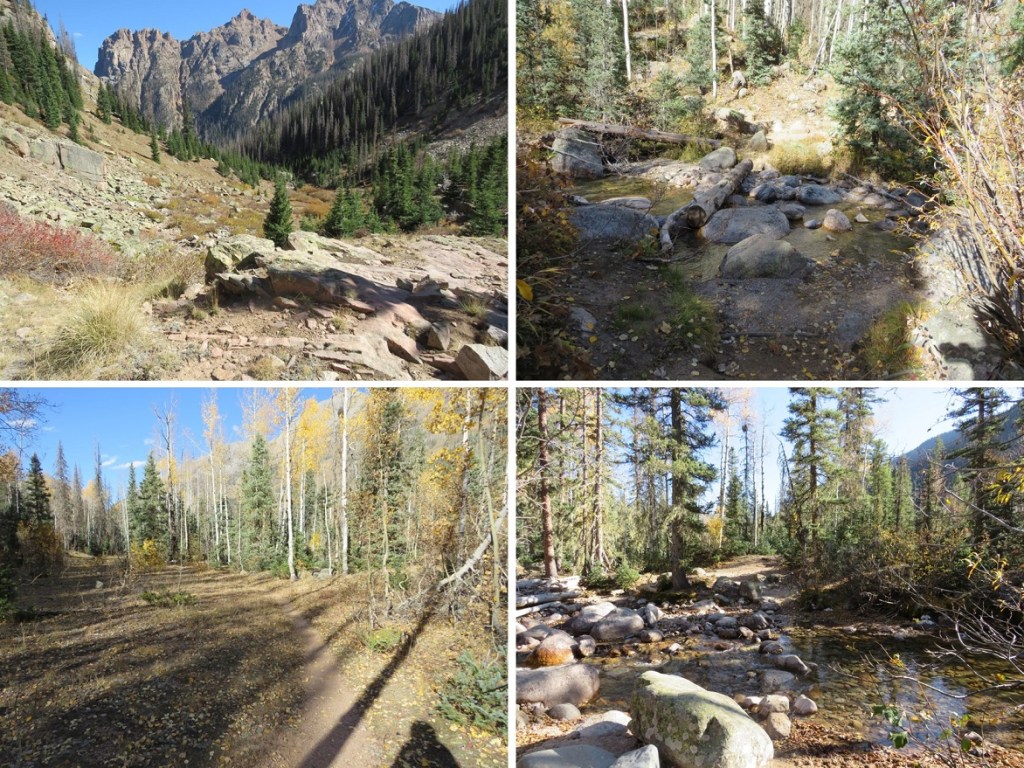
I arrived at the Denny Creek Trailhead and was on the trail at 4:40am. There was only one other vehicle in the lot, which could hold around 40 cars. I’m not going to go into great detail about the hike up Mt Yale because it’s very well documented and mostly a class 1 trail. I’ll just add a few pictures of today’s route.
There’s a great trailhead sign indicating the start of the trail at the north end of the parking area
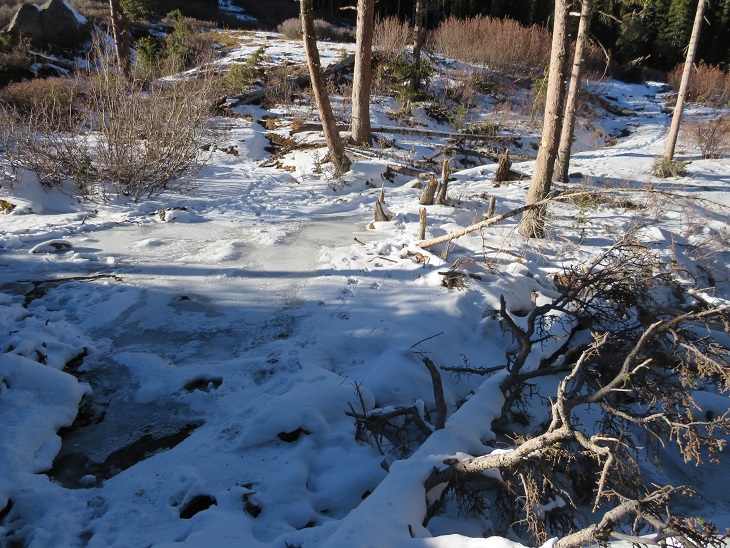
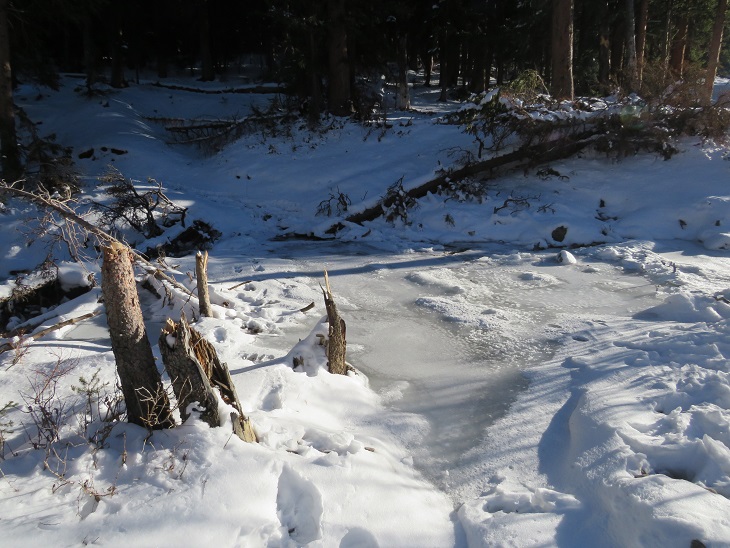
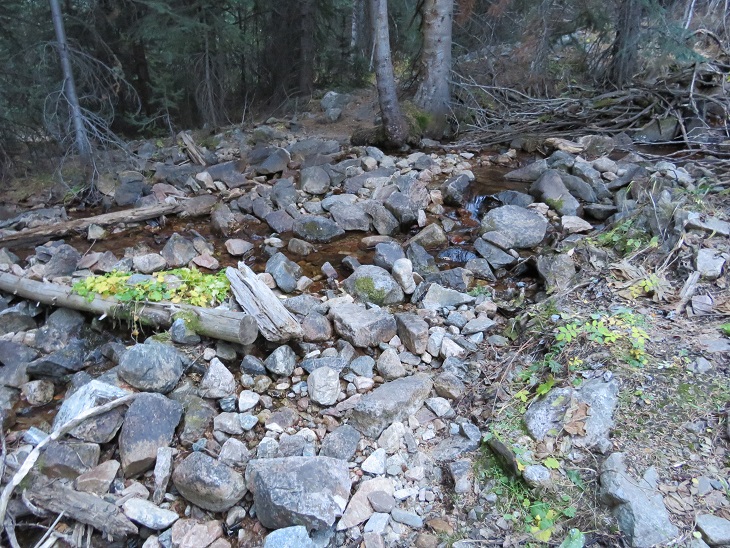
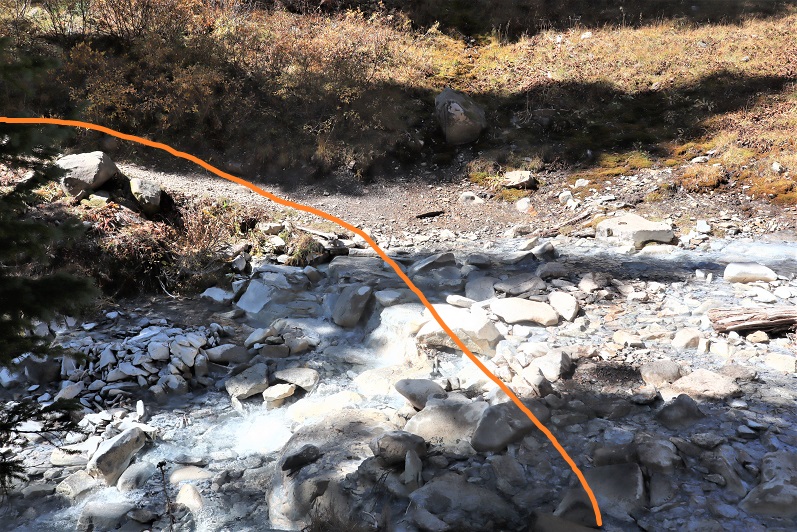
There were three frozen creek crossings, all easy to cross on logs (but remember, ice is slippery, so take care)
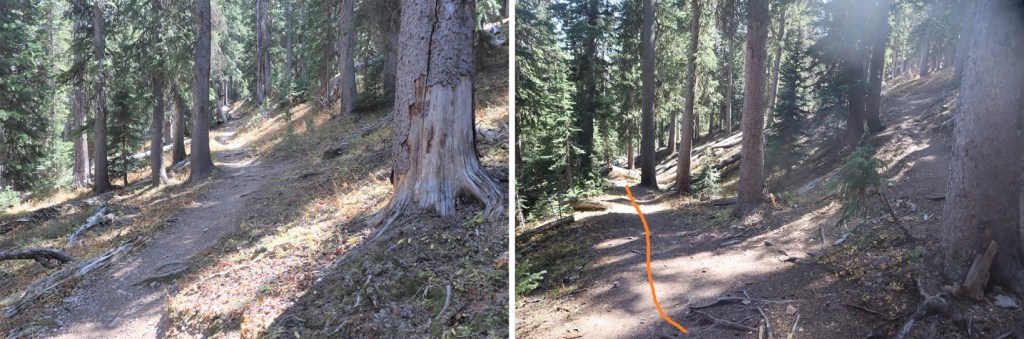
The trail was well packed to treeline. No traction was necessary.
I saw a rabbit directly on the trail. This rabbit didn’t seem to mind my presence, and refused to move/run away until I was about 2 feet away from it. It ran and ‘hid’ under a pine tree, but since it’s now white I had no trouble seeing it behind the branches.
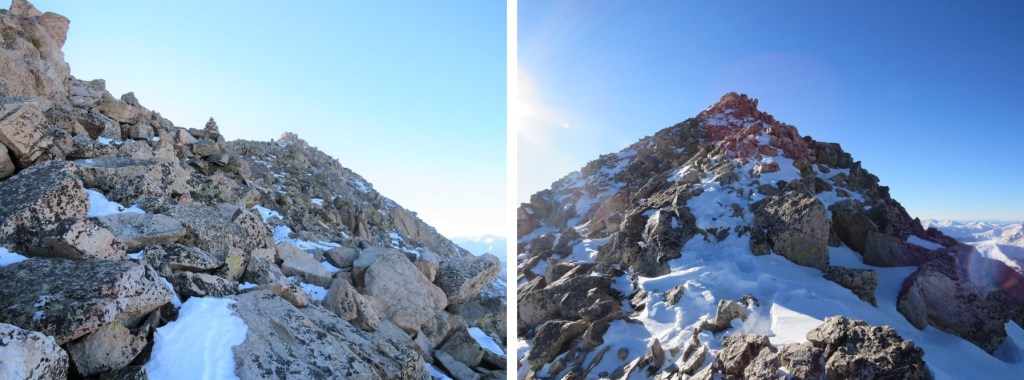
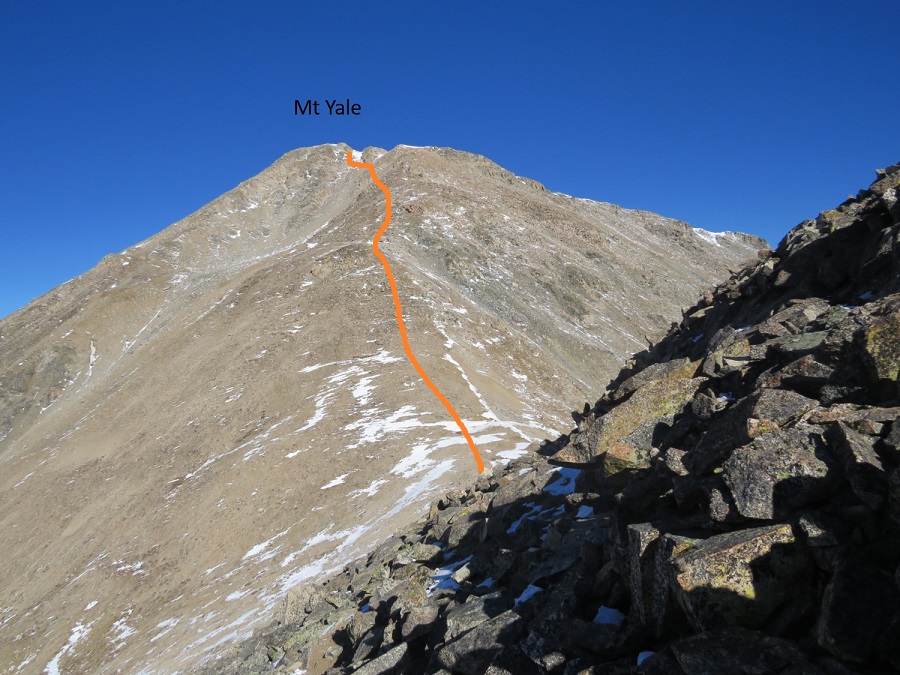
Once at treeline there was still snow, but it was easy to follow the trail to the saddle, and then southeast to the summit of Mt Yale.
The summit of Mt Yale is the highest point at the southeastern part of the ridge.
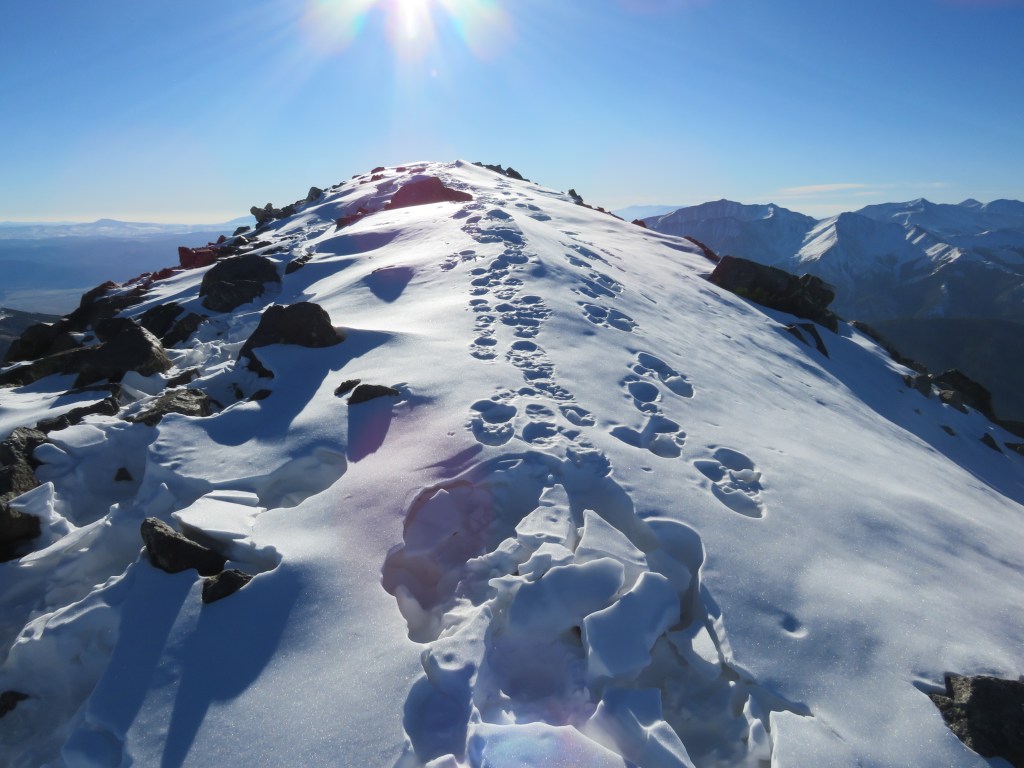
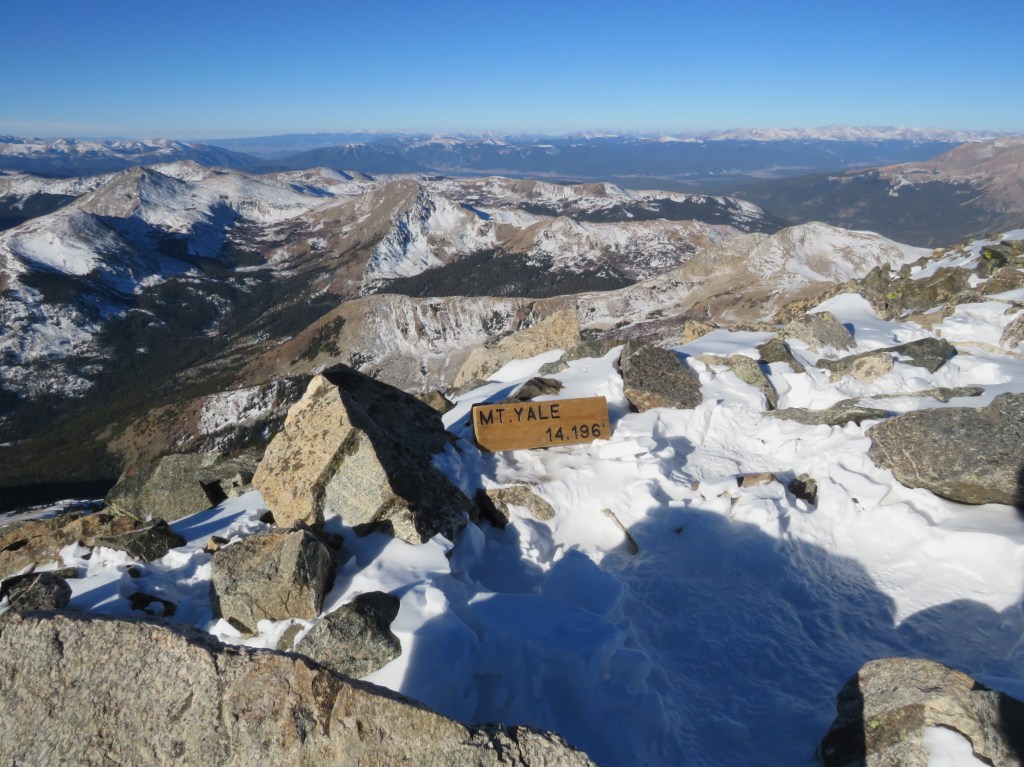
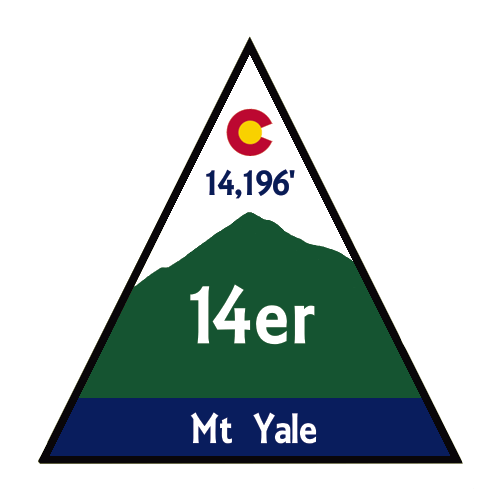
I summited Mt Yale at 8:20am. There was a sign at the summit (I don’t remember it being there last time I summited, and I’m surprised no one has taken it back down/hidden/destroyed it yet)
Mt Yale:
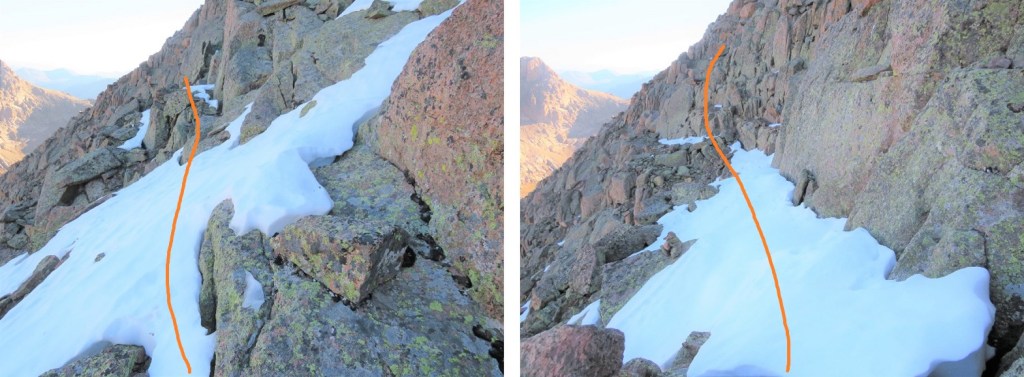
Mt Yale was where the tracks in the snow stopped, but Mt Yale wasn’t my primary objective today so I didn’t stay long on the summit. Instead I continued heading southeast, making my own tracks, postholing at times.
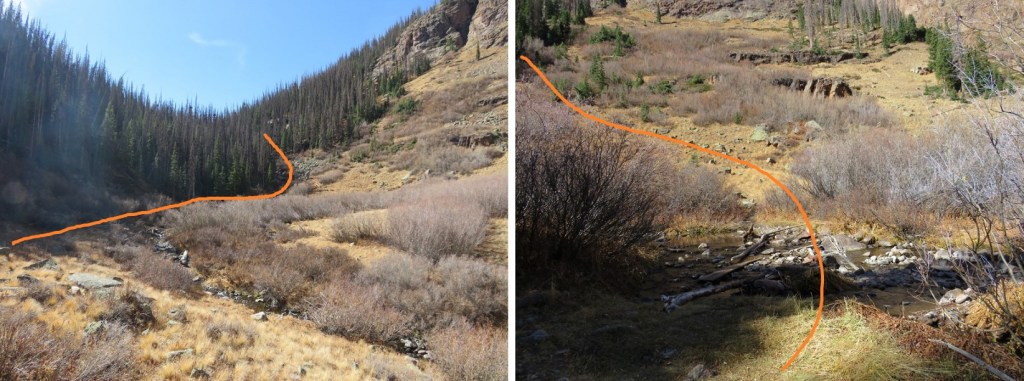
I came to a gully that I was going to descend before heading to the saddle between Mt Yale and Mascot Peak. There was more snow in this gully than the pictures show, and I was glad I wasn’t doing this in winter. A ice axe would have been helpful today, and I should have put on my spikes, but instead I balanced myself with my trekking pole on the slippery snow and made cautious decisions about foot placement. I descended 1122’ to the saddle.
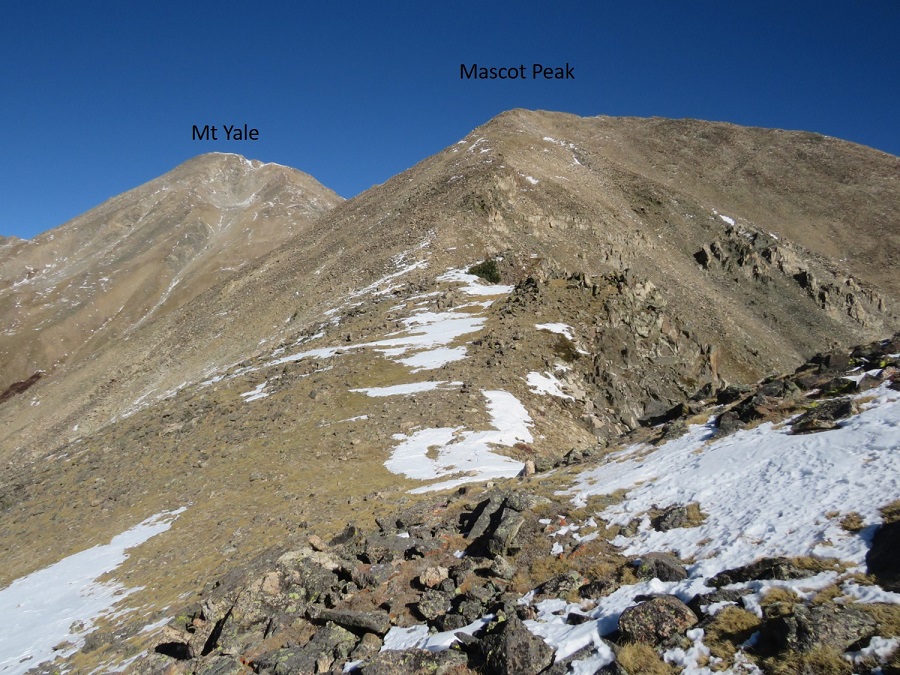
Here’s a look at my route from Mt Yale from the Yale/Mascot saddle. The snow at the top was more troublesome than it looks. There also seem to be several ways to descend to the saddle.
From the saddle the route up to Mascot Peak was simple, straightforward, and not as steep as it looked from Mt Yale. This was the easiest part of the uphill climbing for the day. The only difficulty was the wind.
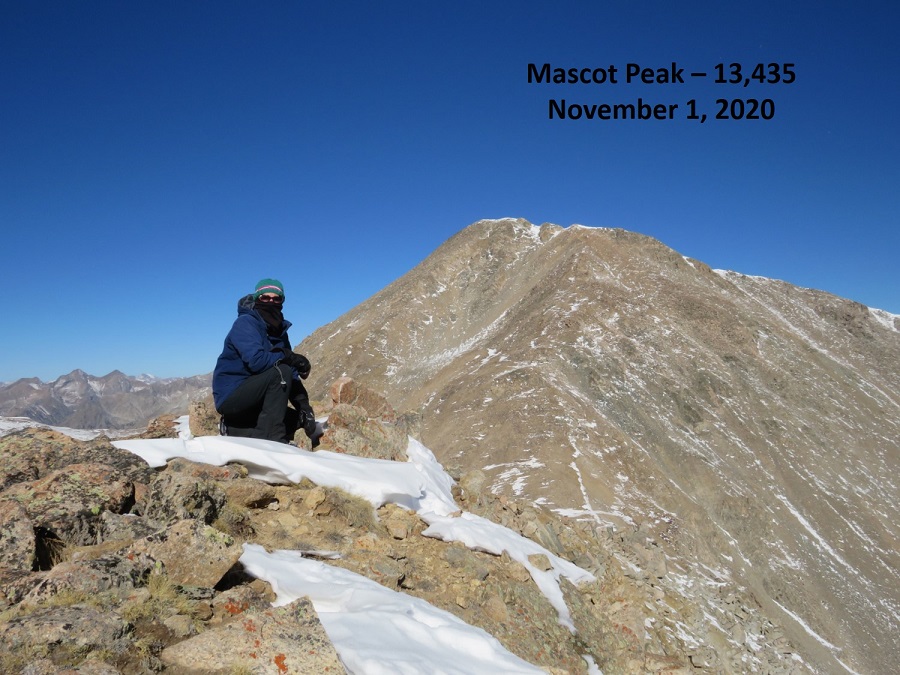
I summited Mascot Peak at 10am
Mascot Peak:
I was making this a loop today, so after a few pictures I continued southwest down the ridge. I stuck to the top of the ridge. There’s a great view of Cottonwood Pass until you get to treeline, so as long as you stay on the ridge it’s difficult to get lost.
Here’s looking back at Mascot Peak and Mt Yale from the ridge
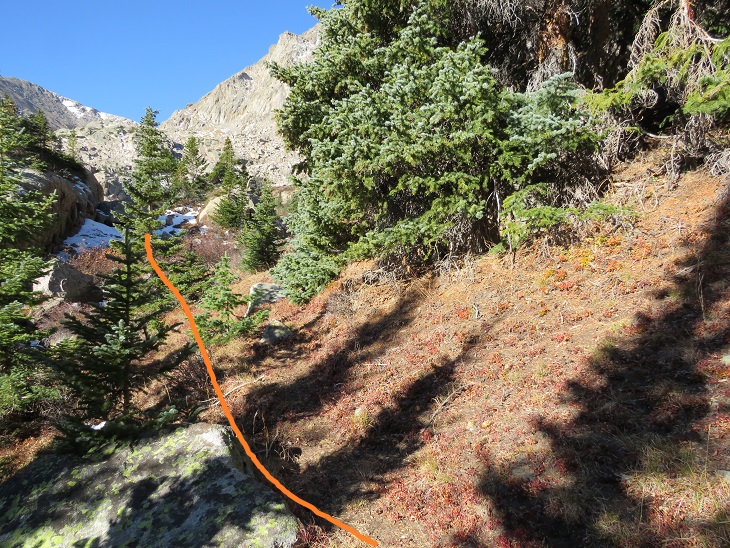
Just before treeline I left the ridge and headed right (west) down what could loosely be called a gully.
I aimed for an old, solitary tree standing amongst the rocks, and then followed the gully as it descended southwest to Denny Gulch
I kept following the obvious curve as it headed to treeline (no trail here, just keep taking the path of least resistance towards Denny Gulch)
In case you want to do this route in reverse, here’s looking back at the route from before treeline and up to the ridge. I would not have wanted to upclimb this, and instead recommend taking the class 1 trail up to Mt Yale. This was very steep, and fun to scree surf down.
Once at treeline I kept aiming for Denny Gulch, following a drainage of sorts southwest
It’s obvious when you reach the gulch, as the mountain starts to back up again. There was a small stream running, and I decided to follow this stream south. I kept crossing and recrossing the stream to find the best route. There were a few animal trails here, and a lot of ducking, climbing, and bushwhacking over fallen trees and through overgrown bushes to get back to the road.
I could have followed Denny Gulch all the way to the road, but ended up coming across a well-defined game trail that headed northwest. I took that for a short distance, and it turned into the remnants of an old mining road that looked like it hadn’t been used in half a century or so.
I followed the old road until it abruptly ended, but I could hear vehicles on the road in the distance, so I aimed southwest towards the road
Once at the road I followed it west back to the trailhead
I made it back to my truck at 12:40pm, making this a 10.72 mile hike with 4839’ of elevation gain in 8 hours.
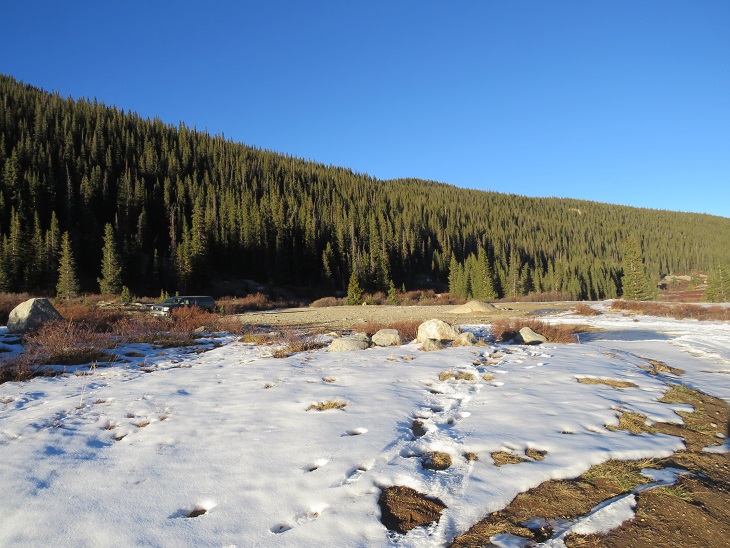
With the recent snow I wasn’t quite sure what to expect on today’s hike. I drove down road 742 in the dark until it dead-ended. The road was icy in the morning, and not too bad on the way out.
I parked at the trailhead, the only vehicle in the lot (both when I arrived and when I left).
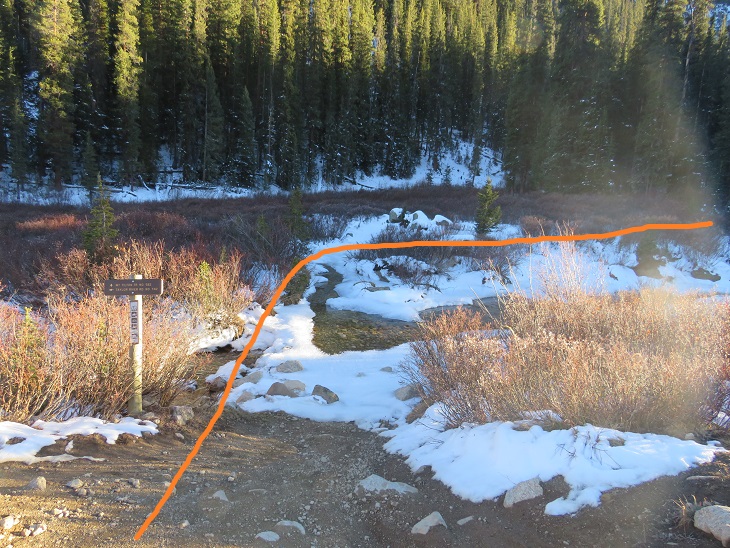
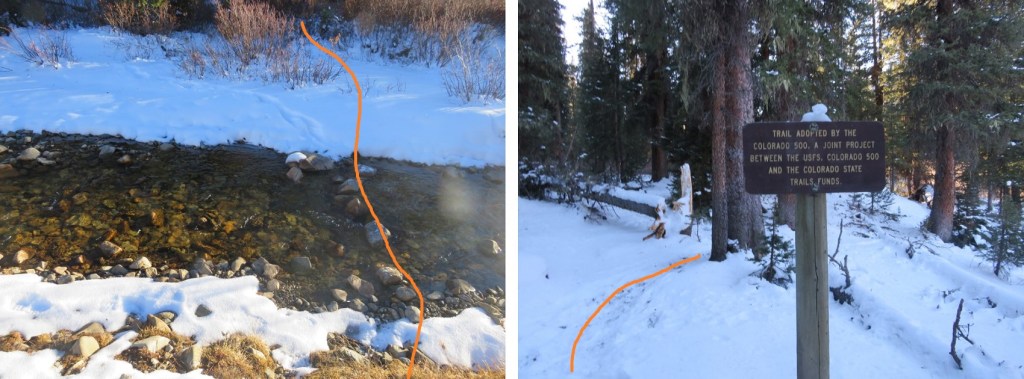
It was 14 degrees outside, so I put on my full winter gear and was on the trail at 6am. The trail starts at the southwest corner of the roundabout, and immediately crosses a stream.
In the morning there was more ice than this photo shows, and the stream was at least a foot deep in areas. There was no way I was starting this hike off with frozen toes, so crossing the stream here wasn’t an option. I spent about 15 minutes searching for a better way to cross (in the dark). I was able to find a good crossing about 15 yards upstream, rock hopped across without any difficulty, and picked up Mt Tilton Trail #582.
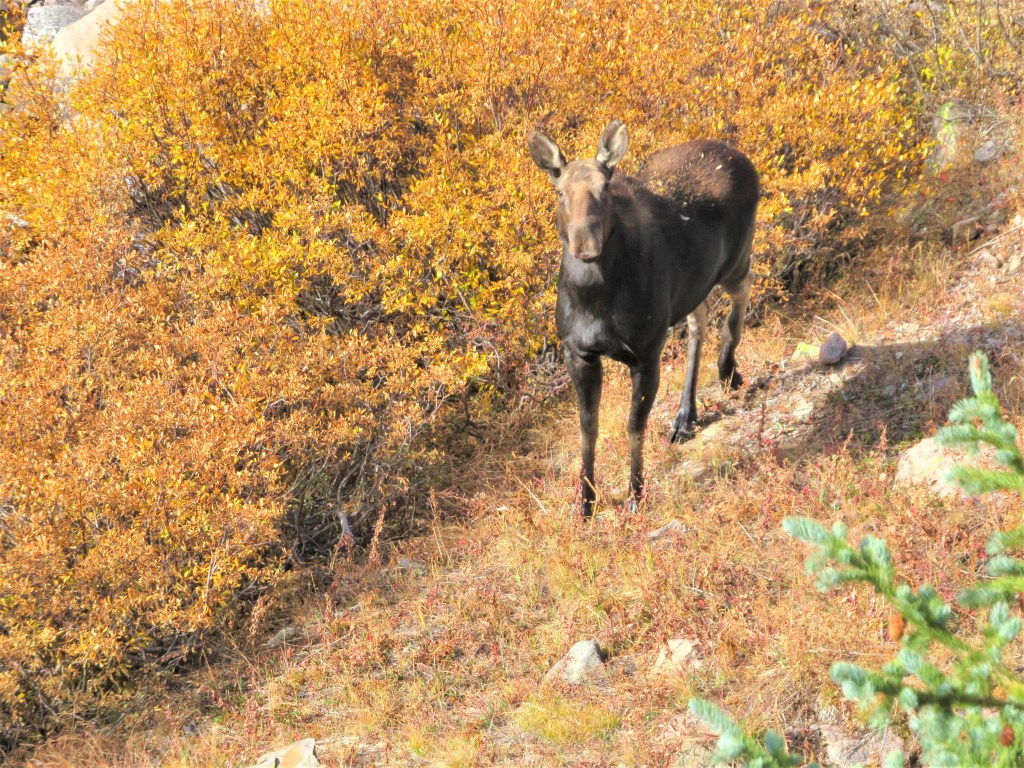
Even with the recent snow the trail was well packed, but not by humans. It was packed down by hoofprints. Some very large hoofprints. There was also fresh moose scat along the trail and a lot of moose tracks, so I kept on the lookout (but never ended up seeing a moose).
There was one more stream crossing. This one was almost completely frozen over. I didn’t really want to cross it, not being sure of how thick the ice was, but I noticed a set of moose tracks on top of the ice and figured if a moose could cross the stream, so could I. I placed my feet on top of the moose tracks and made my way across.
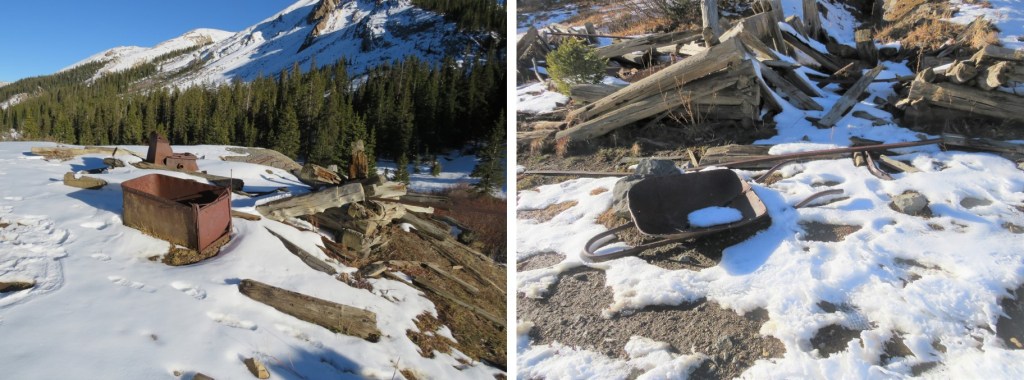
The trail remained easy to follow, no traction needed. I passed the remains of a log cabin
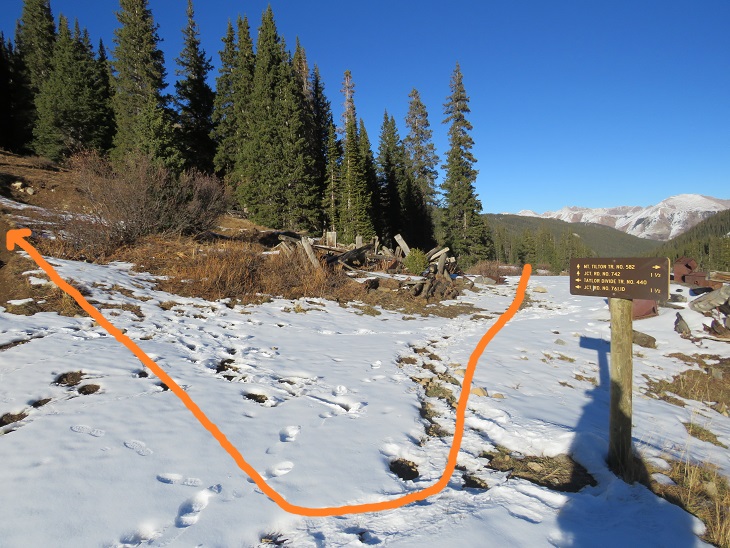
And after hiking for 2.15 miles I came to a second set of log cabin/mining remains and a trail junction. I turned right and followed Taylor Divide Trail #440
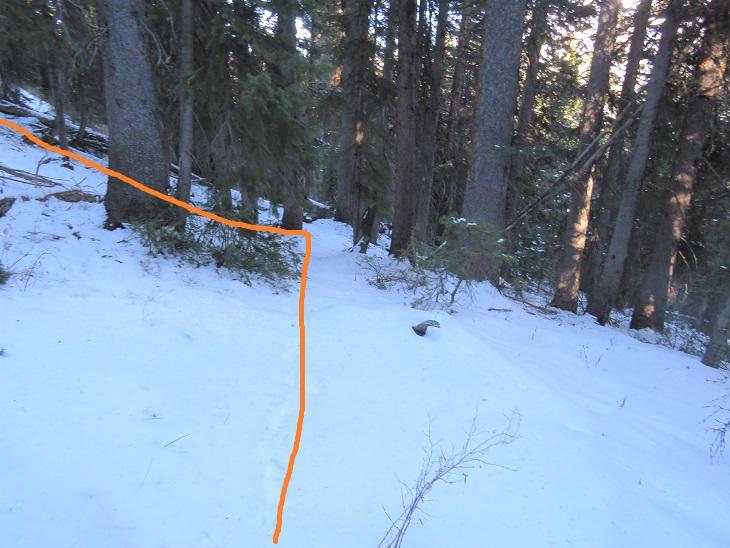
I followed this trail briefly, about one tenth of a mile, until the trail started to head back down, and instead turned left and headed northwest up to treeline. It was about half a mile to treeline from leaving the trail.
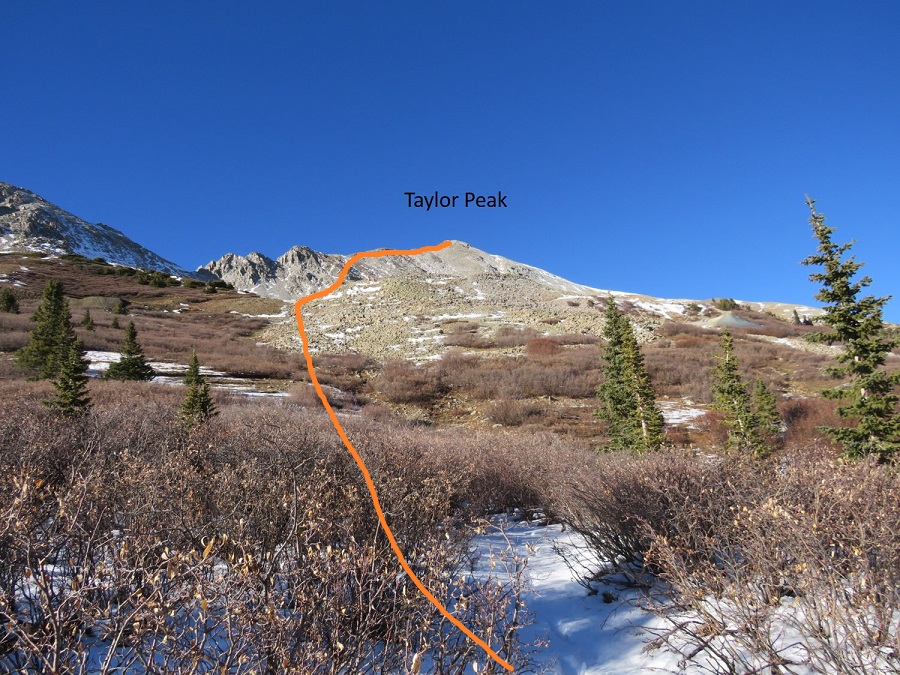
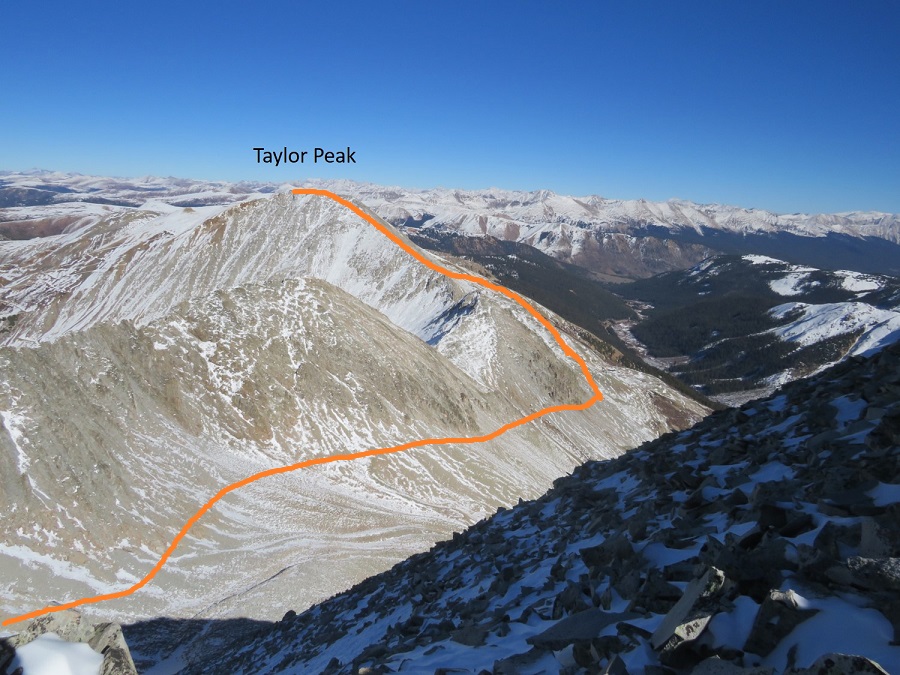
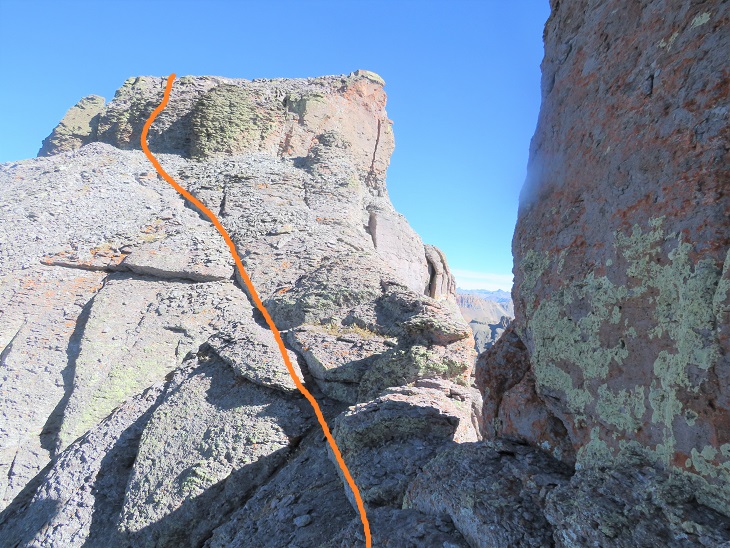
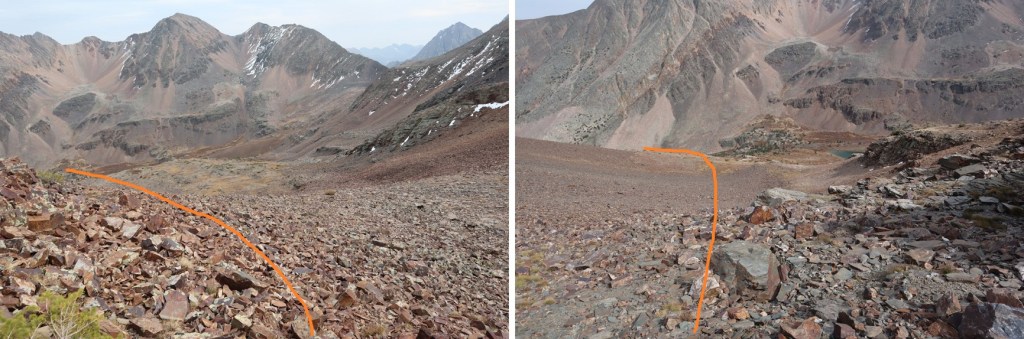
Once at treeline I had a great view of Taylor Peak and how I wanted to summit. Here’s an overview of my route
And step by step. I stayed to the right of the willows to gain the basin
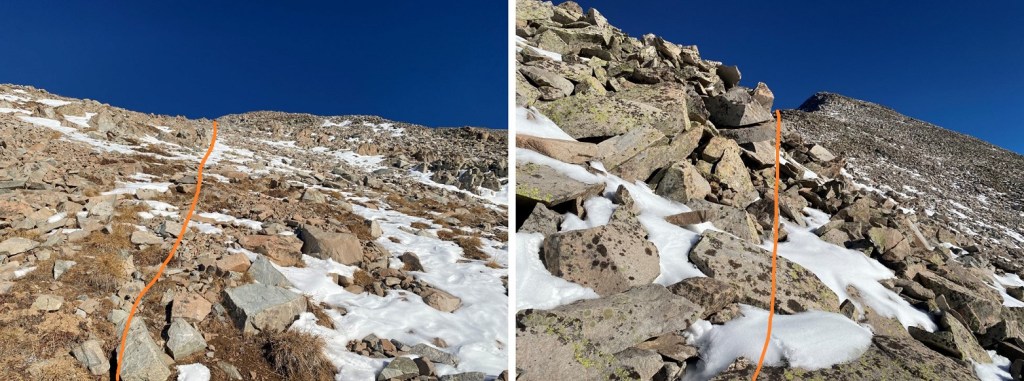
Once in the basin I headed north to gain the ridge
The rocks here were loose, and there was just enough snow to make it slow going, as I had to watch every step. I was worried I’d roll an ankle or plunge into a hole underneath the snow.
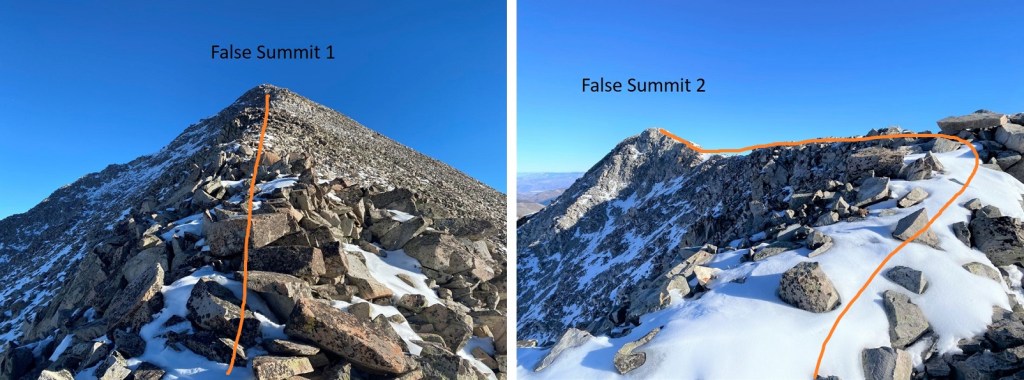
Once on the ridge I followed it north to the summit. There were two false summits before reaching the actual summit
The ridge to the second false summit had some snow to navigate, and what became class 3 climbing due to snow on the route. Sticking to the ridge worked
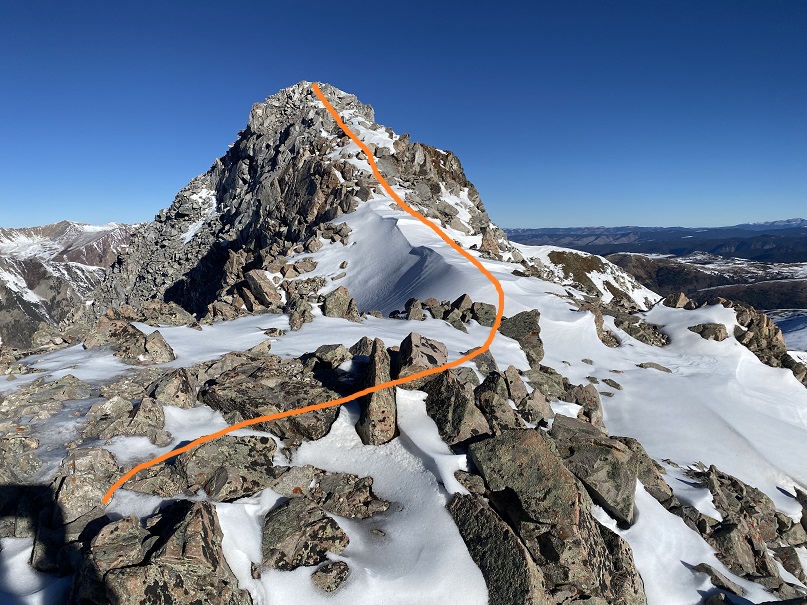
Here’s the actual summit of Taylor Peak
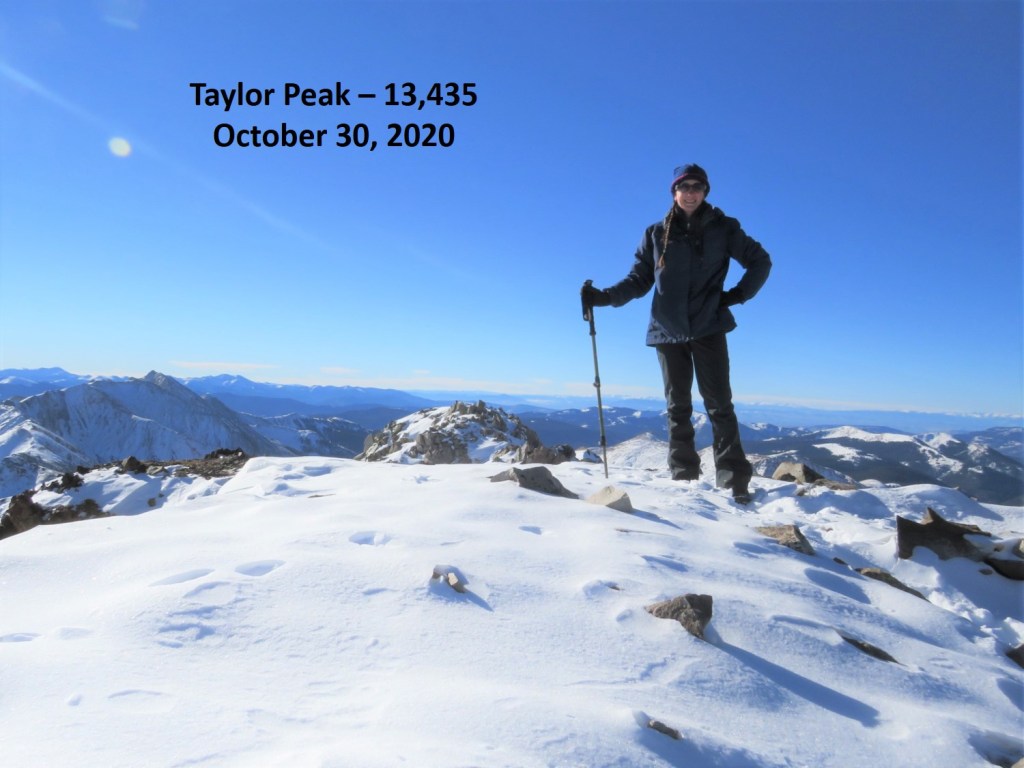
I summited Taylor Peak at 9:40am
Taylor Peak:
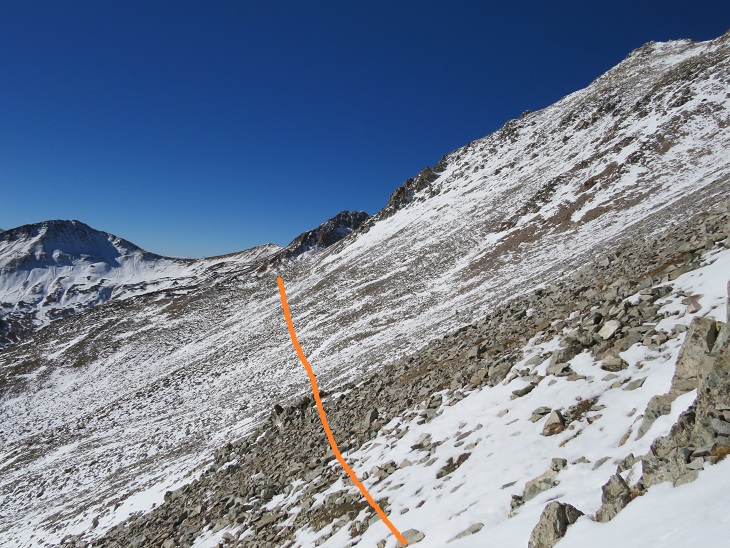
It was a bluebird day, so I decided to head over to Star Peak as well. This ended up taking a lot more time than I’d anticipated. There was just enough snow to make me question every step. The snow as sugary, the rocks rolled, and as it started warming up as the day went on the snow became slippery.
Here’s a look at Star Peak from Taylor Peak
The ridge doesn’t look like it ‘goes’ all the way from Taylor to Star, especially towards the end, so from the summit of Taylor Peak I turned and retraced my steps back to the basin.
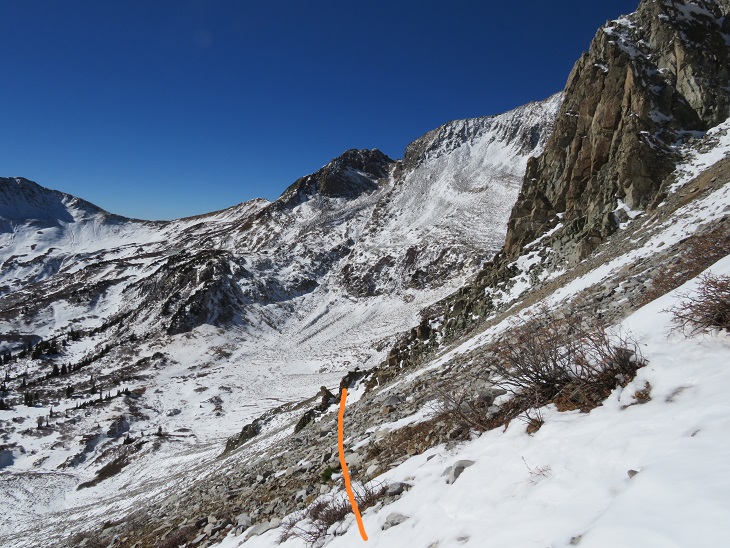
Once in the basin I stayed high and followed the mountainside west
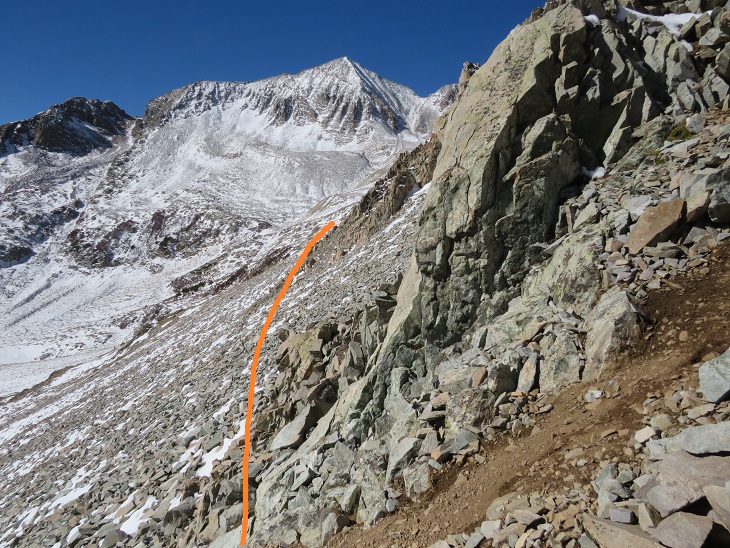
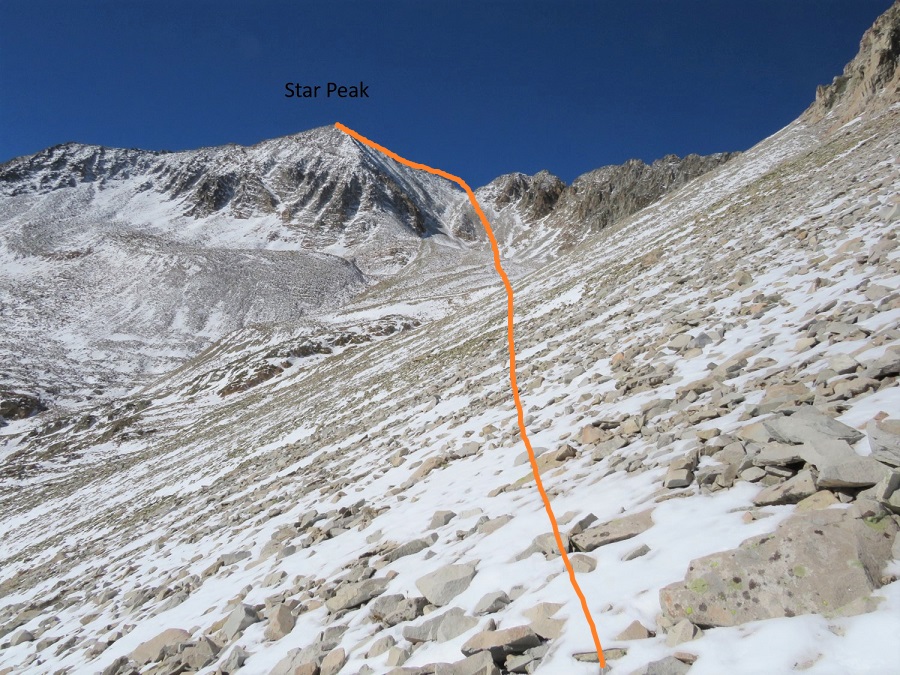
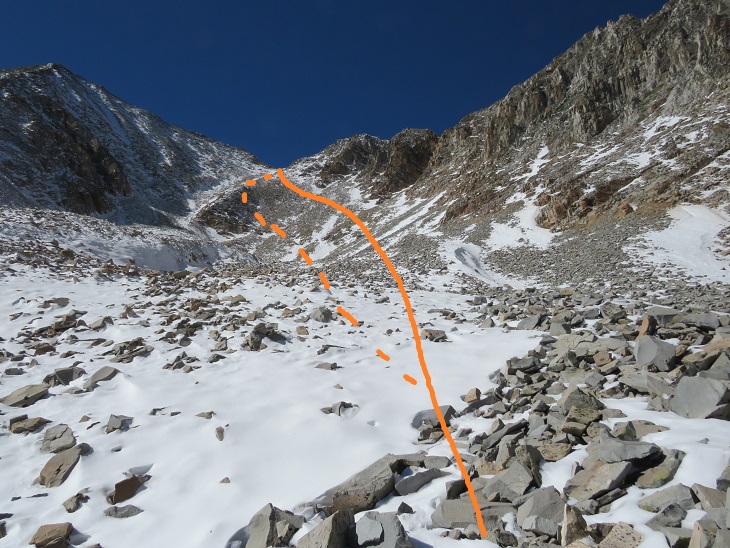
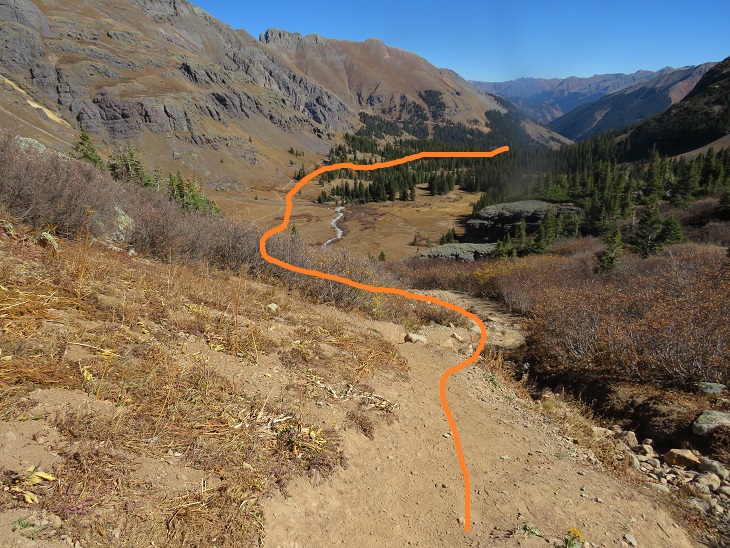
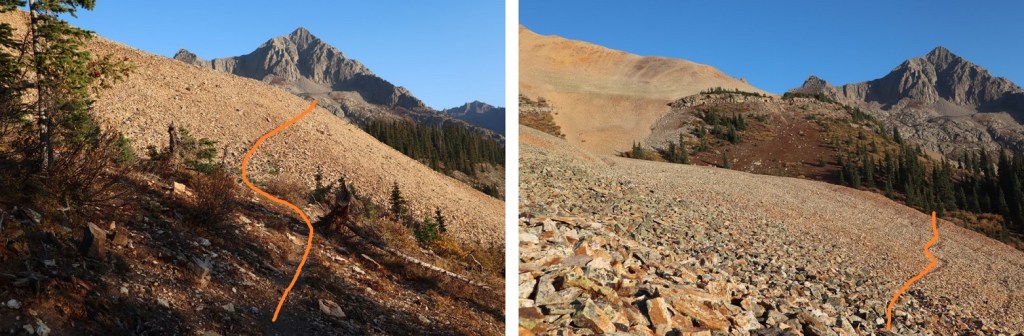
I believe the traditional way to gain the ridge here is to use the gully, but I didn’t like the current conditions, so instead I took a slight ramp to the right of the gully. The rock here was rubble, loose, and not much fun to traverse. However, once I’d gained the ridge and looked down the gully I knew I’d made the correct route choice in todays’ conditions. Here’s my overall route to Star Peak
I took the solid line up, the dotted line down (I’d recommend using the dotted line, as the higher you go here the more loose the rock is)
Once on the ridge I followed it south to the summit. This is probably class 2 in summer, but in these conditions it felt like class 3. The ridge goes, but it’s very narrow and the rocks are loose. The trek here was very slow going as I’d step on snow, only to break off a microwave sized rock or plunge several feet into a hole. I used my trekking pole to gauge every step
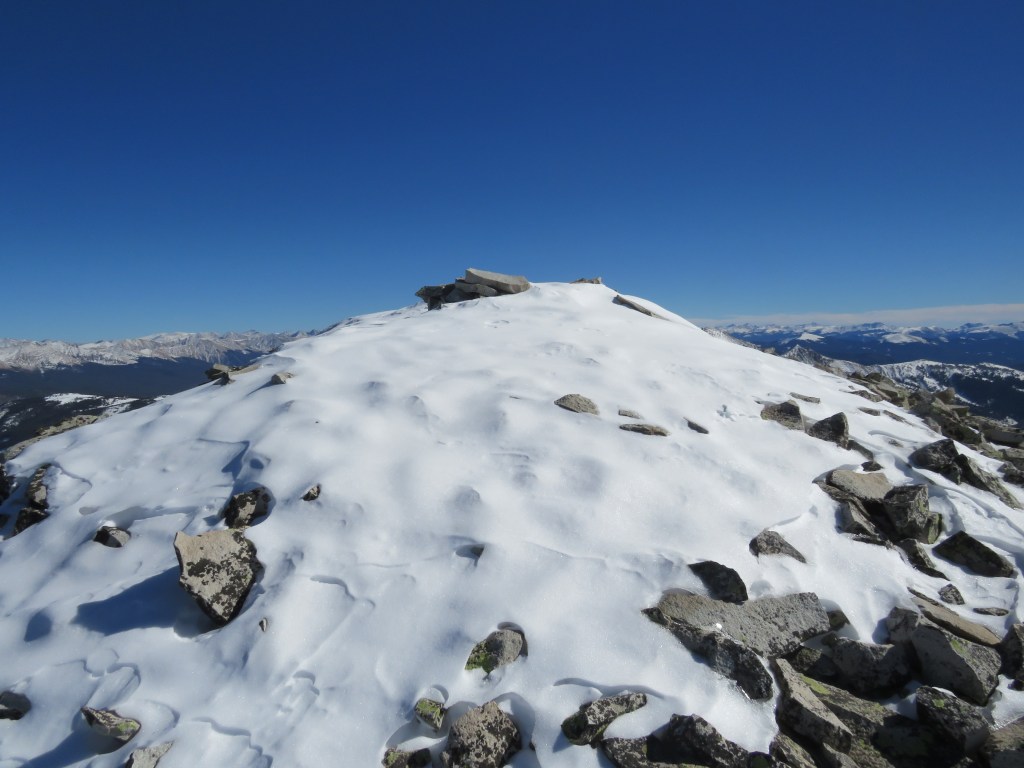
The summit was topped with snow
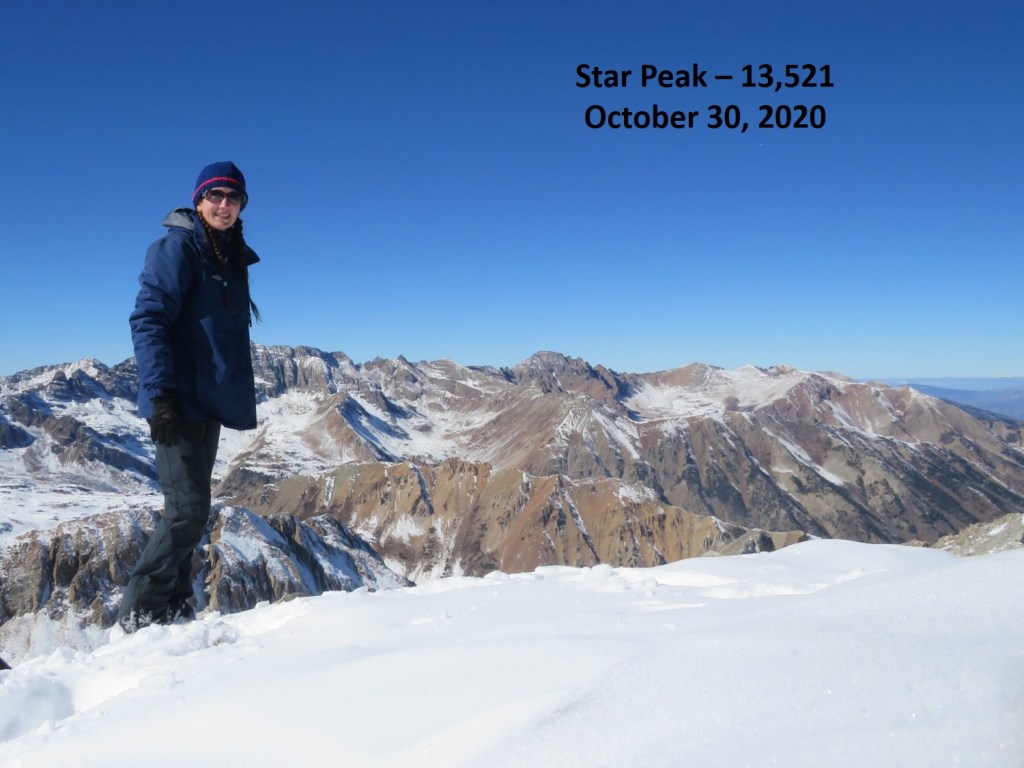
I summited Star Peak at 1:50pm.
Star Peak:
It was a perfect, bluebird day, yet it had taken me quite a while to reach this summit. I sat for a bit to enjoy the view.
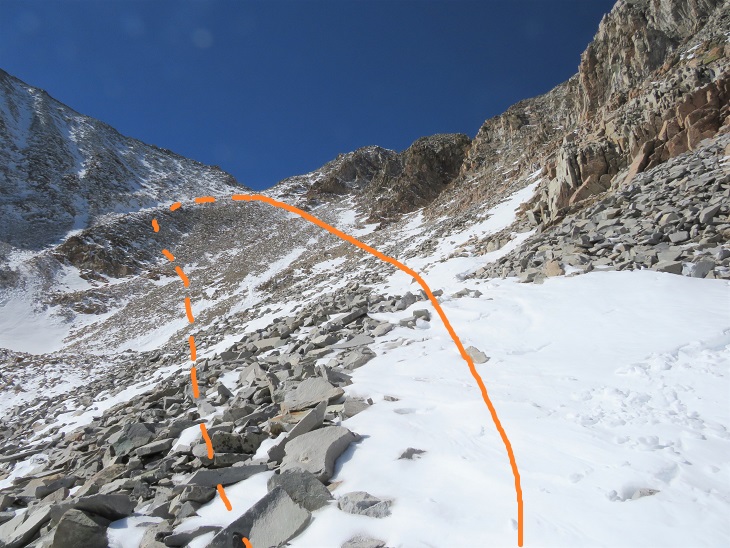
Here’s a look at the route from Taylor Peak to the ridge of Star
I headed back down the ridge
And down into the basin.
Once in the basin I aimed for the drainage
Here’s looking back on my route down from the ridge (dotted line) and the traverse from Taylor (solid line)
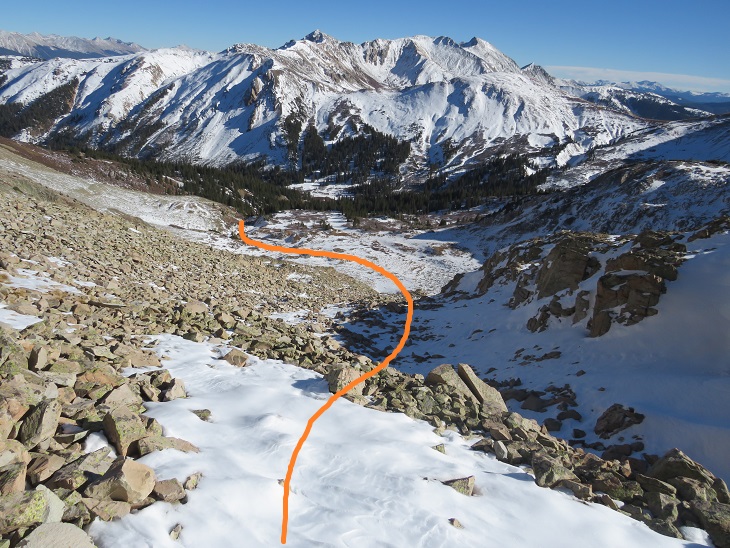
Once in the drainage I picked up a game trail that led me back to where I’d emerged from treeline.
From here I followed the prints I’d made in the snow this morning south, back to the Taylor Divide Trail
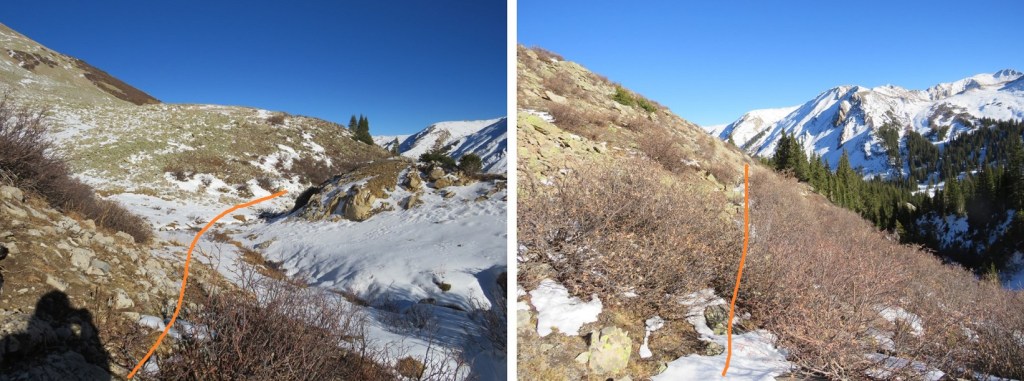
And then back down the basin, over the frozen creek with the moose tracks
Following the well defined trail and crossing the stream that led to the parking area.
I made it back to my truck at 5pm, making this a 13.34 mile hike with 4167’ of elevation gain in 11 hours.
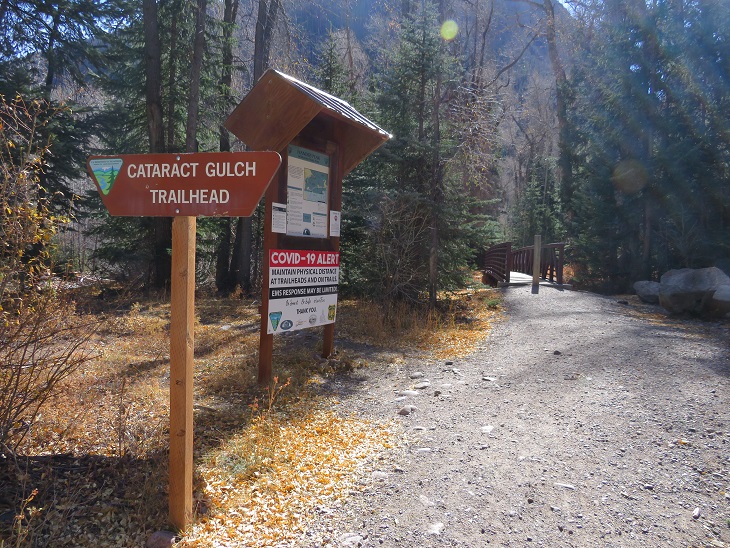
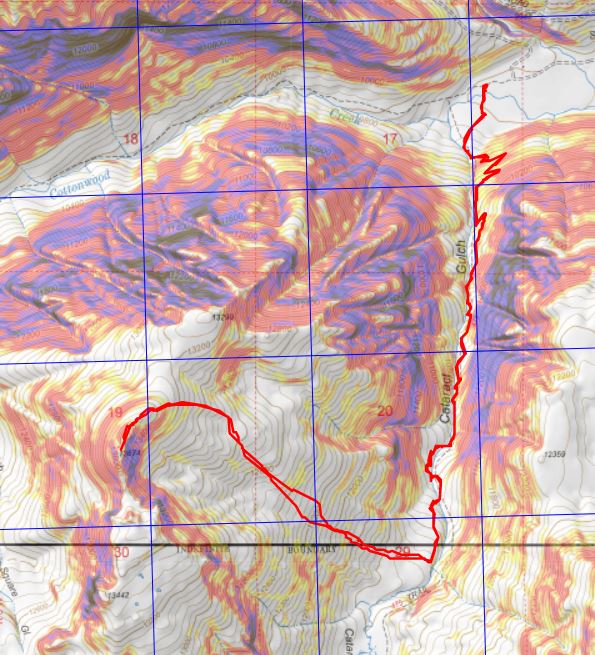
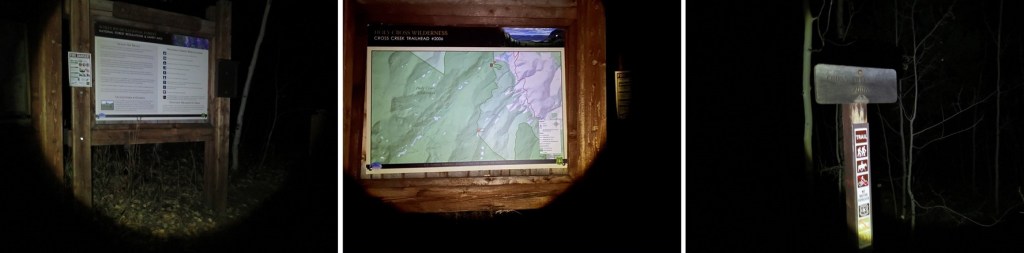
The weather has been outstanding, so I decided to get in one last bicentennial for the year. I woke up at midnight, worked for a bit, and then drove to Cataract Gulch Trailhead. This trailhead has a bathroom (just an FYI). I was on the trail at 6am.
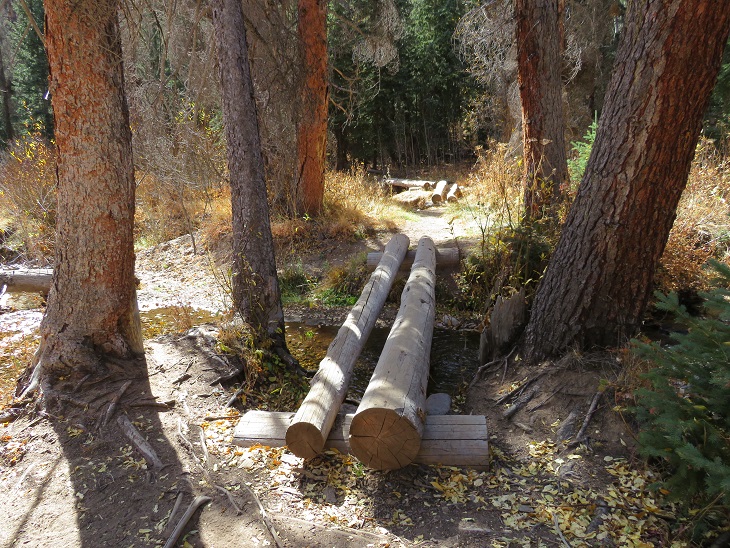
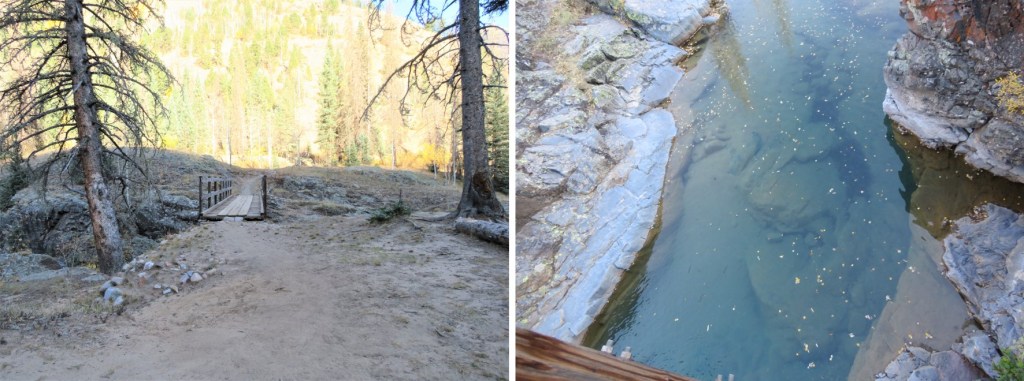
The trail starts at the south end of the parking area, first crossing a bridge, and then a few more smaller bridges (which are new and weren’t here the last time I was in the area) to get across Cottonwood Creek.
I came to a trail register, signed it, and was on my way
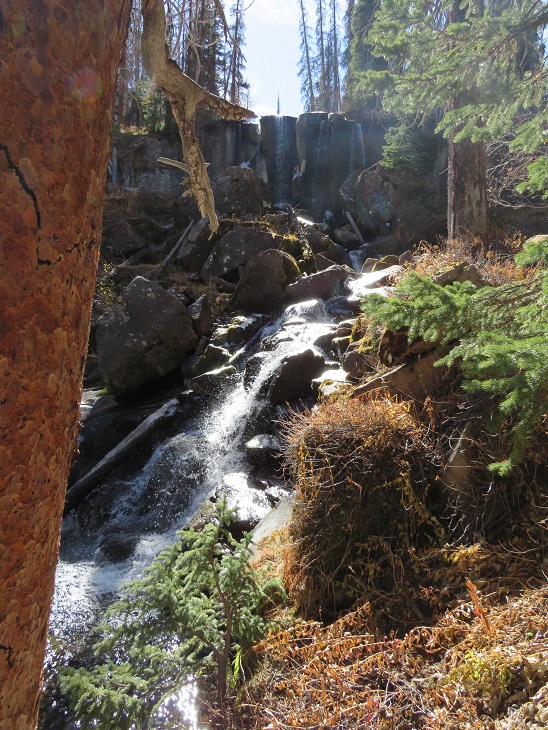
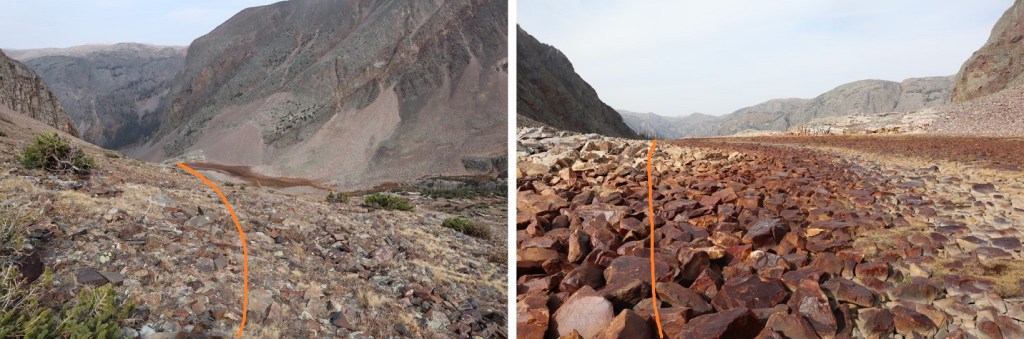
I followed the class 1 Cataract Gulch Trail 475 as it switchbacked south for 3.25 miles
At the top of the waterfall area I crossed the creek a few times (cross the large rock slab first, and then a log)
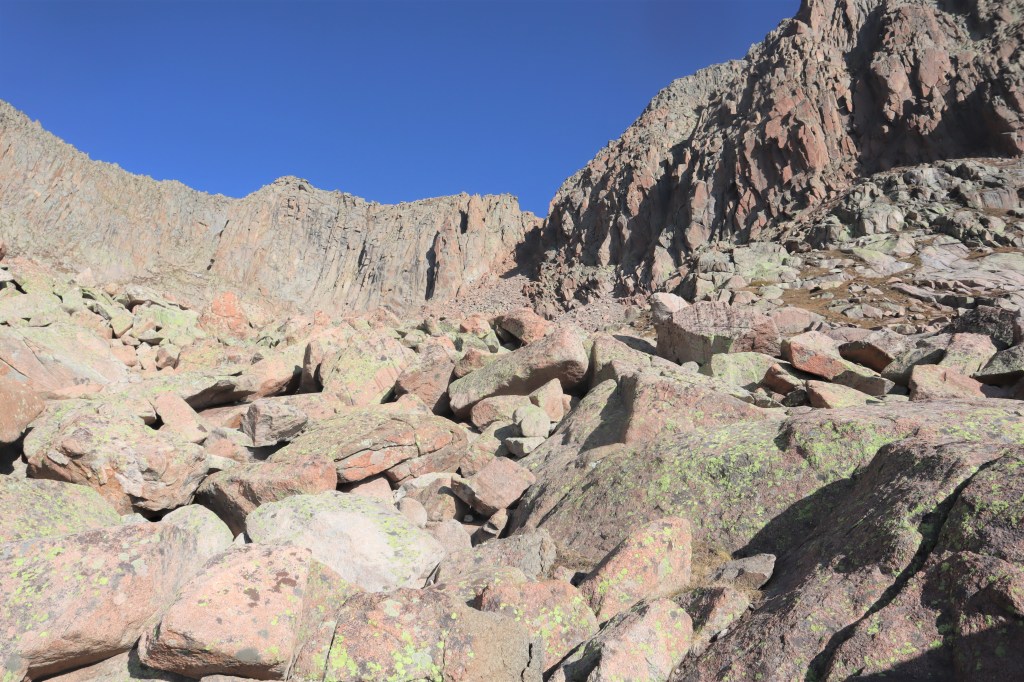
And came to a boulder field
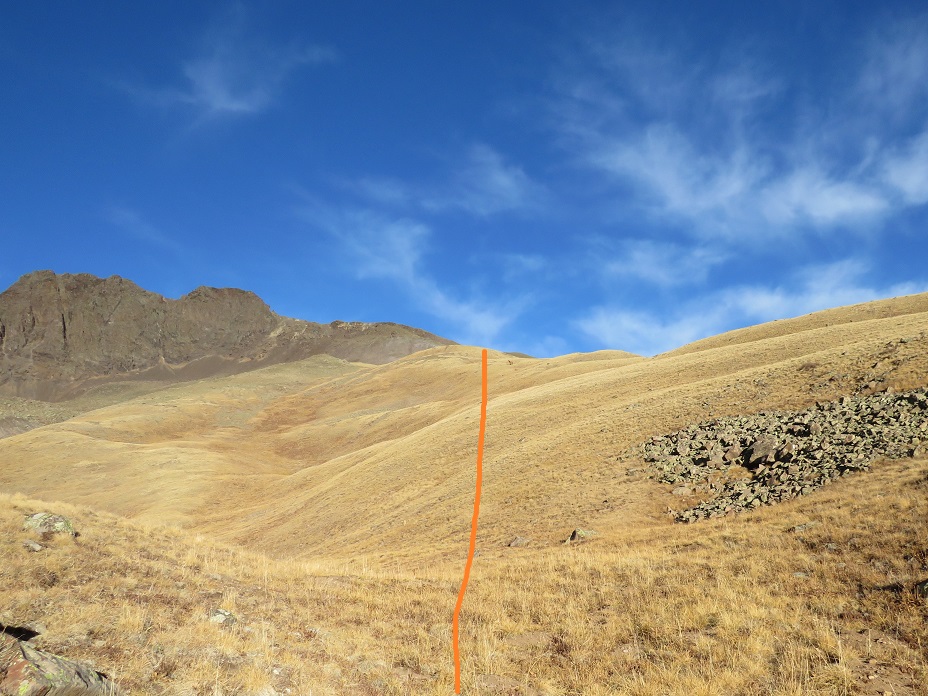
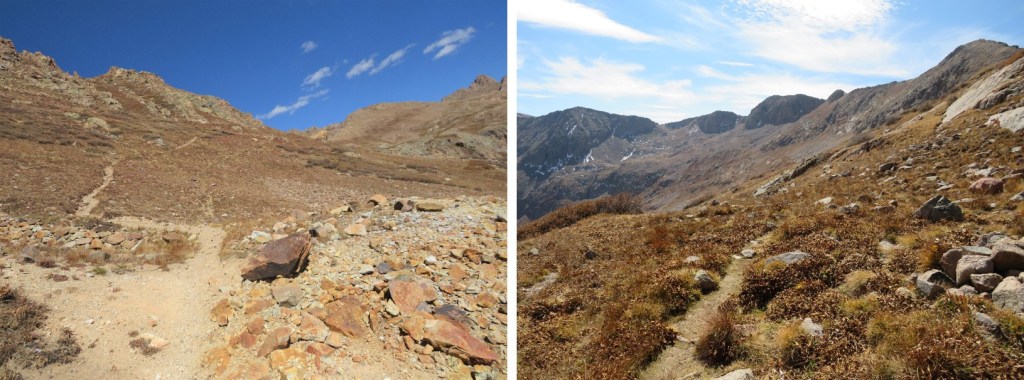
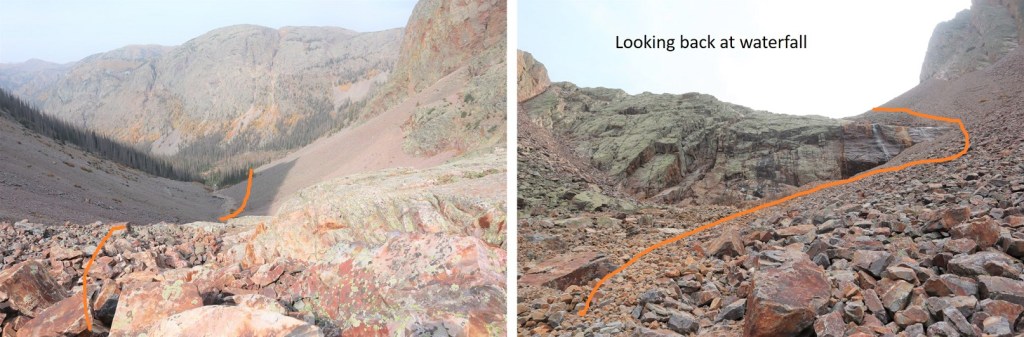
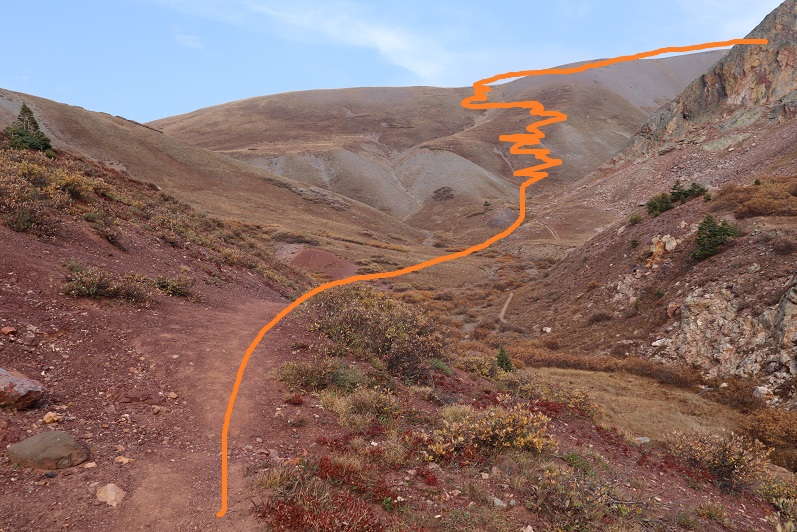
At the top of the boulder field I’d hiked for 3.5 miles. Here I turned right and headed west up the slope. Here’s an overall view of the route. There are many ways to do this, the goal is to gain the upper basin.
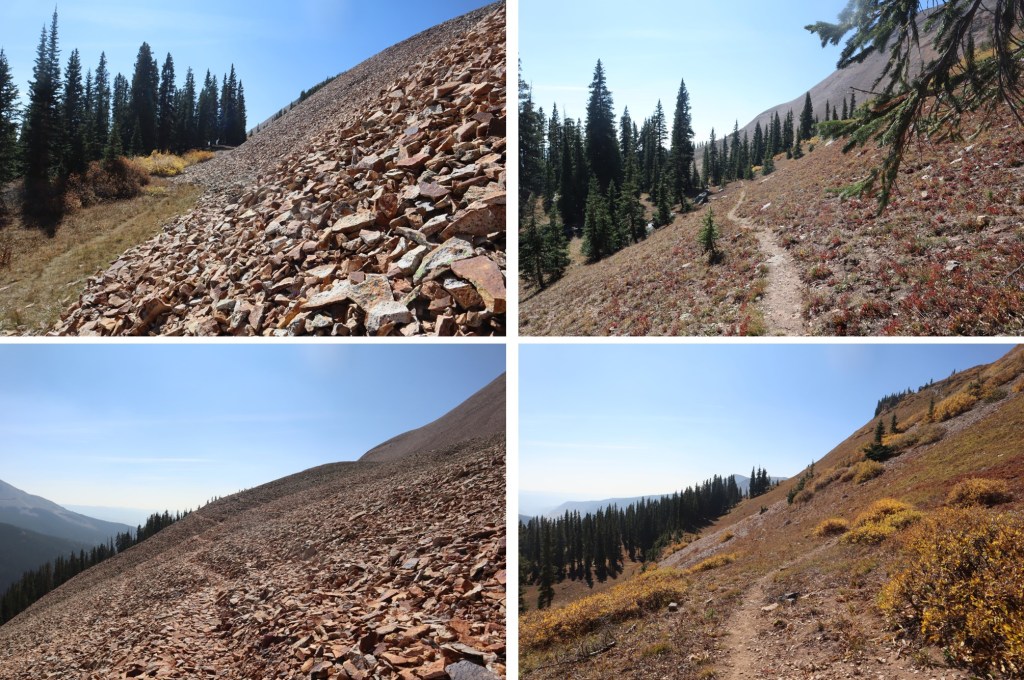
The terrain began rocky
And then changed to tundra
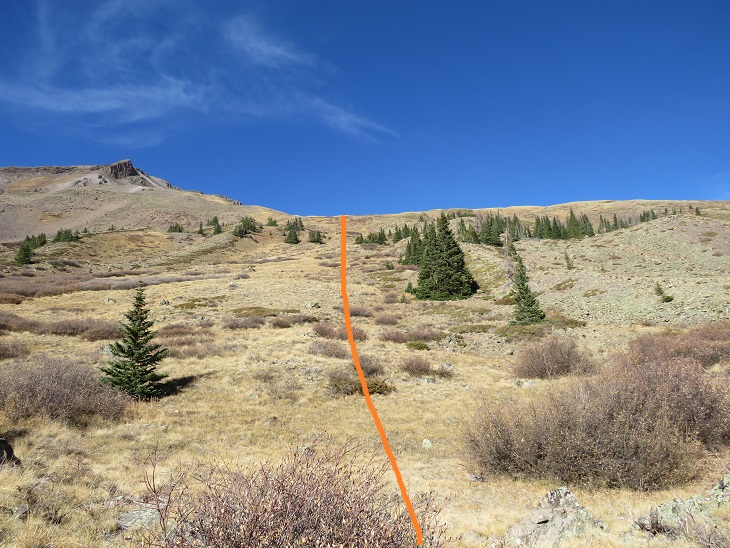
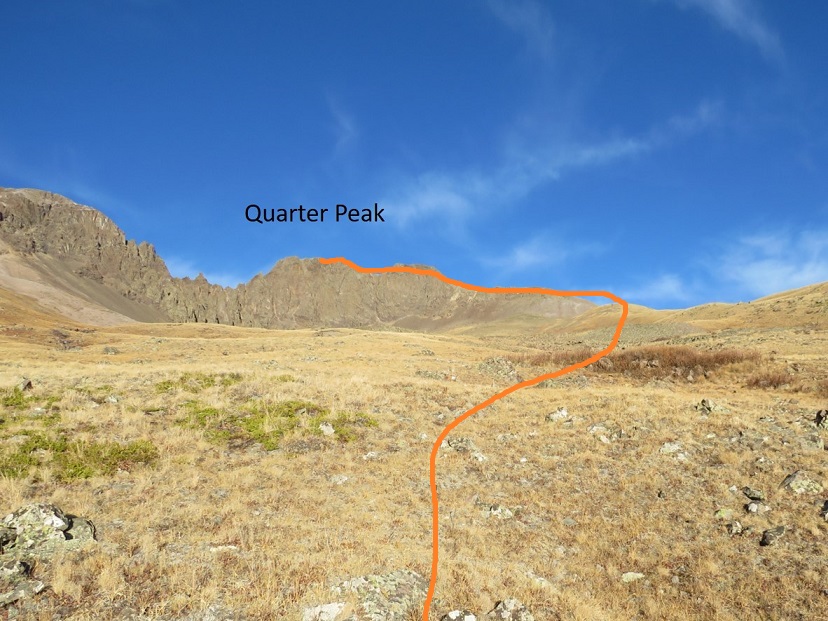
At the top of the hill the tundra started rolling. Here you can see Quarter Peak, and the overall route to get there
I headed northwest and rounded the upper basin
And then turned left and headed up the ridge
This part of the ridge started out as nice, rolling tundra
But about halfway up turned to rubbish rock. I’ll say that again: rubbish rock.
Getting to and staying on the ridge is the best option for this part of the hike. The rock is loose, but at least it can’t fall from above
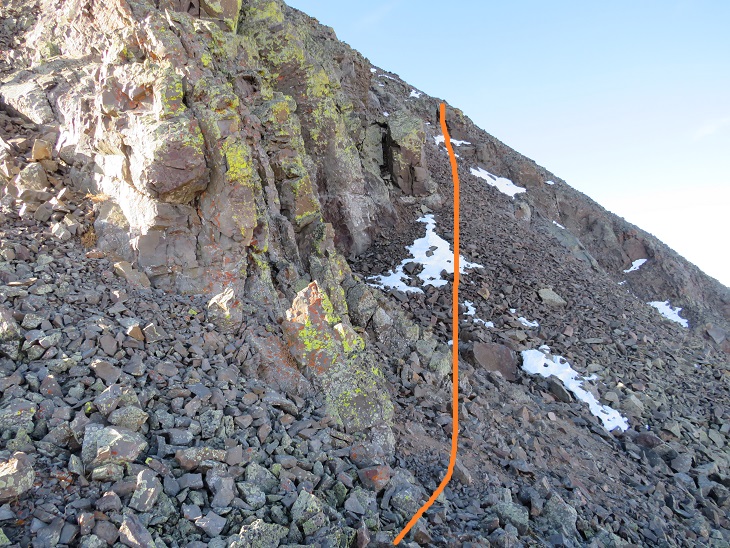
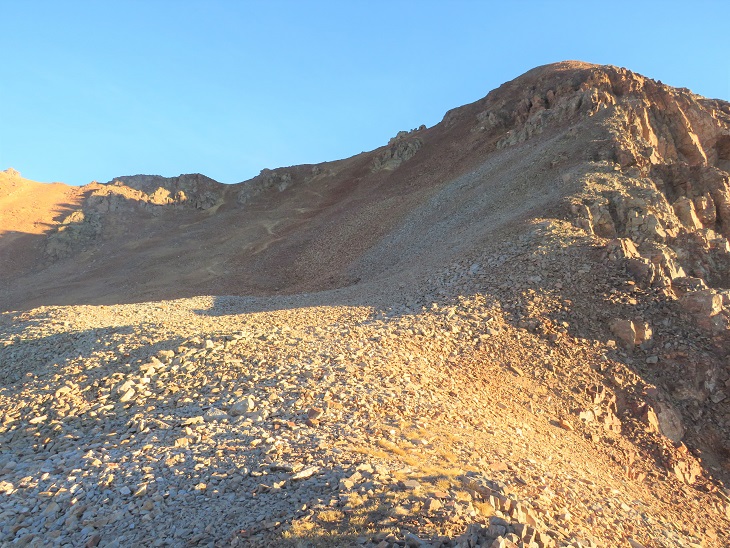
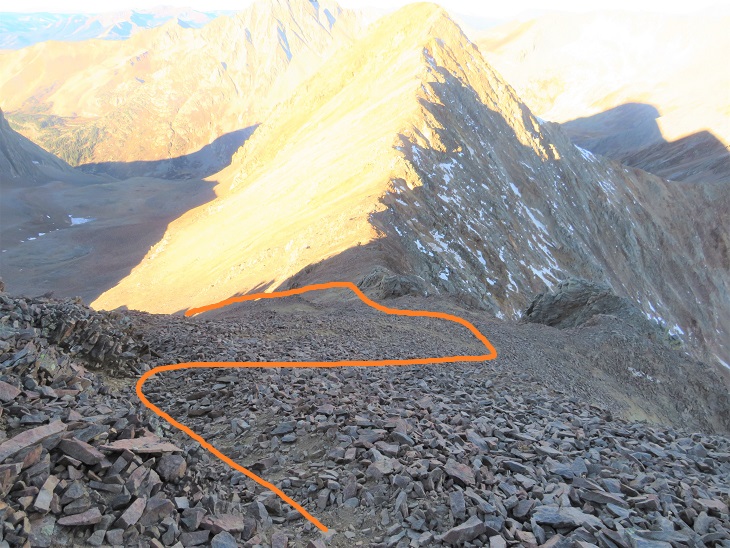
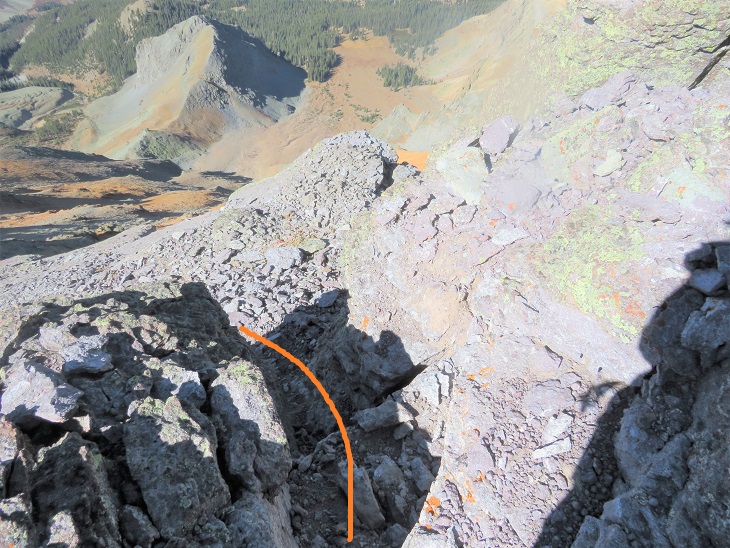
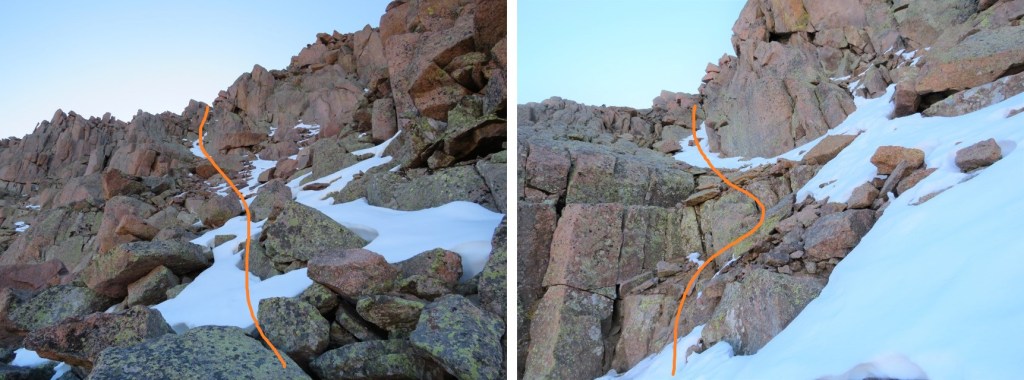
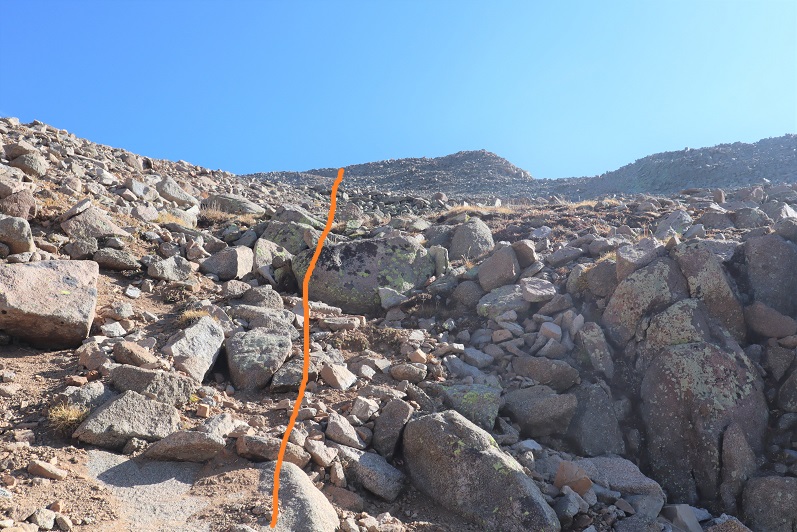
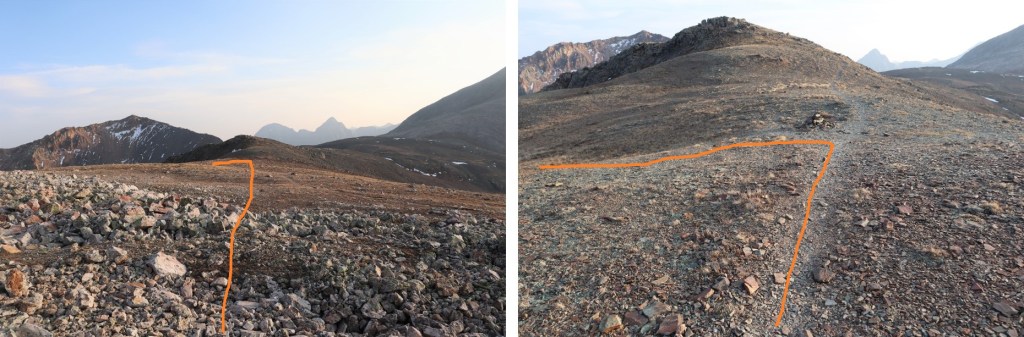
At the top of the ridge I skirted the north side of the mountain for a bit. There’s a gully here, and you’ll want to go straight up it, but don’t (this is a false summit). Instead, ascend about 50 feet up the gully, and then continue skirting the north side of the mountain. This gully is very, very loose, and the terrain changes every time someone ascends/descends.
I quickly came to the false summit, and could see the short path to the true summit. This was class 2
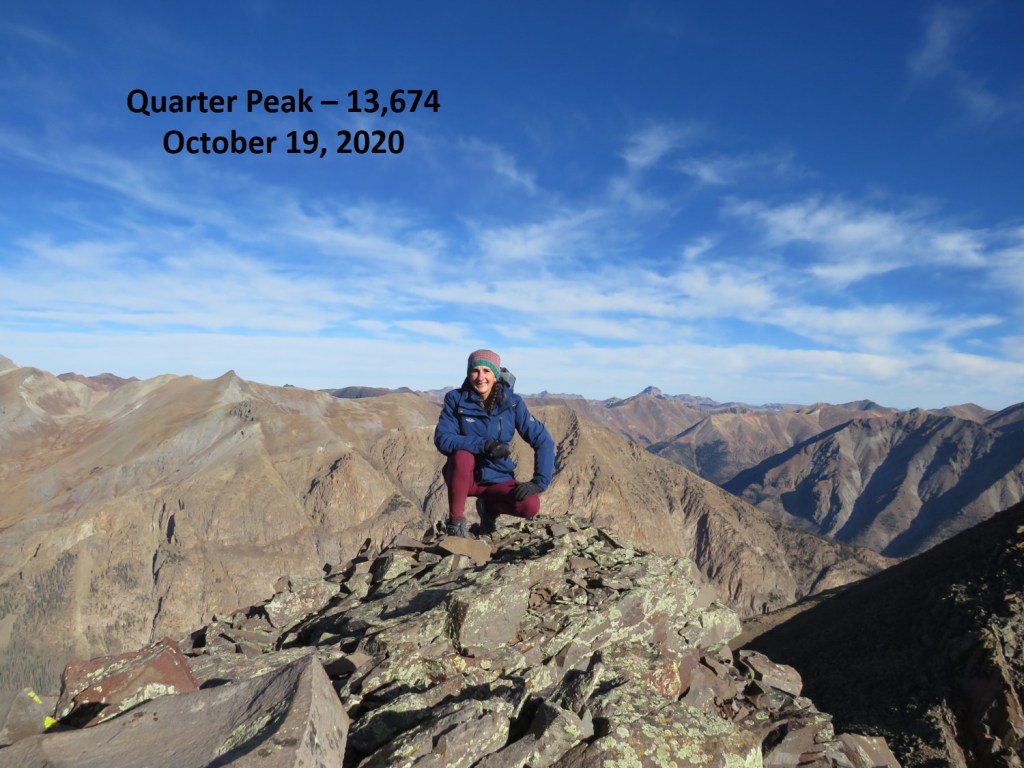
I summited Quarter Peak at 9:30am (unfortunately, I’d lost my sunglasses last weekend camping and didn’t realize this until I was leaving my truck this morning, so I was squinting all day)
Quarter Peak:
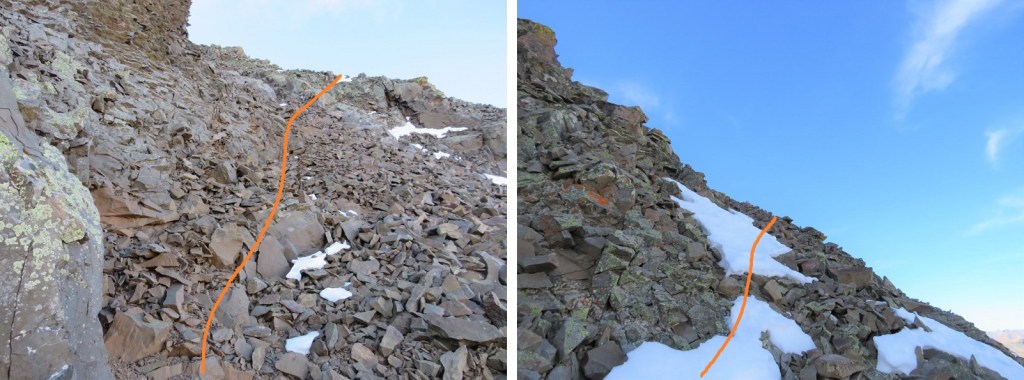
This is an out and back trail, so I headed back the way I’d hiked in. Route finding was much easier this time as I initially stayed low before the gully
When I got to the gully it was just as bad going down as it had been going up. Very, very loose.
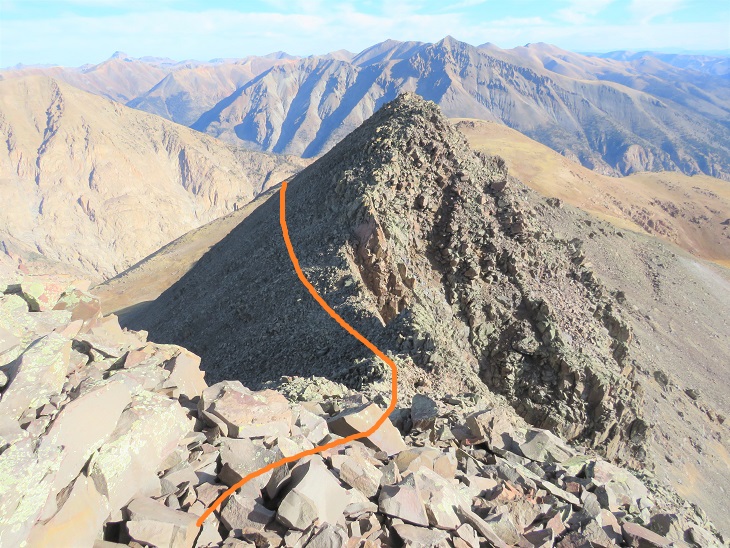
Then on to the rubbish rock, heading east/southeast down the ridge. This was slow going, as I didn’t want to roll an ankle
The rock changed to tundra and I turned right and followed the basin east back down to Cataract Gulch trail
Here are some highlights from the trail down
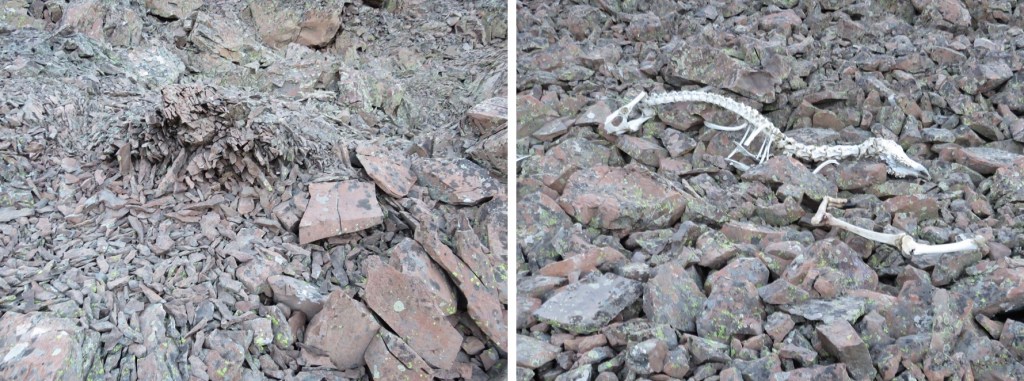
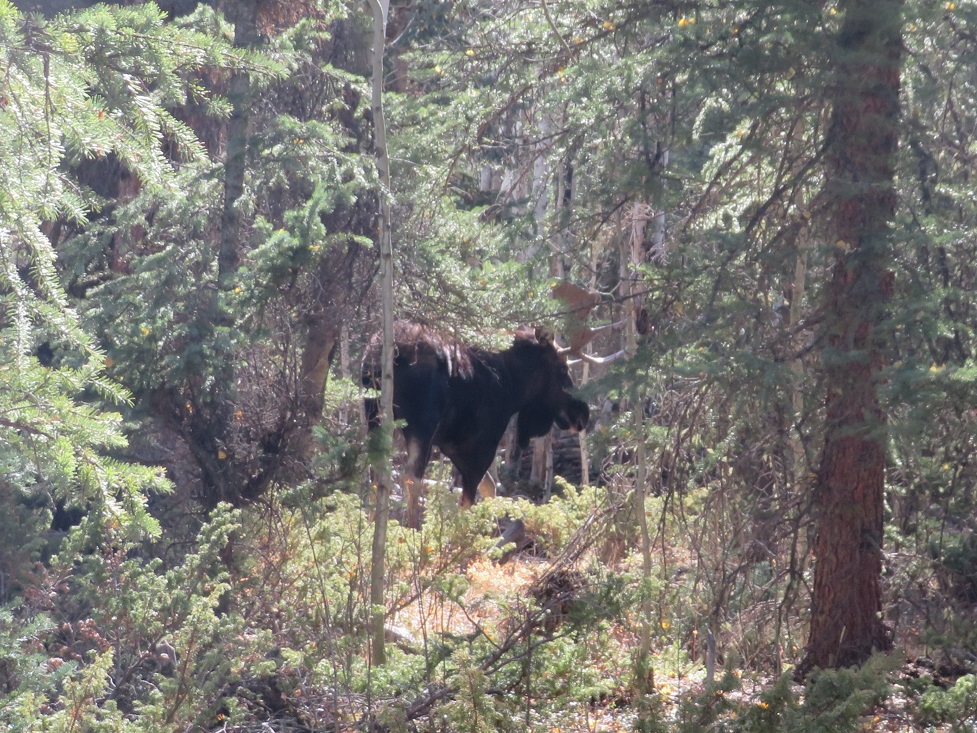
I signed out of the trail register (I’d been the only one to sign it in the past week) and was almost back to the trailhead when I heard a loud rusting. I stopped and turned to my right. No more than 10 feet away from me was the biggest bull moose I’ve ever seen! He was just as startled as I’d been and quickly ran to the cover of denser trees. I gave him plenty of room, and he kept his back to me, so this was the best picture of him I was able to get.
I didn’t stay there long, as he obviously wasn’t in the mood for company. I crossed the creek and made it back to the trailhead
I made it back to my truck at 12pm, making this a 10.3 mile hike with 4227’ of elevation gain in 6 hours.
After summiting Pilot Knob I made it back to the Ice Lakes Basin trailhead and took 585 for 2.5 miles down an easy 4WD dirt road, past the Bandora Mine, until it ended at the south end of the basin. Parking at the Ice Lakes Basin Trailhead adds 5 miles total to this hike.
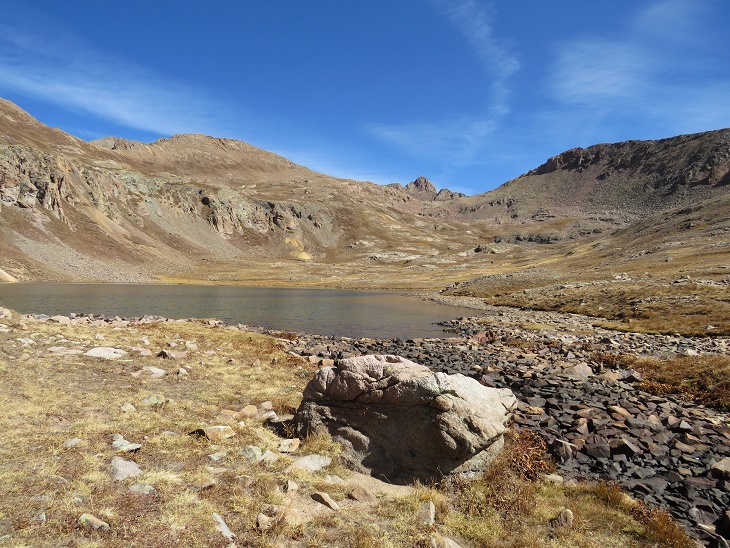
I’ve circled where I parked/dispersed camped for the night. There are quite a few campsites in the area, although I didn’t see another person the entire time I was there.
It was still early, so I made dinner, jotted down some notes, had a few glasses of whiskey, read for a bit, and reviewed my notes from my failed attempt of Rolling Mountain last year.
It was a beautiful evening, so I looked around for a bit to see where the trail started, and then made it an early night.
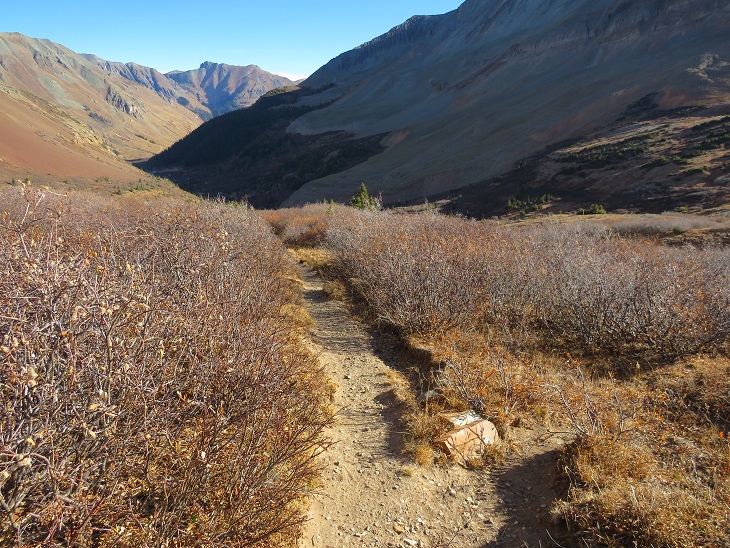
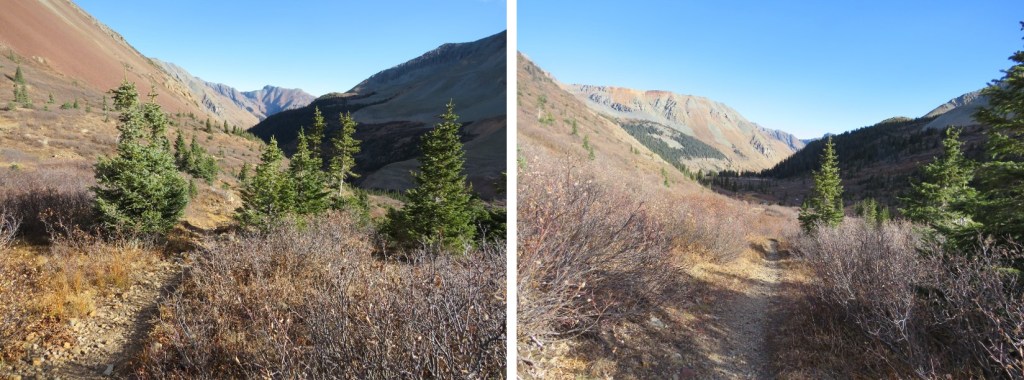
I was up and on the trail at 6am. The trail starts at the south end of the basin, initially crossing a small stream, then following Rico-Silverton Trail 507.
I followed this class 1 trail for 2 miles
After 2 miles I turned right and headed west up the basin, staying to the left of the small gorge/drainage area. There are a lot of willows to contend with here, but if you stay high you can avoid most of them. If you stay low you can still cross, they’re just annoying.
I came to the area that had stumped me last time and was pleasantly surprised to find the depression/bowl wasn’t as deep as it had appeared to be with snow. It was a little steep, but an easy trek across this section and up the gully to the upper basin
I stayed high here, aiming for the ridge. This was an easy trek on relaxed scree and nicely sloping tundra
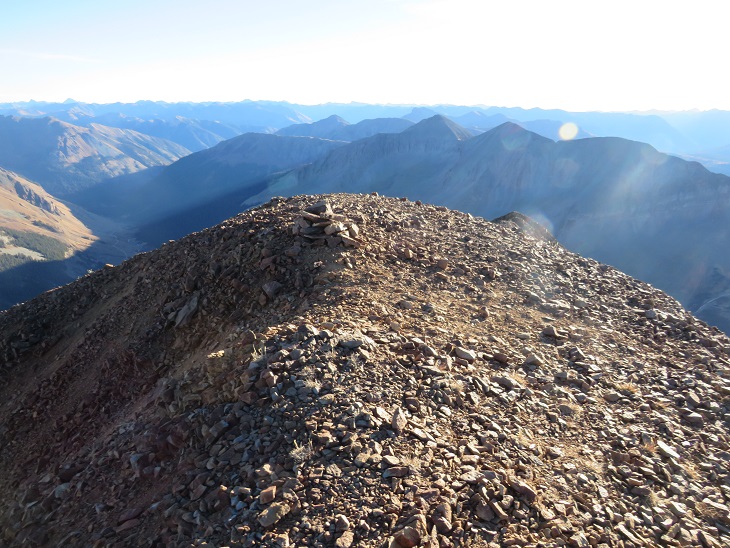
Once on the ridge I turned right and saw an obvious trail that led up to the summit of Rolling Mountain
The trail is light but easy to follow. The terrain was a nice class 2 as it followed the ridge to the summit. It would have been much more enjoyable without the wind.
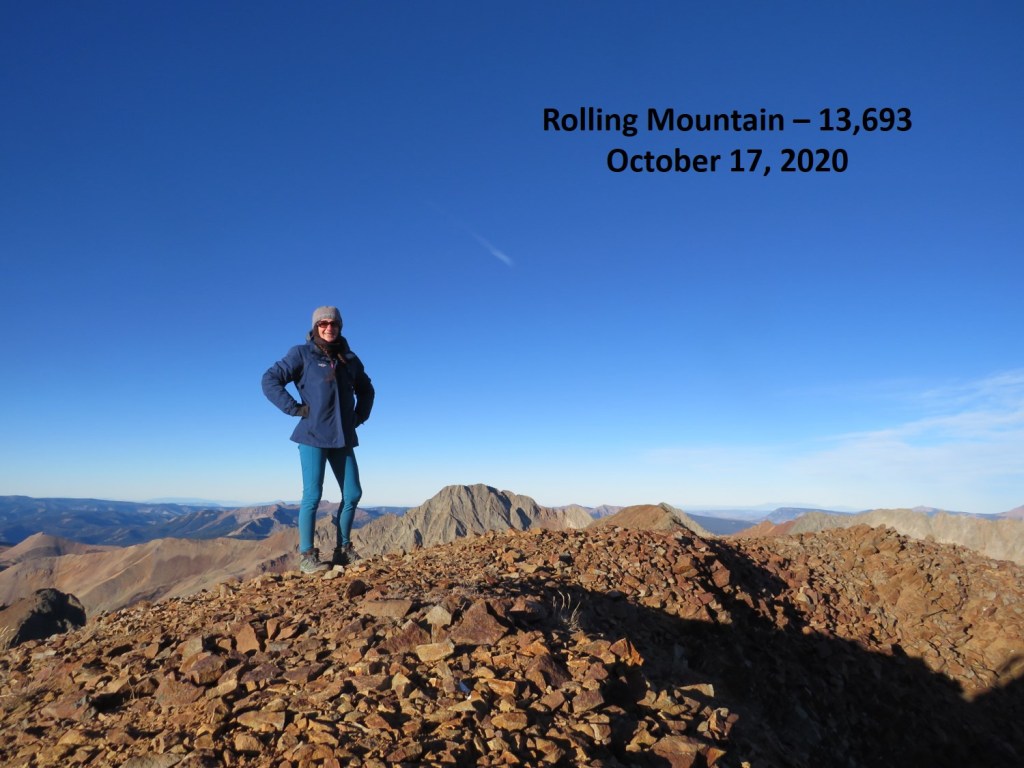
I summited Rolling Mountain at 8:15am
Rolling Mountain:
I had plans to go camping with friends tonight (a 6 hour drive away) so I didn’t waste anytime descending the mountain. Also, it was quite cold and windy. I couldn’t wait to make it back to the ridge and for the wind to settle down. This is an out and back hike, so I retraced my steps
And back down the basin
Up and over the bowl
And east towards the Rico-Silverton trail, staying high to avoid the willows
Once back on the trail I followed it back down the lower basin to the trailhead
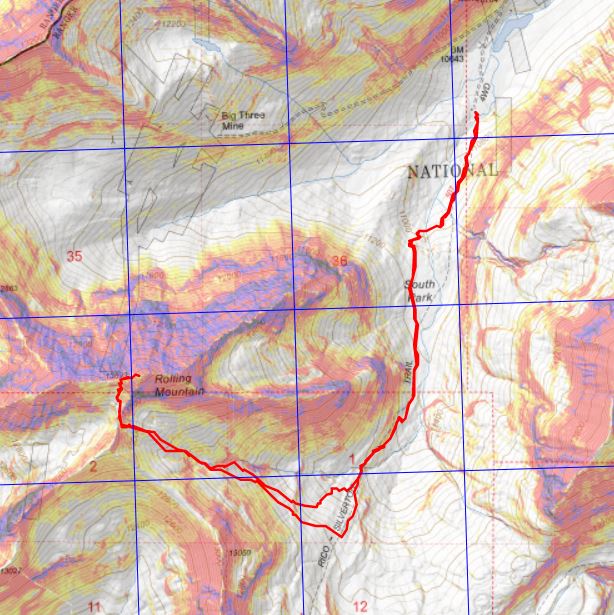
I made it back to my truck at 10am, making this a 7.43 mile hike with 3078’ of elevation gain in 4 hours. The was by far the easiest hike I’ve done in a while, which made my turning around last time sting just a little bit more. Here’s a topo map of the route
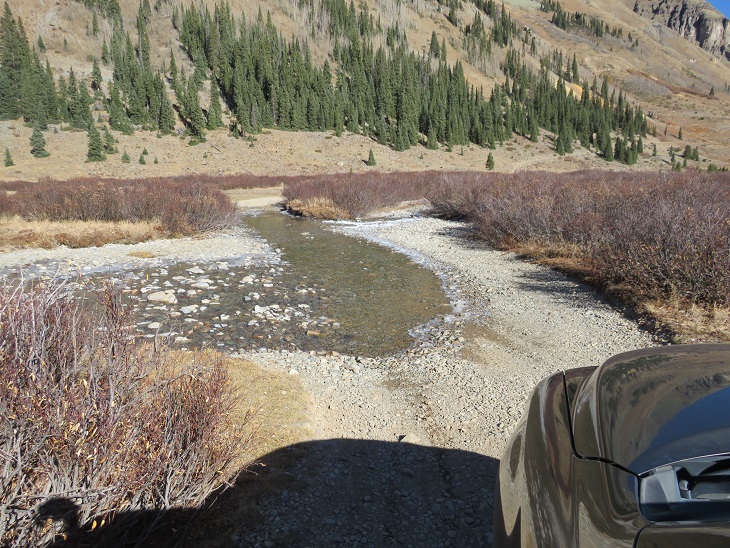
Also, the drive in is easy 4WD (most likely doable in a higher clearance 2WD), but there is a small stream crossing, which is probably deeper in summer. Just something to consider
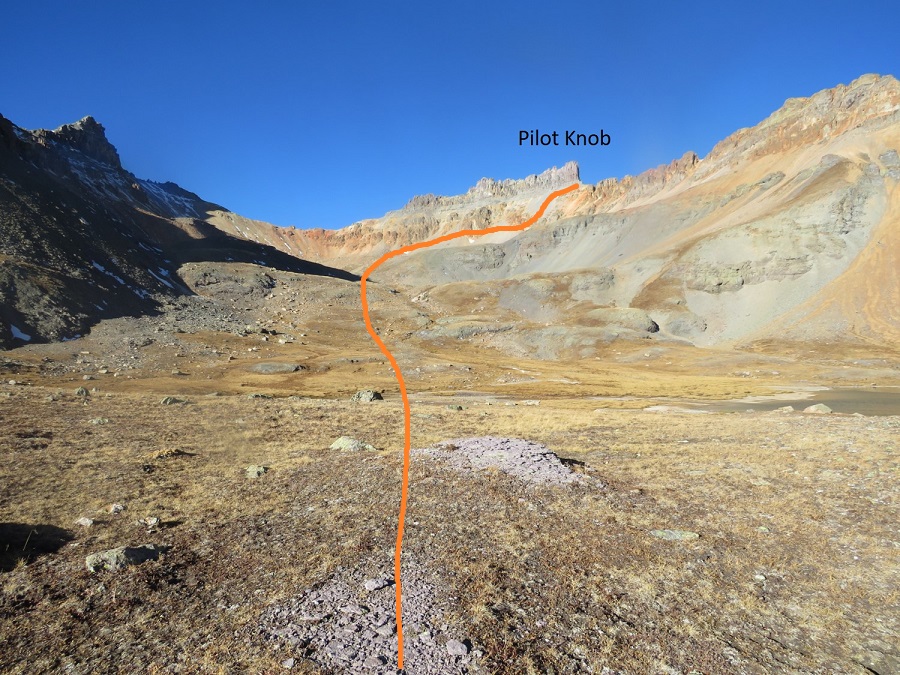
This was my second attempt of Pilot Knob, the first being a few years ago when I tried to link it up with Golden Horn and got caught up in some seriously scary scree. This time I was approaching from the north, my only fear being lingering snow from an early September storm.
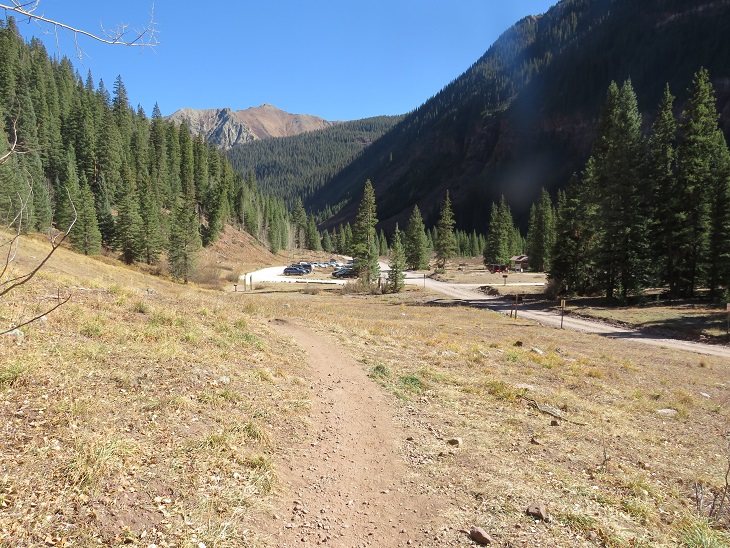
I arrived at the Ice Lakes trailhead at 5am and was the only vehicle in the lot. It was a balmy 22 degrees and since I wasn’t in a hurry I decided to take a nap in my truck until first light. I was on the trail at 6:45am. The trail starts at the obvious trailhead sign at the west end of the parking area
From here it was an easy hike on a class 1 trail all the way up to Ice Lakes Basin. The avalanche area was easy to navigate.
Stay left here
And continue to follow the trail to gain the basin
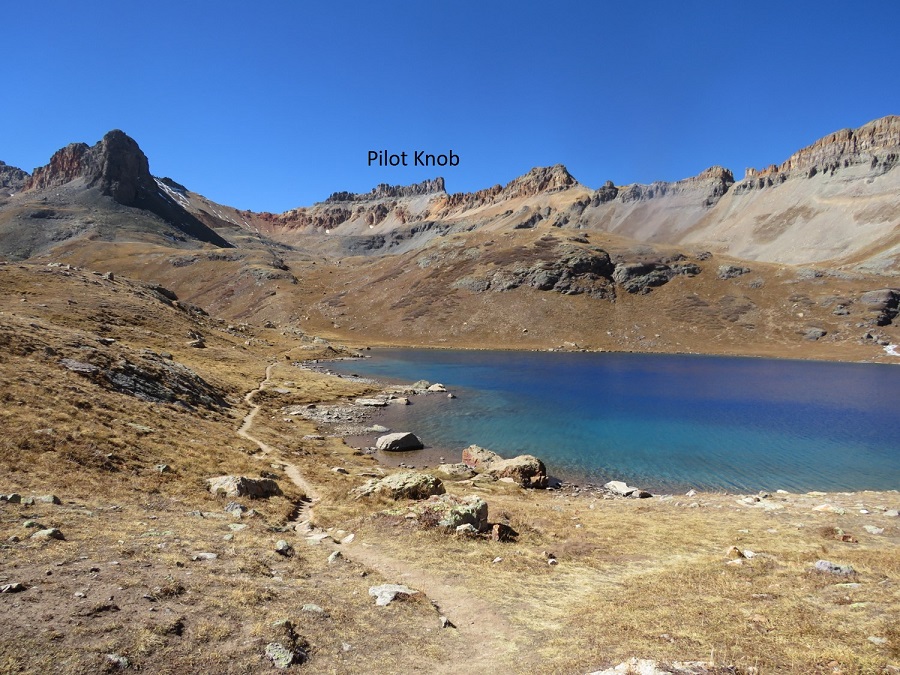
Once in the Ice Lakes Basin the trails get kind of goofy. I skirted Ice Lake to the south and continued heading west.
After Ice Lake there’s a little stream to cross, and then the trail ends and the class 2 section/route finding begins.
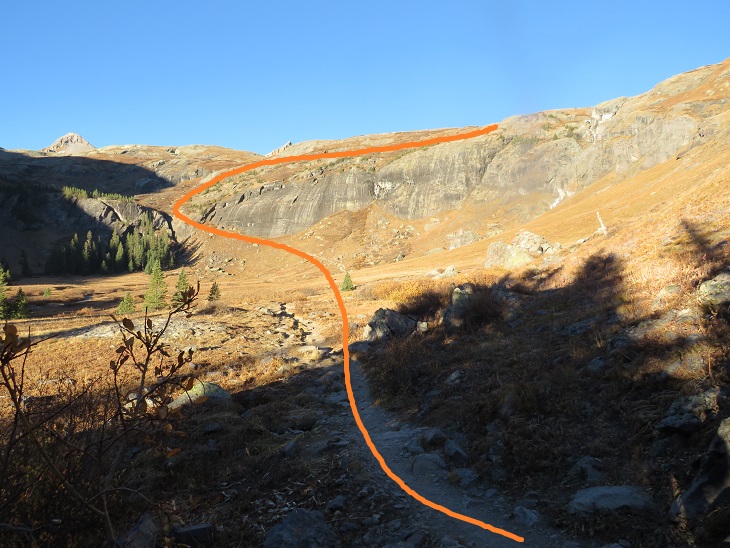
Here’s an overall view of the route I took up to Pilot Knob
And step by step (sorry, I couldn’t resist; I thought this was cool)
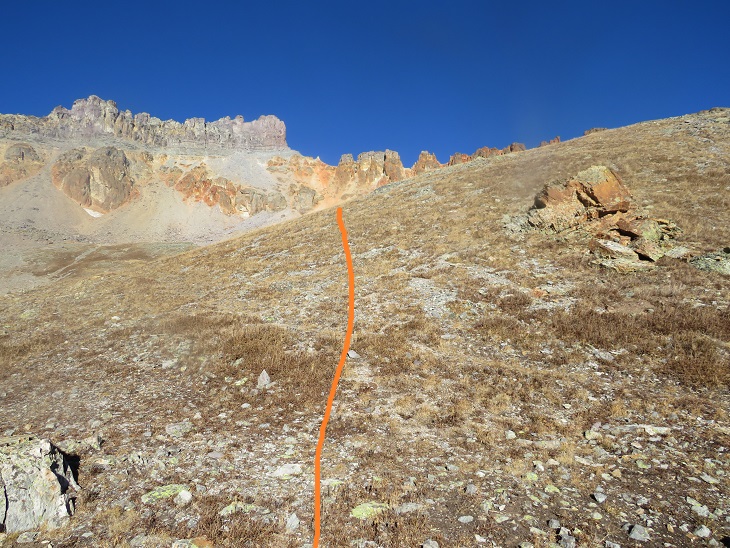
I followed the drainage west up the basin
And once I reached the basin I turned right and headed for the gully that would lead me to the ridge
There are a lot of ways to ascend this gully, none of them fun. The rock here is loose, the scree runs out below you, and there aren’t many handholds. Basically, pick your line and head for the ridge. Microspikes and poles help. I took the solid line up, the dotted line down, but there are tons of options here
Once on the ridge I continued to skirt the north side of Pilot Knob. There was a little bit of snow here, but nothing that required traction. Here the wind picked up, and in the shadows it got really cold.
I rounded the corner and picked up a faint trail in the scree that continued to skirt the mountain. You basically want to stay high here. The scree here is loose, but much, much more table than the scree when coming from the opposite direction (Golden Horn).
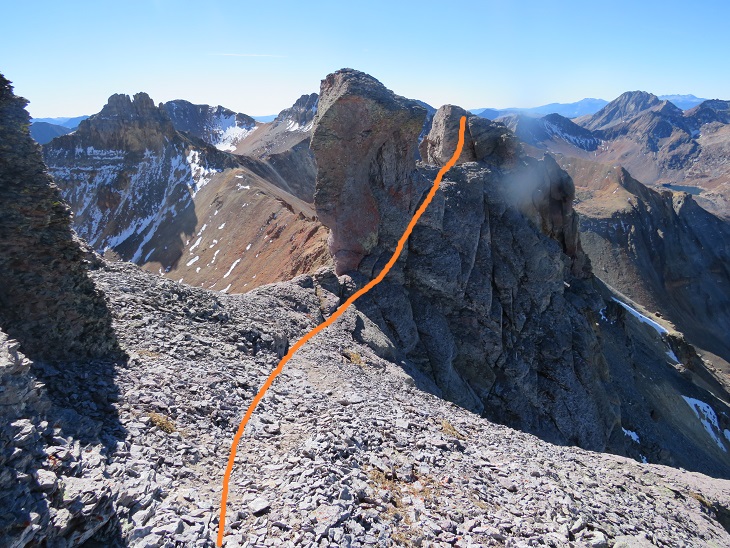
By sticking high here I came upon cairns that led me to the access gully. This gully is extremely well cairned and easy to follow. The climbing is class 3, bordering on class 4, and when you see a cairn and think to yourself “There’s no way I go over that”, you do. Stick to the cairned route here; it goes.
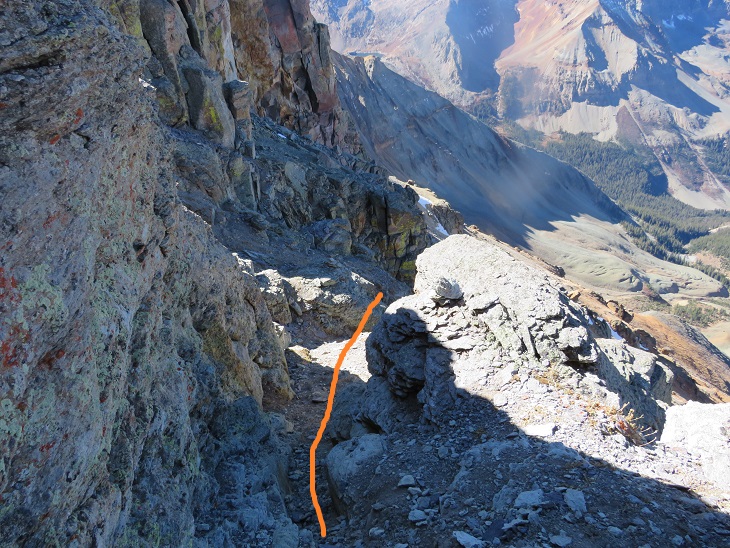
Here are some highlights: I followed the gully northeast to the ridge
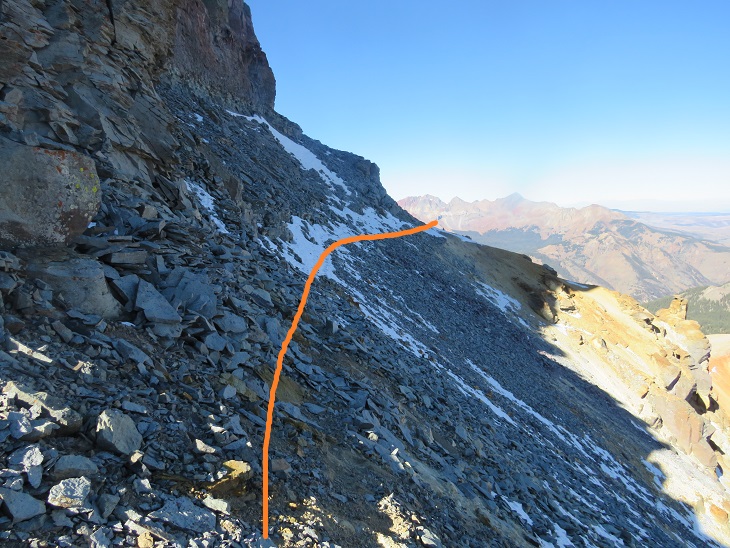
Once on the ridge the scrambling got interesting. This is class 4 and there’s exposure, but luckily the rock is grippy. Here’s the exact route I took, staying to the left of the ridge
The last bit to the summit was underwhelming, and very, very windy. And cold. And windy.
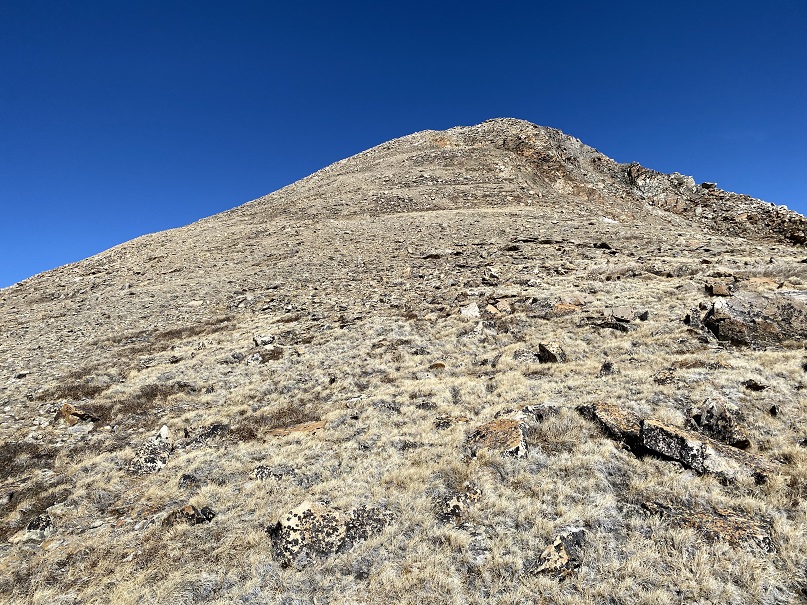
I summited Pilot Knob at 11am
Pilot Knob:
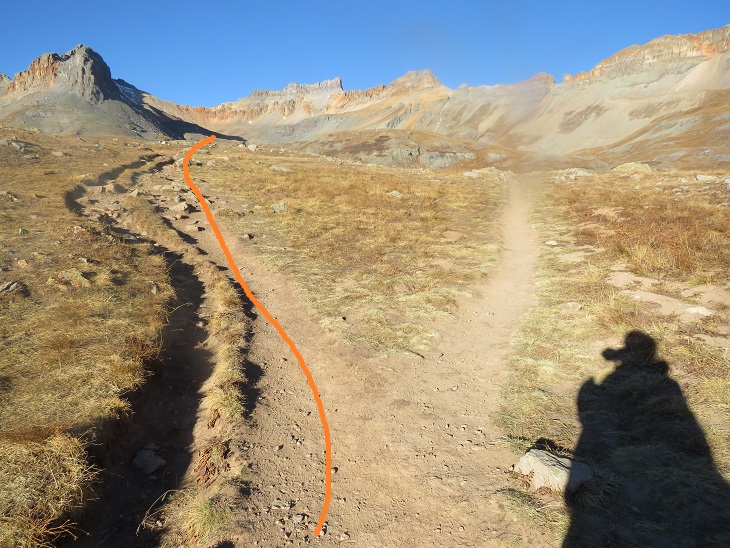
Here’s a look down at the way I came in through Ice Lakes Basin
Time to head back. Here’s an overall view of the ridge to the gully
And a step by step view back down the gully
Once down the gully, here’s the route back to the access gully
The access gully was much more fun do descend than ascend. I put on my microspikes and literally scree-surfed the entire way down, stopping a few times when the rubble became dangerously fast.
Once at the bottom of the gully I followed the same route out
Past Ice Lake and down into the lower basin.
And back down to the trailhead
I made it back to my truck at 2pm, making this a 12.6 mile hike with 4162’ of elevation gain in 7 hours. On to the next trailhead!
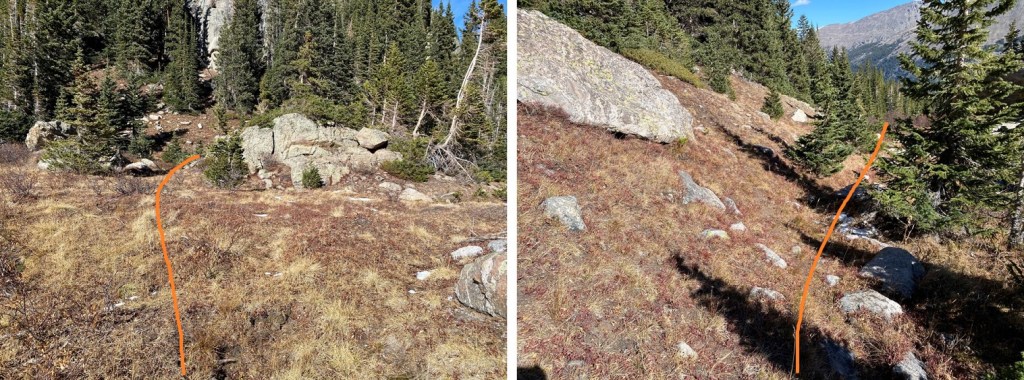
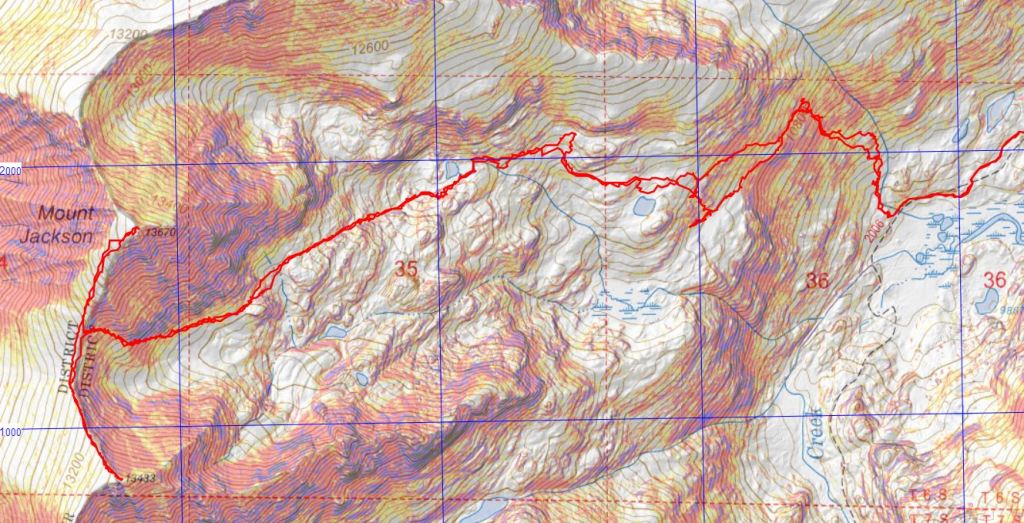
I’m not entirely sure why I chose this approach, but I wouldn’t recommend it; the route finding below treeline is arduous. In any event, if you still want to do this hike, this is how I climbed Mt Jackson and 13433.
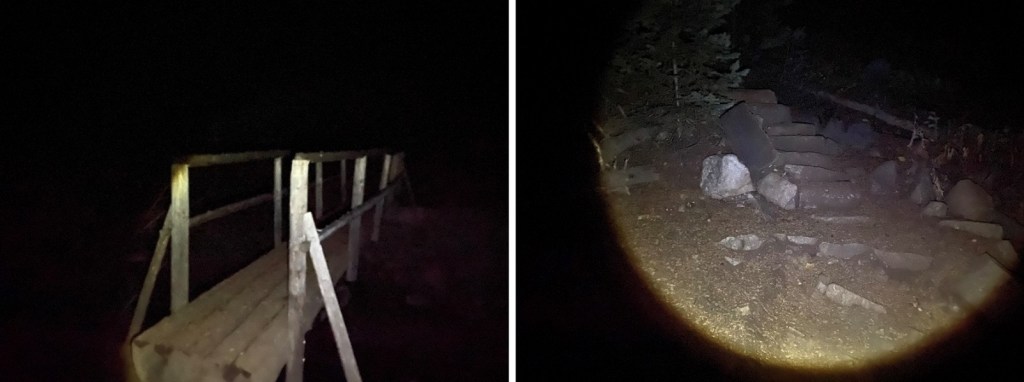
I arrived at the Cross Creek Trailhead and was the only vehicle in the lot. It’s a poorly designed lot that doesn’t offer much room but can fit 5-6 cars if everyone parks nicely. It looks more like a horse corral than a parking lot, and there’s not a lot of room to turn a vehicle around. There is parking across the way as well. I arrived and left in the dark, so unfortunately, no pictures of the trailhead. I was on the trail at 3:45am. Cross Creek trail starts behind obvious signage at the west end of the parking area.
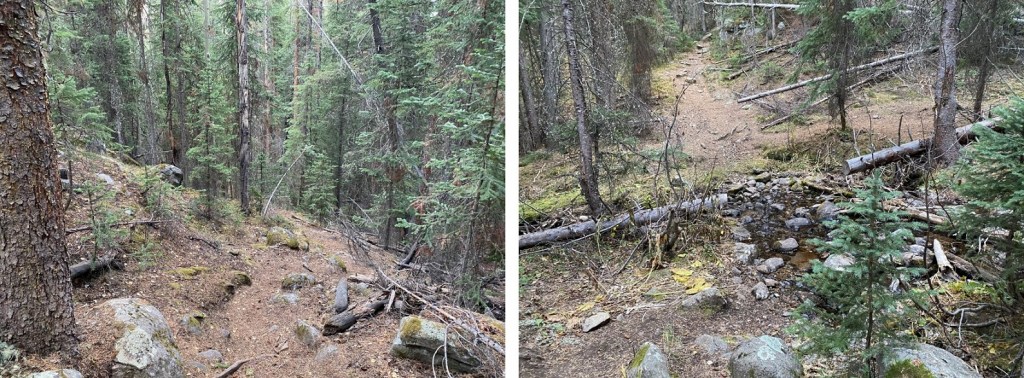
This is an easy to follow class 1 trail. There’s a new bridge to cross over Cross Creek, and some nice stairs to ascend.
After hiking for 3 miles I came across some avalanche debris on the trail. As I was navigating at night I stepped over a log, and instead of hitting solid ground my right foot sank in watery mud up to my thigh.
I quickly extricated myself and did a quick assessment. My shoe and pants were soaking wet, cold, and covered in a layer of mud. It was only around 5am, 30 degrees outside, and I had a serious decision to make. Did I turn around now or continue hiking? I was worried I’d eventually have a Raynaud’s attack, especially if I didn’t dry out before making it to treeline (where it would be windy: I could already hear trees snapping all around me in the dark). I cursed myself for not bringing at least an extra pair of socks. In the end I decided the only way to dry off would be to keep moving, and I could do that either by heading back or forwards, so I continued on. I followed this class 1 trail for a total of about 8.5 miles as it paralleled Cross Creek, staying straight at the Grouse Mountain Trail Junction (but noting where it was in case I wanted to make this a loop).
After hiking for 8.5 miles I crossed a stream and the real route finding began
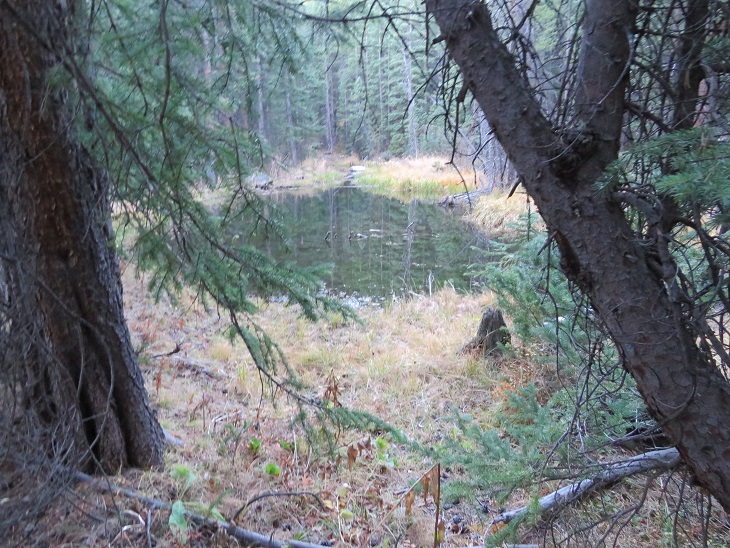
After crossing the stream, I turned right and headed straight up the mountainside, passing a small pond to my left. There is no trail here, and the bushwhacking is intense. I passed several sets of bear tracks while route finding here.
I’d gained 800’ of elevation in 1 mile heading northwest when I came upon a trail! Woot! This was a pleasant surprise. It looked like a game trail, but every now and then I’d see a cairn.
I followed this trail southwest for just over half a mile, until it suddenly ended.
There was a cairn here, but it didn’t seem to lead anywhere. I went about 20 yards in every pertinent direction and couldn’t locate a trail. The snow on the ground wasn’t helping. I got out my map and realized I’d gone too far south, so I turned right and headed north up this drainage.
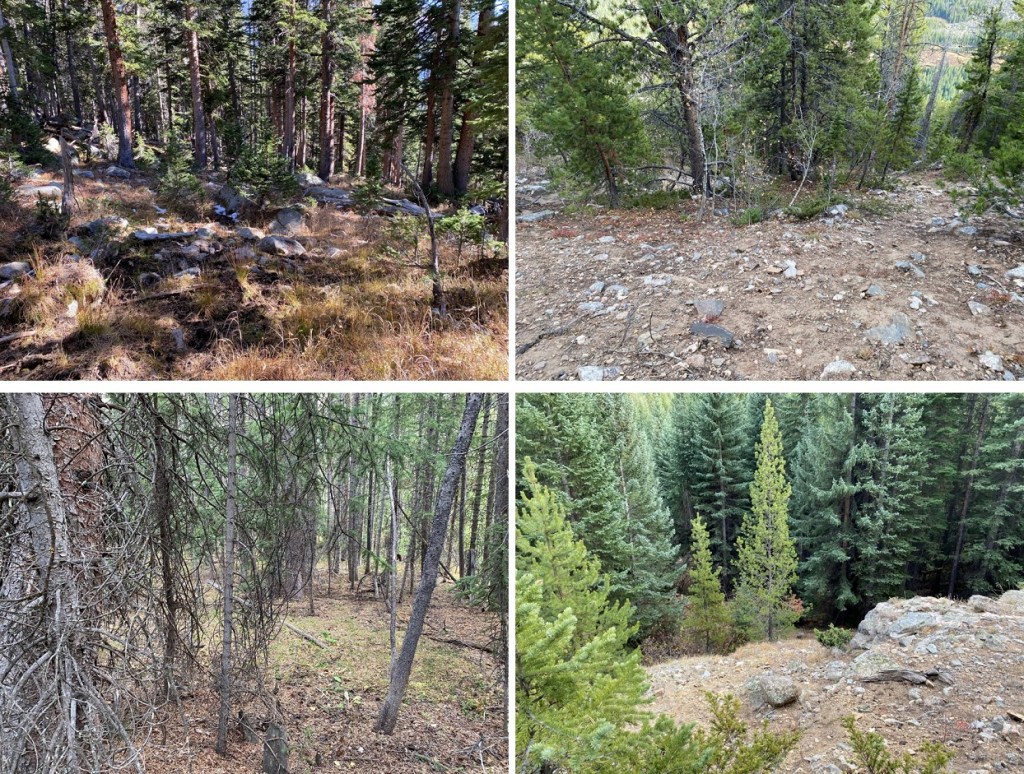
At the top of the drainage I headed west. You can see how much fun route finding was here as well. I kept wishing for treeline so I’d have a visual of my route. On a positive note, my shoes and pants had dried out, so while I was still dirty, at least I was dry.
I also passed more bear tracks here. These tracks had a different gait than the ones I’d encountered before, so I figured there were multiple bears in the area.
Hiking west eventually led me to a marshy area, and here I was finally able to get a good view of where I was headed
I skirted the marshy area to the south and then headed southwest. It’s important to head up over the rocky area and not stay low because going low will lead you to a large rock wall bordering a pond with no way to cross. Here’s an overall view of the route
And step by step up the (first) gully
And second and third gullies. This was really just one long gully that leveled out at times and started again. The snow was bothersome because it was sugary and every once in a while, I’d posthole. It did make me roll my eyes at being worried my feet would be wet from the swampy water: the snow had made sure of it.
At the top of this long gully I continued southwest
Until I hit another (you guessed it) gully. It was here the battery in my camera died and I had to switch to using my cellphone (I’m still figuring out my new camera, and the battery seemed to die rather quickly).
Here I got my first good look at the upper basin. There are several routes I could have taken from here. I’d heard there was a path up the north side of 13433, but I wanted to gain the saddle between UN 13433 and Mt Jackson. I figured my best shot for today would be to stay high and hugging the south side of Mt Jackson. Here’s my overall route
And step by step.
The ground here was surprisingly stable, I just had to watch out for rolling rocks every now and then
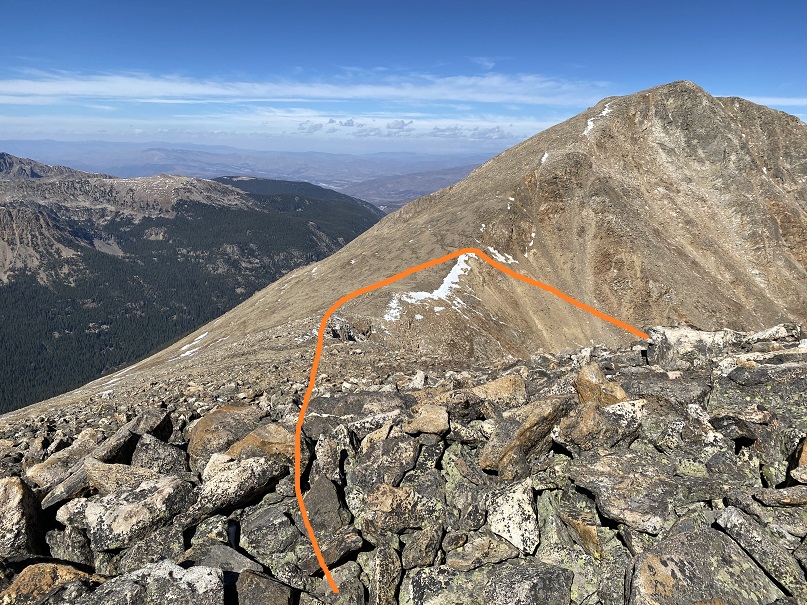
Here’s how I gained the saddle
Up until this point I wasn’t sure which peak I was going to climb first. I had the possibility of making this a loop (coming back down via the Grouse Mountain trail), but once I got to the ridge I was able to feel the wind I’d been hearing all morning. Winds were predicted at 20-25mph, sustained, with 45mph gusts. They were at least that. And brutally cold. I wasn’t sure I was going to be able to make one mountain today, let alone three. I got out my balaclava and heavy-duty winter gloves, turned right, and headed north to the summit of Mt Jackson. This was a fairly easy ridge hike.
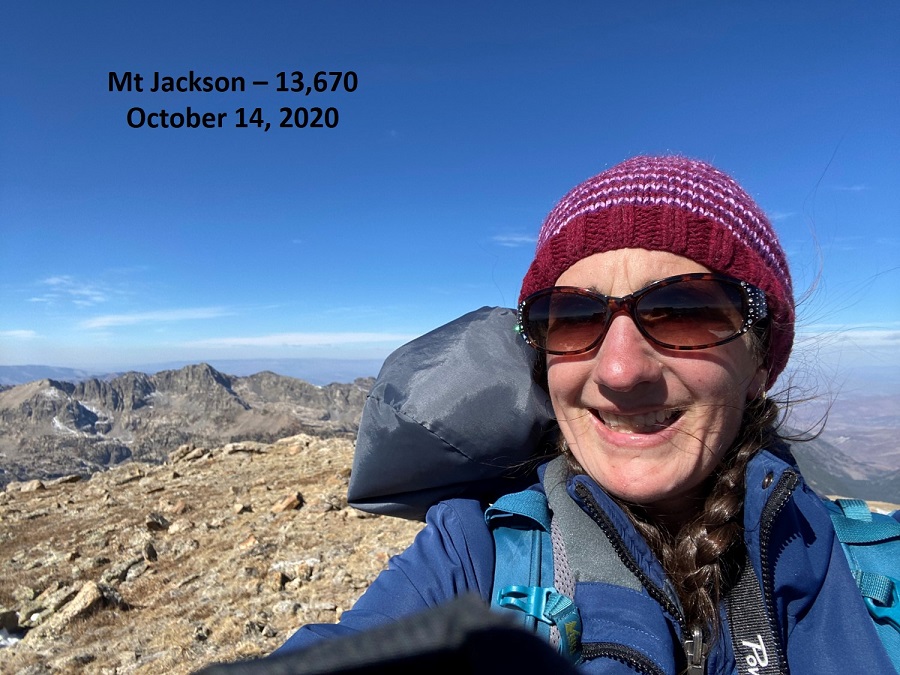
I summited Mt Jackson at noon. The summit was relatively flat.
Mt Jackson:
The wind was blowing so hard all the straps on my gear were slapping me in the face and several times I had snot fly into my sunglasses. Ah, to be a mountaineer! I turned and headed back the way I came, bracing myself against the wind as I made my way towards the Mt Jackson/13433 saddle.
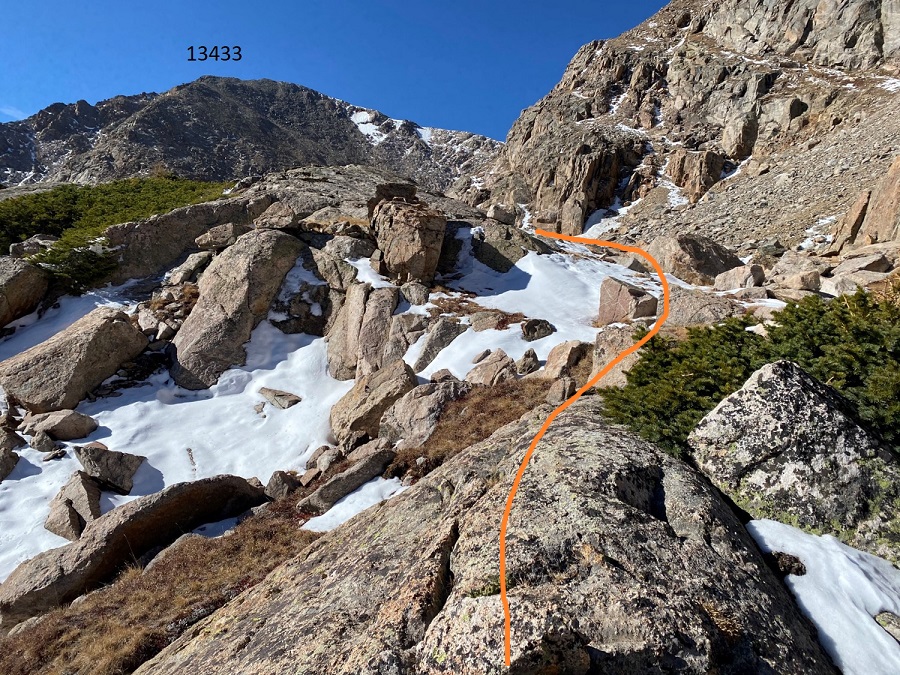
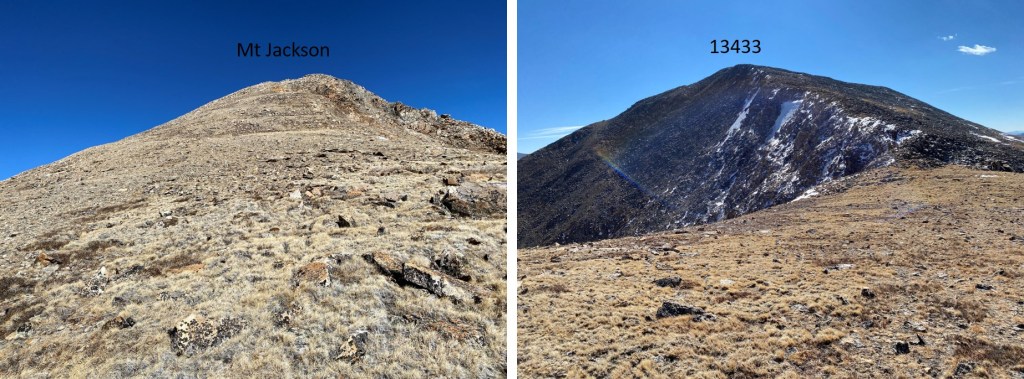
From the saddle here’s looking back at Mt Jackson and up at 13433
It was a short and simple ridge hike to the summit of 13433. I summited at 1pm.
UN 13433:
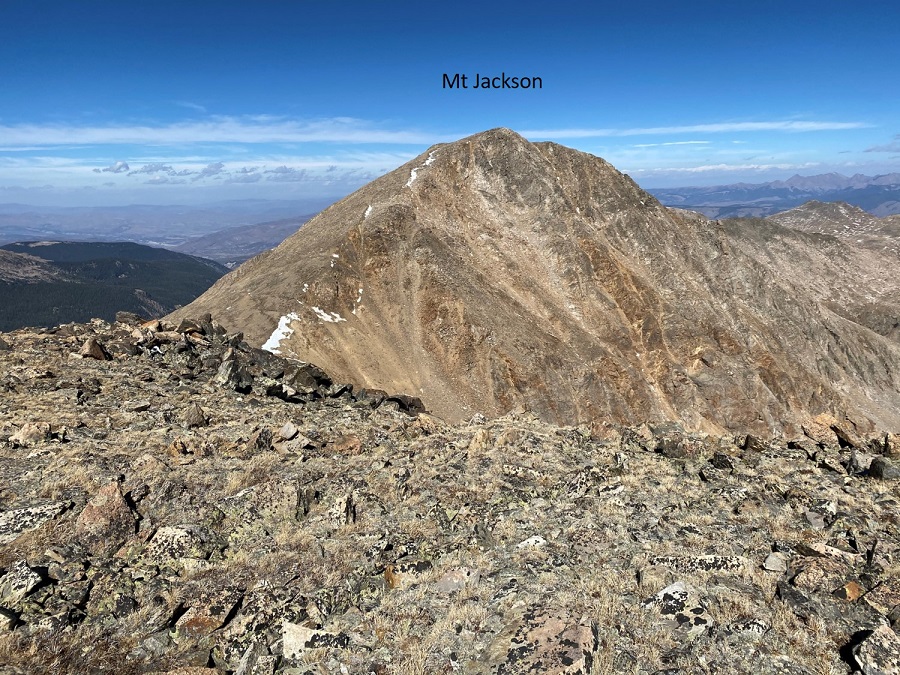
Here’s a view of Mt Jackson from 13433
At this point I couldn’t feel my fingers, so I quickly retraced my steps back to the saddle. The wind refused to let up, and was blowing loudly long after I left the ridge. I saw two crows playing with the currents above the saddle.
Here’s my route back down into the basin
And down the gullies
Here’s how I ascended the rock to avoid the pond to my left
And headed back out of the marshy area
Let the route finding begin again. I tried to re-trace my steps, but it just wasn’t happening. I kept looking for my original route in, but finally realized that wasn’t going to happen. I knew Cross Creek Trail was below me, and as long as I headed down and east I’d eventually run into it. So I headed east.
After wandering down and east and down and east I connected up with Cross Creek Trail and followed it back to the trailhead. I heard trees snapping in the wind the entire hike back. They’d make a loud, booming sound I initially thought was rockfall, except there were no reverberations from rockslides, just a loud crack and boom!
I got back to my truck at 8pm, making this a 28.33 mile hike with 6674’ of elevation gain in 16 hours, 15 minutes.
RT Length: 49.5 Miles (CalTopo) 42.61 Miles (Strava)
Elevation Gain: 9166’ (CalTopo) 13428’ (Strava)
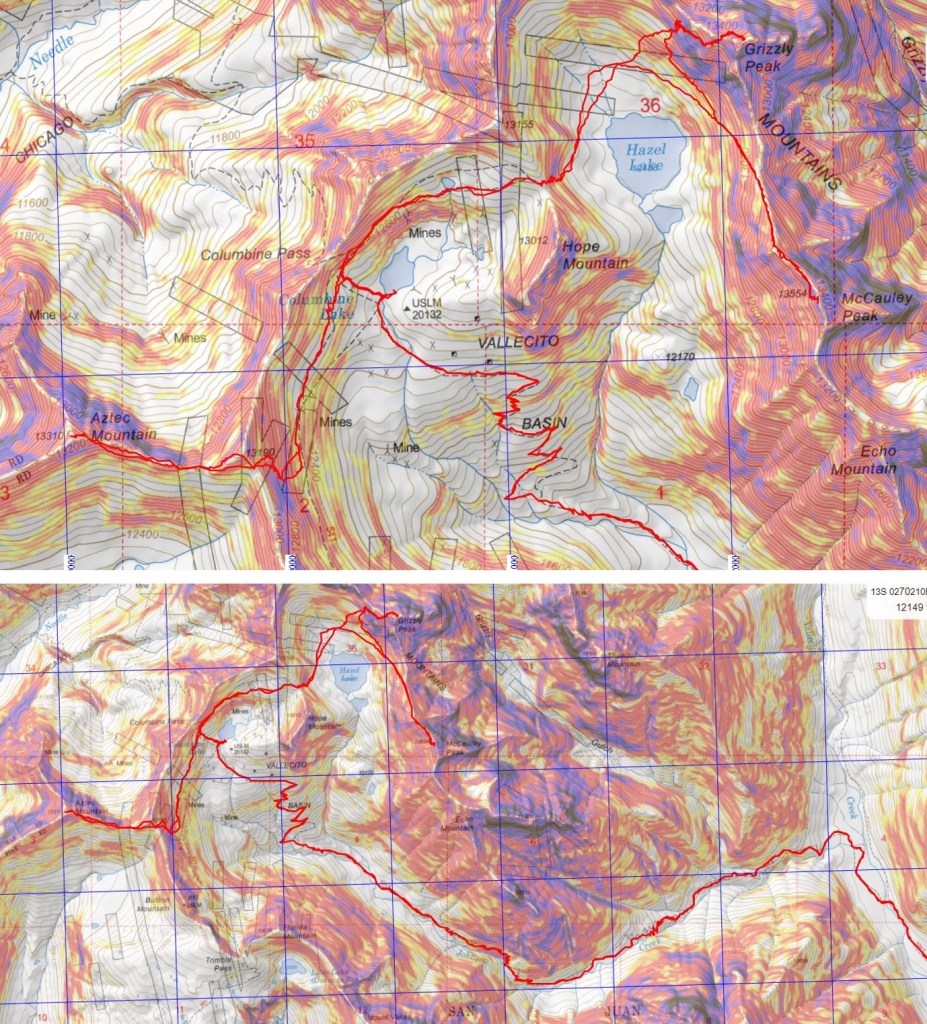
Day 1: Approach, Columbine Lake, Aztec Mountain
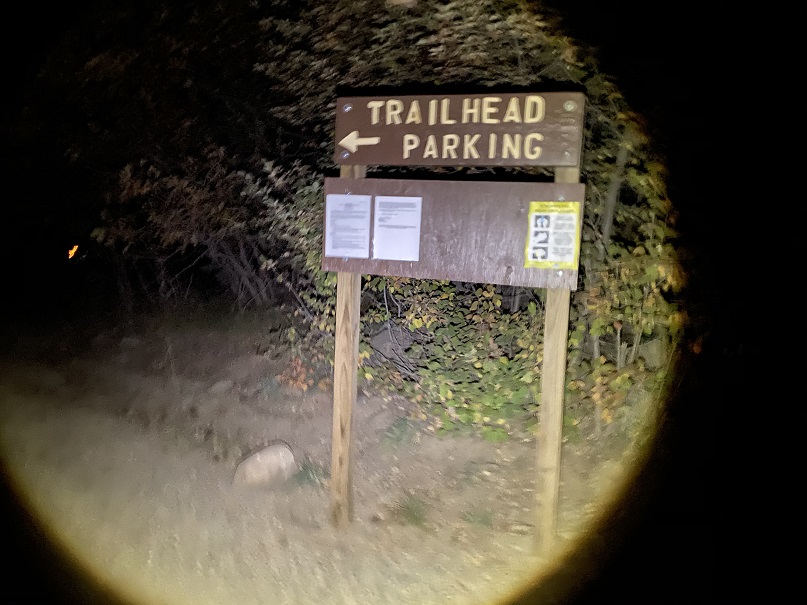
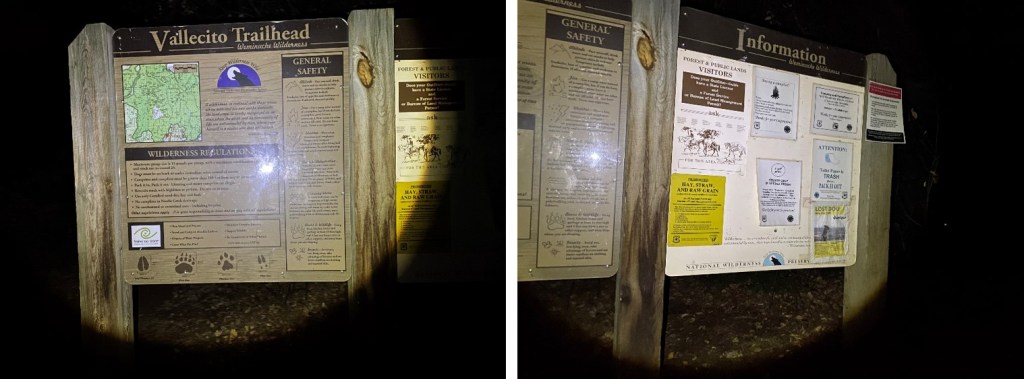
After quite a long drive I made it to the trailhead around 9pm. Just before Vallecito campground there’s a sign indicating trailhead parking is to the left. I parked, and was surprised I had cell service. There were several horse trailers in the parking area, and a few vehicles.
I tried to get some sleep, but my nap earlier in the day had lasted longer than it was supposed to (my alarm didn’t go off, and 30 minutes turned into 3 hours). So, I read a bit, made a few phone calls, and got to bed later than anticipated. I was up and on the trail at 2:30am. The trail starts at the northeast corner of the campground. I started and ended the hike in the dark. Also, I had my new camera with me, and was interested in how the pictures from today would turn out.
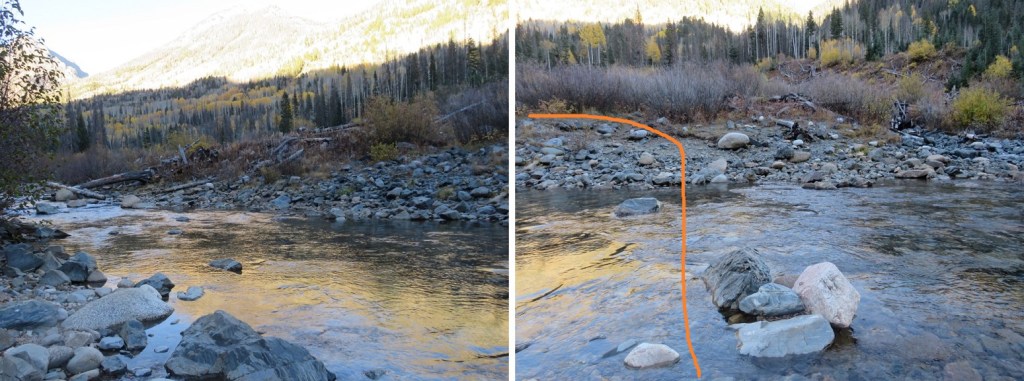
This is a class 1 trail that goes north without any junctions, so it’s difficult to get lost/off track. I crossed the first two bridges (there are actually 3 if you consider the one that leads you out of the campground but doesn’t cross Vallecito Creek), but made it to the third bridge while it was still dark. I couldn’t see across the river, and I didn’t want to cross without a visual, so I laid out my sleeping pad and took a nap for 30 minutes until it got light enough for me to see, then I put on my sandals and crossed the river. I’m glad I waited until daylight: crossing wasn’t too difficult, the water only went up to my knees, but there were pockets/pools where I could have sunk in the water much, much further. My advice is to cross this creek (river?) in the daylight.
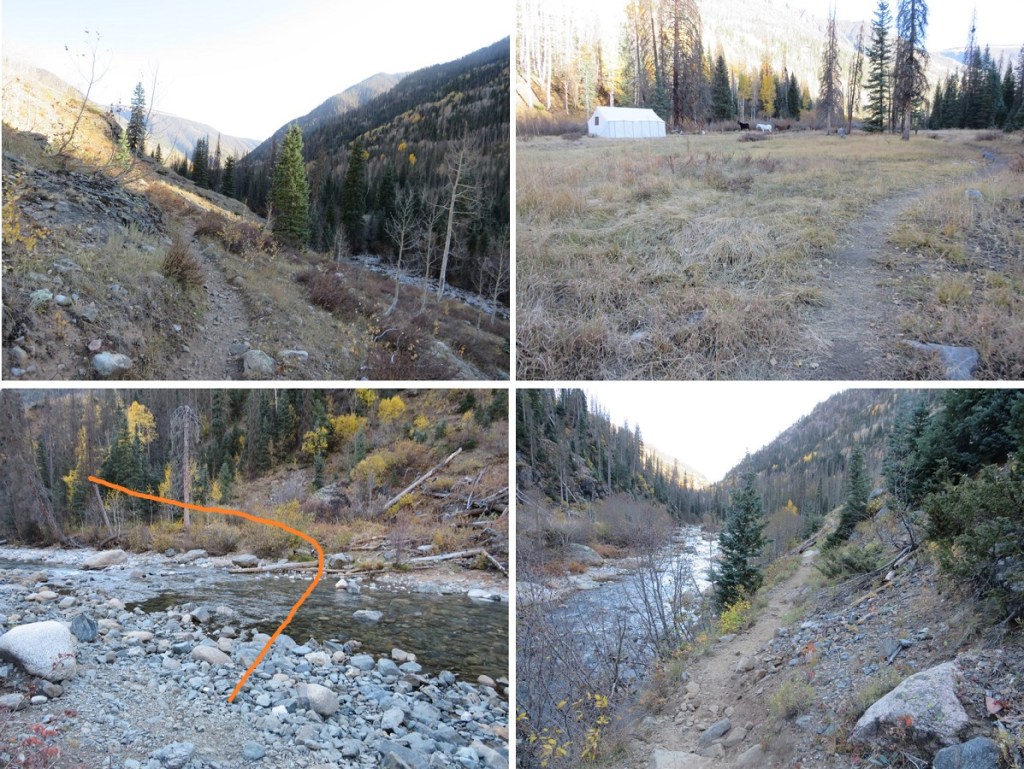
I continued hiking along the class 1 trail, but the stream crossing was causing me to have a Raynaud’s attack. Surprisingly, it was in my hands and not my feet. I kept pumping my fingers and balling my hands into fists, willing them to warm up and stop burning (yes, I realize that was a juxtaposition). My fingers burned for another 2 hours. I should have stopped and warmed up some water to revive them, but instead I continued hiking until I came to the Vallecito/Johnson Creek Junction. I made it to the junction after hiking for 10.3 miles, and continued left (west) towards Johnson Creek
This led me over the 4th bridge, where I continued heading west, up into Vallecito Basin.
Just as I entered the Vallecito Basin I came across a moose. She was just as surprised to see me as I was her. She was the size of a horse, adorable, and reminded me of a puppy dog, but I gave her space. After the initial inquisitive look she gave me she pranced off to the trees and watched me timidly as I hiked away.
I continued on, up a thousand or so switchbacks, through the Vallecito basin to Columbine Lake.
It took me 18.5 miles to make it to Columbine Lake. I made it there at 1pm and decided to sit and take a break for a while. It was here I realized my biggest mistake of the weekend: I didn’t have any chapstik. My lips would be burning until I made it back to the trailhead (and especially after each shot of whiskey). I snacked on a packet of tuna, filtered some water, and considered my options. I’d wanted to hike Grizzly and McCauley today, but I didn’t think I had enough time to make it back before the sun went down behind the mountains. I need to be in my bivy before the sun sets, so this was a serious concern for me. But I wasn’t tired yet. I decided instead to leave my large pack here, take just what I needed in a small pack, and summit Aztec Mountain this afternoon instead.
Here’s an overall view of the route I took to the ridge to Aztec Mountain, as seen from Hope Pass the next day
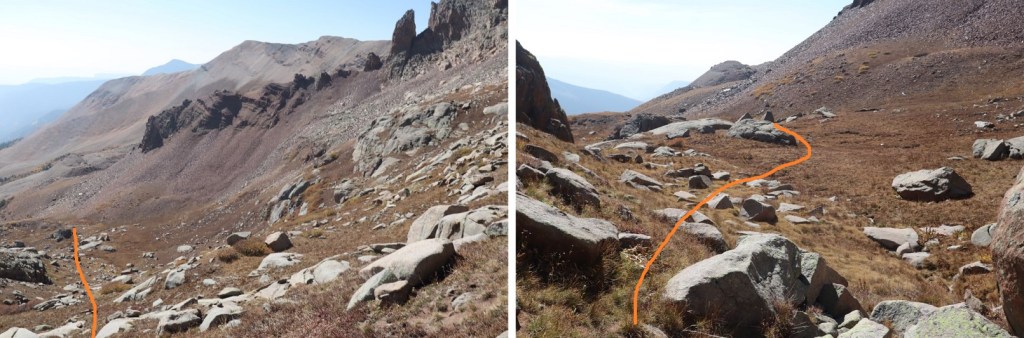
From Columbine Lake I turned and followed the trail northwest towards Columbine Pass, then turned left when it hit trail 541 (no signage, and in fact I had to wing it for a bit as the trail didn’t quite go through, but it was obvious from below where the trail was and I just aimed for it) and headed south.
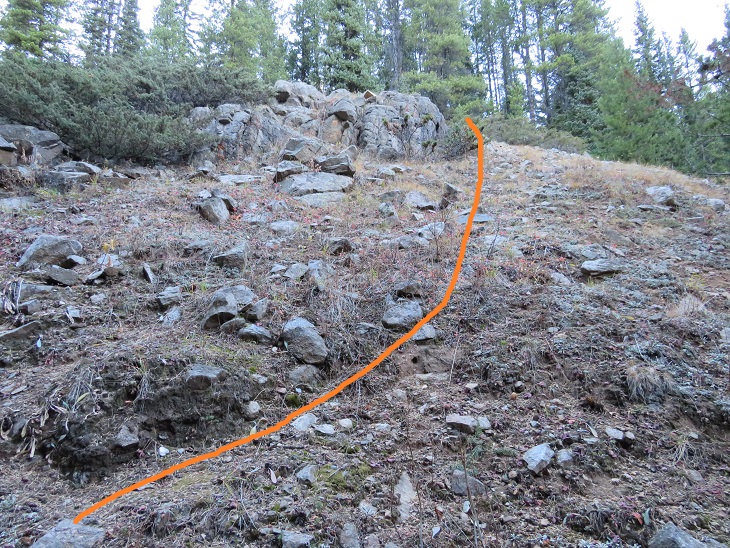
I followed trail 541 for .7 miles, and then left the trail and aimed for this grassy area. My goal was to gain the ridge, and this seemed the best place to do so, as I could see a path on tundra/scree up to the ridge. After hiking up and down this is the route I’d recommend to ascend the ridge.
The terrain here is steep, and it was slow going, but I was able to ascend the ridge
Once on the ridge I was at a bit of a saddle. There is no need to head right (north) to gain this point, as it’s not ranked and you’ll just need to head back down anyway. Instead, skirt the point by heading west.
This will bring you to the ridge that will lead you to Aztec Mountain. This ridge doesn’t ‘go’. Staying low is the better option here. Here’s an overview of the path you’ll want to take
Staying low keeps this class 2. The final gully is easy to access, and the final scramble to the summit is straightforward
I summited Aztec Mountain at 3:15pm
Aztec Mountain:
Here are some pictures of the way back down to Columbine Lake
I was chasing the sun, trying to make it to the lake before the shadow of the mountain made it there and cooled everything down. Between the shadow and I it was pretty much a tie, so I gathered my gear and hiked a bit further into the sunshine and set up camp for the night.
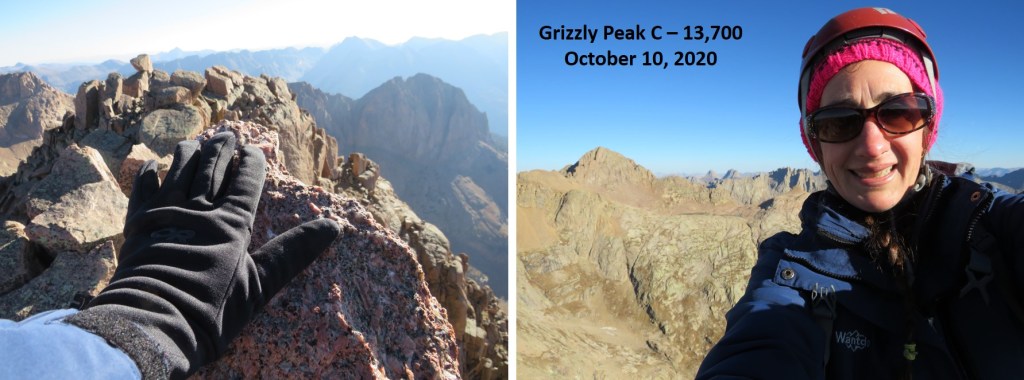
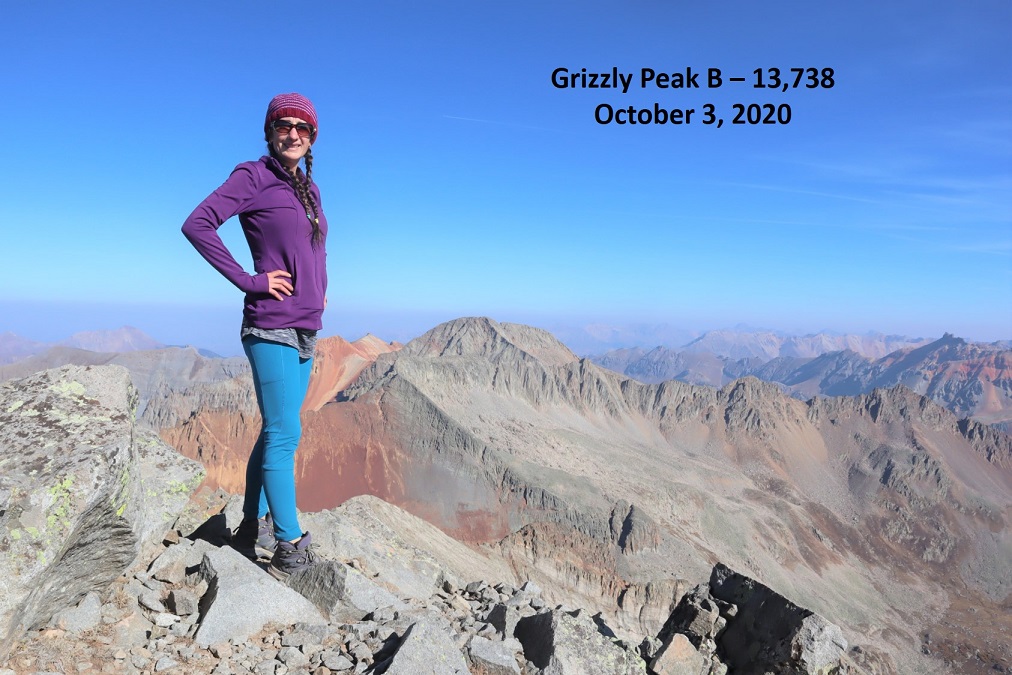
I made it back to Columbine Lake at 5:15pm, satisfied with my choice to hike Aztec Mountain today instead of Grizzly and McCauley. I was spending the night at 12,300’, with a great view of Columbine Lake. I went to dry out my feet but my sandals were still wet from this morning (I’d forgotten to take them out and place them in the sun when I left for Aztec). I ate dinner, filtered some water, heated the water in my jetboil and filled my Nalgene with warm water for the night. I looked around for my extra pair of socks but couldn’t find them, so I guess my feet weren’t going to dry out tonight. I placed the water bottle at my feet and looked at my tracker: it said I’d done 20 miles today. Not bad. I snuggled up in my sleeping bag and bivy and looked over at Grizzly Peak. I thought about the approach tomorrow, jotted some notes down in my journal, put on all the clothing I had with me, and called it an early night.
It was a long night. A long, cold night. I was warm in my bivy and sleeping bag. Halfway through the night I felt something sniffing my ear. Seriously. It felt like a dogs’ muzzle and startled me awake. From inside my bivy I flailed my arm at it, unzipped my bivy, and looked around. There was no moon but the sky was bright with stars. I could see the mountains and the lake and rocks and tundra, but no animal. It hadn’t made a noise when I’d touched it, but I’m guessing it was a fox or a coyote with an ear fetish. The air is thin at 12,000’. A few hours later I woke up, noticing breathing was more difficult than usual. To breathe better I quickly opened my bivy to get in a few gulps of air. Not only did this not help with my breathing, but when I put the bivy back over my head the condensation from my breath had turned to ice. Wonderful. Note to self: don’t unzip the bivy.
Day 2: Grizzly Peak C, McCauley Peak, Descent
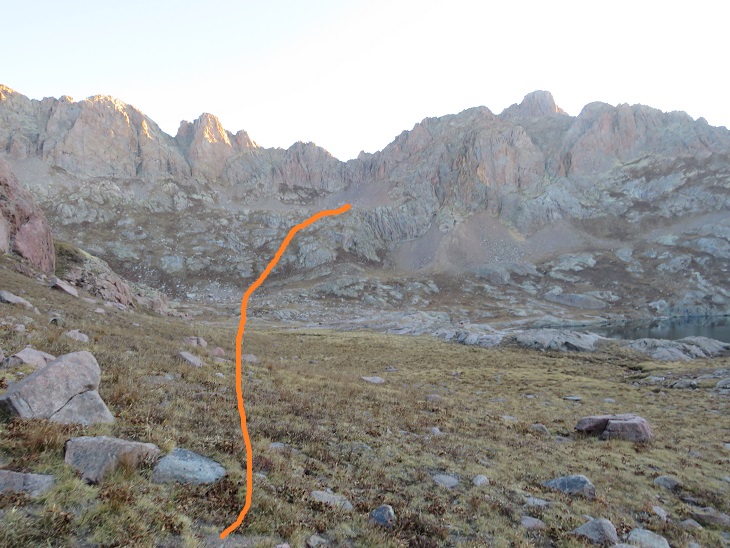
The morning couldn’t come soon enough. Just before first light I re-heated the water in my water bottle, packed my gear and was on the trail with just the essentials, leaving my big pack at the lake. I took the same trail I’d taken to summit Aztec, but at the junction with trail 541 I went right and followed the trail towards Hope Pass. Here’s an overall view of the route from yesterday’s hike
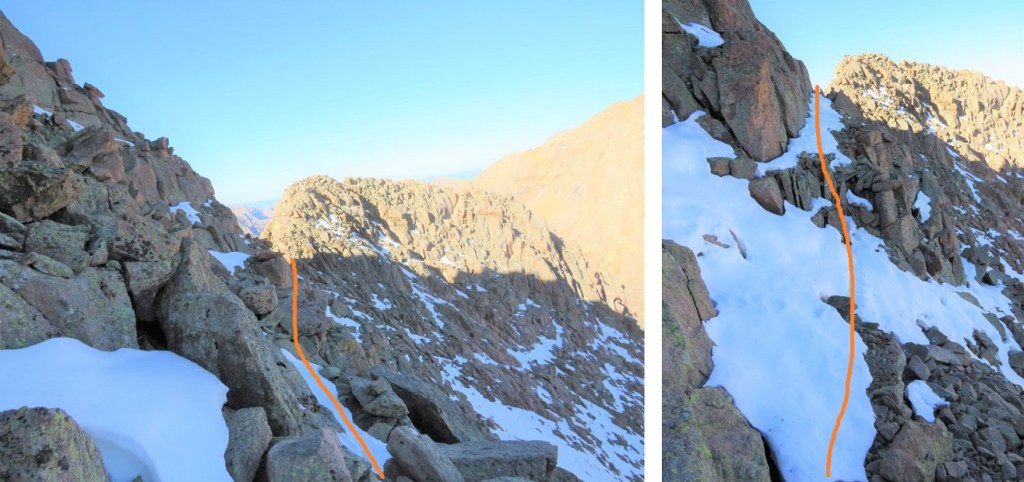
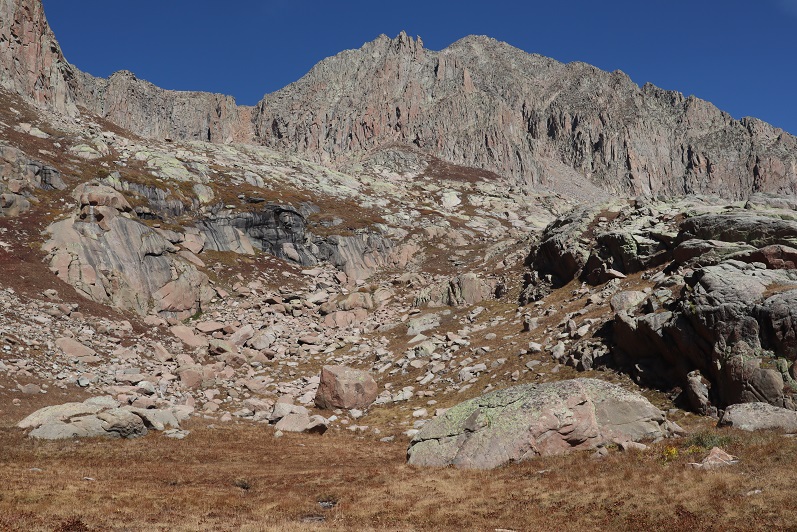
This part of the hike was on a nice trail, and when there wasn’t a trail there were great cairns. From Hope Pass I got a good look at Grizzly Peak C, and the route I wanted to take to gain the ridge. Here’s the overall route I took, aiming for a gully and rock rib that ascends the mountain
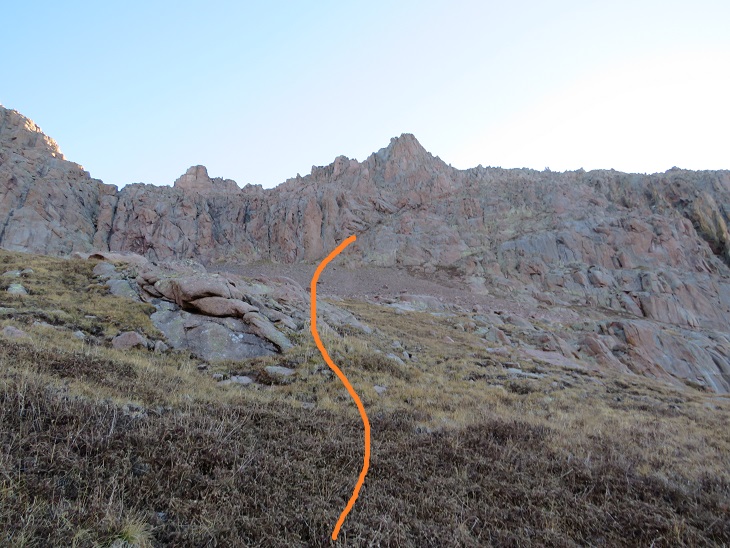
I didn’t descend to Hazel Lake, but instead stayed high, aiming for the grassy slopes below Grizzly’s ridge. There are several ways to do this
From there I aimed for the obvious gully/notch/access point (not sure what to call this?)
This gully/notch/rib is easy to follow to the ridge. Stick close to the wall and follow it southeast as it hugs the mountainside. It starts out as class 3 but after the initial solid gully it becomes class 2. I was pleasantly surprised to find cairns here.
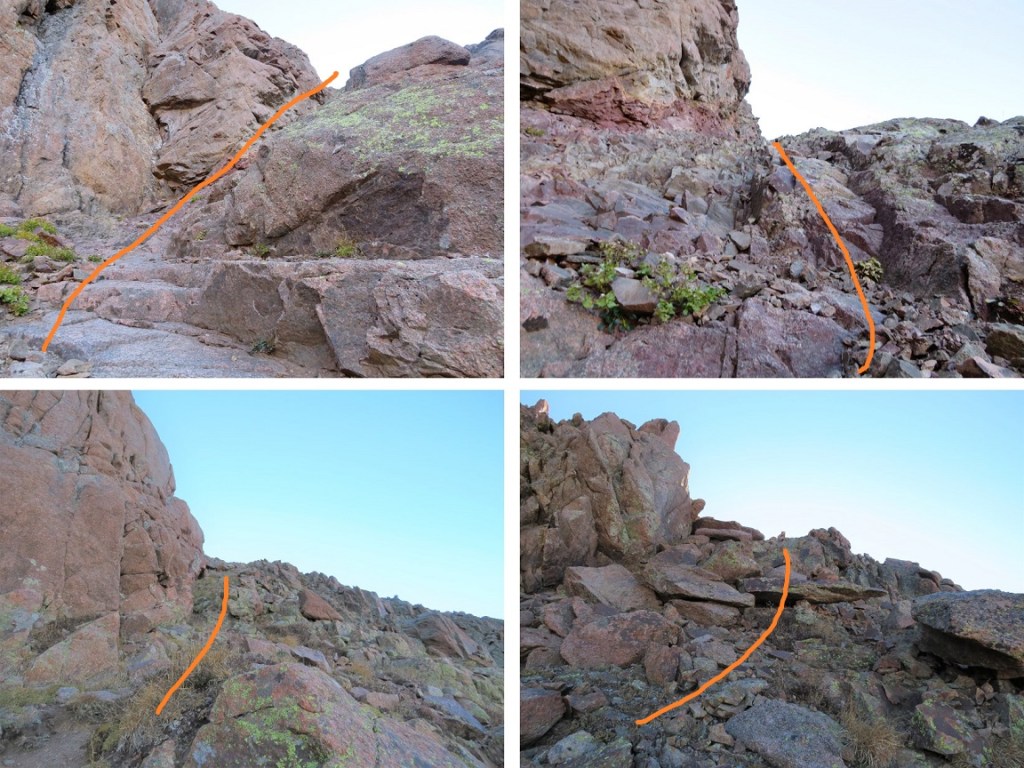
Here’s the last bit to gain the ridge. Aim for the notch (there are cairns here too). The last part of this is class 3.
I went through the notch and found snow on the other side. This wasn’t unexpected, as I’ve spent the past 3 weekends in this area and knew north facing terrain was holding snow. What was unexpected was the amount of snow, and how it all lined the trail. It ranged from non-existent to 3 foot drifts, and from bulletproof to sugary. What’s important for the reader to know is there are multiple ways to summit Grizzly Peak, and tons of cairns to prove it, so I was able to get creative these last 250’ or so to the summit. I rock hopped where necessary, kicked in steps, and created trenches to get to the summit, always heading up and east. Here are some highlights.
The last bit to the summit was luckily snow-free, and class 3-4 (the chimney was class 4)
As I made it to the summit I wasn’t sure if the true summit was left or right. I went right and luckily chose correctly (there was a summit register beneath this point).
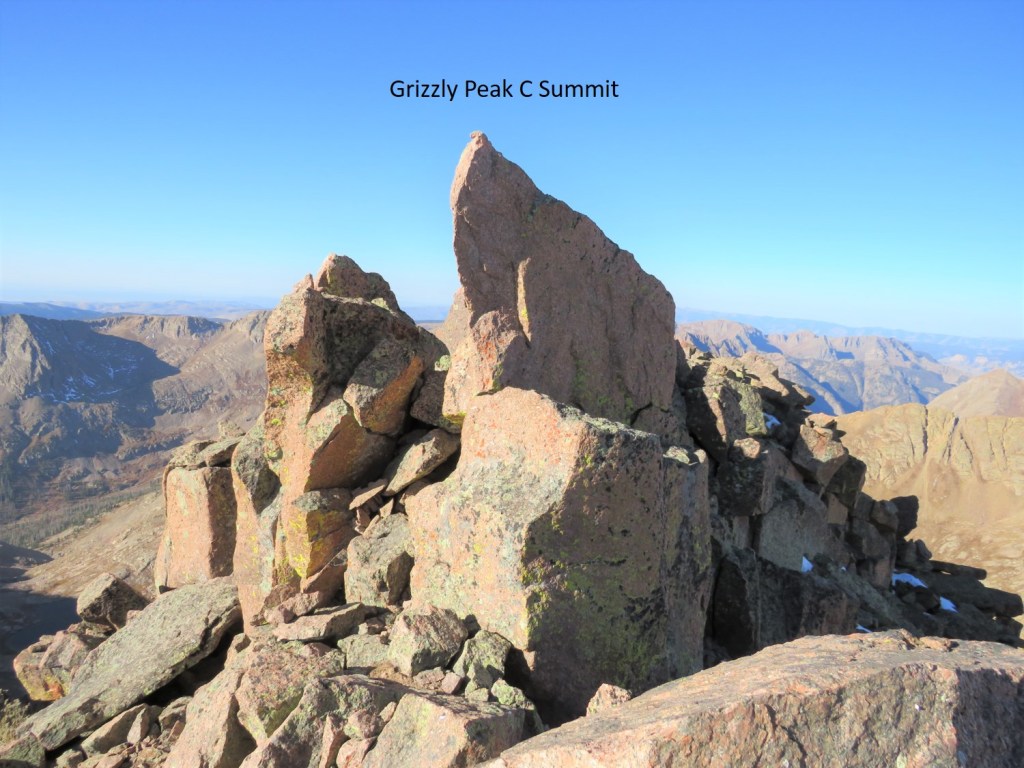
I summited Grizzly Peak at 9:15am. I know some of you are wondering, did I did I sit at the top of the summit point? The answer is no. The point was too pointy to sit directly on top of, but I did climb up the summit boulder, sat on it about a foot from the point and touched the top, so I’m calling it a summit. You can sit wherever you’d like. I also didn’t take the video from the point, as I do a 360 degree video and wasn’t about to attempt turning in a circle while standing on the point.
Grizzly Peak C:
Time to head back down. I down climbed the chimney and headed back, retracing the steps I’d left in the snow to the notch
I made my way back down around the side of the mountain to my entry point
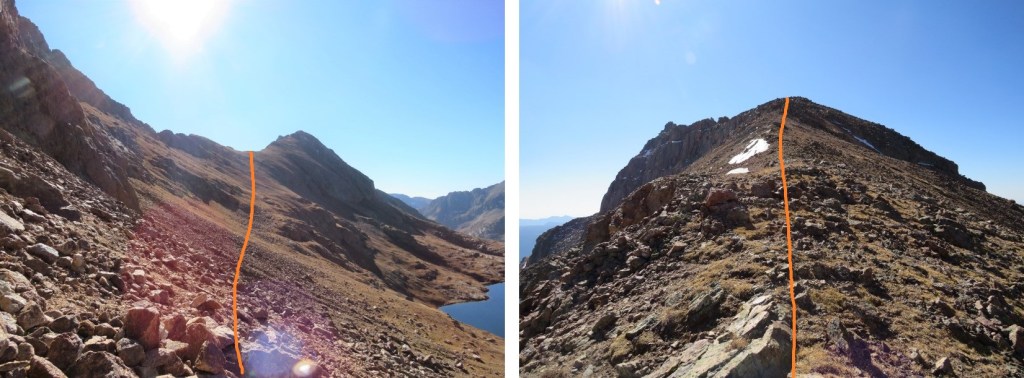
My next objective was McCauley Peak. I could clearly see the line I wanted to take, up the grassy slopes to the Grizzly/McCauley saddle. Staying high didn’t cliff out, but there was one class 4 downclimb required in the area circled in red. If this scares you, you can just go lower initially (the dotted line) and re-gain elevation.
I gained the saddle and headed south along the ridge. This was all class 2
From the top of the ridge I could see the rest of the route. There were cairns here indicating I should go low, but the route was no more than class 3 sticking to the ridge. Here’s an overview of the route I took
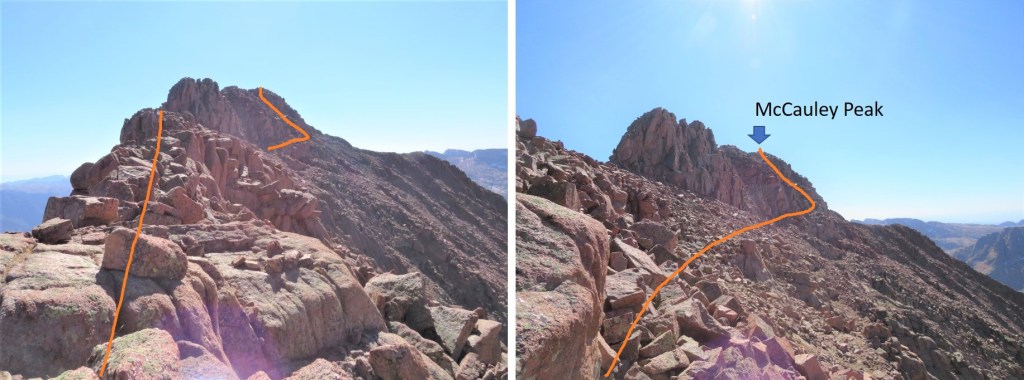
The summit is actually the southernmost point. I rounded the west side of the mountain and found a gully to ascend (note: all gullies here ‘go’).
There was one class 3 move and then it was all class 2 to the summit
I summited McCauley Peak at 11:30am
McCauley Peak:
It was a beautiful day! The predicted winds never materialized, so I stayed a little longer on the summit than usual. Then I headed back down the gully and over the ridge
Here’s the overall route back to Hope Pass
And the route from Hope Pass back down to Columbine Lake (and my stashed gear)
I made it back to my gear at 1:30pm. I mulled it over, and decided instead of sleeping here tonight I was just going to hike as far back as possible, stopping along the way if need be (there are tons of camping spots along this trail). I consolidated my gear and was on my way back down the basin towards those thousands of switchbacks.
Back down to Vallecito Creek and its bridges (or lack thereof). This was much more enjoyable in the daylight. I was able to appreciate the creek and its depth, and even saw dozens of trout swimming in the deeper pools.
I followed the class 1 trail back to the trailhead, following the creek, and passing a hunters’ camp along the way. The mules said ‘hi’ as I trekked by. There were no people to be found.
The whole way back I was prepared to stop and camp, but I was making great time so I just kept going. I mean, I really, really needed that chapstik. About a mile from the trailhead my camera stopped working. It wasn’t until I made it back home I realized the battery had somehow fallen out. This was weird because the door was still closed, and I only realized it was gone when I opened it to take out the flash card. Luckily I have a spare. I made it back to the trailhead at 8pm, and found my extra pair of socks sitting nicely in the passenger seat. I have very different numbers for my stats looking at CalTopo and Strava. I usually go with CalTopo for numbers for consistency sake, but I’ll just leave these here for you to decide which are more accurate, along with a few topo maps of my route.
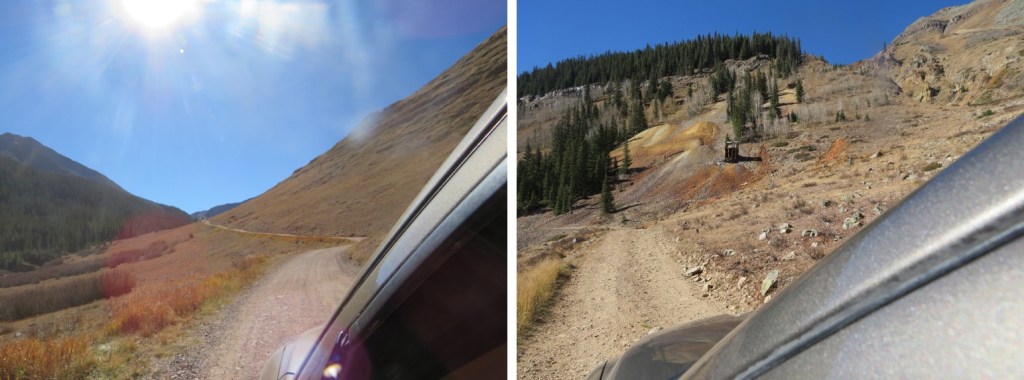
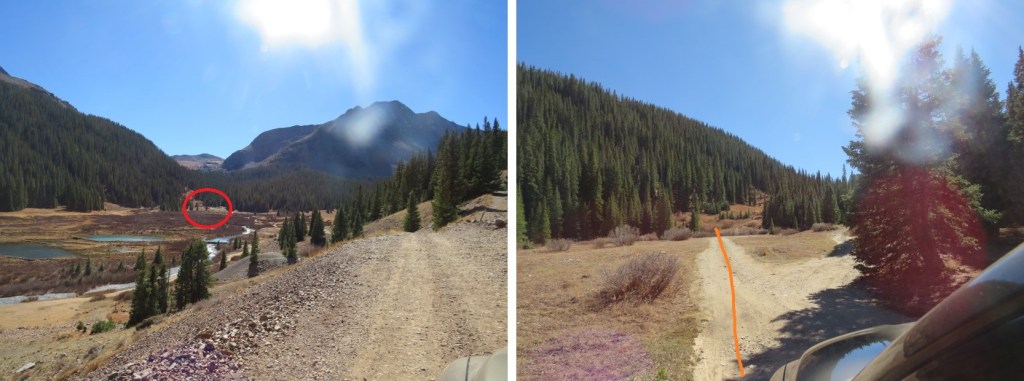
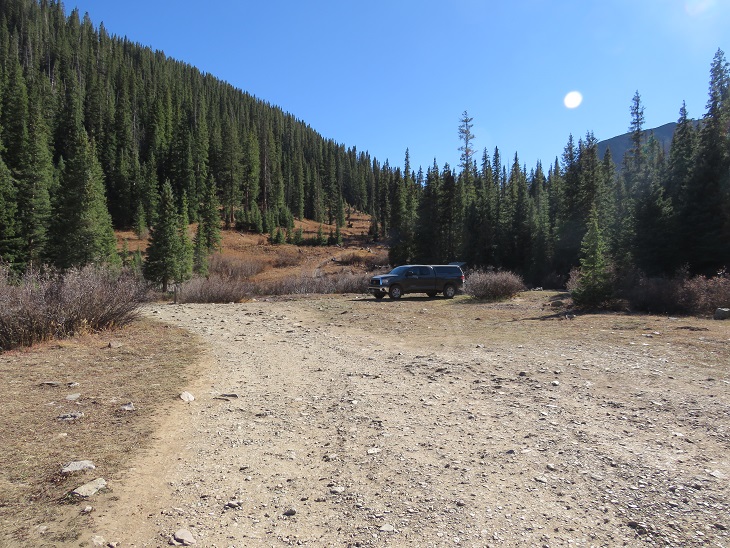
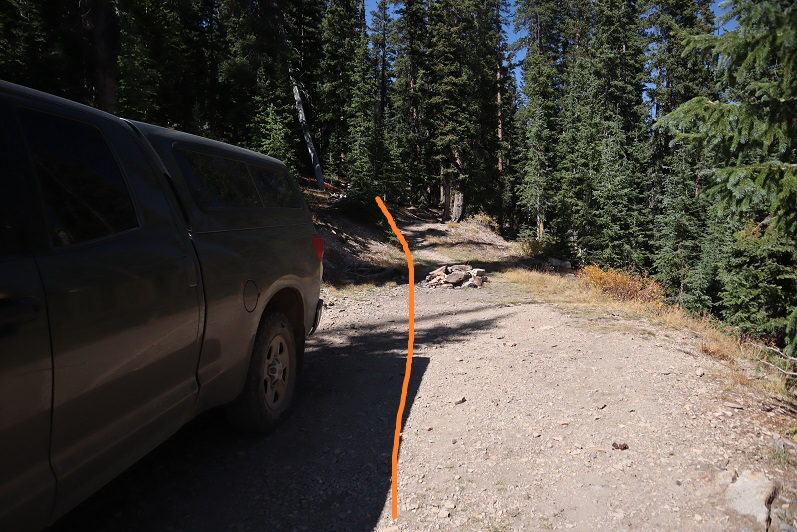
I drove in from Kite Lake after hiking some 13ers in the area. It took me about 2 hours to drive to Silverton, 40 minutes to drive to Purgatory, and another hour and a half to drive to the end of Forest Service Road 579. This is an easy 4WD road, but there are few spots to turn around. I was getting seriously worried about my trip out tomorrow until I (finally) made it to the end of the road. The road abruptly ends at a campsite, which was good news to me, as that meant there should be fewer chances to pass other drivers on the way out because the road doesn’t really ‘go’ anywhere. Mine was the only vehicle at the trailhead.
It was 10:30pm when I made it to the campsite, and I should have been exhausted after hiking/driving all day without sleep the night before, but I wasn’t. I was cold however. I turned on my heater and jotted down some notes in my journal while sipping on some whiskey. I played a few games on my phone and looked over my topo map for the next day. I hadn’t found a lot of good information on this peak, so I’d planned a route myself and I was trying to memorize it so I wouldn’t need to break out my map too often tomorrow. As I sat there, I was reminded of something someone had said to me a few days before: “Don’t you ever relax?” Yes, yes I do. This was relaxing.
My heater was starting to make my sleeping area too warm so I shut it off and decided it was a good time to go to bed. I woke up and was on the trail at 6:30am. The trail begins just behind the campsite
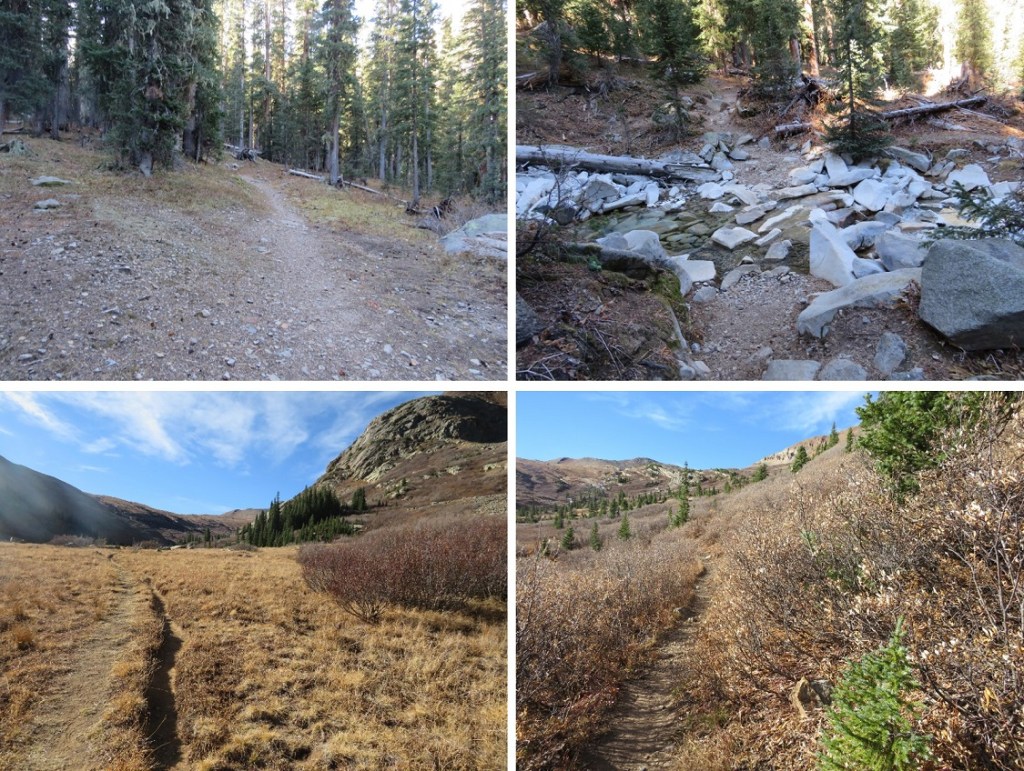
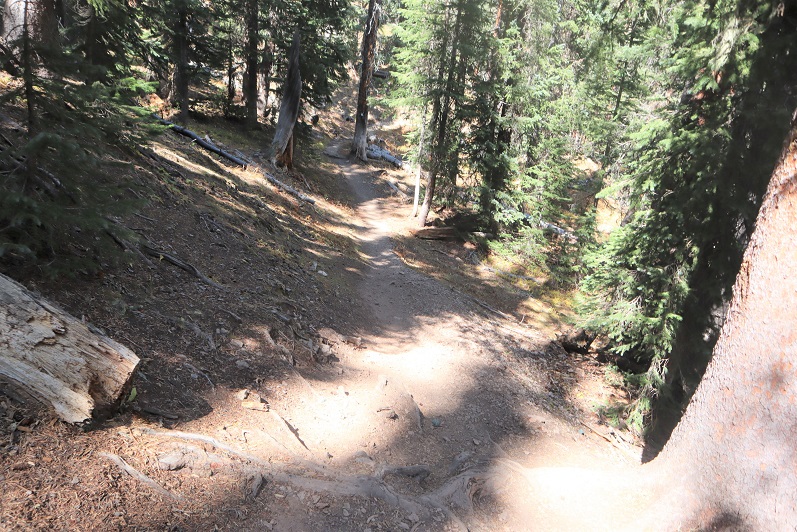
I could smell the fires and hooped the views would be better today than yesterday. Immediately I noticed flashlights shining in the distance. No way?!? I hadn’t seen another vehicle on my way in, and I was very far from any other trailhead. That’s when I remembered I was hiking on the Colorado Trail and this must be a good area to camp for the night. I followed the trail northeast as it descended down to a creek, crossed the creek, and headed east, still following the trail
I stopped here because something was rubbing against my ankle. I’ve never had to put on a band-aid while hiking before, but I thought I’d better now because my ankle would be rubbed raw if I didn’t. Yep, I still need new hiking boots.
I put together a topo map for this route, and in doing so later found there were trails on the route that weren’t listed on the map. The trail I found went lower than I wanted to go, so I didn’t take it initially, but ended up being brought back to it several times, so I’m going to give you beta on the way you should take, not the way I took (which was loopy).
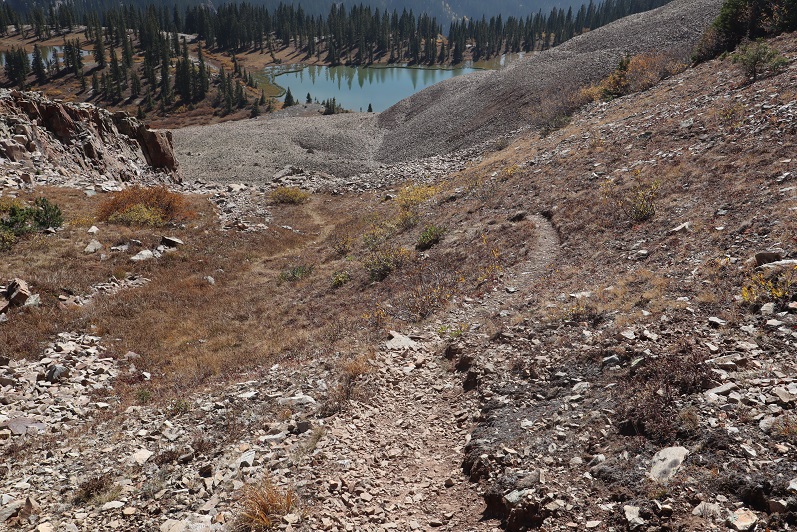
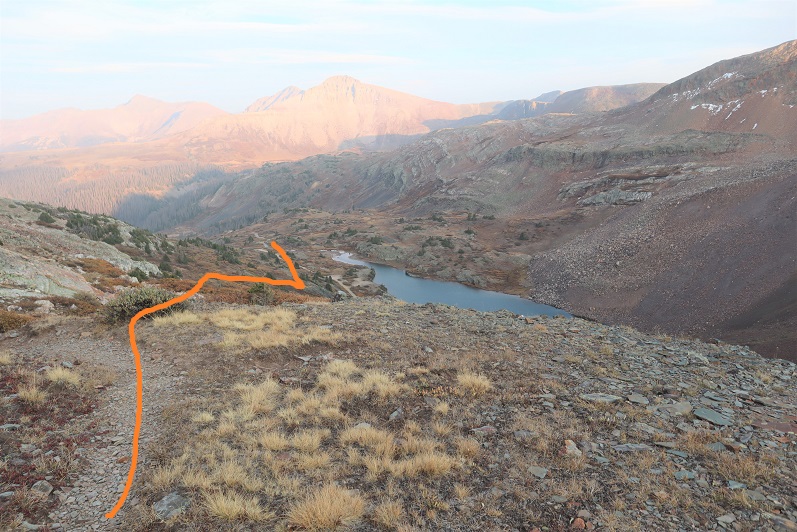
After crossing the stream, head east for .35 miles. Here there will be a faint junction, and if you look carefully, a sign to your right that says “Rico-Silverton Trail” (circled in red). Take the upper trail here and follow it until you pass an obvious pond (about 1.2 miles).
When you get here, there will be 2 trails. Do not ascend the scree! Instead, skirt the scree to your right
And continue following the trail as it skirts the lake to the left
Just after the lake the trail will curve to the left. Follow the trail northeast up the basin
This is where the trail stopped. I wanted to ascend via the upper gully, so I followed the basin as it curved right and then left. Here’s a visual
Some boulder hopping brought me to the base of the gully
I stuck to the right to ascend the gully on rocks, and descended more to the left on the scree
As far as gullies go, this one wasn’t too bad.
At the top of the gully I continued north
I came to an abrupt drop-off, turned right, and followed the ridge a short distance to the summit
I summited Grizzly Peak at 10:10am
Grizzly Peak:
The views were amazing! Much better than my views the day before that were shrouded by haze from the fires
I headed back down the way I summited
Descended the gully
Back down the basin
And picked up the trail
My way back to the trailhead was so much easier than the way in, as I just followed this (unnamed, unlisted) trail back to the Colorado Trail/Rico-Silverton Trail.
Just before descending back to the Colorado Trail I could see where I’d parked my truck
I rounded the mountain and started my descent to the creek
Hooked back up with the Colorado Trail
Crossed the creek
And gained some elevation as I headed back to my truck, staying left to head to the campsite when the Colorado Trail went right
And within a dozen yards or so was back at my truck. There was one other truck parked in the area (a Tacoma).
I made it back to my truck at 12:45pm, making this a 9.96 mile hike with 3543’ of elevation gain in just over 6 hours.
Even though it was a Saturday afternoon I didn’t pass another vehicle on the way down to the 2WD road, which was good because there were long stretches with no turnarounds/passing points. The leaves were beautiful! (I took this picture near the bottom once the road evened out).
Also, this is the last 4WD trailhead I need to use to get to any of the bicentennials I still need to summit! Woot! Just 10 left to go, and they’re all accessed via 2WD roads. Now about that skid plate…
I was in this same area last week, and got a good view of the route I wanted to take to summit these peaks. This weekend the haze from the fires obscured a lot of the photos, but I think I can still get the general description across. I once again drove from Silverton to Beartown, but I decide to drive a little further up the road this time towards Kite Lake. That wasn’t the best idea (the road gets worse as you drive towards Kite Lake) but my truck still made it. She wasn’t thrilled with me, and I’ll be replacing her skid plate this week, but she made it. I drove in and out in the dark, so here are some pictures from last week’s drive.
I parked yards before the lake and was on the trail at first light: 6:30am
I realized on my way down I could have taken the trail to El Dorado Lake to gain the ridge, but that’s not what I did on my way in. You should though. Instead, before Kite Lake I headed south, and then southwest and followed the drainage below Hunchback Mountain to the ridge.
Once on the ridge I came across a trail, and followed it northeast
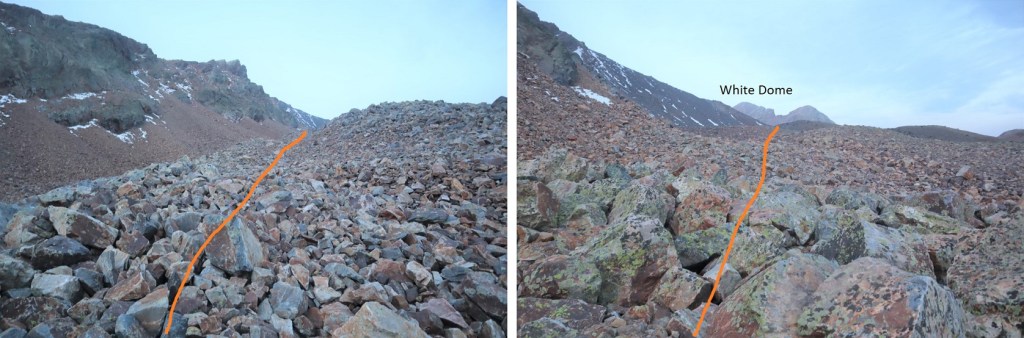
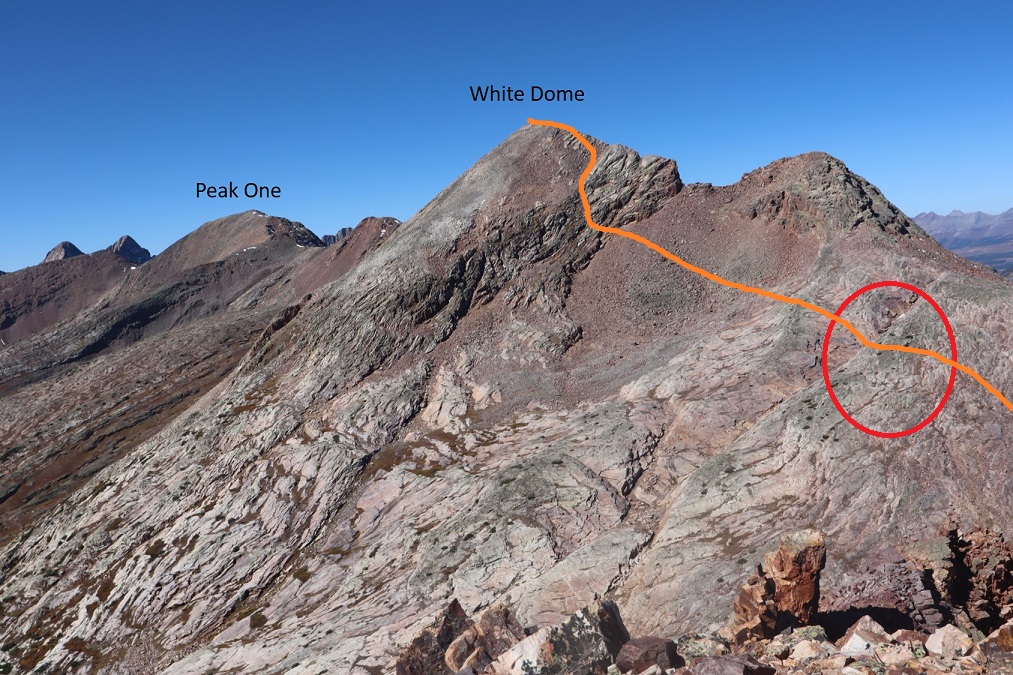
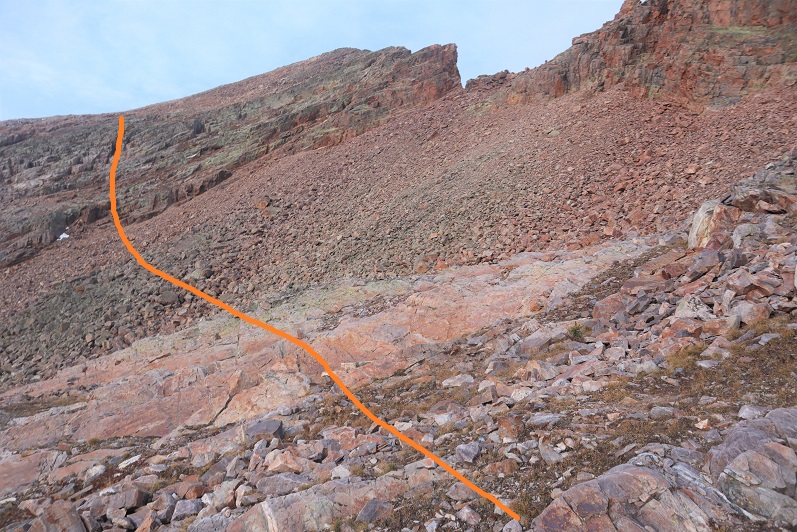
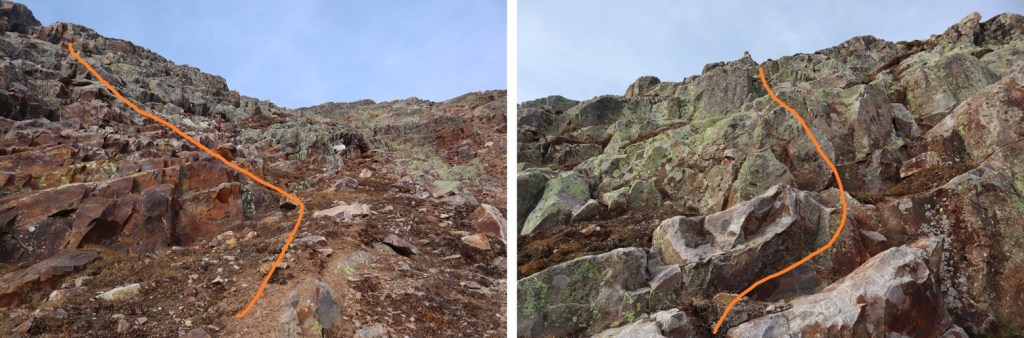
This would bring me to a rocky rib. Here’s an overview of the route up to White Dome, with the rib circled in red (it’s deeper than it looks). The rib drops down about 25 feet, crosses a ravine, and then gains 30 feet. This is class 3, closely bordering on class 4, and the only time I wore my helmet the entire hike.
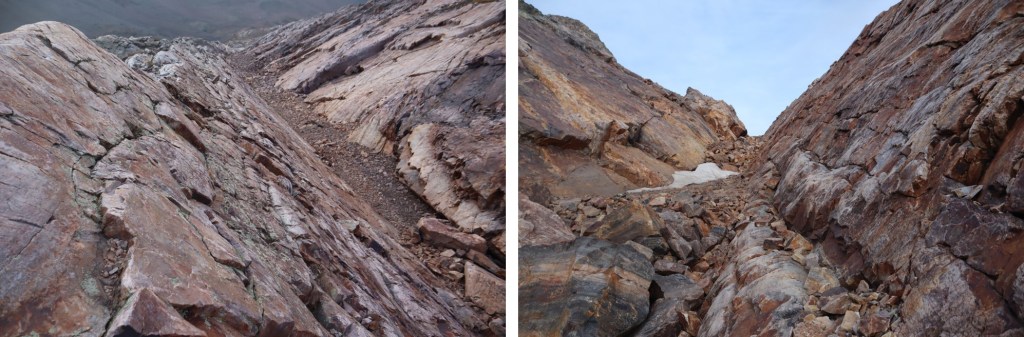
Here’s looking down and up the ravine
And how I crossed
Here’s looking back on how I climbed into the ravine. This is pretty much vertical, straight down.
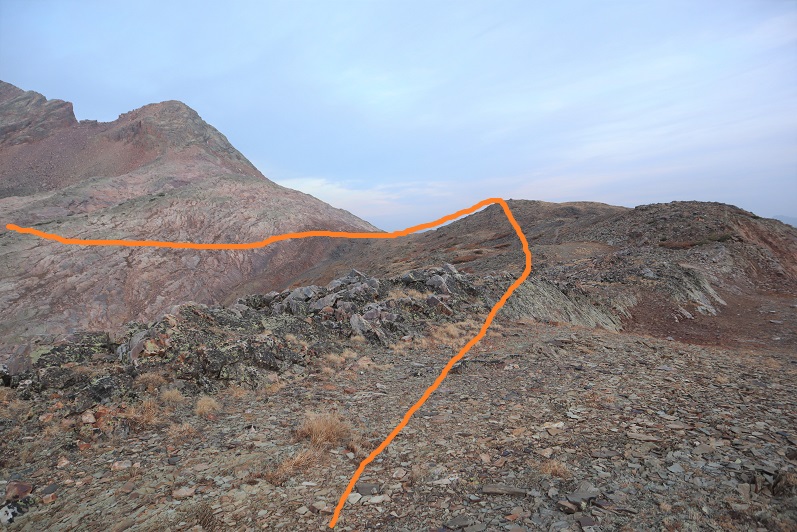
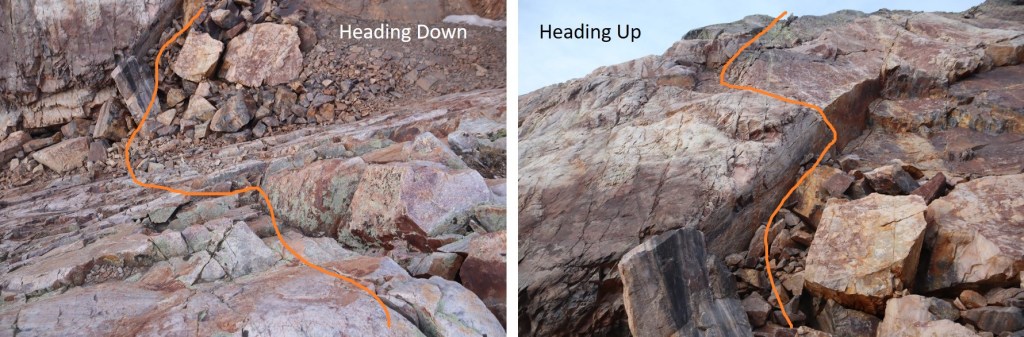
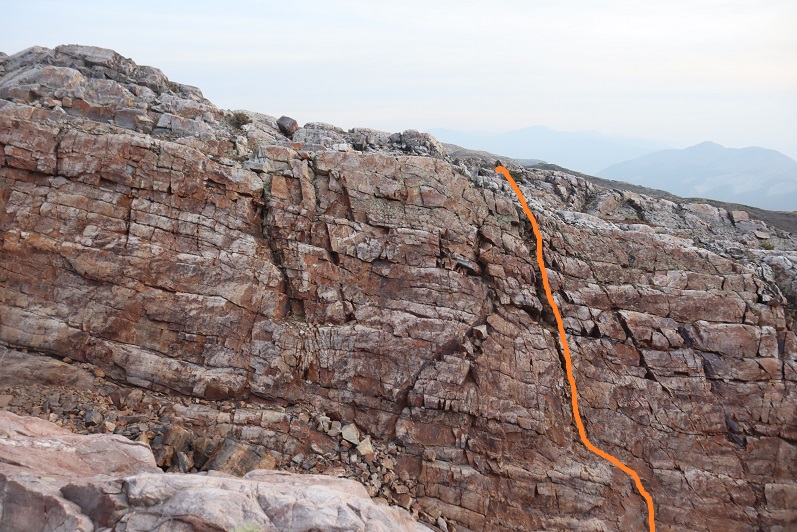
Once out of the ravine I continued southwest across some talus, aiming for another rock band. This was easy to climb up, and there was a cairn at the top, indicating the route to take. This is all class 2/easy class 3. Here are some photos:
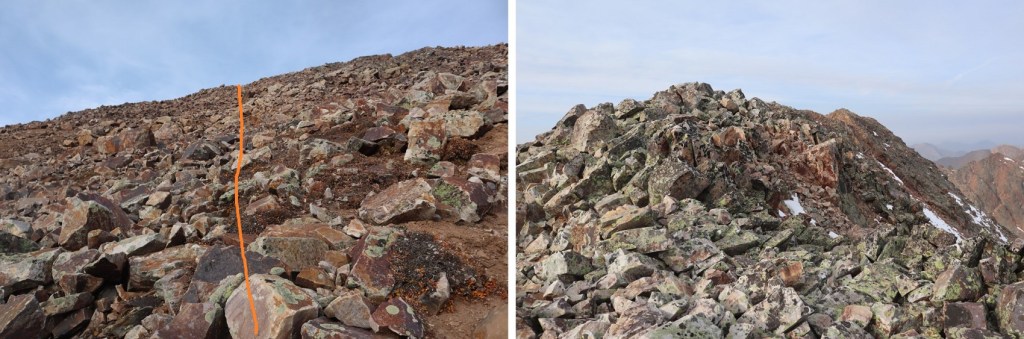
Once I gained the ridge it was an easy hike west to the summit
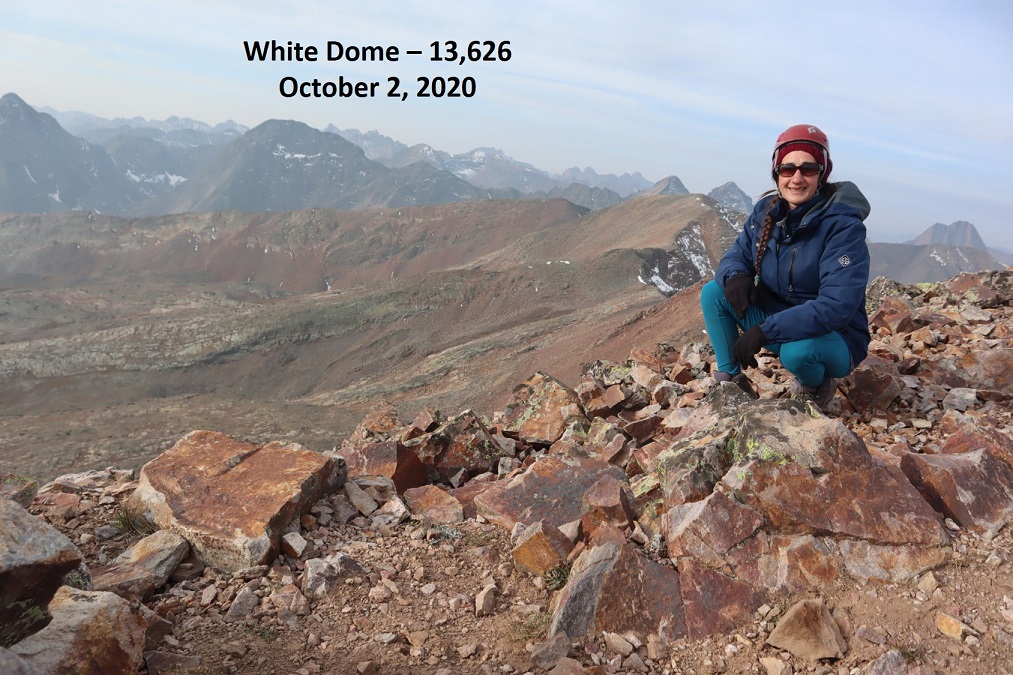
I summited White Dome at 8:45am.
White Dome:
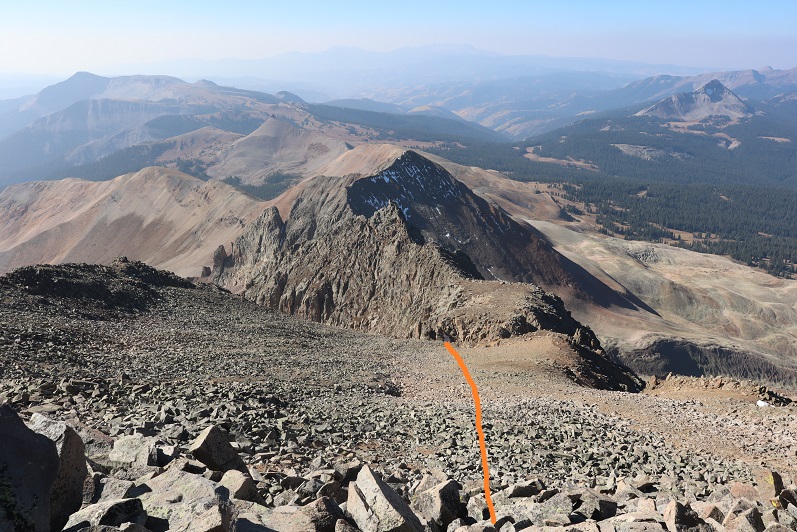
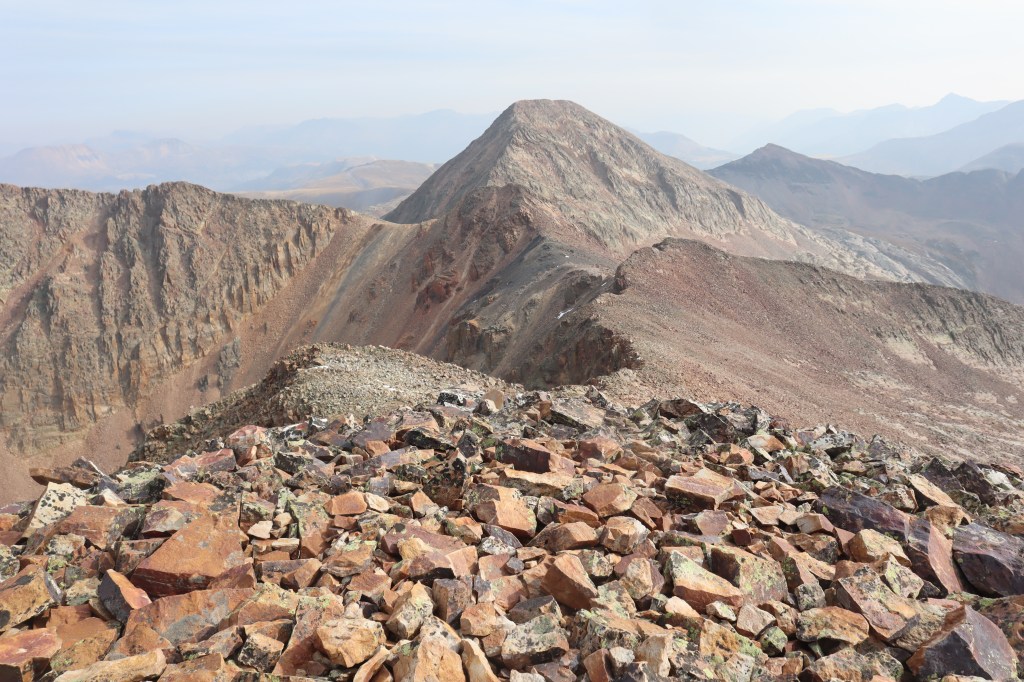
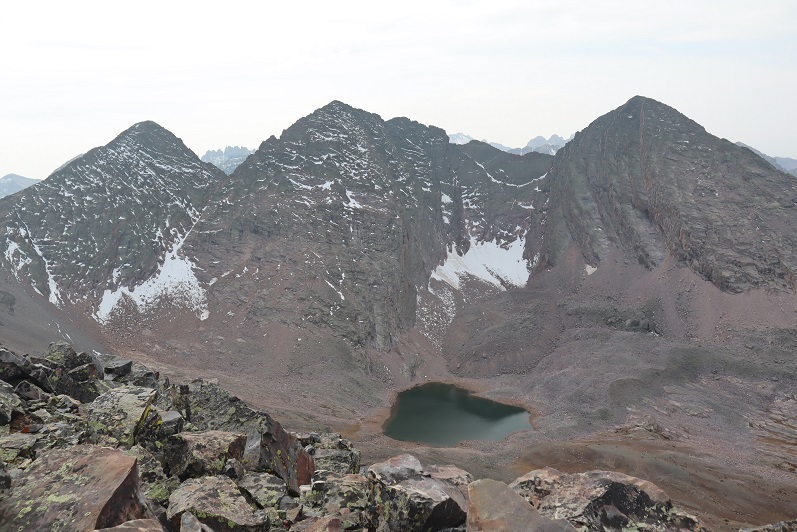
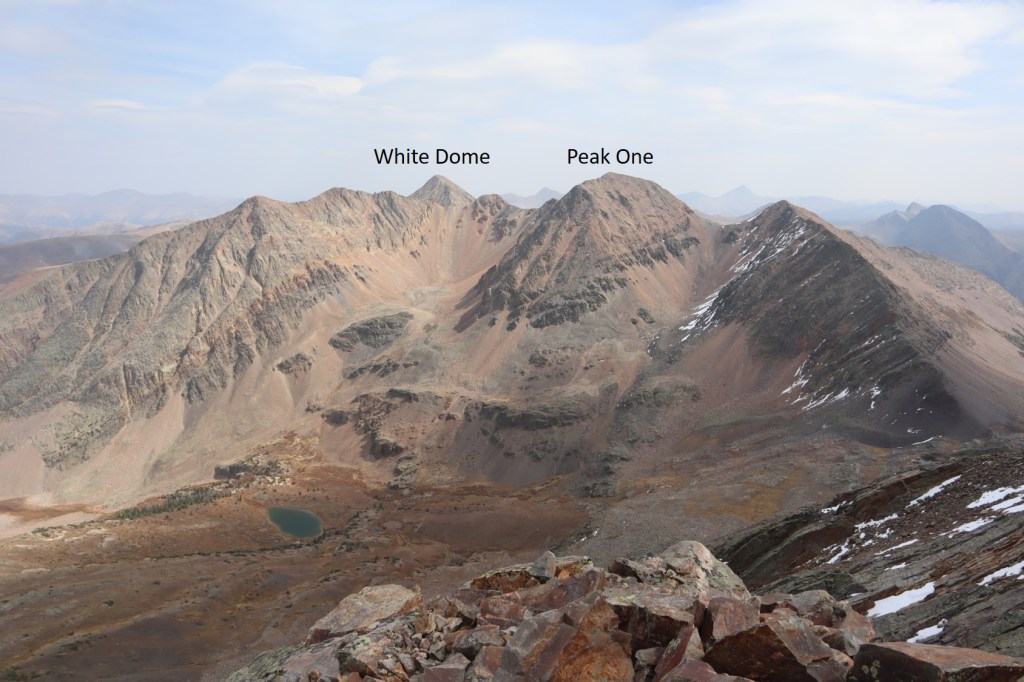
Next up was Peak One. Here’s an overall view of the route
This was a ridge hike, with no large obstacles to summiting. I dipped down once or twice to the right when needed, but this is all class 2
Here’s looking back at White Dome
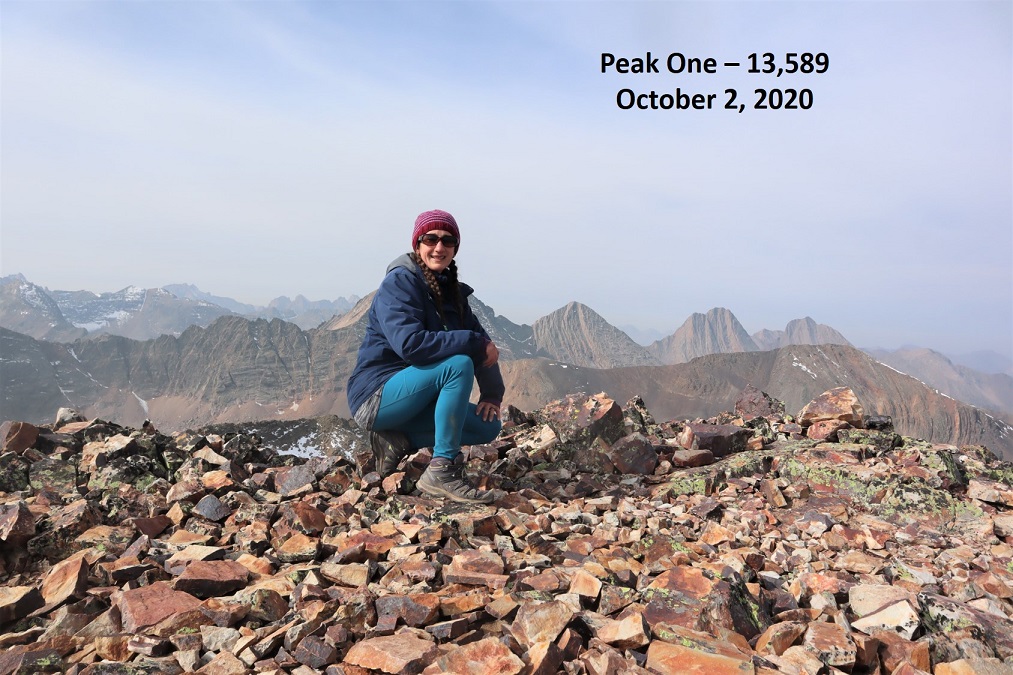
I summited Peak One at 10am.
Peak One:
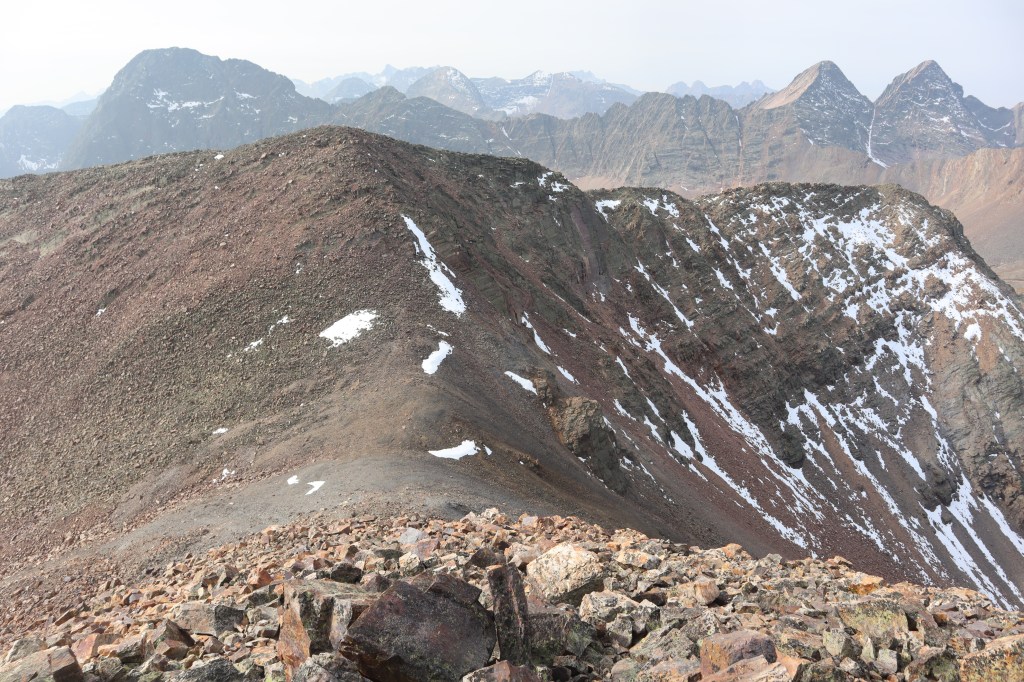
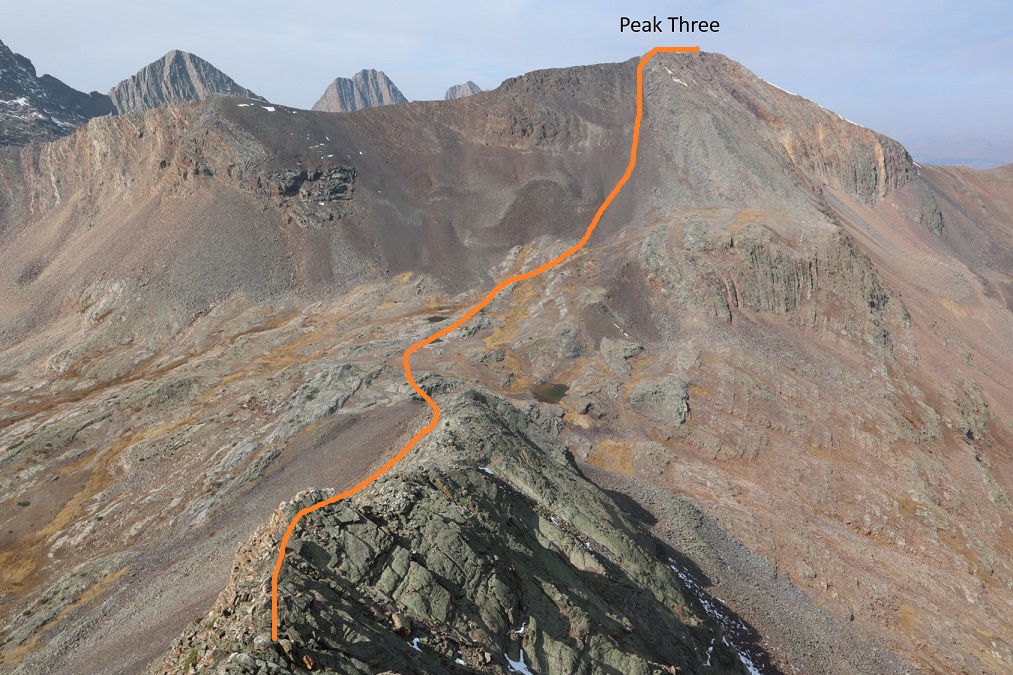
Now I had a decision to make. I could either turn back and head for my truck now, or make this a loop. I looked at my stats. I’d only gone 3 miles. Nope, not enough mileage/elevation/work to justify the drive in. I was going to make this a loop and summit Peak 3 and Peak 2 today as well. It would significantly raise my elevation gain (mostly on the way out) but it would mean I would need to make that 1.5-2 hour drive on a dirt road from Silverton one less time. Here’s looking at Peak Three and Peak Two from Peak One, with my overall route there and down into the basin that would lead me out
I started by heading south and following the ridge down, losing over 900’ of elevation. This ridge was class 2, with nothing too tricky. I could mainly stick to the ridge, but it would be obvious if I needed to dip right or left.
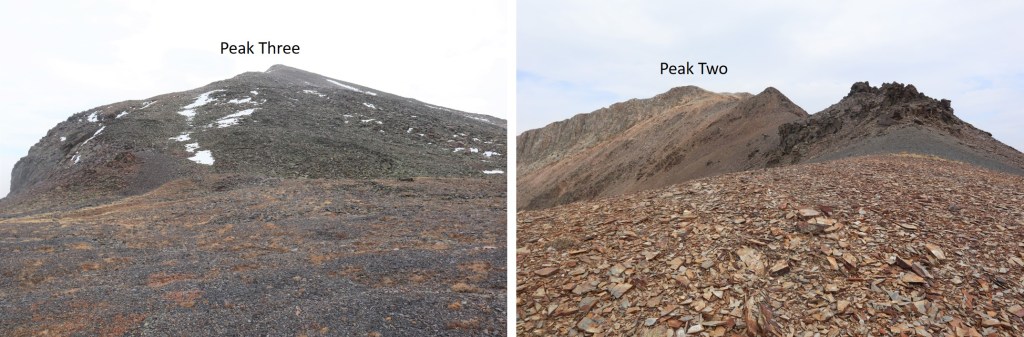
Here’s my overall route from the ridge over to Peak Three
And a look back at Peak One
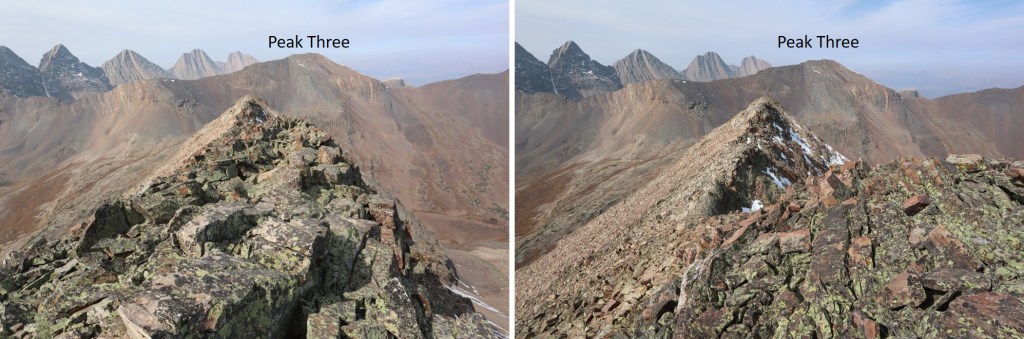
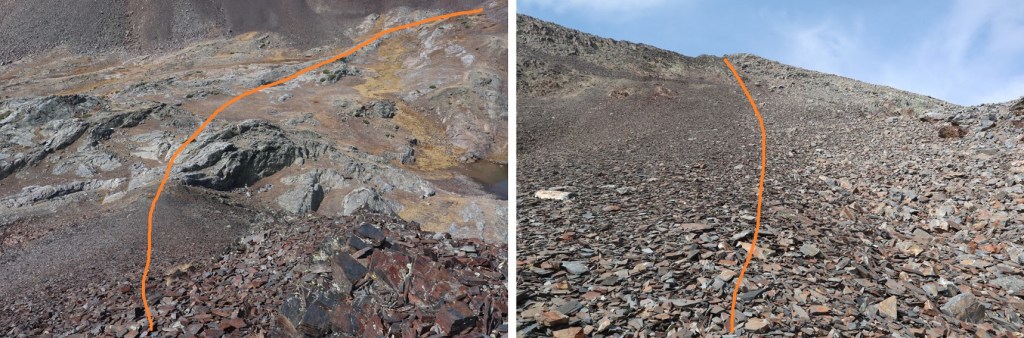
And some step by step photos of my way to Peak Three. After losing approximately 900’ I regained another 800’ to the summit, first by taking a rock rib towards the upper basin, and then ascending using the scree filled gully. The scree here wasn’t too bad.
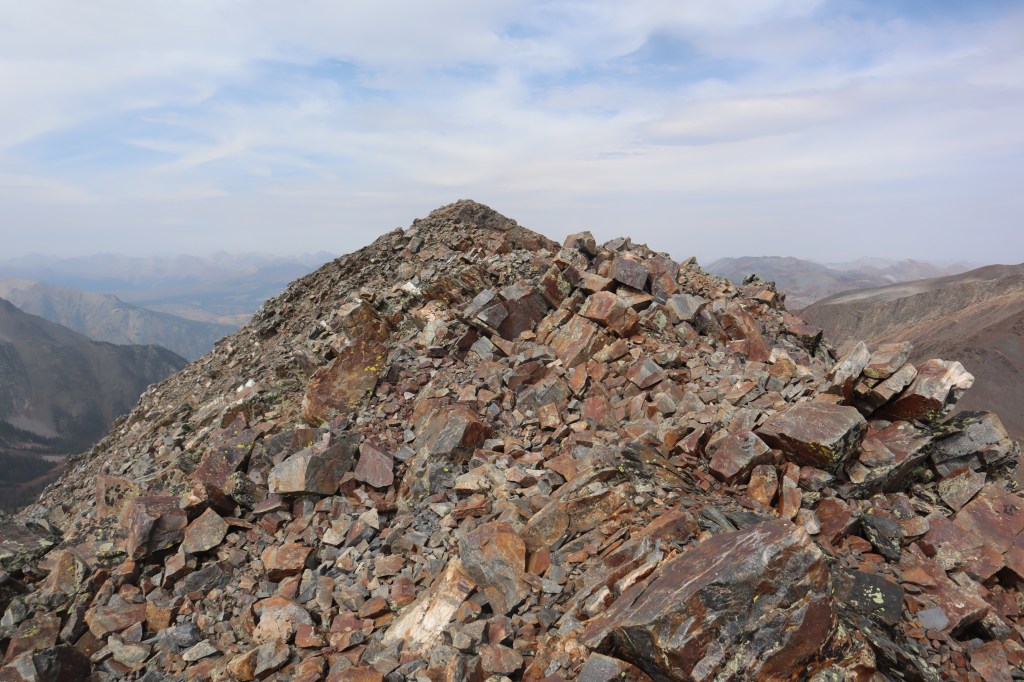
At the top of the gully it was a quick hike to the summit
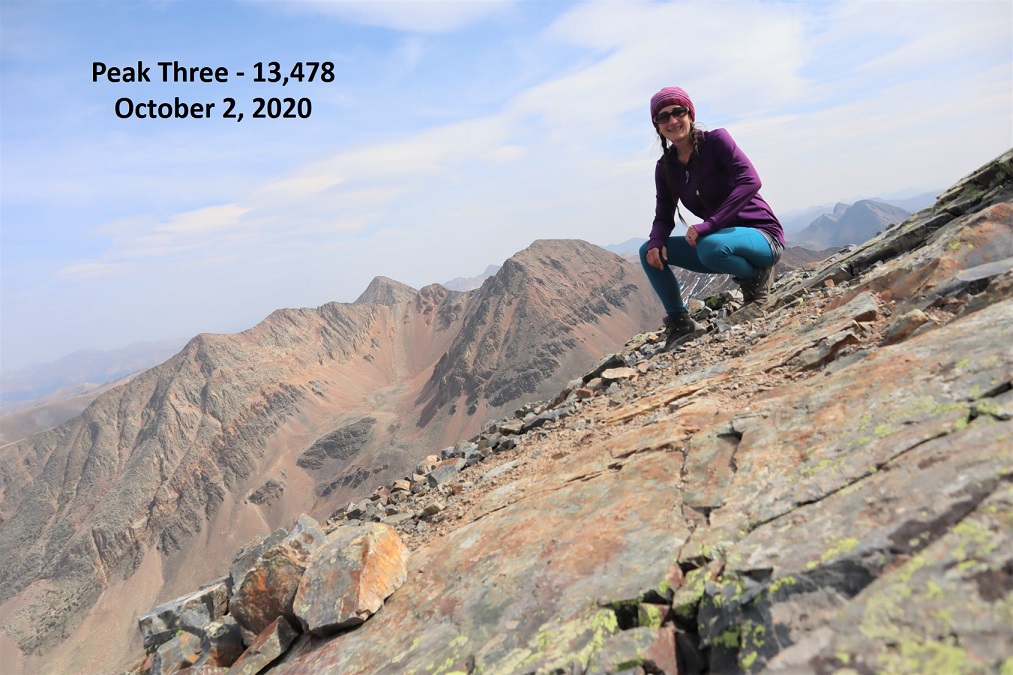
I summited Peak Three at 12:30pm. I had a hard time getting my camera to cooperate, so we get a unique summit photo this time
Peak Three:
There were some pretty awesome views of the Trinities, and Wham Ridge looked dry (I didn’t get a clear picture of Vestal Peak however, sorry!)
And here’s looking back at White Dome and Peak One
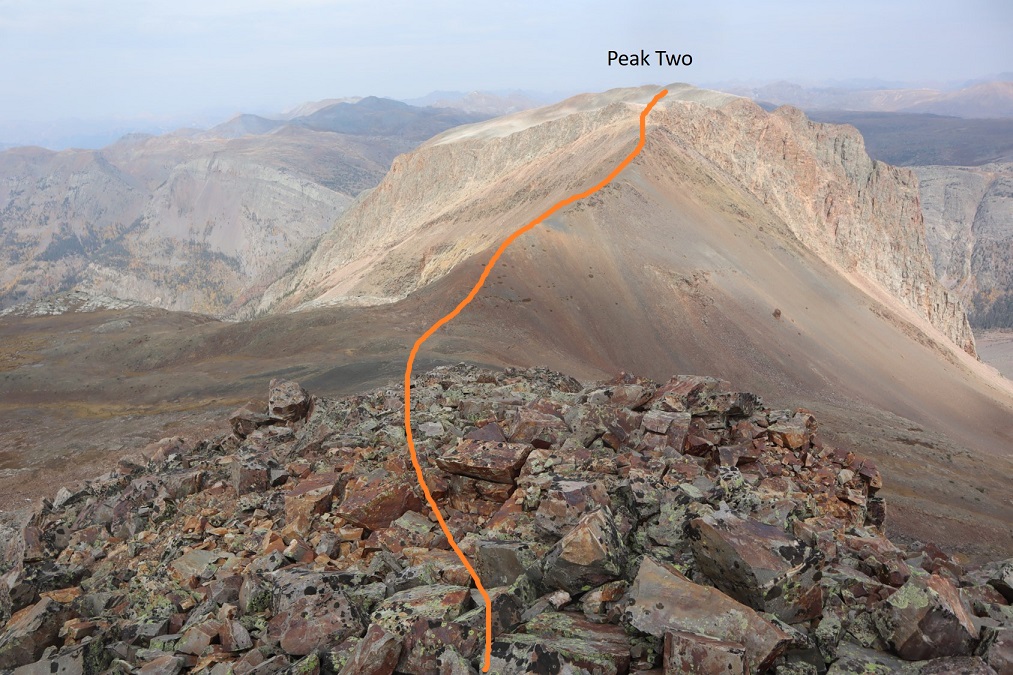
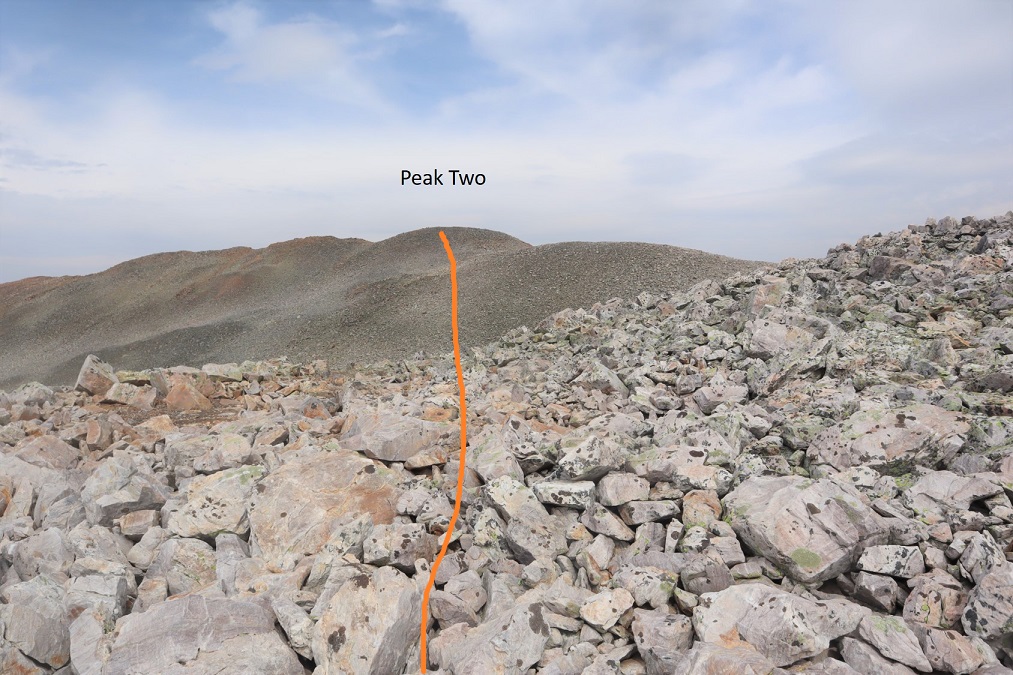
Now on to Peak Two. Here’s the overall route
This is an easy ridge hike. I started out heading north and just followed the ridge. Here are some highlights. From the saddle, looking back up at Peak Three and Peak Two
There’s actually a trail here that skirts the ridge to the left
Then it’s straight up this point to a false summit
And a quick dip and rocky trek to the summit
I summited Peak Two at 1:50pm. Something was wrong with my camera. I couldn’t set up the timer for a photo, so I just took a selfie, which ended up being unfocused. I also couldn’t use any of the buttons, the visual playback didn’t work, and I wasn’t entirely sure the camera was taking a photo (even though I heard a click). Oh well, I guess it’s time for a new camera. I’ve never liked this one anyway….
Peak Two:
I looked to the northeast, and could see my intended exit route. I planned to hike back down to the basin and catch up with the Colorado Trail.
That first required me to head back the way I’d come to the Peak Two/Peak Three saddle
At the saddle I turned left and headed east and then north out of the basin
As you’re exiting, you’ll want to stay left to avoid a smooth rock waterfall
After the waterfall, aim for the trees, pass them to the right, and you’ll be able to see where the Colorado Trail picks up below
This is where I slipped on a rock the size of a microwave that decided to roll as I was using it for balance. I didn’t hurt myself, but I did bang up my camera, and when I went to take another picture all the buttons were functioning again (which was nice, but I’m still investing in another camera). Also, I need new shoes with better traction (this has nothing to do with the rock rolling, I just need new hiking boots). After this I followed the Colorado Trail east for 3.5 miles, gaining about 2100’ of elevation on a class 1 trail
The last bit was especially fun, as it involved dozens of switchbacks (sarcasm)
At the top of the hill I turned right and followed the trail south until I hooked up with the El Dorado Lake Trail, and took that east to Kite Lake and my truck
I made it back to my truck at 1:50pm, making this a 15.03 mile hike with 6051’ of elevation gain in just under 12 hours.