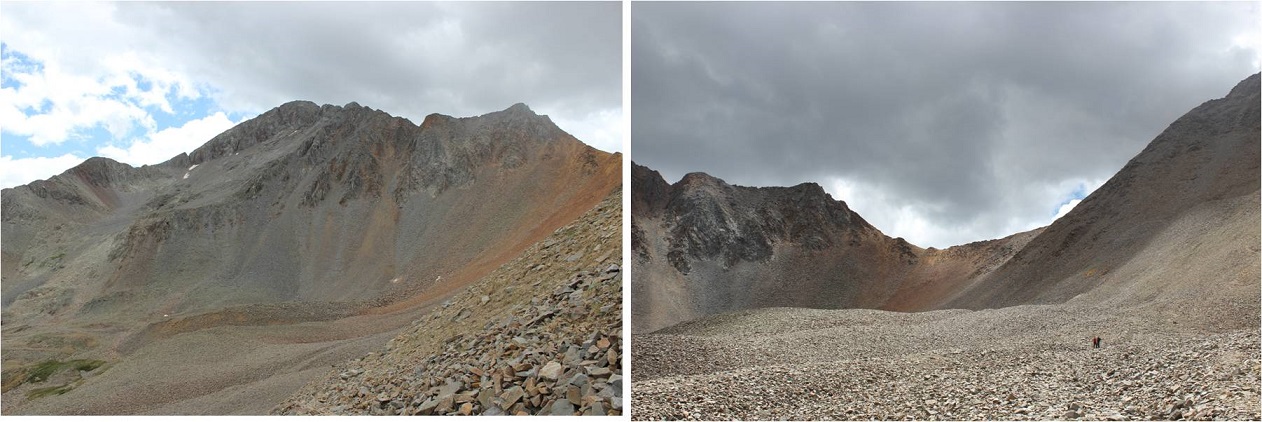
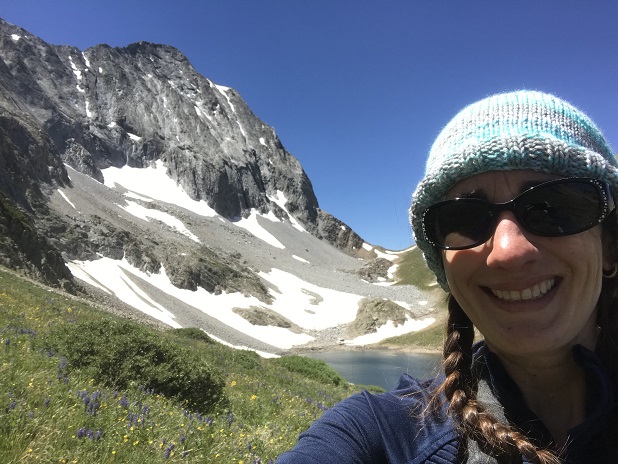
Immediately I knew something was wrong. It was still dark outside, but my alarm hadn’t gone off. I threw back the covers and grabbed my phone: it was 3:24am. Drat! If I were the kind of person to swear several choice words would have been uttered. I had set my alarm correctly for 11:45pm, and wasn’t sure why it didn’t go off? I need a new phone because stuff like this keeps happening.
I’d wanted an extra early start today because I was meeting a friend to go Raft-packing tonight and wanted to get there with plenty of rafting in the sun time. Oh well. I sent a quick text to my friend saying I’d be a little later than intended and was out of the house by 3:30am.
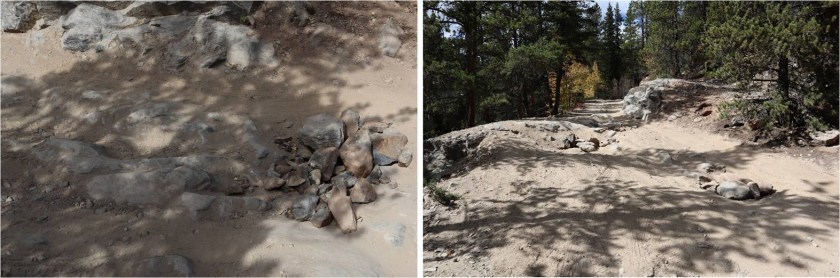
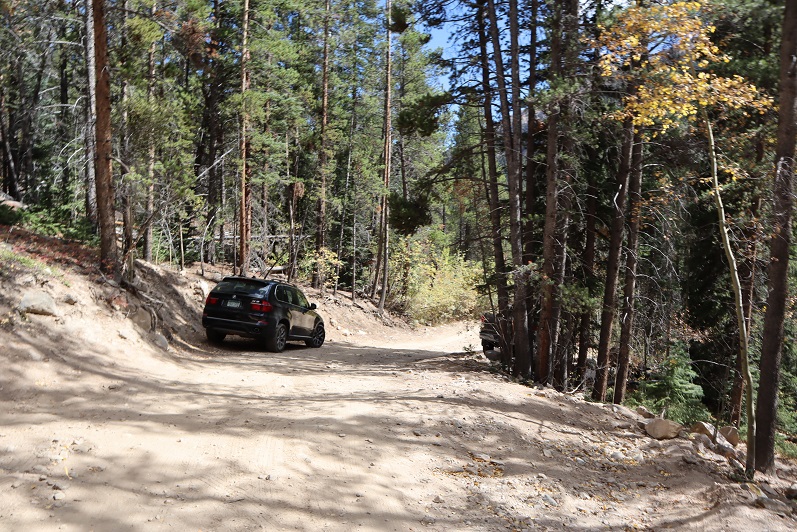
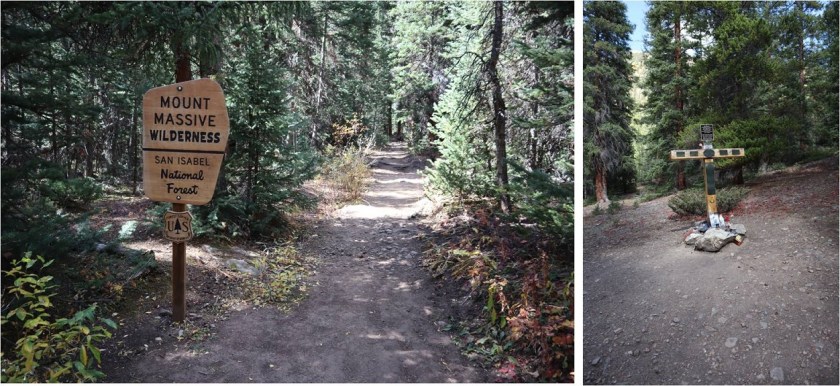
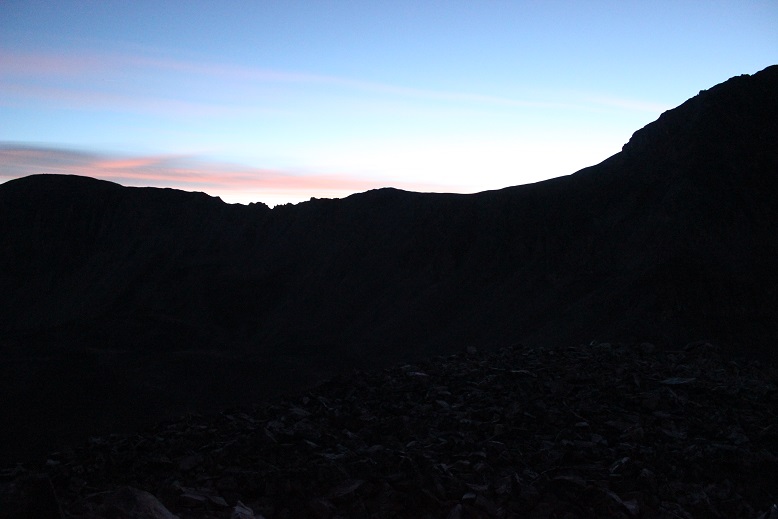
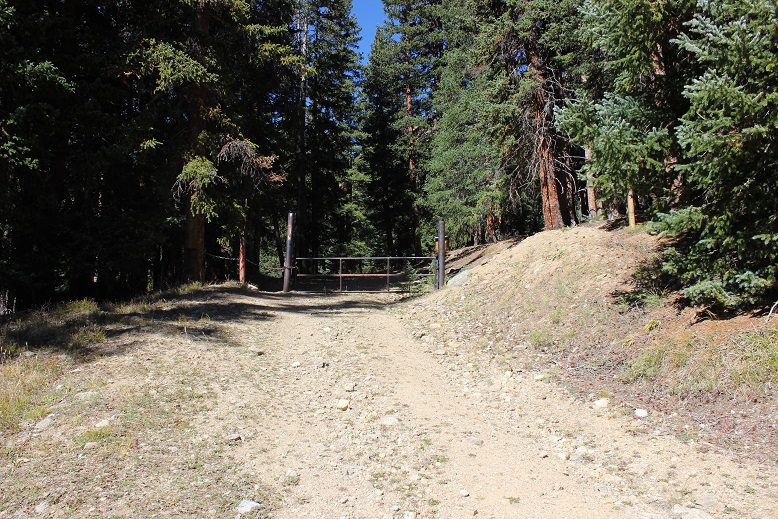
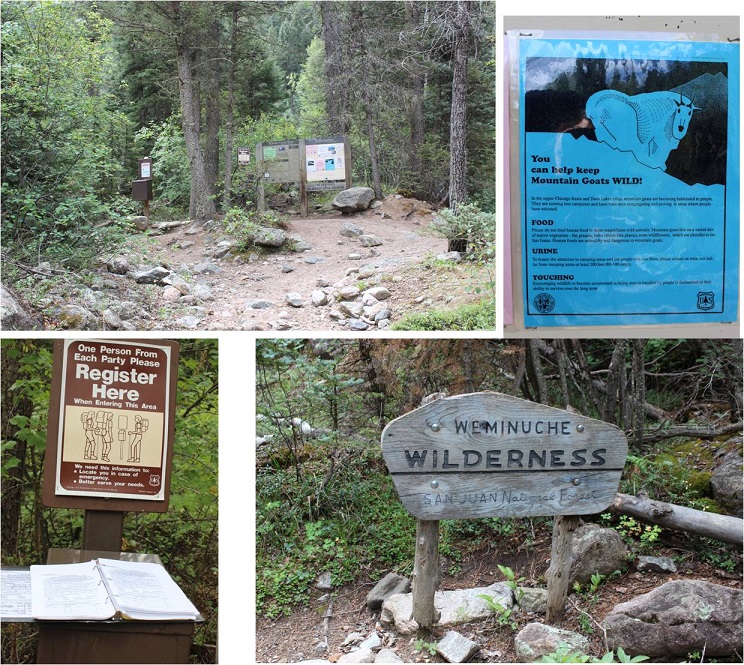
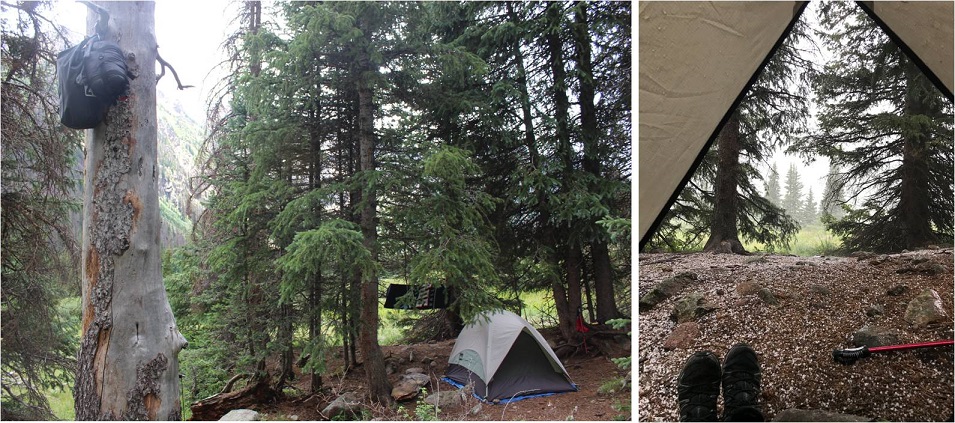
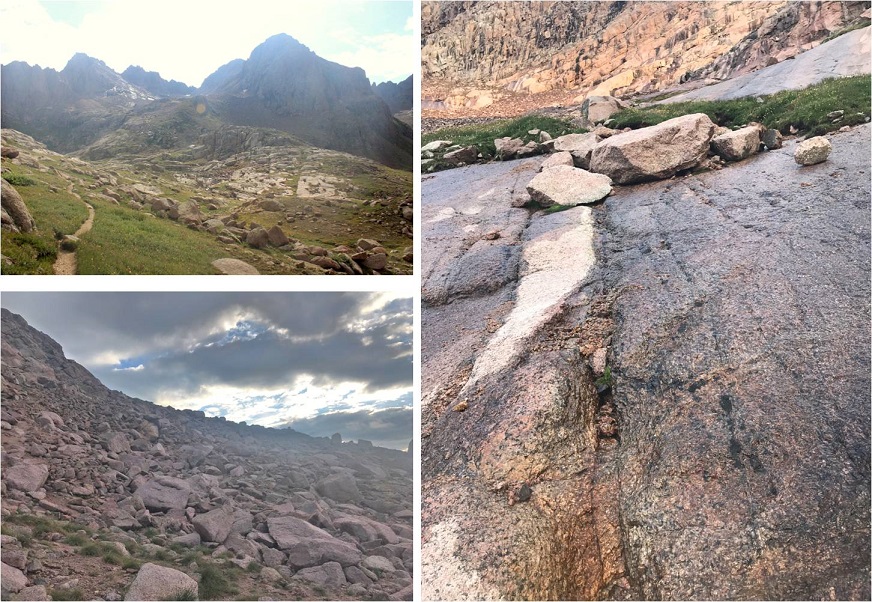
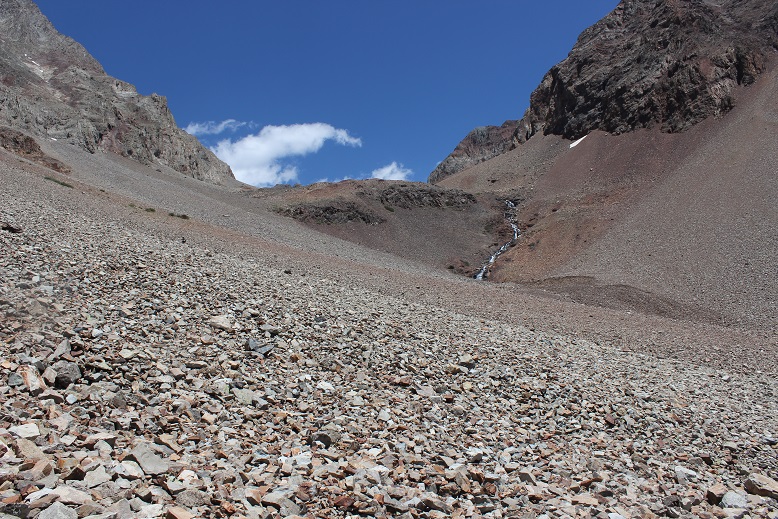
I made it to the North Halfmoon Creek Trailhead at 6:10am. Well, almost there. Someone had put large rocks in the last ‘difficult’ area before the trailhead (most likely an owner whose vehicle shouldn’t have been out here in the first place because it didn’t have enough ground clearance). In any event, I just got new tires yesterday and didn’t want to subject them to those pointy rocks (mentally grumbling because I wouldn’t have thought twice about this section if the rocks hadn’t been there). So I made a 30-point turn and parked just below the trailhead on the side of the road. When I came back another driver with a competent vehicle had done the same. I put on my helmet and started on the trail at 6:30am.
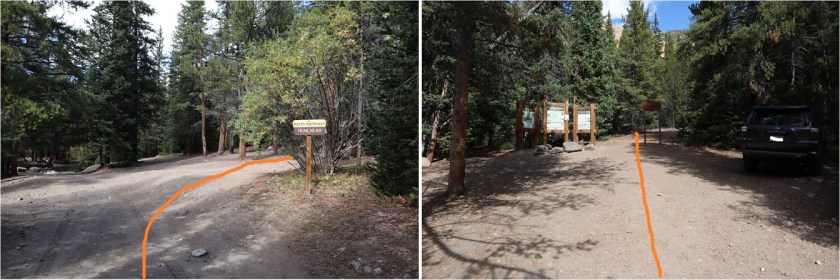
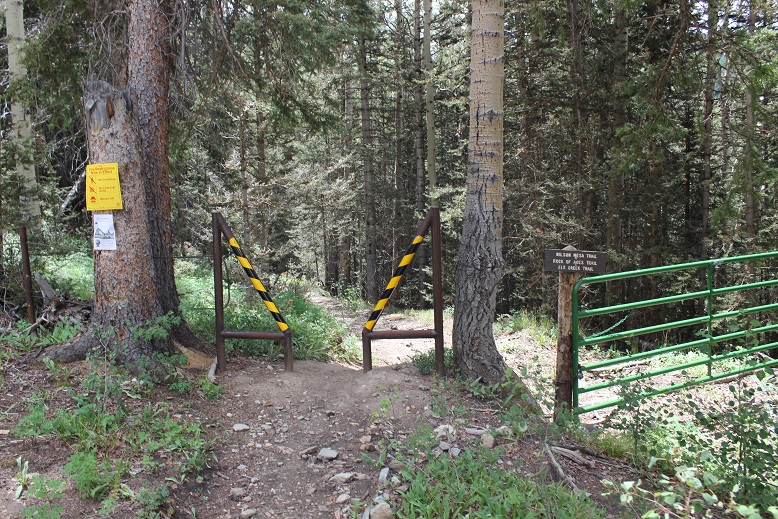
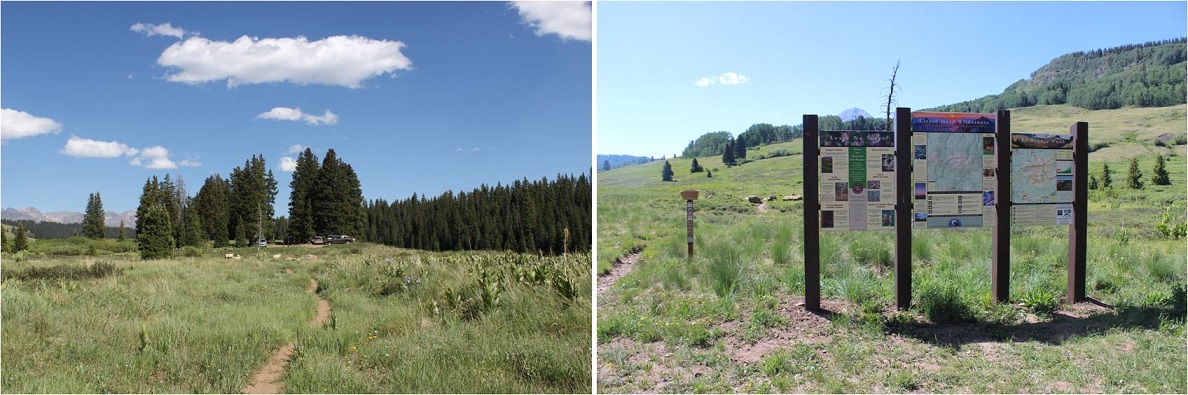
As I got out of my truck it started raining. Luckily it didn’t last too long. There was a 4Runner in the lot when I got there (the only other vehicle I saw all day). The North Halfmoon Creek Trailhead has wonderful signage.
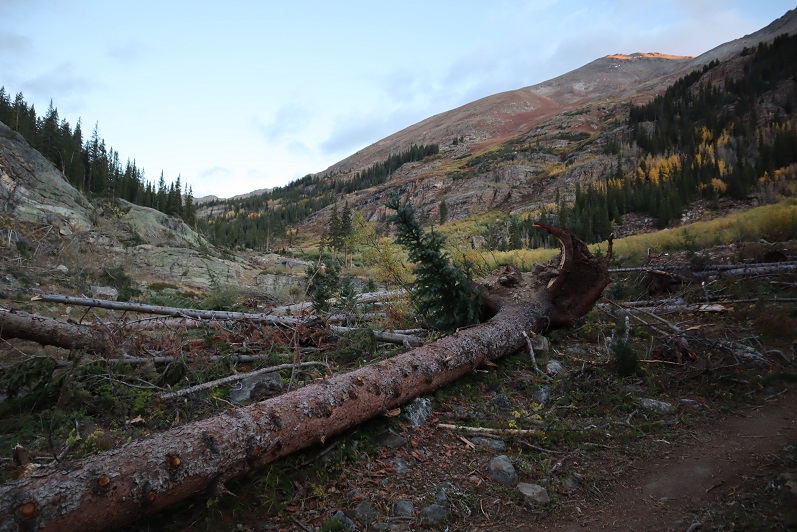
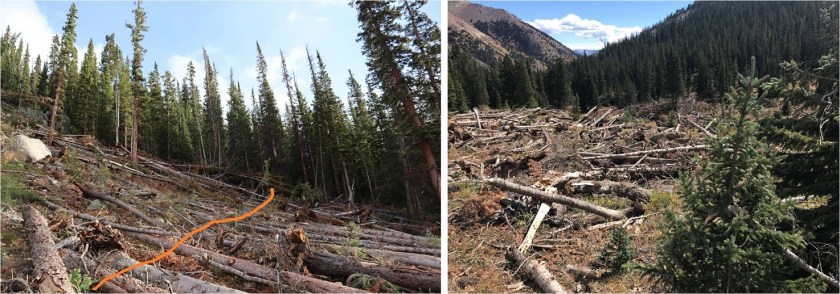
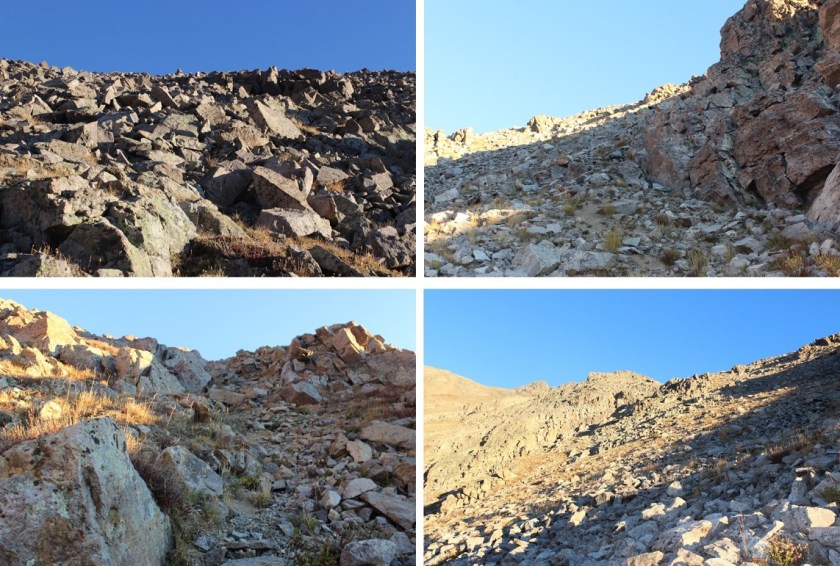
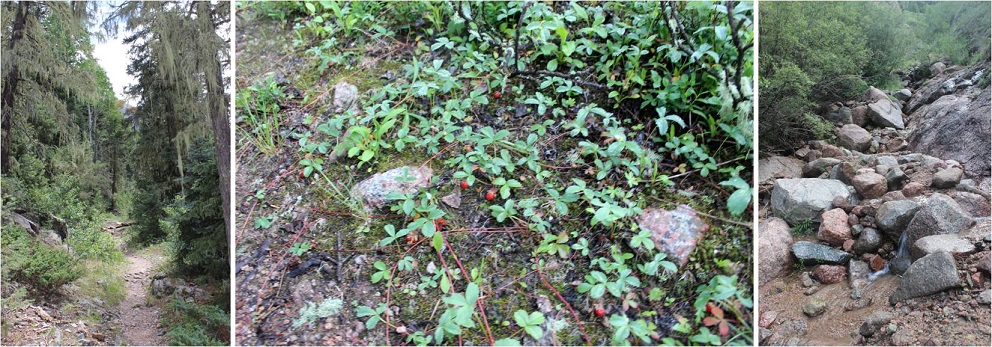
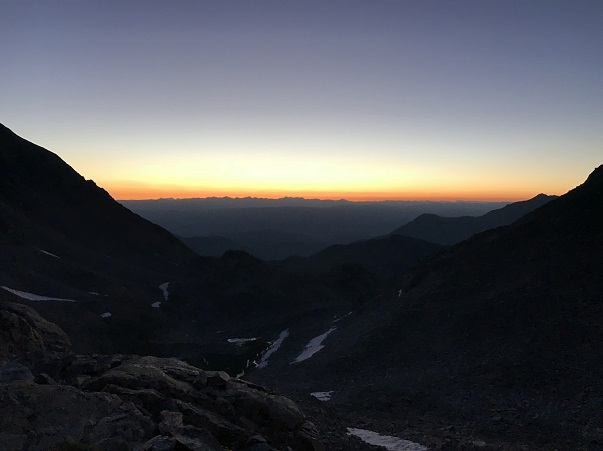
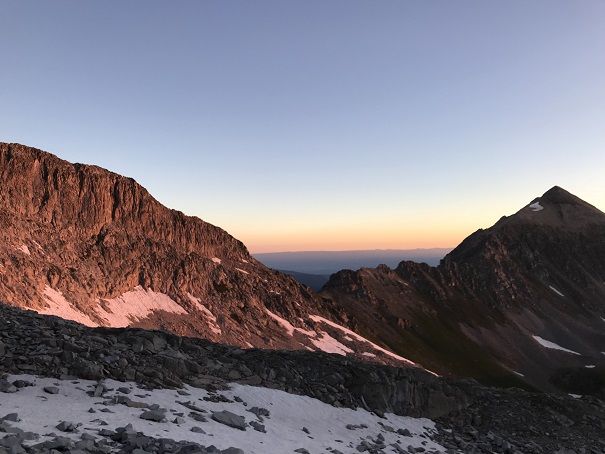
It was weird starting this hike in the daylight: I haven’t started a hike this late in a very, very long time. It made route-finding so much easier! There were a bunch of small avalanche areas along the trail which had been cleared so they were easy to walk through.
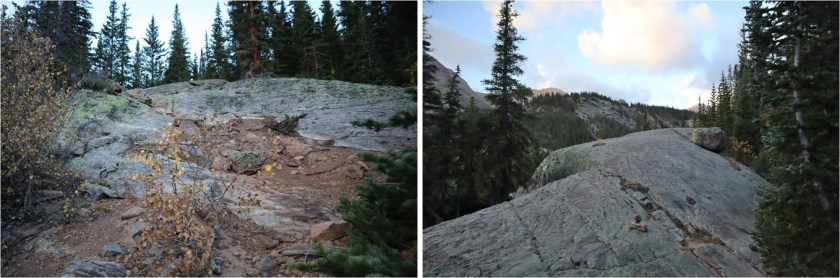
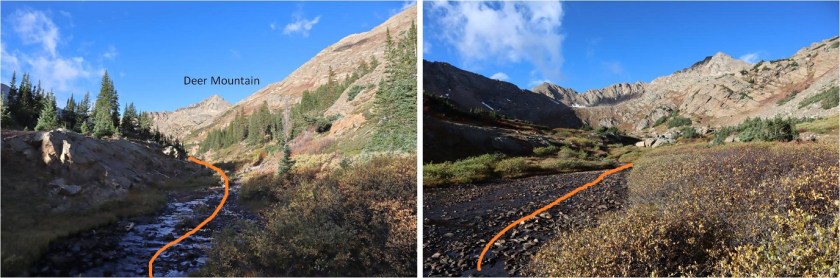
The first part of the trail is very easy to follow
I continued straight at the Mt Massive turnoff
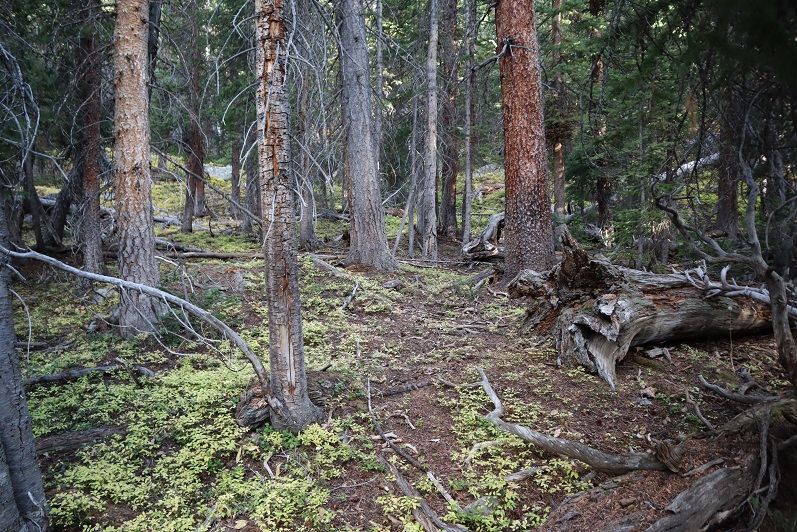
Through a small forested area
Up a large rocky area
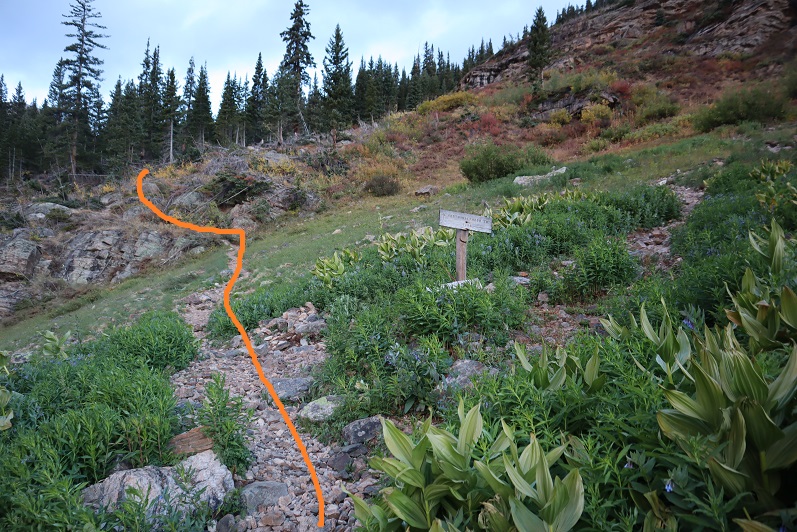
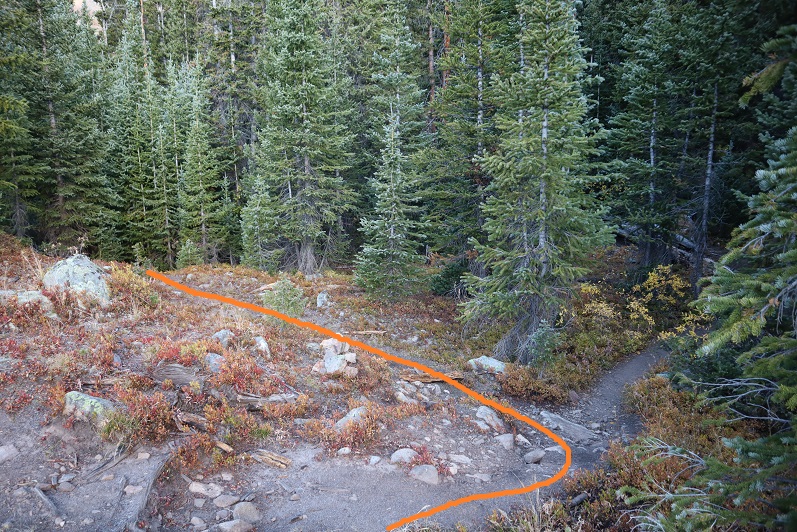
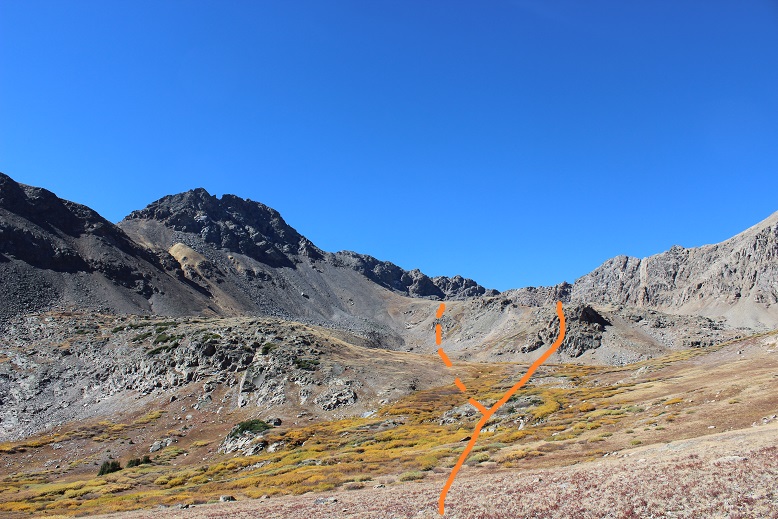
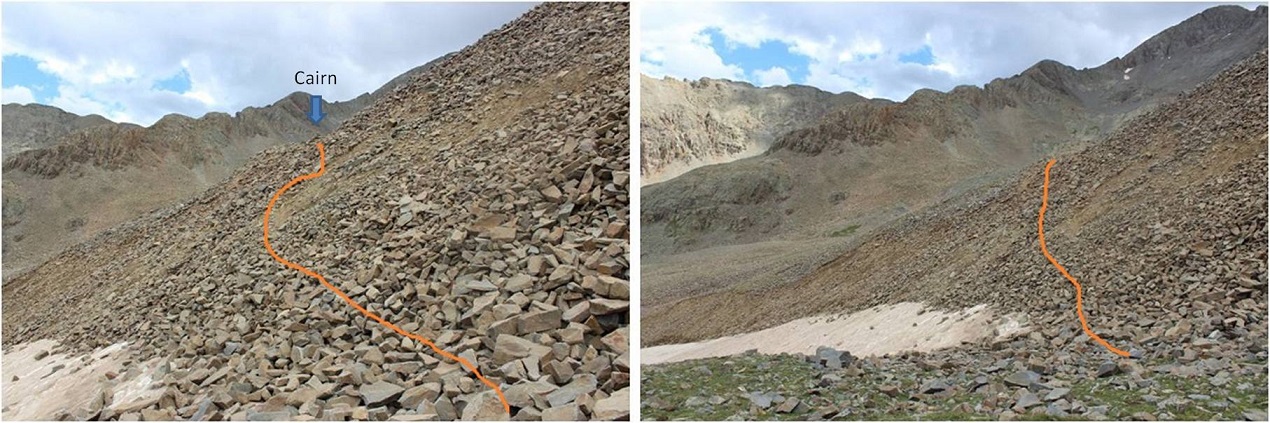
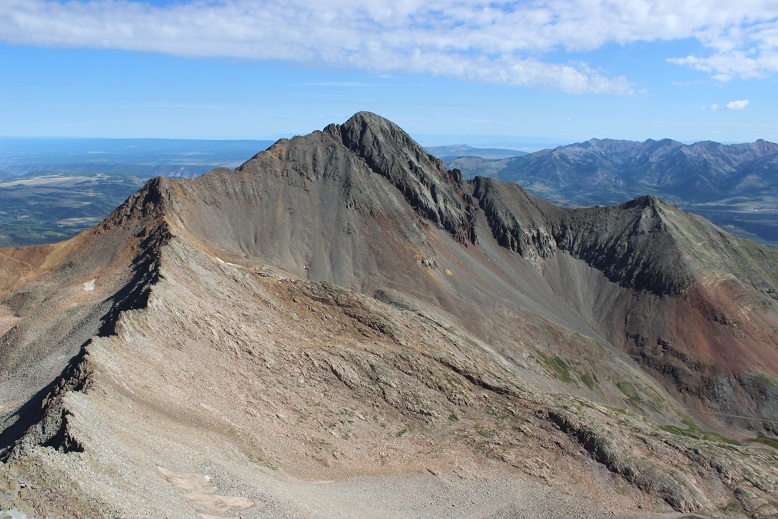
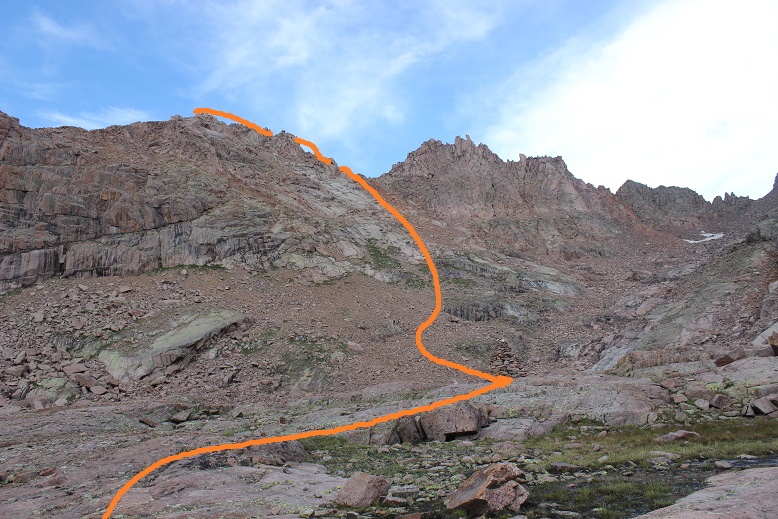
And came to this junction. Here I went left, even though it’s ‘blocked off’. I believe going the other way takes you to Mt Oklahoma.
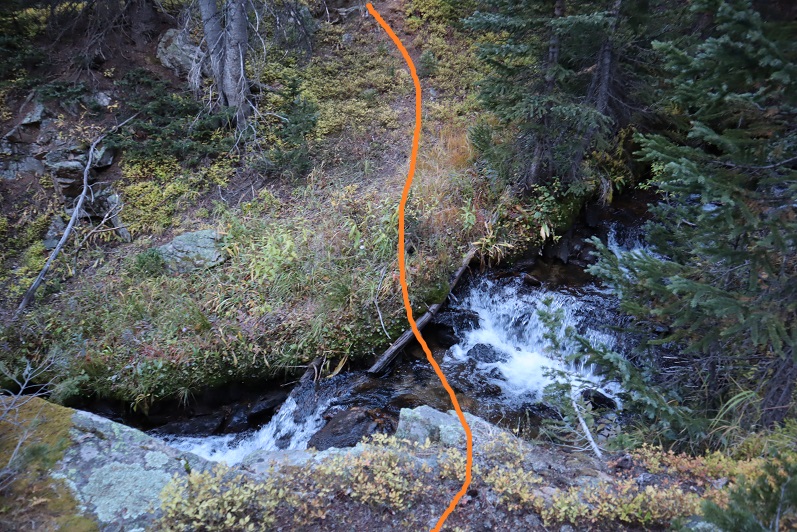
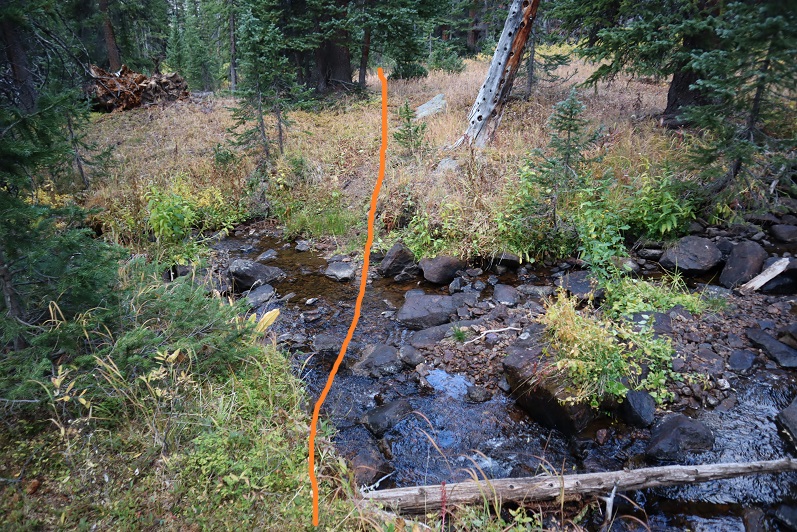
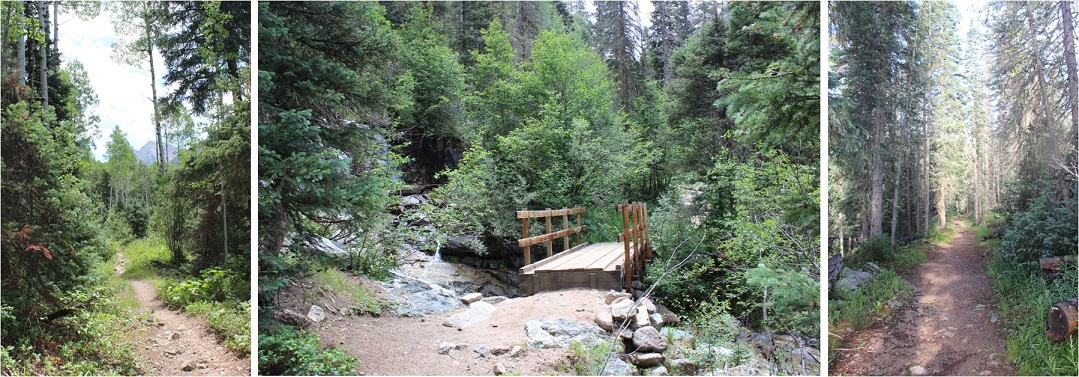
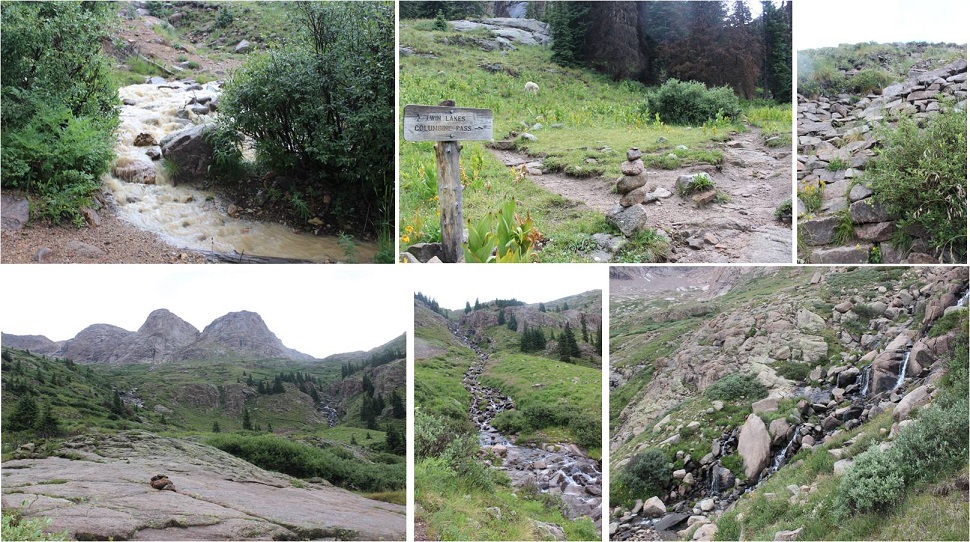
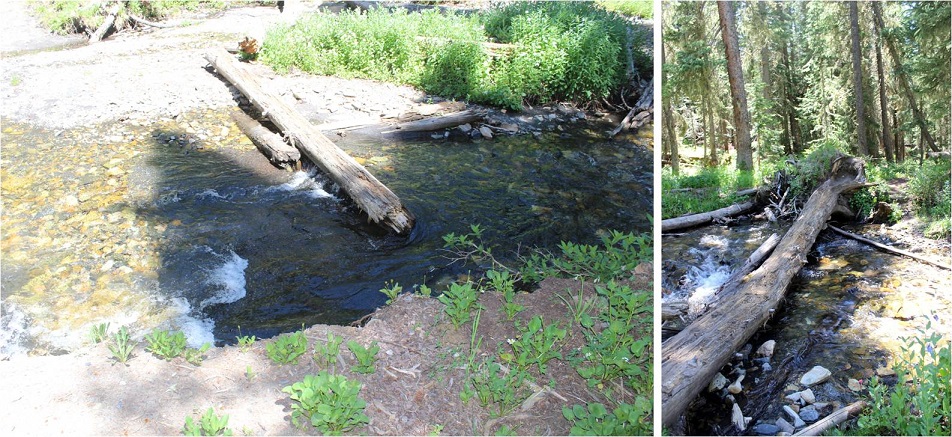
Here the trail ends and the fun begins! I traveled west, crossed a small stream
Continued across an open area back into the trees
And crossed another stream
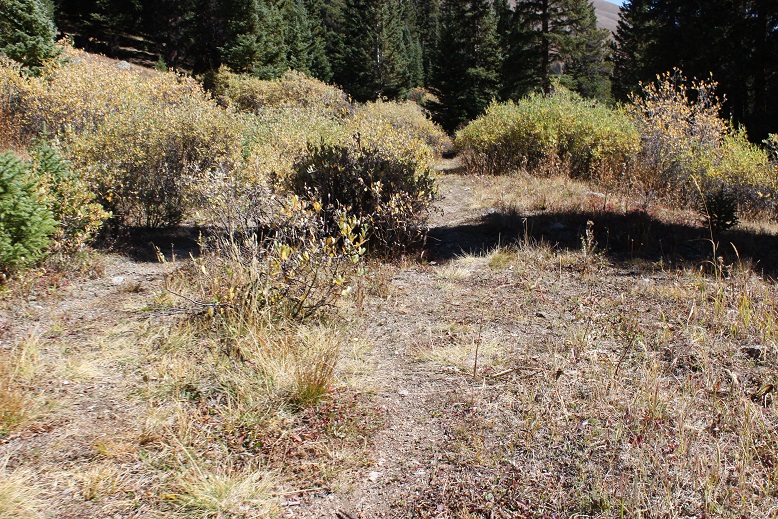
Back into the trees the ‘trail’ looks like this
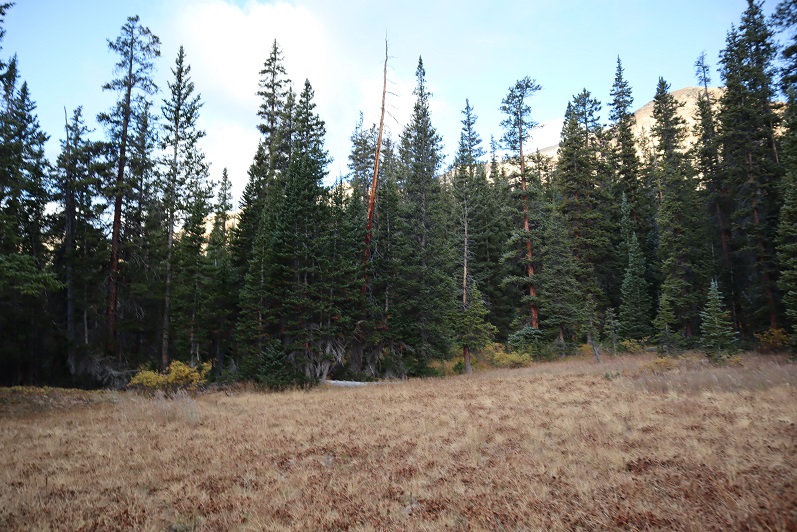
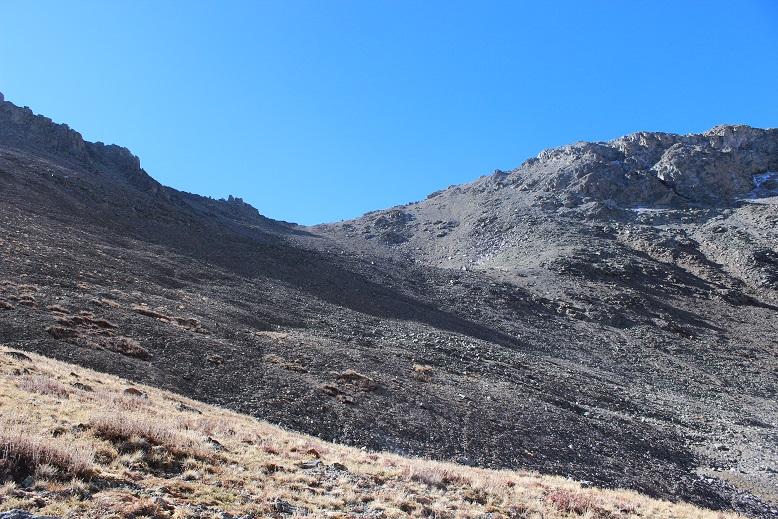
I angled southwest down the mountainside, losing about 100’ in elevation. There were tons of game trails here, but not one that were consistent.
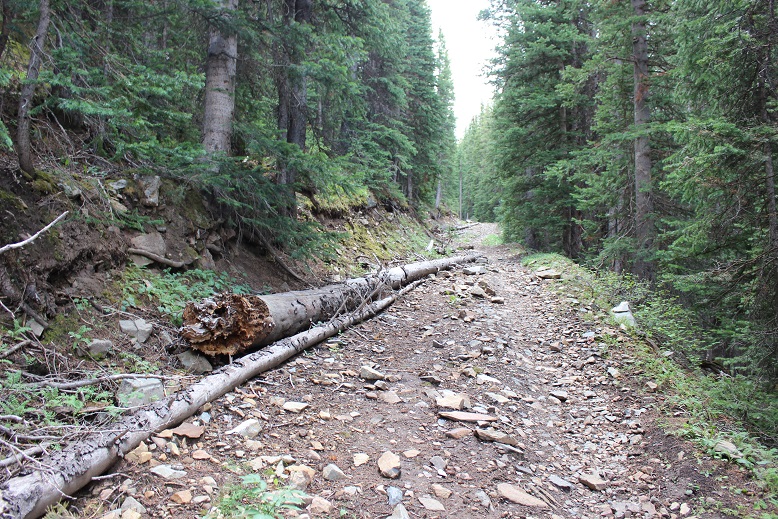
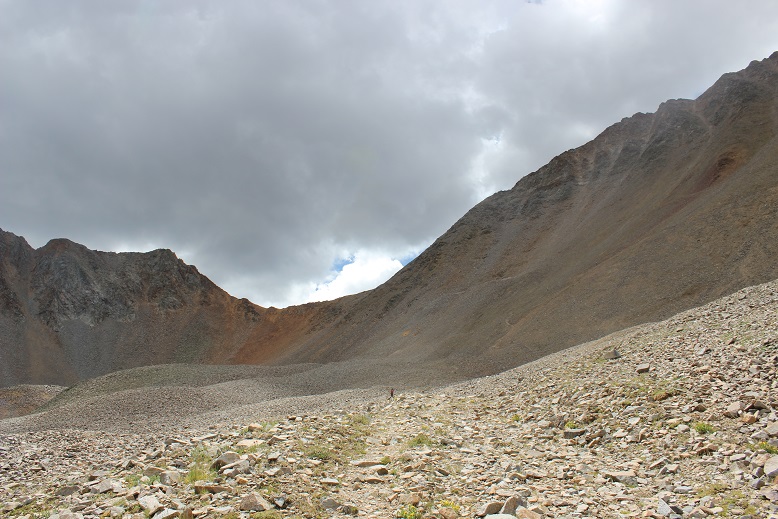
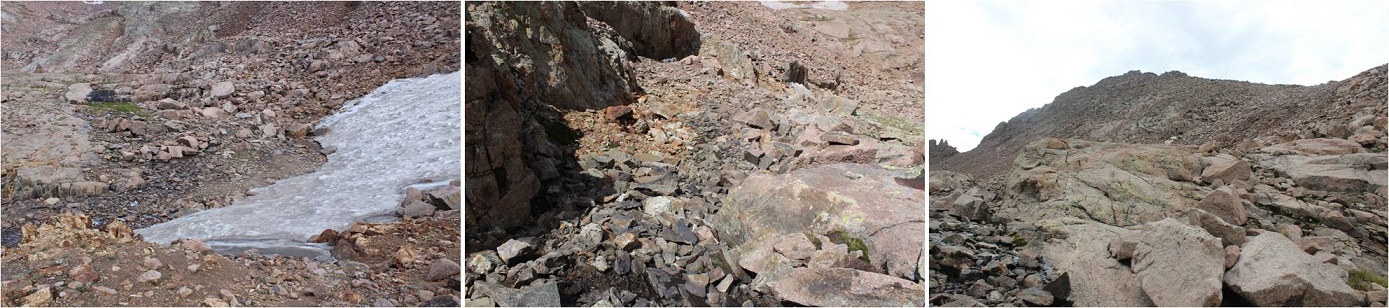
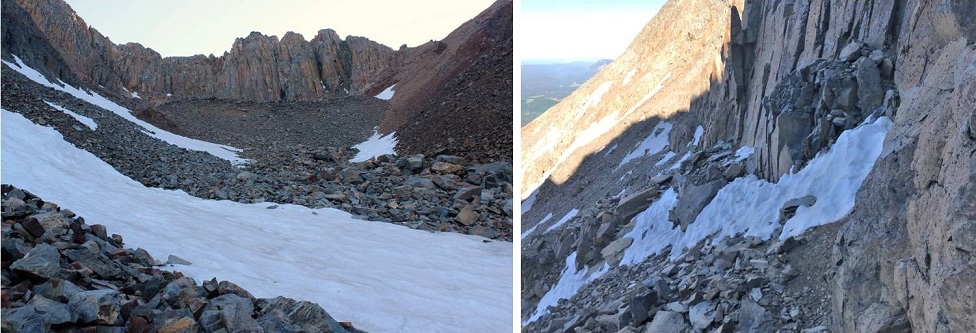
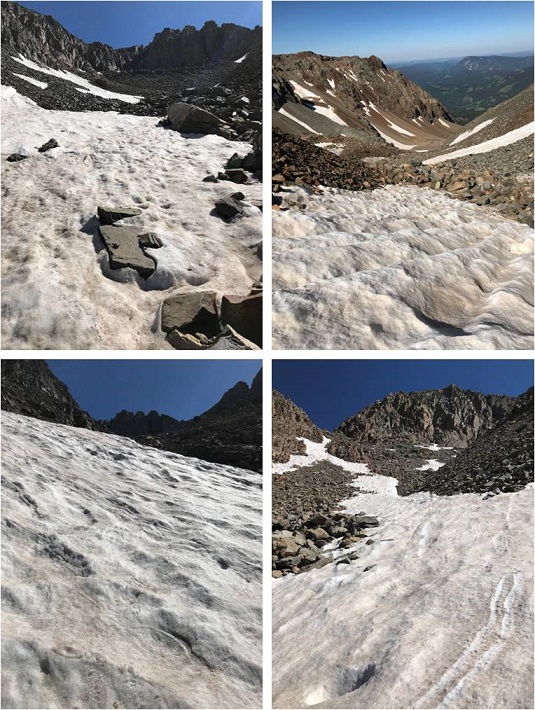
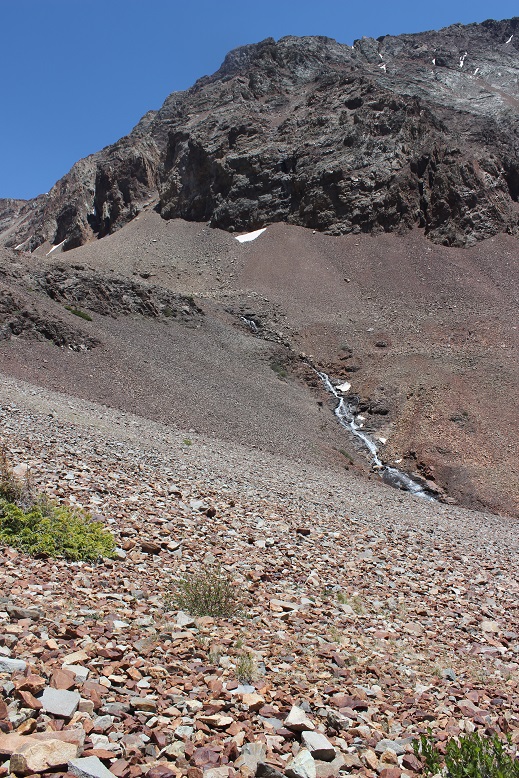
After losing about 100’ of elevation I came to a recent avalanche area. It hadn’t been cleared and there’s no straight path through the debris. It started to snow. At this point I was glad I’d started late because this wouldn’t have been fun to traverse in the dark. Luckily it wasn’t too difficult in the light of day. I just looked for the path of least resistance, crossed, and then headed down to North Halfmoon Creek. The snow ended before I reached the creek.
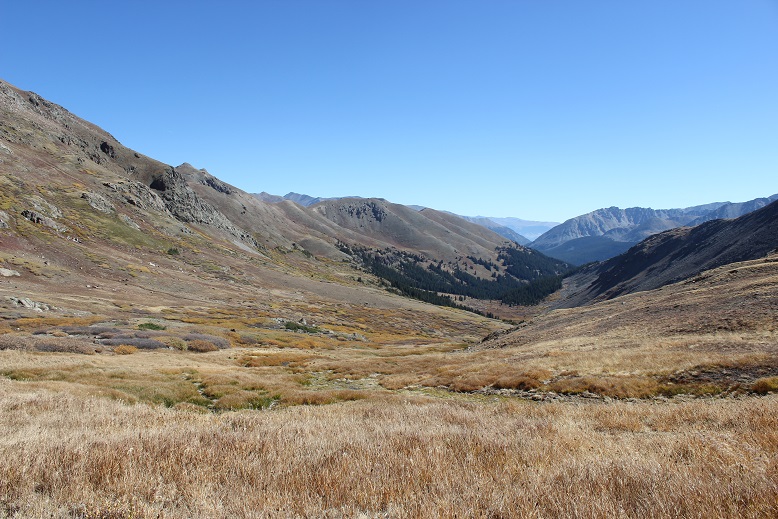
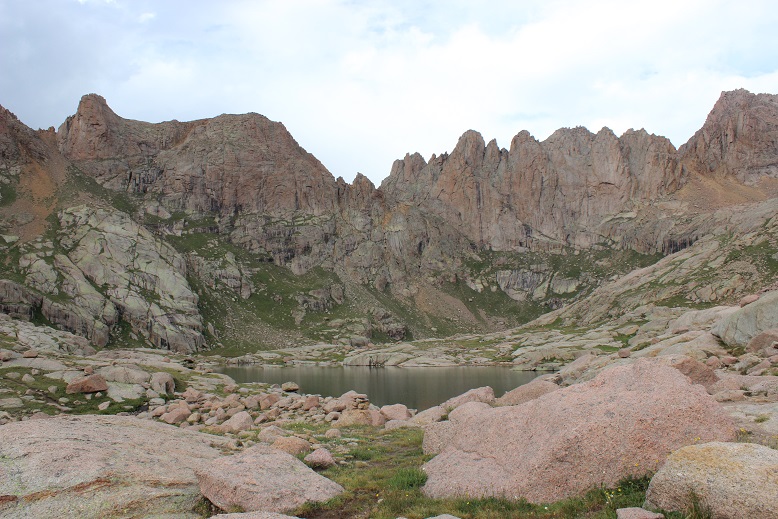
When I made it to the creek I followed it to the end of the basin. At first I walked through the willows, but (obviously) this wasn’t ideal
After a few dozen yards I looked over at the creek, noticed the top of the rocks were dry and decided to just walk along the creek to the end of the basin. This ended up being a fabulous idea and saved me quite a bit of willow-time.
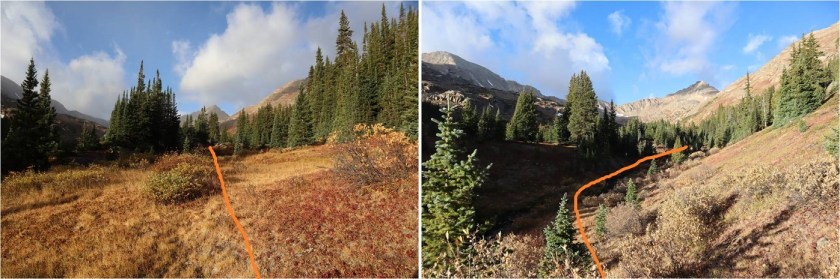
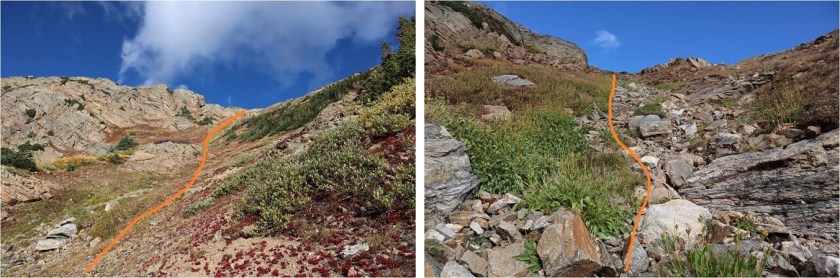
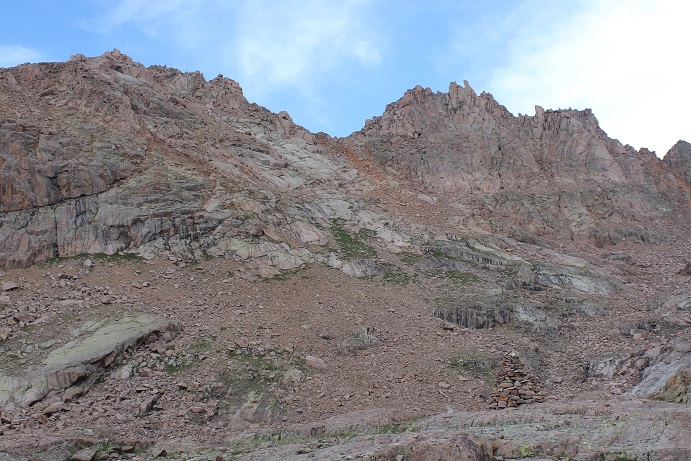
At the end of the basin the creek becomes a small trickle. Here I turned right (northwest) and headed up a grassy gully and then another, more rocky gully. The grassy gully was full of terribly mean-prickly plants.
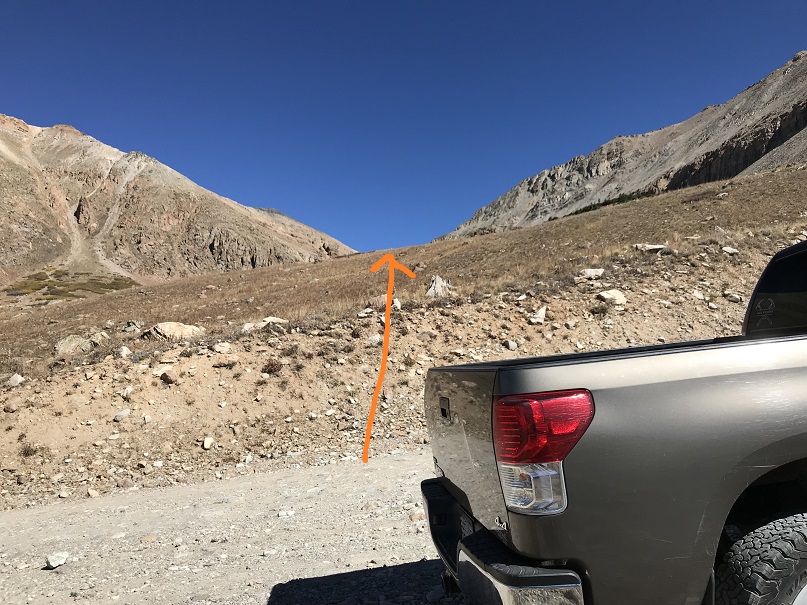
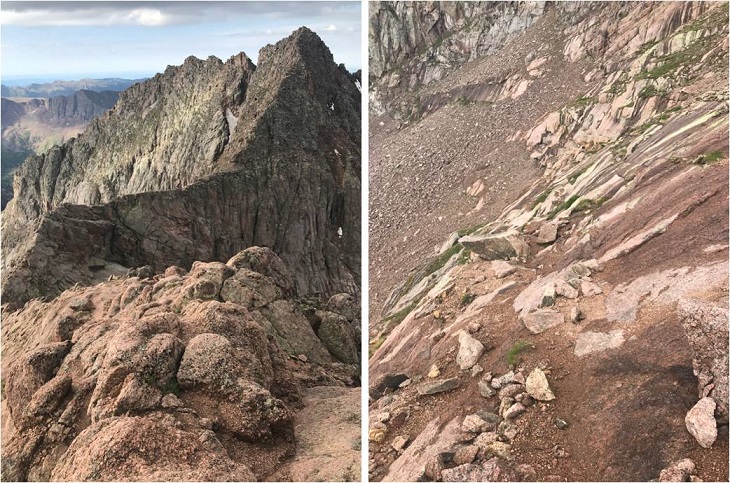
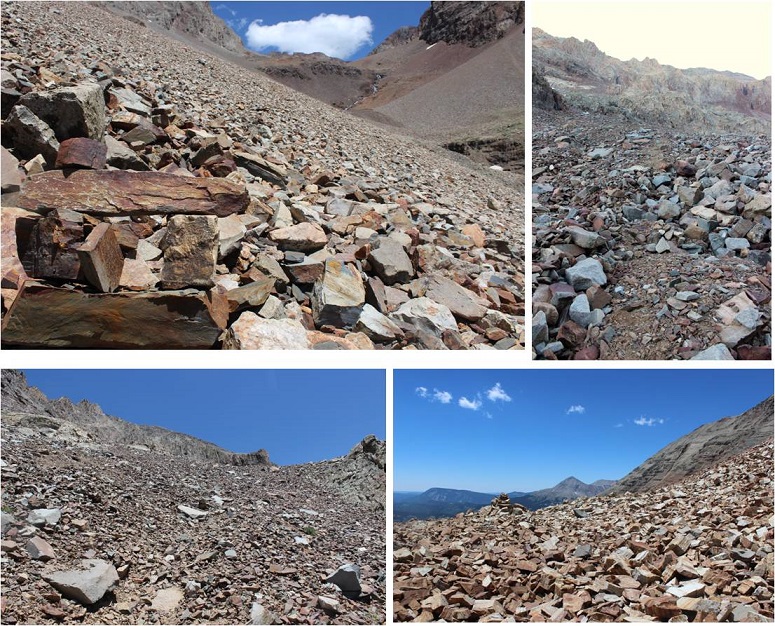
Here the terrain became rockier, with loose talus and unstable rocks. At the top of the gully I turned left (west).
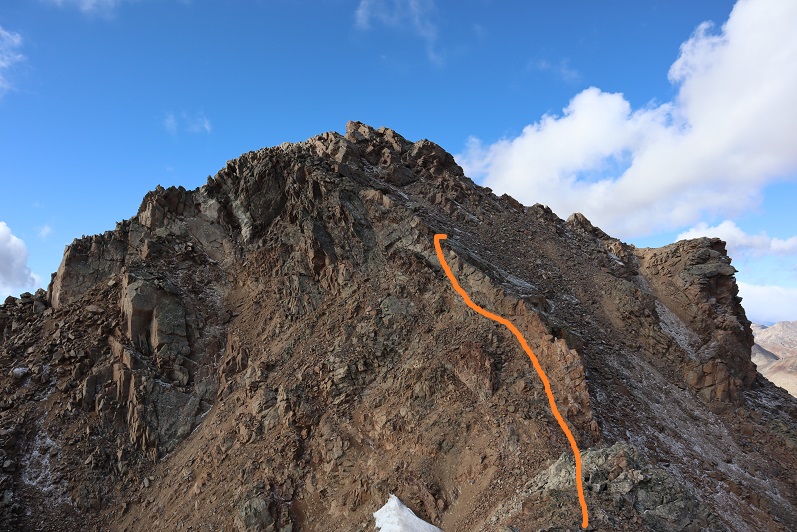
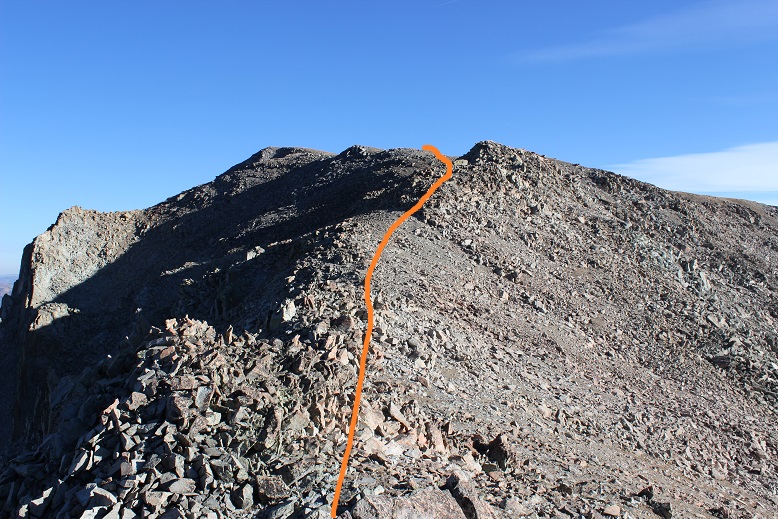
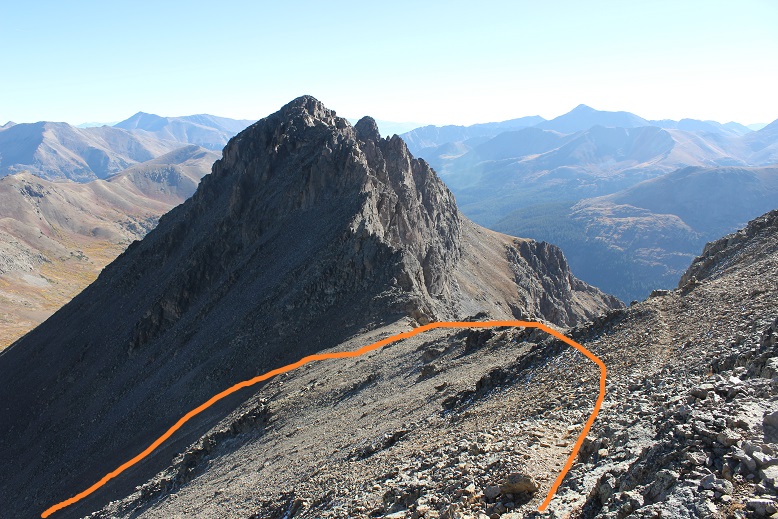
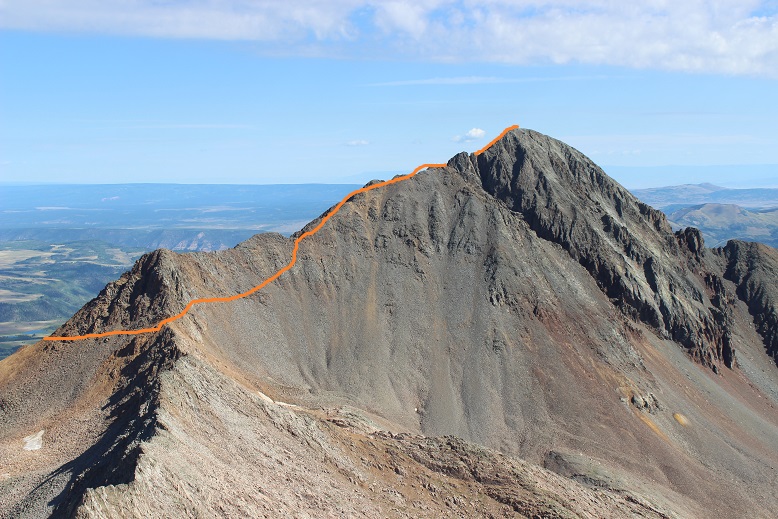
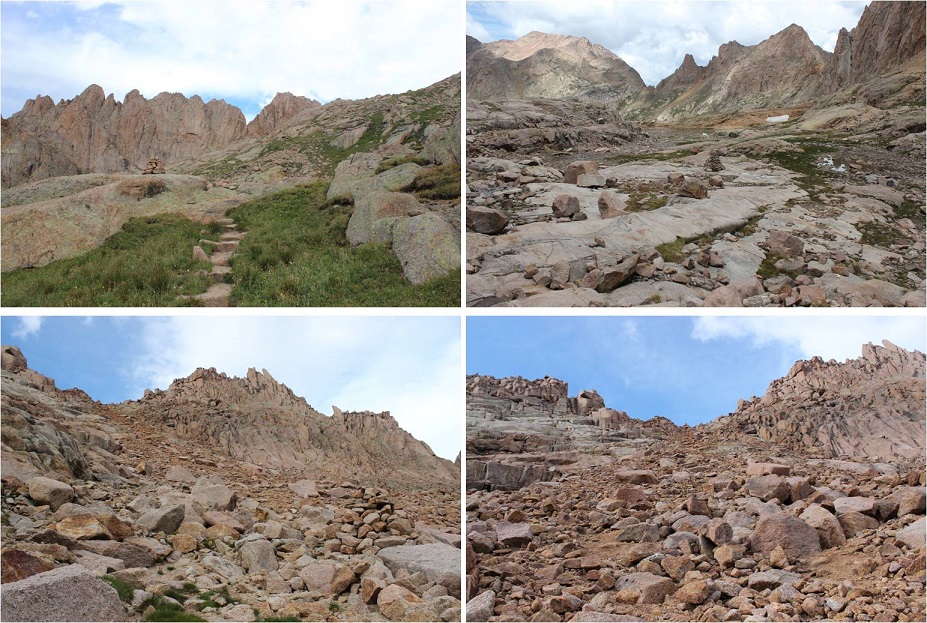
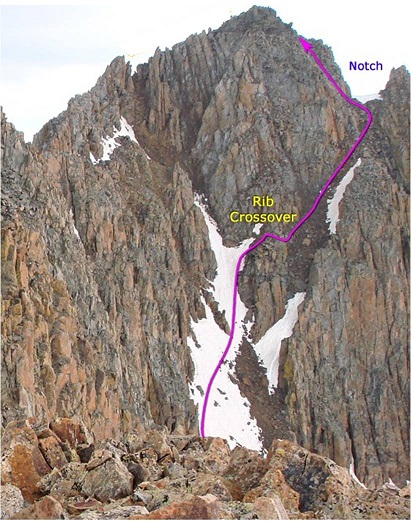
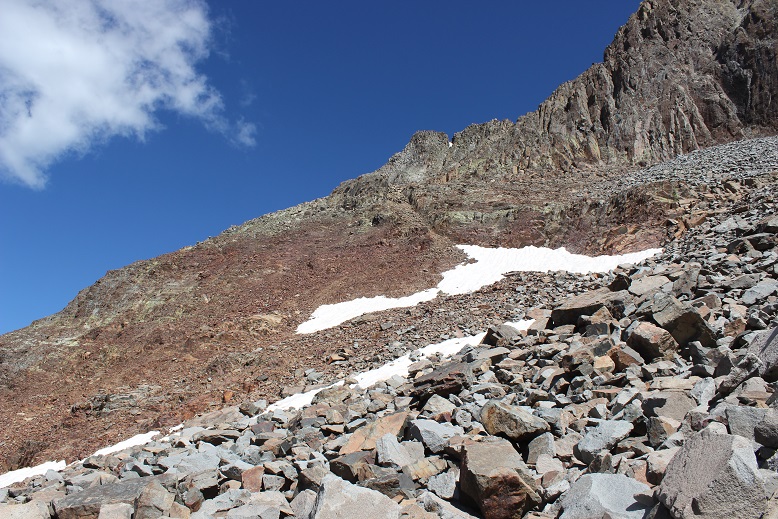
The goal from here is to gain the saddle. I took the solid line up (thinking it would be easier) and the dotted line down. The dotted line down the gully was much easier. If I were to do this again I’d take the dotted line both up and down the saddle.
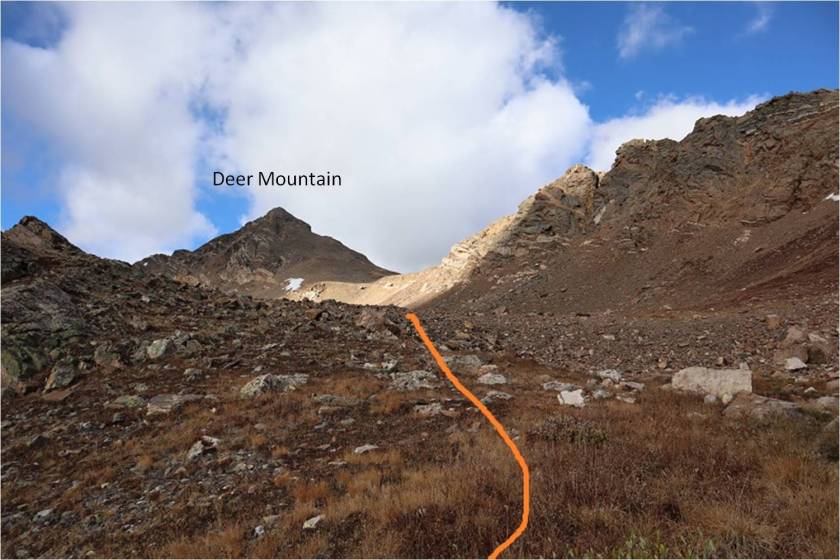
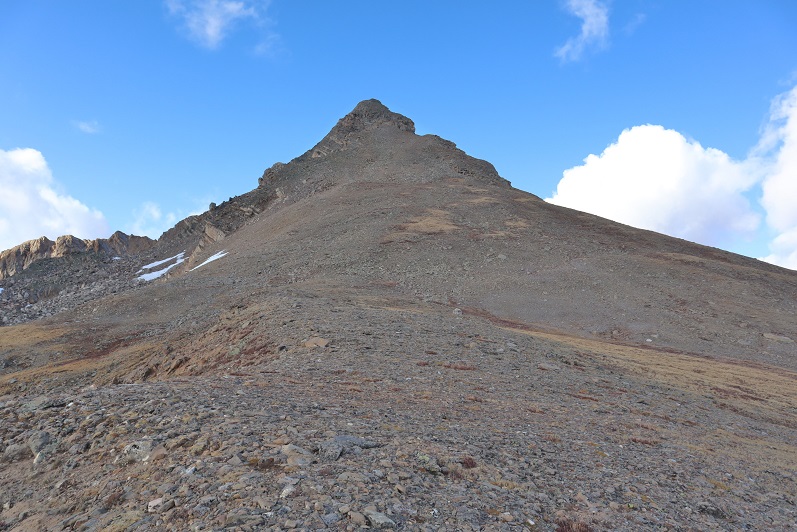
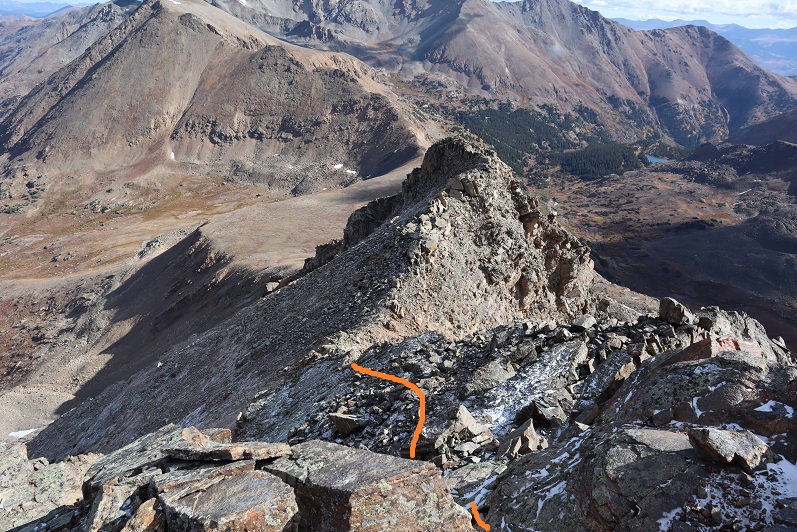
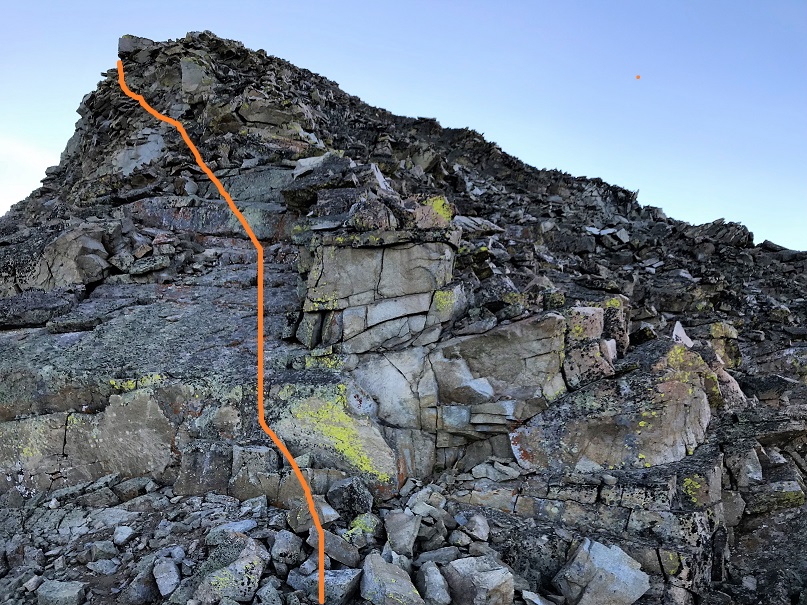
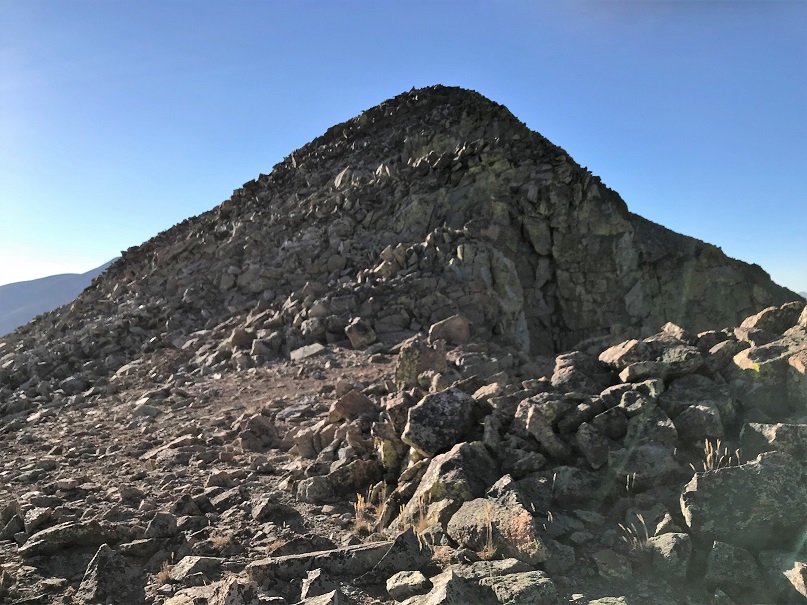
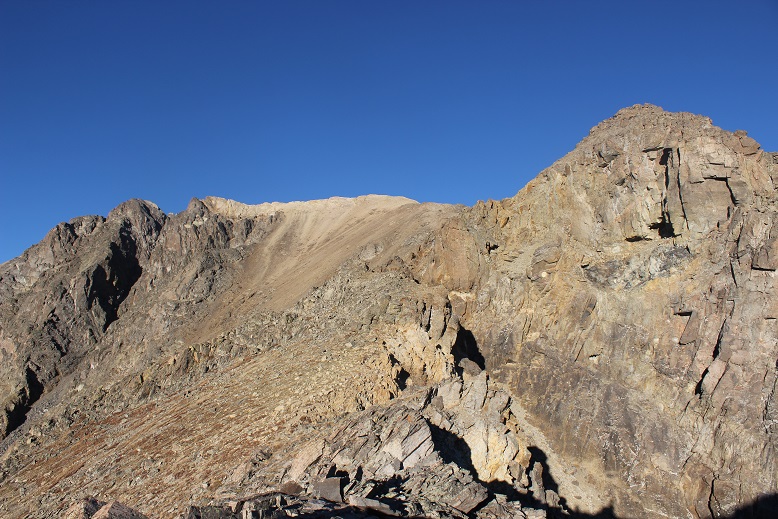
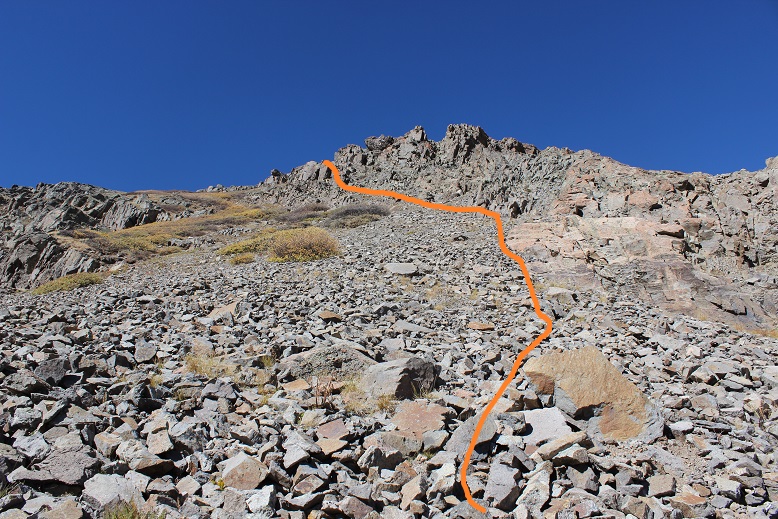
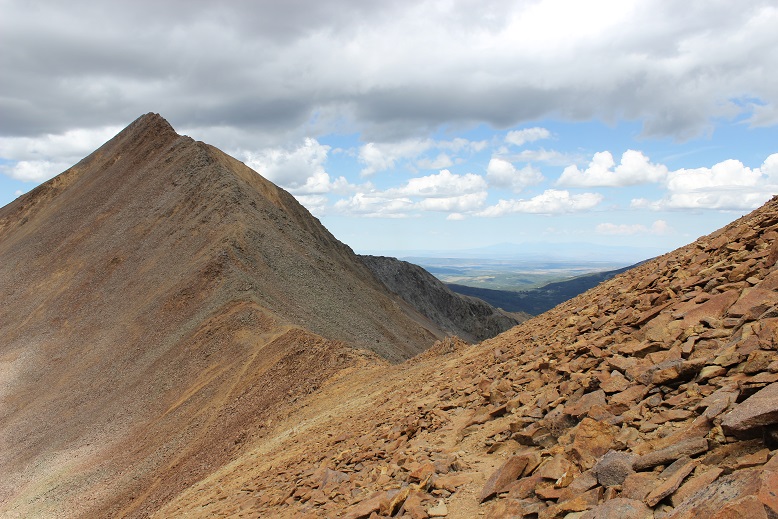
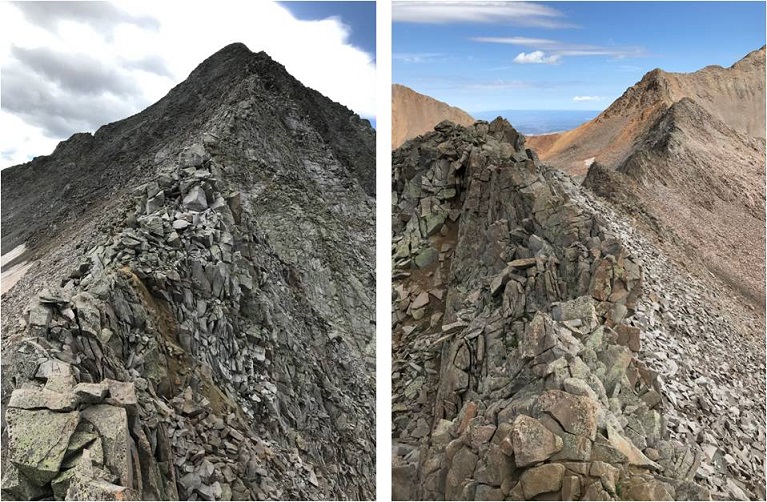
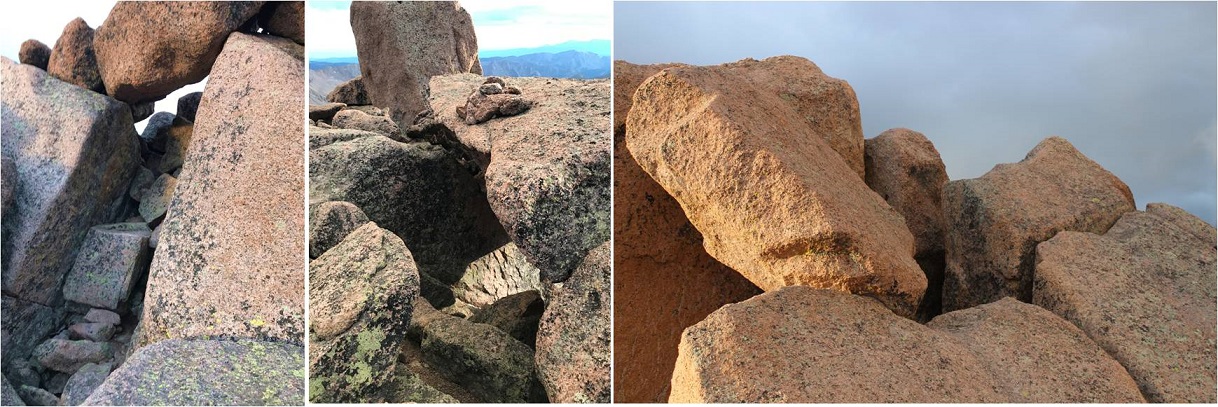
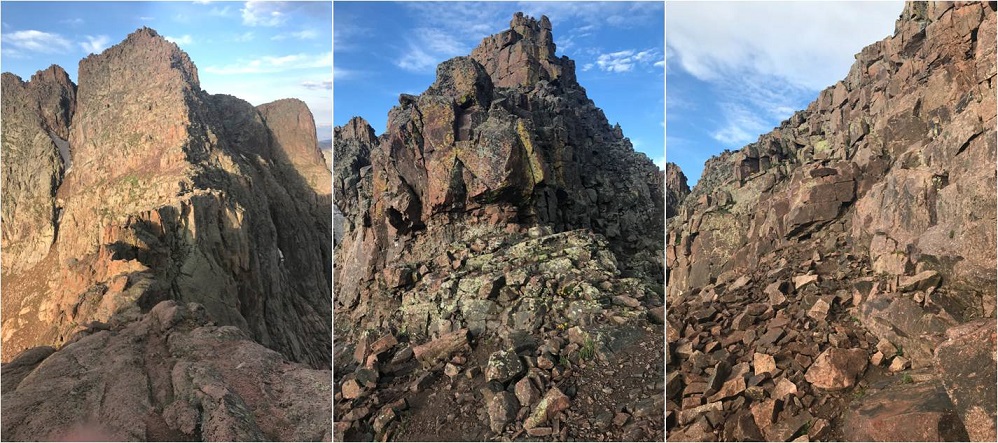
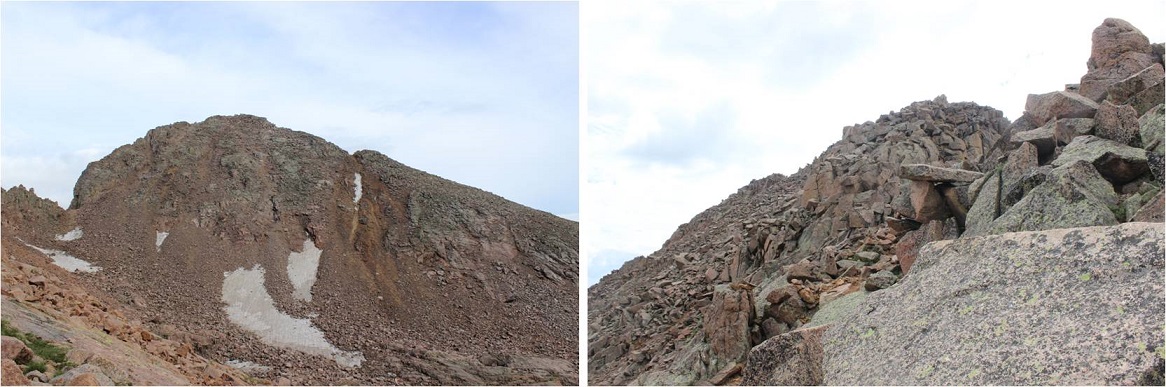
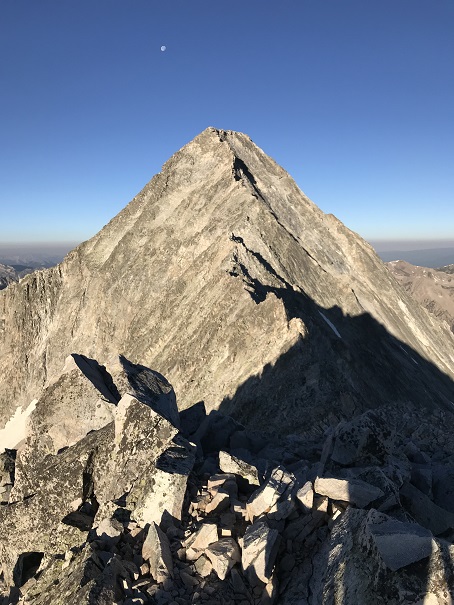
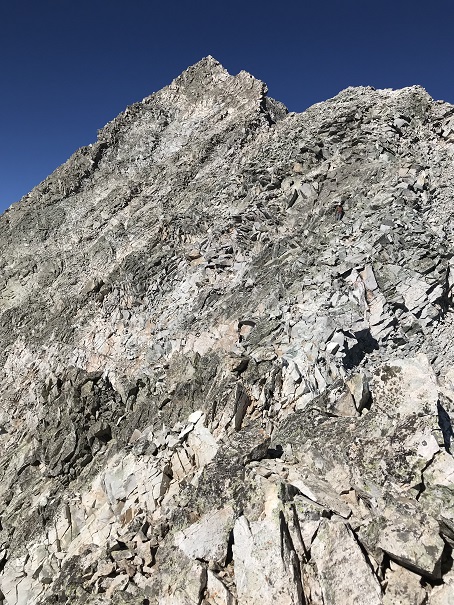
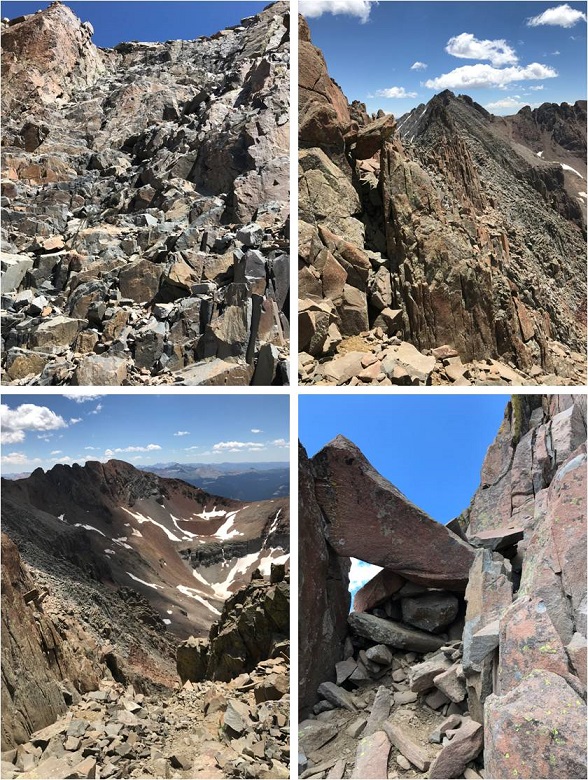
At the saddle I turned left again. My goal now was to gain this point (which is a false summit). Once again, with no trail I just headed towards the peak. This is steeper than it looks, but still class 2
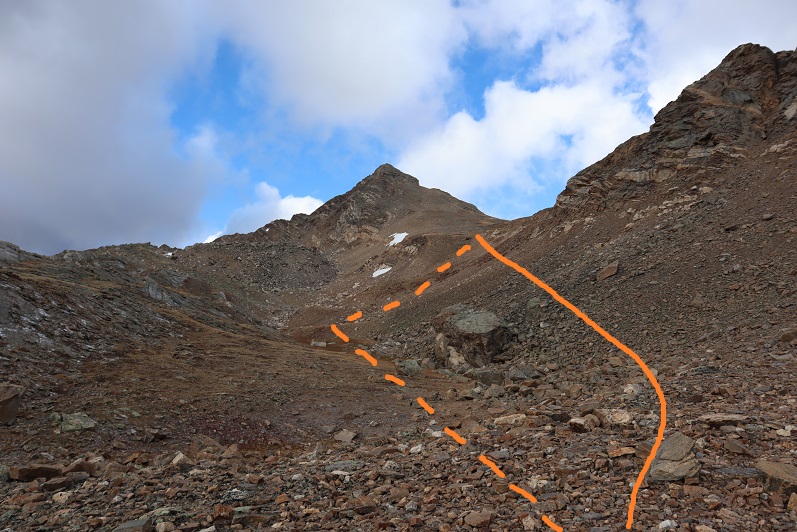
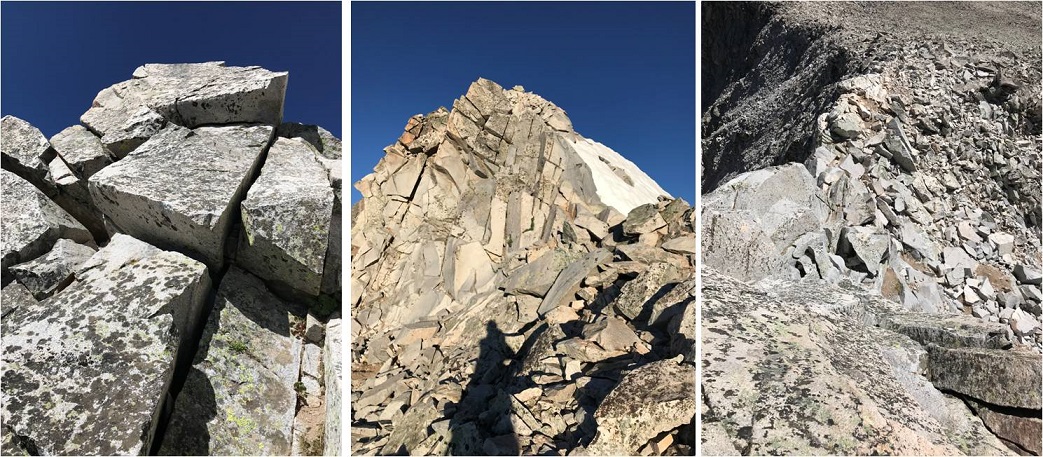
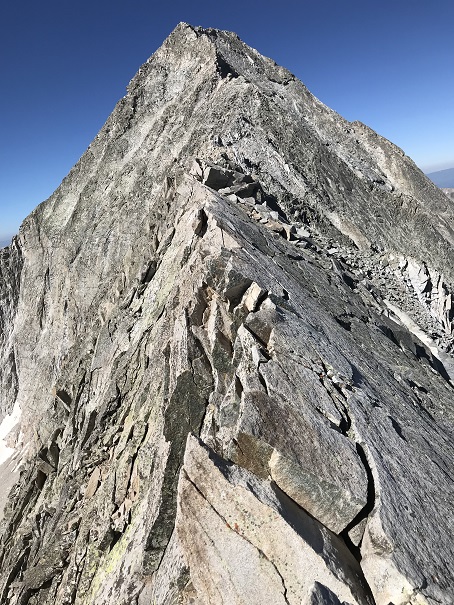
Until you get here, and then it becomes a class 3 chimney. There are several chimneys to choose from. I went straight up the center. It was a little loose, but there were plenty of hand/foot holds.
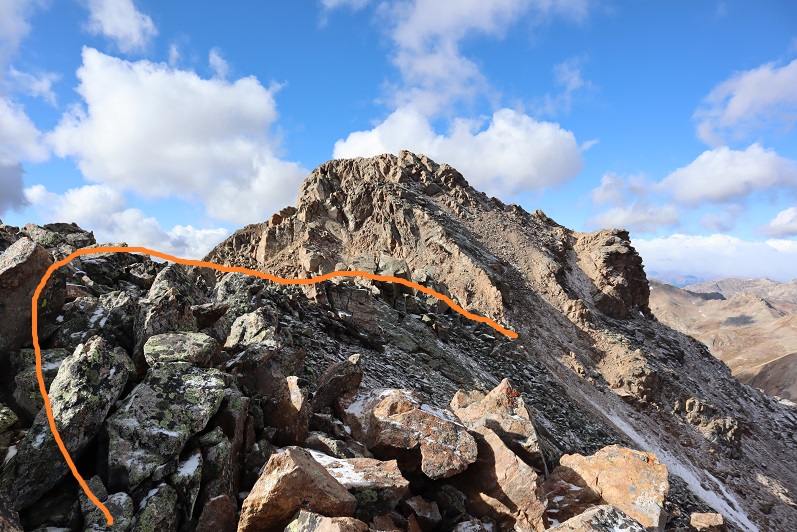
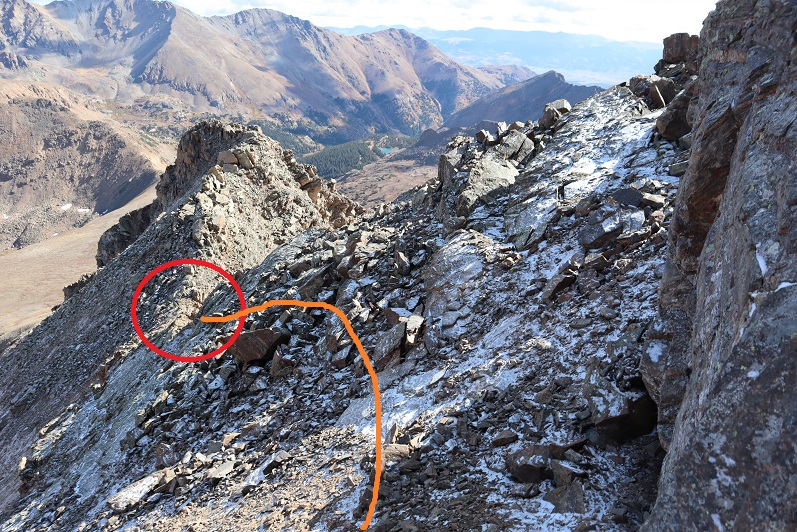
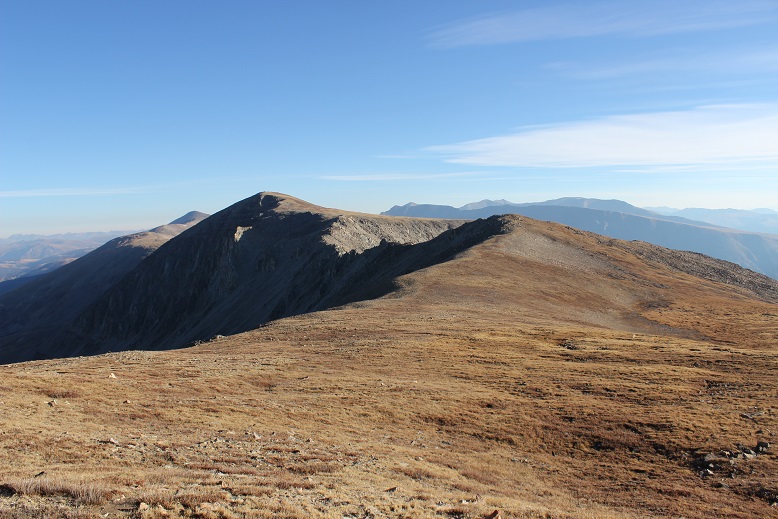
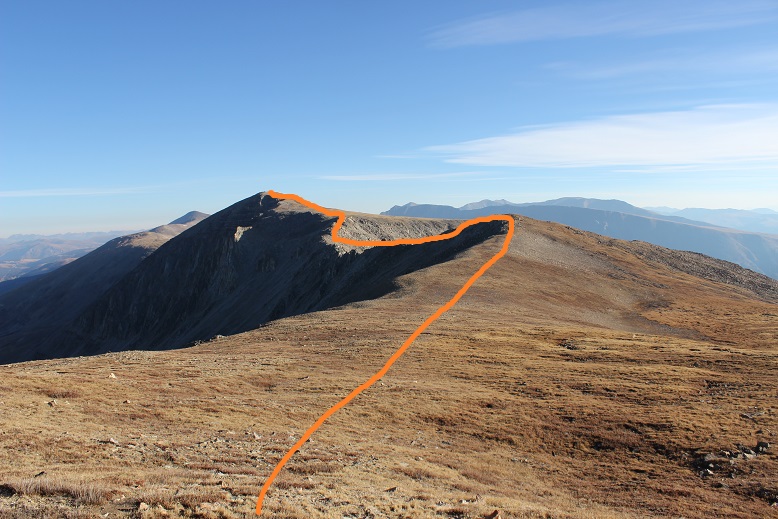
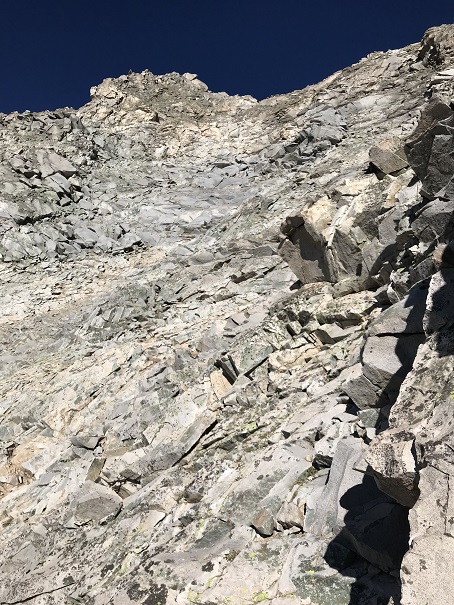
At the top of the class 3 chimney I still wasn’t there: I continued along this ridge. The best option here is to stick to the right.
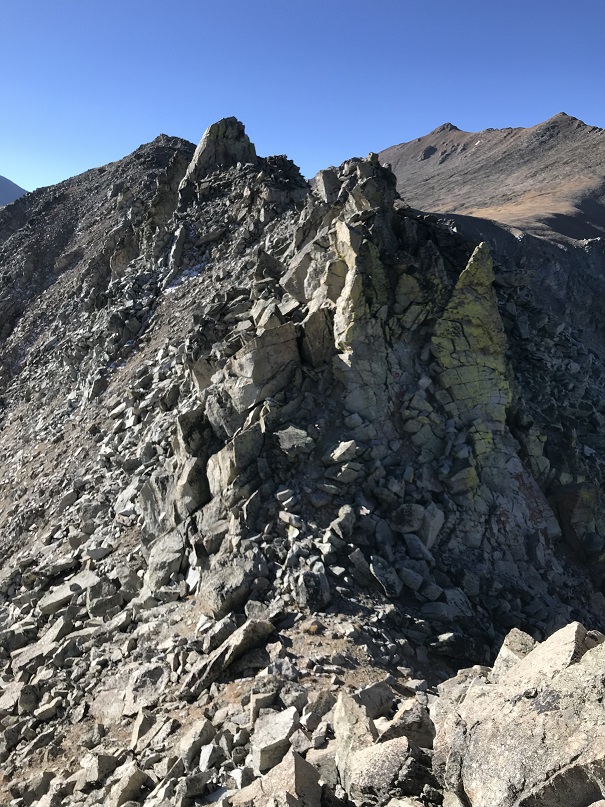
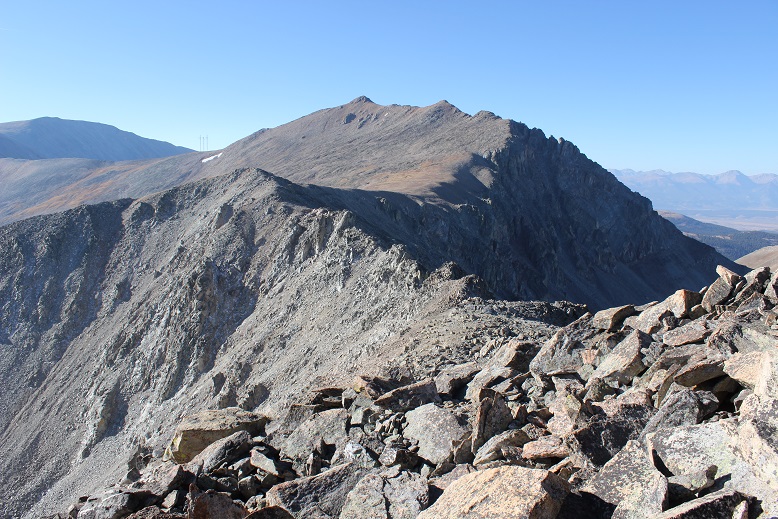
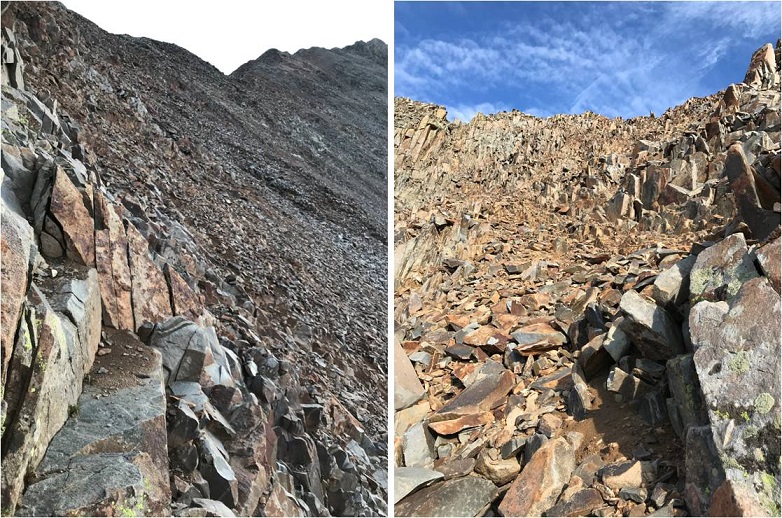
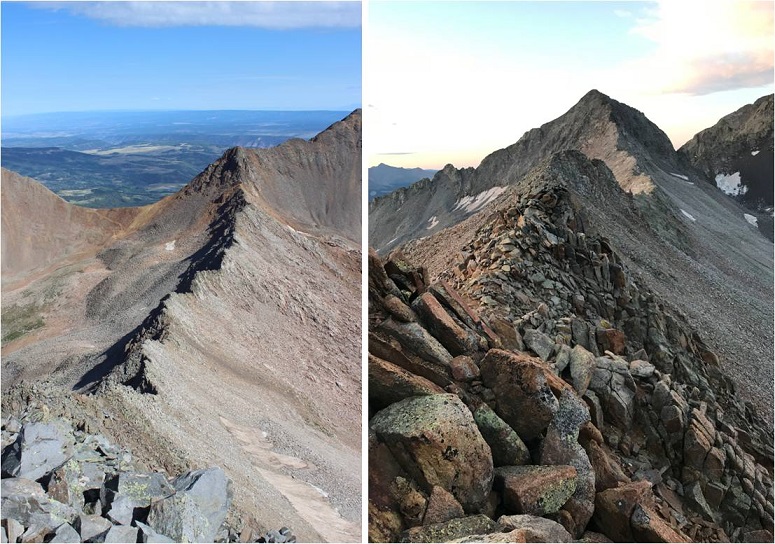
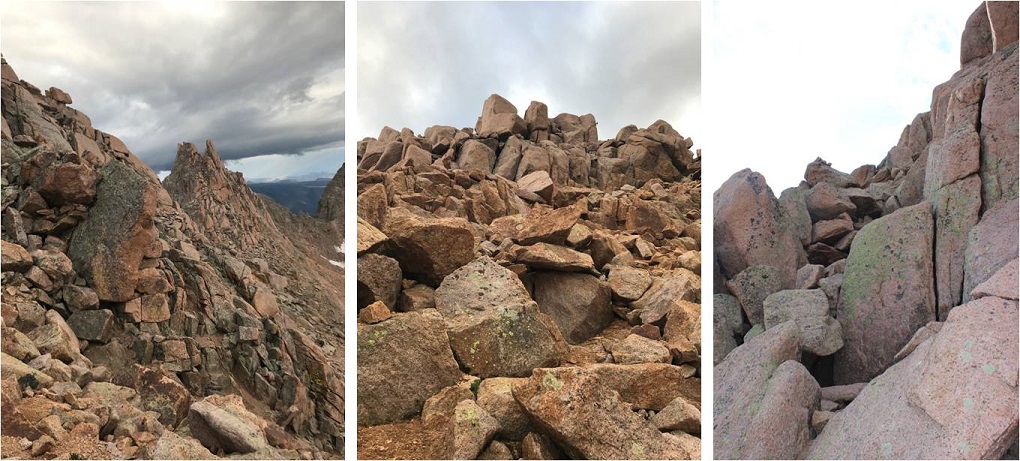
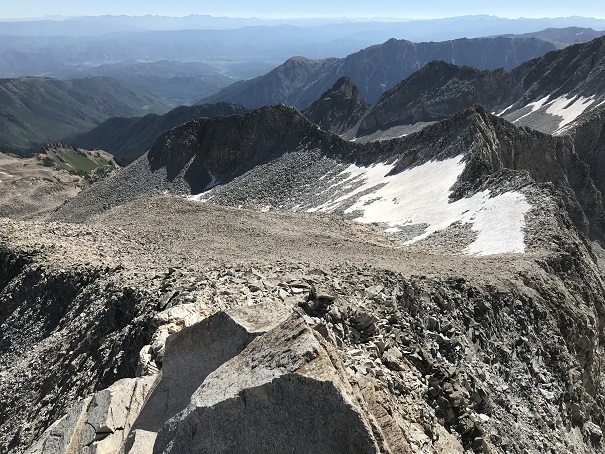
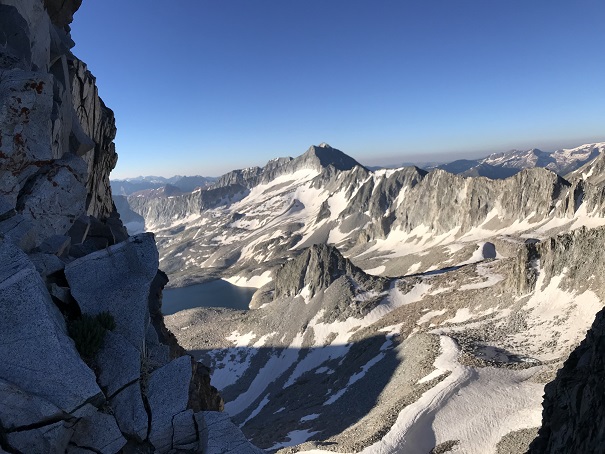
As you can probably tell by the photos, here’s where it started to get icy. What you can’t see is that it was quite windy as well. I made it to the final ridge section and had a choice: I could turn back now and attempt Deer Mountain A at another time, or be extra-super careful and continue on. I kept going, but slowed down my pace so I could be extra careful where there was snow/ice.
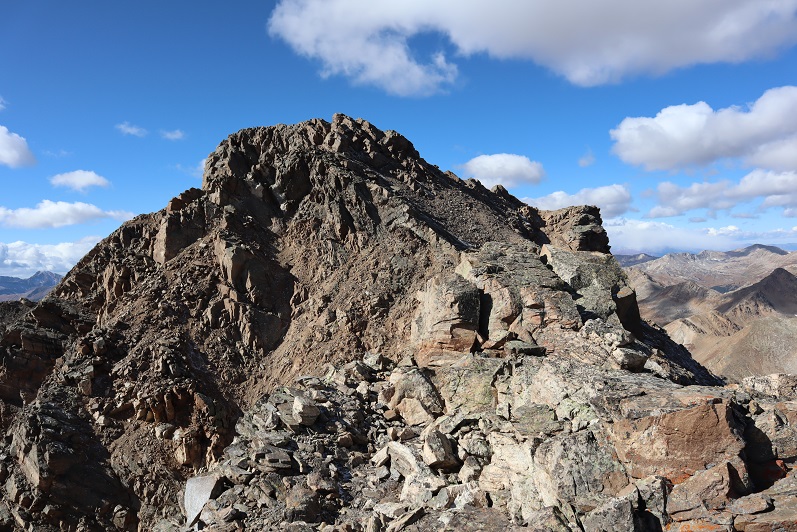
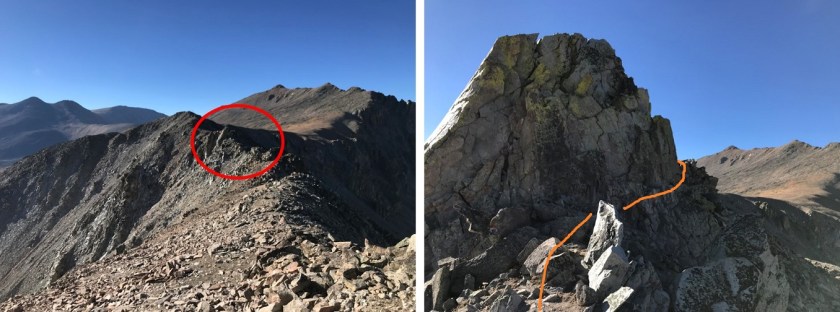
This ridge is short but packs a punch (especially with wind, which there was). The boulders here are very large and unstable, with huge gaps between them you could fall through. Also, there’s exposure. I’d liken it to Halo Ridge but add larger drop spaces and tons of exposure. I would not want to do this in winter where the snow would make invisible the huge gaps between the boulders. Somewhere along this ridge the wind swept the paper I had made with instructions on how to attempt the final summit push out of my pocket. Lovely.
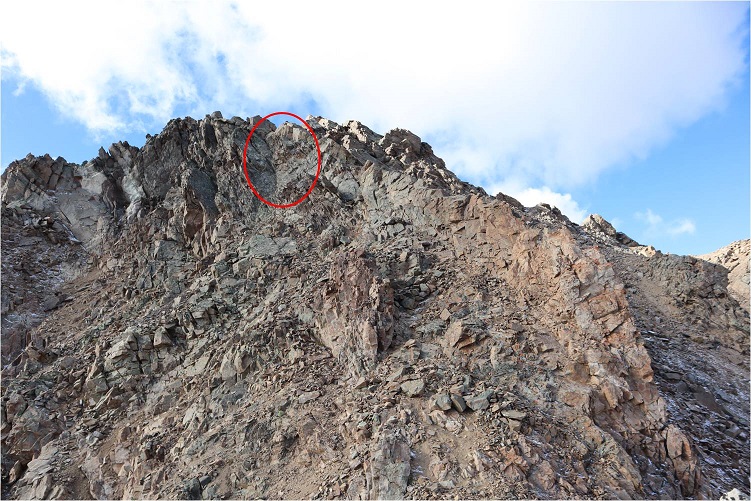
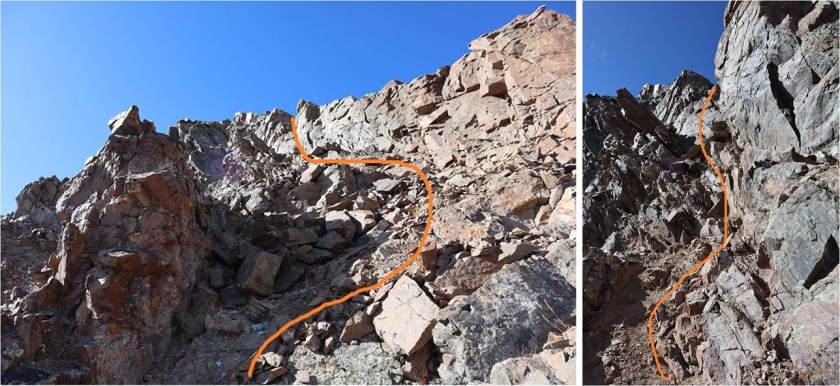
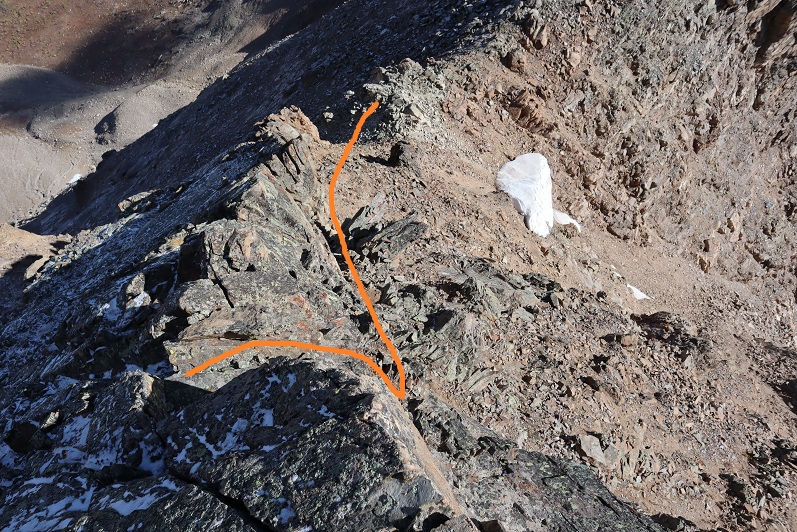
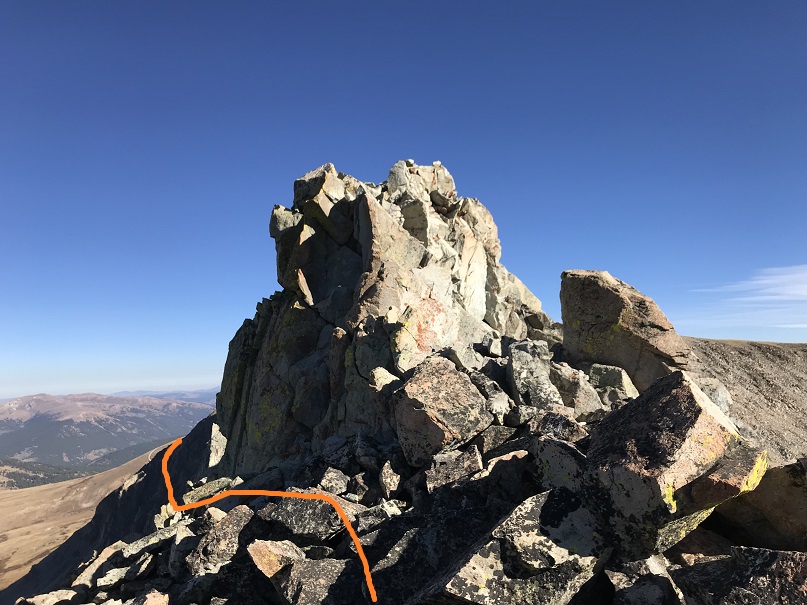
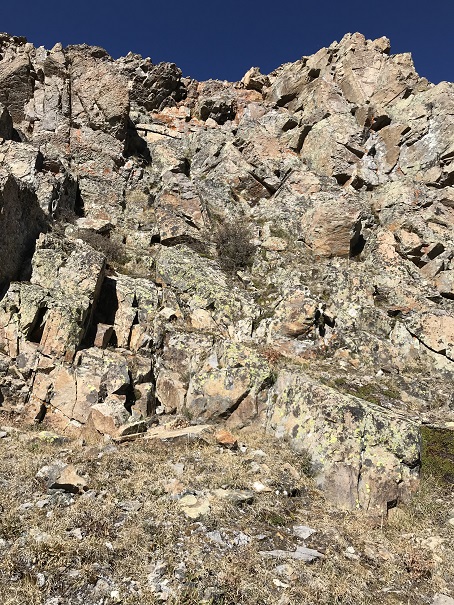
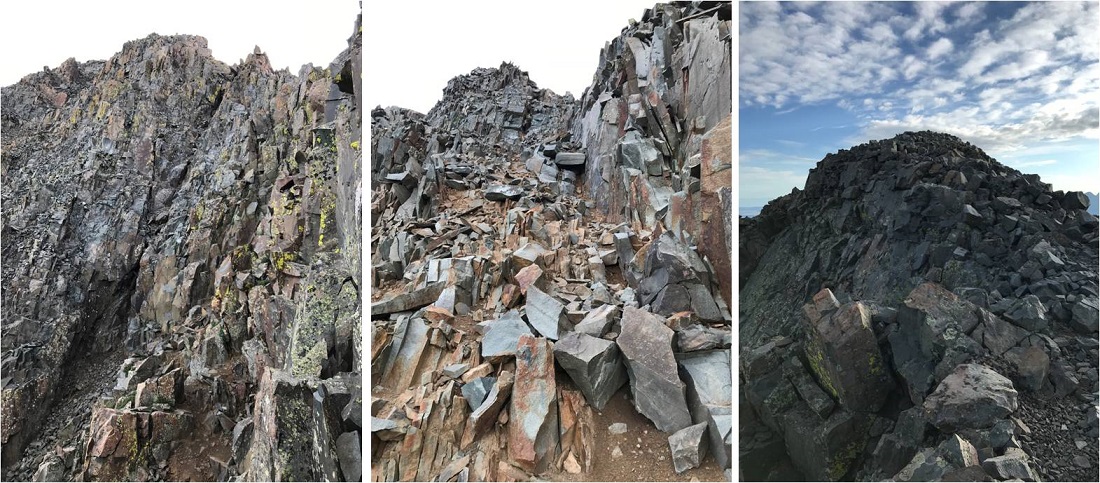
Once across the ridge I came to the most difficult part of the climb. This is class 4, and took me a few attempts to figure out (I hadn’t quite memorized the instructions I’d just lost). At first I started with the circled area, but about ¾ of the way up came to a place that felt way too committing to be class 4 (even for someone short like me) so I retreated and tried again.
I took another look behind the ridge and decided this was not the better option, as this side was much icier than the one I wanted to climb. I tried again in another area and this time was successful making it over the ridge. I had to take off my mittens here to climb, and my fingers were becoming numb: I kept putting them on and then taking them off again to climb. Here’s the route I took. This felt solid class 4.
Once on top of the ridge I wasn’t happy to see all the ice (it’s pretty much invisible in these photos, but it’s there). I once again committed myself to being extra careful as I mapped out the safest route. This is the route I took (sometimes on my hands and knees on the rocks to avoid slipping)
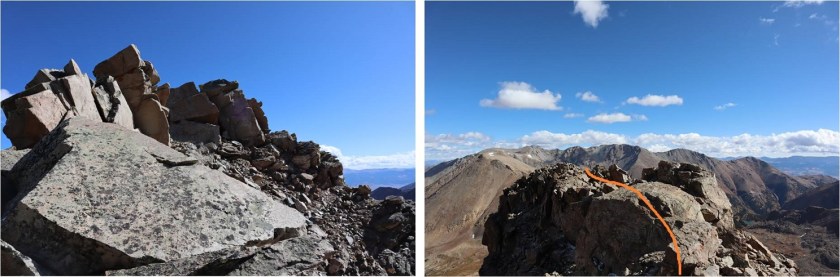
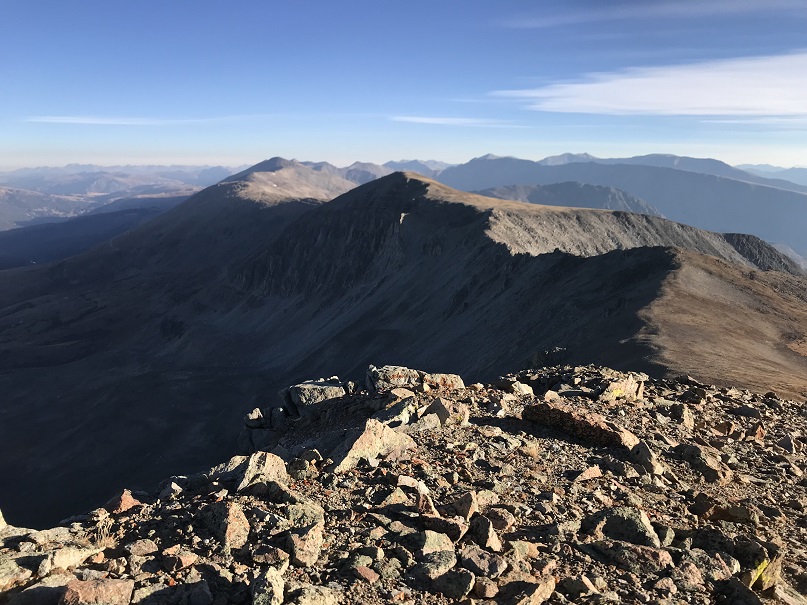
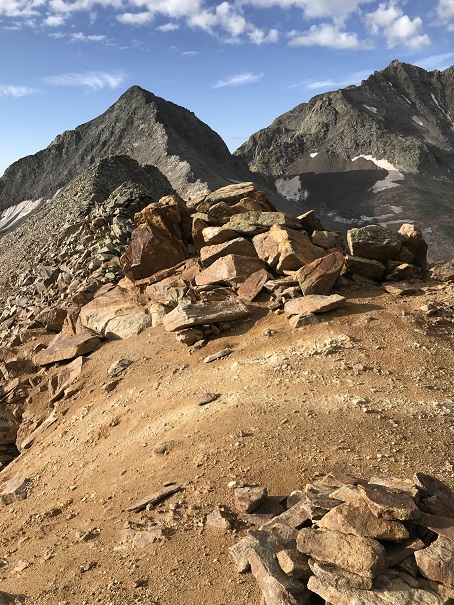
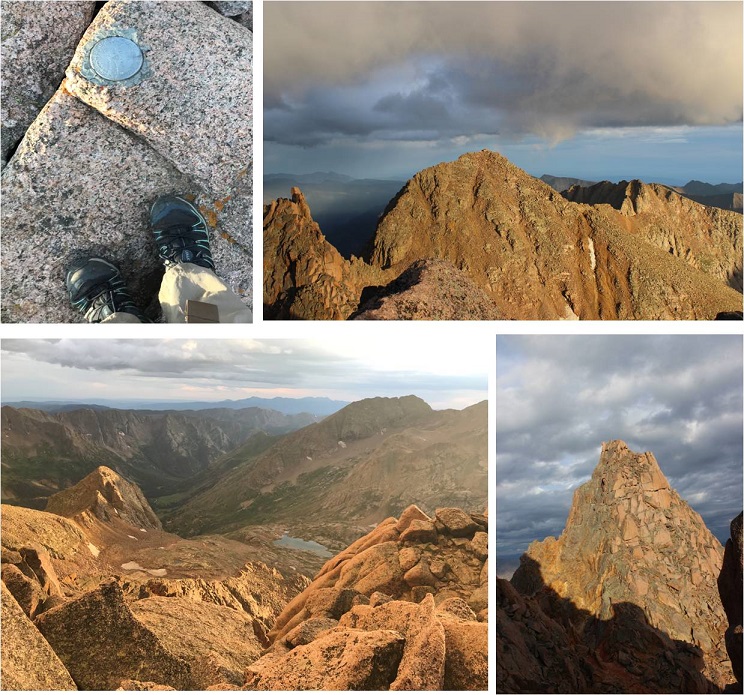
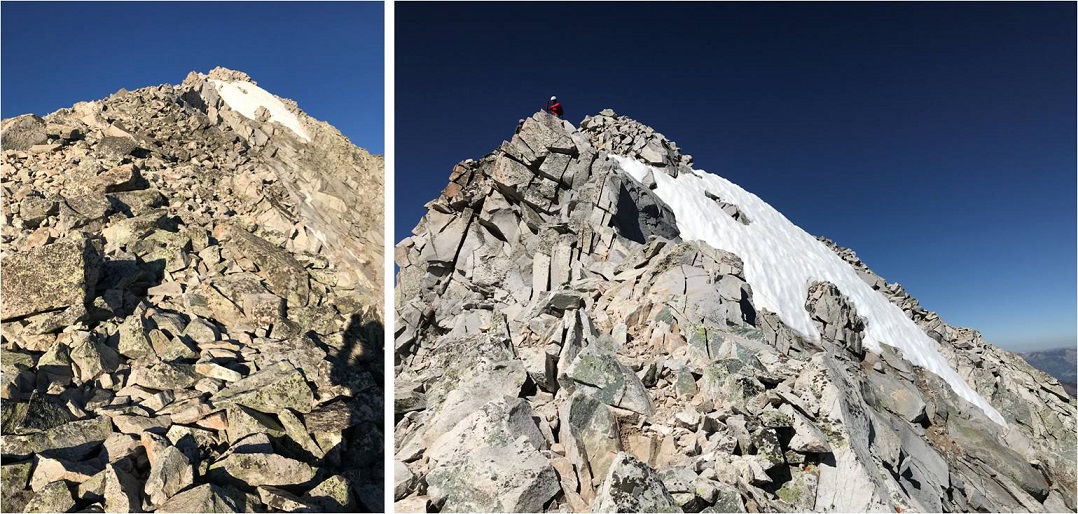
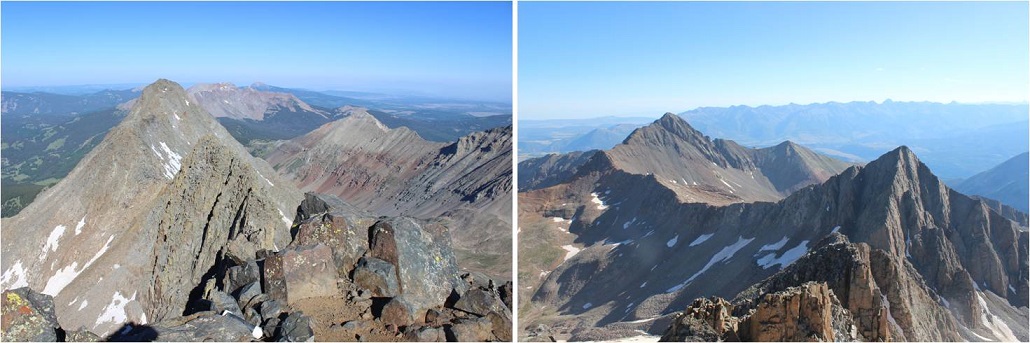
From the top of this area it was a short walk to the summit
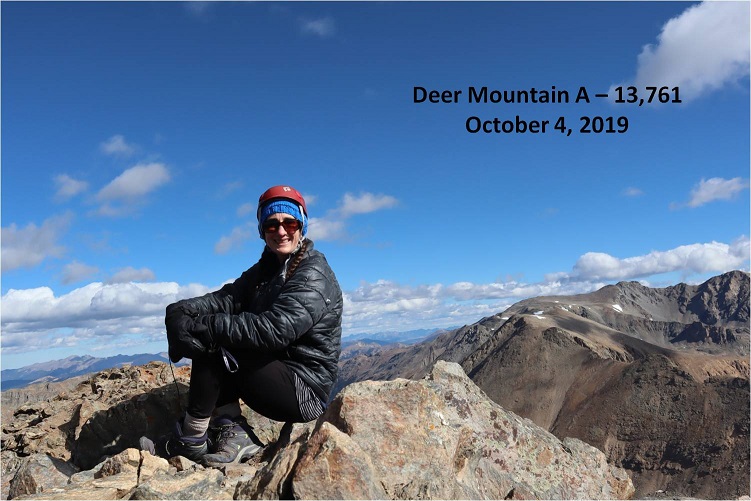
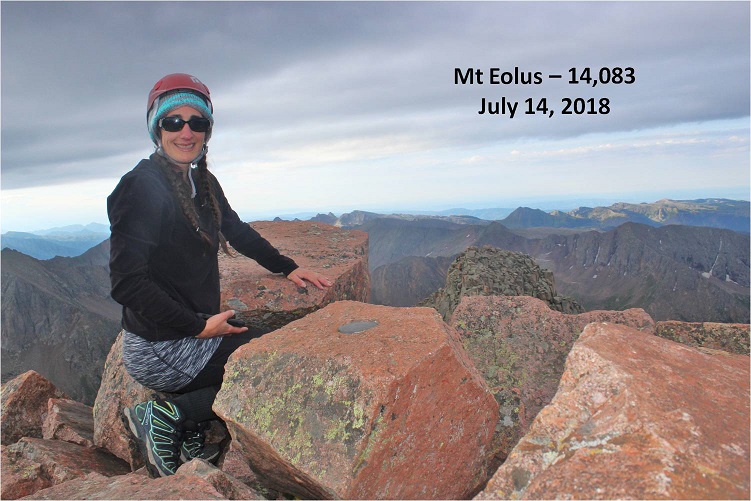
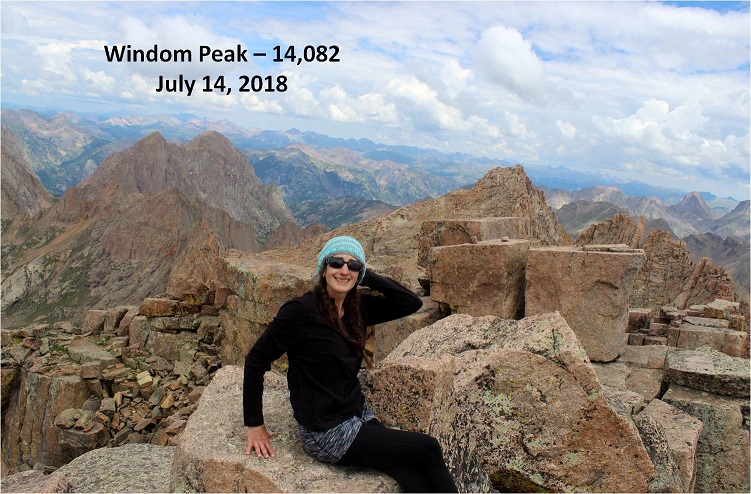
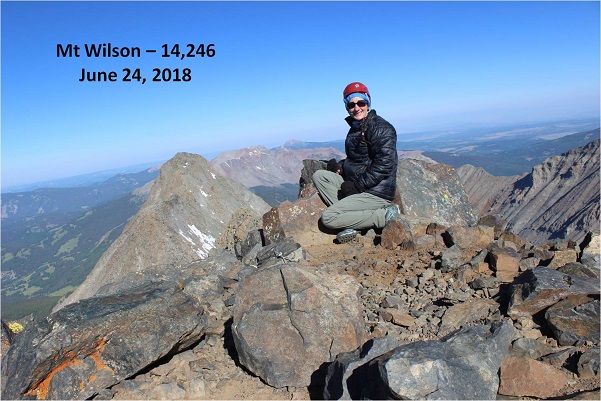
I summited at 10:20am
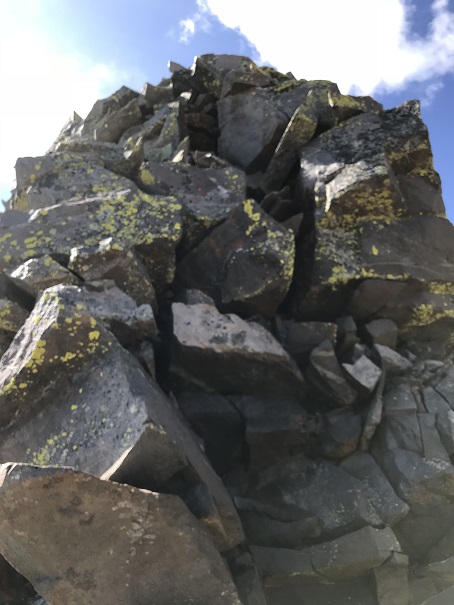
Deer Mountain A Summit:
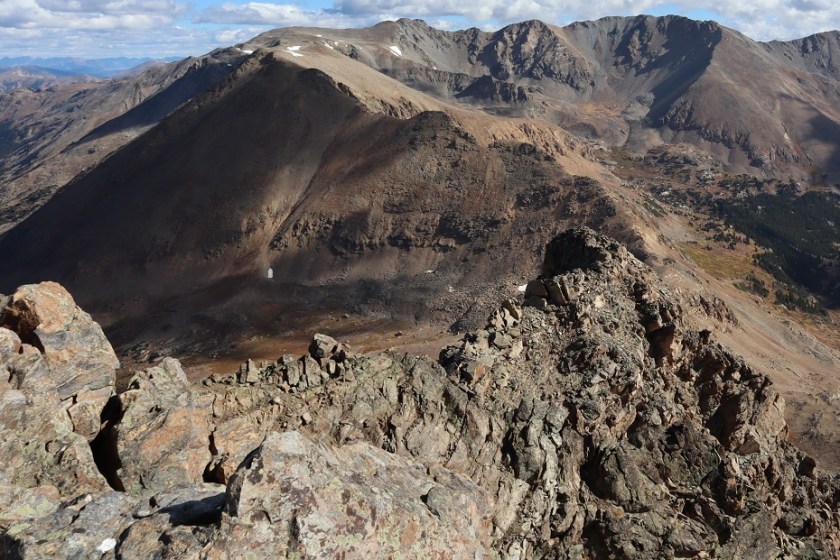
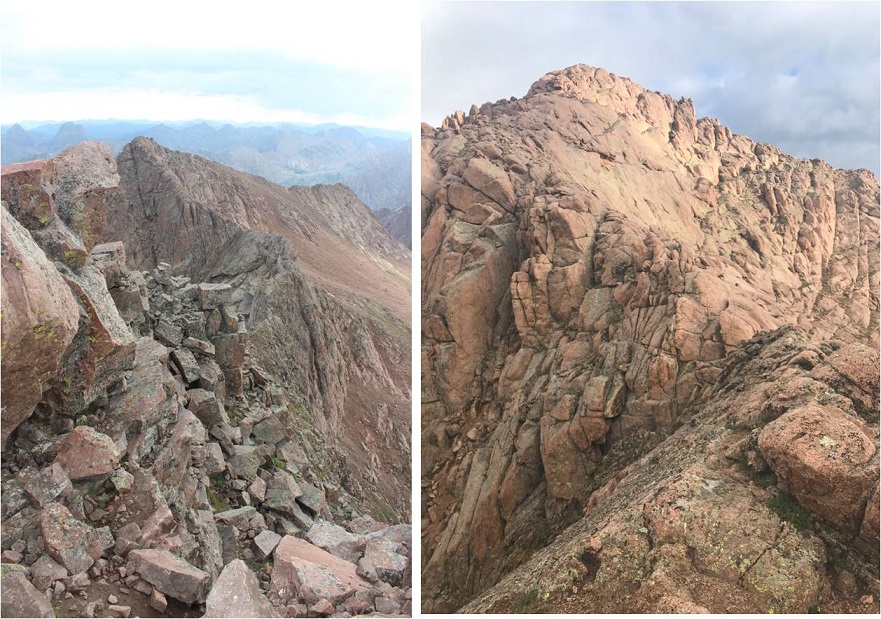
The wind was still a steady 30-40mph at this point and I didn’t want to stay long because I was worried about my fingers. Here’s a look back at that ridge after the class 3 section.
Ok, time to head back. Here’s the route I took back to the class 4 section, aiming for a small notch in the ridge
Here’s what it looks like heading back down the class 4 area. You can see why I didn’t want to take the icy area up or down: it was flat, unclimable rock due to the ice
Back over the ridge with the large boulders
From here you can see the rest of the route back. Oh, and amazingly enough I spotted my instruction paper stuck under a rock. It took some fancy footwork, but I retrieved it and, no longer needed, I put it in my pack.
Here’s looking down the class 3 chimney
And the class 2 section back down to the saddle
At the top of the gullies I aimed for the creek and headed out. This is where my fingers started to thaw.
I followed the creek most of the way
While following the creek, about halfway to the avalanche area I came across a male hiker, surprised to see anyone this far off trail. I asked him where he was headed (expecting him to say Deer Mountain). “Mt. Oklahoma” he replied. He’d never heard of Deer Mountain. I wished him luck and was on my way. I’d hiked on over a quarter of a mile before thinking much of it, but he’d passed the route I’d taken to summit Oklahoma about half a mile before reaching me. I know there are several ways to summit each mountain, and hoped he knew of a different route. Otherwise, he was off track. I wished I’d had a way to let him know, but he also looked like a competent hiker and it was still early in the day with no chance of storms, so if he was off route he had time to figure that out. I got a picture of his vehicle at the trailhead (the only other one there) just in case.
I made it back to the avalanche area, crossed the streams, and found the trail with no difficulties. The rest of the hike out was uneventful.
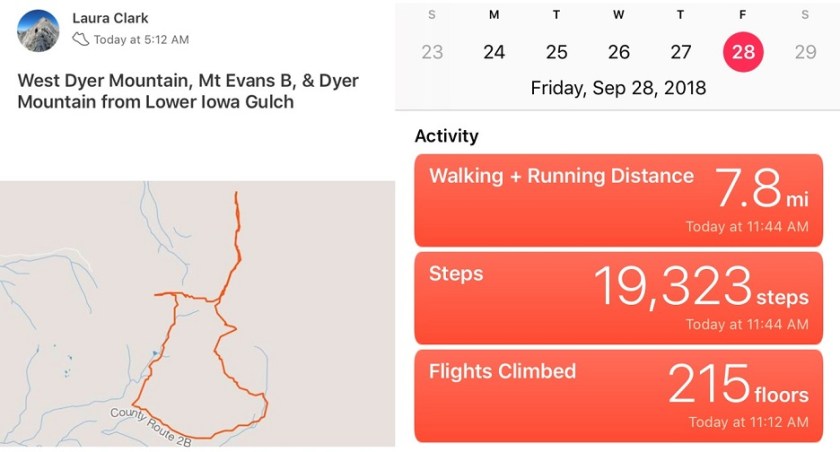
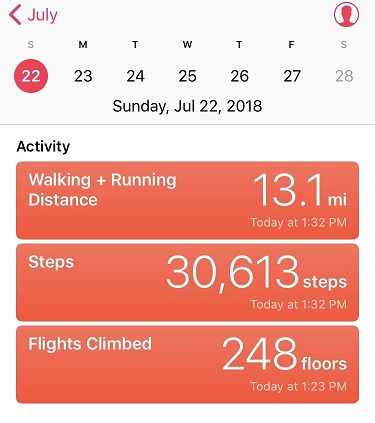
I started at 6:30am and ended at 1:30pm, making this a 10.5 miles hike with 3737’ in elevation gain in 7 hours.
And now to meet my friend for some early October rafting/camping along the Arkansas River!
I woke up at 2am and made it to the Lower Iowa Gulch Trailhead at 5:15am, which was much earlier than I’d anticipated. The drive in is easy on a 2WD dirt road.
There is no official trailhead, so I parked near a tree, gathered my gear, and headed northwest through the base of the amphitheater towards the West Dyer/Dyer saddle.
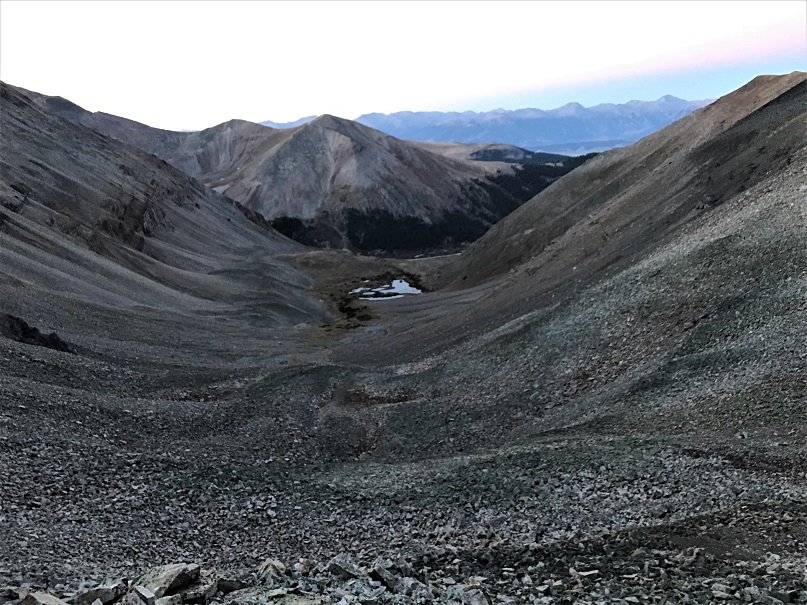
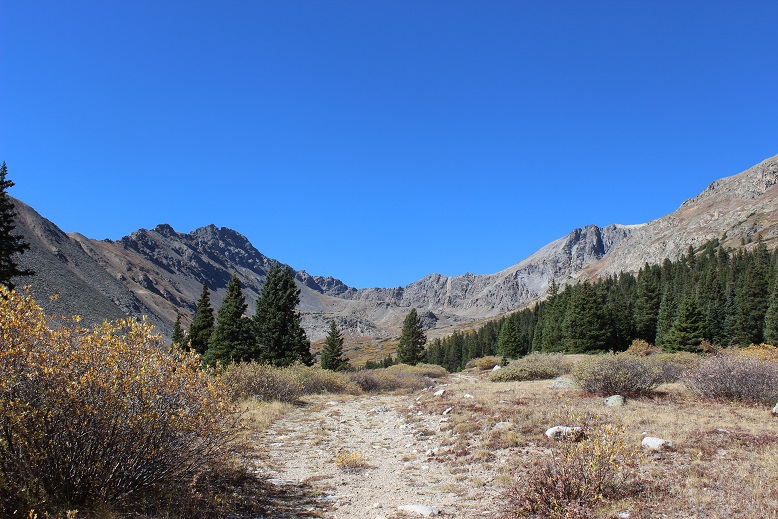
It was only 1.3 miles to the base of the West Dyer/Dyer saddle. There isn’t a trail, but the route is fairly obvious, even in the dark. Just keep heading for the saddle. Here’s a look back on the basin from the saddle
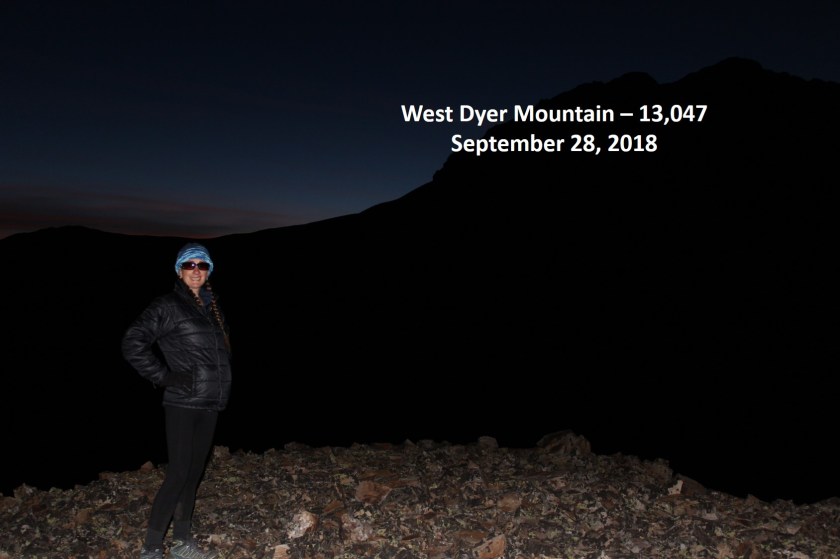
From the saddle I chose to summit West Dyer Mountain first, an unranked 13er. I chose my route to reflect my time constraints and sunrise/daylight limitations. For me it’s a delicate balance between hiking in the dark/daylight (pictures turn out better in the light) and being back at the TH by noon.
It takes so long for the sun to rise in the fall! I wanted to summit and get pictures, but I also needed to be back at my truck by noon so I could drive home in time to pick up my daughter from school and start our day. So while I was hiking slowly because I wanted to get pictures from the summit in the daylight, I also wanted to get in as much hiking as possible today. In any event, after the saddle I turned west and hiked .2 miles to the summit of West Dyer Mountain, slowly, willing the sun to rise. I summited at 6:20am, while it was still dark. I took some pictures of the summit and waited for the sun to rise. But it just wasn’t happening.
West Dyer:
So I turned back towards the West Dyer/Dyer saddle and put on my helmet.
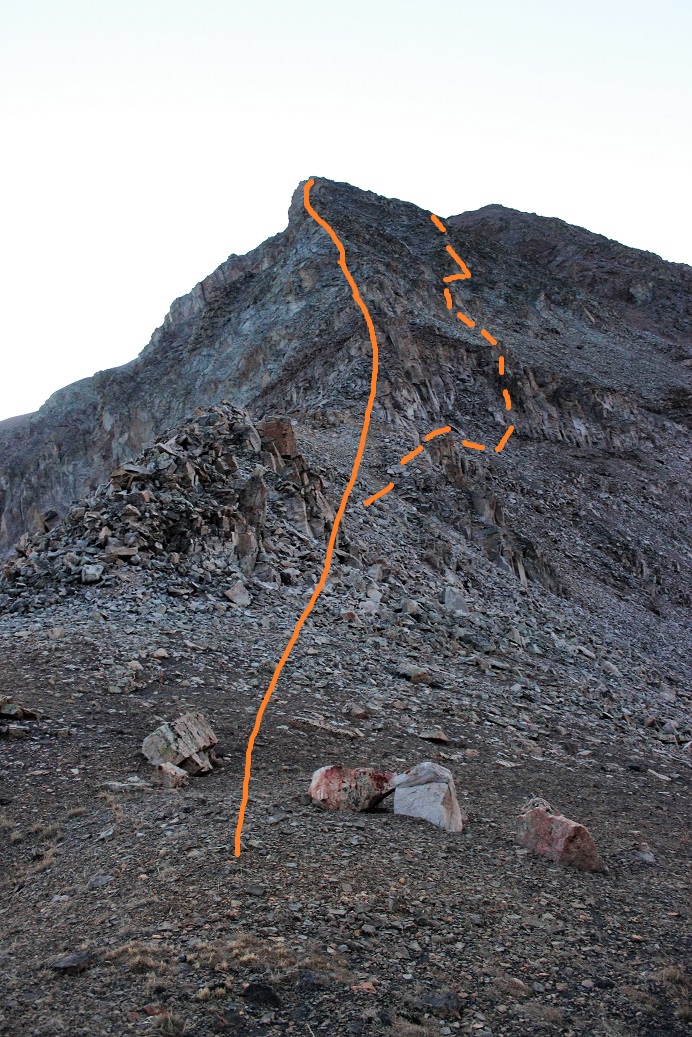
It was still dark and hard to make out the path I was supposed to take up Dyer’s West Ridge. I was hoping it would be more obvious as I got closer to the route. Here’s a look back on West Dyer from the saddle
The route up Dyers West Ridge is a class 4 route. I knew I was supposed to look for the chimney to the right, climb it, and then stick to the right of the ridge to the summit. That didn’t happen. In the dark I never found the chimney, but I also didn’t look too hard. I was expecting a class 4 route, and I discovered if I stuck to the ridge, and once or twice went to the left when necessary (just a little to the left, not much) I was able to follow the ridge all the way to the false summit. Here’s the route I took (solid orange) and the suggested route (dotted line)
It was class 4 the entire way, but doable, spicy, and FUN!
In fact, I kept expecting to cliff out somewhere, and to need to retrace my steps and head more to the right, but that never happened.
It was serious exposure and solid class 4 climbing for the entire ridge. I met up with the regular class 4 route here, just before the false summit. This area has much more exposure than it looks, and is both the most difficult climbing and also the end of the difficult climbing. This picture (below) doesn’t do the exposure justice: The dirt pyramid on the bottom is a 15 foot drop from where I was standing, and actually where two gullies meet, each dropping down on either side to an unclimbable area. I wish I had better pictures of the exposure, but honestly this was all class 4 and I needed my phone in my pocket and my hands gripping the rocks at all times.
After navigating this area (to the left) I was quickly deposited at a false summit, with a great view of Mount Evans B
And Dyer’s false summit
Dyer Mountain was the closer 13er, but I didn’t want to summit it twice today. I’d intended on making this hike a loop, and Mount Evans B was my next goal. Unfortunately, there isn’t much beta on the ridge between Mount Evans B and Dyer Mountain. From where I was it looked doable, and I know it’s been done in the past, so I kept on my helmet and headed towards the ridge.
Here’s the route I took
I followed the ridge crest most of the way, only once or twice navigating to the left or right around some large boulders. This is a class 3 move where I hugged the wall as I traversed a crack in the rock. (There’s another picture later in the report that shows the other side of this wall and my route)
As you can imagine, climbing after point 13,383 is the crux of the route, but it stays at a class 3
After the most difficult climbing is over it’s a class 2 hike up the ledge
To a long grassy slope to the summit
I summited at 8:55am
VIDEO: Mount Evans B:
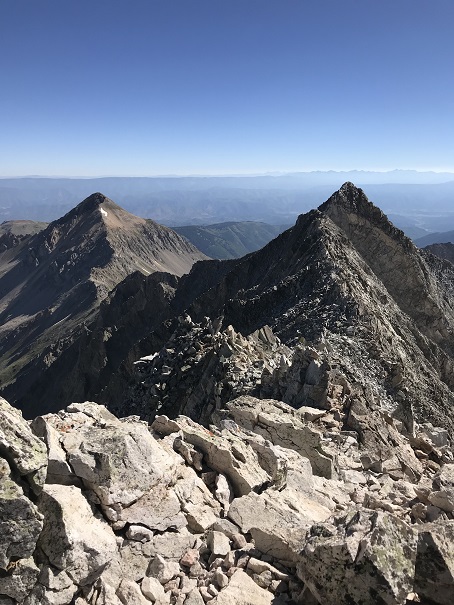
It was an absolutely beautiful day! Besides the wind it was perfect. Here’s a look back on the way I’d come, and the way I’d now need to retrace my steps to summit Dyer.
Here’s a look back on the Dyer/Mount Evans B Ridge
And the route I took
Here’s the class 3 part and the way I navigated around it
I decided not to re-summit point 13,383 but instead cut it to the right.
And headed up to the Dyer Mountain ridge and followed the ridge to the summit
As I ascended the ridge the rocks became loose and mixed with unstable gravel, but it was navigable.
Here’s a look at Dyer Mountain from the ridge
I summited at 10am
Dyer Mountain:
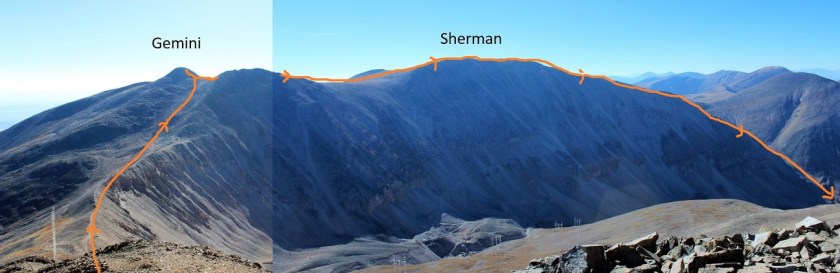
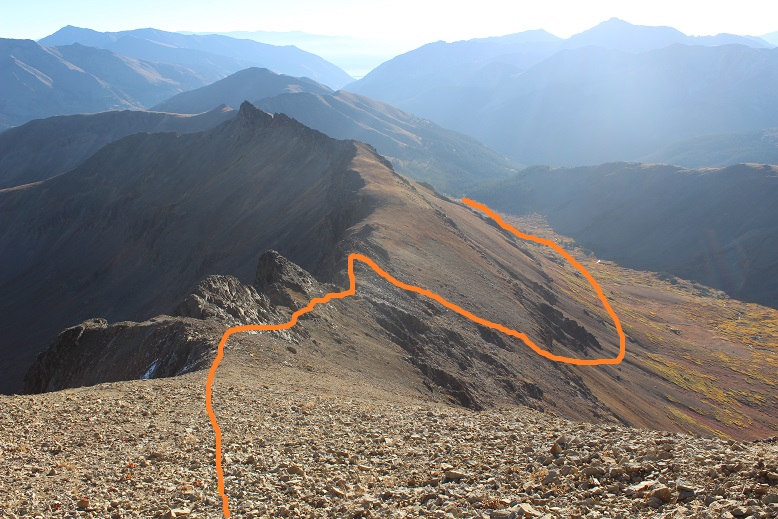
My next goal was Gemini, and then a trek over to Mt Sherman, and finally make it a loop back down to Iowa Gulch.
I made it about halfway down towards the Gemini/Dyer saddle, almost to the radio towers, when I pulled out my phone to take a picture and looked at the time. 10:10am! Whoops! I needed to turn back! Looking at my intended route there was no way I could hike the mile up to Gemini, .7 miles across to Sherman, and 2.5 miles back down to the trailhead before noon. Hmph! I was a bit mad at my circumstances, mainly because it was an absolutely beautiful day and I wasn’t even beginning to get tired. But I reminded myself in another few months my youngest would have her license and I’d rarely see her again (I know, it happened with my older two), so I’d better get a hustle on and enjoy the time I still have with her now. Besides, I’ve already summited Sherman, and combining it with Gemini would make for a good winter climb. I’d be back.
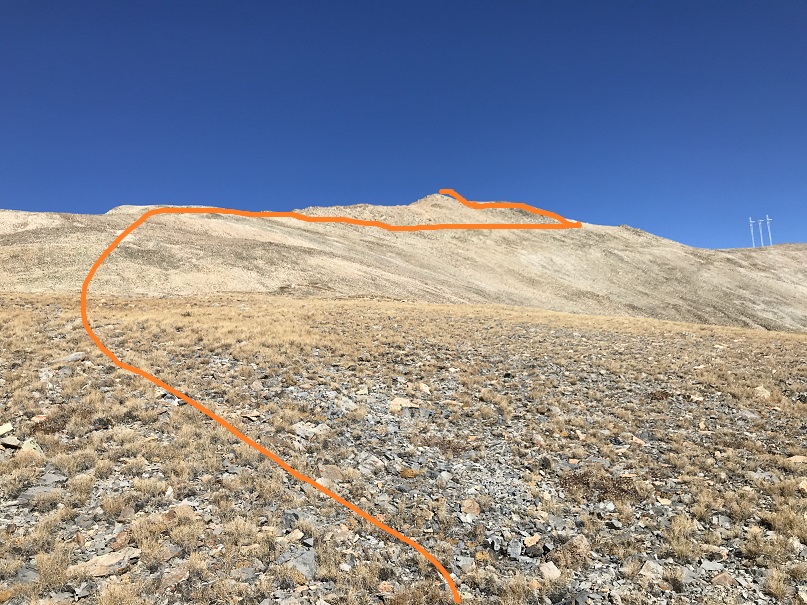
I was in a weird spot on the mountain when this realization occurred. I’m not entirely sure why, but instead of just heading towards the basin I cut across the mountain to the south, trying to link up with the south slope route off of Dyer Mountain. I hadn’t realized there wasn’t any established trail off the mountain, but did as soon as I linked back up with the route. Traversing back was time consuming through very large, loose rocks. Several microwave sized rocks slid below me, doing their best to take me with them.
As soon as I reconnected with the correct ridge I just aimed towards the road in the basin and the towers. It’s important to link up with the road in the correct place because otherwise you’ll end up needing to cross a drainage area
I saw some pretty amazing rocks on the way down
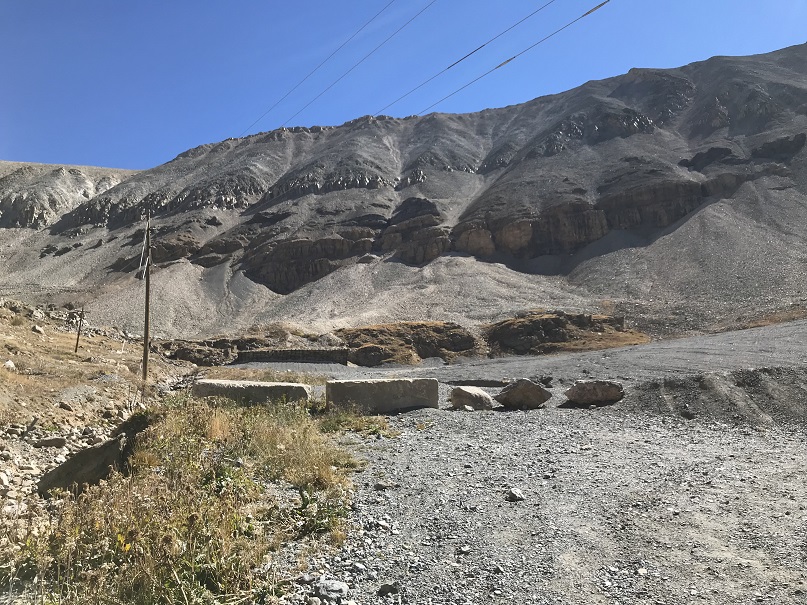
Once I met up with the road I followed it back to my truck. Here’s a look at the upper Iowa Gulch Trailhead
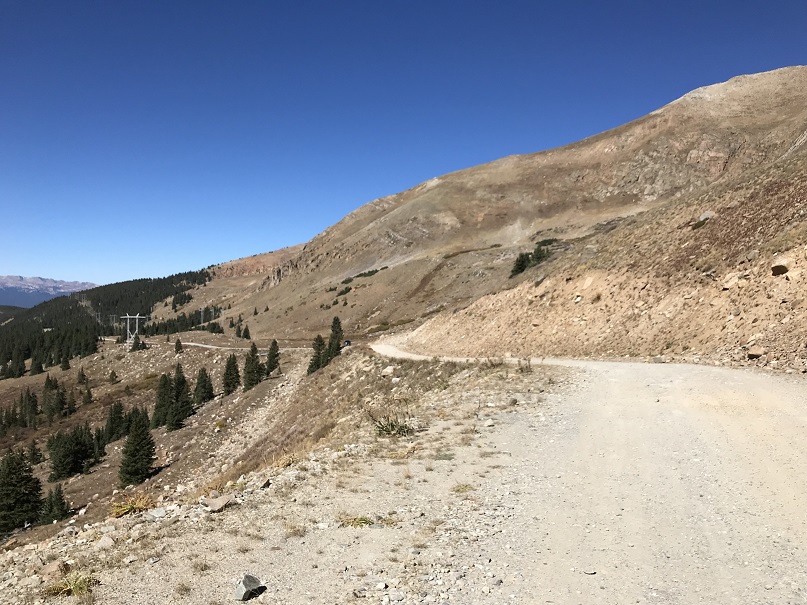
And where I parked my truck at the lower Iowa Gulch Trailhead
I made it back to my truck at 11:40am, making this a 7.5 mile hike/climb with 3350’ in elevation gain in 6.5 hours.
I made it home in time to pick up my daughter from school, take her to ice skating lessons, make dinner, and then headed over watch one of my Girl Scouts cheer at her High School Homecoming Football game, making this a very long day, but totally worth it!
The road past the La Plata Trailhead is 4WD the entire way to the upper trailhead. In fact, I felt the second 4WD portion was easier in many places than the early 4WD portion. Only one area gave me pause, about half a mile from the 394 junction. The dip in the road was bigger than it looked, wasn’t anticipated and caught me off guard.
I parked in a grassy area just before reaching the gate and started out at 5:45am.
The gate was locked and it didn’t look like anyone had driven on the road past the gate in quite a while. This is where the trail starts.
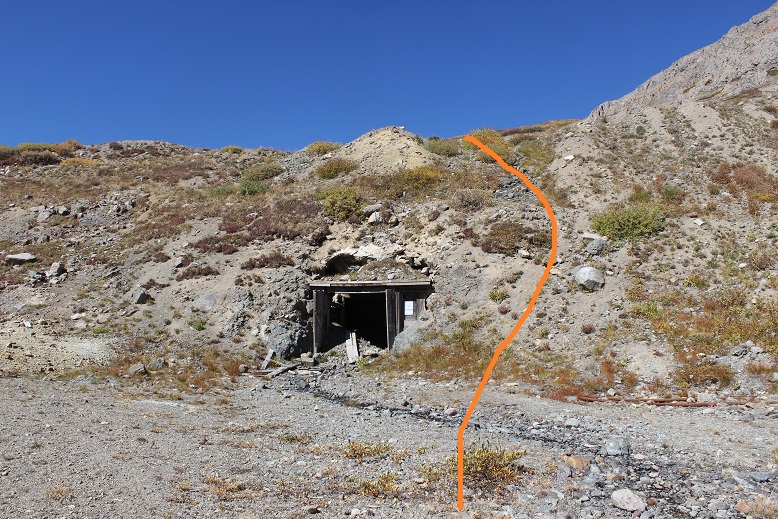
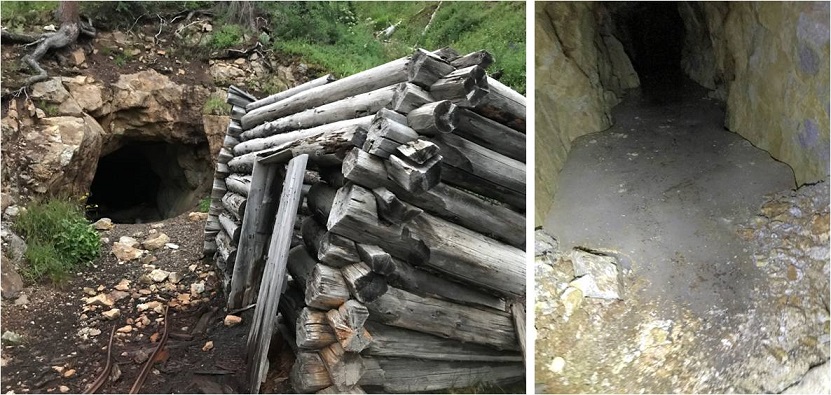
Follow the road west into McNasser Gulch. Almost all of this trail is above treeline, but until you make it to the mine you’re on a trail overgrown with willows.
The mining area is at 12,100’. It’s boarded up pretty well, but still looks neat (and operational?).
The trail in this area gets kind of fuzzy, but it picks back up again directly over the mine (so make your way around it and head west/northwest/right).
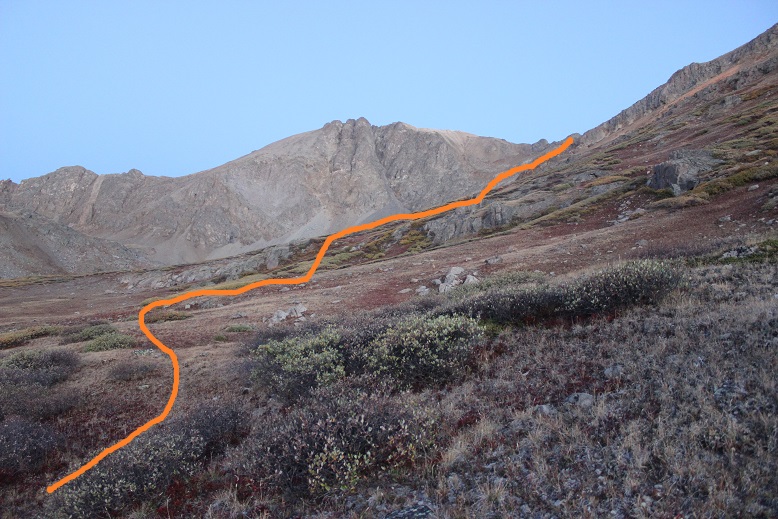
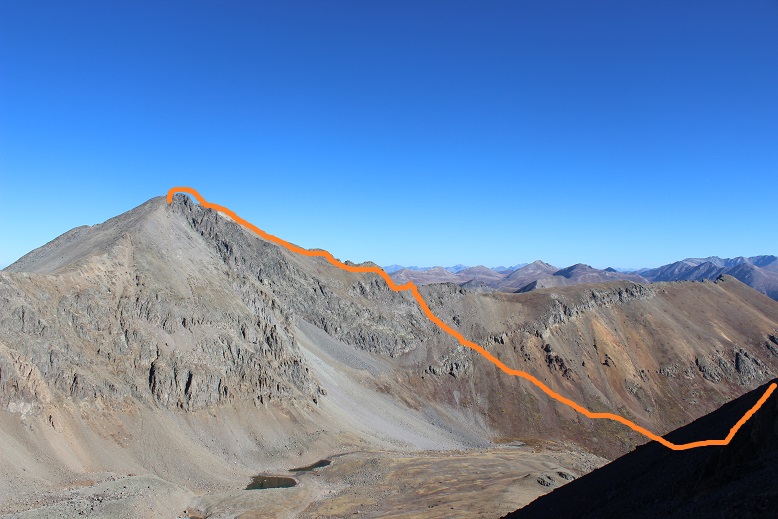
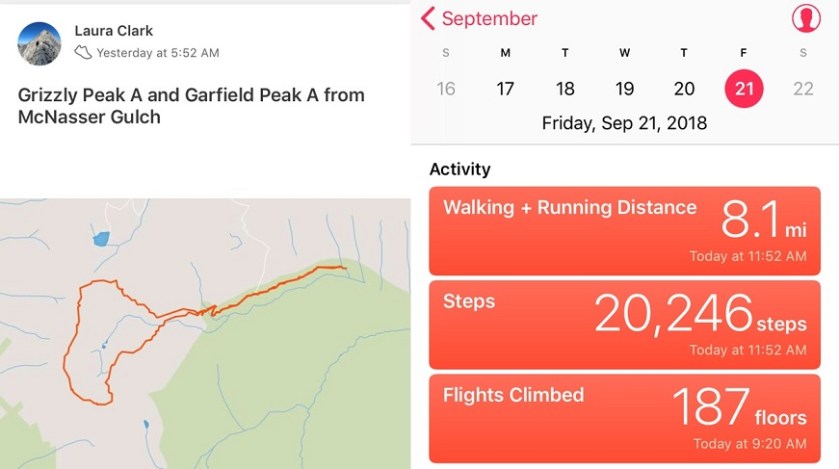
From here there is no trail. Head northwest through the basin towards Grizzly Peak.
After rounding the basin and heading northwest (right) you aim for this bump:
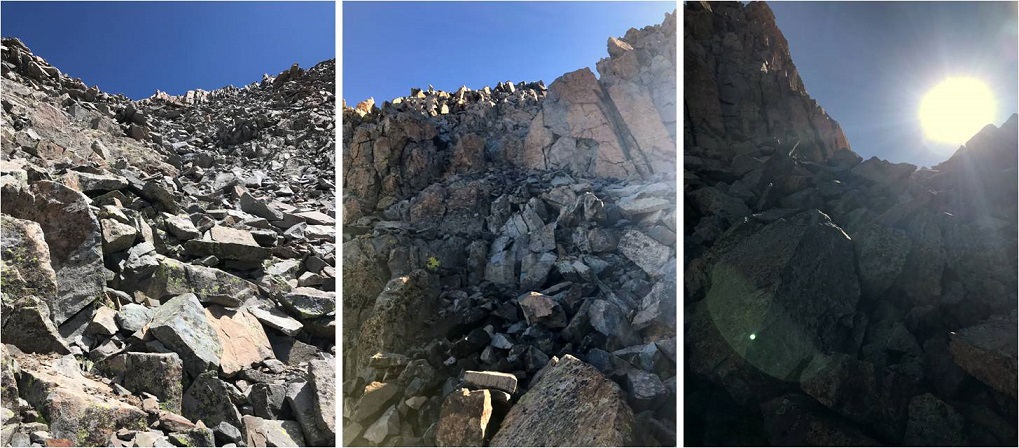
The terrain is much steeper and rockier than it looks. The ground was full of loose sand/scree.
Once you make it to the saddle turn left (west and follow the ridge).
This is done by initially sticking to the ridge crest and then skirting the 3 gendarmes to the left before regaining the ridge and following it to the top. Here’s the view looking back at the route so far
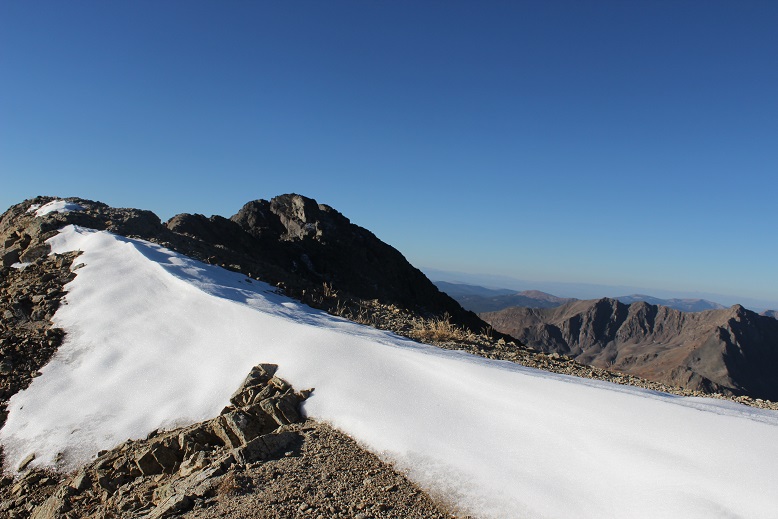
There was just a little bit of snow at the top
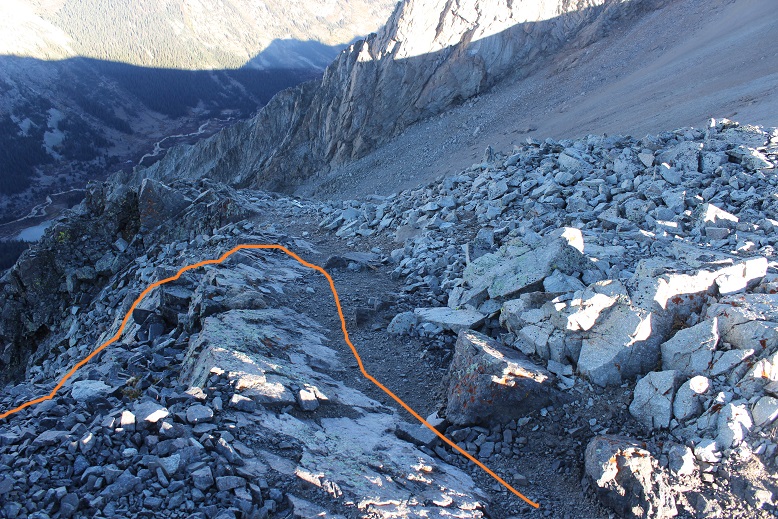
The rest of the route to Grizzly is only .2 miles. I followed the ridge to the south. There was an established trail here.
The final pitch was loose and made up of bowling ball sized unstable rocks but easy to navigate
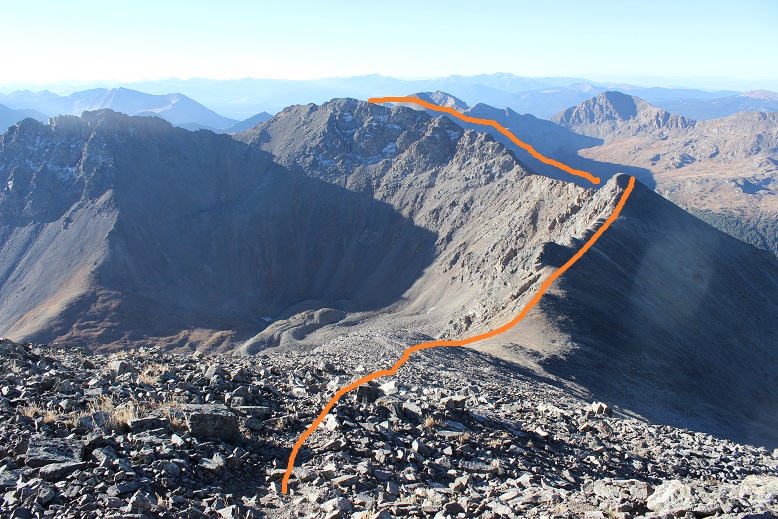
Here’s a view from Garfield looking at the route up Grizzly
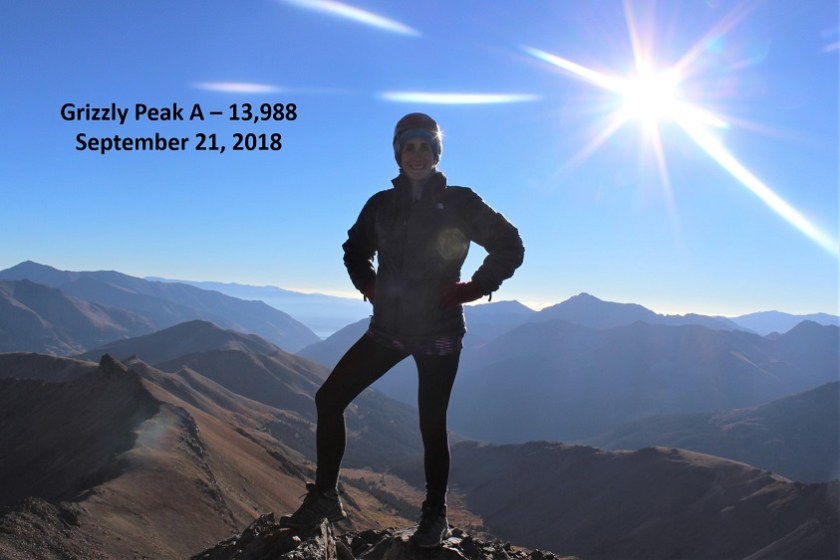
I summited Grizzly Peak A at 8:10am
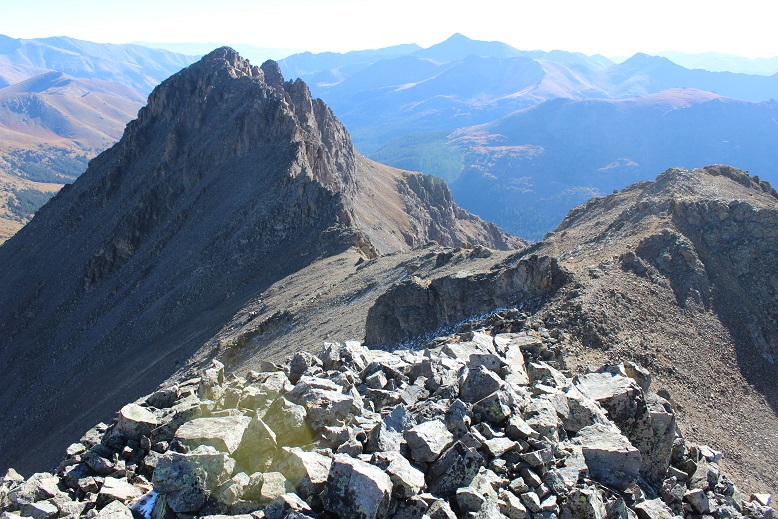
Here’s a picture of Garfield from the summit of Grizzly.
To get there you need to re-trace your steps, but not far. Head back the way you came and about 20 steps down from the summit you’ll turn left (south).
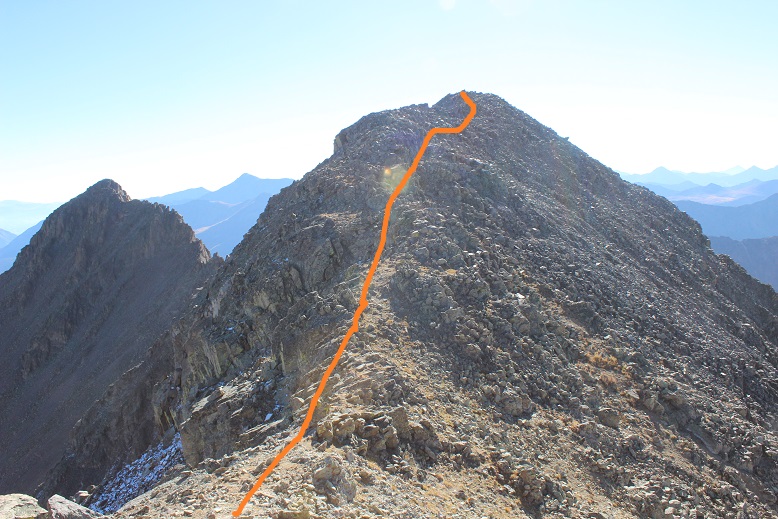
I had to do one class 3 move to get down this part of the ridge, and after completing it realized there was an easier way. Here’s the route from the Grizzly/Garfield Saddle
I followed the trail along the ridge and behind point 13,650. After rounding 13,650 (to the right) I followed another trail around the south slopes and gained the ridge.
From the ridge I climbed to the summit (no trail on this part)
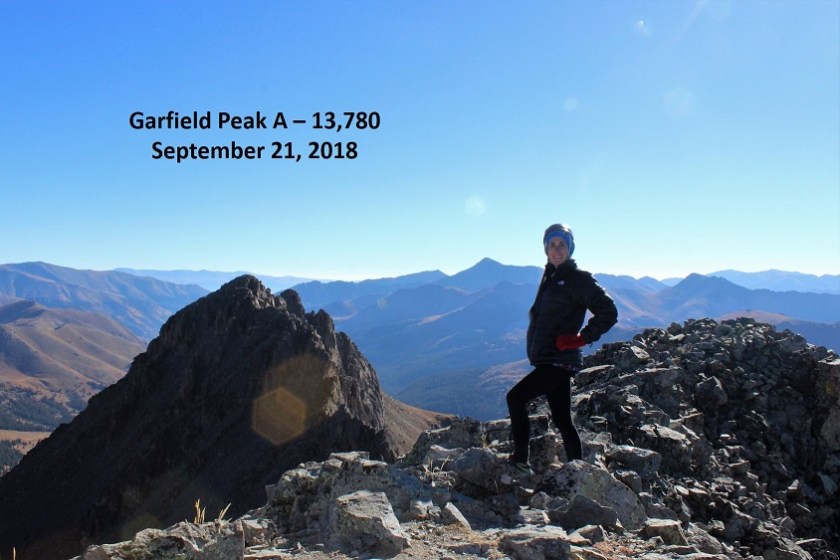
I summited at 9:20am
I was done summiting both peaks for the day, but from here the route actually became more difficult. I had a hard time finding a decent path off the summit of Garfield. I’m sure it was a height thing on my part. I could tell where I was supposed to downclimb, but it was a class 4 downclimb I needed a few more inches to be able to achieve. This was very frustrating. I had to backtrack and look for an easier way to Garfield’s Gully. Here’s where you’re supposed to leave the ridge
I eventually made it to the saddle. From here you strap on your microspikes and head straight down. There are a lot of trails down, and they all lead into the basin.
This was some of the worst scree I’ve ever encountered. I was so glad I’d chosen to do Grizzly First: there’s no way this would have been enjoyable trekking up (in the snow however it might be easier). If you’ve done the gully on Pyramid or the decent off Bross, this is worse.
It descends 1000’ to a small lake, but just when you think you’re finished with the scree you gain a small ledge and there’s tons more (so don’t get too excited the first time you think the scree’s over).
My advice is to aim (right/northeast) for the rocks near the grassy area. The rocks are stable, where nothing in the gully was. I took the gully and had large rocks tumble down from above me and I had to take cover several times (no one else was out there today, these rocks were just free falling from above). Here’s the route I took (as seen from Grizzly).
When you reach the grassy basin your troubles aren’t over yet. There’s more scree to traverse, or you can choose to downclimb rock ledges. I’d had it with the scree, so I downclimbed the class 3 & 4rock (which led to more loose talus)
Here’s a look back at what I downclimbed
And a closer look at the climbing
Here’s another look at how I came out of the basin. I took the solid orange line (rocks) over the scree route (dotted)
The good news is after this the hike got really easy! I just crossed the stream and followed the basin back to the mine, where the 4WD road picked back up.
Here’s a look back at the basin
I made it back to my truck at 11:30am, making this 8 mile climb in just over 6 hours
The weather looked better in the San Juan’s than the Elk’s, so I decided to go for Wilson Peak this time. I left my house at 8:30pm and made it to the trailhead at 3am.
The best part about the drive? Listening to 105.7 ‘The Range’ on the radio after I pass Gunnison. I’ve always been an old soul, but in a previous life (High School) I used to love ‘old’ country music (Lorrie Morgan, Reba, Charlie Daniels, Patsy Cline, George Jones, George Strait, Garth Brooks, Travis Tritt, Pam Tillis, etc.). I’d go dancing every week at our local country bar (another story for another day: How a 14 year old gets into a bar…), and this radio station plays all the classics from the 1950s up through the 1980s. The same ones I grew up dancing to, and thankfully without many commercials. I like a lot of different types of music, but this was a relaxing way to fill a few hours driving. Yes, singing was involved.
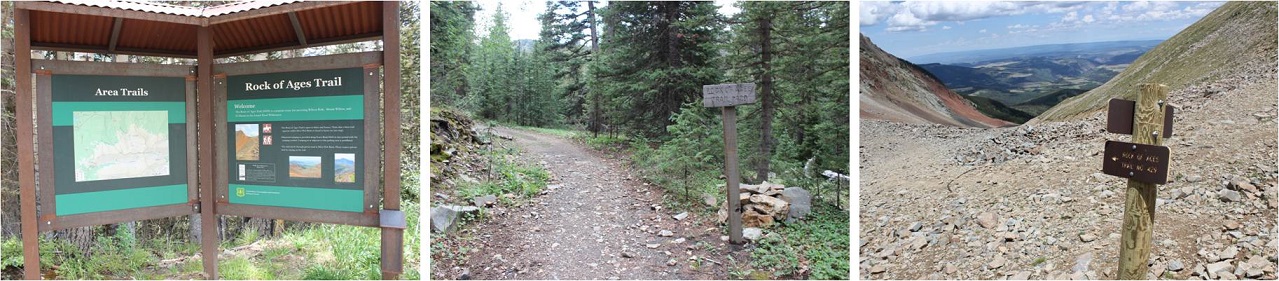
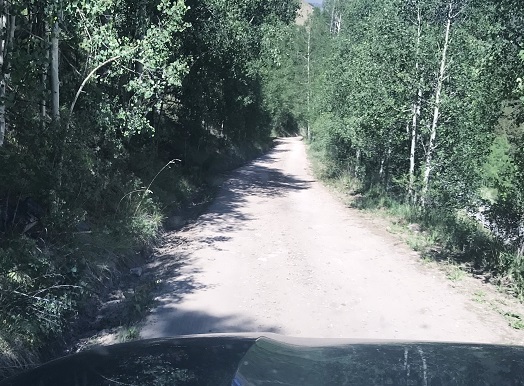
The 8 miles on the dirt road to the Rock of Ages trailhead took me at least half an hour to navigate. It wasn’t a particularly rough drive, just slow going with a lot of little mud puddles.
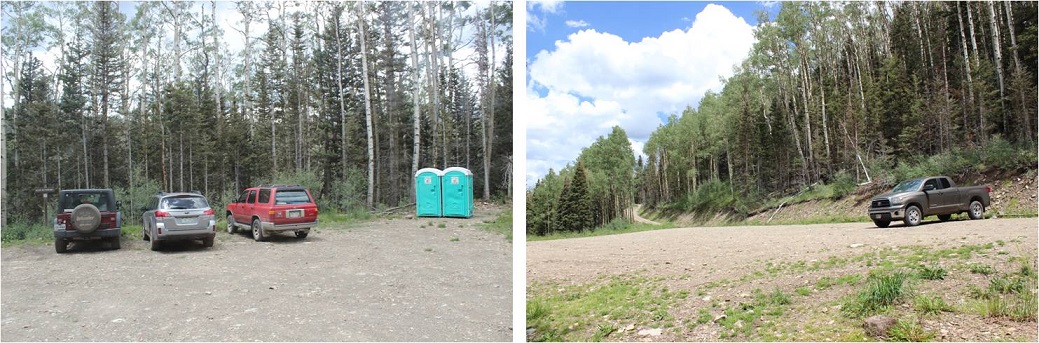
The trailhead had plenty of parking space, two porta potties, and only one other vehicle in the lot when I arrived. There was a sign that said “Head in Parking” and since it didn’t also say “only” I backed my truck into a space. I’m a Girl Scout and I was a park ranger for a while, which means I never head into a parking space. Ever. It’s just not efficient in an emergency. If there’s an emergency I want to be able to get out of there as fast as possible, so I always either back in or pull through when I park my truck. No exceptions. It’s been drilled into me…
The trail starts here (note, no trail register)
I was on the trail at 3:15am. The moon had already set, so I had a great view of the stars as I started my hike through the trees. The ground was very wet, most likely from all the rain the San Juan’s have been having this week. This was great because it allowed me to look for recent human and animal tracks. I didn’t see any animal tracks (just a few from horses) so I didn’t anticipate seeing any wildlife on this hike. (I didn’t).
And this trail had great signs! All the way to the basin I knew I was on the Rock of Ages trail (that’s where the signs stopped).
Between the two basins (Elk and Silver Pick) you go up a hill, and then actually lose a couple hundred feet in elevation. I remember thinking as I was hiking in how this wasn’t going to be fun hiking out (it wasn’t).
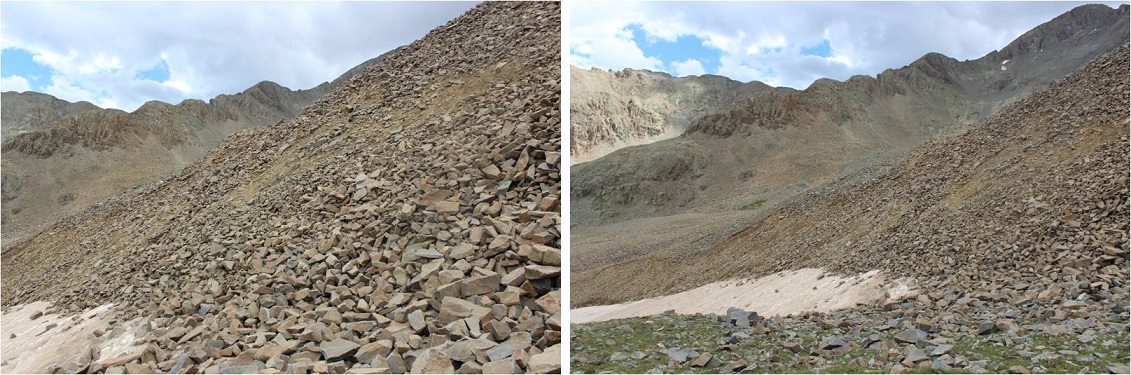
The only thing wrong with this trail? It was made up of lots and lots of talus. The entire basin and in fact 90% of the route was made up of talus. I’m not a fan of talus in general, mainly because I don’t pick up my feet enough when I walk. Even though I’m light I’ve always walked heavy. I could never sneak up on someone, and I recall “Laura, stop stomping like an elephant” being a common phrase in our house, even though I wasn’t actually trying to be obnoxious. Since I walk fast lots of talus for me = lots of tripping. I had to consciously think about each step I took to keep myself from tripping on the talus. This was more of an issue on the way out. It’s also more difficult to follow a talus trail in the dark. During the day route finding is a non-issue, but in the dark everything looks the same (sadly, no CFI stairs here).
Here’s where talus at night became an issue. I’d been following the service road when it suddenly ended and cairns began. I’m a big fan of cairns, but these seemed to go in a circle, not leading anywhere. Also, the trail ended. I got out my topo map, and knew I was supposed to head straight over the hill into the upper basin, but when I started up the hill the rock was dangerously loose so I backtracked. I hiked up and down the hillside, looking for an alternate route, but there didn’t seem to be one. There was a snow bank without footprints, so I knew that wasn’t the correct way, and I kept coming back to the cairns. My flashlight wasn’t much help, as everything looked the same in the shadows. I honestly tried to find the route for at least 20 minutes, and finally decided to just go for it and trudged up the hillside, navigating carefully through the loose rock. This ended up being the right thing to do, as a cairn invisible in the dark from below awaited me at the top. Here’s what the route looked like
In the light of day the route was obvious (see below), but in the dark I wasn’t able to decipher between the trail and talus. There had been a rockslide of sorts over the direct trail, so there wasn’t a solid trail to follow. Here’s the route you’re supposed to take:
I hiked up and around the rest of the basin towards the Rock of Ages Saddle and noticed I was sweating a lot more than normal. My entire lower back was wet, which was weird? I felt around my backpack and noticed it was drenched. My water bladder was leaking. Well, this wasn’t ideal. I fixed my water bladder with a piece of duct tape and made a mental note to get another one before my next hike. Considering I’ve had it since 2003 it’s probably about time for a new one. The only downside? If the wind picked up I’d have to cancel my hike. Right now there was no wind, but that could change once I made it to the saddle. If it did, my Raynaud’s might start up and I’d get cold have to turn back. Hopefully that wouldn’t happen. The good news? I had on black yoga pants so while it felt like I’d wet my britches if I came across other hikers no one would actually be able to see that my pants were wet in all the wrong places: Let’s focus on the positive here!
Woot! I made it to the saddle, and no wind! The sun was just beginning to rise and I had a great view of the north sides of Mt Wilson and El Diente Peaks.
Here’s what the saddle looks like.
I stashed my trekking pole, turned left, and hiked toward the Wilson Peak / Gladstone Peak saddle.
From the saddle I put on my helmet, turned left again, and started my trek to the summit. I ended up hiking too high on the initial ridge and had to back-track because I got into an area I couldn’t traverse. Here’s the route you should take: Aim for the dip in the ridge, and then follow the ridge towards the summit.
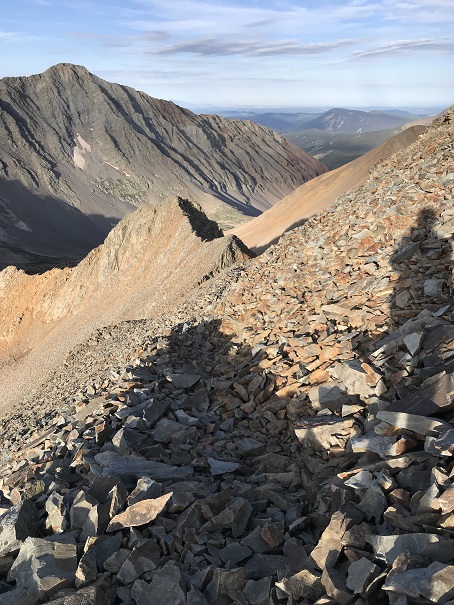
Here’s another view… aim for the small saddle in the ridge. You don’t want to climb too high or you run into lots of choss, i.e. very, very loose talus that isn’t easy/possible to traverse.
Wilson Peak has a false summit. The cool part about this is it’s where the climbing fun begins. You get to climb up a wall, descend, and then climb up again to the true summit.
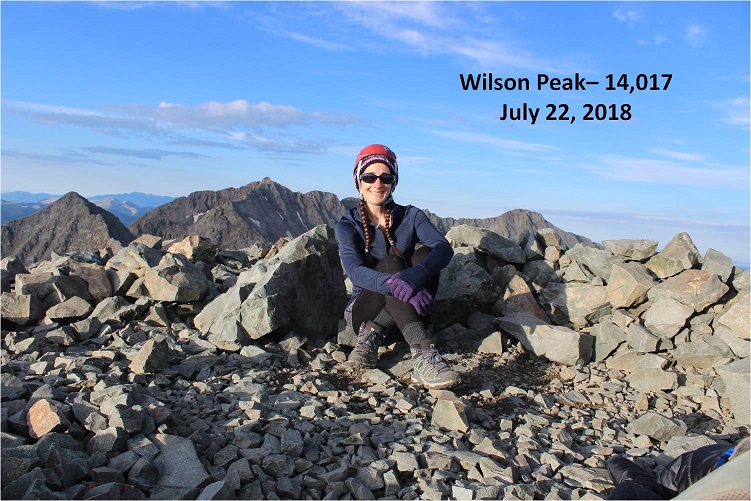
It was 7am. From the summit I could see Gladstone Peak, Mt. Wilson, and El Diente Peak
I took a summit selfie to prove I’d summited
And started on my way back down. The trail was much easier to follow now that I knew what to look for.
I made it back to the area I’d climbed too high at and had to backtrack, but this time at the correct elevation. I heard climbers above me and called to them, letting them know they were too high as I’d been. I placed a cairn where I was so they could see where they needed to be and wished them luck.
I made it back to the Gladstone/Wilson saddle. It was almost 8am, and the skies were pretty clear. It’s a centennial, and I was here, and the weather was nice, so I decided to attempt Gladstone Peak. I took off my (now dry) backpack to get out the directions I’d made up. Drat! Apparently I’d accidentally printed two sets of directions for Wilson Peak and none for Gladstone. Hmmmm. No worries, I had my GPS. I pulled up the route and drat again! When I pulled it up it kept me in the basin for the entire hike (and I knew that wasn’t right). I looked at the mountain before me and considered.
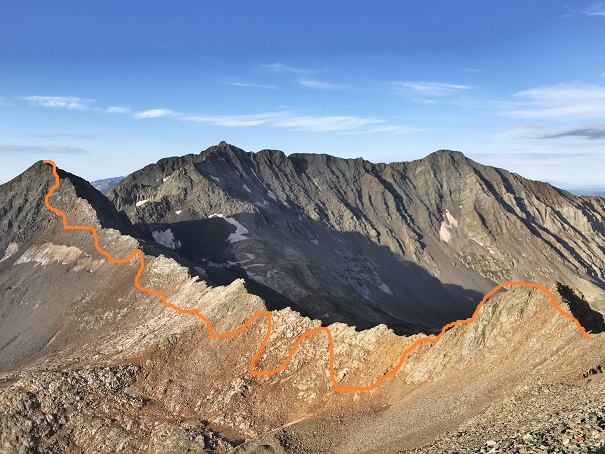
I’d put the directions together, so I tried to recall what they’d said. I remembered this was a class 4 hike, I was supposed to stay mainly on the ridge, only dropping down once to class 3 terrain to avoid a more difficult section, if the rocks are too loose you’re off trail, and if I had to go off the ridge to go left.
Well, I was here, so I decided to attempt Gladstone. I followed the saddle to the beginning of the ridge and did my best to stay on the ridge. I’m sad to say I failed almost immediately. There were no cairns. I quickly became a wuss and didn’t think I could stay on the ridge, so I dipped down and when I felt safe again climbed back up to the ridge. That meant I was going up and down loose gullies to avoid exposure. This happened over and over and over again. I knew I was off route and making this harder than necessary, but I kept looking for easier terrain (and not finding it). This was actually the more dangerous option.
The rock was all unstable, loose and shifting as I tried to step on it. I had to be careful with each step I took. I was frustrated but slowly making progress. When I got past point 13,341 I heard someone shout enthusiastically from the summit. Apparently someone else was on this mountain! He seemed pretty excited with himself. I watched him descend and aimed for where he was on the mountain. At one point a rock about the size of a microwave I was going to stand on let loose and cracked and tumbled down into the gully below me, producing a lot of noise and that fire and brimstone smell that comes from such an event. I took a deep breath and continued on.
When the climber was about 50 feet above me I called out to him. I wanted his advice on the trail back since the trail I took in hadn’t been all that pleasant. I called three or four times before I realized he had ear buds in. Why anyone would willingly take away one of their senses on a class 4 hike is beyond me, but I did applaud him wearing ear buds instead of blasting his music. Oh well, I was close, I could make it the rest of the way on my own and re-assess the route from the summit. I don’t think he ever knew I was there. Here’s the final push to the summit.
This is the path I followed (kind of… I probably went up to the ridge and down a gully a few more times). Please, please, please don’t do what I did. I realize this is a total mess.
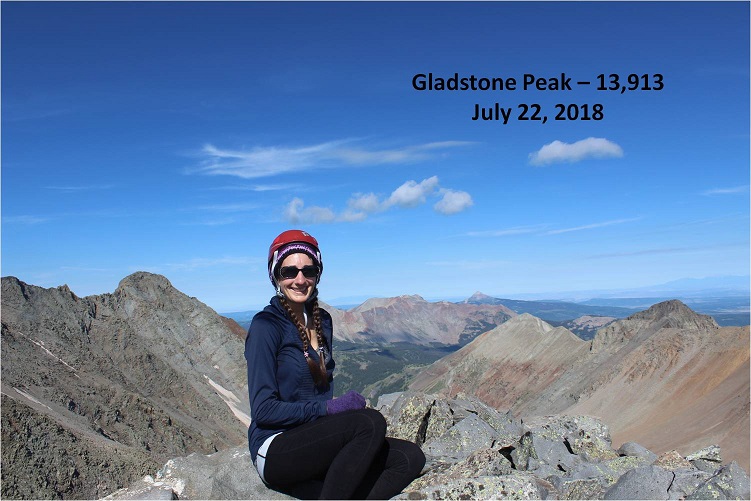
But I did it! I summited at 9:30am and knew why ear bud guy was so excited: That was one tough climb! Here’s my summit selfie
From the summit I could see the ear bud guy had trekking poles (WHY on a class 4 route?!?!?) and was following the ridge. After point 13,341 he disappeared and I never saw him again. Nothing nefarious, I was just focused on the weather/views and wasn’t able to locate him again when I looked towards the ridge.
Here’s the view from Gladstone Peak, looking at Wilson Peak
Wow! What a mountain! OK, now it was time to head back down. I made the decision to do my best this time to follow the ridge, no excuses. I’ve done class 4 before, I know I can do this. And so I started down, doing my best to follow the ridge. Here’s what the beginning looked like
I began scrambling. Luckily the rock, although unstable, was sticky on the ridge. There was a lot of exposure but as long as I focused on the task at hand it didn’t bother me. The weather however did. The clouds were moving in fast, and this was slow going. I religiously stuck to the ridge, and you know what? It was doable! Scary as hell, but doable. I could do this! I was climbing up 30 foot rock faces, balancing on ledges, stuffing my hands into cracks and balancing my feet on thin lines that shouldn’t have been possible, but I was successful with every step. I just kept thinking to myself “If I can do this in the gym I can do it here”. Check out the view from the base of Gladstone looking at what I’d just accomplished, and what I had left
Here my confidence soared. I started picking up speed, still careful to make sure my placements were stable before using them. I was making great time and I was actually having quite a bit of fun with each new obstacle. I’d look at something, think “no way” and then go for it. Here’s the route I took back… I just followed the ridge.
I made it to the Gladstone/Wilson saddle and did a happy dance. Woot! I’d done it! Class 4 all the way baby! Let me tell you, Gladstone Peak gives Capitol a run for its money.
I learned a lot about myself on that ridge about what I can do. It’s ok to be scared because that’s your body’s natural response to a dangerous situation: Do it anyway.
The clouds were rolling in as I made it back to the basin. The basin was busy, filled with hikers coming in from multiple trails. I felt a few sprinkles, but nothing seemed too ominous or threatening. It was weird hiking through the basin in the daylight where I could clearly see the trail.
I could also see a bunch of abandoned mines I hadn’t known were there in the dark
And remember the 20+ minutes of route finding I had to do? That was a cinch in the daylight! The hillside is right next to the old rock house and yes, those cairns do lead to nowhere but in a circle.
I made it back to my truck at 1:15pm, making this 13 mile double summit hike/climb in 10 hours. Not bad considering I lost quite a bit of time to route finding both on the trail and on the ridge.
I decided to let my truck play in the mud puddles on the dirt road back to the highway, getting her dirty in the process. No worries though, because it rained the entire way home, so in the end I came home with a clean truck.
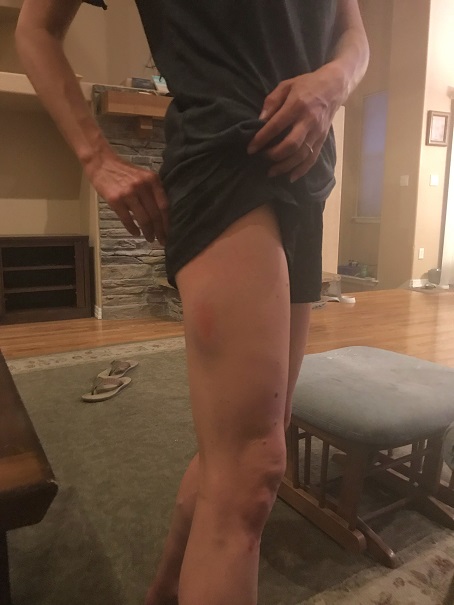
I didn’t make it home until 8:30pm, making this a 24 hour trip door to door. I immediately took a shower, and was confused at how many large bruises I had I didn’t remember earning, mostly on my shins, thighs and forearms. I guess the ridge bites back!
Oh, and push-ups were a killer this morning! I must have really used my arms yesterday…
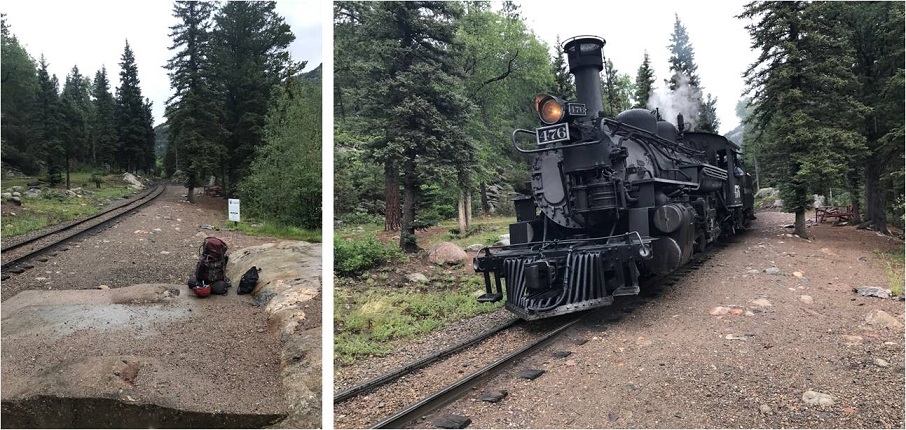
I’ve been preparing for this weekend since February when the summer camp catalog came out. I knew I wanted to plan this trip for the days when my youngest daughter was at summer camp, so when she chose her camp I made my reservations with the Durango & Silverton Narrow Gauge Railroad for the days she’d be gone.
It didn’t matter what the weather was, that was the time I had available to go. My son was going on a solo road trip to Arizona (well, he brought the cat) and my oldest would be at Drums Along the Rockies, so I had 1 free weekend to backpack this summer.
Well, then the fires happened and not only did they shut down the railroad, they closed the entire San Juan National Forest. This was unfortunate for numerous reasons, and also because it looked like my trip wasn’t going to happen. Then they re-opened the forest (woot!) but not the railroad. This was getting frustrating! I kept calling the railroad station to see if they were going to be running the train, and every time I called I got a different answer.
So I made two plans: One for if the train was running, and another for if it was not. This was my one weekend to visit the Chicago Basin and attempt its 14ers this summer and I didn’t want to waste it. Going through Purgatory didn’t sound fun but if it was my only option I was prepared to hike into Chicago Basin that way. Normally I wouldn’t mind, but I had a strict time limit because I had to work Monday morning.
I checked and re-checked and checked the weather forecast again. It did not look promising. 70% chance of thunderstorms in the morning, afternoon, and evenings for the entire weekend. These conditions were less than ideal but at least I could prepare for them. I became a weather expert (it seems this isn’t monsoon season yet, but pre-monsoon season that mirrors the actual monsoon season… yeah, basically it’s going to rain buckets with lightning and thunder added in for fun, and it won’t be predictable).
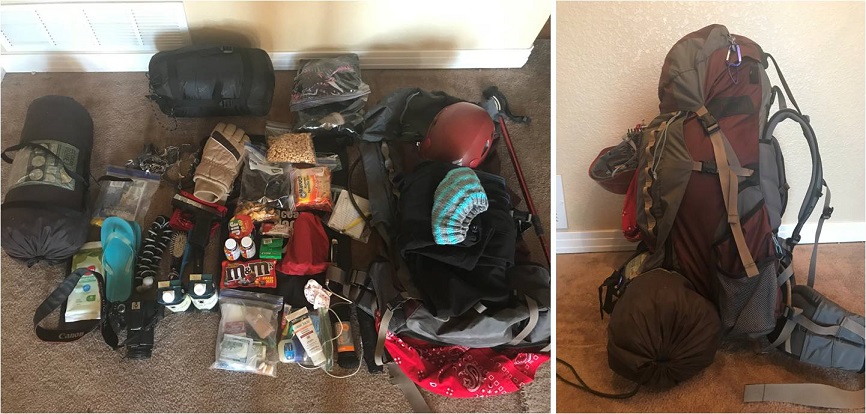
I packed, unpacked, reduced, and packed again. I decided to cut weight by eliminating the need to cook my food (I make a mean beef jerky and dehydrate fruit to bring with me that doesn’t need to be cooked) and added warm layers. Extra socks, pullovers, hats, and gloves.
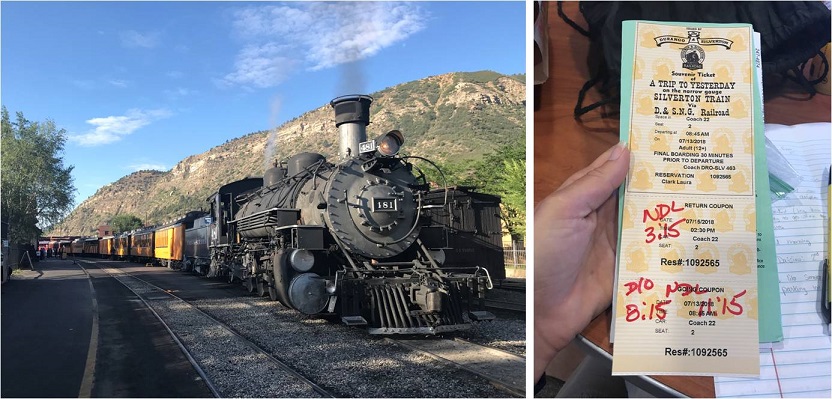
The day before my trip the train was scheduled to run again, but they weren’t giving out backcountry permits until late August. However, they would honor my tickets since I’d bought them so long ago. Woohoo! I was good to go!
Thursday afternoon I closely watched the weather out the windshield of my truck as I drove the 6.5 hours to Durango. If the weather tomorrow was like today I was golden: heavy cloud cover with no rain. Before checking into the motel I stopped by the train station to pick up my ticket. There was only one other backcountry permit in the queue besides mine, which told me not many of us would be packing in with the train.
Next I checked into the motel. I made small talk with the man at the front desk wearing the Zia Marching Festival shirt (my kids went two years ago for band so small talk was easy) and was assigned a room and a parking space. I stopped by Wendy’s for a quick dinner and brought it back to my room.
This was the smallest motel room I’ve ever stayed in, mainly because I’m a hotel snob. I travel a lot for work, and I need the hotel to have a gym so I can work out every morning. Most hotels with gyms are just… nicer in general. I didn’t think that was necessary for tonight’s stay, so I just chose the cheapest place I could find. I had an assigned parking space my truck didn’t fit into and a room just big enough to walk around the bed. I was a little concerned my truck would get broken into overnight. Well, all I really needed was a place to sleep, so this would do just fine. Check out the view from my room…
I poured myself a glass of wine and brought my backpack in from the truck. After dumping all the contents on the bed I went through my gear one last time. I’ve been backpacking many times, but tonight I seriously felt like Cheryl Strayed. I dipped a fry into my frosty and considered: I’d done a good job packing. There was nothing I thought I didn’t need and I had extra space in my pack. Everything was in a Ziplock bag and I had extra large trash bags if needed. I was good to go! But it felt weird only packing for myself. I haven’t been solo backpacking in a long time: I’m usually in charge of a group of scouts, so I have to over pack things like emergency supplies, food, etc. I could get used to this!
I took a last minute shower (I’d brought my Disney shampoo for good luck: if you’ve ever stayed at one of their resorts you know what I’m talking about), and charged my cell phone and camera. I made a list of goals for this weekend (stay warm/safe/make good choices, learn something, make the most of the time I had, hike at night if necessary, and if the weather’s bad sleep until it’s good). I did some texting and problem solving and answered some very important last minute emails that came in about a potential magazine interview on Monday and made it an early night so I could get started early in the morning.
I had a couple of people who had considered hiking in with me but had canceled due to weather. I was actually relieved they weren’t able to make it! I would have been a terrible hiking buddy in this weather because I’m too goal oriented and I don’t need much sleep. Hiking solo gave me time to hike as fast as I needed, set up camp (or not) and hike/eat/etc. whenever it worked for me. If someone else had been with me I’d have felt responsible for their comfort/ etc. and I’m pretty sure I’d have either made them mad or I wouldn’t have summited (making me mad).
The night had been sweltering. There was an air conditioner that I had to turn off because all it did was make noise. Well, you get what you pay for. I had to take another shower in the morning because it had been so hot overnight. I dressed for success in my new hiking pants that are supposed to repel insects and are two inches too short because I had to get them in the kids section. (Note to athletic/outdoor clothing manufacturers: not every “woman” is large. I’d like some hiking pants that fit a 5’4” 105lb woman please… I’ve been looking for years and resorting to wearing yoga pants under your size 2’s or shopping in the kids section isn’t working for me!)
I did one last sweep of texts and put my phone on airplane mode. The weekend had officially begun.
Check out at the motel wasn’t until 8am but I had a train to catch. The front doors were locked so I dropped off my room key in the slot and headed to the train station. It was a beautiful morning! And that sunrise! It almost physically hurt not to be hiking now when the weather was good.
I was the first one of the day in the parking lot at the train station. I parked in long term parking with 3 other vehicles from yesterday and mentally calculated how many people should be in the basin.
McDonalds was close so that was breakfast. I haven’t eaten this much fast food in quite a while. In fact, I don’t think I’ve been to a McDonald’s since I was in High School. Thoughts from the McDonald’s lobby: it smells like cigarette smoke in here, there are two types of people here: those in their pajamas and those in their motorcycle gear. The parking lot filled up fast.
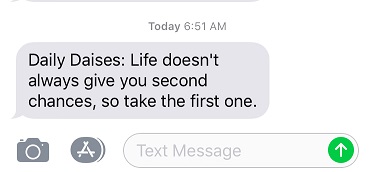
My Daily Daisy text pinged my phone and I took it as a good sign:
I went back to my truck to get my gear and walked to the train station.
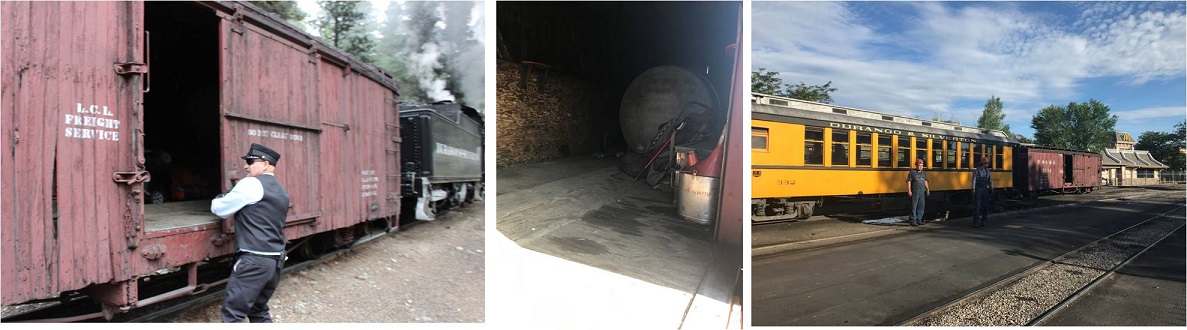
Of course I got there early, so I walked the platform and talked to the volunteers and employees. They were all thrilled to be working again, as they’d all been out of a job for the past 6 weeks. Some teared up as they talked answered questions.
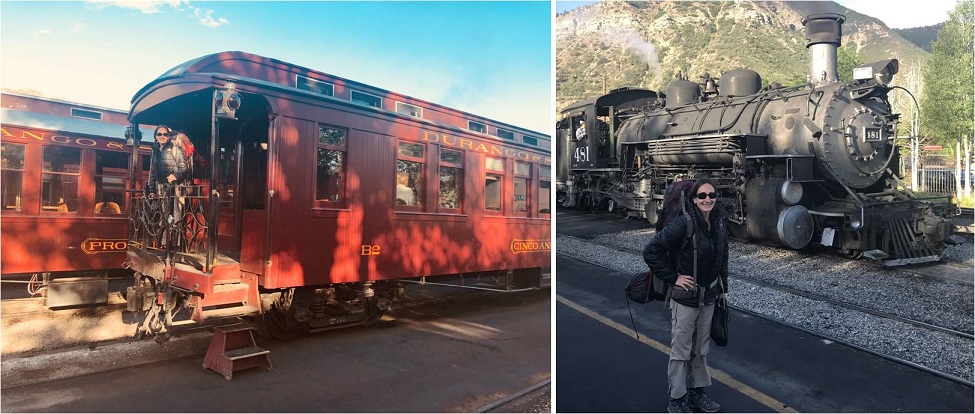
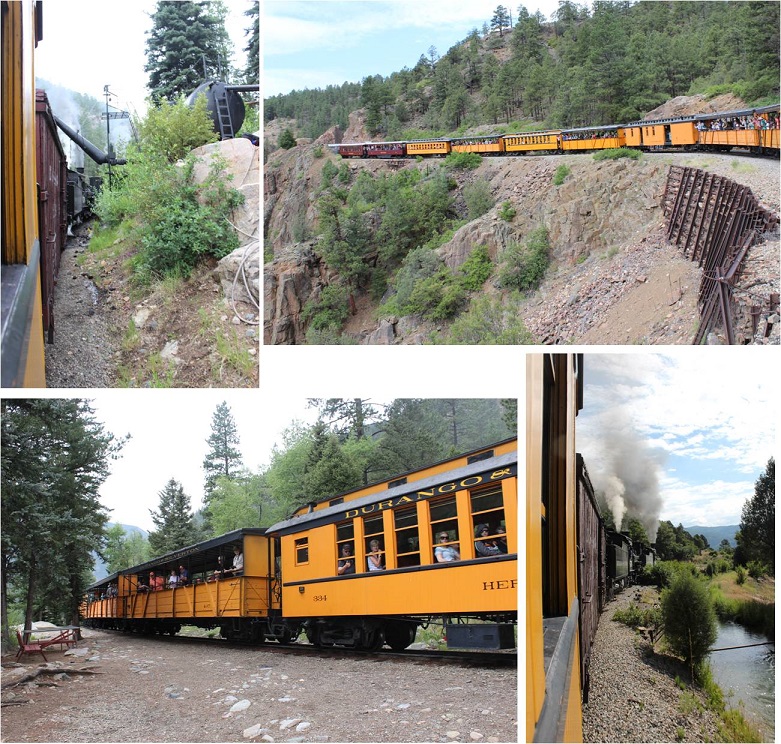
With the help of brakeman Chris I loaded my gear into a boxcar with the two other backpackers and thought to myself how it was already hot outside and I stunk. Those two guys in the picture below on the right stayed behind and watched the wheels on the train to make sure there weren’t any sparks. Several employees shook hands with the engineer and told him to “stay safe out there”.
The train left right on schedule. There were homemade signs and posters all over the fences thanking firefighters and welcoming the train back. Several houses had “Welcome Back Train” signs, and tons of people stood by and cheered the train on as it left, or came out to see the train as it passed by their front yards. The citizens were visibly emotional to see the train in action again, wiping away tears sand clapping. You could tell the closure of the train had impacted the community greatly.
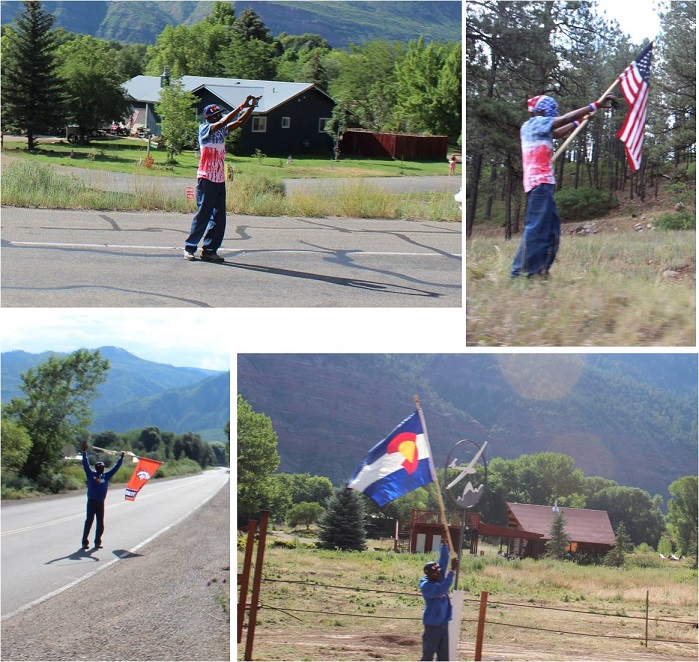
Check this guy out! We saw him every few miles or so, cheering us on. I’m not sure if he was an enthusiastic Durango citizen or paid to do so by the train station, but he would cheer us on, get in his vehicle and drive ahead of the train, change is outfit, and get out and cheer us on again. Everyone on the train loved him. We passed him at least 8 times.
I sat next to a brave mother and father of 6 well behaved boys under 10 years old. One of the train employees talked with me about stopping in Needleton and asked me if I knew how to jump off of a moving train. The boys eyes got wide when I said “Absolutely, I just tuck and roll, right?”
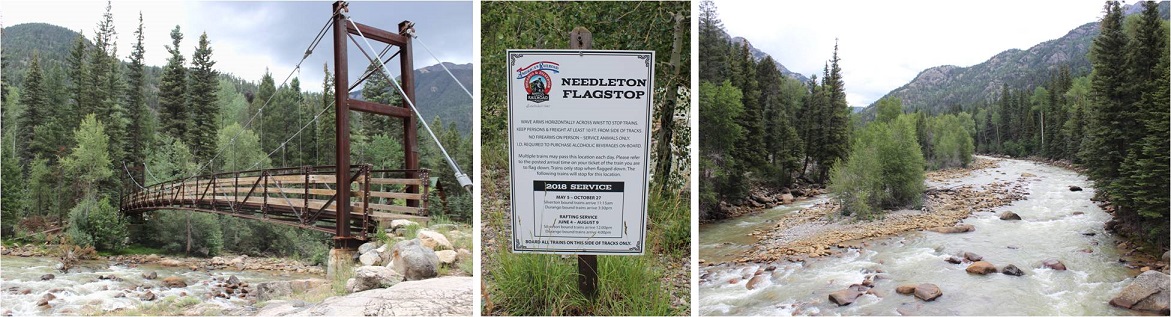
It was a long 2.5 hours to the Needleton stop. I passed the time by going over my trail notes again and again. I arrived at the Needleton flagstop at 11:40am.
I waved goodbye to the train, said a quick greeting to the other two hikers, and started the 6 mile hike to the Chicago Basin. This hike has excellent signage. I signed in at the trail register at about .8 of a mile up the trail where it intersects with the Purgatory Trail.
I passed several groups of hikers hiking out as I was hiking up. They gave me some advice that ended up being very useful: Hang everything up when you leave with your bear bag. Leave nothing in your tent or on the ground. The goats and marmots will eat through your tent to get to your stuff. Also, don’t pee anywhere near your campsite: the goats like pee and will follow you to get it. I found this last part weird since usually urine (especially male urine) usually keeps predators away, but I guess goats aren’t predators and like the salt. In any event, their advice was correct.
The trail was heavily shaded and followed a creek, but that didn’t stop it from being hot out! I don’t usually hike in the middle of the day: It’s tiring! Most of the hike in follows a creek. At the halfway point I crossed a bridge, knowing I had 3 miles left of the hike and seriously hoping it would rain soon.
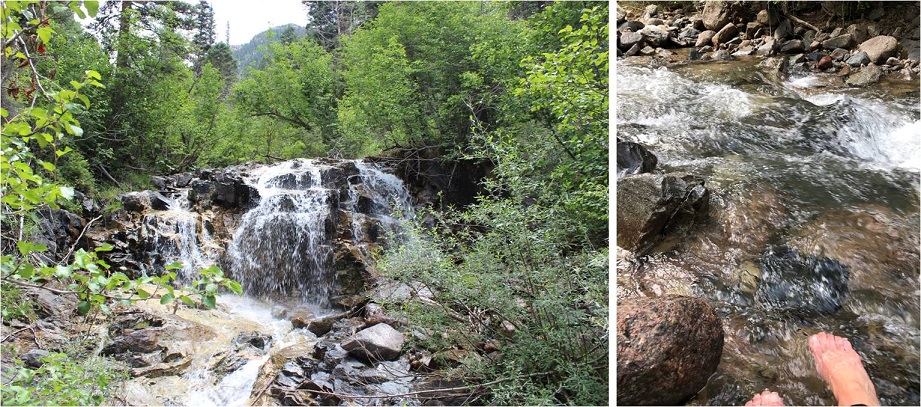
There were tons of strawberries covering the ground, as well as downed trees. When I saw this small waterfall I stopped and dipped my head in the water (swallowing some in the process, so if I get Giardia I’ll know why). This cooled me off and felt amazing! I soaked my bandana and continued on. From here it was 1 mile left to the basin.
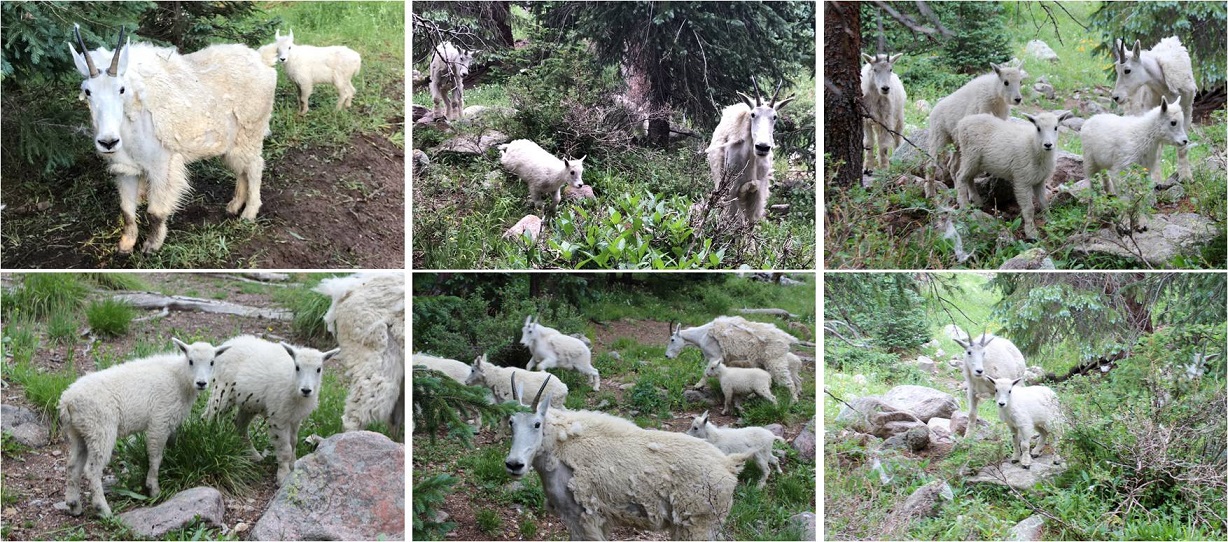
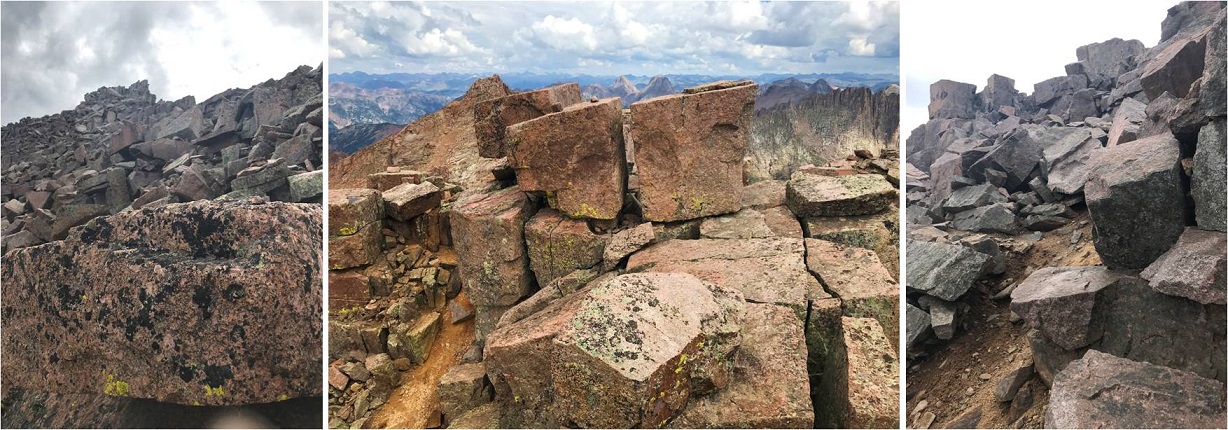
I arrived at 2:40am and was greeted by tons of bold and very adorable goats! Here’s proof:
The goats were everywhere, and seemed to like my company. I carefully placed a beer in the creek to cool off, set up camp, hung my bear bag, re-hung my bear bag because the first place I hung it was covered in sap, and looked up at the weather. It didn’t look too promising, so I went back to the creek to retrieve my beer and went back to camp to eat something. I’d been saving the beer for tomorrow but I was really hot and needed to cool off. I sat down to eat and it immediately began to hail!
This lasted for about 45 minutes and cooled everything off in the basin. It was a good time for me to eat, rest, and get my bearings. There were a lot of people camping in the basin, many more than I’d anticipated considering they couldn’t take the train. They must have all hiked in from Purgatory. Oh, and the inside of my tent was getting wet. Lovely. It stopped raining at 5:15pm and just before it completely stopped I decided I wasn’t going to waste any time. I hung up everything I wasn’t taking with me, gathered my gear and headed towards the trail.
The Twin Lakes Trail gets you to the intersection for all 4 14ers, so I decided to hike up to Twin Lakes and make my decision then which 14er I’d attempt tonight once I got there. I passed several goats along the way.
Since it had just rained/hailed the creek crossings were high. I had to get creative to cross them. The trail came to a junction where I turned left and followed it up the hill, through some rocky areas and some well maintained stairs up a slope and through some waterfalls.
At the top of the slope was Twin Lakes. I could go either left towards Mt Eolus and North Eolus, or right towards Sunlight or Windom.
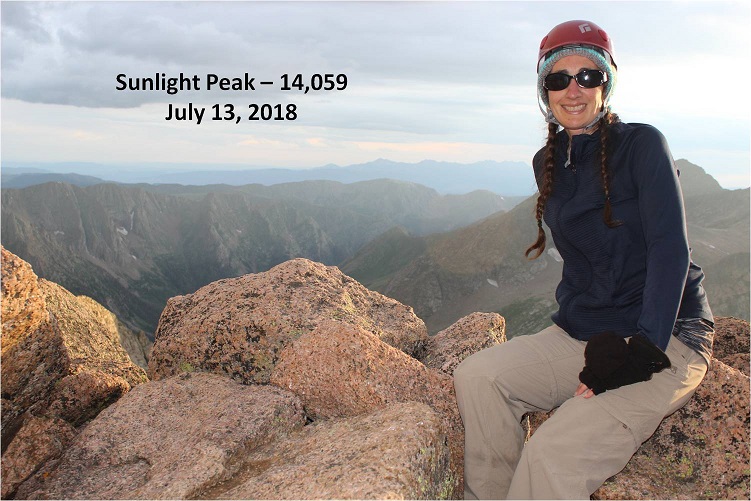
I’d been doing a lot of thinking on the trek up to Twin Lakes about which 14er I should attempt. I really wanted to get both Eolus and N Eolus done tonight, but as I was watching the weather it looked best near Sunlight Peak. It was a difficult choice, but I chose Sunlight, purely due to weather. I mean, doesn’t it look inviting?
Here’s the route I took:
As you can see, the route is very well cairned. I followed the 6 foot tall cairns toward the gully, and then up the gully to a notch. This gully was a good gully! It had some loose terrain, but was mostly made up of rocks about the size of a tire. I was keeping an eye on the weather, but as you can see, it looks great!
From here I followed the route left. This part was actually quite easy and didn’t require much route finding, just some scrambling over class 3 terrain.
Here’s a great view from a hole in the ridge. I decided not to take this route but to turn left and head to the final summit pitch.
From here there were a couple of class 3 moves, and then a class 4 move up and around to the summit. I made it to the summit and decided to drop my gear and climb the last bit to the “true summit”. It was a scramble on some grippy rock to the top of a few boulders placed a few feet apart in all the critical areas. That had been too easy!
I made it up to the top of the highest boulder and took a look around. Wow! I needed a picture of this! Drat! My camera was back down with my stuff. No worries, I’d just climb back down and get it. I slid feet first down the rock and jumped onto more solid ground. I got a few pictures of the summit marker and surrounding peaks
And took a summit selfie to prove I’d summited.
I took a quick video of the summit, and came to the realization a storm was approaching very quickly. I hadn’t been able to see it from the way I’d climbed in, but it was obvious now I needed to get back to treeline as soon as possible.
Please watch the video below with the sound on. Note it starts at 7:58pm, and then it jumps to 8:30pm.
In 10 minutes time I made it to the top of the gully and it started sprinkling. Wow, that was fast. No worries, I’d just put on my poncho and keep heading down. I made it about a quarter of the way down the gully when the sky broke loose: it started pounding rain, and then hail, and then the thunder and lightning started. There was nowhere to hide: No caves or rocks to hide in or under. I was completely exposed and I couldn’t hike up or down to find shelter, as there wasn’t any. I didn’t want to be a moving target so I found two large rock slabs that didn’t provide any shelter to back up and huddle against. I still had my helmet on, but water was cascading down the rocks straight onto my head, and I was being pelted from the front by the storm. The second half of this video takes place after the worst of the storm is over, but you can still get a sense for the atmosphere.
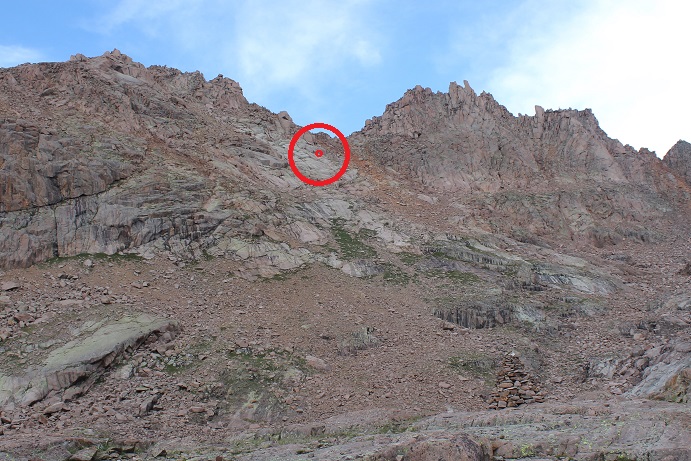
Just for reference, this is where I was during the storm.
I sat there for over an hour and a half, listening to the thunder crackle all around me and waiting for the lightning to stop. There was no lightning tingle or electric current in the air as I’ve heard from other people who’ve been caught out in storms. Luckily most of the lightning stayed in the clouds, but every so often I’d see a bolt strike Windom. I couldn’t get off that mountain fast enough, but I needed to be safe at the same time, so I waited it out. When I finally felt the lightning was far enough away I got out my flashlight and hiked back to the Chicago Basin soaking wet.
Well, as far as picking a peak to hike tonight I had picked the right one. Windom was a nightmare with all that lightning, and I realized the next day I wouldn’t have been able to summit the other two peaks: I’d have had to come back and hike at least one if not both of them again the next day.
I made it back to my campsite sometime before midnight, and the entire basin was already asleep (besides the goats I said hi to as I passed them on the trail). I was hungry, so I brought down my bear bag and rummaged around for something to eat. Peanut Butter sounded good, but where was my spoon? In the dark it was difficult to find anything, and I was trying to be respectful and quiet for the other campers. Well, I couldn’t find a spoon, but I did have some dehydrated bananas that I could use as a spoon. So there I squatted next to my bear bag, trying not to sit on the ground because it was wet, flashlight on the soil, with a tub of peanut butter in one hand, and the other scooping it out with a banana slice. When I was done I licked my fingers and put everything away.
Now to deal with my sleeping arrangements. I’d put my sleeping bag in the tree with my bear bag before leaving to keep it away from the critters, not anticipating the rain, and now I had a soaked sleeping bag (or so I thought). Luckily I’d brought two tarps. One I’d put under my tent earlier today when setting up, the other I got out now and as quietly as I could folded into a square and placed it inside my wet tent, forming a barrier between the wet floor and myself. I opened my sleeping bag and was delighted to find the fleece blanket I’d rolled around the sleeping bag had absorbed 95% of the rain water, and the sleeping bag itself was mainly dry. I hung the fleece outside and settled down for bed.
Saturday morning came early. After almost 4 hours of sleep I was up at 3:45am and out by 4:15, ready to tackle another peak. I re-hung all my gear by my bear bag and set out in the dark, hiking under the stars and some wispy clouds. The clouds didn’t look too threatening. Everything was still wet from the storm.
I followed the same route I had yesterday up to Twin Lakes. My legs were still sore and I was actually thirsty. I hiked slow and steady past Twin Lakes and towards Mt. Elous. Here the sun began to rise and I got a good look at the route before me.
I hiked towards the edge of a basin and then up a ramp and over some rock slabs
Here’s where the hiking got fun! It became a climb from here on out. I climbed up this optional (class 4?) wall to reach the saddle / ridge
And looked at the catwalk to my left. This was going to be fun!
There was a lot of exposure here but the route wasn’t too narrow. I followed the catwalk to the final pitch up the East Face, which required a lot of route finding and class 3 moves. Let’s just say aim up: There are tons of cairns and they all parallel each other, but the basic route goes up.
Woohoo! Summit Selfie
Now it was time to head back and tackle North Elous. Here’s a look back at the Catwalk and North Elous’ Ridge
The ridge was actually very easy to navigate. It had grippy rock and was a sticky but simple scramble towards the top. Once again, I was glad I’d chosen today to hike this instead of yesterday. Oh, and I was a bit sore so I was hiking slow.
I took a quick summit selfie
And looked back at the way I’d come. Pretty cool! The catwalk looks like a beast, and so does the way back down.
Ok, 3 down, 1 to go. I was closely watching the weather today as I hiked back to Twin Lakes. I made it to the lakes at about 9am and was concerned with the amount of clouds I saw in the sky. I figured I had a 50/50 chance of needing to bail on Windom, but like I said before, I was sore and didn’t want to hike down to Chicago Basin just to hike back up to do Windom again later today: That elevation gain was brutal! I decided to try it, as I could always turn back if needed. I’d just take it slow and keep watching the weather.
At Twin Lakes I met Boy Scout Troop 393 from Phoenix, a fun group of guys to talk with. They were filtering water, and told me about the time a couple of years ago when they hiked Windom. A few of them were Eagle Scouts and Life Scouts.
I continued on towards Windom. The trail follows much of the same route as Sunlight through the basin, but then angles right up a gully (there is a trail to the right near the ridge but it’s currently washed out).
There were several routes, but I took the gully up and aimed towards the ridge, to what I found was a false summit. Drat! I thought I was making great time and I’d been so excited I was going to climb this mountain before the weather set in, but when I hit the notch I realized I still had another 45 minutes or so to go. I steeled myself against the let down and kept climbing, more intent now than ever on finishing this trek.
The final push from the notch follows the left (not the right as the GPS told me to go) and contains some class 3 moves, even though it’s rated 2D. It was very well cairned, and quite a bit of fun!
It took me longer that I’d have liked to summit, but when I did I felt fabulous!
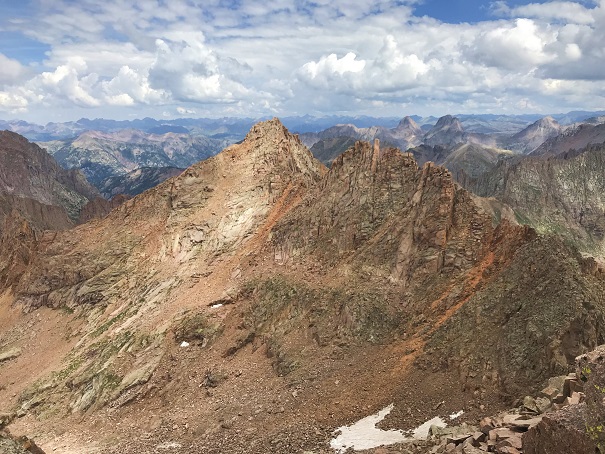
Check out that view of Sunlight!
OK, now it’s time to head back down. The weather was holding, but I didn’t want to cut it close. I turned around and the Boy Scouts called to me from the saddle. They wanted to know if they could summit before the rain hit. Now, that’s a difficult question to answer. I’m not sure how fast they hike, and sure, they could probably make it up, but they weren’t going to make it down before the rain hit. I told them as much and passed them on their way down. They’d already hiked this one a few years ago, so they knew the route. I wished them luck and continued on.
Just before making it to Twin Lakes I met up with the rest of their troop (not all were prepared enough to climb Windom today). We had a nice chat before I excused myself to head back down to camp. I practically skipped back down as the weather held. Sure, I hadn’t brushed my hair in 2 days, I was getting hungry and I was tired, but I’d just summited the 4 14ers I’d come to summit! This mission was a total success!
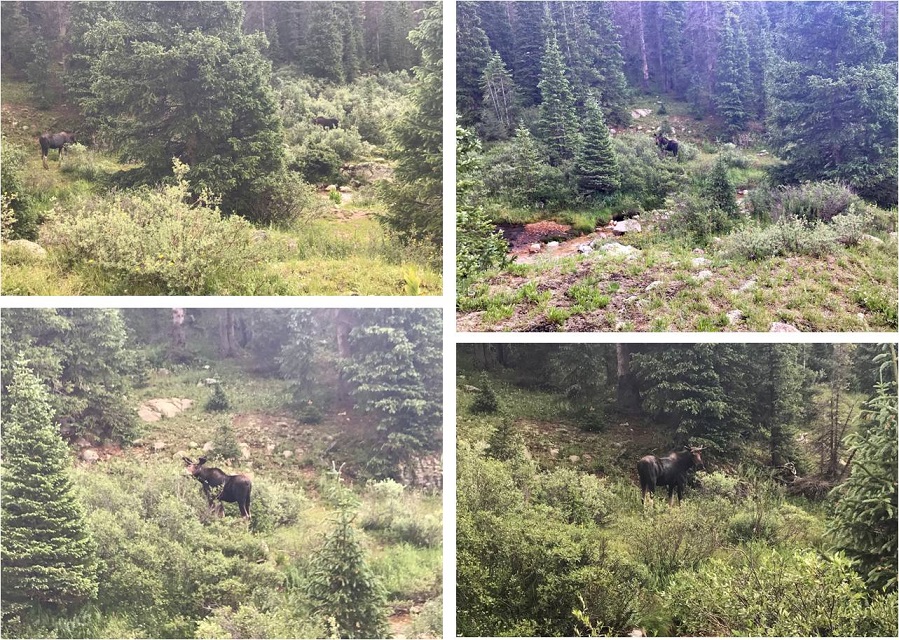
To top it all off, today I did everything right. All my clothes and sleeping bag were dry, as it hadn’t yet rained. I took a trip down to the stream to filter some water and stumbled upon two moose! A male and a female who didn’t much care I was there
I went back to my tent, ate about ¼ a package of Ramen and some dried fruit, and then cleaned myself up before the rain started. My feet were sore and I stunk, but I was happy as I sat all dry in my tent. I thought about tackling Jupiter tonight/tomorrow. Should I? I kept going back and forth with it in my mind. I took a quick 2 hour nap and was woken by my neighbors. Unfortunately they were boisterous and the man’s voice carried. It continued to rain so I decided against Jupiter for now. I lay down, and the next thing I knew I woke up at 1am, needing to use the bathroom. Well, that had been quite a nap! I guess I’d caught up from the night before. The only problem was it was too early to hike. I didn’t want to summit in the dark, so I decided to just lie in bed and wait an hour or two. The next thing I knew it was 5am, and now it was too late to summit and still make it back. Or was it?
I jumped out of bed, gathered some food, and went to look for the Jupiter trail. As I was hiking I really gave the outing some thought, and while I felt I could summit in time I was worried it would put me hiking back down to the train during the wet weather time of day, and I didn’t much want to do that. So I made a nice 3 mile loop out of the hike instead. I came across an abandoned mine I’d wanted to explore but the ice kept me from it
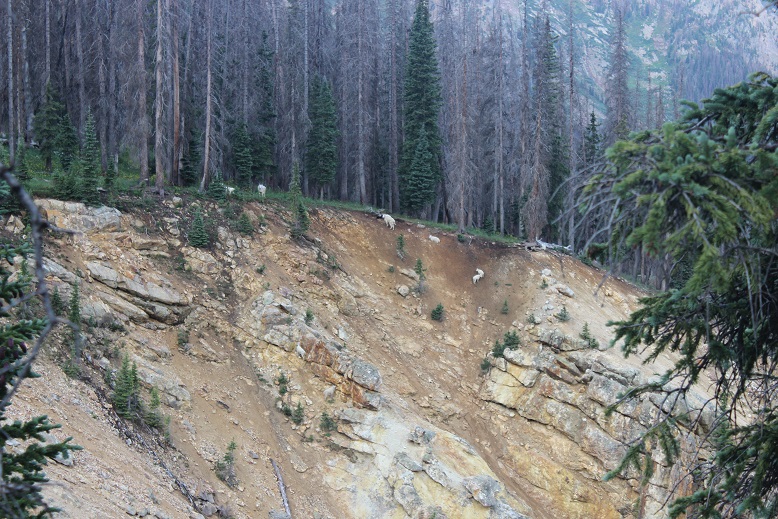
I stopped for a bit to filter some water, and then continued the trail as it followed a ridge. Here I meet a ton more goats all playing on the scree slope. Two baby goats looked like they were trying to push each other off. The rest just seemed to be rock climbing.
I leisurely walked back to camp, and when I arrived at 7am I was surprised to find the Basin was totally cleared out! Everyone had packed up and left. Wow! So I packed up my things, said goodbye to the goats, searched for and picked up pieces of trash, and left at 7:45am to head back down to the train.
I was in no rush today, which is not normal for me. I’m always in a hurry. I actually stopped, took breaks, and enjoyed the waterfalls and streams. It was so nice not to be in a hurry! I stopped to have a snack by a waterfall, and once I’d made it down to the Needleton/Purgatory Junction I took off my shoes and soaked my feet in the stream as I heard the 11:30am train go by. I washed my hands and re-did my hair. There were tons of flies here, and I tried not to take offense they seemed enamored with me.
I put my shoes back on, passed 4 hikers who’d been let off the train and watched the clouds roll in as I made it to the flagstop. Hey, guess what? I just realized I hadn’t seen a single mosquito this entire trip! I thought the Chicago Basin was notorious for mosquitoes? Hmmm… I must have been lucky!
I made it to the flagstop at 12:30pm, which meant I had 3 hours to wait for the train. That’s quite a bit of time to do nothing, but almost immediately it began to rain. I crossed the tracks and found an old shelter on the other side. It didn’t look too safe, but it did look like it would keep me dry. I’d just have to be careful not to sit down/step on any nails.
For the next 2 hours I watched the rain from inside the shelter. It looked much worse on the trail, and I congratulated myself for not going for Jupiter today: I’d have been stuck in that hailstorm hiking right now if I had.
At about 2:30 the rain stopped, so I went back out by the tracks. A little before 3pm the 2:30 train went by, and out of nowhere 3 high school aged boys ran across the bridge to wave at the train. It seems they’re staying at a cabin on the river (they’d come in by train this morning) and their only entertainment was waving at the train, so they were coming out every time one passed.
My train came closer to 4pm. The two other hikers who’d come in on the train with me were there to take the train back (they’d gotten caught in the hailstorm hiking back down). After getting a $5 beer I had some great conversations with the other people sitting next to me. I tried to relax before my 6 hour drive home, but everyone was chatty. I was ok with that. In fact, I was just fine. I’d accomplished what I’d come to accomplish, meaning I didn’t have to hike in through Purgatory next week to finish hiking the Chicago Basin 14ers. But… I’d still like to come back at a later date, maybe with others next time. I would also still like to come back and do Jupiter someday, but I’m thinking of making it a day hike from Purgatory…
I’ve been longing to tackle Capitol Peak for quite a while now. I told myself as soon as a favorable conditions report came out I’d hike Capitol on the first day I was available that had a good weather window. That day was today. The forecast called for low winds, clear skies, and 60 degrees on the summit. I couldn’t ask for a better day!
After taking the kids to Elitch’s water park all day I took a 2 hour nap and headed out to the trailhead at 8pm, stopping by Walmart first to buy new batteries for my flashlight. My flashlight wasn’t out of batteries, but I haven’t replaced the batteries in it in over a year and I planned on hiking for hours tonight in the dark: I didn’t want my flashlight failing on me.
For the first time in a very long time I made it to the trailhead without a hitch. My directions all synced up and I arrived at 1am to a parking lot filled with cars. The Capitol Creek trailhead is a rough 2WD / easy 4WD trailhead. I put it in 4WD because I could on the way in, and on the way out used 4WD because of the elevation loss. Beware: there are cows on this road.
I parked next to a ranger’s vehicle and didn’t fill out a camping permit. I wondered to myself if I was supposed to (it was 1am and I was going to be parked there all day, so it would look like I was camping), but in the end didn’t because I wasn’t setting up a tent and didn’t plan to stay overnight. There wasn’t a trail register.
I started just a bit before 1:30am (I stayed in the truck to eat breakfast and replace the batteries in my flashlight) and hiked in the dark for about 4 hours. My flashlight failed, but not because of the batteries. I had to hit it against a tree a few times to get it to go on again. It might be time for a new flashlight. It’s funny how I wasn’t thinking of bears this time at all: I knew if I saw an animal it was most likely going to be a cow, and I used to raise cows, so I’m not scared of seeing them in the dark. I was kind of expecting them. There was also a full moon which made night hiking phenomenal! If you want an easy segway into night hiking I’d recommend hiking when there’s a full moon. The (many) stream crossings were made easier with the reflection of the moon on the water.
I appreciate good signage! I took the Ditch Trail and loved all the great signs.
The signs were useful because there were a lot of offshoot cattle trails. Cattle trails tend to parallel each other, and sometimes weave around each other, making route finding challenging in the dark. Here’s a photo of the junction just before the large stream crossing and meet up with Capitol Creek trail.
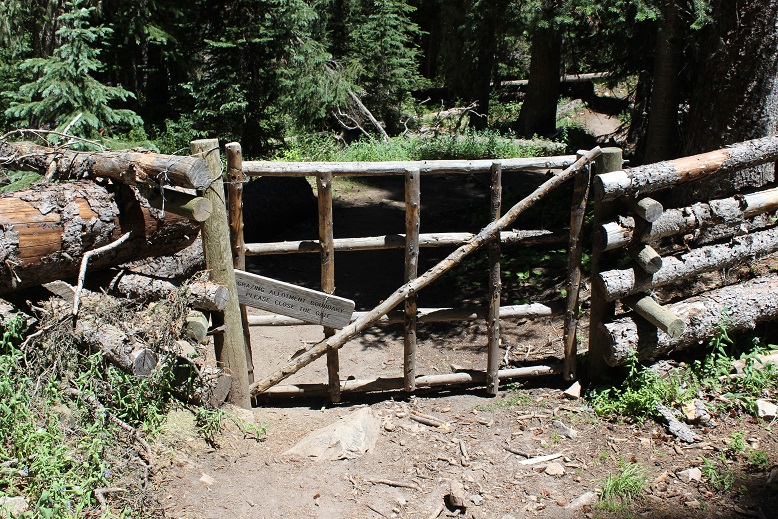
I came upon an unexpected gate in the dark. It was there to keep cattle out, and difficult to open and close and lock with one hand (the other was holding my flashlight. I’m not fond of headlamps because they don’t allow you to scan ahead of you effectively in the dark).
From here it was about 3 more miles to the lake. I followed the stream for most of the route, hiking up a hill and into a small basin. In the basin I passed several tents lit with flashlights, as it was now 4am and people were just getting up to start their hike up Capitol. There were also a few flashlights already visible on the trail ahead of me. It looked like there were a lot of people intent on summiting Capitol Peak today. Since it’s the Sunday before the 4th of July this was actually anticipated. In the end I saw 7 people today hiking Capitol.
I was able to hike the switchbacks up to the saddle without too much difficulty, as the trail was well maintained. In fact, I wasn’t even tired yet and didn’t need to pause for breath on the 900’ of elevation gain on the way up. The sun was just beginning to rise as I passed the saddle. There are several fires in the area, but none were visible on my hike today, and no smell of smoke in the air. The sunrise however clearly showed evidence of fire activity.
I stashed my trekking pole and looked at my map. At this point I was supposed to traverse south across the slope, but there were several gullies filled with just enough snow to make the crossing dangerous without crampons. I tried to down-climb one section and realized my legs weren’t long enough to make the stride needed to safely down climb and sighed inwardly. I had crampons, but didn’t want to put them on, so instead I found a route lower on the slope to traverse, being careful to stay as high on the ridge as I could because my directions said not to traverse too low. There were at least 3 different cairned routes here to get across the ridge, which I’m assuming are there due to different snow lines. Here’s a picture looking back at the ridge. The route I was supposed to take went through each of those sections of snow, which were only problematic around the gullies.
This is where the talus and loose rock began. I followed a cairned trail to the right and looked up at K2 and a lot of avoidable snow and some not so avoidable snow. I didn’t really want to keep away from the snow, so I put on my crampons and aimed for K2.
At the top of the basin crampons were no longer necessary. I still had some trekking and rock hopping to do to get to K2. There were cairns, but most were toppled over. I just pointed towards K2 and aimed up.
Once I reached K2 I looked for the route to hike around it, thinking I’d just summit it on my way back, but the class 3 route was covered in snow that wasn’t easily traversable.
OK, so up and over K2 it was! There were several Class 4 moves required to gain this unranked 13,664’ summit, as well as to cross over it to get back down to the trail.
Here’s the view from the top, looking at the trail back
While K2 is a class 4 on the way up from the basin, it’s a sheer drop from the other side! (So be sure to descend to the west) Here’s a look at that cliff face as well as the start of the trail of the ridge to Capitol.
Here’s a look at the ridge before me leading to Capitol Peak.
The first big obstacle of this ridge is the Knife Edge. The Knife Edge is considered to be the crux of the route. About 150 feet long, but with a drop of over 1000’ to cliffs below, the exposure here is dramatic. The ridgeline of the knife edge is indeed sharp, making straddling and sitting on it extremely uncomfortable and not practical.
Many people use rope to cross this section (belaying partners across). There are several ways to negotiate Capitol’s Knife Edge solo: the monkey crawl, butt scoot, side to side foothold shuffle, and (dare I say it) the tightrope traverse (not recommended), just to name a few.
I’ve been working on my upper body strength lately, bouldering at a rock climbing gym once a week and practicing my pushups (I’m now up to 100 pushups a day). I chose to cross the Knife Edge by straddling the (mostly) stable rock, hugging the sides with my knees. I then leaned forward and used my arm strength to lift myself up, bending my elbows, lifting my arms, and placing my hands one in front of the other to press myself forward. This meant I always had at least 3 (but usually 4) points of contact on the ridge at all times. Every 5 feet or so I’d stop to give my arms a rest, but not for too long because it was an extremely uncomfortable edge on which to sit.
I know it looks like a lot of exposure, and it is, but for me it wasn’t scary. I just focused on putting one hand in front of the other and didn’t look down (too often). It only takes about 5 minutes to cross, and when you do you have the whole rest of the ridge still to traverse!
The rest of the route stays to the left of the ridge. Wow. This was going to be intense! I was just glad the route was free from snow. I took a deep breath and reminded myself that even though I’d passed the crux of the route this ridge is not an obstacle to be taken lightly: It’s full of unstable rock that can give way at any moment. That combined with a lot of exposure makes for a mission that required 100% of my attention. Many people have died hiking this ridge; 5 last year alone. I cannot die. Not now anyway. I realize no one wants to die when they set out hiking a 14er, but I cannot die. I have three teenagers at home I’m the sole caretaker and provider for. If I died there’d be left without their only parent, and I can’t let that happen. I have to be prepared and stay focused at all times so I can return safely home to them. I don’t take this responsibility lightly.
Knowing how people have run into trouble on this mountain helped me prepare. I felt I knew what to look out for and how to stay as safe as possible on this ridge. I know the rock is infamously unstable, even when it appears to be solid. So I took extra care with every handhold and foothold, making sure I was completely stable before making my next move. This meant I was scrambling slowly, but at least I was being safe. And that exposure!!! I knew if I slipped and fell I wasn’t stopping for a long time. Just as with the Knife Edge, I stayed focused on the task before me, only taking my eyes off what I was doing to make sure I was on route, after making sure I was secure.
The ridge seemed to go on and on and on, but it wasn’t really that long. There was a relatively solid grey gully just before the final push to the summit.
At 11:30am I was there! I’d summited Capitol Peak! I looked back at the route I’d taken from the saddle.
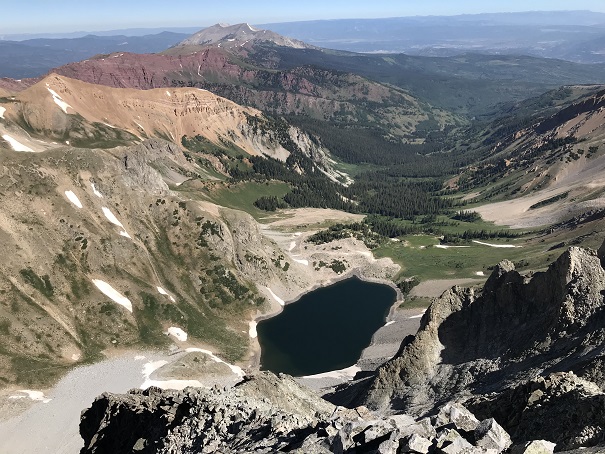
Here’s a view of Capitol Lake from Capitol Peak
I was surprised to see how little snow there was left on Snowmass: last month the mass had been full of snow!
I was ecstatic! Capitol Peak is arguably the most difficult 14er to climb, and I’d just climbed it. Solo. I was on top of the world, but I was also realistic: I still had to climb back down. I don’t consider a summit successful until I’m back on class 2 terrain, and for me that meant getting back to the saddle before I could really celebrate. So I got a summit photo and prepared to head back down.
I looked at the route below me
It was full of very unstable rock and loose boulders. Some sat precariously on top of another rock or lose dirt, while others were part of a larger boulder, ready to cleave off and tumble down the mountain when touched. I’d heard numerous rock slides today, and didn’t really want to be a part of one. In many ways down climbing is more difficult than climbing up because you’re off balance and begin with less stable footing and facing the pitch, but it’s made even harder when climbing alone because no one’s there to help tell you where to place your hands and feet, something more obvious when climbing up. Much of this route requires you to turn and face the rock before descending. As I did so I reminded myself once again to take it slow and test out every hand and foot hold before putting my trust in its support. Several rocks did indeed give way or slip out from underneath me, but I was never put in a position where I fell. I did smack my knees and shins few times though.
I made it back to the Knife Edge ready to tackle it once more. This time there was another group crossing when I got there, so I took their picture and text it to them. This really is a very cool accomplishment, made even cooler with picture proof. The people behind me took a picture of me crossing.
The rock is indeed stable, but there were two slabs near the middle that were wobbly. I probably could have dislodged them if I tried (I didn’t). They will almost certainly flake off in the next year or two on their own.
After crossing the Knife Edge I thought about how Capitol Peak is considered the most difficult 14er by many, and for good reason. Personally I think Little Bear in winter was more difficult (and one I never want to do again) but that could have been because of the conditions. The Knife Edge of Capitol wasn’t scary for me at all. I didn’t experience heightened adrenaline or fears. I just looked ahead and crossed the same way as I’d done earlier in the day. Apparently exposure is only an issue for me if steep snow and ice is involved.
I navigated up and over K2 (again, so does that mean I get to count it twice?) and back down the basin. This time I put on my crampons and hiked straight down the snow. There was definitely some glissading to be had here. I kept on my crampons for the entire basin, even though they were only needed half the time. I just didn’t want to take the time to keep putting them on and taking them off. It made for an interesting (and noisy) time hopping from boulder to boulder, made totally worth it cruising through the snow.
I made it back to the gully I didn’t feel comfortable crossing this morning and watched someone else climb up the side. I took off my crampons and found footholds I was unable to see in the dark this morning. The only downside was my shoes were wet from the snow, and it’s no fun climbing with wet soles!
At the saddle I picked up my trekking pole and started my way back down to Capitol Lake. Here’s a view of the trek up the saddle
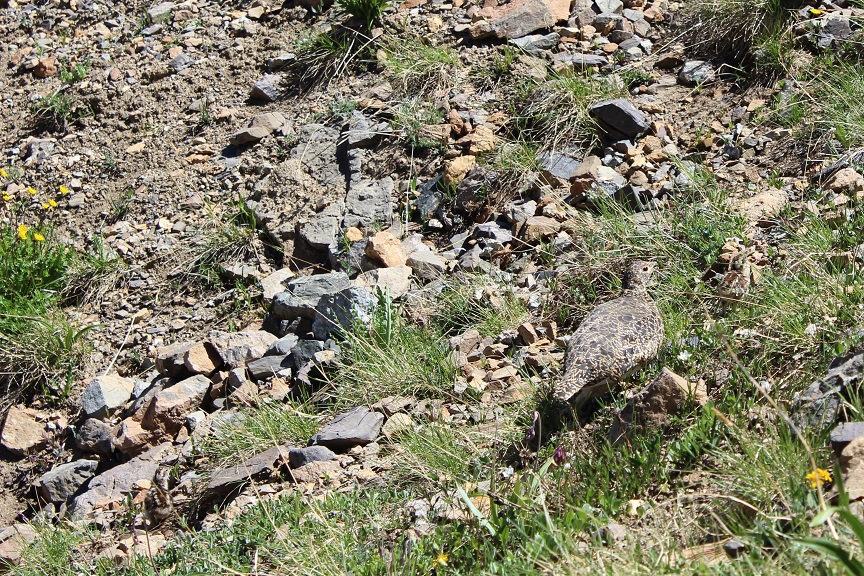
About halfway down I came across a Ptarmigan and her chicks. They were adorable! The hen seemed a bit overwhelmed.
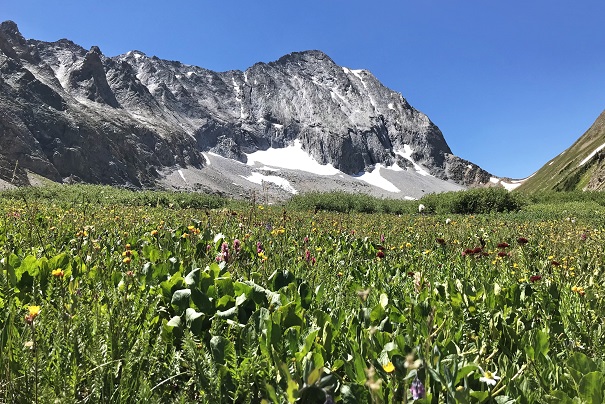
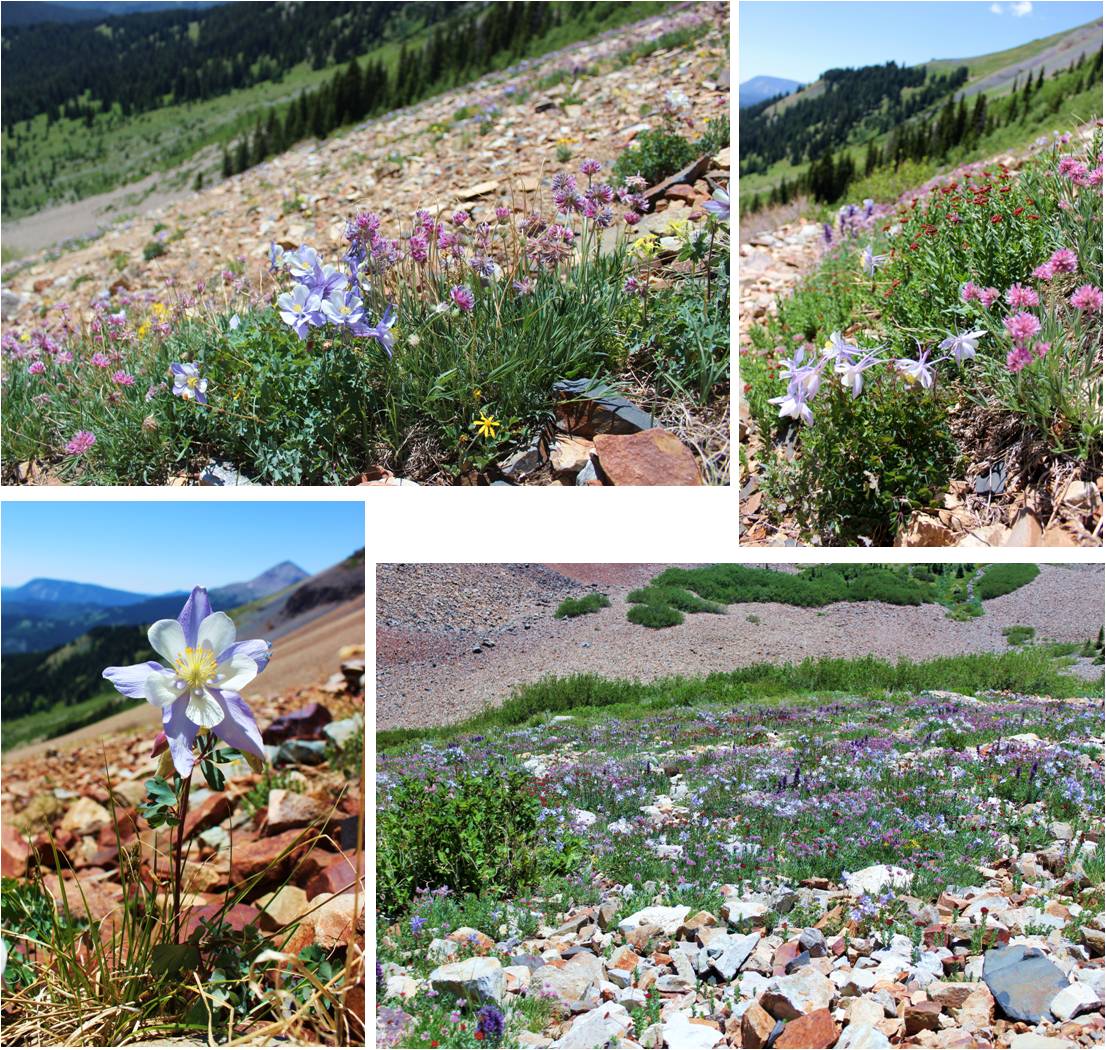
The wildflowers here were fantastic!
Now I felt as if I’d truly safely summited Capitol Peak… and… I had a new favorite 14er! Capitol was everything I looked for in a 14er: a good trek in (although I could have used with a mile or two less on this one), gear required, scrambling, a real crux (Knife Edge), class 3/4 terrain, awesome views, just enough snow in the right places to make it interesting, and not too many people. There are some hikes I never want to take again. This is not one of them. I had to get a selfie with my new pal
It was now mid afternoon and the weather was fantastic. There were wildflowers all around, bees and butterflies flitting about, and a light breeze in the air. This was hiking!!!
In the daylight I had a better view of the trail
And stream crossings
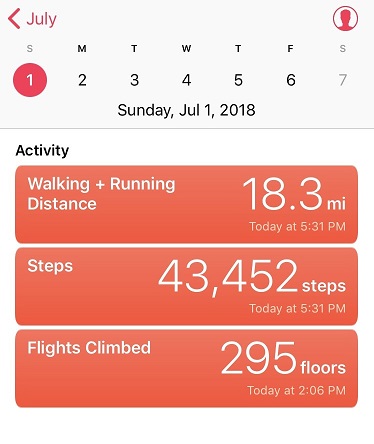
The hike out seemed to take forever, but that was probably because it was warm out and my backpack was heavy. I made it back to my truck at 2:30pm, making this an 18.3 mile hike/climb completed in 13 hours.
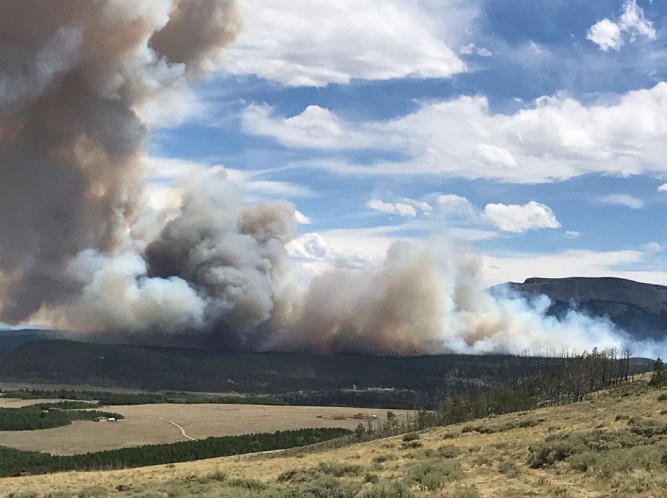
The drive home took much longer than the drive in because the 285 was closed for the Weston pass Fire and lots of people were evacuating.
Also, it’s a holiday weekend and there were TONS of motor homes, RV’s, and vehicles hauling toys on the road. We didn’t go above 35mph for over a 70 mile stretch, despite it being a 65mph zone. Such misuse of time makes me go insane!!! Drivers who are driving that slow need to pull over to let faster drivers pass. Think of it as a law or something. I need to time my drives better so I’m driving home later in the day!
It’s 7:30pm on Saturday night, and I go downstairs to find all 3 of my teenagers hanging out in my youngest daughter’s room. My son is sitting in a chair in the middle of the room serenading everyone, trying to figure out how to play a Bruno Mars song on his accordion. My oldest has her laptop in her lap, and my youngest has her headphones on (but takes them off when I enter the room).
The kids ask me why I’m not driving to the trailhead? Didn’t I have a long drive and hike ahead of me tomorrow?
Me: Well, you see yesterday I saw a really big bear when I was coming home from hiking. A really big bear. I didn’t realize we had bears that size in Colorado! I’m stalling because I don’t really want to hike solo in the dark for longer than I have to with bears on my mind.
My son: I thought you talked to us yesterday about not letting other people’s fears dictate your hikes?
Me: Yes, but currently, this is my fear.
My youngest: That’s fair.
My oldest: But you’re not hiking the same mountain, right?
Me: You’re right! Hey, I’m not even hiking in the same mountain range. Thanks! I’m out!
My oldest knows how I think, and knew just what to say to get me moving. I’ve hiked for miles and miles in the dark solo dozens of times, but for some reason seeing that really large black (cinnamon colored) bear yesterday kind of freaked me out. Sure, it was running away from me, but it wasn’t the smallish black bear I’m used to seeing. I encountered it during the day, but it’s not something I’d like to repeat at night. I know I’ll get over it after a time or two of hiking at night again; the experience was just still fresh in my memory and didn’t sit well.
So I drove the 6.5 hours to the Kilpacker trailhead. Quick note: the driving directions given on the dot com are correct, but I misinterpreted them. The instructions said to drive to Lizard Head pass and continue south. So when I got to Lizard Head Pass sign I turned south into the lot, thinking this was the pass, and looked for a route south. This wasn’t the pass, and I circled the parking lot twice looking for it. It was dark and the road was a half loop, leading to other trailheads and me to believe I was missing the turn off. I figured I must have missed something? Nope, there was no turn at Lizard Head Pass: just continue driving when you see it and don’t go into the parking lot (unless you need to use the restroom, because they have one there and not at the trailhead).
The 2WD dirt road in was a bit narrow in places, but easy to navigate. I put my truck in 4WD because I could, but it wasn’t necessary.
I signed the trail register at the well marked trailhead and started my hike a little before 4am. In the dark. Here’s proof:
The first 5 miles of this hike are really easy. Very little elevation gain (in fact, you lose more than you gain it seems, which stunk on the way out) and no real challenges. That is, if you put aside the fact when you hike in the dark your sense of hearing intensifies and every shadow becomes a mountain lion/bear/rabid squirrel coming at you at full speed. About 2 miles in I heard a large pine tree fall 20 feet in front of me on the trail, which was a first for me (but it’s gotta happen a lot, right?).
I came upon the stream crossing and it was more difficult than anticipated. You see, when I came upon it in the dark I saw a broken log in the water, with no way to cross. I walked up and down the banks a few times until I noticed an in-tact tree that was easy to cross. It’s one of the fun challenges of hiking at night! (I had a GPS but it wasn’t helpful in this situation, as it showed the crossing far from both logs, in a place where there were no logs).
So, how did I deal with my bear thoughts? I diverted my mind to a speech I’m writing for a presentation I’m giving next week at a conference on sensor technology, tapped each and every log and large rock I passed with my trekking pole to make noise, and said “Hey Bear!” more than I have in years. It worked, because I didn’t see any animals (which was also kind of a downer because I actually like seeing animals when I hike).
The route was very well maintained until I reached the basin.
I reached the basin just as the sun was coming up. This was a very large basin filled with a lot of talus.
From here the route wasn’t difficult to follow, but everything looked the same, making cairn finding a fun game.
I never did see the cutoff for El Diente because I wasn’t looking for it. I was focused on route finding for Mt Wilson, but here it is (I found it on my way back down).
I left my trekking pole near a large rock, fully expecting a marmot or pika to destroy it (it’s time I got a new one anyway).
I chose to do Mt Wilson first because it’s further and there was a chance it would have snow. I wanted to get the snow part of the hike done in the morning before the snow softened. The jury was still out on the traverse. After hiking through miles of talus I came to a drainage area with larger rocks. I could see a snow free line to where I needed to go so I didn’t put on my crampons and spent the next hour and a half carefully hopping from rock to rock up the drainage.
Once I made it to just below the gullies below the summit it was much safer for me to put my crampons on, so I did, and left them on until I was about 150 feet away from the summit (when rock climbing became necessary).
Here’s the route I took (I’m using the photo from 14ers.com because mine don’t have this great of a perspective).
After making it to the notch rock climbing was necessary. Yes, it is important here to look back at the way you came. You’ll be surprised at how different it looks from this perspective!!!
There was one class 3 move
And the rest was a fun uphill scramble with the added bonus of the sun blinding me as it was just rising over the ridge
Wow! What a beautiful day for a summit!
I took a summit selfie, a summit video, and was back on my way.
This time I put on my crampons for the gully and kept them on as I was descending most of the basin, straight down the snow. Wow! What a difference from hoping rock to rock! This was so much easier! I wished I’d have done this on the way up: I’d have saved quite a bit of time.
Now it was time to head over to El Diente. I’d made the decision I wanted elevation gain today, and the best way to do that was to descend Mt Wilson and climb El Diente instead of doing the traverse. Also, I didn’t have a map or instructions for the traverse with me and this seemed like a safer option, even though the traverse was snow free.
The pink “v” is what you’re supposed to do if you hike each peak separately, but I found an established cairned route and took the blue line.
I still looked for and traversed the rib, but I took a route from the west instead of the east.
I climbed the gray gully and hiked just below the organ pipes
After gaining the ridge I actually moved from the south side and traversed the north side of El Diente. The north side had some snow directly on the route, but it was easily navigable. Here’s a picture looking back at the north side part of the trail and also of the traverse.
Here was the crux of the climb for me: I rounded the corner and since there was snow on the direct route from this point on I made a few class 4 moves to gain the summit. (It’s a steeper climb and those rocks are larger than this picture makes them look).
I couldn’t tell where the exact summit was. My GPS kept switching between points, and some were obviously not the summit (it was doing this for the north and south side of the mountain too, which was frustrating). There was no summit marker so I just stood on multiple high points on the ridge, just to be sure I hit the ‘actual’ summit. The high points were quite narrow so this picture is closer than I’d have liked.
Take a look at that ridge heading back to Mt Wilson!
I was much more confident on the way back down El Diente. Both of the climbs I did today were completely within my abilities. They were fun, and while there was exposure I wasn’t scared at all (not even much of an adrenaline rush). These routes seemed very similar to the Mt Sneffles ridge route. The only downside? The talus! OMG, that stuff didn’t quit! Talus stinks to hike in because all of the rocks are of irregular size, none of them are stable or large enough to securely put your foot down, and they cause you to slide when hiking downhill. It’s hard on the knees and impossible to hike down fast without slipping.
The only good thing about talus? It’s gorgeous to look at! I found several pieces that looked like they contained fossils of plant material. I left them there for the next hiker to find.
On the way back down I was able to see flowers that weren’t visible in the dark. Absolutely stunning! Pictures don’t do them justice!
I turned around before exiting the basin to get a good look at the waterfall
Here’s more of that talus route down…
I was able to retrieve my trekking pole with only minor bite marks. Due to the bite size I’m assuming a pika was involved, and was pleasantly surprised it wasn’t destroyed. I’ve heard stories of the rodents ruining gear, but they only seemed to have a nibble this time. Apparently they didn’t like the taste of the cork handle.
This hike made for a long and beautiful day, as I made it back to my truck at 4pm (and home at 10:30pm, so door to door it was a 27 hour day). I actually stopped at treeline to let some hikers pass (two young men trying to run down the talus to catch up with/pass me, and falling several times doing so… I figured I’d just let them pass since I wasn’t in a hurry today). To make sure they were well ahead of me so we wouldn’t play leap frog I waited for about half an hour in the meadow, enjoying the view. Talus might be tough to hike in, but it sure makes a beautiful mountain!