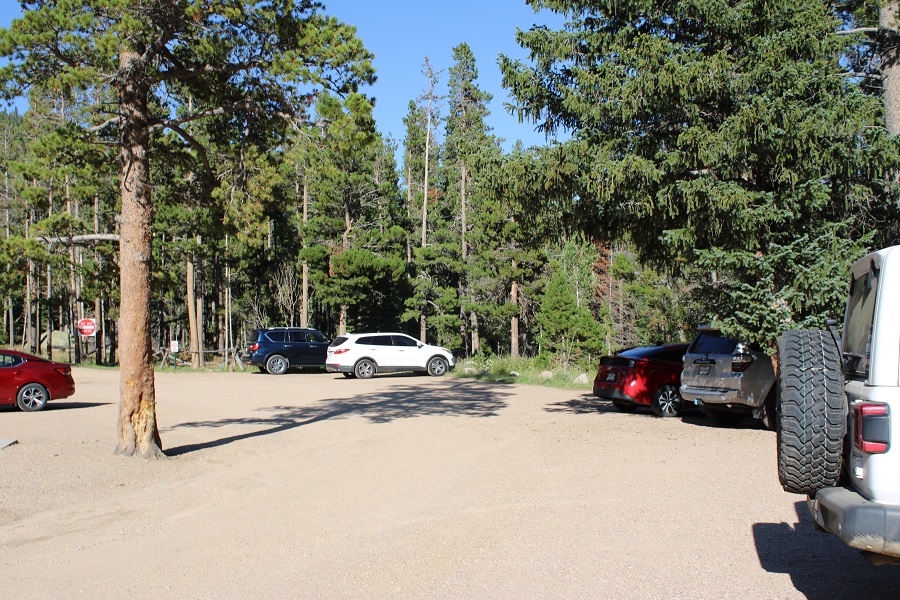
I parked at the Wild Basin Trailhead inside Rocky Mountain National Park and was on the trail at 4am. There’s plenty of parking here, but they have timed entry from 9am-2pm every day.
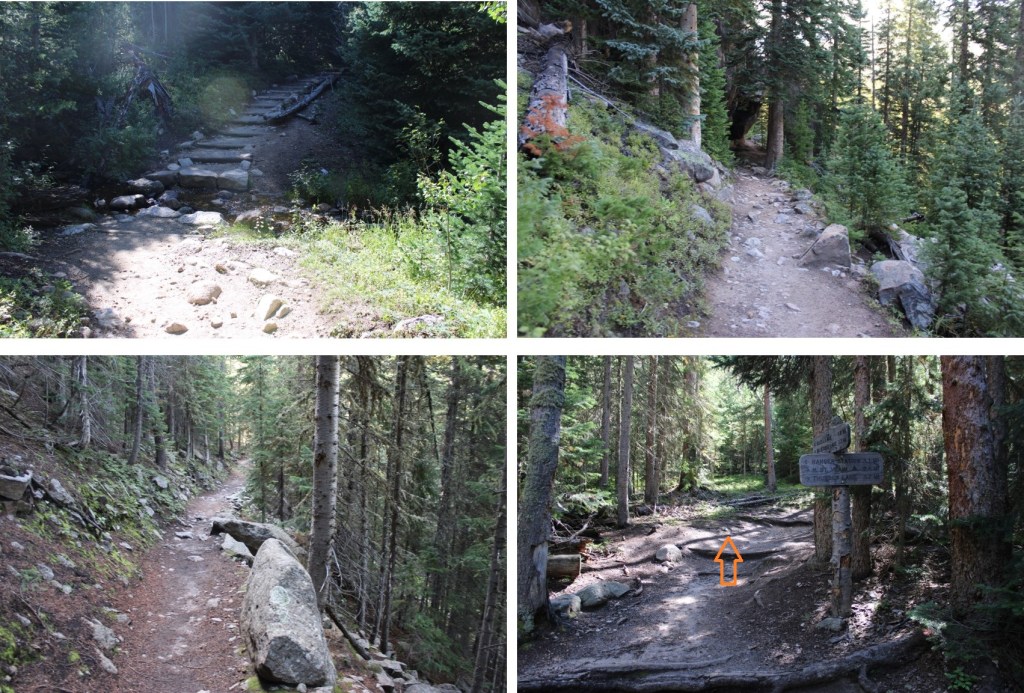
The trailhead starts at the south end of the parking area
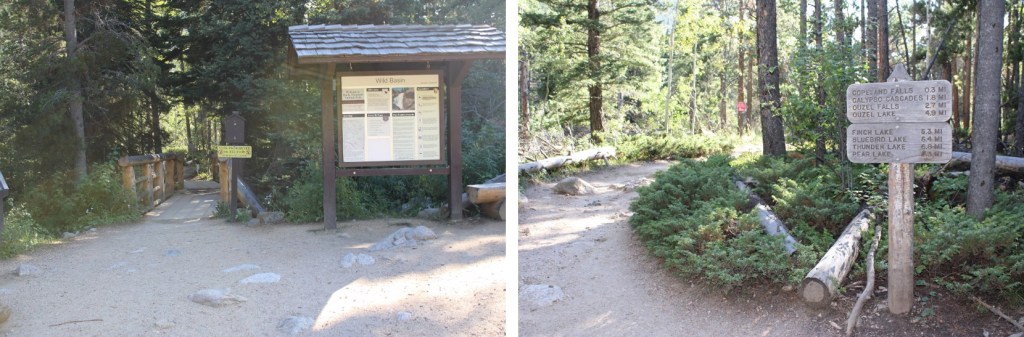
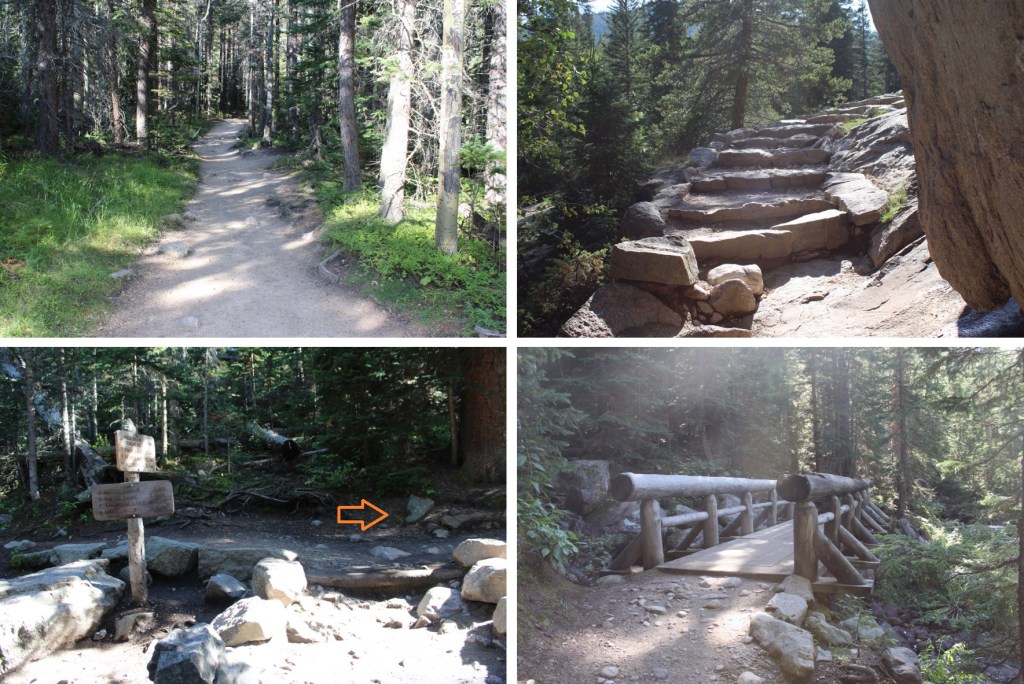
I followed the signs for Ouzel Lake/Bluebird Lake. This class 1 trail is really well marked, so it’s difficult to get lost if you read the signs. I passed several waterfalls (Copeland Falls, Calypso Falls, and Ouzel Falls).
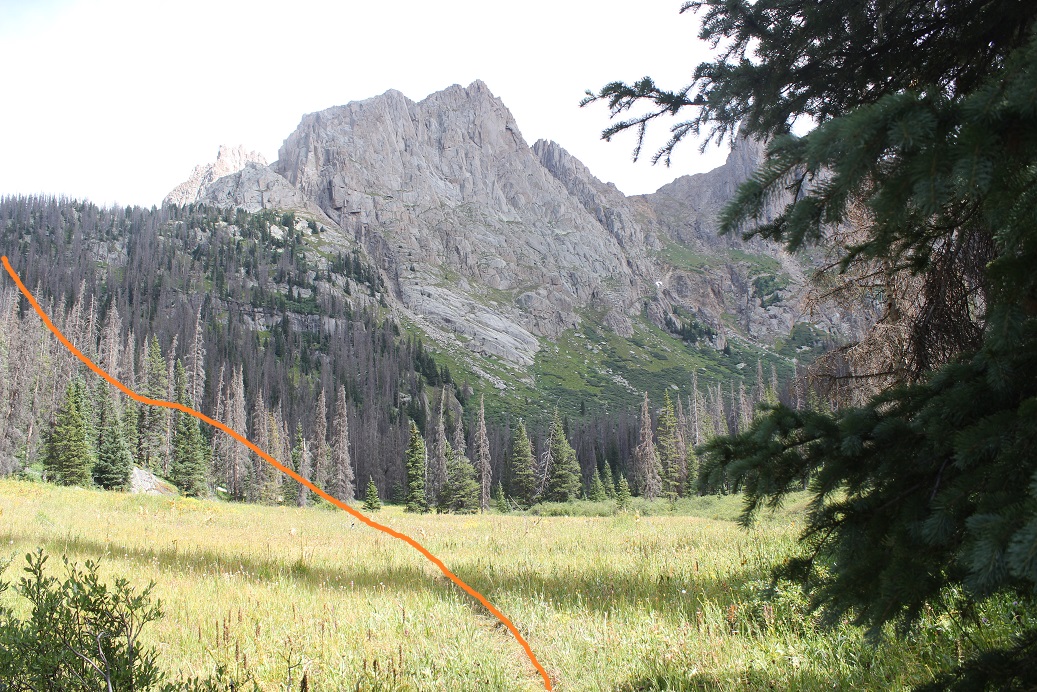
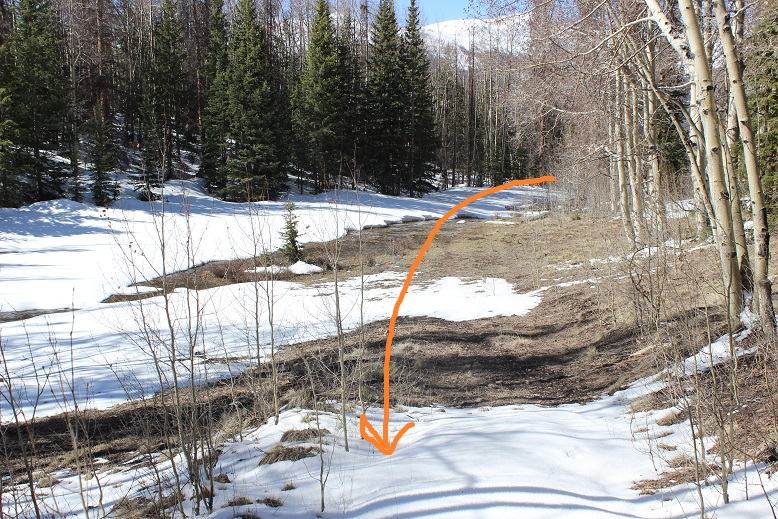
After hiking for 4.75 miles I came to the junction for Ouzel Lake and Bluebird Lake. I turned right onto the Bluebird Lake Trail.
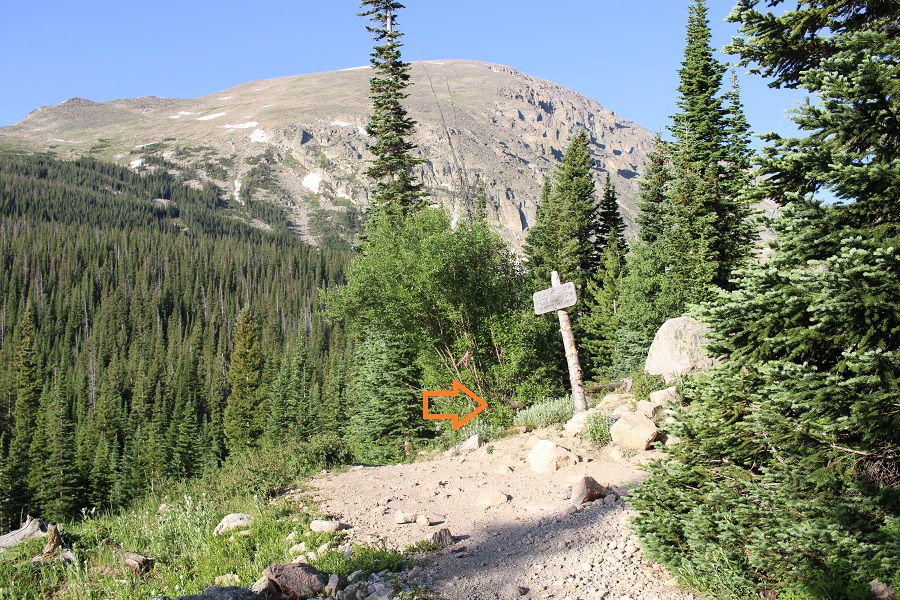
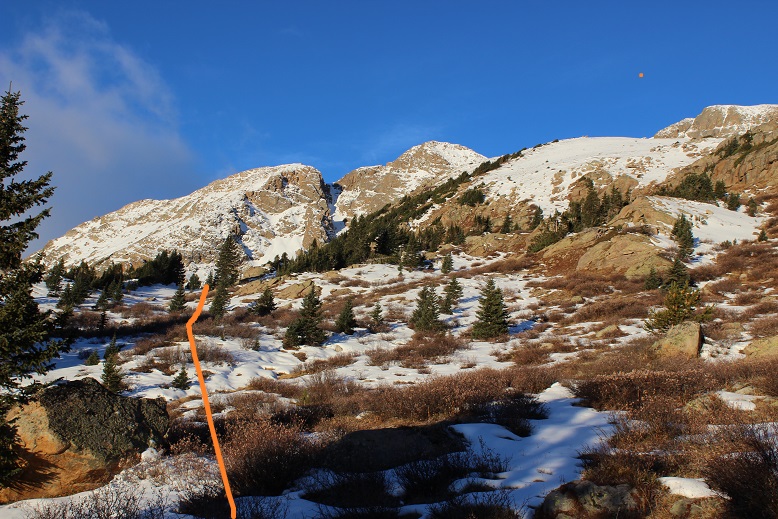
I didn’t stay on this trail long however. Maybe about 10 yards or so. Then I left the trail and headed northeast to gain the ridge
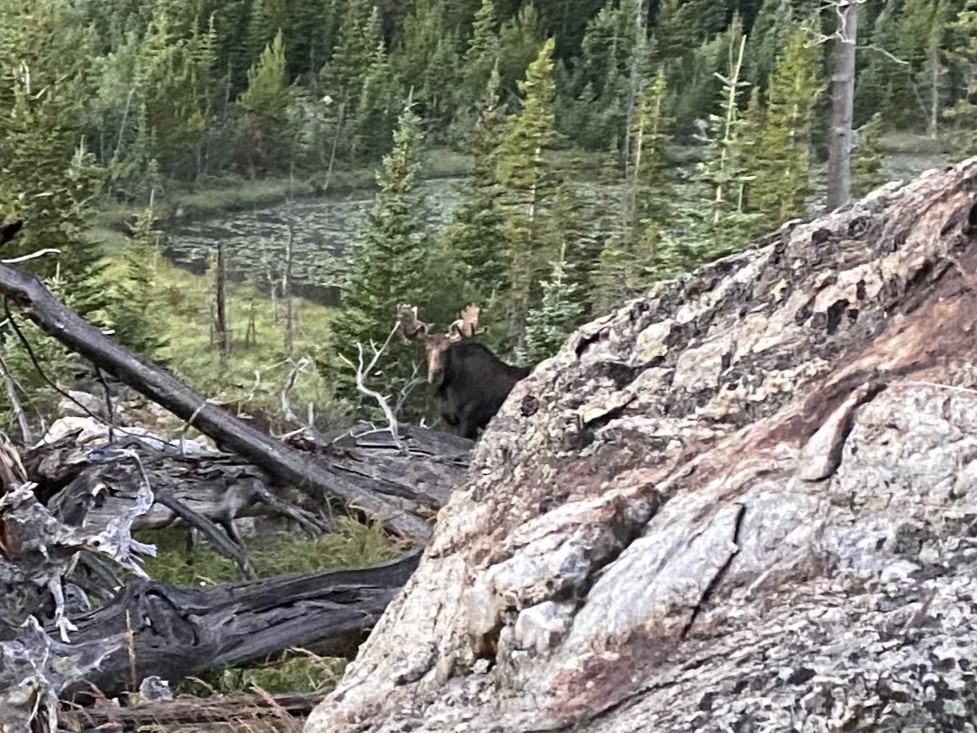
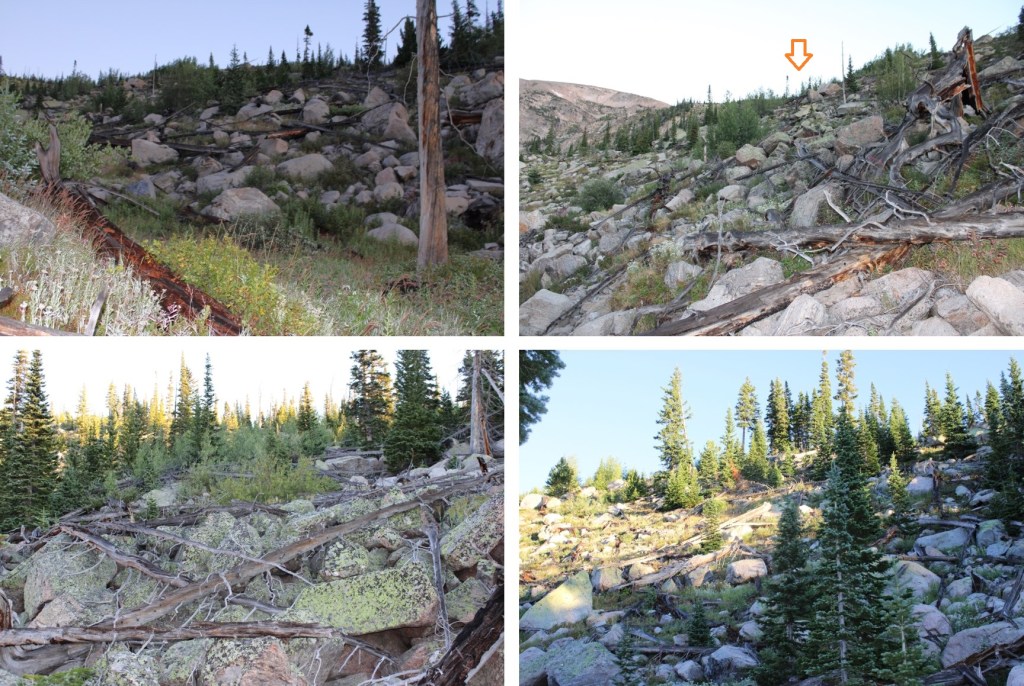
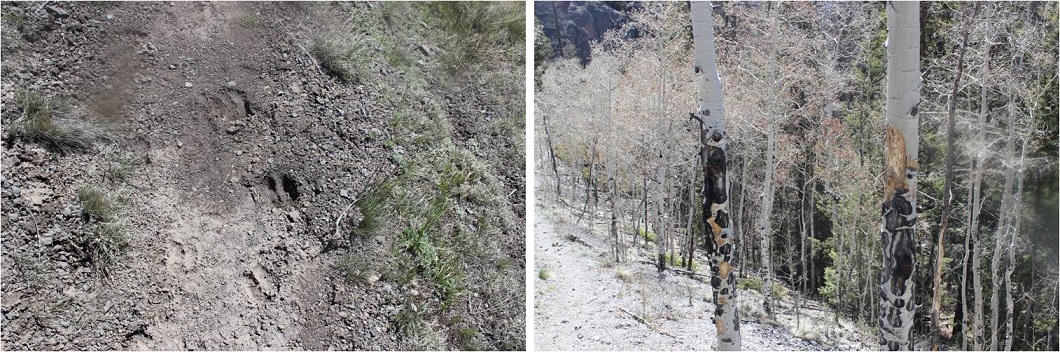
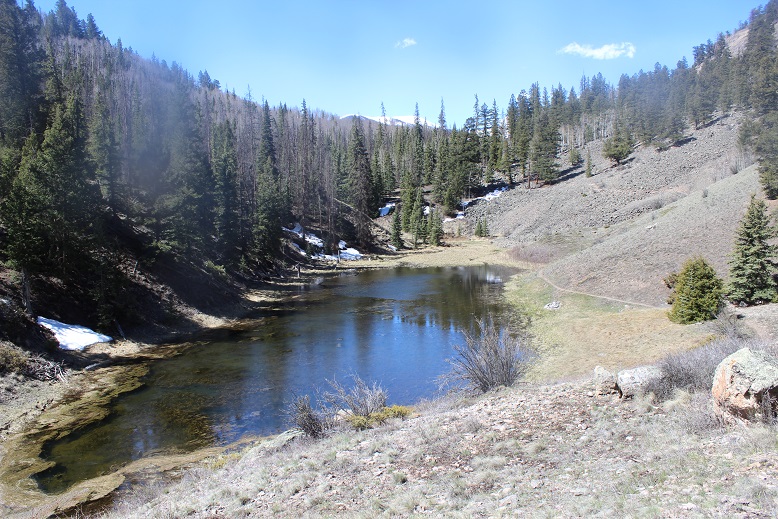
This is where I startled a moose. He was about 15 feet away from me when I saw him, so I quickly ducked behind a large boulder. Usually, moose run away when they see you, or ignore you, but this guy seemed interested in me. I’ve seen probably over a hundred moose in Colorado, and I’ve only been charged once. This guy looked like he wanted to charge me, so I remained hidden. For a solid 15 minutes, every time I peeked out from behind the boulder, he was still staring at the boulder I’d hidden behind. I know moose have poor eyesight, so while he knew I was still there, he was probably trying to figure out if I were a threat or not. (That’s Chickadee Pond in the background).
Eventually I crawled away on my hands and knees so he couldn’t see me in the brush, and continued my way up the ridge. This included a lot of bushwhacking through downed trees. A lot of downed trees.
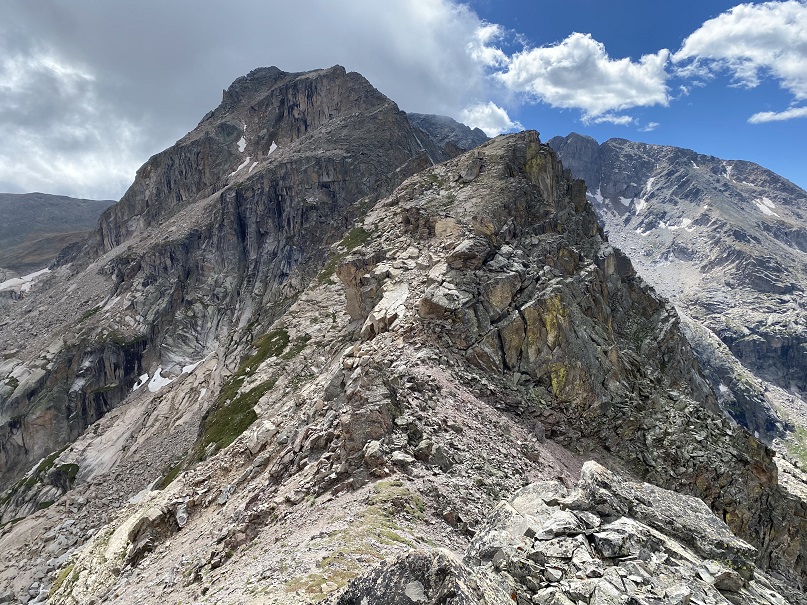
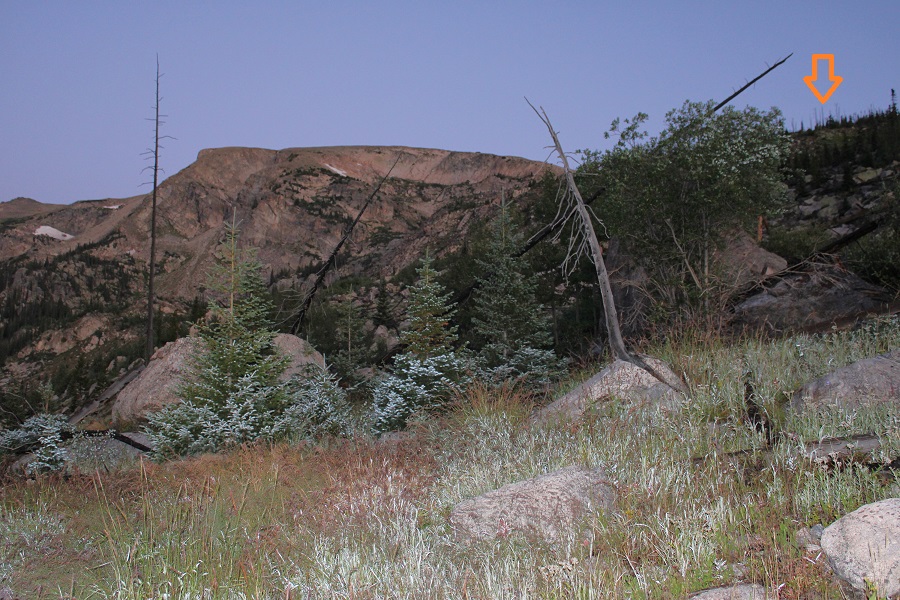
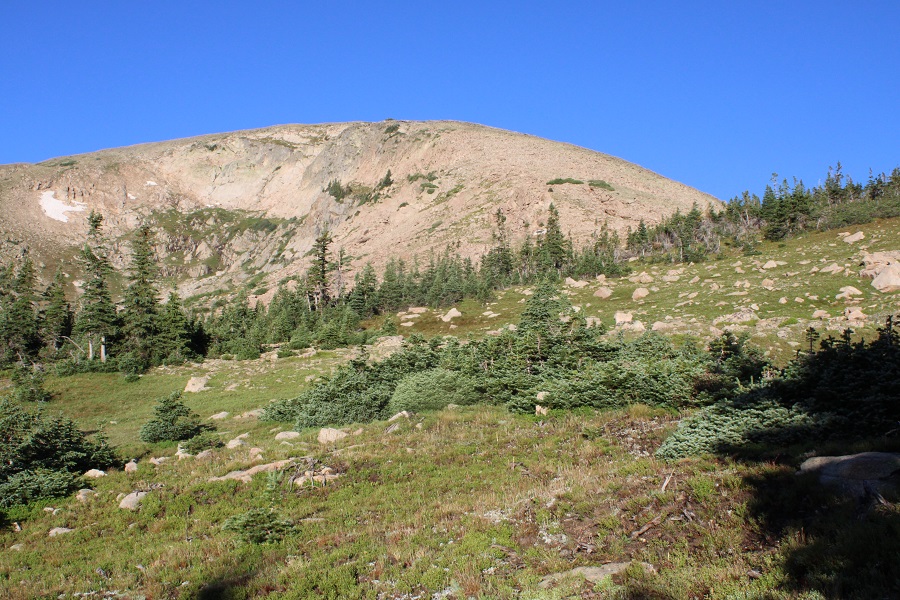
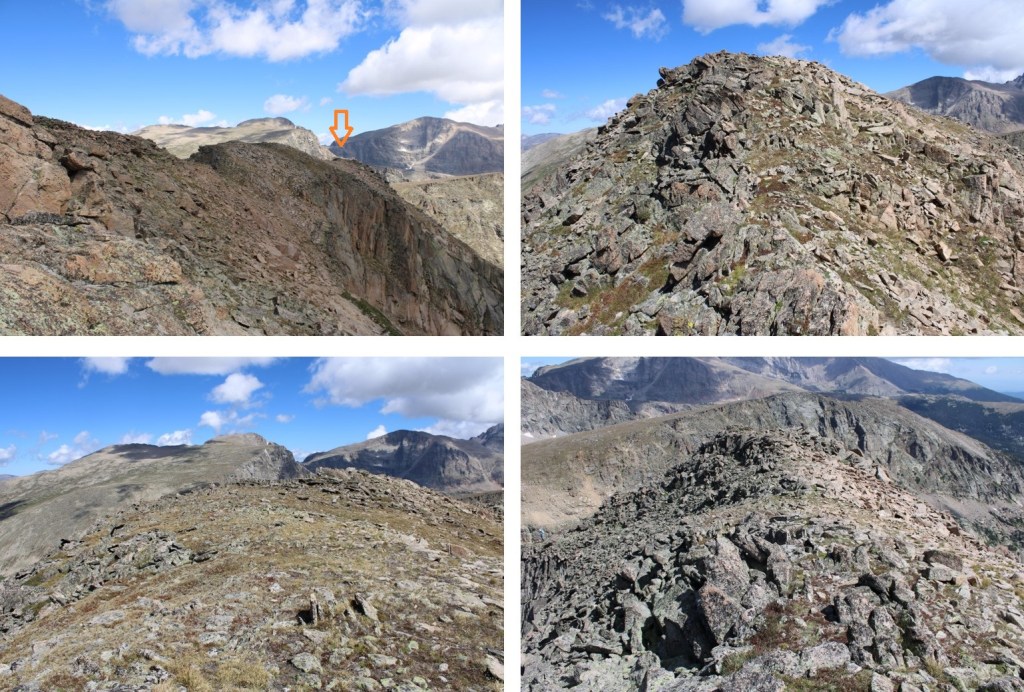
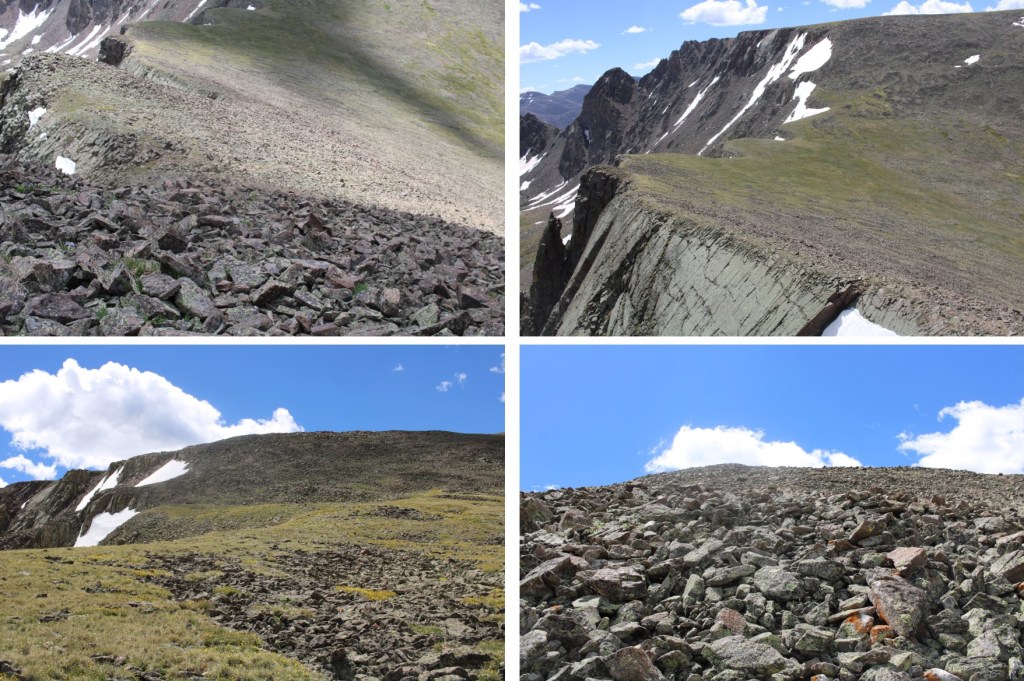
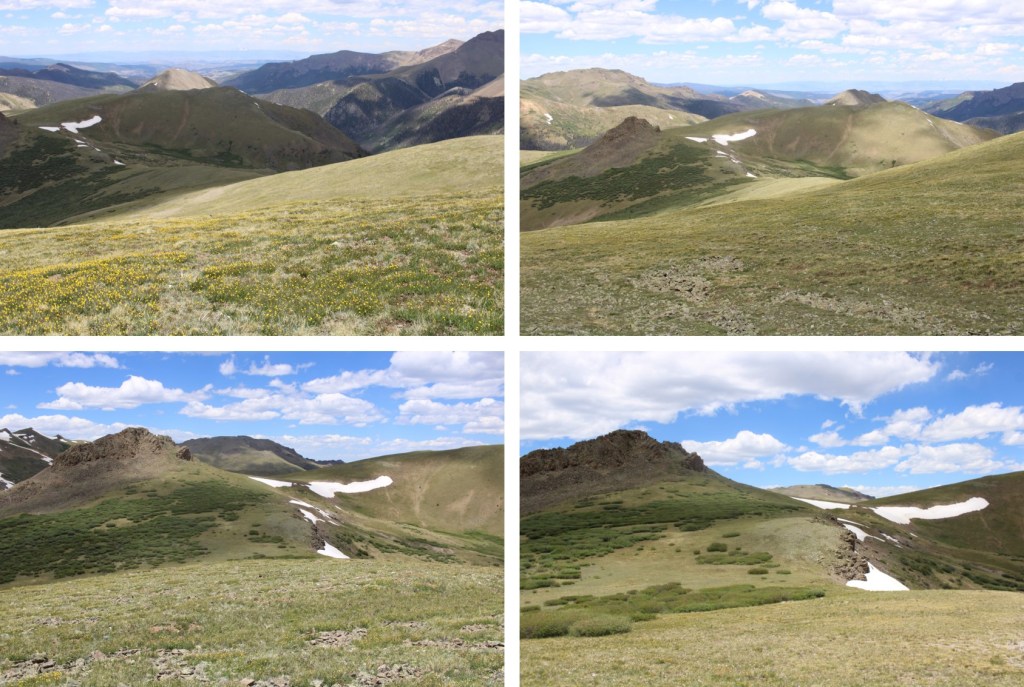
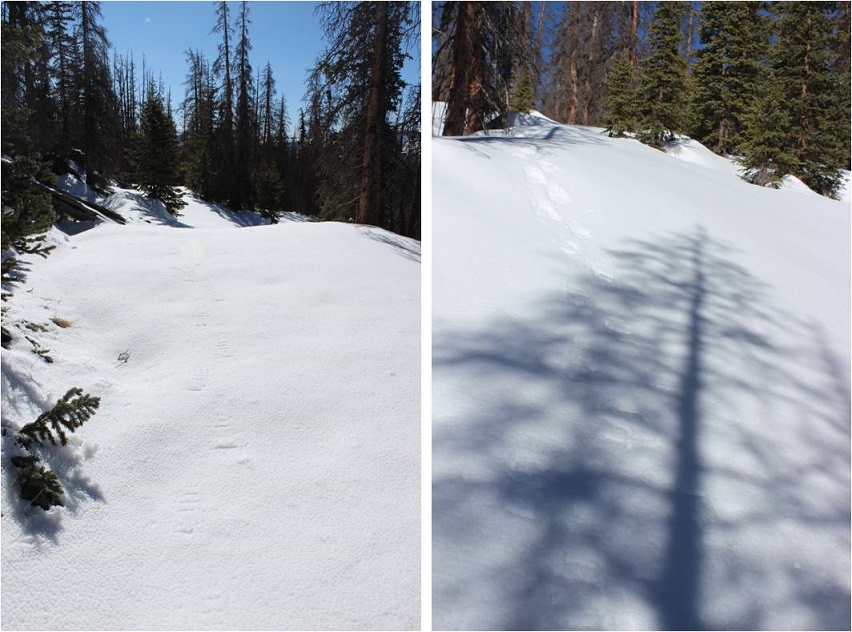
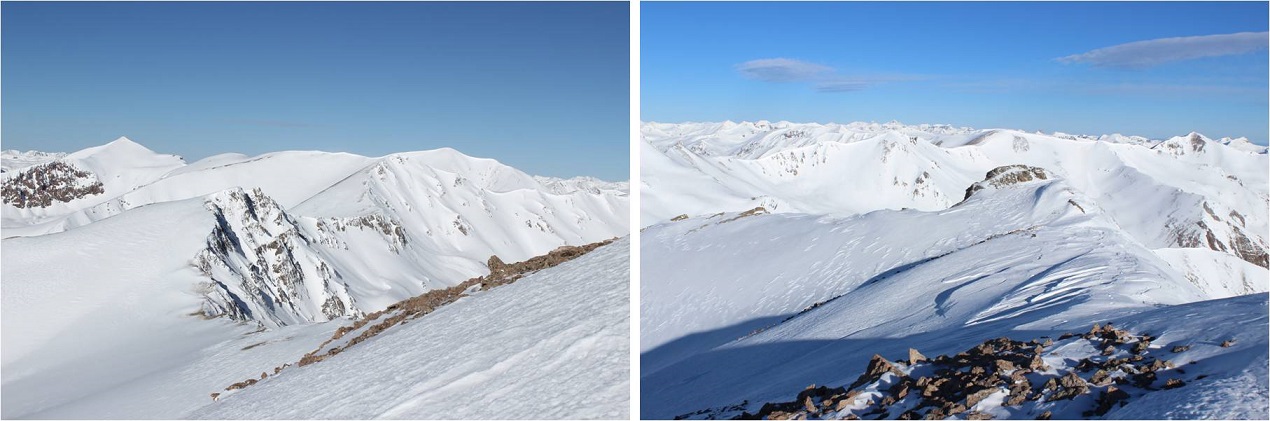
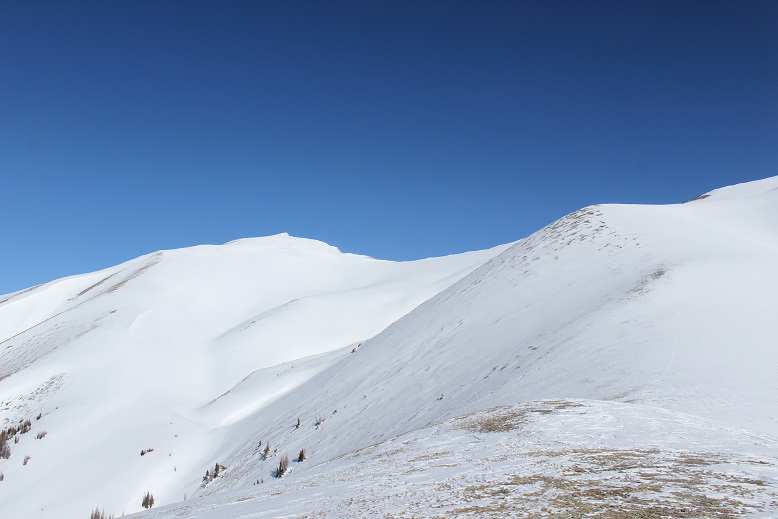
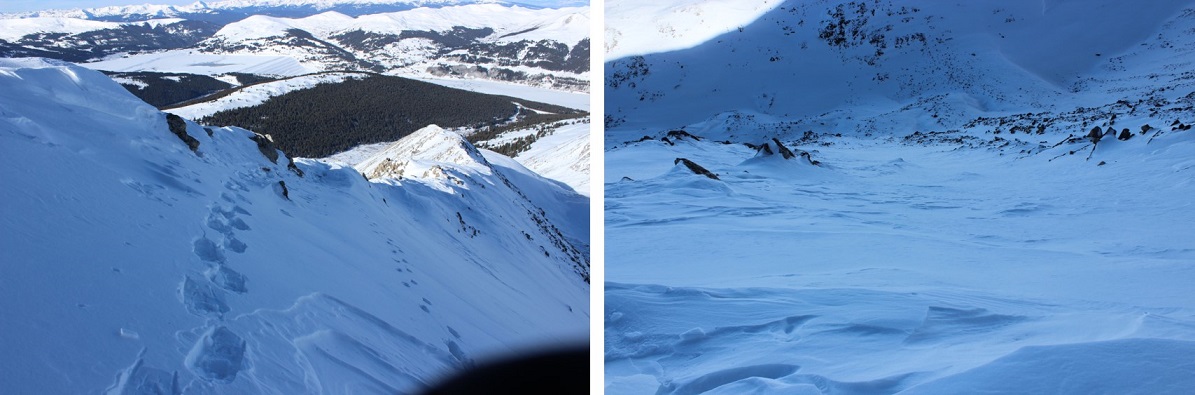
Once I made it to the ridge, I followed it west to treeline
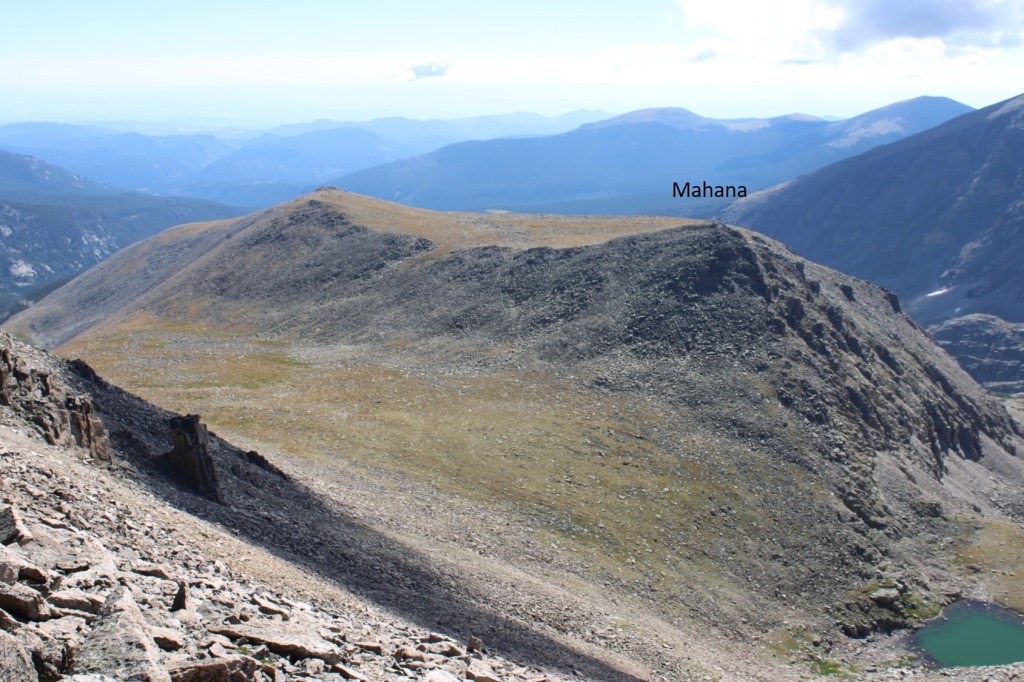
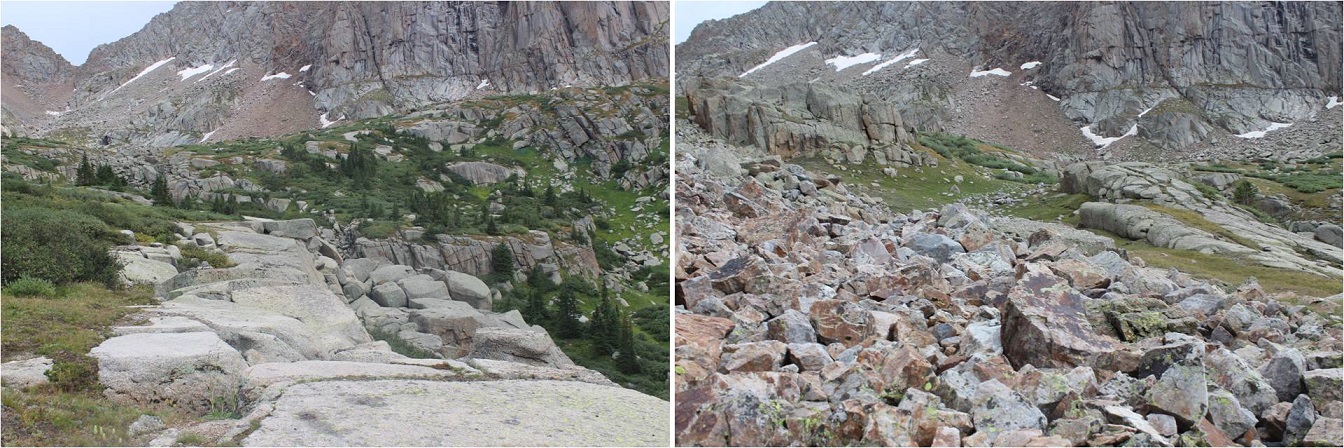
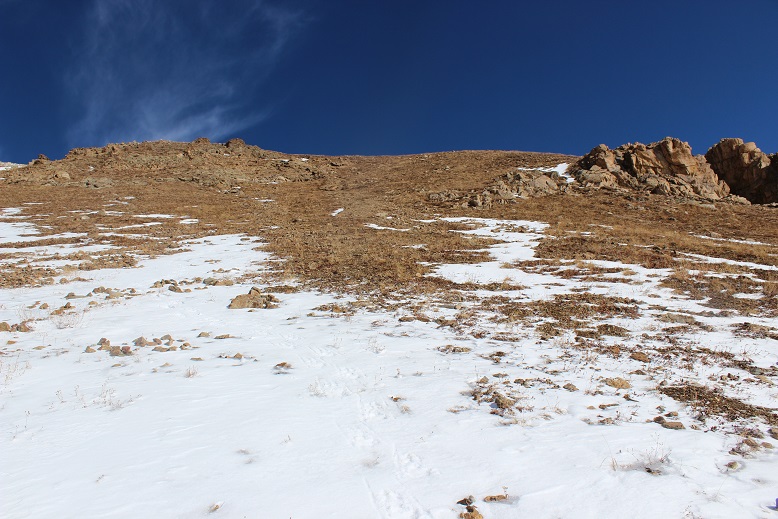
The route from here was straightforward. I stayed o the ridge, following it west. The terrain started out as loose rocks, then changed to tundra.
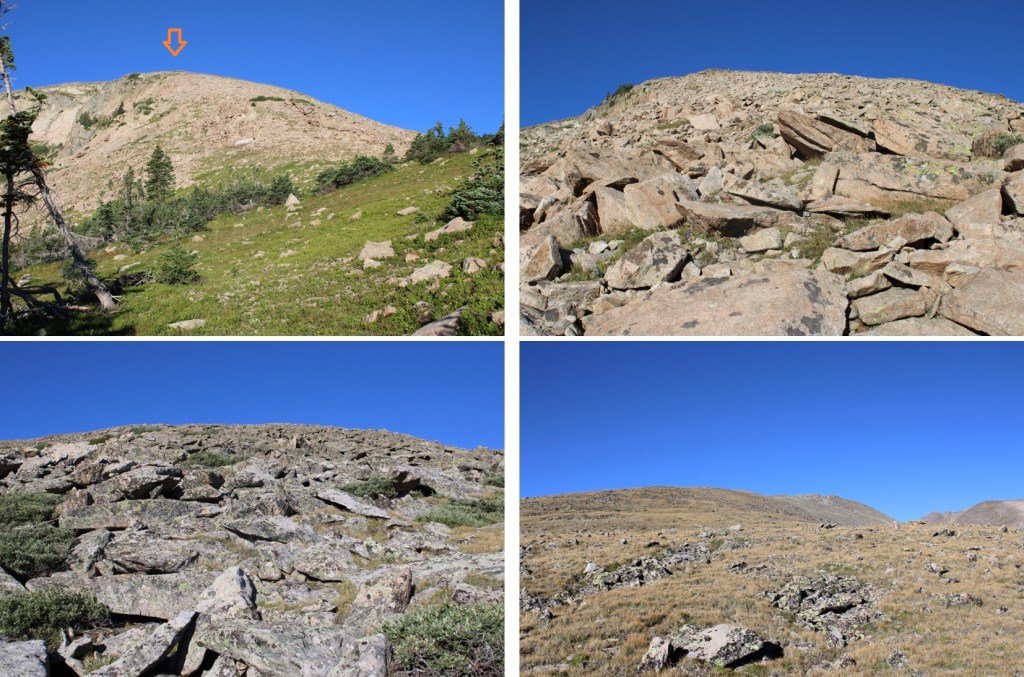
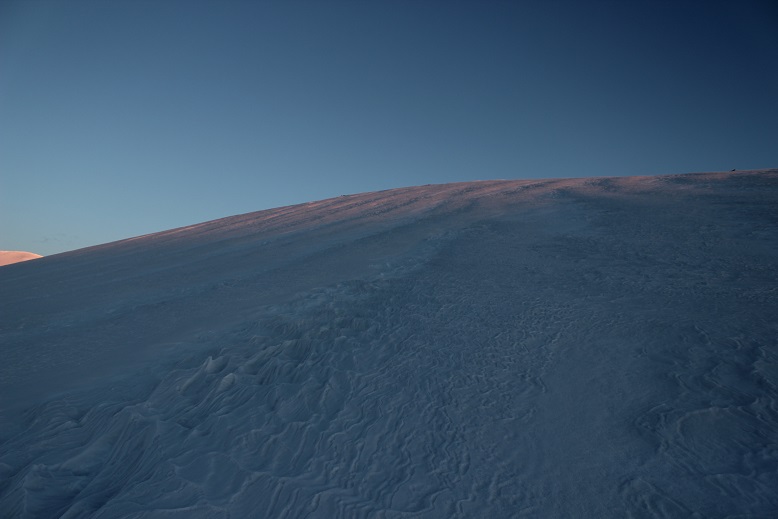
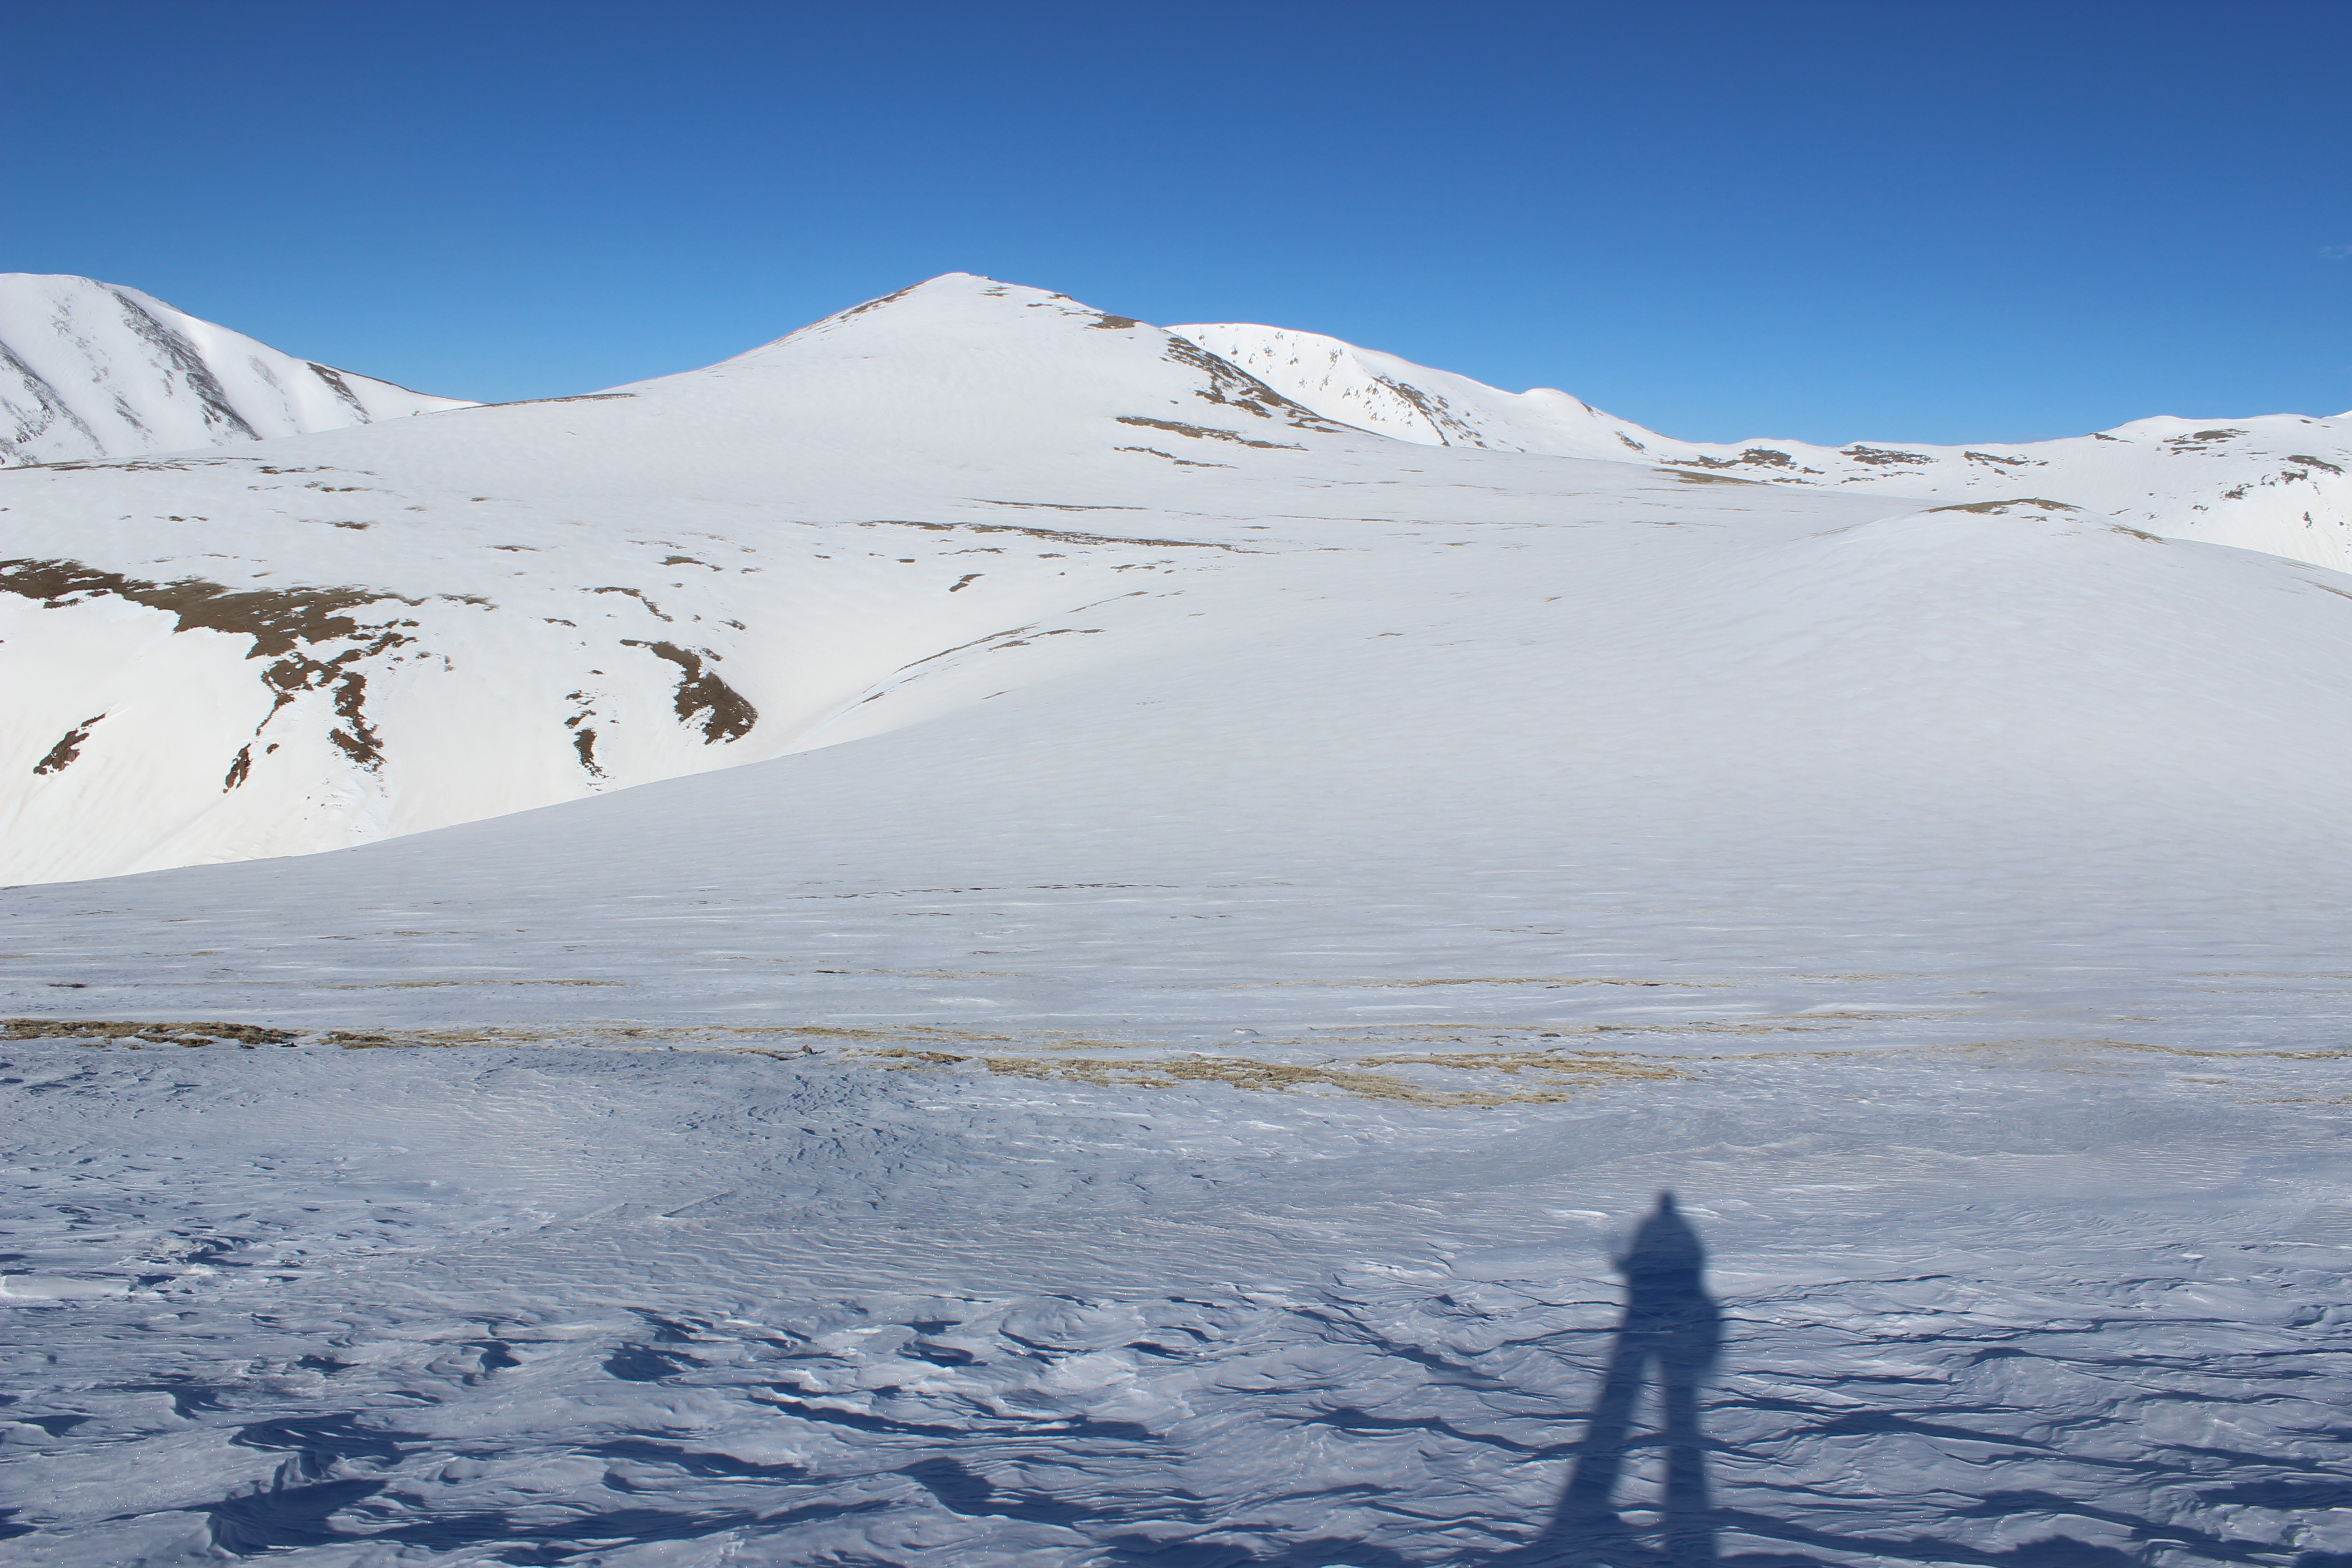
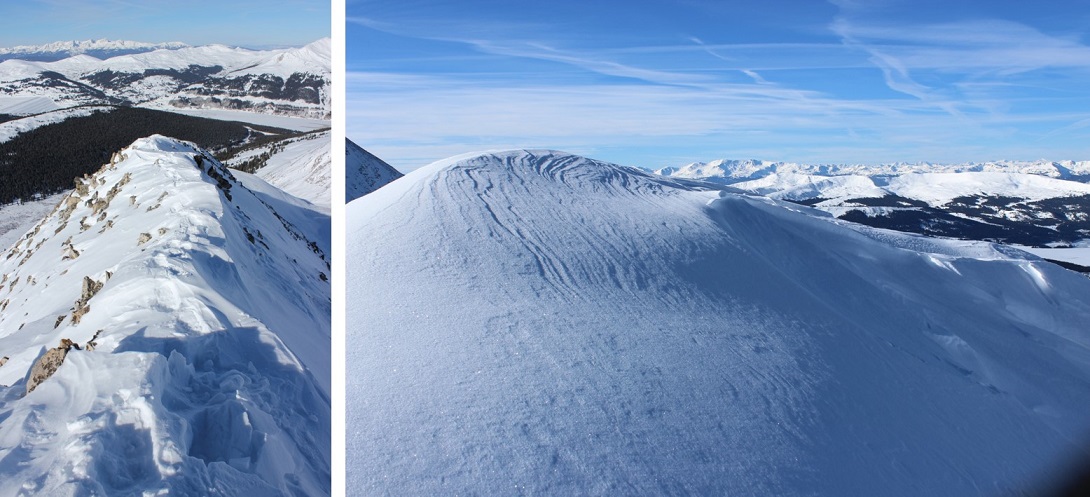
When you get to the tundra, don’t be fooled: this is a false summit. Stay to the left of it
This is the true summit of Manaha Peak. It’s easy class 2 to get there
I summited Mahana Peak at 9am
Mahana Peak:
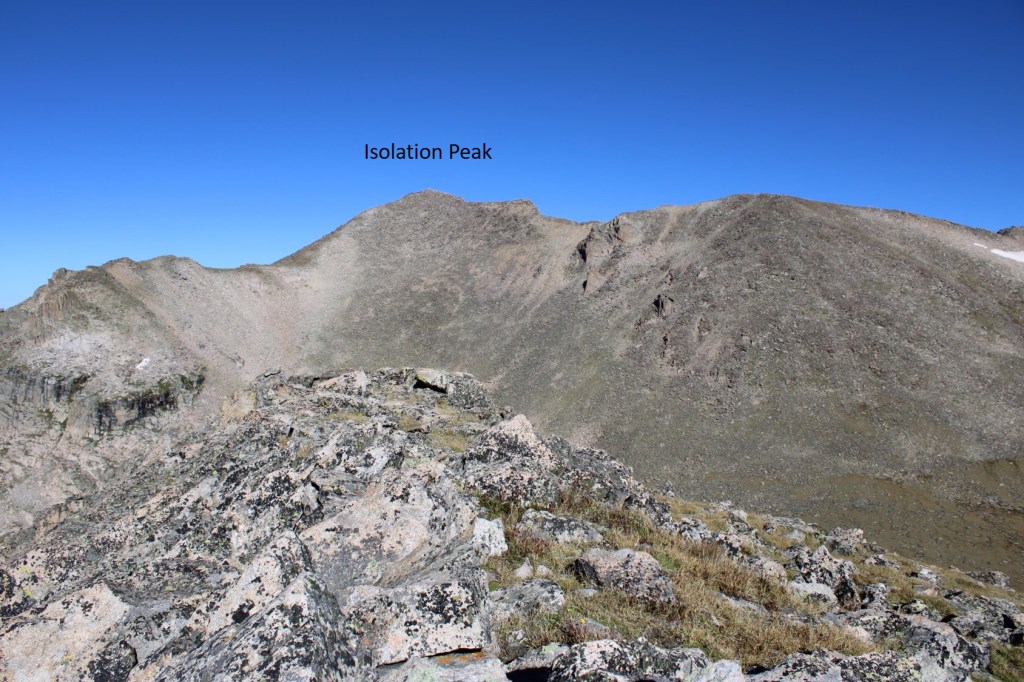
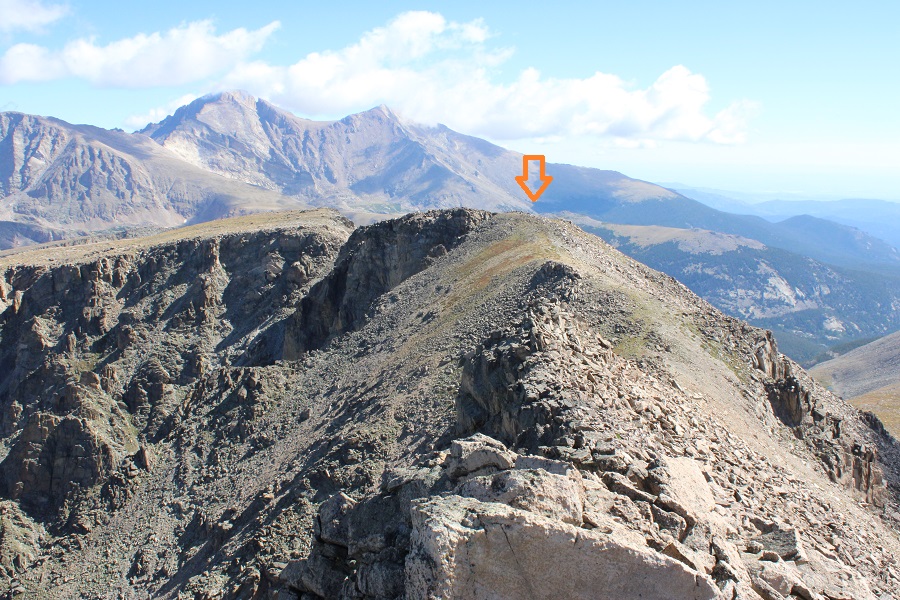
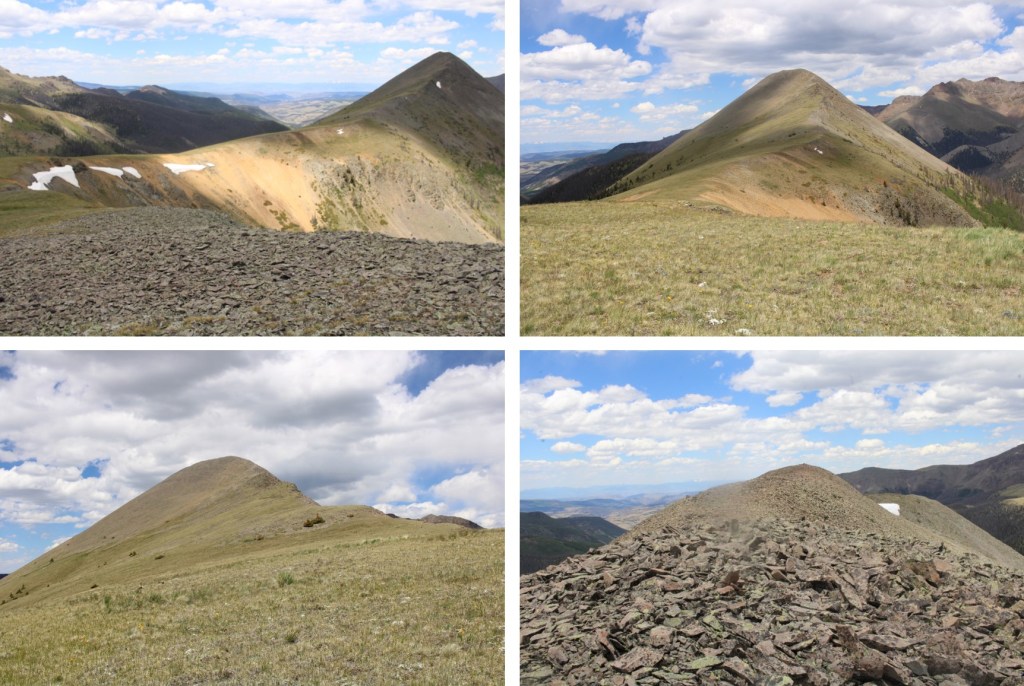
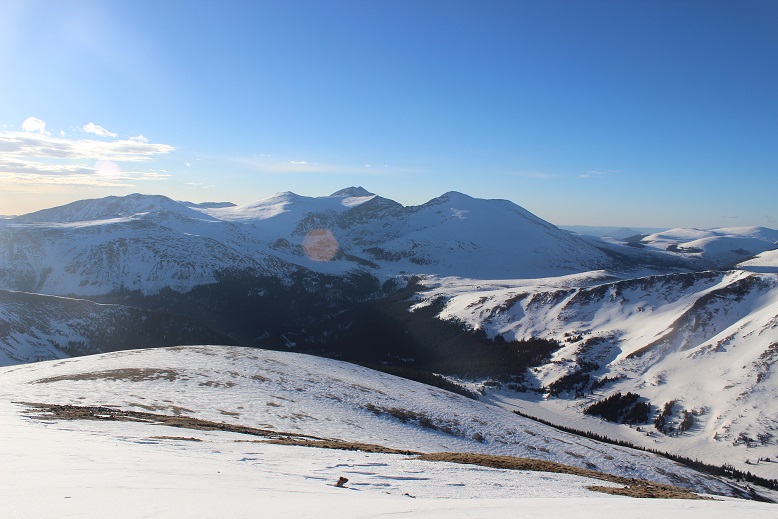
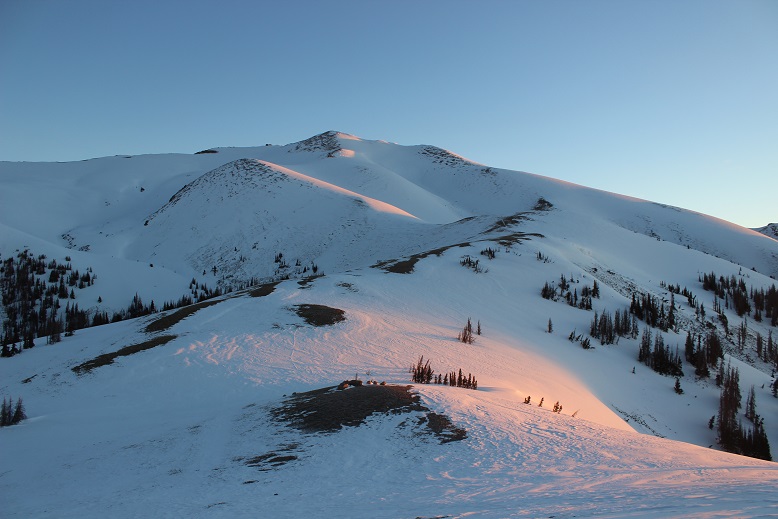
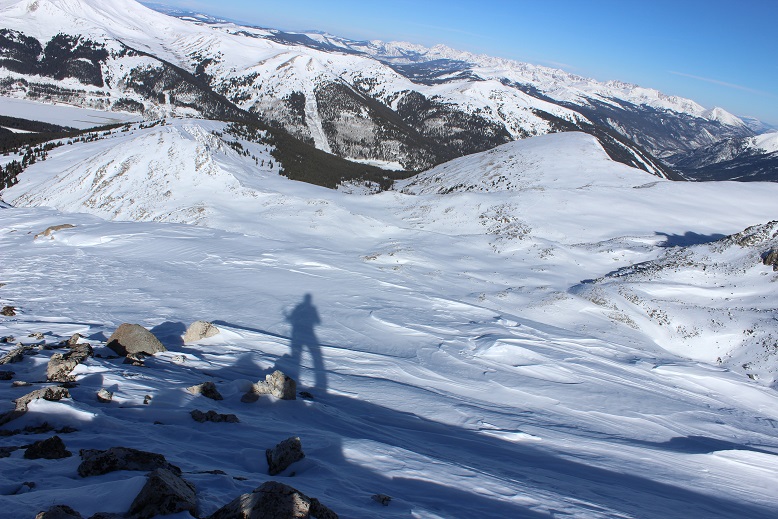
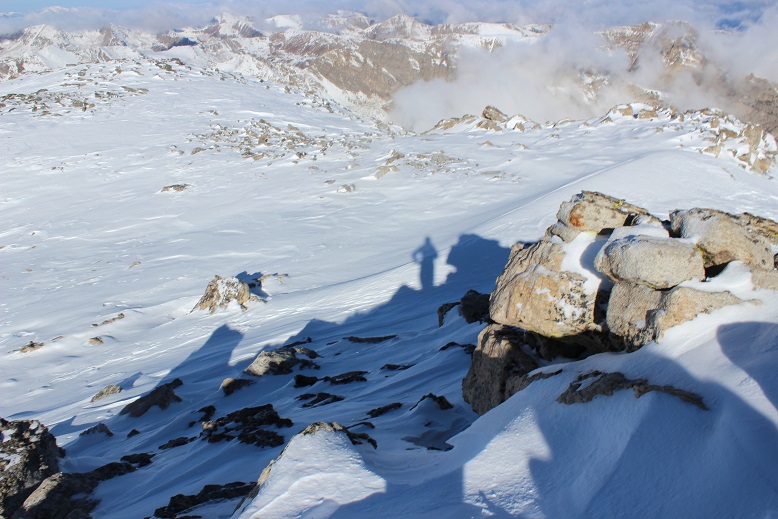
From Mahana Peak, I could see Isolation Peak to the northwest
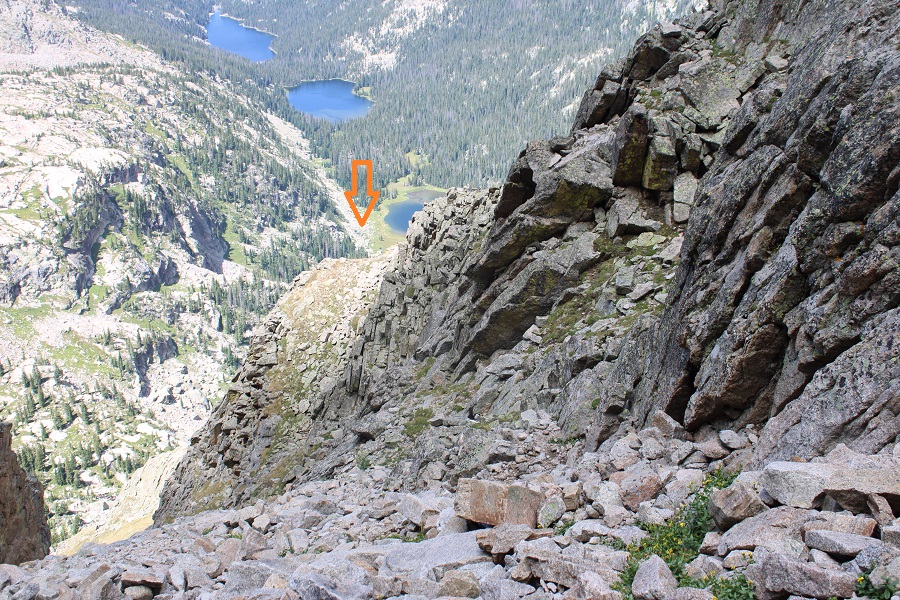
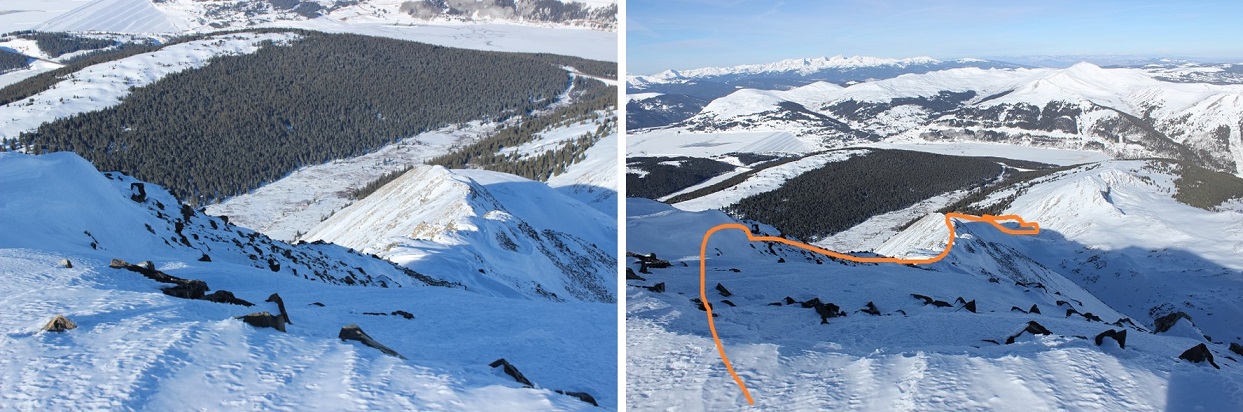
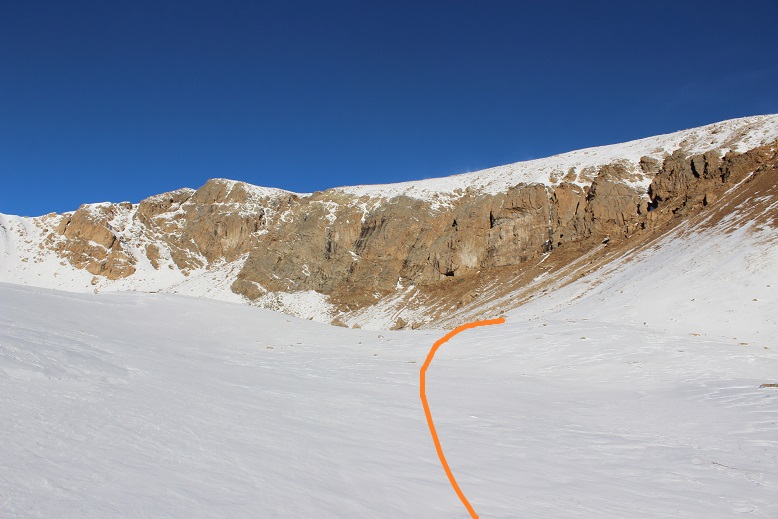
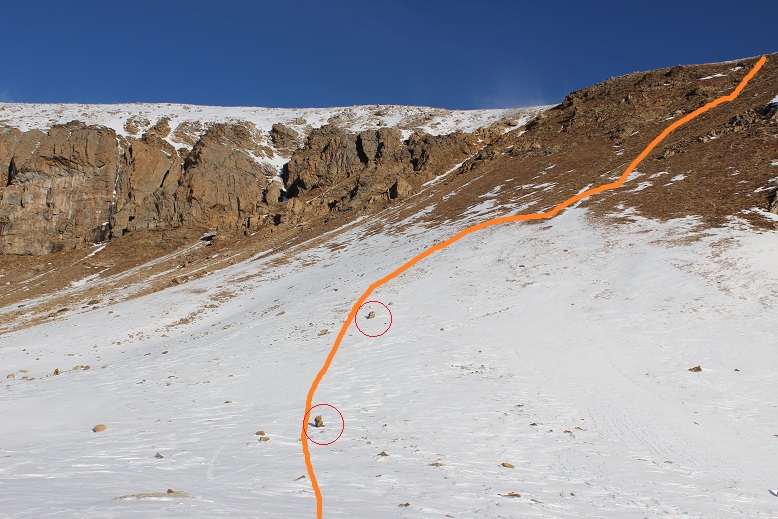
To get there, I headed northeast along the ridge until I came to a low point, and then headed northwest towards the ridge.
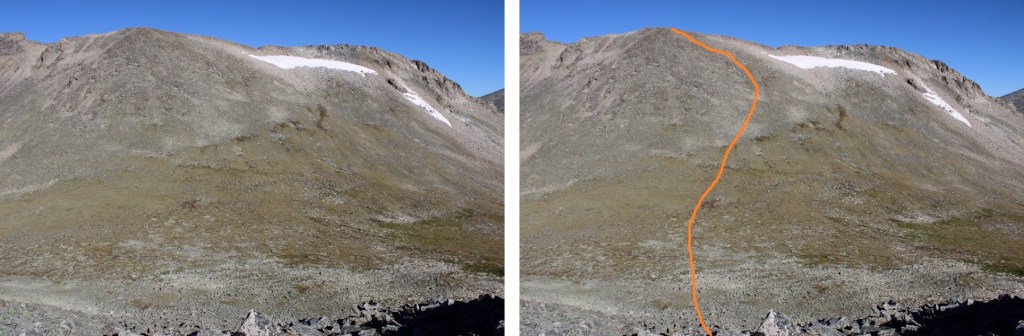
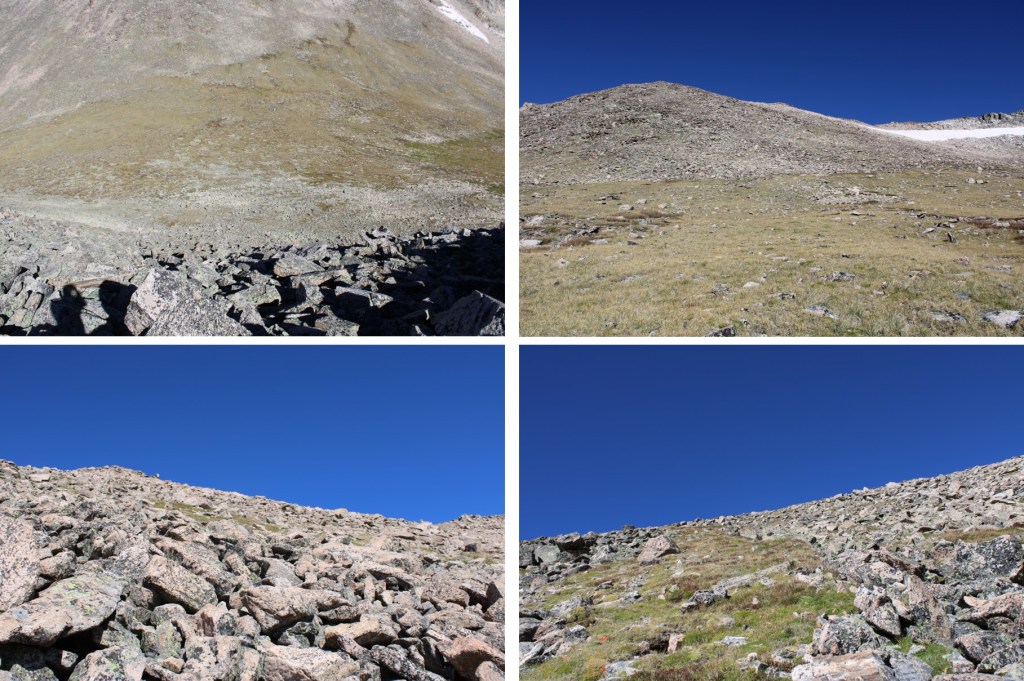
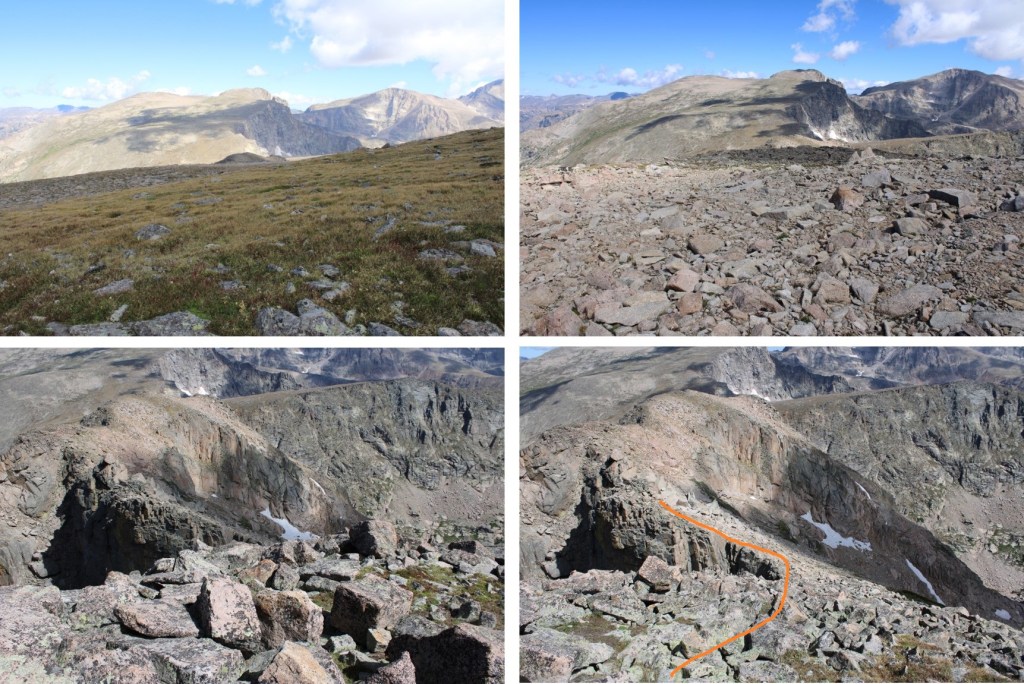
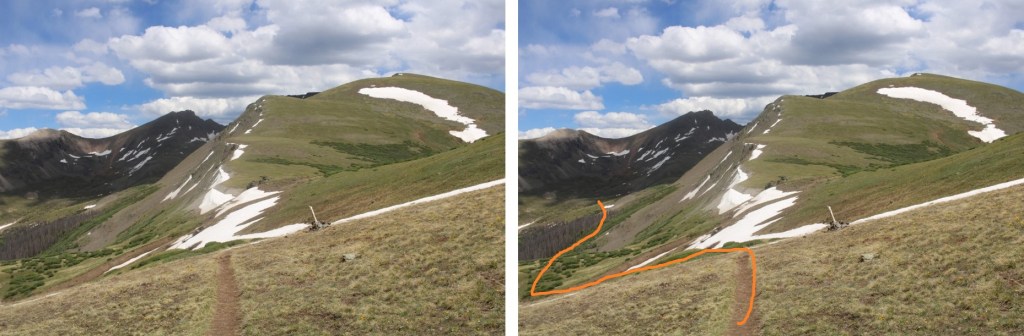
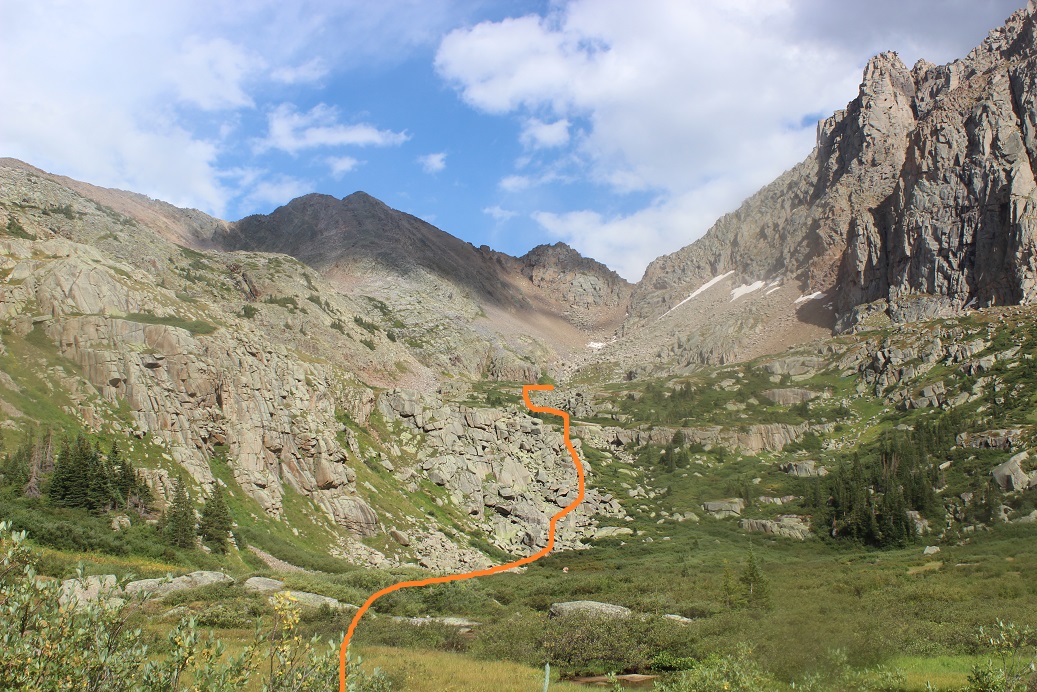
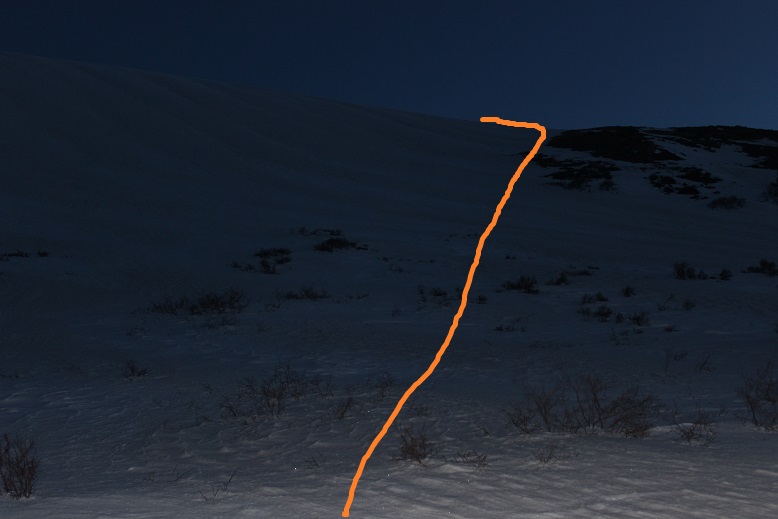
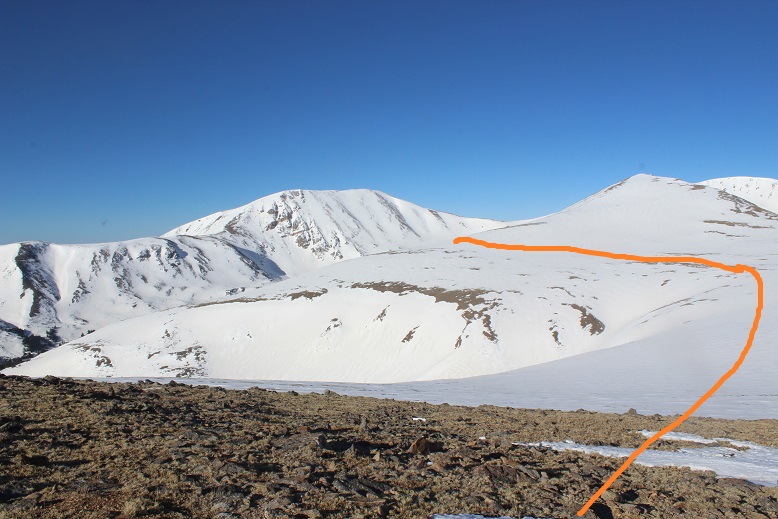
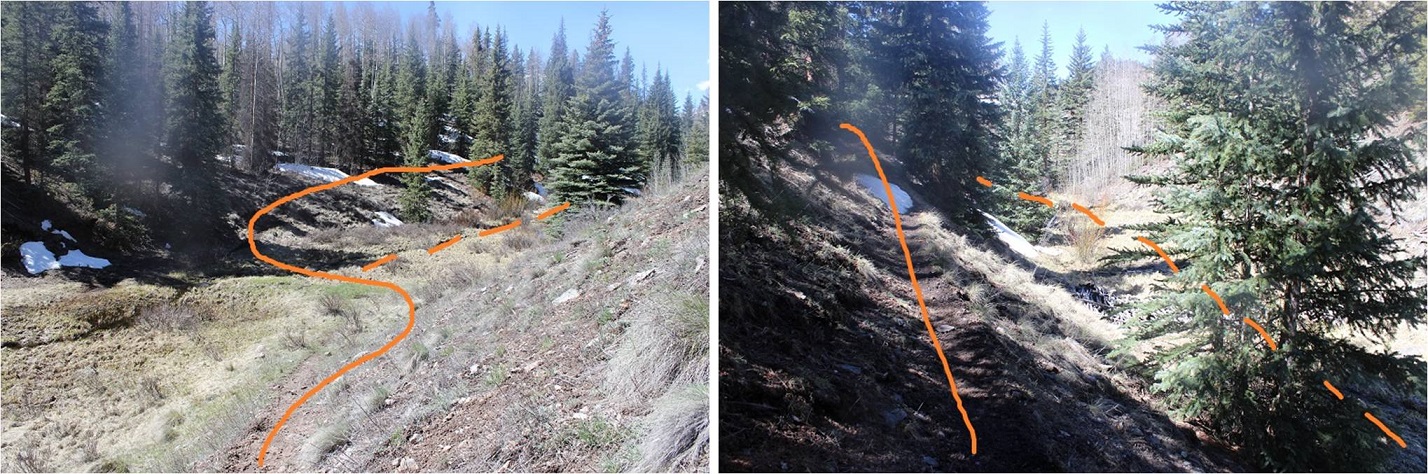
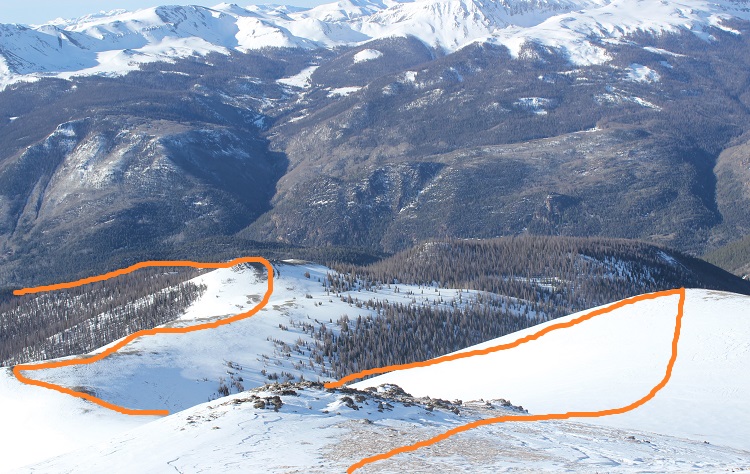
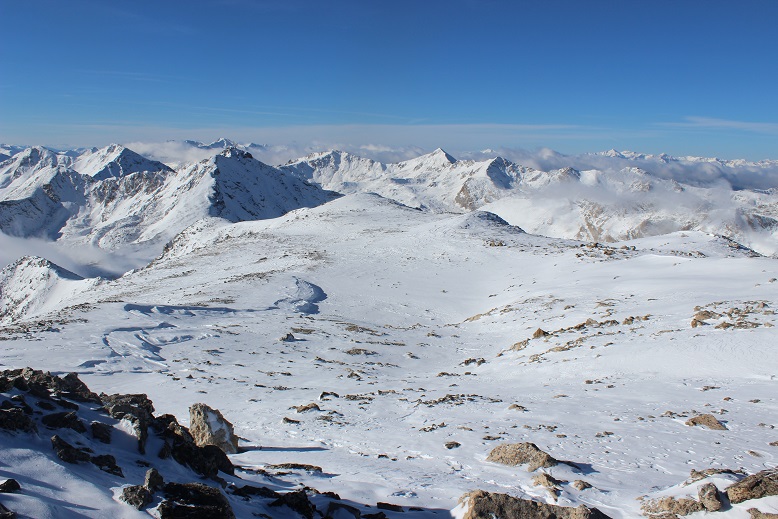
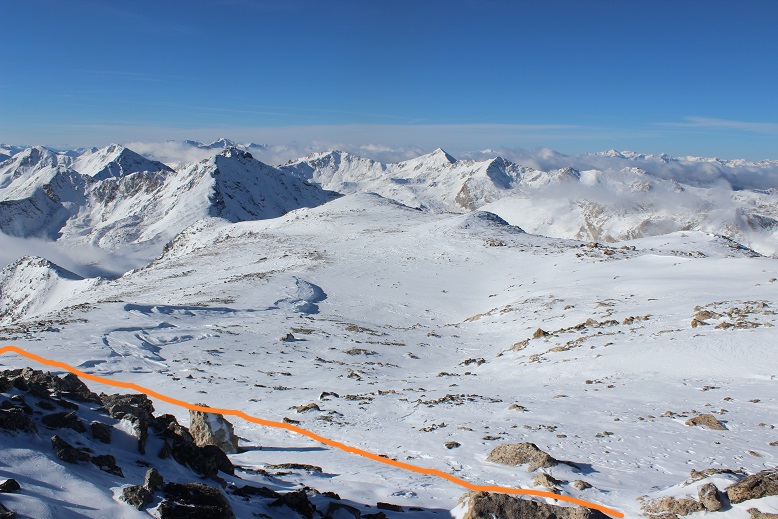
This is the overall route I took to gain the ridge of Isolation Peak. If you look carefully, you will see a green band of grass that makes the route easy to follow. I descended on rocky terrain, then was greeted with tundra, then rocky tundra as I ascended.
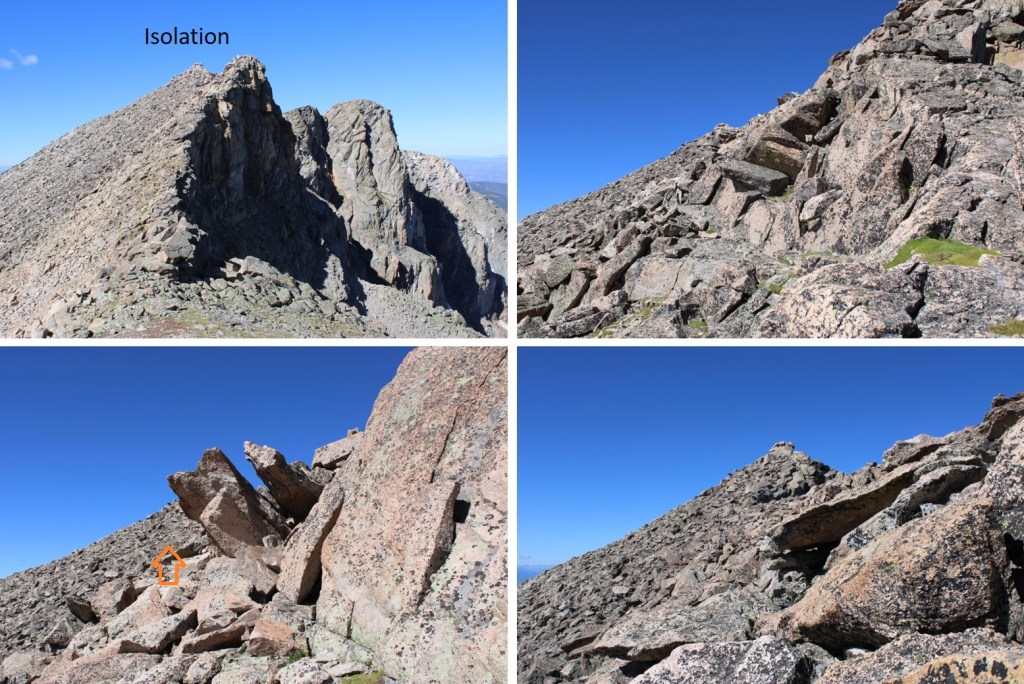
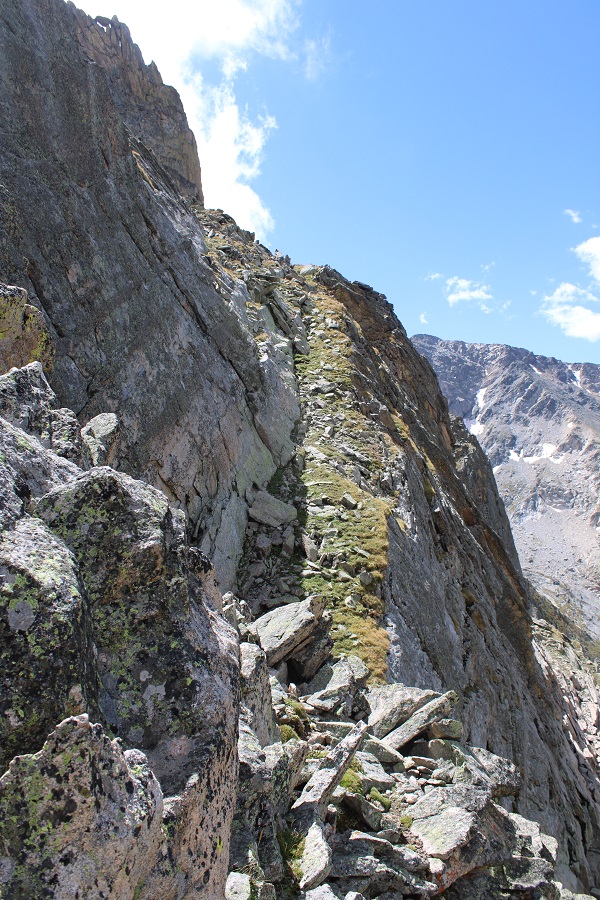
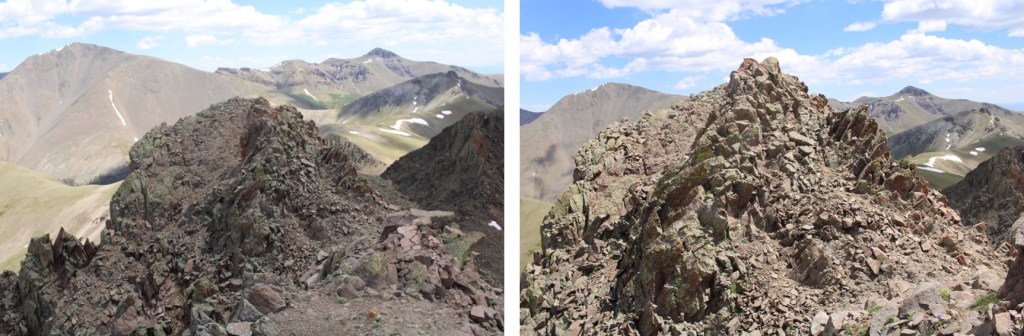
Once on the ridge, I turned left and could see Isolation Peak to the southwest. This was a class 2 hike, sticking to game trails either directly on or to the left of the ridge, until the last 10 feet or so, when it was a quick class 3 scramble to the summit
I’m pretty sure this block is the summit. I sat on it, but briefly. Pictures/video were difficult. The summit rocks didn’t feel stable, and I could see through them to air below if I looked down.
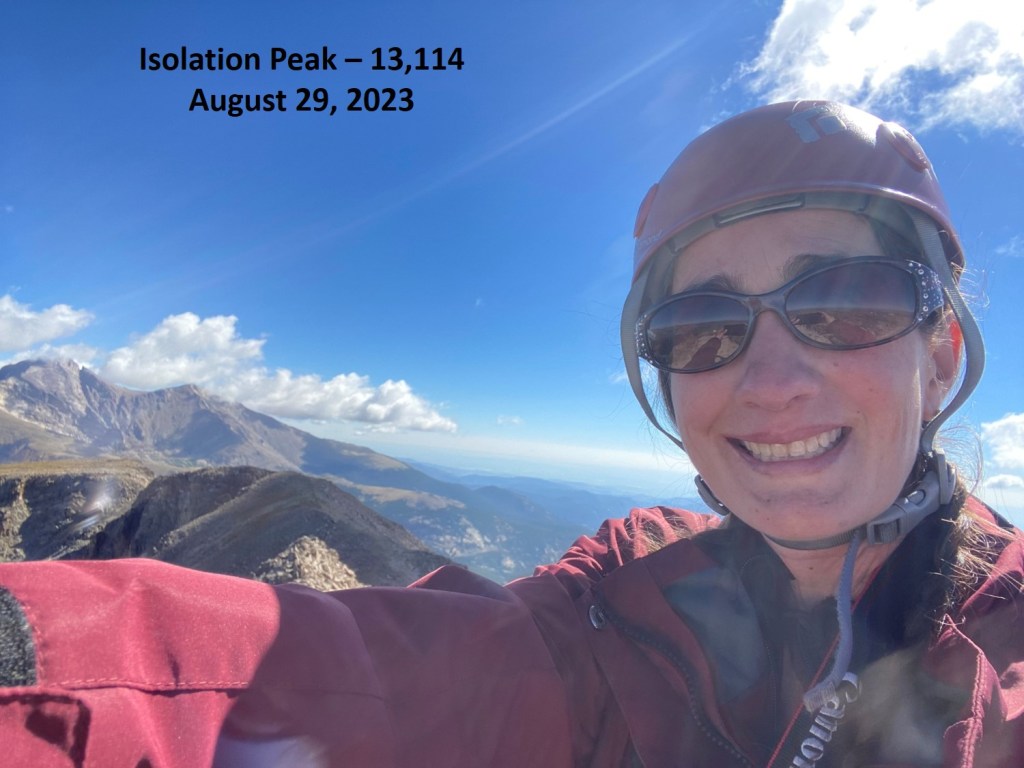
I summited Isolation Peak at 10:30am
Isolation Peak:
Here’s looking back at Mahana Peak from Isolation Peak
If you’re not up for class 3-4 scrambling, now’s the time to head back the way you came in, towards Mahana. It’s the fastest route. If you’re up for some scrambling, strap on your helmet if you haven’t already, and head northeast along the ridge. Some of this ridge I’d consider choose your own adventure. This is the route I took, keeping it class 3, with some easy class 4 scrambling (down chimneys/gullies).
I was now back to where I ascended the ridge, and followed the ridge northeast. There is a lot of elevation gain and loss on this descent
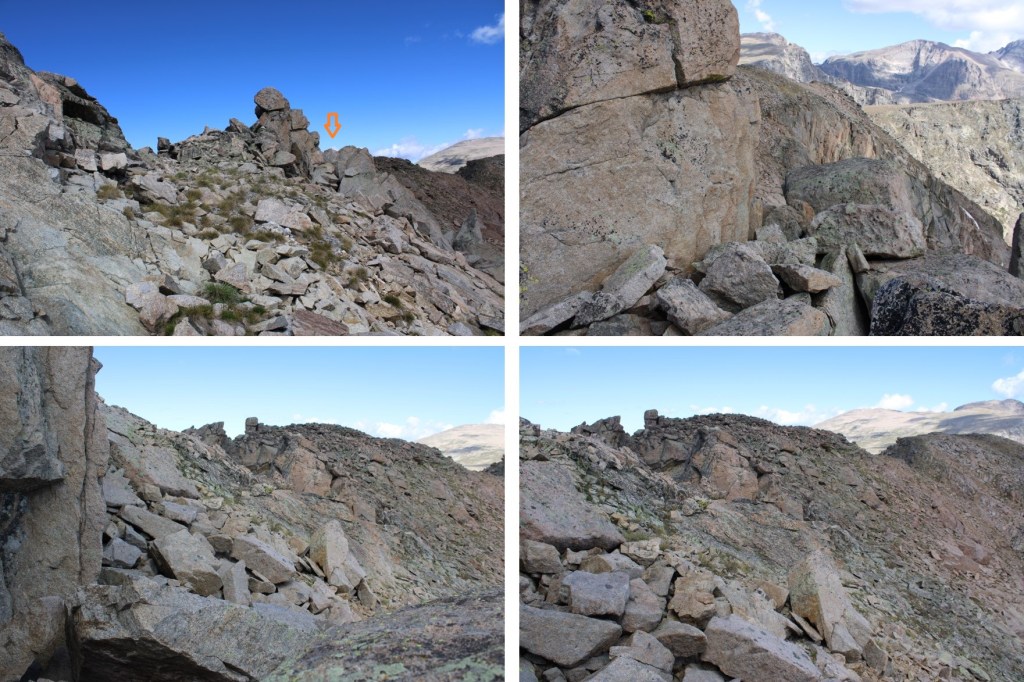
I went to the right of this boulder. Getting through was sketchy class 3. The boulders were large, but there was a lot of empty space between them, and they didn’t feel solid.
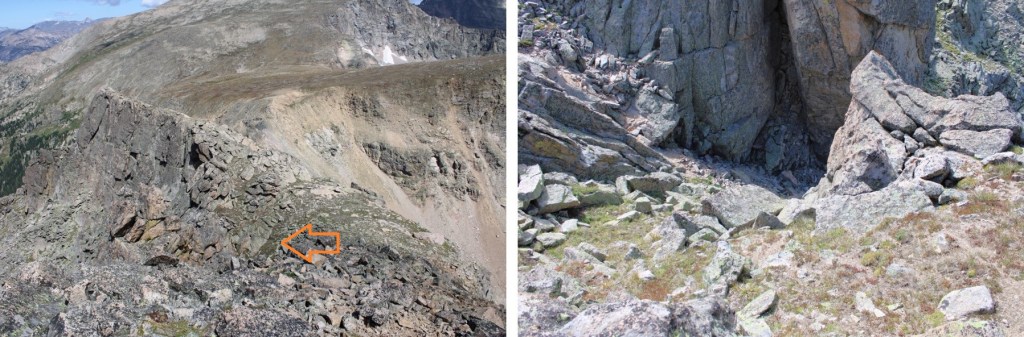
My next objective was to make it here (this was class 2, sticking to the ridge)
This is where it got a bit tricky. I turned left, and descended into a rather large and steep gully. I spent a lot of time in this gully route finding, and my advice is to stick to the gully proper until you make it down to 12160’. You’re trying to go below this rock formation, which goes a lot further down than you’d think.
I turned left, and descended into the gully
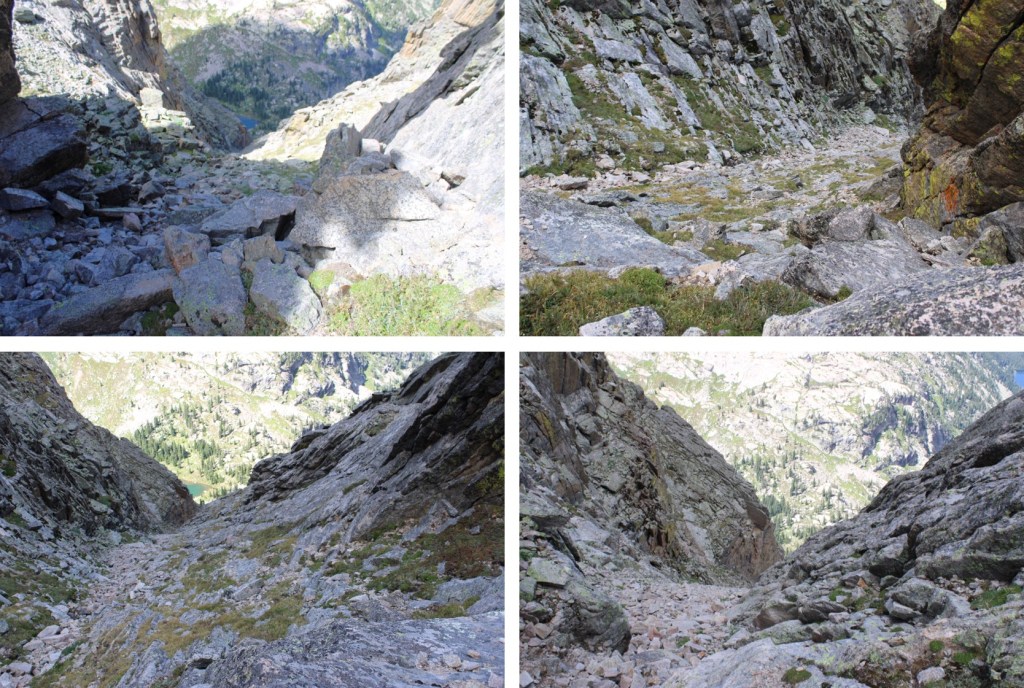
I came to a place that looked like it cliffed out, but it was really just a drop onto a boulder, then a 7-foot downclimb.
Here’s looking back up at the gully
And a look at the final drop. The boulder in the middle was essential to the descent.
This was at about 12160’, where I stopped descending the gully, and looked for a grassy ledge climbers right.
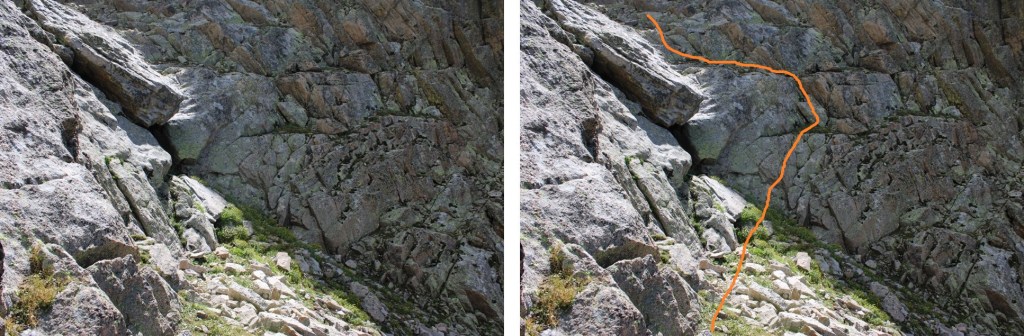
I made it to the ledge, descended another grassy ledge, then reascended a grassy ledge to re-gain the ridge
For those of you doing this the opposite way, here’s a look back at the grassy ledge I descended. You can see why I had to drop down so low in the gully, with the sheer cliff face to navigate.
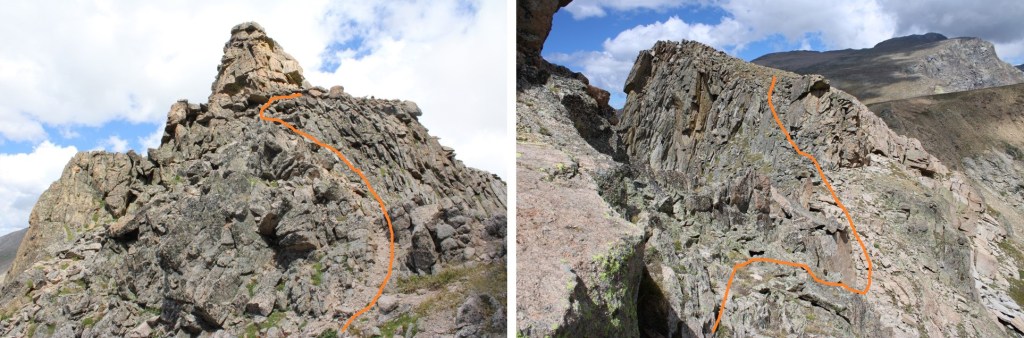
Here’s how I got around the next few obstacles
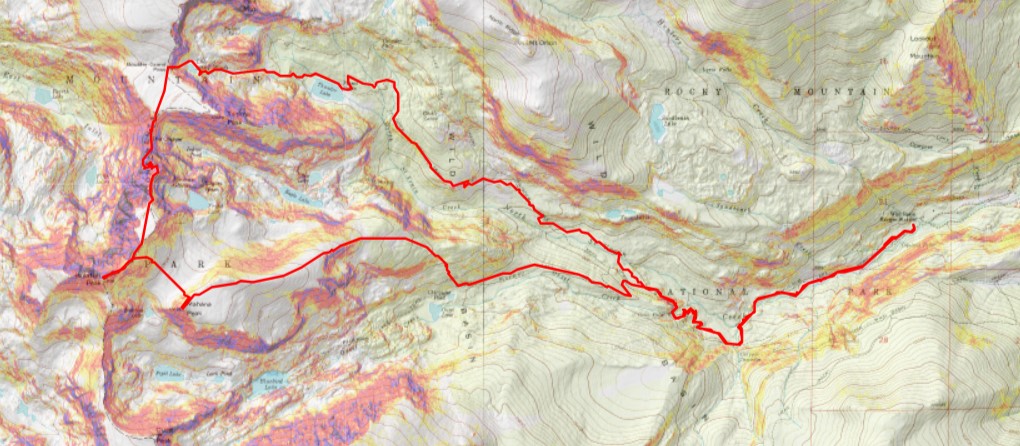
And that was it for the climbing for today. I kept my helmet on because I still had a scree-gully to descend, but all the class 3 and 4 stuff was done. I’d wanted to head over to Mt Alice today too, but clouds were forming and I didn’t think it was a good idea. I headed towards Boulder-Grand Pass, turned right, and descended the gully towards Lake of Many Winds. From the pass, it was 9.5 miles back to the trailhead.
A good trail picks up here, and leads all the way back to the Wild Basin Trailhead. Here you can see Thunder Lake. This trail becomes the Thunder Lake Trail, skirting the lake to the left. This is a class 1 trail. Once again, it’s very well marked, with signs indicating the route back to the Wild Basin Trailhead
I made it back to the trailhead at 4:45pm, making this a 21.79 mile hike with 5665’ of elevation gain in 12 hours, 45 minutes, at least according to CalTopo. Strava gave me drastically different numbers
My stats here are going to be off (to be explained later).
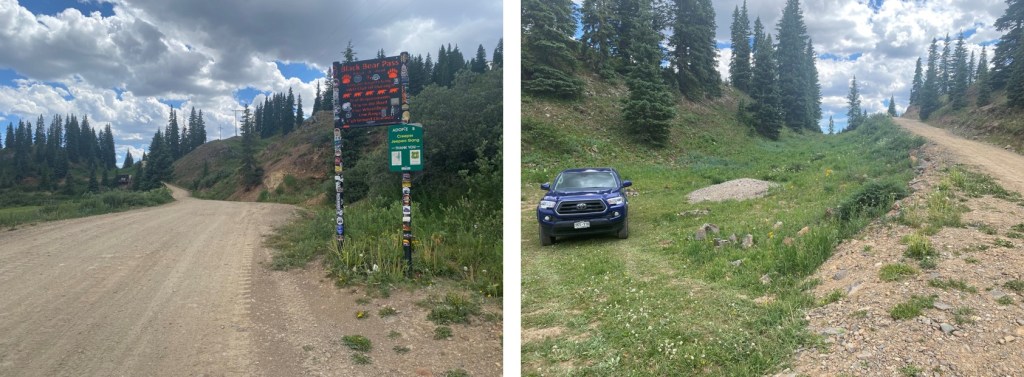
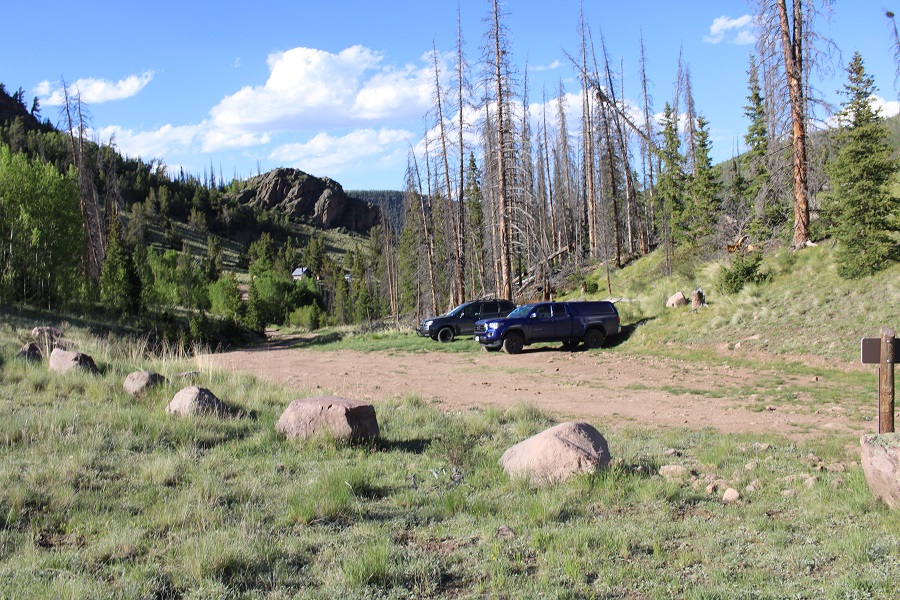
I arrived at the Black Bear Pass trailhead the night before, excited to find a good camping spot near the road, at about 11,100’. If you drive a little further up, 100 yards or so, there are a few more sites.
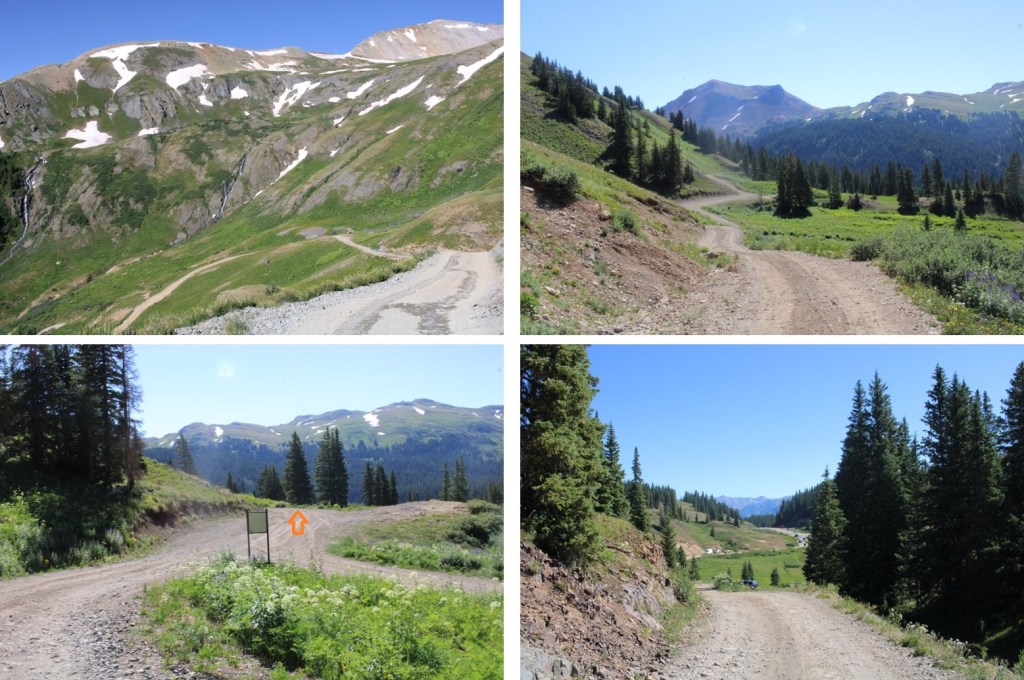
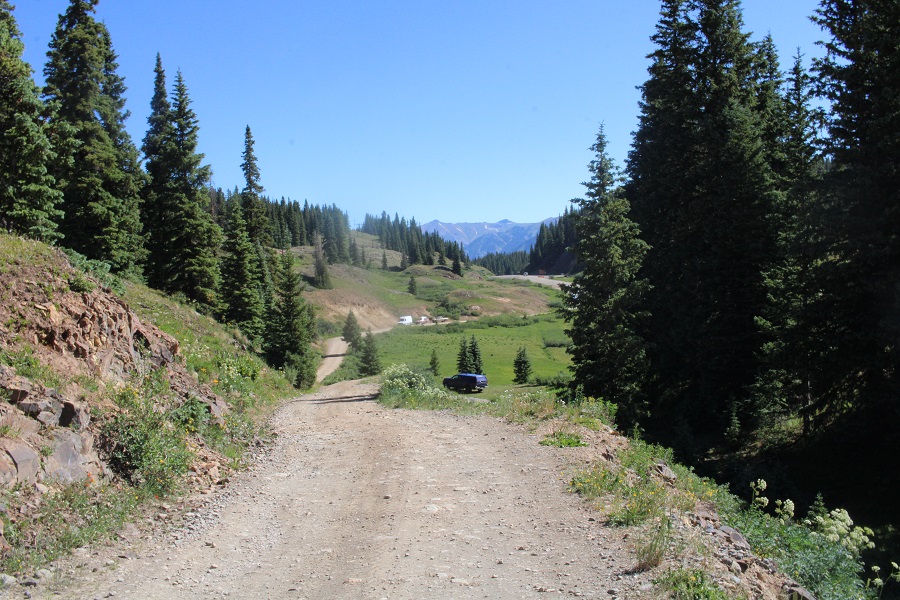
I parked, read, ate dinner, and fell asleep early. I was on the trail at 5am the next morning. The trail follows 4WD dirt road 823 for 3.3 miles to Black Bear Pass. A stock 4WD can make it to the pass, but be mindful it’s a narrow shelf road at times, with few places to pass other vehicles. Here are some pictures of the road.
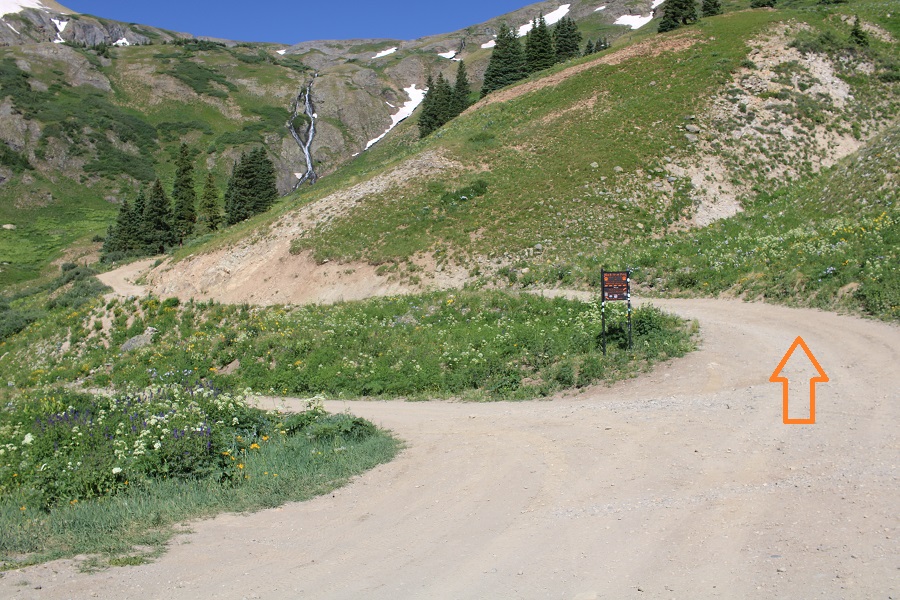
After hiking for 1 mile I came to the junction for Prophyry Basin and Black Bear Pass. I went right, towards Black Bear Pass.
And continued on, towards Mineral Basin.
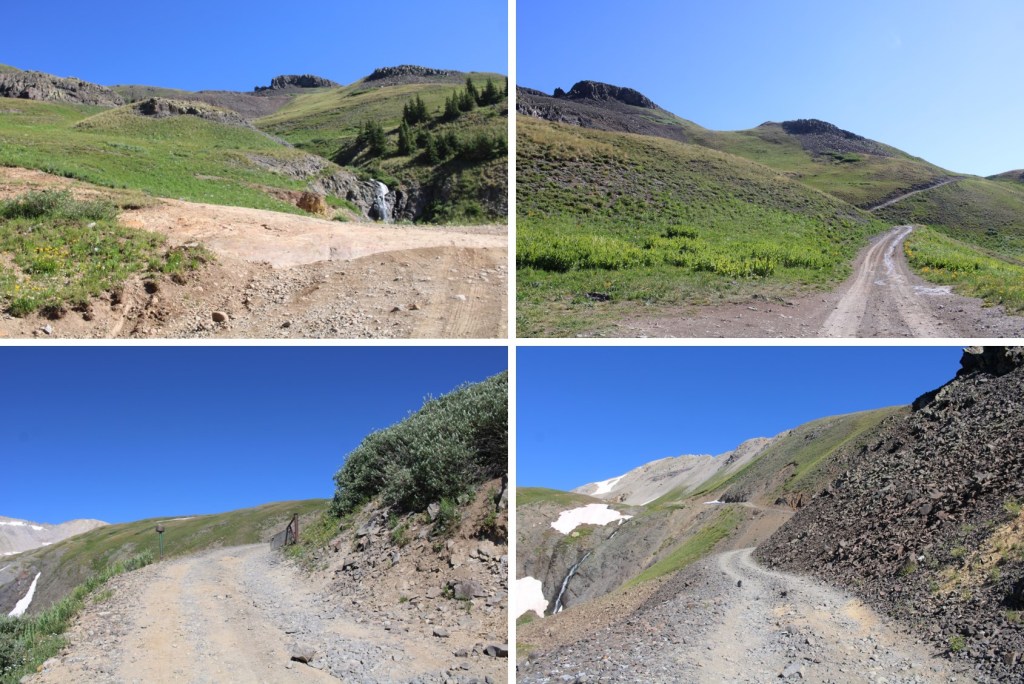
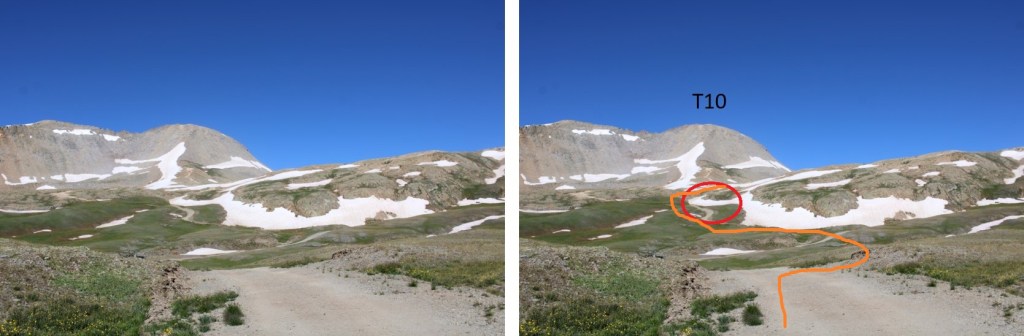
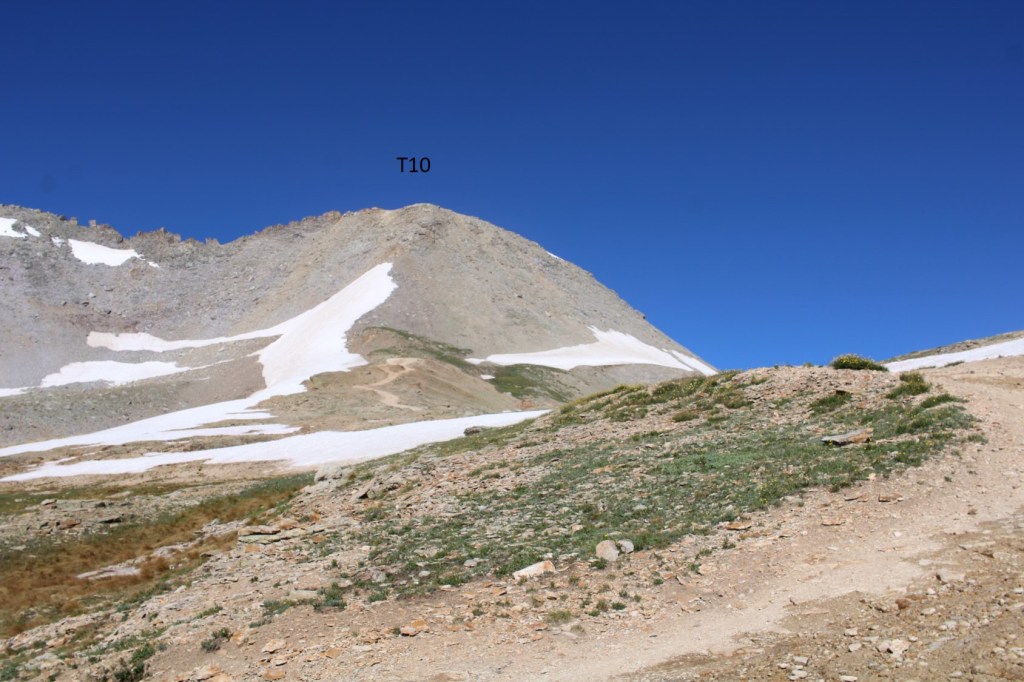
There was a little snow to contend with in getting to Black Bear Pass, so I went left to avoid it.
To my left I could see T10, which hadn’t been on my list for today. However, looking at it now, it looked doable from this side, so I headed over there. There seemed to be several viable routes. At the grassy area I put on my microspikes, and headed up. The first 150 feet or so were straightforward, and then the choss hit. Terrible, terrible choss that gave way as I ascended. I was creating rockslides both above and below me, which included not only scree and choss, but also microwave plus sized rocks. Nothing was stable. It looks like the route changes every time someone attempts to go up or down. I got cliffed out several times, backtracked, and tried different ways. Finally, I knew while I could have made it up, I wasn’t going to recommend this route to anyone (someone’s going to get seriously injured or die), so I might as well head back down. I made it about 100 feet from the summit before turning around. Please don’t attempt this route unless you have great balance and are good with floating and falling talus and boulders (none of the rocks were steady. None of them, and many fell with the scree). For me, this was outside of my choss-safety zone.
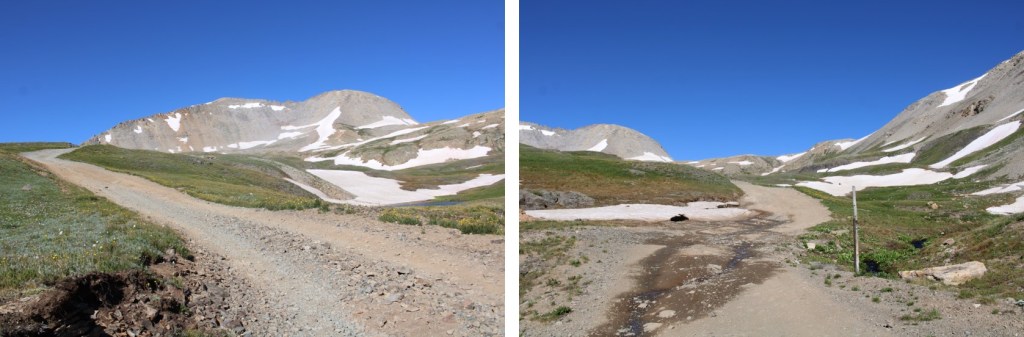
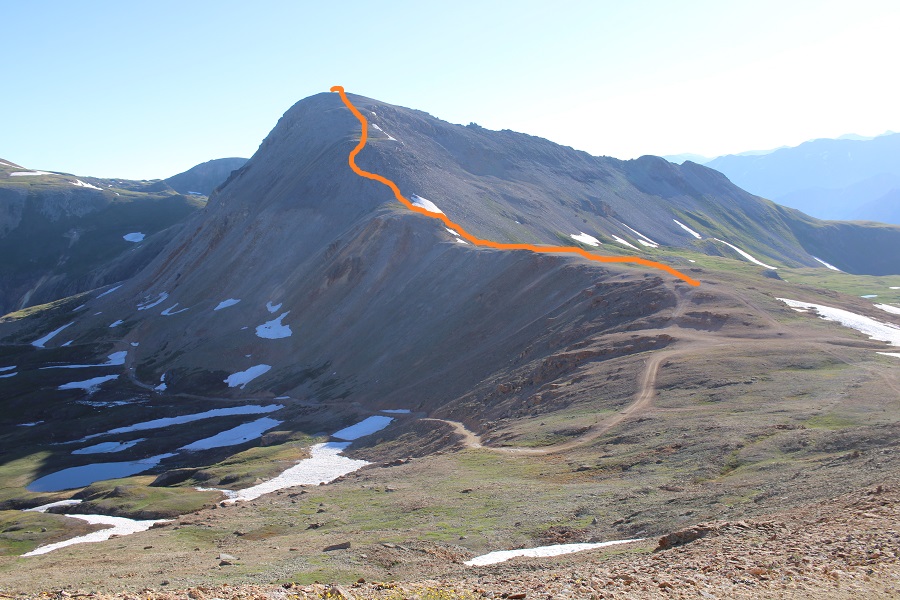
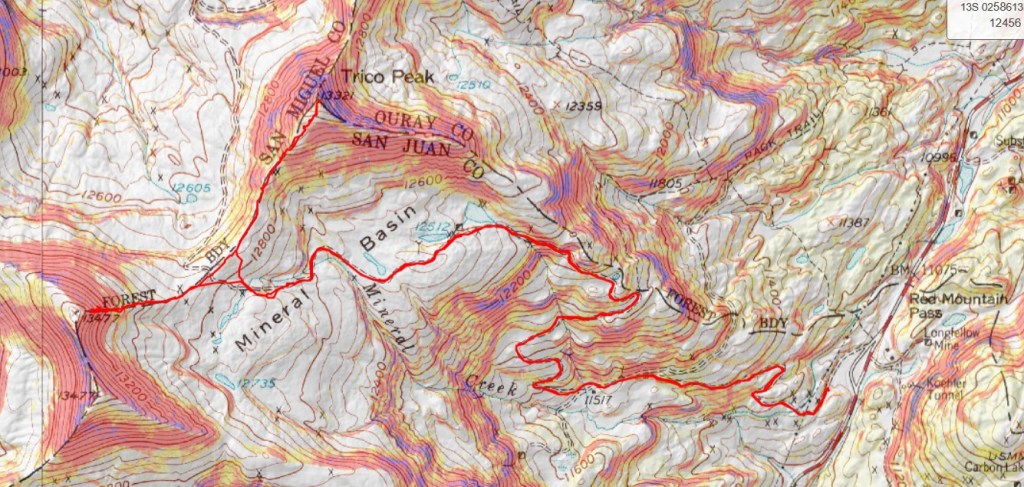
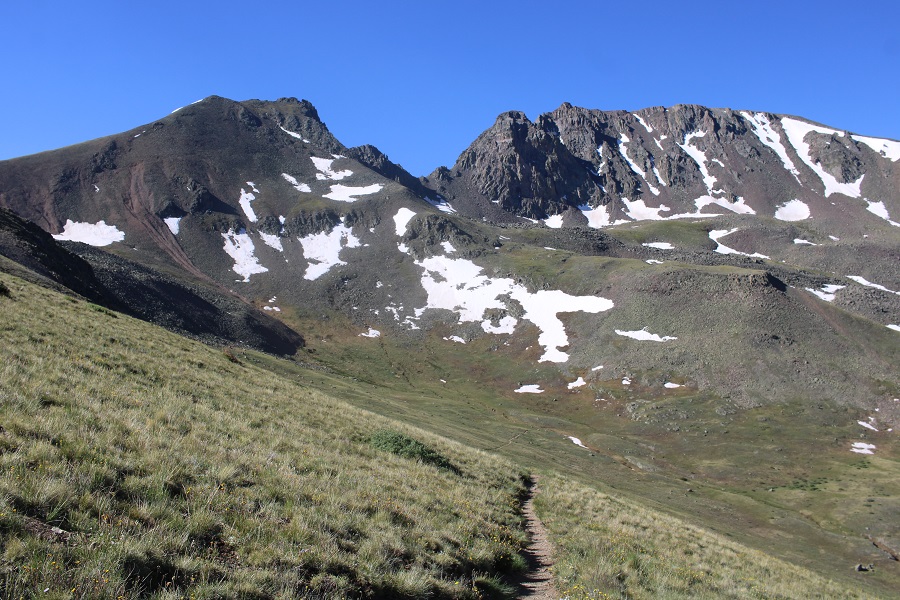
Ok, so from Black Bear pass, I headed northeast, with Trico clearly visible.
This was actually a straightforward and easy route. There’s a faint trail you can’t see from below, that will get you all the way to the summit.
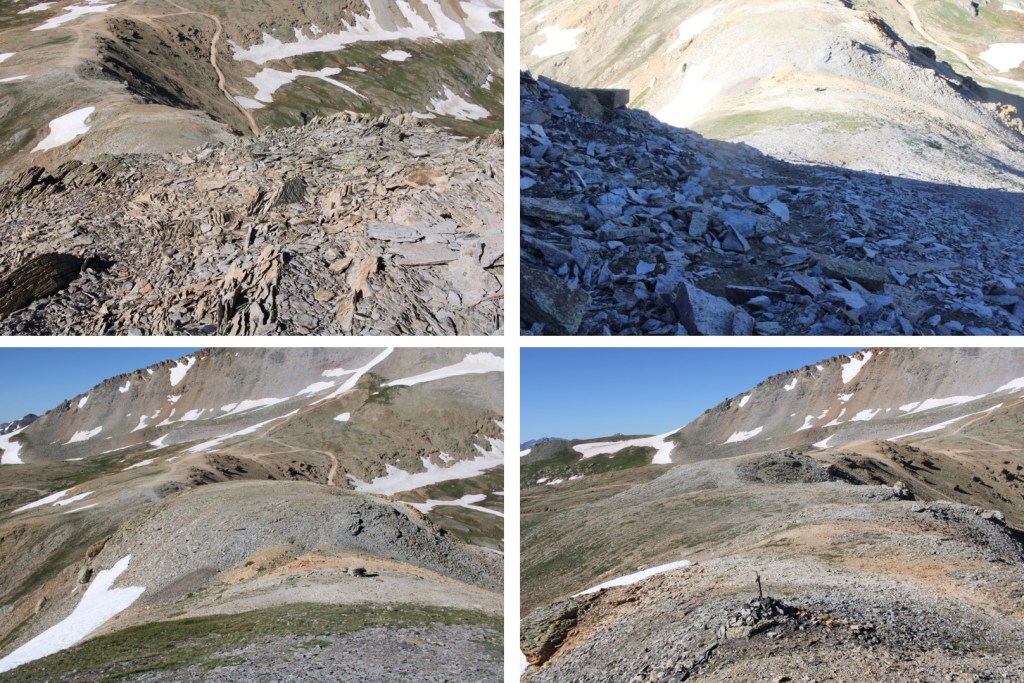
Here are some pictures of the route
Once I gained the ridge, this was the overall route to the summit
There was a faint trail here as well.
I summited Trico Peak at 8am (still wearing my helmet from T10)
Trico Peak:
I took advantage of the bluebird day and 2 bars of LTE service at the summit, and stayed for about half an hour, calling people and answering emails.
Then I was on my way back down to Black Bear Pass.
Back at Black bear Pass I turned left, and followed the road 823 back to the trailhead, avoiding the small section of snow along the road.
I made it back to my truck at 10am, making this a 8.78 mile hike with 2844’ of elevation gain in 5 hours, along with a lot of route finding on T10, and spending a half hour on the summit of Trico.
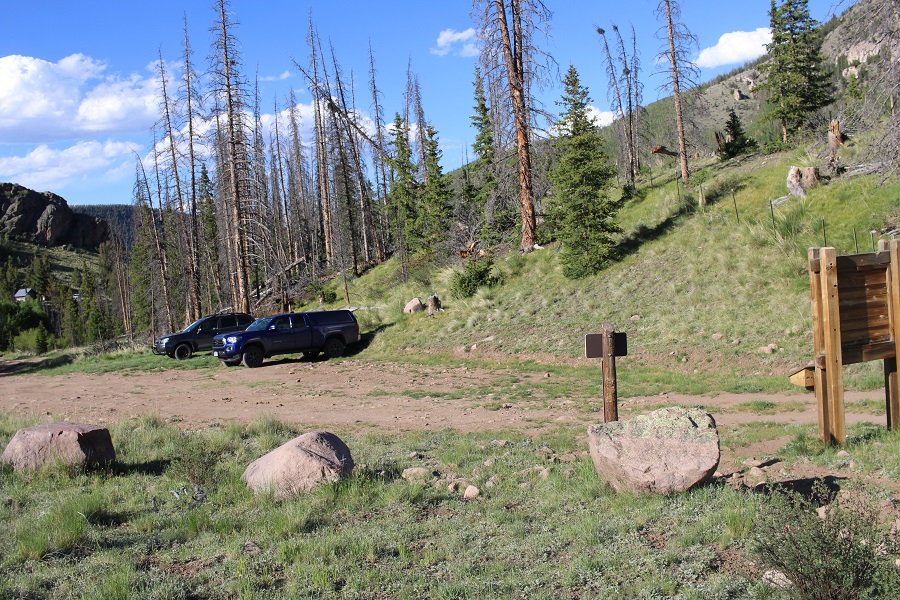
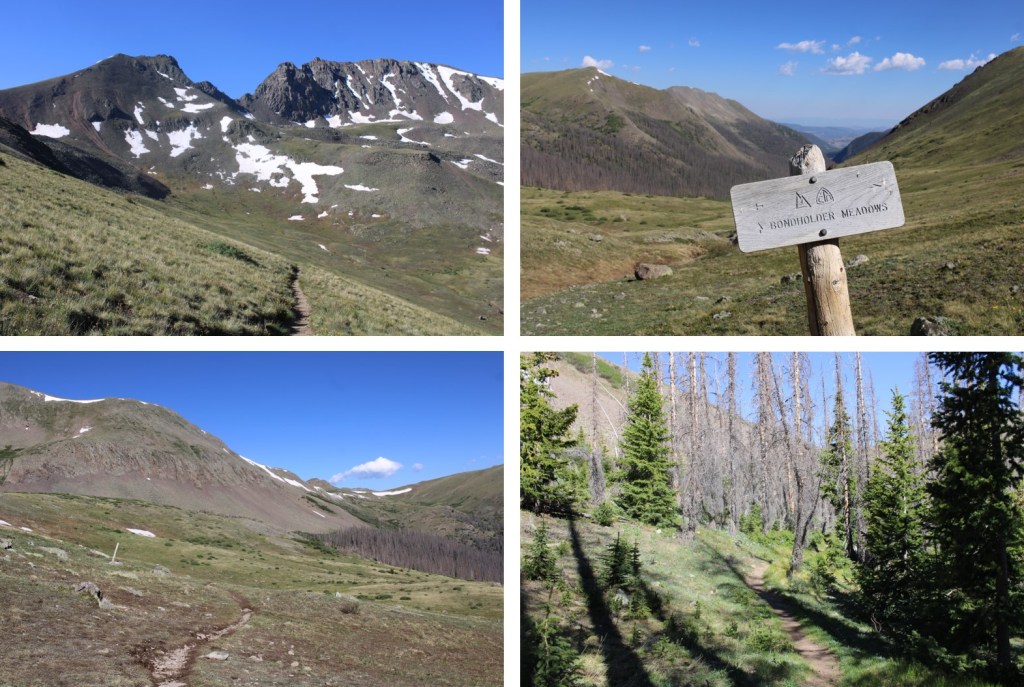
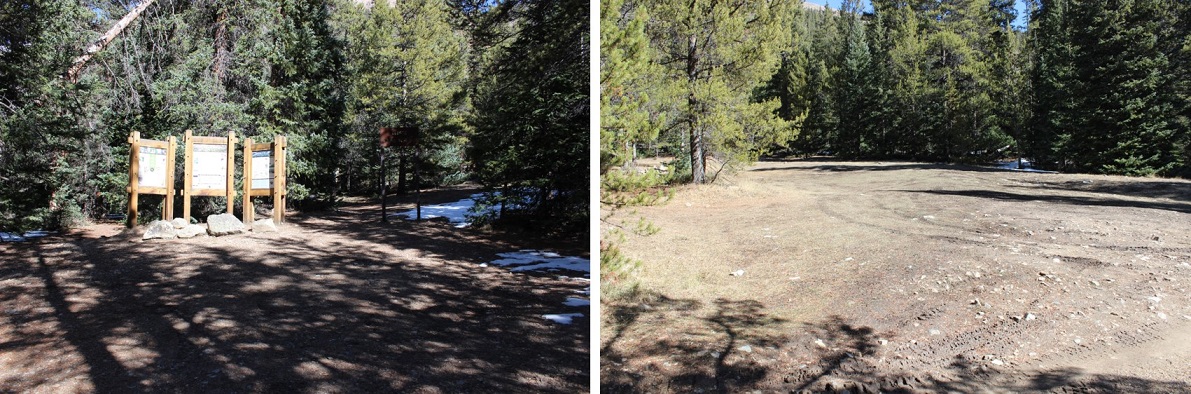
I drove to the Eddiesville trailhead the night before, and was up and on the trail at 4:30am. I’ve been in this area for over a week, and was fairly confident I wasn’t going to need microspikes or an ice axe (I didn’t). The trail starts at the south end of the parking area, and follows the Colorado Trail.
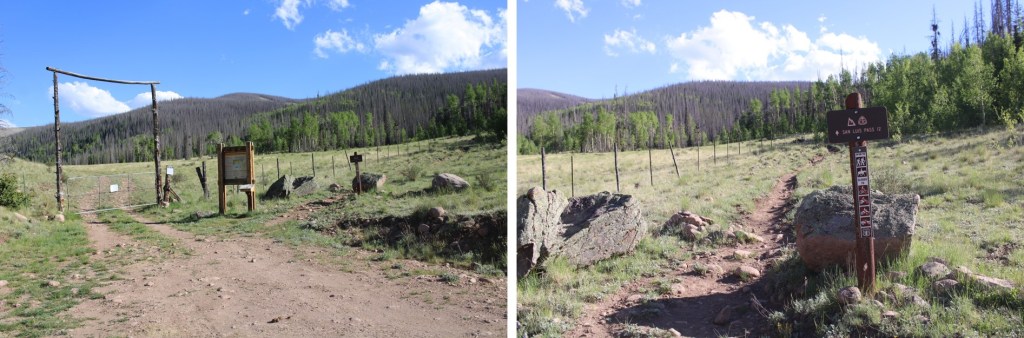
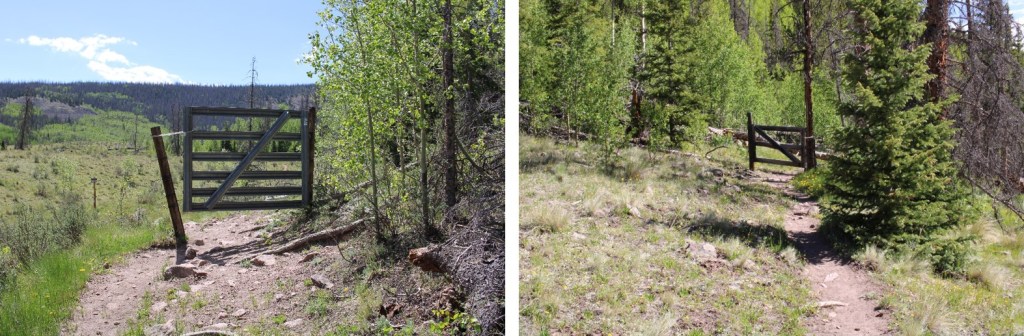
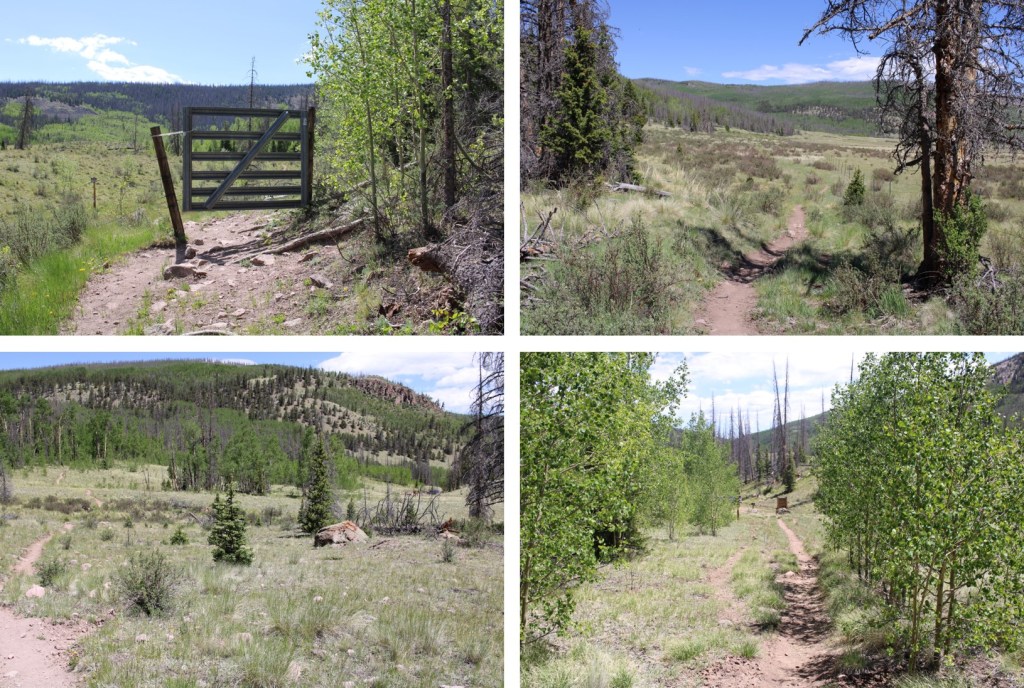
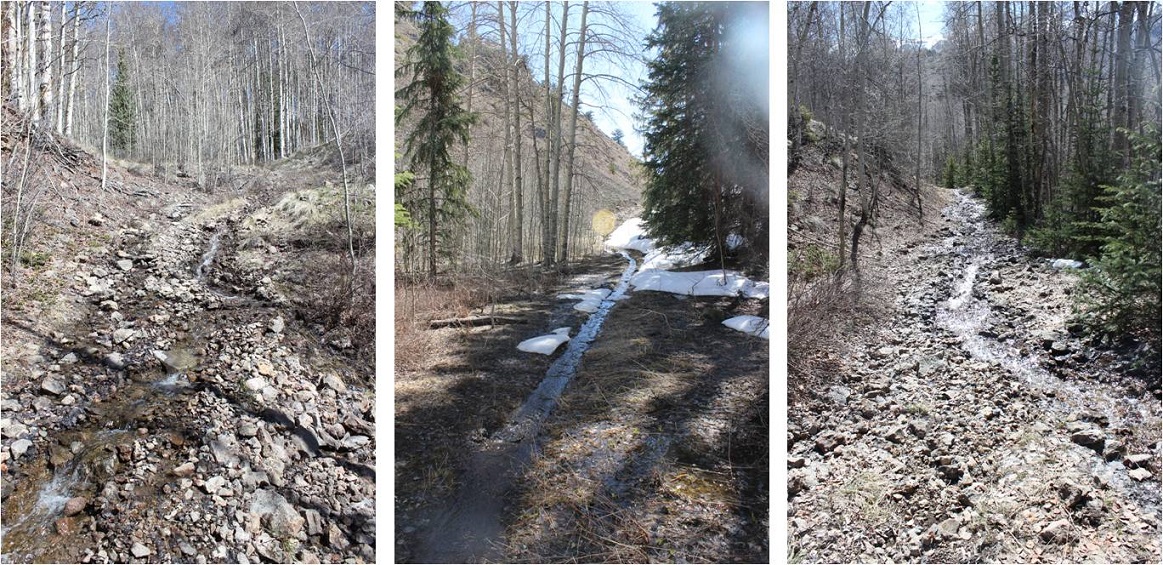
I followed the Colorado Trail for 8.25 miles, all the way to the San Luis Peak/13166 saddle. This was a very well-marked trail, which made it difficult to get lost. Also, there weren’t many trail intersections, also making it easy not to get lost. I crossed several small creeks and downed trees on my way, and passed through two gates (latched, not locked).
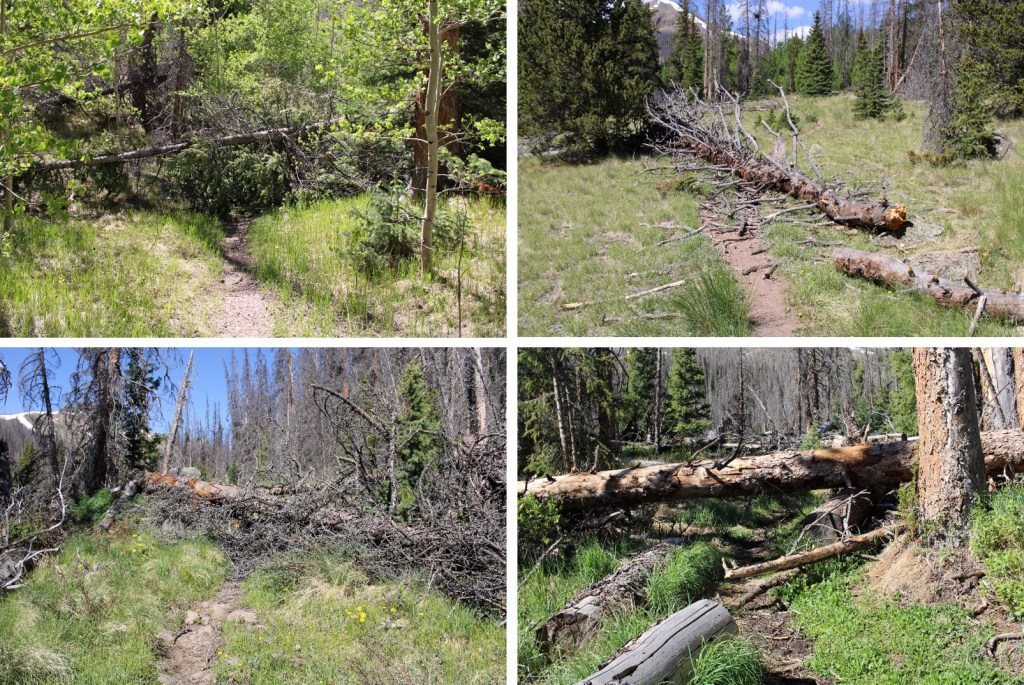
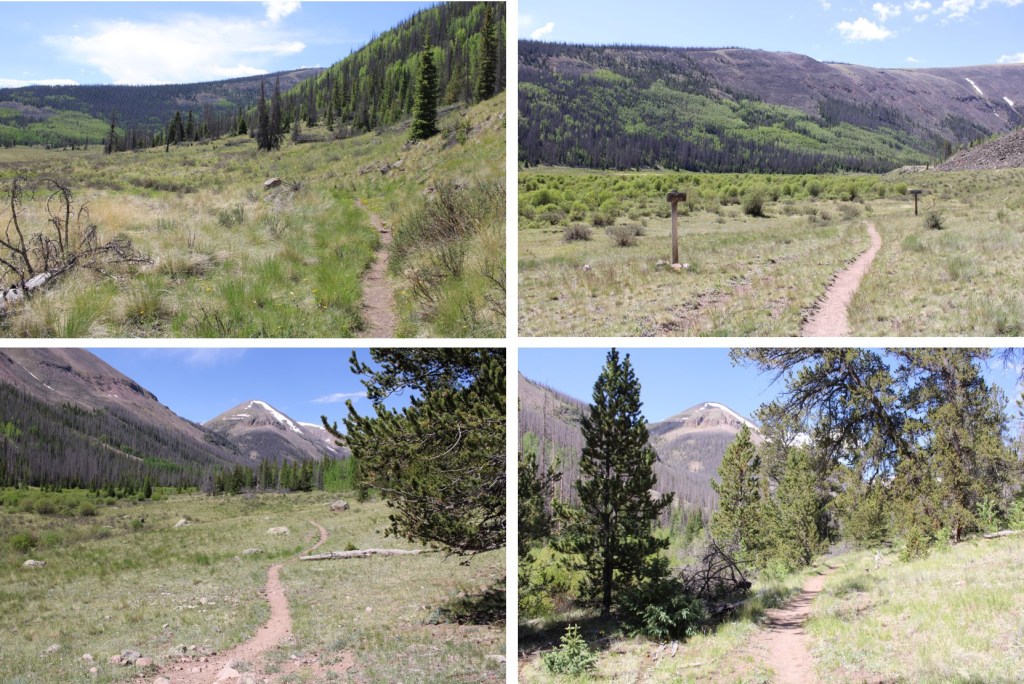
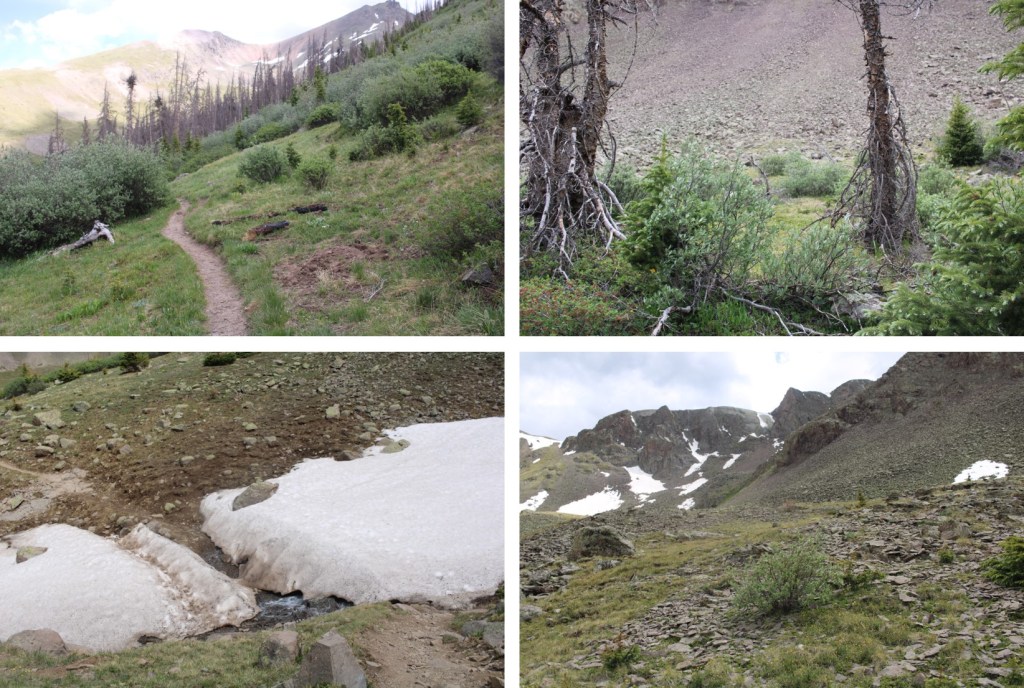
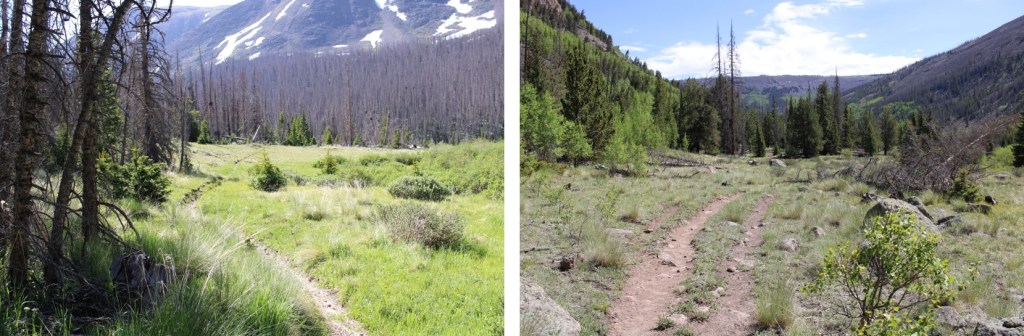
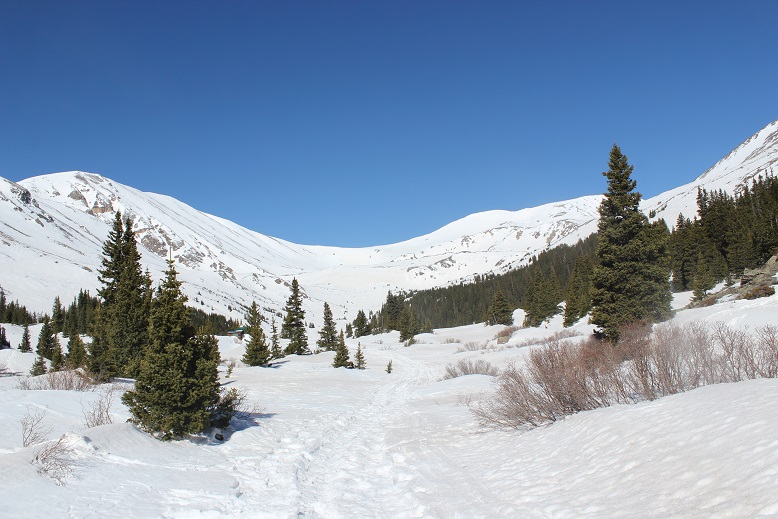
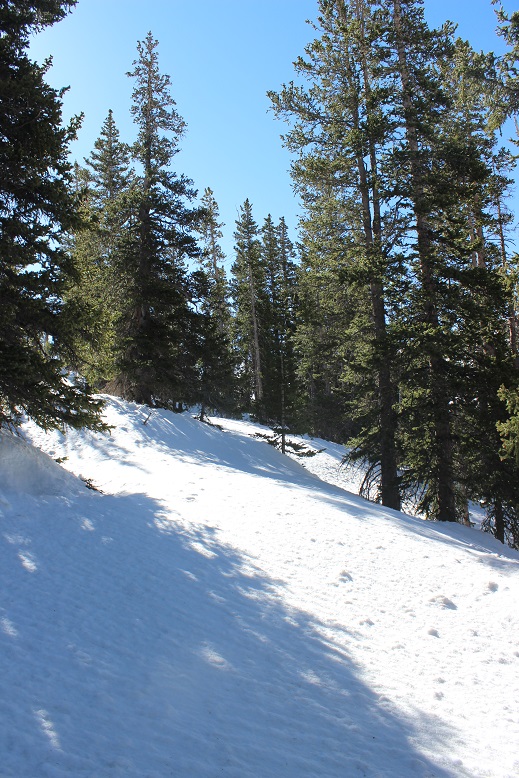
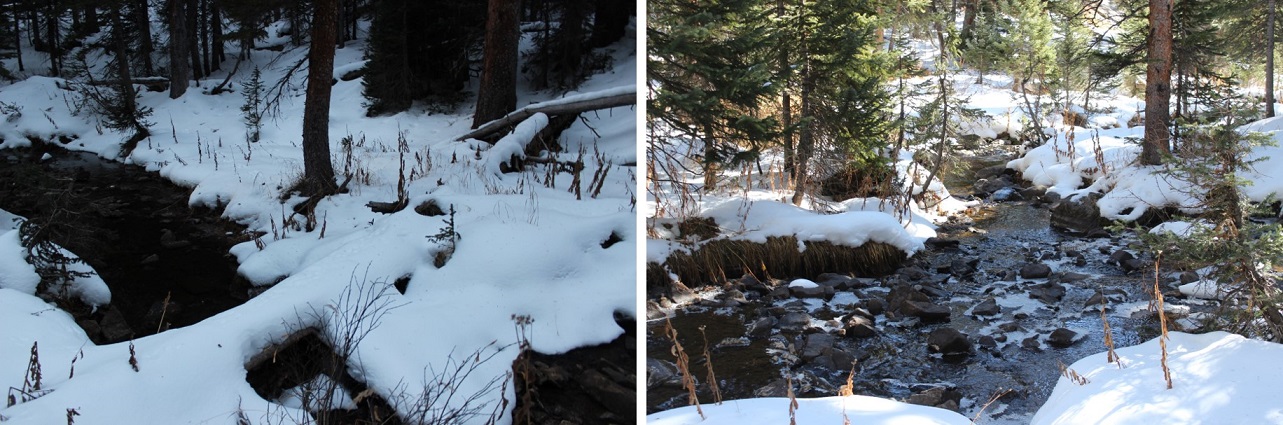
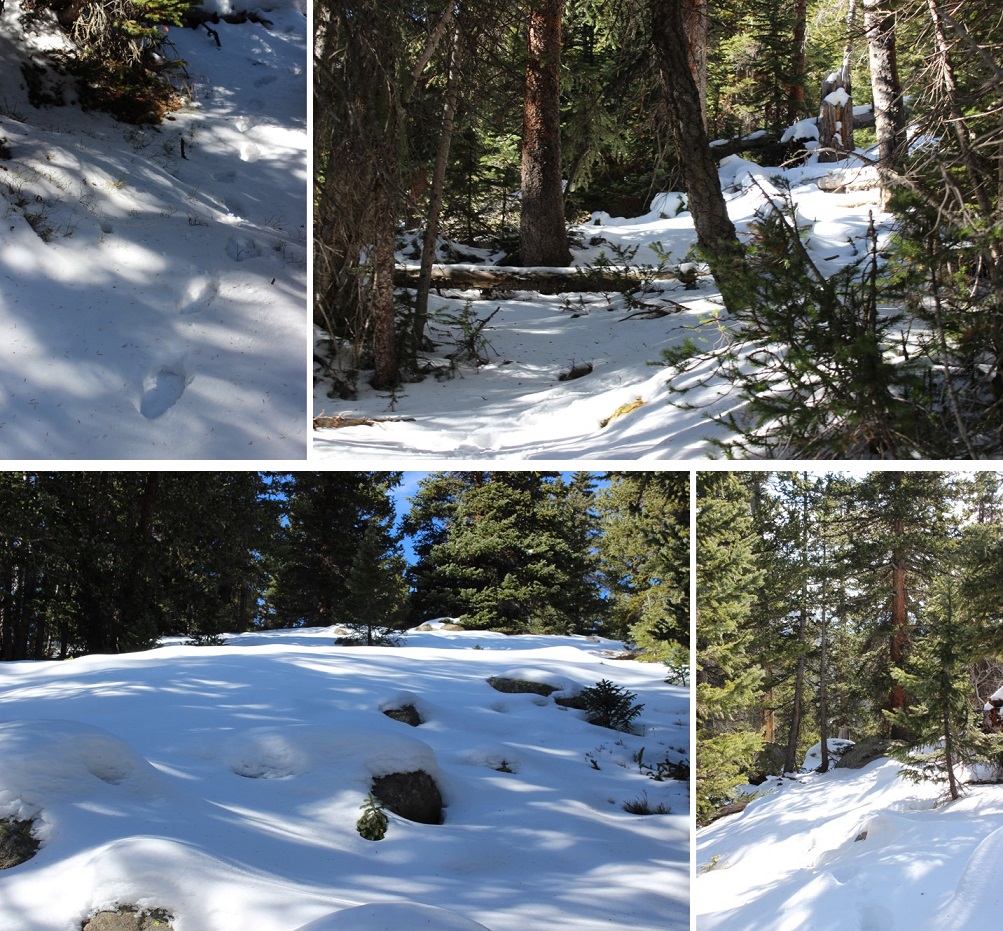
Here are some pictures of the terrain, which followed Cochetopa creek up the basin.
After hiking for 7 miles, I crossed Stewart Creek
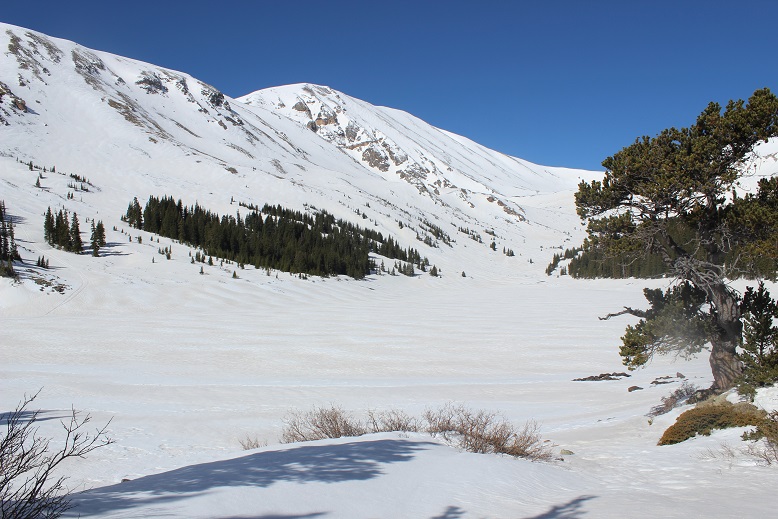
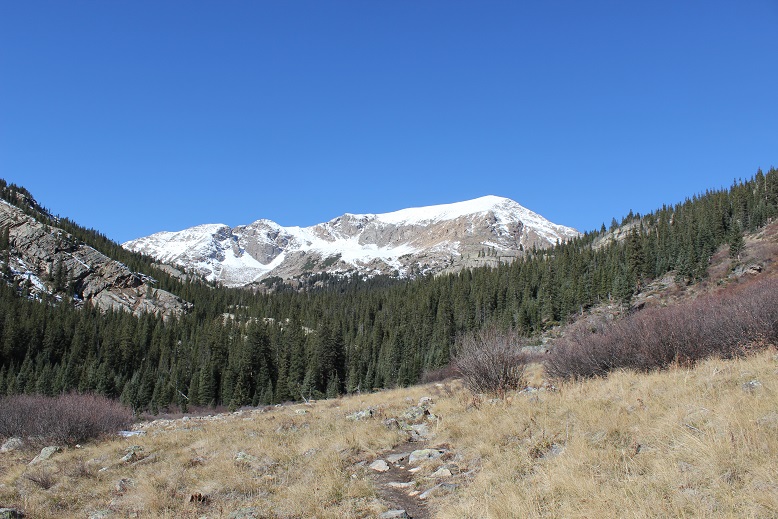
I was now above treeline, and could see the 13166/San Luis Peak saddle.
The Colorado Trail nicely brought me there.
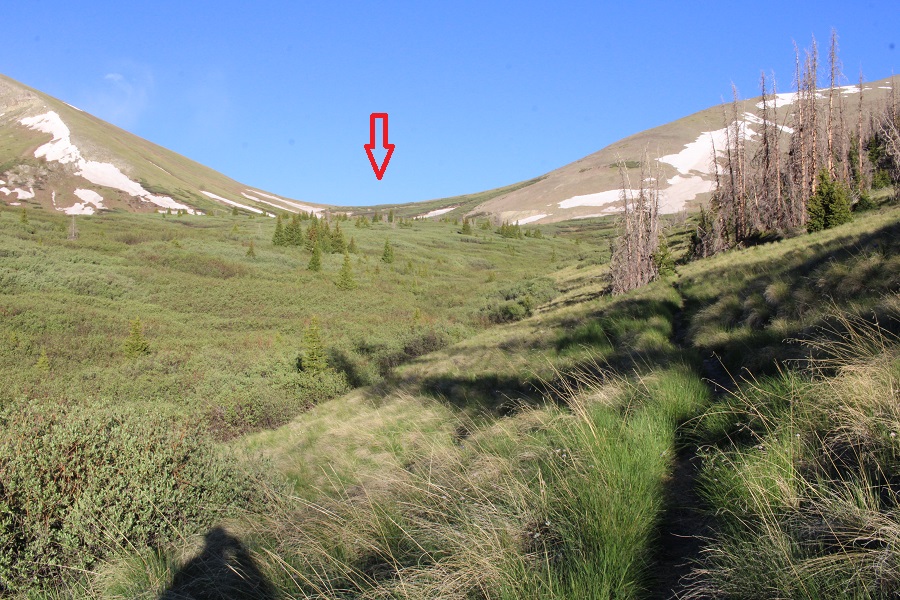
I would now lose 255’ of elevation as I headed down west, towards another pass, still following the Colorado Trail
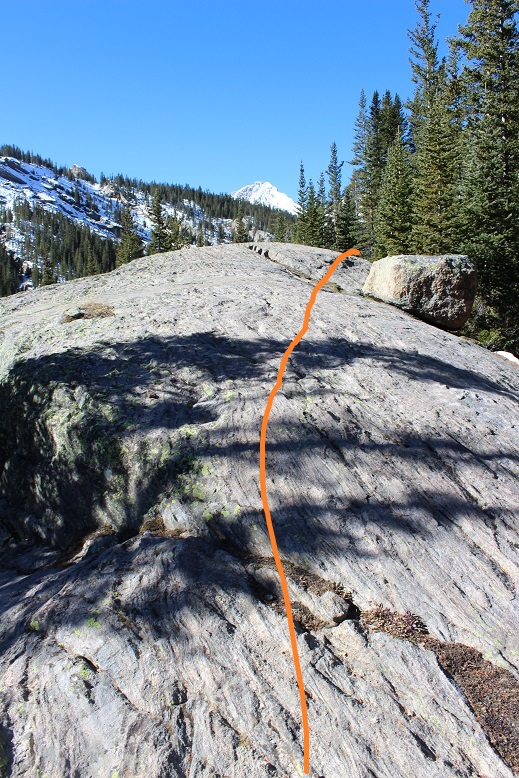
Here’s the route
It was all pretty easy, class 1 hiking
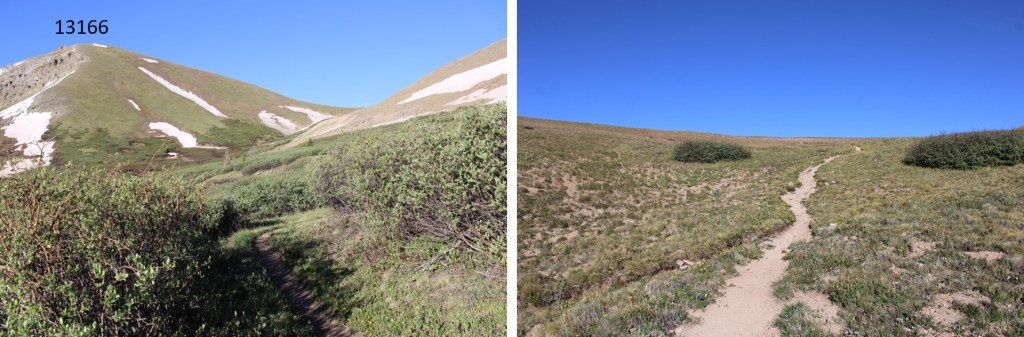
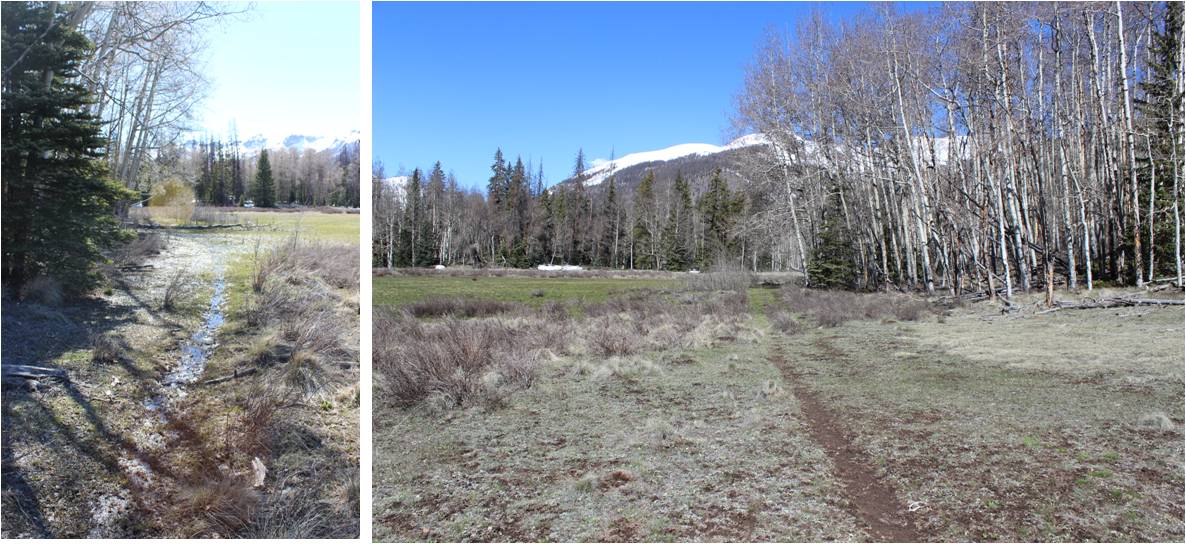
I arrived at the next pass, and lost another 460’ of elevation, once again, on a nice class 1 trail. This one took me through Bondholder Meadows
Here’s the route
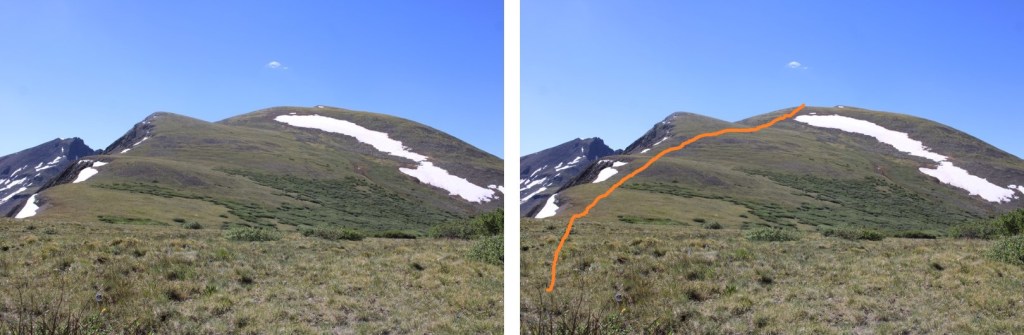
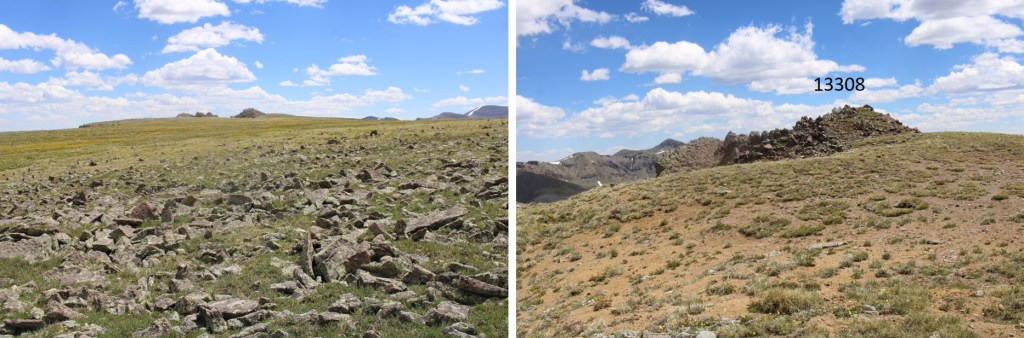
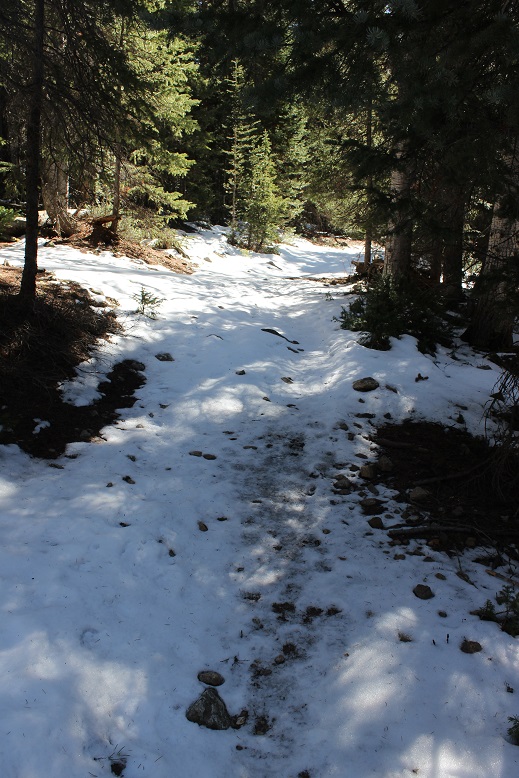
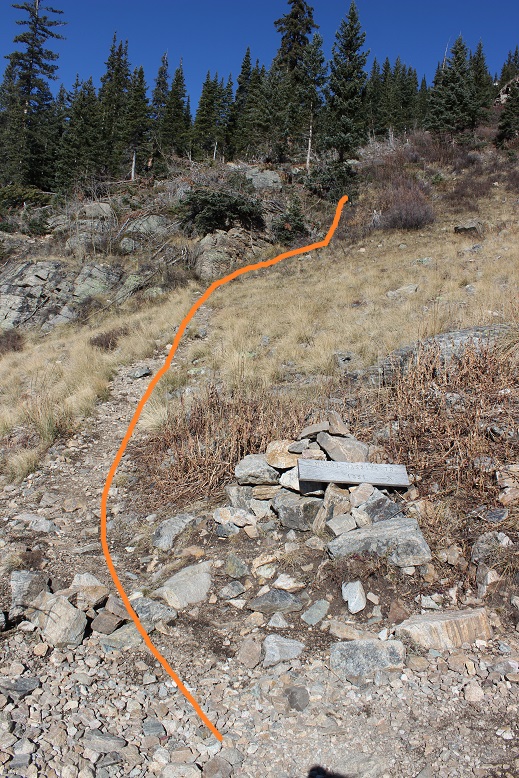
After hiking for a total of 12.5 miles, and at 12290’ of elevation, I saw this cairn, and turned left, leaving the Colorado Trail. I headed south a short ways to the ridge. There was a little bit of snow here, but spikes (etc.) were not needed.
Once on the ridge, I turned left again and followed it southeast. Here I stashed my backpacking gear and started hiking with a daypack with just the necessities. Please keep in mind, what you see here is a false summit. This was all easy class 2 on tundra.
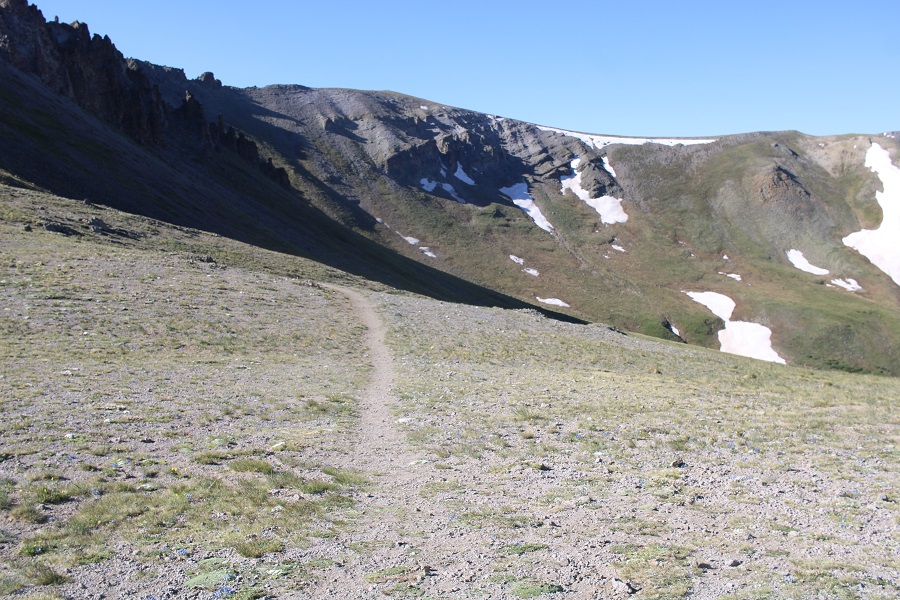
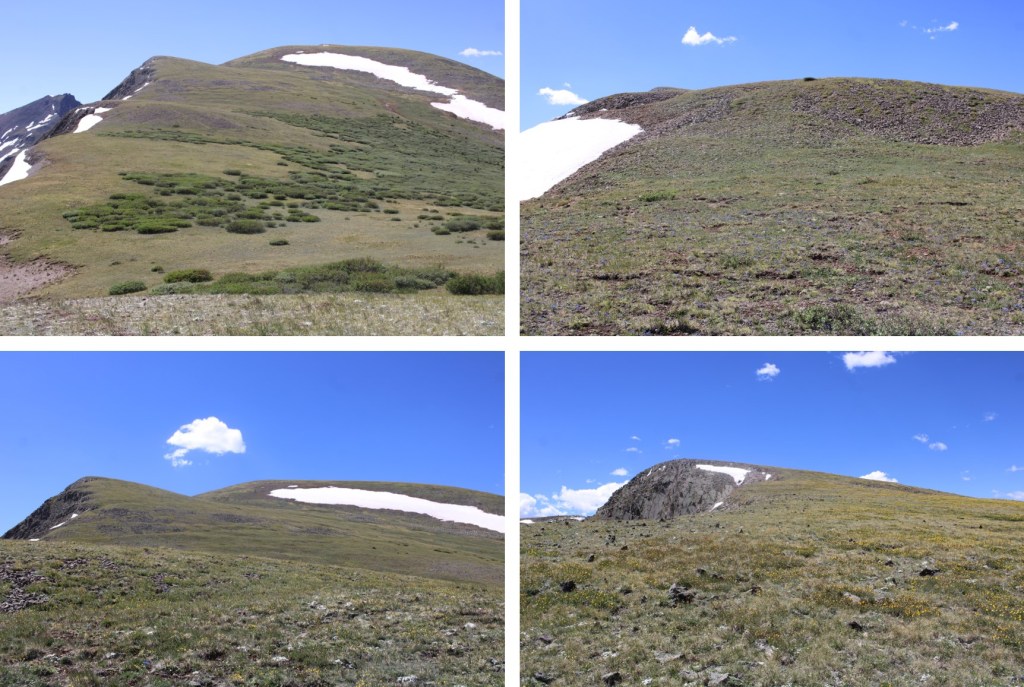
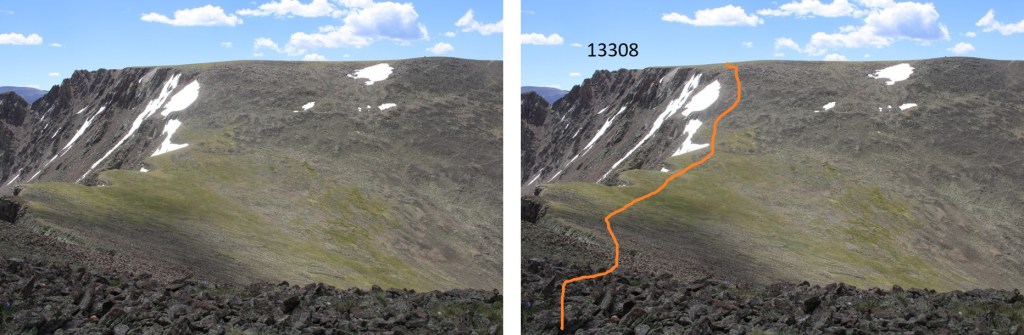
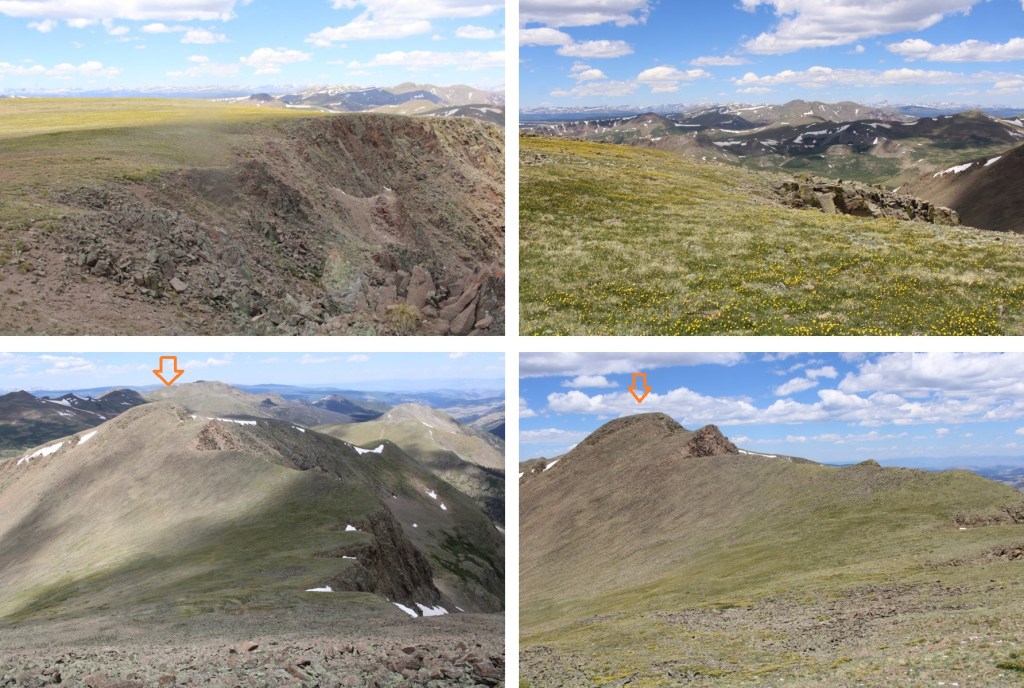
At the false summit, I could see the true summit of 13308. I would need to descend about 135’, and then re-ascend another 335’ to make it to the summit. This area was a mix of tundra and rocks. I followed the ridge southeast.
Once I reached the top of the rocky ridge I was greeted with Alpine tundra. I headed east towards the summit.
When I got there, I was unsure if I was at the summit, or if it were the pint further, so I climbed up and down (still class 2) to the summit further east, but when I got there, the first summit looked higher. When I checked my altimeter, both summits had the same elevation, but when I got back to the first summit, there was a summit register, so there’s no need to climb back and forth. Here’s the view looking at the second summit
And a view from the second summit looking back at the first
I summited PT 13308 at 11:45am
PT 13308:
I headed back down the ridge to where I’d stashed my gear, first descending, then reascending, then descending again.
Here’s looking at that rocky false summit
From that summit, I could see my next peak, 12580
This is where the wind picked up. Forecasted winds were 20-25mph, but I’m sure these exceeded 50mph. I had to hold onto my bandana, as it kept getting blown off my head. I made my way back to my stashed gear, then back to the Colorado Trail.
Once on the Colorado Trail, I continued following it northwest for about .75 miles
I rounded the side of a hill, and PT 12580 came into view. I left the trail, and headed towards the summit. This was all class 2 on tundra, then class 2 on rocks
There was a summit register, which hadn’t been signed in over a year, so I’m thinking this isn’t a very popular peak. I summited PT 12580 at 2pm
PT 12580:
Now to head back down the trail. I took the same way out as I did in. I wanted to sleep close to Bondholder Meadows, but preferably in the trees.
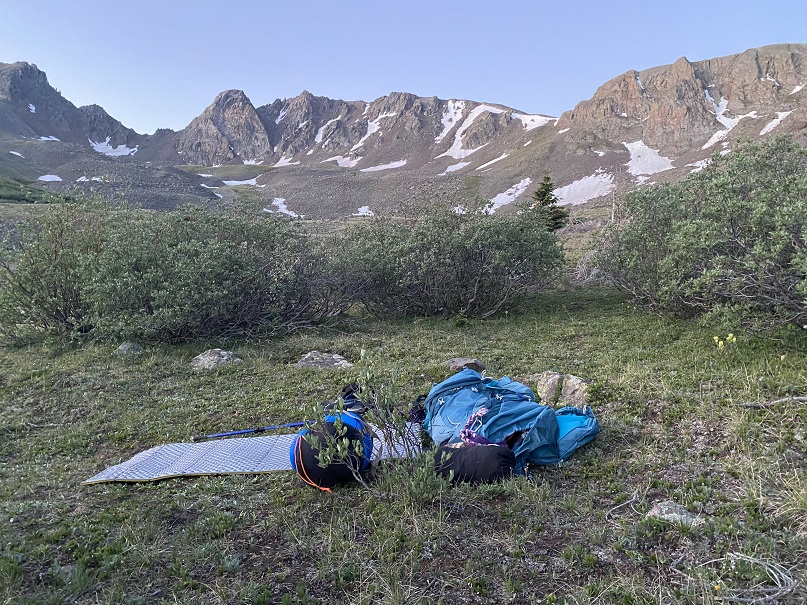
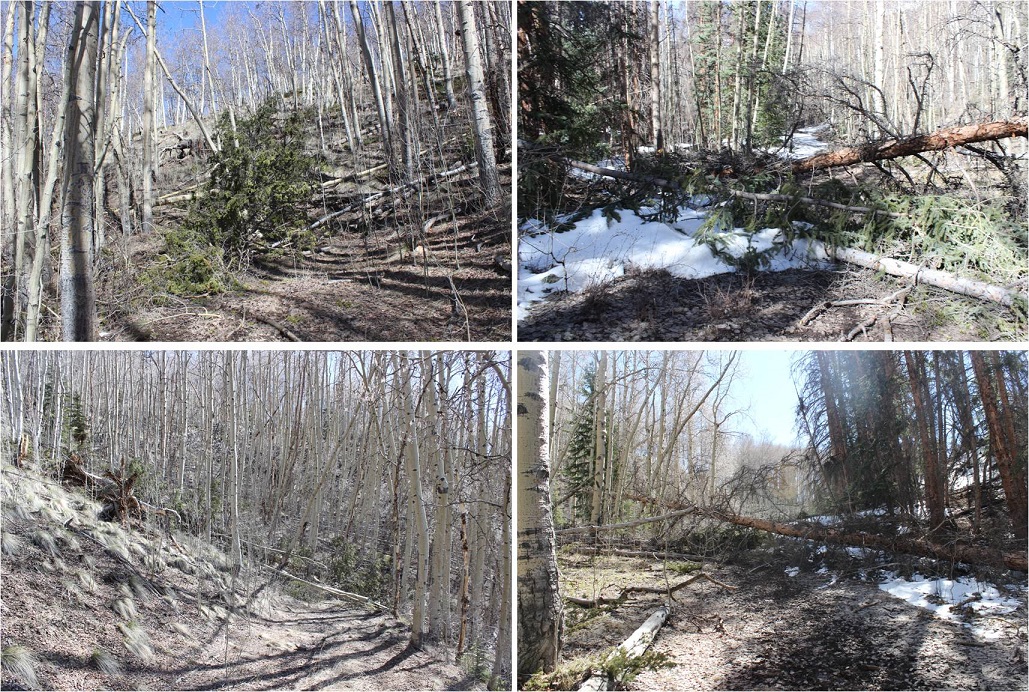
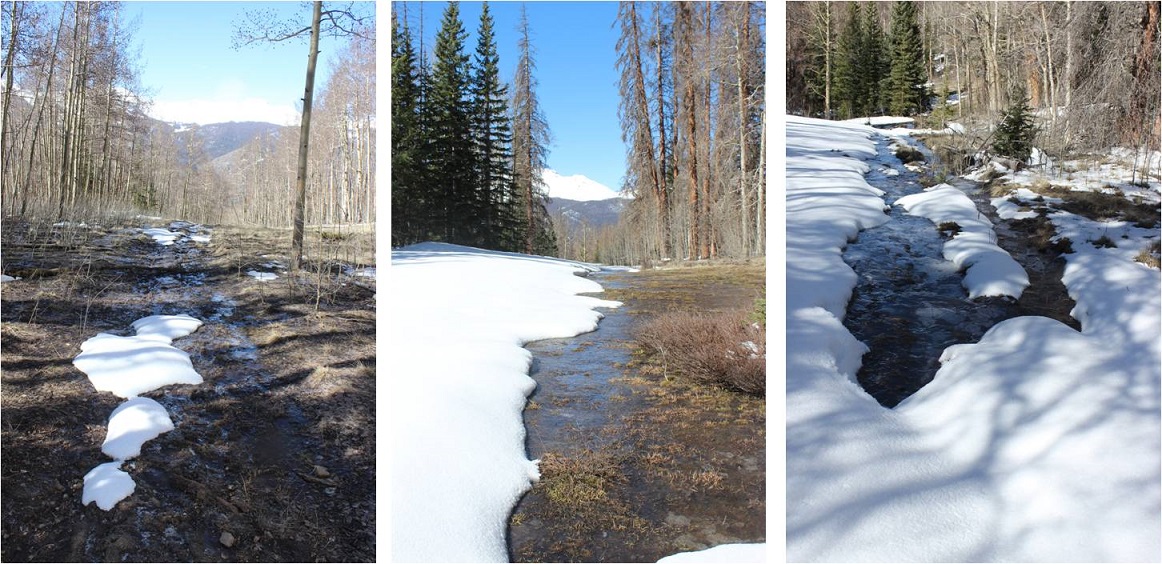
I ended up hiking further than intended, because the campsites I found were full of very dead trees, each placed perfectly to fall on me wherever I chose to sleep. With the current wind gusts, I didn’t want to chance it, so I hiked to the very end of the trees, and found a place to camp surrounded by willows, near a creek that still had a little bit of snow.
I set up my bivy, ate dinner, and bedded down for the night. It was an uneventful and warm night, except for the purring I heard around midnight and the thundering hooves I heard when I woke up. I never saw either animal.
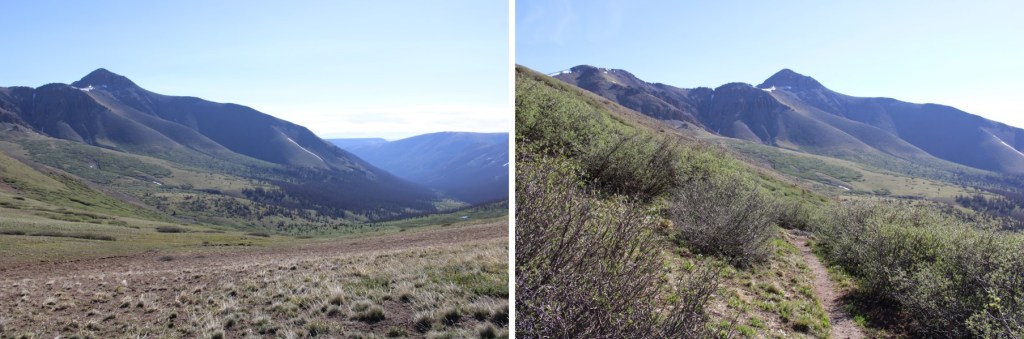
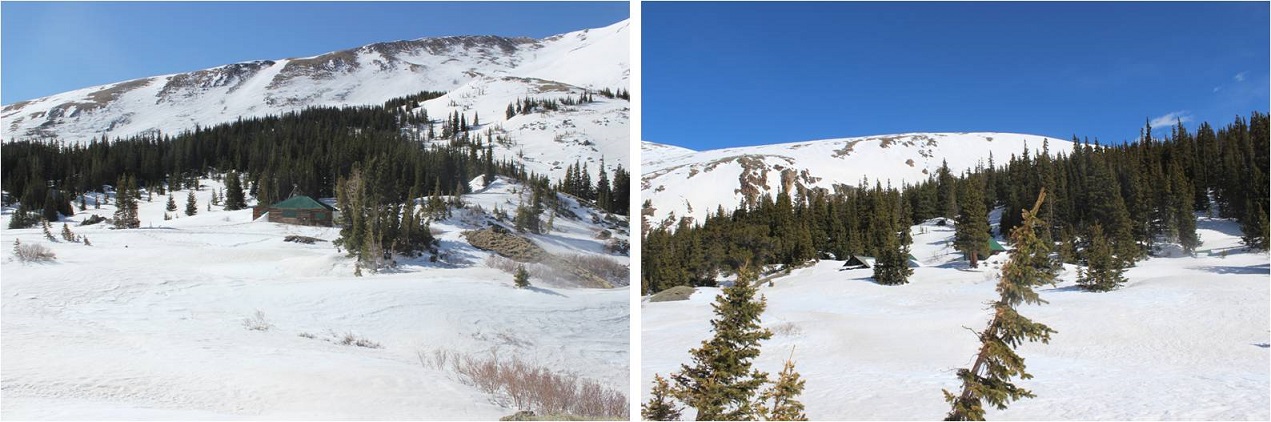
The next morning I was up and on the trail by 6am, headed northeast along the Colorado trail. Here are the two passes I needed to go over
At the top of the last pass, now all I had to do was follow the class 1 trail back to the trailhead.
Here are some pictures the rest of the way back to the trailhead. I saw a couple of bull moose munching in the willows, but that’s common for this area.
I made it back to my truck at 10am.
This was a 31.68 mile hike with 6041’ of elevation gain.
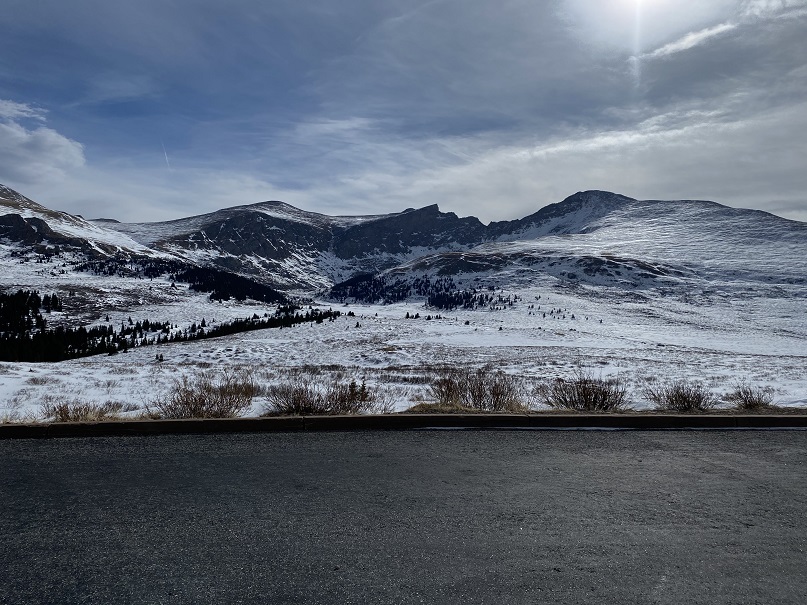
I’ve already summited Mt Bierstadt in winter, so I’ll just post a few highlights. It was cold and windy and beautiful and I was the only one on the mountain that day, practicing social distancing the best way I know how!
50 meter rope was perfect (but tie the ends, because it was close)
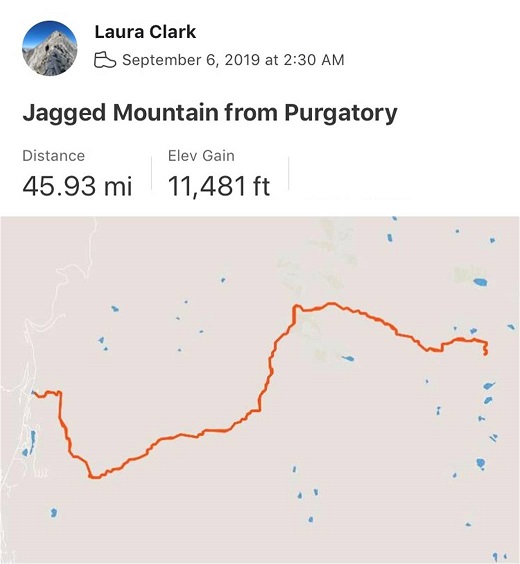
I knew the risks going in: The weather didn’t look all that great and my first day in would be from no sleep from the night before, but I’m used to these circumstances and decided to go ahead and attempt Jagged Mountain this weekend.
If I were to do this climb again and I had the time availability I’d stretch it into 4-5 days. Unfortunately, with my work/volunteer/mom schedule I knew I’d never get that much time off in a row, so my plan was to hike up to the base of Jagged Pass the first day, either summit Jagged that night or the next morning, hike back down to the Animas River the next day and camp somewhere between the cutoff to Noname and the base of the Purgatory Trail, and hike out the third day, with the understanding I could change plans as I went (one of the benefits of solo hiking).
I’d spent quite a bit of time going through my gear to make it lighter, and I think I shaved off about 10lbs, making my pack a much more manageable 35lbs (including rope, harness, webbing, etc.)
I drove the 6.5 hours to the Purgatory Trailhead and was on the trail by 2:30am. This is the third time I’ve hiked in from Purgatory, and the third time doing so in the dark. I decided to get some stats from Strava this time.
First Trail Bridge @ 4.3 miles, 2 hours of hiking.
Second Trail Bridge (cutoff to Chicago Basin) @ 9.9 miles, 4 hours 30 min of hiking
Needleton Bridge @ 10.8 miles, 4 hours 50 min of hiking
The Needleton Bridge area has some private property surrounding it, and several social trails to cabins. This is the correct trail to bring you towards Pigeon Creek and Noname Creek. It starts just to the right of the Needleton Bridge.
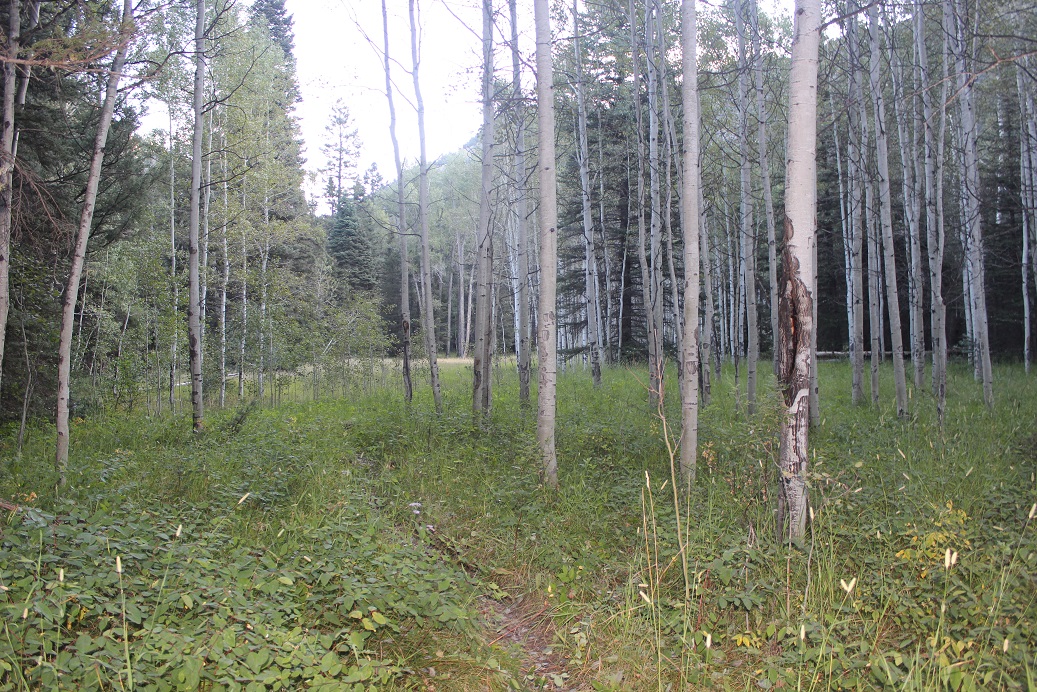
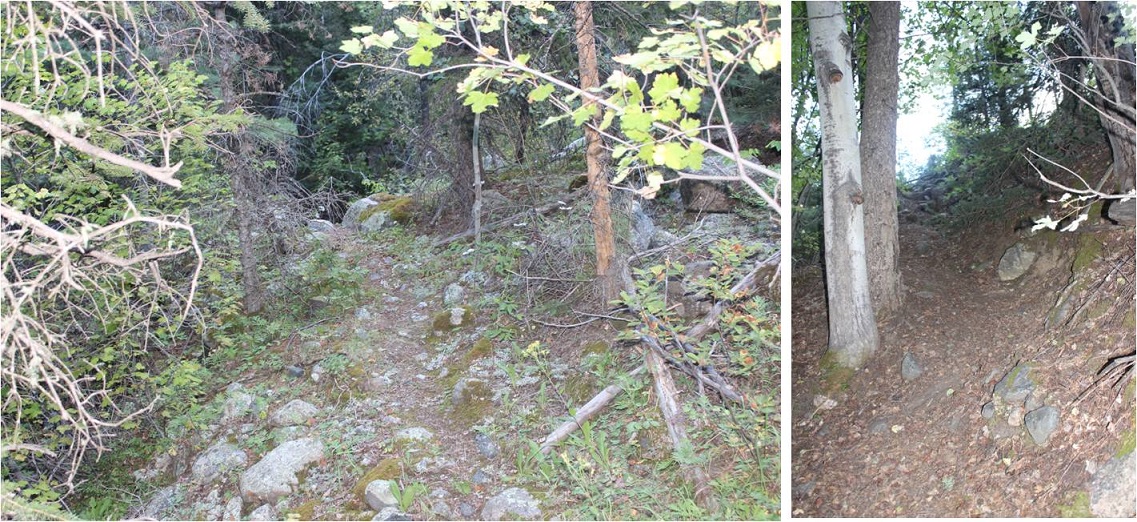
The path here is easy to follow and brings you to the “campers meadow” / Aspen Grove at the turnoff for the Pigeon Creek approach to Ruby Basin
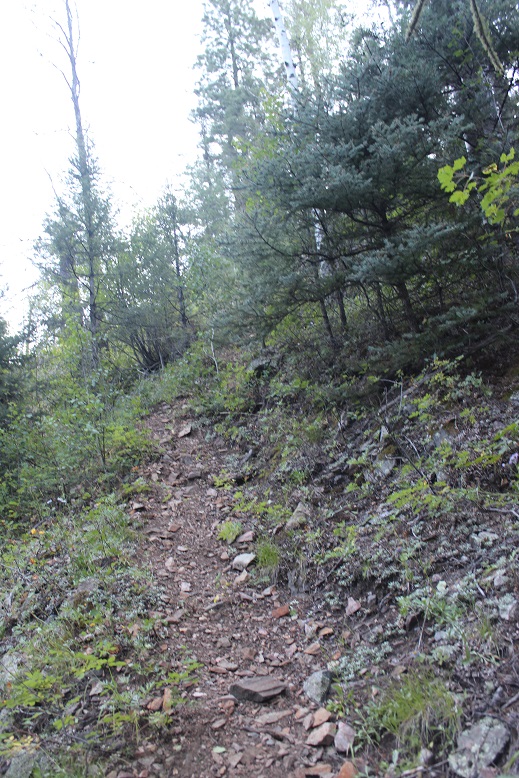
From here the path was much better than I’d anticipated. There were cairns and a semi-worn footpath to mark the way north through the forest, paralleling the Animas River
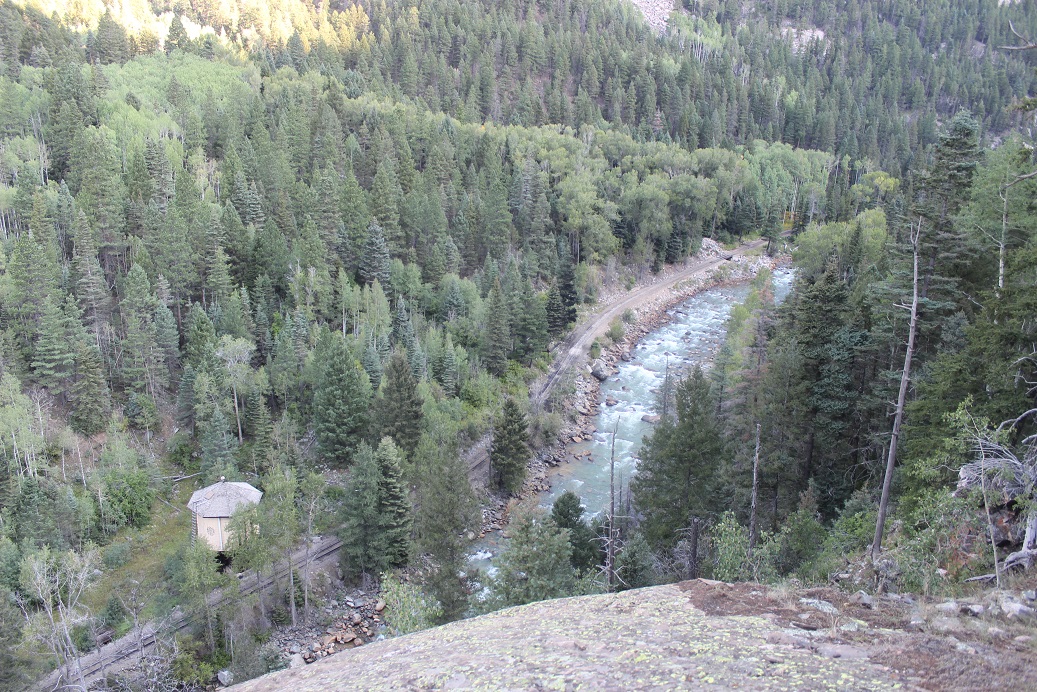
Then, for no reason whatsoever (except of course the river below) comes Water Tank Hill. It’s worse than it sounds: 200’ straight up the side of the mountain (and then back down to the river afterwards).
When I got to the top of Water Tank Hill I noticed the water tank was actually on the other side of the River. I decided this would be a great place to take a rest. As I sat down I noticed a Black Bear racing over the tracks and through the yellowish/green grass in the middle right of this photo. I was reaching for my camera when I saw her cub bounding after her. I wasn’t fast enough to get a picture, but thought to myself: Cool! About 10 years ago I’d taken the trail from Durango to Silverton and asked one of the workers how often they saw bears, and he said in the 25 years he’s worked there he’s only seen one. I felt pretty special to get to see this pair this morning. I also asked myself what they were running from?
I sat here for a bit and had breakfast (I decided to force myself to eat this time). Beef Jerky and Almonds for breakfast isn’t all that bad. After a short rest I put back on my gear and headed down Water Tank Hill, which was just as bad as the way up
Back at river-level the trail was once again straightforward. I thought to myself how this trail was much easier than the Pigeon Creek trail (but to be fair I’d done that one twice in the dark both ways, and I was doing this one in the daylight).
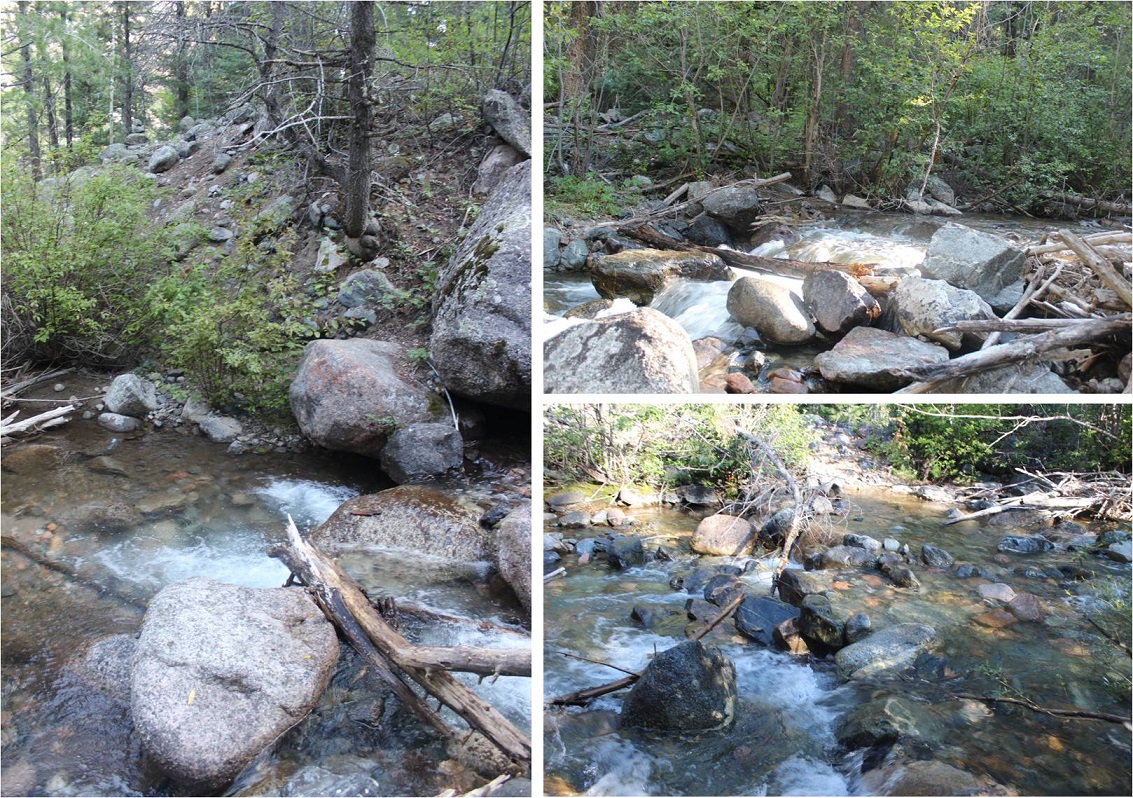
I crossed several creeks
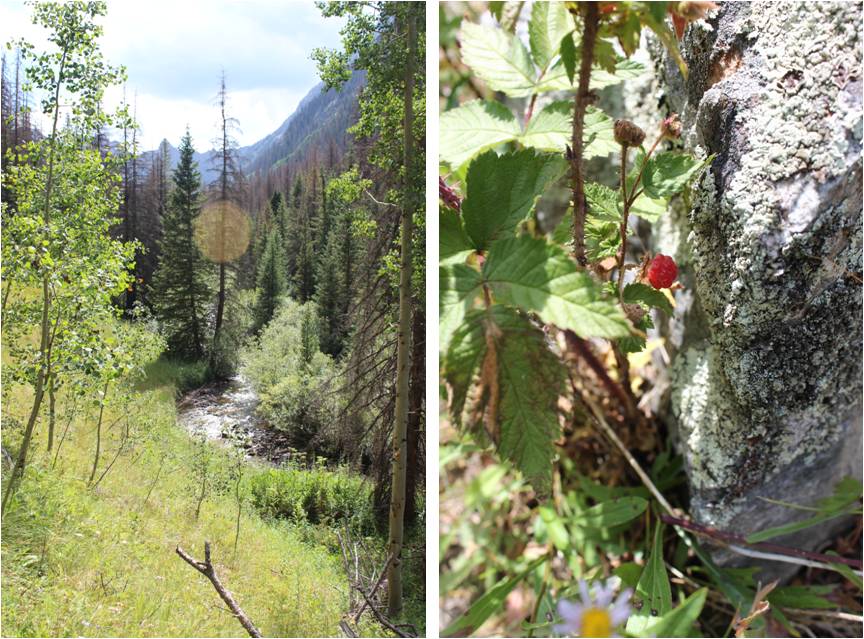
And turned right (east) and followed the Noname Creek trail. Once again, the trail was easy to follow (but obviously not maintained)
It follows the Noname Creek. I found a patch of raspberries growing as the crow flies from the raspberry patch on the trail to Ruby Creek, as well as thimbleberries (which always seem to grow alongside raspberries)
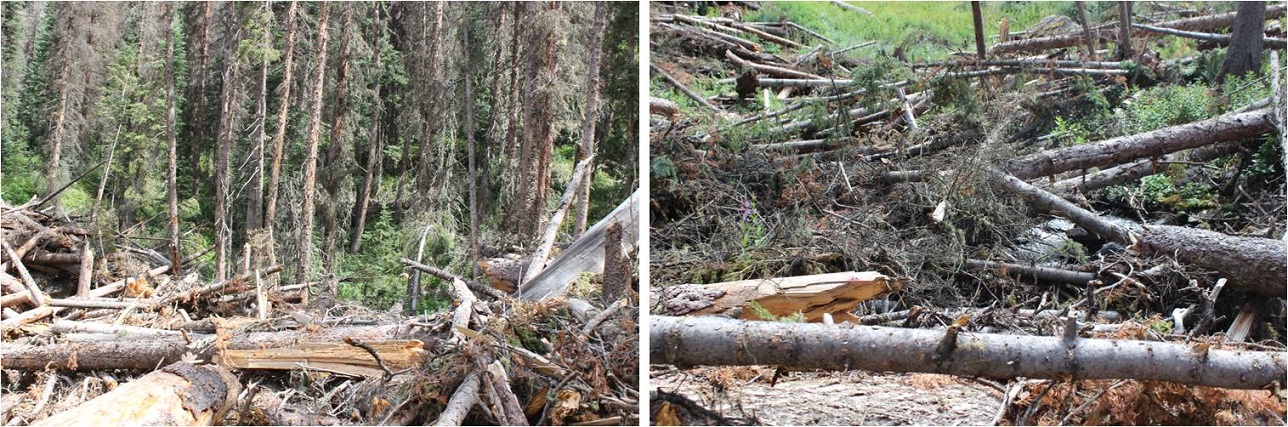
The difficulty came when I reached the first avalanche area (I think there are 3 in total, but two of them kind of run together). I’d heard to avoid most of the debris to cross the creek, and so I did so. This ended up being a terrible idea (maybe I crossed at the wrong section?). There were trees piled on top of trees that reached heights well over my head. This made crossing the river a bit dangerous, as the trees weren’t stable and there were huge gaps. Hundreds of trees criss-crossed the creek.
Eventually I had to cross the creek again and there was still avalanche debris to contend with
The above picture is deceptive, as there are still large areas of trees piled on top of each other to cross and no clear path to take. The trees are tumbled together and rotting. I had to secure each step carefully, even if it looked like the log was solid (some would roll). Crossing this area took a long time, and is not something I’d recommend doing in the dark. As I came out of the 2nd avalanche area I realized what I should have done was stick more to the left (north) and I told myself I’d do that on the way back. I was so excited when I reached a trail again!
About half a mile after I found the trail again I hiked a bit up a hill and found myself at the Jagged Cabin, which was more run down than I’d anticipated. I made it here after 18.2 miles in 10 hours, 42 min. I’m sure the avalanche area slowed me down…
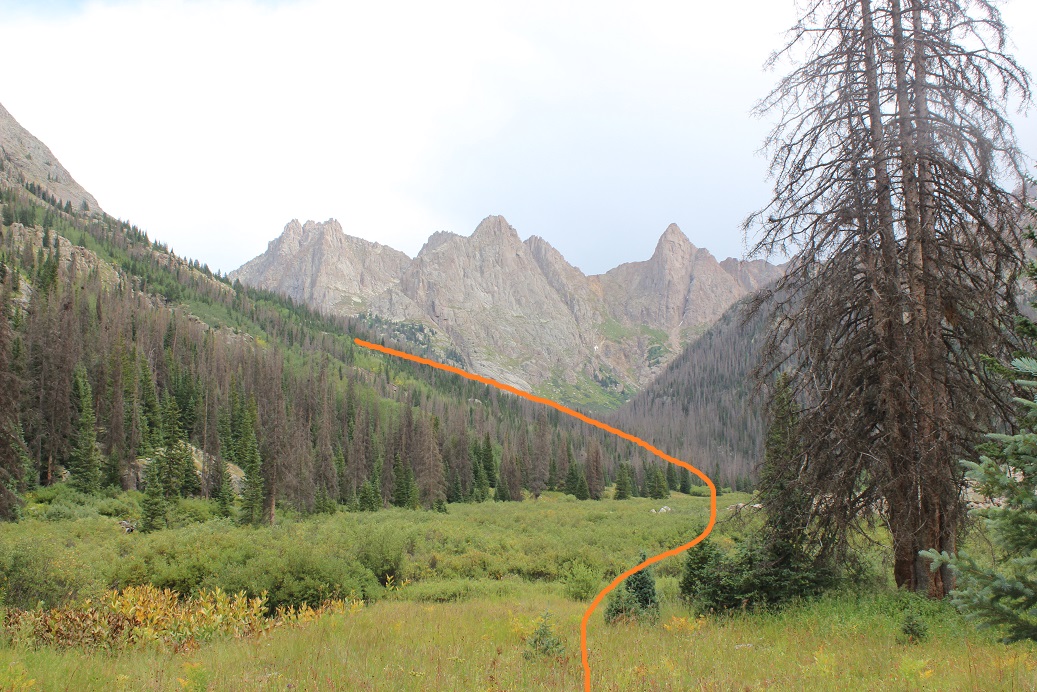
I took off my pack and rested for a bit, going over the next part of the route.
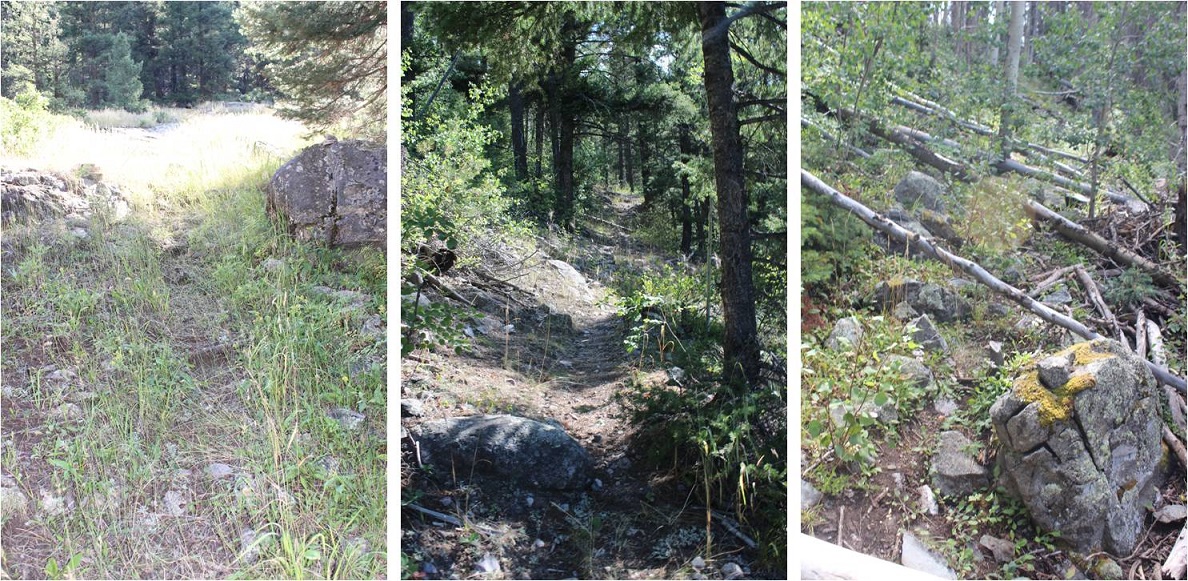
I put back on my pack and headed east through willows and more forest and more uphill. I went left at this junction and came across another small avalanche area that was annoying but not difficult.
I entered another clearing and went left again, up the hill to the basin below Jagged Pass
Here route finding was a bit of a challenge because there were so many trails, but as long as I stayed on a trail and kept the stream to the right of me I was headed in the correct direction
It started raining halfway up this hill, and this is where my troubles began. I’d totally expected it to rain (each day called for rain between 12-5pm). I just hadn’t anticipated how drenched I’d get from just a little rain. You see, I was hiking through overgrown grass and willows
The rain collected on the plants and soaked my pants as I walked through them. I think it’s worth noting everything I was wearing was “waterproof”, including my socks, pants, and jacket(s). Within 15 minutes I was soaking wet. No worries though, because I had a change of clothes in my pack and I could dry off once I reached my campsite. Here’s the rest of the route to the small lake I camped at. There was no trail here and the route I took included some boulder hopping
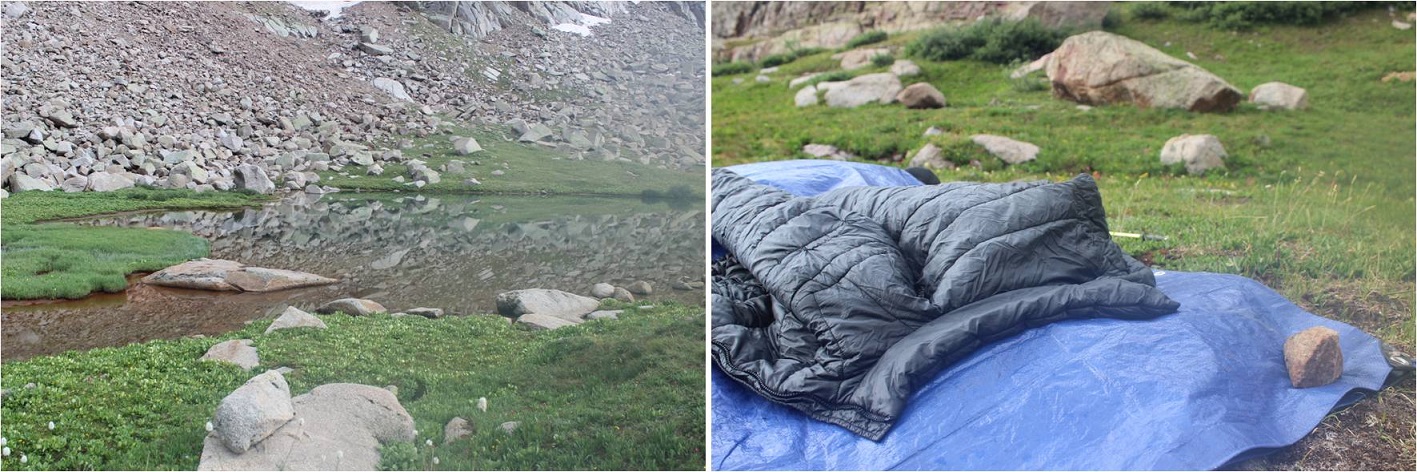
I made it to my campsite at a pond just below Jagged pass (12,210’) after 21.1 miles and 13 hours 30 minutes of hiking. Note, this is NOT the unnamed lake at 12,522’
Jagged Campsite:
It was about 4:30 in the afternoon. I set up camp quickly, thankful the forecast only called for rain until 5pm. Camp was just a tarp, bivy, and sleeping bag, so setting up didn’t take long. I changed my clothes, laid out my wet pants and socks to dry, ate dinner (more jerky and nuts) and filtered some water. There were flies and mosquitoes, but the flies seemed particularly interested in me. I’d been sweating all day and they were intrigued.
As I was filtering I found an umbrella that had seen better days. I wondered how it got here? In any event, it soon became “useful” (not really) as it started raining again. I quickly packed up the clothes I’d set out to dry and sat under the mangled umbrella, watching the rain.
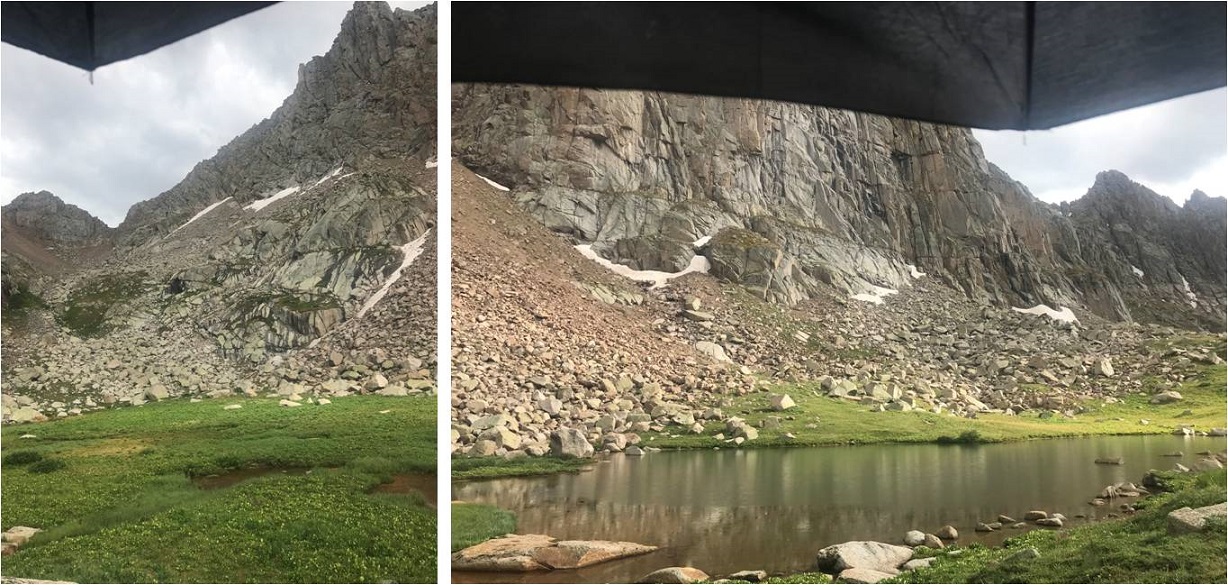
The rain didn’t look like it was going to stop anytime soon, so around 5pm I decided to take a nap. I woke up around 7pm to a fantastic view of my campsite in the evening glow.
I was also a little bummed: Had I just missed my opportunity to summit Jagged by taking a nap? There wasn’t a cloud in the sky, so the rain couldn’t have lasted too long. Oh well, it had been a long day, so I decided to go back to sleep to prep for tomorrow.
It rained most of the night. On the positive side, I was nice and warm and dry inside my bivy and sleeping bag. I woke up several times: a few because it got stuffy and I couldn’t breathe (but due to the mosquitoes I’d wanted to keep my set up as air tight as possible). Another time it was to rain, and once to a very loud grinding noise coming from below me. It sounded like a rabbit slowly biting through a carrot, and a little like a hand saw slowly cutting through wood. I heard this a few times and figured out it was most likely a marmot burrowing below me, extending its tunnels (or something).
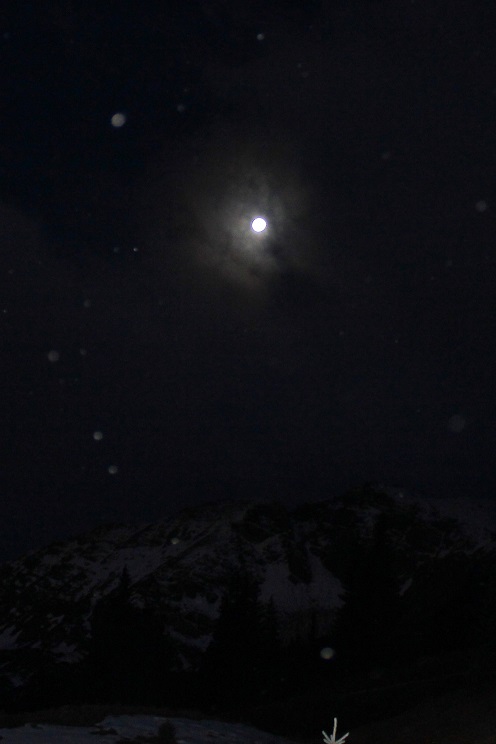
At 5am I woke up to clear skies and sat in my bivy for a full half hour just gazing at the stars. I could make out dozens of constellations, a few satellites, and at least 4 meteors flying through the sky. I was pleasantly surprised at the lack of clouds.
Curiously, I thought I saw a flash light up the mountains. The first time I saw it I thought my eyes were playing tricks on me. The second I looked around for lightening (sure that was what it had been). No clouds, so it couldn’t have been lightening. The third time I saw it I thought maybe it was someone hiking in the dark and their flashlight was causing it? That didn’t make much sense, and I couldn’t see anyone with a flashlight below, so I ruled that out as well.
I didn’t want to move, not only due to the amazing nighttime view but also because it was a bit chilly; but I needed to get a move on.
I left all my nonessential gear under my tarp, put on my helmet, and even though it was dark I headed in my intended direction. There was a grassy slope to the left (north) of me I took to a rocky area and up and over the pass
I made it about 5 minutes before I had to stop because I couldn’t see anything and it was getting dangerous traversing over the wet, rocky area. I sat in one spot for about 20 minutes, allowing the sun to rise before continuing on. As I sat there I could see what I hadn’t been able to from below: a storm to the west. It had been lightning I’d seen, but luckily the storm seemed to be petering out.
This gully was full of rocks and nasty scree that took careful foot placement but was straightforward
At the top of the gully I turned right (south) and got my first good look at Jagged Mountain
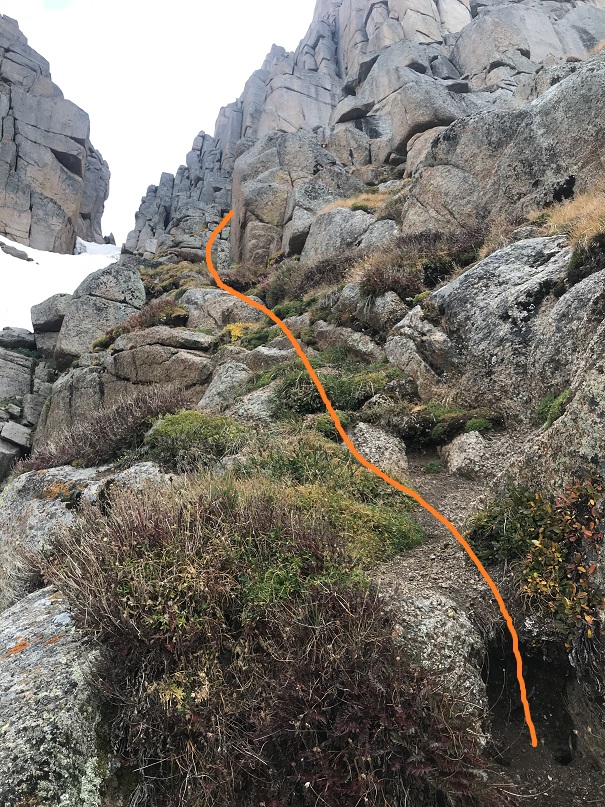
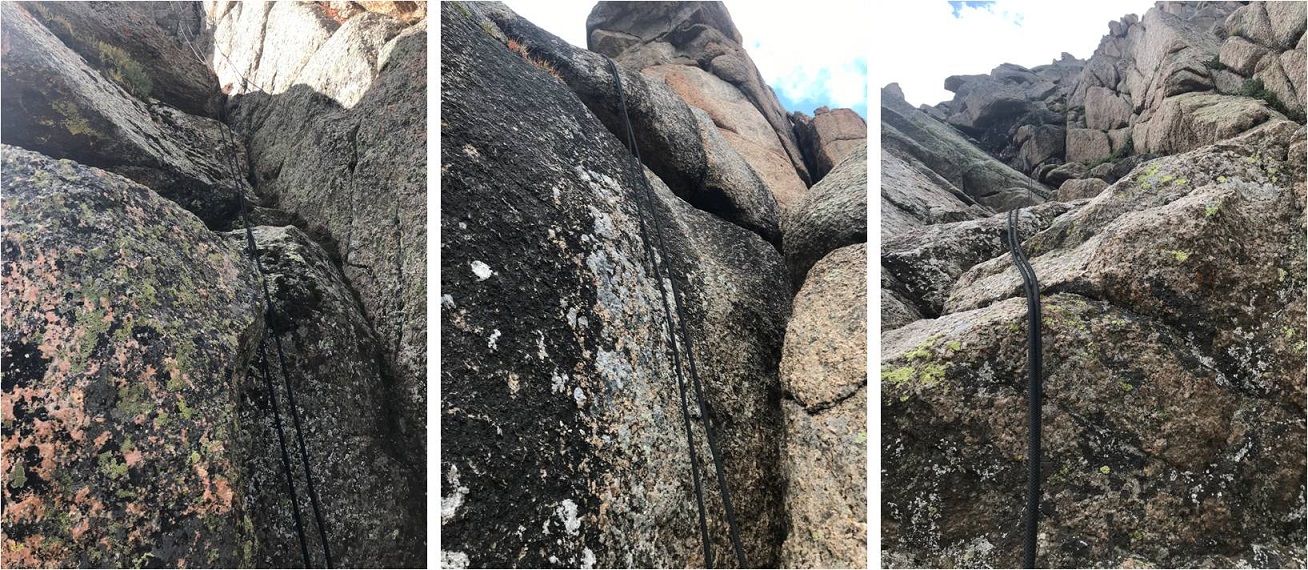
I spent some time planning my route. Here’s the route I took, staying below the areas of snow and just to the right of the gully.
This area is steeper than it looks
Here’s the path to the first crux, just to the right of the gully
I turned to look back on the way I’d come and noticed that storm that looked like it was going away wasn’t. In fact, it was coming right at me! Ugh! It was only around 7am and it wasn’t supposed to rain until noon but yet here was obvious rain headed my way. I was glad I wasn’t in the Vestal Basin right now.
The rain started falling and I got out my poncho, put my back to a rock, and sheltered in place for half an hour, waiting for the rain and graupel to stop. While I sat there I did a lot of thinking. I knew due to this rain the rocks would be wet, so I’d have to be very careful. Also, I needed to set a turn back time, which I set for 12pm. In my mind I was thinking this rain could be a good thing: It wasn’t supposed to rain until noon and it was raining now: maybe this would be it for today? (insert God laughing here).
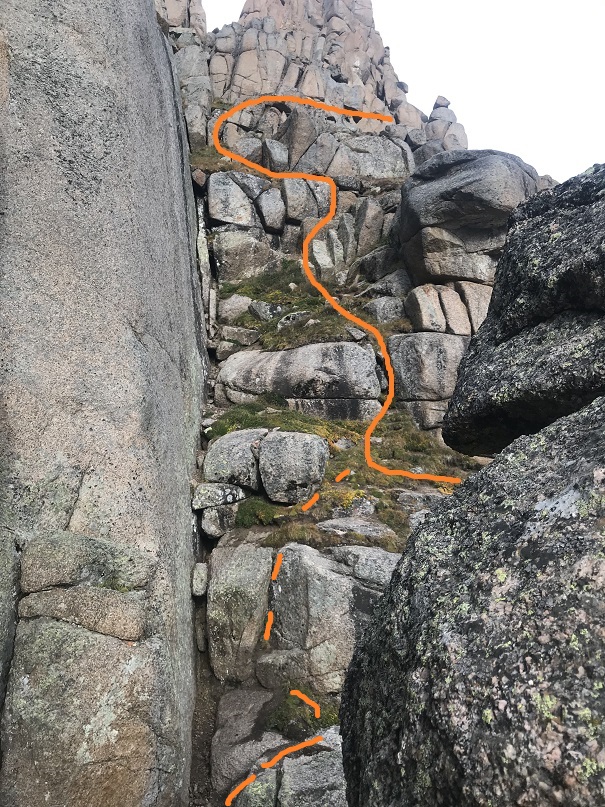
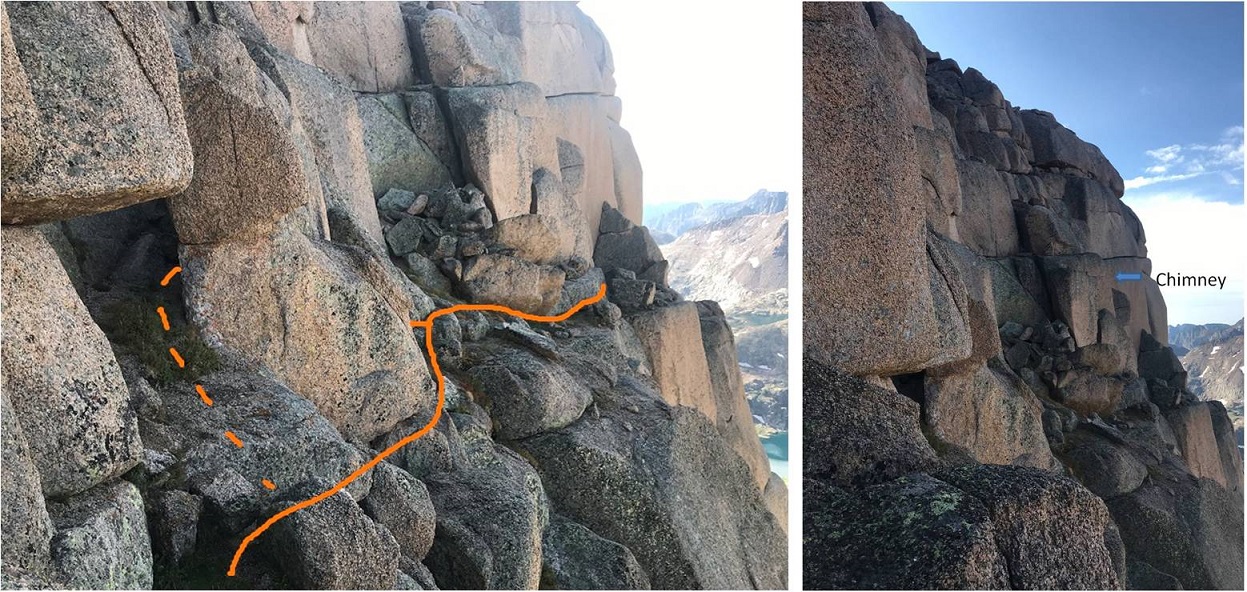
Once the rain stopped I set to work at the first crux. You’re supposed to go over these grassy slopes, but I wasn’t able to get over the first bit. I wished I’d brought my rock climbing shoes!!! I tried and tried and tried but I just wasn’t tall enough to get myself up and over the first rock: I had no traction with my feet and nothing to hold onto with my hands. There had to be another way?
I went to the right and found another area that looked “easier”. I attempted to gain the slope this way but wasn’t able to pull myself up here either. Ugh! So I went back and tried the slopes again, but it just wasn’t working. I went back to the second area, took off my pack, and was easily able to climb up. This was no good though because I needed my rope to rappel. So I attached a small rope to my pack and tried to haul it up after me: the rope broke. Face palm.
Ok, next idea: I rummaged around in my pack for my knife but was unable to find it? My idea had been to use it kind of like an ice pick for leverage on the grassy slope (since there were no rocks/etc. to grab onto). I was upset I couldn’t find my knife, but I did find my microspikes and decided to put them on. These gave me the traction I needed to pull myself up and onto the slope from below. I then made my way around and finished the first crux. (The dotted line is how I think you’re supposed to get over this area, but I wasn’t tall enough to make it happen).
The climbing became steep. I’m assuming this is the second crux
There weren’t cairns here but I knew I was on the right track because I kept seeing anchors set up. I inspected each one on my way up and they all looked good enough to use on my way down.
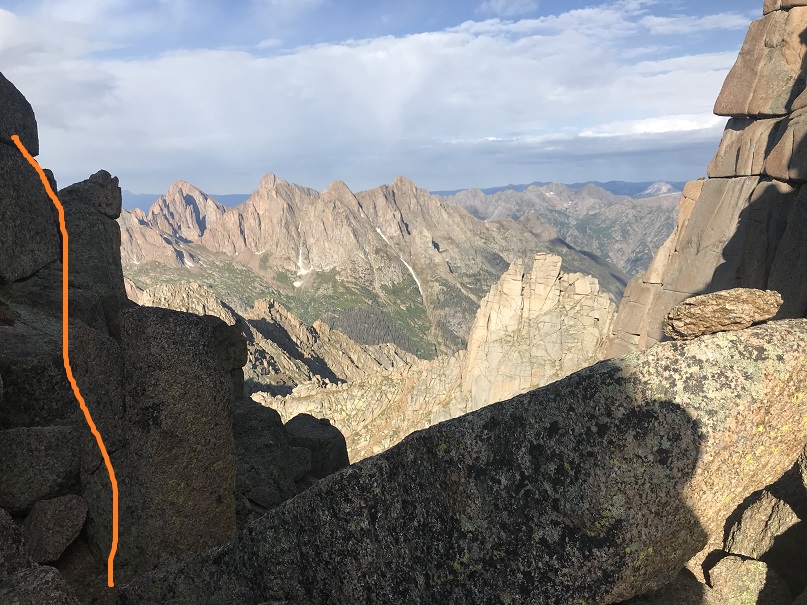
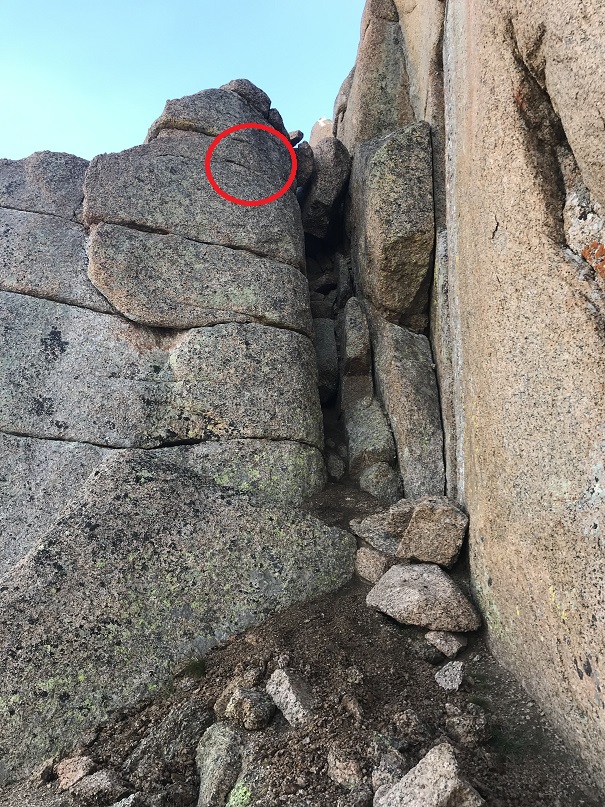
I made it to the notch, got my first good view of the sky and turned left. It looked like the weather was going to hold out for me today after all!
Here’s that airy traverse. There’s a lot of exposure here but luckily for me the rocks were dry and it was a short section. I took the solid line, but if I hadn’t been wearing my backpack I could have fit through the hole where the dotted line is (behind the rock is a tight fit with a pack).
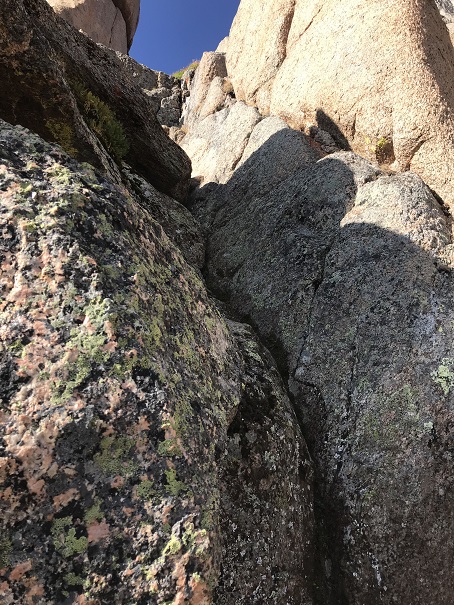
I was feeling pretty good about myself at this point as I rounded the corner and saw the chimney. It used to be a class 3 chimney but there had been a rockfall and the top two rocks in the chimney were “new”. I’d heard they weren’t that difficult.
So I decided to just go for it. Indeed, the first part of the chimney was easy. Easy until I came to the place just below those new top two rocks. They were positioned in such a way they were overhanging the rocks below. I tried and tried and tried but I wasn’t able to get around the rocks, so I retreated to the bottom of the chimney and studied the route again.
It looked like the way to get over this area was to balance on the ledge to the left and haul myself over. So I tried again, but that crack was smaller than a pencil and there was no way I was going to be able to balance on it without rock climbing shoes. Drat!
I was getting seriously frustrated and tried several more times from numerous different angles and was unsuccessful. What was really demoralizing was I was so close to the summit! I went back down the chimney (again), took off my pack, and studied the rocks. There had to be a way up and over this area, and I had to bring my rope with me (there was no way I was soloing down the chimney without a rope). I told myself I was going to keep trying over and over again until my turnaround time at noon. I was kicking myself for the second time today for not bringing along my climbing shoes, but I wasn’t ready to give up yet.
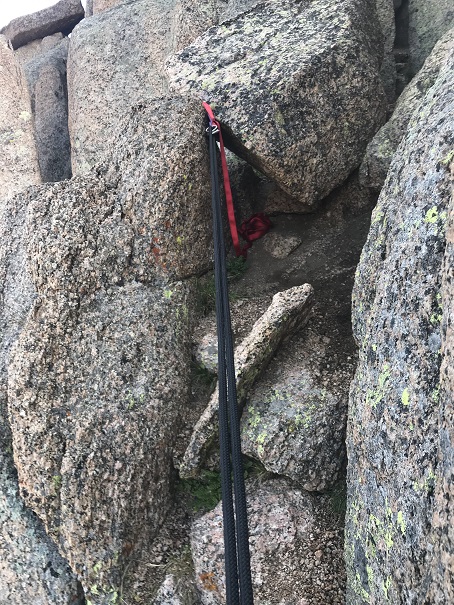
I just needed a little bit of leverage. That’s when I got an idea! I put on my climbing harness, attached my rope to the belay device (because I’d need the rope on the way down but couldn’t carry it up in my hands). I took some webbing and carabineers with me and left everything else (including my camera) at the base of the chimney.
I climbed back up the chimney again and this time when I made it to the rocks at the top I turned around and faced away from the chimney. What I did next I’m sure isn’t kosher, so I’m not going to describe it in detail (but if you’re interested I’ll tell you at a 14er HH). It involved a lot of upper body strength, some webbing, and a move I learned in elementary school when I’d play on the bars at recess. My feet made it up and over the right side of the chimney first and I hauled the rest of my body over, thrilled I’d figured this problem out!!! Here’s the route I took and a look back down from the top of the chimney
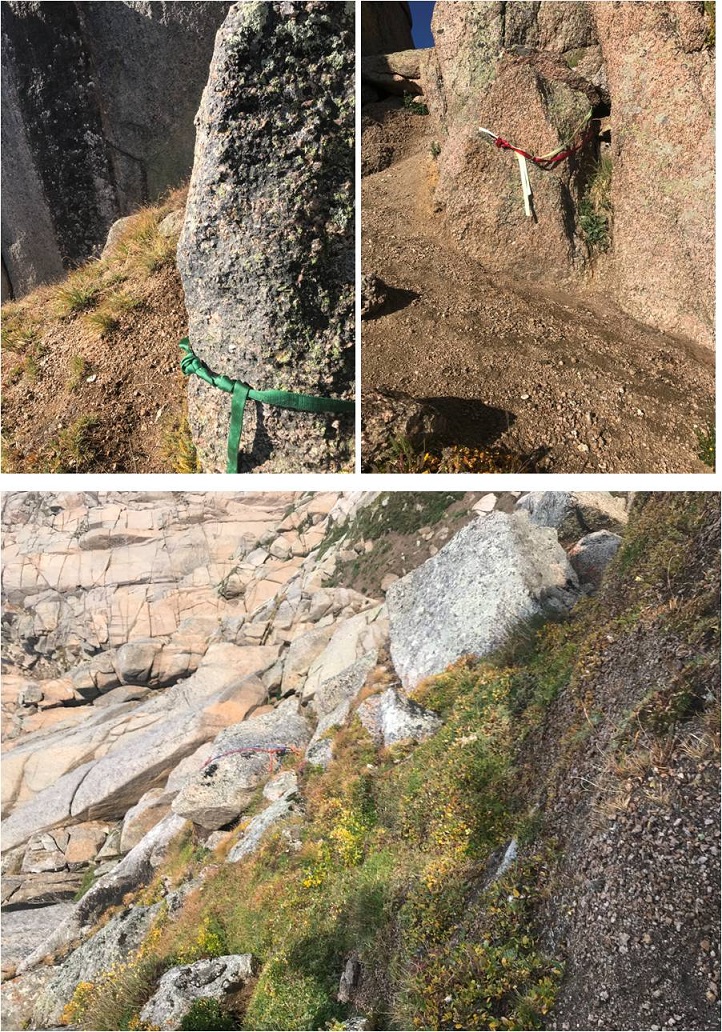
There was an anchor set up about 10 feet from the top of the chimney that looked sketchy. I was glad I’d brought my webbing and rope up with me and decided to secure it now before summiting, lifting and pulling the rope hand over hand until I had it all above the chimney. I didn’t need a lot of webbing but I’d been unable to find my knife, so if you get up there and wonder why someone left all that webbing I can assure you it wasn’t on purpose: I just didn’t have anything to cut it with (I did have more webbing in my pack however, so this wasn’t all of it).
I summited Jagged Mountain at 10am
Jagged Summit:
Here are some summit views and a pretty robust anchor set up if you want to rappel the 165 feet down instead of heading back the way you came (that’s a lot of rope!)
Jagged Mountain was by far the most challenging summit I’ve ever attempted. I was very proud of myself for not giving up, even when I seriously wanted to. Now I just had to get back down to my campsite safely. I turned to exit the way I’d come and rappelled back down the chimney, retrieved and recoiled my rope and put back on my gear.
Here’s looking at the traverse back to the notch
I used every anchor station on the way back down, collecting and recoiling my rope after each descent (that’s exhausting!)
I brought a 50 meter rope with me and it was exactly the right length. I rappelled 4 times (including the chimney) and on the last rappel to right above the snow my rope just touched the ground (a great reason to tie a knot in the ends of your rope!).
I was coiling my rope here when I saw the flight for life helicopter heading towards the Animas River. I said a silent prayer for those involved (stay safe adventuring out there friends!), put on my microspikes and headed back to the pass, keeping an eye on the weather.
At the pass I took a selfie just because I could and because, hey, it’s Jagged
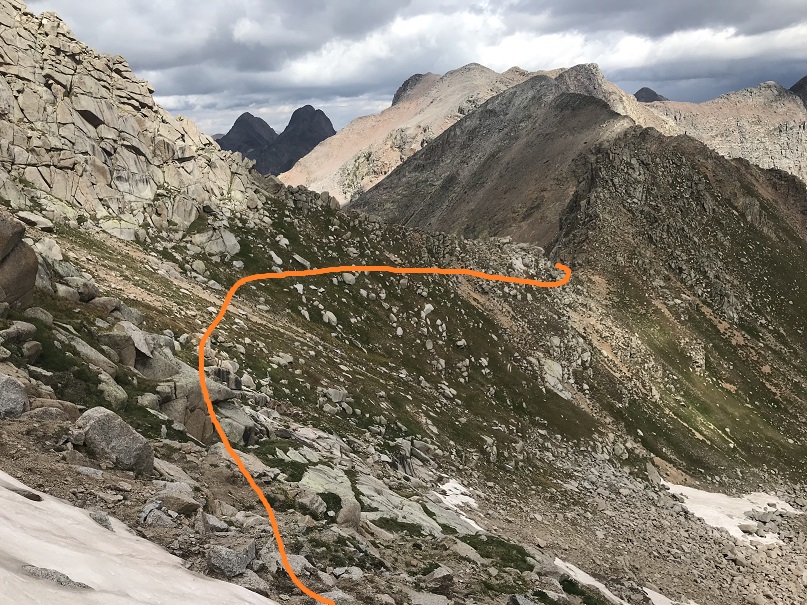
Here’s the route to my campsite (note I camped below the unnamed lake: I didn’t see a reason to hike all the way up there?) and the path out through the basin.
I made it back to my campsite around 12:45pm, making this about 6 hours campsite to summit to campsite: that’s a long time for 2 miles round trip! (I blame it on the rain…)
It had been my intention to hike back to my camping area, eat lunch, gather my gear, filter some water, and head back. Mother Nature had other plans. As soon as I made it to my camping area it started to rain, so I turned myself into a tarp burrito and rested for about an hour. When it became apparent the rain wasn’t letting up anytime soon I had some choices to make. I didn’t have any dry clothes but the ones I was wearing because I’d been unable to dry my wet clothes from yesterday. I could:
Stay where I was and wait out the rain and hike back the entire route tomorrow. By doing this I’d be chancing the snow forecasted for tonight and the conditions would be similar to today since the sun wouldn’t have been out to dry the rain
Hike back now in the rain and stop somewhere along the way to camp in wet clothes
Hike all the way to Purgatory in wet clothes (approximately 20 miles)
I knew I’d gotten more sleep last night than I usually get in 2 nights time so I was well rested. I also knew if I tried to sleep in wet clothes I would just shiver all night (and sleeping naked wouldn’t have been any good since I’d need to put on wet clothes in the morning and hike out anyway, so I might as well just hike out now). I have a lot of energy and need to exhaust myself to go to sleep: staying put didn’t mean rest.
Curiously, the umbrella that had been there yesterday was now gone. I’m assuming a marmot took it?
I decided to hike out, so I packed up my gear (found my knife in my sleeping bag: It must’ve fallen out of my pocket last night) and in the beginning tried to use my tarp to shield me from the rain (in case you’re wondering, it didn’t work). I was soaking wet in the first 5 minutes. Everything, including my waterproof pants, socks, jacket, and shoes were sopping wet. I could actually see the water oozing out of the top of my shoes and when I put my arms down I saw water dripping out of my sleeves.
It rained. And rained. And rained. After about 2 hours I screamed (to no one in particular) ‘”STOP RAINING!” It didn’t work and it didn’t really matter: the ground and trees and bushes were going to be wet for days (the forecast called for more rain/snow).
My main concern was getting past the avalanche area while it was still daylight. I stayed north this time and went over some boulders, avoiding trees where I could, which ended up being the better idea. There was still no trail to follow, but I was able to pick up faint game trails at times through the 3-4 foot brush. The difficulty of the avalanche area was compounded by the rain and slick conditions. I was slipping and sliding over tall-grass camouflaged wet rocks and trees; the only consolation being I was doing it now instead of tomorrow (in worse conditions).
In case I didn’t describe it properly last time, the avalanche area is full of enormous trees and branches piled on top of each other in various states of decomposition and some areas are like trap doors: they looked olid but you could fall right through them. My shins and thighs and forearms are covered in bruises. My hiking pants are completely torn up and I’m in the market for a new pair. I kept falling and about halfway through my phone stopped working (I’m guessing because it was waterlogged). I didn’t dare get out my DSLR in these conditions so I mentally resigned myself to losing pictures/my track, which stunk because I really wanted them from this climb!
Thankfully I made it out of the avalanche area and back on the Noname Trail in the daylight, and from there booked it down to the Animas River. I wanted to get as much of this hike done in daylight as possible so I wasn’t taking breaks. I was taking “bend over to get the weight off my shoulders and pump my thighs up and down” breaks though, usually for 5 seconds worth of ujjayi breath before continuing on.
As I hiked I looked for fresh animal racks in the mud and unfortunately didn’t see any. There were brief periods where the rain stopped, but I’d only get about halfway dry out before it started raining again. I didn’t bother being careful crossing the creeks: my feet were already soaked, so a little creek water wouldn’t hurt any.
I made it to about a mile before Water Tank Hill when a man surprised me. He was dressed head to toe in rain camo. “Oh, I didn’t see you” I announced (well, duh) and we talked for a bit. He looked like a hunter but I noticed he had a tripod in his pack and guessed he was a photographer. He had an accent that suggested Eastern Europe. He was soaking wet as well and had no idea how he was going to get dry tonight. When I told him I was hiking back to Purgatory he first said “wow, that’s a long way!” and then asked me if I’d come this way on my way in. We had a laugh over 200 feet of “why am I doing this?” (Water Tank Hill) and then I was on my way.
I made it up Water Tank Hill and decided to take a short break. It was 8pm. I played with my phone again and was finally able to get it to turn off and reboot. Once it was done I was able to open my phone again: yes!!! I hadn’t lost my data and it looked like my tracker was still going. I was still soaking wet and my feet felt like I was hiking in water shoes, but this, this was a major win!
From here it didn’t take long to make it back to Needleton, where I breathed a huge sigh of relief, knowing I still had 11 miles to go but they would all be on a well established trail with no route finding. I just needed to keep going, slow and steady.
I’ve hiked the Animas River Trail several times, and it’s getting easier to know where I am and how much further I have to go, even in the dark. For the first time I didn’t see any campers (most likely due to the weather forecast). I stopped for another break at the base of the Purgatory Trail. Despite not having time to filter water I still had plenty so I didn’t filter any now. I had some peanut butter and was on my way again to hike the last 4.3 miles up to the trailhead.
I’ve done this last part three times: once in the daylight and twice now in the dark. Let me tell you, hiking up Purgatory in the dark is the way to go! The daylight sun in demoralizing. Sure, tonight I was soaked due to the rain, but I wasn’t gulping down water every few seconds to stay hydrated. Also, the first couple of times I hiked this trail I got frustrated due to all the ups and downs in elevation. It’s no fun to gain elevation just to lose it again. So I changed my mindset this time: I was going to have to do the last mile directly up from the river anyway: I might as well enjoy the downhill times while I could.
I made it back to my truck around 1:45am, making this a 46 mile hike with 11,481’ in elevation gain in 47 hours. I took off all my gear, cleaned myself up, and decided to take a nap before heading home. I tried for 30 minutes to fall asleep, couldn’t, and got up and just drove home (too much sleep yesterday?)
There had been a 30-70% chance of rain today from 12-5pm, but it had rained at 7am, 12-5pm, 7pm, 8-10pm, and as I turned my truck on to leave it started pouring again…
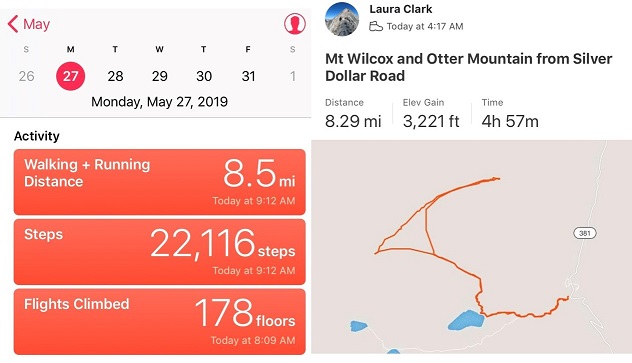
I’d already considered this a successful Memorial Day weekend: I’d climbed 3 peaks in the San Juans without (major) incident. Saturday I did all the “mom” stuff: Washed all the sheets, did the laundry, went shopping, vacuumed, re-planted a few plants destroyed in the storm last week, and took my daughter ice skating. As we were having dinner I asked my 16 year old what she wanted to do tomorrow? Sleep and study for finals. Hmmm… it looked like I had another morning free to hike! I didn’t want to do anything too far away because it was Memorial Day and I wanted to make something special for dinner, so I did a very quick search of peak conditions and settled on a peak I didn’t need much info to hike: Mt Wilcox.
Mt Wilcox is generally done as a loop with Argentine Peak and Square Top Mountain, but I’ve already done both other peaks previously and just needed to tick off this one in the area, making it the perfect choice for this morning.
Yes, Mt Wilcox seemed like a quick and easy 13er, and there was a close 12er I could hike if all was going well. I didn’t do much research but I also couldn’t find much information in the 10 minutes or so I spent gathering information. I looked at a few trip reports, printed out a shaded topo map and was ready to go.
I arrived at the Guanella Pass Campground / Silver Dollar Road trailhead at 4am and was on the trail by 4:15am. I put on snowshoes in the parking lot and kept them on for the entire hike. I did not regret this decision: they were a bit overkill in the morning, but very helpful on my way back.
I followed the Silver Dollar Road Trail for a little over a mile. The road was still covered in a few feet of crunchy ice.
I followed the road all the way to Naylor Lake, which was covered in ice as well. I steered clear, but it looked like others had recently tried to ski across it?!?!?
There were a few cabins here, some mostly covered in ice. There were footprints and ski tracks everywhere.
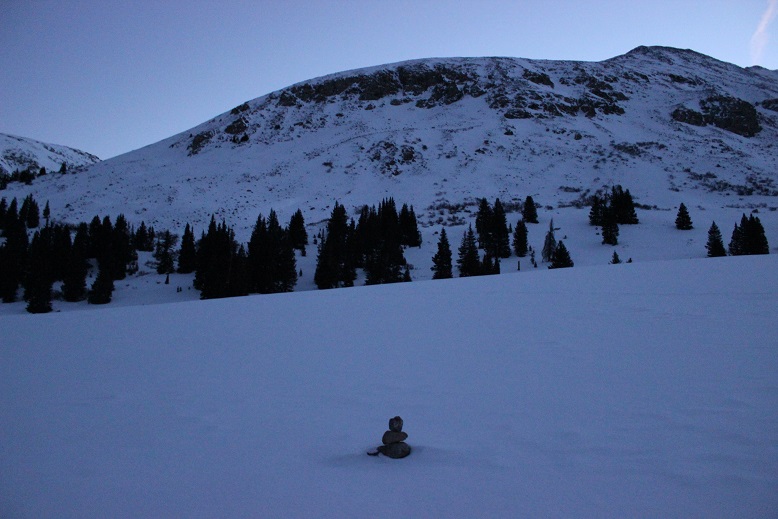
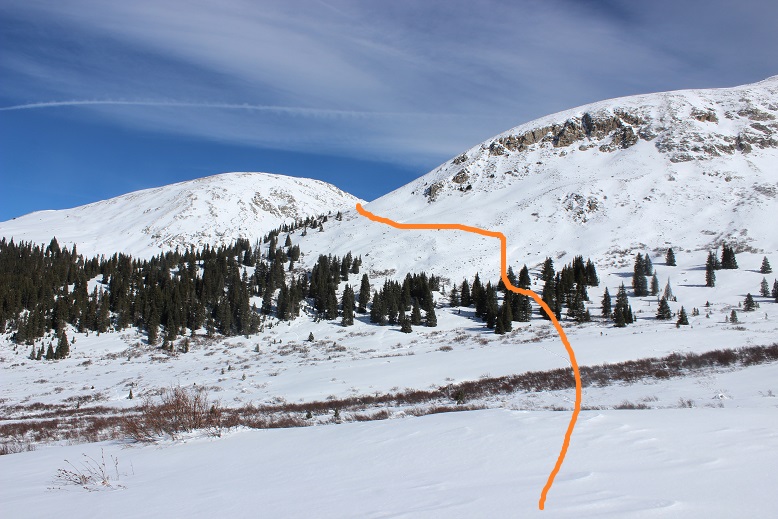
At the lake the trail ended and I headed Northeast through the trees and up a small gully to treeline
My beta told me to ascend here, to which (in the dark) I said nope.
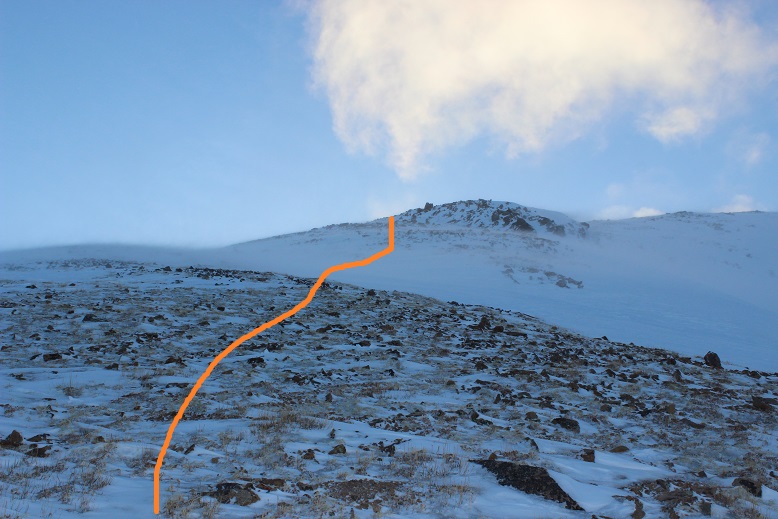
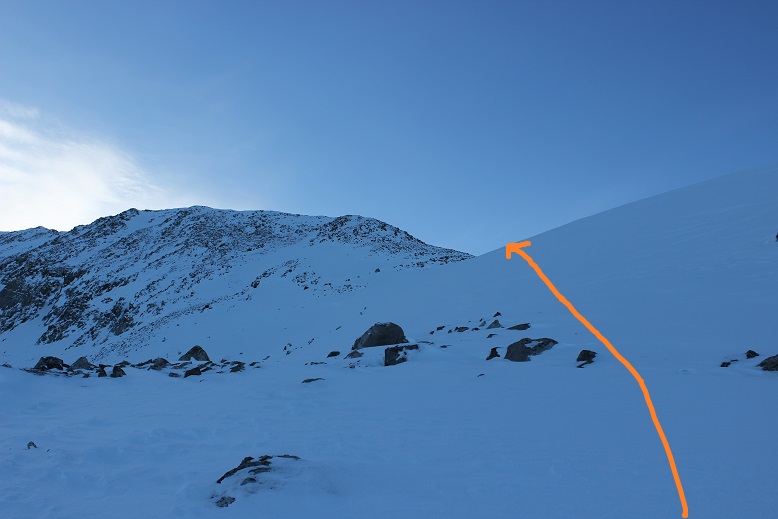
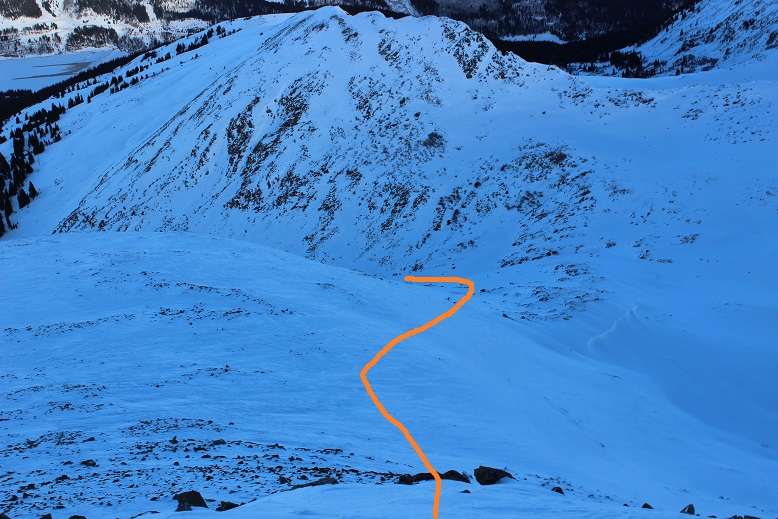
There had to be an easier way! I decided to trek along the small basin to see if there was an easier way to get up and over this part. I knew from looking at my topo map once I got above this area the terrain would just slope. I came to this point and thought to myself “this is doable”, picked a line, and made my way up.
It was still pretty steep, but nothing as dramatic as the suggested route. It’s amazing how snow changes things! On the topo map this area looked very similar to Elkhead Pass, which I was unable to downclimb, yet this was manageable.
I made it up this difficult area and then was greeted with a long white climb up snow
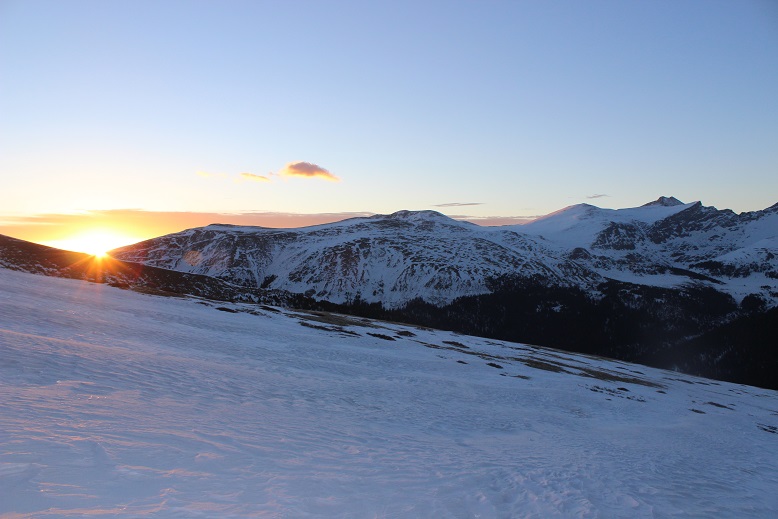
Every so often I’d look back, waiting for the sun to rise. The Sawtooth looks pretty cool!
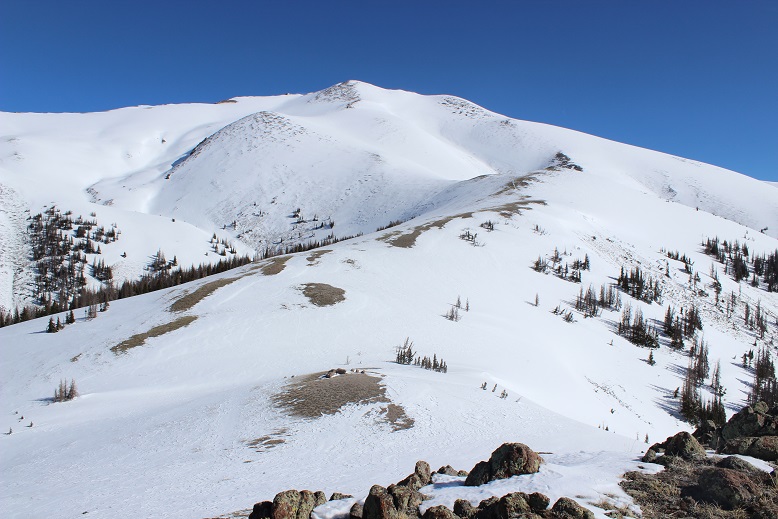
I kept heading west until I could see the summit of Mt Wilcox. When it came into view I thought to myself “That’s it? That looks too easy!”
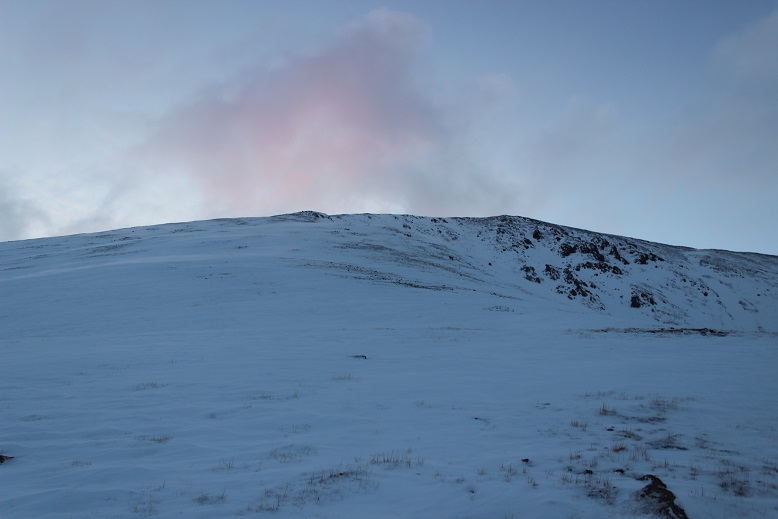
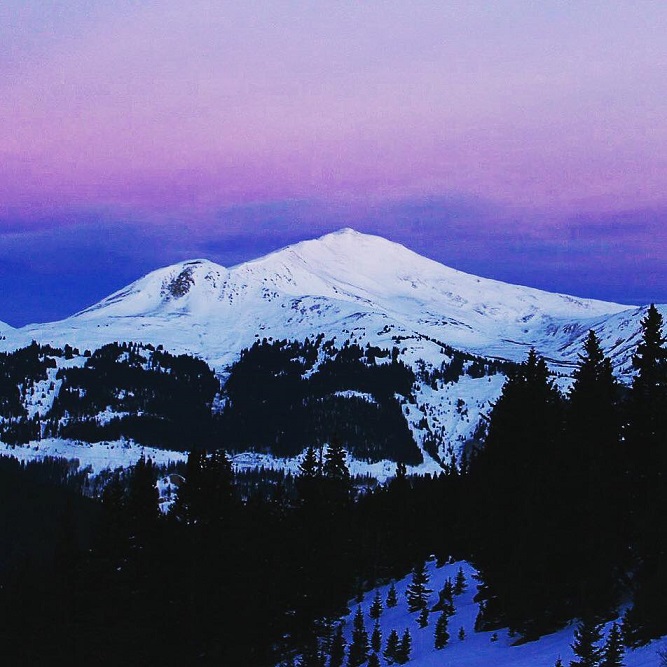
What I didn’t realize was it’s much further than it looks. I had a hard time focusing on the path ahead of me because I kept turning around to watch the sunrise. Alpine sunrises are the best!
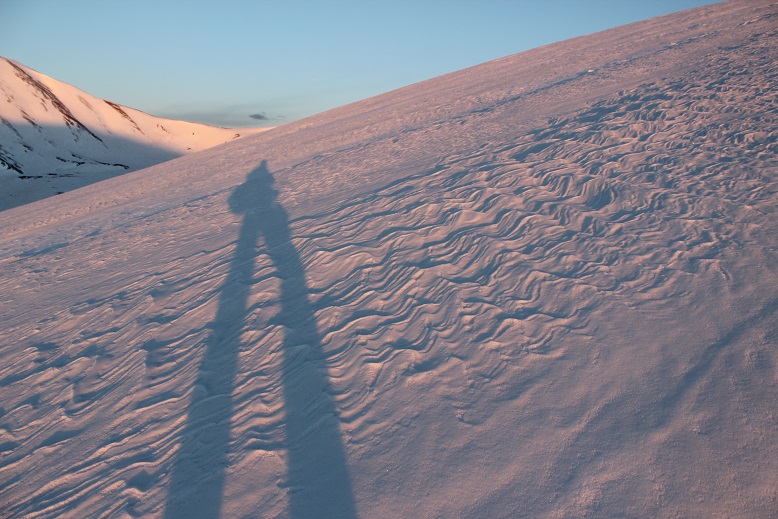
They turn the snow pink for 5 minutes or so
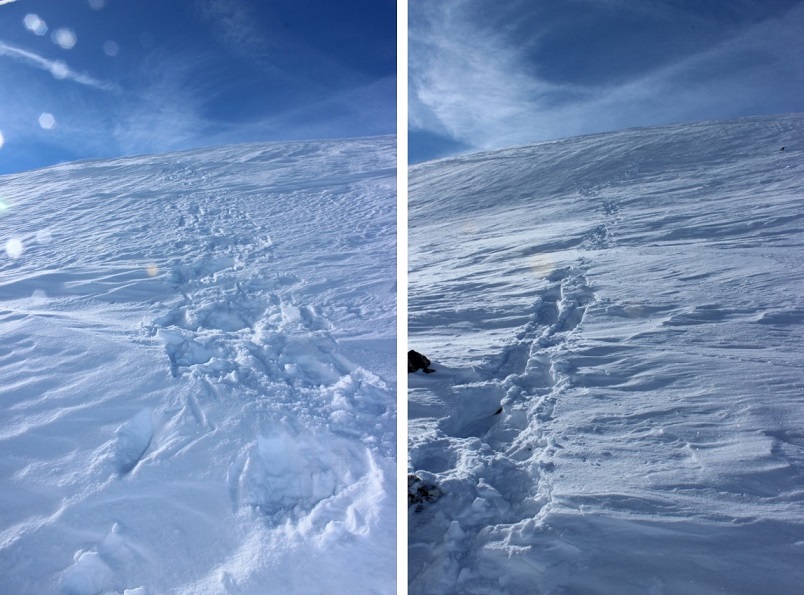
The snow here was very consolidated and easy to navigate. I wasn’t making any tracks though
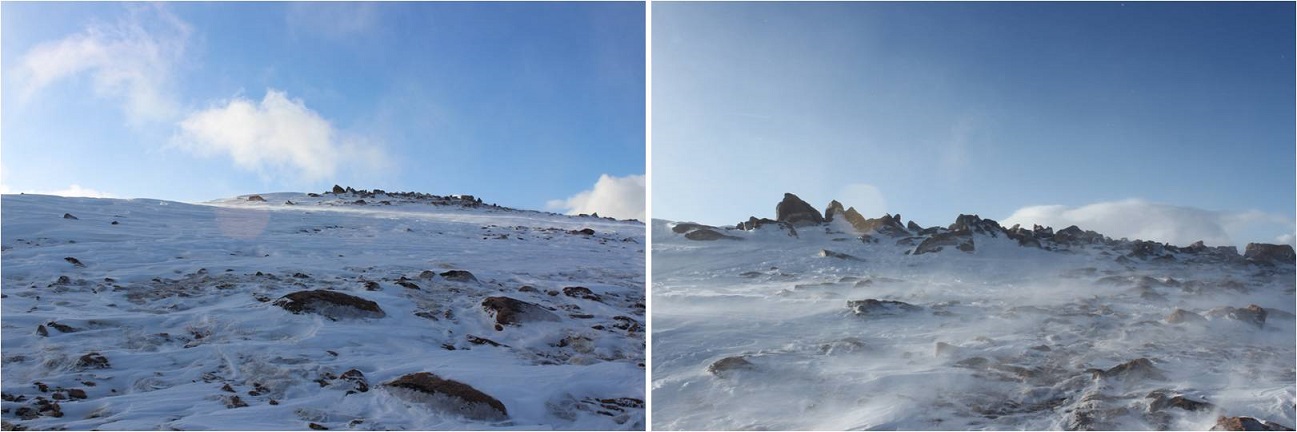
This hike wasn’t very challenging, but it didn’t seem like I was getting any closer to Mt Wilcox
I’d climb over one area, just to be greeted with another slope
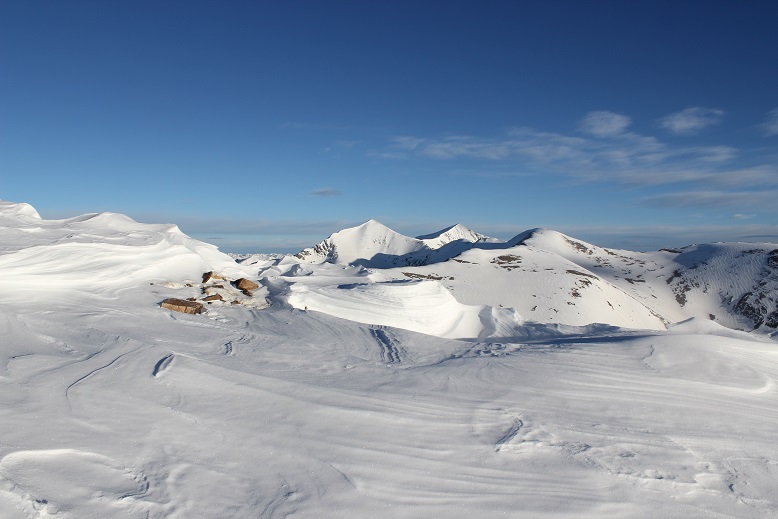
The summit was snow covered, with amazing views!
The hike to the summit hadn’t taken me very long and I wasn’t tired, so I decided to head over to Otter Mountain.
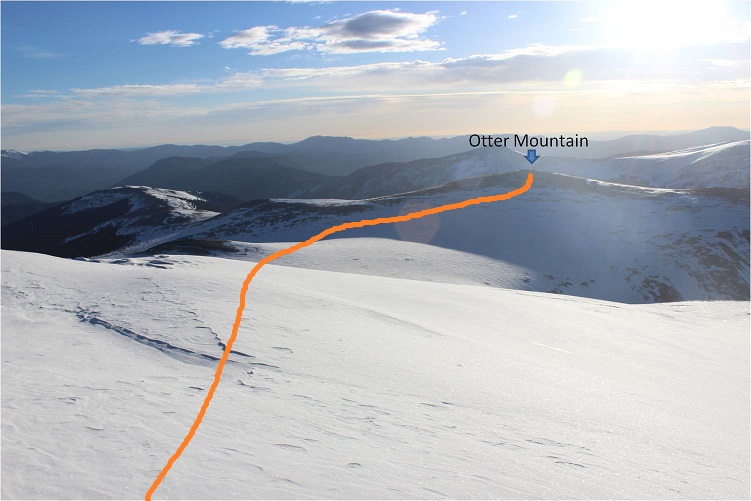
This was very easy. I hiked northeast down the slope of Mt Wilcox to about 12,300’ (losing about 1100’ in elevation) and then just ascended Otter Mountain
Here’s a look back at Mt Wilcox from the base of Otter
The only downside (besides the 400+ feet in elevation gain I had to regain) was the sun was rising as I was hiking up Otter Mountain. I was hiking directly into the sun, which was less than ideal
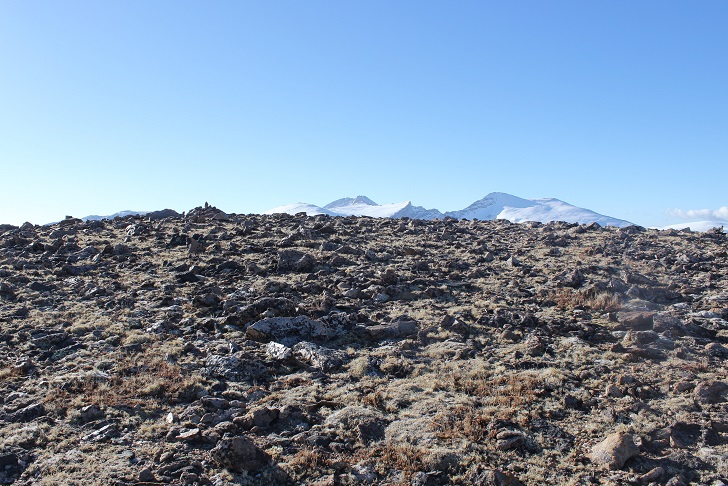
I kept trying to race the sun, trying to make it to the shadows, hiking faster than it was rising, and when I was almost to the top I won!
The last 100 feet or so in elevation gain were on dry tundra, so I took off my snowshoes and hiked the rest of the way with them in my hands
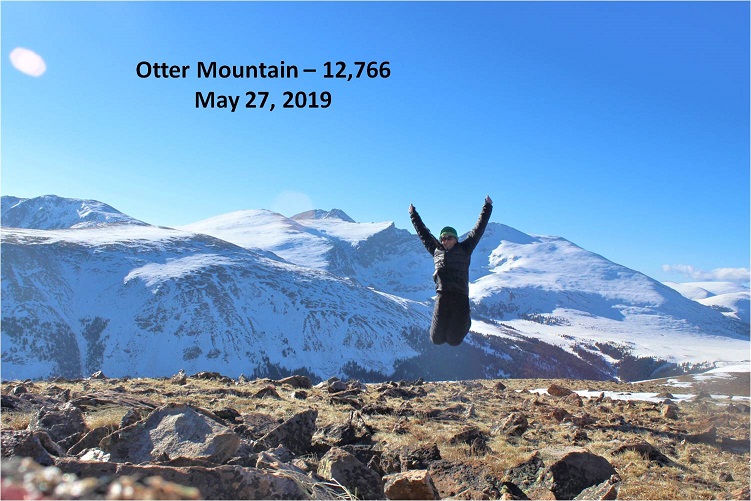
One thing I really like about 12ers is it’s easy to breathe while you’re hiking to the summit. I turned around to look at Mt Wilcox and the path I’d taken
Time to head back. I knew I could just take the slope of Otter Mountain down to the parking lot,
But I wanted to get day pictures of the hike, so I made it a loop. I stayed high to avoid the drainage area (which was a serious drop from every angle). Here’s the path I took back
Just Because…
And a look back at Otter Mountain and the route I took from the Mt Wilcox ledge area
Time to try and find my tracks and head back down! Another reason I wanted to make this a loop was to see how difficult the downclimb would be. I can climb up terrain no problem, but the downclimb still puts me on edge sometimes, and I considered this great practice without too much commitment (a fall wouldn’t be too far and it would land me in the willows).
I hate saying this, but once again, it’s steeper than it looks
I made it down successfully to the willows
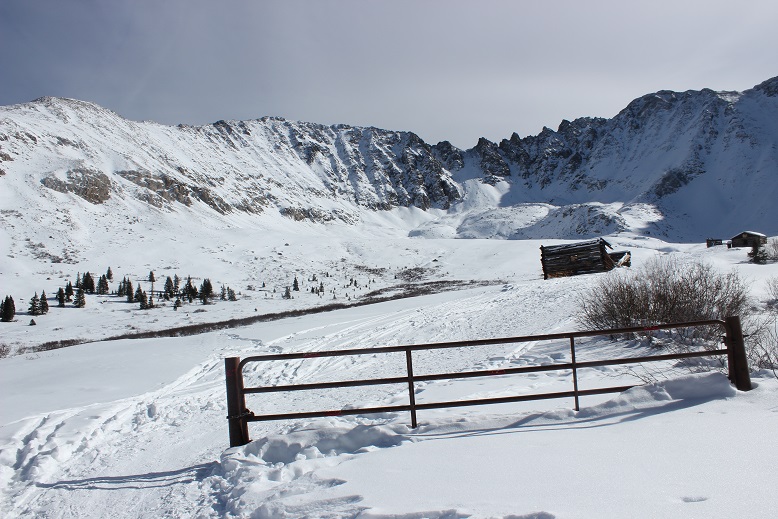
And trekked back to Naylor Lake. It looked like someone had been skiing in the area recently. As I passed the cabins I noticed a “No Trespassing” sign near an open gate. Note: in the dark on the way in I hadn’t seen the gate OR the “No Trespassing” sign. It wasn’t reflective and had been covered in snow. The gate was 90% covered in snow, open, and had tracks going straight through it. The rest of the hike was done in slushy conditions, even though it wasn’t yet 9am. I was glad I’d worn snowshoes. I made it back to my truck at 9am, making this an 8.5 mile hike in under 5 hours. I made it home by 11:30am, 30 minutes before my promised 12pm arrival.
OK, so obviously all I thought about on my way home were those “No Trespassing” and “Private Property” signs. I was mad because I hadn’t realized this was private property and because I’d been following tons of footprints (meaning others hadn’t been respecting private property either). I was mad at myself for not doing more research before the hike (I hadn’t checked maps that would have given me this information) and I was upset all the trip reports I’d looked at (although few) hadn’t mentioned private property and I’d taken their advice. Also, I kept seeing NFS trail signs, so I had no idea I was on private property.
The first thing I did when I got home was look up a map and find a way to fix this. I didn’t have this map on my trek: I made it when I got home. (The topo I had just had slope angle and terrain, and didn’t include the lakes (etc)). Please don’t take my route (the dotted line). There’s another route you can take to the left of Naylor Lake that will get you around the lake, looks easier than the route I took in some areas, and will keep you on public lands.
Also, I will gladly donate tons of Girl Scout cookies to the Naylor Lake Club as penance (and you should close your gates and put up reflective signs for us early birds if you don’t want trespassers… just sayin’).
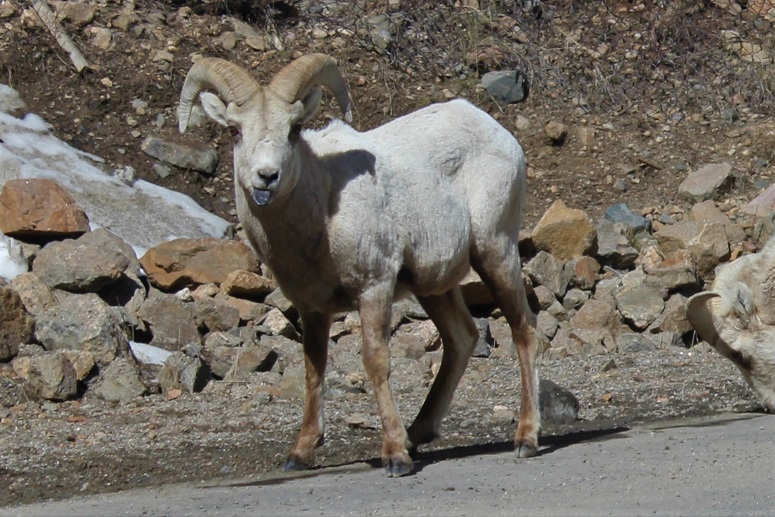
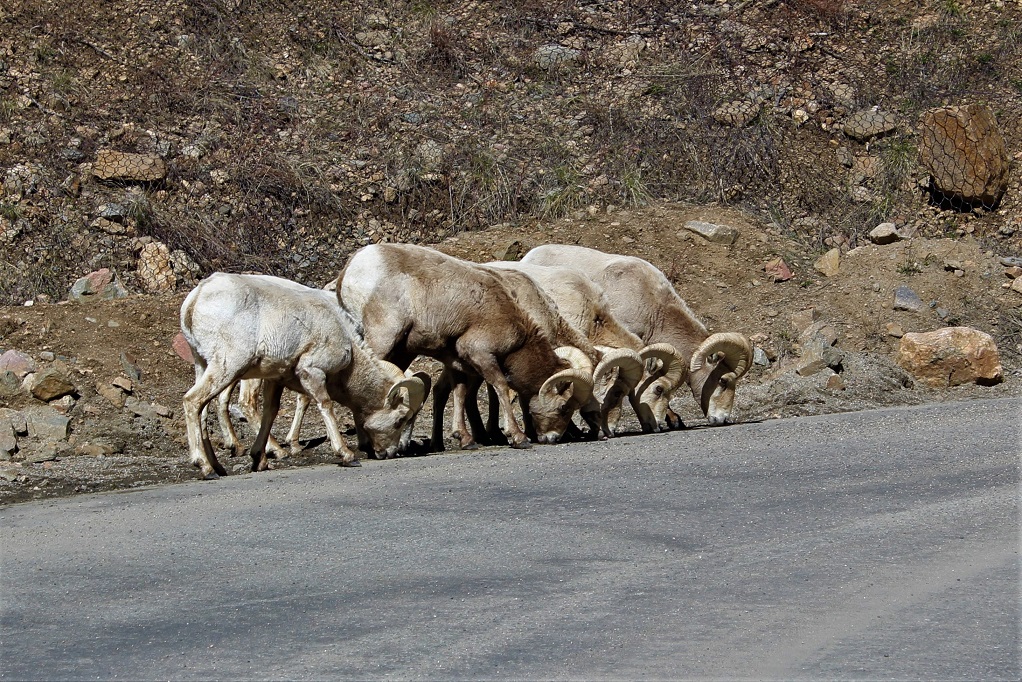
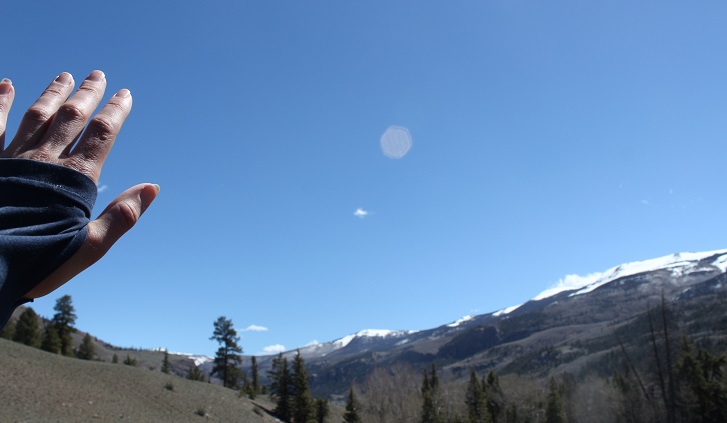
The best part about my hike? I met some friends by the side of the road on my way down!
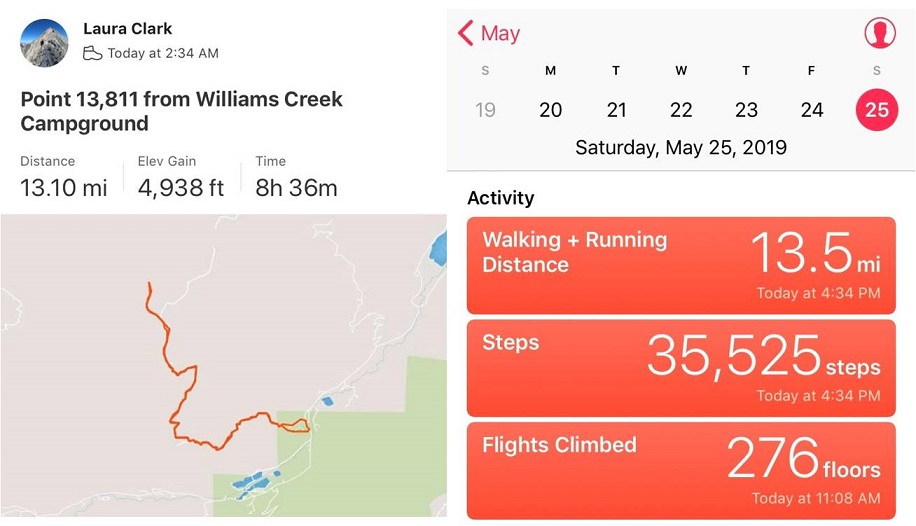
So far this weekend nothing was going as planned. I took a 2 hour nap before getting up at 10pm to drive the 6 hours to the trailhead. I’d wanted to hike Point 13,811 today but ended up getting “lost” (apparently there are two Williams Creek Trailheads geographically close to each other) and long story short the workaround was a 3 hour drive, so I missed my window to climb Point 13,811 safely yesterday. What really stinks is I’d printed out the correct directions, set my GPS to the incorrect campground, and when my GPS took me a different way I didn’t challenge it, I just figured I was headed in the back way (face palm). Lesson learned.
Well, I’d driven all this way and wasn’t going to drive back without a hike. I switched my plans and decided to hike 13ers Baldy and friends instead.
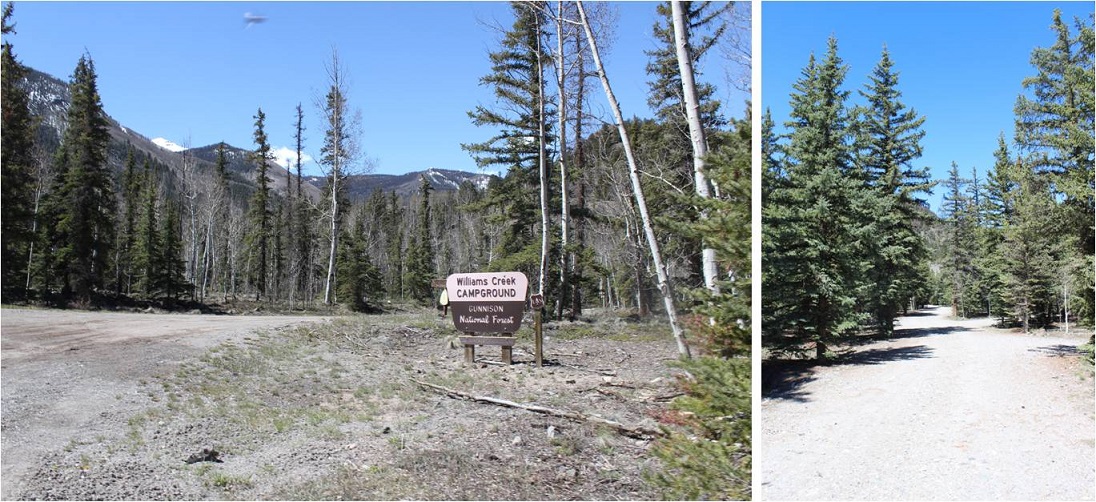
After hiking Baldy and friends I drove the 30 minutes to Lake City and the William’s Creek Campground. There was tension in the air in Lake City. The residents seemed to be on edge, and for good reason: Avalanches have closed the popular 4WD roads in the area and now the residents are worried of flooding when those avalanches thaw. Apparently so are the tourists because they aren’t here. This is Memorial Day weekend, and the city looks like a ghost town.
I drove to the campground and was surprised to find not one of the campsites was taken. Not one.
I stopped to talk with the camp host and she told me she’s never seen it like this before. Her voice was quivered as she worried it would be like this all summer. I told her I was just interested in sleeping in my truck near the trailhead but wondered what to do since the trailhead was inside the campground? Should I just park on the road and hike in? She told me to just pick any spot I wanted and I could camp for free. I offered to pay, and she refused. Wow!
She was also concerned I was going out there by myself with “all that snow”. I told her I’d be fine and I’d be gone by noon, but if my truck was still here at night she could start worrying about me.
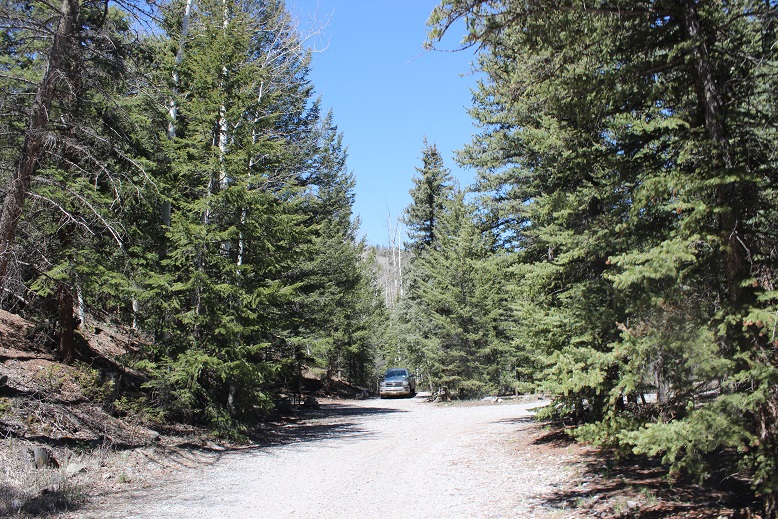
The trail starts at the back of the campground between spots 11 & 12, so I backed my truck into spot #12 and prepared to make it an early night. A quick wet-wipe bath, 4 packages of tuna, a roll of Ritz crackers, and 3 shots of whiskey later I was sound asleep (by 3pm).
I woke up twice during the night but was able to quickly get back to sleep. When my alarm rang at 2am I was not a happy camper (I’m not a fan of sleeping at trailheads: getting up is the hardest part) but forced myself out of my warm sleeping bag and got ready for the hike. I made myself eat a bagel as well (I don’t like to eat in the morning, as it makes me nauseous while hiking, but I knew I needed the calories). I was going to drink water on this hike too for two reasons. 1) I was dehydrated from not drinking anything yesterday (except 3 shots of whiskey) and 2) hydration is important. I just hoped it didn’t make me nauseous.
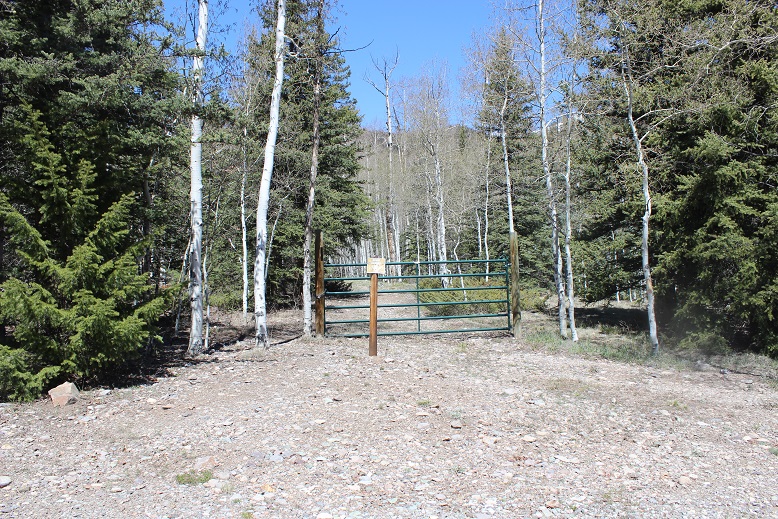
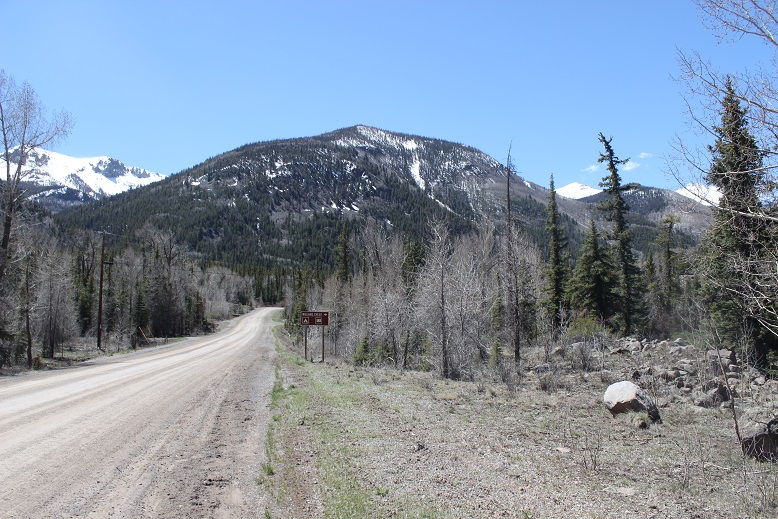
I’d done so much research and knew I wanted to make it to treeline as the sun rose, so I needed to be on the trail early. It was 4.5 miles of intense elevation gain to make it to treeline, so I started today at 2:30am, passing through the gate between sites 11 & 12.
The first part of the trail was dry.
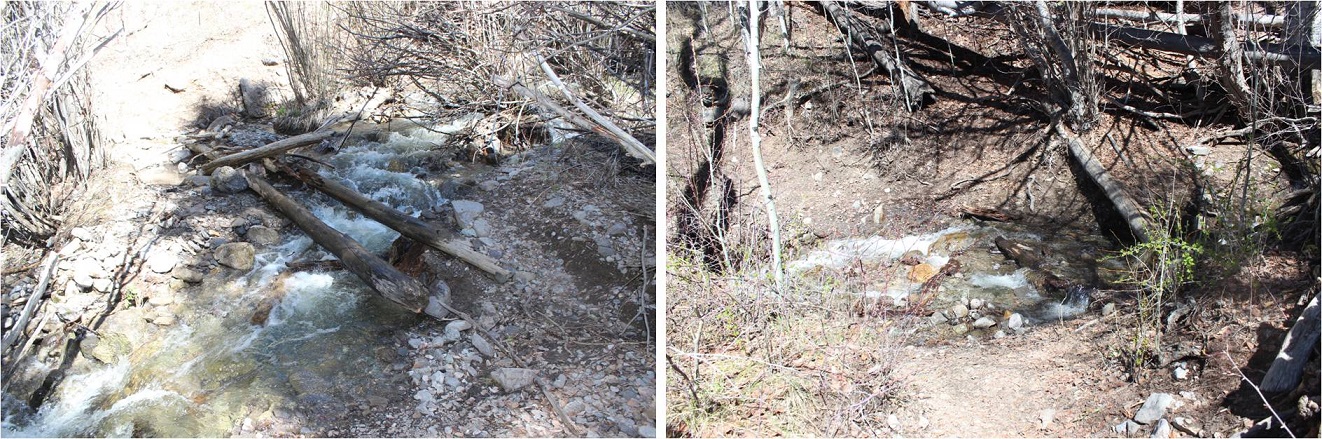
The trail was easy to follow as it crossed a few streams and skirted the south side of the mountain. The stream crossings were a bit tricky in the dark, as everything was slippery and loose and the water was flowing fast. Any logs you see that look stable over the water are in fact, not.
I could see lots of evidence of deer/elk/moose in the area (all 3 determined by the scat I saw) but didn’t see any wildlife.
The trail passed by a few ponds. The first one I had no trouble navigating in the dark
The second one is where I had some problems. The correct thing to do here is to go left and hug the side of the slope. In the dark I didn’t know this and instead followed what I thought was the trail (but was really the creek). Luckily this only lasted a quarter mile or so and I was back on track. I didn’t even know I’d done anything wrong until I was hiking back and could see the obvious (and dry) trail above me. The solid way is the way you should go, the dotted one is the way I took. My advice: stay high, stay dry.
Directly after I found the trail again I was in a rocky basin. However, I didn’t know this at the time, I just thought I was following a good trail (with a little bit of solid snow). On my way back I realized it was a rocky basin.
Here’s where the “fun” began. We’re currently right in the middle of spring thaw after an intense winter season. At this point the trail conditions became less than ideal as the spring melt became a river in the middle of the trail
You can imagine how much fun this was to hike in the early morning dark when it was still pretty icy. I came to a small meadow and followed it through what had become a springtime marsh
This area did not smell good: It smelled infected. Just after the meadow is where the fun began, as I was now on a very small and “defined” jeep road. There were several areas with large downed trees covering the trail. On my way back in the daylight this wasn’t difficult to navigate, but as I’ve found quite a bit lately, navigating downed trees in the dark isn’t a pleasant task. Luckily they were all within the same 200 feet or so on the trail.
Oh, and remember how the trail was covered in ice and water earlier? Now it was covered in ice and water and snow! So much fun! I hopped back and forth, trying to stay on the snow. Luckily it was consolidated and not too difficult to accomplish.
Here the trail became difficult to follow again due to the conditions. I was able to find the “jeep road” again at this point (here I’m looking back)
The steady snow began at 11,000’ and never stopped. The road was initially easy to follow, and then around 11,500’ I lost it.
In the dark I had no idea where the road had gone, but the snow was getting a little slushy so I put on my snowshoes and looked at my topo. I needed to head east to summit the mountain in front of me (12,000’). I aimed east and forged my own trail, amazed at how deep the snow was in this area.
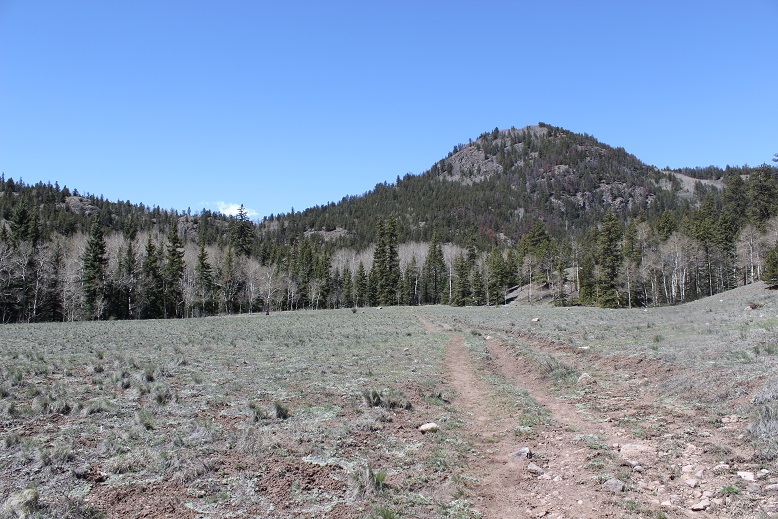
I made it to treeline, where both the wind and elevation gain quickly picked up. I was excited to get to the top of this hill (which was point 12,195)
Here’s looking back on the way I came up to treeline
My plan had worked! I’d made it to treeline just as the sun was beginning to rise
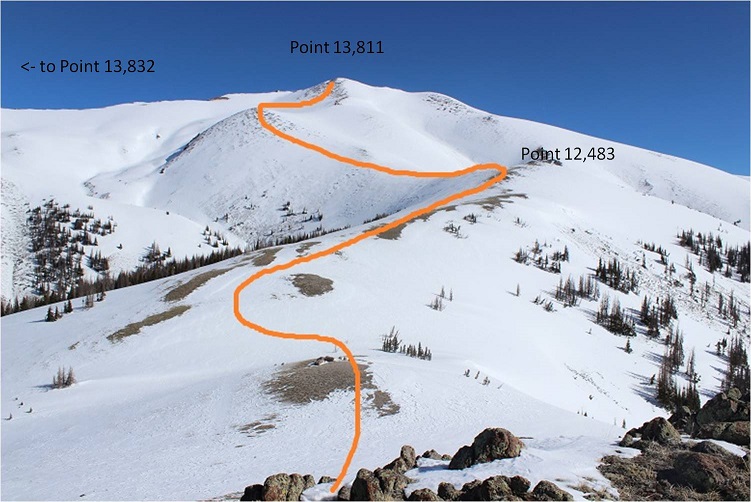
I took another sip of water and considered: I now had a clear view of the path to the summit. Here’s the route I took
It looks easy and straightforward, and it is, but there are a few things you should know:
Point 12,195 and Point 12,483 are not ranked (I know, bummed me out too!)
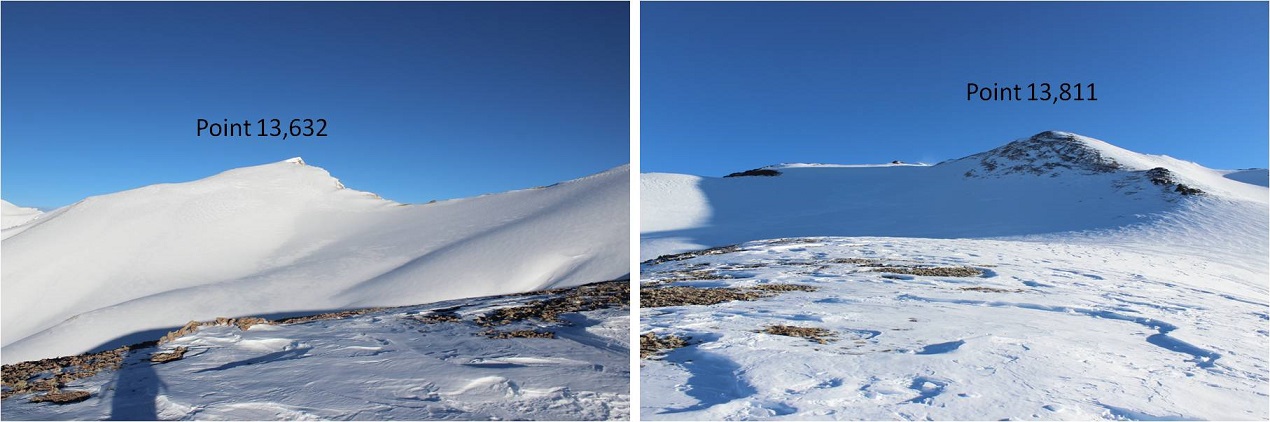
Neither is Point 13,632
The elevation gain is steeper than it looks
It’s longer than it looks (about a mile and a half, maybe more)
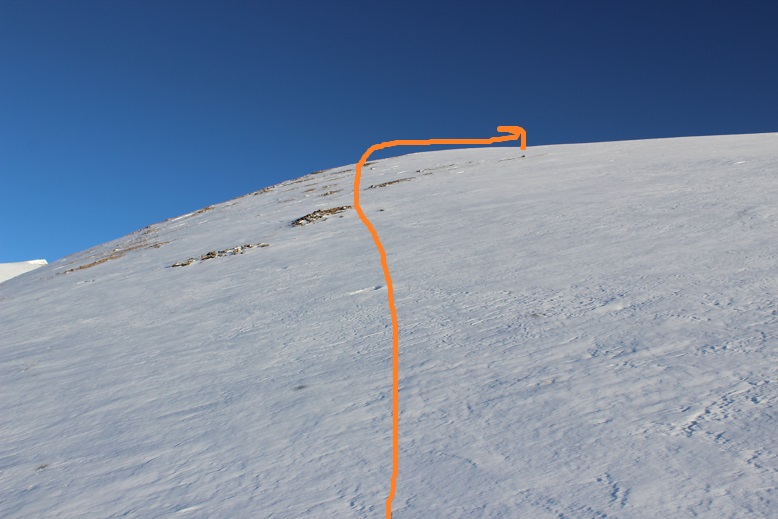
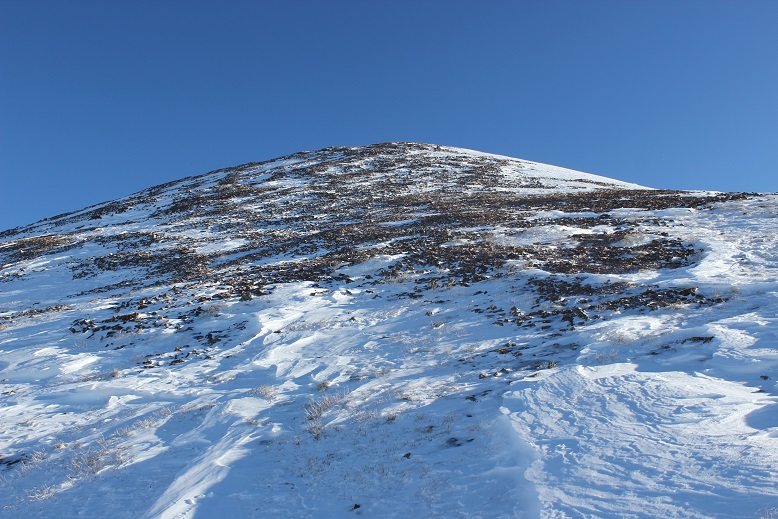
So I started on my way. I skirted Point 12,483 and started hiking the hill to the east (it looks like you can just go straight and hike the adjacent hill but you’ll hit a gully). So, you hike up and when you reach a small plateau you turn right and head north to the summit.
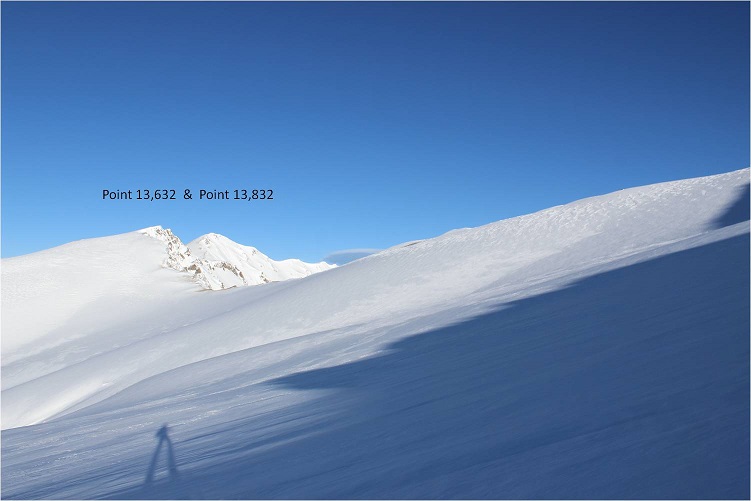
From the plateau if you look left you can see Point 13,632, and to the right is Point 13,811
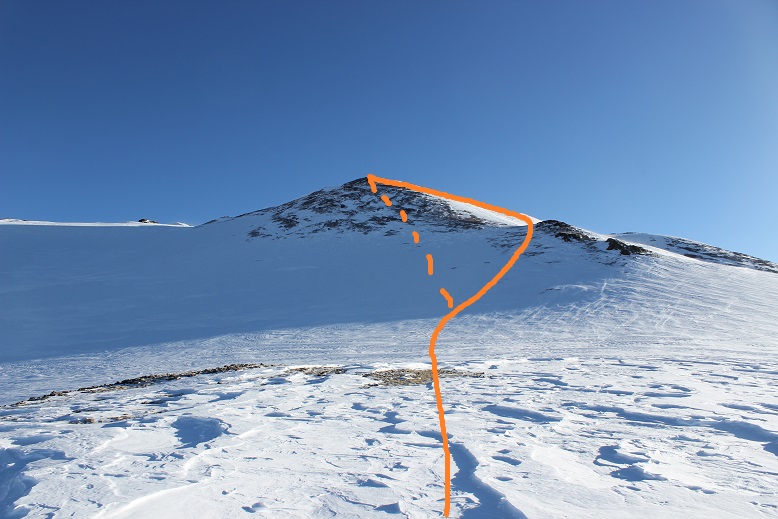
I headed north to summit Point 13,811. Here the snow changed and changed and changed, from consolidated to postholing to very slippery ice. This is the route I took. I took the dotted line up, and the solid line down.
I would NOT recommend taking the dotted line route. I repeat, DO NOT TAKE THIS ROUTE. It was nasty scree mixed with ice or snow, neither which provided any traction on the 30-35* slope. A fall here would tear up your gear and your hands if you weren’t wearing protection.
From halfway up I got my first good view of another centennial: Point 13,832 (and took a few more sips of water)
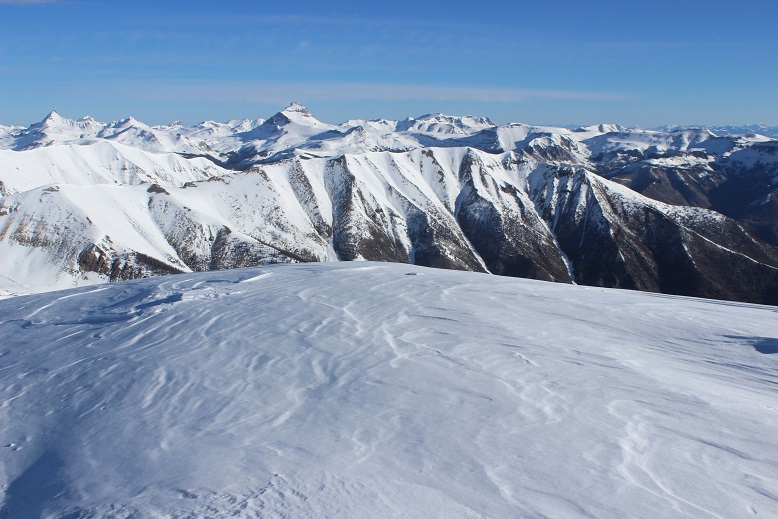
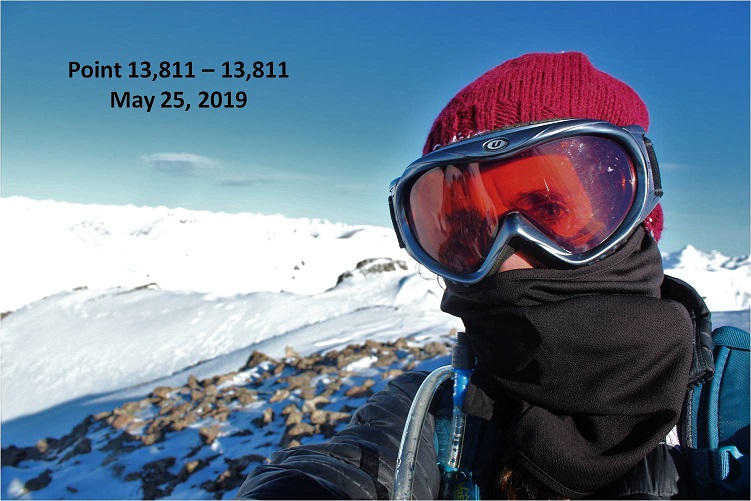
I summited to intense winds on a small cornice.
There was no place to set my camera where it wouldn’t slide down the peak so I did my best to get a selfie (sorry, it’s terrible) and looked around
I’d really wanted to hike over to Point 13,832 today and get in both centennials, but I didn’t feel secure on that ridge. In fact, I’d kind of expected it to be more wind-blown. I’d just hiked across snow that looked similar, and the conditions varied quite a bit. Parts that looked secure were not, and parts that didn’t look solid were. I didn’t want to fall and slide that far unsupported. The fall line was so long I couldn’t get it all in one picture
And so I mentally prepared myself to drive the 6 hours back to Lake City sometime this summer to knock off that other point. Time to head down. As I said before, this last 200 feet of vertical or so was not pleasant. I wasn’t going to do that again on my way down. Not going to happen. But the ridge wasn’t much better: It was all ice at a sharp angle, and when the ice gave way rocks went with it. I’m not gonna lie: I turned and faced the mountain at times for this part. Also, I love my ice axe.
I made it to the small saddle and looked at the rest of the route down
And started to get nauseous. Ugh! I knew this would happen! Well, at least I was descending in elevation. Here the snow had varying conditions as well, but less danger of injury
I made it to Point 12,483, over Point 12,195, and back down the trail, following my tracks below treeline. Here I discovered things I hadn’t seen in the dark (the correct trail, stream crossings, navigation around downed trees, rock piles, etc.) and a few things I hadn’t seen in the dark (notice the spider?)
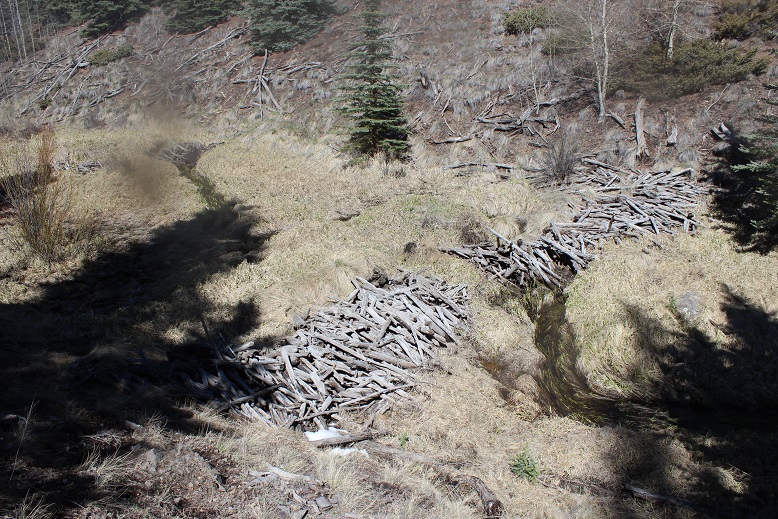
Oh, an old beaver dam…
I was almost done with the hike when I came to a fork in the road I hadn’t remembered, and decided to take the path more traveled. This ended up being a mistake (although not an unfortunate one). I quickly came to a trail register I hadn’t seen in the dark. It was designed for hikers over 7 feet tall, so someone had placed a large rock at its base. I still couldn’t see inside.
Now I was in a meadow. I wasn’t entirely sure I remembered a meadow at the beginning of this hike? Hmmm… things are different in the dark
As I walked through the meadow my arms started to hurt. You know what I’m talking about: your arms get sore from elevation and the blood pools in your hands and you do the “Praise Jesus” walk through the woods. Well, I was doing it now through the meadow
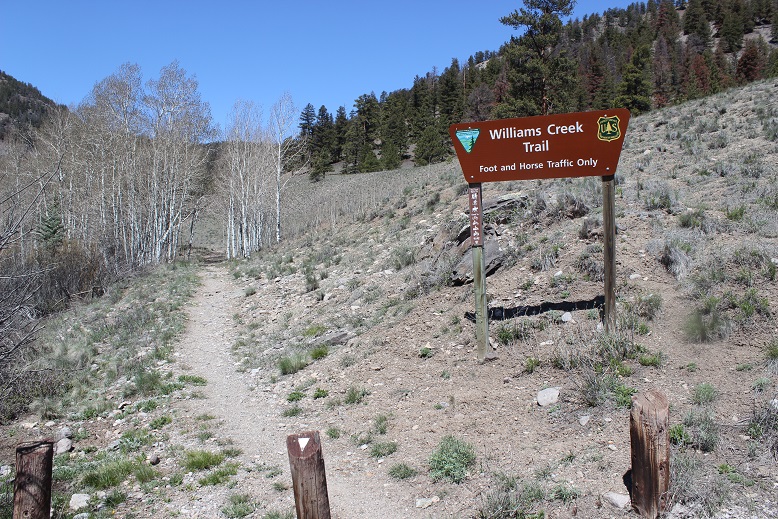
And then I saw houses? Wait. Uh oh. This wasn’t right, but I immediately knew what had happened. I exited the meadow and saw a sign I hadn’t seen on my drive in: A sign for the (correct) Williams Creek trailhead. Because of it’s placement you can’t see it driving in unless you know it’s there, but you can see it driving out.
I turned right and immediately saw the campground sign. Hmph. OK, so I guess I hadn’t needed to enter the campground to find the trailhead.
I felt really dumb, but not really because at least I knew where I was. I walked back to the campground, through the campground to my campsite, and stopped the clock. I made it back at exactly 11:11am
I’d hiked 13.5 miles with almost 5000’ of elevation gain in 8.5 hours.
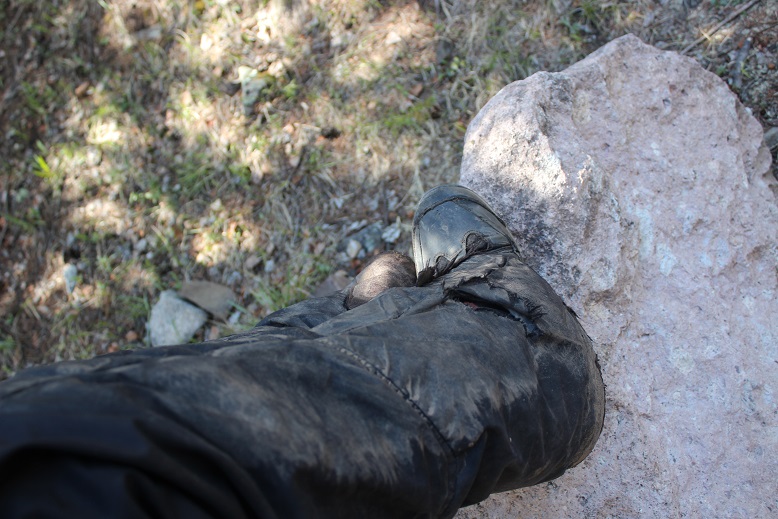
Oh, and check out my pants. I seriously need a new pair of winter pants. I’ve had this pair since 1998 when I bought it at a garage sale for $3. Last year my crampons tore a hole in them, and I’ve been sewing them up ever since, but I think it’s time for a new pair. This hole collects snow when I hike, which means I can stop every 5 minutes or so and unload 5lbs of snow-turned ice or I can carry it in my leg, limping unevenly as I go.
Added to that they’re bibs, which makes using the facilities unpleasant; especially when it’s cold outside. I’ve been looking for new snow pants for quite a while but I can’t find any in my size, and yes I’ve checked Goodwill and in children’s sections. Any petite ladies out there have advice on buying snow pants that fit (and preferably look good)? I think I’m seriously in the market for a new pair at this point…
On my way out I stopped by and thanked the Camp Host, wishing I had something to offer her in return (since she wouldn’t take money). Usually I give out Girl Scout Cookies but I didn’t have any this time. She asked me to let people know Lake City is open, half of the city is in no danger of flooding, and she’d love to have some campers! If you get the chance this summer, consider camping in Lake City at any of the campgrounds along County Road 30. They’re open (and empty). I drove through the Mill Creek Campground and it didn’t have any campers either…
Today was Mothers day, and what better way to celebrate than to go on a solo hike above treeline and let my kids sleep in? Yep, that’s what I thought too, so I made plans to be out and back before my kids woke up (they’re 16 and 20… they’ll sleep until 3pm if I let them).
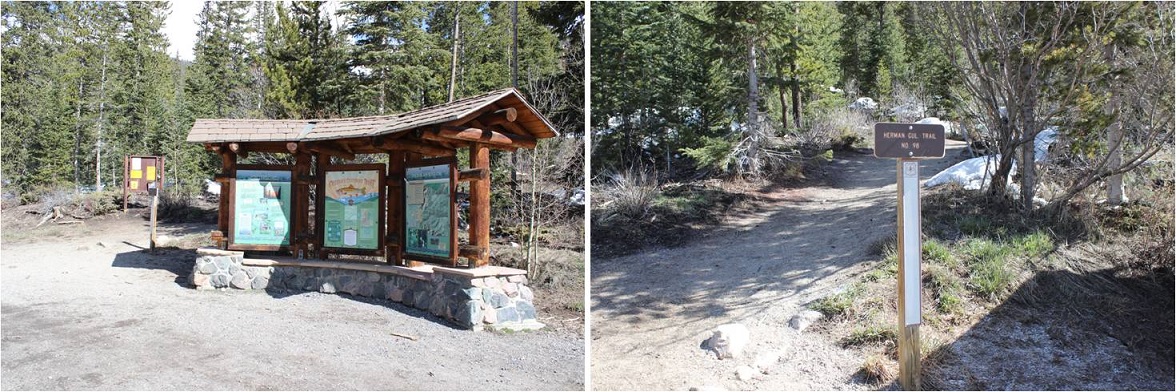
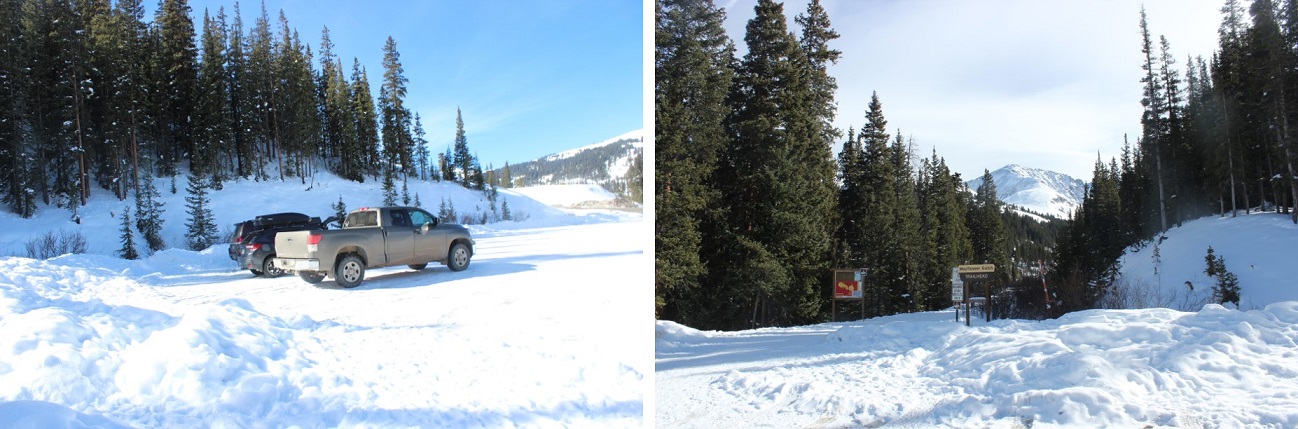
I couldn’t sleep, so around midnight I decided to just get up and go hiking, even if it was a few hours earlier than intended. I made it to what I thought was the Herman Gulch trailhead to a locked gate at 3:30am, got out my gear and began my hike, only to quickly discover I was not hiking the correct trail. It was immediately obvious and I knew my mistake, so I went back to my truck and re-parked it at the very accessible and open Herman Gulch Trailhead. There were bright orange signs warning me of avalanche danger.
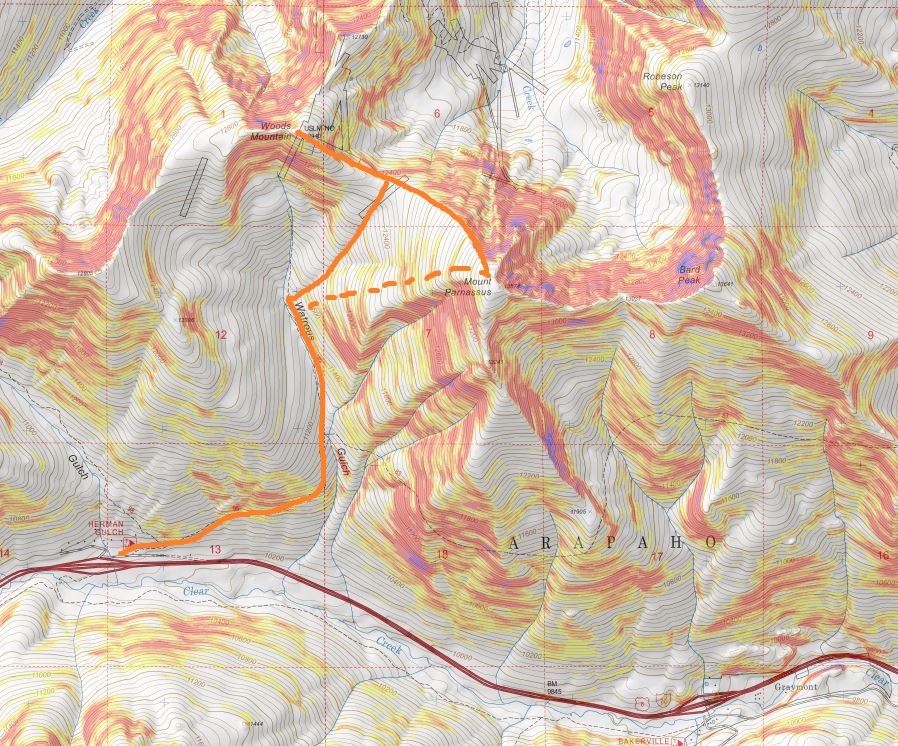
The trail starts just behind the information sign, and follows the Herman Gulch trail west.
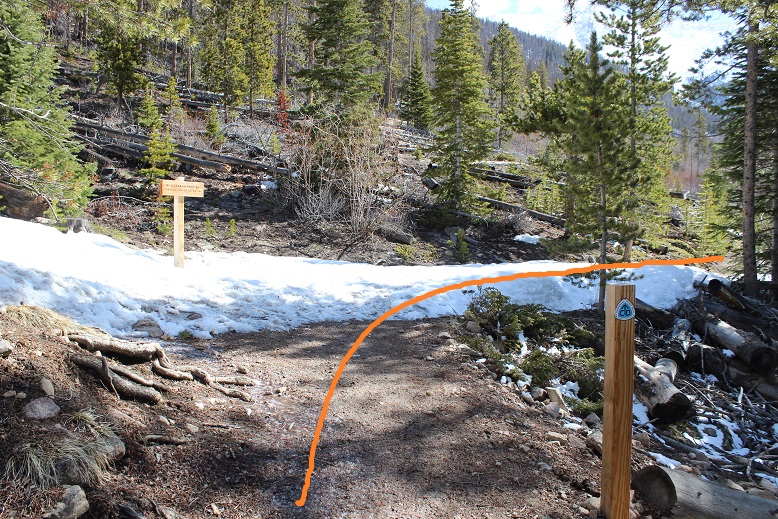
The trail was free of snow until I made it to the Herman Gulch / Waterous Gulch Junction. From here on out the trail contained continuous snow, but traction wasn’t necessary for a while. I turned right (east) at the junction.
As I rounded the ridge the snow immediately began to pick up, and in the dark I foolishly tried to walk up what turned out to be a path of solid ice. I immediately slipped and tried to catch myself, but ice is like glass and I cut up my right hand trying to brace myself against the impact and to latch onto something I could grab when I fell. It actually wasn’t that bad, but there was a lot of blood (it hadn’t been cold enough to put on my gloves yet, so my hands didn’t have any protection). I sat down, took off my pack and put my right hand in my mouth to clean up some of the blood while rummaging around my pack with my left hand, searching for my crampons. It looked like someone had taken a snowboard down the trail and smoothed it out, which is great for skiers and snowboarders but it made hiking up the path similar to hiking up an ice chute. Microspikes weren’t going to cut it this morning: I needed crampons. At 9000’.
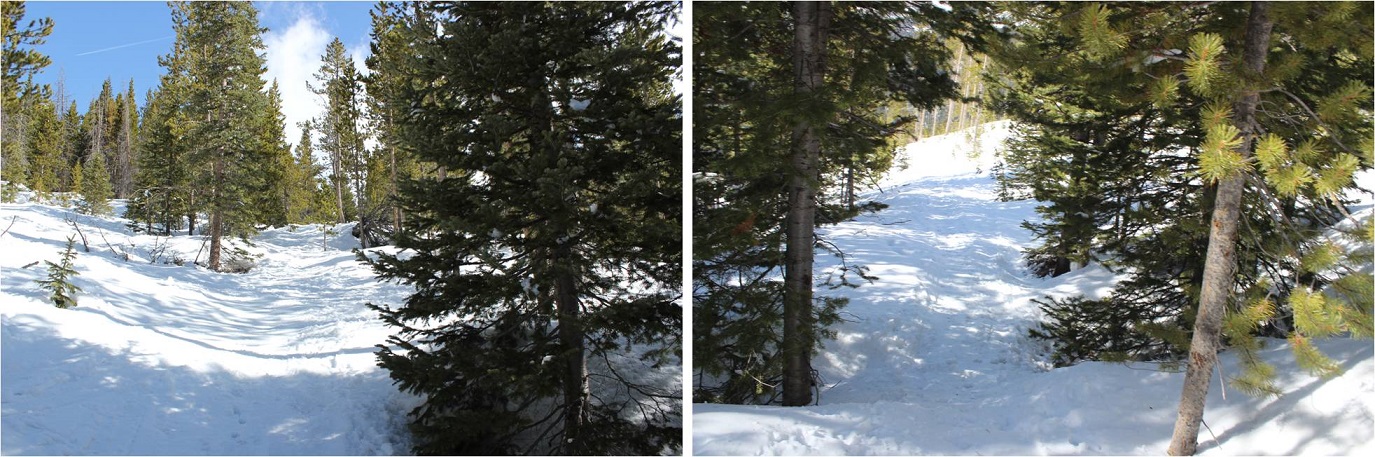
I stuck my hand in the snow and it immediately froze and the bleeding stopped. I kept my crampons on for most of the hike, mainly because I was too lazy to take them off and they weren’t getting in the way. The trail through the trees was easy to follow as this must have been a popular hike yesterday.
There were several parallel ski lines, but all tracks led to the same area. There was also evidence of several avalanches in the area. Most looked to be many years old, but some looked recent.
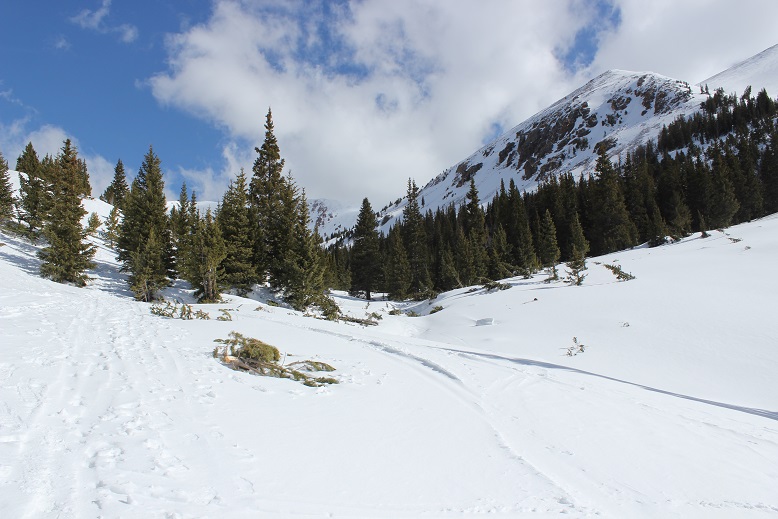
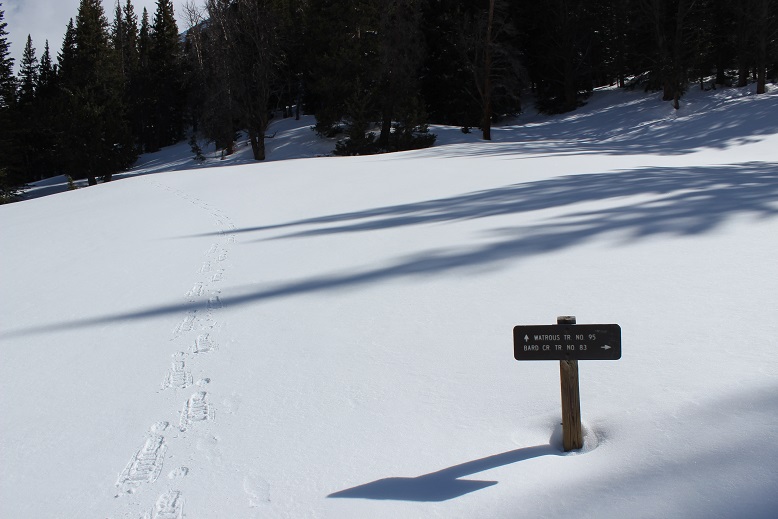
After about 2 miles I crossed over to the Waterous/Bard trail junction. I could hear water flowing underneath me, so this might be a creek in the summertime but it was covered in several feet of solid snow this morning.
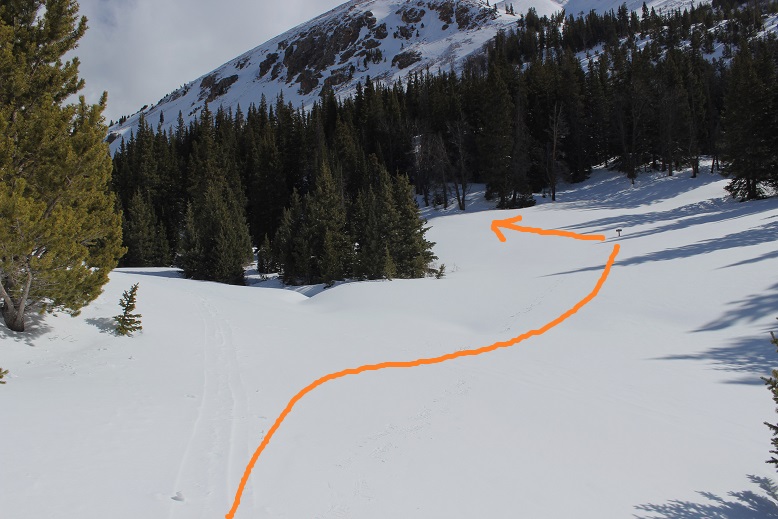
This is where the ‘trail’ stopped. I turned left and continued on the Waterous Gulch trail for about 1/3 of a mile along the east side of Waterous Gulch
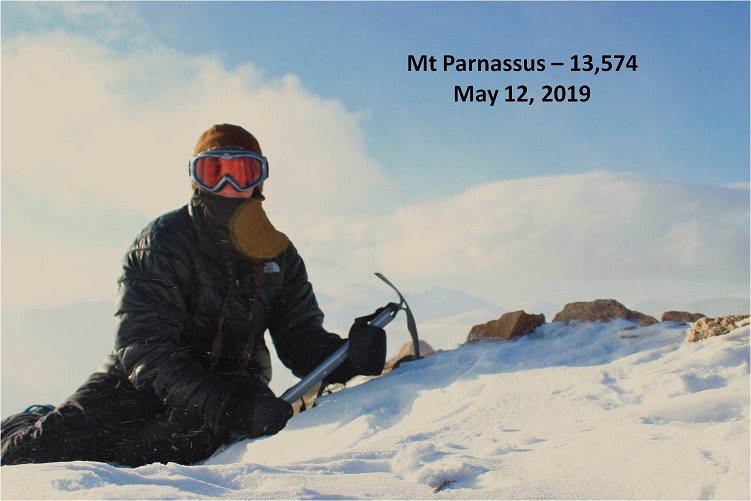
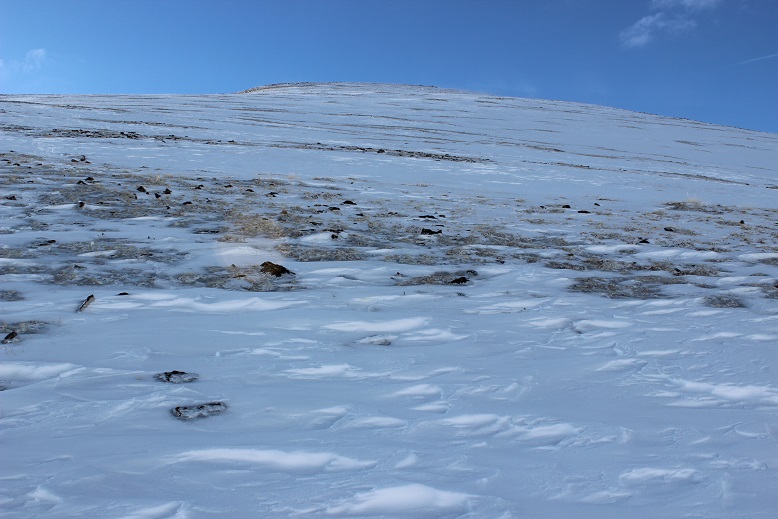
My research told me to hike up the west slopes of Mt Parnassus to the summit, so I turned right (east) here and started up (in the dark, so I couldn’t tell just how steep these slopes were at the time). I needed my ice axe, especially just before treeline as this area was loaded with steep snow.
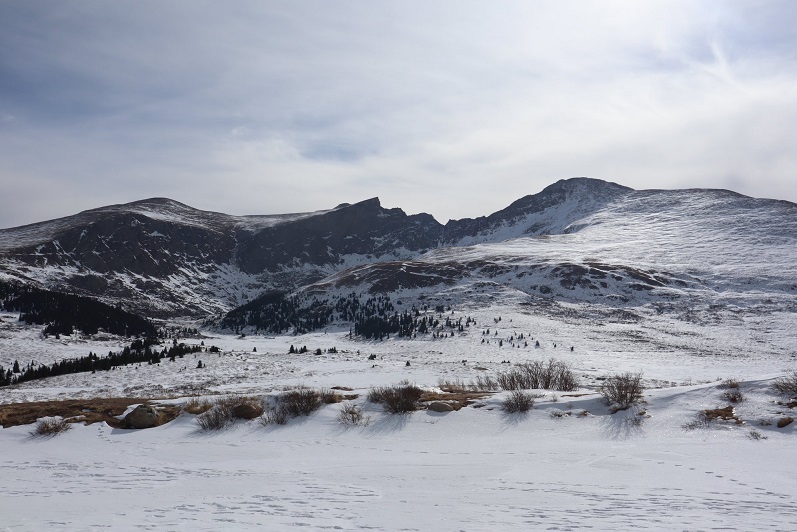
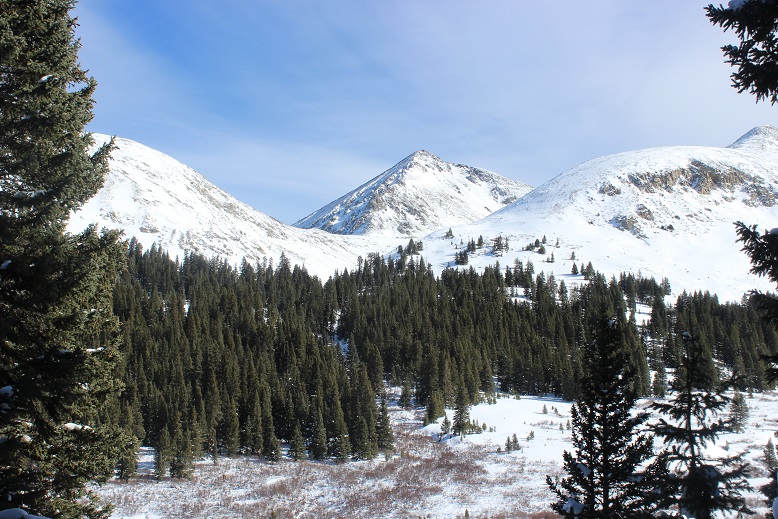
What awaited me was 2000’ of elevation gain in about a mile. I made it past treeline just as the sun was beginning to rise
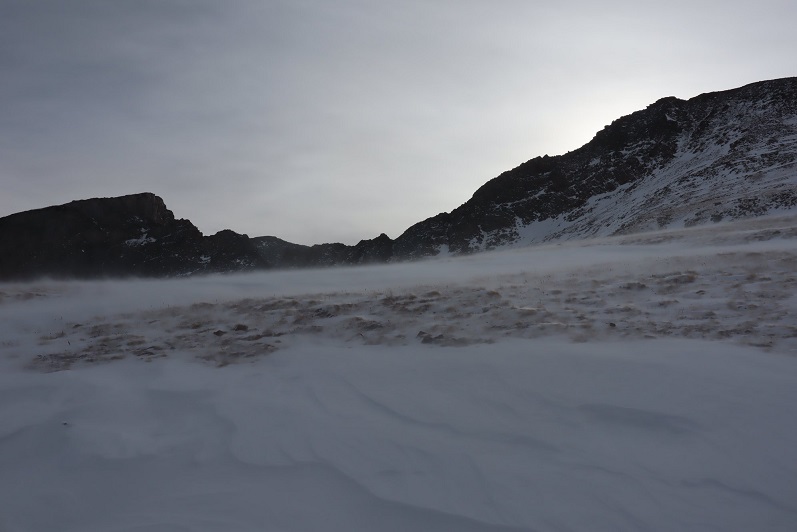
The only downside? This is where the wind picked up, and I mean picked up! The forecast had called for 15mph winds today, but these were much higher, and sustained. The wind didn’t seem to care about one direction or another: it kind of swirled around as it blew past. I put on my balaclava and every time I saw a gust coming turned and braced myself against the mountain, waiting for it to pass. It was too early to put on my goggles, so shielding my eyes was especially important, as it felt like shards of glass were flying at my face.
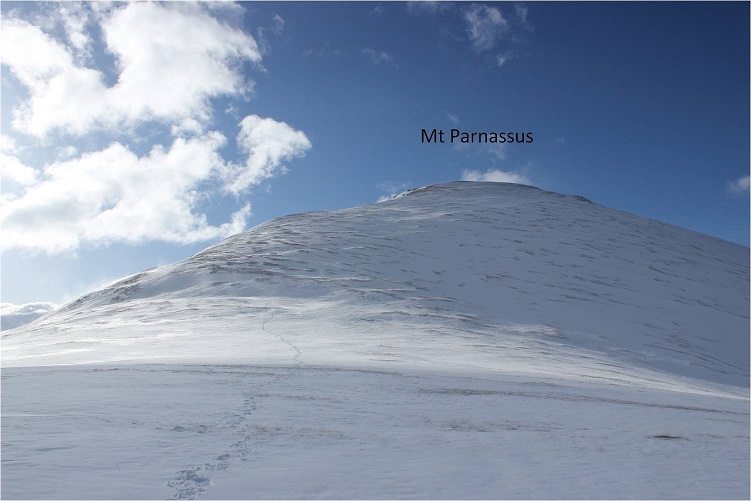
Every time there was a break in the wind I’d look ahead, find a new landmark, and hike towards it. Here’s the route I took over the first hump
And second hump
And third hump (these sections are all much longer and steeper than pictures make them look)
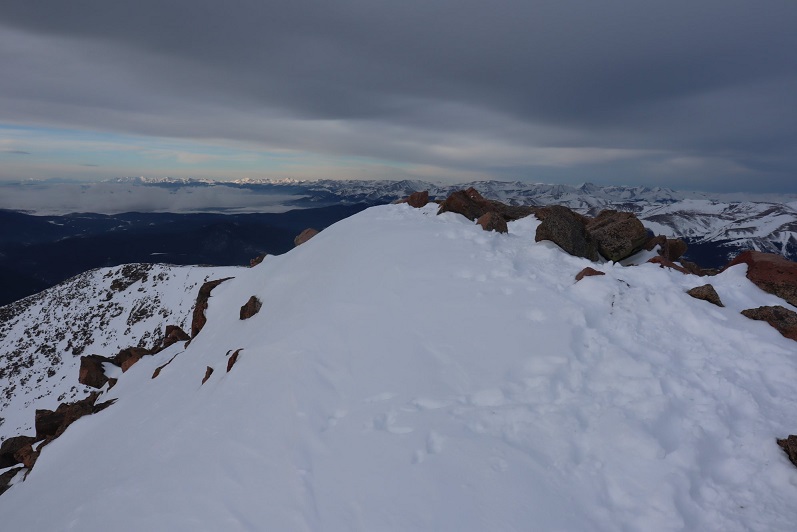
Until I could finally see the summit!
That wind hadn’t let up so I didn’t stay too long on the summit.
I took a summit photo that didn’t turn out too well because of the wind and blowing snow
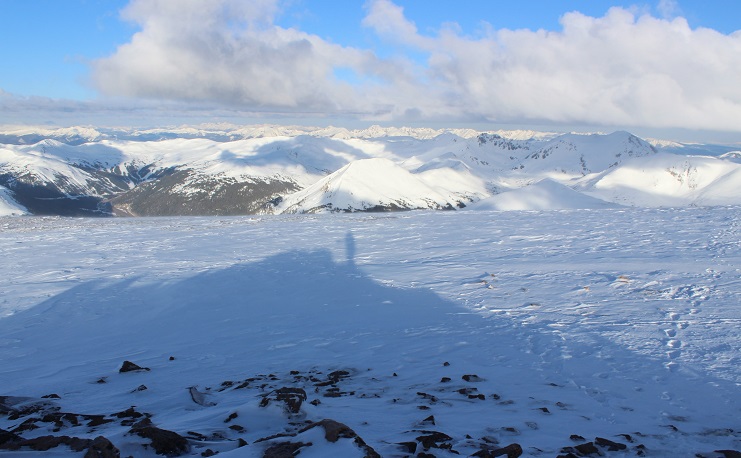
And waited for a lull to get a shadowselfie. Check out all that snow! Amazing for the middle of May!
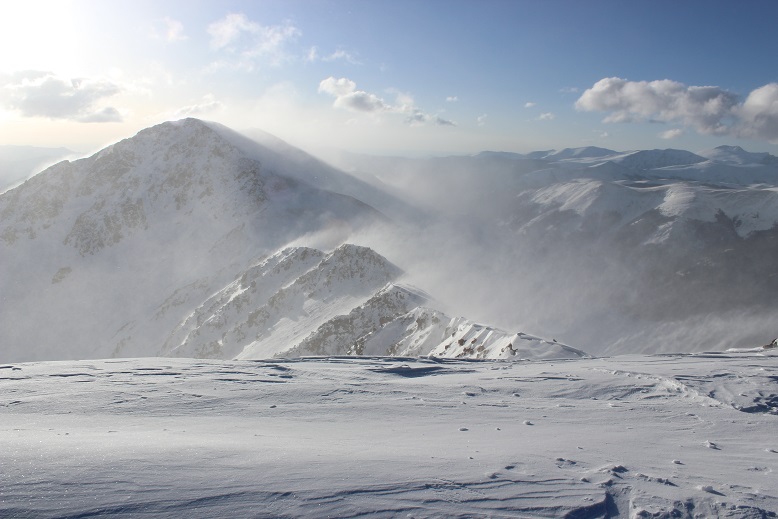
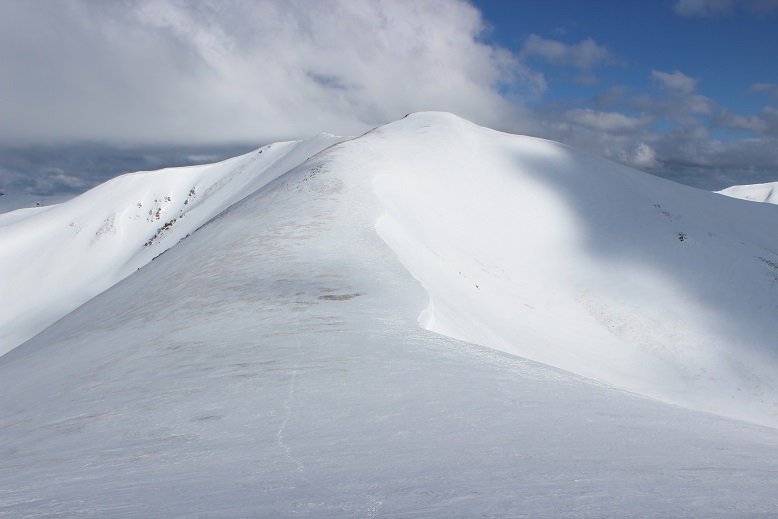
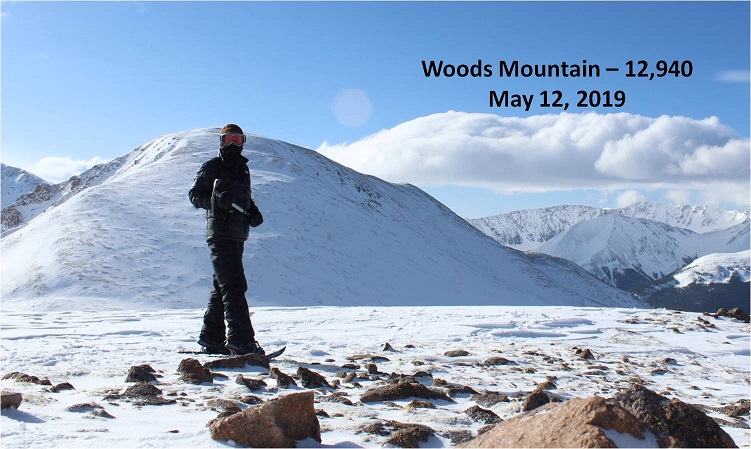
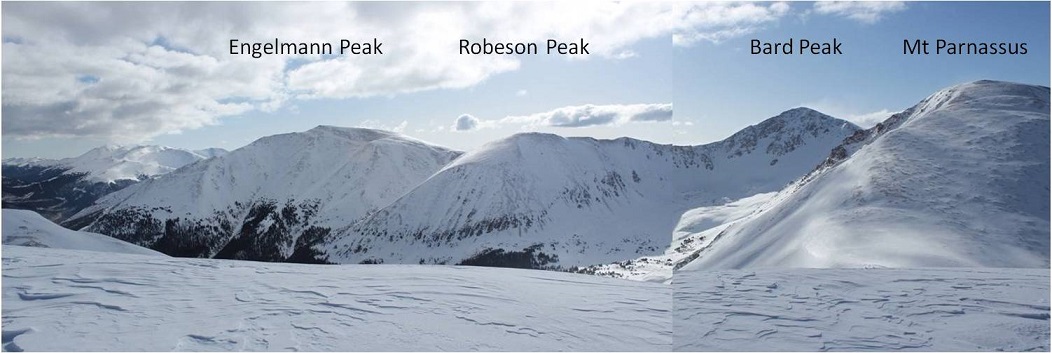
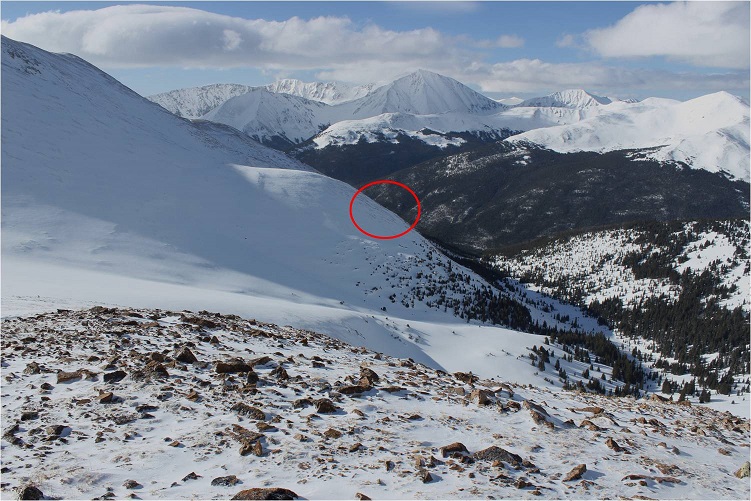
Take a look over at Bard Peak. I’d really wanted to make this a double summit today, but those winds weren’t letting up. They’d been at it since I’d hit treeline and showed no sign of stopping. The wind was making clouds out of the snow on the ridge, continuously blowing it up into the air. This ridge looked spicy without the wind, and with it downright dangerous: Those cornices were made up of loose snow. I could tell because the wind was picking it up and throwing it around without too much trouble.
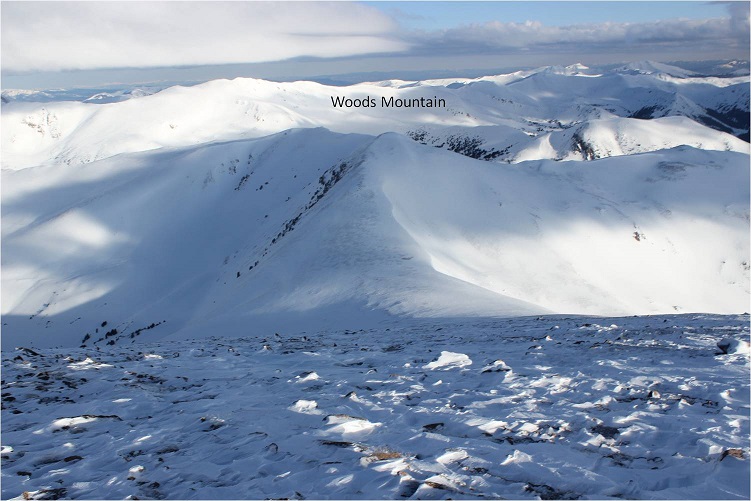
Well, that was a bummer. I guess I’d just head back the way I came. And then it hit me: Woods Mountain was just across the way, and while it isn’t a 13er it’s a respectable 12er (12,940’). I’d just head over there and get in a double summit that way. So I turned and headed northwest towards Woods Mountain (and away from the wind).
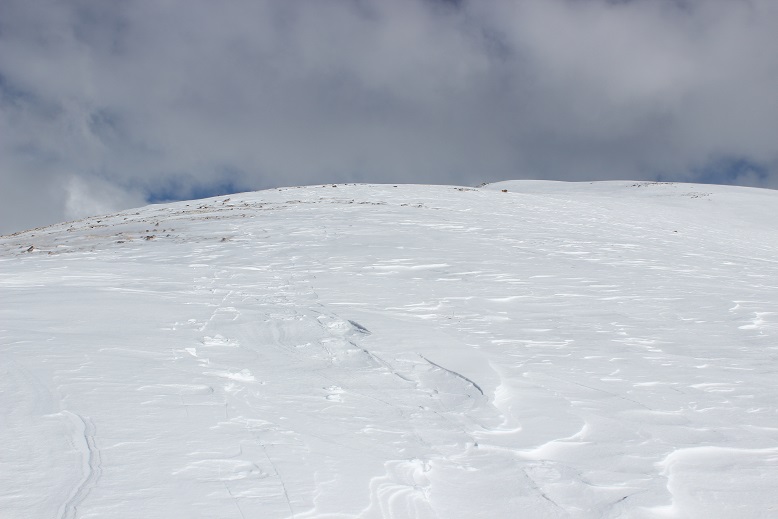
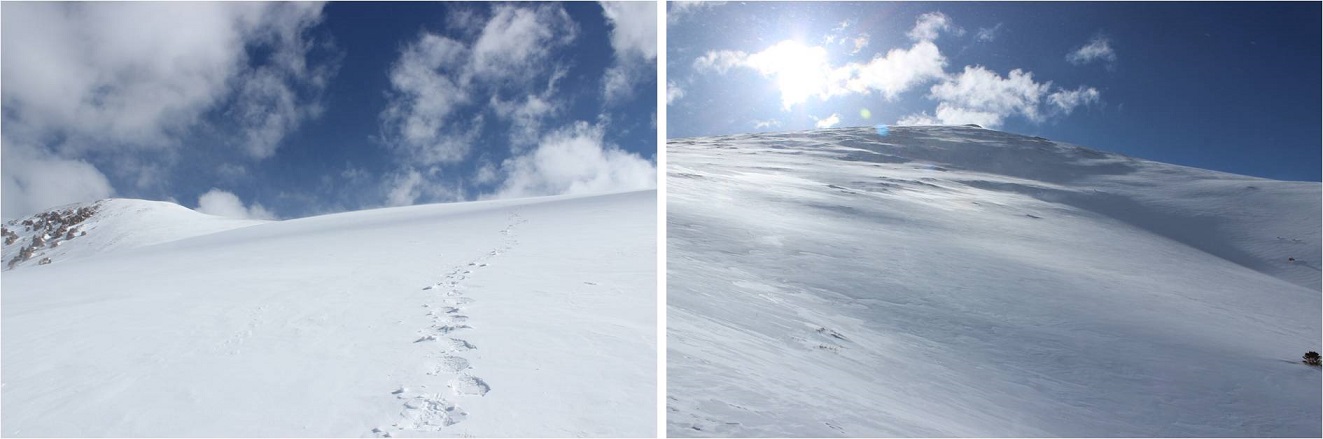
Almost immediately my crampons became cumbersome, so I took them off and exchanged them for snowshoes. Ahhhh! Much better! I turned to look up. Yep! That’s steep!
I made it down to the Woods/Parnassus saddle in no time and looked back at the way I’d come
And my way up Woods Mountain
This was going to be easy! The only downside? The saddle was a bit windy as well.
The slope up Woods Mountain was long and gentle and didn’t require any rest.
It didn’t feel like it took very much time to summit (and here the winds calmed down)
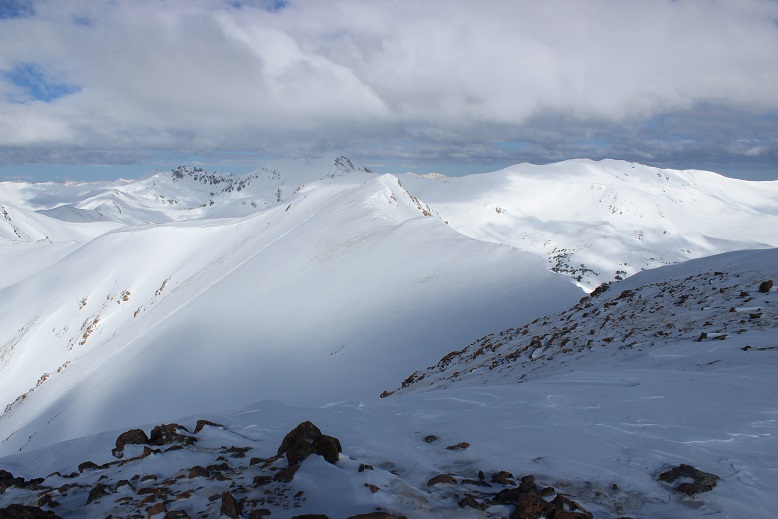
From the summit I looked back at Parnassus and the other 13ers I’d intended to hike today. I sighed: the wind was still at it. Oh well, this just means I’ll have to do the Engelmann-Robeson-Bard trek later.
I turned and looked at the way I was supposed to head down the mountain, behind Woods’ south slopes, and on to Point 12805, but it just didn’t look…. safe.
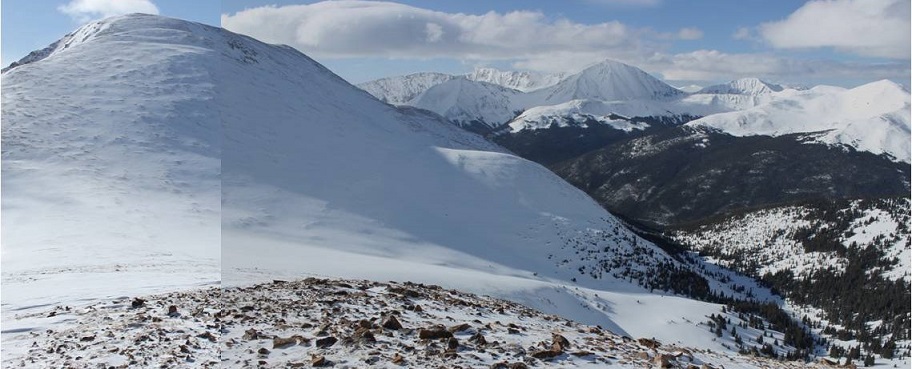
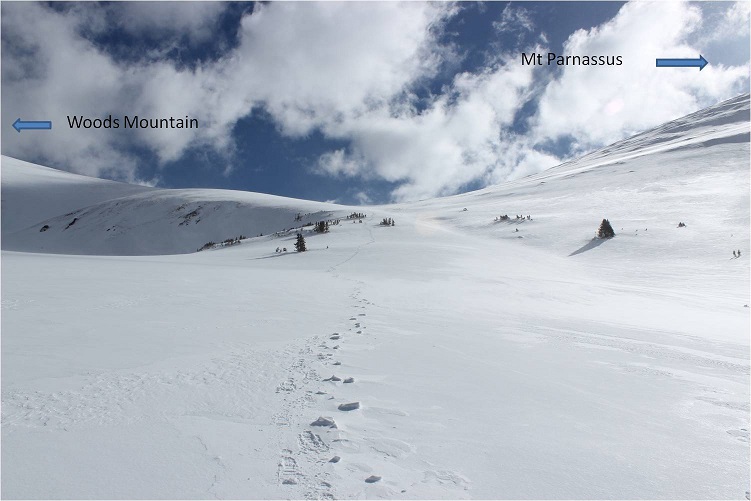
So I turned and looked back at the Woods/Parnassus saddle and studied the terrain.
I got out my topo map and concluded it was safe to head back to the saddle. I took the solid orange line back down to Waterous Gulch. The dotted orange line is the way I summited Parnassus.
Oh, and I could see a solo hiker taking the same route I had up Mt Parnassus. That meant someone else was out here today. Cool!
The wind started picking up again when I made it back down to the saddle.
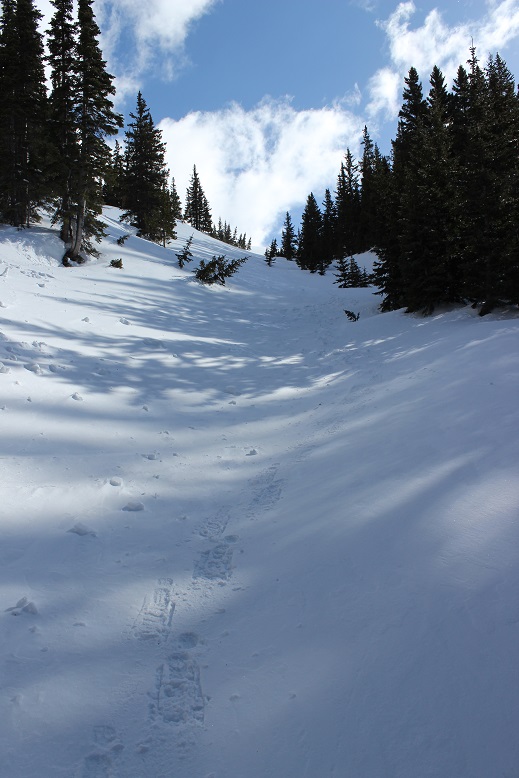
I turned right (west) and headed down towards the gulch. Just before treeline I turned back around and looked at the way I’d come
I turned back towards the gulch and followed the drainage to a small gully
The bottom of this gully ended in Waterous Gulch, about 200 feet from where I’d turned to start my long trek up to the summit of Mt Parnassus. I quickly came to the realization it would have been much easier to just have used this small gully to gain the saddle between Woods and Parnassus to summit Mt Parnassus rather than to have climbed Parnassus’ west slopes. I’d recommend just taking the gully. The dotted line is the way I summited, but as you can see, the solid path works just as well (if not better).
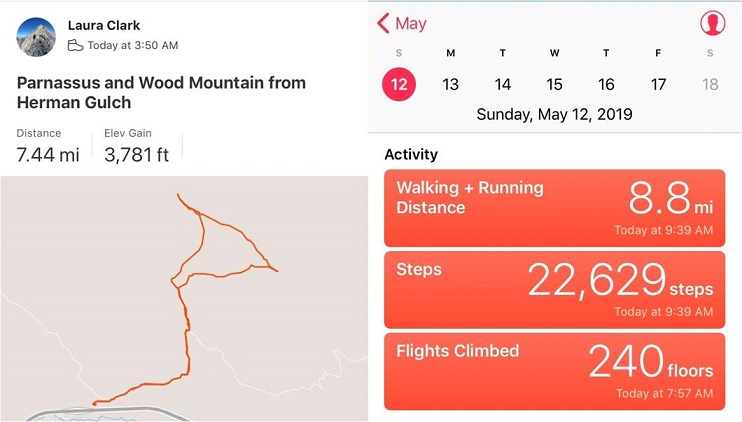
Back in Waterous Gulch I picked up my earlier trail and followed it back to my truck, taking pictures in the daylight for future use. The snow had warmed up and the icy section from this morning now gave a little as I descended (so no slipping!). I made it back to my truck at 9:30am, making this a 7.5 mile with 3781’ elevation gain in 5.5 hours. I was a bit disappointed I hadn’t made it over to Bard Peak, and with that missing the added mileage and elevation (I wasn’t even tired…) but on the positive side I’d make it home before noon, and it was Mother’s Day, so I should wake up the girls and do something to celebrate.
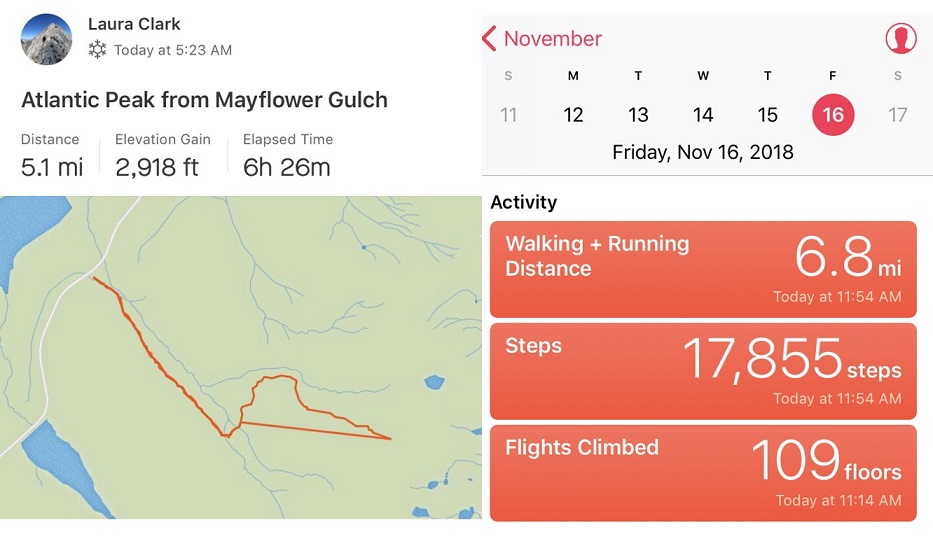
I really wanted to do Atlantic and Pacific together, but until April I have limited time schedules for hiking (I need to be back at my truck by noon to make it home in time to pick up my daughter from school, so it’s hikes under 8 miles until then). The weather indicated Atlantic Peak would be a good choice for today, so I went for it. This was only supposed to be a 4-6 mile hike and I wanted to break in my new winter hiking boots. They were supposed to be lighter and warmer than my Sorrels, but I was skeptical so I wanted to use them on a shorter hike before committing to longer distances.
I arrived at the Mayflower Gulch trailhead at 5:15am to 14* weather, much better than the -5* weather of last week in the San Juans. I was also pleasantly surprised to find it was right off the road: no off road driving for me today. There was one other vehicle (a Subaru) in the lot, and while the gate was open up to Boston Mine I decided to park my truck at the lower lot and hike in.
The lower lot was icy!!! I put on my microspikes in the truck and gathered my gear. I set out at 5:30am. It was very peaceful hiking at night. Silent. Very silent. No moon, but the stars were magnificent! The only sound was the snow falling off tree branches and onto the trail below. The trail was tightly packed down by other hikers, snowshoers and skiers.
A 4WD vehicle could have made the icy drive, but since this hike was so short it didn’t seem worth the extra mile and a half. I made it to the Boston Mine area before sunrise and put on my snowshoes in the dark. I was lazy so I kept my microspikes on and just put my snowshoes on over them. If I needed to take them off it would be a quick transition and maybe I could keep my gloves on the entire time (saving my fingers from the cold).
Oh, btw, this fence is not the height of a normal fence… it’s probably half the height (so the snow looks deeper than it actually is).
Snowshoes ended up being a great idea, because while the trail was packed down, as soon as I went off trail I started sinking to my knees, even while wearing my snowshoes. I looked for a trail across the gulch, but it looked like I was the first since the last snowfall so I broke my own trail.
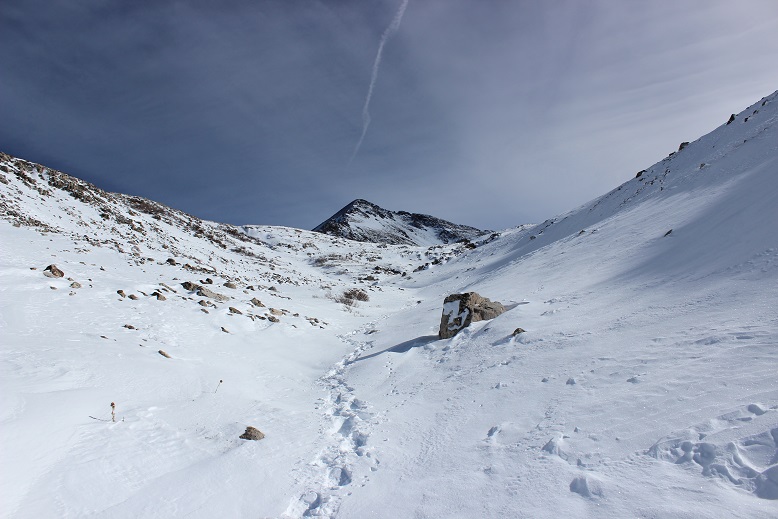
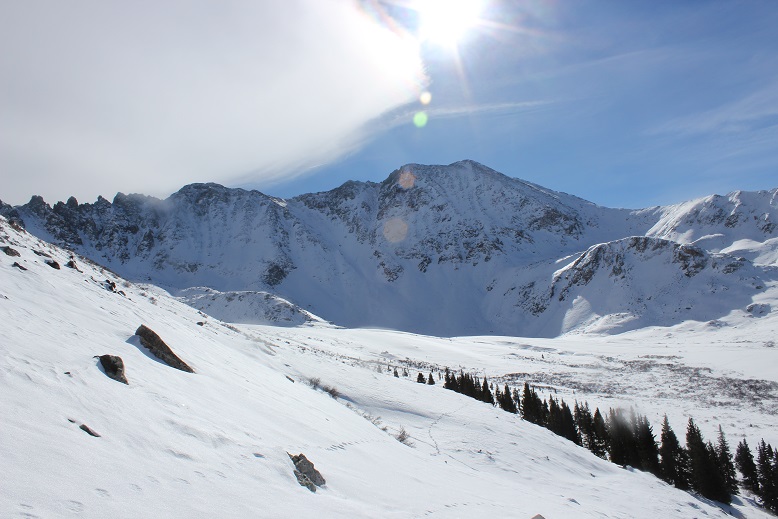
The sun was beginning to rise, and Jacque Peak looked beautiful.
The snow was sugary and made snowshoeing difficult. I’d be fine for a few yards, and then plunge up to my waist. This was a serious problem in the willows, but I made it across the gulch and was surprised to exit and stumble upon a cairn! This was an unexpected treat! I found about 4 cairns on the entire route, always unexpected and sometimes on my way back down.
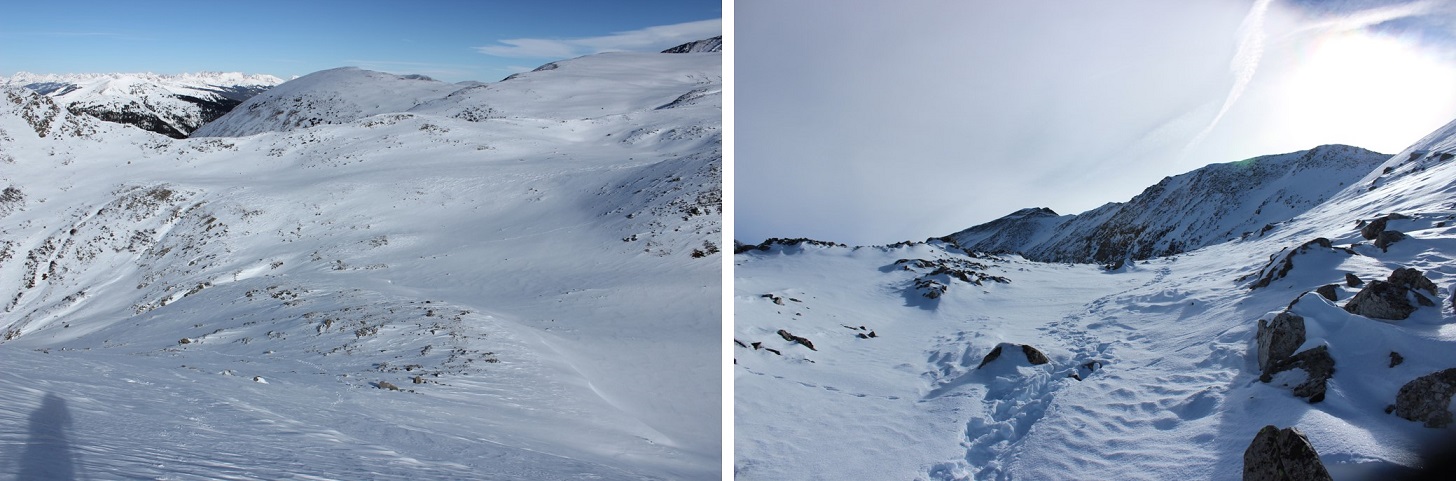
After crossing the gulch I was supposed to follow Mayflower Creek up to Atlantic’s west ridge, but the snow didn’t look stable and it looked really deep, so I stayed higher up on the hillside. This was great (early elevation gain) but there were times I was seriously worried about avalanche danger. It wouldn’t have been an intense avalanche, but I could see signs I should take an alternate route back once it warmed up. So I was slow in traversing the slope, but careful and ultimately safe.
Here’s the route I took
My next task was to hike Atlantic’s lower west ridge. This ended up being more difficult than anticipated: the snow here was very consolidated, unlike the sugary snow on the slopes and gullies. My snowshoes weren’t going to cut it. I took off one snowshoe and tried it with my microspikes. They became ice skates. Hmph. Ok, I was going to need to get creative. I put back on my snowshoes and got out my ice axe. This wouldn’t have been a problem with two ice axes or two ice picks and crampons, but I only had one ice axe and I hadn’t brought my crampons (I thought it was still too early). So I used my ice axe to drill a hole big enough for my left hand and then struck the snow with the axe and my right hand for support and lifted myself up. My snowshoes used the holds I’d made for my hands. This worked very well and I was able to gain the ridge in no time at all. (Note to self: It’s time for crampons).
Here’s a look back on the route
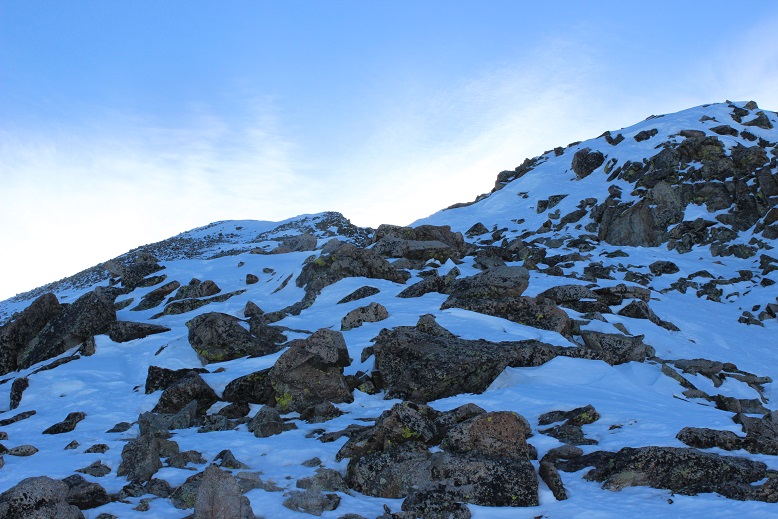
From here I was just supposed to follow the trail to the summit, but there wasn’t a trail, and in fact, at about 12,700’ I encountered some of the most difficult terrain of this hike.
This is where I wanted to turn back. I seriously considered it. The snow was intermittent and what snow there was was sugary and covering loose talus, so I couldn’t get a good grip on it in my snowshoes. I took them off again to try it with just spikes and it was even worse! My microspikes were of no use: I really needed the stability/flotation of snowshoes. Even though they weren’t perfect, they were a big help. This area took me much longer to navigate than it should have, but I didn’t quit and I didn’t turn back. I gained this ridge and was met with this:
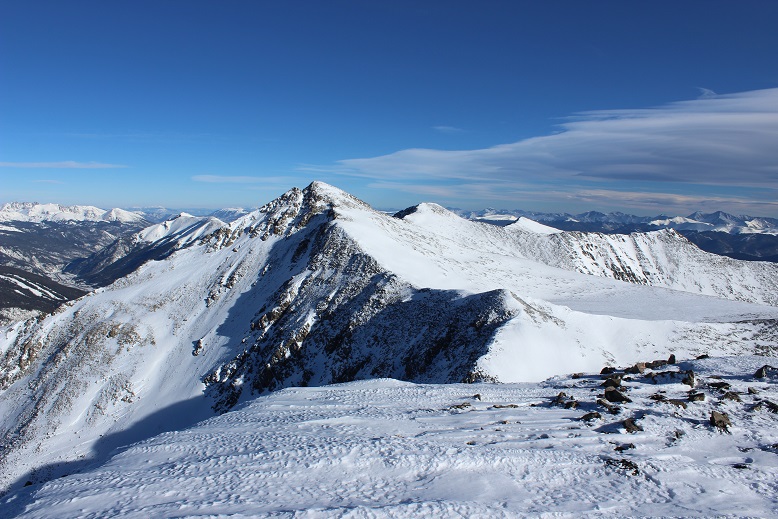
Wow. That ridge didn’t look too difficult in normal conditions, but I could already see this would be a challenge due to the unpredictable snow. Maybe not a challenge for seasoned snow summiters, but I’m still new to this. There was snow, lots of cornices beginning to form, and a narrow ridge to navigate. I forged on ahead.
Luckily a mountain goat had been here last night and gave me some tracks to consider. There were times I didn’t feel safe following it’s tracks, but they did give me a good general direction to follow, which was directly on top on the ridge.
I’d reach one summit and find another, which was frustrating, but I knew everything I encountered was within my abilities and even a bit challenging. I came across a few sections that would have been class 2 if there hadn’t been snow, but with the snow (and instability of said snow) I decided it was safer just to go straight over the ridge. This turned the hike into a class 3 climb, and with snowshoes made me a bit clumsy (but safer than without).
This was one of those learning opportunities where I was scared at times but knew I could do it so I kept pushing forward, even though there were many times I wanted to quit and come back in the summer.
Here’s the route I took:
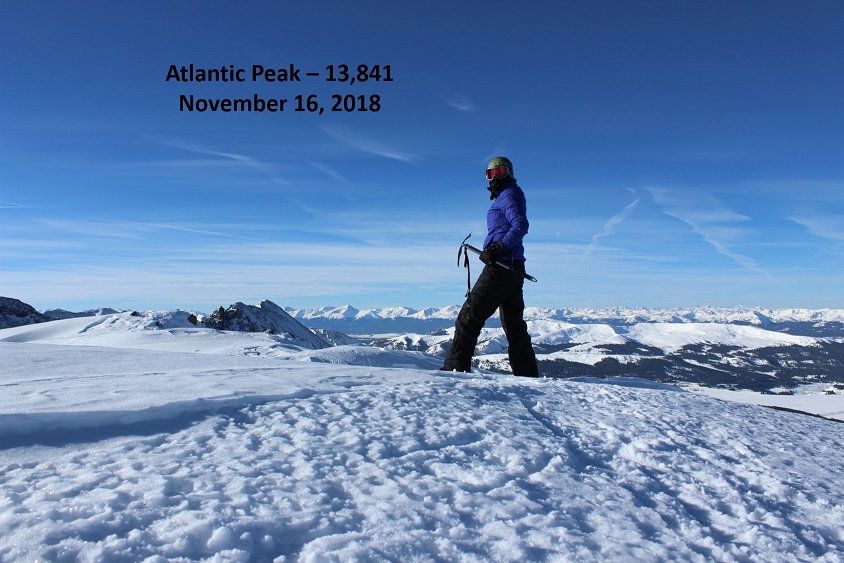
The trek wasn’t long, and I wasn’t tired when I reached the summit, but I was cold. Luckily my phone and camera were working, although my phone cut out halfway though the first video and I had to take another one and then it shut down. I plugged it into my portable charger and took pictures with my DSLR. I summited at 9am.
VIDEO:
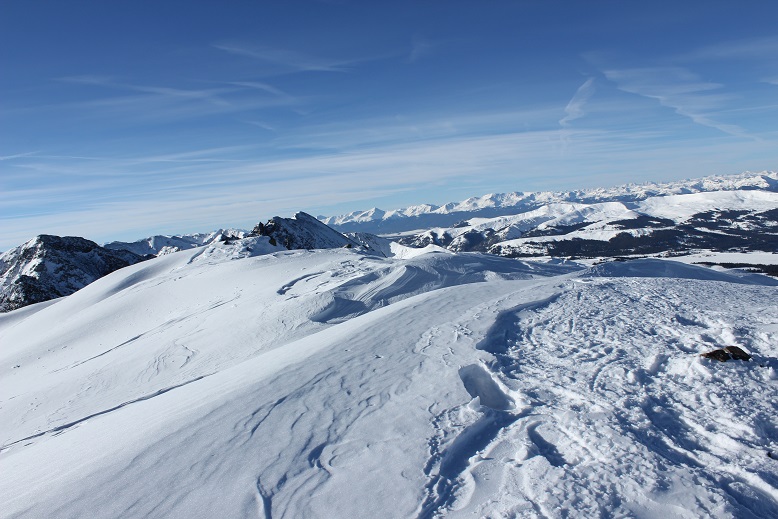
While it was cold it wasn’t windy, so the cold was bearable. I stayed on the summit much longer than I normally do, taking pictures and marveling at the beauty of the mountains with snow.
I considered traversing Pacific Peak as well, but didn’t think I’d be able to do it successfully with my time constraints. The class 3 route looks doable now though, so I may be back in the next few weeks.
Here’s a look back at the route
The trek back was easier than the hike in because I just followed my tracks (and didn’t look down). Looking down would have caused unnecessary anxiety.
Those ridges were something else!
Of course I took a shadowselfie
I decided to follow the creek down because that was what I was supposed to do and I was seriously worried about avalanche danger on the route I’d taken up the mountain. I’m still learning about avalanches, but know some of the initial signs and what I was seeing wasn’t making me comfortable. So I took the creek, but this proved difficult as well, as out of nowhere I’d sink up to mu chest in soft snow and then have to work myself out. This happened many times and was frustrating, but I still felt safer than on the slope above.
Just before hitting Mayflower gulch my toes started to hurt: the new snow boots were fine, but the snowshoes and boots combination was cutting off circulation in my toes and trekking downhill was beginning to hurt. This hadn’t happened in my previous boots, and is something I need to consider.
Also, I lost my phone. It fell out of my pocket and I had to retrace my steps ¼ of a mile uphill to find it. That wasn’t fun. I found it buried in snow (but attached to my bright orange solar charger). I picked it up and trudged back down the hill and across Mayflower Gulch to Boston Mine.
It was a beautiful day! And warm! I took off my gloves but had to put them back on again once I made it back to the trail (and shade). Have I mentioned I love my new gloves!
My new winter books are ok, but despite my double tying them and folding them under my laces they still came undone while hiking, which isn’t an option for me since I can’t tie them wearing mittens. I may try safety pinning them next time.
I made it back to the trailhead at noon and looked at my STRAVA map. Hmph! This wasn’t right: It showed my trek to the summit, but it seems it stopped working there and picked up again where I found my phone in the snow after losing it (please don’t attempt to take that straight line: it’s not safe!!!). So while the elevation gain is most likely correct, the trek down and mileage definitely are not. My iPhone told me I’d hiked 6.8 miles, so I’m going with that for mileage. The hike was 5.5 hours.
Here’s my Relive map (which is also false since it did that straight line thing from the summit to where I lost my phone).
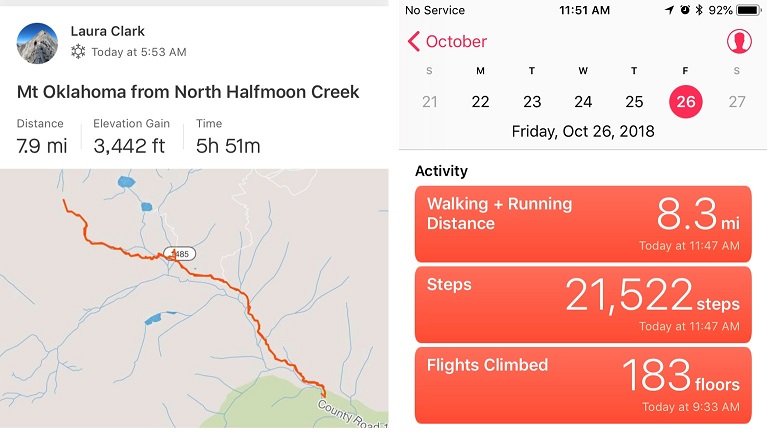
I made several spreadsheets this week outlining possible hikes, and finally settled on Mt Oklahoma. Imagine my surprise when I checked the weather forecast one more time at 2am and it switched from 15mph winds to 45mph winds! I considered changing my peak at the last minute, and then looked at the direction of the wind. I should be ok….
Speaking of OK, when I was about 8 or 9 years old I understood the joke for the first time that “Oklahoma is OK”. I thought this was hilarious, even though my friends didn’t ‘get it’. I told it over and over again and got blank stares. Maybe I just wasn’t telling it right? But I digress…
I arrived at the trailhead around 5:30am, surprised the 4WD road was clear of snow all the way to the upper trailhead, despite snow in the forecast for last night. Conditions of the road in are the same as the last time I was here (https://wildwandererlmc.wordpress.com/2018/07/20/55-mt-massive-14421/).
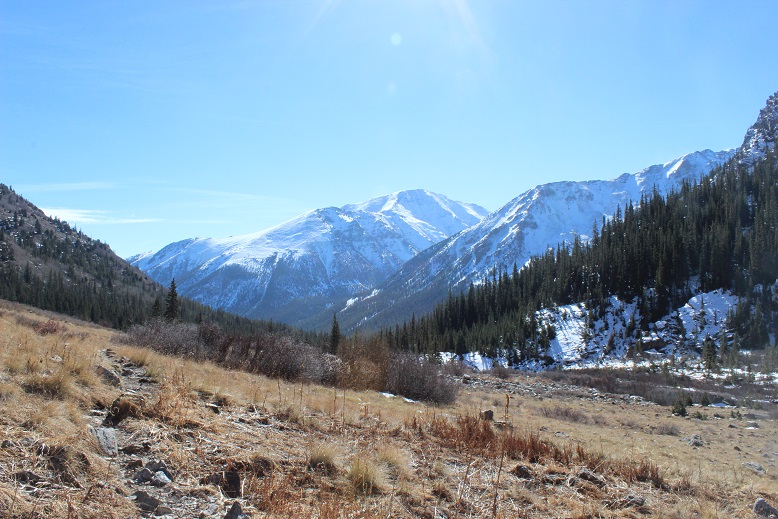
There were no other vehicles in the parking lot. I gathered my gear (whoops! I forgot my goggles, oh well, my sunglasses would have to do) and started just before 6am. I followed the Mt Massive/Halfmoon Lakes trail to the trail junction in the dark, but by the light of the full moon. The trail had pockets of snow, but no traction was needed.
The moon gave off enough light so I didn’t need my flashlight, but not enough light to get a good picture of the mountains in all their snow capped glory. They were beautiful, and I stopped several times to try and photograph them (none of which turned out). I was wasting serious time trying to get a picture I’d never be able to capture, so I put my camera(s) away and kept going.
From the trail junction I continued west, back into the trees
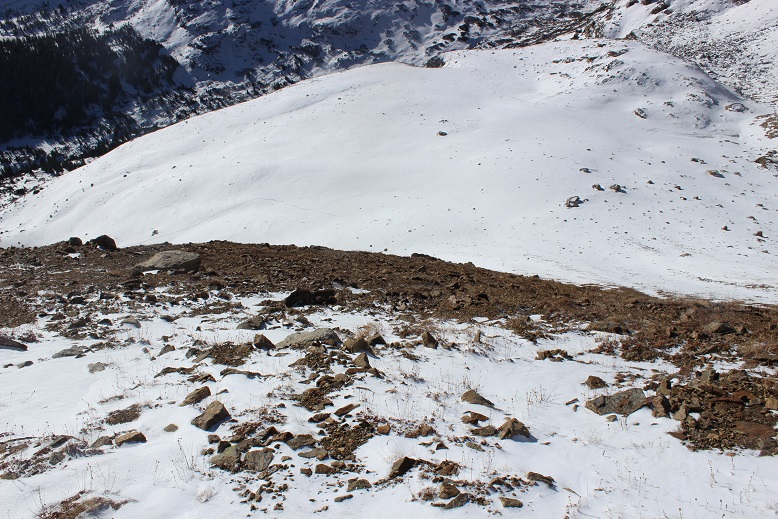
And up and over a very large rock (I’m guessing 50-70 feet long?)
I kept thinking to myself how I wished the elevation gain would start soon. I was over 2 miles into a 4 mile summit, and still no real elevation gain. Those last few miles were going to be a killer! From here I left the North Halfmoon Lakes trail and the route-finding began. The trail was surprisingly free of snow until I passed the second creek crossing.
From here snowshoes would have been helpful, but I didn’t put them on. Route finding through the trees was interesting. At points I could tell there was a trail, or a heavily used path out there somewhere, but most of the time everything was covered under lots of snow.
I had to backtrack once, but was able to find my way to the ridge and after exiting treeline I found a few cairns (not enough to rely on… maybe 5 total in the next 2 miles). At the ridge I continued left
Over this hill and up the drainage
And up some more drainage. This is where I put on my snowshoes. The snow is deceptively deep in some areas here (it is a drainage after all) and bare in other places. The snowshoes were worth it for the times I sank to my waist.
At the top of this drainage was a small basin
I found 2 cairns here, indicating the way I should take up the slope.
This is where the hike became challenging. That slope is much steeper than it looks, and just when you reach the top, there’s another slope just as long to navigate. I kept on my snowshoes until the snow stopped, and then put them in my pack and hiked up to the ridge. Hiking was much easier with the snowshoes! I’ll take snow over scree any day.
When I reached the ridge I was surprised to see more snow. A lot of it! But it didn’t look that deep, so I put on my microspikes and started forward.
That lasted about 30 feet. There was no way this was going to work. I needed snowshoes. And goggles (that wind!). I stopped to put them on, realized I’d left my goggles in my truck (drat!) and looked at the task before me. I had less than an hour to make it to the top before my turn around time. My legs were burning, and it was slow going, but I knew I could do this. I trudged on. There isn’t an exact route to the top, just keep aiming for the highest point. I chose to go left instead of straight because the snow looked deeper and less stable directly in front of me.
Once again, it’s steeper than it looks and I had to stop every 50 feet or so just to catch my breath. My ice axe proved useful several times. The wind was picking up and I was getting cold. Those 2 miles without elevation gain were catching up on me!
I summited at 9:25am (my turnaround time was 9:30am)
VIDEO:
The summit is mostly flat, with a small cropping of rocks near the Mt Massive side.
Here’s a view to the south
This is the way I came up
I turned and looked to the left of Massive, and there was the weather I’d been worried about. 45mph winds turning fresh snow into ice clouds, headed towards me. It was time to book it off this summit before those clouds reached me.
But first, a shadow selfie
I backtracked the way I’d hiked in, following my tracks
The snow was soft, perfect for skiing. I didn’t have any skis, but I had fun gliding in strides in my snowshoes. I quickly made it back to the scree slope where the snow ended for about 200’ and the scree reigned.
I decided against taking off my snowshoes for this part. Snowshoes actually provide the same stability on scree as they do on snow. Plus I was too lazy to take them off just to put them back on again. (If your snowshoes are aluminum don’t try this. Also, get new snowshoes).
I made it down into the basin and stopped for a bit to reapply sunscreen and take off my gloves (I had on multiple pairs). This was also the last time I saw my hat. Since I had on a balaclava too I didn’t notice when it went missing. I’m not sure if I lost it here or in the trees, but if you find it please bring it down and donate it to a worthy organization (I knit about 300 a year and give them to low income elementary schools and teen homeless shelters in Colorado). This was the only time I wore it, and after washing it I’d planned on adding it to the donation pile.
I continued following my tracks back down to treeline and back to the North Halfmoon Lakes trail. After the second stream crossing the snow virtually stopped, and when I hit the junction it was gone all except for when I was in the trees
I made it back to my truck at 11:50am, 10 minutes before my 12pm target time, making this an 8 mile hike/climb/snowshoe adventure in about 6 hours.
I didn’t see a single person the entire day, which I consider a win! There was a Tacoma in the parking lot when I left, and I did see at least 2 if not 4 sets of tracks on the trail going up to Mt Massive as I was heading down.