De Anza B – 13333, Beaubien Peak – 13184, Francisco Peak – 13135, Lomo Liso Mountain – 13112, Miranda Peak – 13466, PT 13569, PT 13229

RT Length:  16.25 miles

Elevation Gain:  6102’

I am so glad this happened!  Everyone I met on this trip was highly competent, an avid mountaineer, and just a generally great person.  My only regrets are that we didn’t have more time to chat, and the group was split due to weather and all 15 of us couldn’t have met at the same time.  I’m looking forward to when we have gatherings again, as you are all my people!   

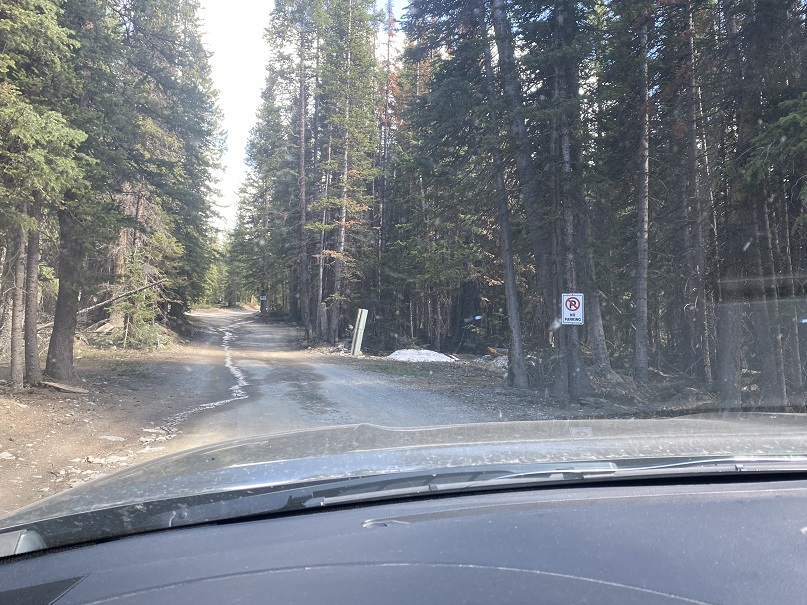
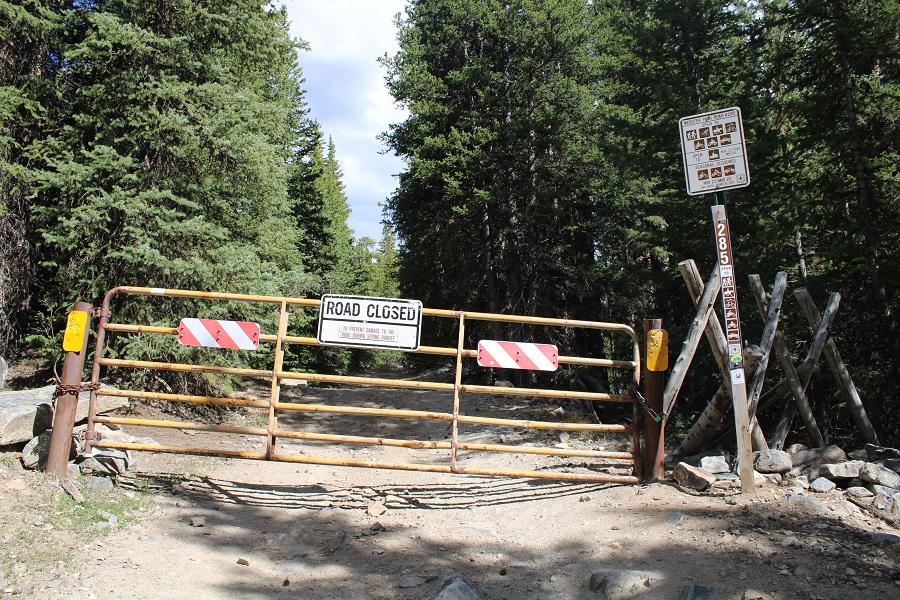
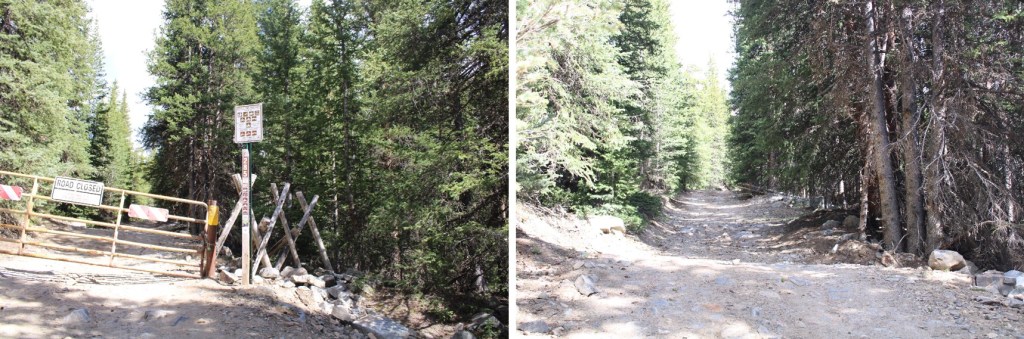
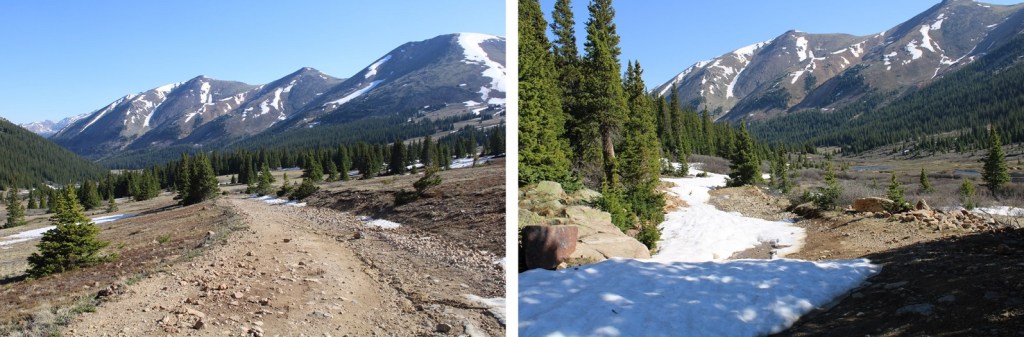
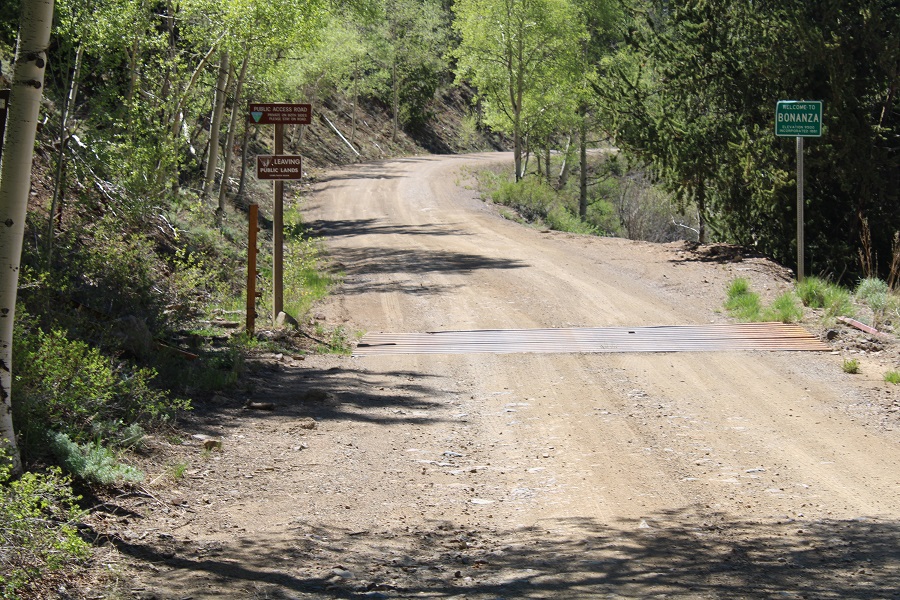
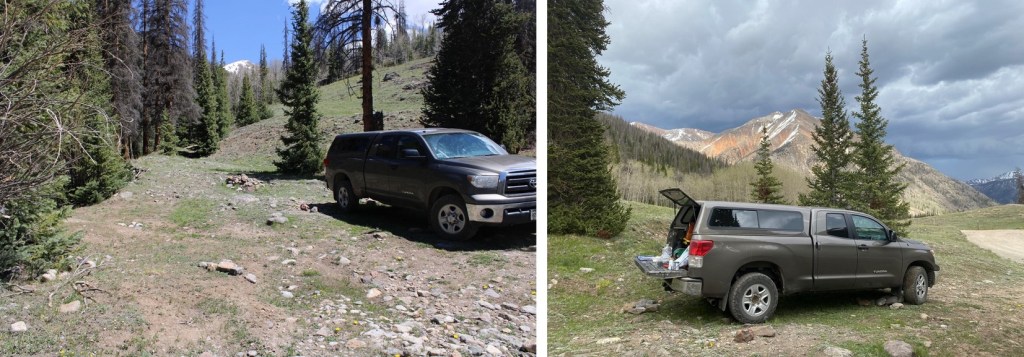
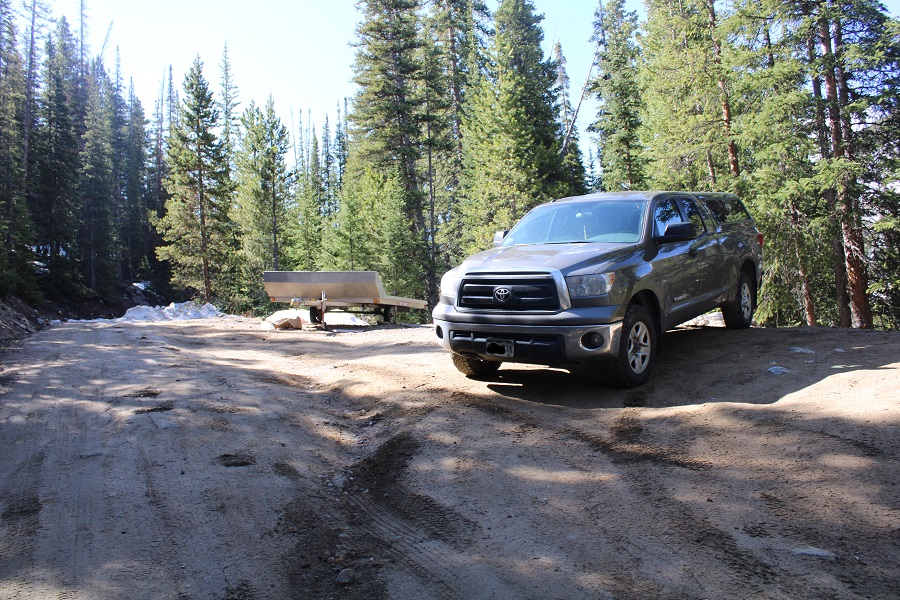
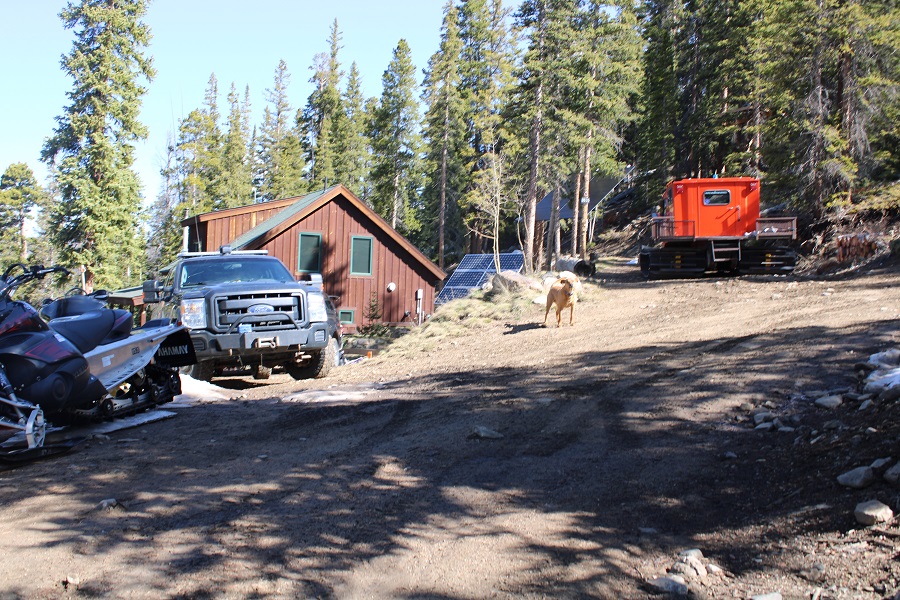
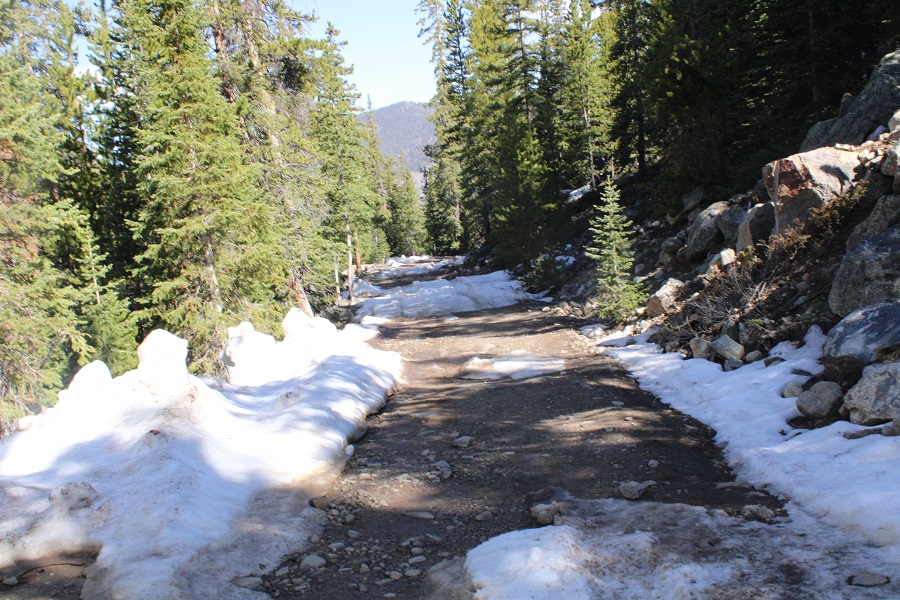
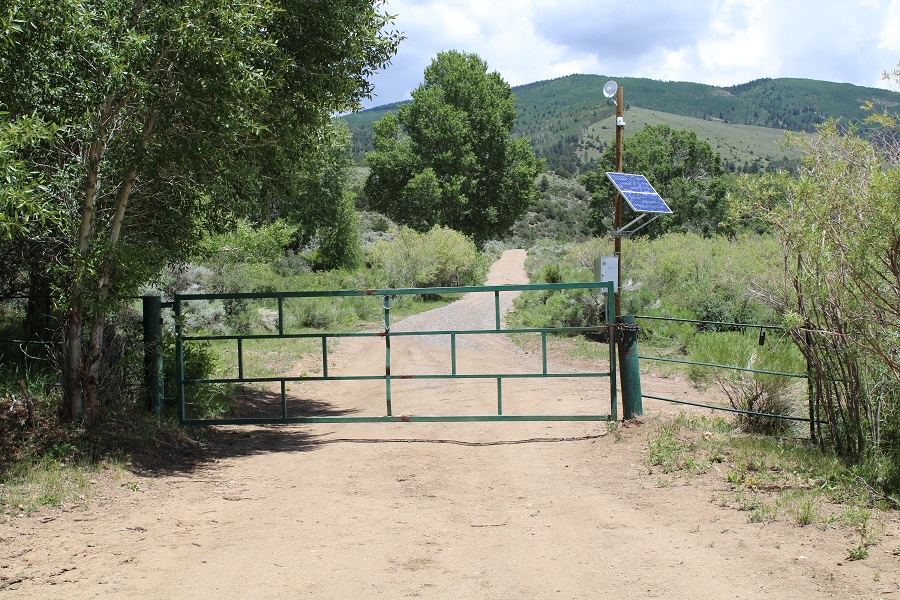
We had originally planned to hike these peaks last weekend, but the forecasted snow had us put off the trip for a week, and our group of 15 got split up into 3 groups.  6 of us arrived at the Whiskey Pass gate around 4pm and were escorted up to the Whiskey Pass campsite to be the first group of 2021 to hike the Northern Cielo Vista 13ers.  We left the two Subaru’s down low, but they could have made it up the 4WD road to the campsite (but not to where they shuttled our vehicle and we exited).  I never put my truck into 4WD on the way up.

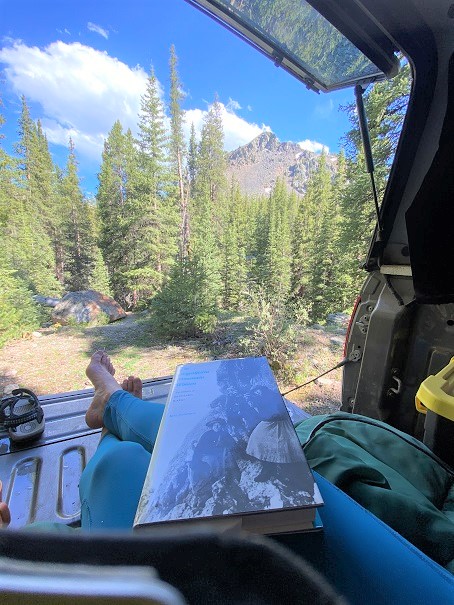
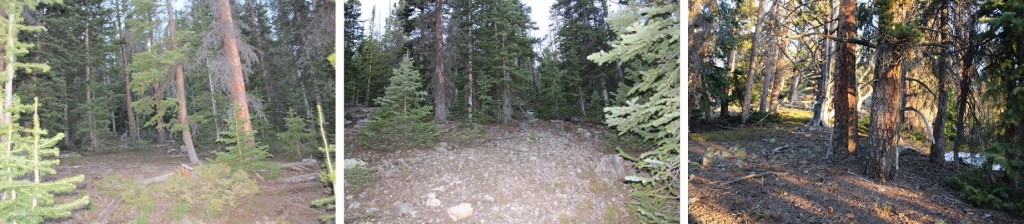
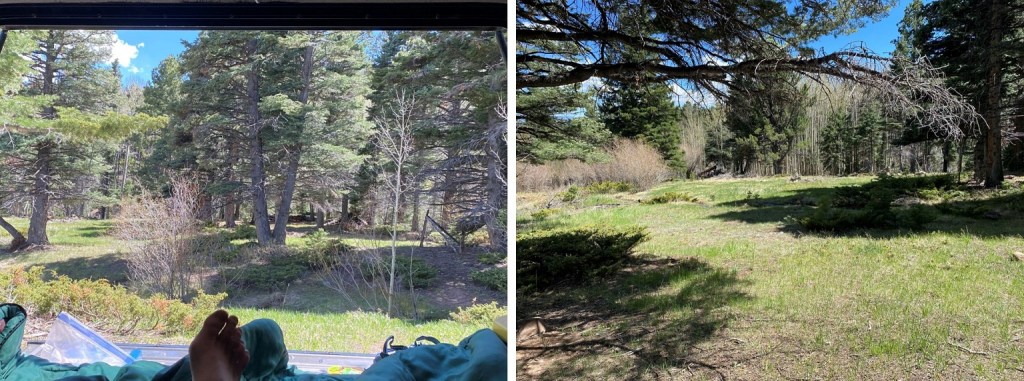
Our campsite for the night was at 11,500’, and absolutely beautiful.  If was obvious no one had been up there in quite a while.  It was nice to put faces to names, and all of us chatted for a bit.  Some of us slept in our vehicles, and others set up tents.  We all had different ideas for what we wanted to accomplish on our hikes the next morning, and all got to bed relatively early so we could start early. 

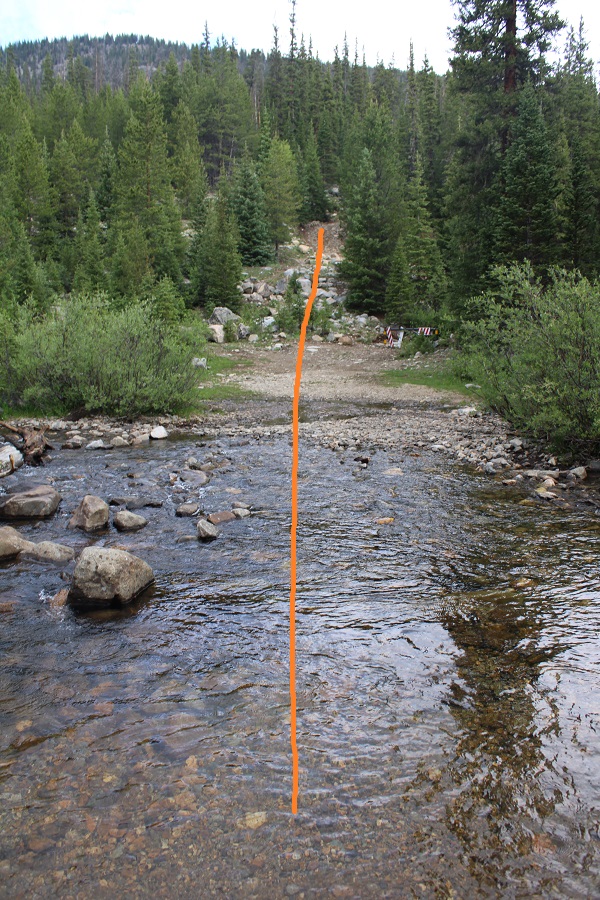
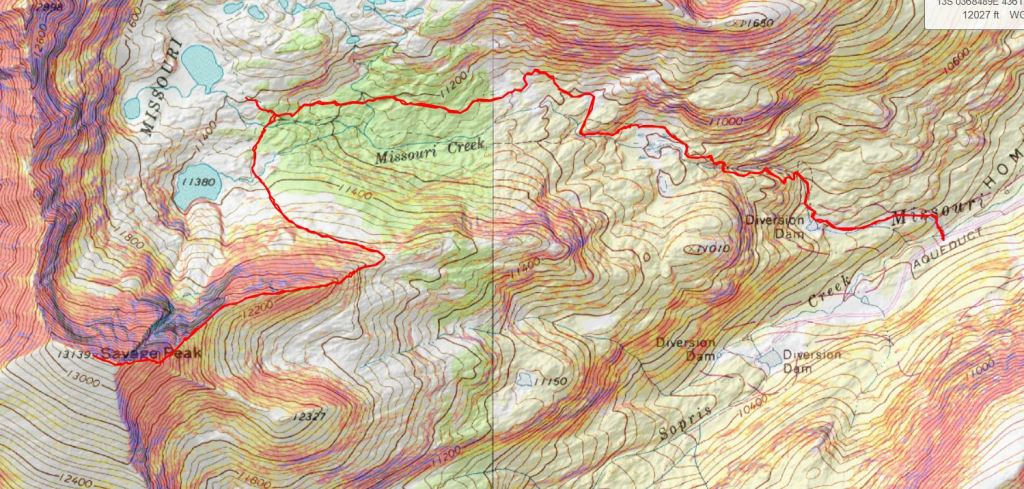
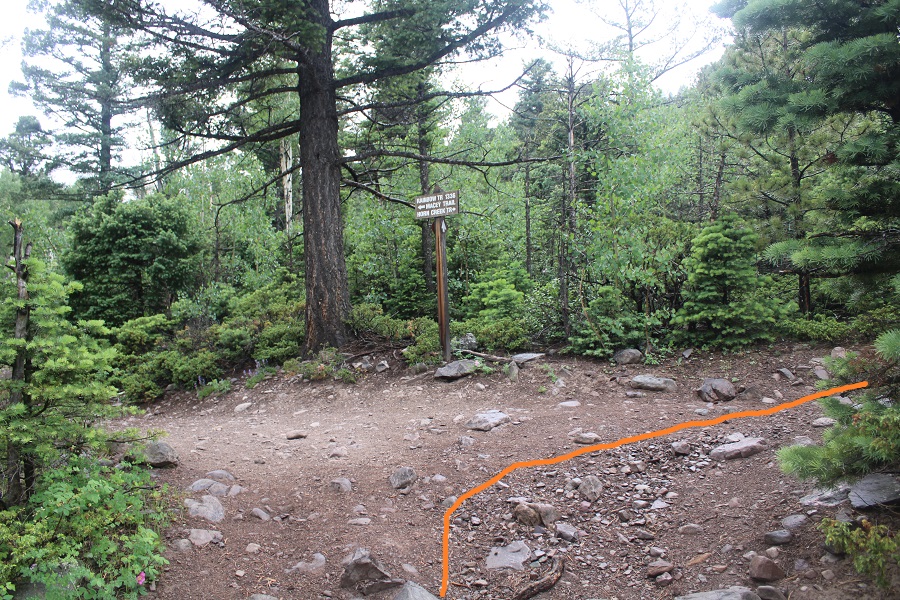
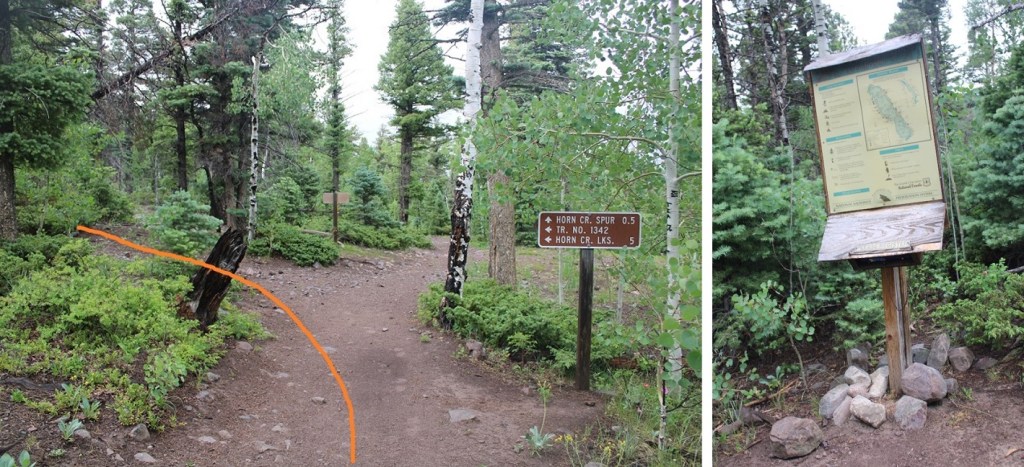
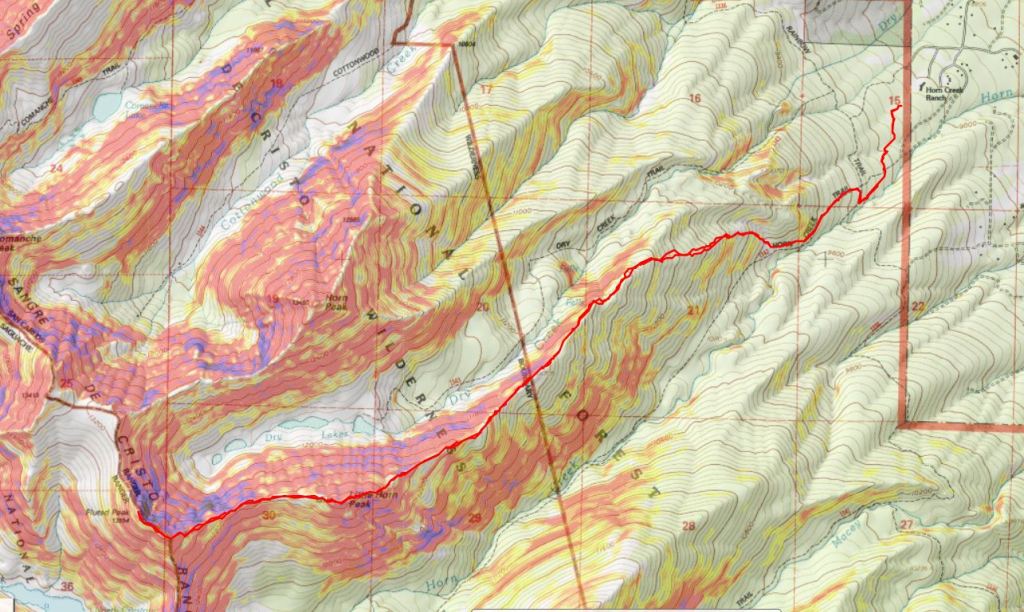
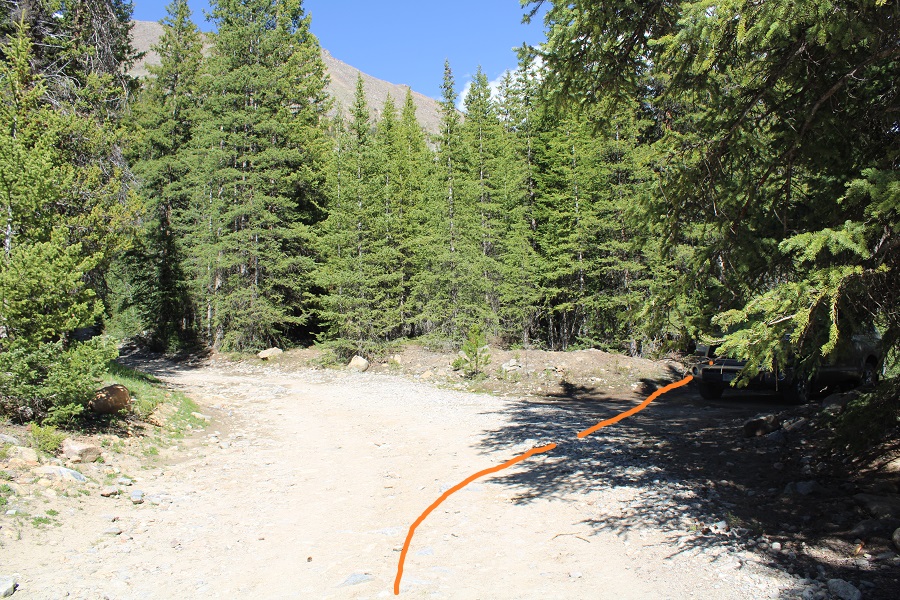
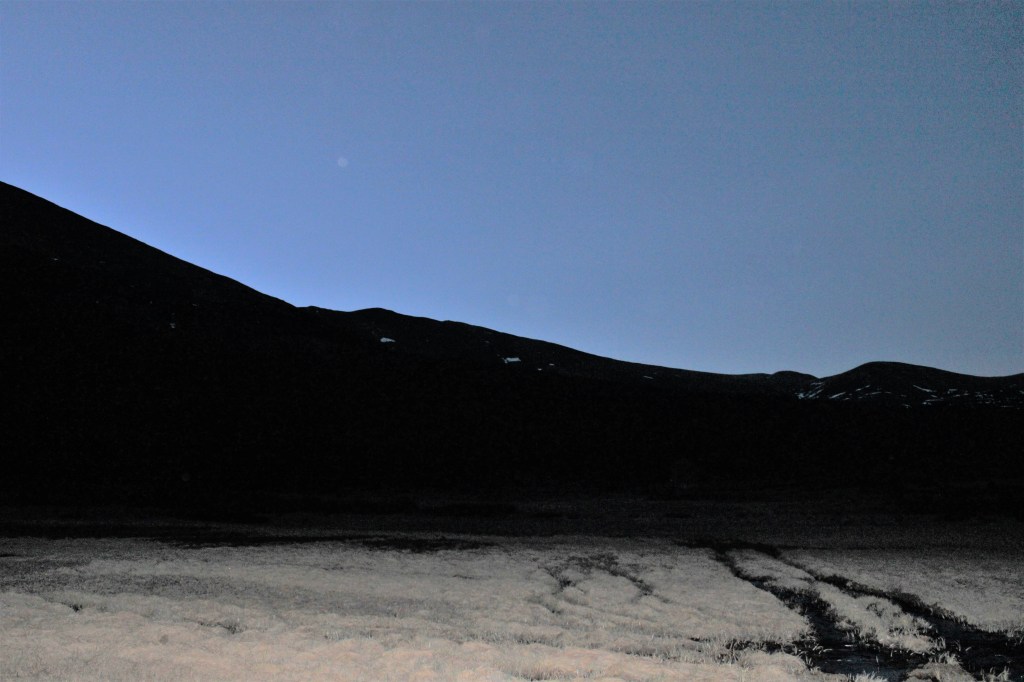
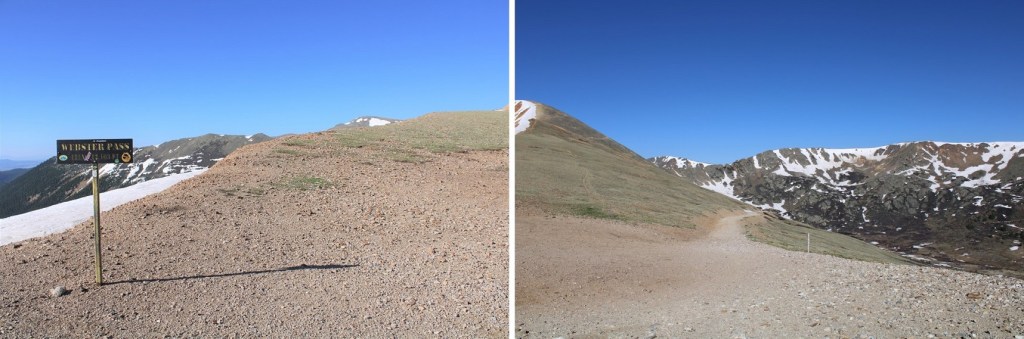
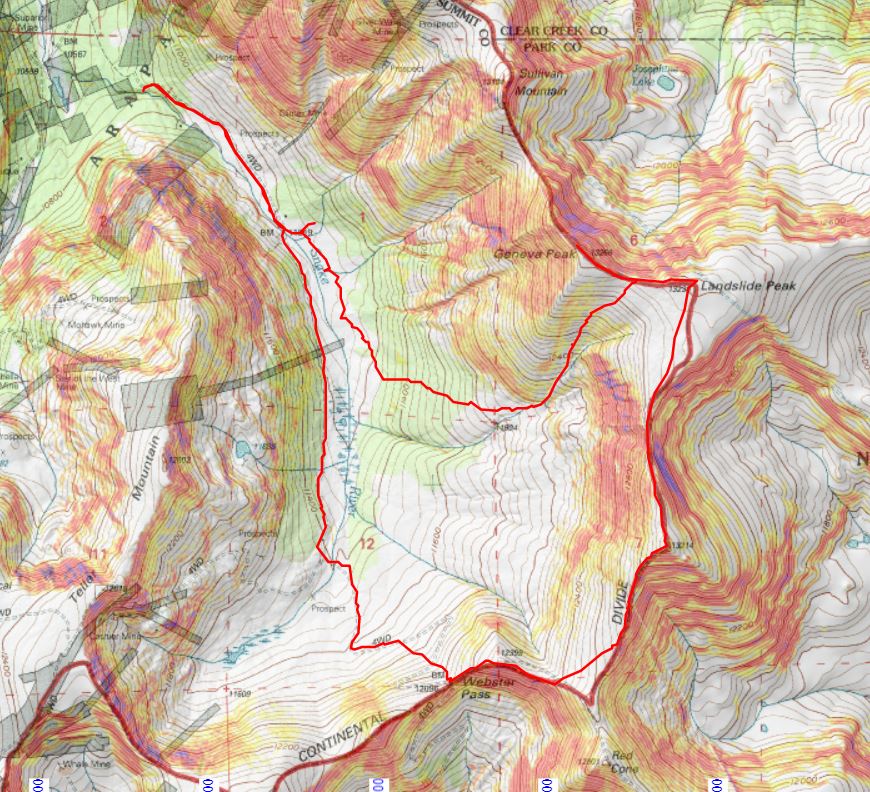
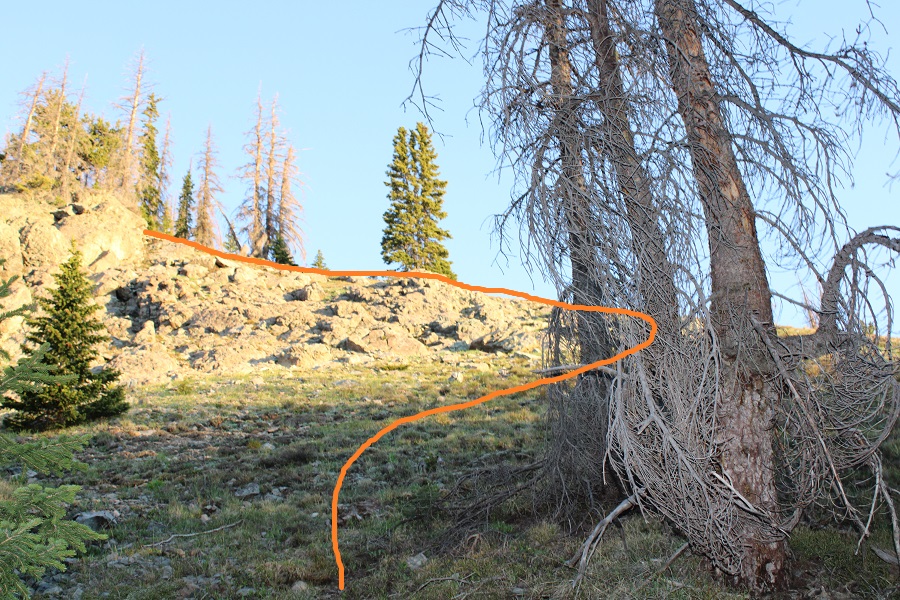
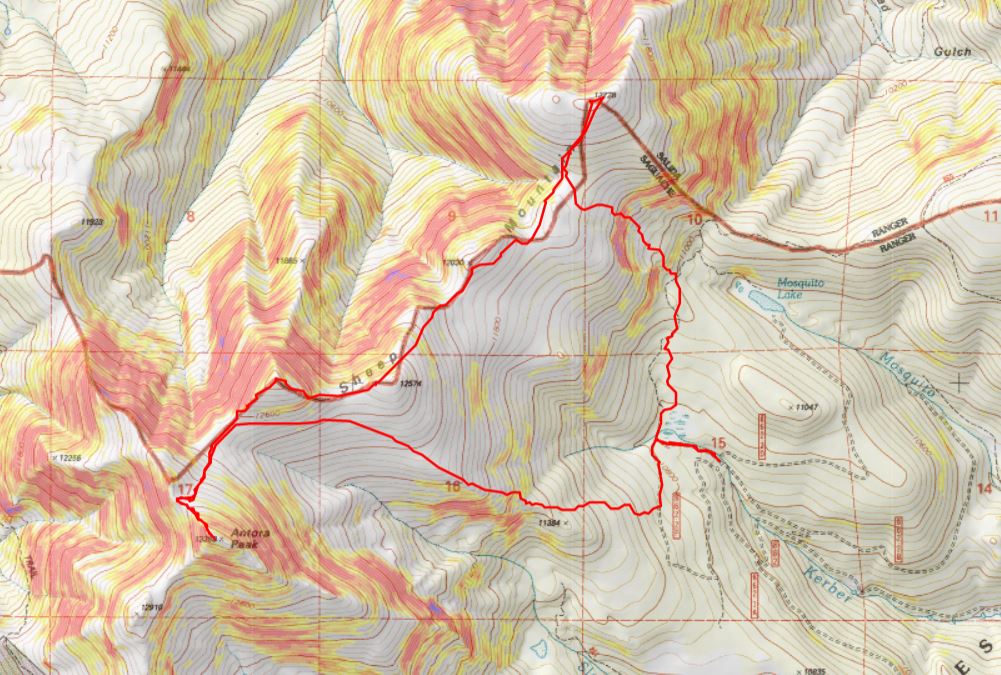
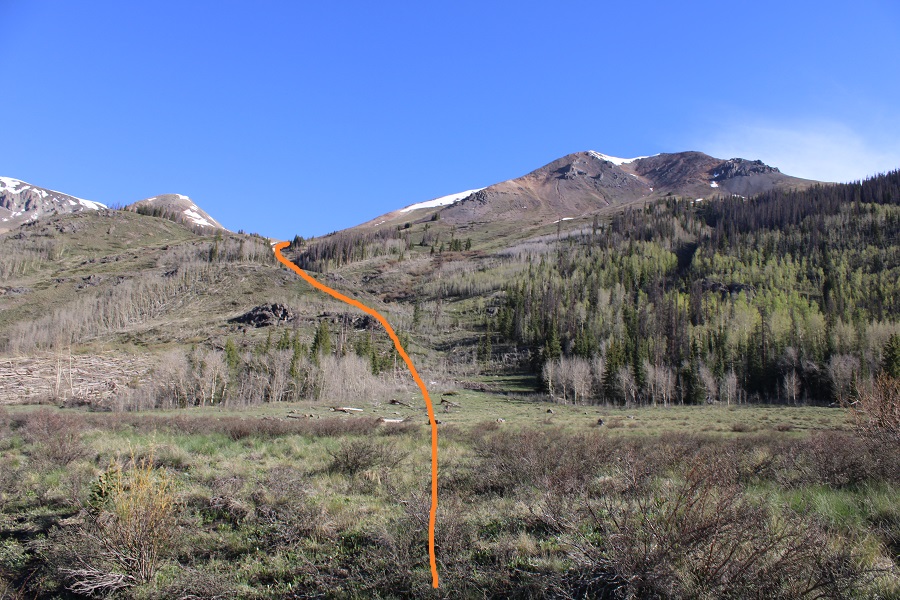
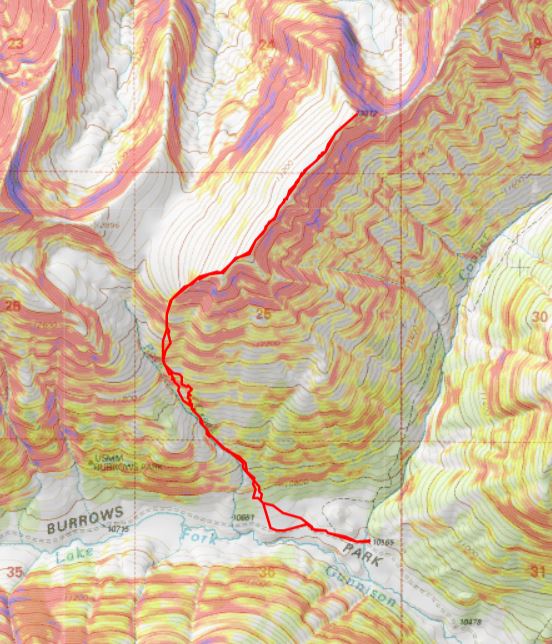
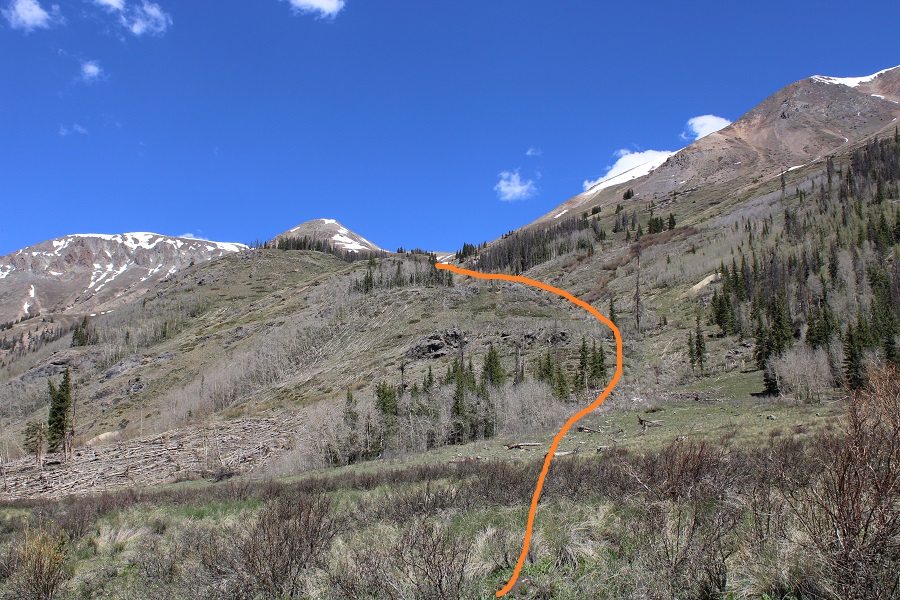
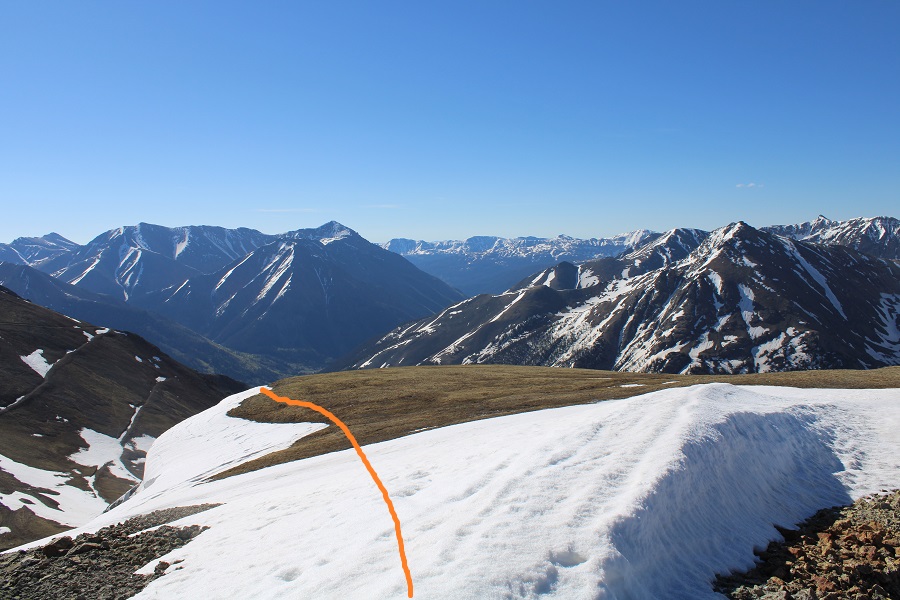
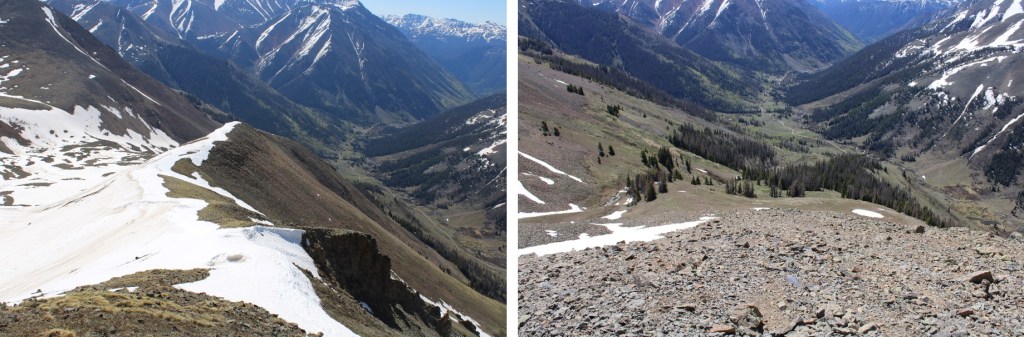
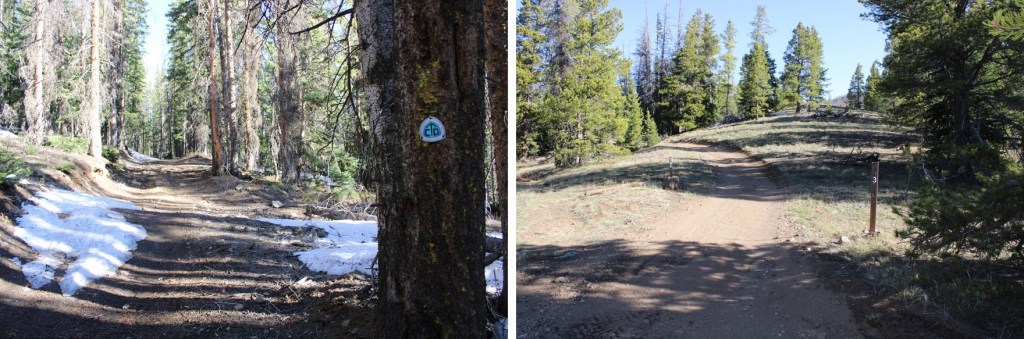
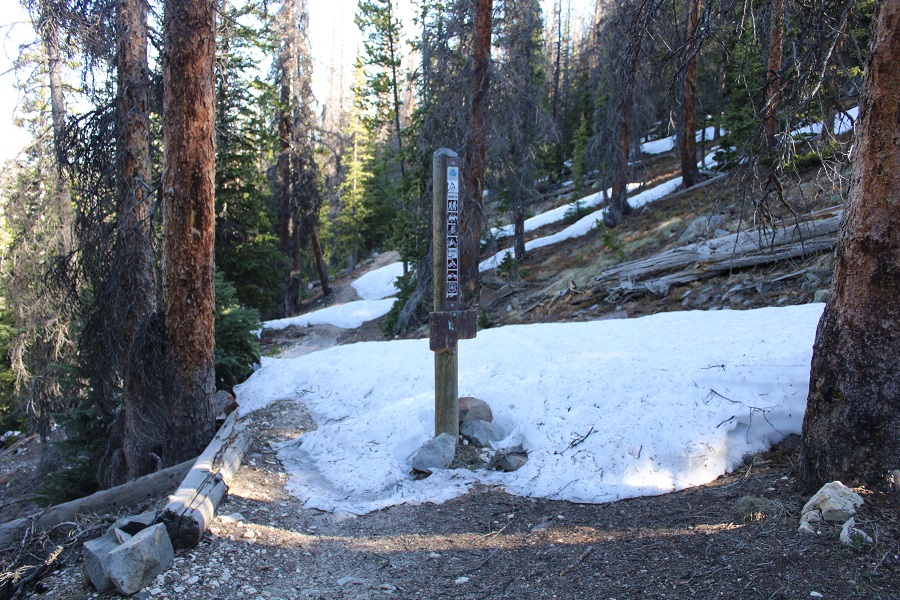
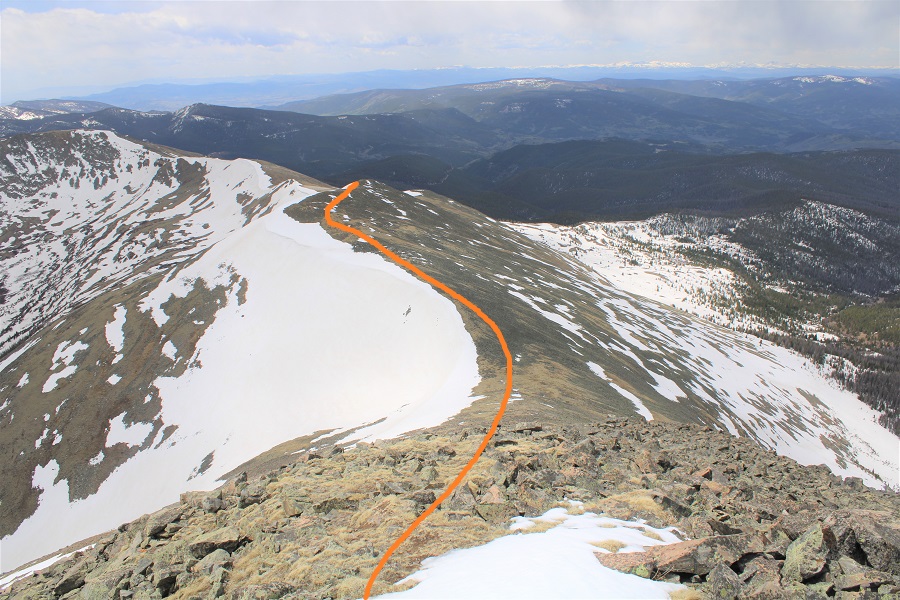
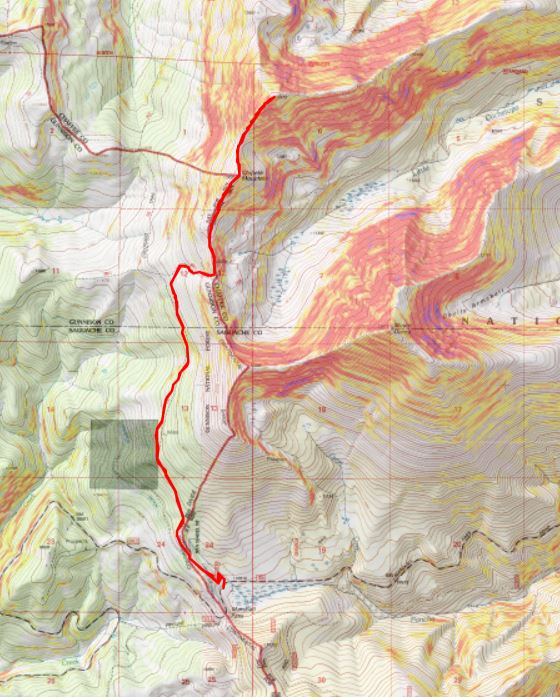
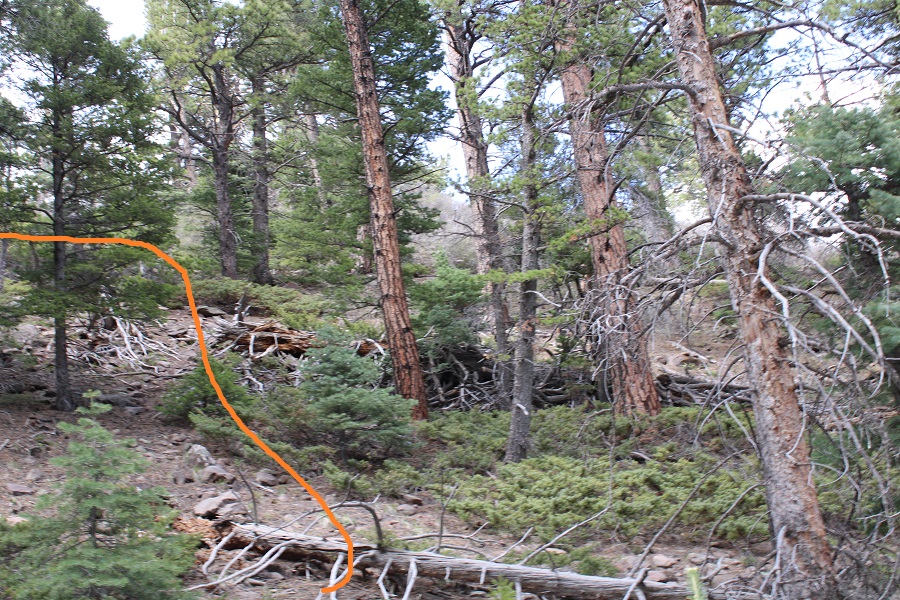
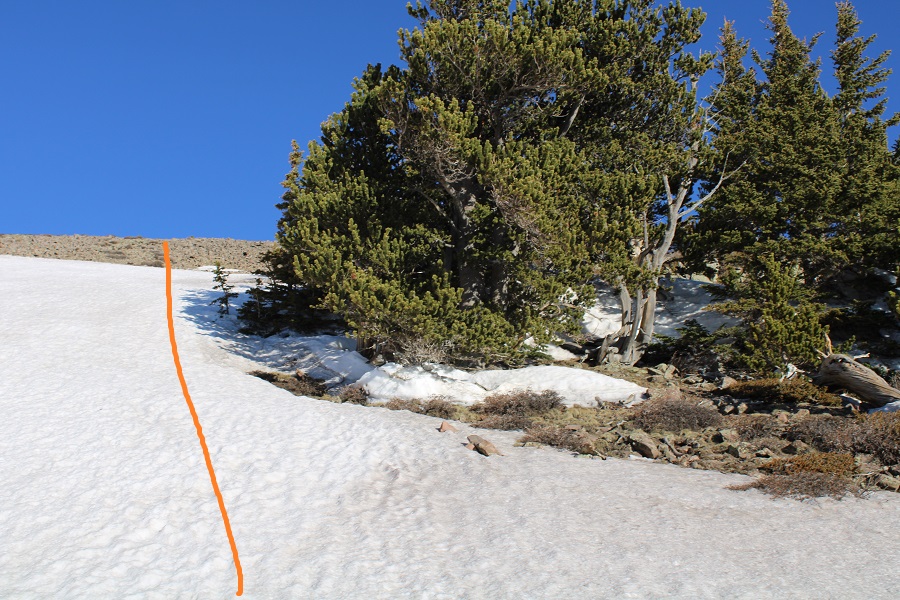
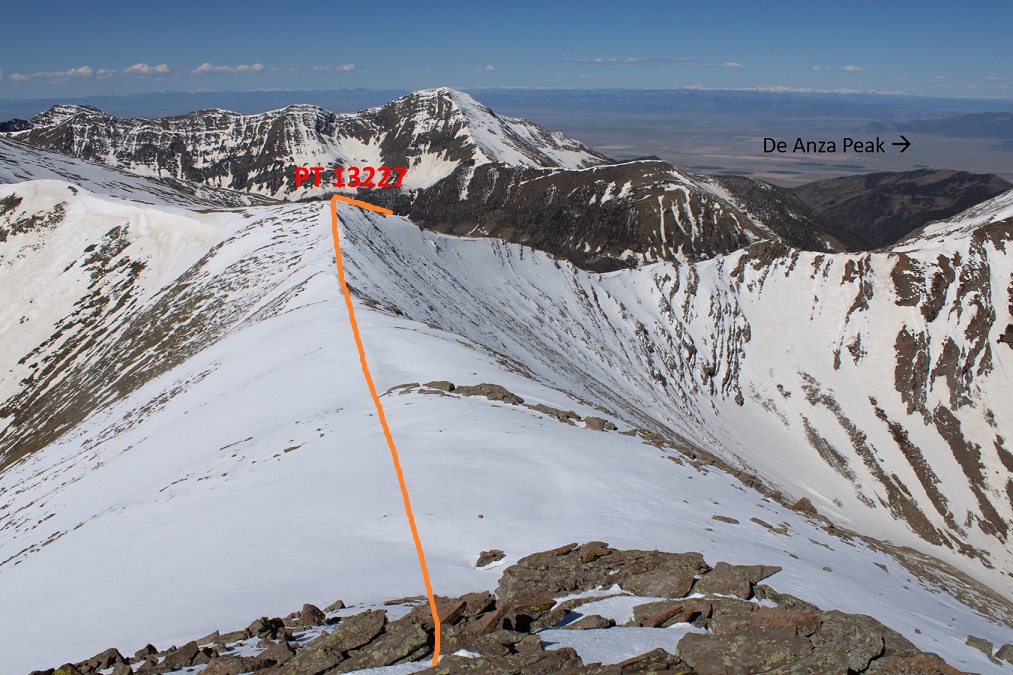
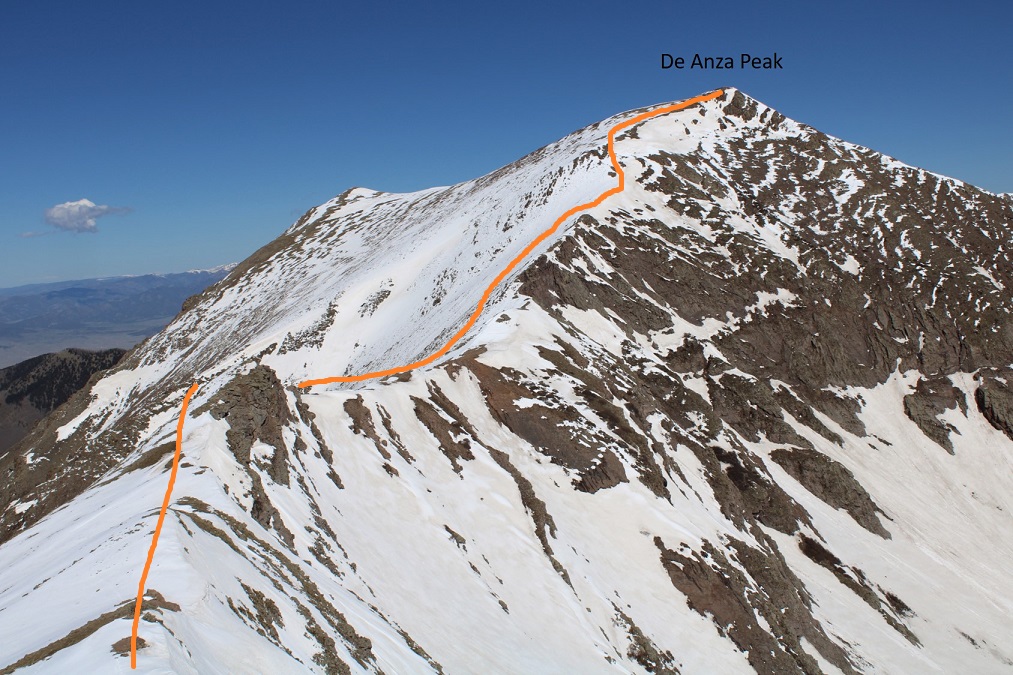
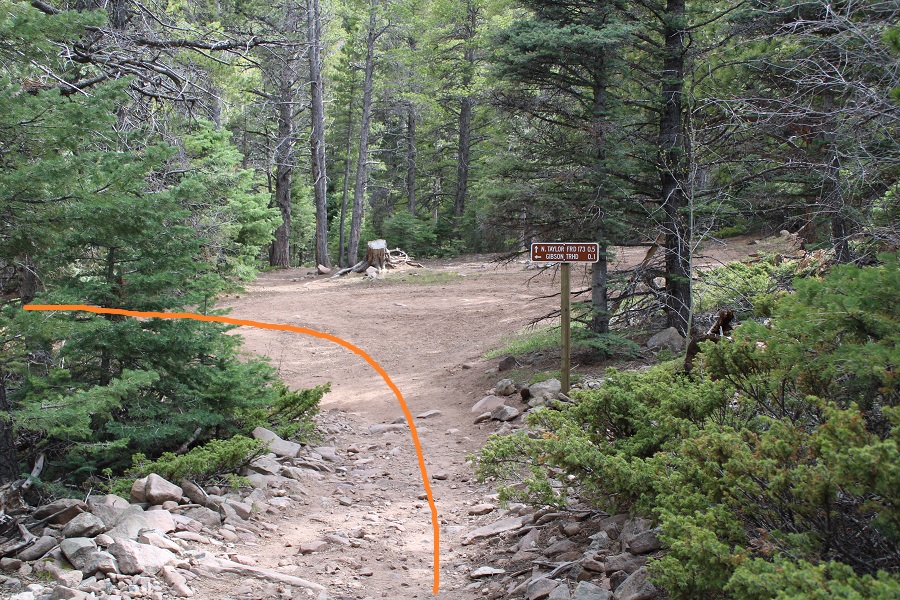
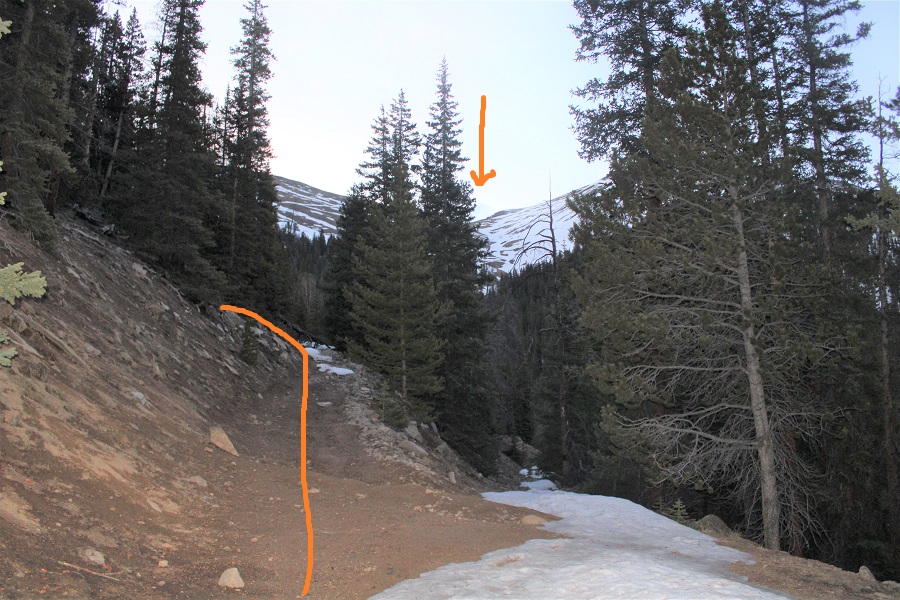
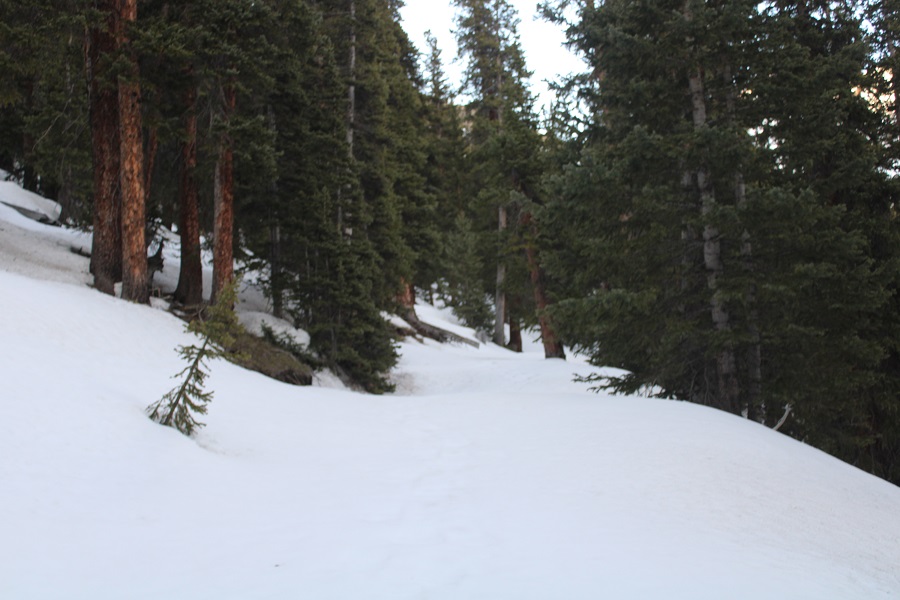
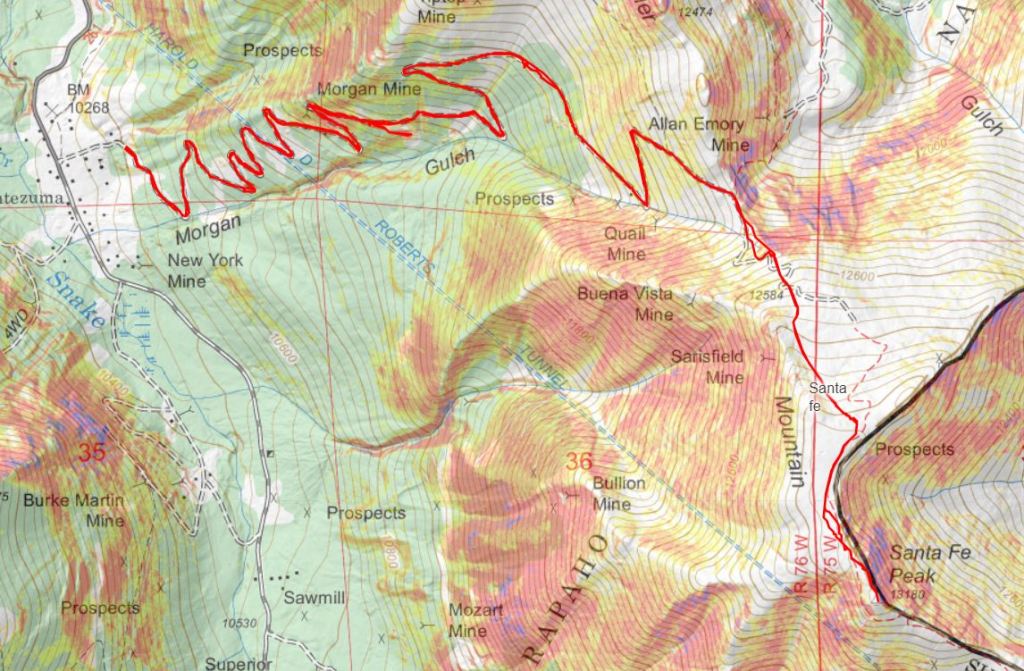
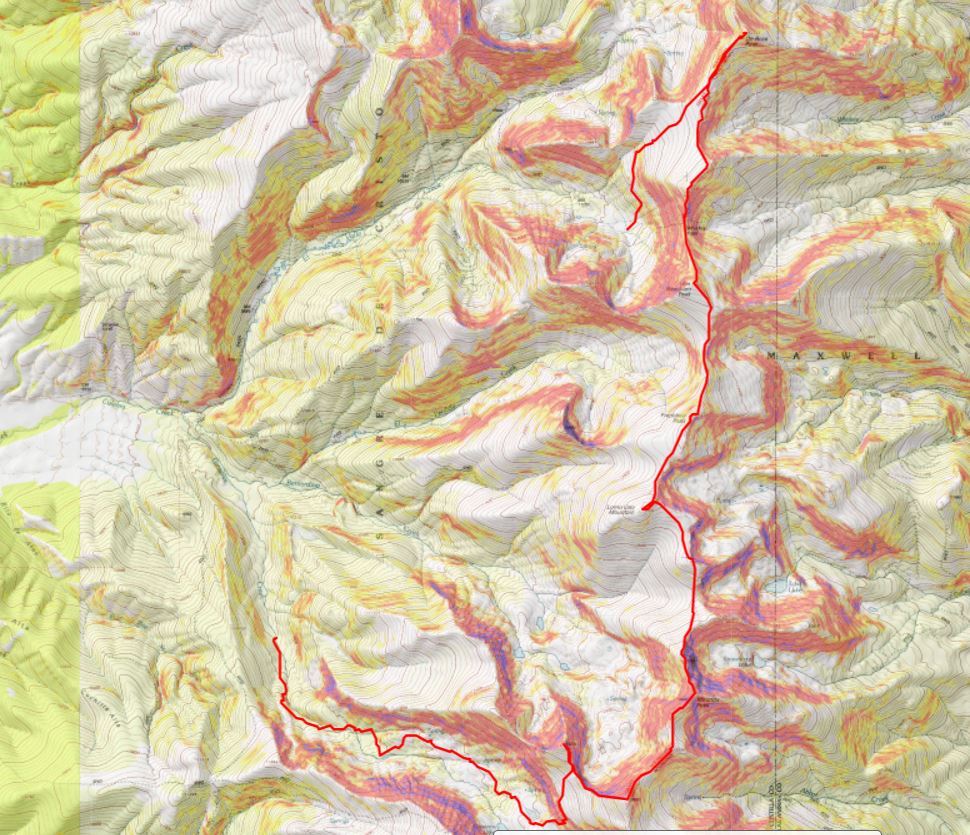
I was unsure when I went to bed what time I’d start, but when I woke up without an alarm at 1:45am I knew it was time to get going.  I was on the trail by 2am.  I didn’t see anyone else up, which meant they were either already on the trail or starting later (both ended up being true).  I wanted to get De Anza peak first, so instead of going over Whiskey Pass I started out heading northeast.  Here’s a visual.  There’s actually a road up there I followed for a couple dozen yards before I circled around the side of the mountain and headed northeast for the De Anza/Whiskey Peak saddle. 

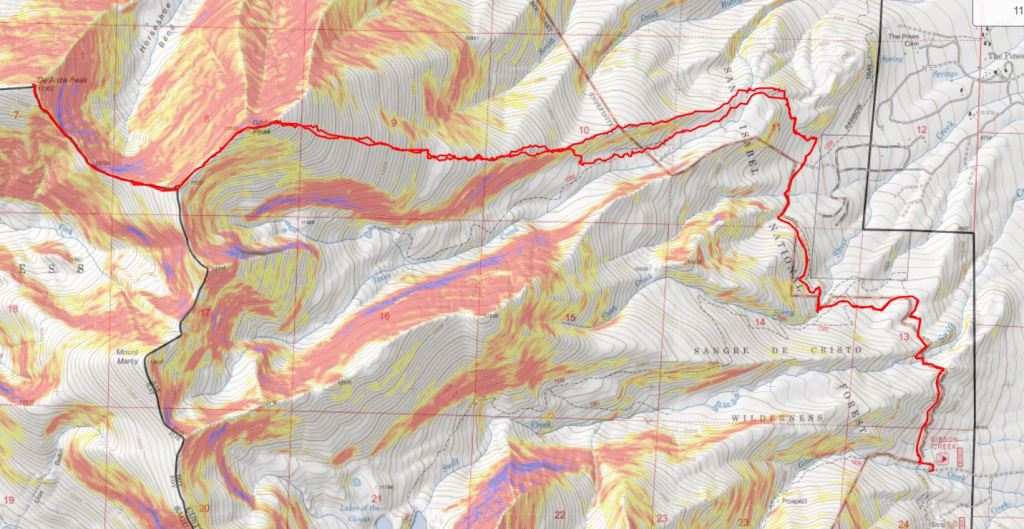
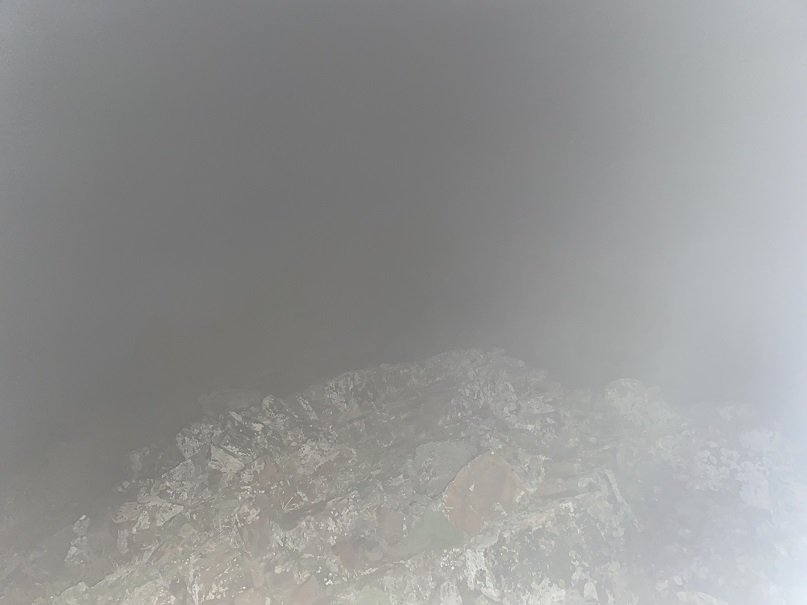
Sorry, but since it was so early in the morning, I don’t have pictures from the hike to De Anza or Whiskey Pass, so you’ll need to use the topo map as reference, but I believe it’s self-explanatory.  Also, the weather was terrible:  I was hiking in fog the entire time.  I’m not sure if you’ve ever hiked in fog in the dark, but flashlights are useless.  You can only see about 5 feet in front of you, and actually have a better visual turning your flashlight off for a second to see the terrain.

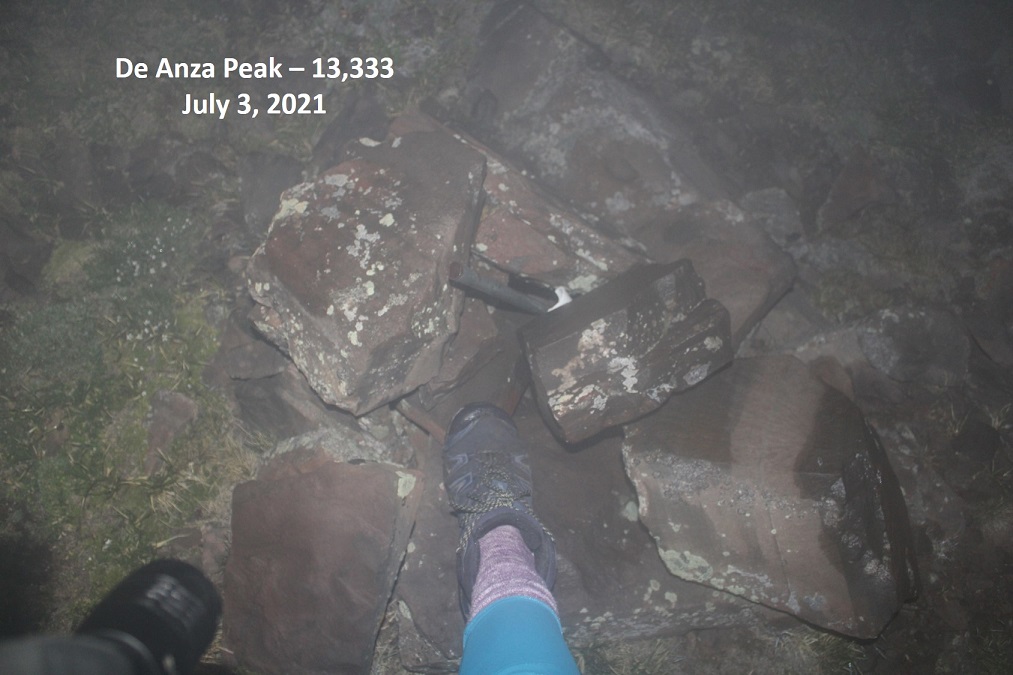
Hiking up to De Anza was easy, as all I had to do was keep hiking northeast and up and I knew I’d eventually make it to the summit. When I did, I thought to myself “that was too easy” and had to check my Peakbagger app to verify I was already at the summit.  I was, so I took a picture of my feet at the summit cairn, and headed back down. My advice on this peak:  If you’re already paying to hike here, hike De Anza as well.  I’m guessing it may have added half an hour total to my hiking time.  Totally worth it, and super easy, especially by avoiding Whiskey Pass on the way up, which meant less scree/talus to navigate:  it was all tundra for me.

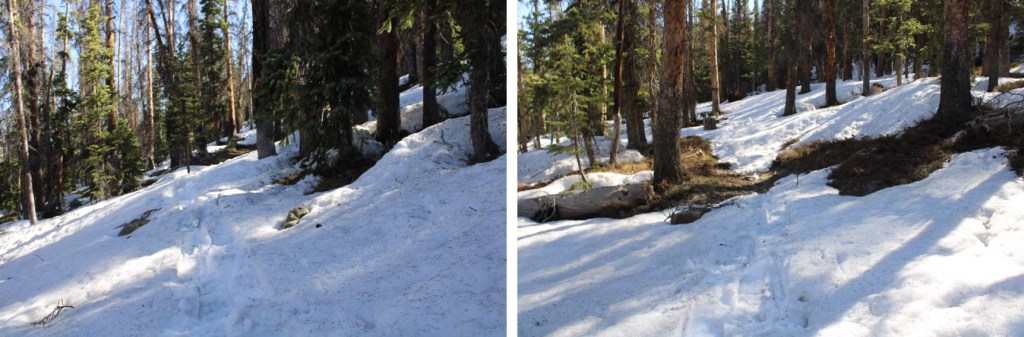
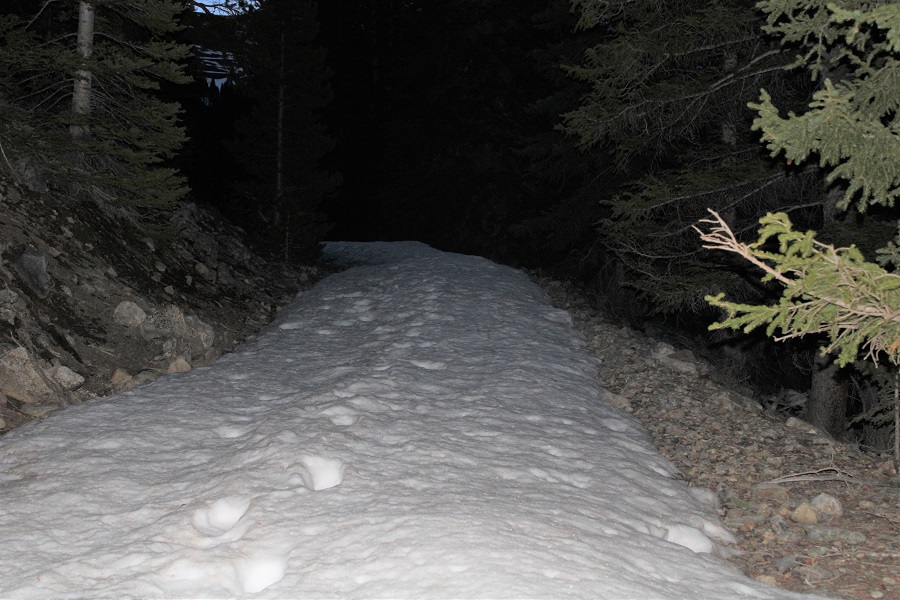
Hiking back down the ridge was the tricky part.  It was still dark and foggy and I had no visual sense of direction.  At one point I encountered snow and knew I was going the wrong way because I hadn’t encountered snow on the way up.  At times I’d point my flashlight away just so I could see the terrain better.  I kept my compass in front of me and did my best to head southwest down the ridge. Hiking in the dark with fog is not ideal. 

Once again, no pictures here as I made my way to Whiskey Pass.  In the daylight this is probably easy to navigate, but in the dark I kept coming across large gaps in the ridge I had to maneuver around.  If you’re doing this in the daylight I’m sure the route is obvious.  If you’re doing it in the dark I’d say if you’re in doubt, stick to the right (west) when you encounter a chasm/drop off.  It’s all class 2, so if you feel it’s more difficult than that, re-assess your route. 

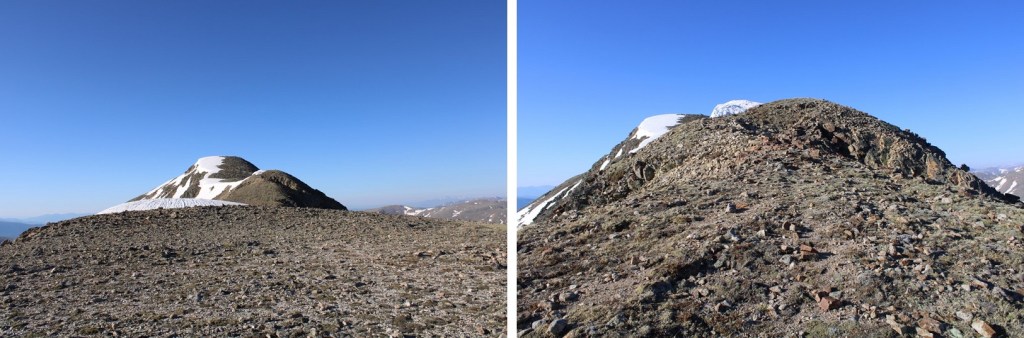
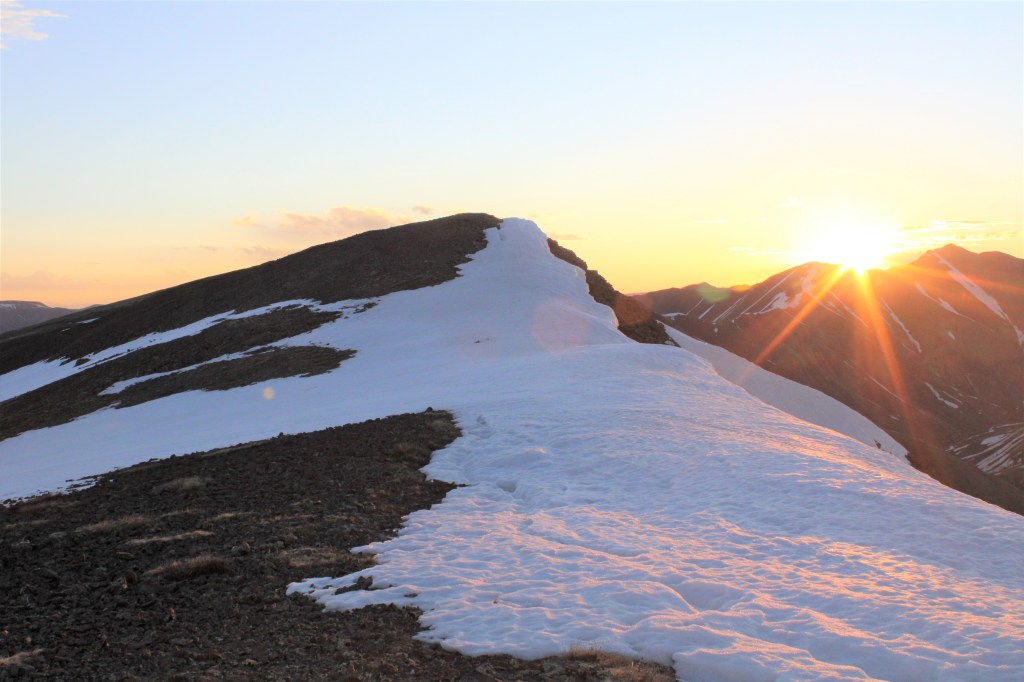
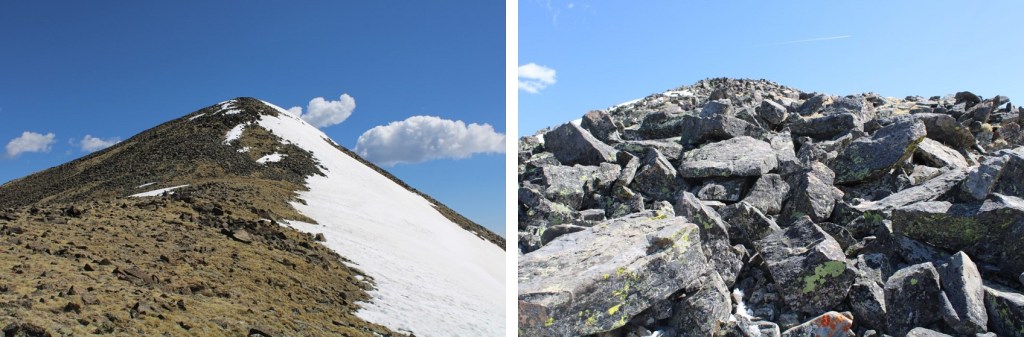
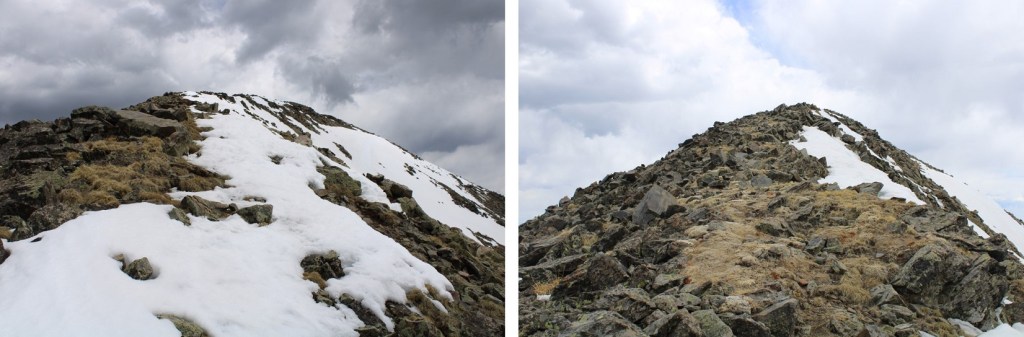
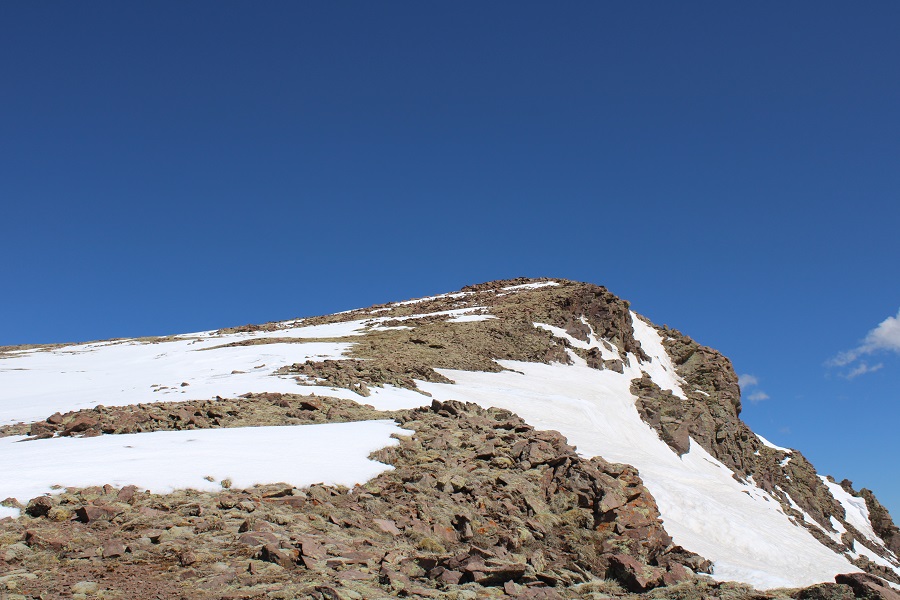
The hike from Whiskey Pass up to Beaubein Peak was a straightforward ridge hike.  It was still dark, but the sun was starting to rise as I kept heading south. 

Summit of Beaubien Peak

Beaubien Peak:

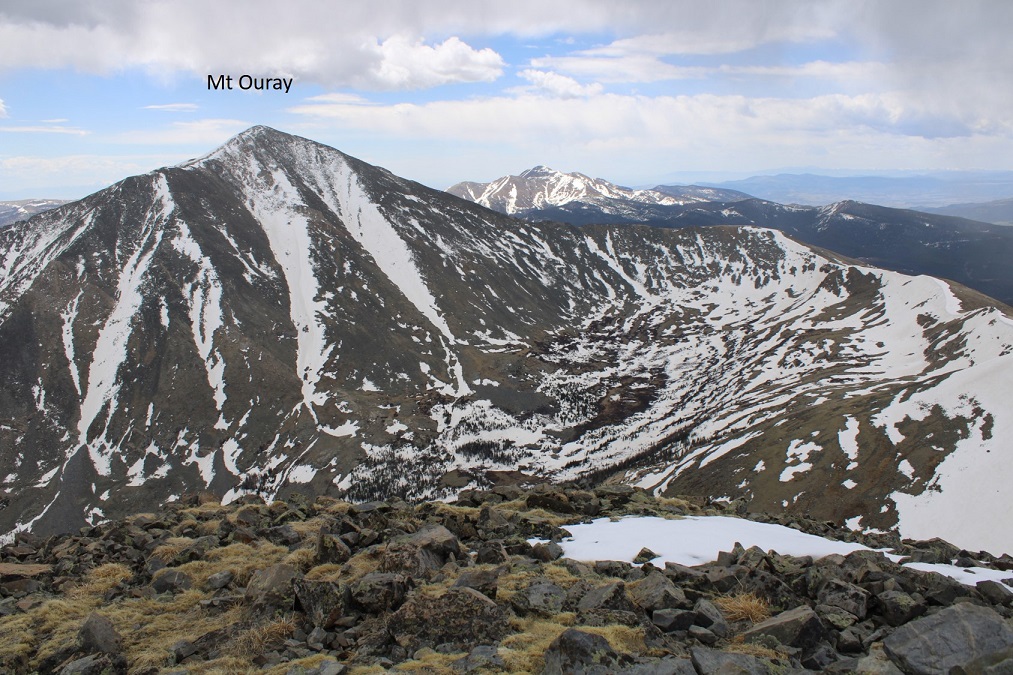
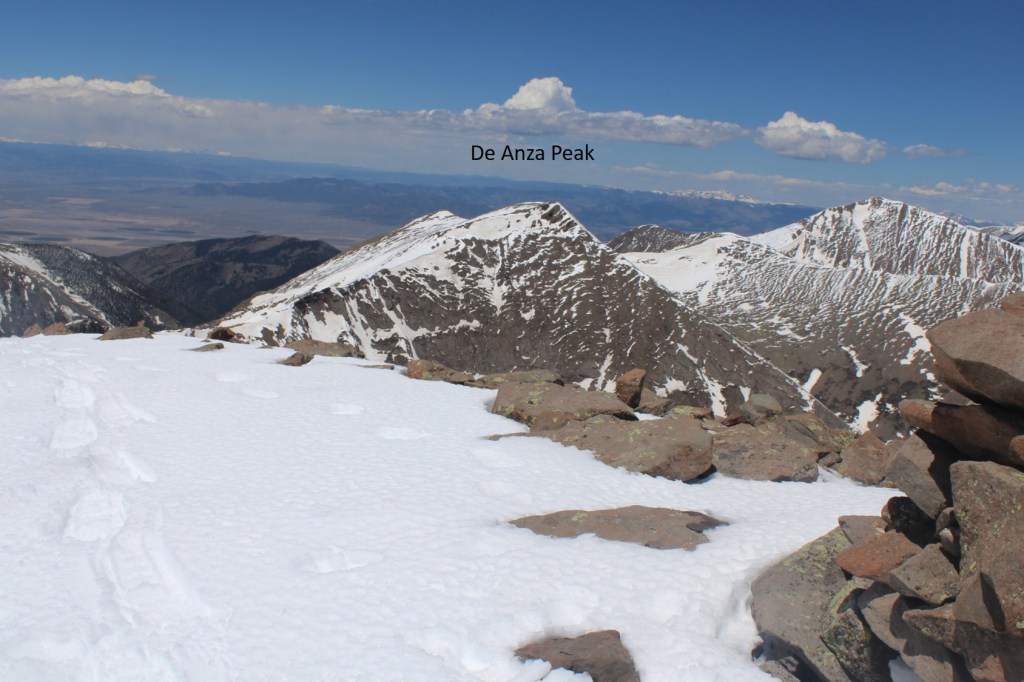
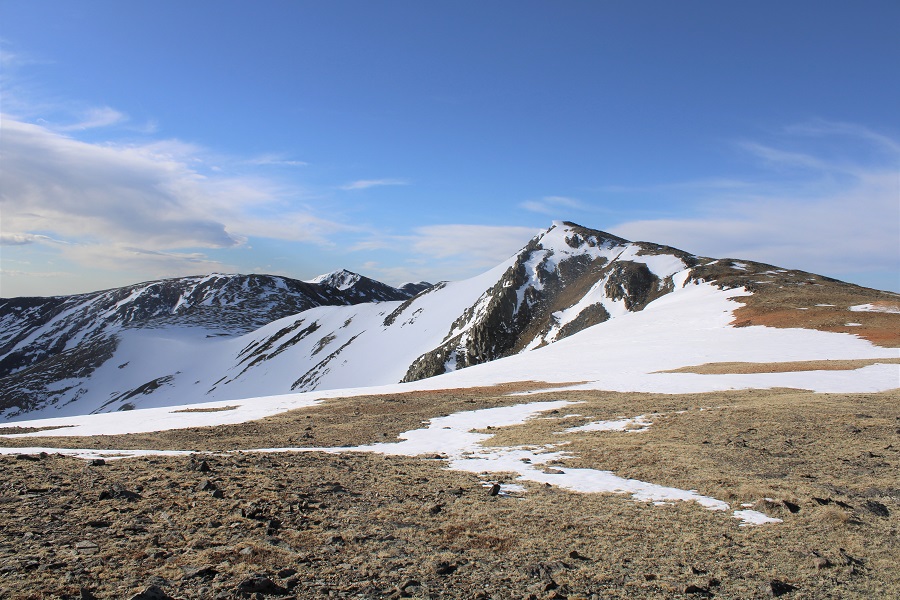
Here’s my view looking back at De Anza. 

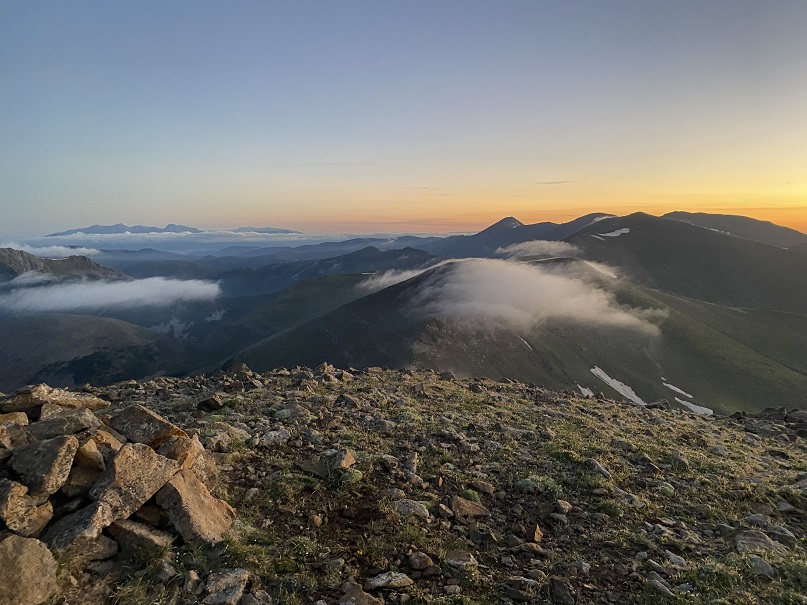
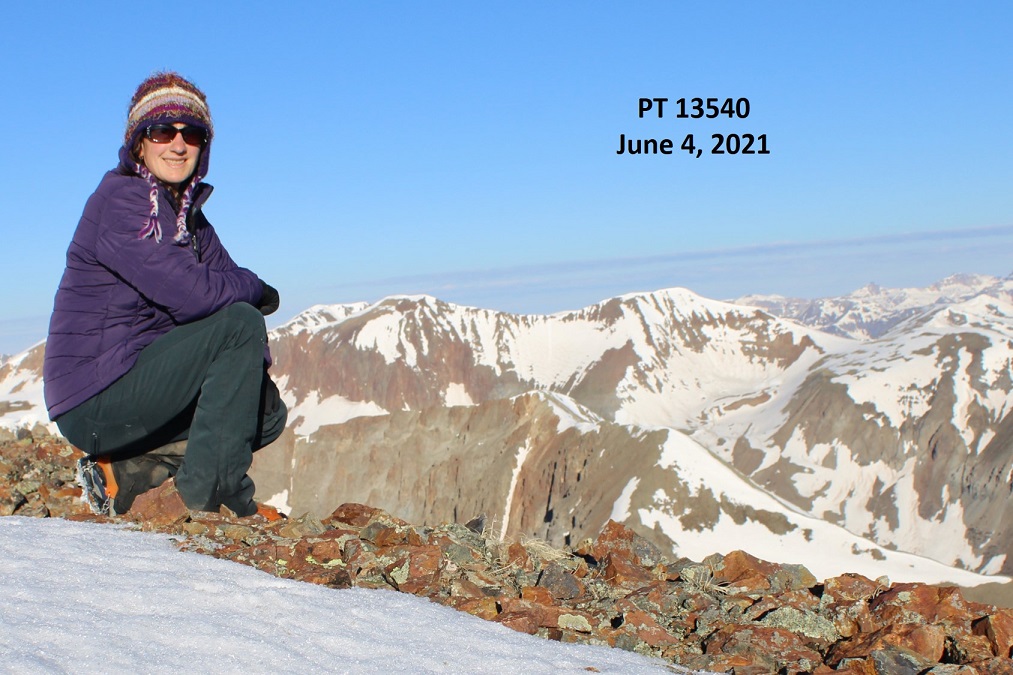
It’s colder than it looks

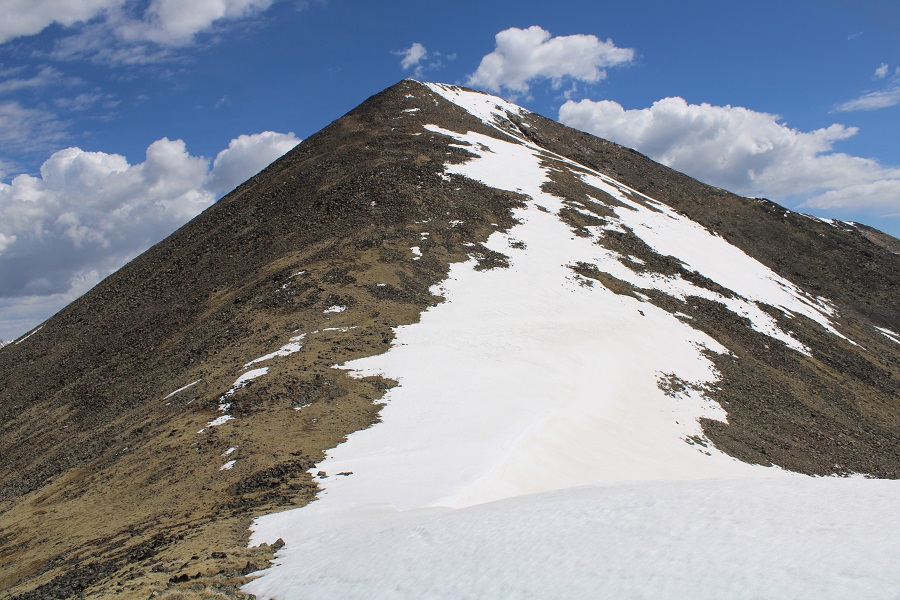
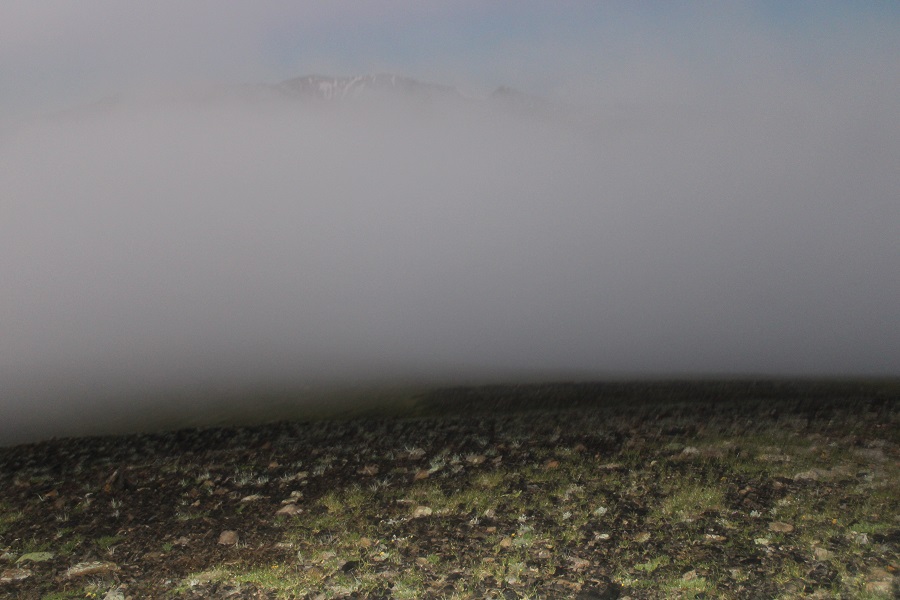
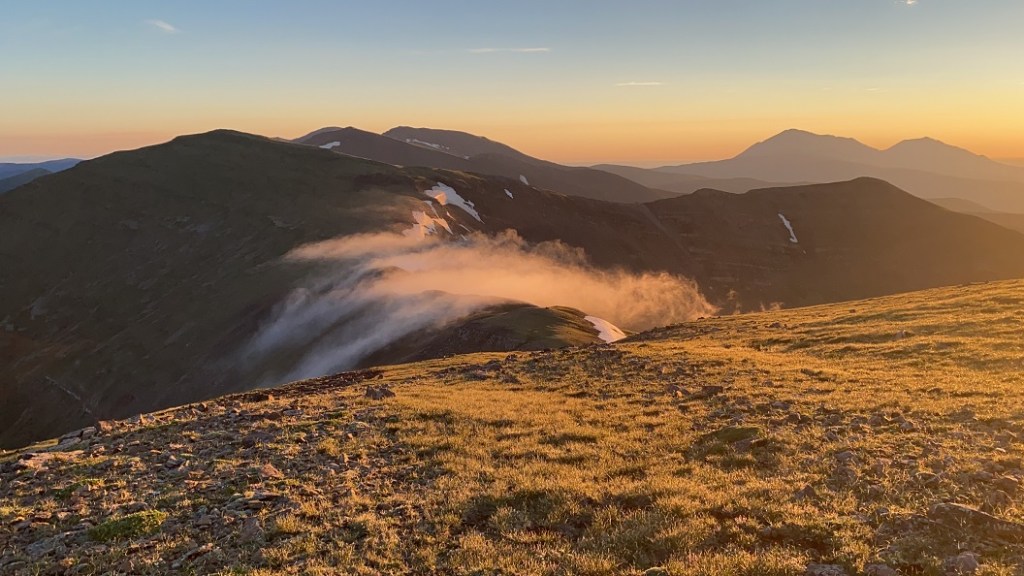
Next, I continued following the ridge south.  The clouds didn’t seem to want to go away. I could see Culebra in the distance, and was just waiting for the fog to lift and the sun to rise

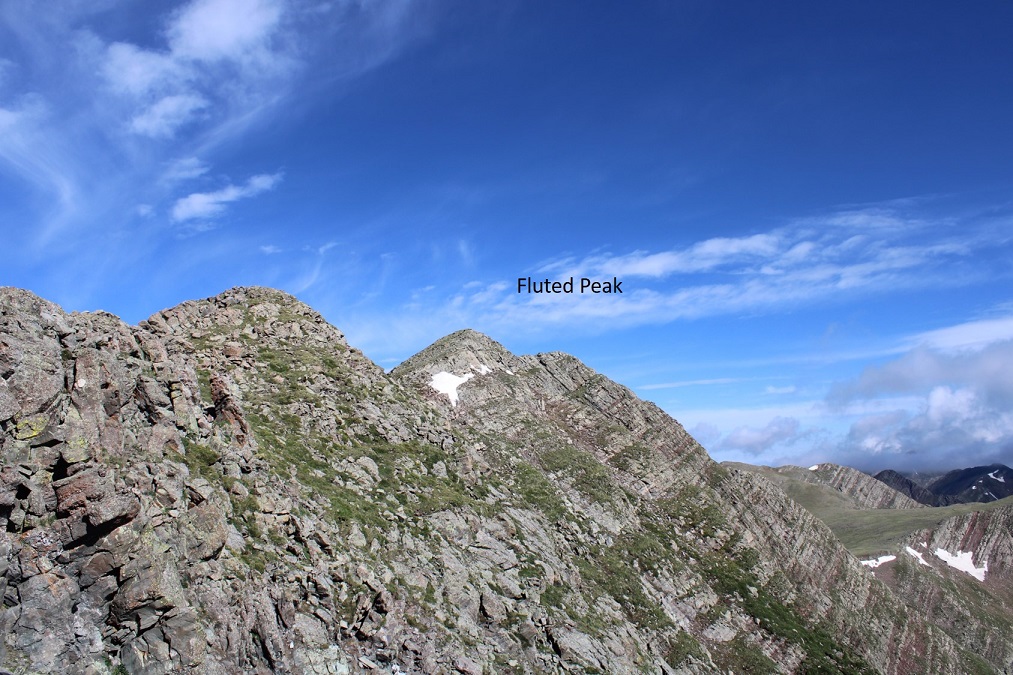
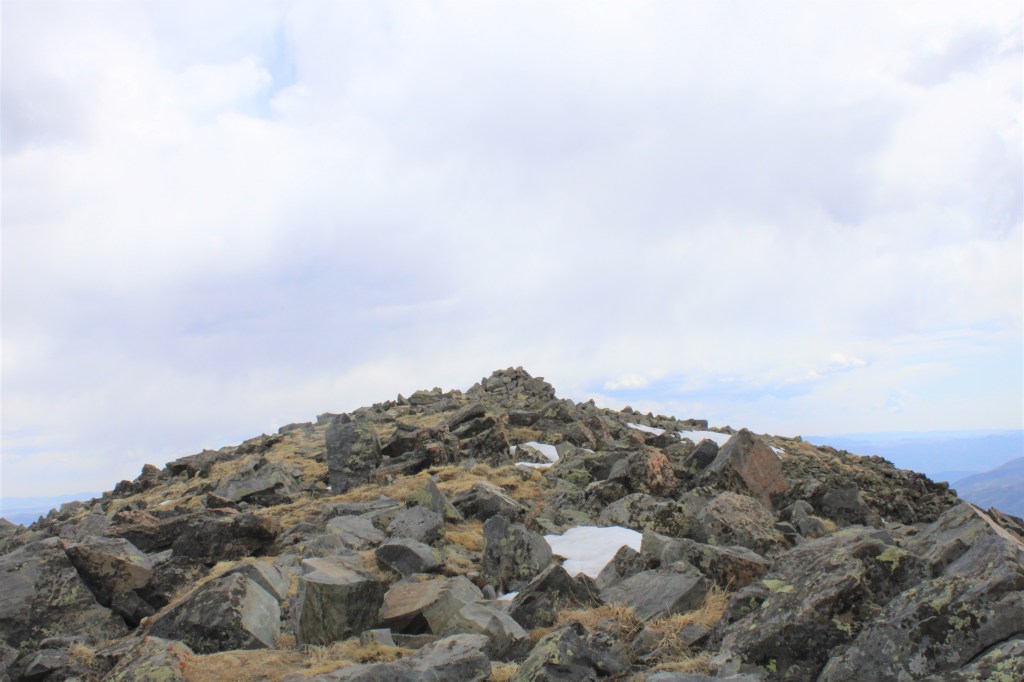
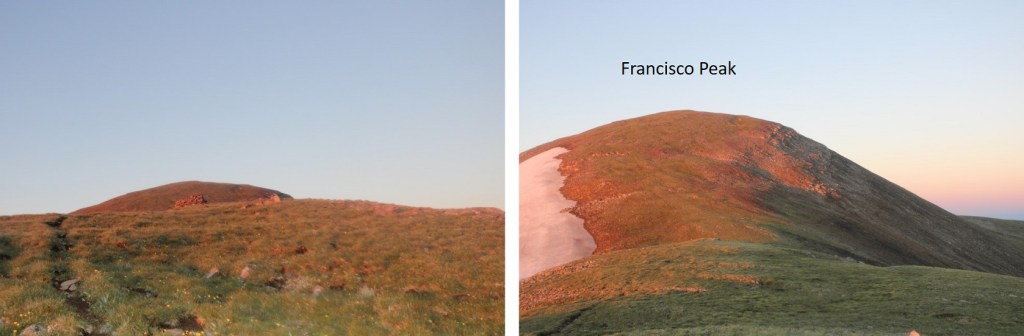
Here’s a look at Francisco Peak

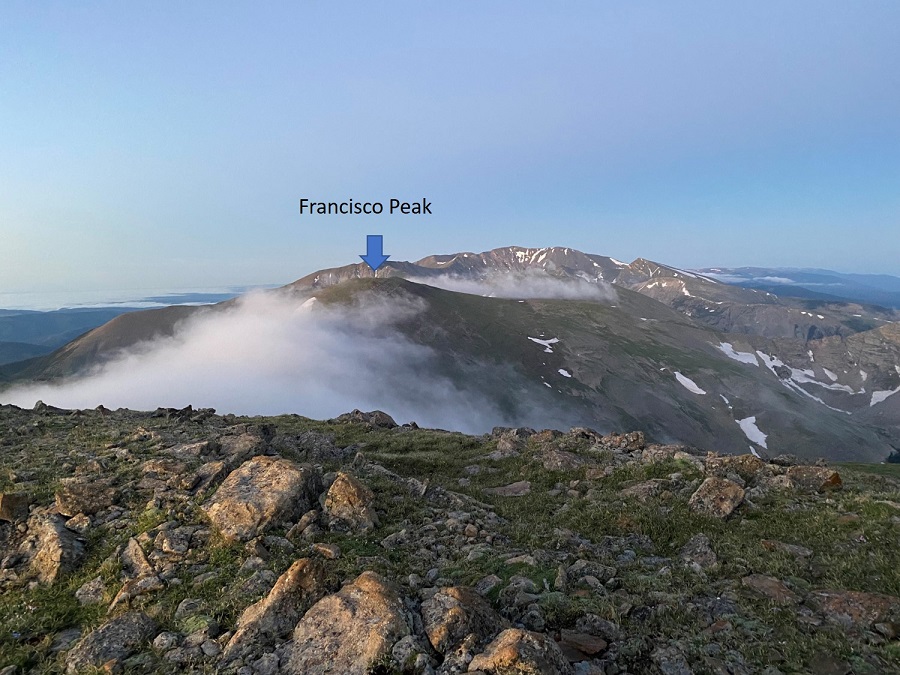
Once again, I hiked through the fog to get there

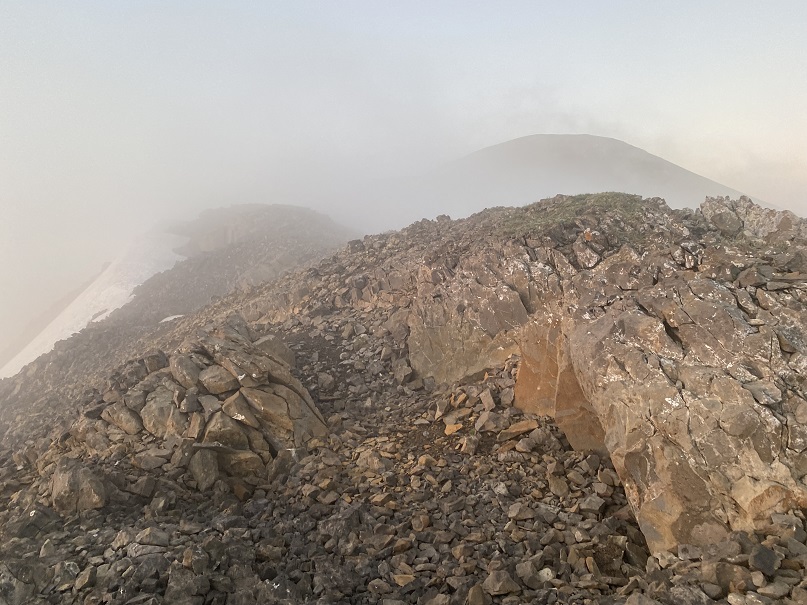
From the summit, it looks as if the true summit of Francisco Peak is further southwest (where the cairn is), but it isn’t. It’s actually where I’m standing, taking this picture.

However, I didn’t realize this until I’d walked over to the other side, so you get a picture of me there, not at the actual summit… but close. 
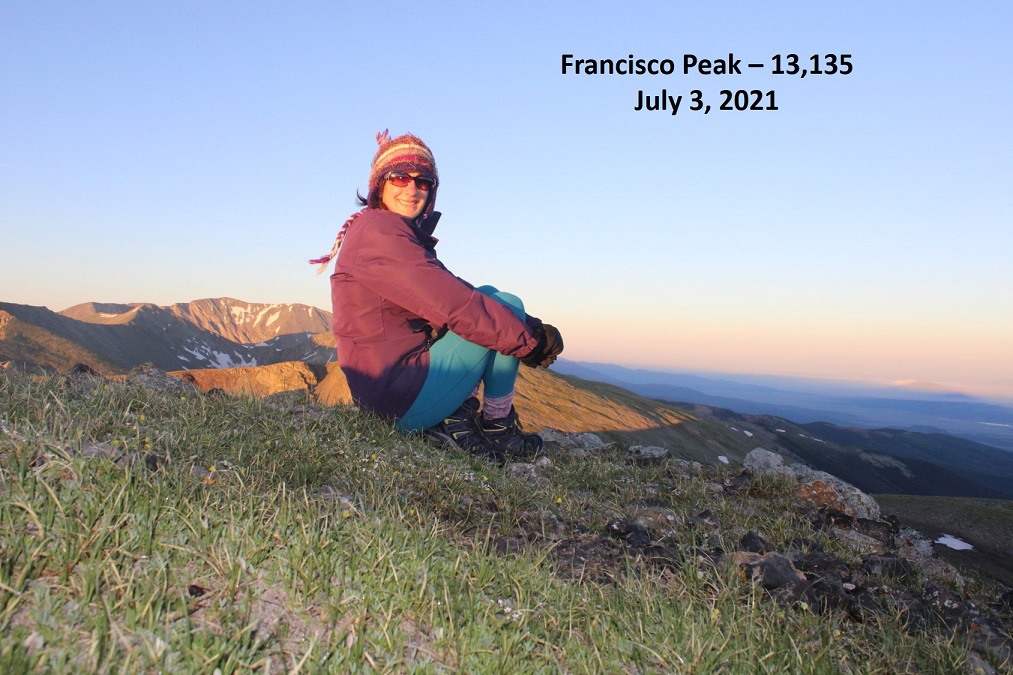
Francisco Peak: 

Here’s looking back on the route so far.  Still colder than it looks

The clouds now behind me, I continued following the ridge south towards Lomo Liso Mountain.  This was an easy ridge walk on tundra

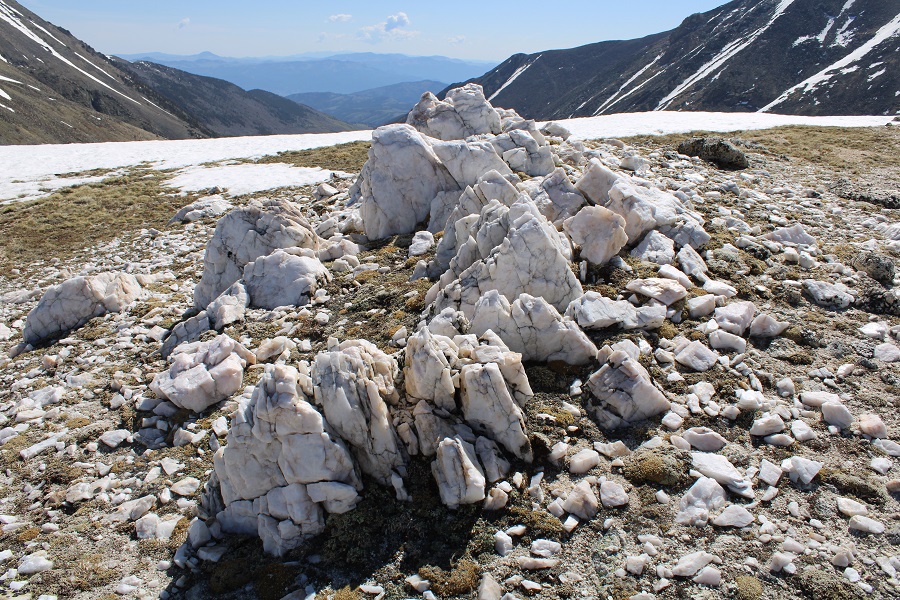
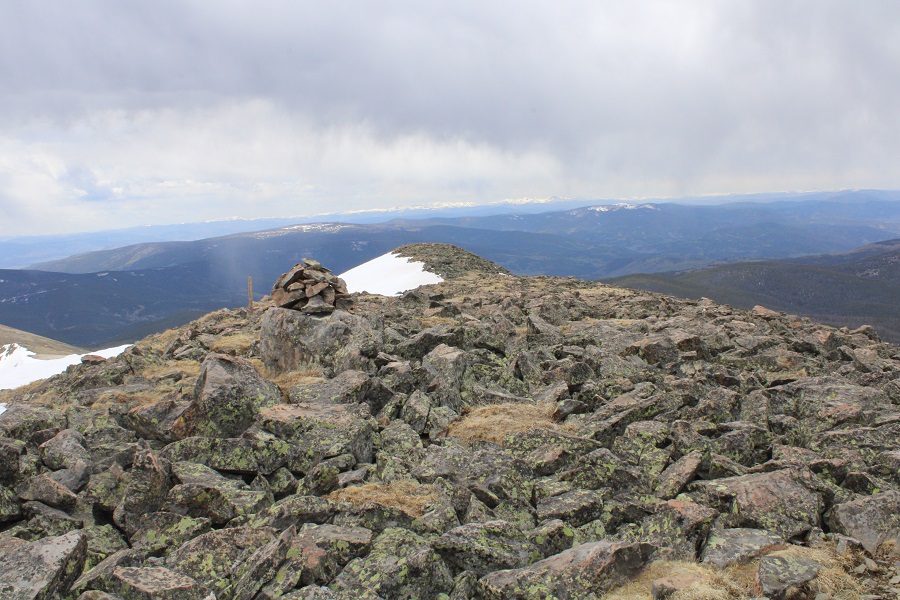
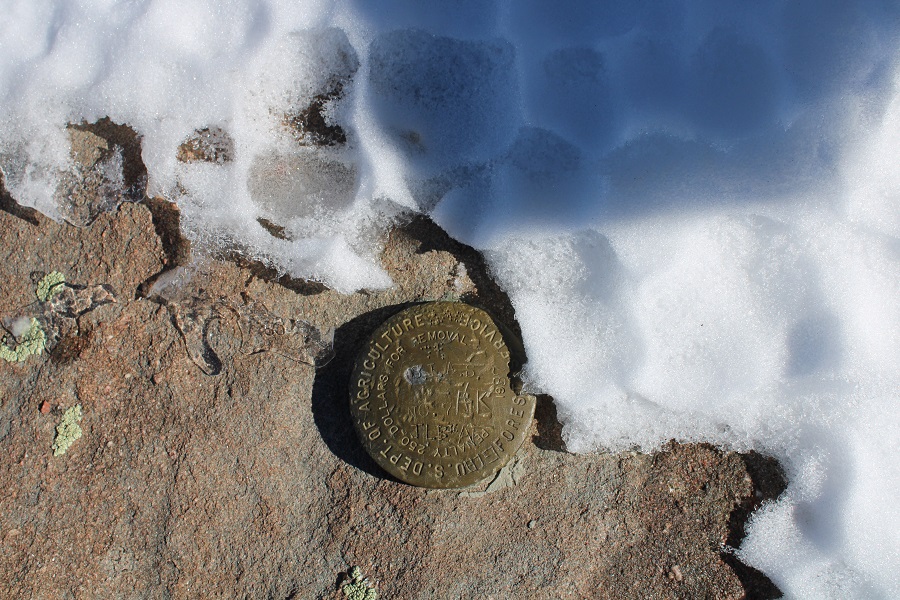
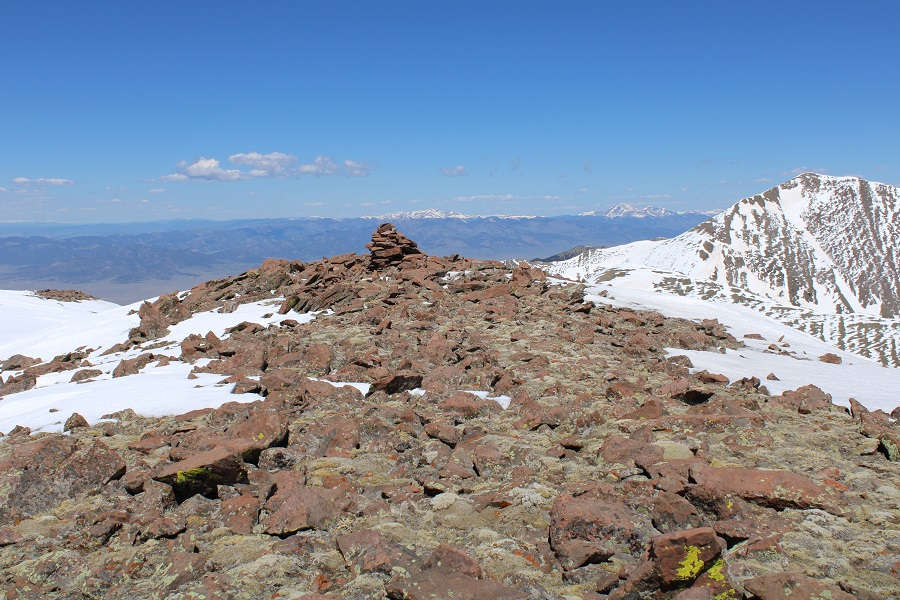
The summit was large and flat and it was again difficult to figure out where the ‘true’ summit was, so I went with where the cairn was located.  Side note:  all the summit registers on all of these peaks have been broken and are empty. 

Lomo Liso Mountain:

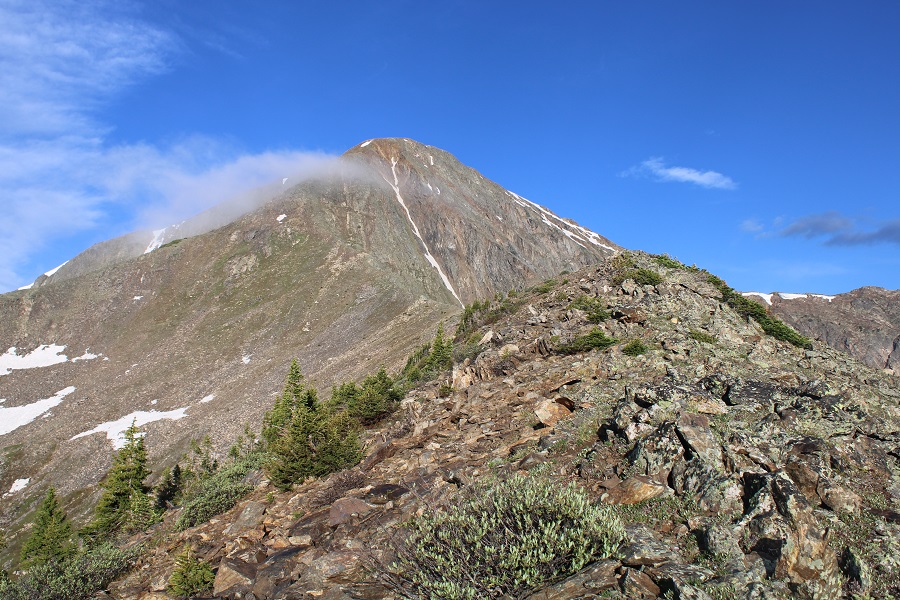
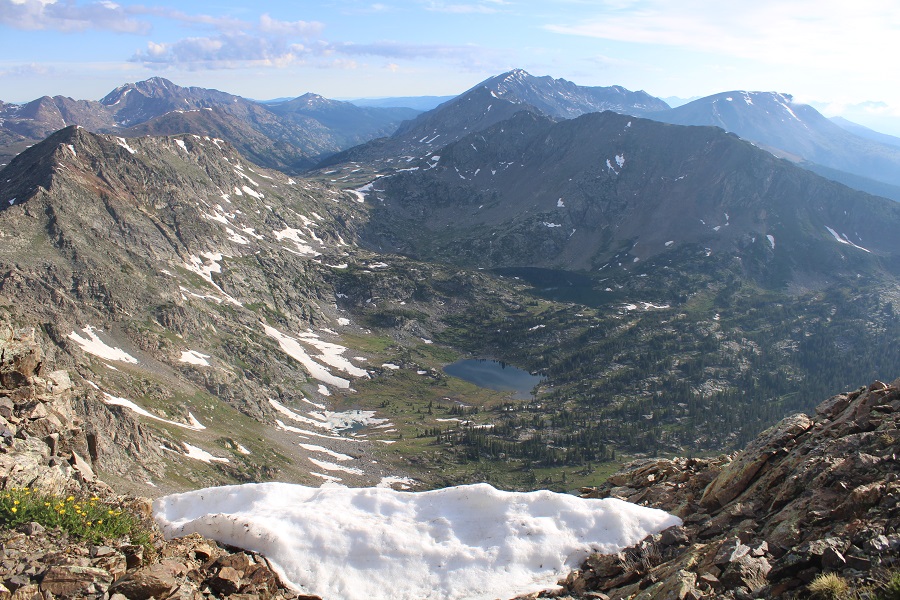
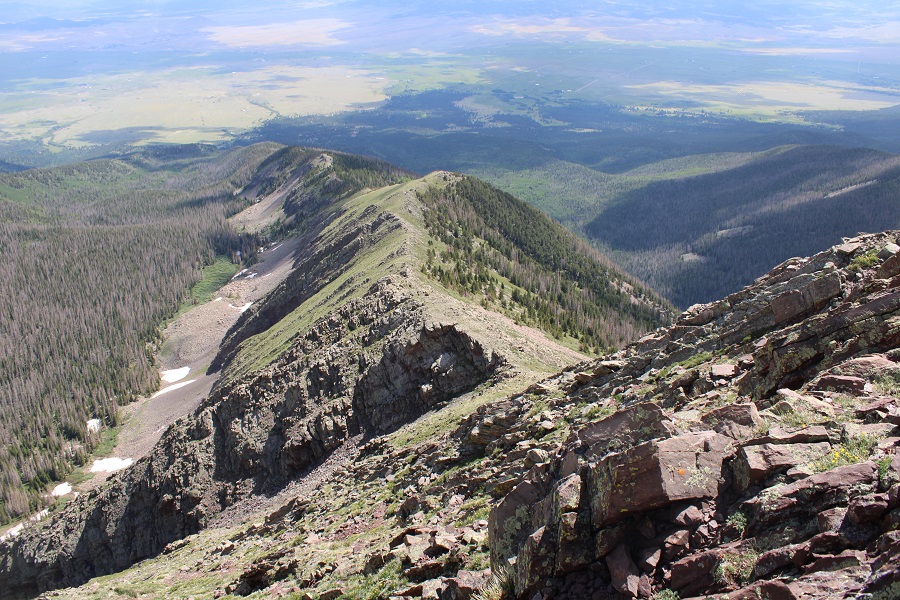
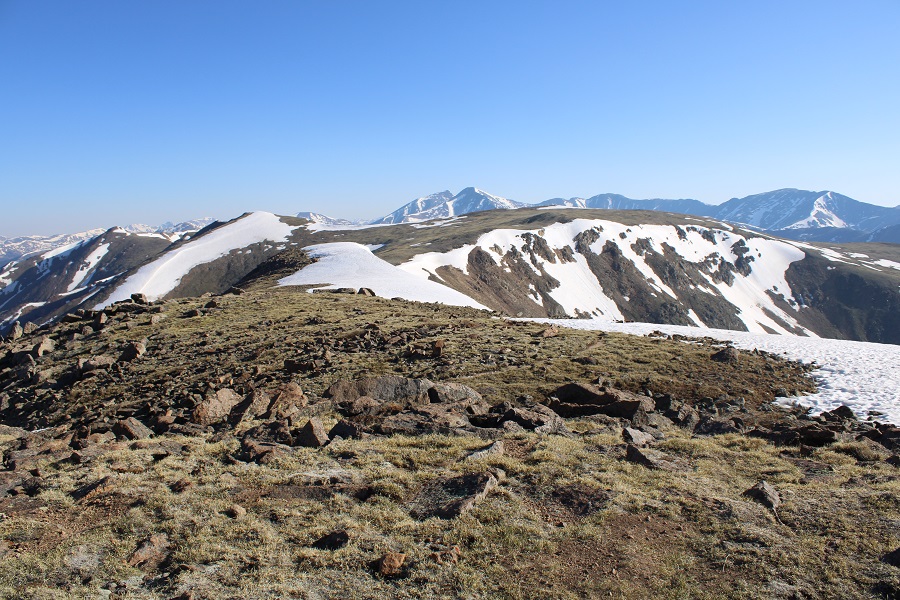
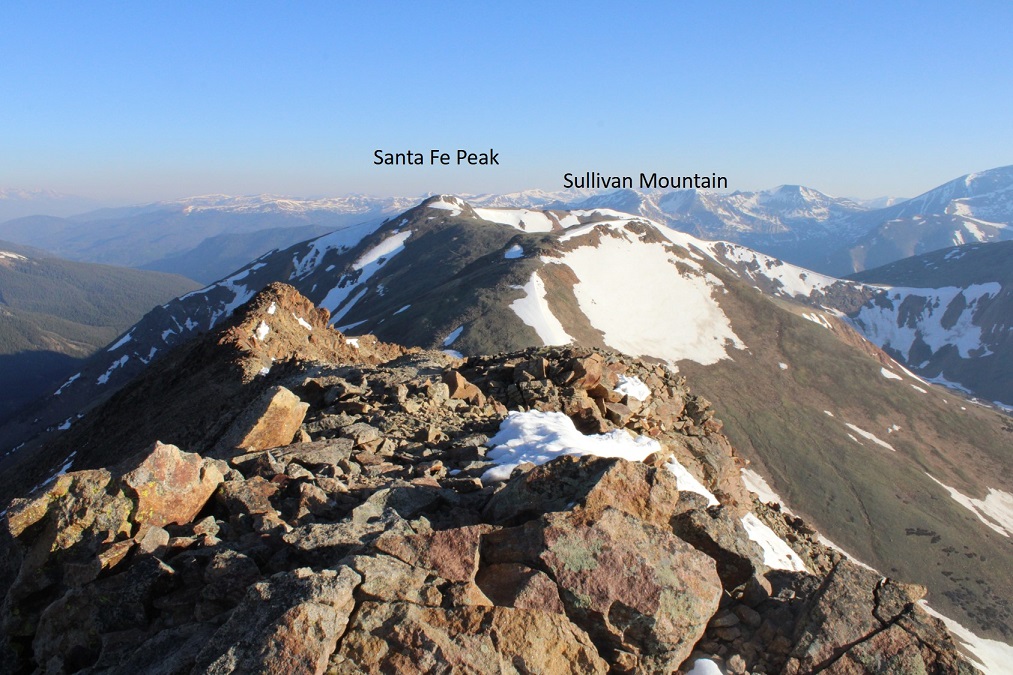
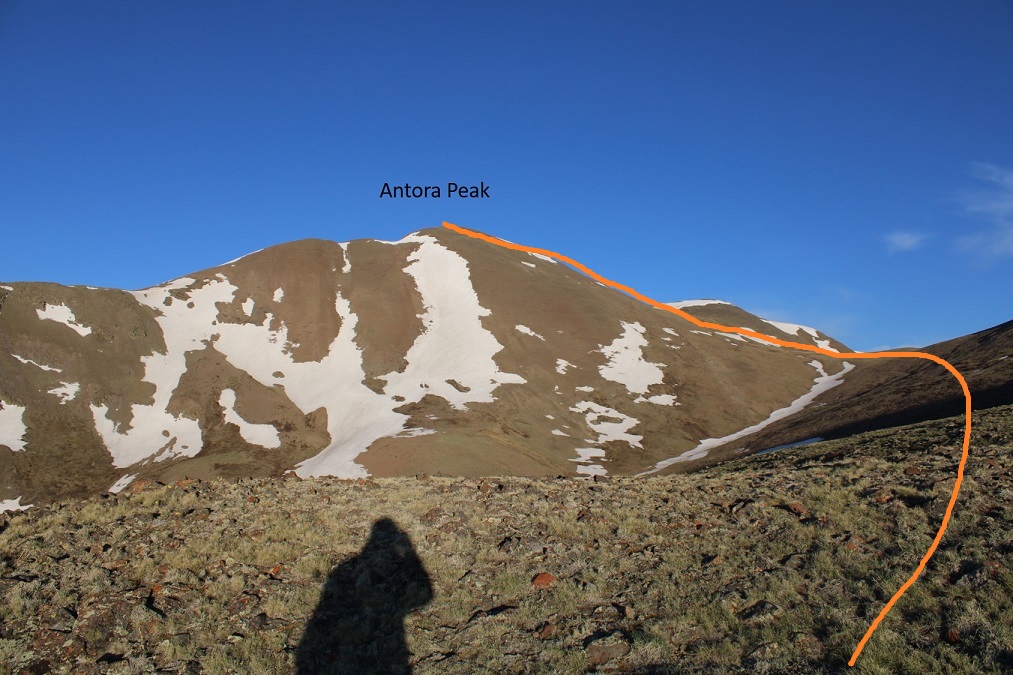
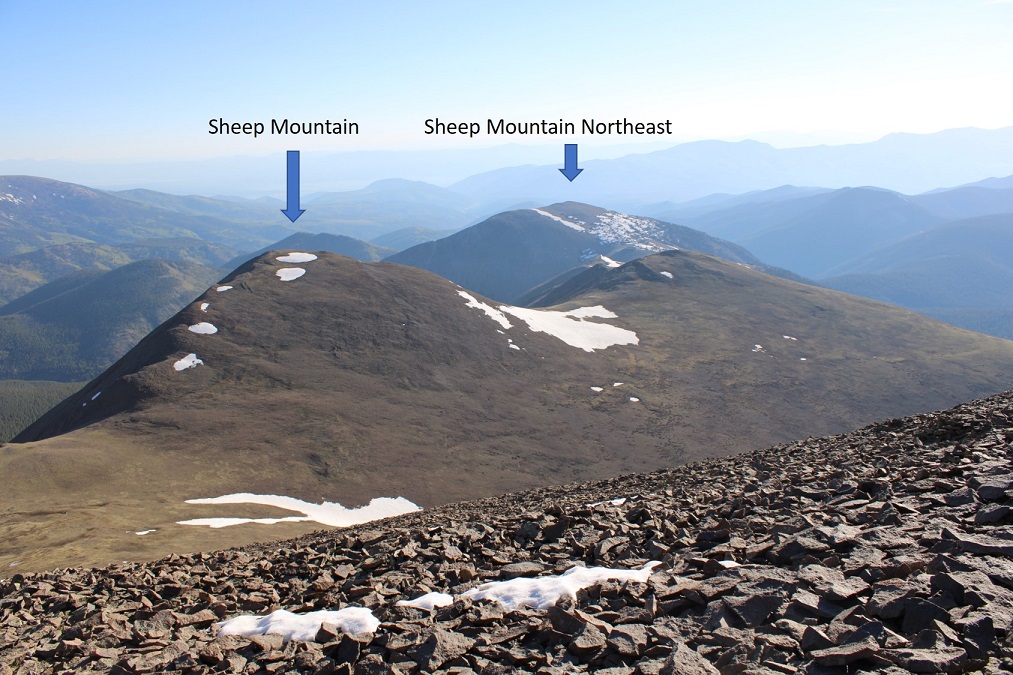
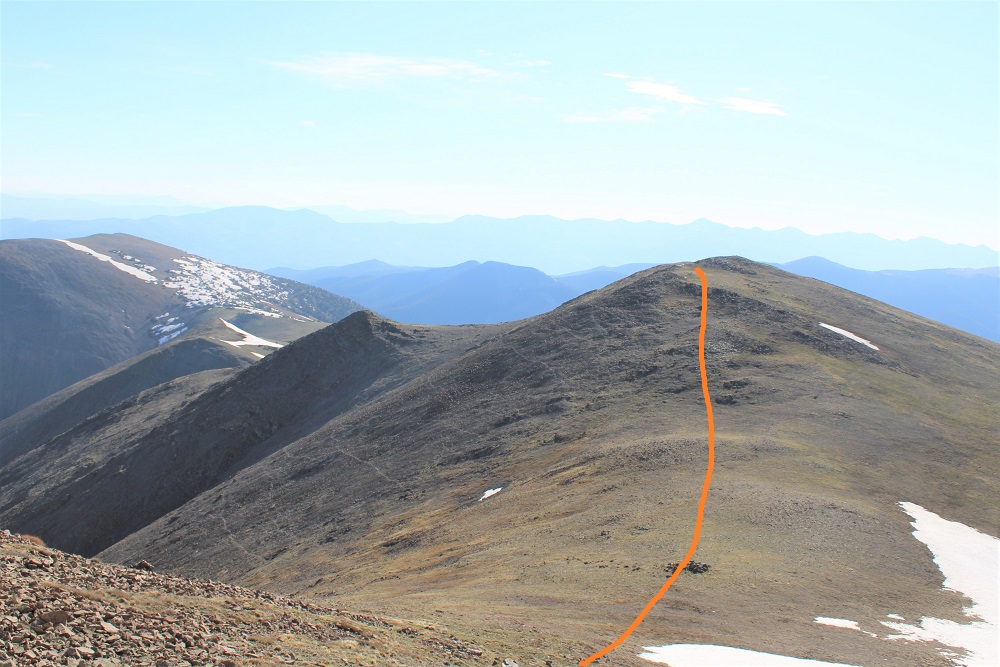
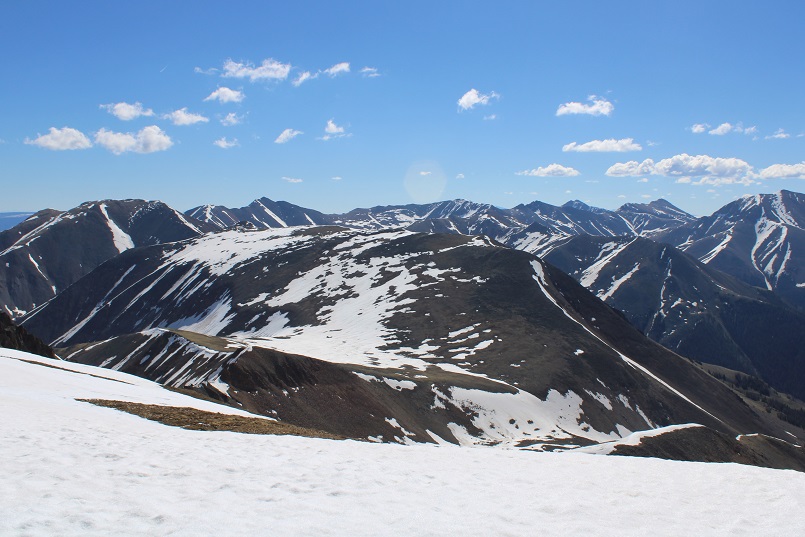
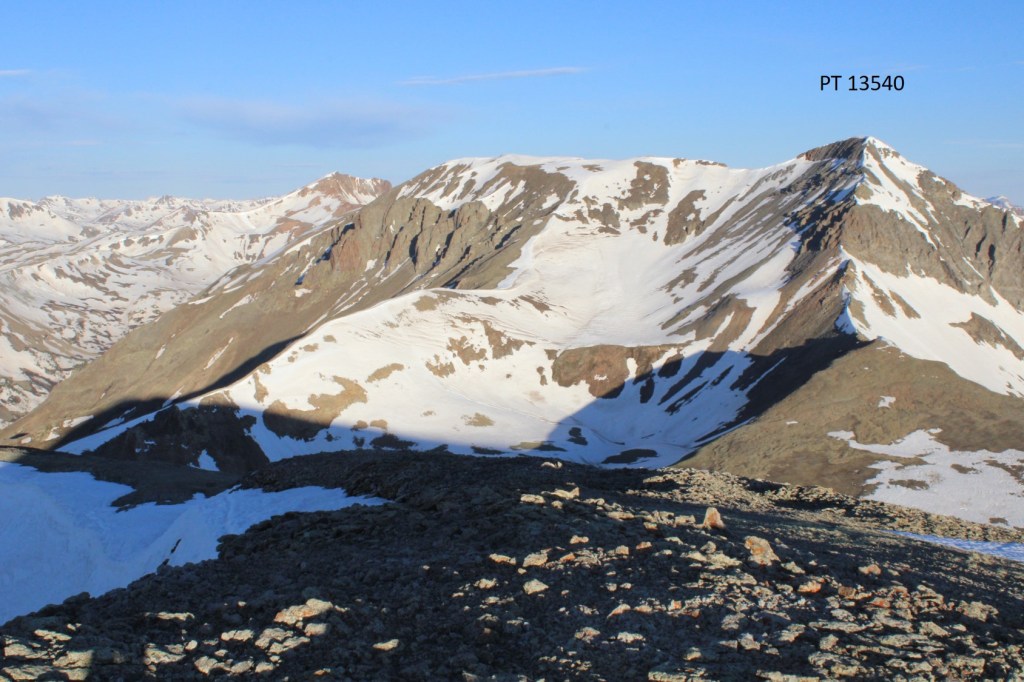
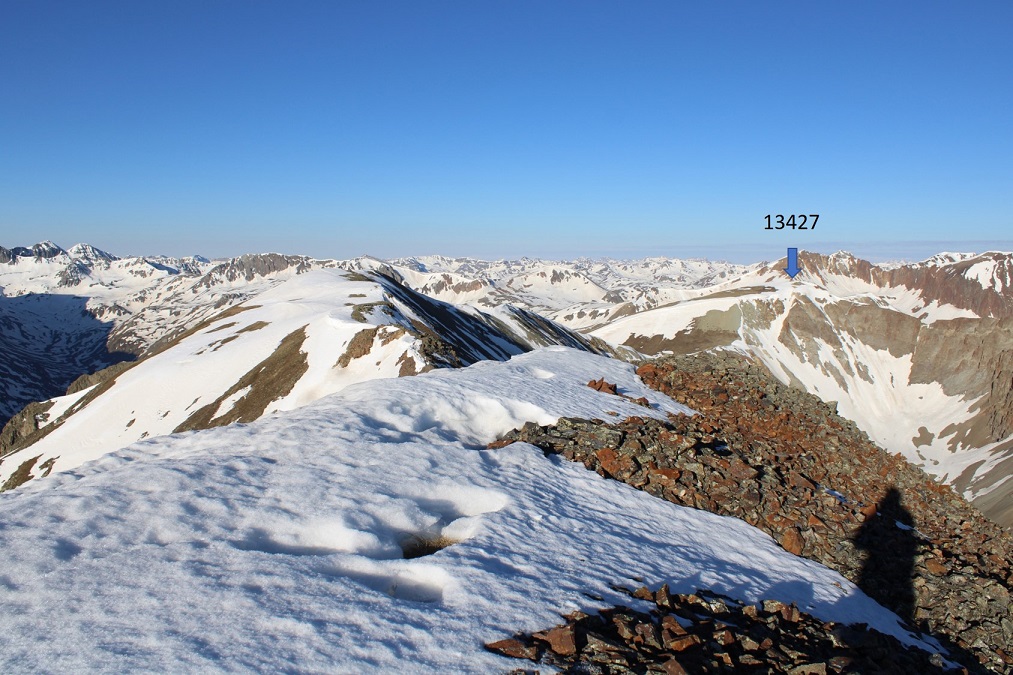
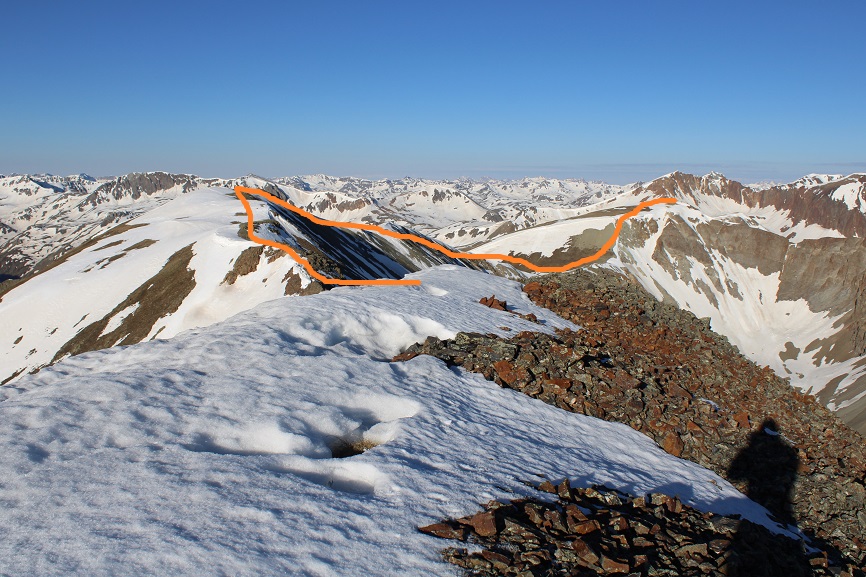
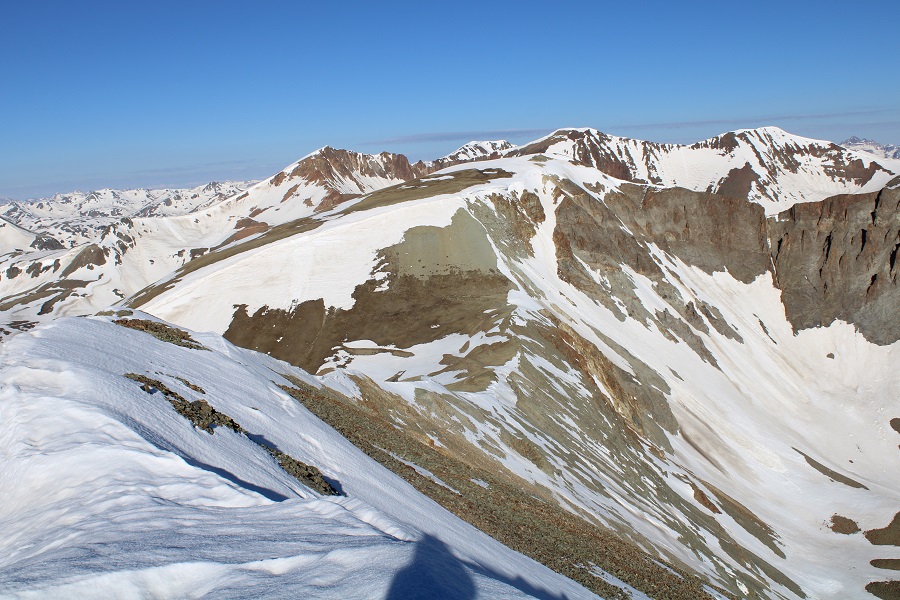
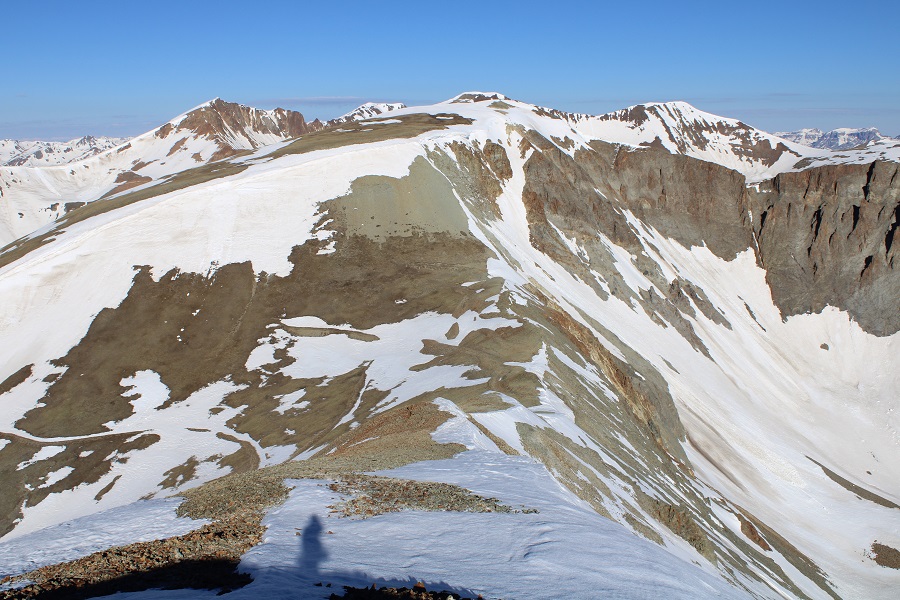
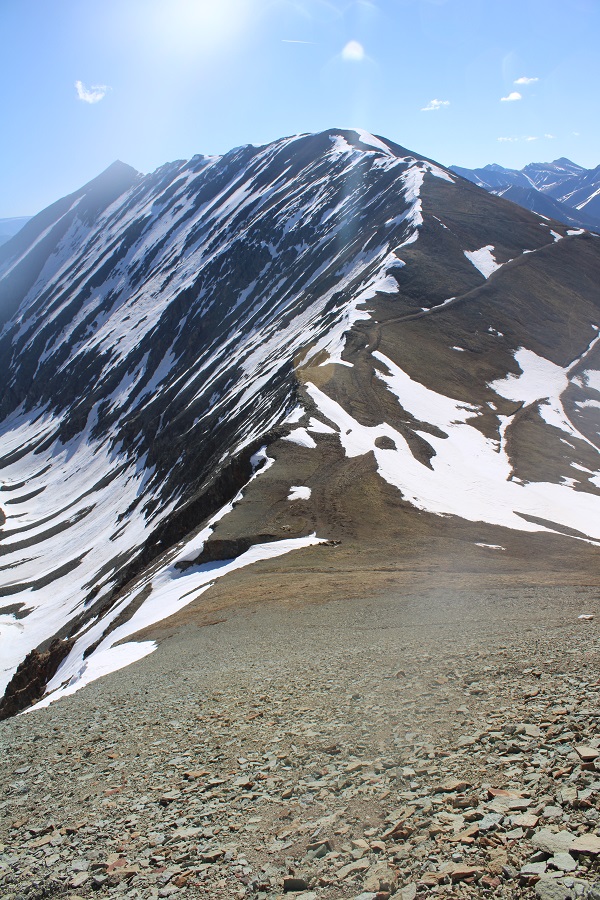
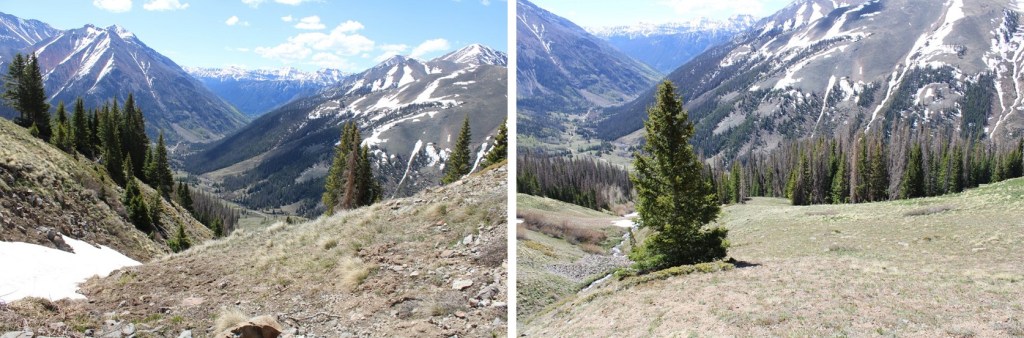
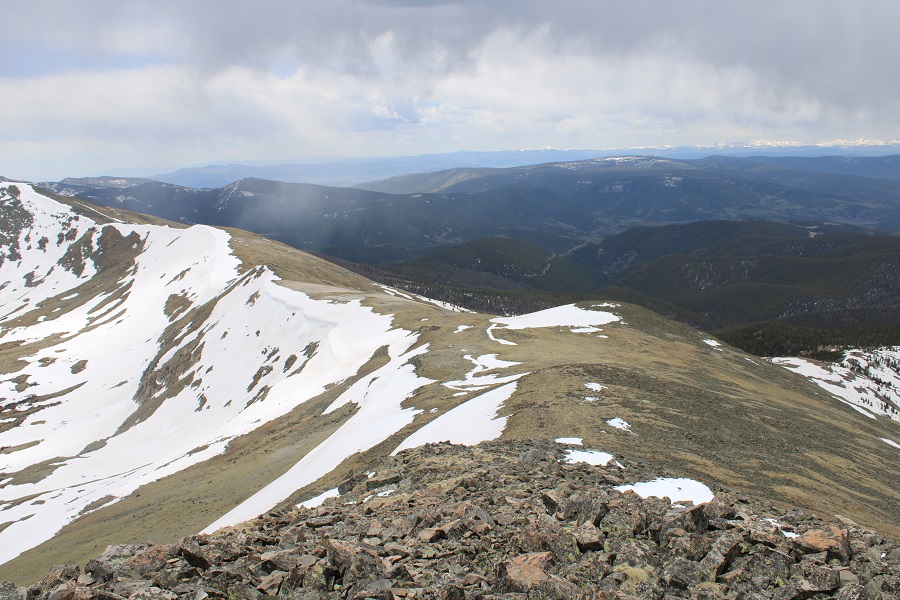
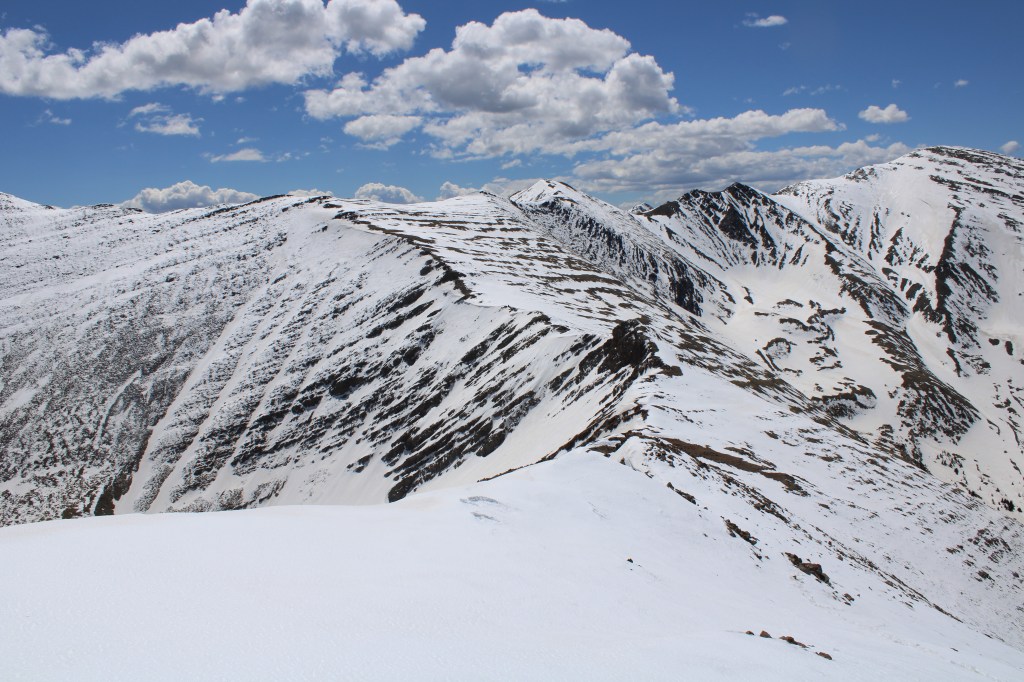
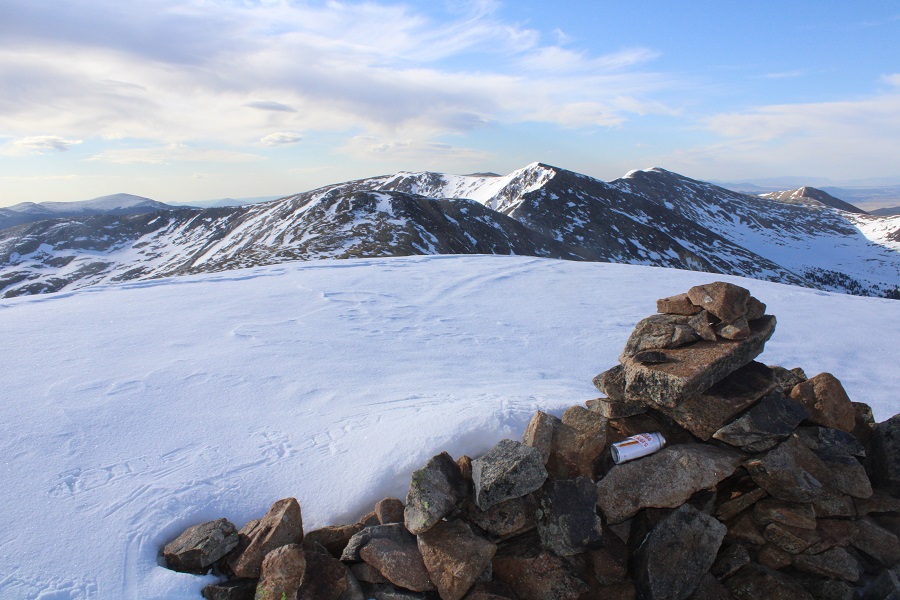
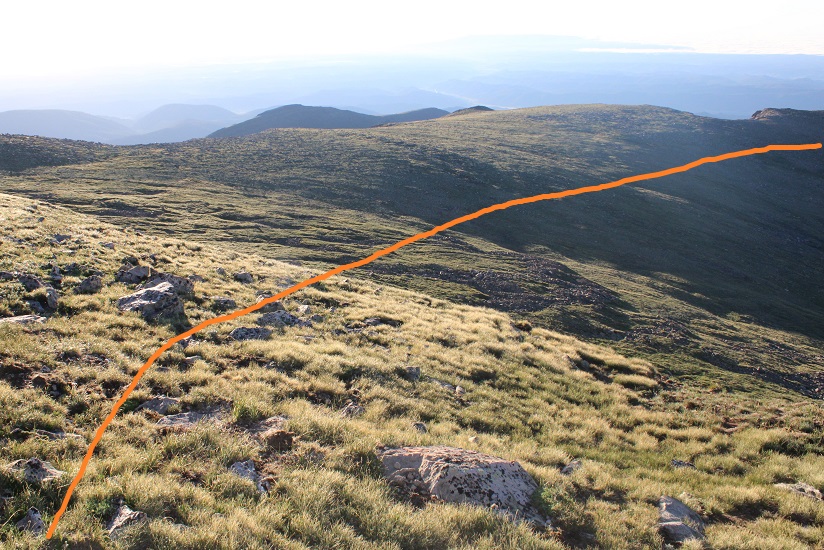
From the summit of Lomo Liso you can clearly see the rest of the route

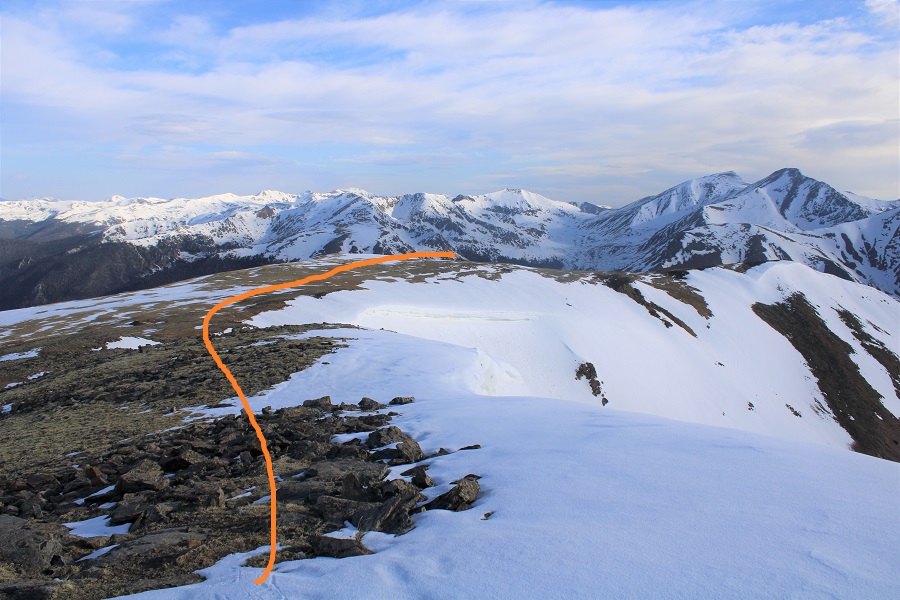
From the summit of Lomo Liso I turned and headed northeast, and then followed the ridge southeast.  It’s really quite obvious the direction you should go.

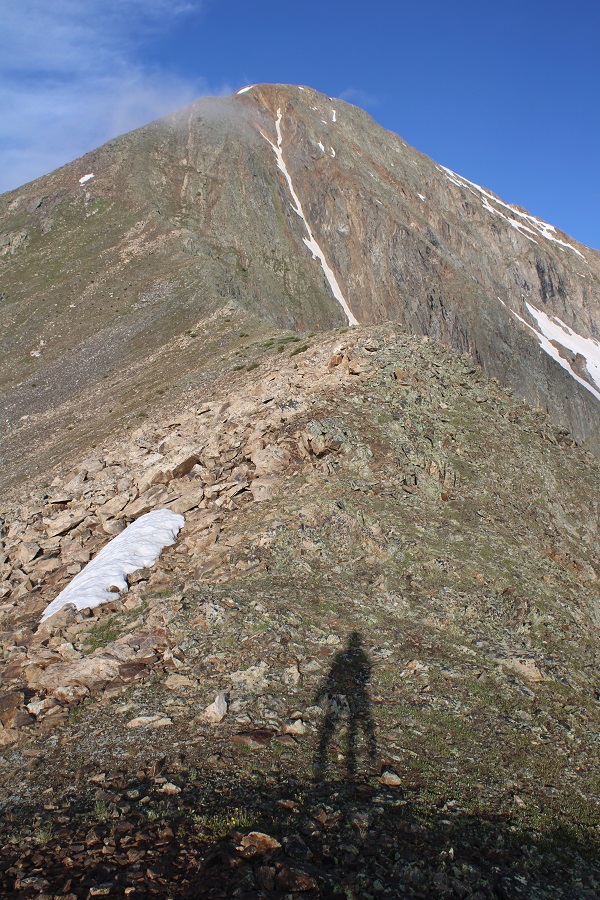
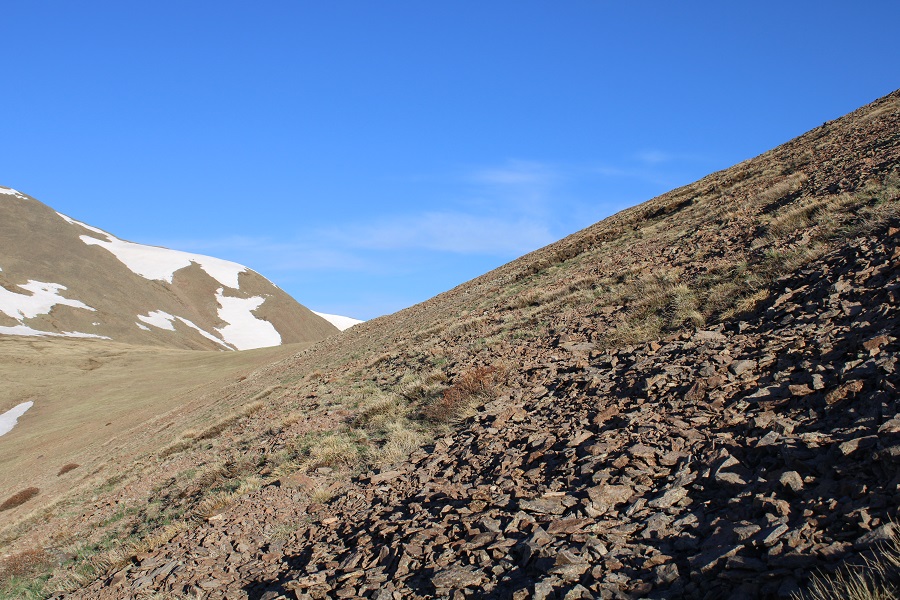
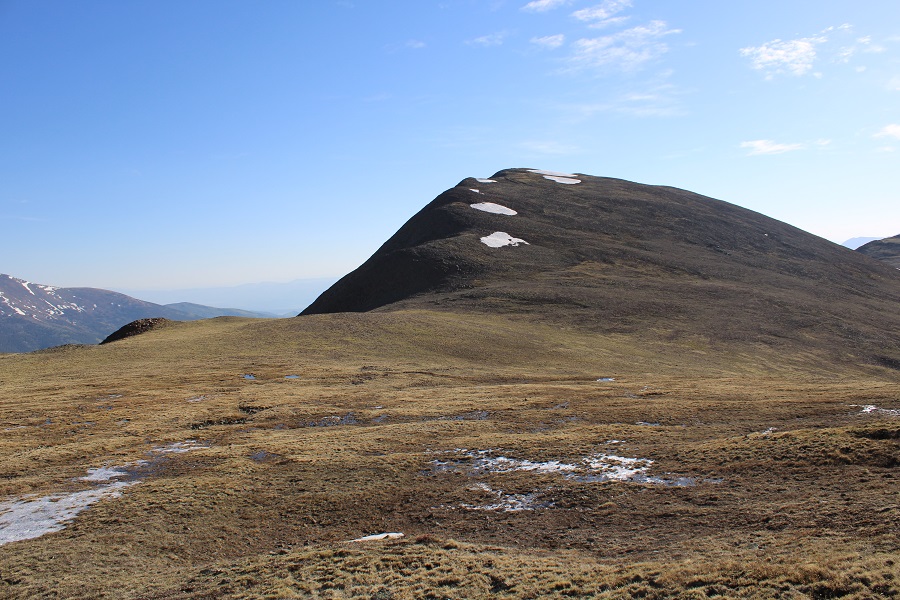
There were some ups and downs to the ridge, but it was a simple tundra hike

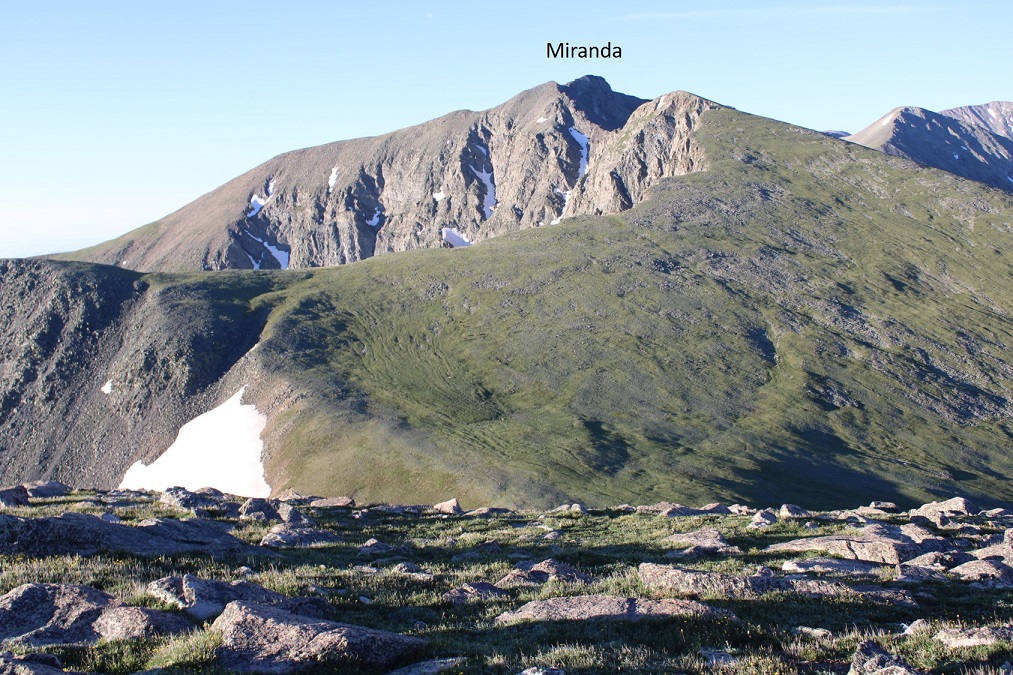
This is also where I saw my first herd of elk for the day (I ended up seeing 3 herds total, but some were too far away to see in pictures, as they were down in the basins)

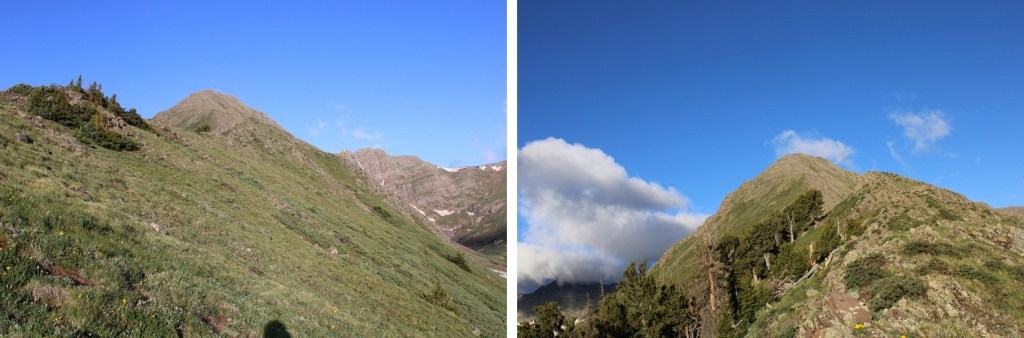
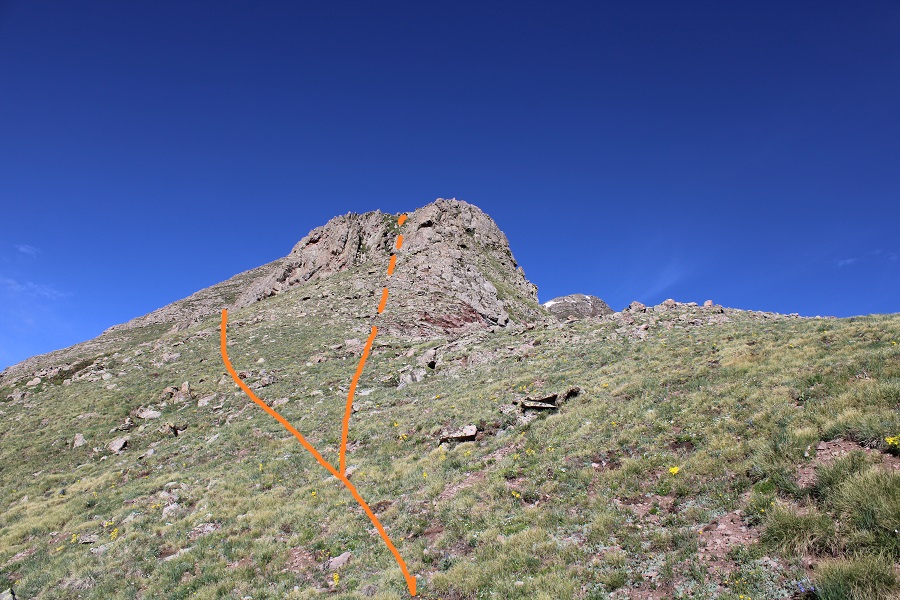
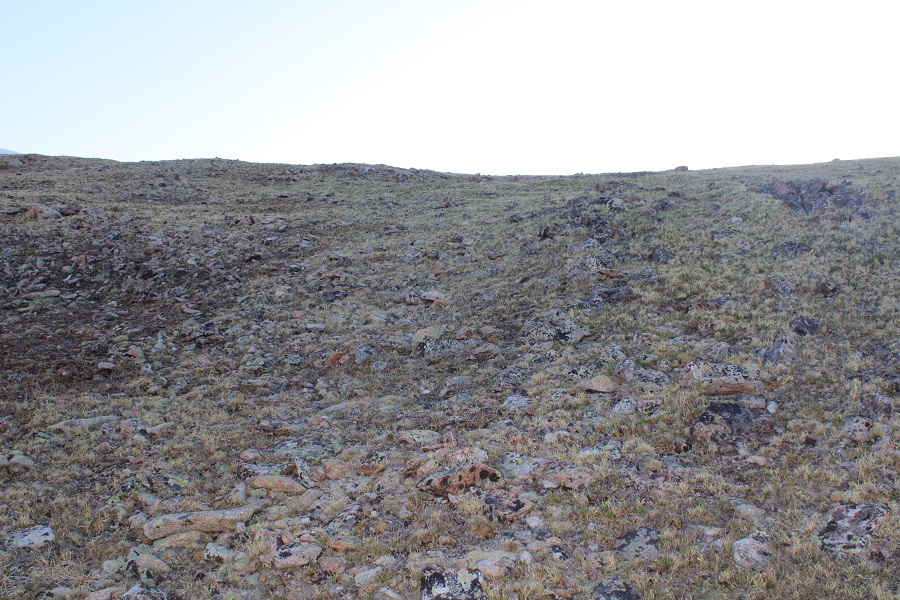
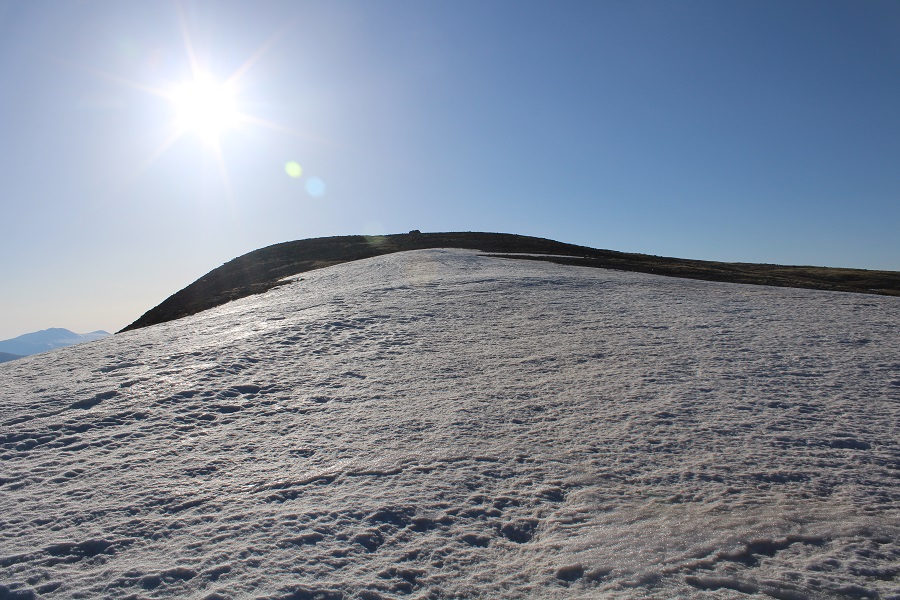
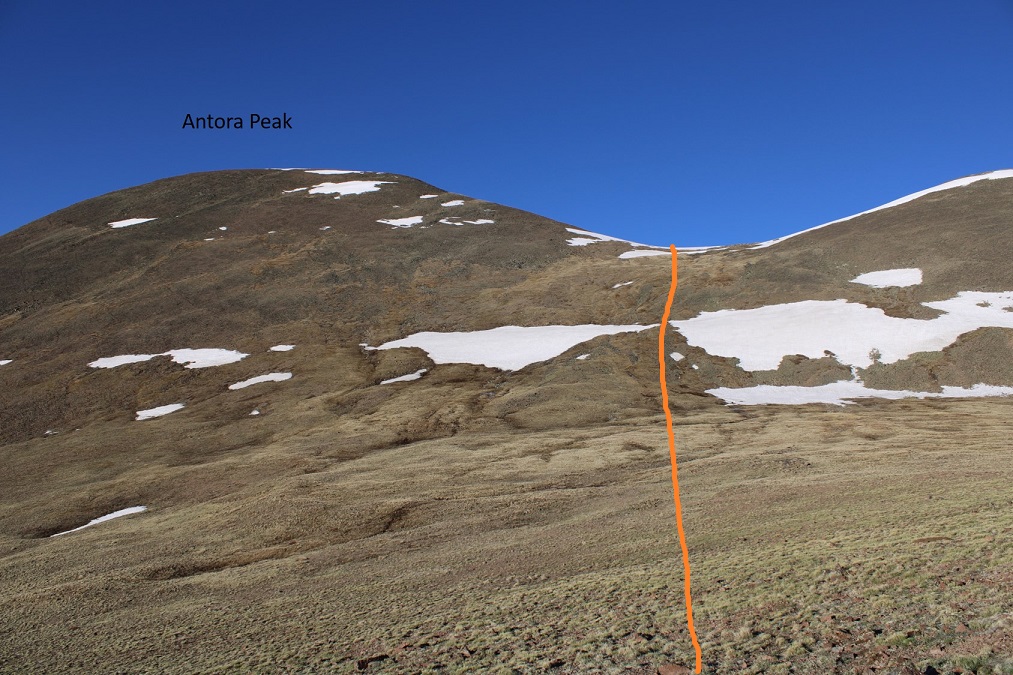
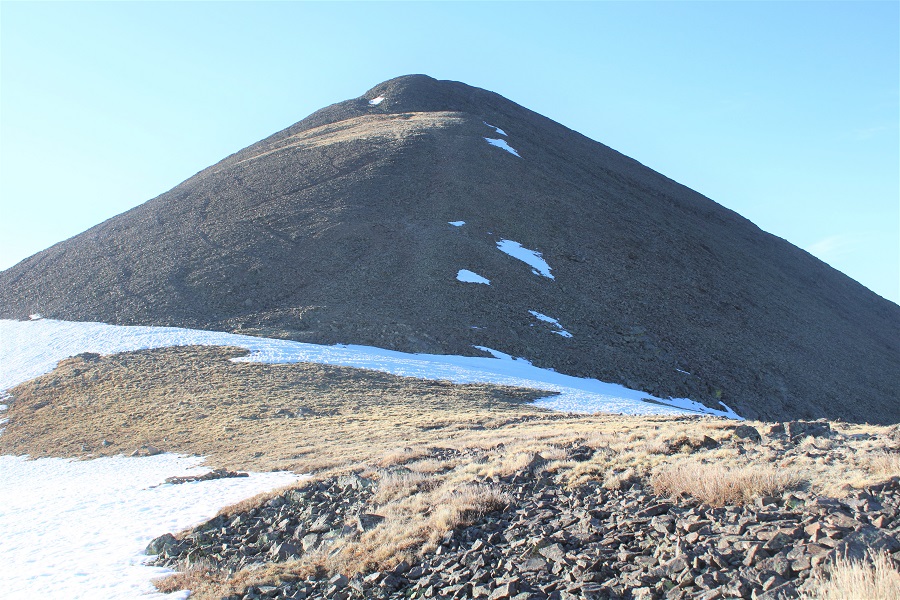
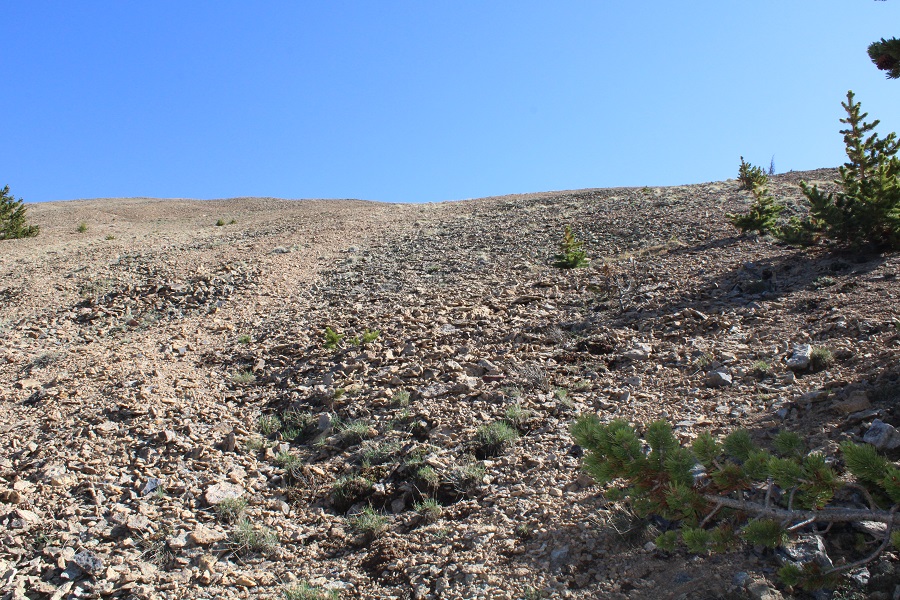
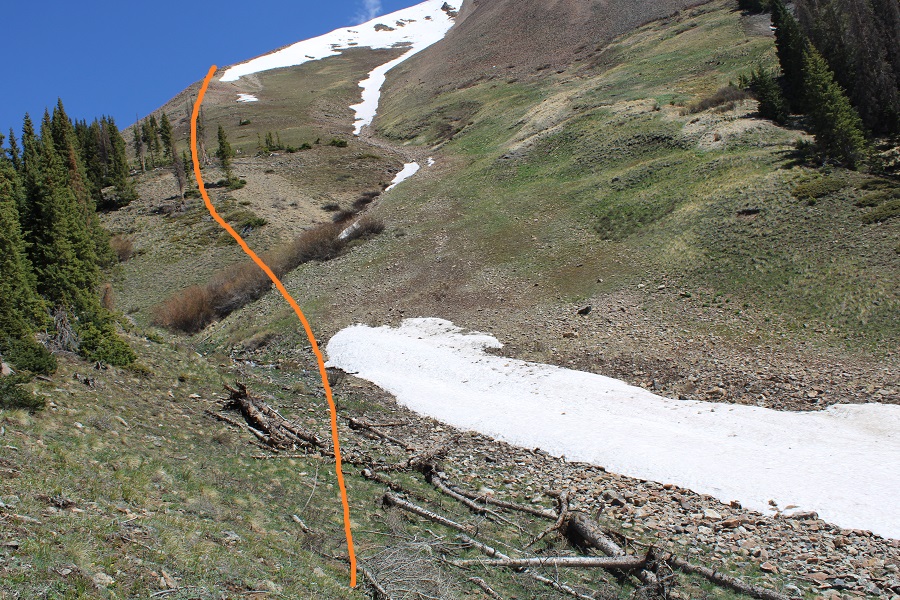
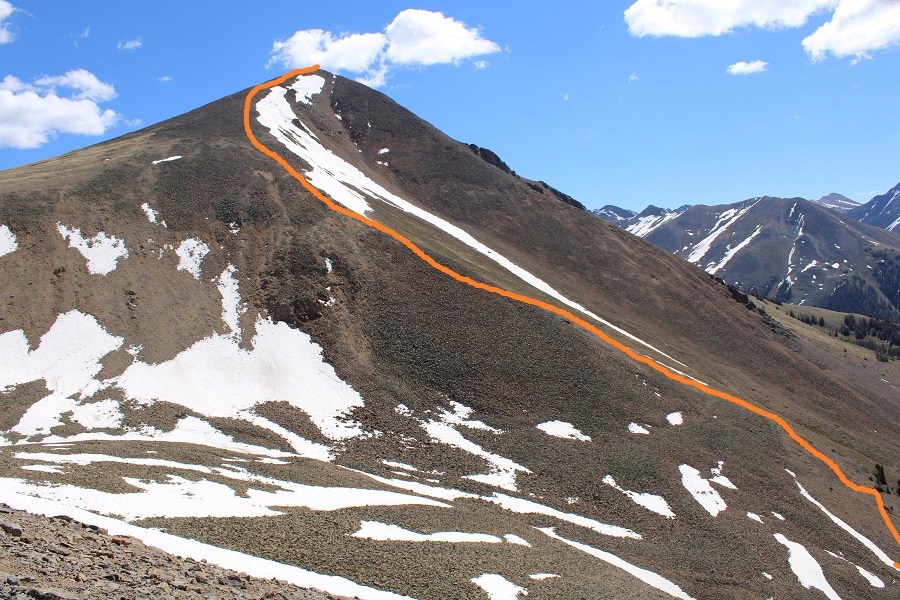
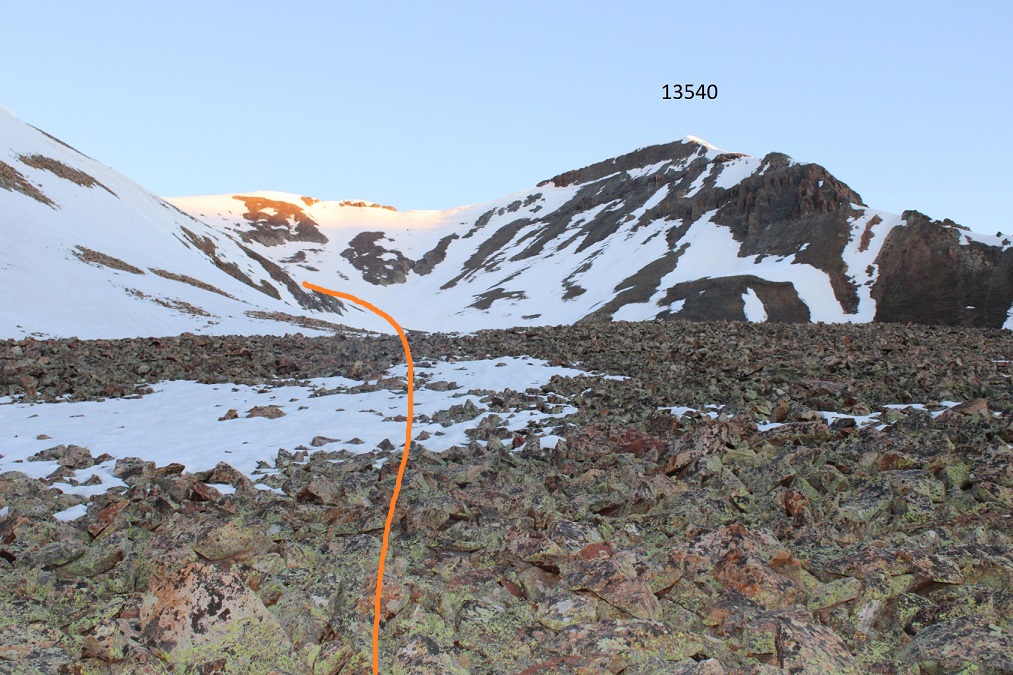
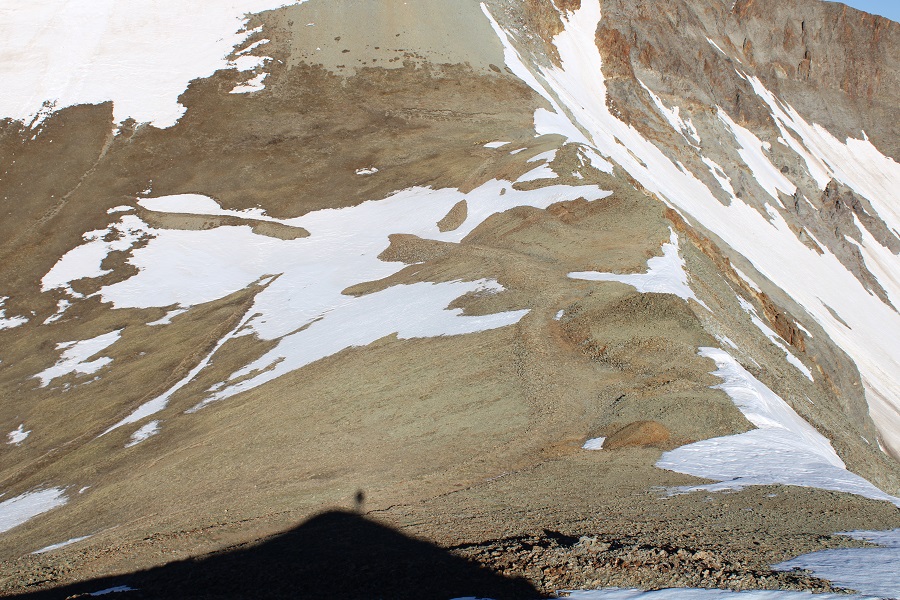
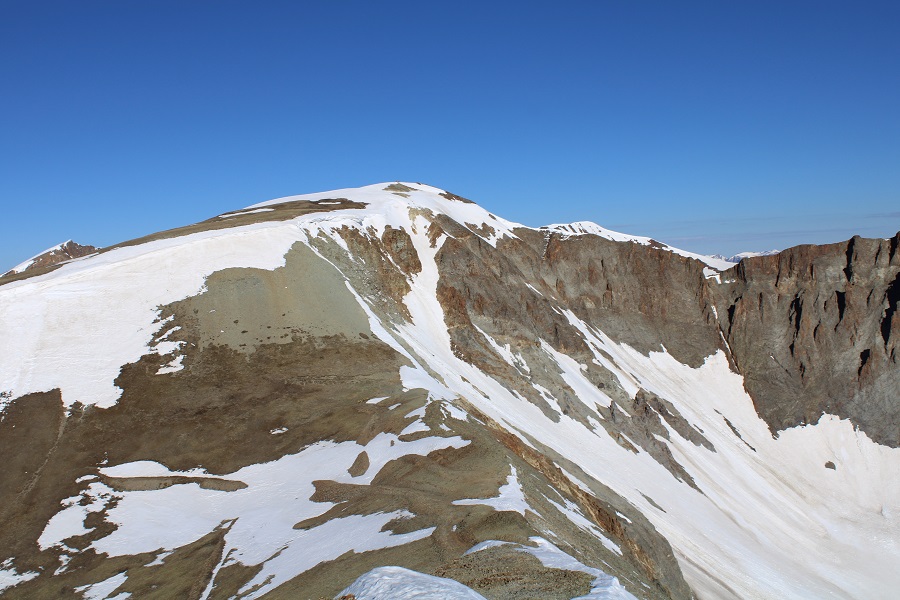
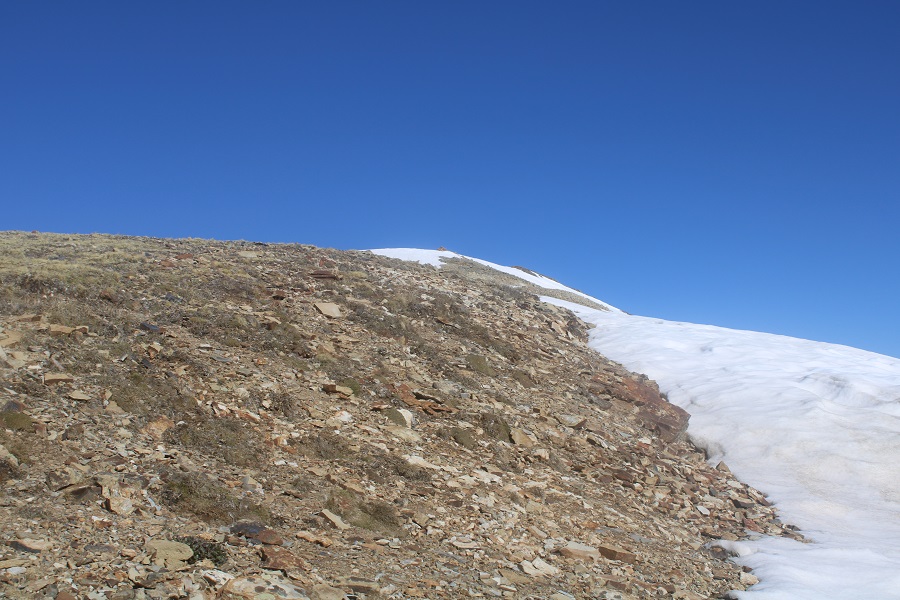
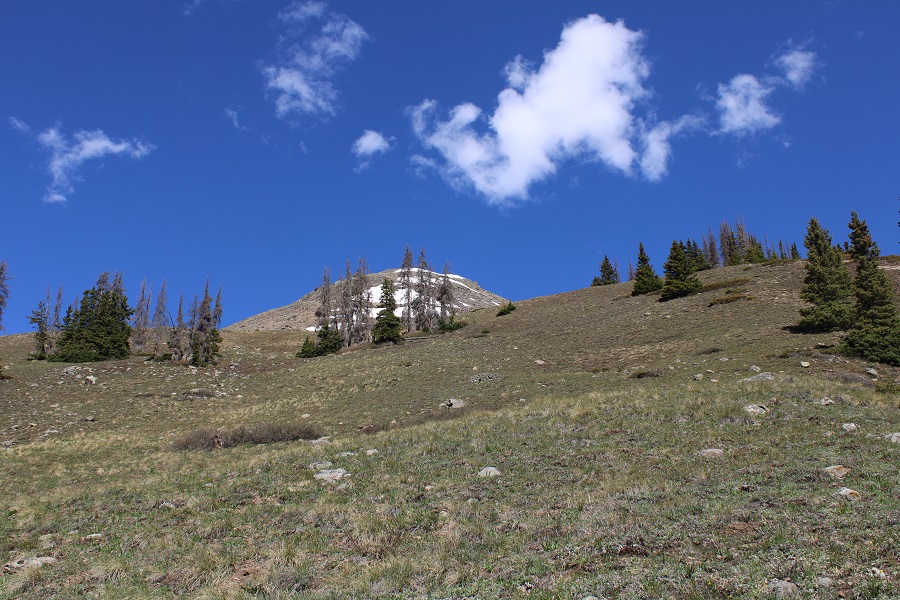
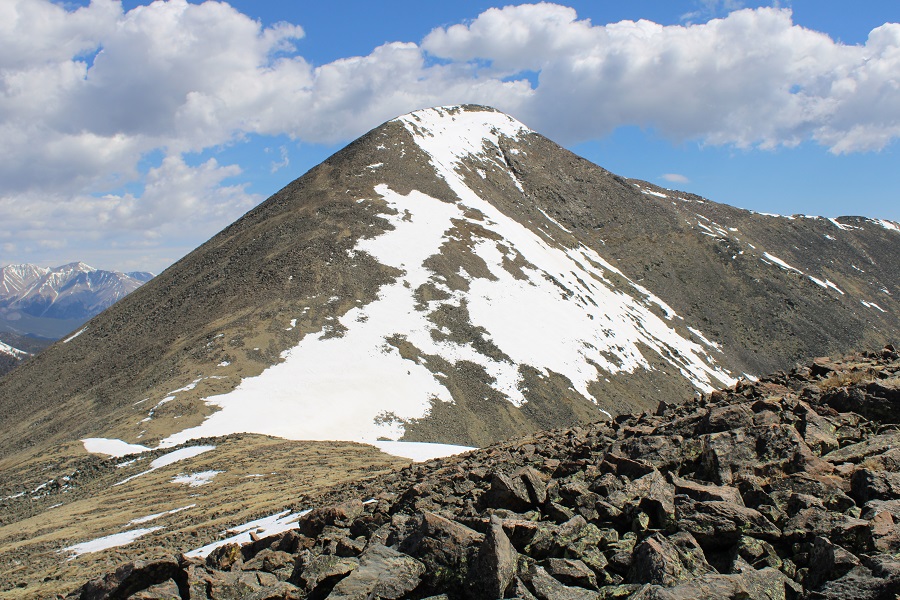
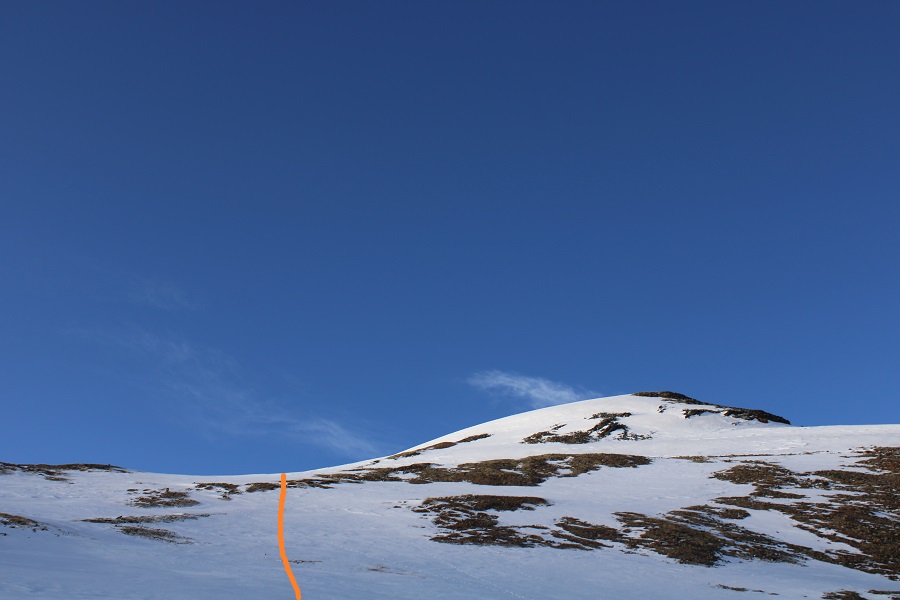
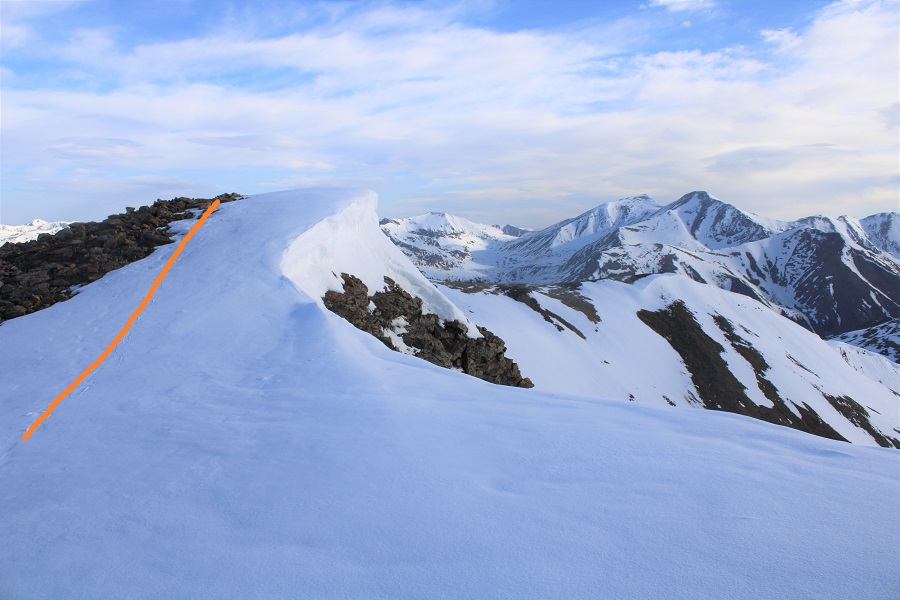
After the elk ran away from me I hiked up the north slope towards Miranda Peak

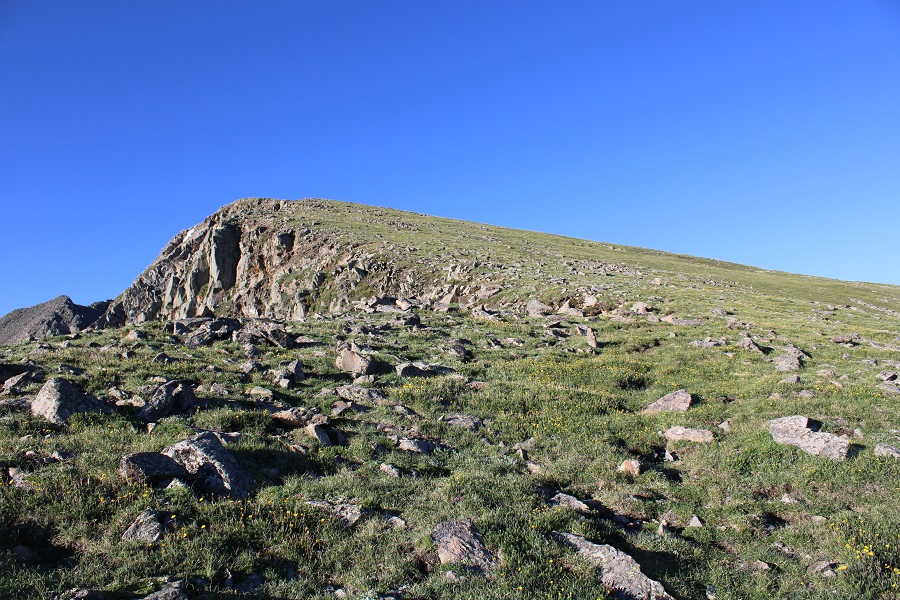
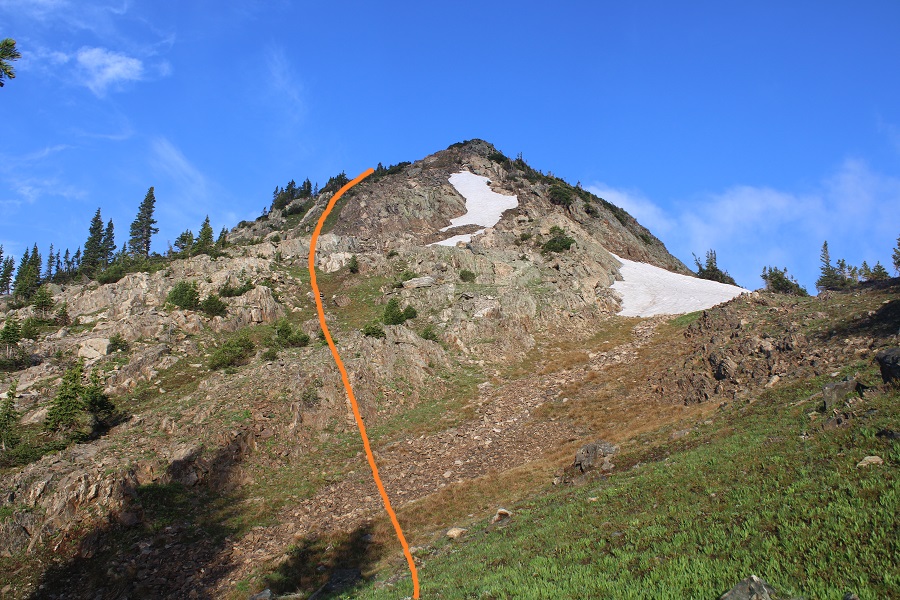
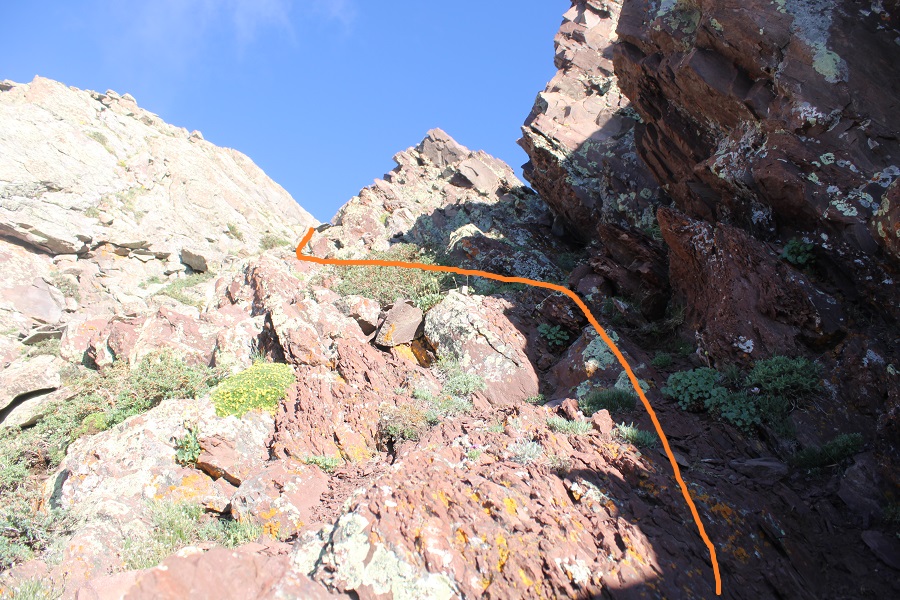
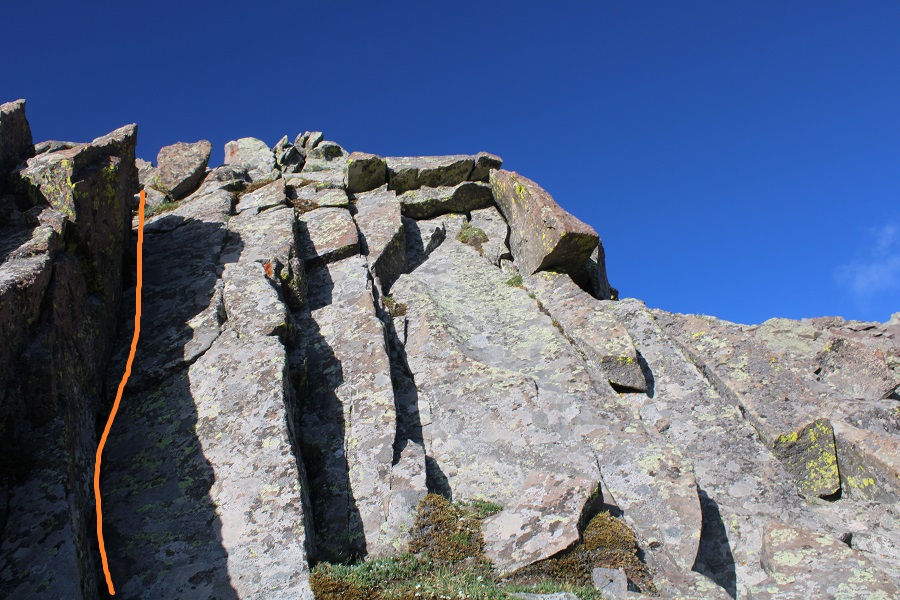
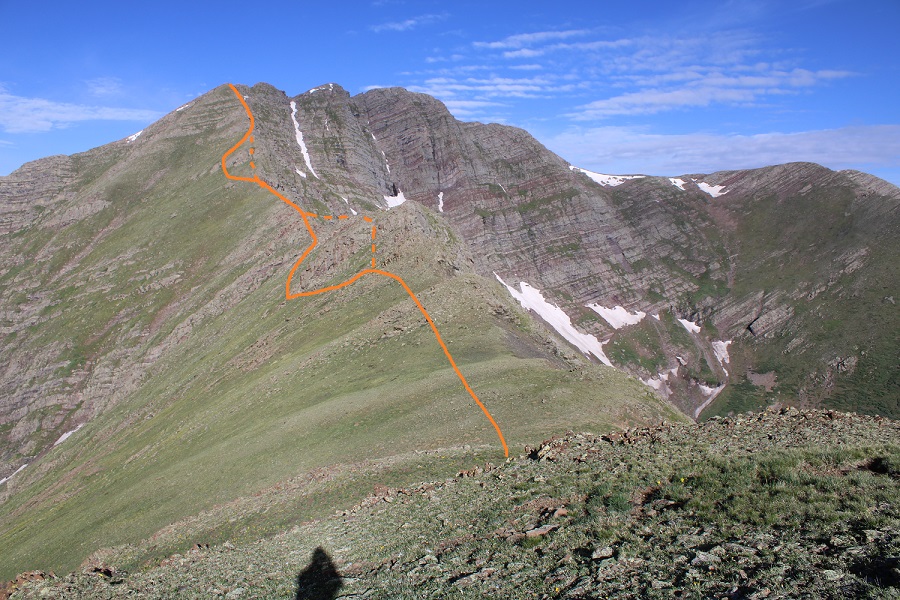
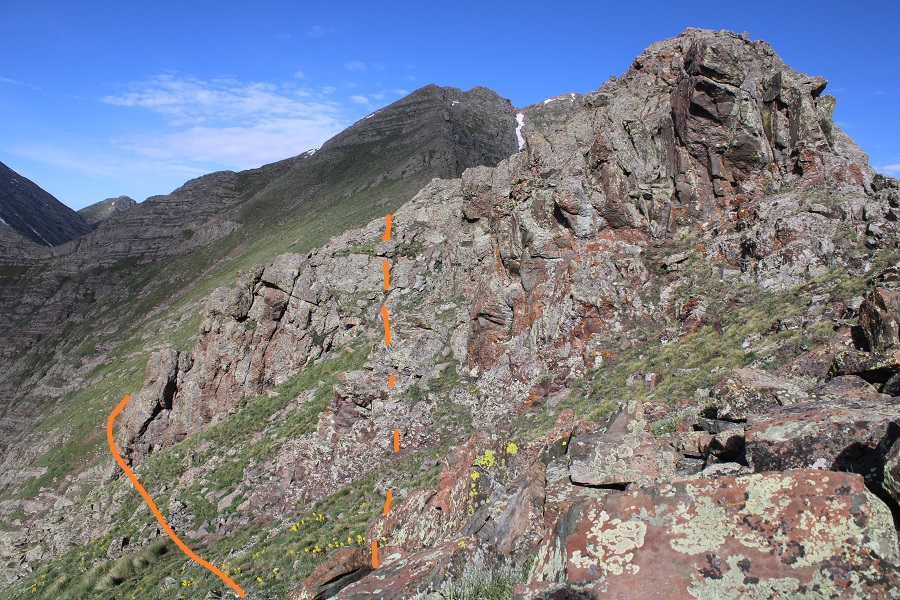
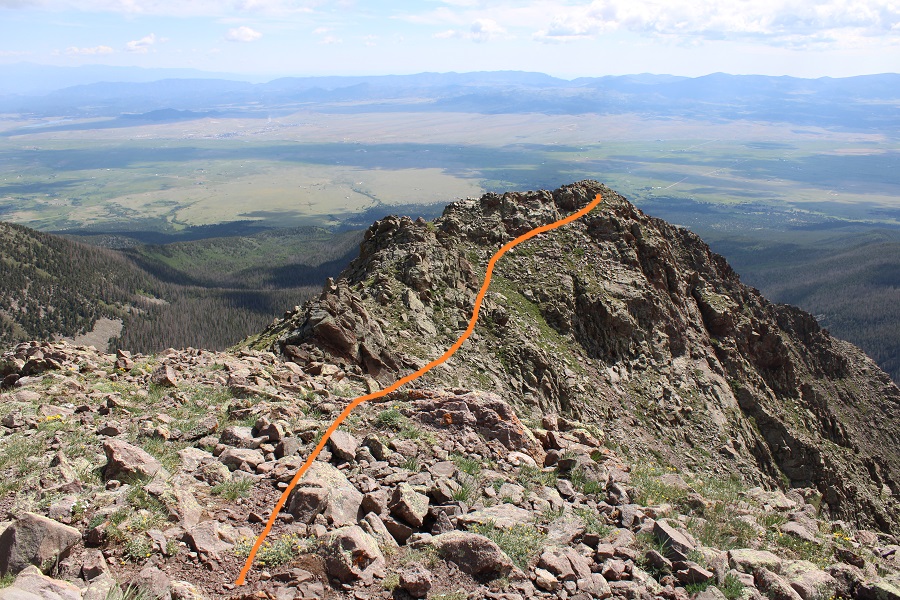
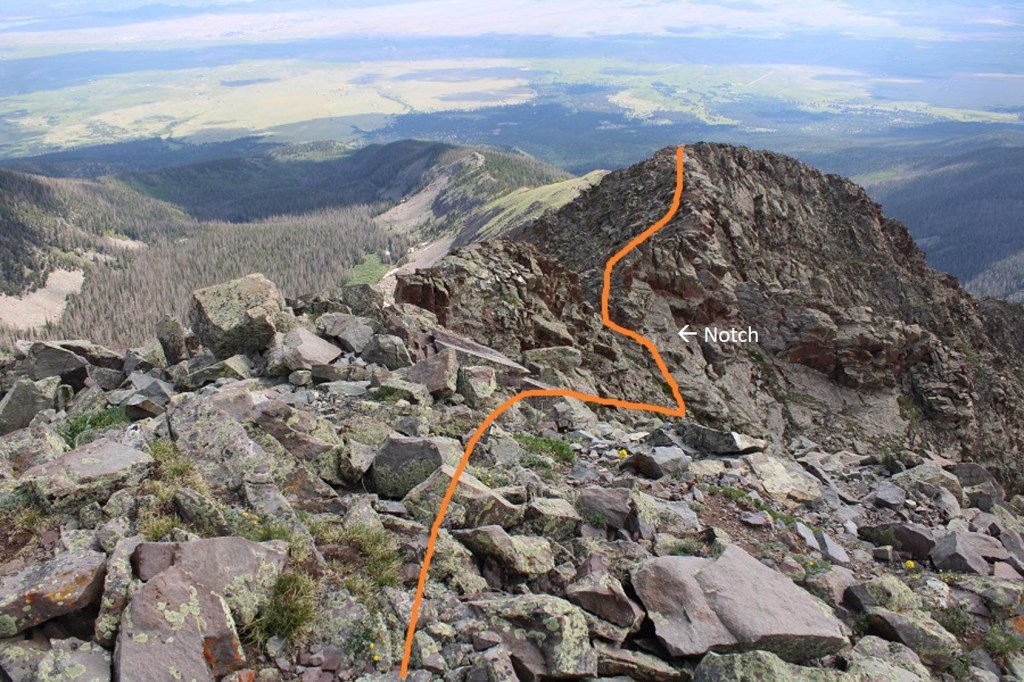
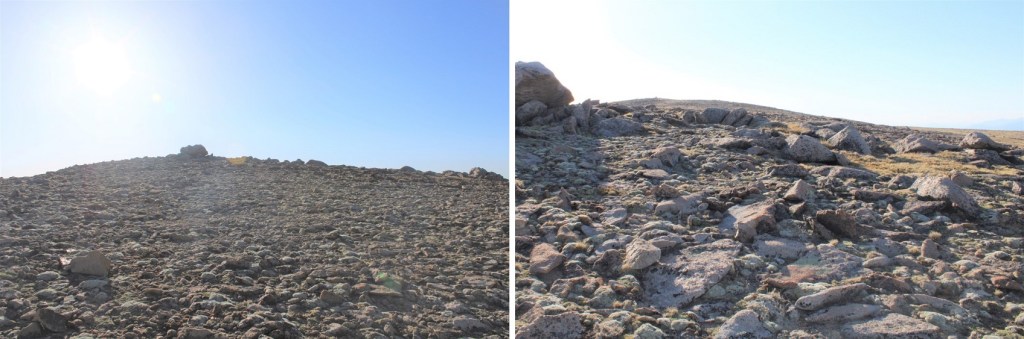
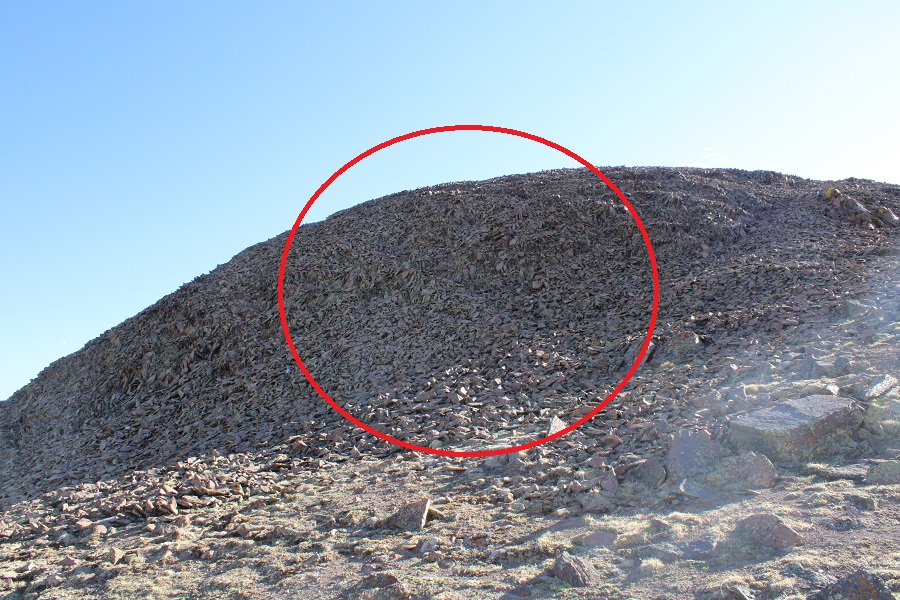
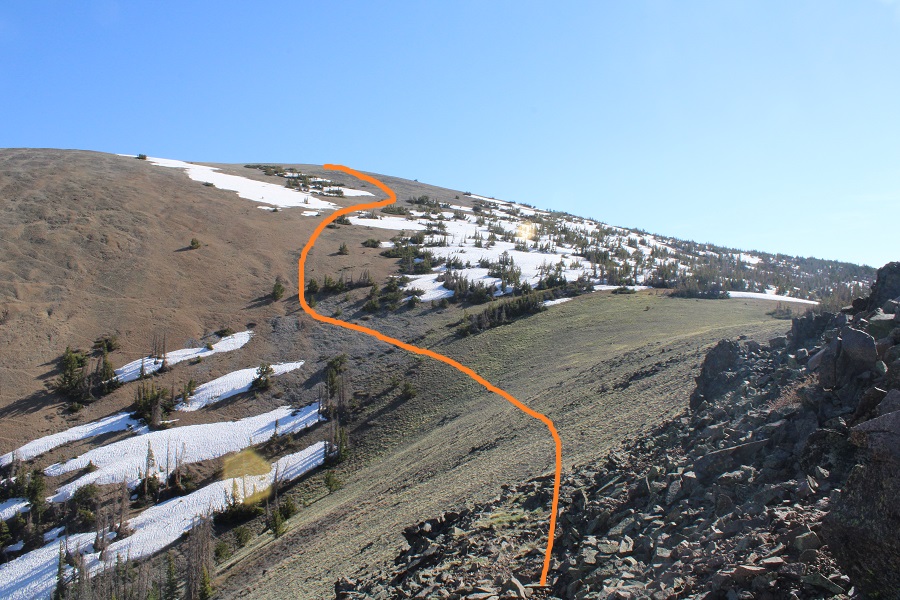
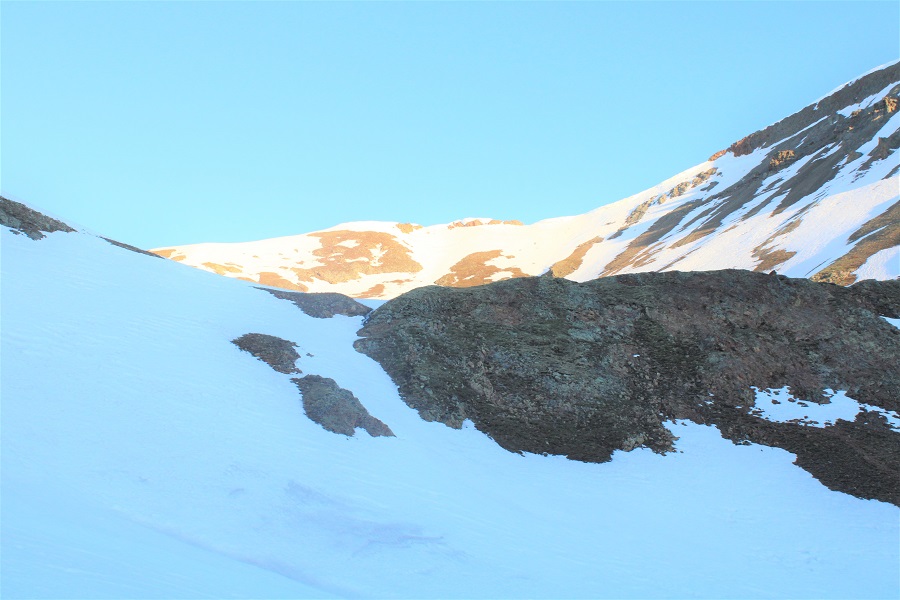
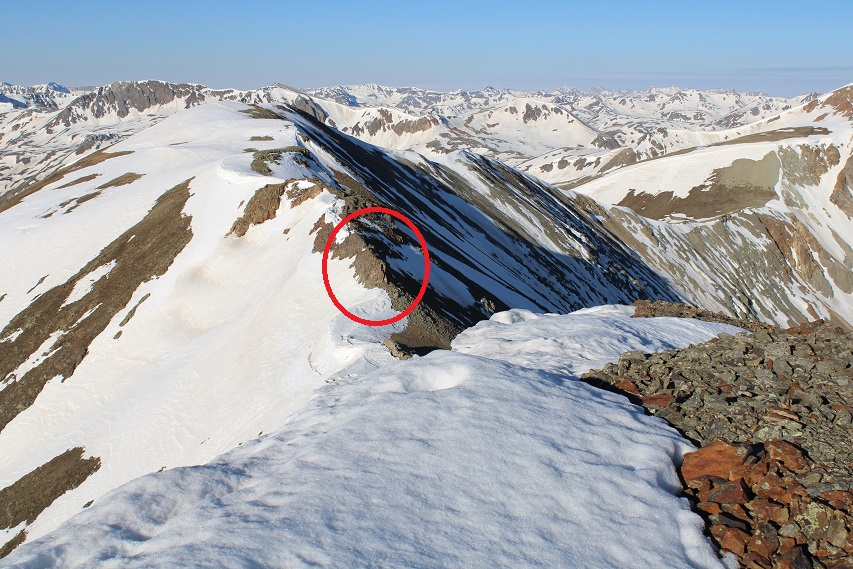
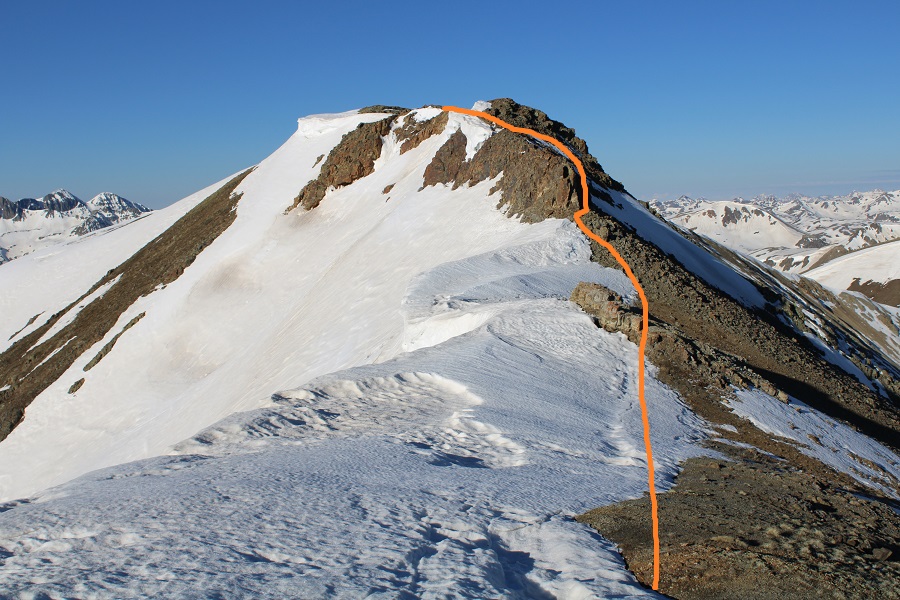
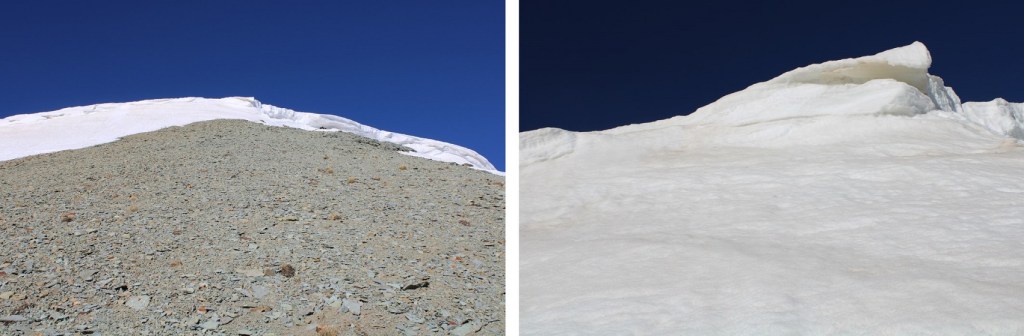
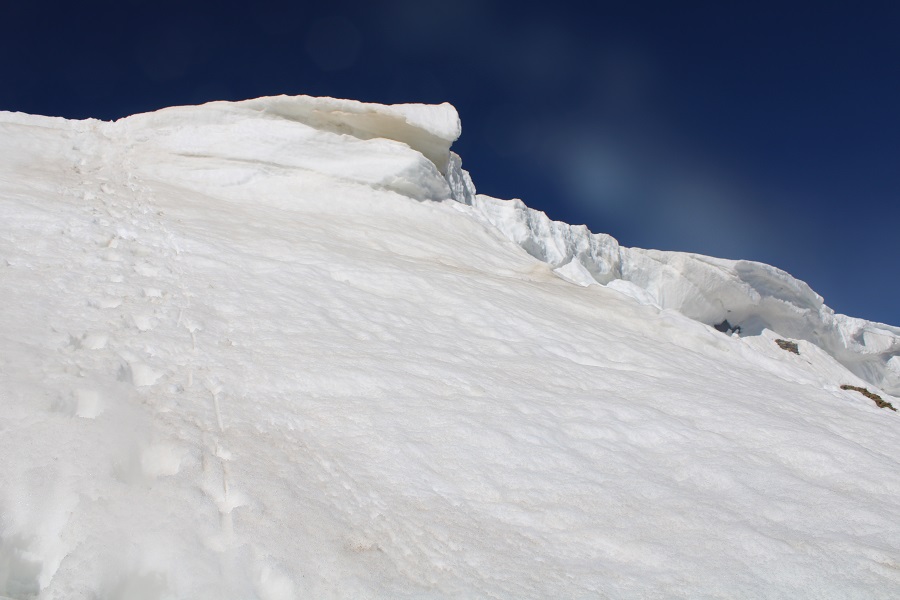
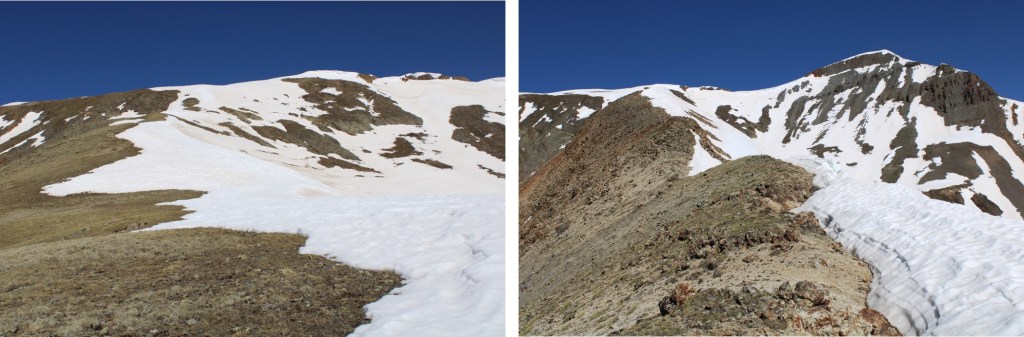
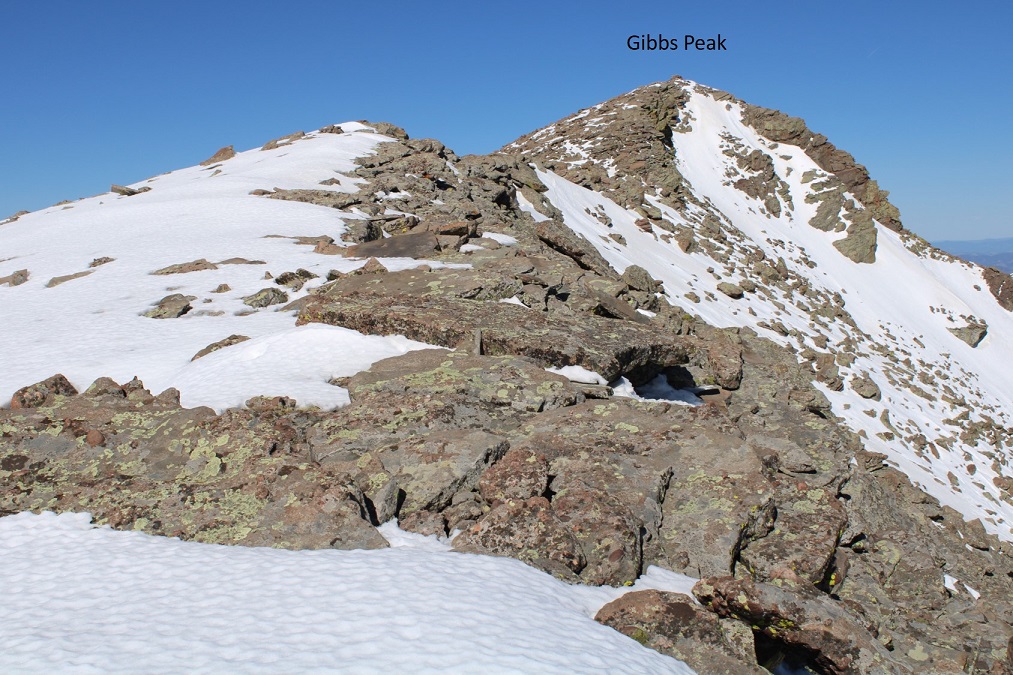
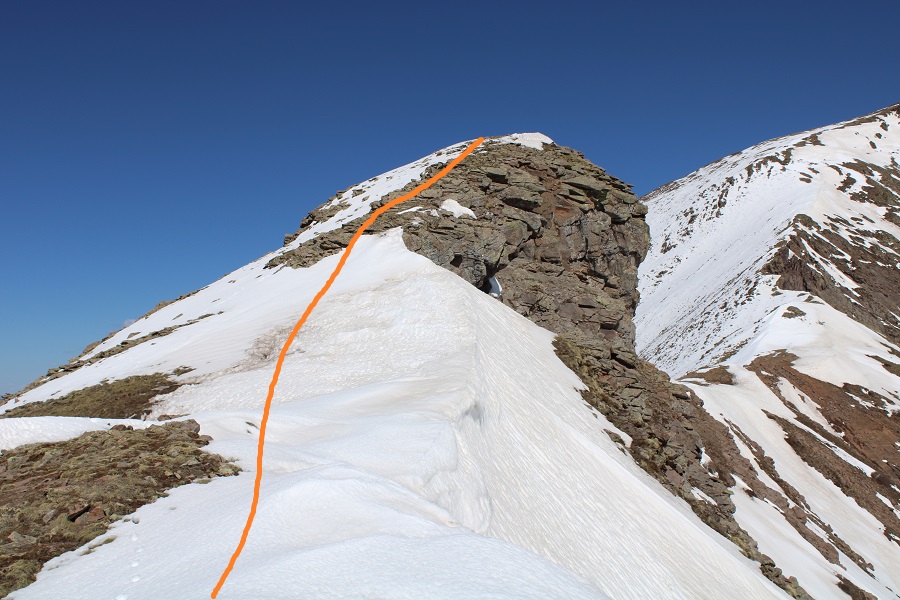
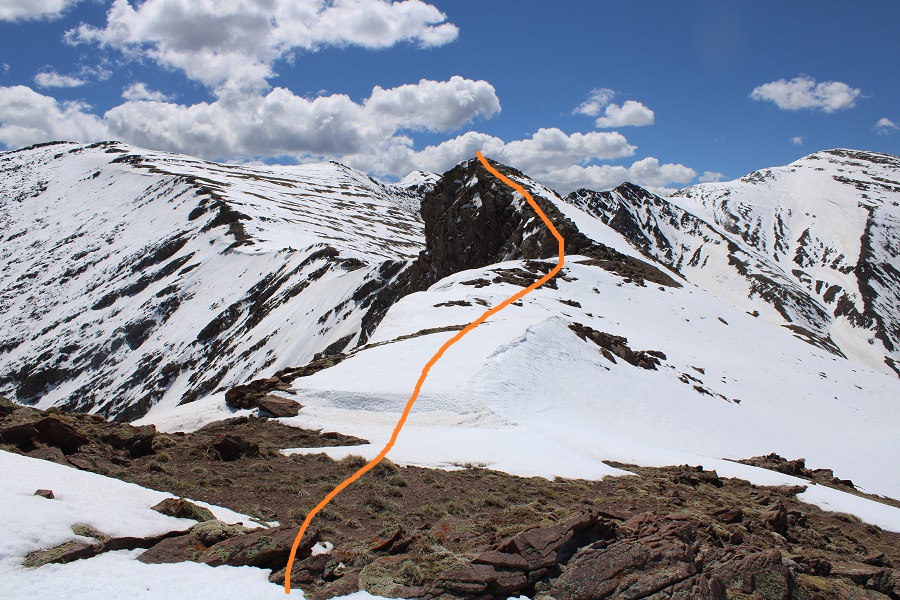
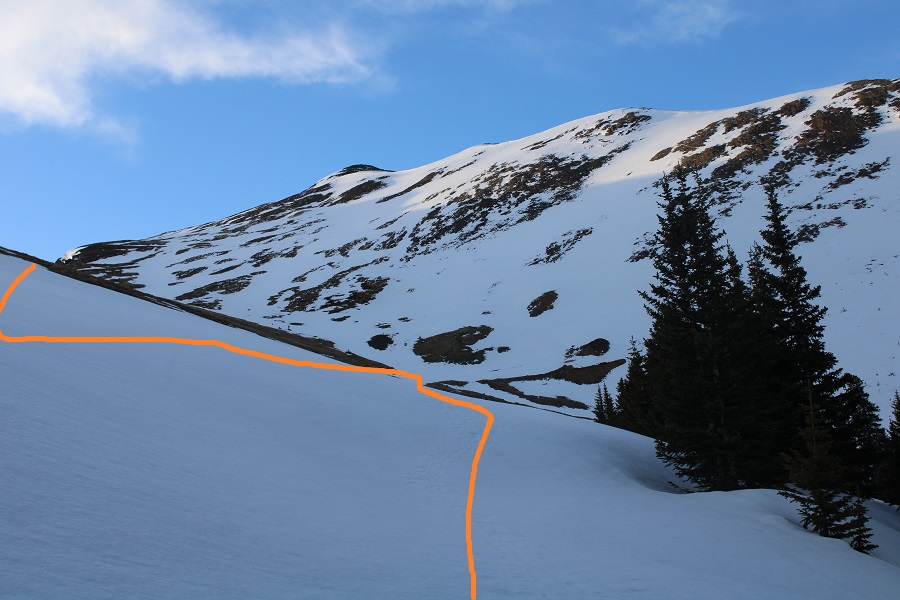
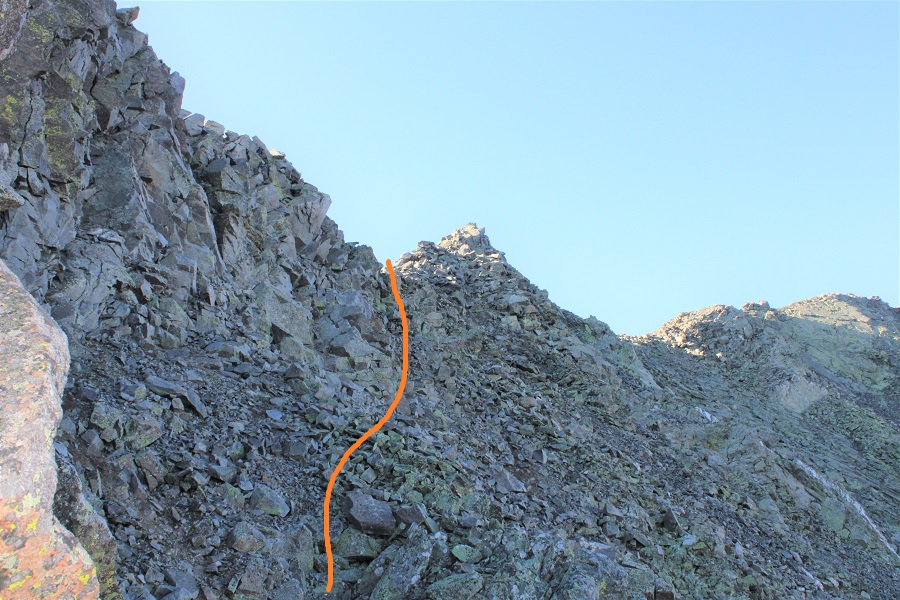
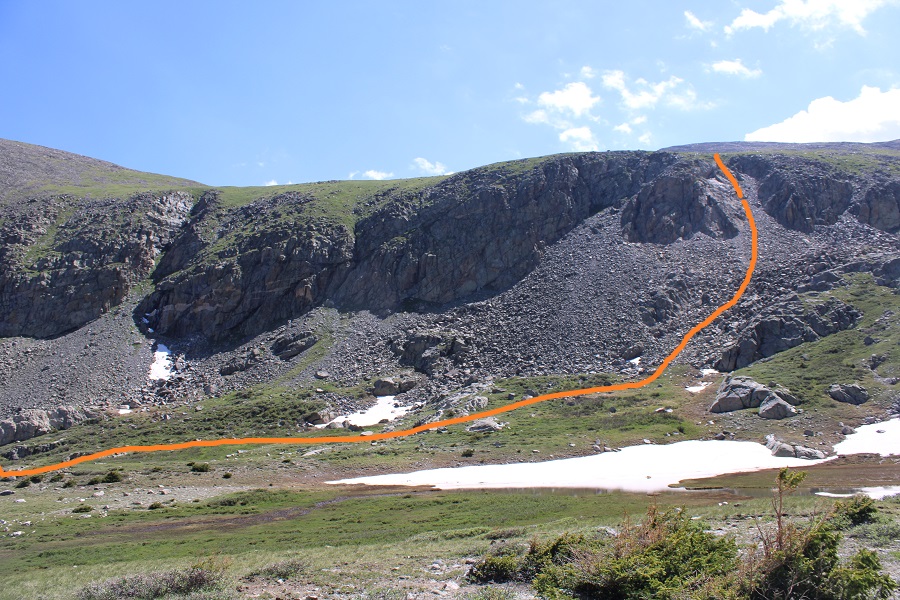
The last bit to Miranda is class 3 for a short distance.  Here’s the overall route.  If you’re in a large group you may want a helmet for the loose and rocky gully (but it’s relatively short, I’d suggest just taking turns ascending so you don’t kick rocks on the person below you).

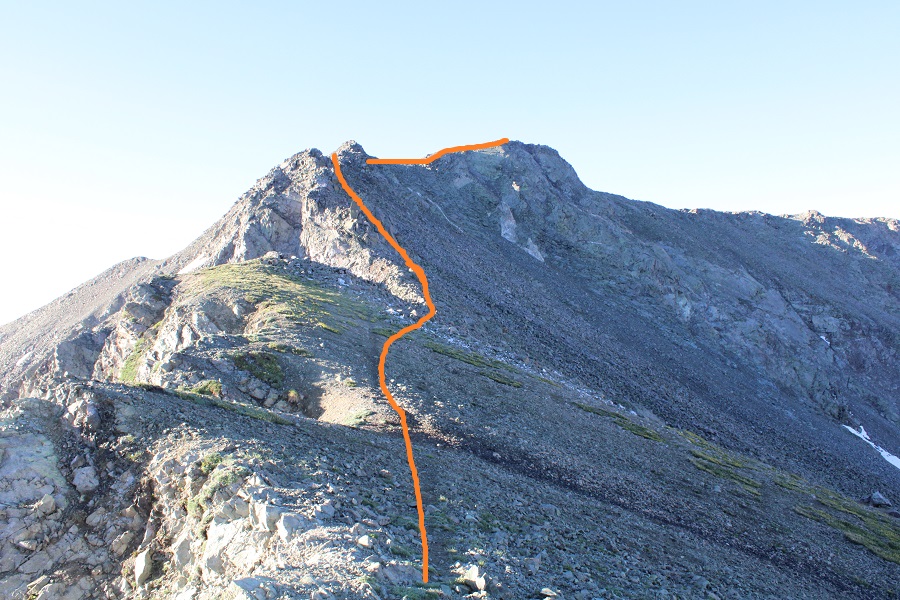
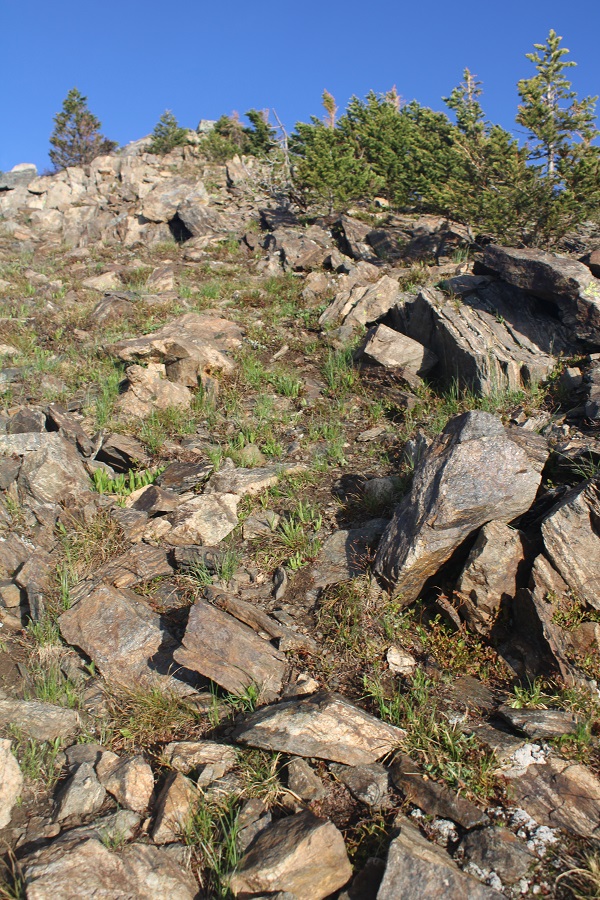
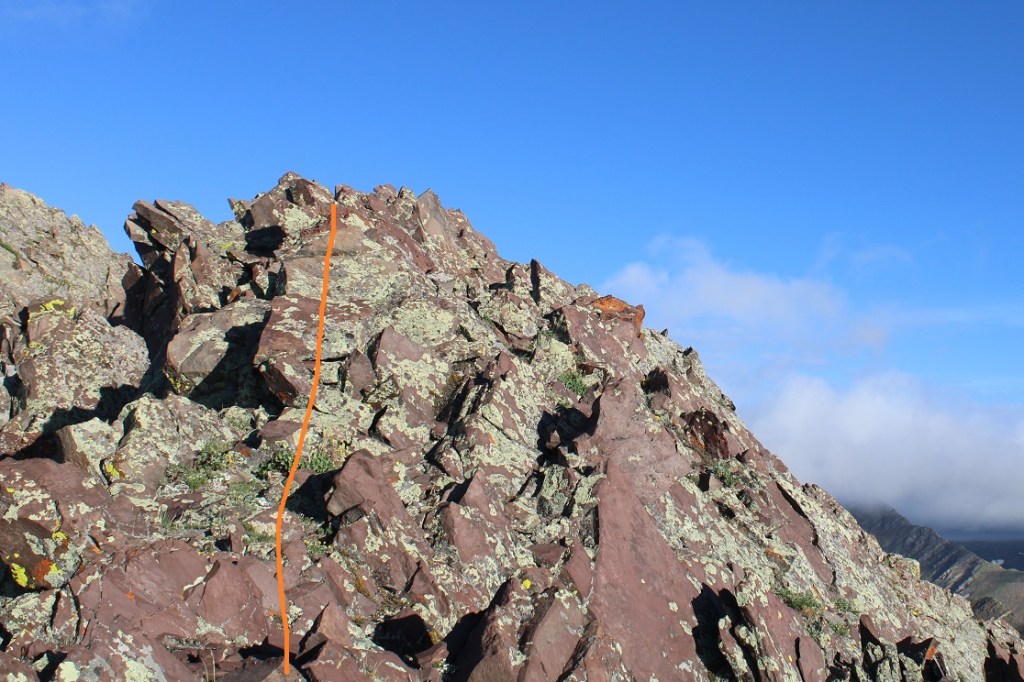
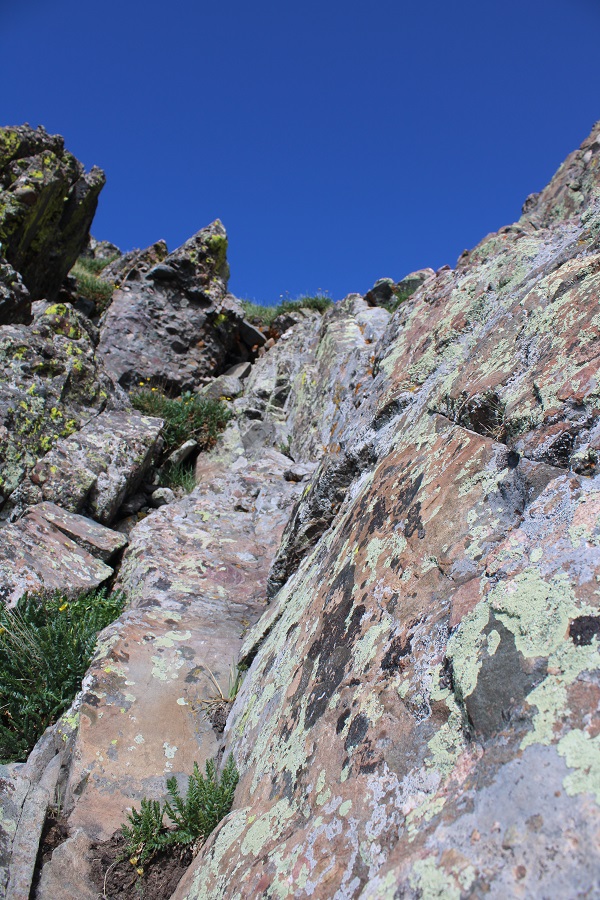
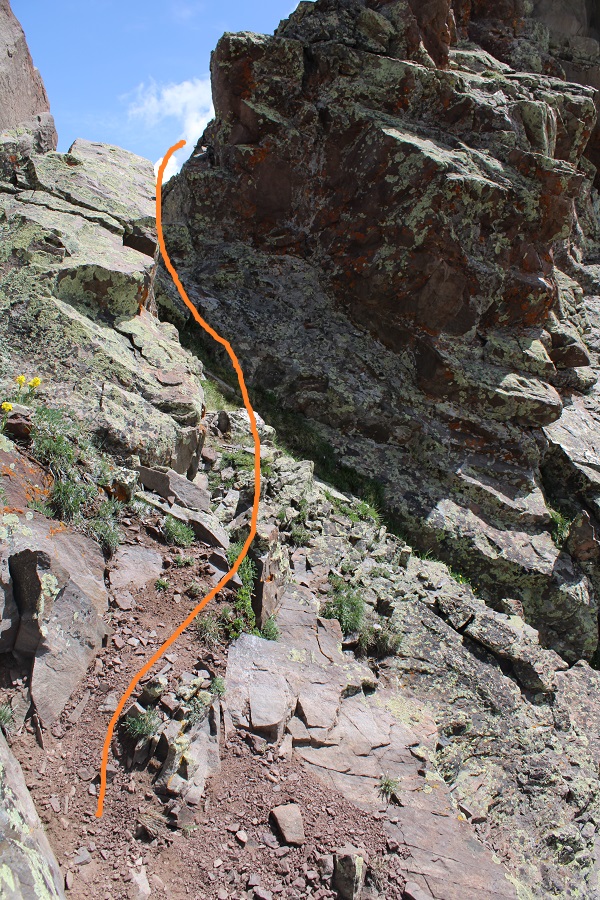
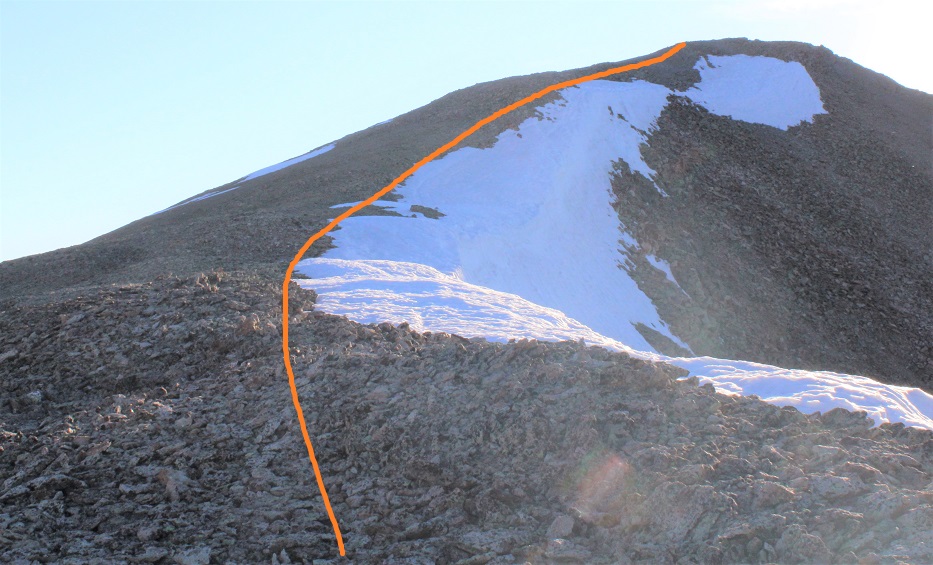
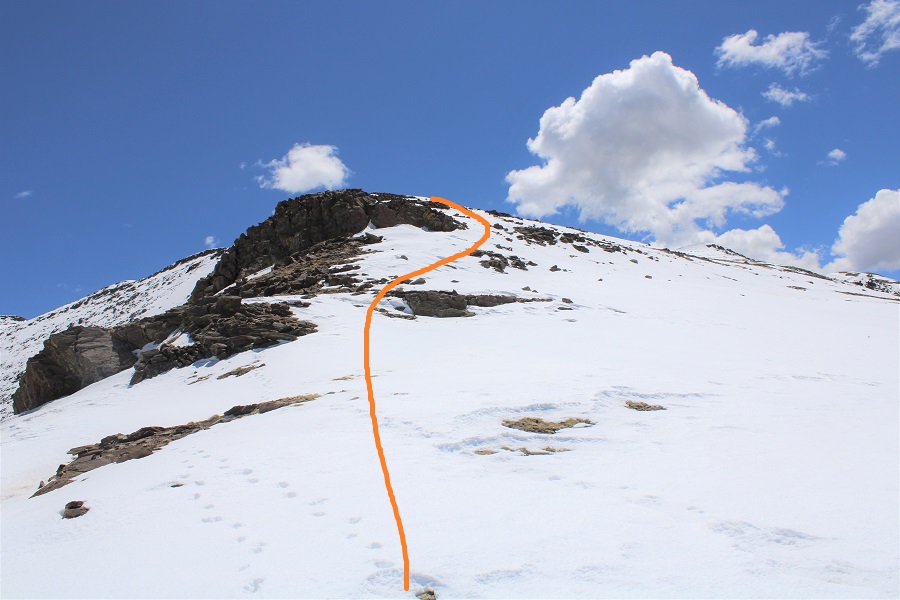
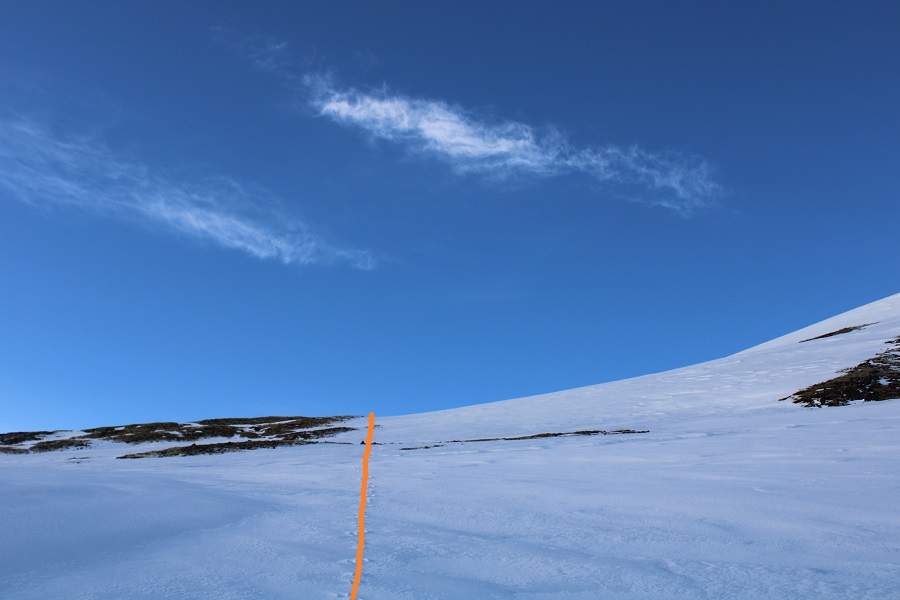
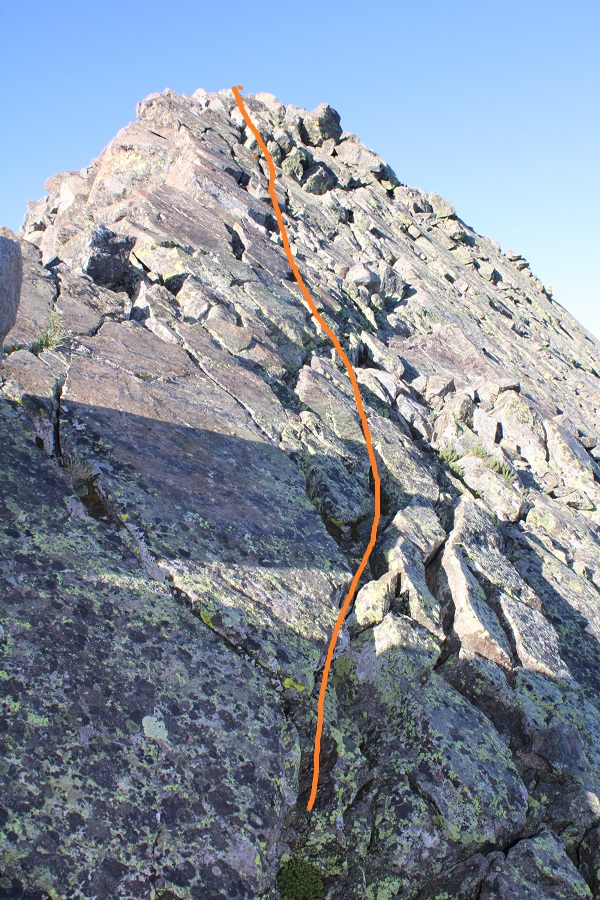
Once in the gully, here’s how I ascended to the ridge

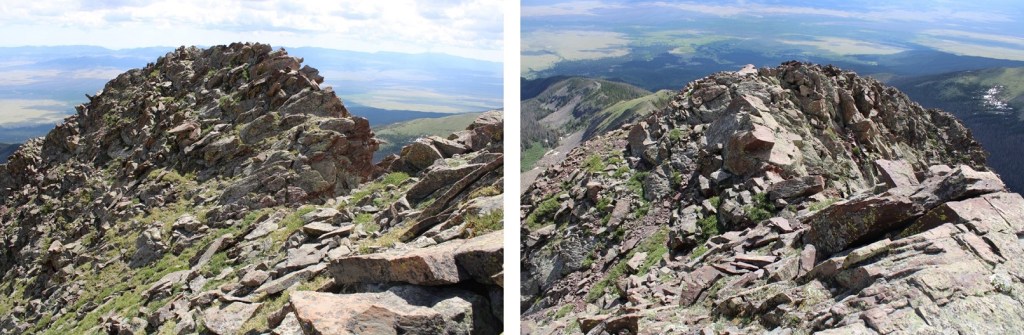
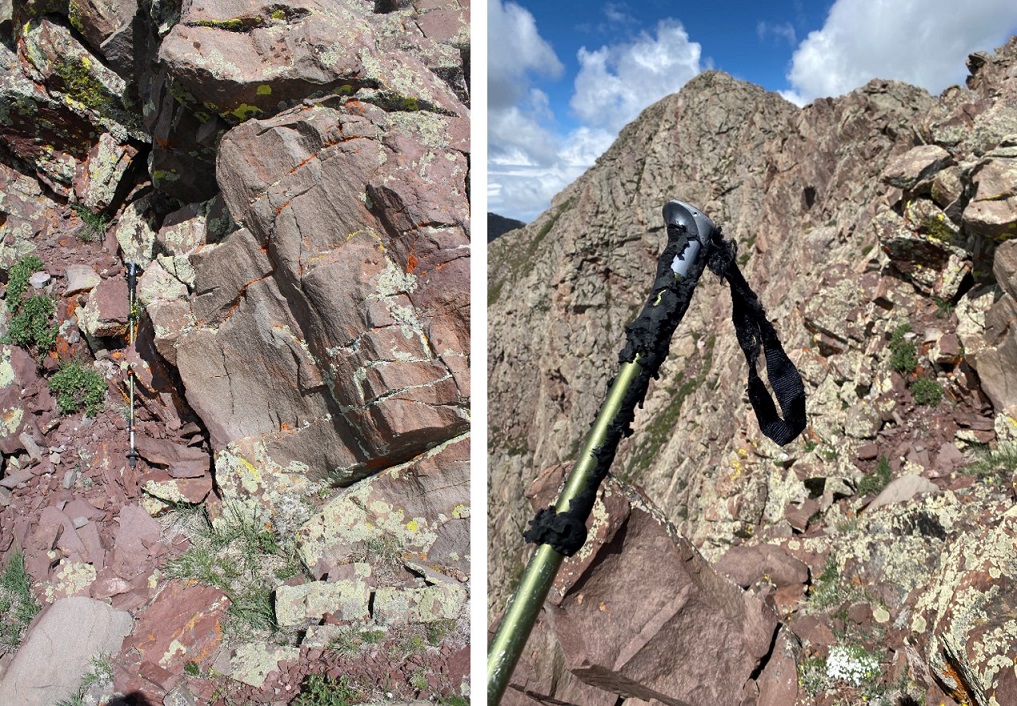
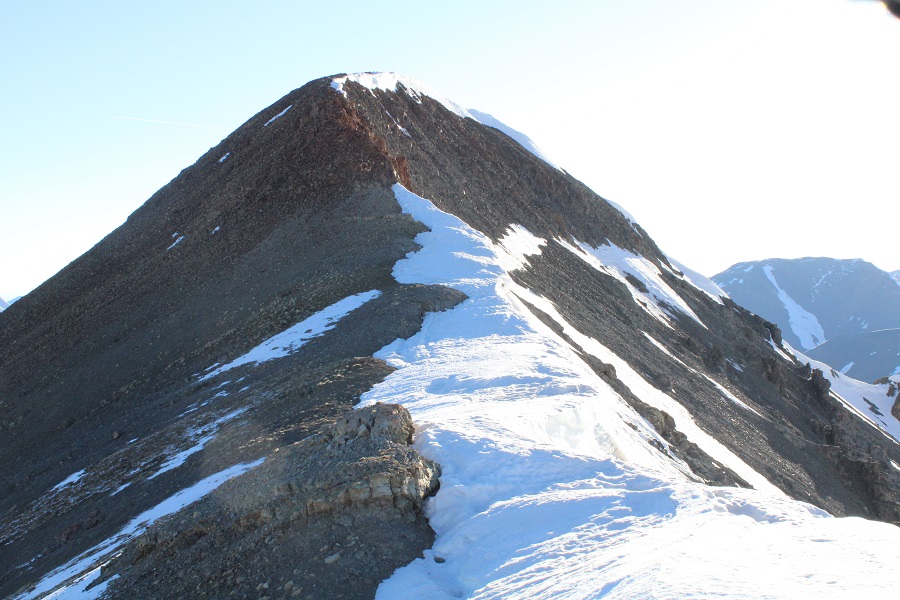
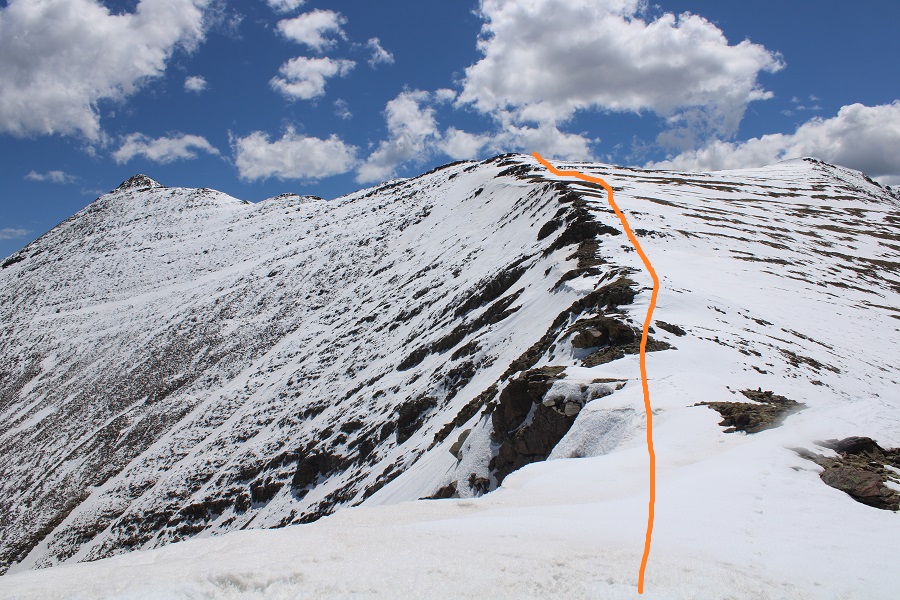
Once on the ridge I dipped to the left (east) to go around PT 13247, and then stayed on the ridge proper towards Miranda.  This area reminded me of the knife edge on Capitol, but with less exposure and better footing. I was able to put my feet in the cracks and walk across easily.
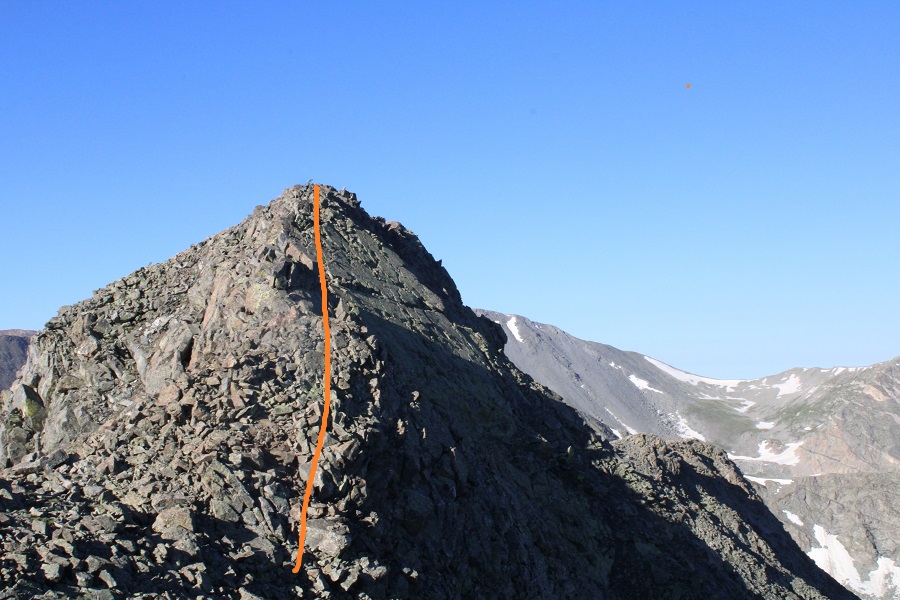
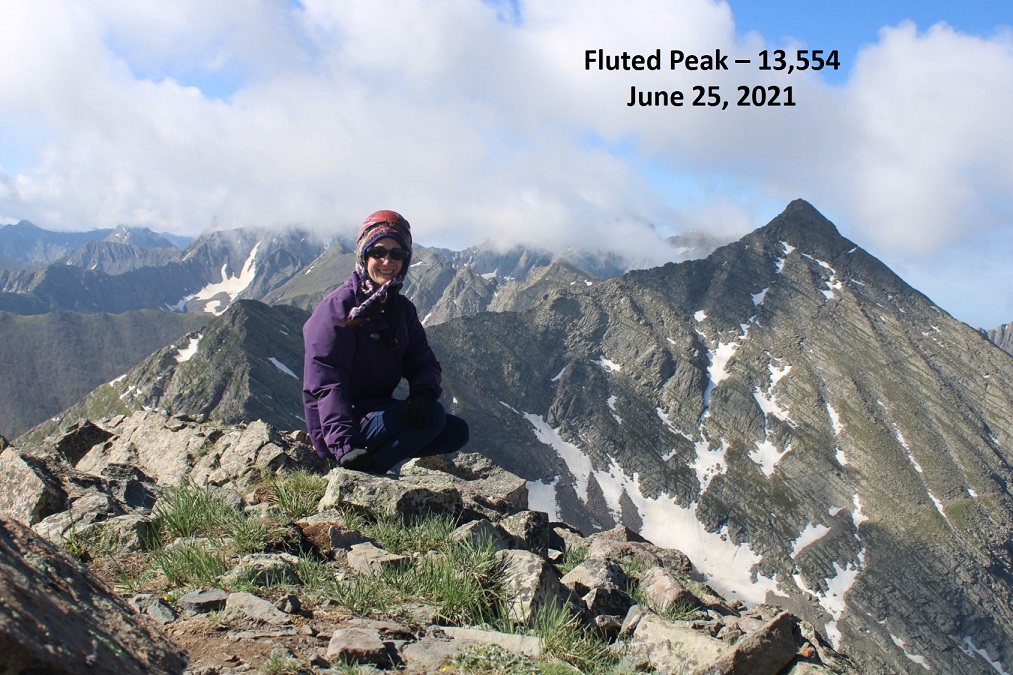
Miranda Peak: 

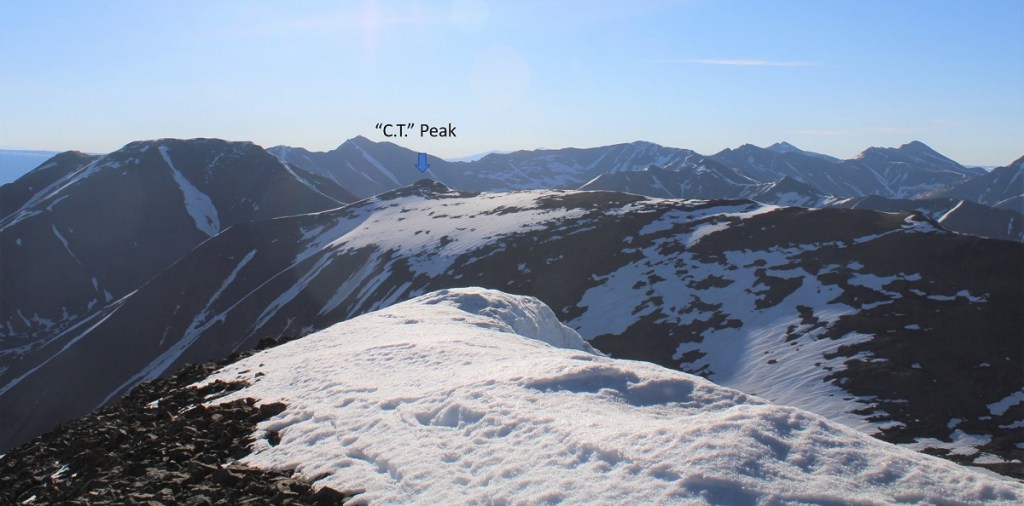
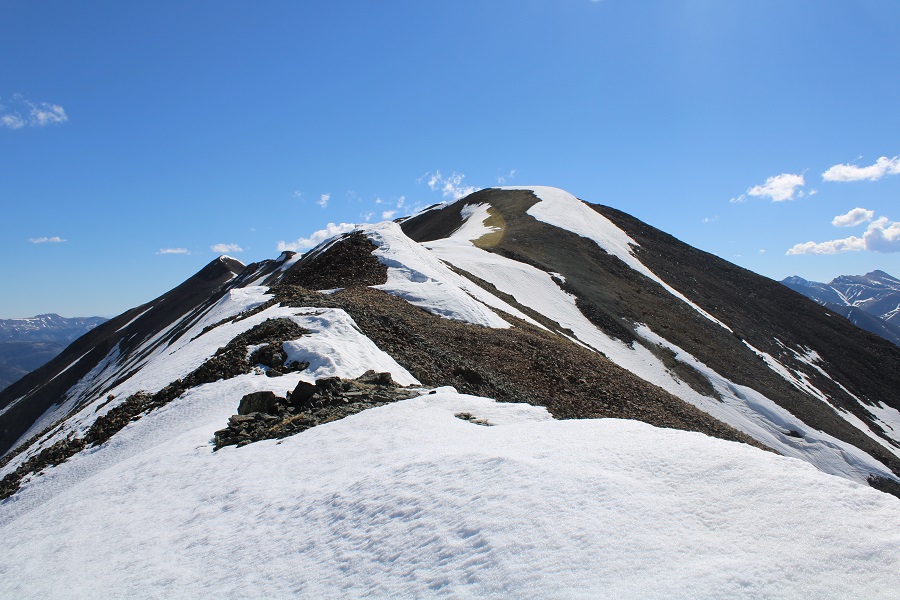
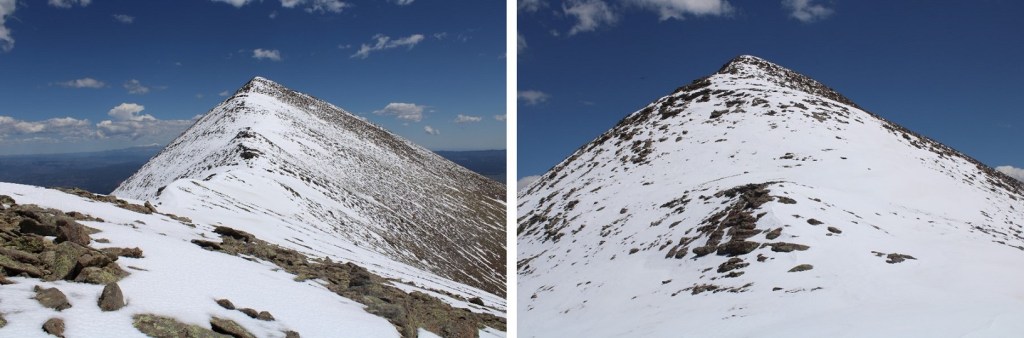
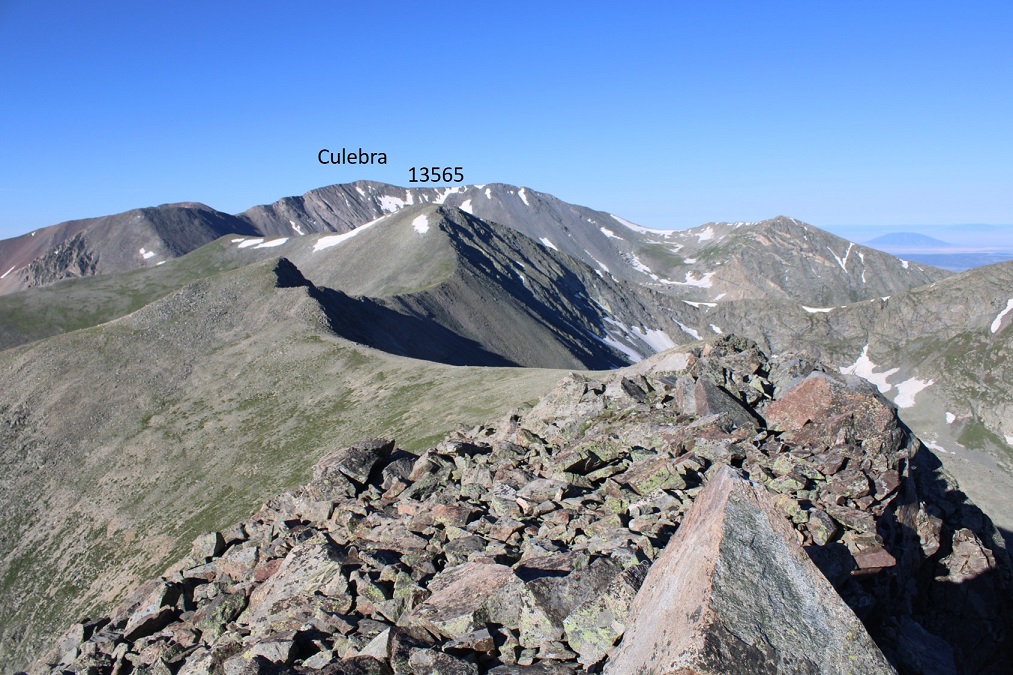
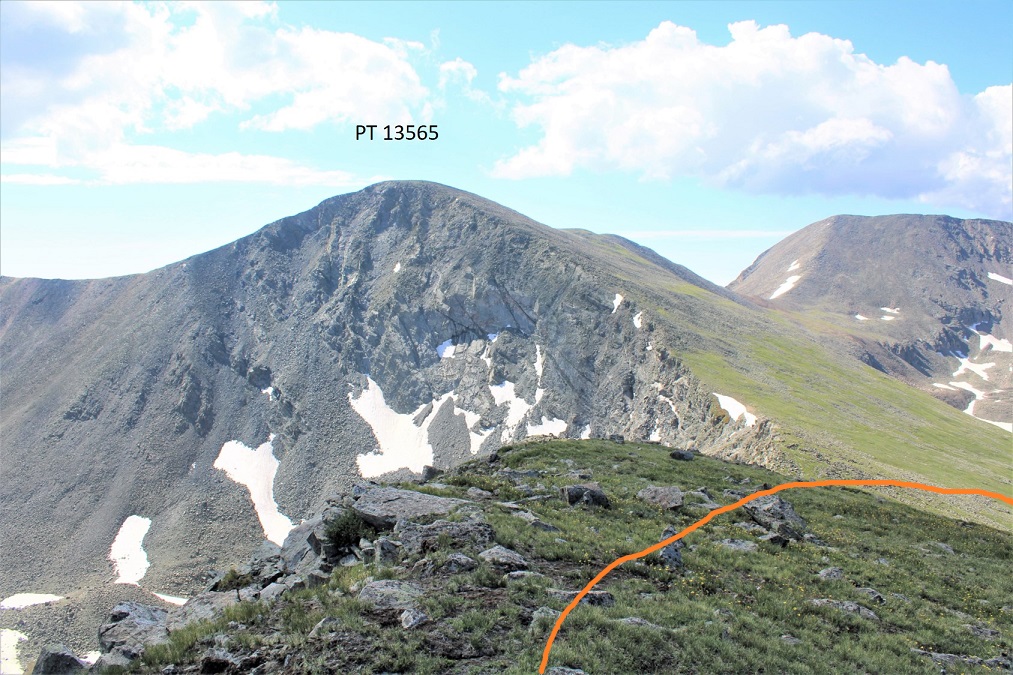
Miranda is unranked, so I didn’t take a summit selfie. From Miranda you can see Culebra, as well as the next ranked peak:  PT 13565.  As you can tell from the picture below, it’s a simple ridge hike.

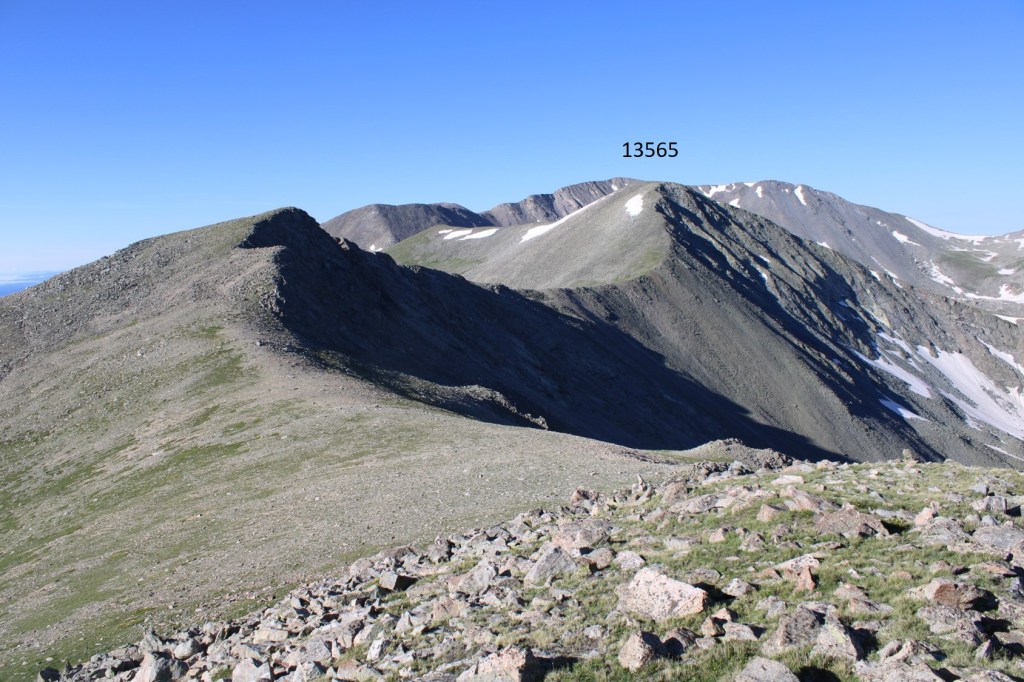
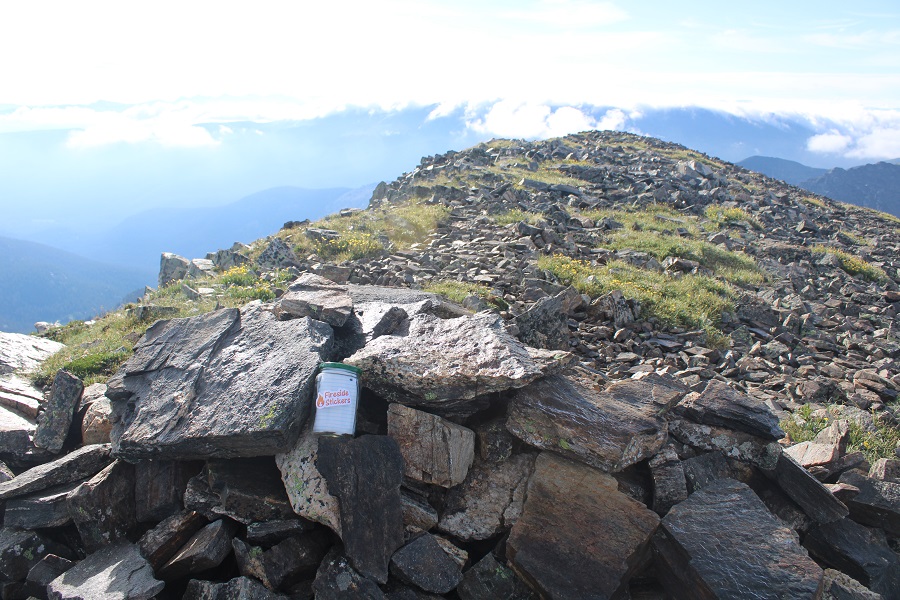
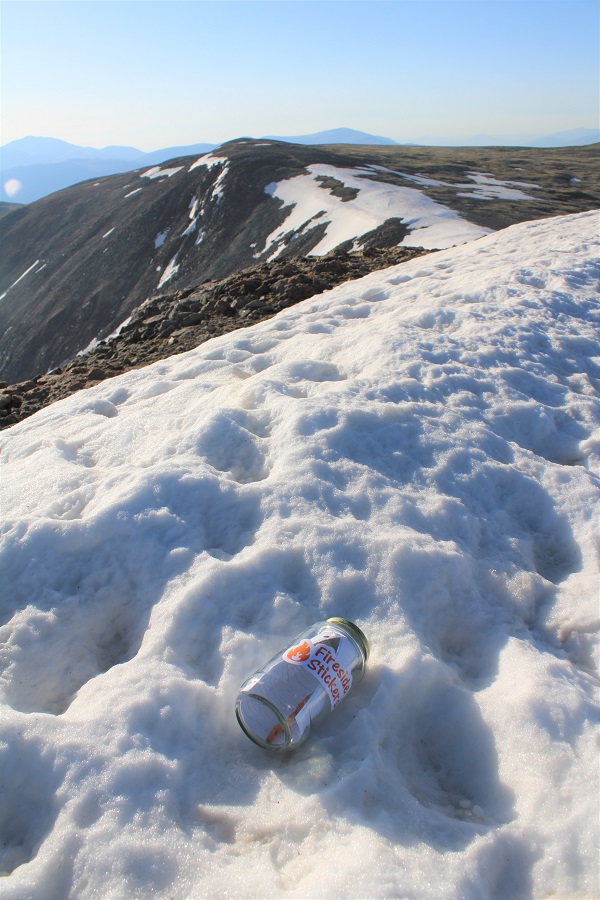
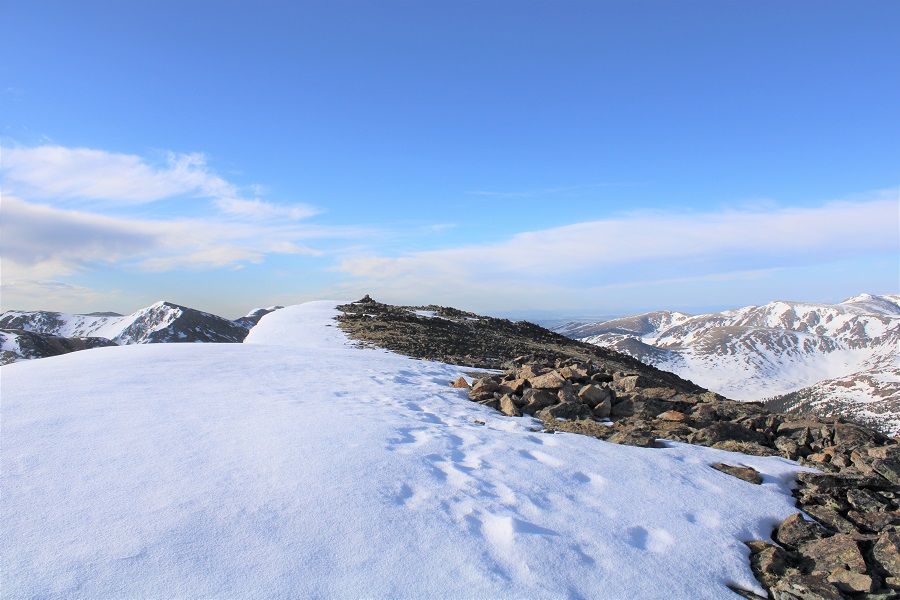
The summit of PT 13565 was also flat, and the summit register was also broken with the information missing (hopefully the next group will bring new summit registers)

13565:

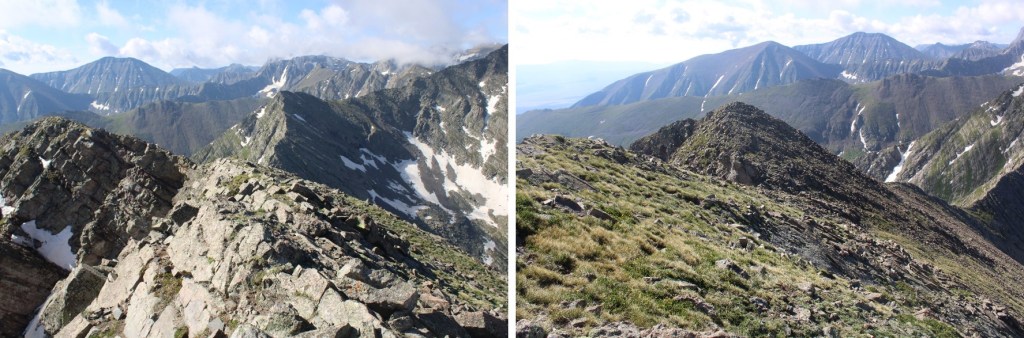
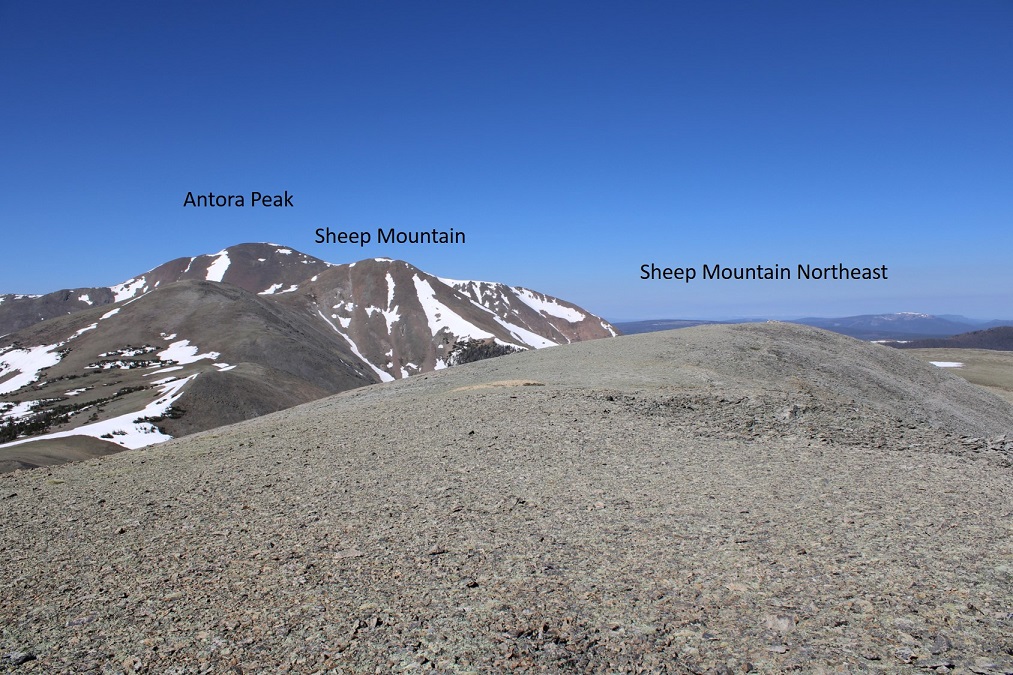
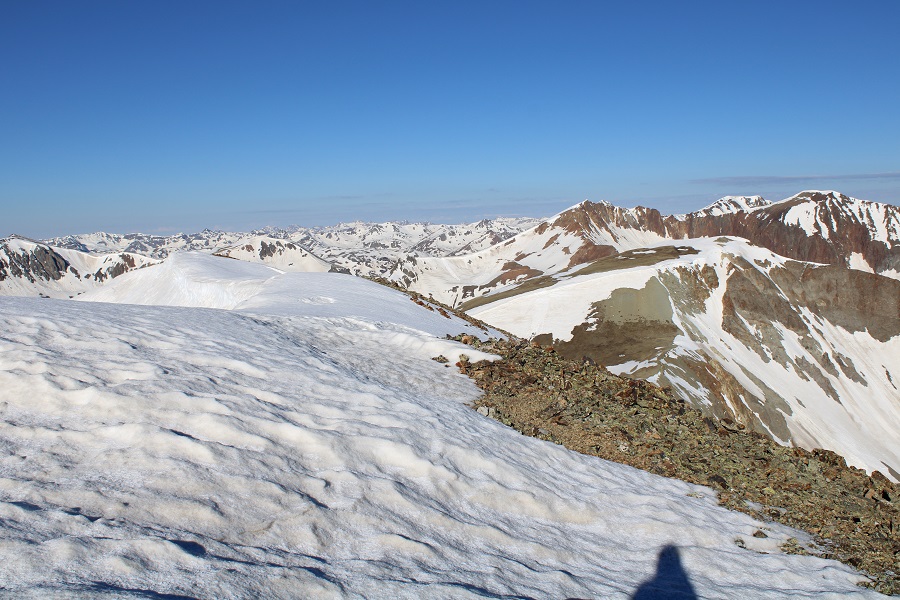
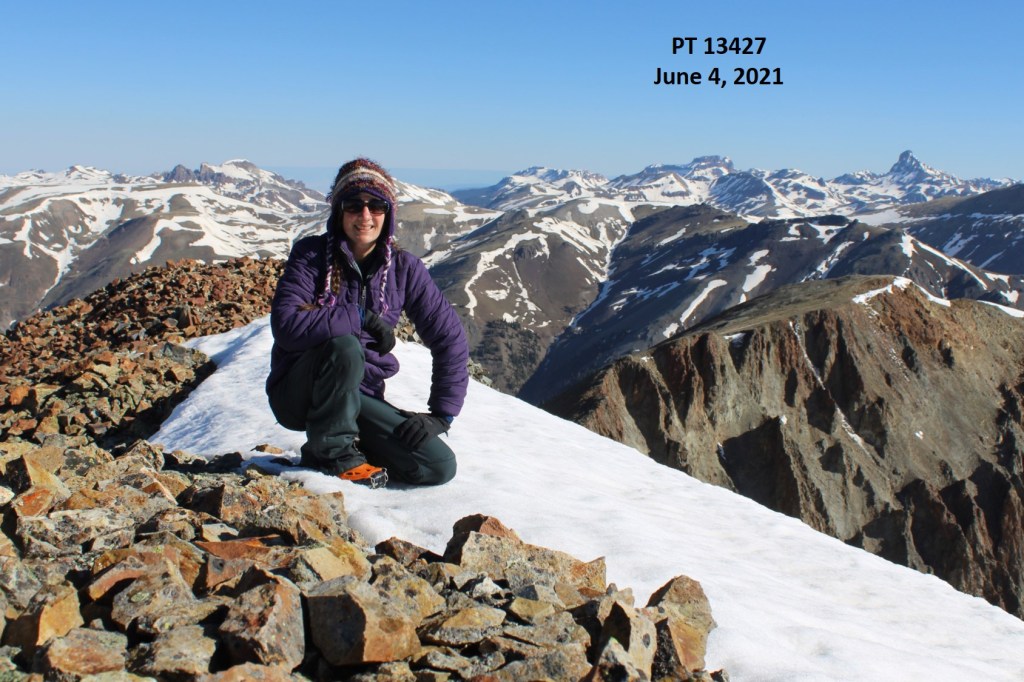
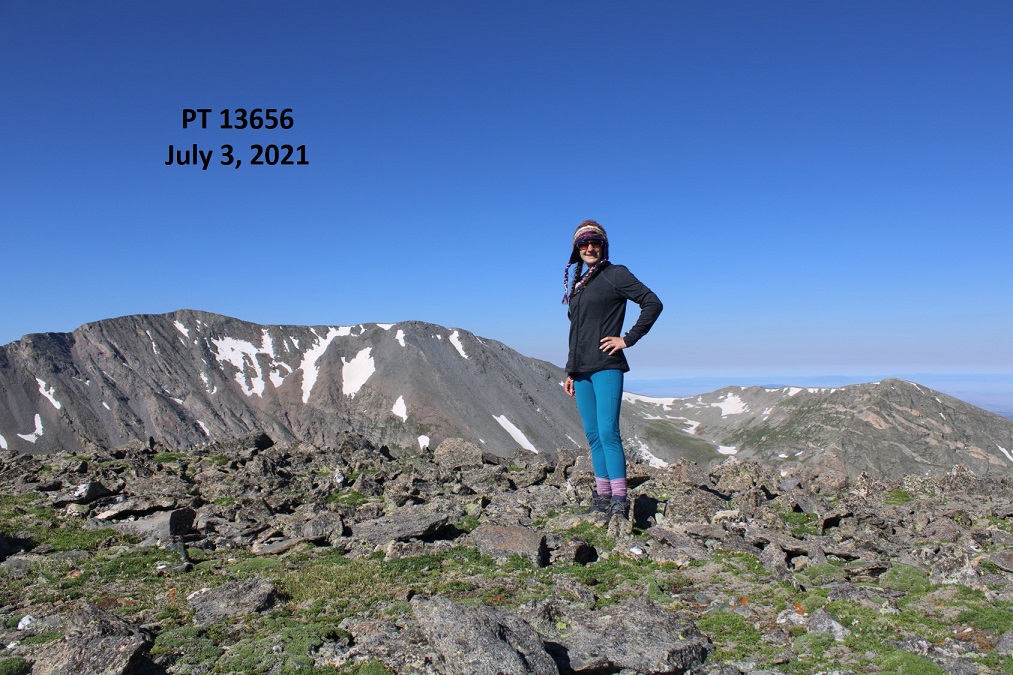
Here’s looking back at some of today’s peaks from PT 13565

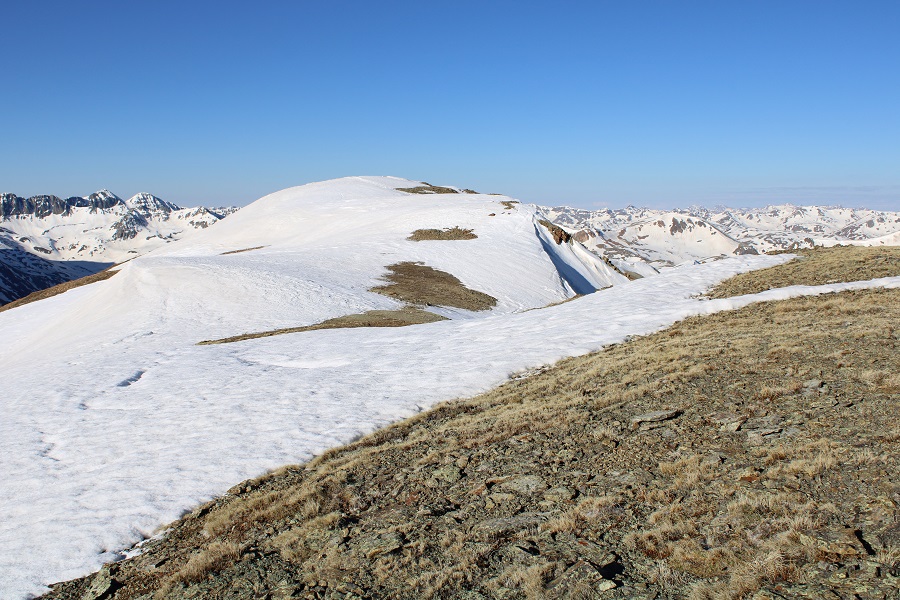
Turning west, then following the ridge northwest, it was an easy hike to PT 13229
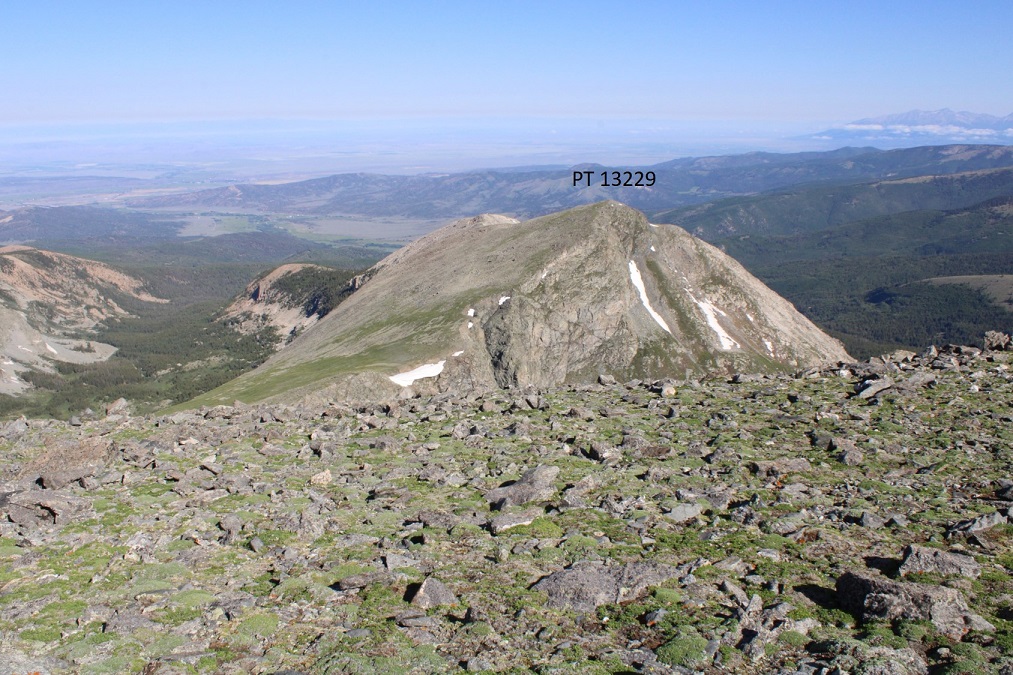
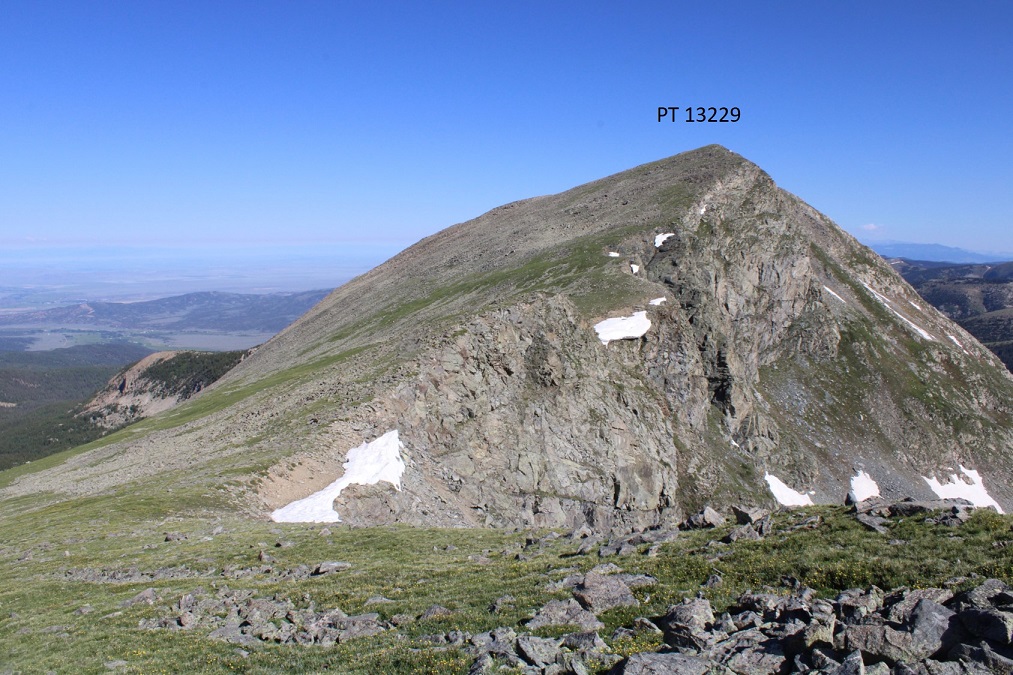
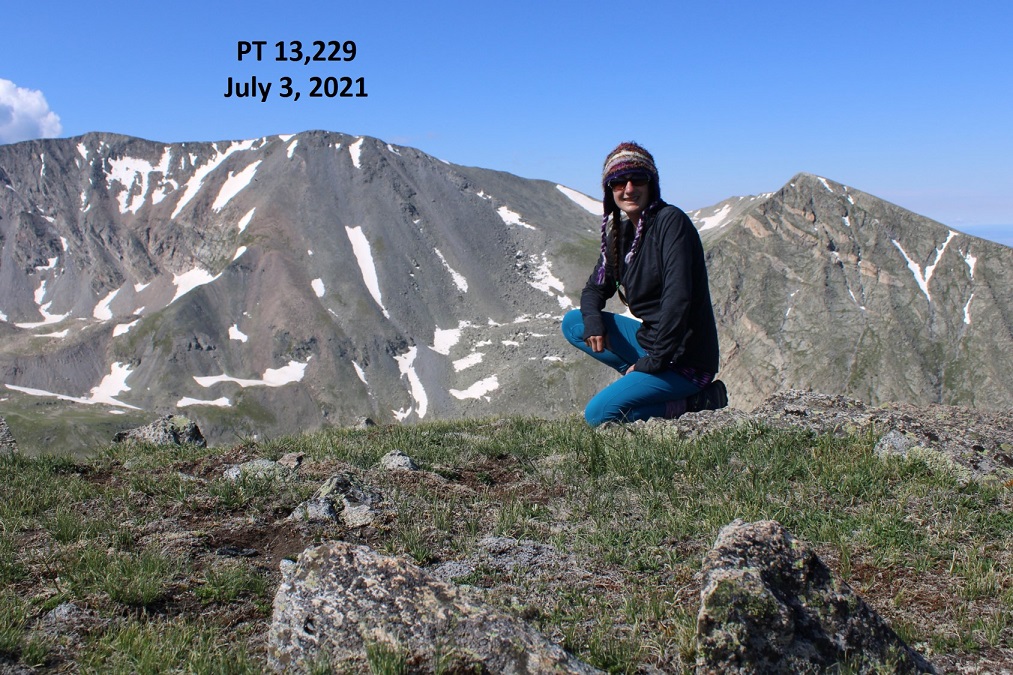
13229:

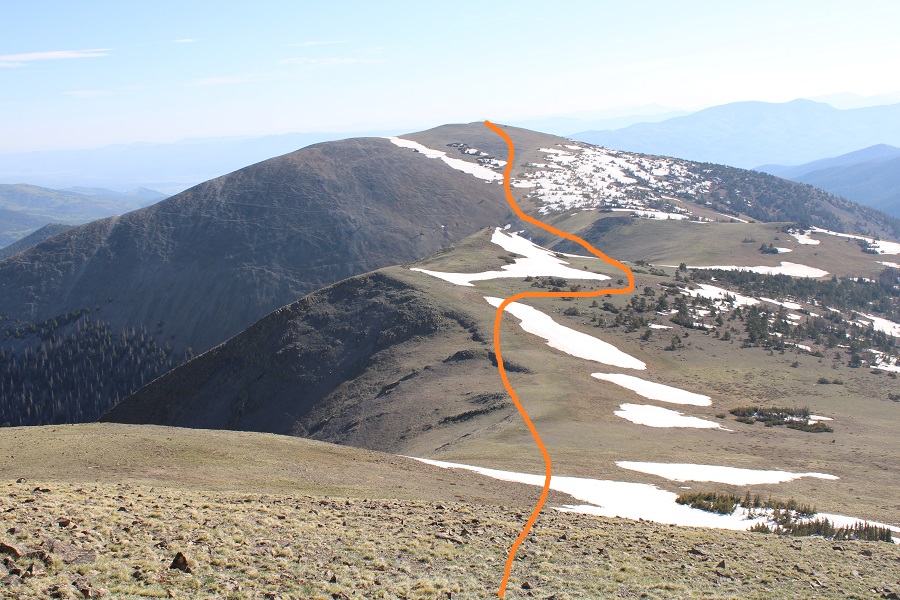
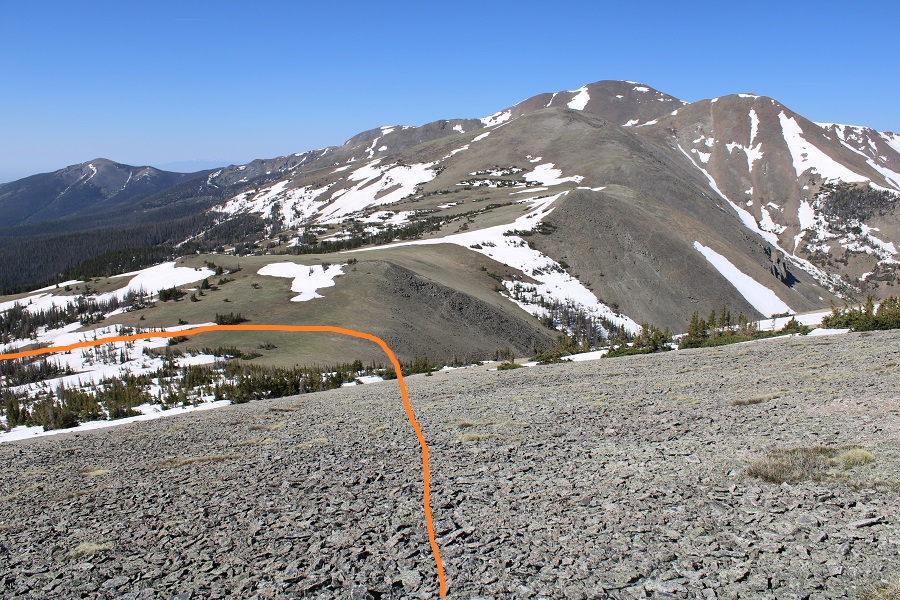
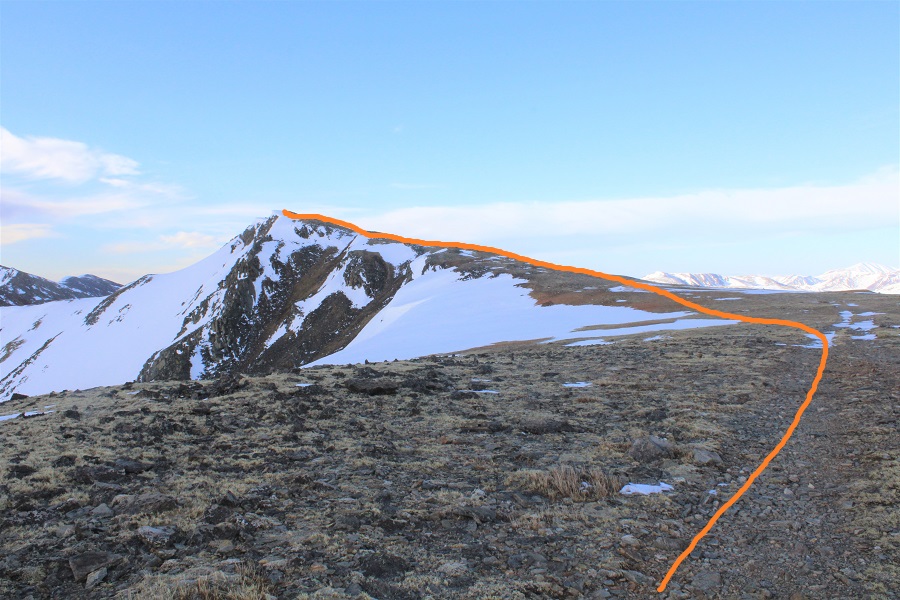
After summiting PT 13229 I returned to the 13565/13229 saddle and then turned right and headed south.

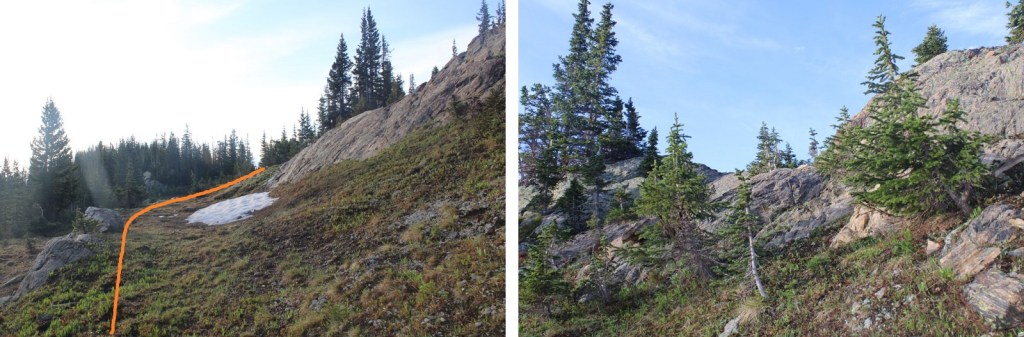
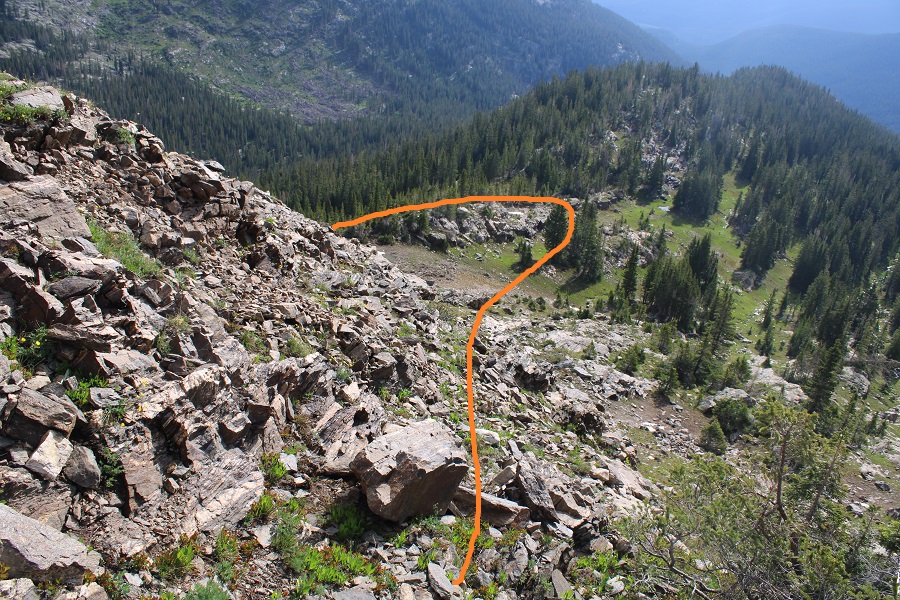
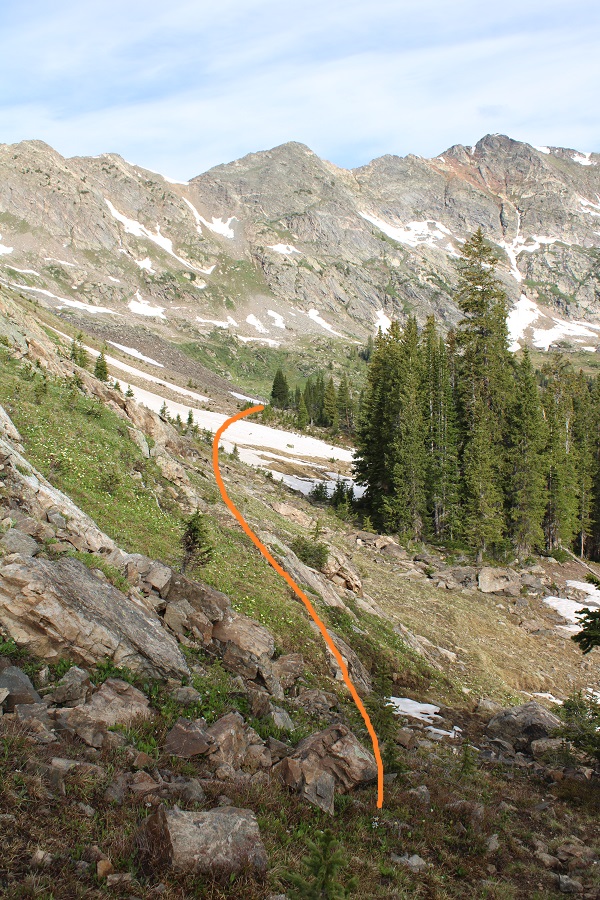
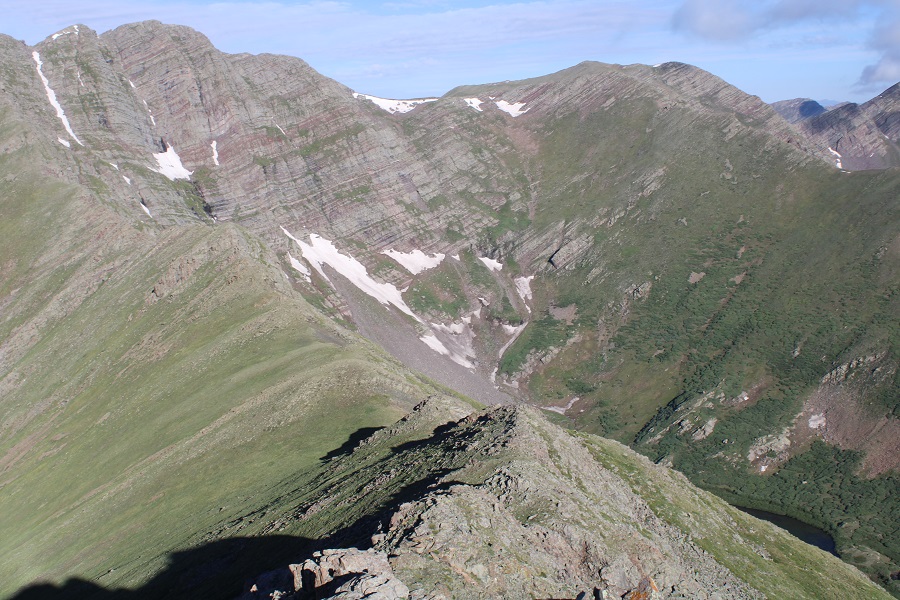
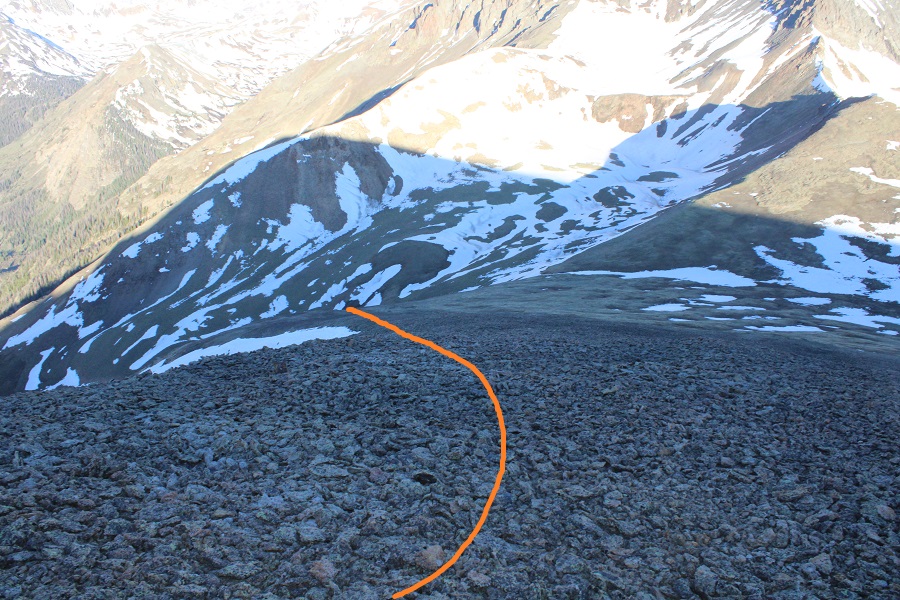
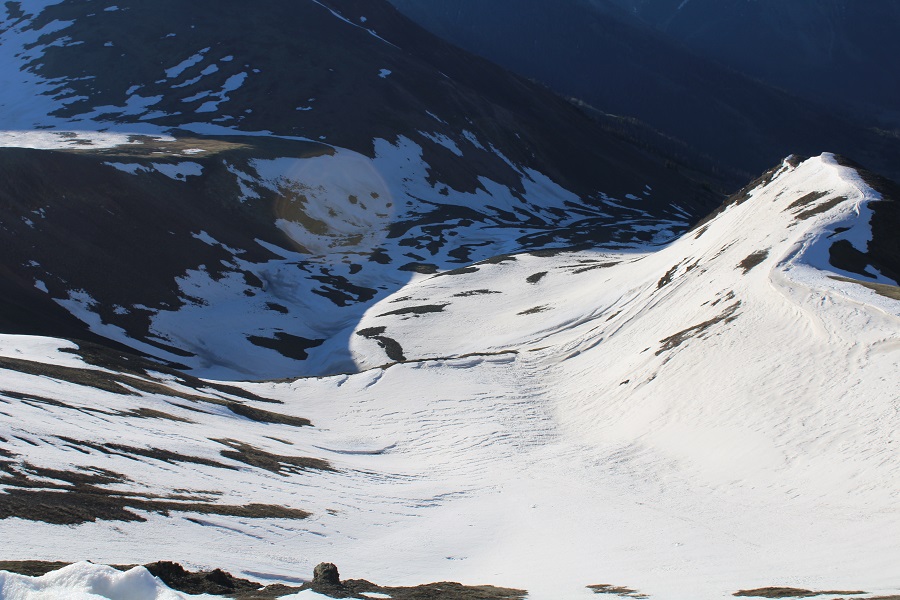
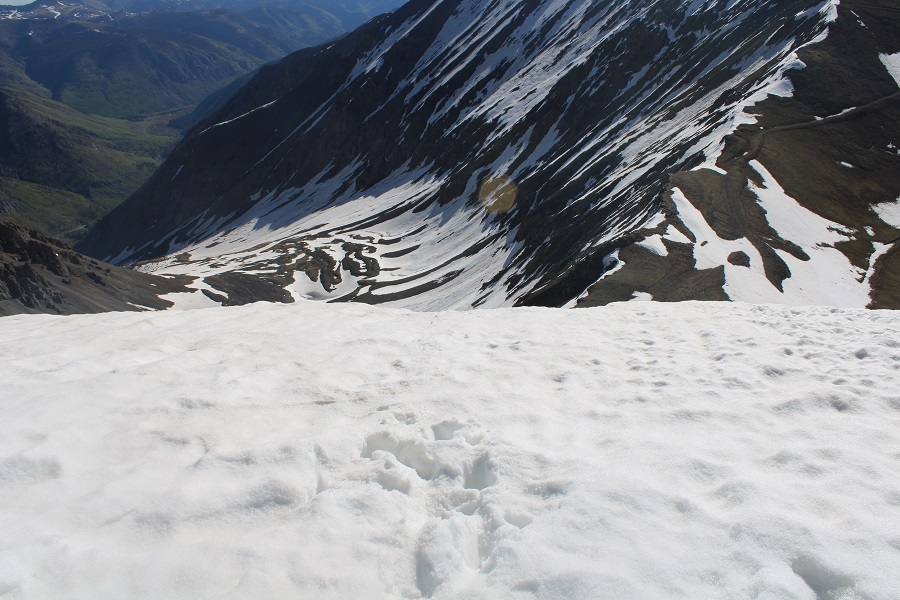
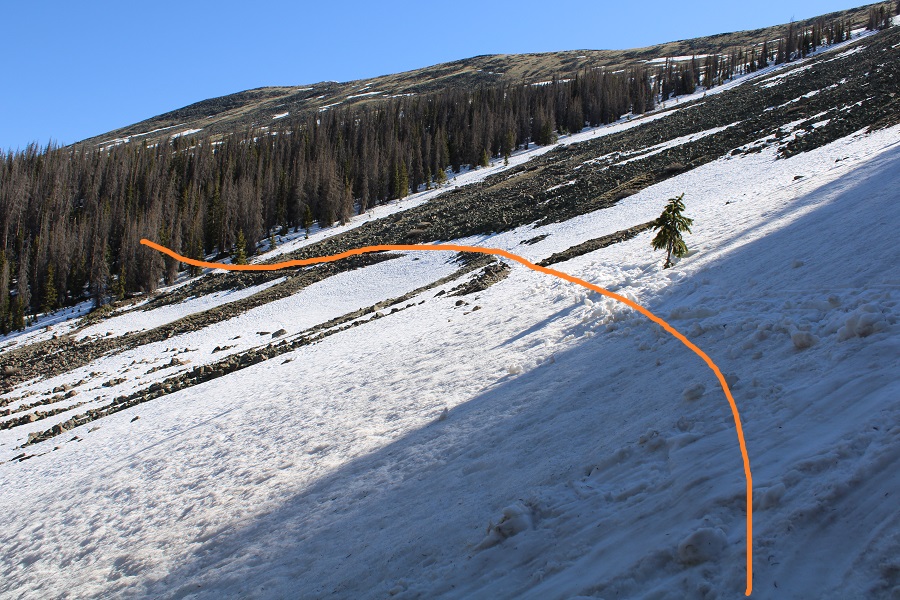
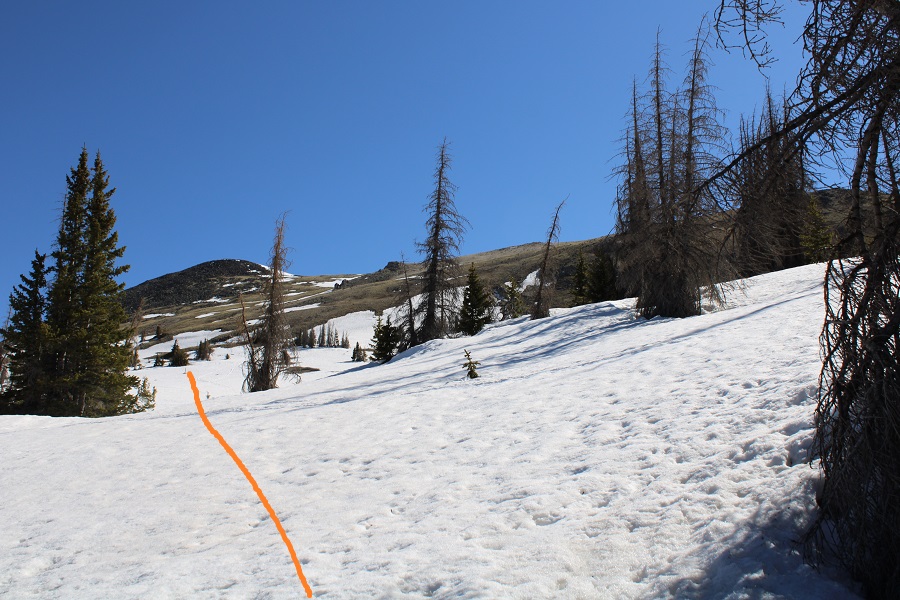
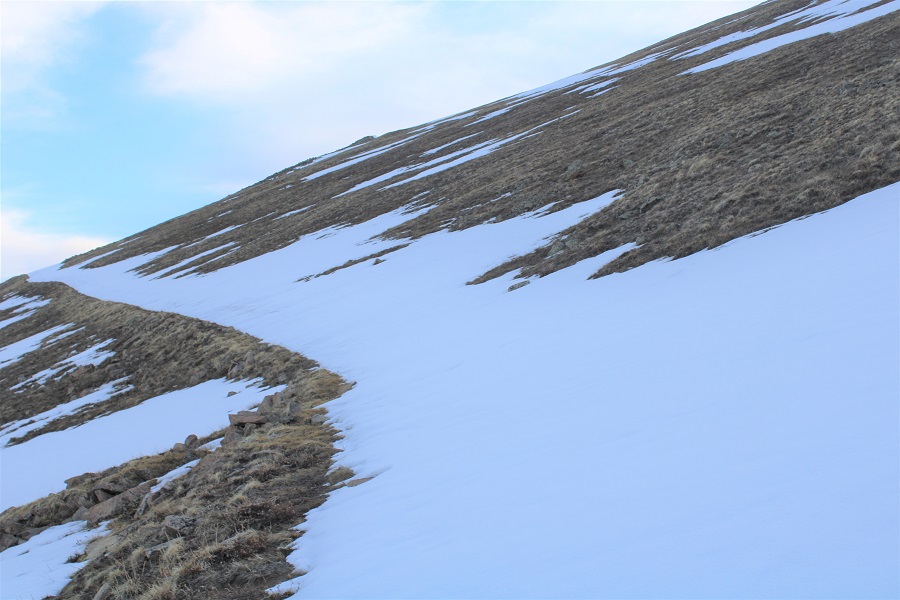
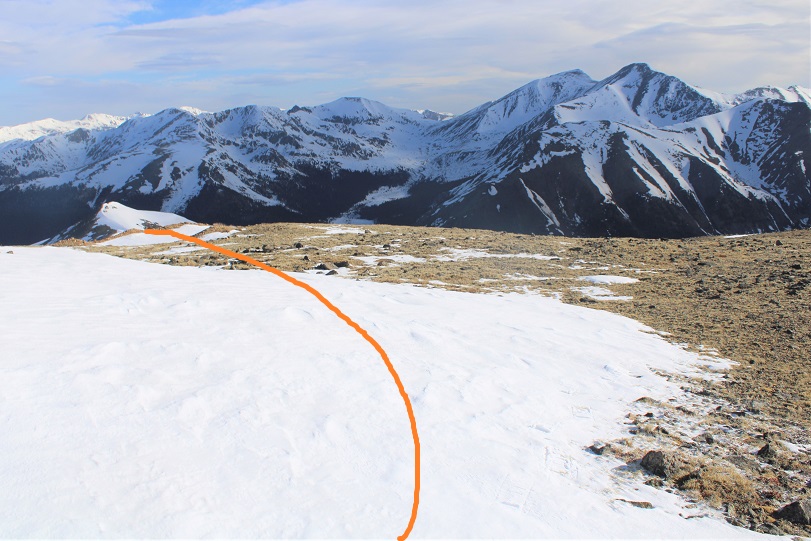
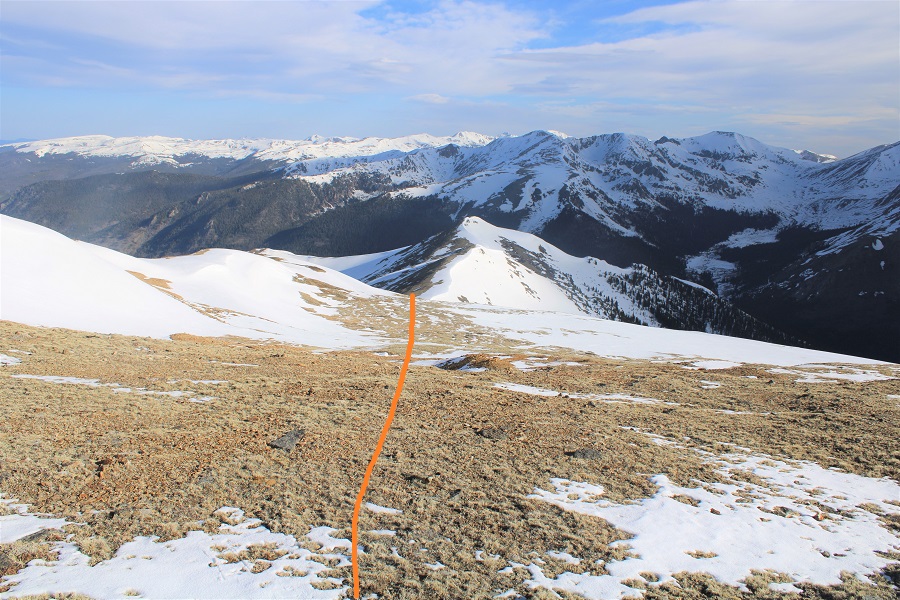
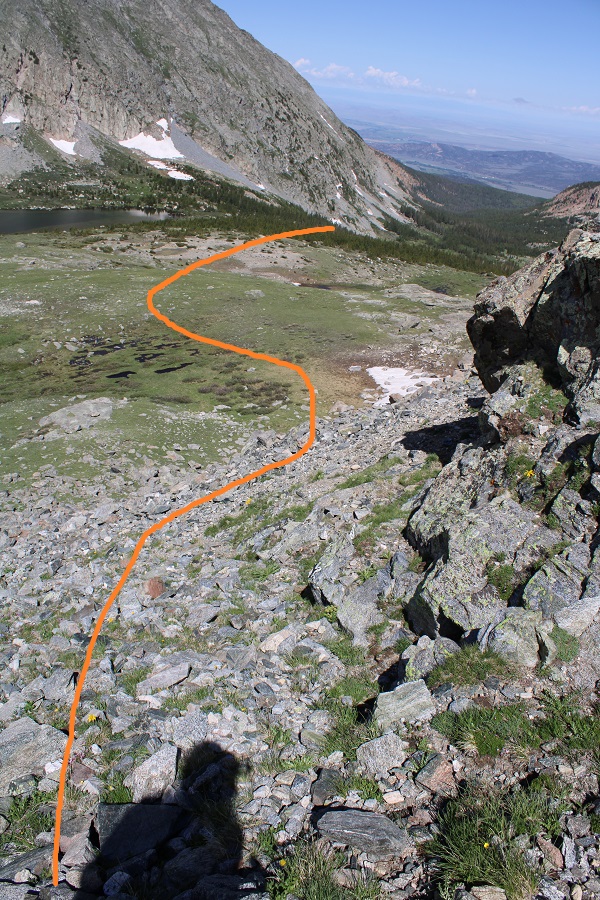
This is where it gets tricky.  There’s a large area where you can cliff out on your descent.  You’ll need to hike much further south than you want to so you can avoid the cliffs.  I looked for a break in the cliffs, and didn’t descend until about 12500’, down a gully.  Here’s what that looked like from above

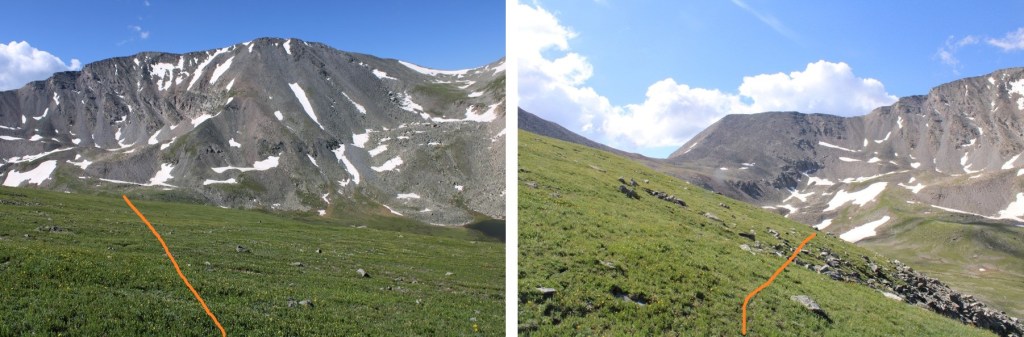
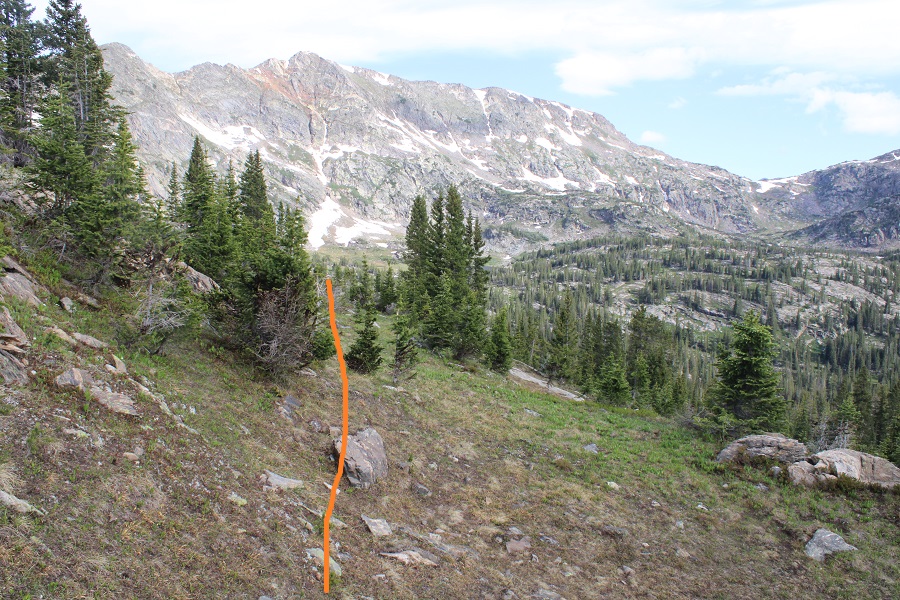
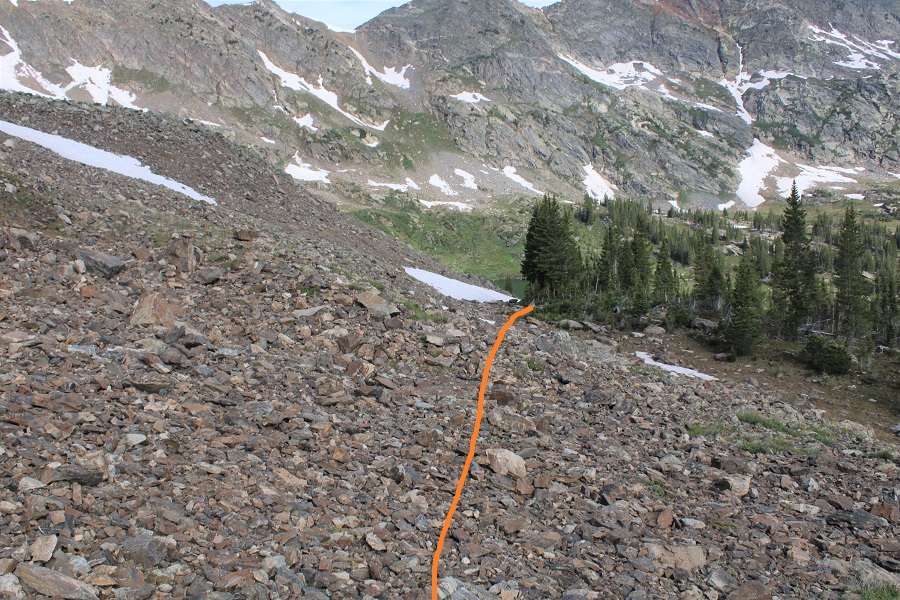
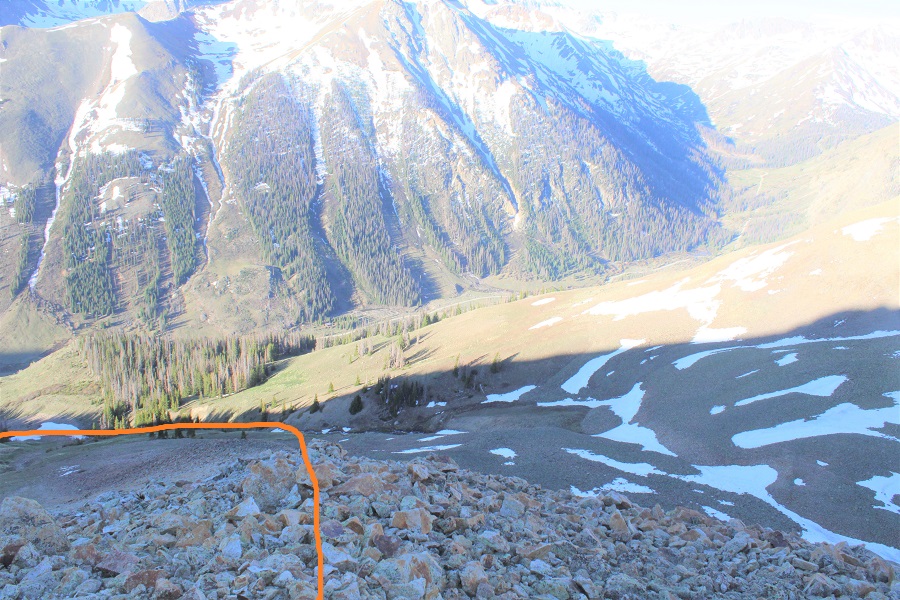
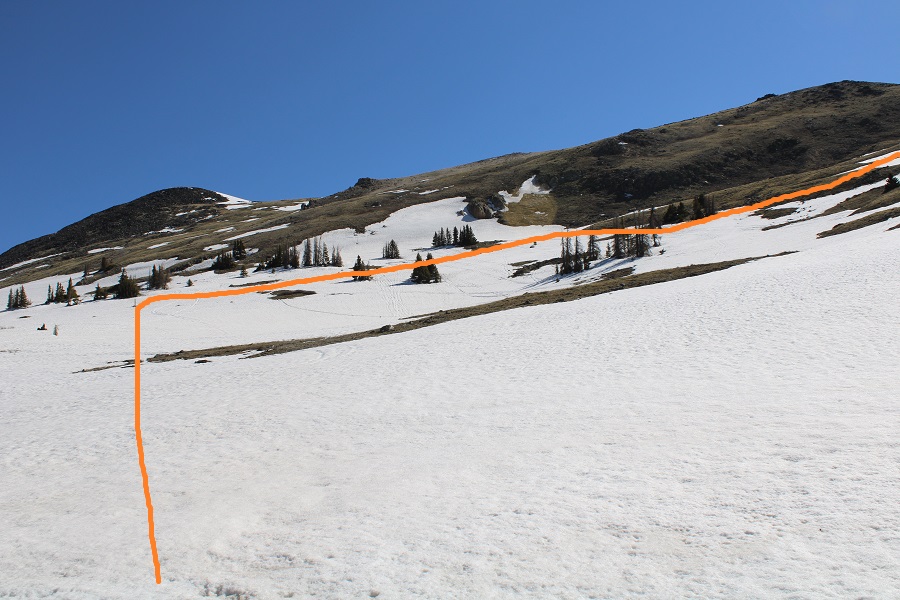
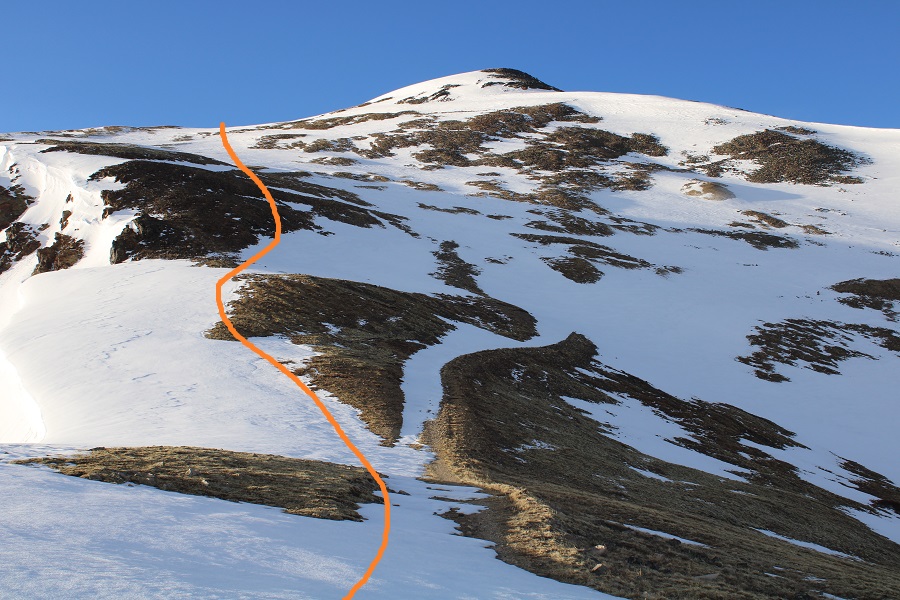
Here’s what you’re trying to avoid, and a view of how I came down (from below)

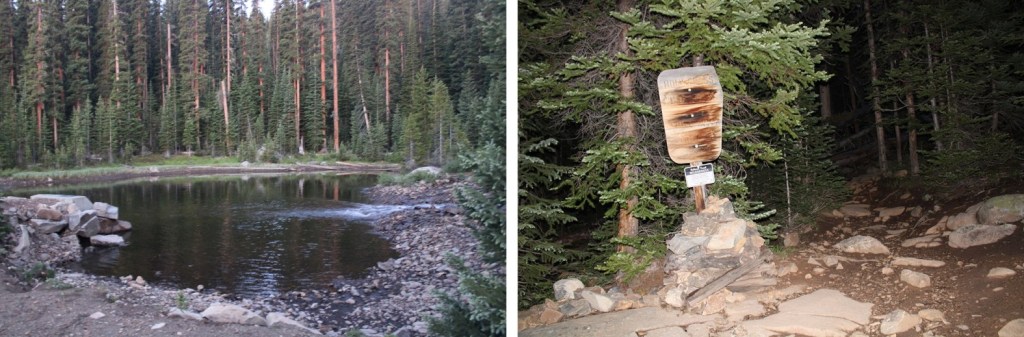
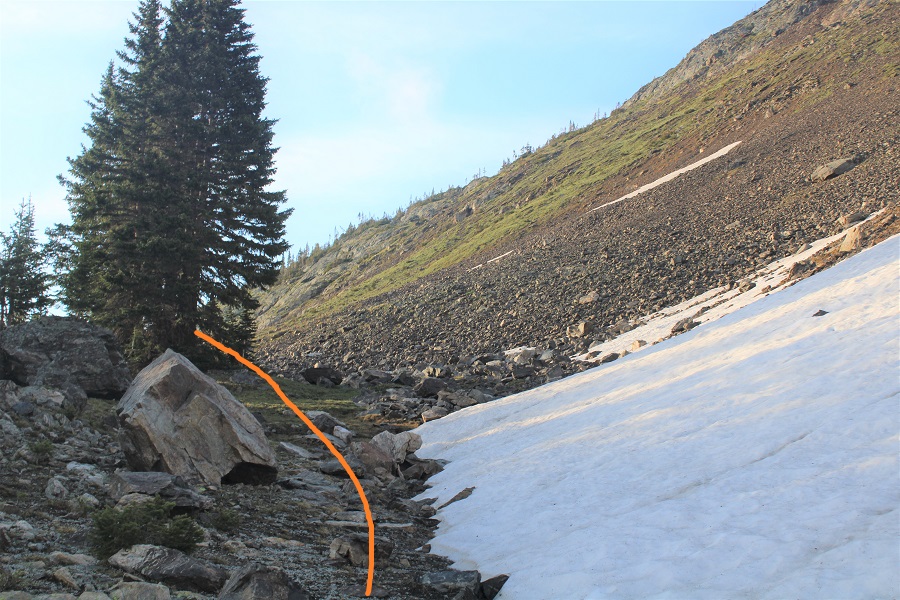
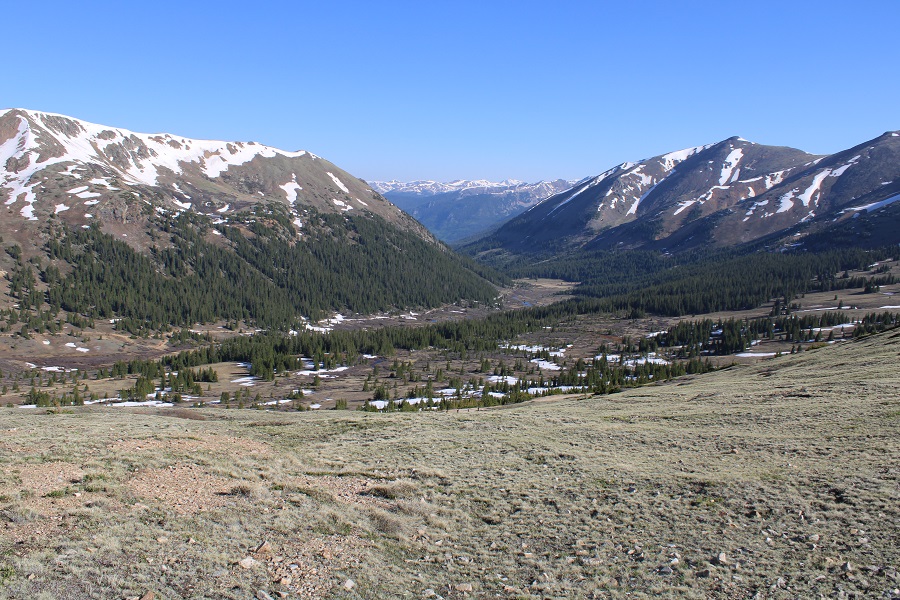
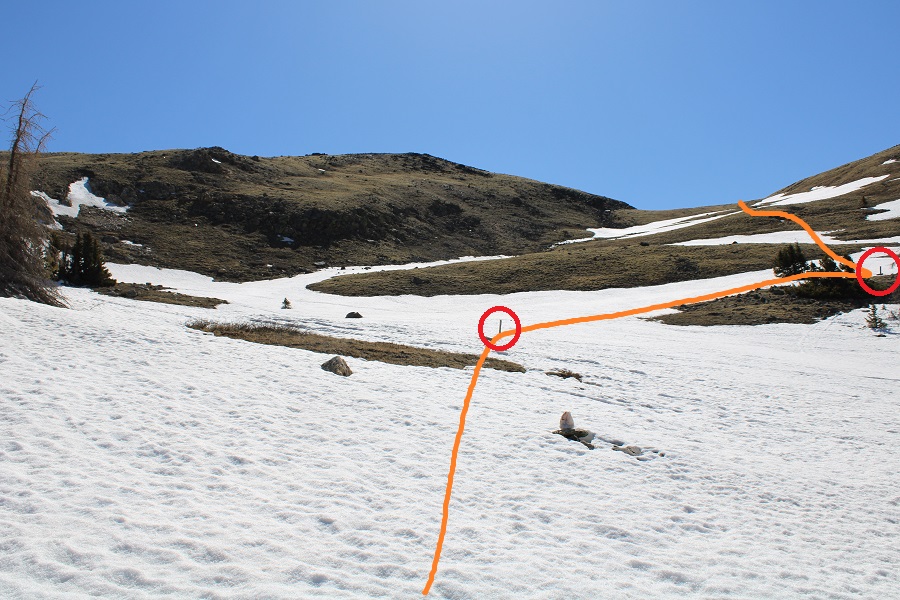
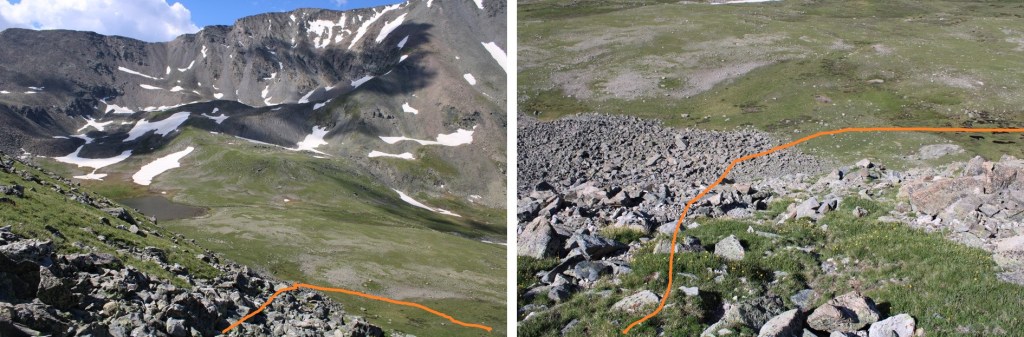
Once in the basin, I headed northwest.  It’s important to stay between Cameros Lake and the smaller pond

Here I saw a herd of elk.  Of course, they didn’t stay long

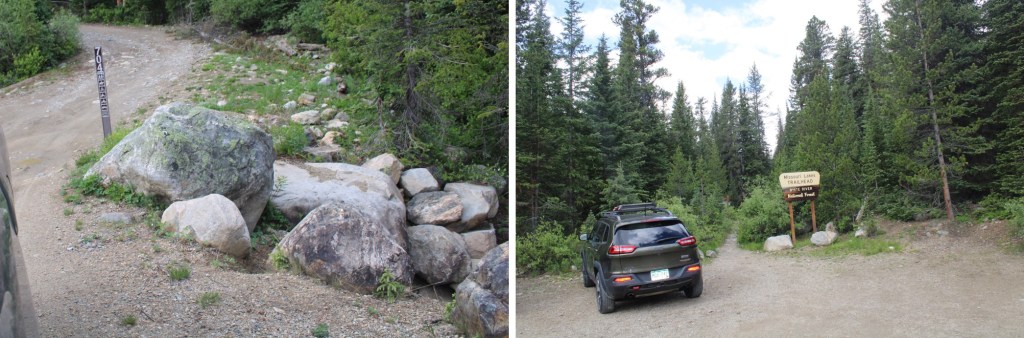
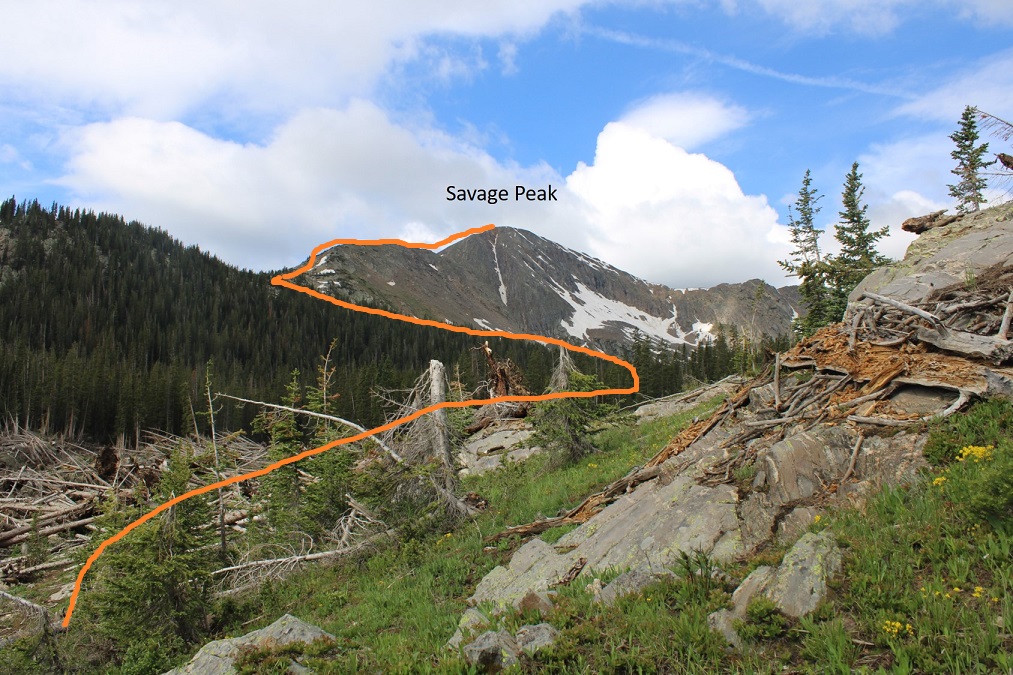
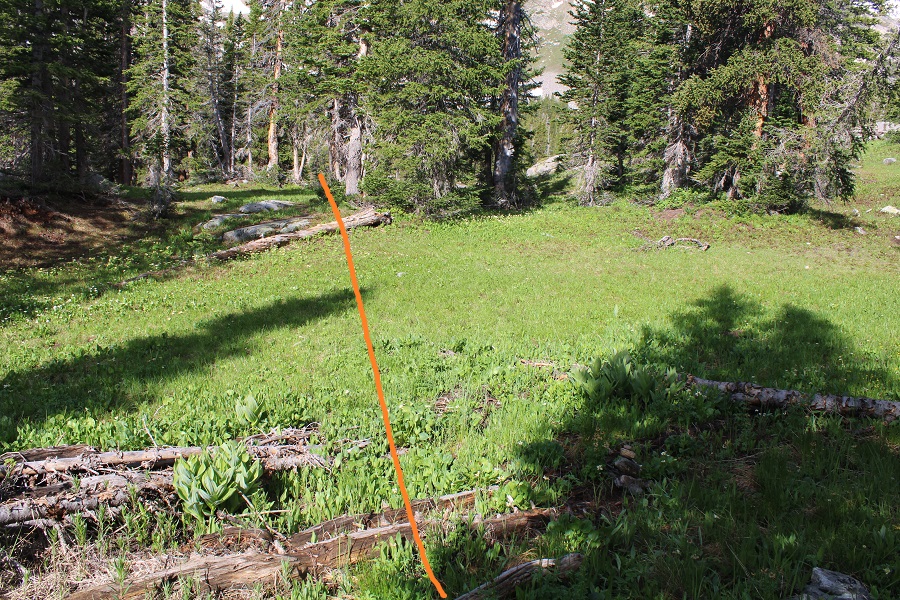
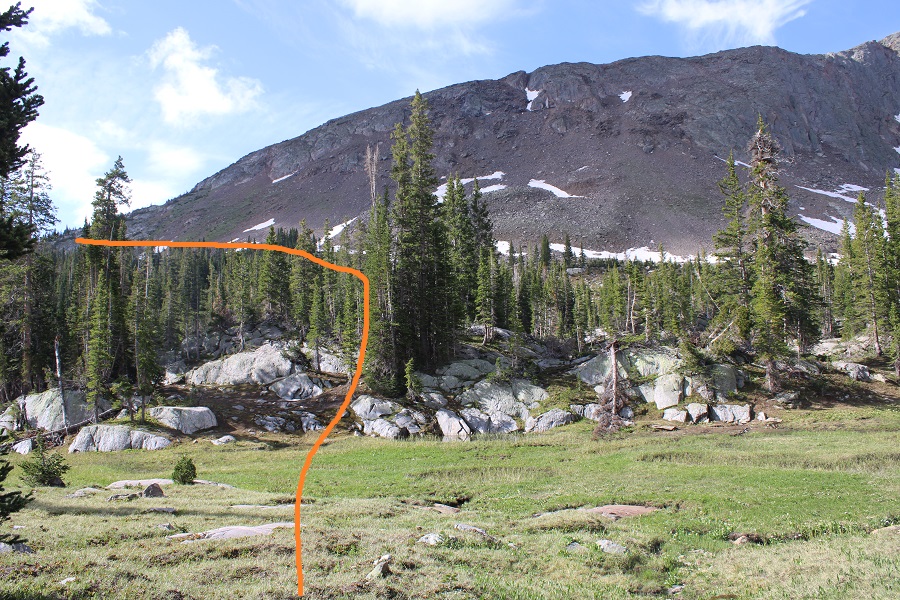
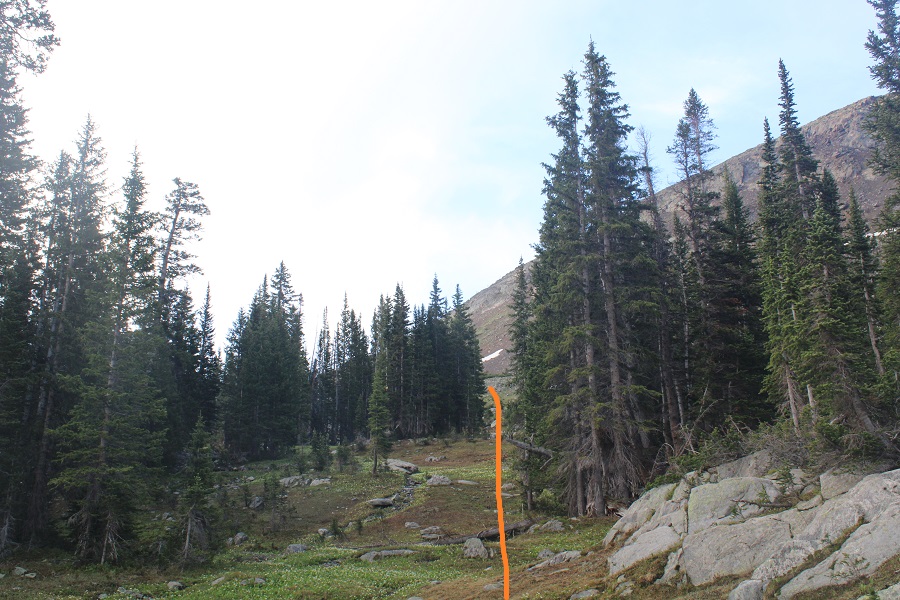
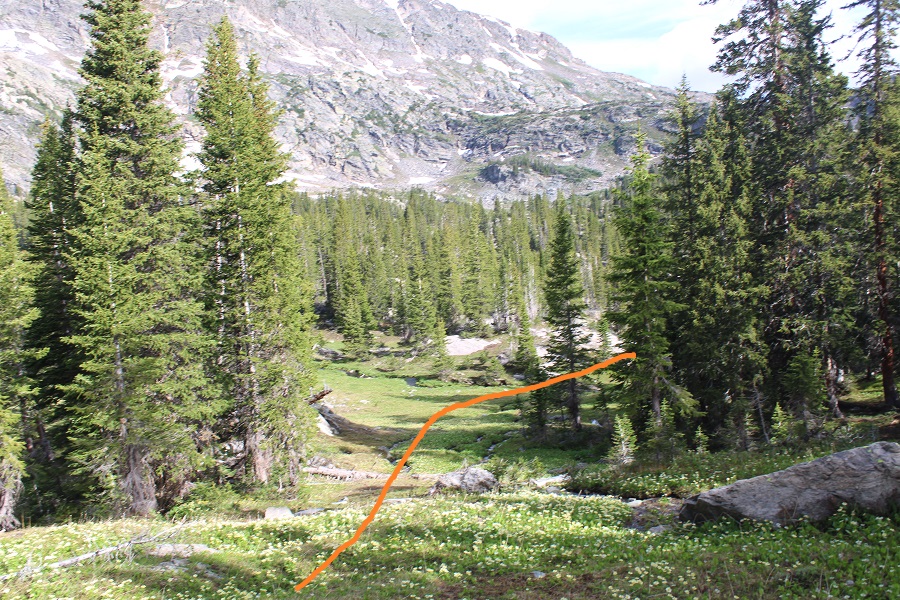
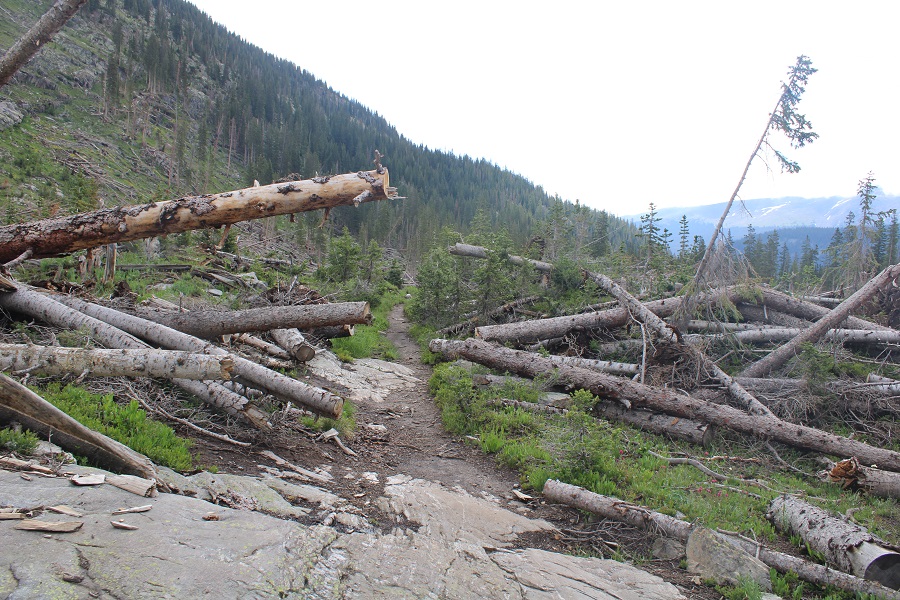
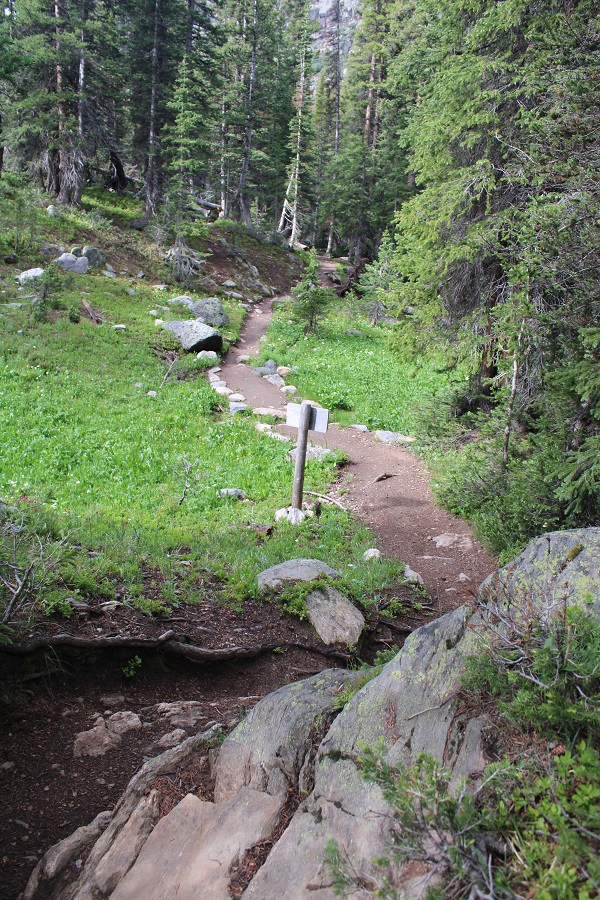
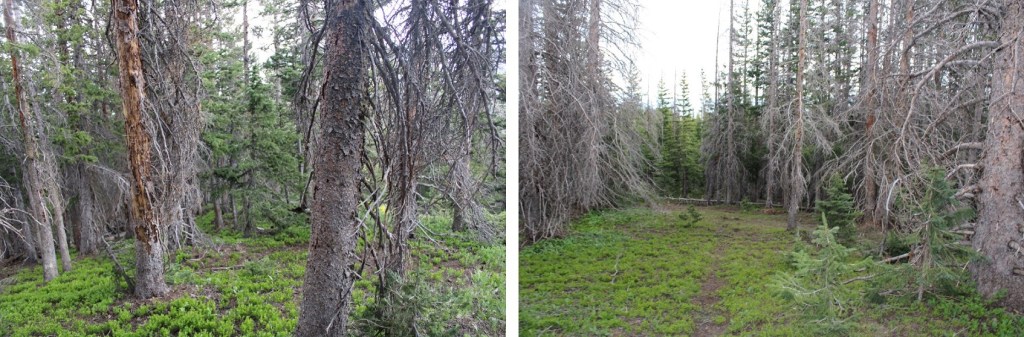
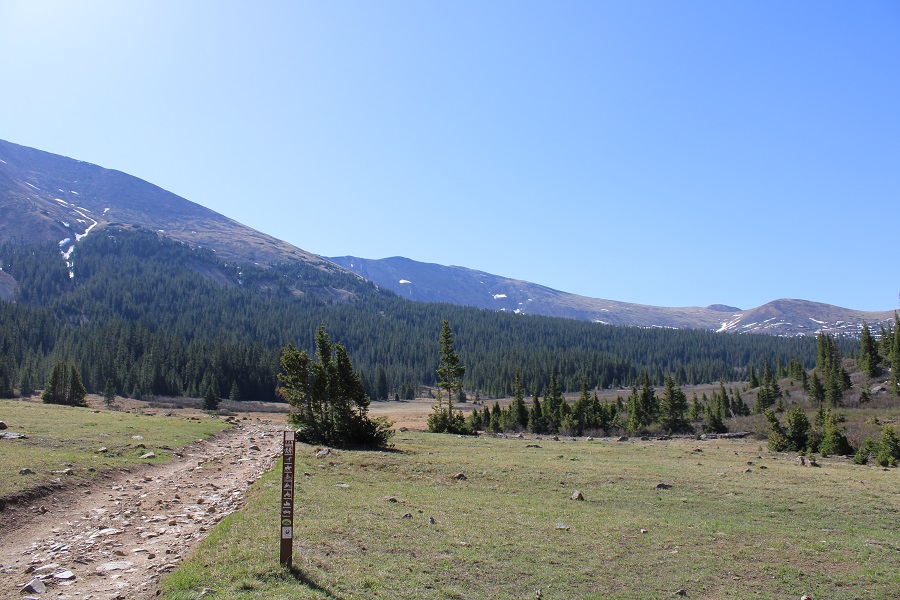
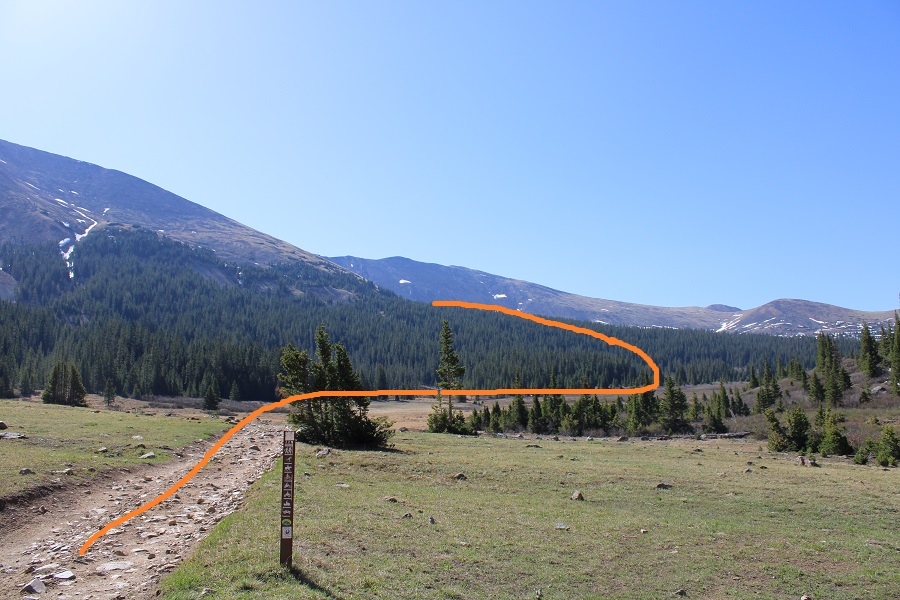
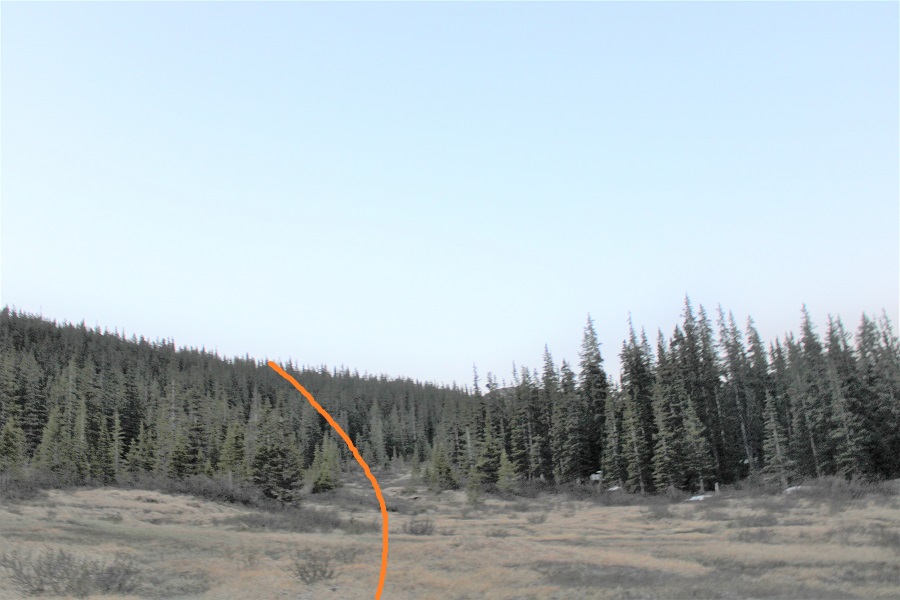
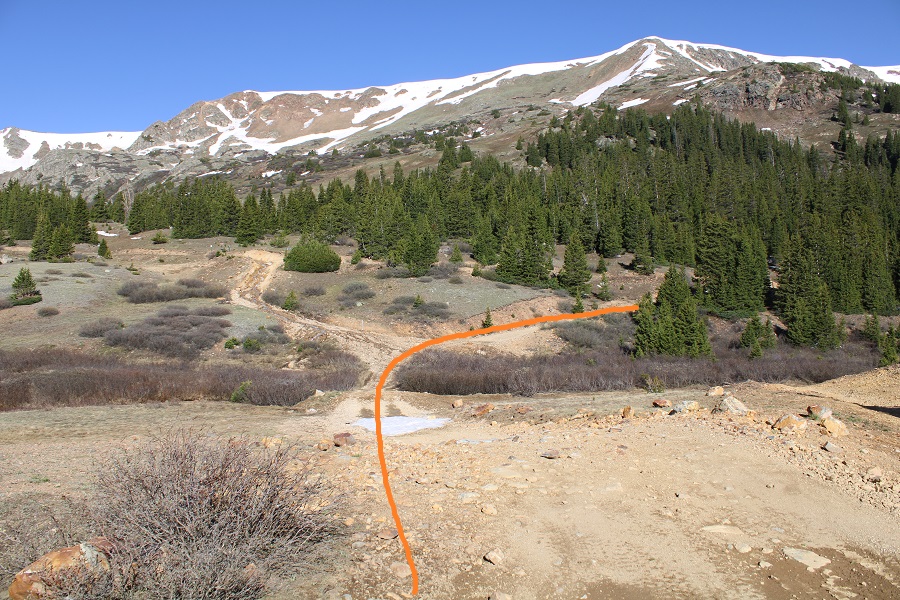
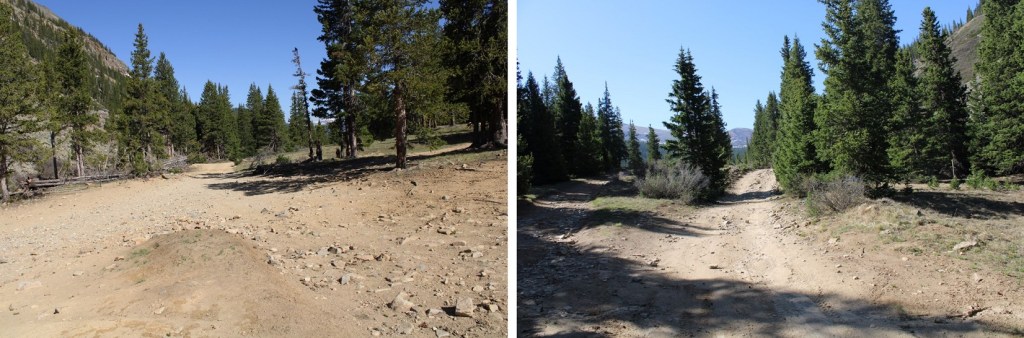
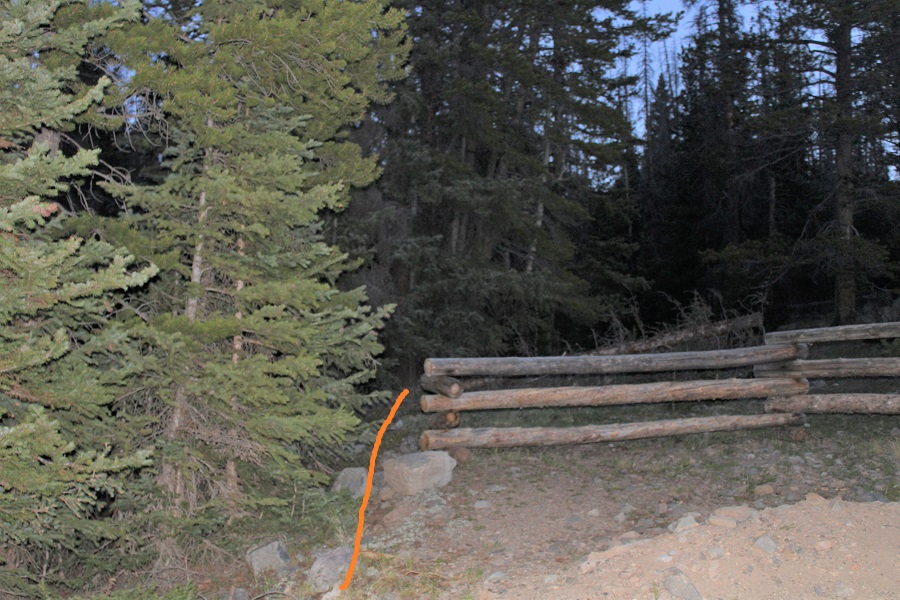
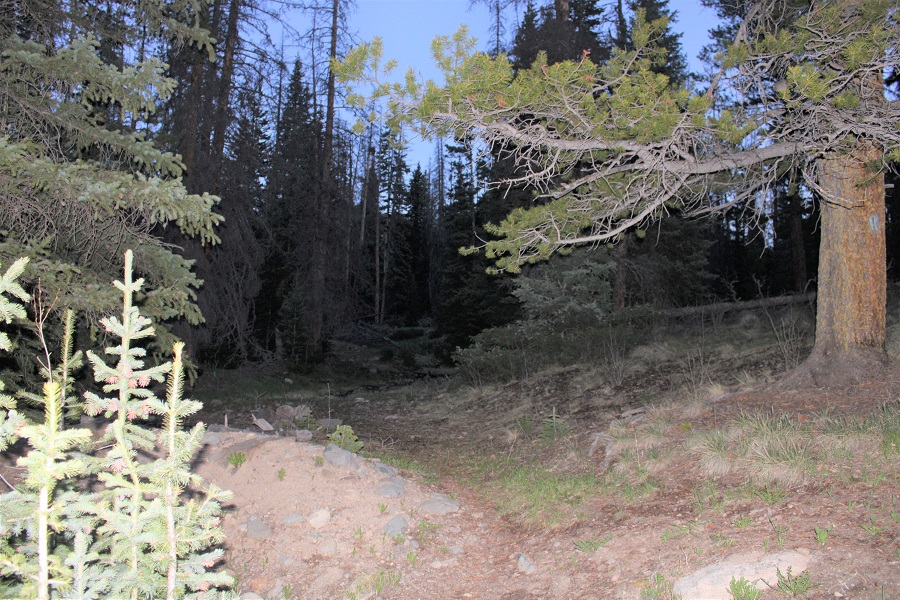
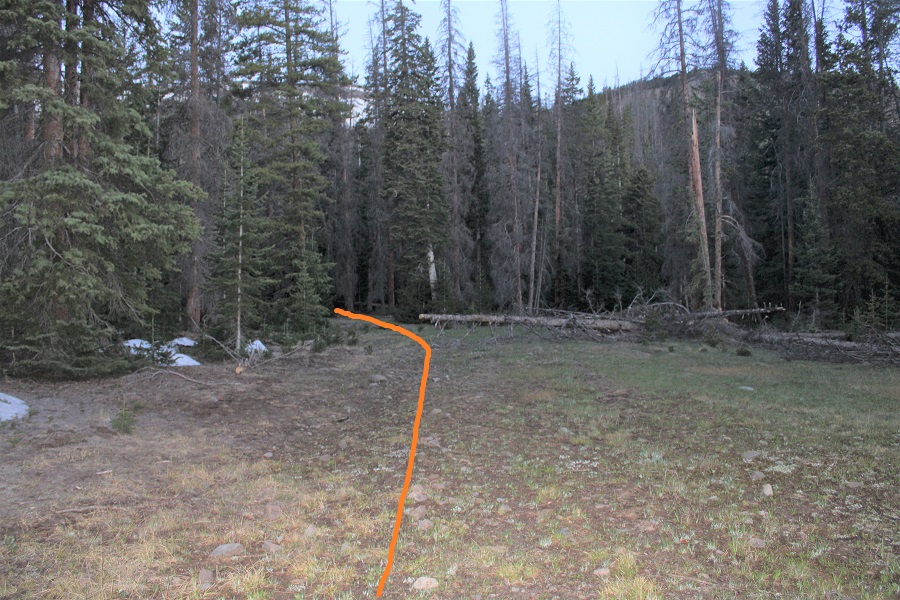
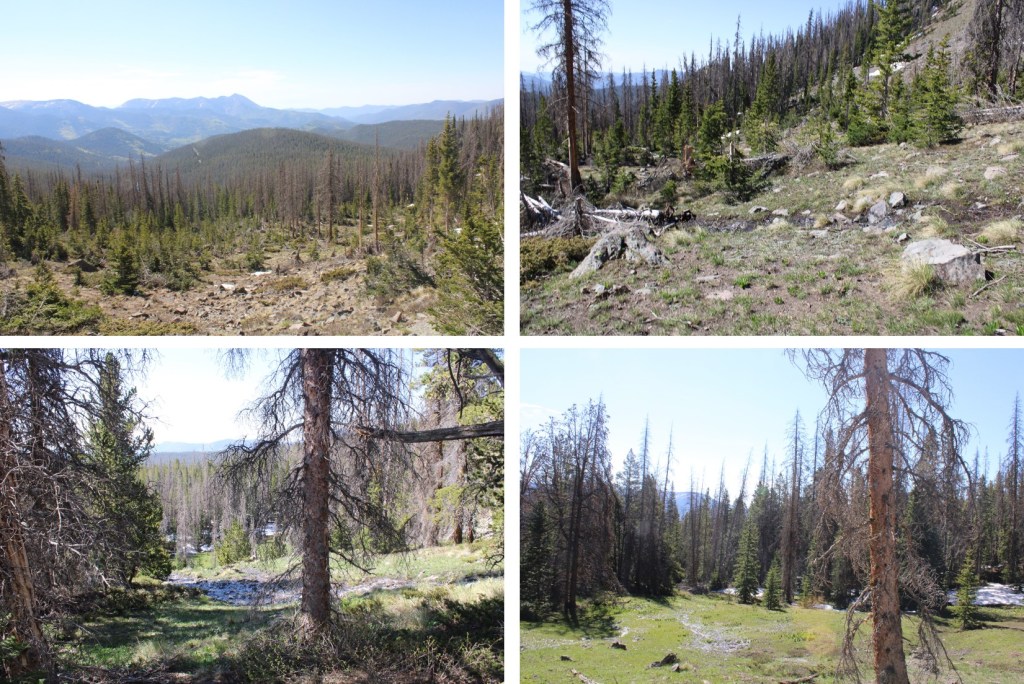
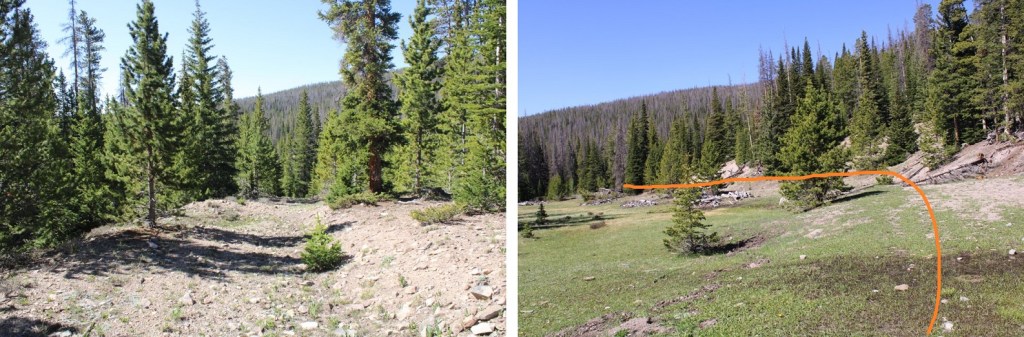
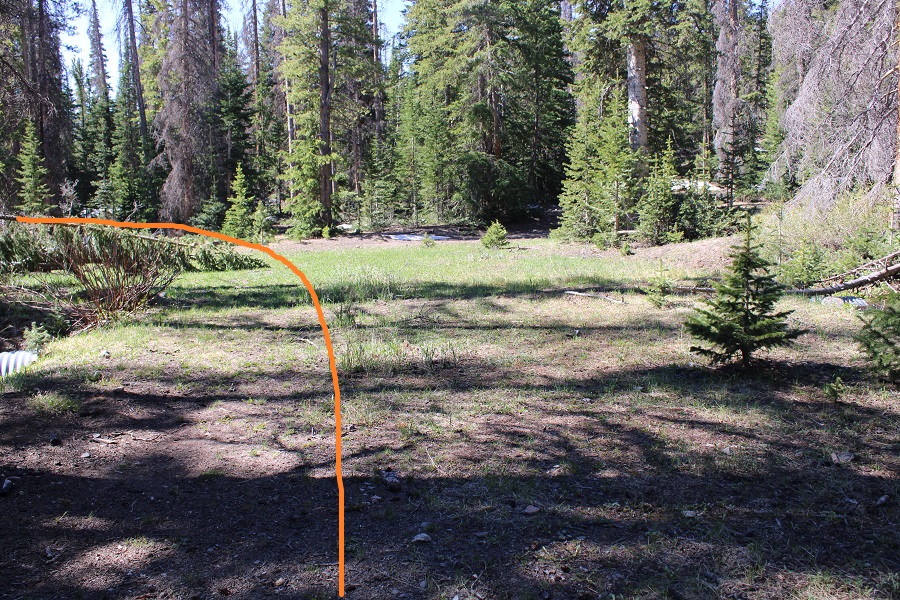
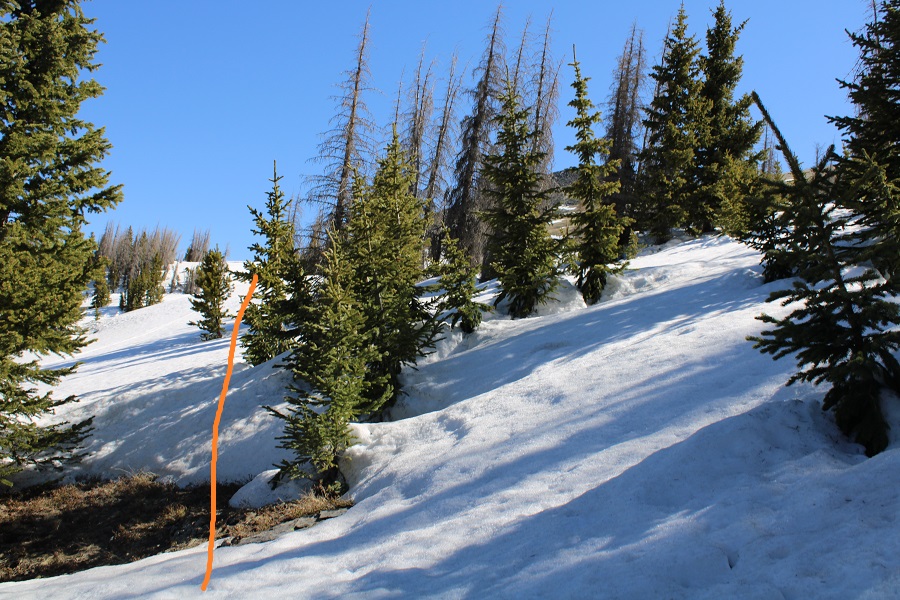
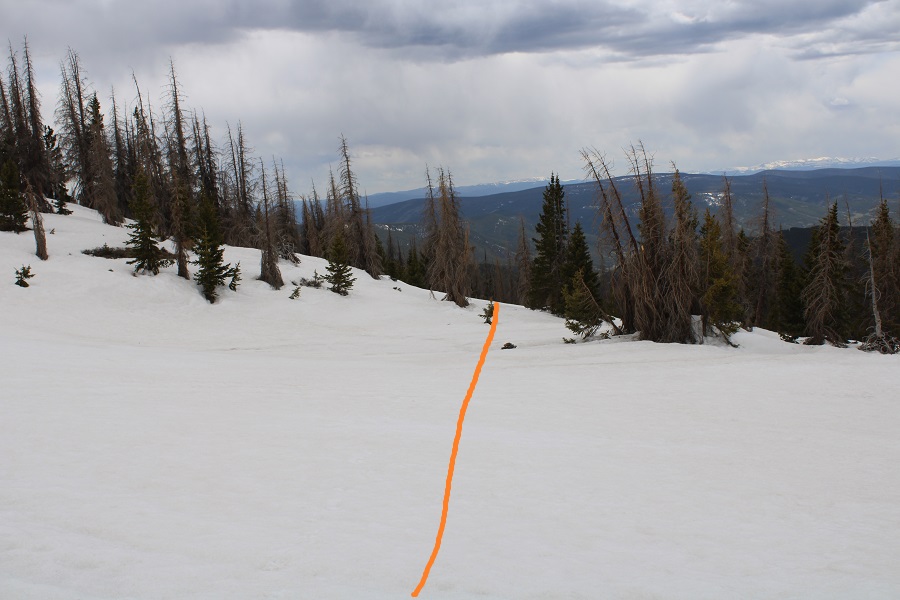
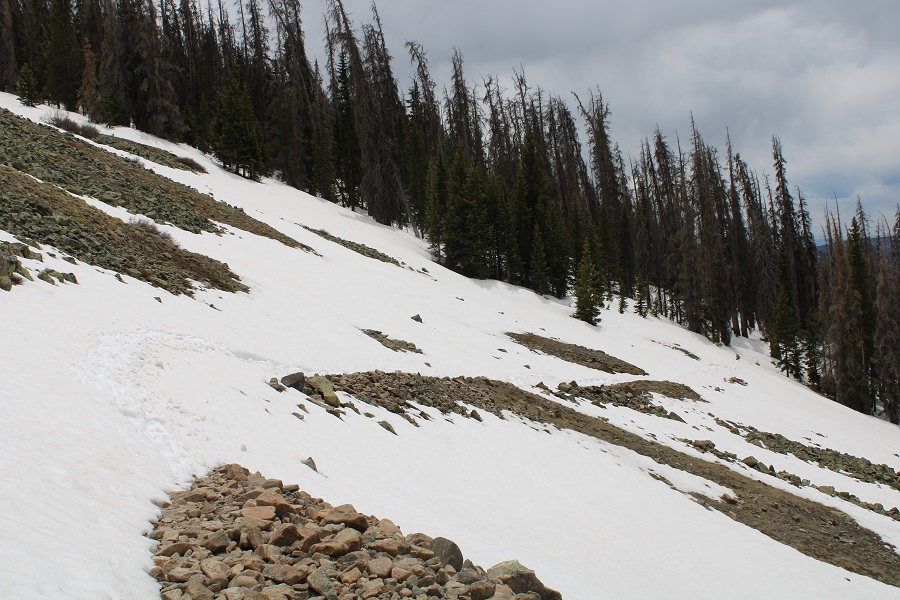
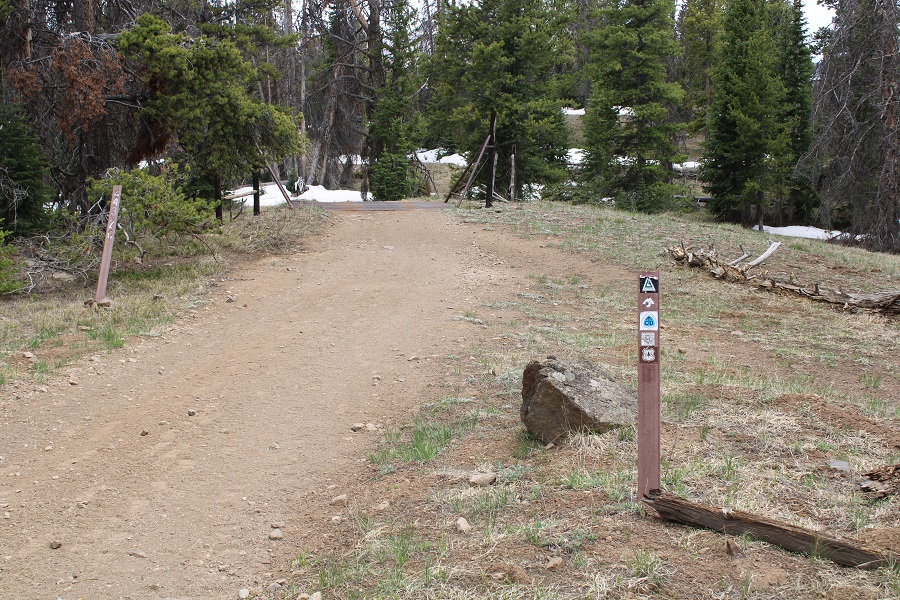
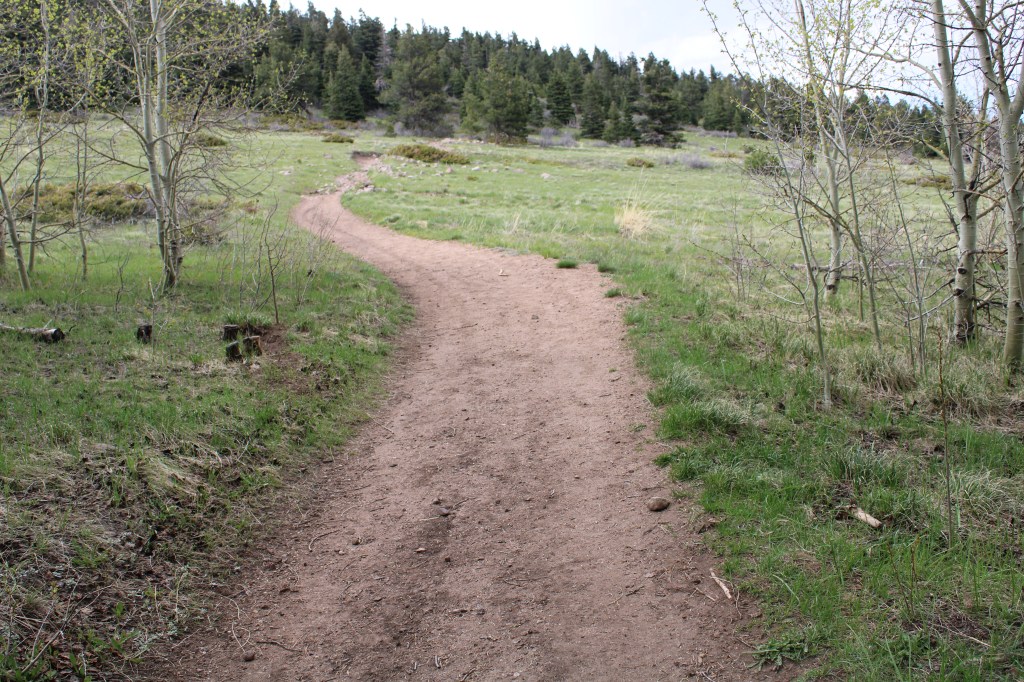
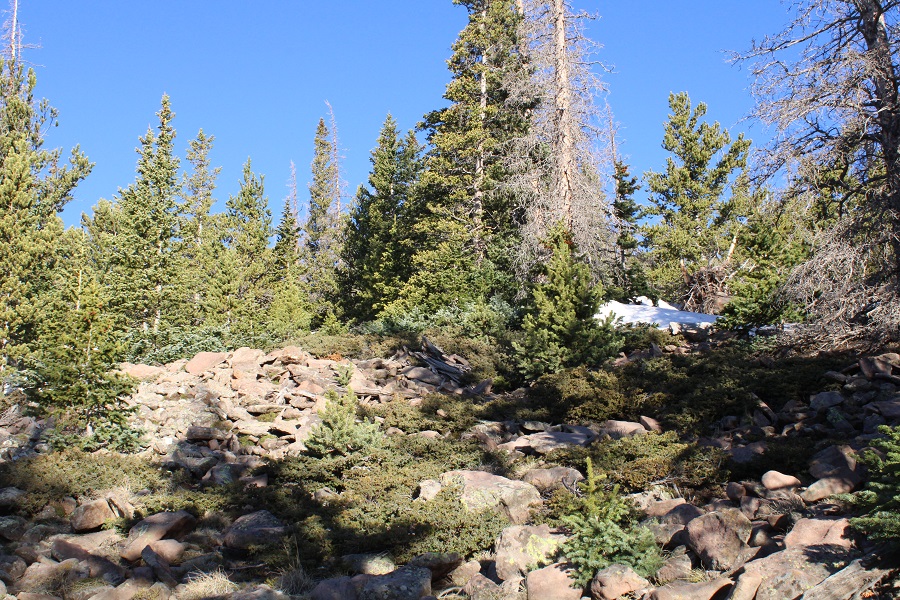
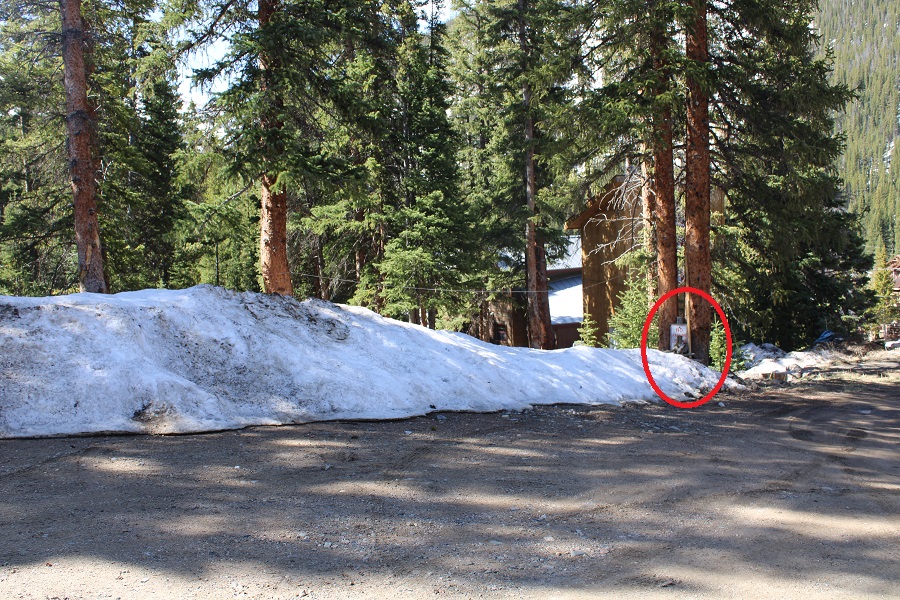
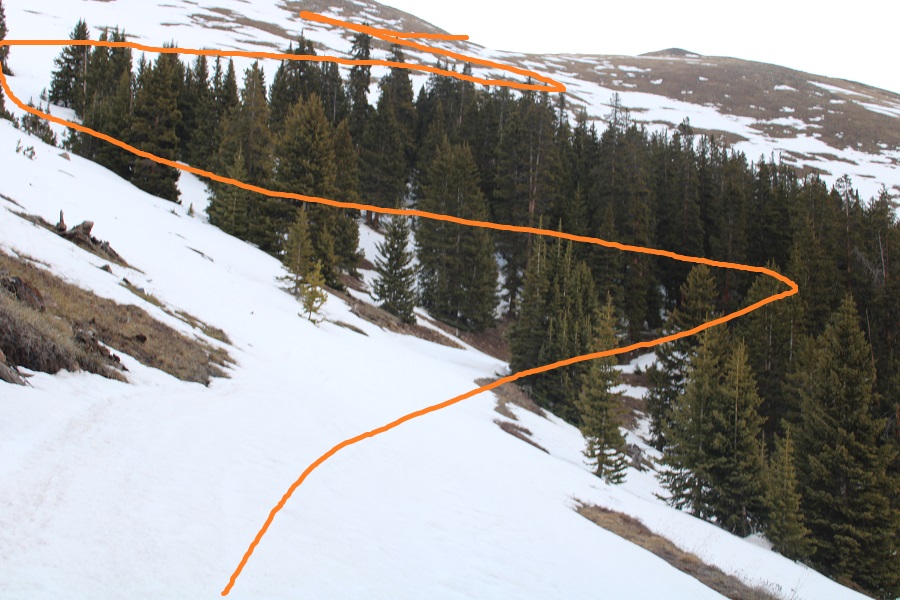
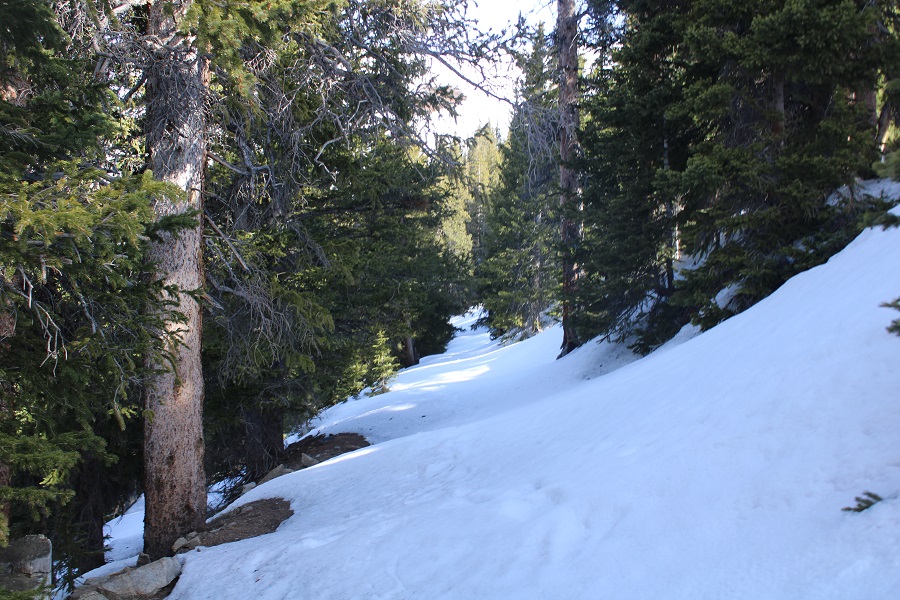
As I exited the basin, I came upon two sets of cairns, which led to a very faint trail that eventually became a more pronounced trail and then an OHV track that led me out of the basin, and back to the 4WD road.

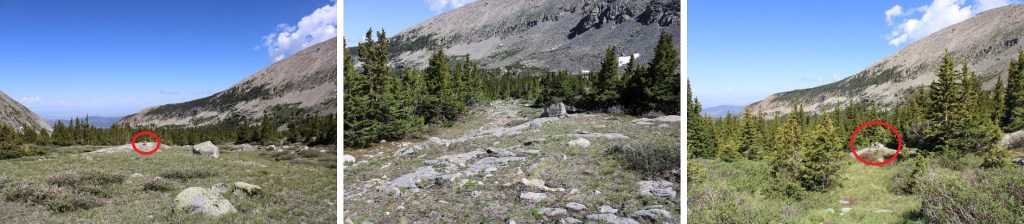
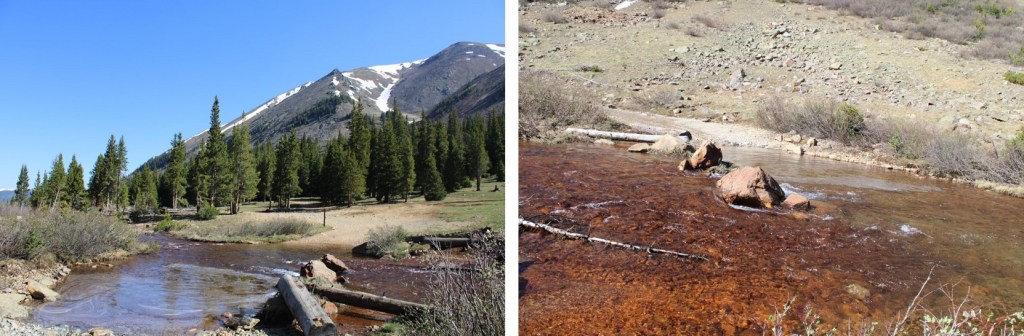
The trail stays to the north of Carneros Creek.

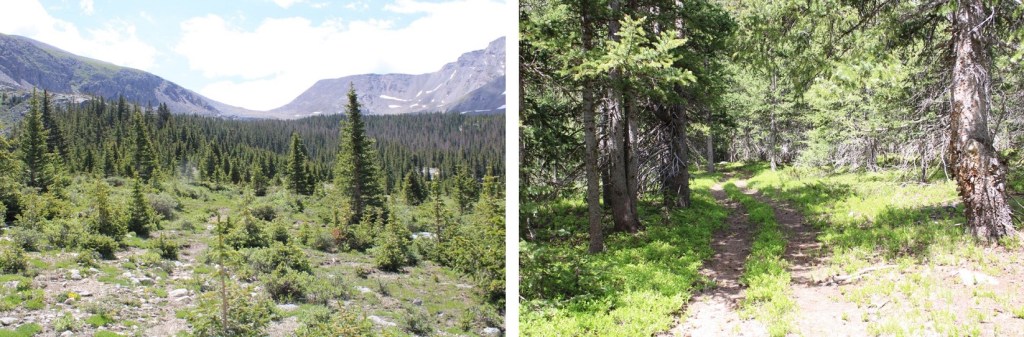
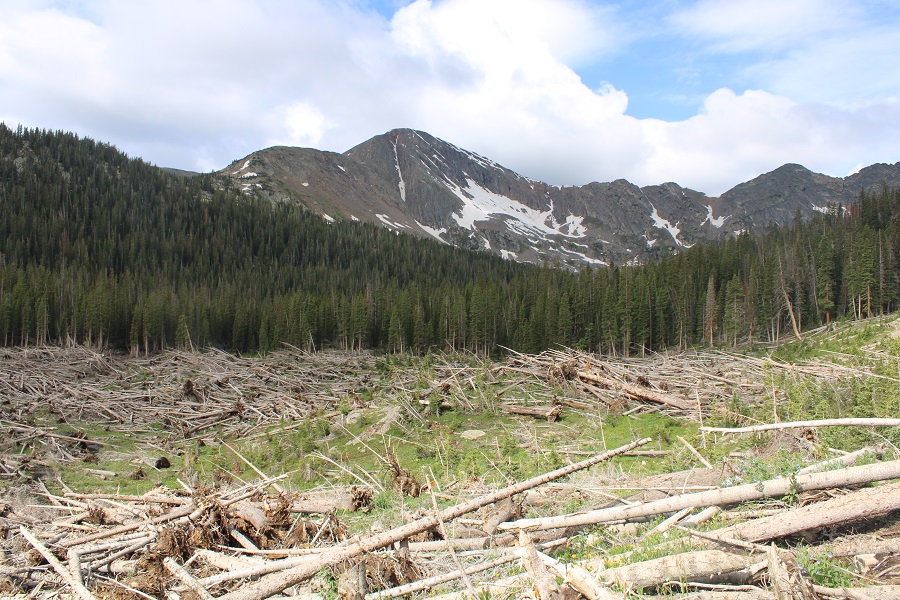
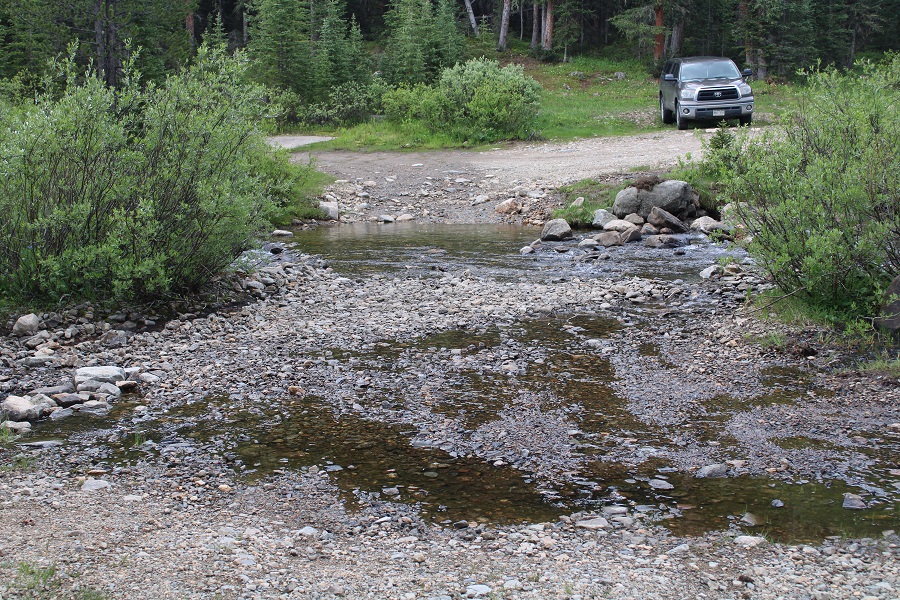
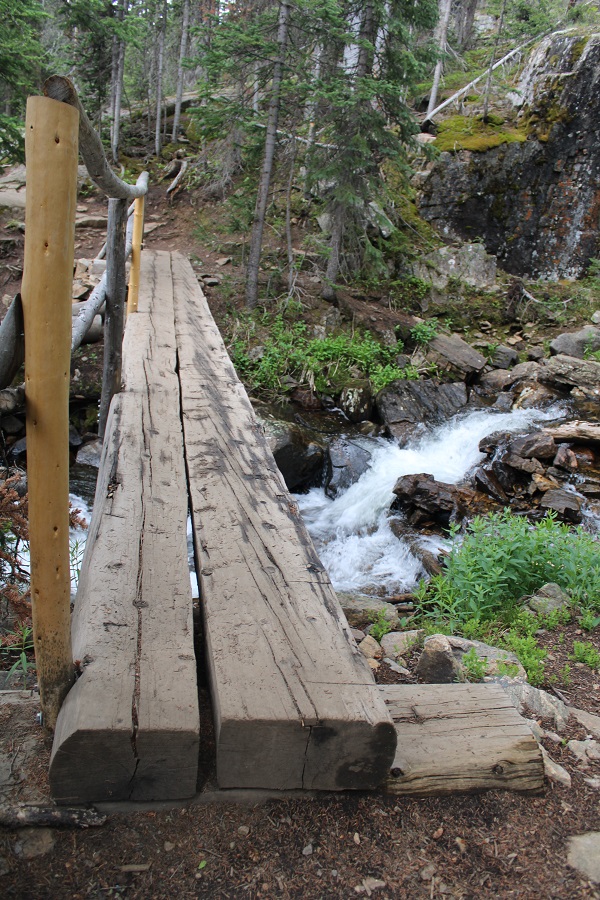
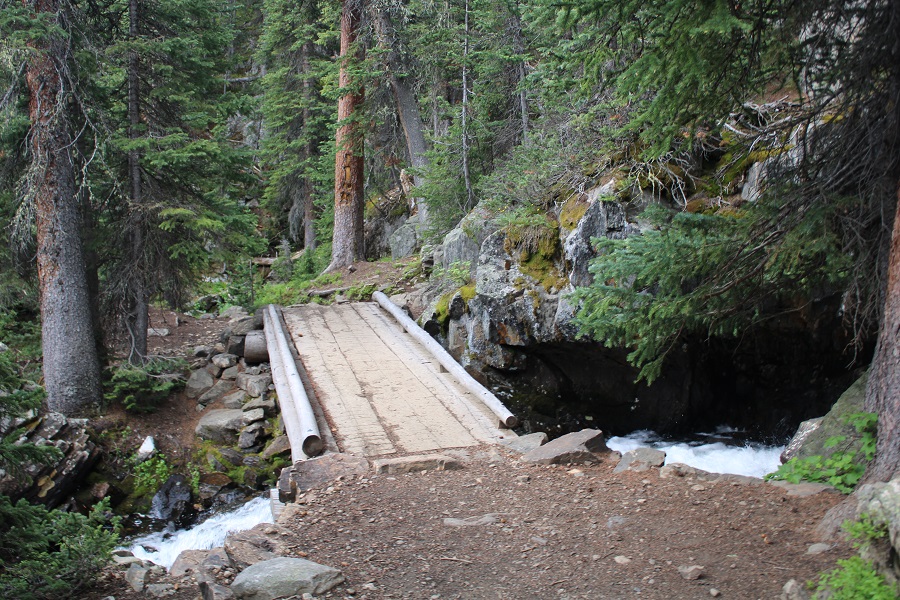
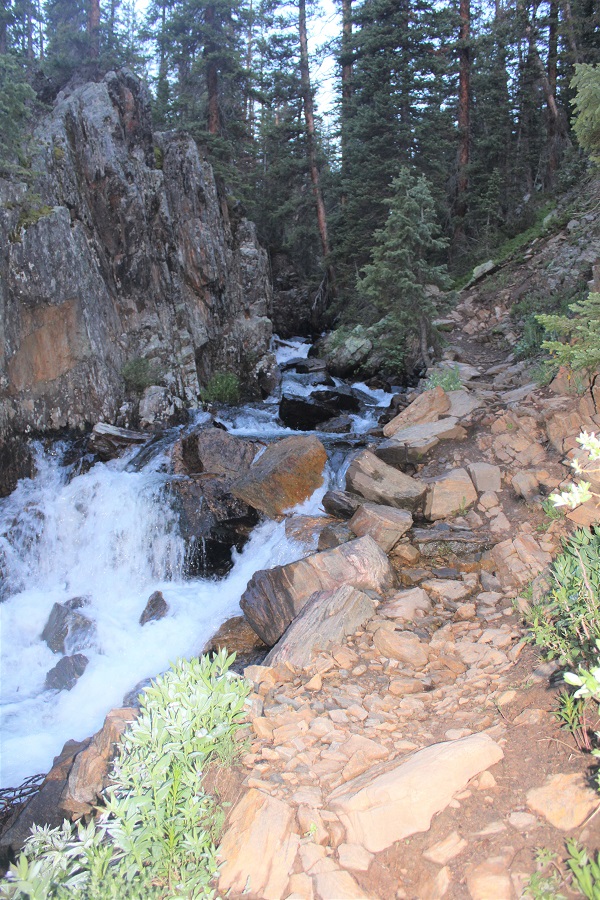
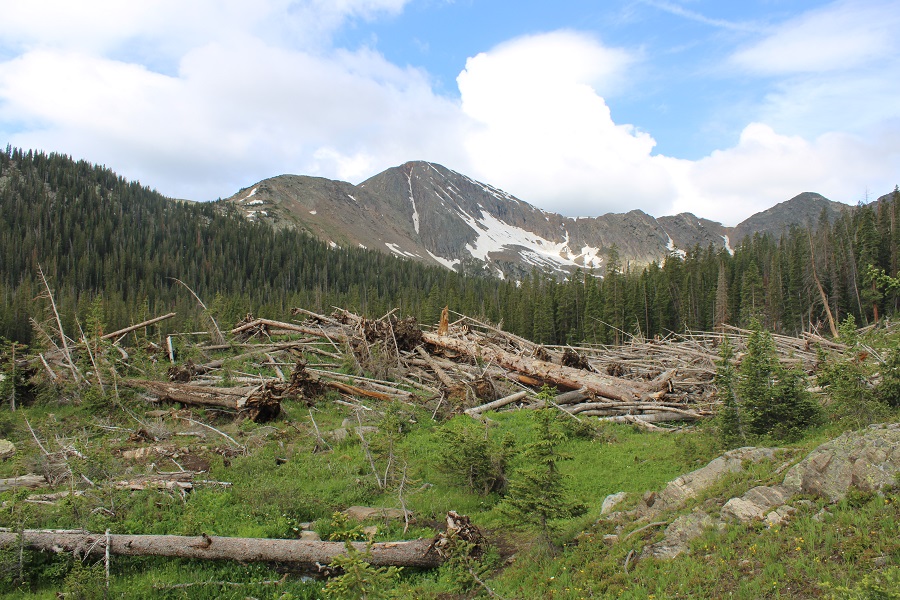
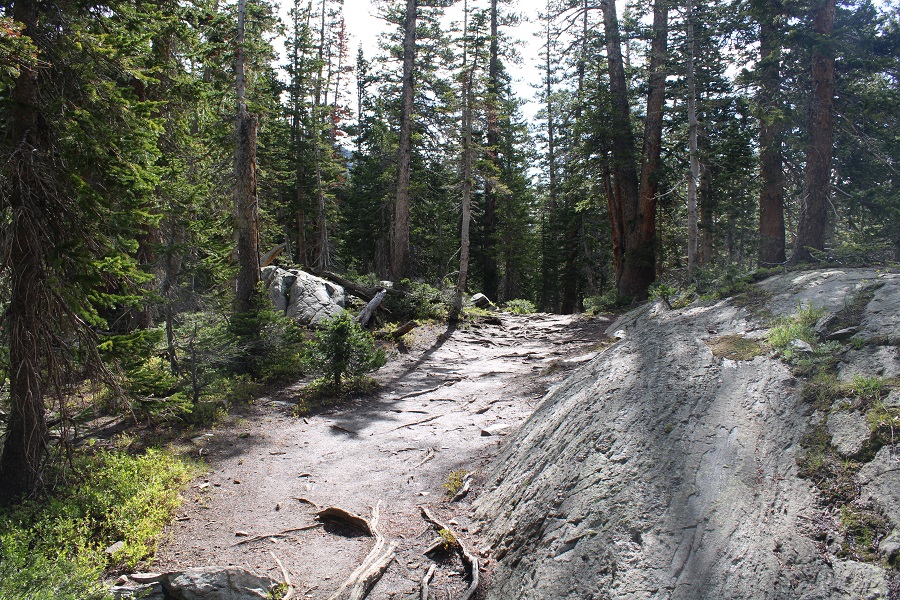
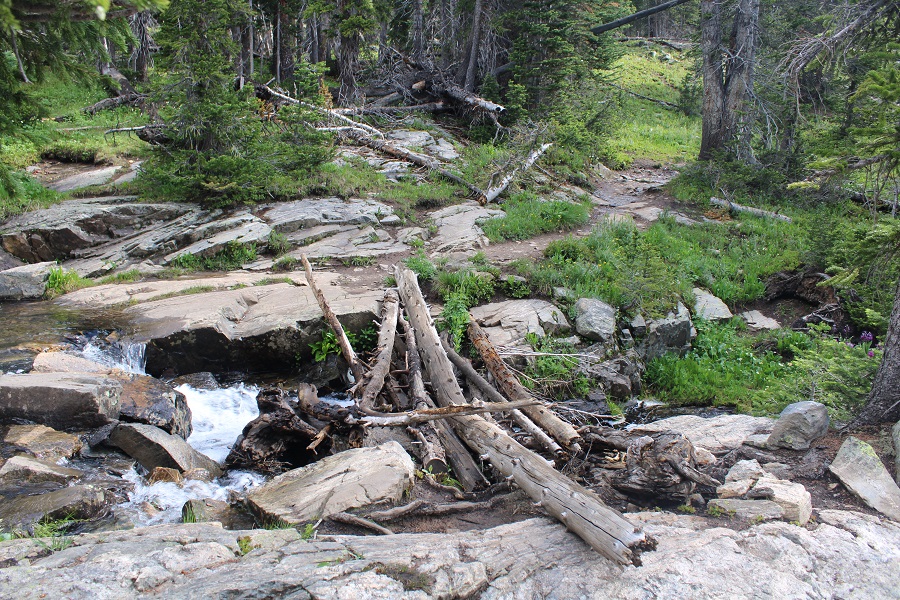
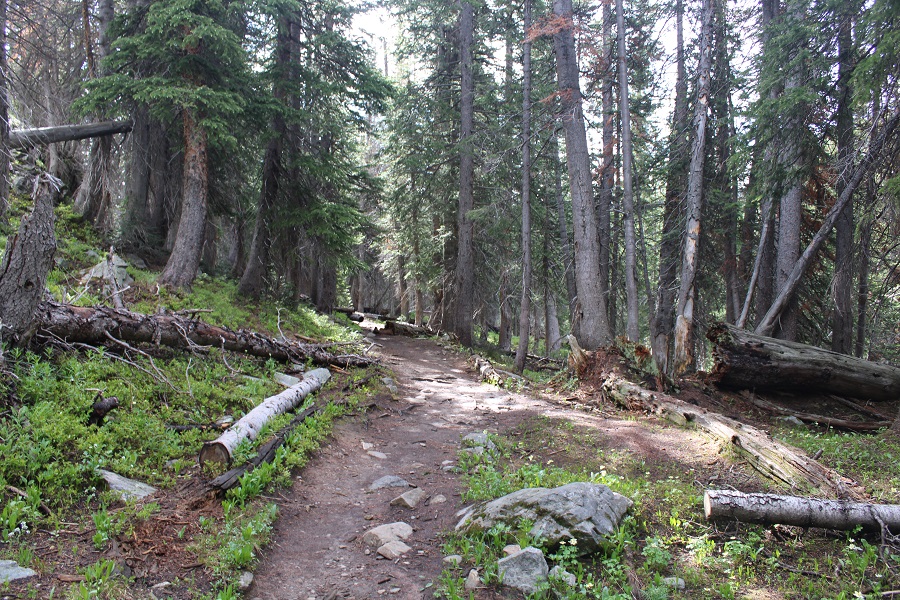
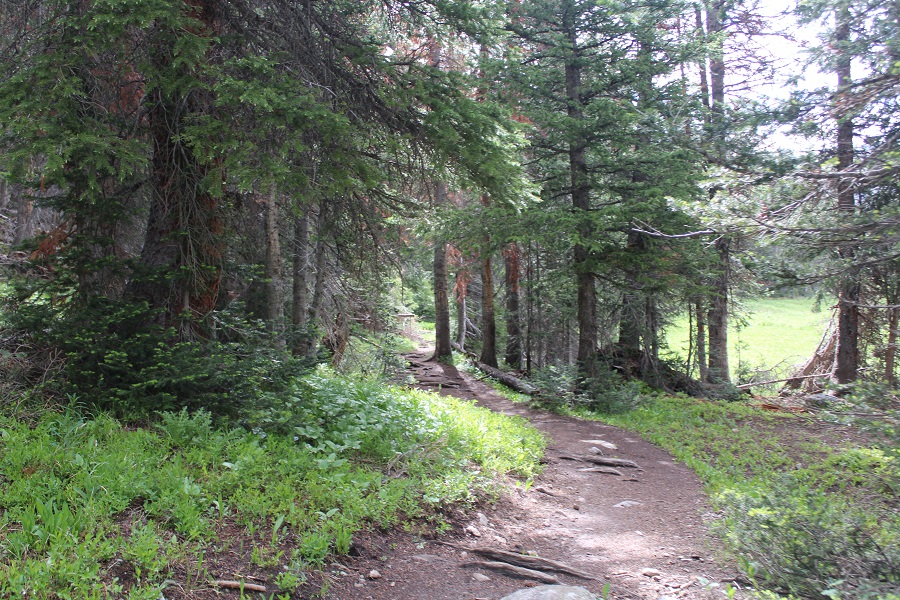
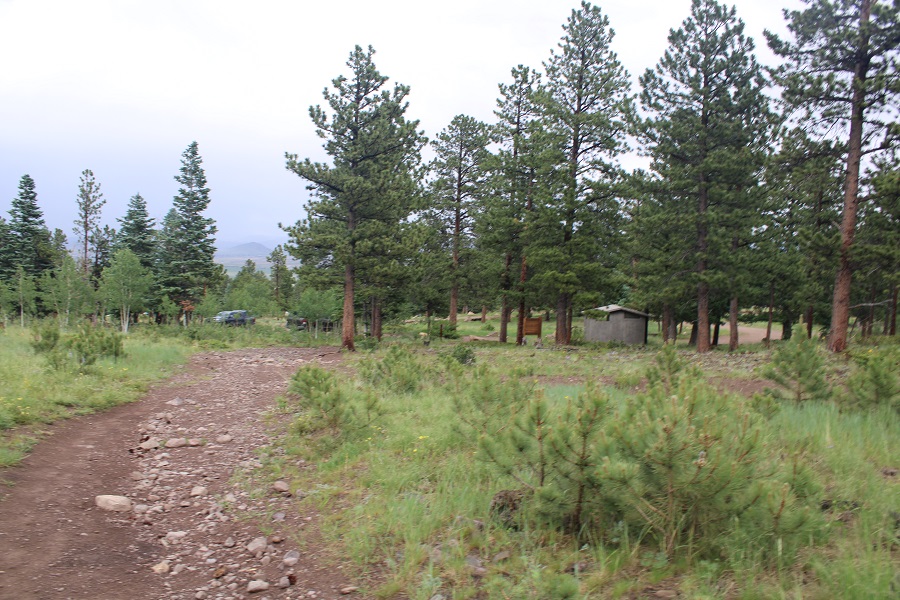
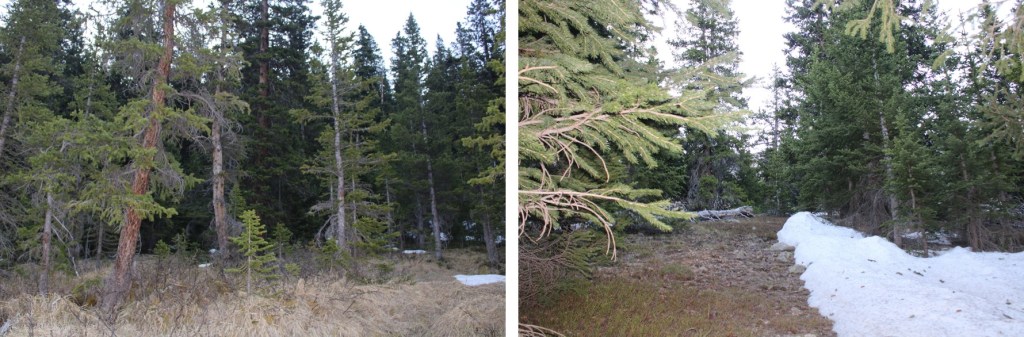
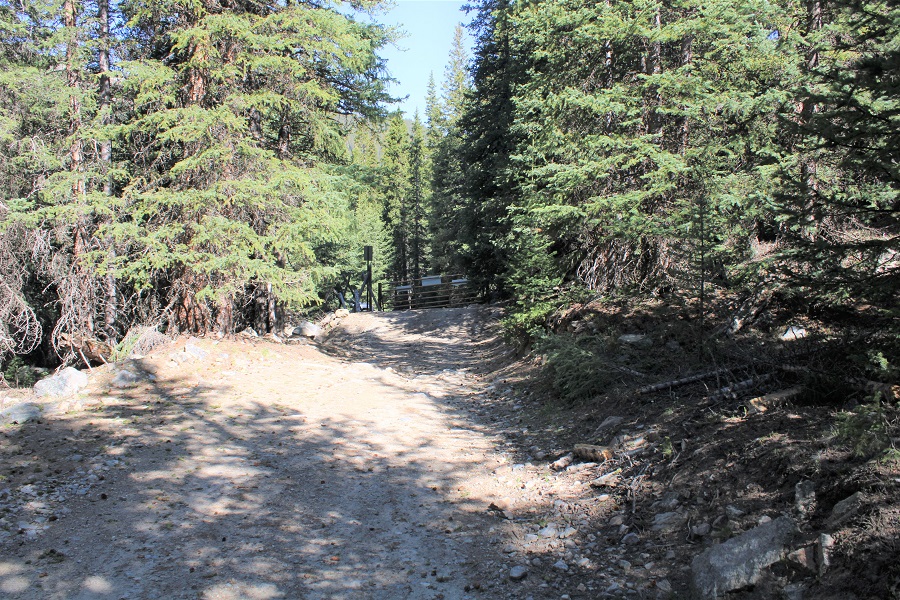
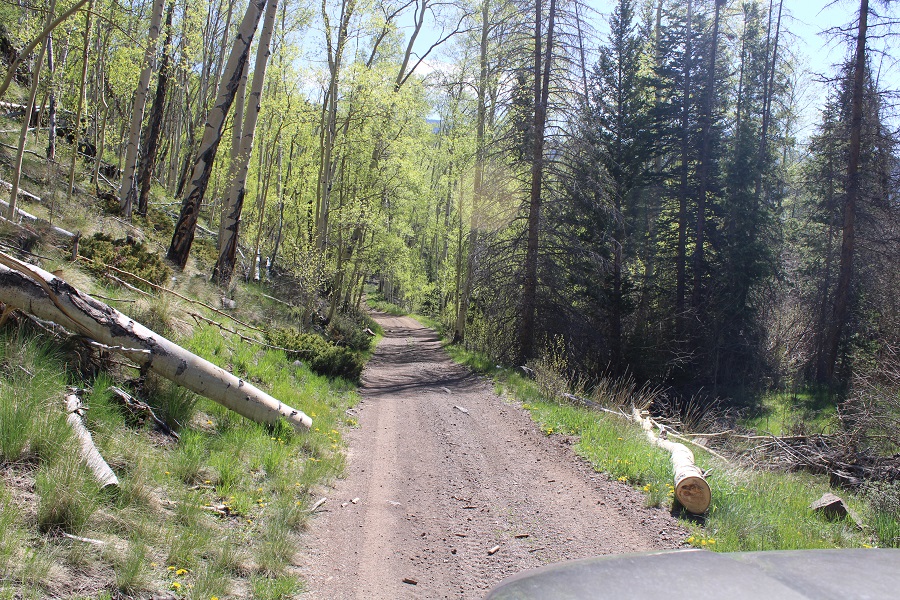
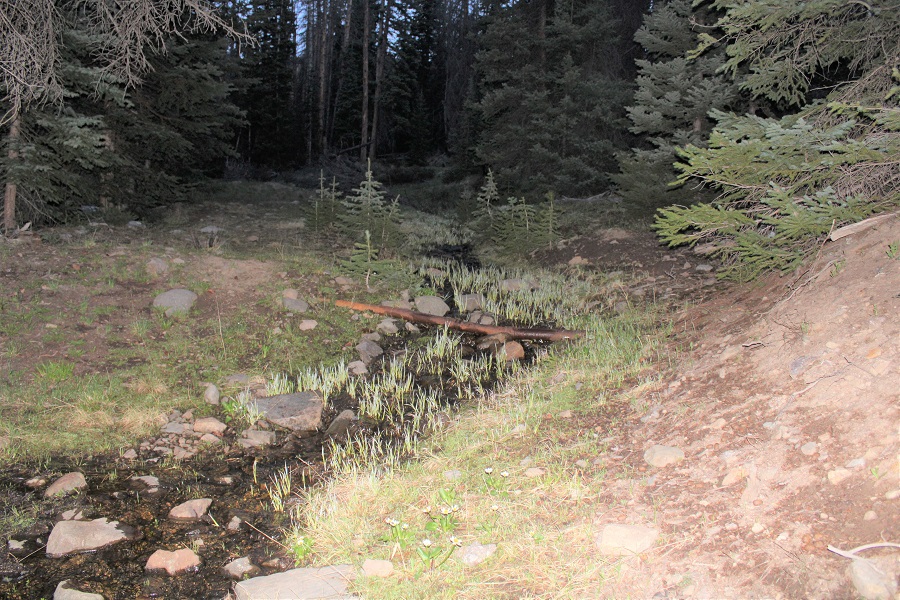
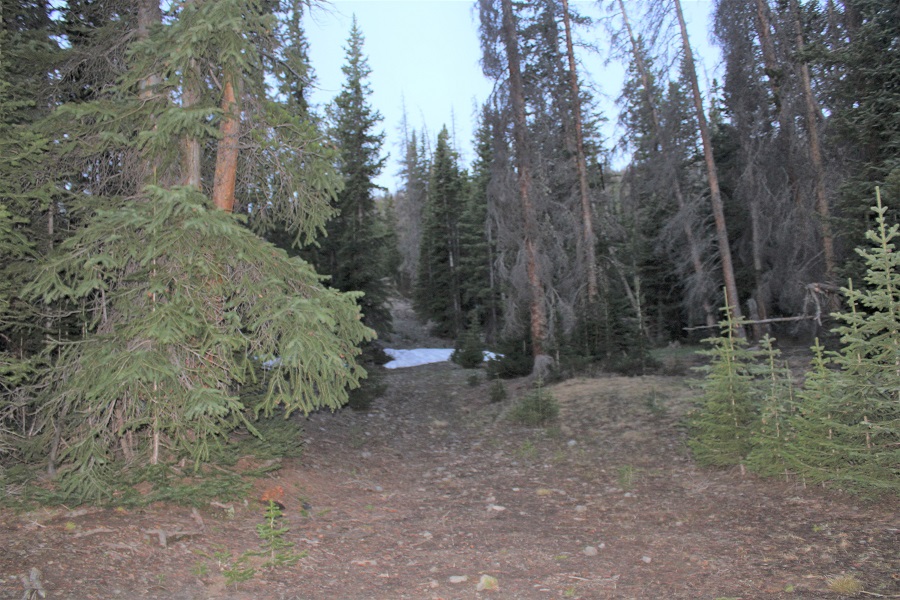
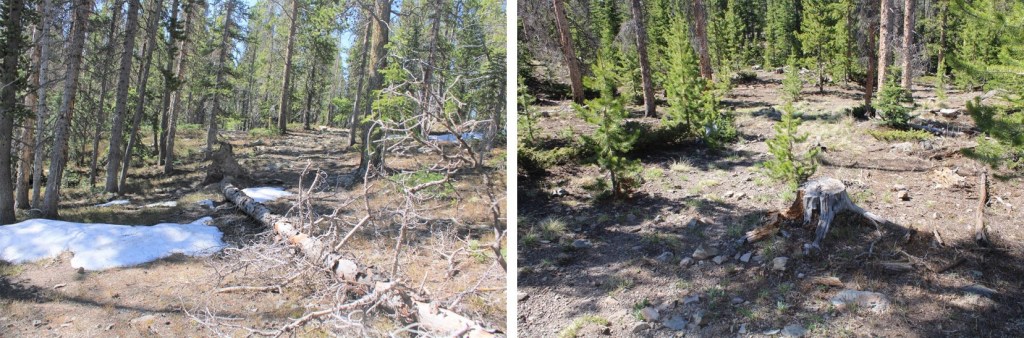
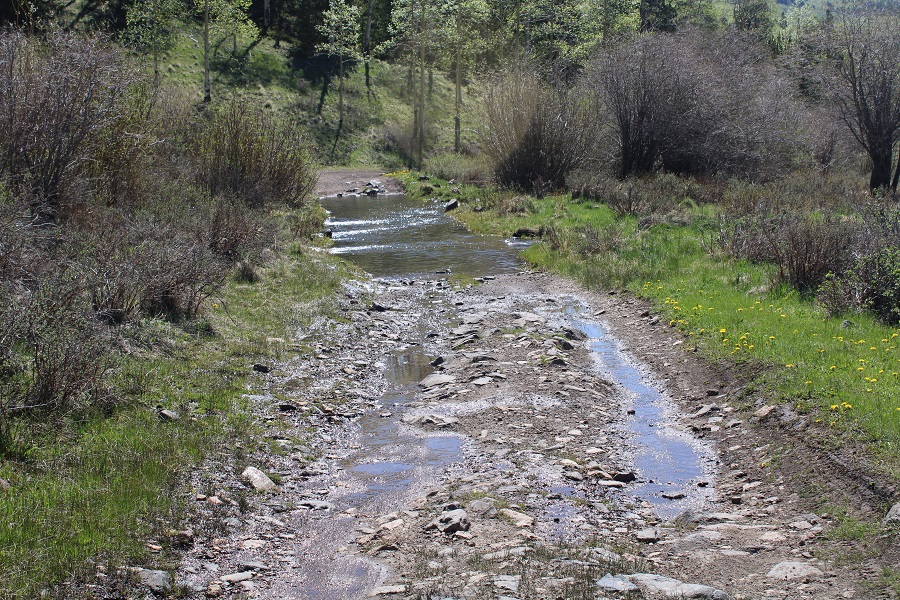
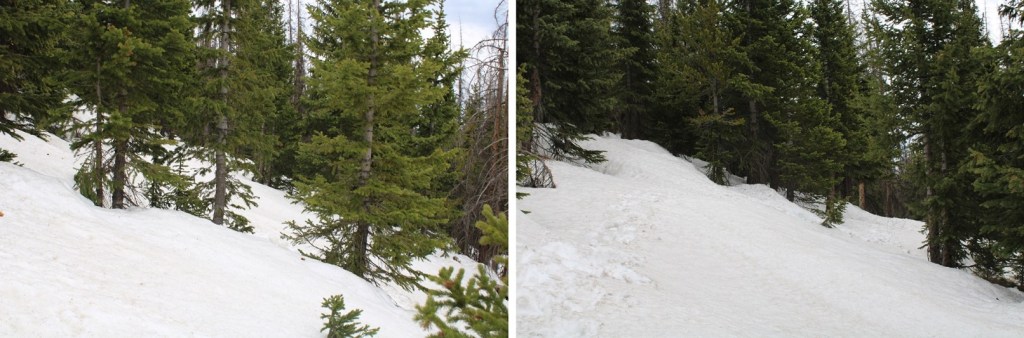
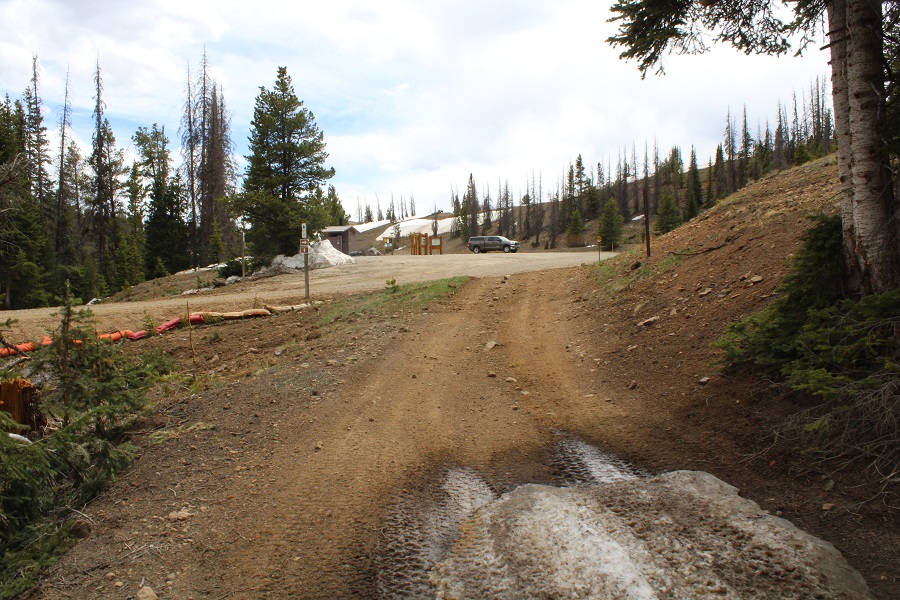
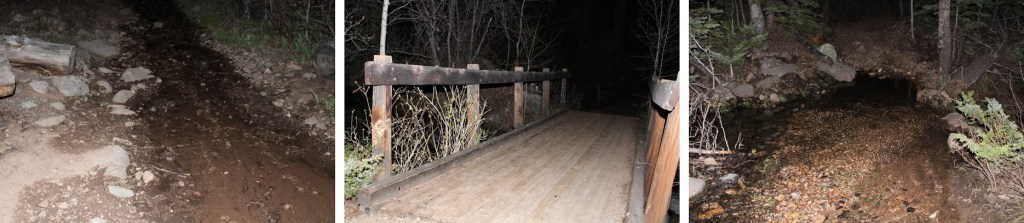
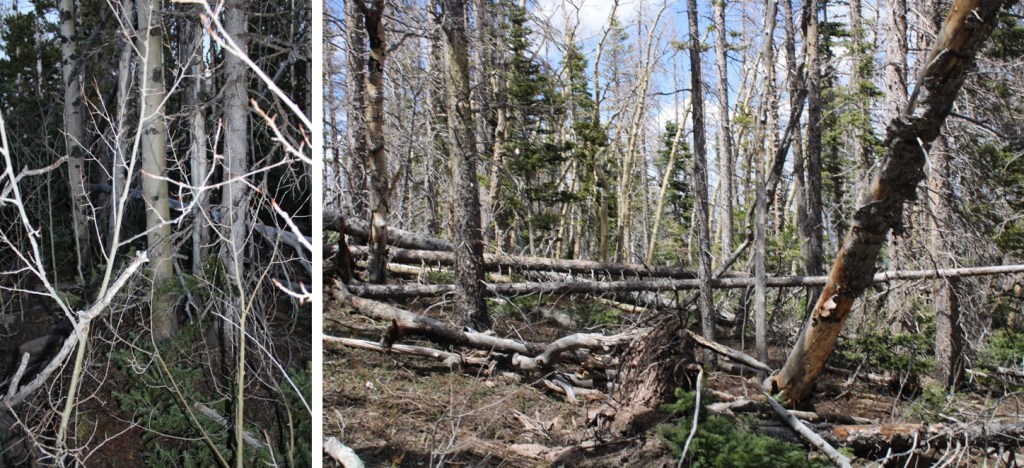
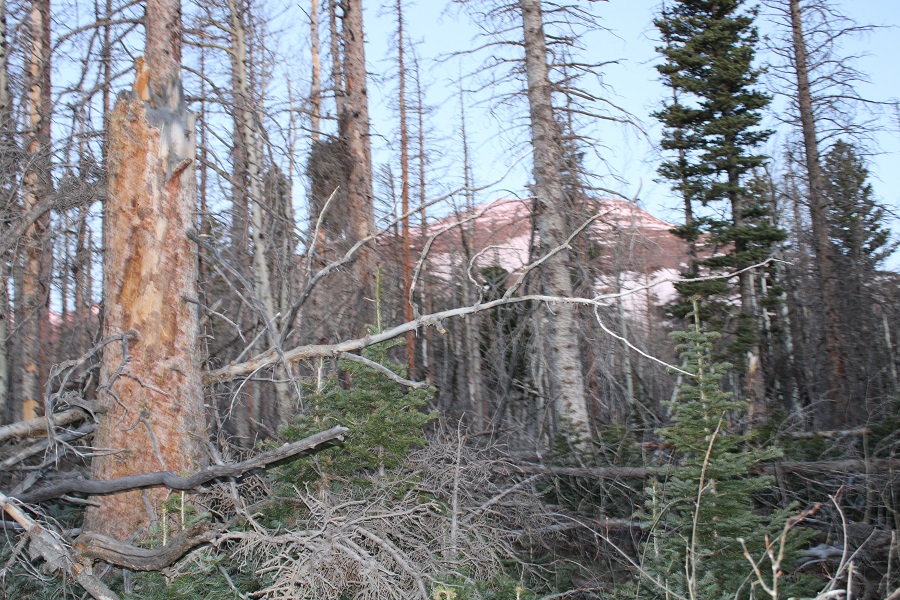
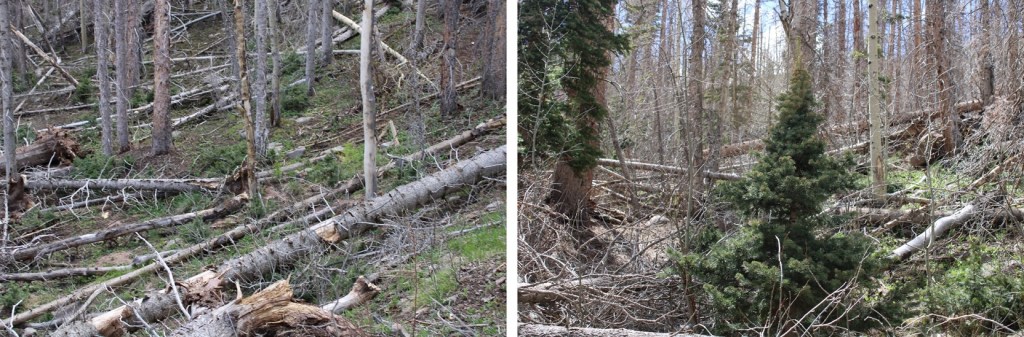
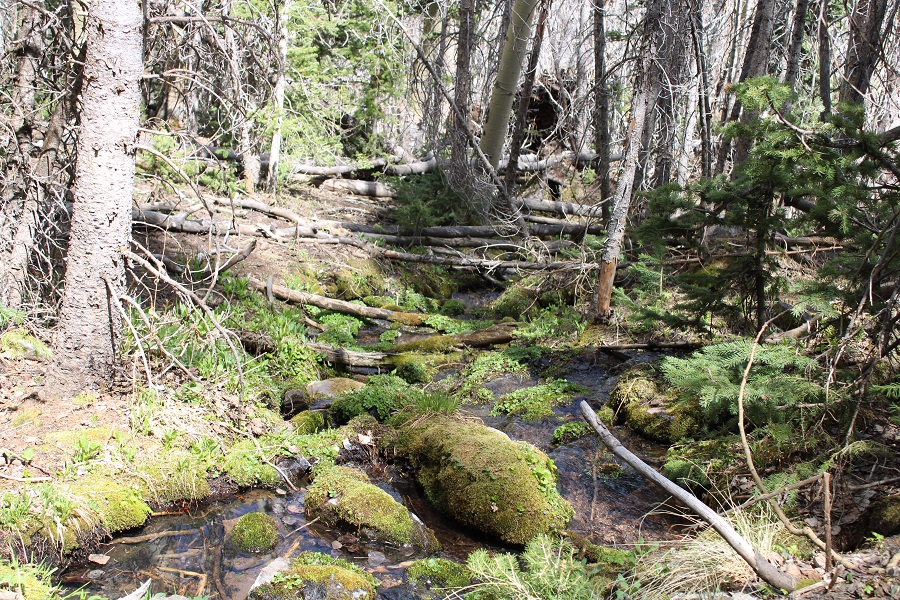
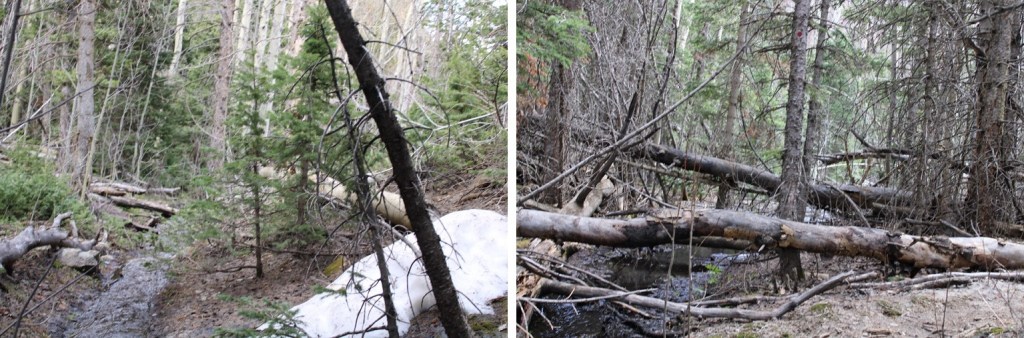
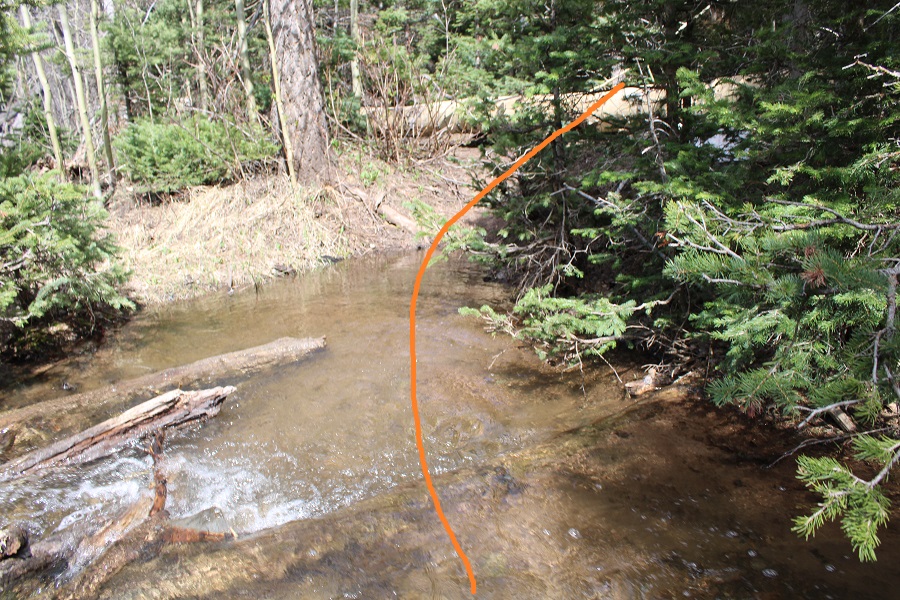
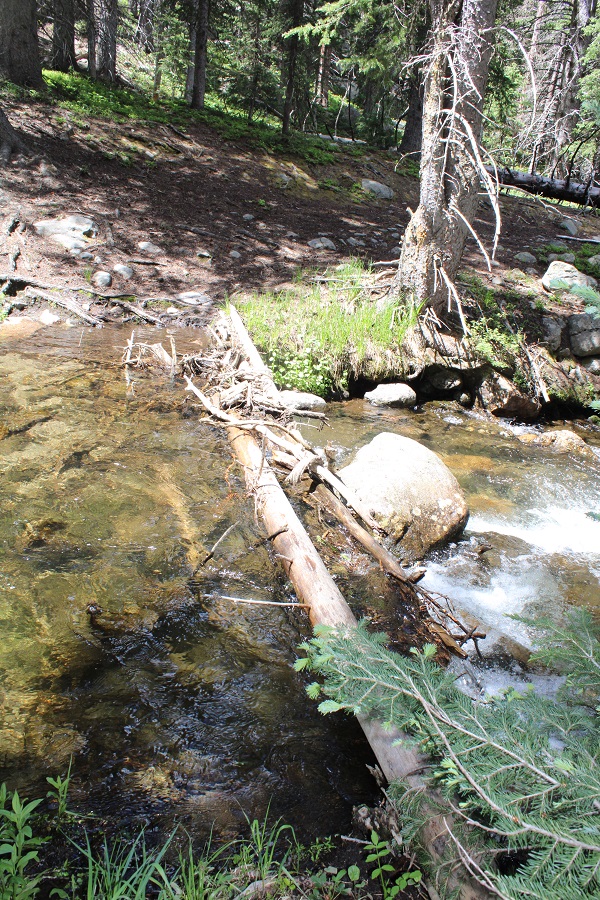
Once below treeline the hike seemed to take forever, as it was another 4 miles to where they’d shuttled our cars.  There were a lot of downed trees, and a lot of elk tracks.  I heard a few turkey, and I even startled some elk on the trail that ran away as I approached.  Eventually I crossed Carneros Creek on a few logs that had been placed for just such purpose. 

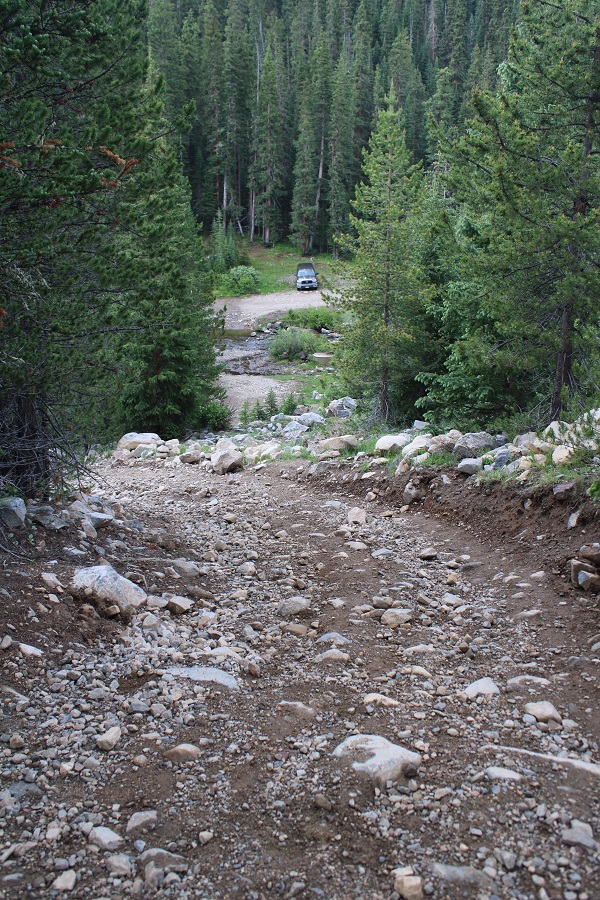
And made my way back to where they had shuttled our vehicles.  As I arrived, Carlos was just bringing the last of the vehicles up.  We chatted for a bit (they are seriously super nice:  every time I’m here they act as if all they care about is my happiness, which is appreciated, considering we pay quite a lot for the privilege of hiking there).

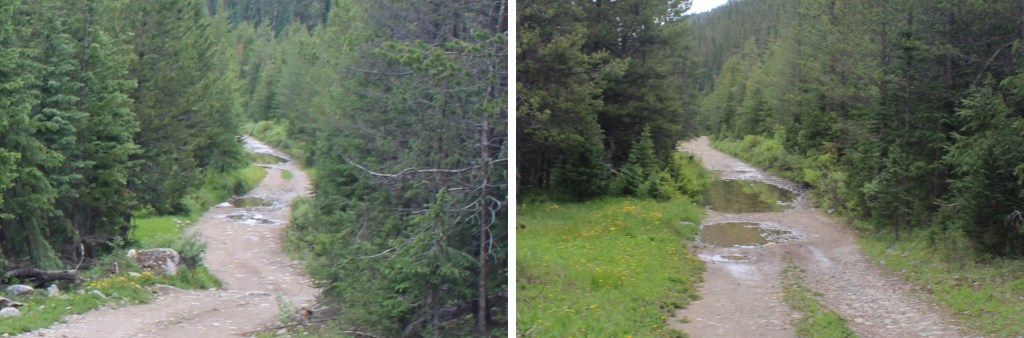
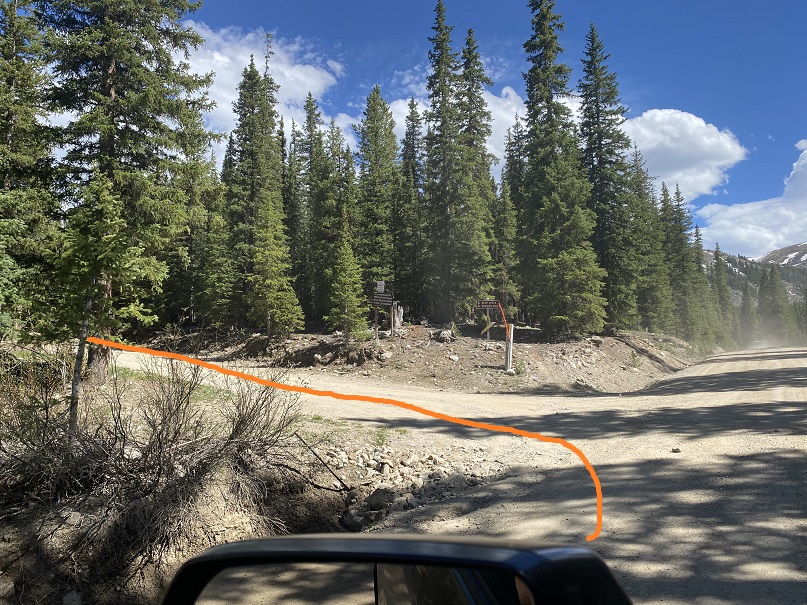
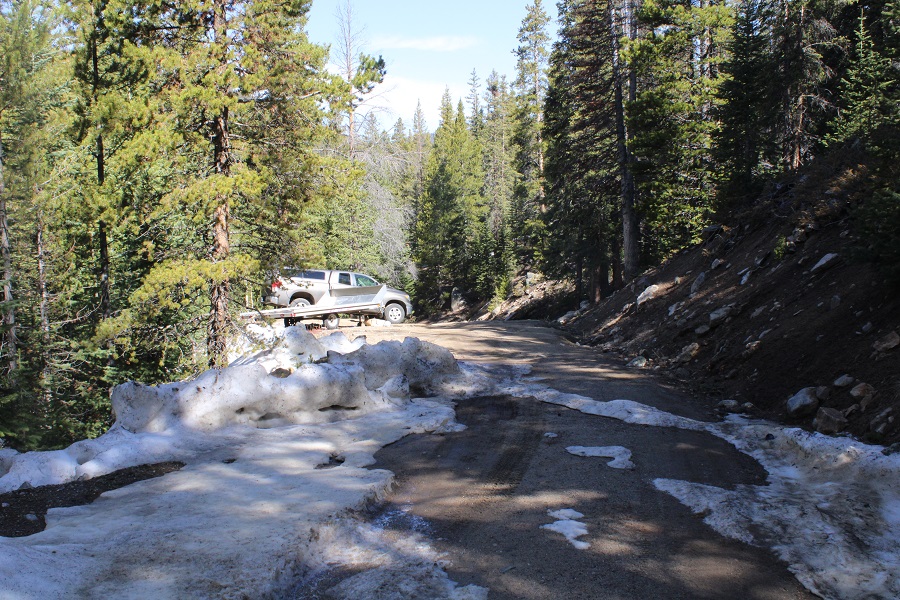
I’d really recommend having a GPX file for this route, if just to get out of the basin and back to the vehicles, as most of the rest of the hike above treeline is self explanatory.  Message me if you’d like mine (although I’ll admit it’s not perfect).  I’d assume if you’re hiking these peaks you have a good sense of direction, and that you have a lot of off route hiking experience, so you should do just fine.  Most of this hike is on tundra, and the gully/ridge section just before Miranda is quick and nothing to worry about.  I’d like to add the drive down was more difficult than the drive up, as we were now in a different area and the road had more divots and ruts to navigate.  I still didn’t need 4WD, but I couldn’t have done it without clearance.  Carlos did use spray paint on the grass/dirt to indicate which turns to take, which was helpful.

I made it back to my truck around 11:30am, making this a 16.25 mile hike with 6102’ of elevation gain in 9.5 hours.  On to the next trailhead!

Savage Peak – 13,139

RT Length:  9.24 miles

Elevation Gain: 3314’

The storms this week have put a damper on my hiking plans.  Most of the peaks on my immediate goal list are too long to complete before the storms hit, so when I saw the weather was good near Savage Peak I jumped on the chance to get in a quick weekday summit. I drove past the Missouri Lakes trailhead and drove the 4WD road to the stream crossing. I didn’t need to put my truck into 4WD (which was good, because it’s still not working).  There were some large puddles to splash through on the way in.

I parked at the stream crossing, and wore my sandals to cross the river and start the trail

The road curves around a bit, but you can just go straight up the hillside and pick up the road from there.  The stream was only a couple of inches deep.  You could drive across it, but it only saves you about 100 feet of hiking, so it’s not really worth it.

I followed the road for about half a mile to the diversion dam, where the road ended and the Missouri Lakes trail began.

This was a class 1 trail that followed Missouri Creek.  I loved how easy it was to follow up and into the basin, crossing the creek several times on sturdy bridges.

I followed the trail west.  At about 11,000’ I came upon avalanche debris.  The trail was well maintained and easy to follow through the debris.

This is also a good place to get a visual of the route.  This is where you’ll be aiming.

I continued following the well defined trail to 11330’, then left the trail to head south towards the ridge, aiming for a rocky ramp that hugged the side of the mountain. 

Once on the ramp, I followed it east to the base of the ridge.

At the base of the ridge I turned right, and followed the ridge west

Here’s the first good view of Savage Peak

This is a simple, class 2 ridge hike to the summit.

There is a small false summit just before the true summit

I summited Savage Peak at 7:40am

Savage Peak: 

There were some great views of Missouri Lakes

I left a summit register and headed back the way I’d come

Here’s a look down the ridge

Here’s how I exited the ridge

And headed back into the basin

Back in the basin I headed northeast until I linked back up with the Missouri Lakes Trail.

And followed the trail back through the landslide area and across the bridges

Once back on the 4WD road I followed it back down to the stream, and my truck on the other side.

I made it back to my truck at 10am, making this a 9.24 mile hike with 3314’ of elevation gain in 5 hours, just as the storms were rolling in.

Now, off to visit some Hot Springs and get that back window fixed. 

Little Horn Peak – 13,143 and Fluted Peak – 13,576

RT Length:  12.35 miles

Elevation Gain: 5504’

I parked at the Horn Creek Trailhead, the only vehicle in the lot.  I’m always surprised at how few people take advantage of the free dispersed camping sites we have in Colorado, especially ones like this with a bathroom.  Eager to summit and get back to treeline before the incoming storm, I gathered my gear and was on the trail at 4:30am.  The trail starts by following the Rainbow Trail southwest for just over half a mile

Then I turned right onto Horn Creek Trail

I followed Horn Creek Trail for a short distance, about a tenth of a mile, before turning left at the junction towards Horn Creek Lakes.  Here there’s a register, that looks to be kept up.

I stayed on this trail for half a mile, before leaving the trail at 9590’ and heading north and then west up the ridge.  There is no trail here.  I left a small cairn to indicate where I left the trail, but I don’t expect it to be there long, as it was small.

Route finding here can be a bit tricky, but the goal is to gain the ridge.  I did this by heading west, through the pine and aspen trees.  Every once in a while, I’d come across a game trail.  They all fizzled out however.  This area is easy to navigate, as there aren’t too many downed trees.  I was able to avoid most of them.

Once I was on the ridge, I followed it southwest to treeline.  This is a long ridge, and it seemed to take forever to make it to treeline.  Here’s my first glimpse of Little Horn Peak

Like I said, this is a long ridge

The class 3 fun starts at the top of the ridge, which is a false summit.  From here you can see Little Horn Peak’s true summit

My trekking pole isn’t collapsible, so I left it at the start of the class 3 section, put on my helmet, and started heading straight over the ridge.  The class 3 section is consistent for another half mile to the summit. 

Start out by going straight over the ridge.  There is some exposure here. 

Then you’ll dip down to the right.  Look for a notch, go through it, and now you’re on the left side of the ridge. 

Go up the gully and cross back over to the right side of the ridge

There’s a section of rock to upclimb.  This was difficult class 3 / easy class 4 (and much more difficult and committing on the way back down later in the day).  

From the top of this section I could see the summit.  I stayed on the left side of the ridge from this point on, staying on class 2 terrain.

I summited Little Horn Peak at 7:45am

Little Horn Peak: 

That was it for the class 3 section of the hike.  The ridge over to Fluted Peak is class 2 (with the option to go up a class 3 chimney, but it’s avoidable).  Here’s Fluted Peak to the west.

This was a simple ridge hike to the saddle.  You can’t see them very well in this photo, but there was a mama bighorn sheep with her baby walking up the ridge.  The baby couldn’t have been more than a month old.

From the saddle, here’s how you keep this a class 2 hike (dotted lines show the class 3 route)

Here’s the first obstacle (class 2 solid, class 3 dotted):

And the second (class 2 solid, class 3 chimney dotted):

Here’s that chimney up close

After the chimney, it’s straightforward class 2 to the top of the ridge to the first false summit. 

Fluted Peak is actually here

There are two quick false summits to go up and over

And then the final summit

I summited Fluted Peak at 9am

Fluted Peak: 

The clouds were coming in fast, so I decided to re-trace my steps and head back to Little Horn Peak (I’ve already summited Horn Peak, so there was no need to make this a loop today).  I headed back to the ridge

Here’s a picture of Little Horn Peak from the Fluted Peak Ridge

It all stayed class 2 until I made it to the summit of Little Horn Peak

From there It was class 3 again until I made it to the ridge.

Here’s a closer look at that notch

And the last bit of scrambling to the ridge

I made it to the ridge and looked around for my trekking pole.  It wasn’t where I’d left it.  Instead, it was about 15 feet away, at the entrance to a marmot burrow. I picked it up and found some marmot had turned it into a snack.  Just adding more photographic evidence to prove the case “Marmots can’t be trusted with trekking poles”.

I sighed, took off my helmet, and headed back down the ridge (yes, I brought the trekking pole down). 

Once back at treeline I turned back for a last view as it started raining. 

The rain quickly turned to hail and I had to put my camera away. Here are some pictures of below treeline, in-between bouts of rain/hail. I just kept descending northeast, and when the ridge ended I continued east towards Horn Creek Trail.  Once again, I’d pick up game trails and then lose them.   A little advice:  you should be able to hear Horn Creek flowing below you to your right if you’re going in the correct direction.

Back on the trail I followed it to the trailhead.

I made it back to the trailhead at 1pm, making this a 12.35 mile hike with 5504’ of elevation gain in 8.5 hours.  That had been a fun day of scrambling!

I dried off and headed to the next trailhead.  When I got there it was still raining, so I decided to make dinner inside the topper of my truck.  I finished, cleaned up, and was sitting down to write notes in my journal when I heard a loud “BANG!” 

I looked up, and the back window to my topper crumpled and broke into thousands of pieces.  I honestly thought I’d been shot at, and turned around but didn’t see a bullet hole anywhere.  Next, I gingerly opened the window, crawled out of the truck and took a look around:  no one in sight (but it was still raining). 

I assessed the damage, and realized I needed to take care of this asap, so I put on gloves and cleaned up all the broken glass I could, still getting some small slivers of glass embedded in my fingers.  Next, I drove to where I could get cell reception, and found the nearest place that would be open the next day to fix the broken glass was 5 minutes from my home, and 6 hours from where I was right now.  I sighed:  It looked like I had a long night ahead of me. 

It turned out the auto glass store couldn’t help me, and told me to go to where I’d originally bought the topper.  They couldn’t help me for another 4-6 weeks (and $600), but referred me to another glass shop that didn’t open until Monday.  So, a quick trip to Walmart to pick up some duct tape and a tarp and I was able to create a makeshift door that does nothing to keep animals/intruders out, but has done a decent job keeping out the rain.  I’m still not sure why the window broke:  I was told sometimes there’s just a flaw in the glass.  That sounds bogus, but I’m getting a new one soon anyway, and I’ve learned not to get windows in my next topper (I don’t use them anyway).  I’m actually more upset I lost out on two days of hiking. 

Geneva Peak – 13,266 and Landslide Peak – 13,238

RT Length: 9.84 miles

Elevation Gain: 2965’

It took me longer than anticipated to get to the trailhead due to an unexpected semi fire on I70.  At first it looked like the entire hillside was on fire, due to all the smoke, but as I got closer I realized it was a semi.  West bound wasn’t closed however, so I was able to get past it faster than those travelling east (which was closed).

When I finally made it to Montezuma, I turned left on 285 and followed it towards Webster Pass

This is a moderate 4WD road (which is good, since I still don’t have my new truck).  They are serious about ‘no parking’ on private land here, and let you know you’re not allowed to park in any available pullout.

I was able to drive the .7 miles to the gate, but when I got there the gate was closed.  Had it been open, I would have been able to drive all the way to 11000’.  It was closed to allow for spring runoff (I’d find the next day it’s going to be a while before it opens:  Webster Pass is still socked in and the 4WD roads have several feet of snow in some areas).

There were 3 places to park here, but none of them were very level, so I turned to drive my truck to a spot I’d seen on my way in, just about a dozen yards or so back down the road.  As I was doing so, I noticed 3 ATVs:  The drivers drove them through the woods, around the closed gate sign, and up the road.  On my hike the next day it was obvious theirs were the only tracks. I was mad they were breaking the rules, but also hoping maybe they were ‘official’ and checking to see if the trails had melted out?  They didn’t look very official.  They also looked like they’d had to turn around.

Here’s the camping spot I chose for the night:  a legal place to park at 10780’, next to the Snake River.

I got out and explored.  There are several fire pits behind the parking area, and what look like good places to put up a tent.

After exploring, I went back to my truck, made dinner, sipped some whiskey, and started reading a book I bought at a used bookstore in Arizona:  The Magnificent Mountain Women, Adventures in the Colorado Rockies by Janet Robertson (1990).  It’s about all the first women to summit various Colorado Mountains, mostly 14ers.  While I only made it about 50 pages in that night, so far it’s a great book, with a lot of good points and tons of background information on the lives of these women and their ascents.  Added bonus:  it includes pictures. 

After a few chapters I decided to make it an early night.  I had a lot of dental work done the day before and I was still sore.  I had a hummingbird come visit me inside the topper of my truck (that’s 5 times now that’s happened to me), cleaned up, and went to bed. 

I know the route I took is not the conventional route to Geneva/Landslide, but I did this on purpose:  I’m hiking the loop with a friend next week and I’m trying to keep my streak of summiting peaks solo before going with someone.  I hadn’t yet done Geneva, so I wanted to tick it off before we climbed it together next week, so I got a bit creative.

I was on the road at 5am, just before the sun rose.  I took a quick short-cut from my camping spot through the trees to the gate (saved me a total of about 5 yards of walking). It’s an obvious and well-travelled side trail. 

I passed the gate and continued along 285

I followed this road for .85 miles, until I came to a wide-open gulch.  This is probably where I would have parked if the gate had been open. My hike would take me on a loop back to this place.

Here’s an overview of my hike to treeline: 

There was a sign indicating a trail that intersected the road at 11045’.  It showed there was a trail heading southeast, and indeed, in the dark it looked like there was a trail.  I knew I wanted to head this way, so I started following the ‘trail’.

I’m thinking this was a snowshoeing trail.  But, in any event, it took me in the right direction.  The only problem?  It was under spring runout.  The entire area was marshy and I was sinking in the slush. Not fun.  I found if I stayed higher, more to the left, I was able to miss the brunt of it.  The ‘trail’ ended after about 200 feet. One thing I knew:  this was not going to be fun on my way back.  I decided to take the road down. I continued hugging the trees for three quarters of a mile, doing my best to avoid the willows

Then, at 11180’ I followed a small drainage into the trees, and headed east to treeline.

Once at treeline my route was obvious.  I just aimed for the drainage and followed it up.  Note:  This is the southeast face of Geneva Peak, and it’s pretty much all tundra.  I could have just gone up the ridge and ended up in the same spot, or followed the curve of the drainage all of the way right and done Landslide first.  Lots of choices here.

I chose to go up the drainage, straight to the small saddle between Geneva and Landslide.  This was nice and steady on tundra:  nothing unexpected.

Once at the saddle I turned left and headed towards Geneva Peak.  There was still a lot of snow here, but it was firm and I didn’t need microspikes.  I just followed the ridge northwest to the summit

The summit was covered in a cornice.

I walked a little further north to take my summit photos.  I summited Geneva Peak at 7am

Geneva Peak: 

Here’s a look at Geneva and Landslide from my picture spot.

Here are some other 13ers in the area:

I re-ascended Geneva, left a summit register on the cornice, and retraced my steps back to the Geneva/Landslide saddle. 

This was a quick and simple hike, following the ridge east.  The snow was avoidable if I were to dip down to the right, but at this time of day it was still firm and I didn’t even need microspikes to navigate.


There’s a bit of a false summit (if you could call it that) on the way

I summited Landslide Peak at 7:15am.  I’m jumping for joy because this is the 250th unique 13er in Colorado I’ve summited solo.  Woot!

Landslide Peak: 


Here’s looking back at Geneva

Since I didn’t want to drop back down into the basin and go through the marshy areas, I decided to hike the ridge south back to Webster Pass, then take the road back. Here’s the overall route along the ridge.

And some step-by-step pictures up and over this unranked point that is 13180’

This is easy class 2 up and over

Once at the top I made my way down to the 4WD dirt road.

At the road I turned right, and followed it west to Webster Pass.  As you can see from this picture, even in June, Webster Pass is impassible due to snow.

Here I had a great view of how I ascended Geneva Peak

At Webster Pass you can follow the 4WD road back, making this a loop

Here you can see the road, on the other side of the Snake River, and the path it leads out

Once on the road, there were varying conditions, from dry, to muddy, and eventually to snow covered.  The snow covered portions would have been difficult later in the day, but this early in the morning the snow was still (mostly) firm and I only postholed a couple of times

Just before making this a loop I came to a water crossing where Snake River meets 4WD road 285.  It was about 18 inches deep.  I took off my boots, rolled up my pants, and waded across, doing my best to avoid the stagnant area

Then I continued following 285 northwest, back to my truck

I made it back to my truck at 9:30am, making this a 9.84 mile hike with 2965’ of elevation gain in 4.5 hours. 

Now, off to the airport to pick up one of my Girl Scouts: We’re off to California for the week for their Senior trip to learn how to surf.  It’s our last trip before they all head off to college.  Maybe I’ll be able to find some good hikes along the beach? 

Antora Peak – 13,269, Sheep Mountain (UR) – 12860, and Sheep Mountain – 12,228

RT Length: 8.53 miles

Elevation Gain: 3562’

Boy, was that drive in fun!  I took LL56 to Bonanza, and then the 862 4WD road.  The road was clear to Bonanza, and then the fun began.  Notes about 862:  It’s narrow, making passing difficult.  It’s easy 4WD:  In fact, I didn’t put my truck into 4WD (because I couldn’t), but having decent ground clearance was nice.  The creek crossing looked more difficult than it was.  I’d say the water was 8-10 inches deep.

I parked at the junction of 862 and 8622D.  There’s a fence blocking off the road here, next to Kerber Creek.

The trail starts just behind the fence, and follows an old 4WD road and Kerber Creek for .3 miles

At this point the road comes to a ‘T’, and since I made this a loop, I ended up coming back to this spot on my way down.  Now however, I turned left, and continued to follow the road south.

I stayed on this road for another .3 miles, and then left the road to head west and bushwhack up to the ridge.  As far as bushwhacking goes, it wasn’t too bad:  Not a lot of downed trees, so heading west and staying west was easy.

At treeline, there’s a rock outcropping to skirt to the right

And then I followed the ridge northwest.                               

Once on the ridge I could see Antora Peak to my left

Here’s an overview of the rest of the route to the Antora Saddle.

And some step by step pictures.  There is no need to ascend Sheep Mountain at this point, but instead skirt it to the left, staying parallel with the saddle.

Once on the ridge I turned left and followed it southeast to the summit.  There were a bunch of game trails here, but I just went straight up the ridge.

I summited Antora Peak at 7:15am

Not sure why I called it Sheep Mountain in the video:  Probably because that was what I was viewing and it was in my head.  Oh well, this video is actually the view from Antora Peak.

Antora Peak:

There are fires in the area, so it was a hazy day.  I was making this a loop, with Sheep Mountain and Sheep Mountain Northeast.

I headed back towards the Antora/Sheep saddle

And then crossed the tundra and headed up Sheep Mountain.  I was glad it was still early and the water still (mostly) frozen on the tundra, otherwise this would have been a sloggy mess

There’s a game trail that goes up the side of Sheep Mountain. It can be hard to see initially, but it’s useful in getting through the initial mound of loose rocks.

Then it was up and over the ridge

The summit had a great view of Mt Ouray to the north

Sheep Mountain: 

Now to head over to Sheep Mountain Northeast

I hiked northeast, following the ridge

Here’s a look back at Antora Peak and Sheep Mountain

I was able to avoid most of the snow on the ridge towards Sheep Mountain Northeast.

Just before the final ascent I skirted the mountain to the left, following game trails

And then continued northeast to the summit

I walked all over the summit, trying to find the highpoint.  It looks like it’s further east than it really is (the first cairn you come to is the actual summit).  Here’s looking back at the route

To make this a loop, I hiked a third of a mile southwest, then cut across the tundra, heading east

This led me to a gully.  From here I could see Mosquito Lake.  I didn’t want to go to the lake, I wanted to find the trail that led back to the 4WD road.  Here’s the basic route:

I followed the gully down, crossed some small runoff streams, and kept heading south, looking for a trail. 

I actually found a trail, but kept losing and finding it again.  It hasn’t been used frequently in years, and there are a lot of game trails here.  I’m pretty sure it’s a ranching area as well.  At one time it looked like the trails were maintained:  they may even have been roads, but now they’re a mess.  I knew I was on the right track however, because I kept seeing tree stumps from sawed trees.

Continuing south, I eventually made it to the old road

This road led me back to the junction from earlier this morning.  I turned left onto 862 (no signage) and hiked the short distance back to my truck. This area is full of nice irrigation channels.

I made it back to my truck at 10am, making this an 8.53 mile hike with 3562’ of elevation gain in 4.5 hours. 

Now to drive out in the daylight.  Luckily, it was a Tuesday and I didn’t expect to encounter any other vehicles on the road.  I didn’t.  The Bonanza Mine was pretty cool.

“C.T.” Peak – 13,317

RT Length:  6.21 miles

Elevation Gain: 2925’

I’d been parked for a couple of days at Cooper Creek, dispersed camping and hiking.  I woke up to rain, so I decided to hit the snooze button on my alarm and just lie there in the bed of my truck and wait it out.  Within 15 minutes the rain stopped, and I was on my way.  This is a very straightforward hike, mostly above treeline, with little route finding (although there is some bushwhacking along Rock Creek).

I followed CR 30 for about a third of a mile, and then ascended Rock Creek, sticking to the right side of the creek

Just before making it to the basin, at after 1.5 miles and at around 11900’, I left the creek and started heading east, up the west ridge of the peak. 

While straightforward, this area was steep.  It started out with scree, then turned to rocks the size of microwaves, and then smaller rocks the size of softballs.  I just kept following the curve of the mountain as it climbed northeast.

Once I made it to the ridge, the elevation gain evened out.  I followed the ridge for .75 miles northeast, all the way to the end, to the summit.  95% of the snow was avoidable. 

I summited “C.T.” Peak at 6:15am

“C.T” Peak: 

There was a summit register.  It was still early, and it had been my intent to continue on to “Gudy Peak”, but the traverse was covered in snow, and I knew from yesterday’s hike how quickly the snow turned dangerous, so I opted to wait for it to thaw out and come back another time, knowing there’s be snow in the Cooper Lake Basin as well.  I turned and headed back the way I’d come.

Back down the ridge

Until I met up with Rock Creek and followed it back to CR 30

It was still really early in the morning, so I decided to spend some time investigating the avalanche site.  It looked recent (this winter?).  The house was scattered all over the area, with the roof several hundred feet from the closest level of the house (it looked like at least a 2-story house).  Beds were still made, but the fridge was empty, indicating the house had been closed up for the winter.  There were hiking boots in great condition, bed frames torn to pieces, propane tanks, wood burning stoves, and daily household items lying around, even a full bottle of laundry detergent.  There were camp chairs, still in good condition, folded and lying under fallen aspens next to what could have been a porch.

After abut a half hour of wandering around I made my way back to the road and followed it back to my truck.

I made it back to my truck at 8am, making this a 6.21 mile hike with 2925’ of elevation gain in 4.5 hours. 

Here’s a view of the ridge route from PT 13540

And a look up the ridge from the PT 13540 ridge

It was still early, so I decided to take a nap for a few hours.  I woke up, finished reading the book my daughter lent me, as well as a biography on Calamity Jane, and decided this finishing hikes early and just relaxing had its’ benefits.  I hiked around for a bit, started a campfire, sipped some whiskey, and thought how wonderful dispersed camping, and life in general, can be. 

PT 13540 and PT 13403

RT Length: 8.95 miles

Elevation Gain: 4206’

CR 30 has had some work:  the road was much nicer to drive than it was last year.  No more potholes!  At least the firsts 11 miles or so.  The last 5 were still a little rough.

I parked near Cooper Creek and settled in for some dispersed camping.  There was a storm rolling in I and I got to listen to the thunder roll as I ate dinner (Pho, which was awesome) and read a little.  After a while campers set up across the way.  I went over and talked with them:  It was a father and son duo from Alabama, road-tripping because the son had just finished college.  Very cool father/son time. 

I made it an early night, sleeping until my alarm went off at 3am.  I hit snooze and was on the trail by 4am.  The route starts out following CR 30 west for about a third of a mile, then I left the road and followed the drainage/Rock Creek northwest.

The area where you leave the road is also the site of a recent avalanche:  a house was destroyed, and there are pieces of the house, roof, furniture, shoes, etc. strewn about the area for about 100 yards.

I followed Rock Creek into the upper basin, staying to the left of the creek (but hugging the creek the entire way).

Once in the basin I followed it as it curved northwest.

There was a lot more snow here than I’d expected:  I put on my microspikes and climbed into the upper basin.

Once in the upper basin there was even more snow.  Microspikes were still ok at this time, but I knew I’d want to take a different route down, as the sun was going to warm up this snow quickly and there was no telling how deep I’d be postholing.  I aimed for the ridge, and once on the ridge, followed it west to a kind of saddle

At the saddle I turned right and followed the ridge northeast to the summit of 13540.

There was a class 2 rocky section to navigate.  I just went up and over this.

Here’s a look at the summit

I summited PT 13540 at 7am

PT 13540: 

Here’s a look back down at the upper and lower basins. 

My next objective was PT 13427

Here’s the route to get there

I turned and followed the ridge southeast.  Here are some step by step pictures

The area in the above picture, circled in red, is pictured below.  I skirted this to the right

Then followed the ridge, glad I’d put on my microspikes

Eventually I came to an area where I started losing elevation.  The snow was largely avoidable by sticking to the left on the ridge.  I was a little worried about that cornice in front of me however

I lost about 475’ of elevation to the saddle

Then started up the east slope.  This area was covered in scree, and quite steep. I kept eyeing the cornice, trying to find the best way to ascend.  While I had snowshoes, I didn’t have crampons, so my microspikes would have to do if it came down to it.  Here’s the path I chose to take to the summit, looking for a stable but accessible part of the cornice to climb.

When I got to the cornice, I was able to kick in steps with just my microspikes, although, lacking in forward facing spikes, they needed a little creative help from my ice axe at times. 

Towards the top I started postholing as the cornice leveled out, and had to slide on my belly the last few feet to make it to the tundra. Once over the cornice the summit was obvious, to the north

I summited PT 13427 at 8:30am

PT 13427:

Here’s a look back on PT 13540

It was still morning, but the snow was softening up quickly.  I wanted to get back over that cornice asap. I turned and headed back towards the cornice

It was easy to find my entry/exit point, as I could still see the marks from where I army crawled a few minutes ago.

I did the same thing again, facing the mountain and using the steps I’d kicked in earlier.  It was rapidly warming up:  the tip of the cornice was now steadily reedripping water.

Here’s a look at the ridge back up towards PT 13540

I slid down the scree and followed the ridge back. 

The snow was mostly avoidable until I made it to where the ridge kind of levels out for a while.  From then on it was posthole city

I knew there was no way I wanted to re-enter those basins, so I decided to take the southeast ridge down.  It parallels the basin, and while there was snow, a lot of it was avoidable.  Where it wasn’t I was postholing.  I had snowshoes, but was too stubborn to put them on.  Here’s the overall route out

And step by step, first down the ridge

Then following Rock Creek back to CR 30

Here’s a picture looking up the ridge (in case you want to take the ridge up)

I came to the avalanche area, and it was then I realized a house had recently been destroyed (more on this in my next trip report on “C.T.” Peak). 

I made it back to the road and followed it back to my truck

I made it back to my truck at 11:15am, making this an 8.95 mile hike with 4206’ of elevation gain in 7 hours, 15 minutes.

For reference, here’s a look at my route up to PT 13540 (solid line) and down (dotted line), as seen from the west ridge of “C.T” Peak.

It was still early:  I’d initially intended to add “C.T” Peak on today as well, but didn’t want to re-enter the basin with the way the snow was warming up, so I switched my plans and was going to do that peak tomorrow.  Instead, I got out a book my daughter just finished reading and was eager for me to read as well so we could discuss it together.  I walked around Argentum, found some old structures hidden way up in the hills behind my campsite, relaxed, and sipped whiskey.  Dinner was a block of white cheddar cheese and some bacon.  I had new neighbors, so I welcomed them, and then made it an early night.  It rained.

Chipeta Mountain South – 12,850 and Chipeta Mountain – 13,472

RT Length:  10.58 miles

Elevation Gain:  3281’

This was my third attempt at Chipeta Mountain this year.  The first time I drove out the road was open but impassible due to snow.  The second time the road was clear, but the gate was closed.  I saw several videos/pictures of people on the pass this year, but later found out they were part of a mining operation and the only ones allowed to access the road.  The road formally opened on May 28.  Today was May 29.  It had already been a long morning:  I’d woken up at the Gibson Creek trailhead, intent on hiking a few 13ers in the area (also not my first attempt these peaks this year), but after about 1000’ of elevation and deteriorating snow conditions I decided to make today a ‘me day’.  I hiked back to my truck, chugged a beer, and came up with a new plan:  I was going to drive to Marshall Pass, see if it was open, spend a day relaxing, and then tackle Chipeta Mountain tomorrow. 

Marshall Pass was open and snow/mud free to the pass.  I was surprised at how few people were dispersed camping this Memorial Day weekend.  I parked near the bathrooms and information signs.

I checked the weather, and it wasn’t supposed to rain until 5pm tonight.  I did the math, figured I had plenty of time to get in a hike before weather set in, gathered my gear, and was on my way.  I was on the trail at 8am.  The usual trail from the trailhead has a sign saying it’s no longer in use, so I took the very short bypass and started along the road instead.  This is road 243G, located at the north end of the parking area.  If was a bit muddy to begin with.

It was obvious from the start motorized vehicles hadn’t been on the trail yet this year, as there were numerous downed trees at the beginning (not much after a mile in, however).

I was following the Continental Divide and Colorado Trails north, along the west side of the mountains. 

After hiking for 1.7 miles snow started covering the trail.  Luckily, this snow wasn’t quite mashed potato snow, and I could get by hiking over it with just microspikes (on the way in),

After hiking for a total of just over 3 miles I turned right and headed east up the slope.  A map will tell you this is trail 484.1, but since it was covered in snow I headed east,  and once I saw them, I followed the posts to the saddle.

Once at the saddle I had a great view of Mt Ouray.  I turned left and headed north along the ridge.

Here an obvious trail picked up (the trail only lasted to the top of this hill).

From here you can see the rest of the hike:  it’s a straightforward ridge hike that starts out with tundra, and ends with a lot of loose rocks the size of tires.  Note:  The drop from South Chipeta Mountain to Chipeta Mountain is more drastic than this image would indicate.

Here are some step by step pictures of the ridge.

There’s a cool Quartz formation, with a lot of interesting rocks lying around

Then it’s on to South Chipeta Mountain

It’s rockier than it looks towards the top

From the top of South Chipeta Mountain (12850) you can clearly see the route to Chipeta Mountain (13472).  From South Chipeta you will lose 200’ of elevation, and then gain 825’ of elevation to the summit of Chipeta Mountain. 

This is also a simple ridge hike, but it takes time and careful foot placement because the rocks aren’t stable and tend to roll.  Nothing above class 2 however.

Weather unexpectedly started coming in early as I neared the summit of Chipeta

I summited Chipeta Mountain at 11:15am, after just over 3 hours of hiking

Chipeta Mountain: 

Here’s the view of Mt Ouray from the summit of Chipeta

I didn’t like the look of the clouds, and there was virga in the direction I was headed, so I didn’t stay on the summit long.  I retraced my steps back over South Chipeta Mountain to the saddle.

At the saddle I turned right and headed back down to the Continental Divide / Colorado Trail

At this point I needed snowshoes.  Strapped them on and followed my tracks from this morning south

I made it back to the trailhead at 2pm, making this a 10.58 mile hike with 3281’ of elevation gain in 6 hours.

I was still intent on taking a ‘me day’, so I decided to sleep in my vehicle here overnight.  Around 5pm a couple drove in, saying they were planning on backpacking part of the CDT/Colorado Trail.  The had along their dog, and a ferret on a leash (the woman had a ferret fanny pack as well, for when needed).  I asked them if they had snowshoes?  The woman slapped the man across the chest and said “See? I told you so!”  They didn’t have snowshoes but headed out anyway. When I woke up at 5am their vehicle was gone, so I’m guessing they didn’t end up staying the night, which was a good idea, considering there was a storm coming in.  I’m not sure what a wet ferret smells like, but it’s probably not ideal.

Gibbs Peak – 13,577 and De Anza Peak – 13,362

RT Length:  20.02 miles

Elevation Gain: 7343’

I drove to the Gibson Creek trailhead the night before, concerned I wasn’t going to get a spot to park on Memorial Day weekend.  Imagine my surprise when I was the only one there.  Two more vehicles would join me later, but I was genuinely amazed the trailhead wasn’t more crowded: there’s great dispersed camping here.

Bonus:  no mosquitoes!  I spent the next few hours relaxing, making dinner, sipping whiskey, and reading, before making it an early night.  

(It was, in fact, a long night, full of nightmares.  I’ll spare you the details, but let’s just say they involved frantic mothers holding their decapitated babies, pleading for help and saying there was a horrible accident, and a demon that took over the body of a frail child: the demon needed to die, but doing so hurt the child.  Not fun when you’re camping all alone.  I woke up around 2am and knew if I went back to bed my nightmare would continue, so I tried to think about other, happier things before starting out on my hike in the dark.  What’s happier you ask?  I have 3 kids.  I told myself when I got a divorce in 2012 I wasn’t going to date seriously until my youngest was 18 and had graduated High School.  Well, she graduated this week, and is off to college, so I spent the next hour trying not to think about the nightmare I’d just had, and instead thinking about what I was going to do about dating, whether or not I really want to at this point, and realized I haven’t ‘dated’ since the 90s, and it’s certainly changed.  It’s weird to be 40 years old and an empty nester.  So, how y’all dating now?)

But I digress.  Knowing it was going to be a long day, I was on the trail at 3am.

The trail starts at the north end of the parking area, and heads west for .1 miles before turning right and following Rainbow Trail 1336 north.

I followed Rainbow Trail as it wound around the east side of the mountain for 3.25 miles, crossing several creeks along the way.  One creek crossing even had two bridges to make the crossing easier (the other areas had shallow enough water where bridges weren’t necessary).  There was about a mile of the trail deep in spring conditions, with runoff covering the trail.

After 3.25 miles I came to a junction, and took Trail No. 1350 left (west) towards Texas Creek Basin. This is where my flashlight went out and I was glad the sun was starting to rise. 

Note:  Trail 1350 is not a maintained trail.  I was hiking it in the dark at this point, and there were so many downed trees I kept getting off route trying to go around them (going over them wasn’t always practical).  It wasn’t much better in the daylight.  I decided to gain the ridge as quickly as I could, and follow it west to treeline.

It took me 2.75 miles, and 2000’ of elevation gain to make it to treeline.  It was here I experienced the worst and most extensive bushwhacking I’ve ever encountered.  It was like hiking up through avalanche debris (although it was obvious the wind had knocked the trees down).  The ridge was either dense with new growth, or a jungle gym of downed trees.  I would not recommend this route, and I told myself I’d take Texas Creek on the way down (note:  I later realized I would not recommend the Texas Creek route either).  There was a small but raging creek to ford early on, and then it was straight up the ridge.

After hiking for a total of 6.75 miles I came upon 100 yards of mashed potato snow.  I strapped on my snowshoes and kept heading west towards treeline.   The snow kept starting and stopping again.  On my way up I kept my snowshoes on.  On my way down I misremembered how long the snow section was and kept taking the snowshoes off, just to need them again.

Once at treeline there was a small amount of snow to navigate, and then I was able to avoid most of the snow to the summit.

One good thing about the hike above treeline:  there are no false summits to Gibbs Peak.  What you see is what you get.  As long as you keep heading west and gaining elevation, you’ll make it to the summit.

I made it to the summit of Gibbs Peak at 9am, after 6 hours and 8.25 miles of hiking.

Gibbs Peak:

There was a benchmark on the summit.  I took off my pack and realized I’d lost my water bottle somewhere.  That’s what I get for not strapping it in.  No matter, there was plenty of snow if needed.  I’d have to look for my water bottle on my way back down.

There wasn’t a summit register, so I left one.  I had a great view of De Anza Peak to the northwest. 

In order to get to De Anza Peak I had to head southwest to point 13227, and then northwest to the summit of De Anza.

This part of the hike was actually quite fun, as I was now losing elevation, getting a little bit of a break, and following animal tracks the entire way.  

When I made it to PT 13227 I turned right and headed followed the ridge northwest.  You can’t tell from these pictures, but I was actually downclimbing a bunch of rocky areas.  On the way back I stuck to the areas covered with snow, as climbing up the rocks, especially in snowshoes, was a little too spicy for me without a helmet.

There was still more elevation to lose however.  Here’s an overall view of the route to the summit

From this point on I needed snowshoes, as I began postholing up to my waist.  I strapped them on and followed the ridge.  Here are some step by step pictures.  I went straight up and over this hump

Then mostly stuck to the ridge, aiming for the gullies to my left just before the summit

Once up the short (30-40 feet or so) gullies I followed the windswept ridge to the summit

I summited De Anza Peak at 10:40am

De Anza Peak:  

Here’s looking back at the route from Gibbs Peak

I left a summit register and started back.  While it looks like a simple ridge hike back to Gibbs Peak, the areas without snow are actually rock formations, and I needed to skirt them on my way back. 

I made it back down to the saddle, and went up and over the bump in the ridge again

Then skirted the rocks to the right, staying on the areas with snow

Then it was a simple ridge hike back to the summit of Gibbs Peak

I re-summited Gibbs Peak, then followed the ridge east back to treeline.  I looked for my lost water bottle, but was unable to find it.  (If you find it, it’s yours!)

This time, when I entered the trees, I stayed right.  It was my intention to avoid all the bushwhacking I’d one on the way in by taking trail 1350 out.  I once again encountered the mashed potato snow at treeline

And at 10,600’ I descended towards Texas Creek. 

I was highly disappointed to find this area was no better than the way I’d taken on my way in.  In fact, it may have been worse:  at least when I was on the ridge, I had a sense of direction. Now I was unable to find a distinguishable trail, so I followed the creek east out of the basin. 

At one point I realized the creek was actually the trail, or what used to be the trail. 

Eventually the trail became a bit more distinct, although still covered in water and downed trees.  Just know if you’re following the creek east, you’re going in the right direction. 

I had to eventually cross the creek, and to do so I needed to take off my shoes.  I crossed the creek, and here the trail picked up again.  From the creek crossing Trail 1350 was much easier to follow; there wasn’t any water on the trail, but there were still downed trees. 

From the creek crossing it was just over a half mile to the Rainbow Trail / Trail 1350 junction, where I picked up the Rainbow Trail again and followed it back to the trailhead.

I made it back to my truck at 5pm, making this a 20.02 mile hike with 7343’ of elevation gain in 14 hours. 

So, which approach is better, the ridge or the creek?  If I had to go with one, I’d say the ridge, just because I had a better sense of direction.  Both were miserable. 

Santa Fe Peak – 13,180

RT Length:  9.36 miles

Elevation Gain:  2894’

I needed a quick hike today before picking my mom up from the airport, and since this one is kind of close to I70 and the weather was nice I decided to go for it.  I kind of wanted to do this as a loop with a few other 13ers in the area, but any excuse to get out and get another hike in the same area is good enough for me (I’ll be back).

I’ve heard a lot about the town of Montezuma and its lack of parking.  Yes, there is a lack of parking.  So, my advice is to do this hike on a weekday, or arrive early (or both) to secure a legal parking spot.  Please respect private property owners’ rights. 

When driving through Montezuma, and turning down 3rd street, on your right you’ll see this area, that looks inviting to park.  DON’T PARK HERE!  It’s private property.  There are signs (covered in snow no doubt most of the time) asking you not to park in this area.  I’ve circled one in red.  Note, when you drive in, the sign is behind you, so it’s difficult to see. When I left the owner of the property was watching me from his window.  It’s probably a game to him.  So, don’t park here.

Instead, continue about 10 yards pasts this sign for 4WD road 264.  (Also note, the black and white sign says ‘highway legal’ vehicles only. 

Here you will find a small pull-off area where you can park.  Only about 3-4 vehicles can park here if you all pull in nicely, so if you’re first, set the example.  This is Public Land.  From here on out, it goes back and forth between public and private land, and it can get confusing.  The road also narrows and there are a lot of downed trees in the area, so it’s not really worth it to try to drive further.  Especially in winter conditions (like today).

Just an FYI:  There’s a house/structure around 10,800’.  They plow the road themselves, but it’s still ‘iffy’ to drive to that point, and they currently have an unfriendly dog.  I wouldn’t drive past the staging area, even if you feel you can.

After some careful maneuvering (my 4WD is still out and there were some deep ruts) I backed into a spot, gathered my gear, and was on my way at 5am.  It was around 37 degrees outside, and the snow hadn’t consolidated overnight, so almost immediately I started post holing.

I’m stubborn, so it took me 1.5 miles to put on my snowshoes.  I should have put them on right away. I followed 4WD road 264 for 3.7 miles to the saddle of Morgan Peak and Santa Fe Peak

Once at the saddle there was still a road, but it was difficult to discern with the snow, so I just headed southeast to the ridge

Here are some step by step pictures

Once on the ridge I could see Santa Fe Peak.  I’d need to go right and follow the ridge southwest to reach the summit.  The wind picked up here, and all that postholing I did earlier came back to haunt me:  the snow I’d obtained in my socks from postholing had melted and now was freezing back into ice again:  my socks and toes as a direct result were now frozen. 

The ridge was easy to follow, and windblown.

There was one cornice, but it was easily avoidable, and made for a kind of ‘false summit’ (pic on the way back). 

I summited Santa Fe Peak at 7:30am

Santa Fe Peak:

I didn’t see a summit register, so I left one.  Here’s a look back on the other 13ers in the area.  If it wasn’t so windy… if my socks and toes weren’t solid ice, and if I didn’t have to pick up my mom from the airport I’d be making this a loop, as the conditions looked perfect (sigh).

I turned and retraced my steps back over the cornice, along the ridge, to the saddle

It was interesting: I could see tire tracks, but due to downed trees on the road in, it’s probably been a while since vehicles have been up here

From the saddle I followed the 4WD road back to the trailhead, glad I’d decided to put my snowshoes on, as I came across my morning post-holing adventures

When I finally took the snowshoes off, I accidentally took a wrong turn, and ended up at the old Morgan Mine.  I took a quick picture and re-traced my steps (probably private property so I didn’t investigate further than a quick photo).

When I made it to a bend in the road around 10,800’ I could see the residence/office (etc.) and immediately a dog rushed out and started barking at me.  This is right where the Harold Roberts Tunnel is (short information on what that is and why it’s cool here).

I’d heard about this dog, and was a little bit apprehensive.  However, I held my trekking pole in my right hand, and my Ruger in my left hand inside my coat pocket.  I’d hate to actually hurt an animal, but if it attacked, I was ready.  Luckily, this dog was all bark and no bite:  It barked viciously, but never left his/her side of the road.  I kept walking like I was supposed to be there, and nothing came of the encounter. 

I continued following the road back to my truck.

I made it back to my truck at 9:30am, making this a 9.36 mile hike with 2894’ of elevation gain in 4.5 hours.

As I drove out, I stopped to get pictures of the trailhead, parking/no parking areas, etc.  for a trip report.  The owner of the house nearest the parking area stood in his window and watched me the entire time with a scowl on his face.