PT 13102, West Truro – 13,149 & Truro Peak – 13,298

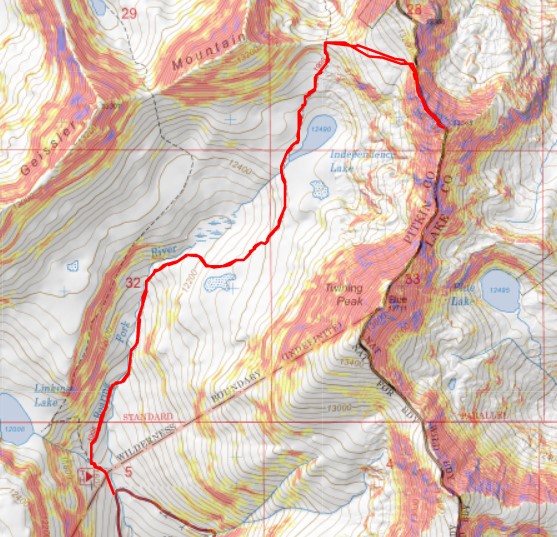
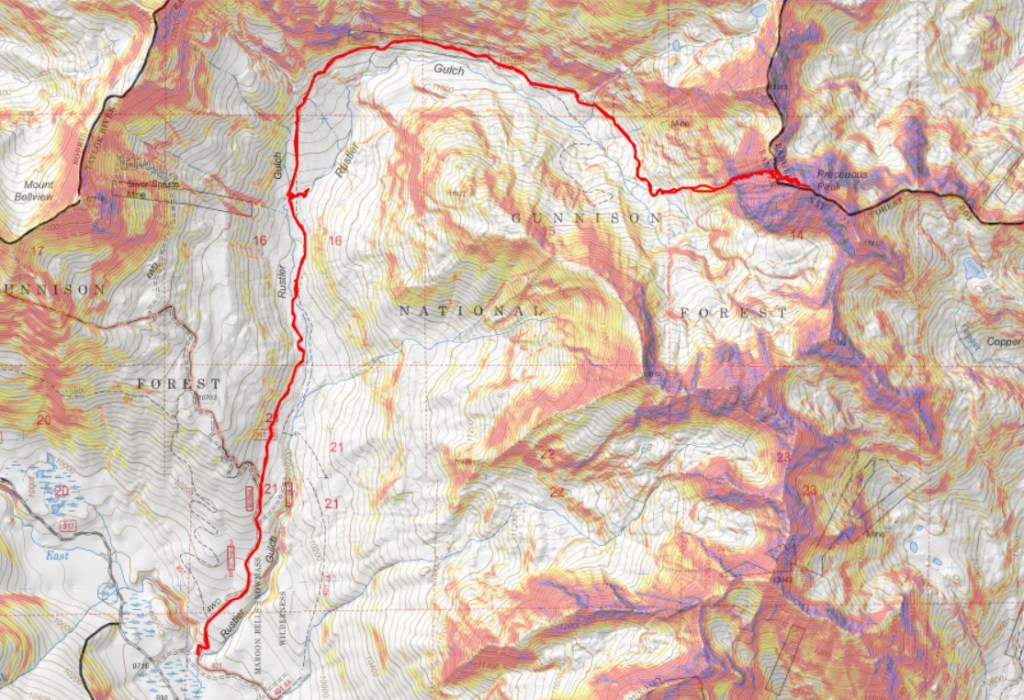
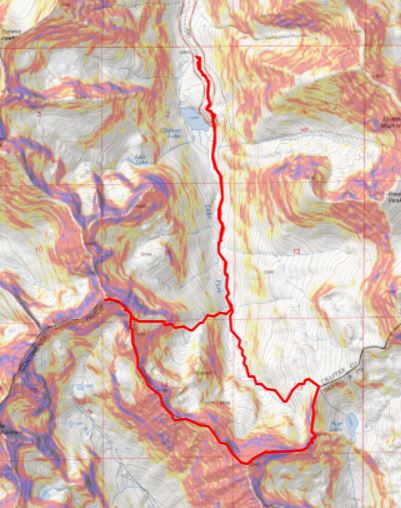
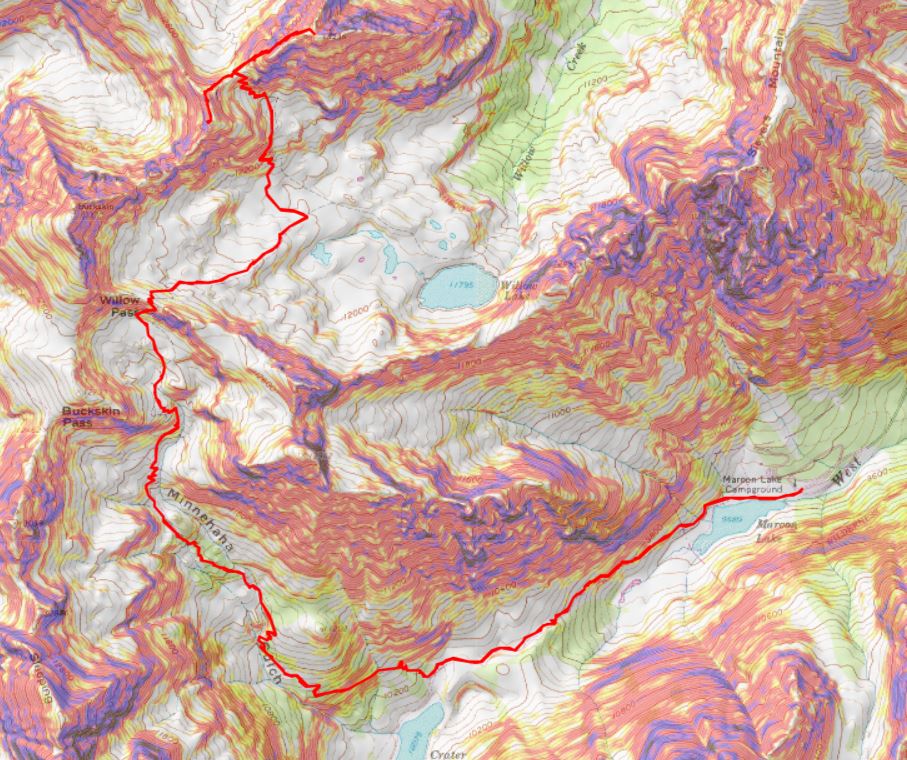
RT Length: 8.49 miles

Elevation Gain: 3489’

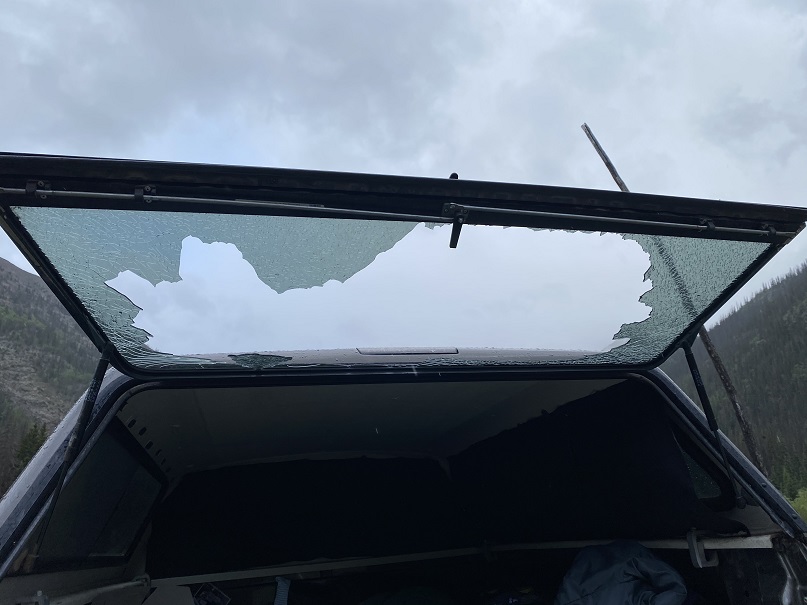
As I sat down to type this up, I’m already at the next trailhead.  I got out my computer, camera, etc. and set it all up to write a trip report.  Just as I was starting, a huge gust of wind blew through the site, creating a whirlwind of dust.  All that dust is now inside the topper of my truck, as well as all over my computer, bedsheets, etc.  Oh, the joys of living out of your truck!  I swept it up as good as I could, but dirt and dust went everywhere!  My poor electronics.

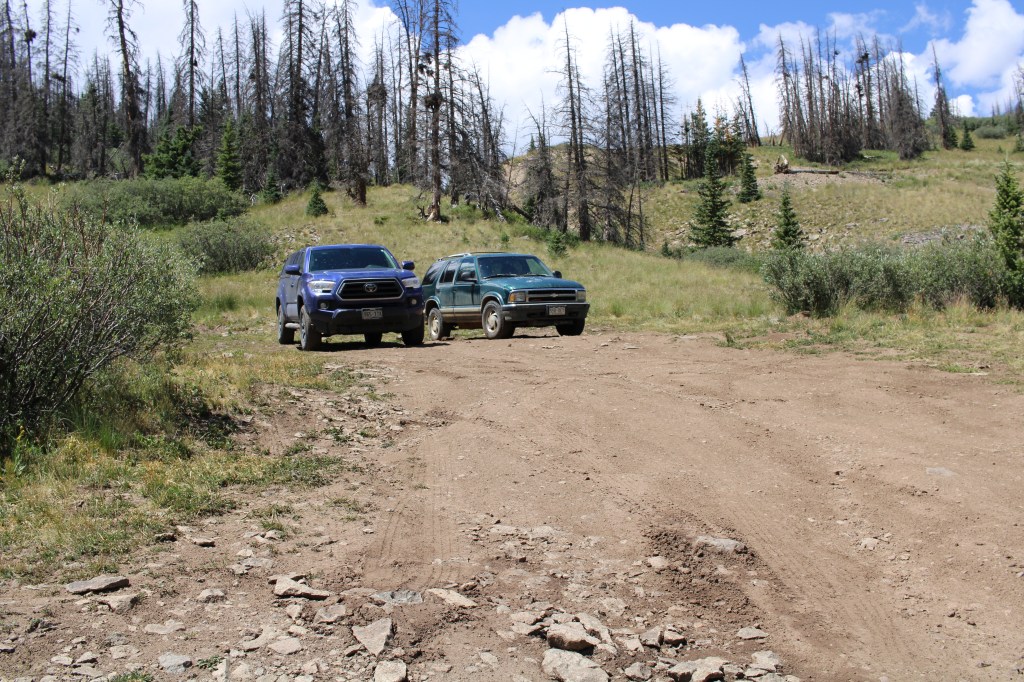
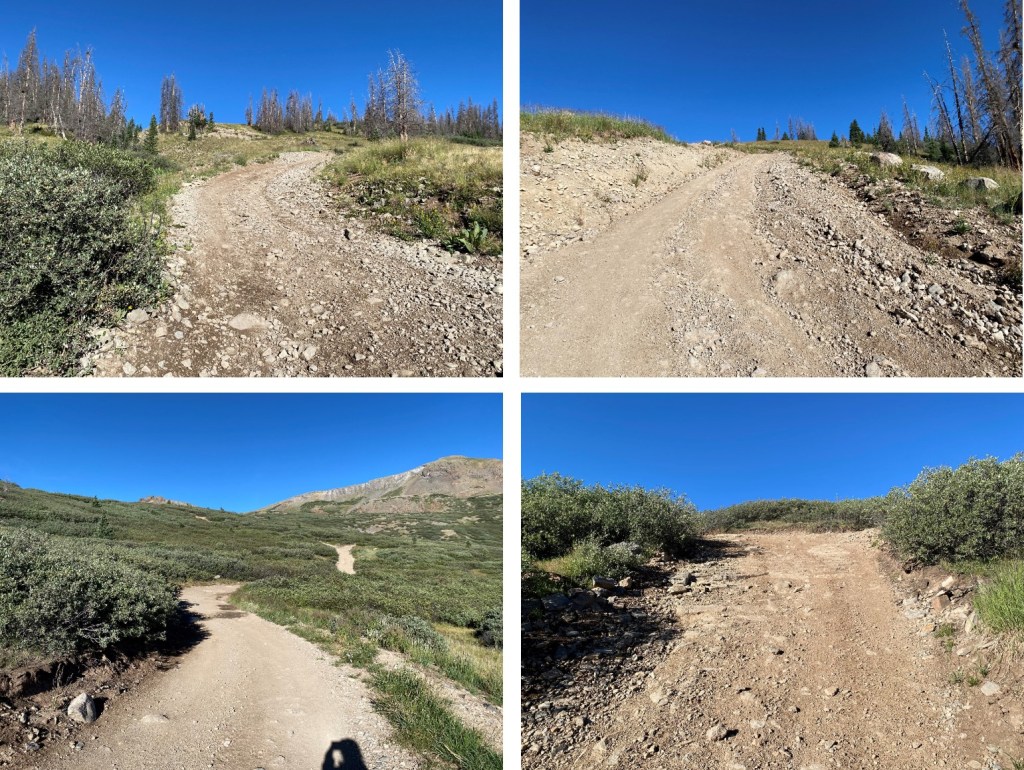
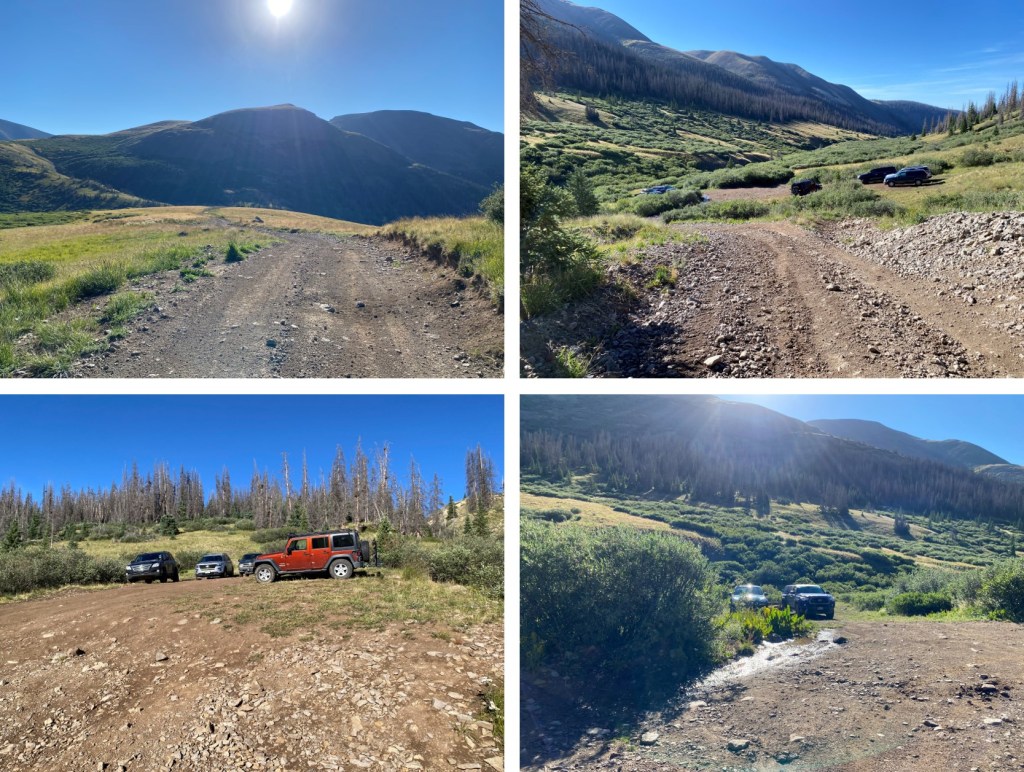
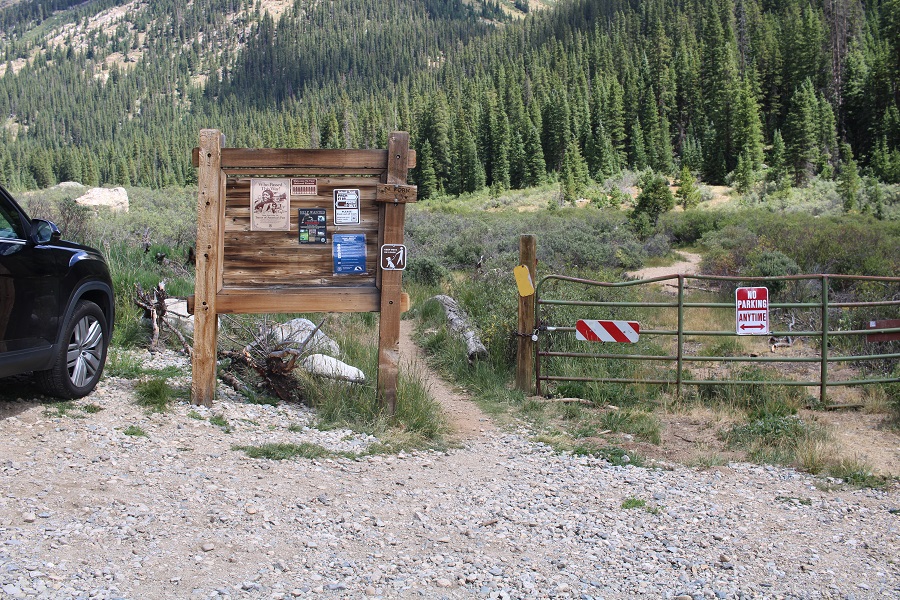
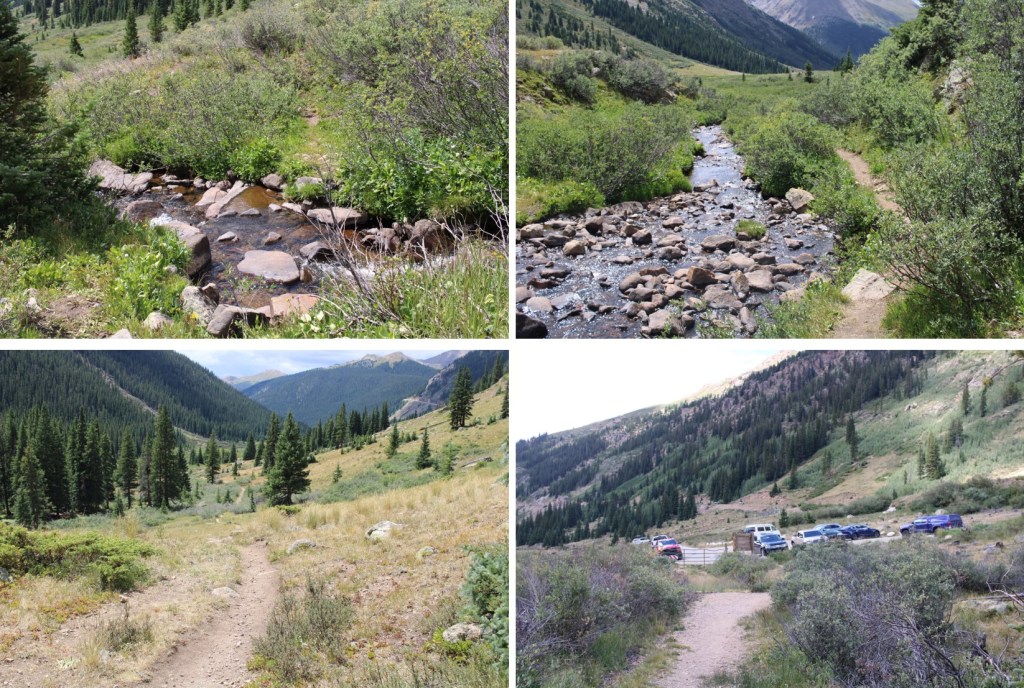
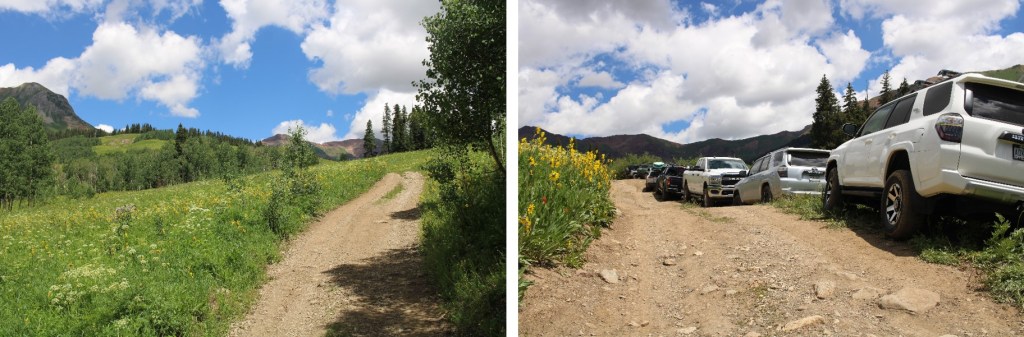
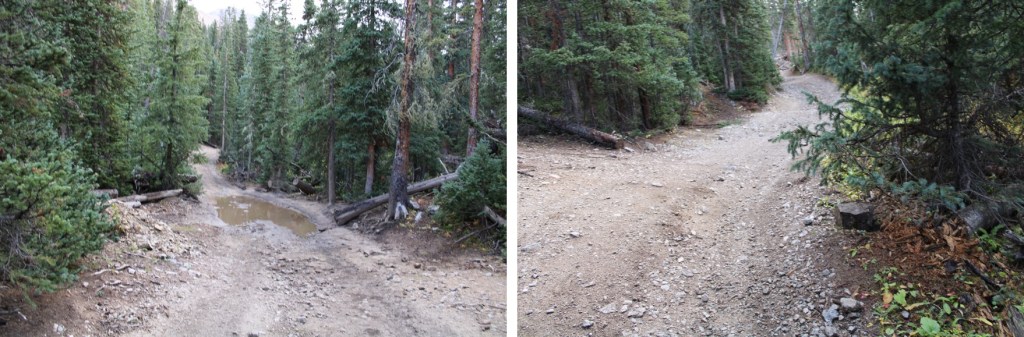
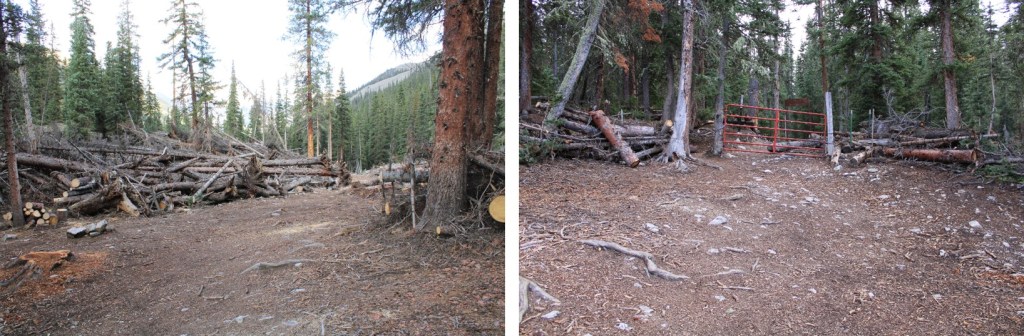
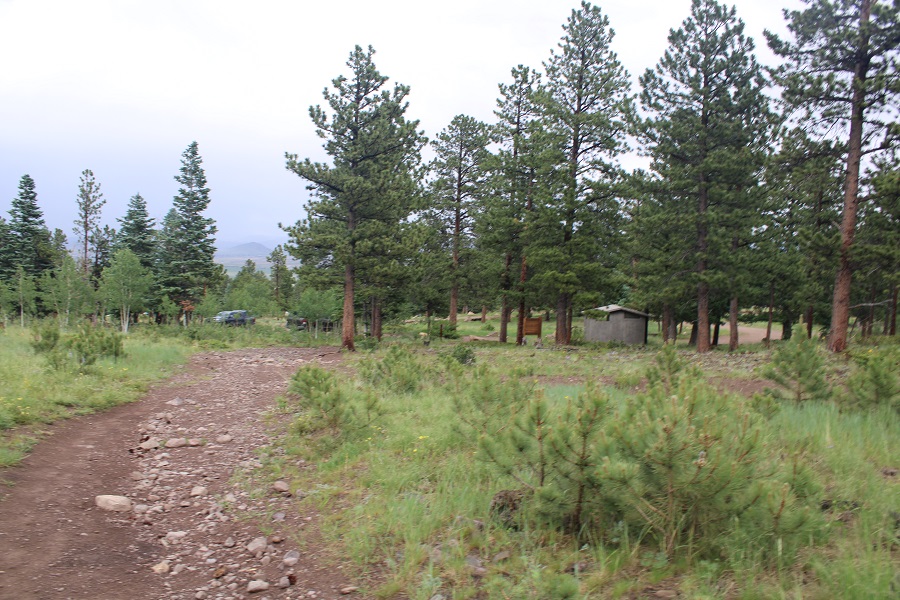
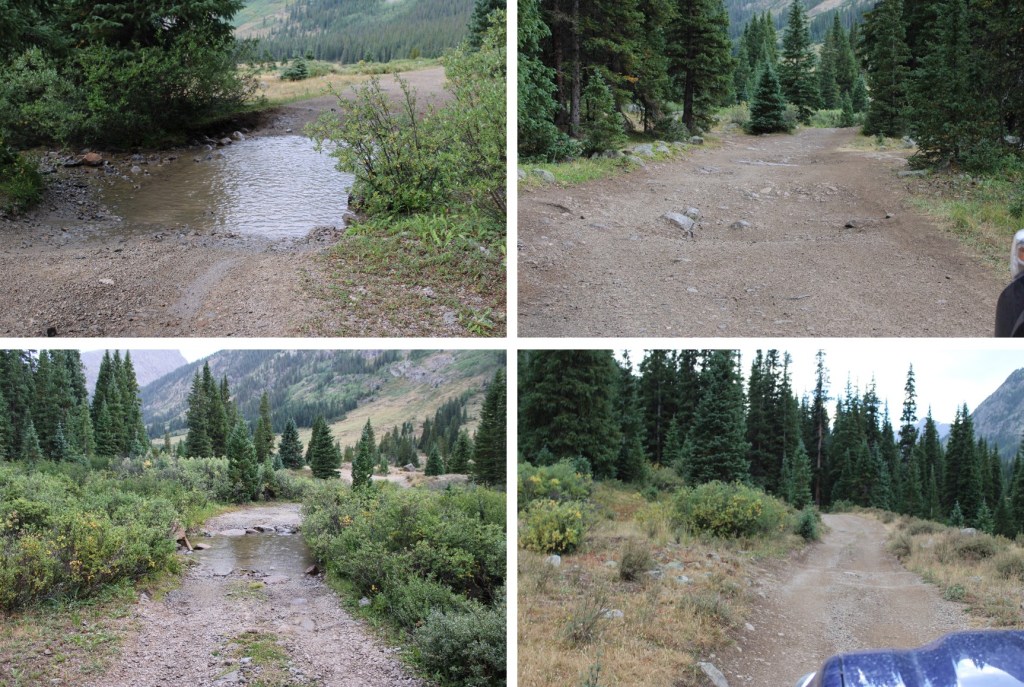
Ok, on to the trip report.  I parked past Grizzly Reservoir at 10800’ at a nice dispersed campsite to start this hike. 

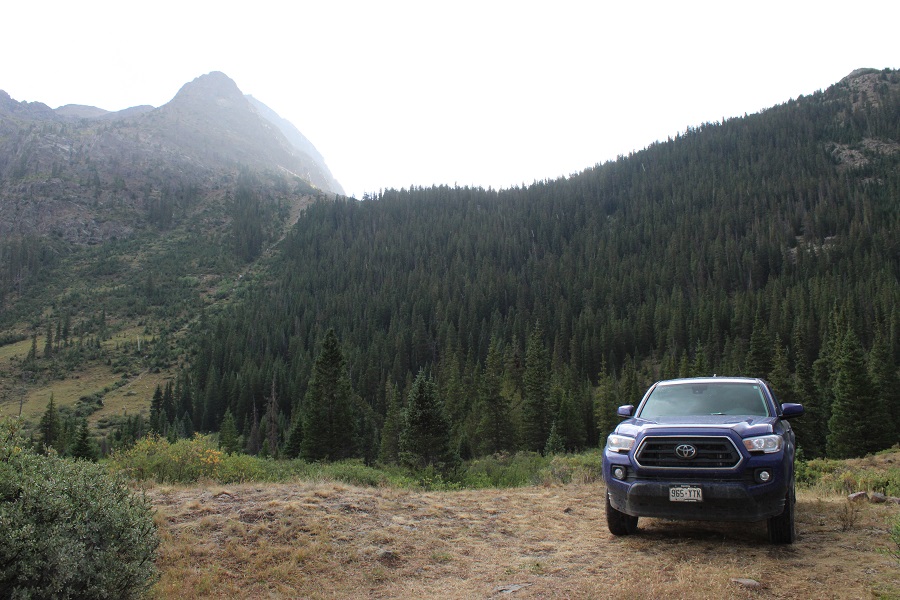
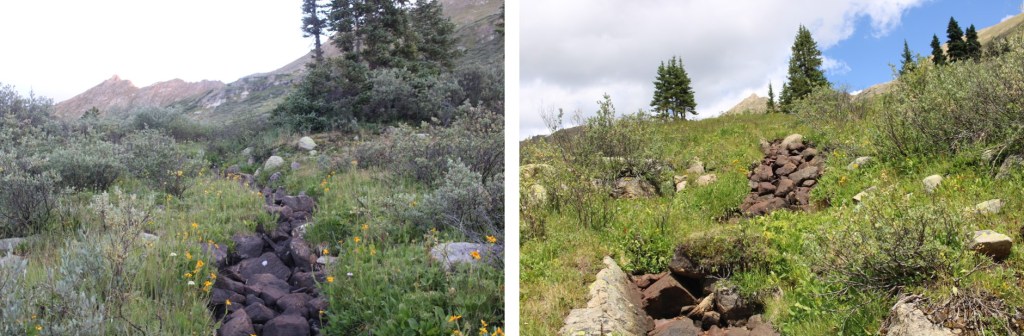
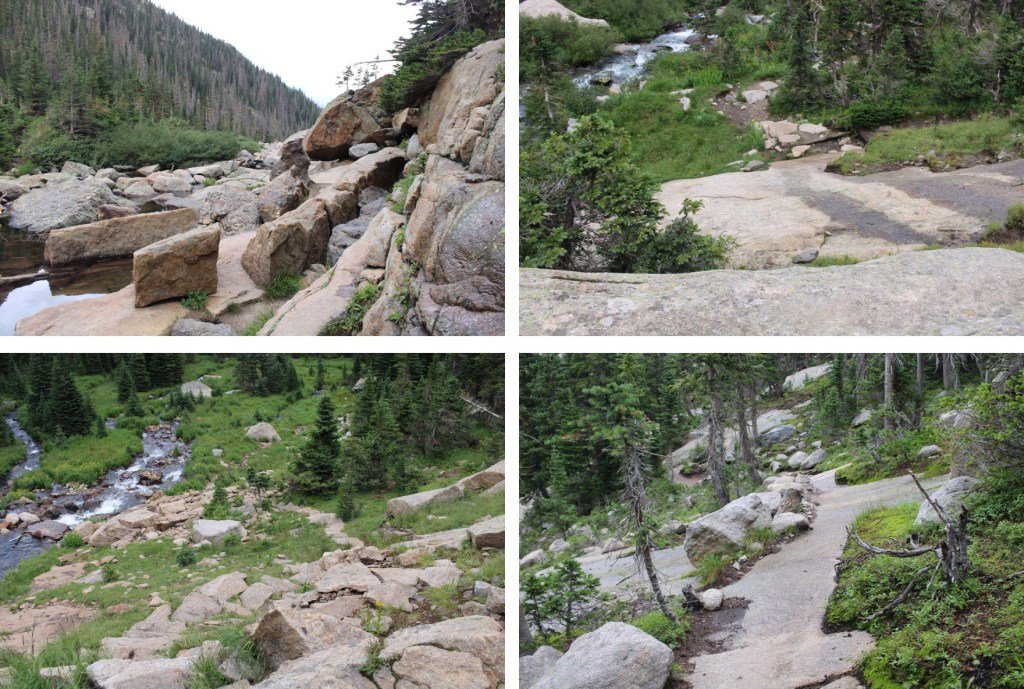
The drive in was easy 4WD, with a lot of creek crossings and potholes to maneuver. 

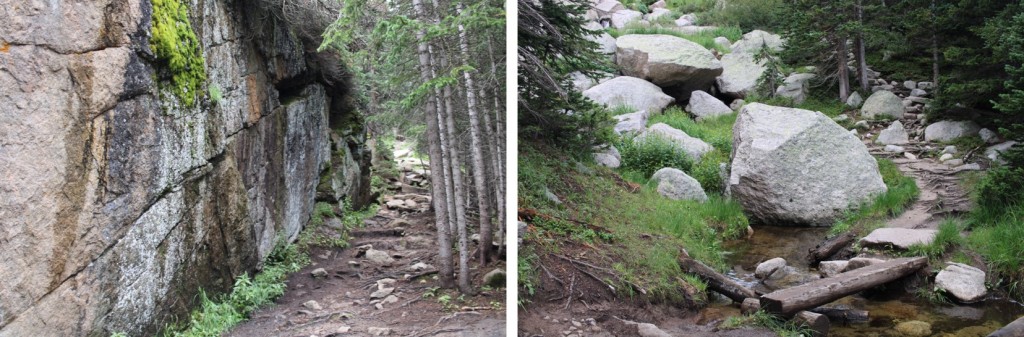
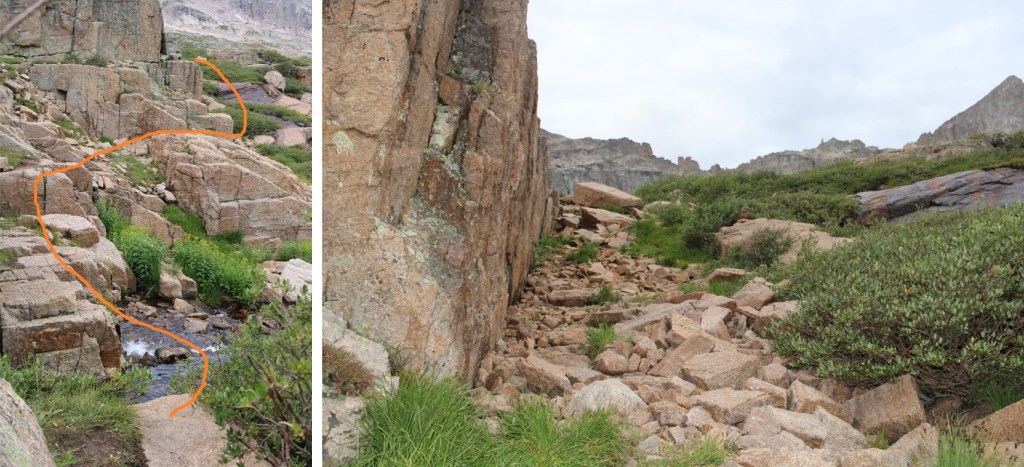
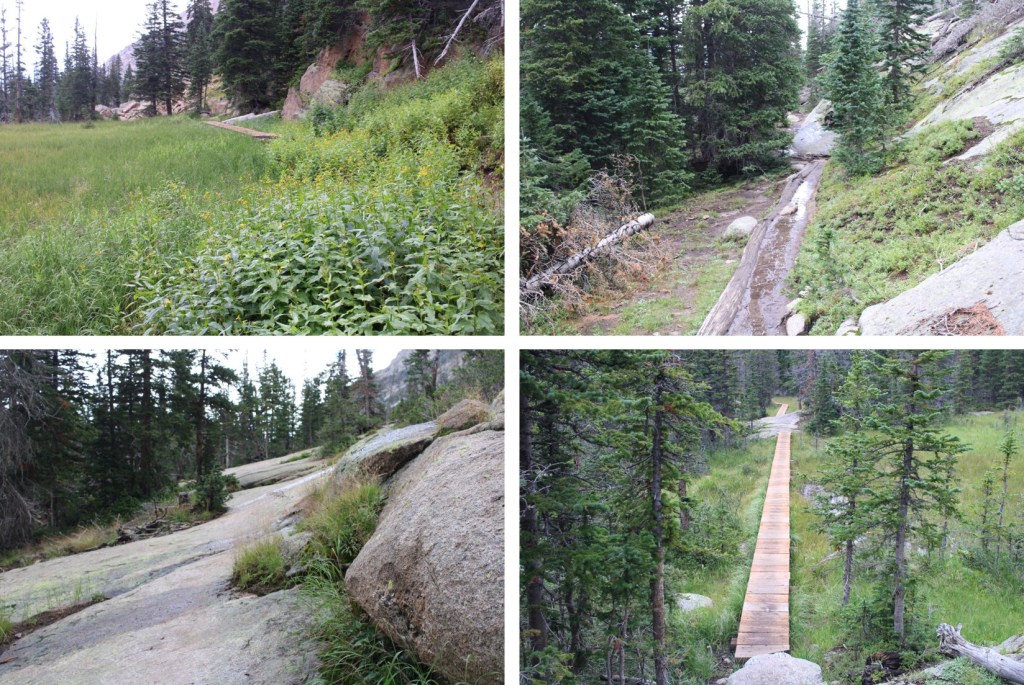
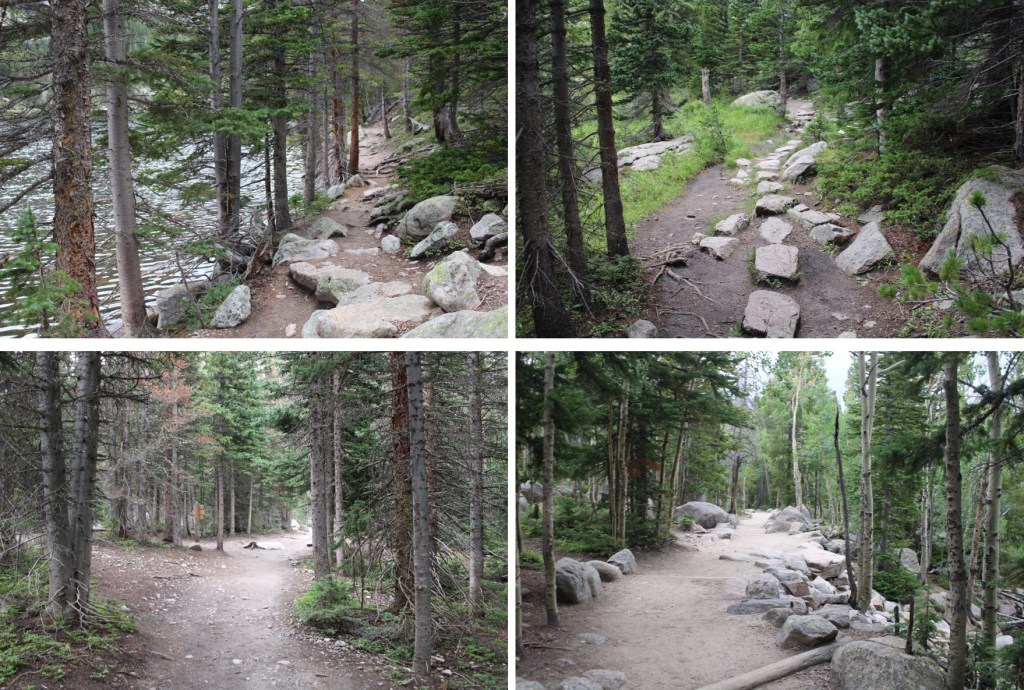
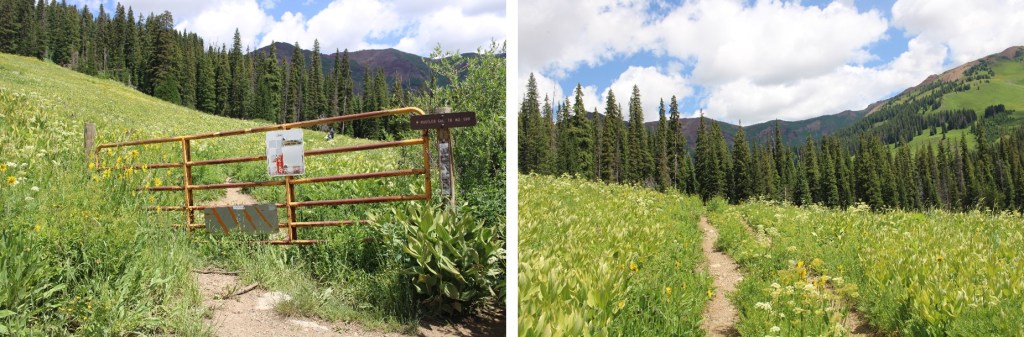
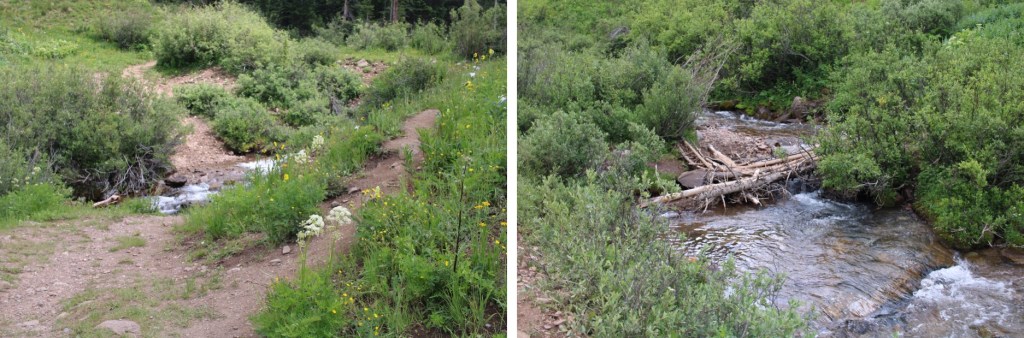
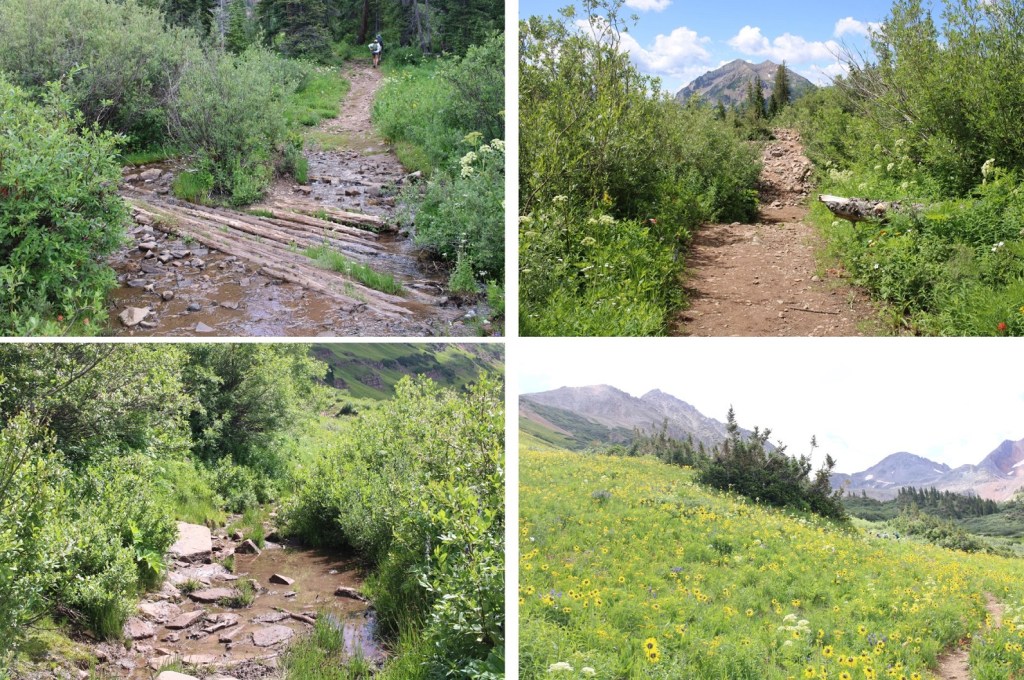
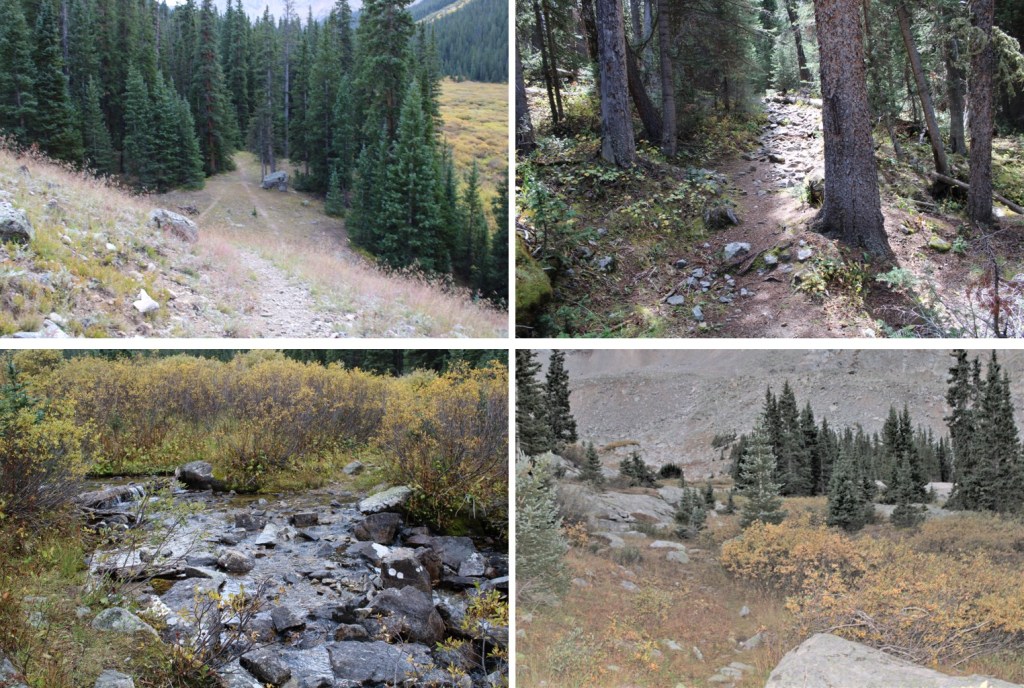
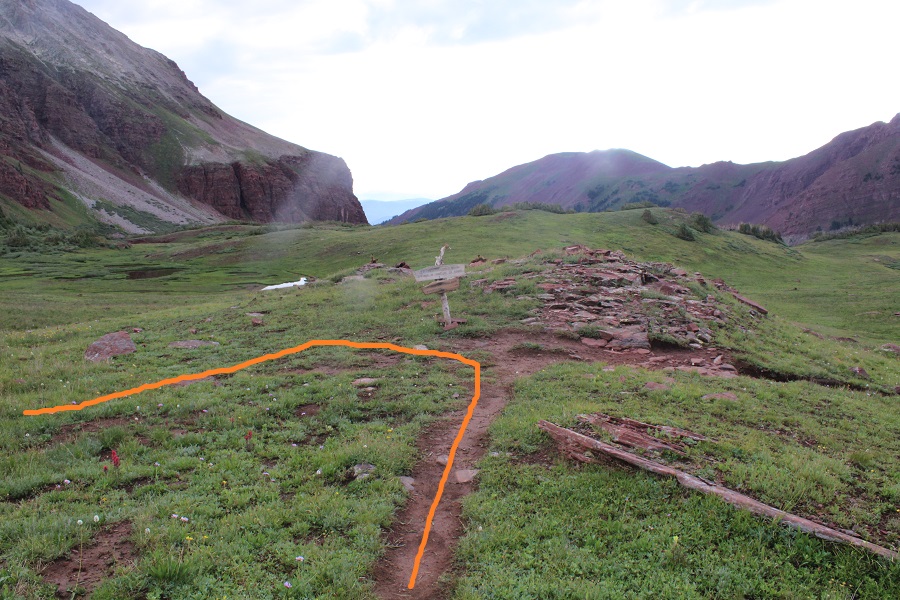
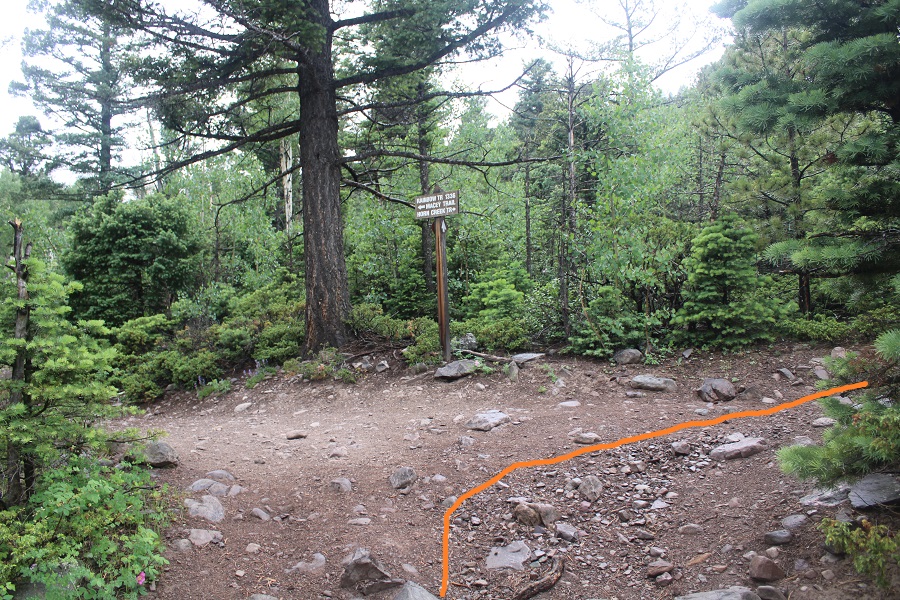
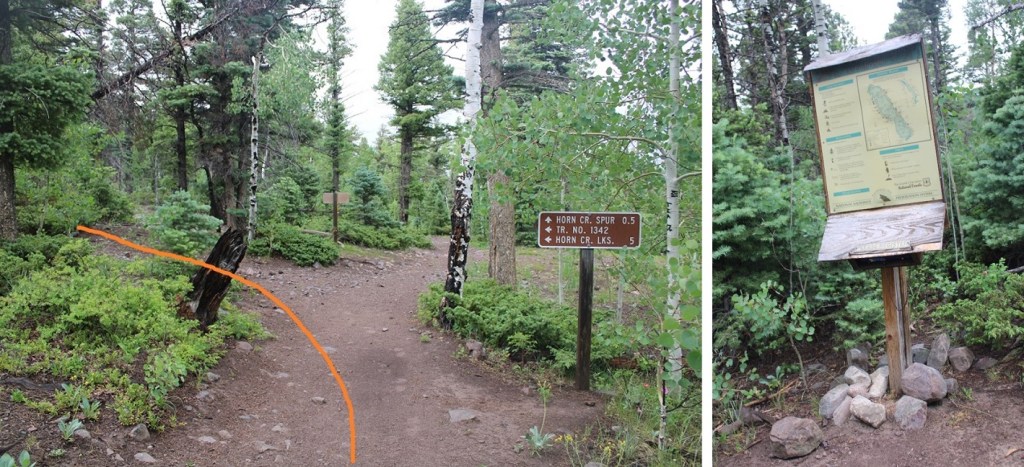
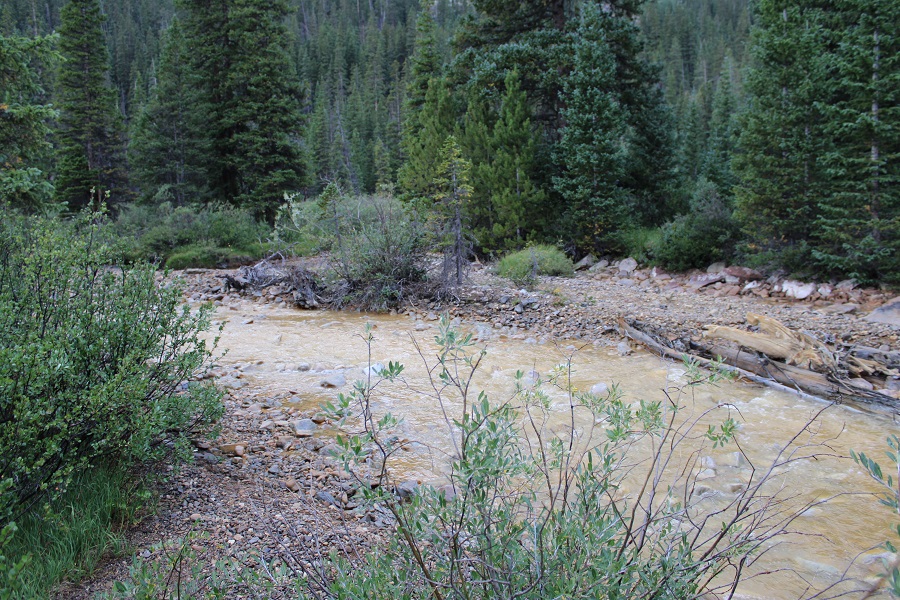
I was up and on the trail at 5:45am.  The trail starts at the wests end of the parking area, and almost immediately crosses Lincoln Creek.  I put on my stream crossing shoes and was on my way.

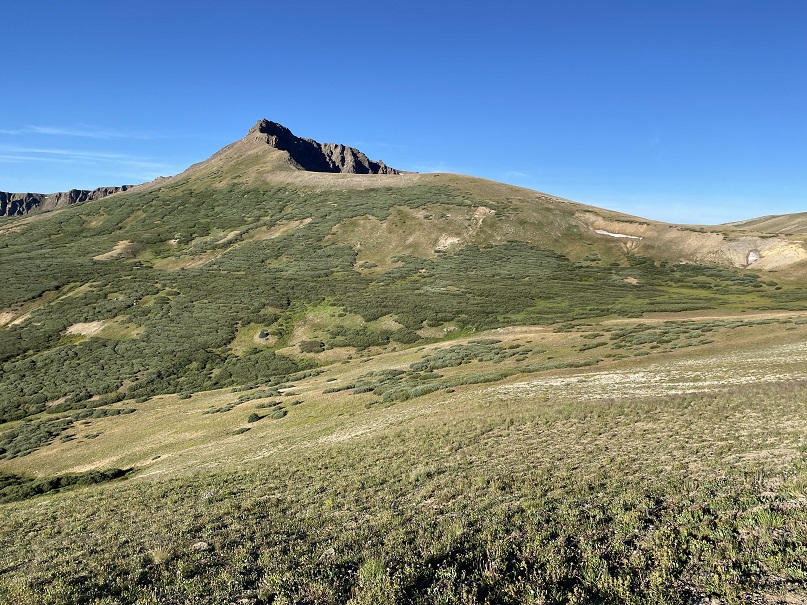
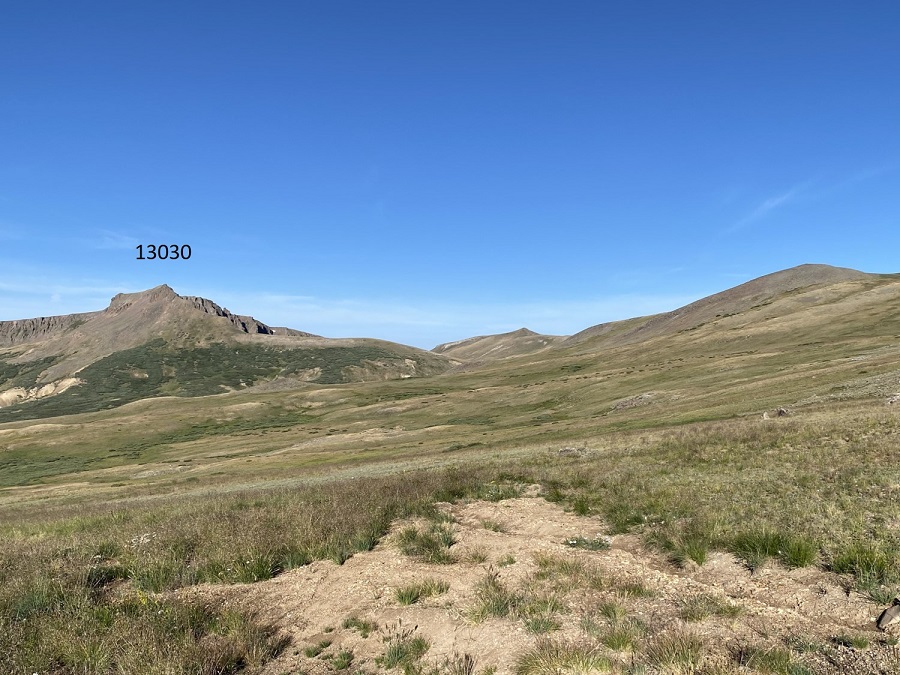
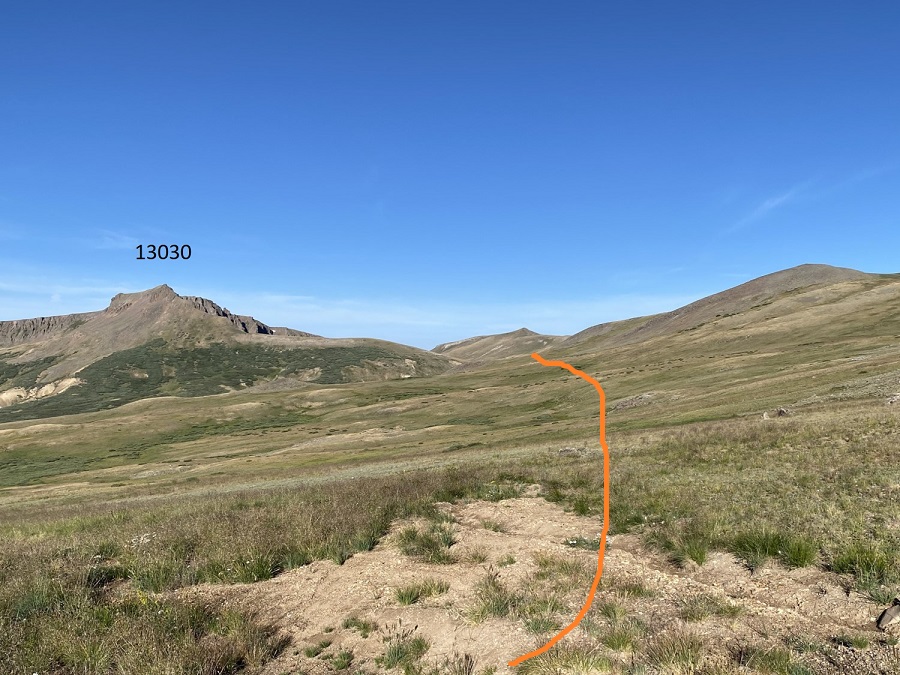
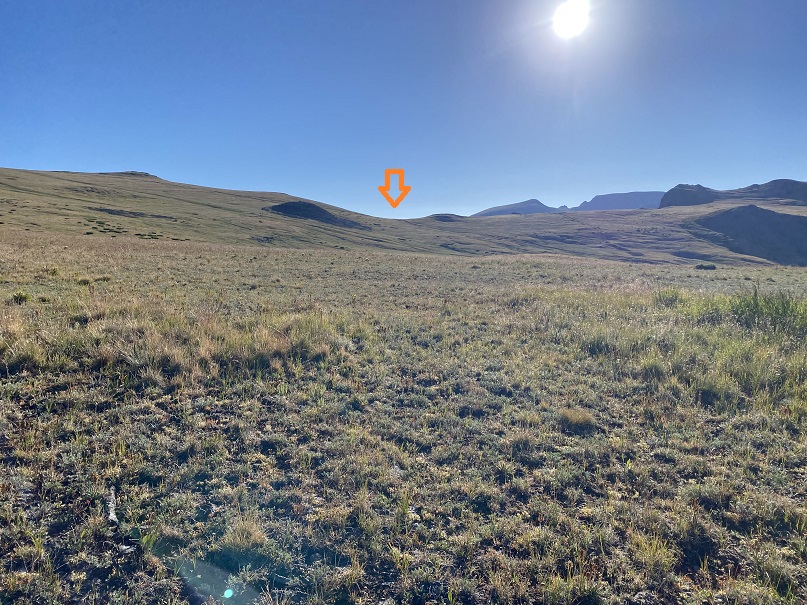
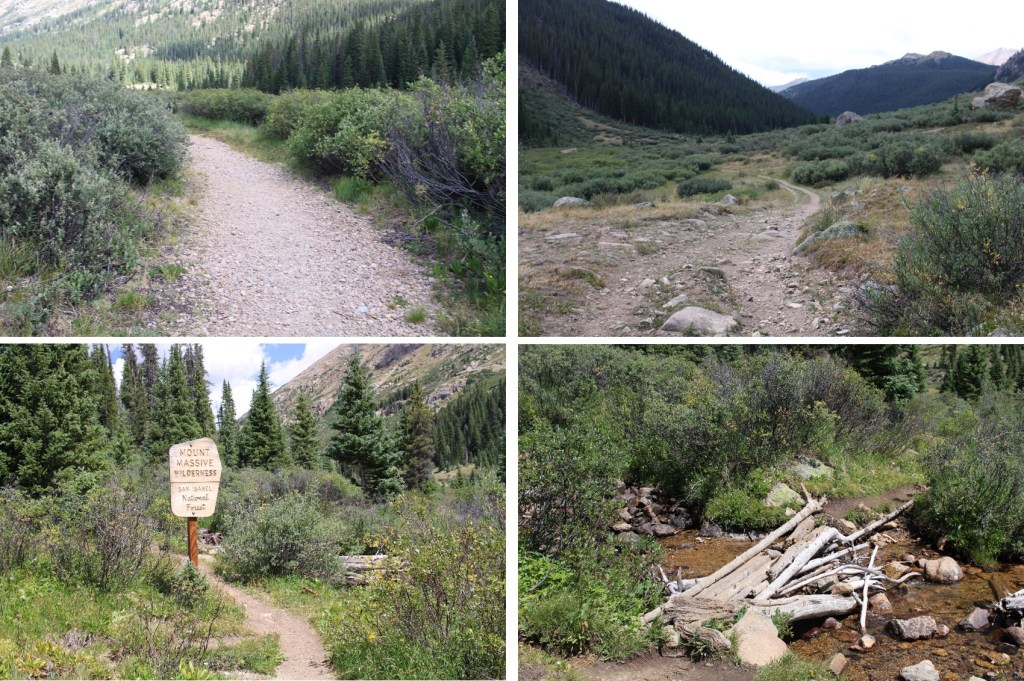
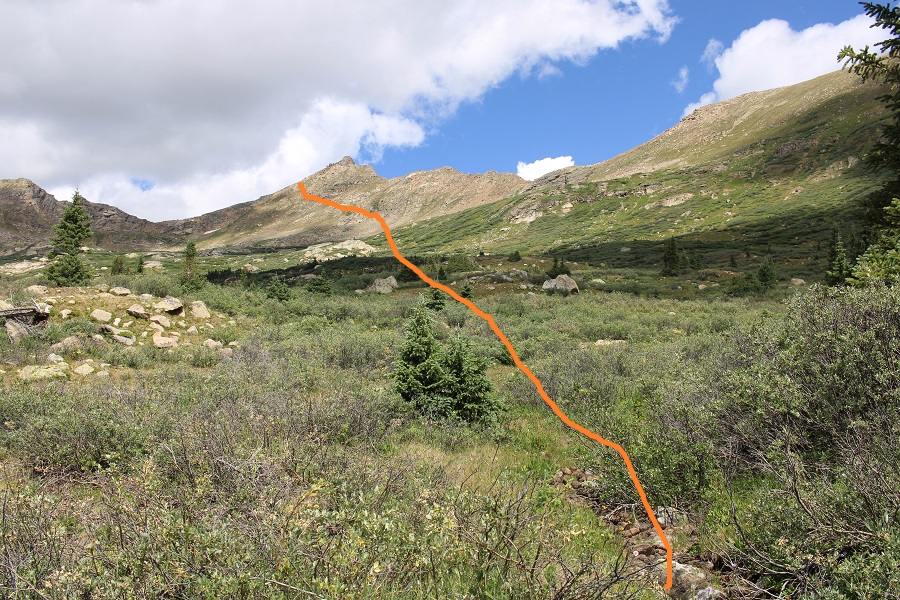
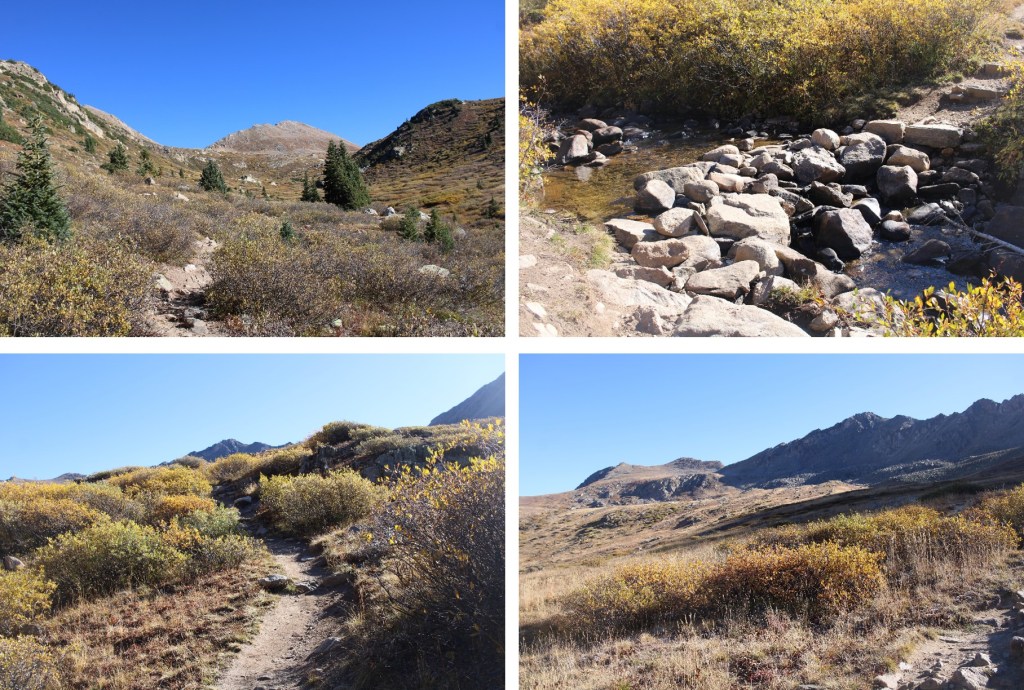
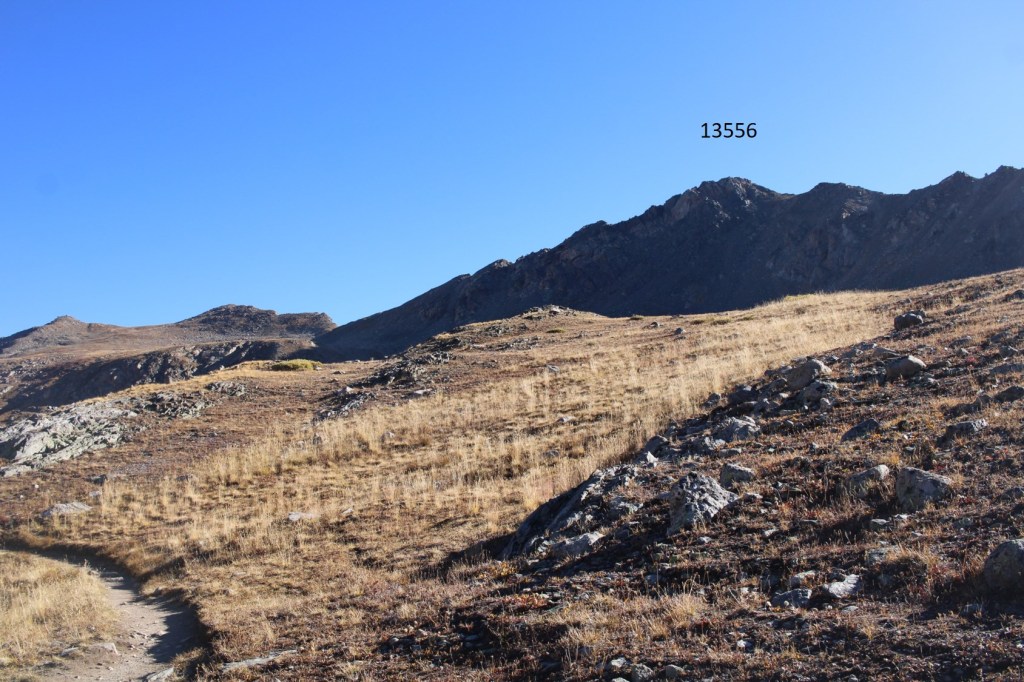
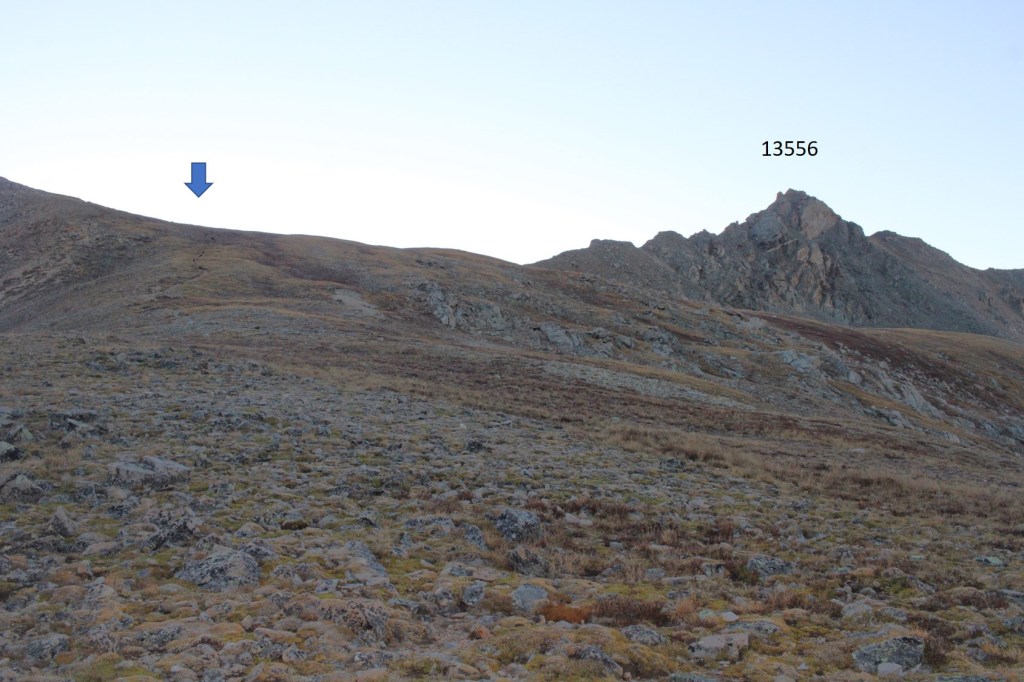
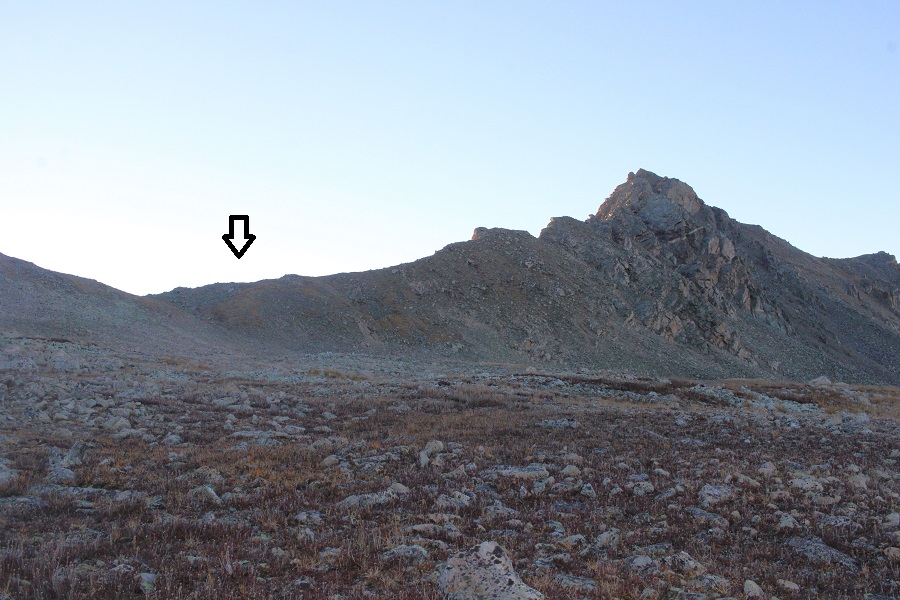
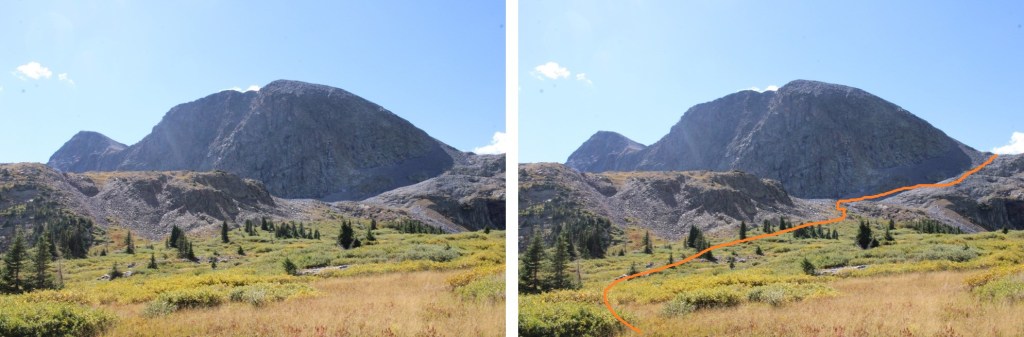
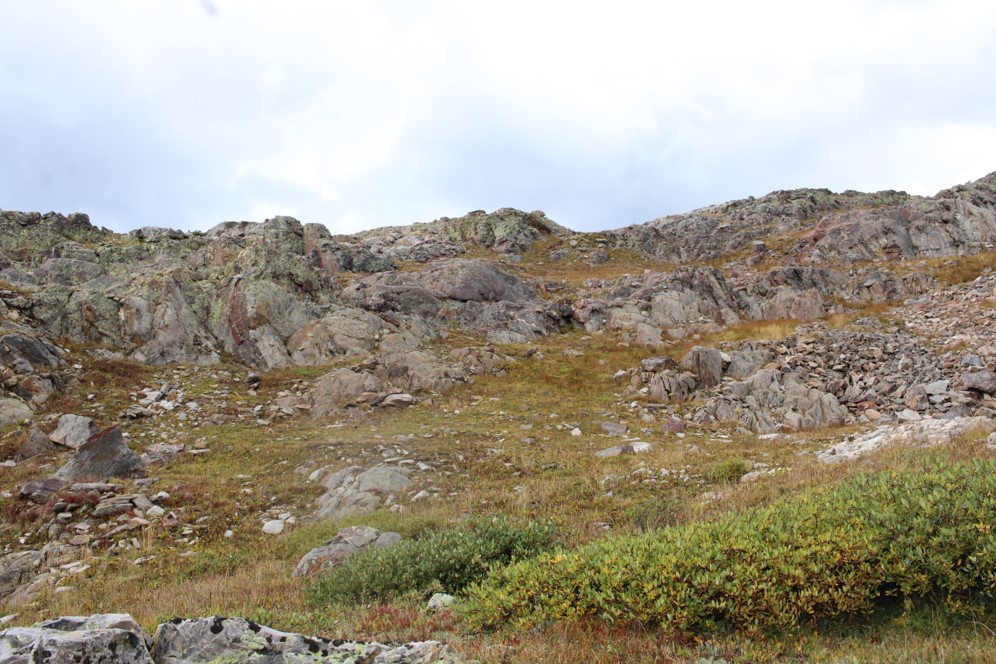
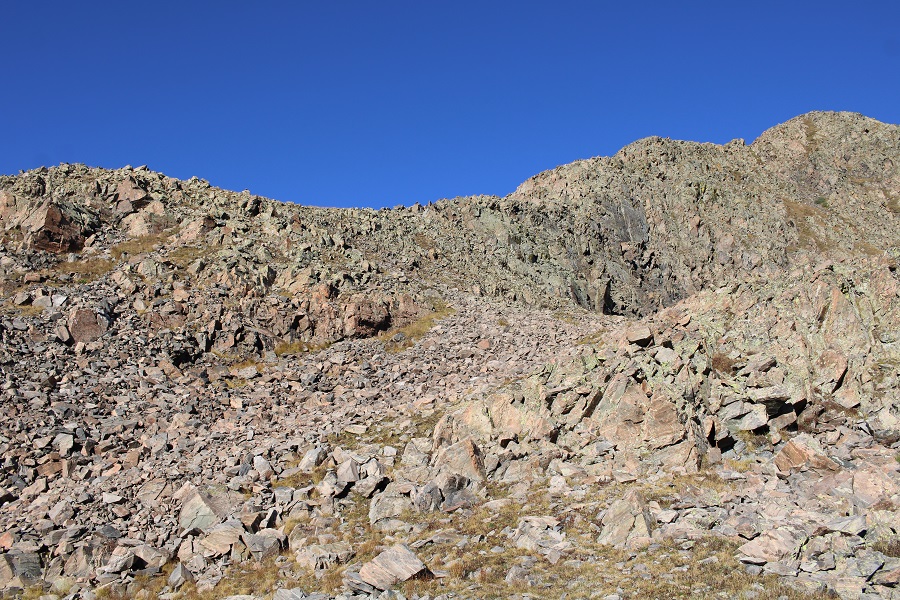
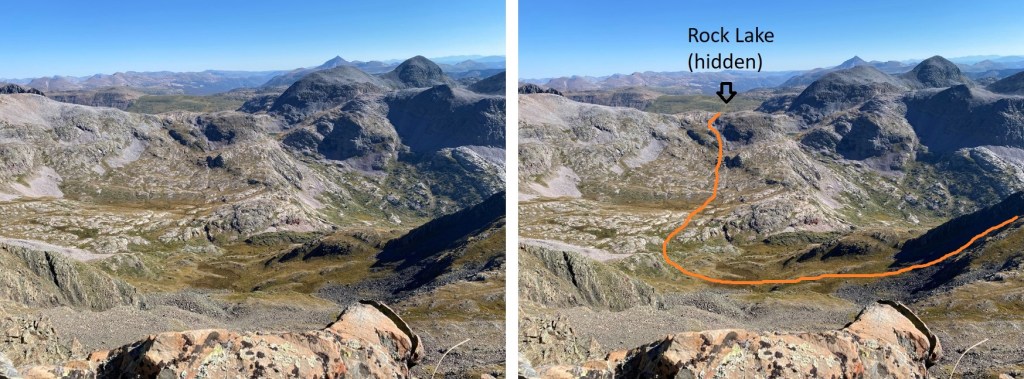
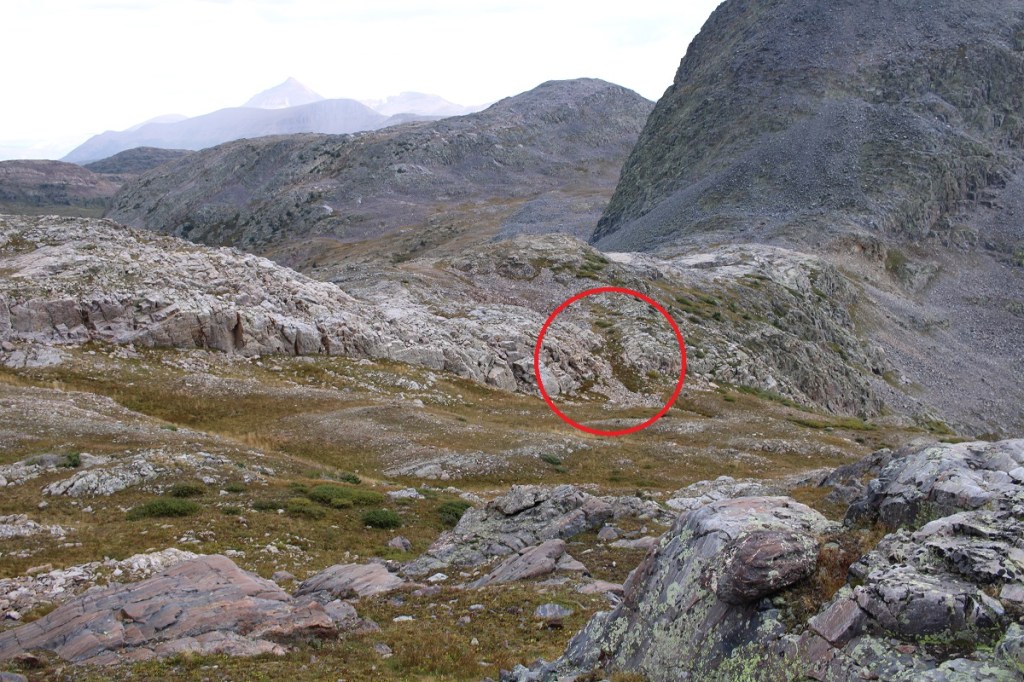
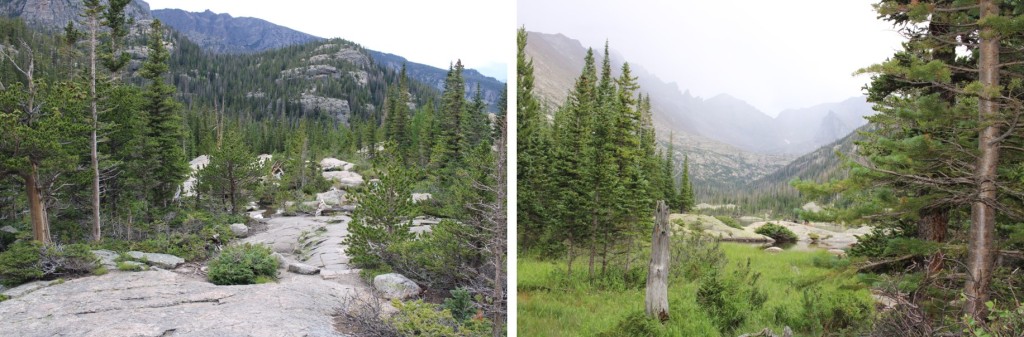
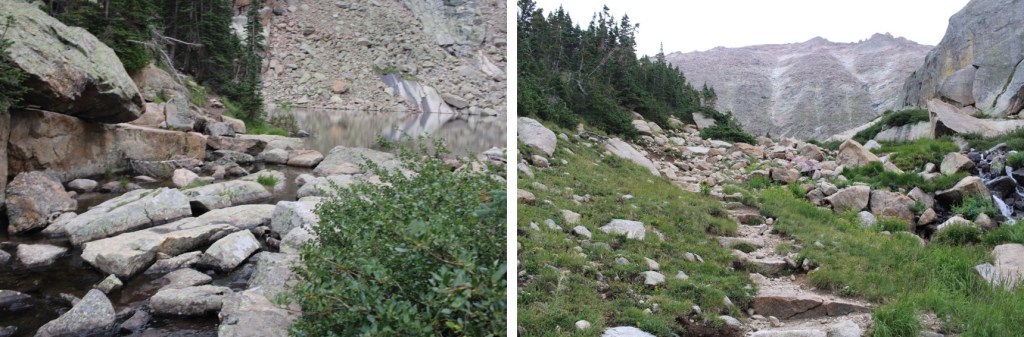
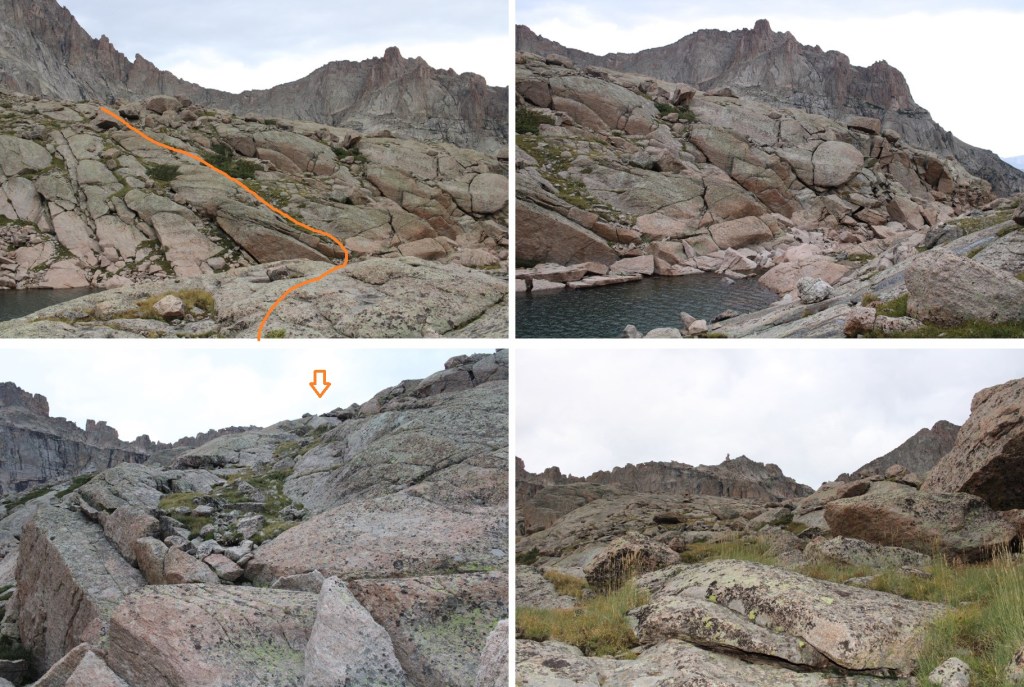
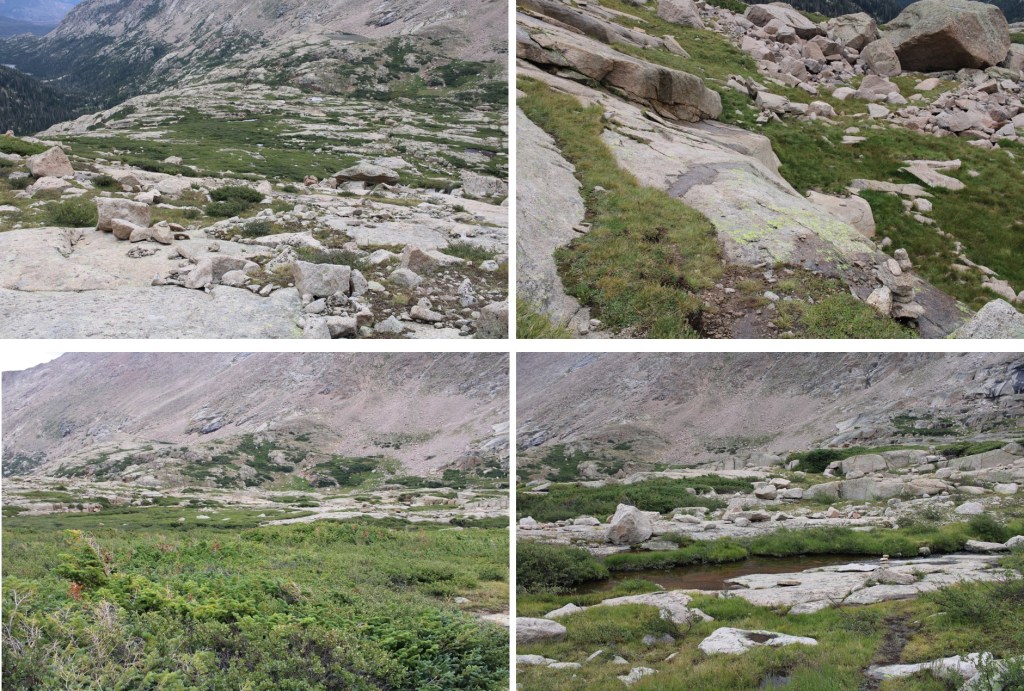
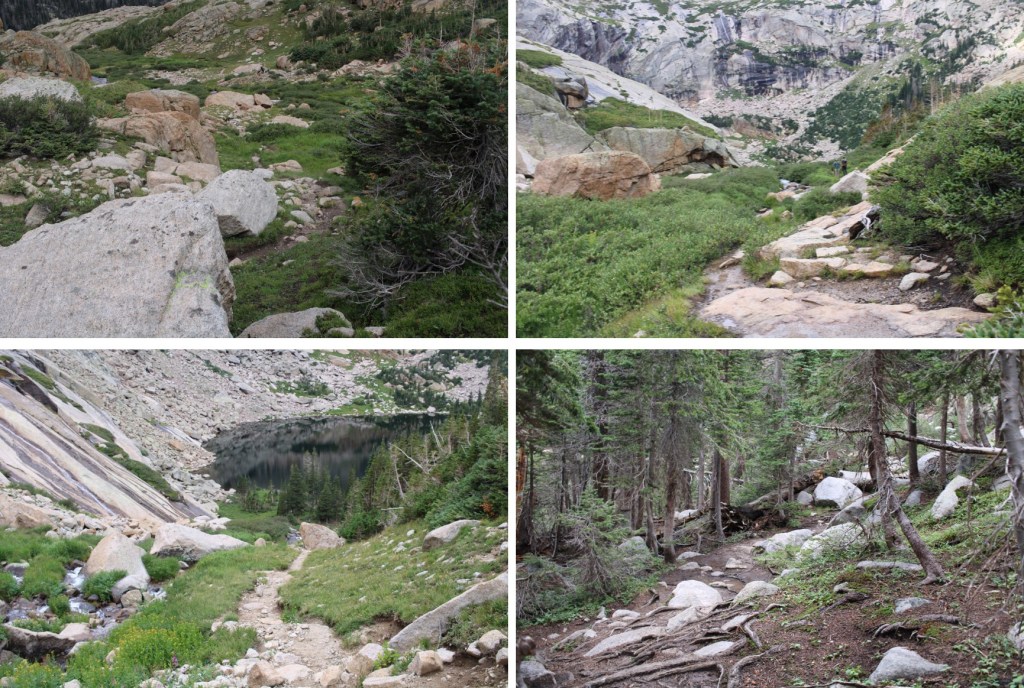
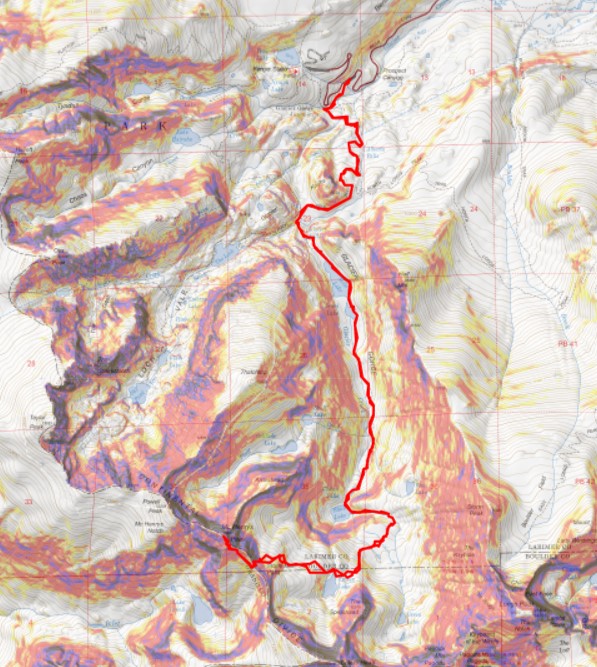
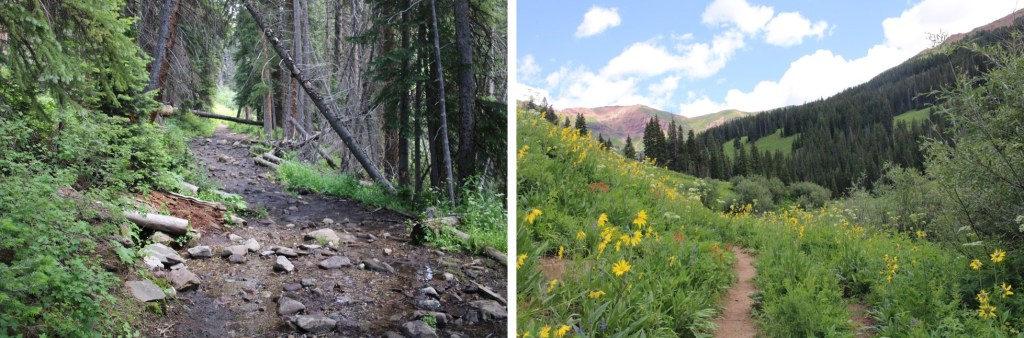
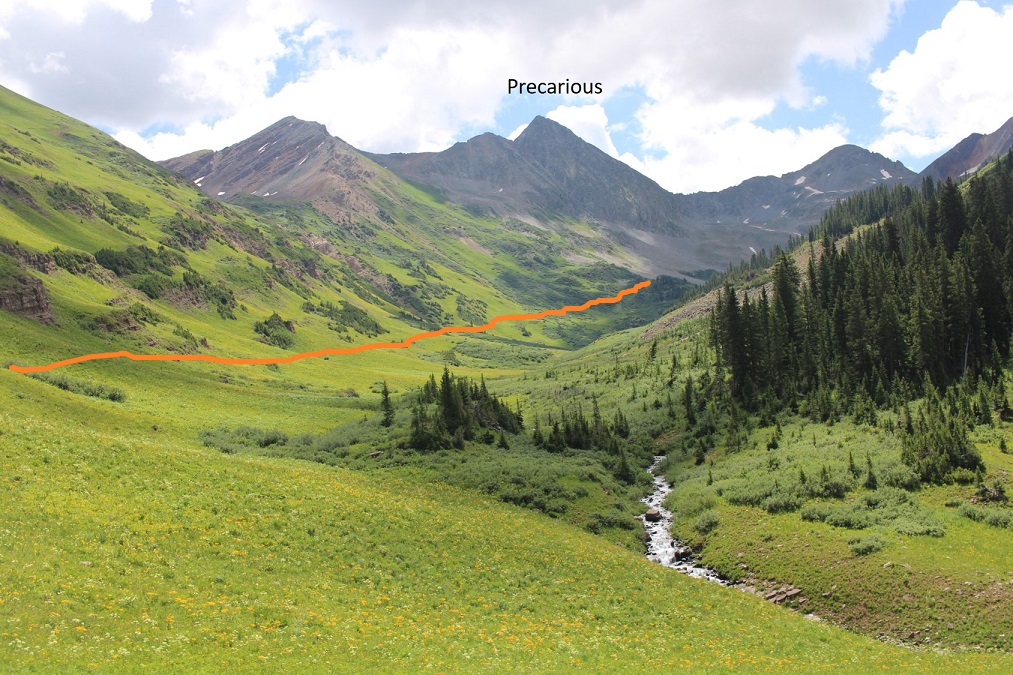
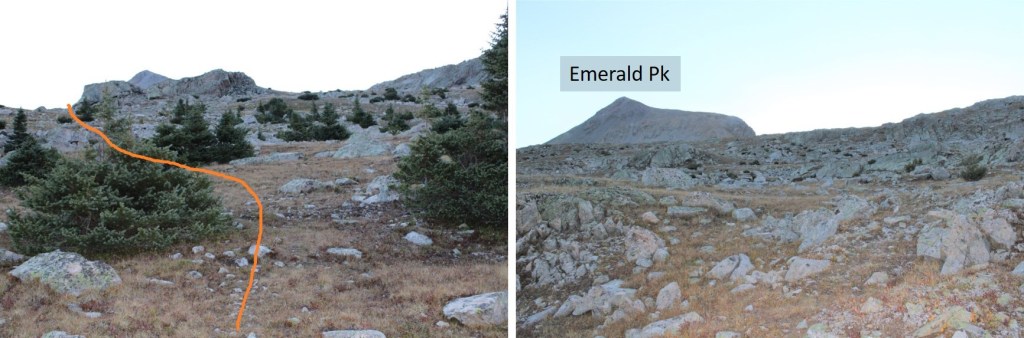
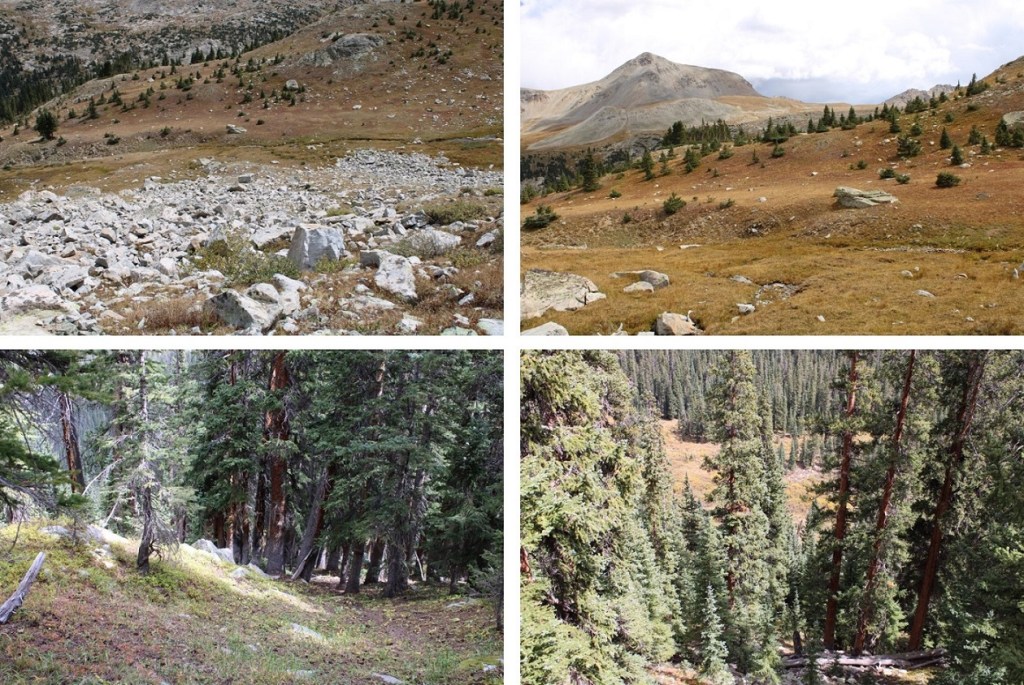
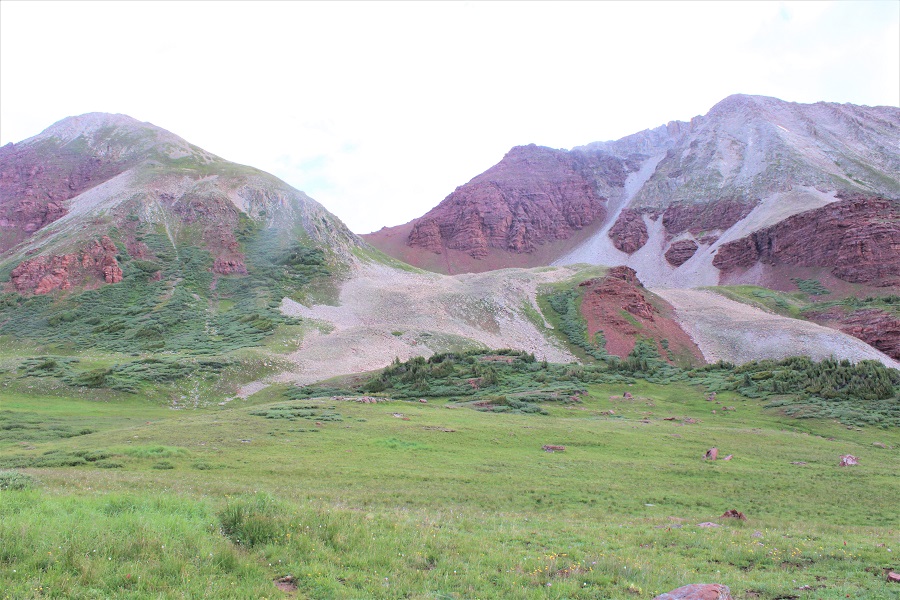
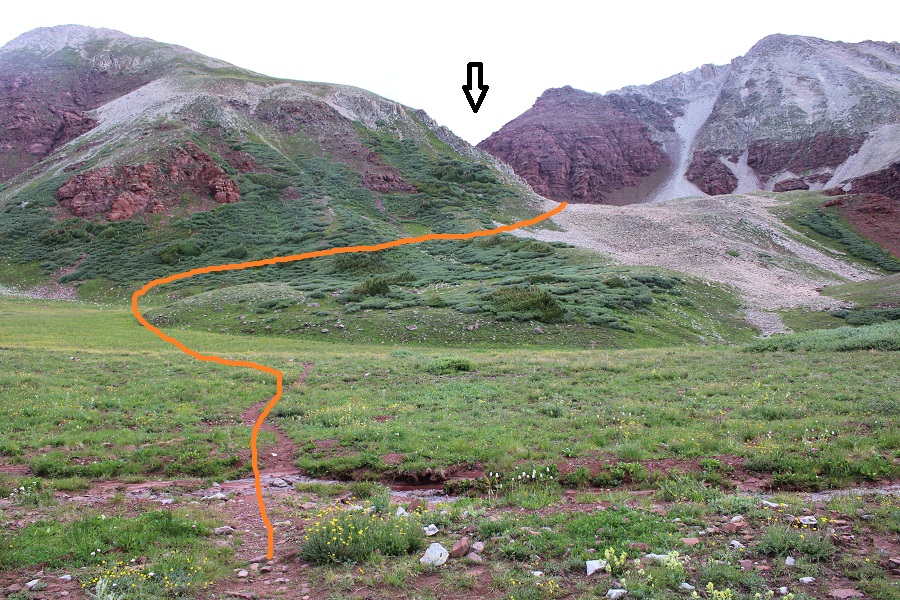
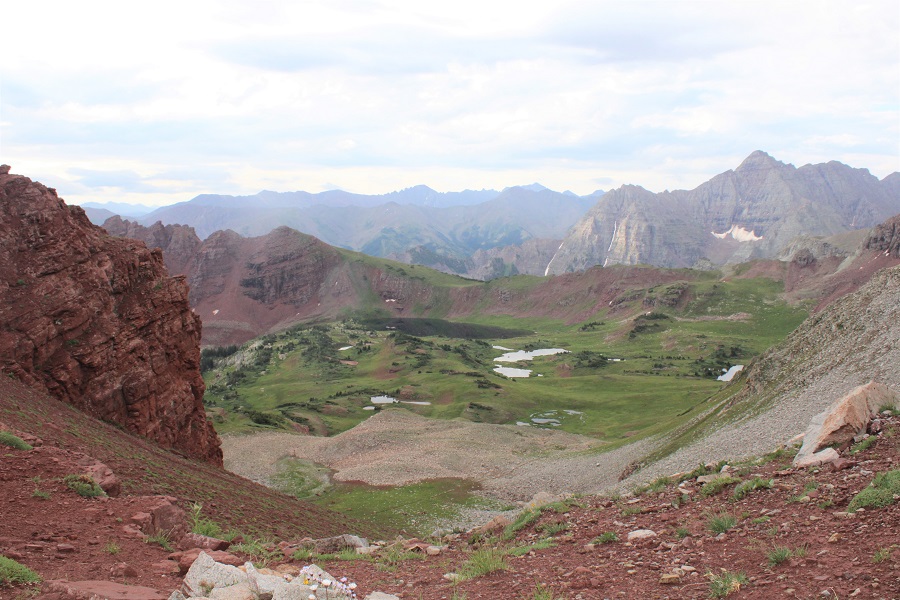
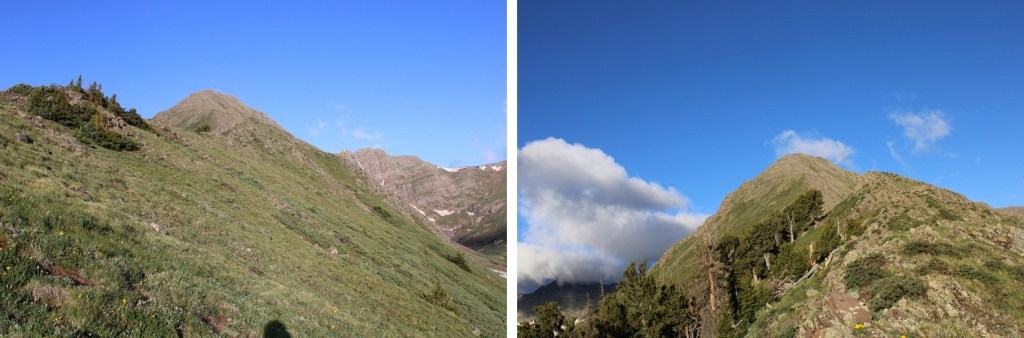
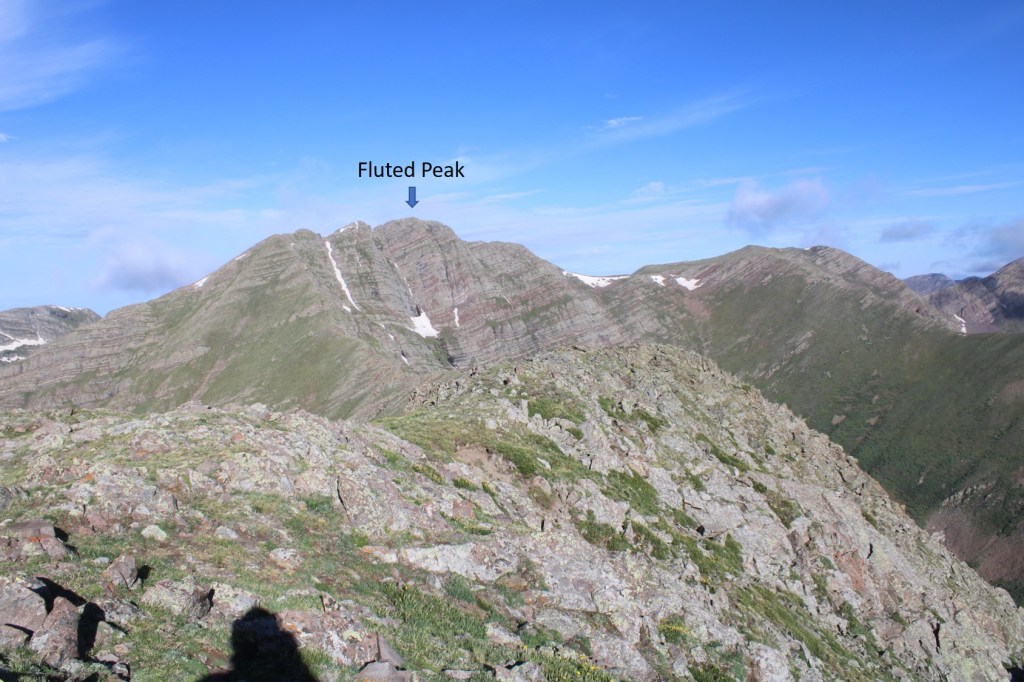
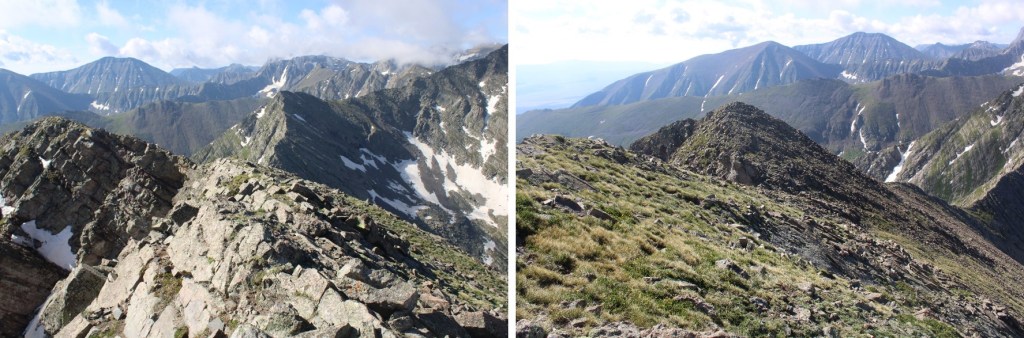
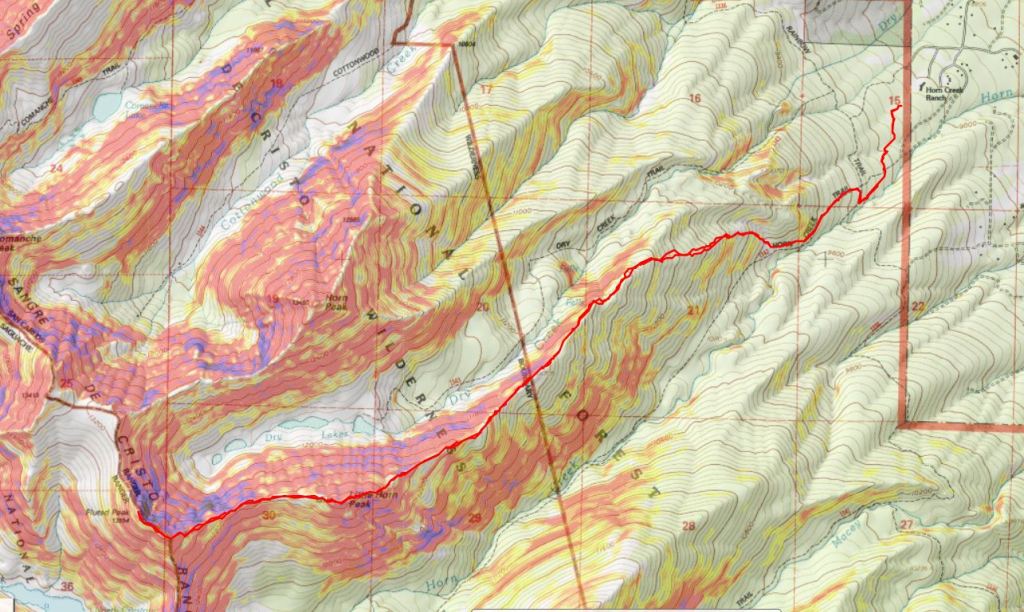
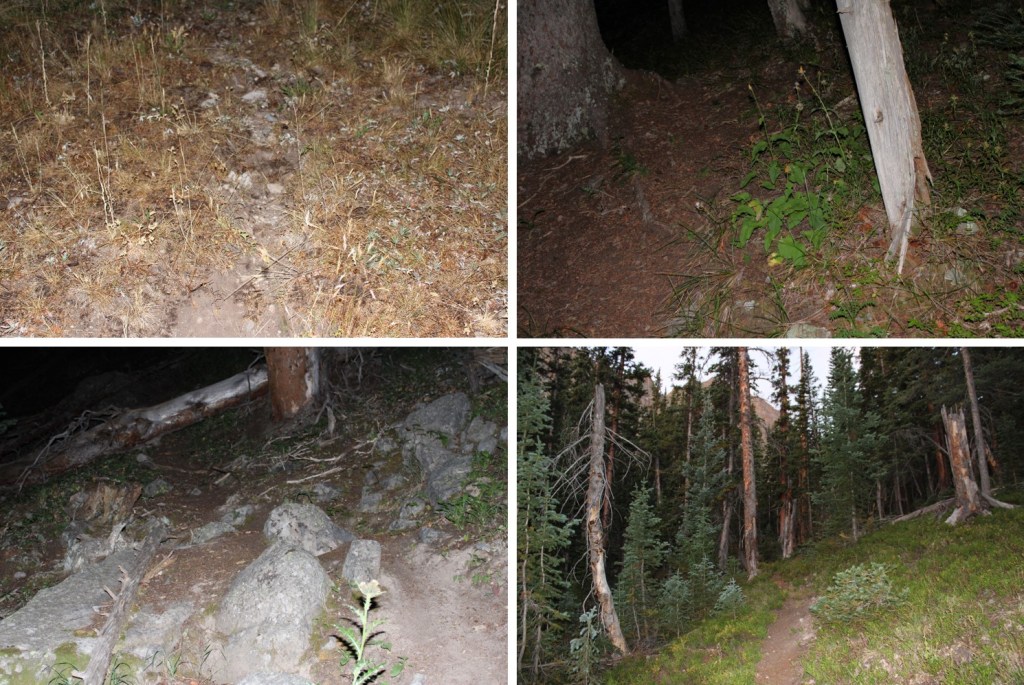
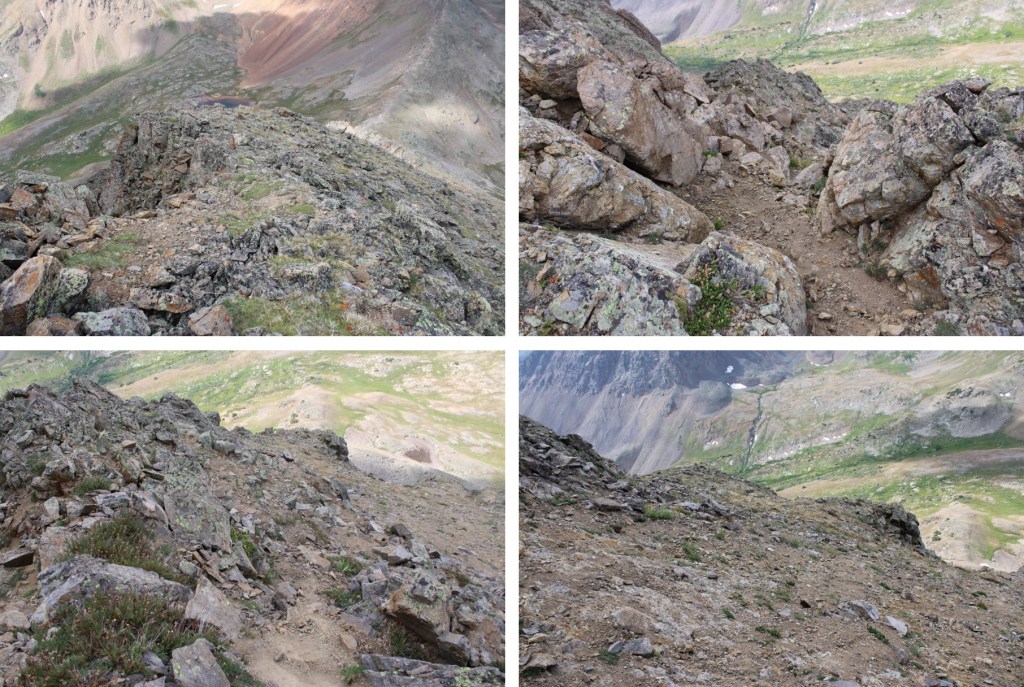
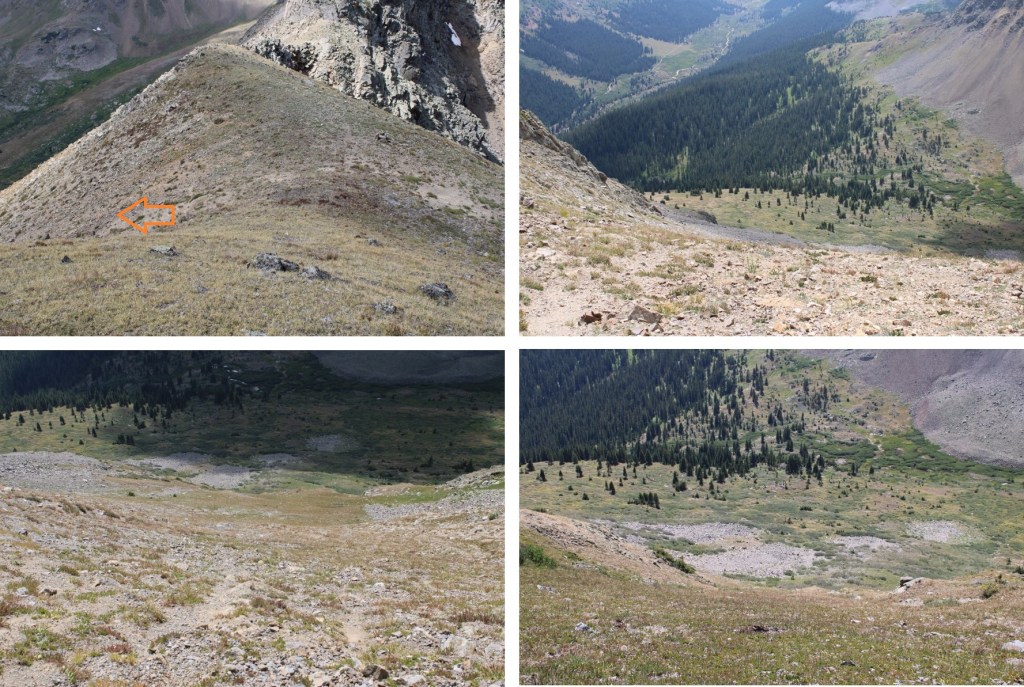
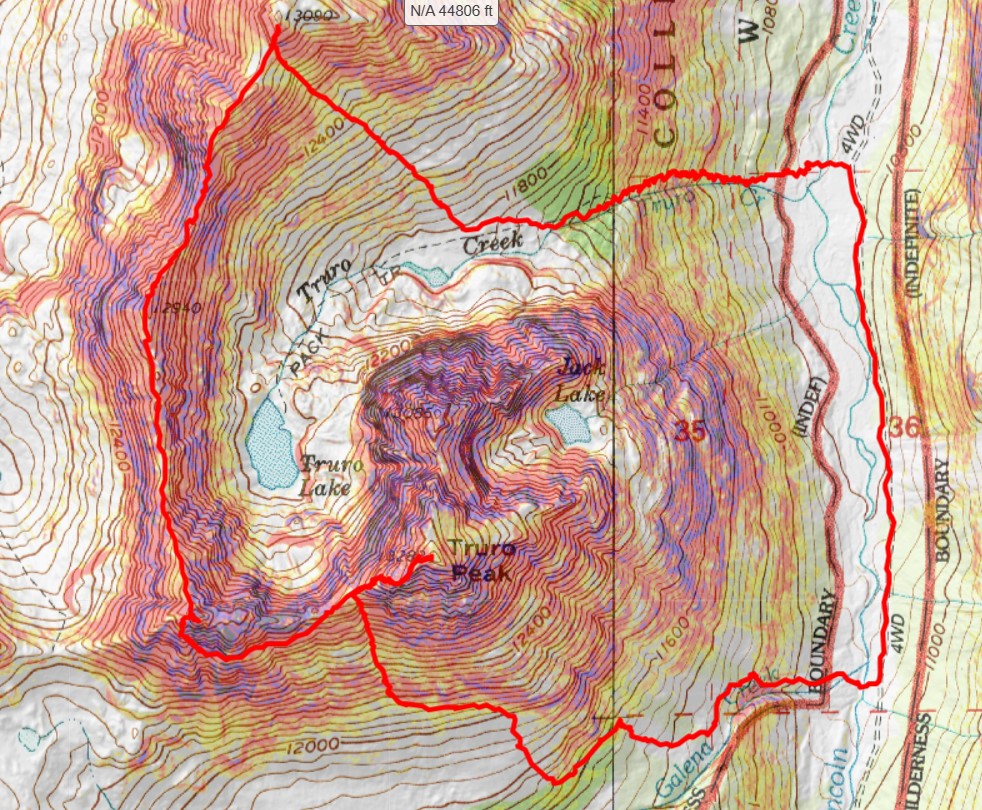
Here is an over view of where you’re going.  There are game trails to get you to the upper basin, but there are a lot of downed trees to contend with.  I just kept heading west, staying right of Truro Creek I could hear in the distance, following game trails as I went

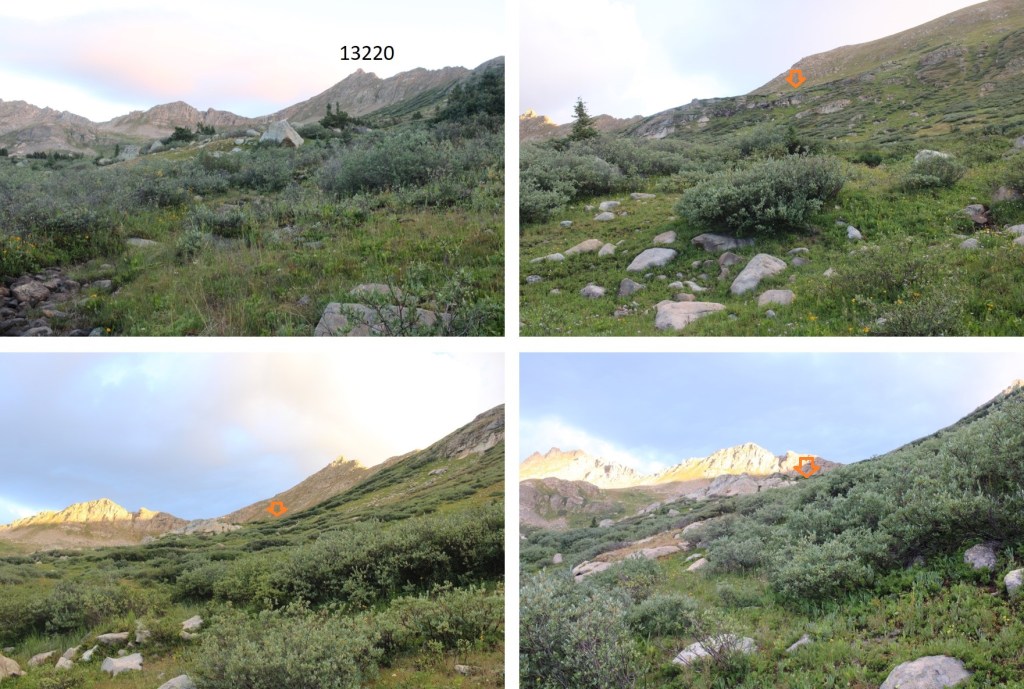
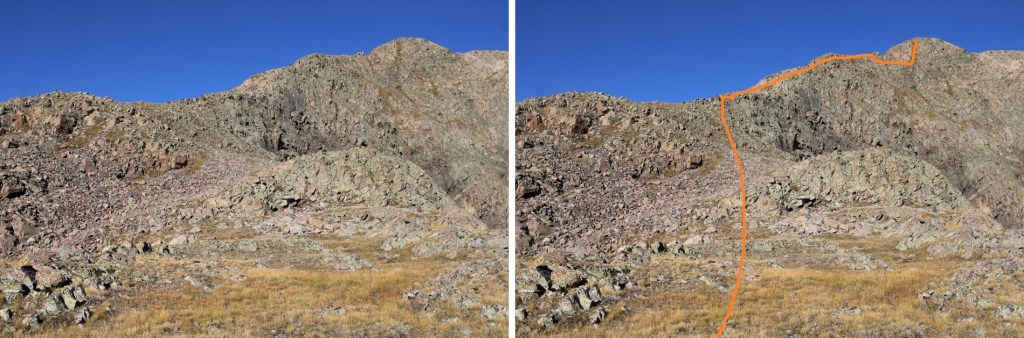
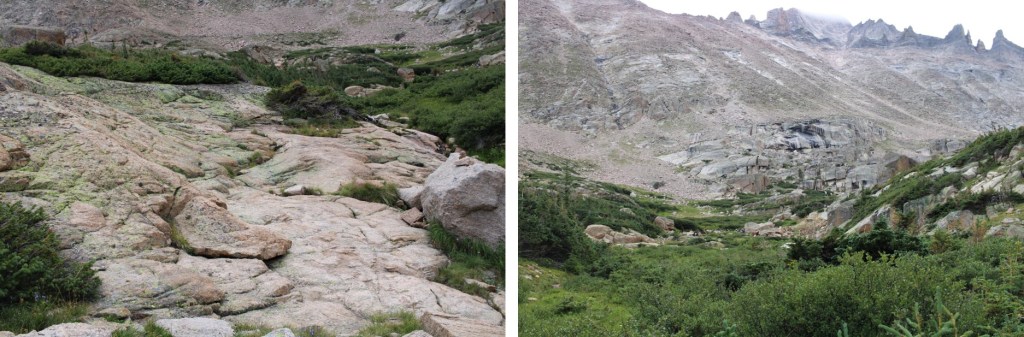
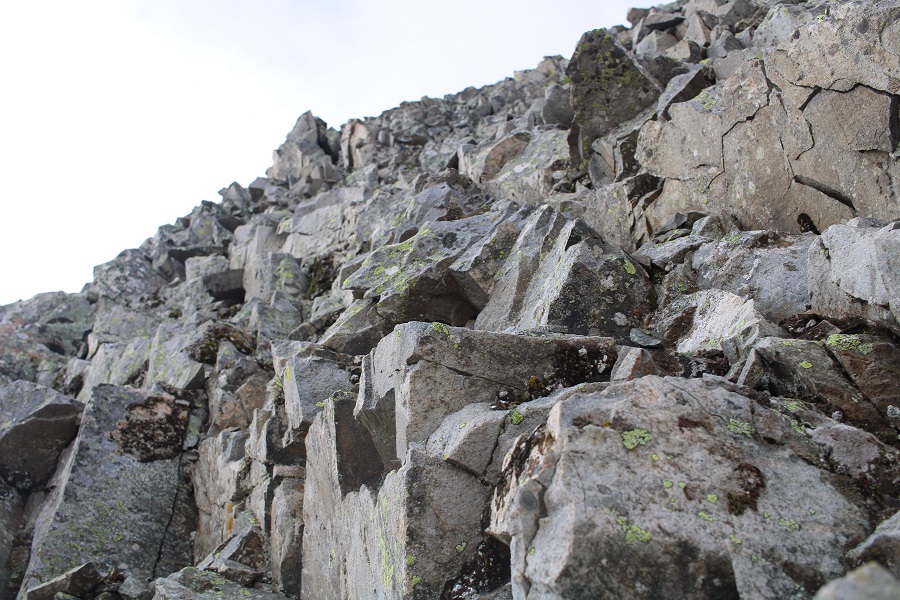
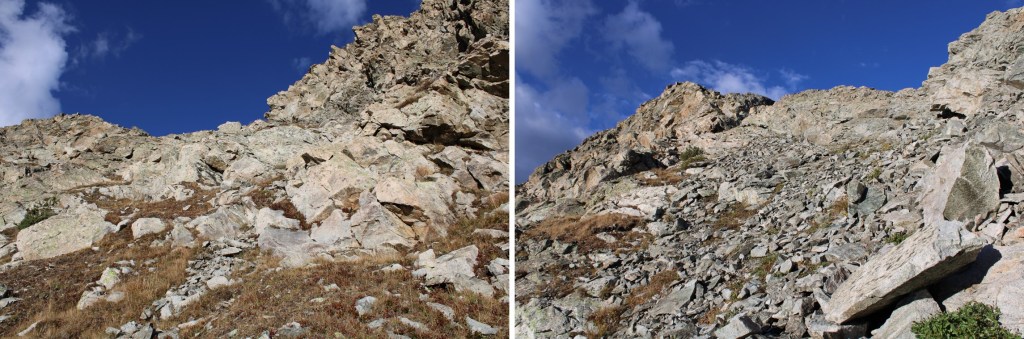
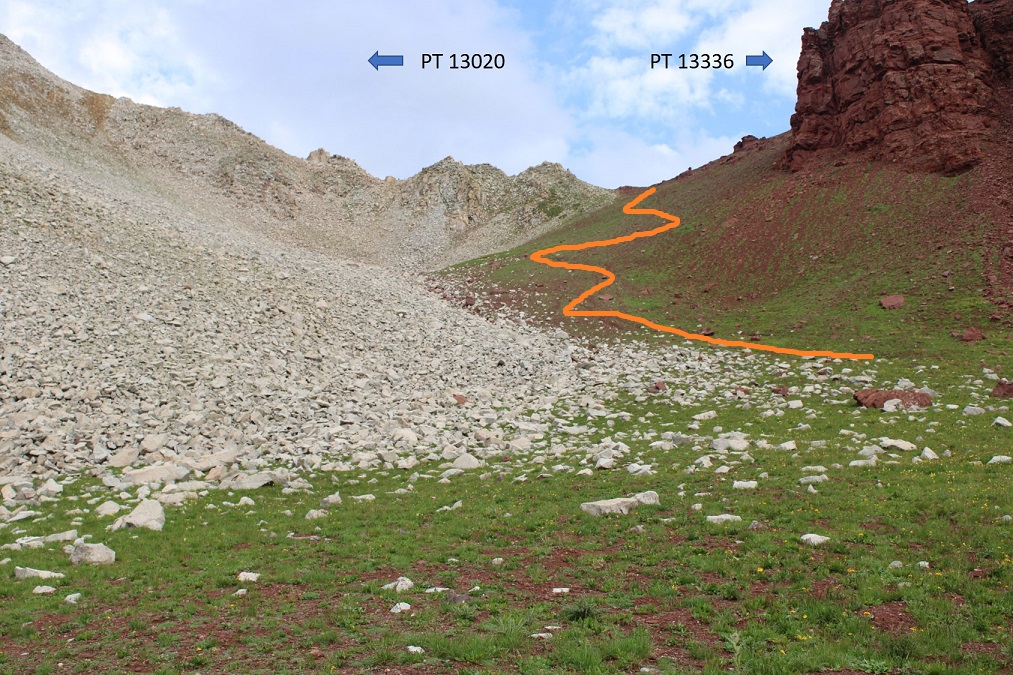
Once I made it up the ridge, I continued west to treeline.

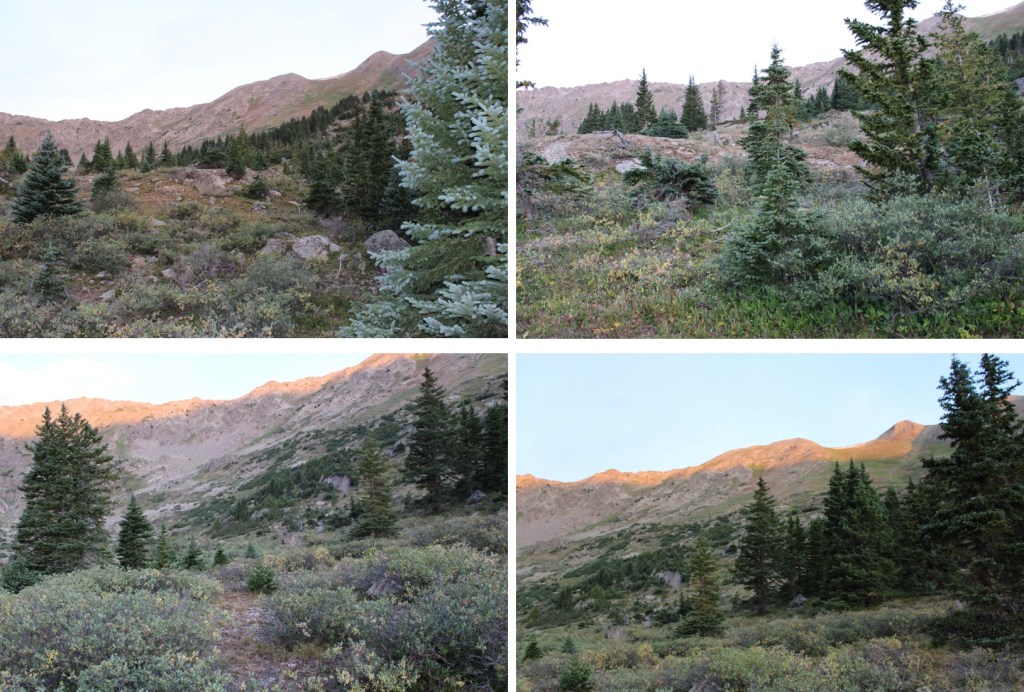
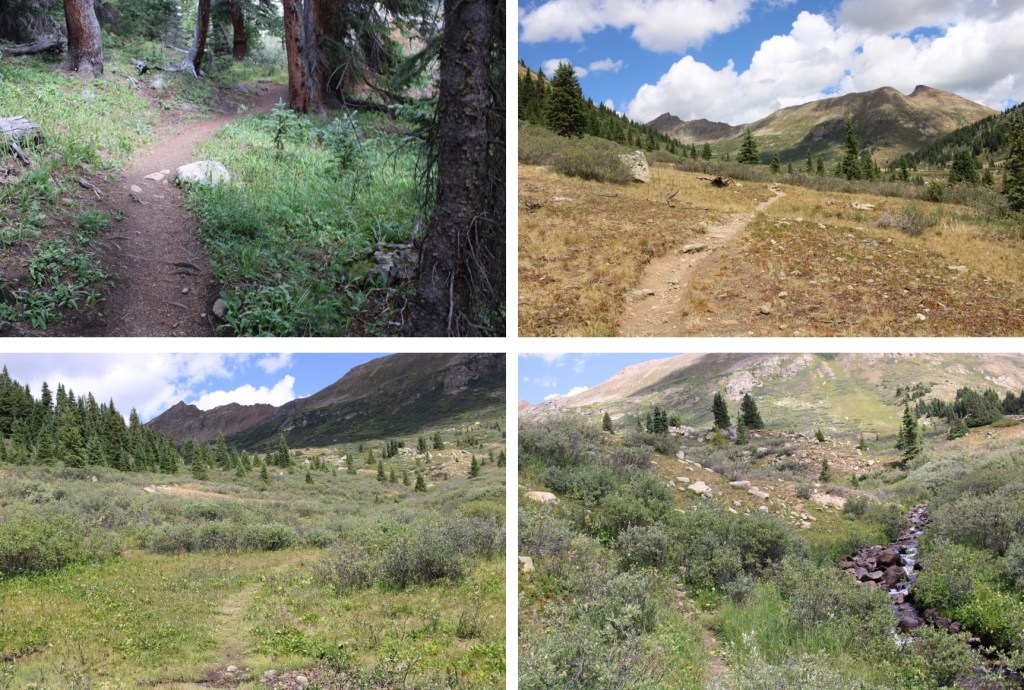
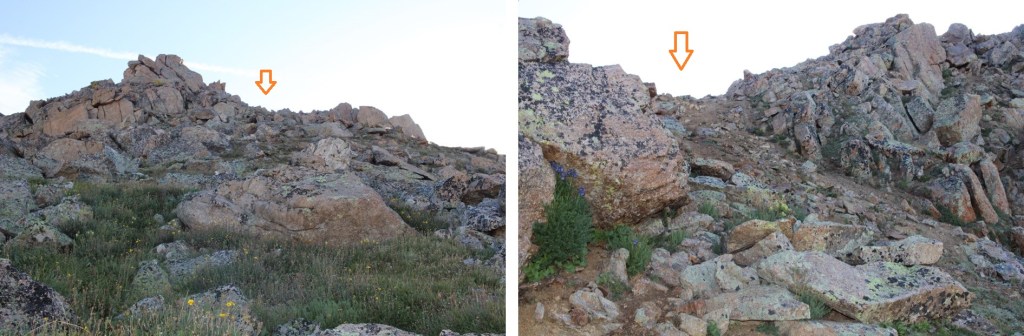
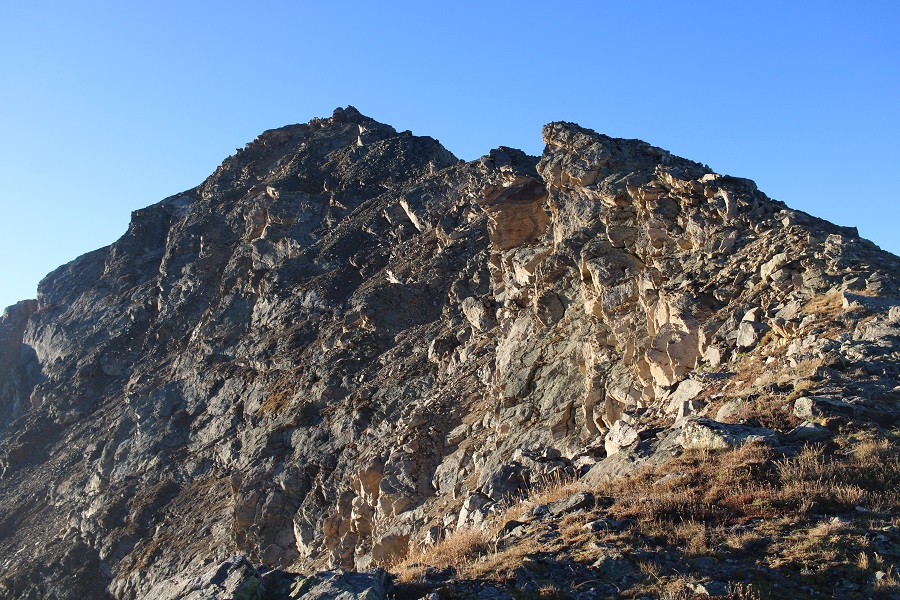
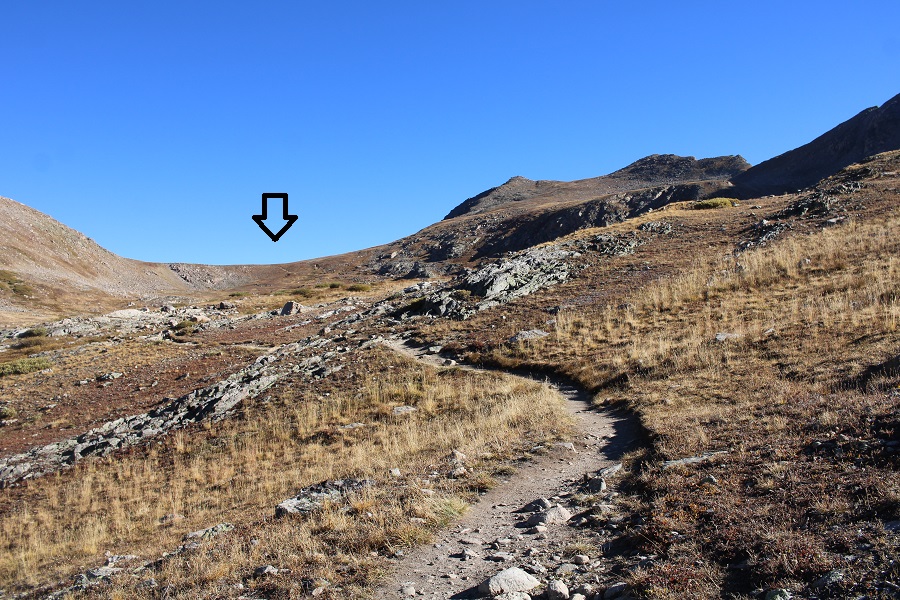
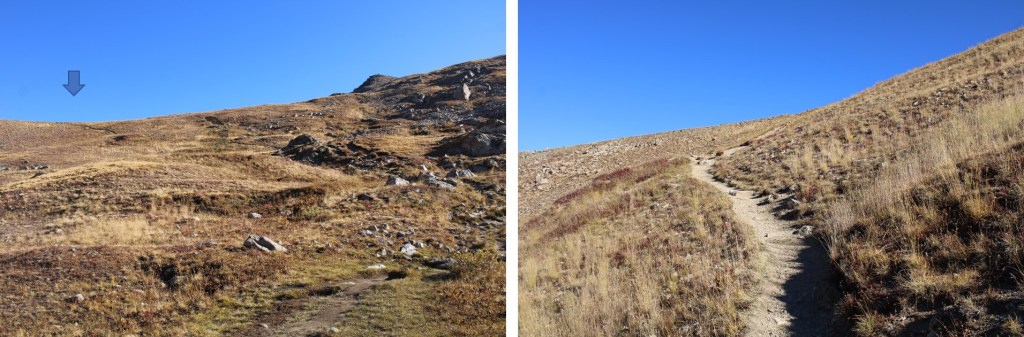
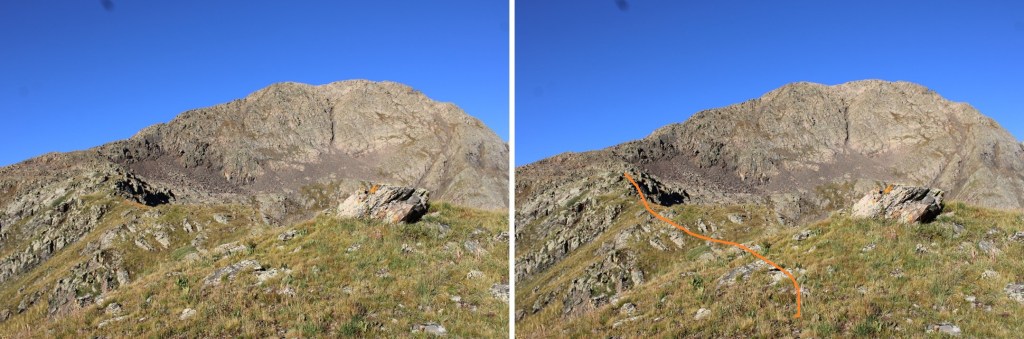
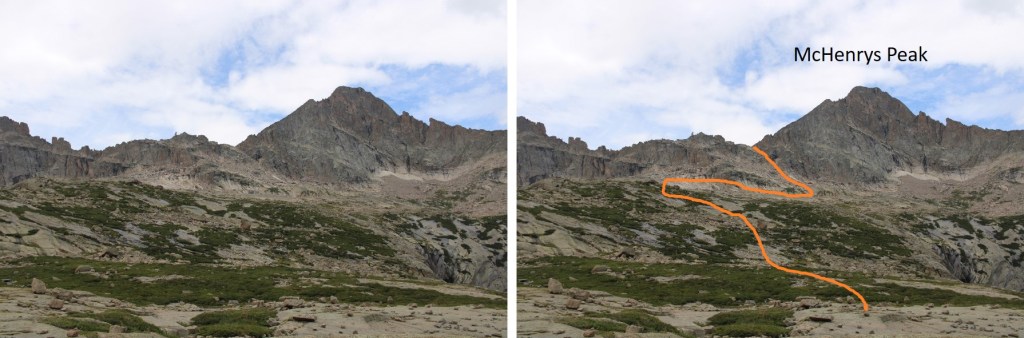
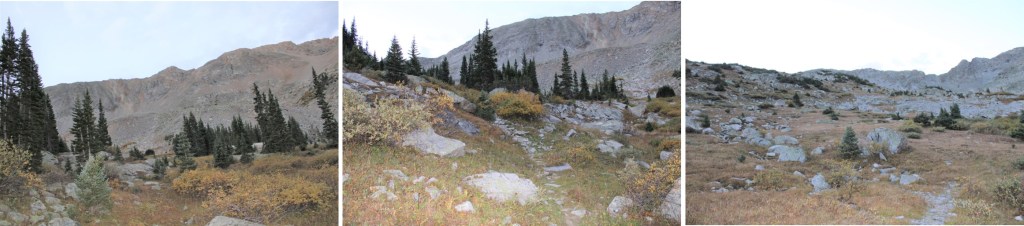
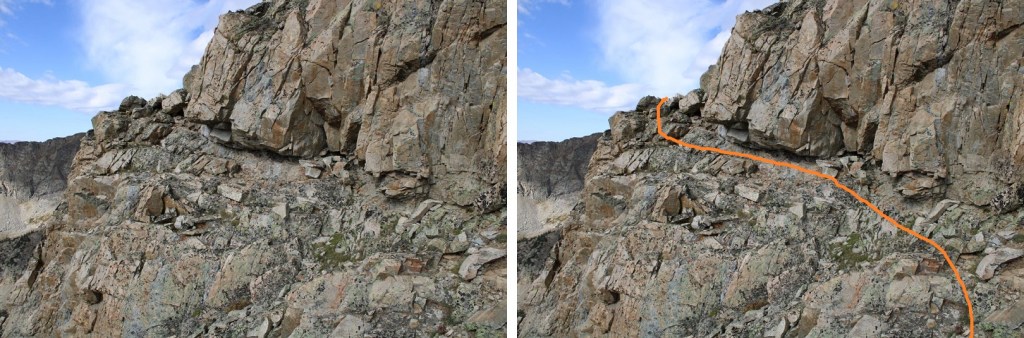
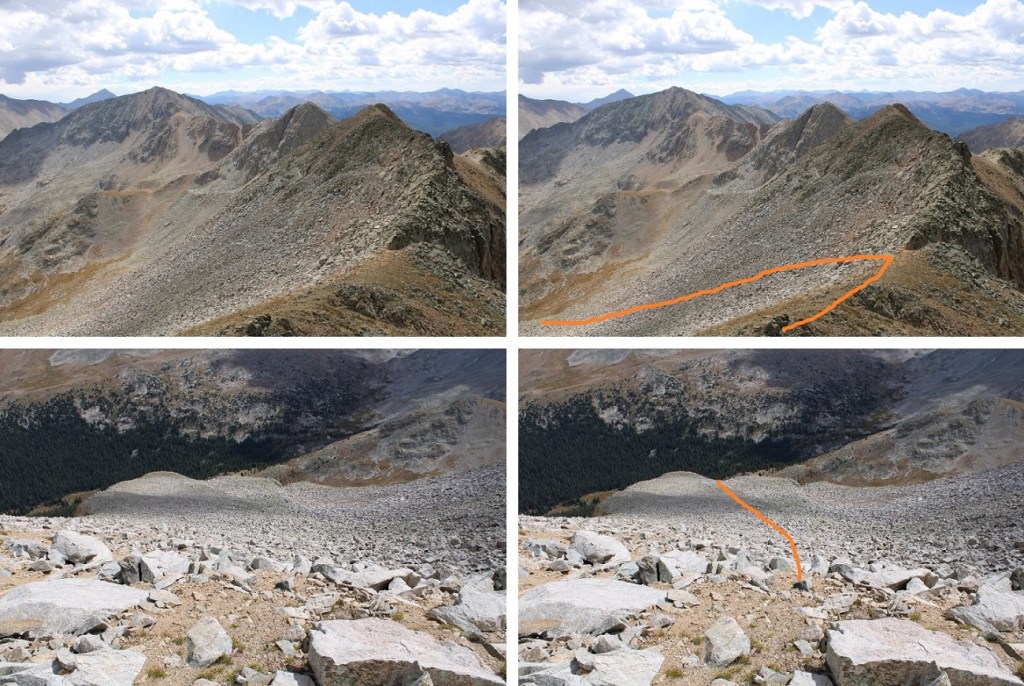
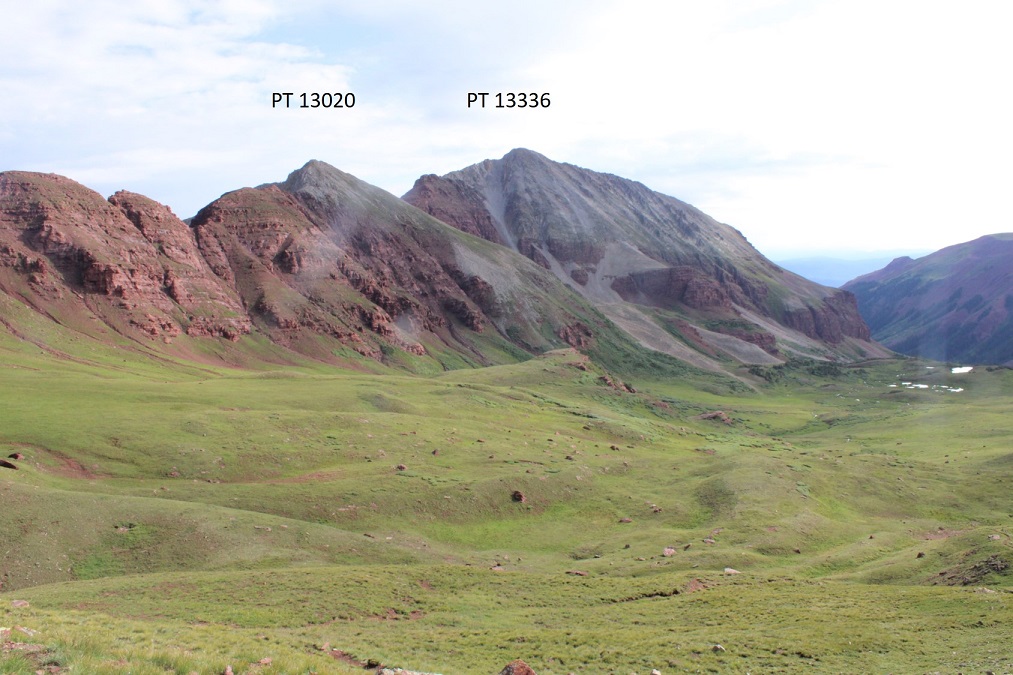
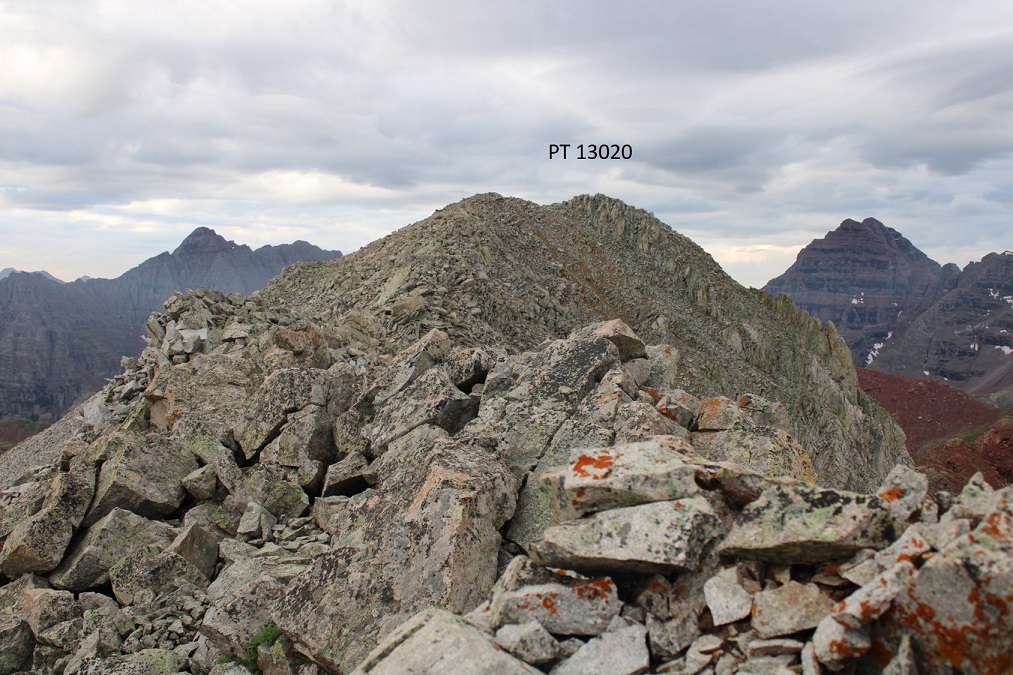
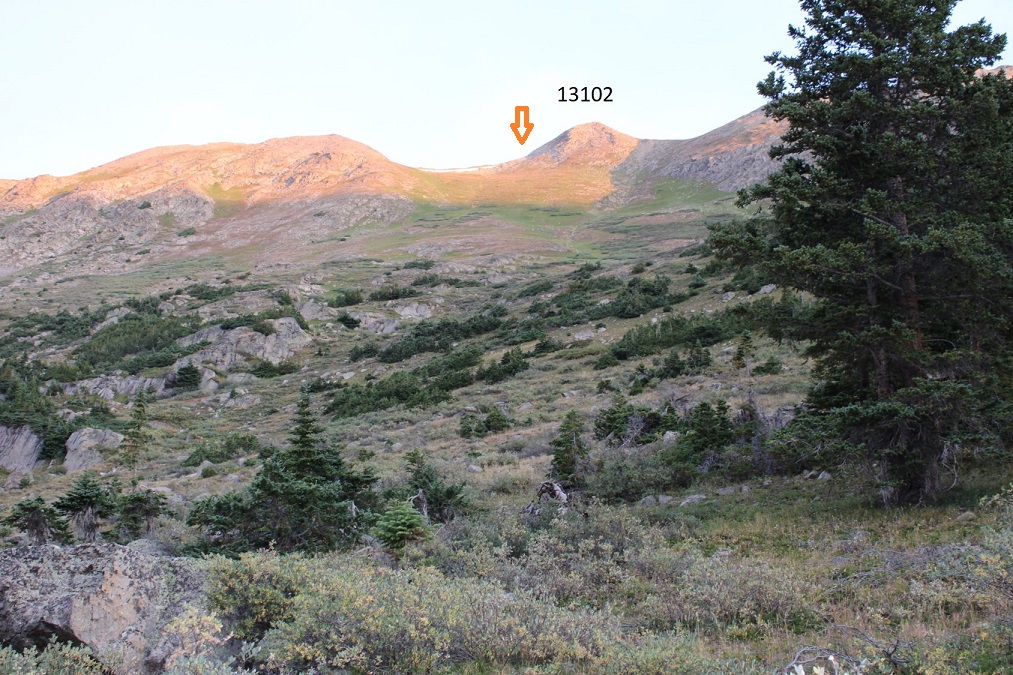
Once I got past the trees, PT 13102 was to the northeast.  It was choose your own adventure to make it to the ridge. 

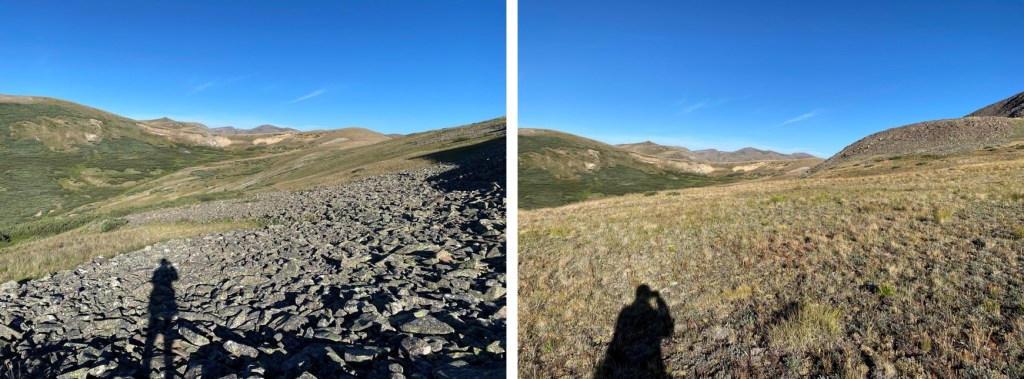
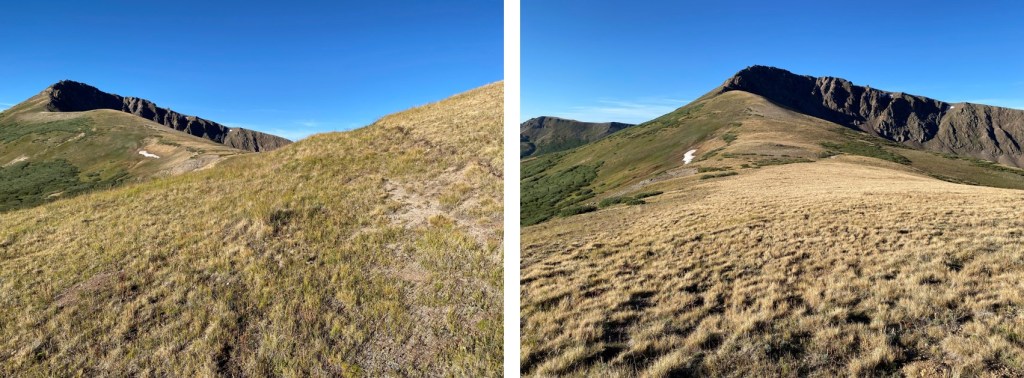
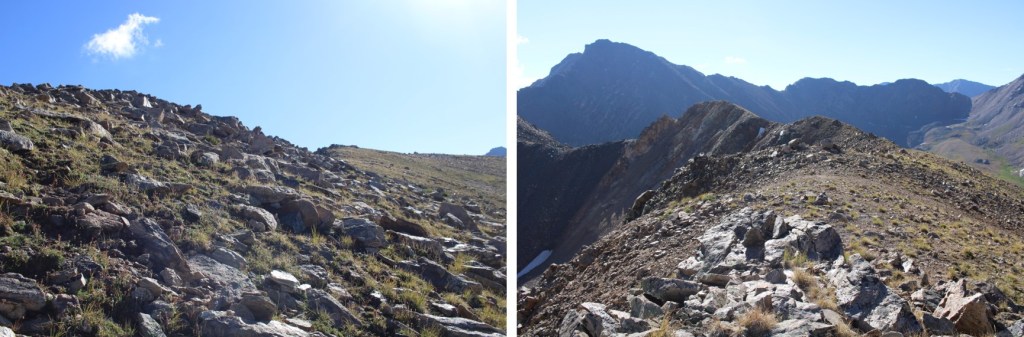
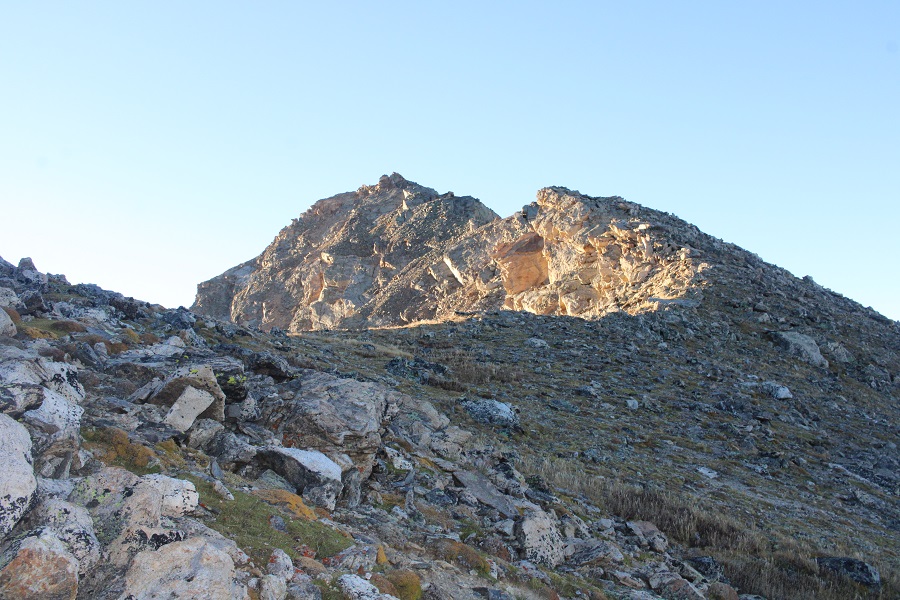
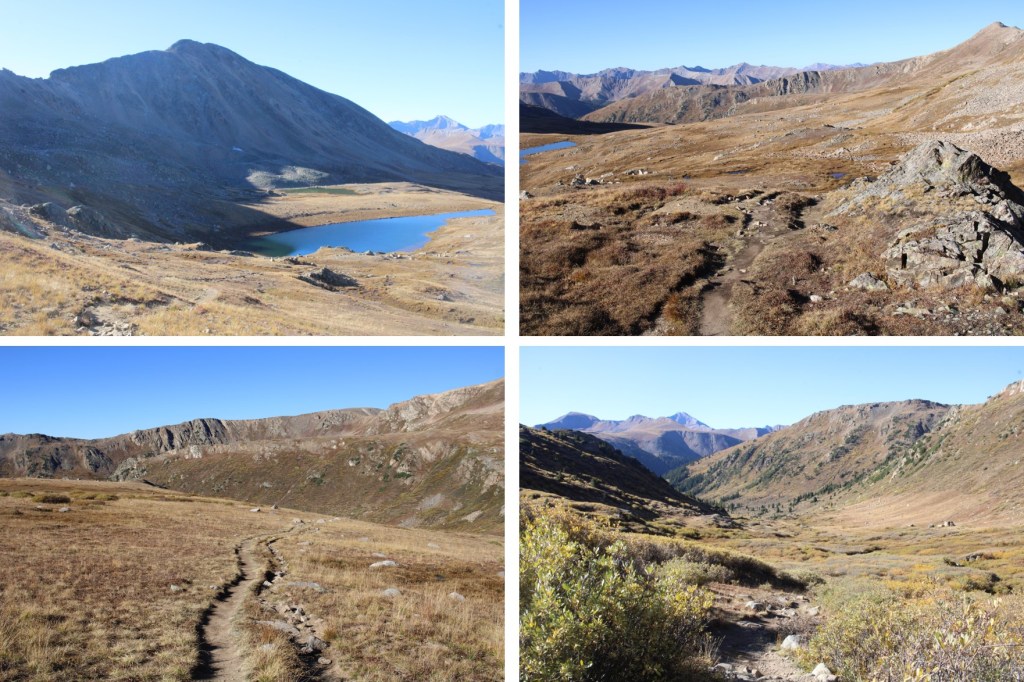
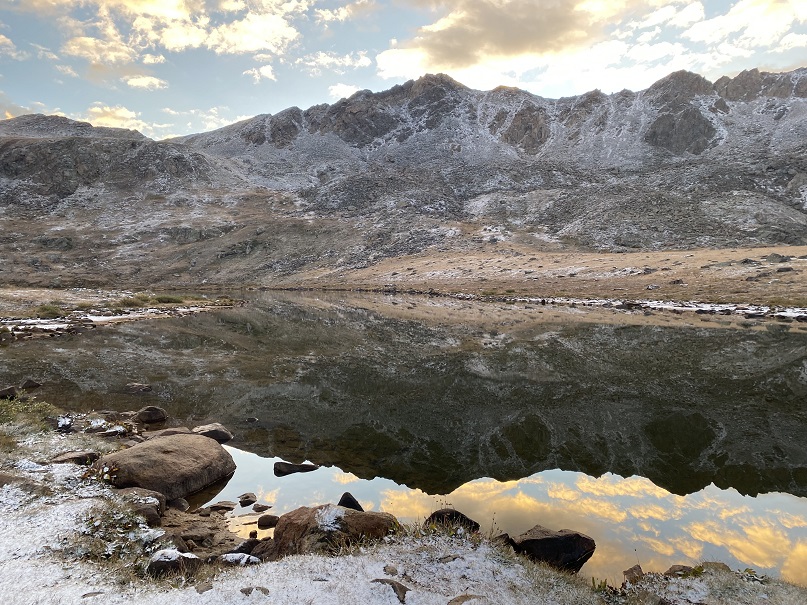
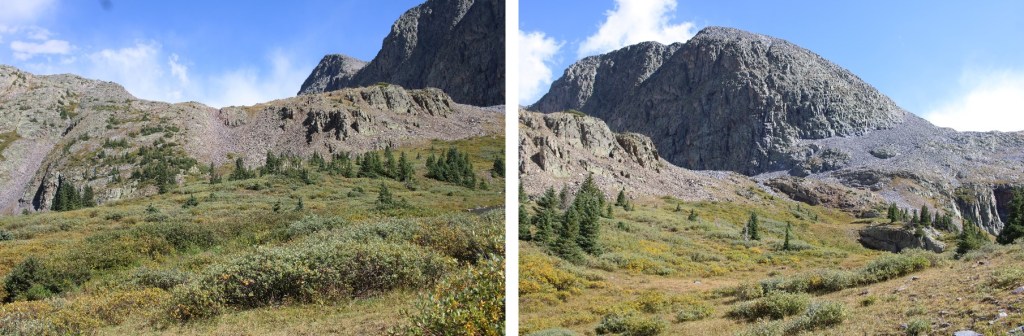
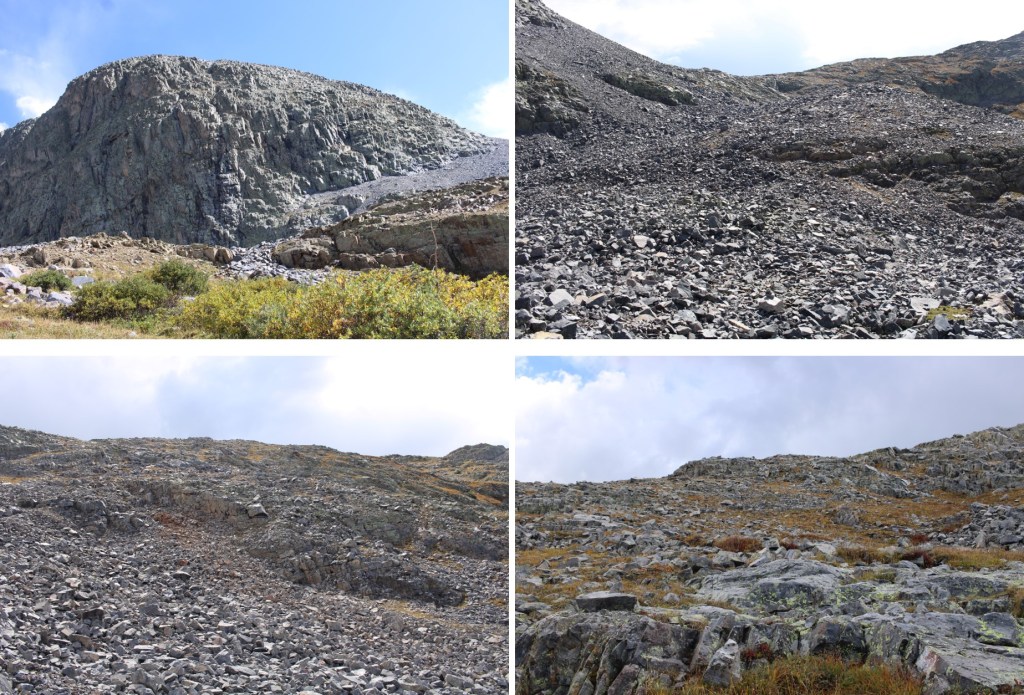
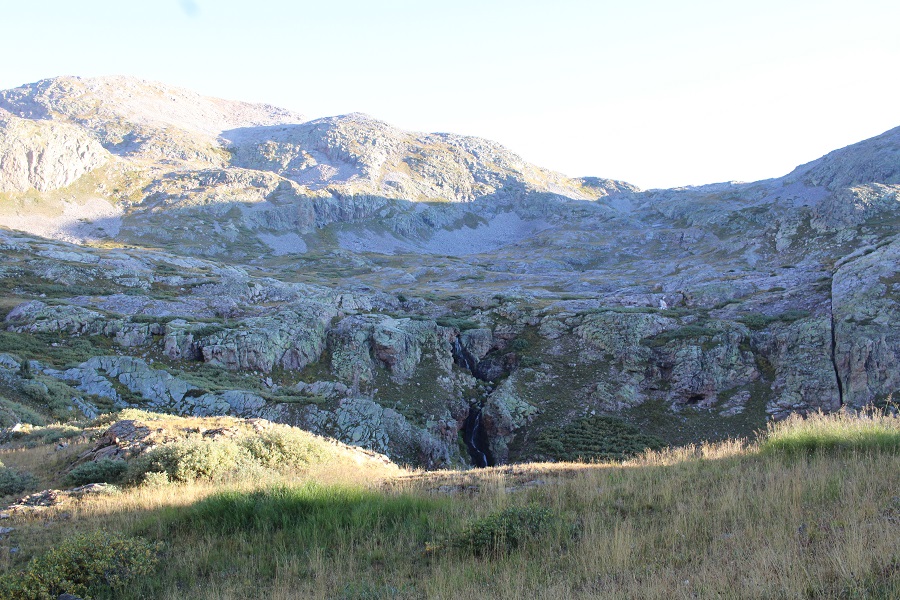
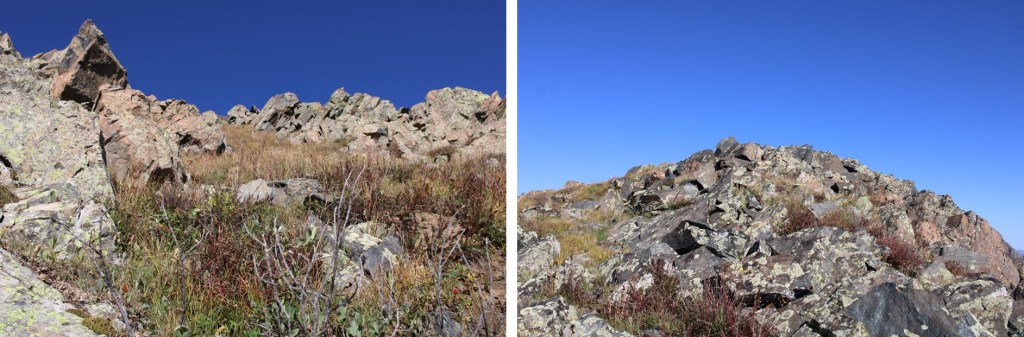
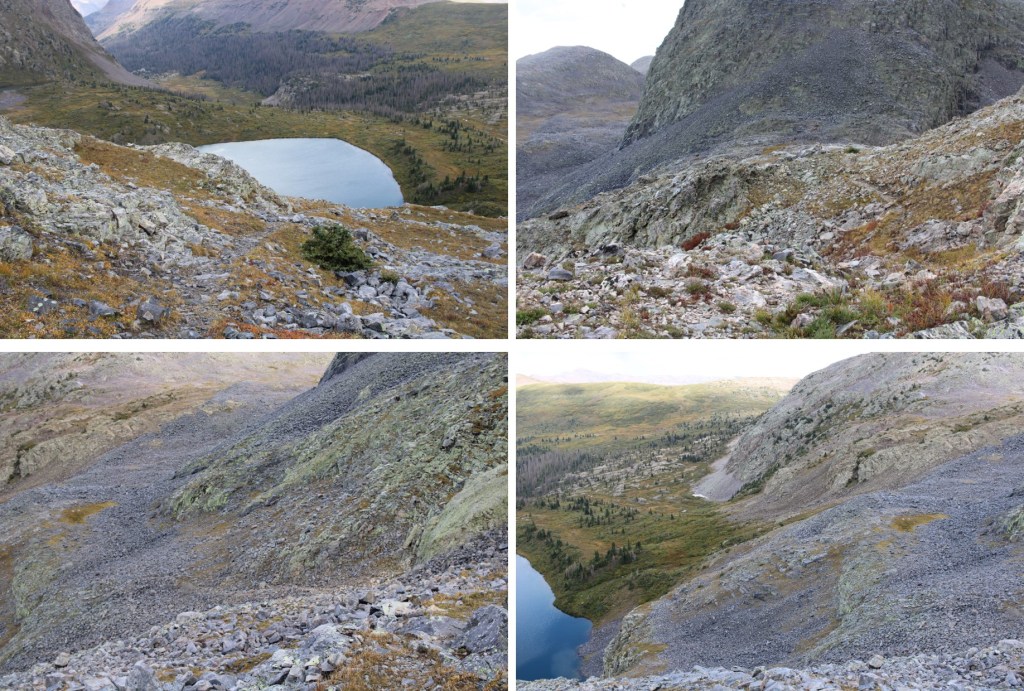
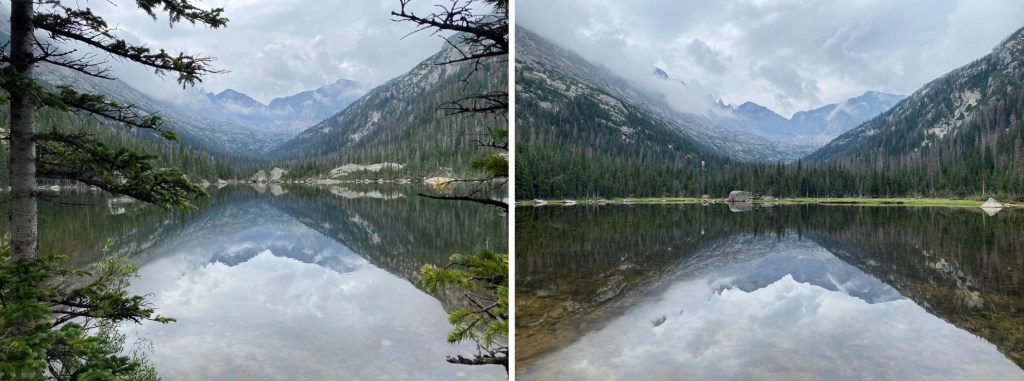
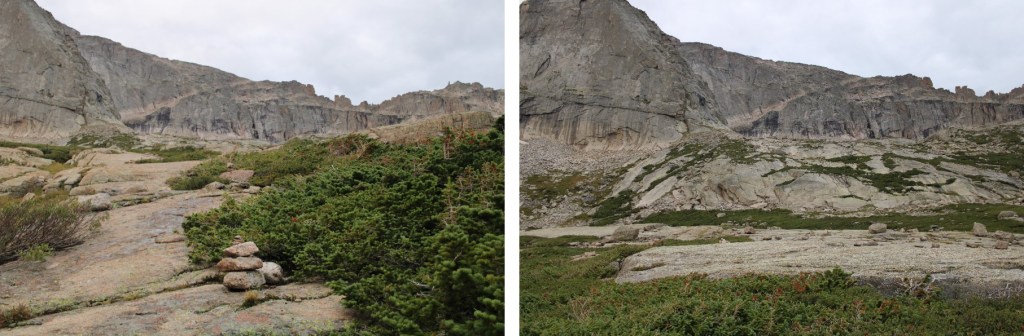
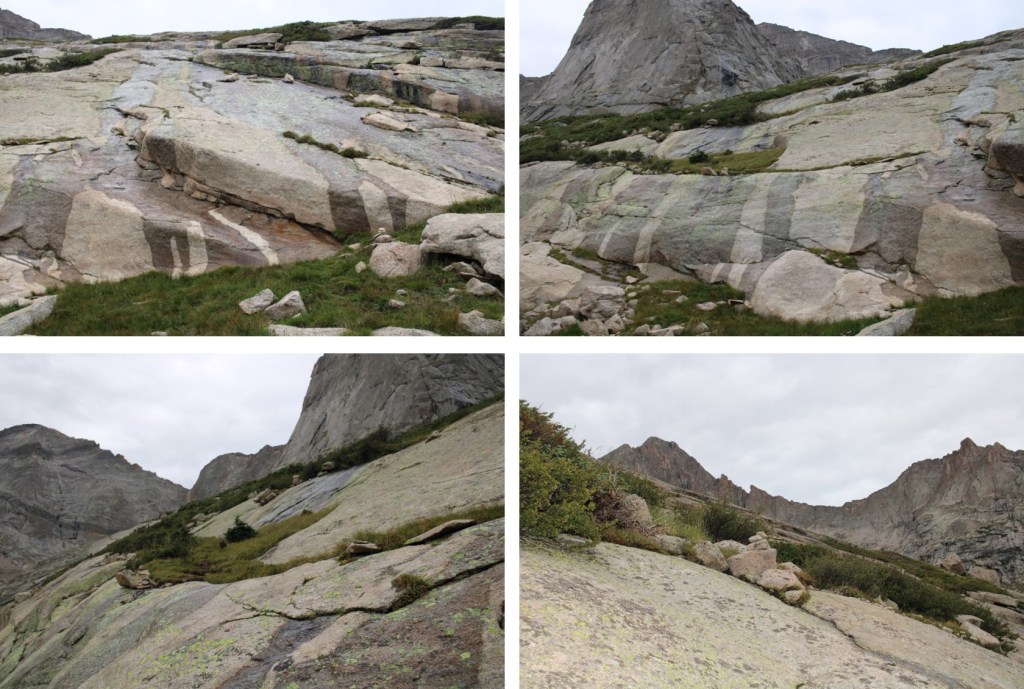
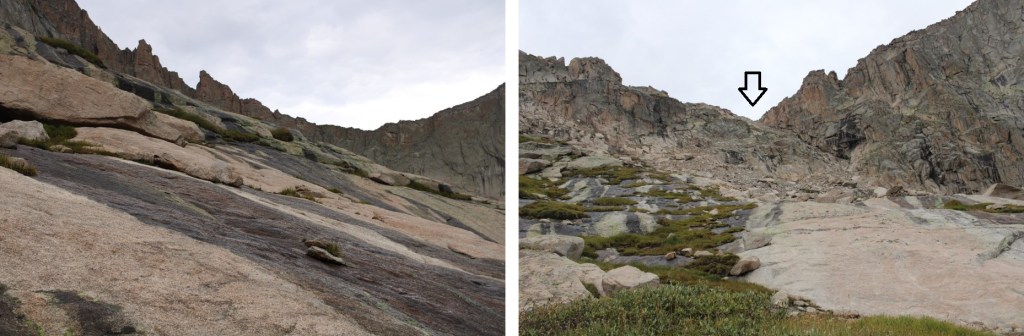
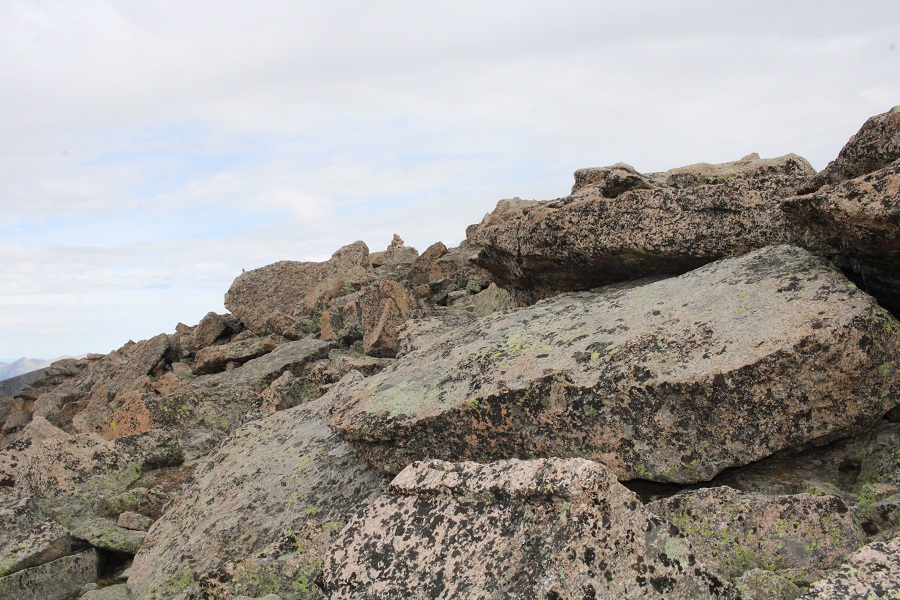
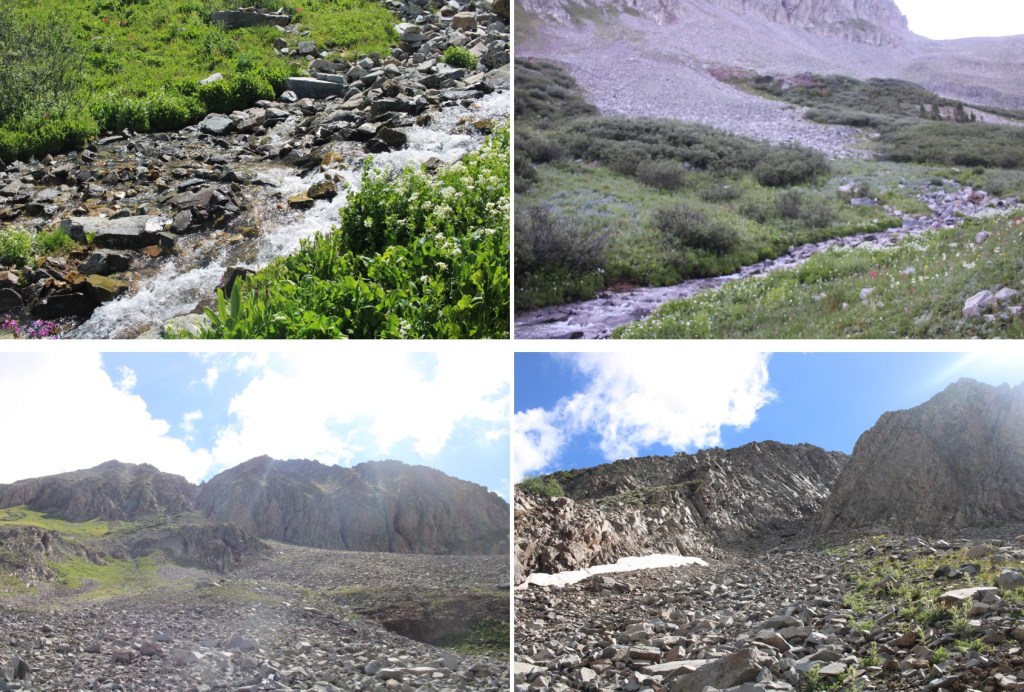
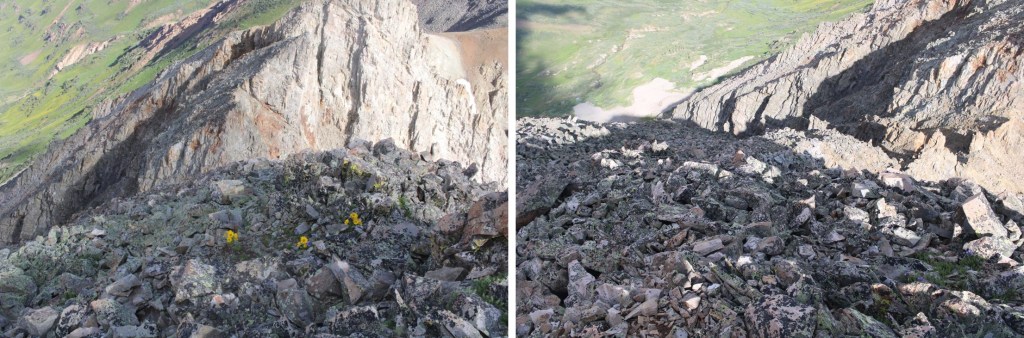
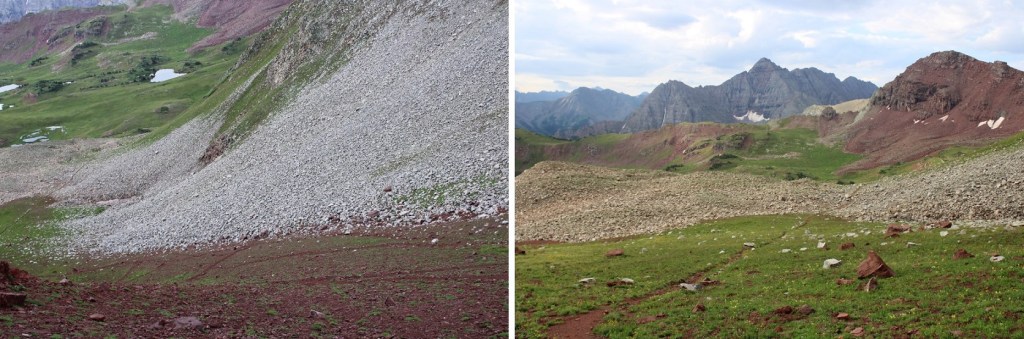
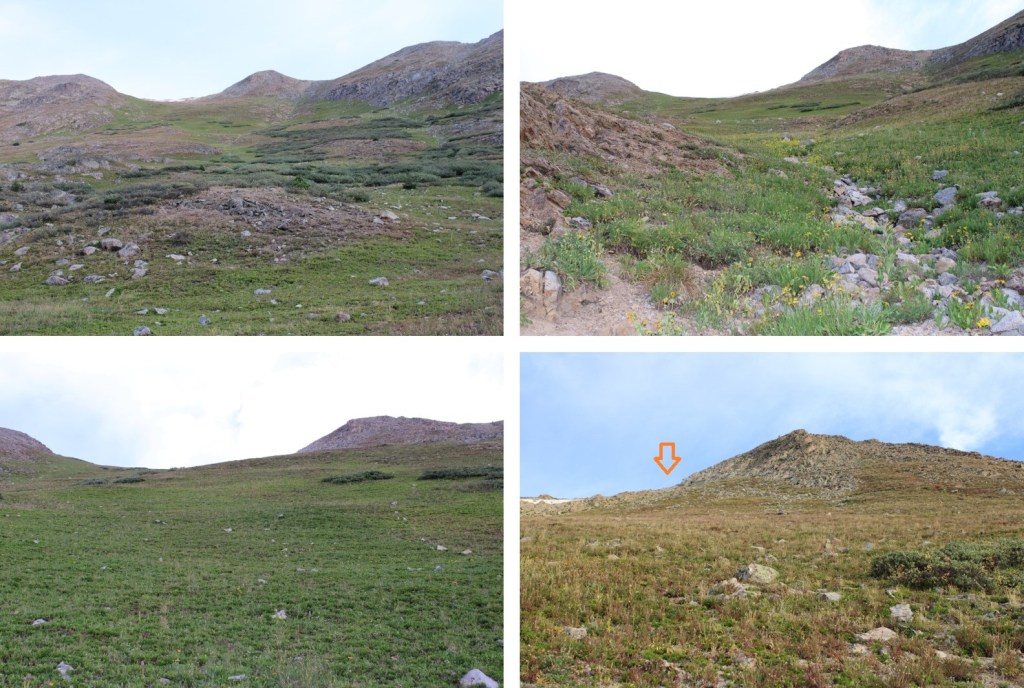
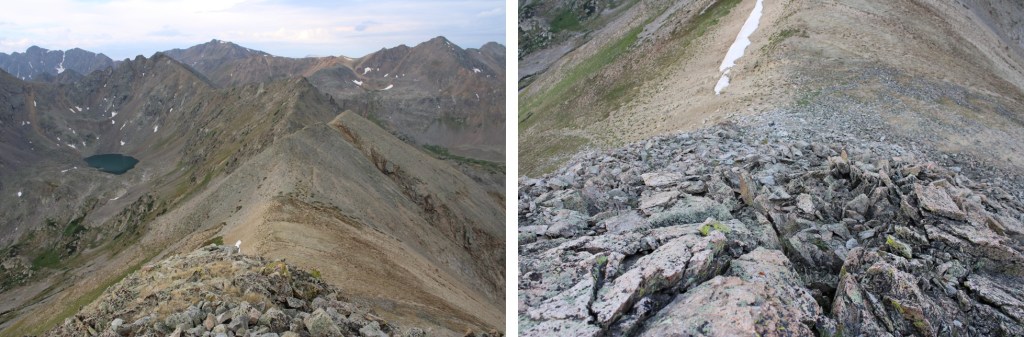
Here are some pictures of the easy tundra walk to the ridge

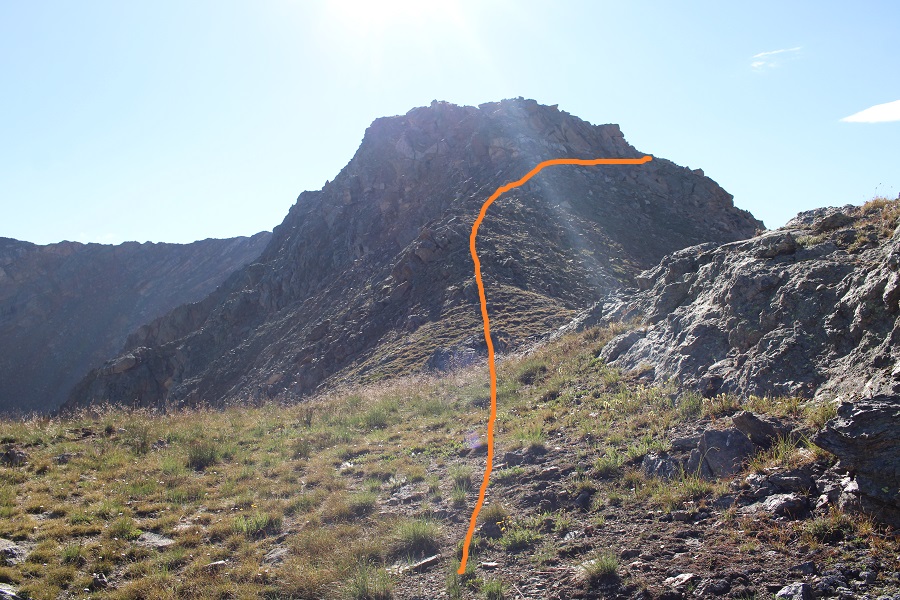
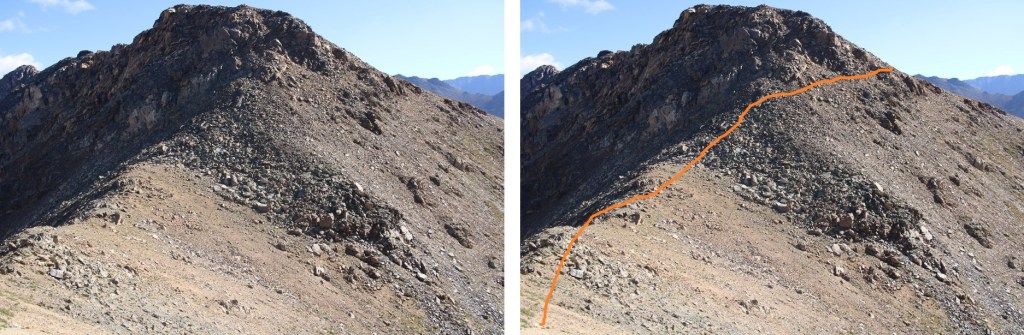
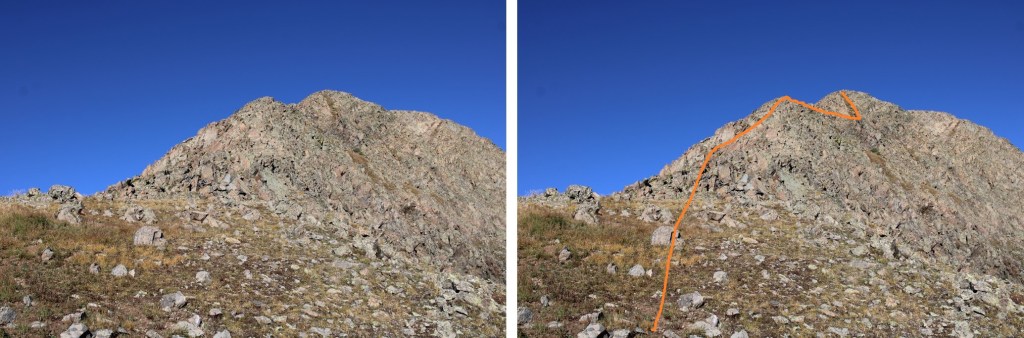
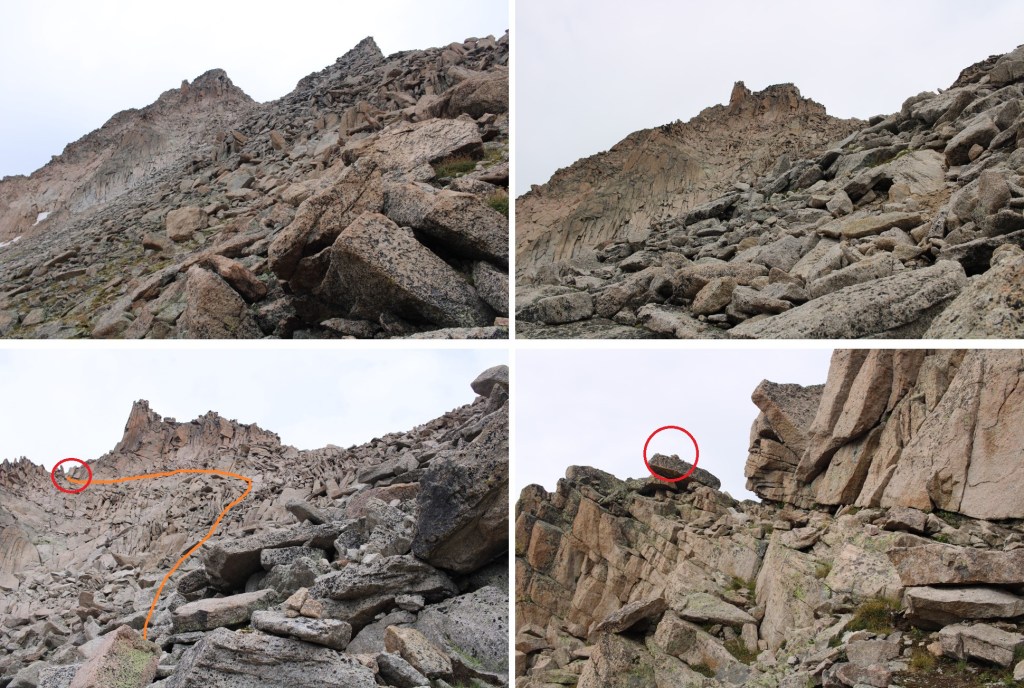
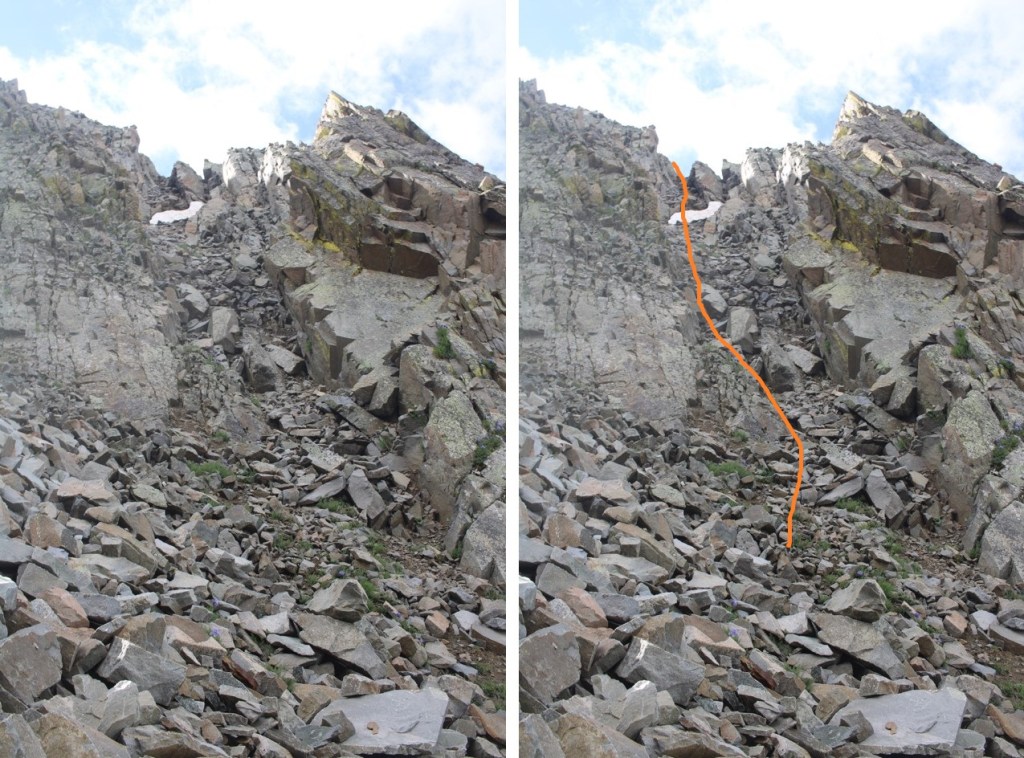
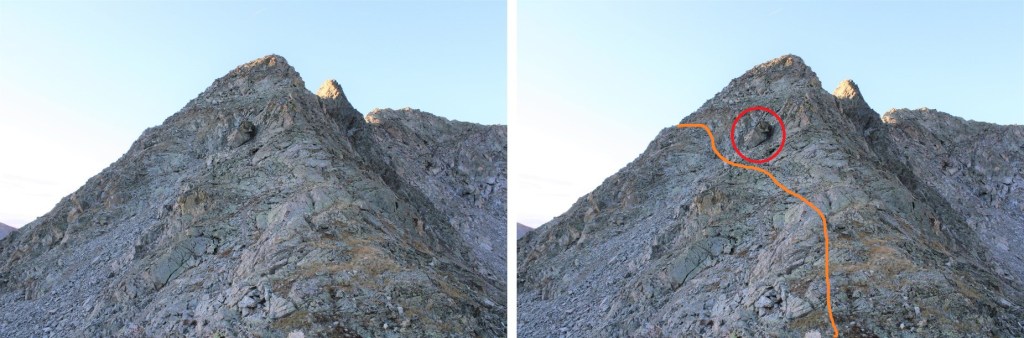
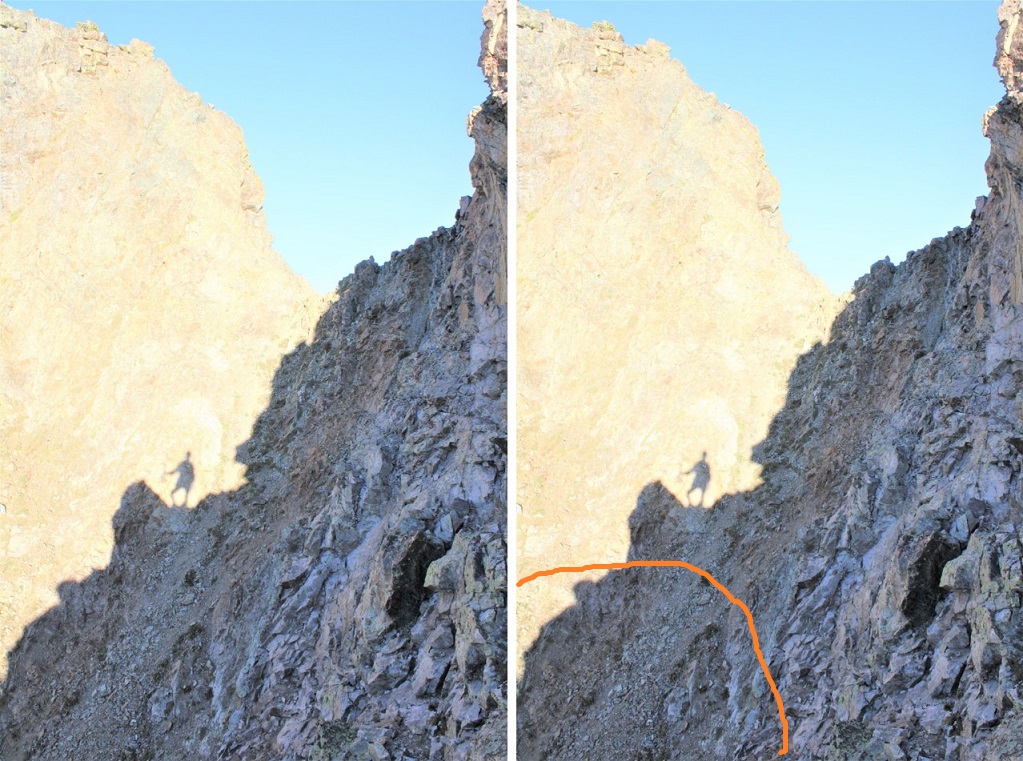
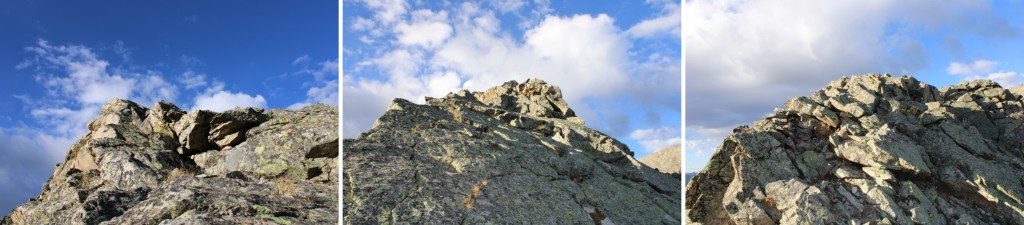
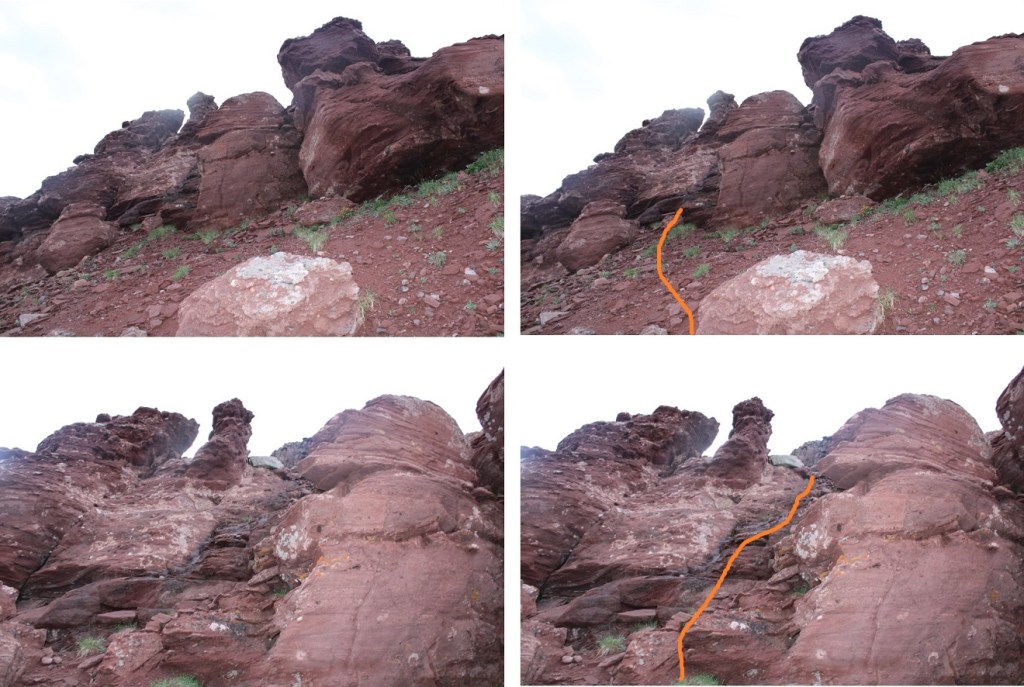
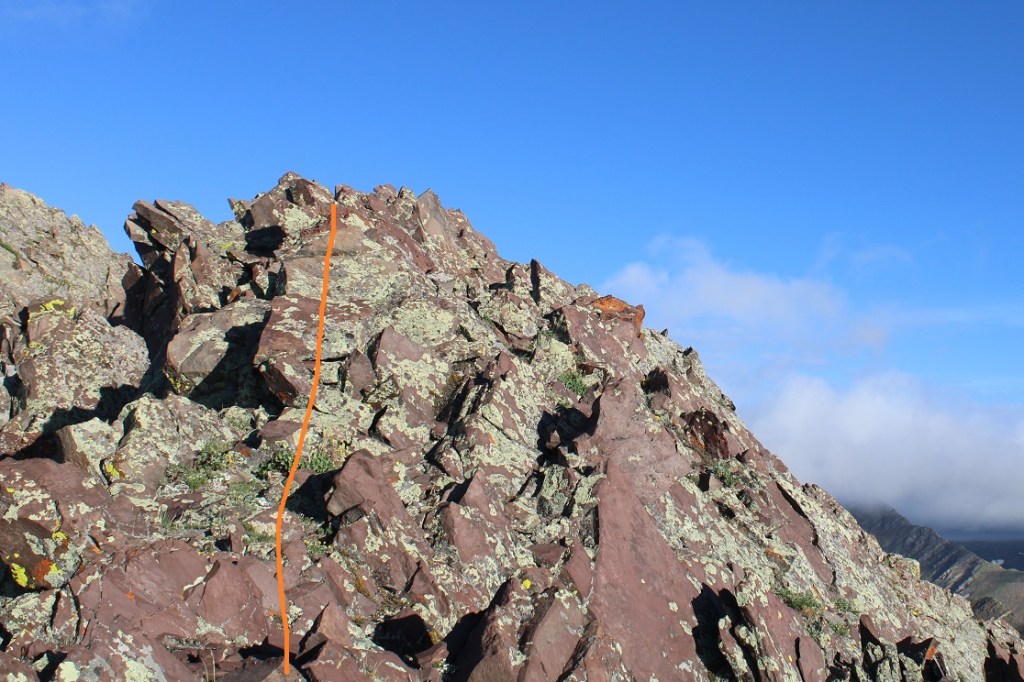
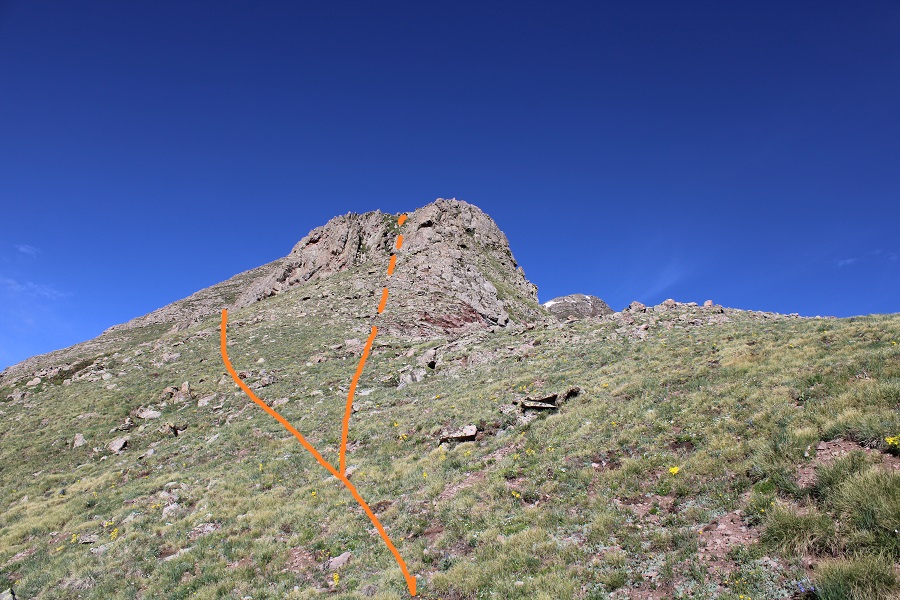
I put on my helmet, turned right, and headed north to the summit.  This was class 3, but solid and relatively short. 

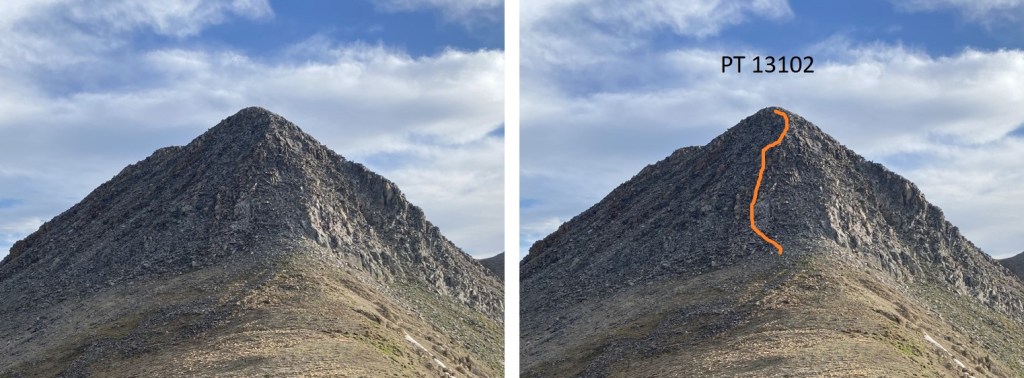
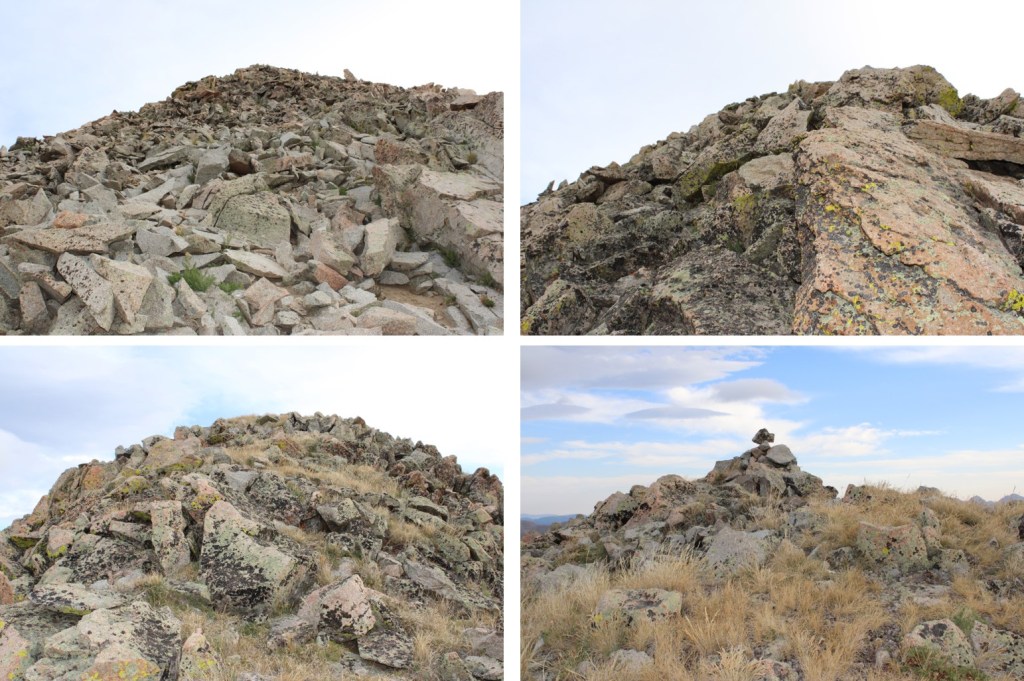
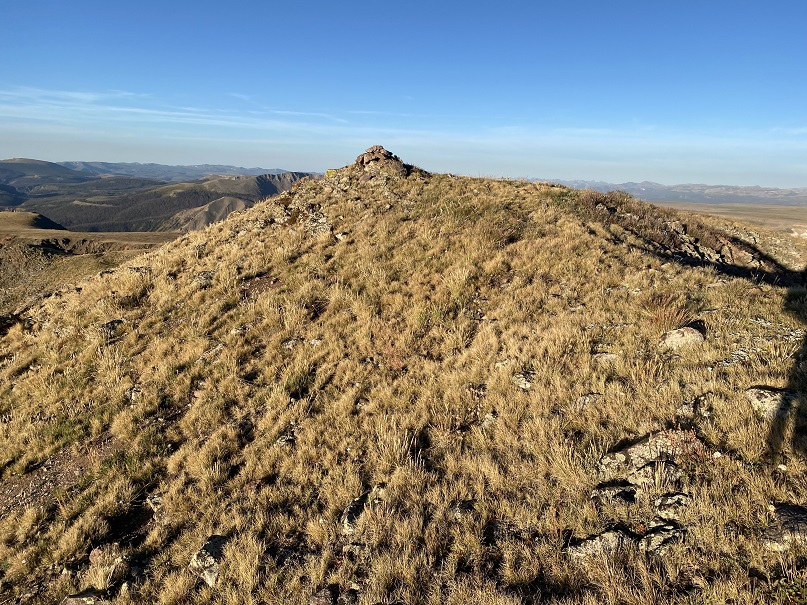
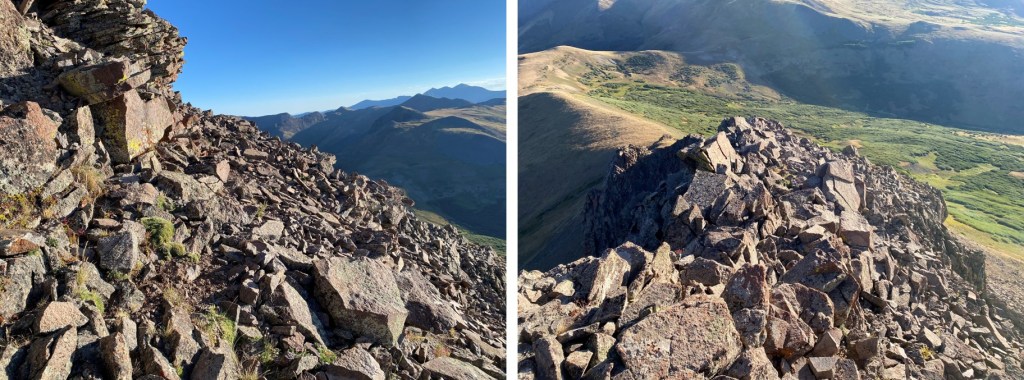
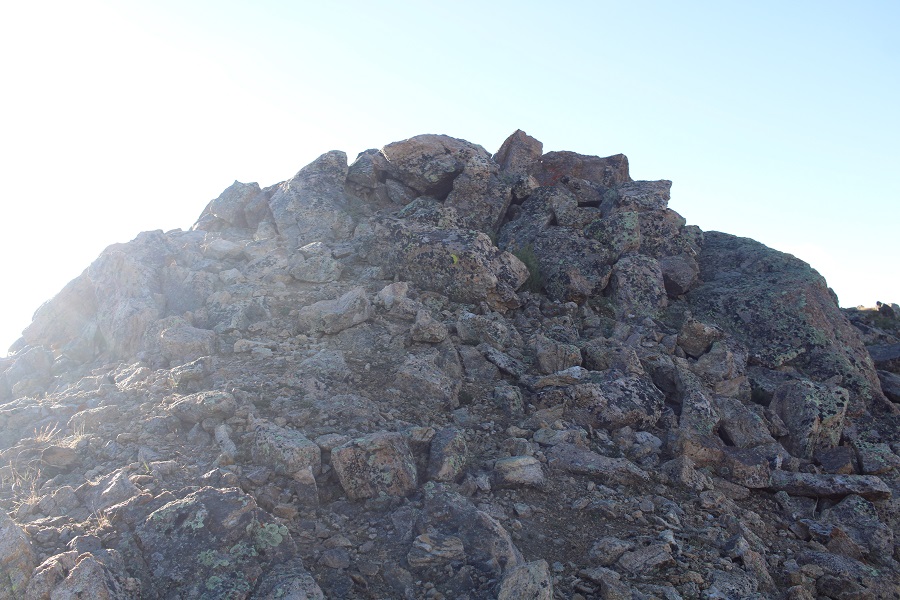
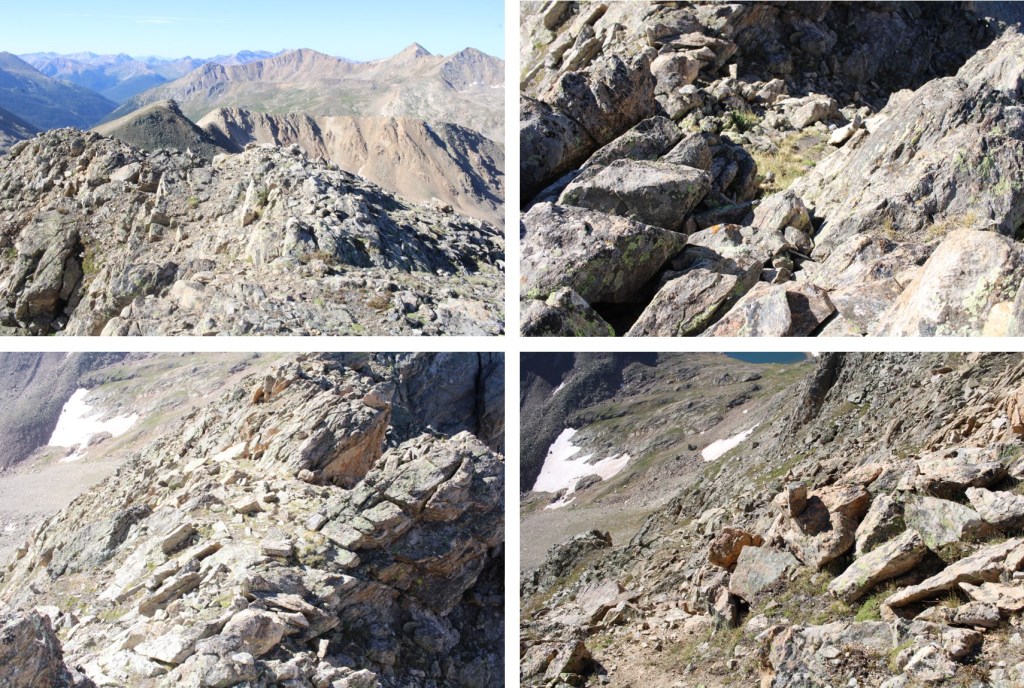
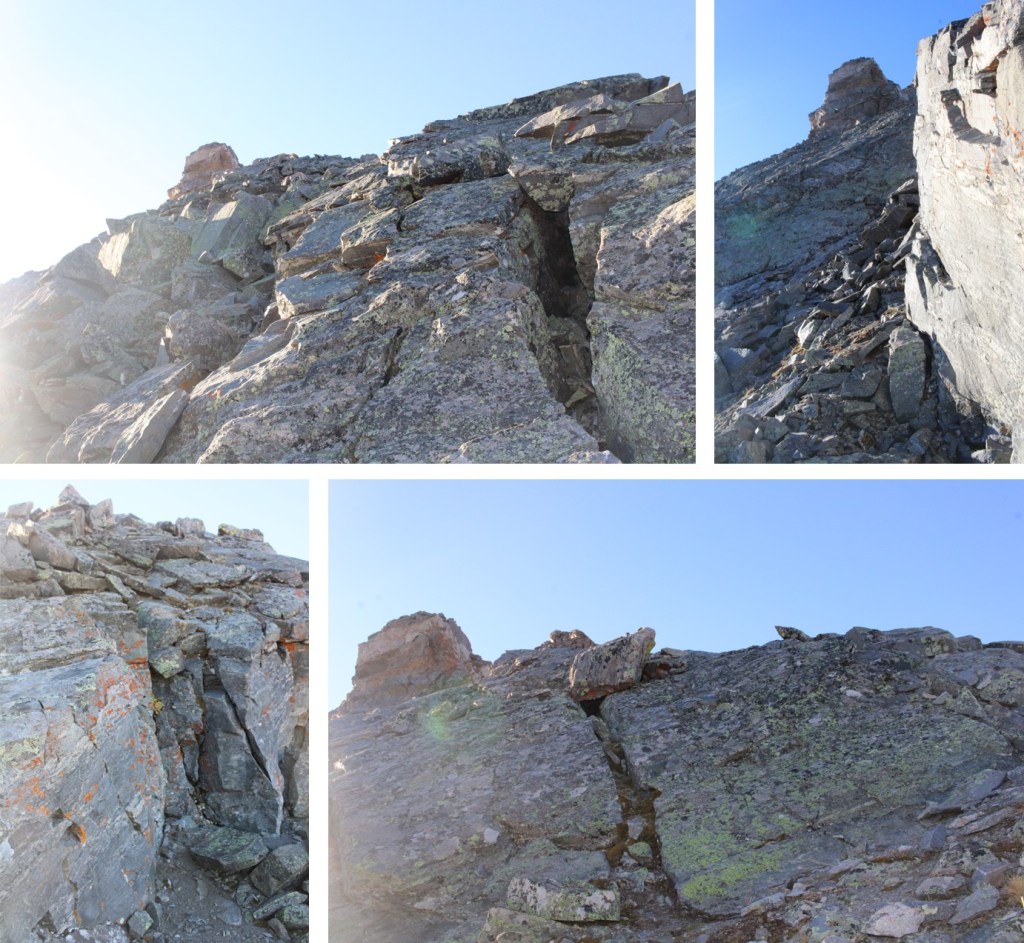
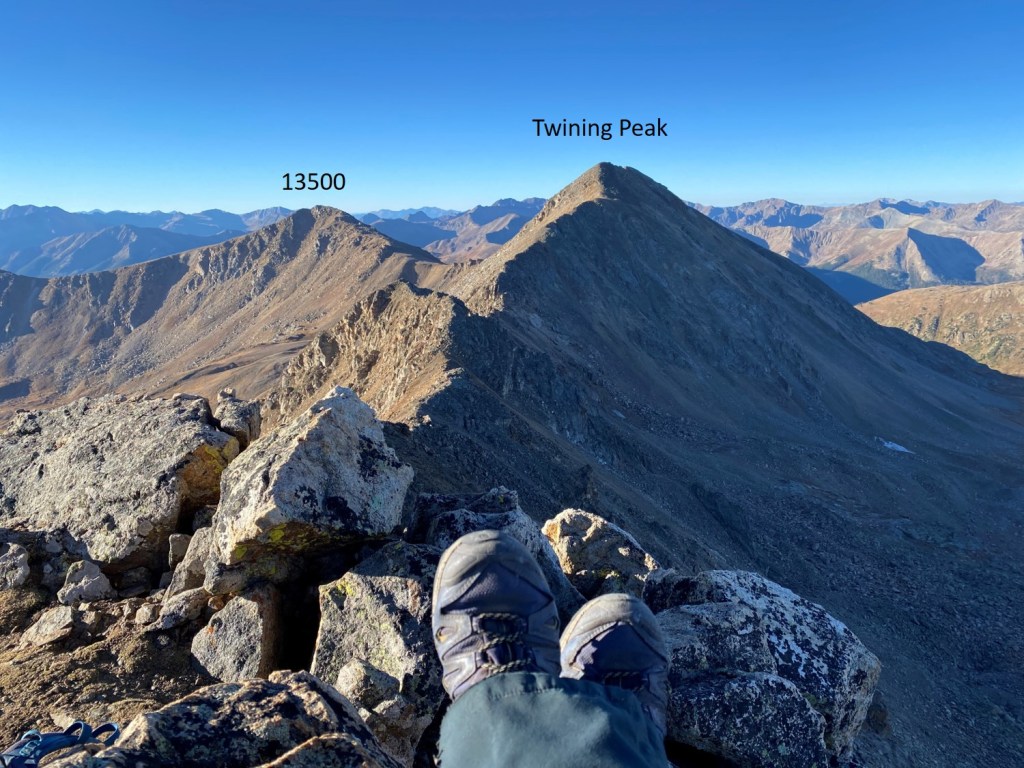
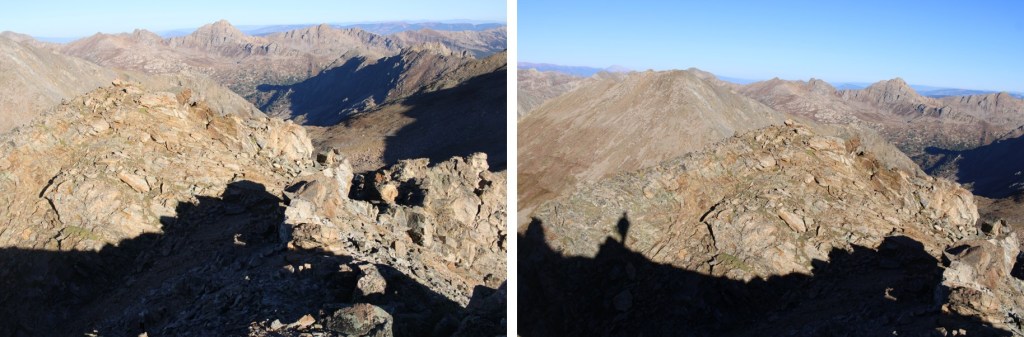
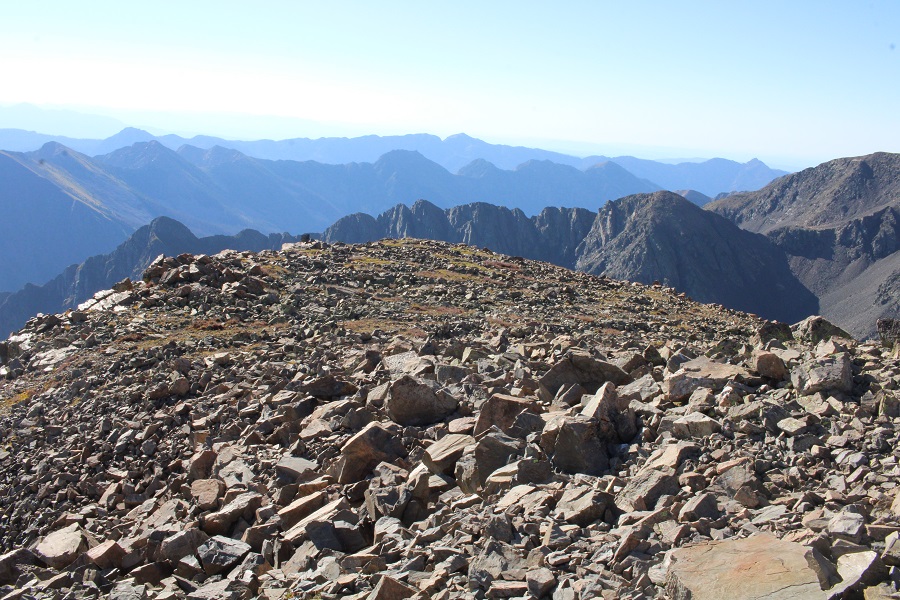
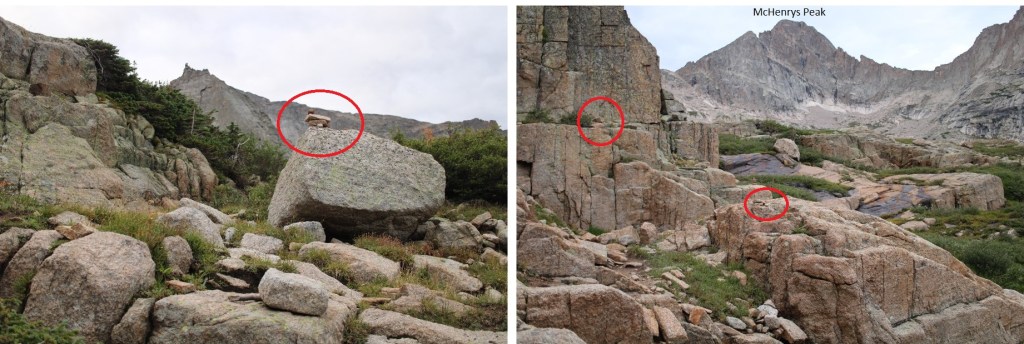
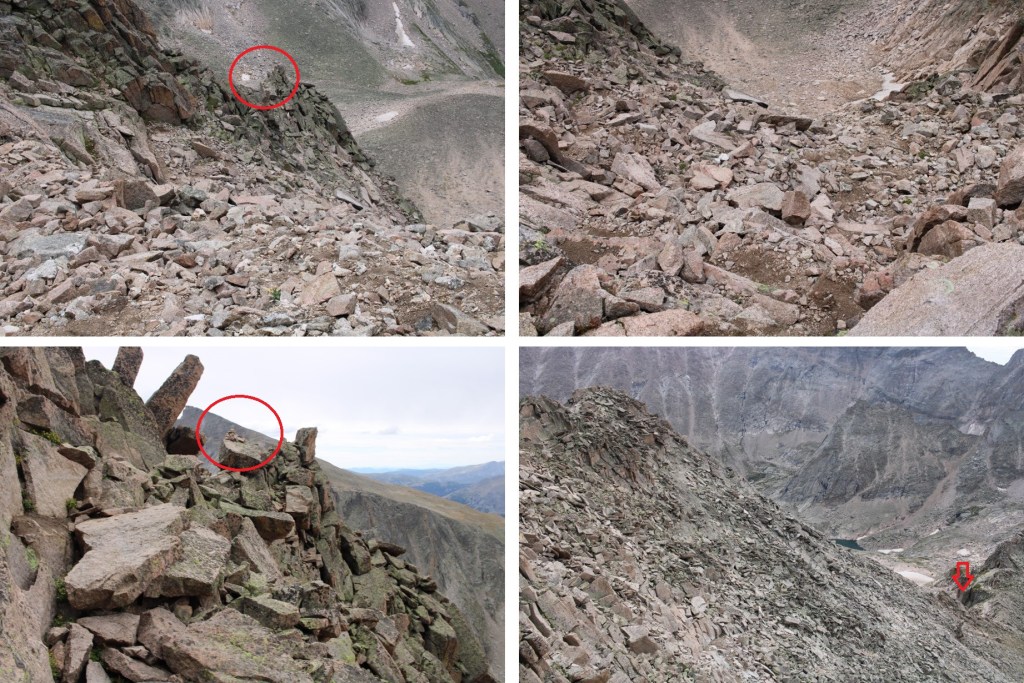
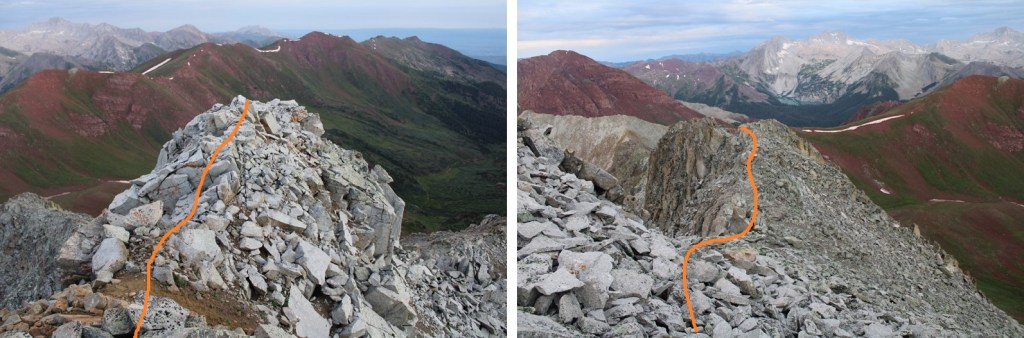
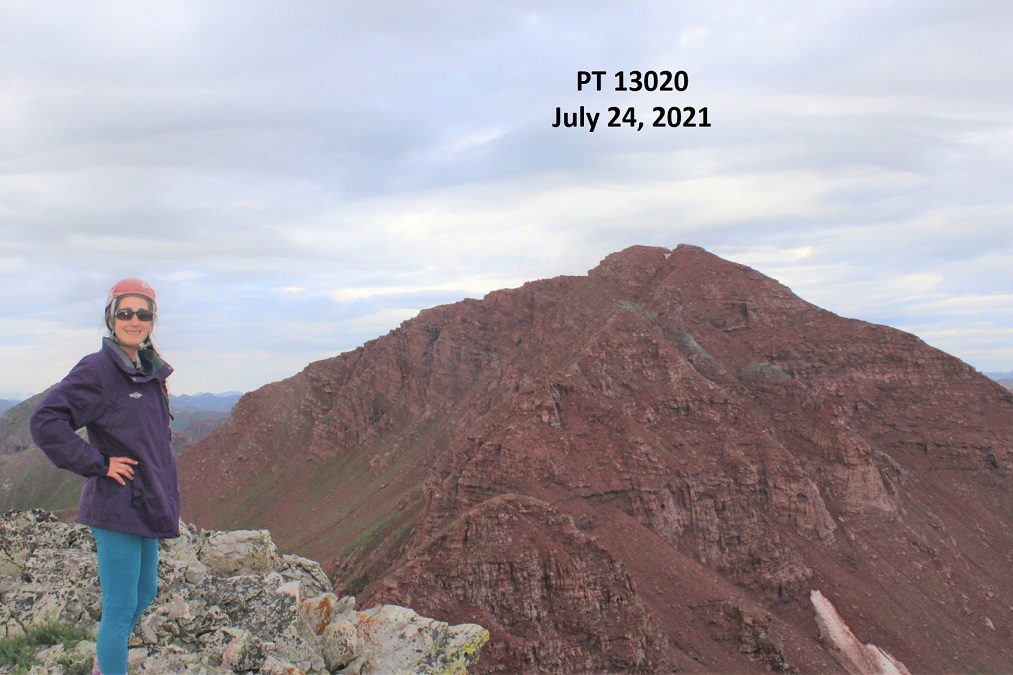
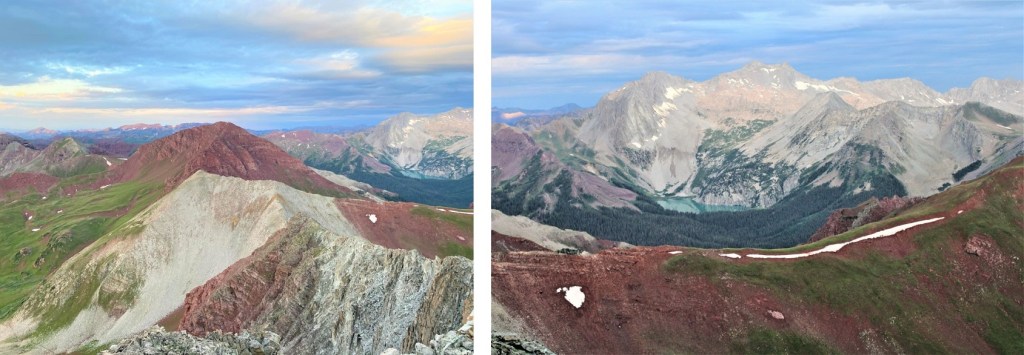
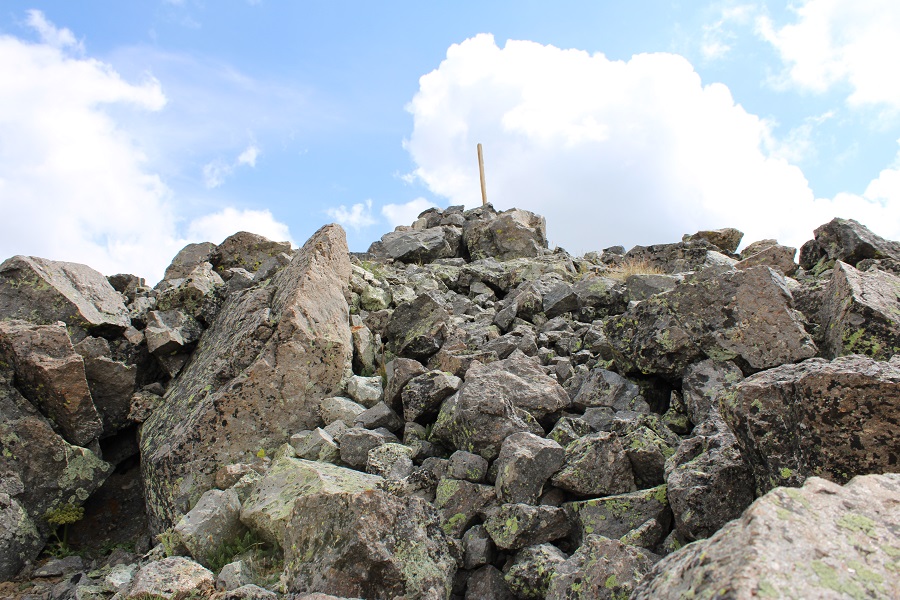
I summited PT 13102 at 7:30am
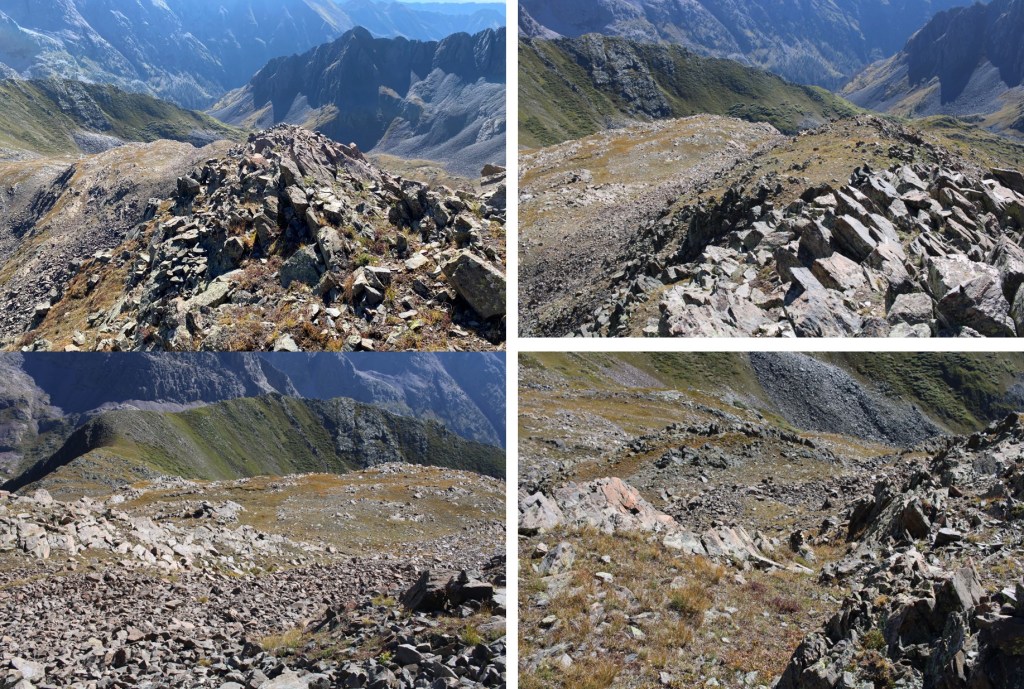
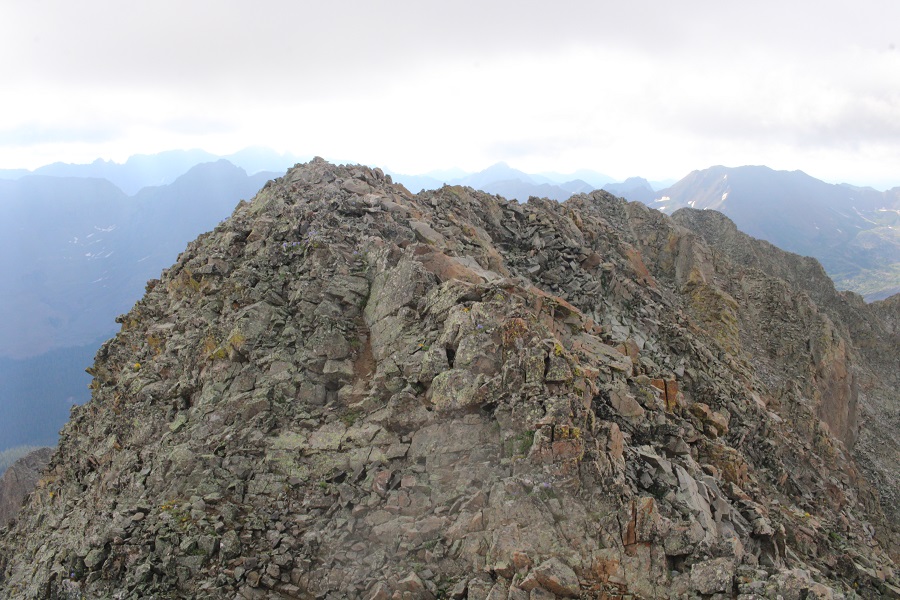
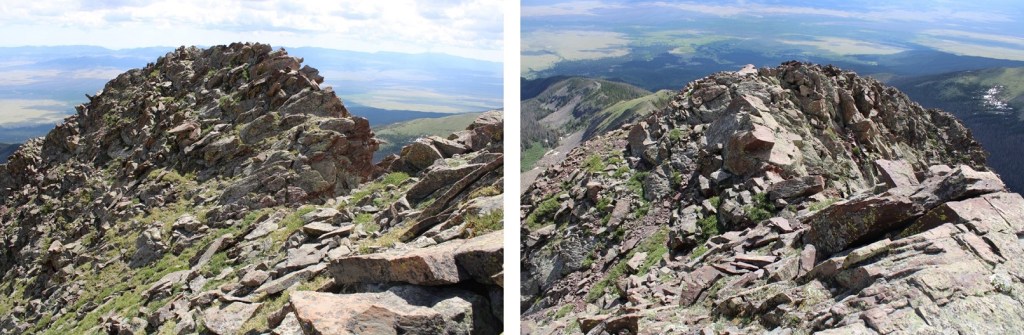
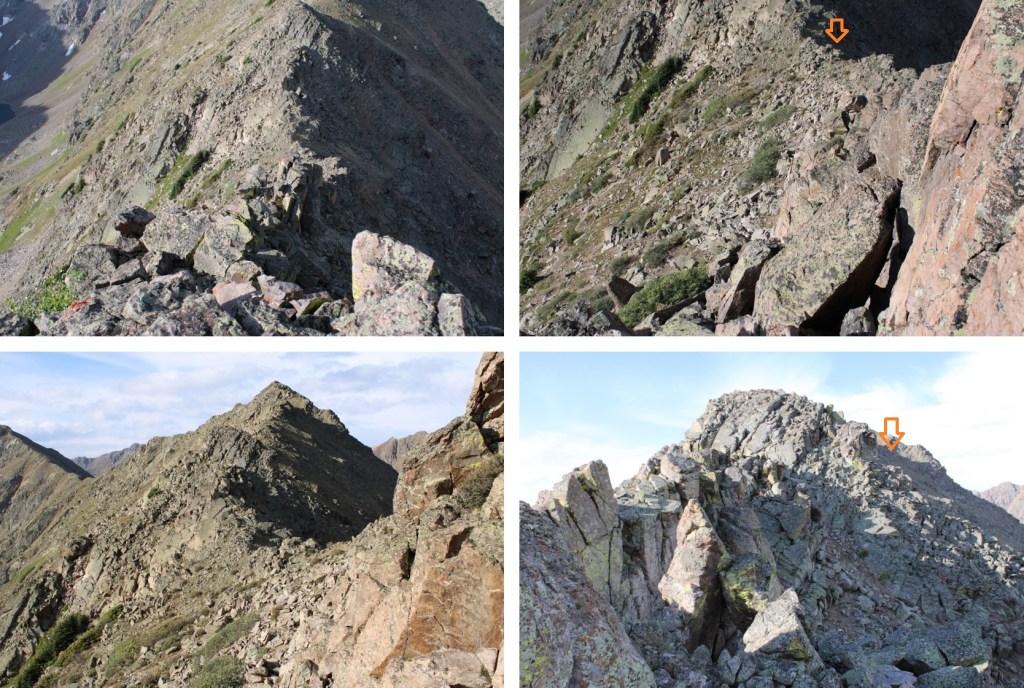
PT 13102:

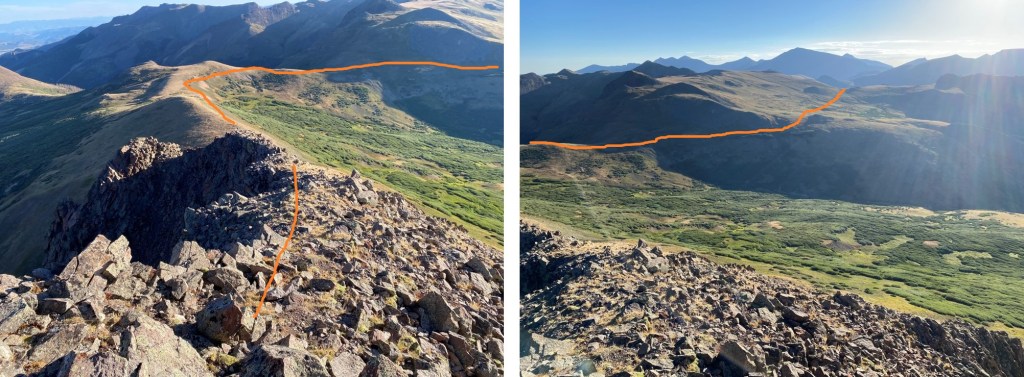
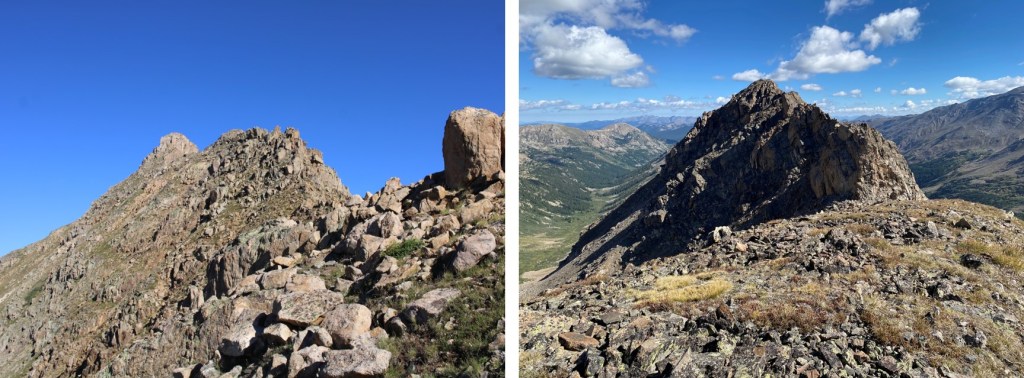
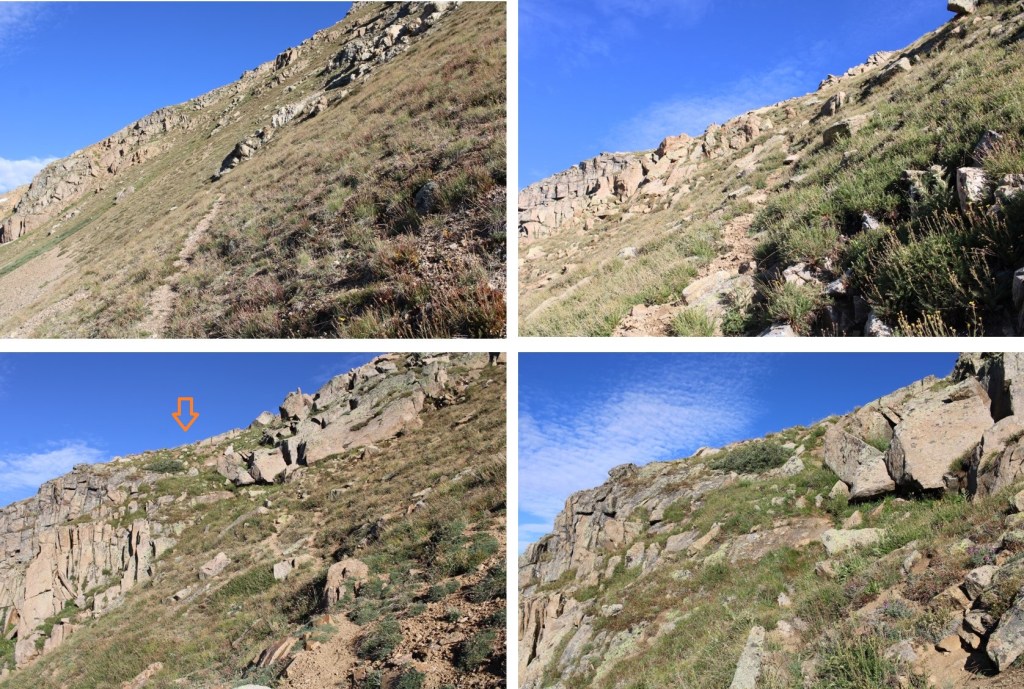
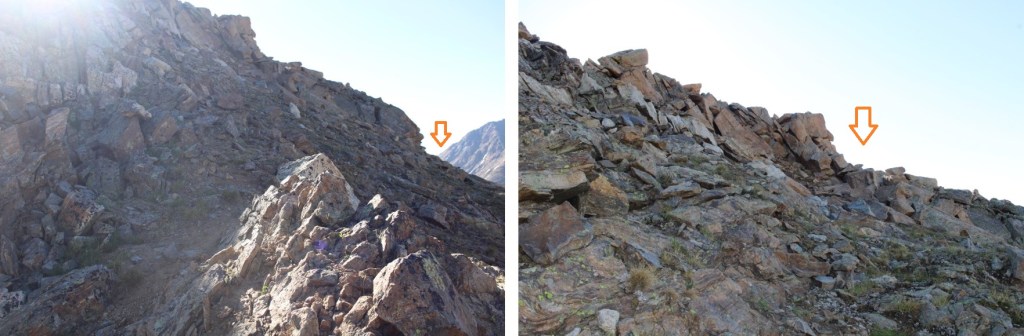
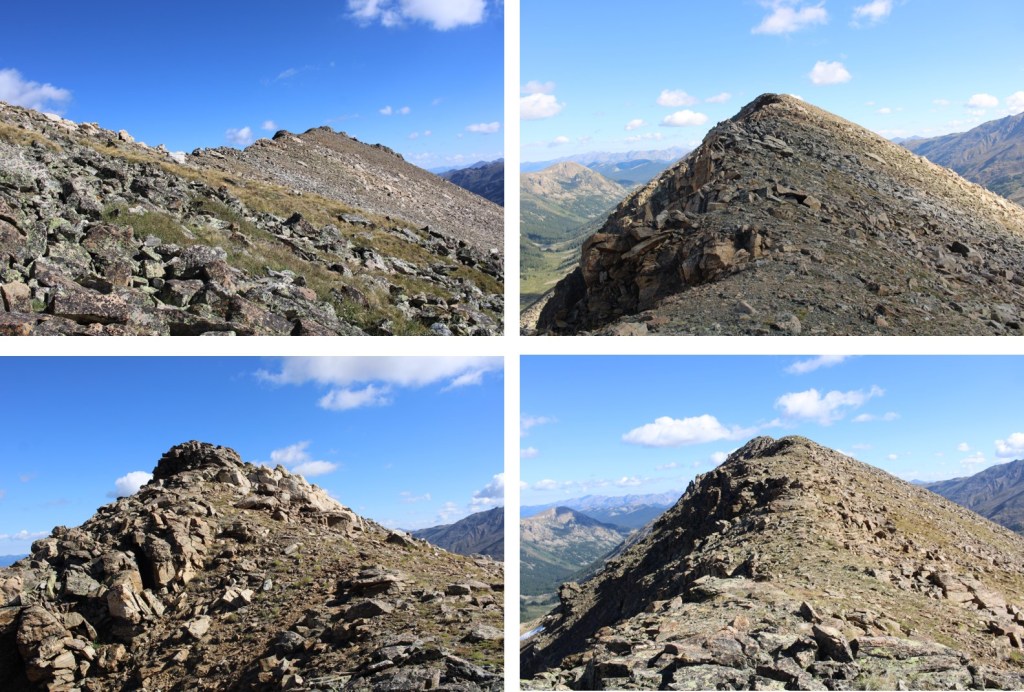
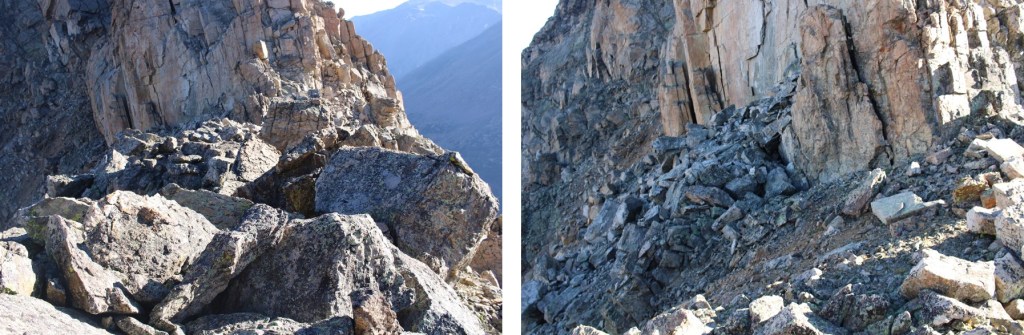
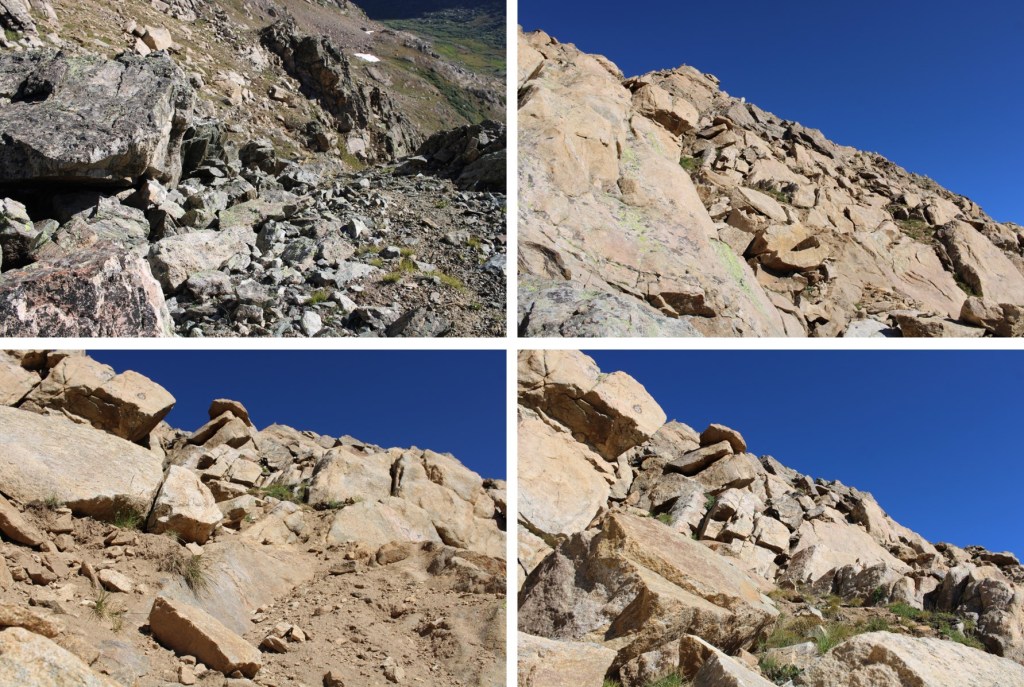
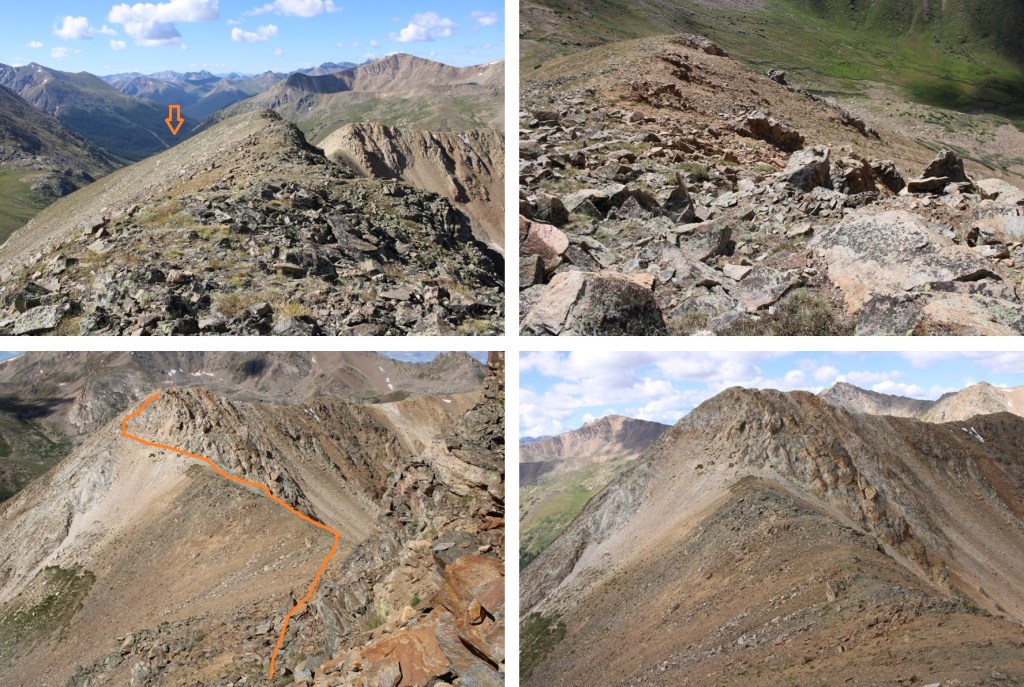
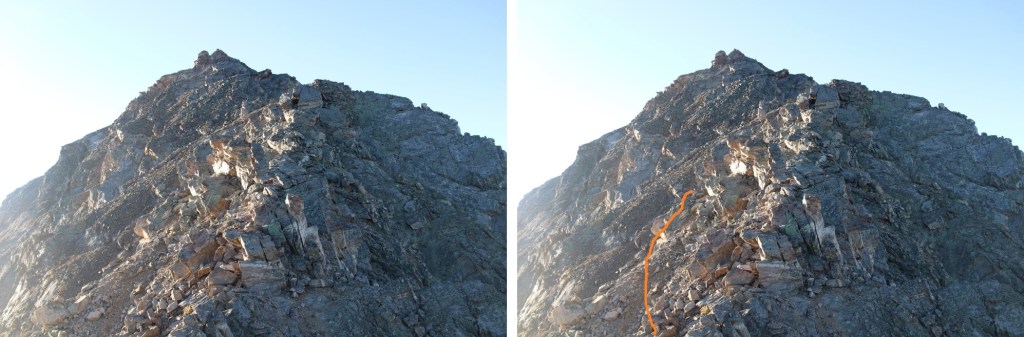
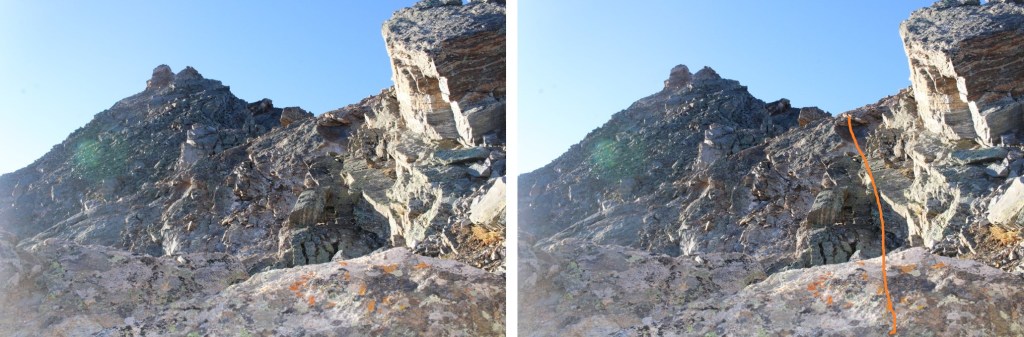
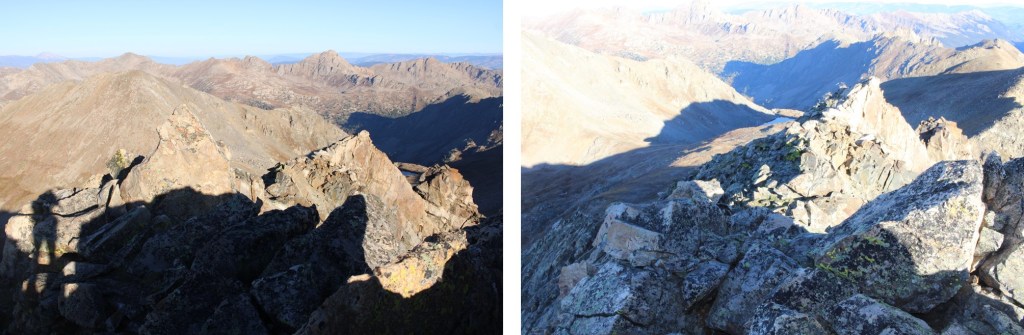
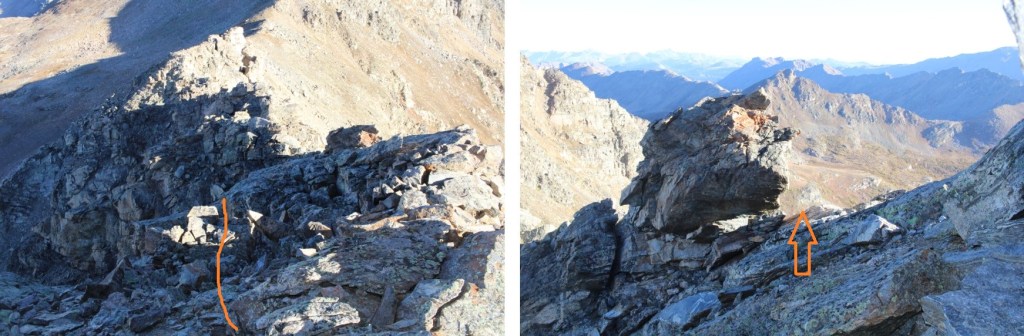
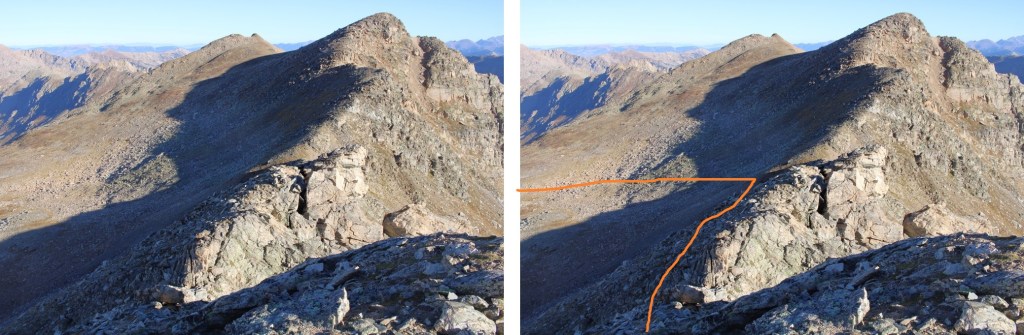
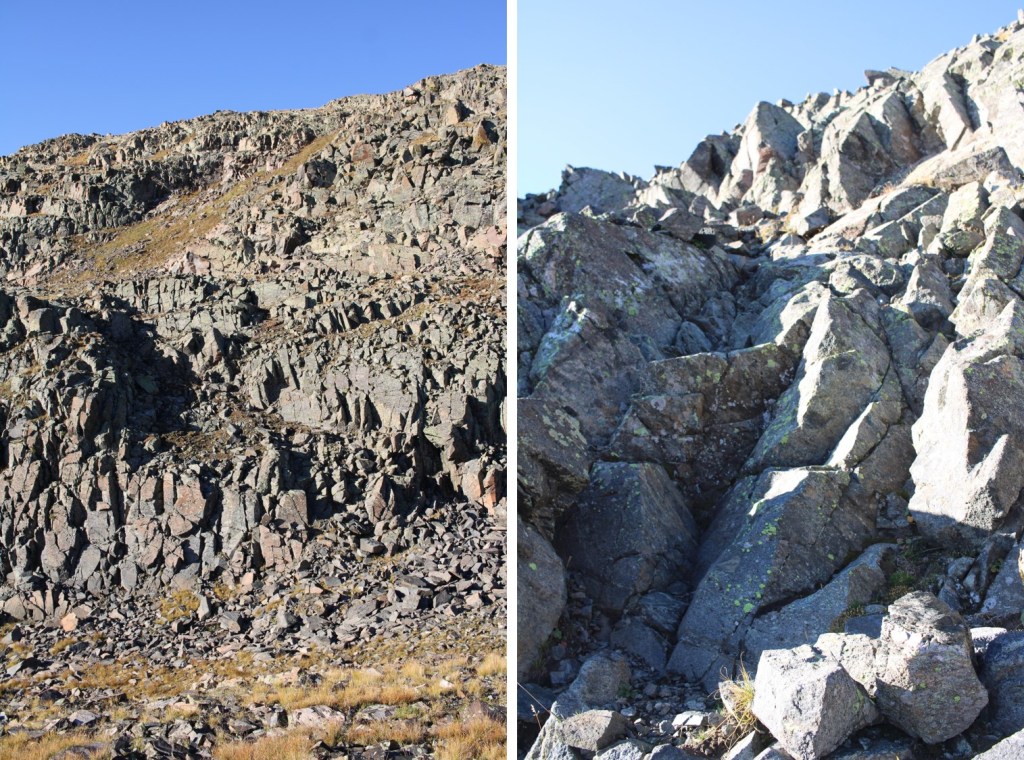
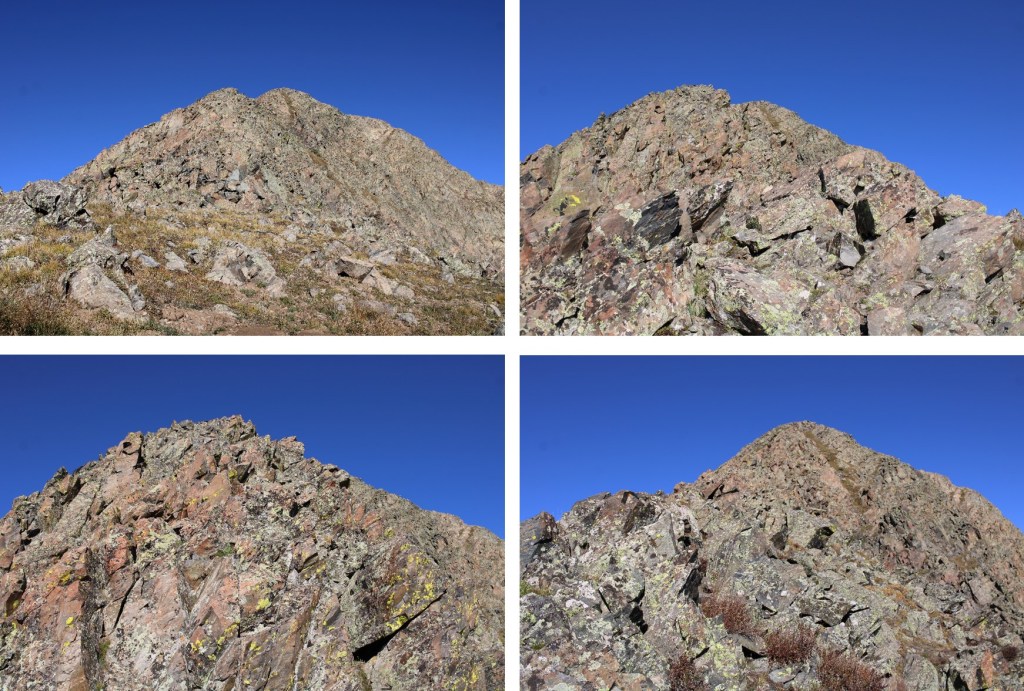
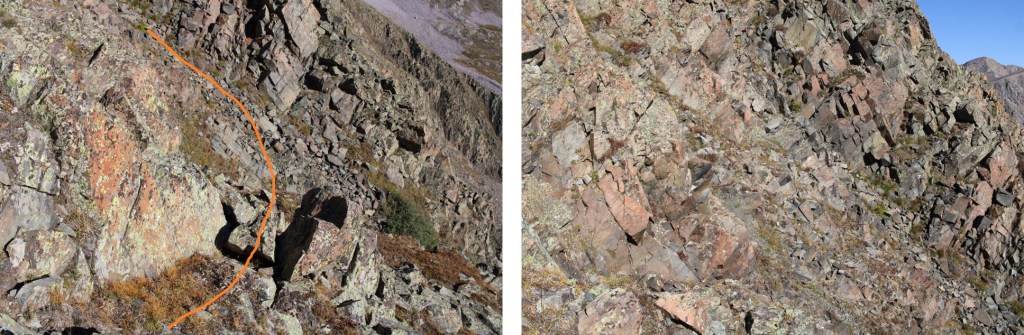
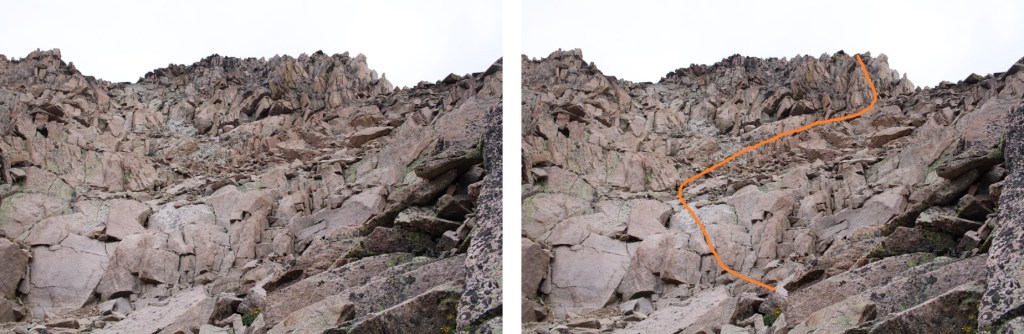
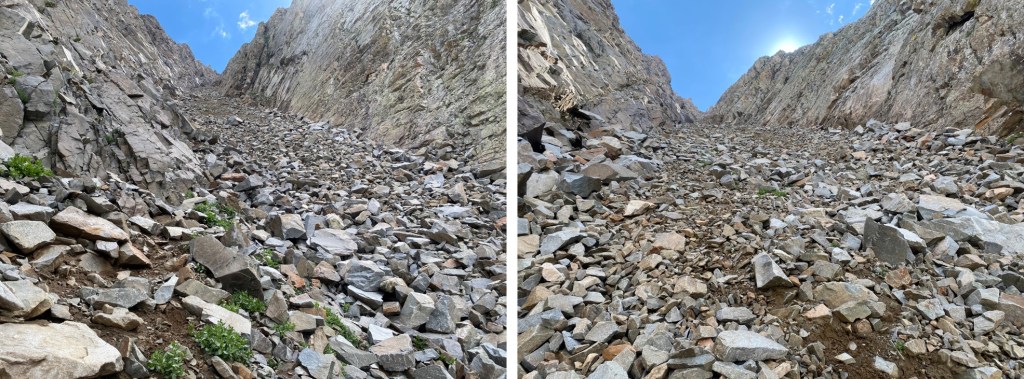
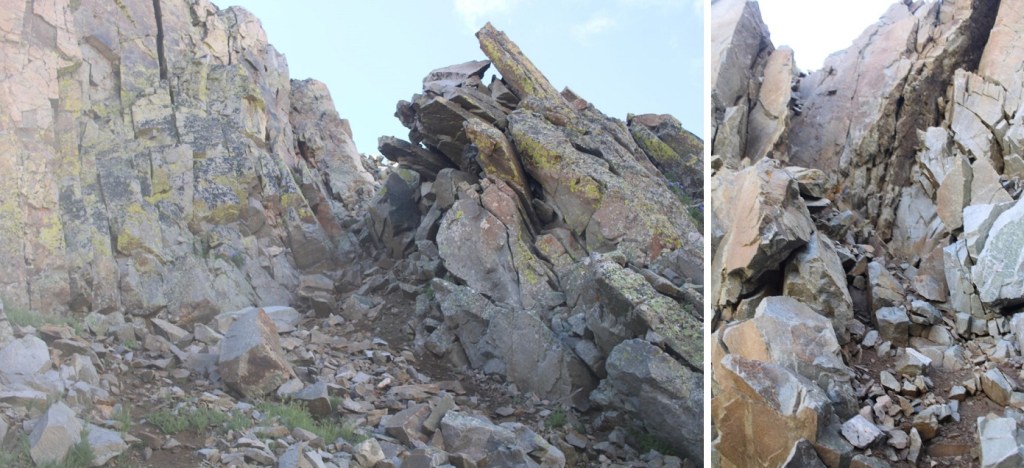
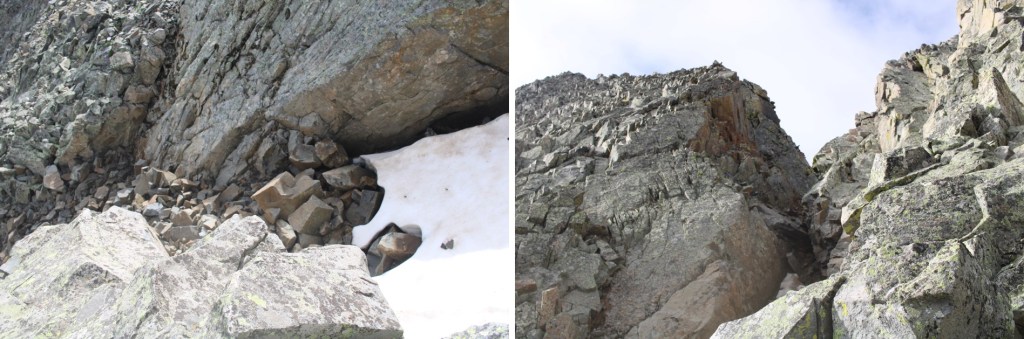
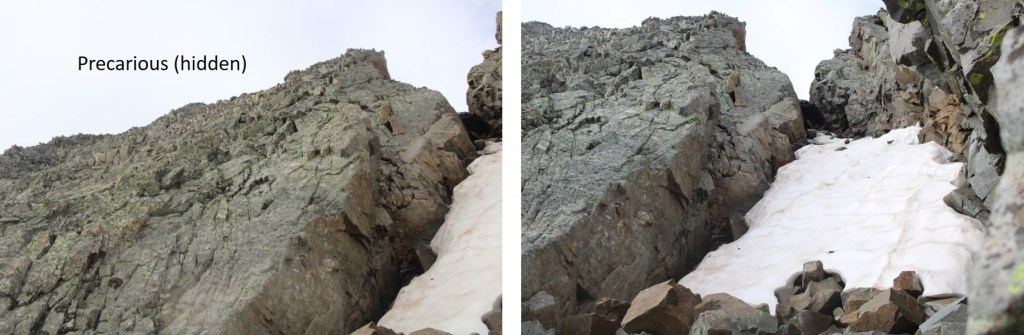
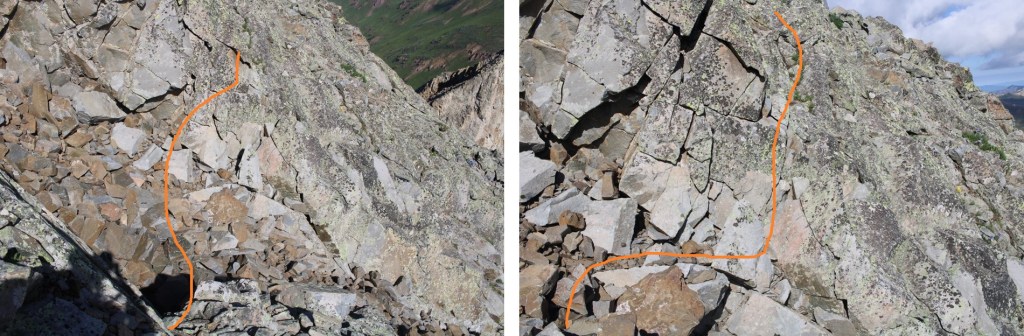
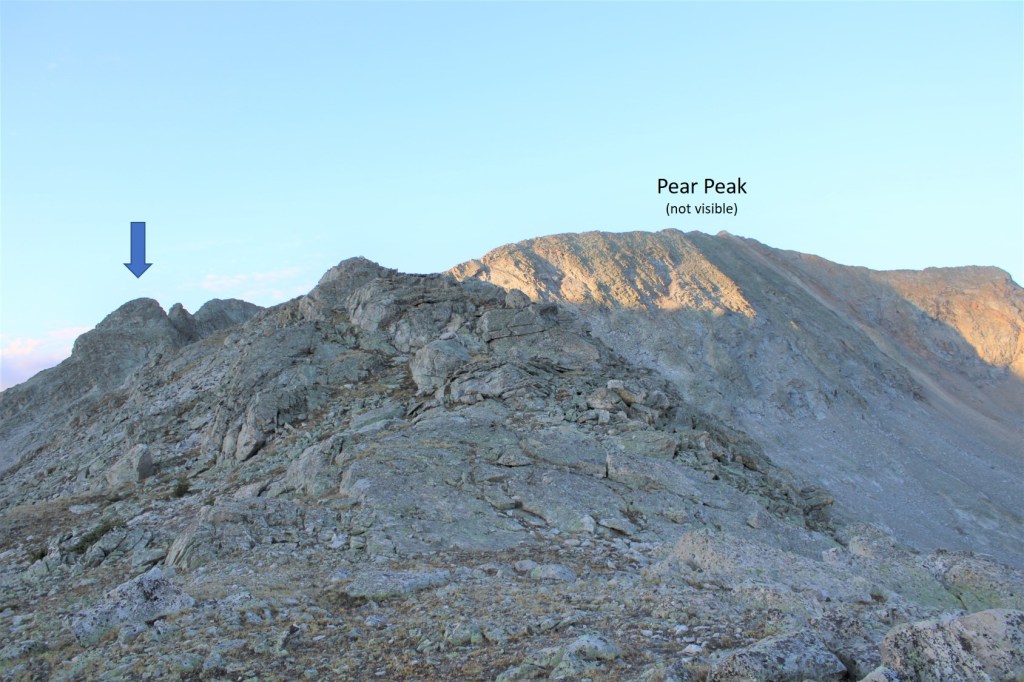
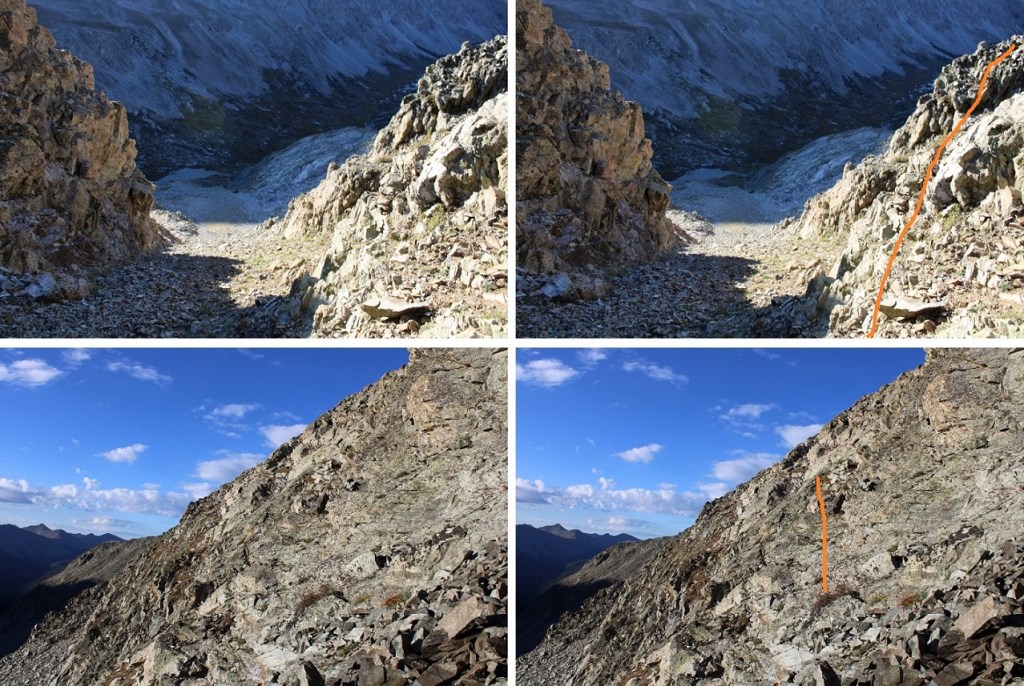
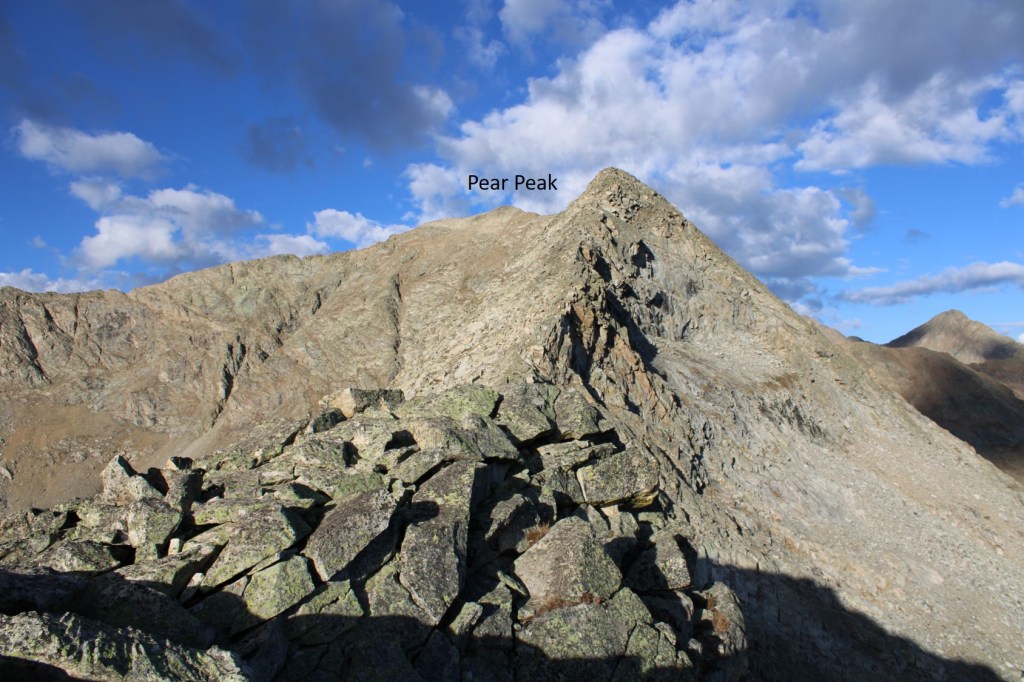
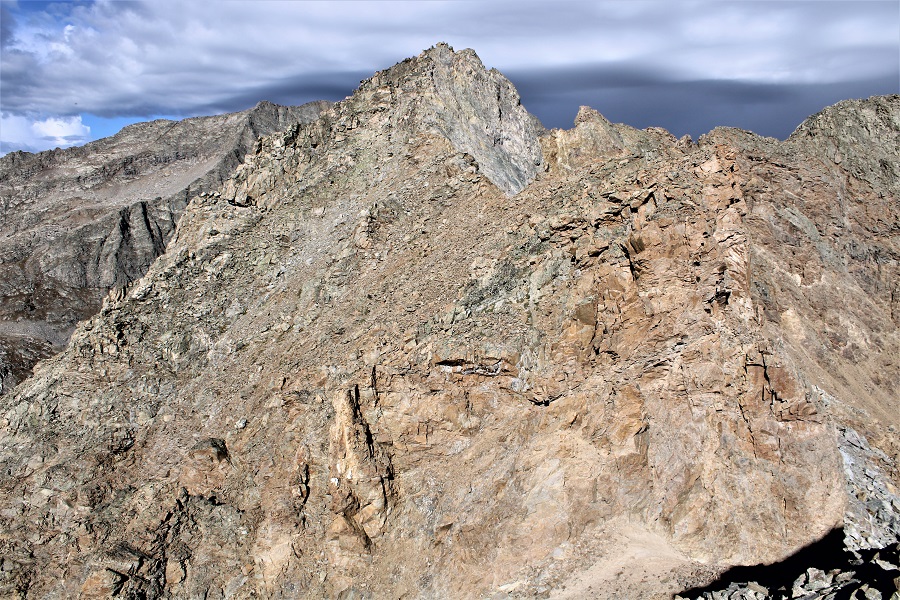
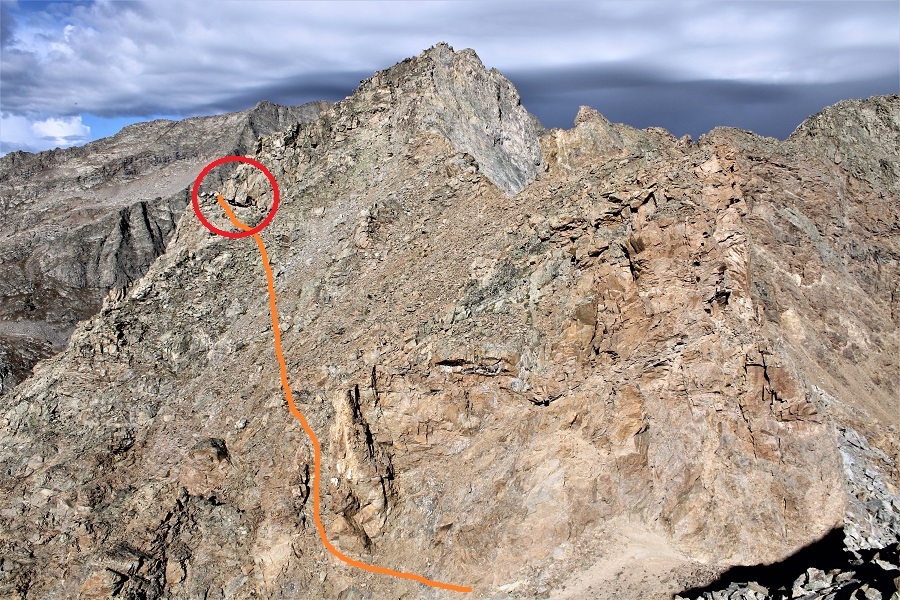
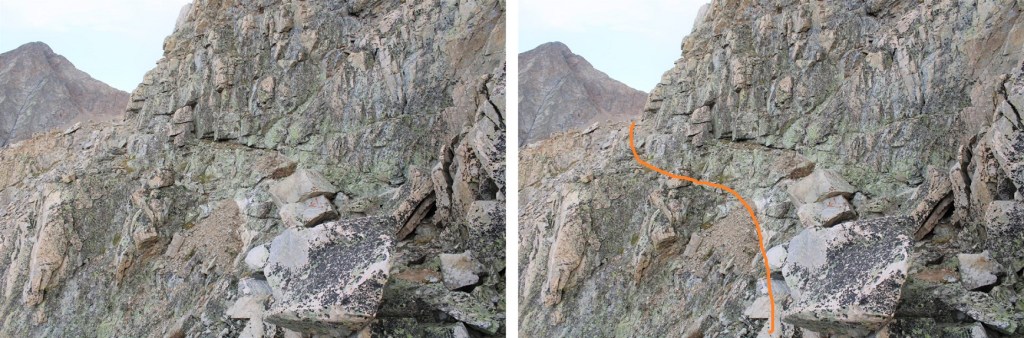
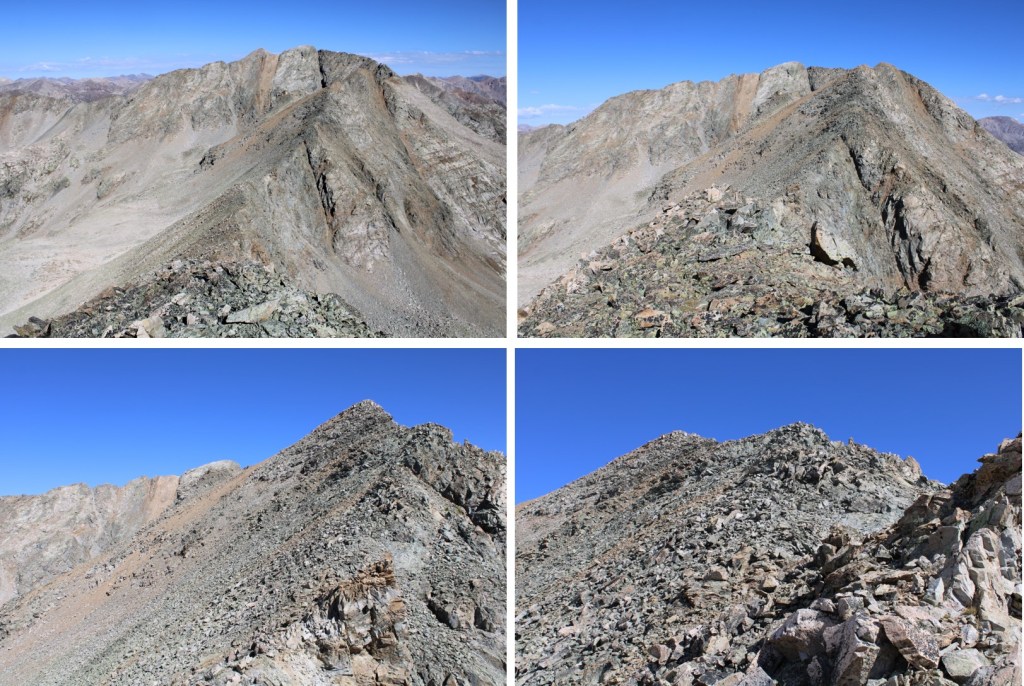
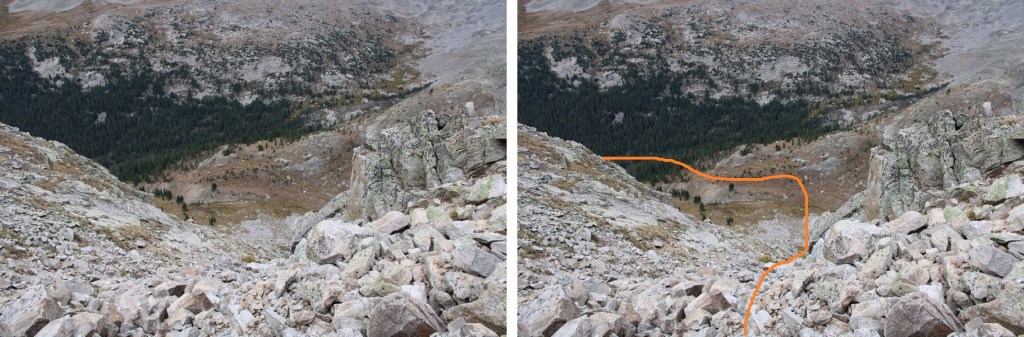
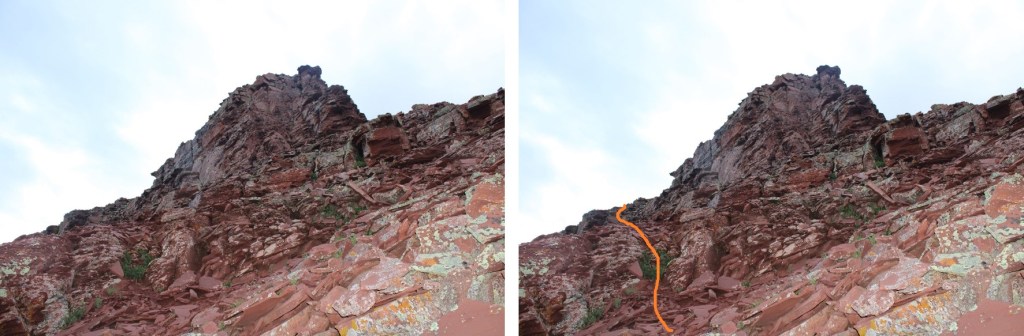
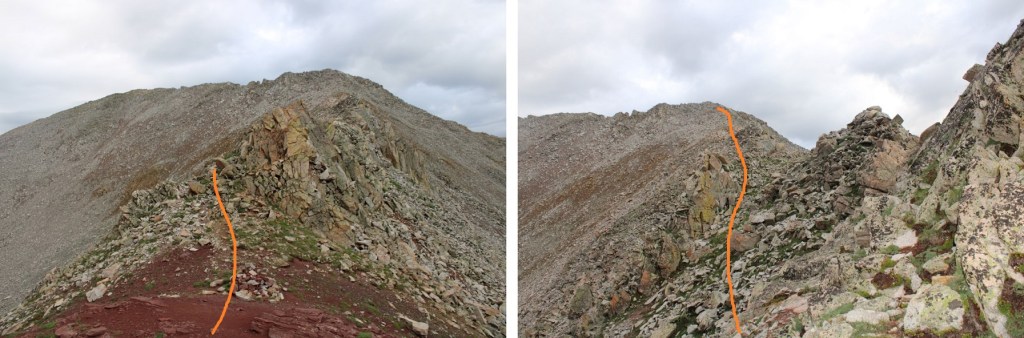
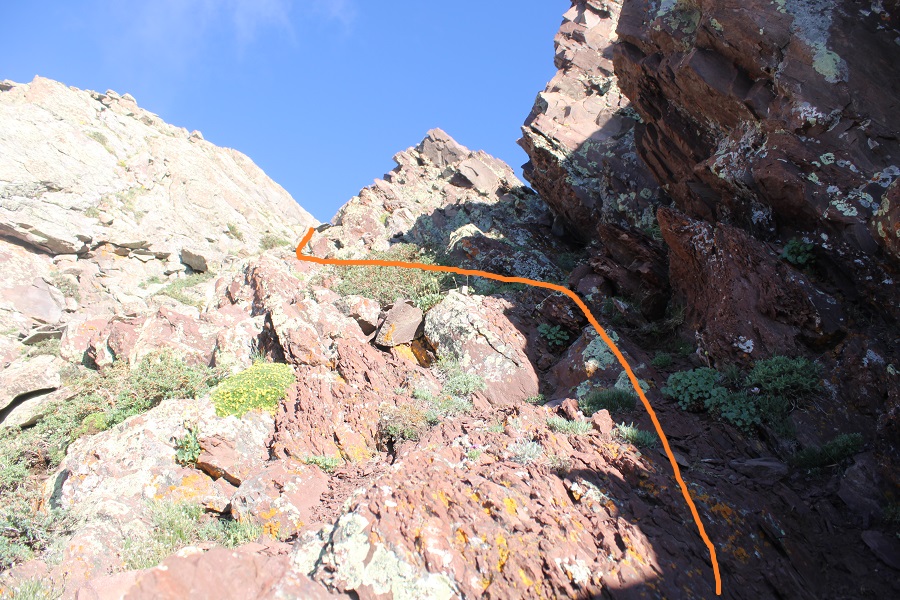
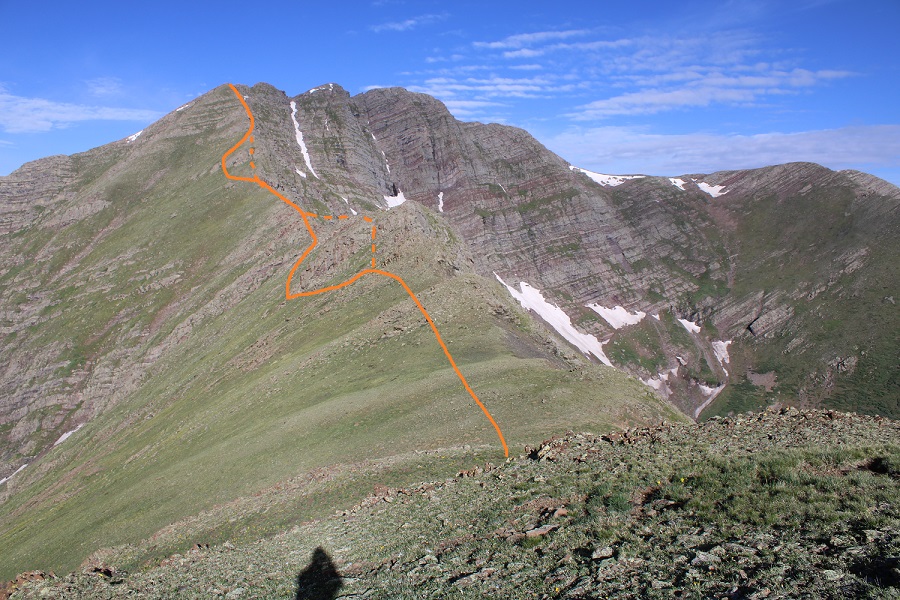
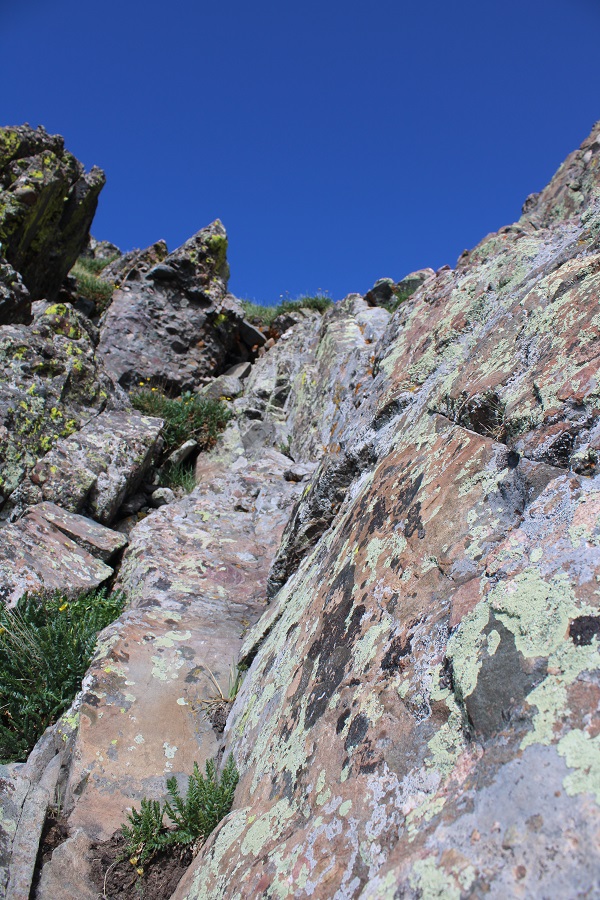
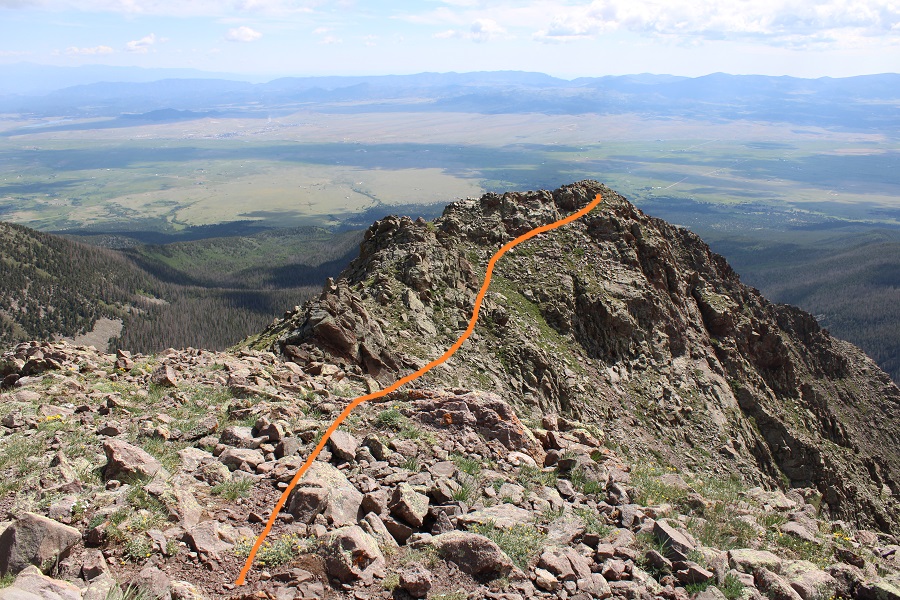
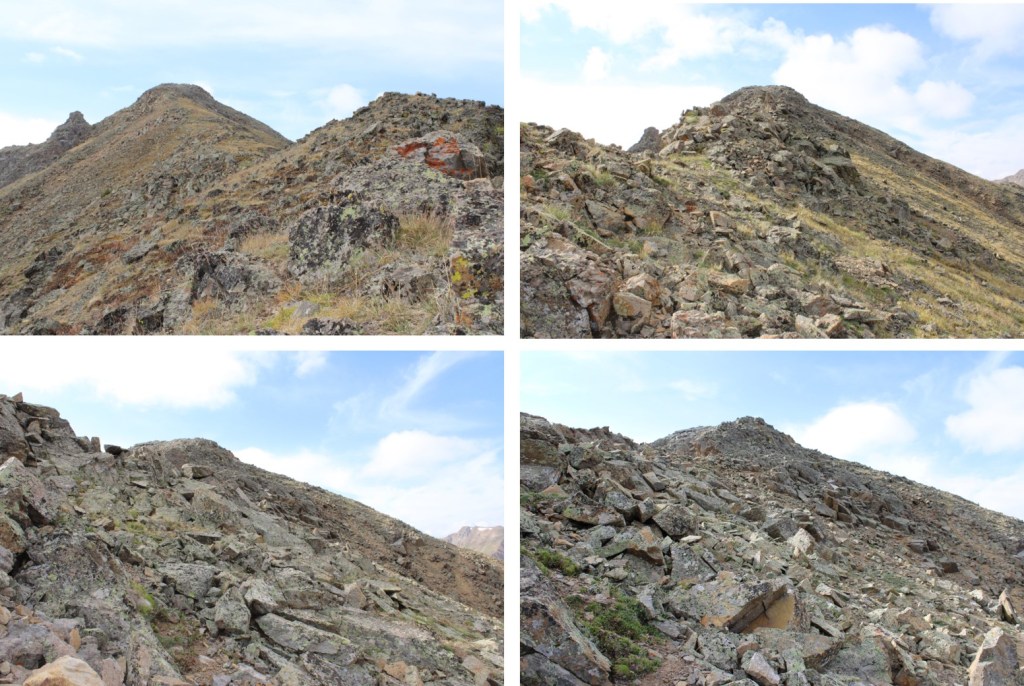
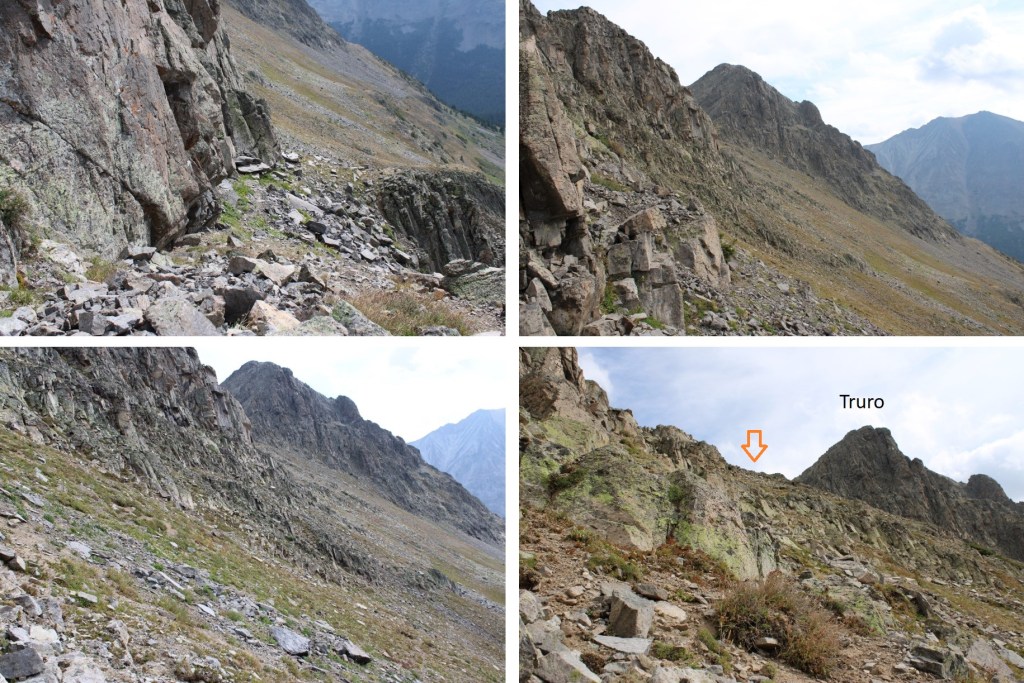
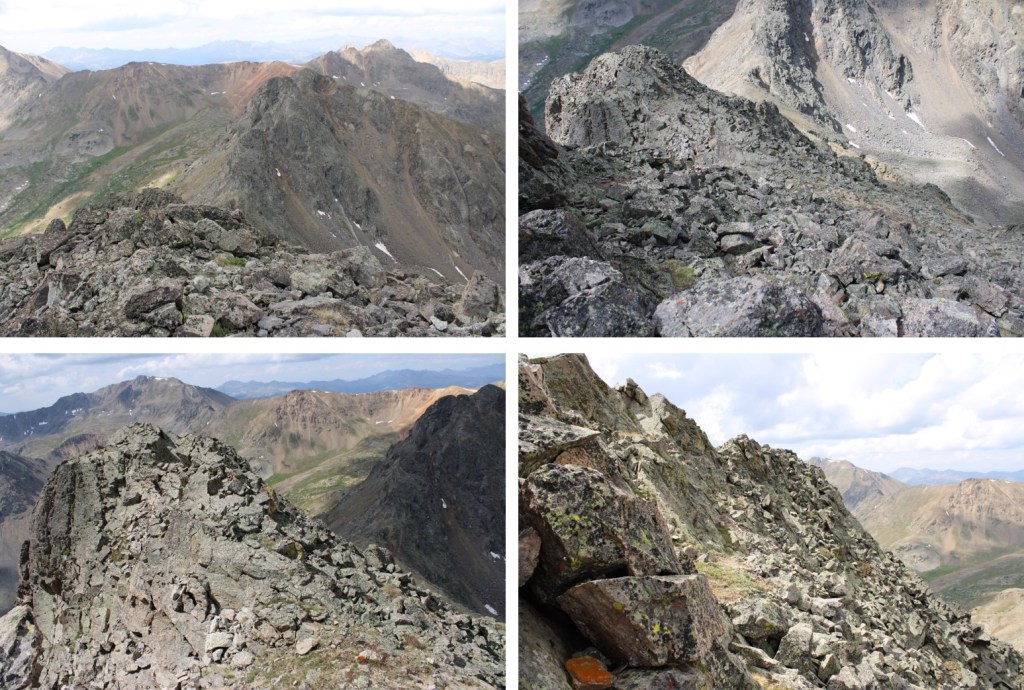
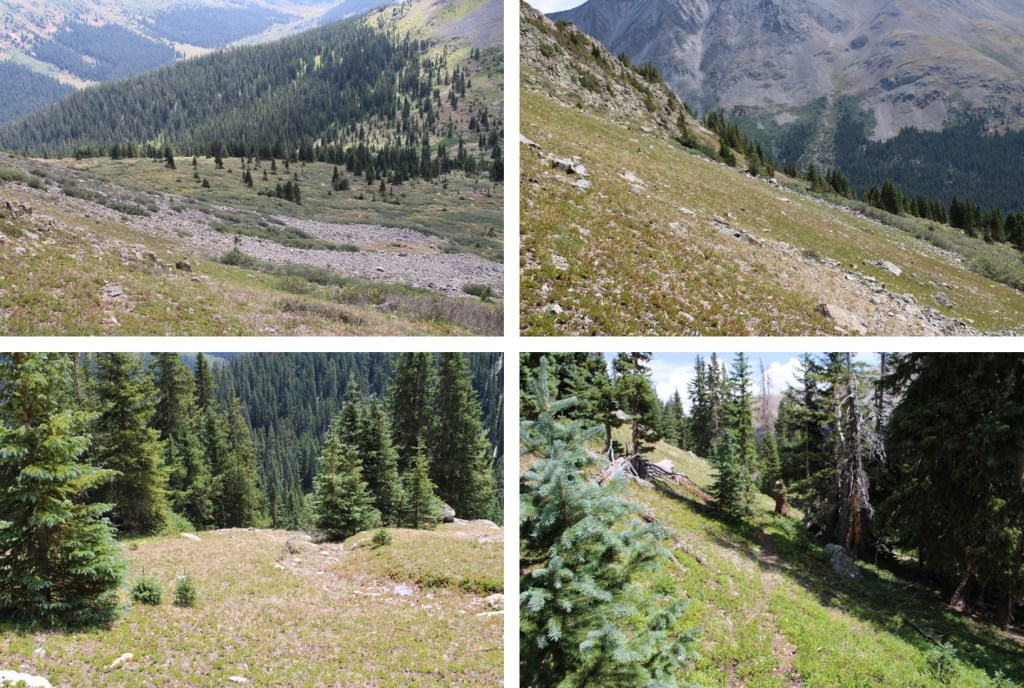
From here on out, this was a ridge hike to West Truro.  There were sections of class 2 and 2+, but most of it was class 3 and it was slow going, trying to figure out the best route to take.  I believe there are several ways to do this ridge, so you can choose how spicy you make it.  I found I stayed on the ridge proper, dropped to the left, and dropped to the right about equal amounts of time.  Just be forewarned:  once you commit to the route, there are few bailout points. 

I headed southwest back down the ridge.

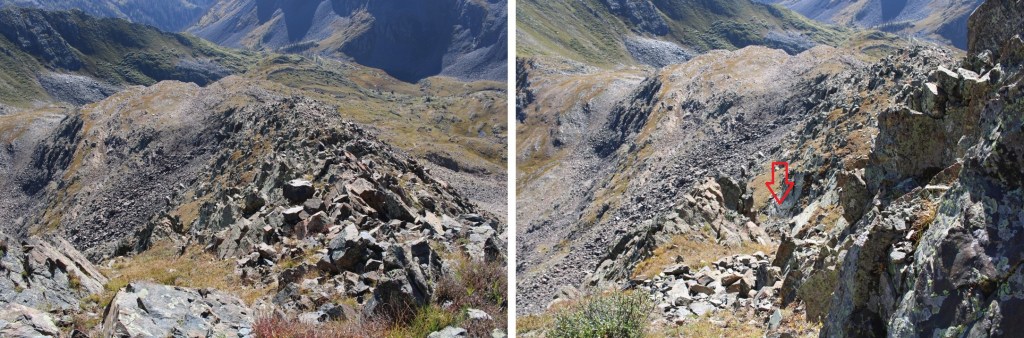
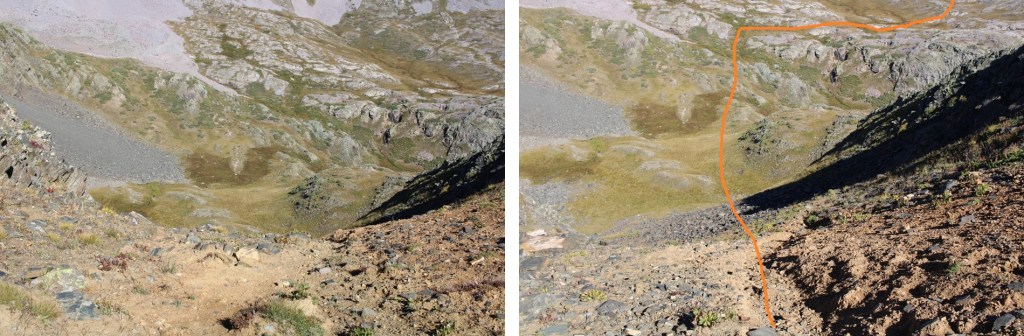
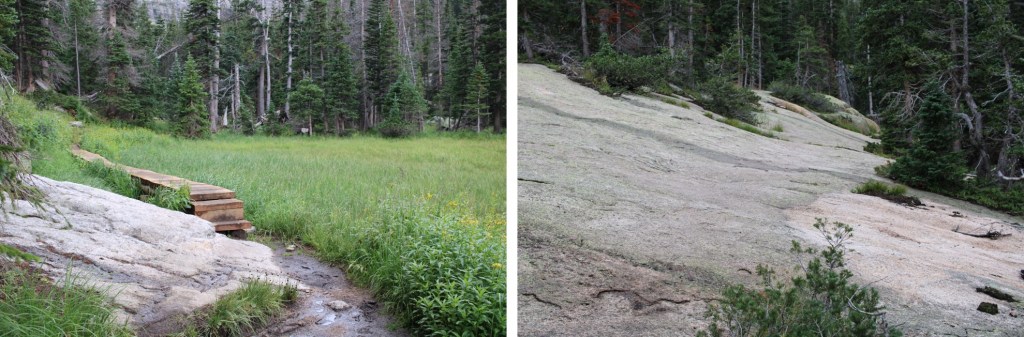
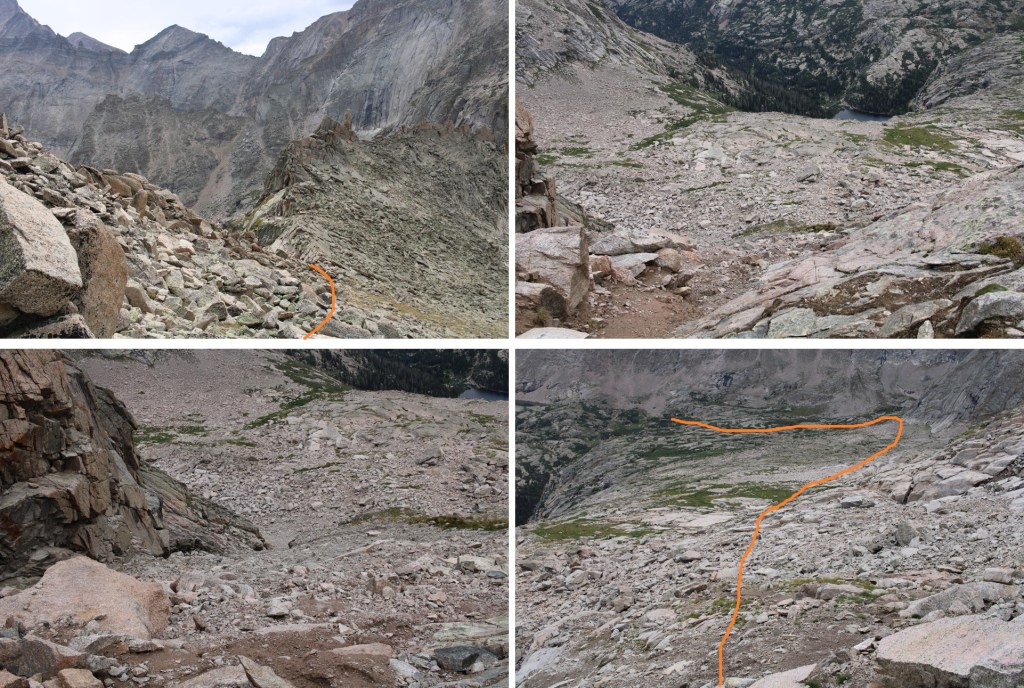
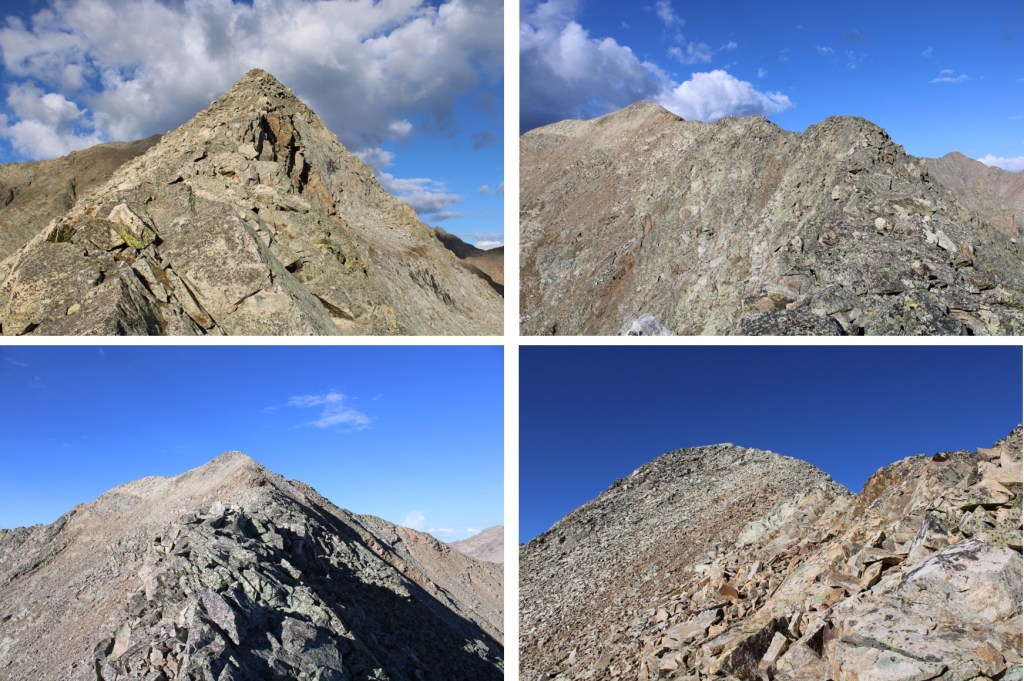
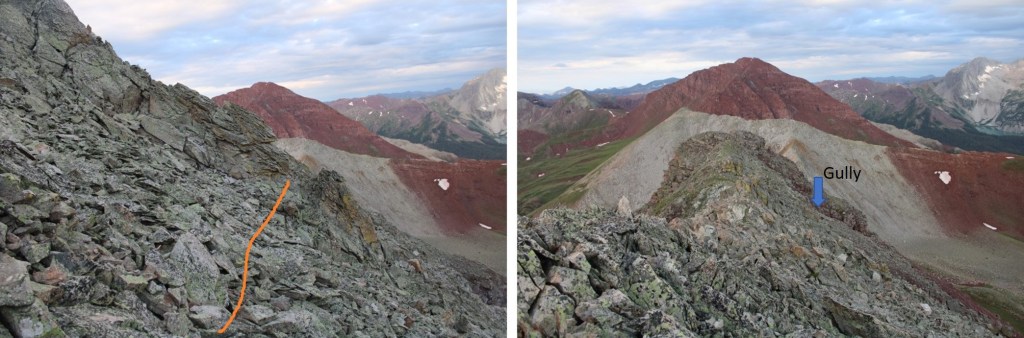
From here on I was following the ridge basically west.  Since this is choose your own adventure, I’ll highlight a few pictures, and the route I took.

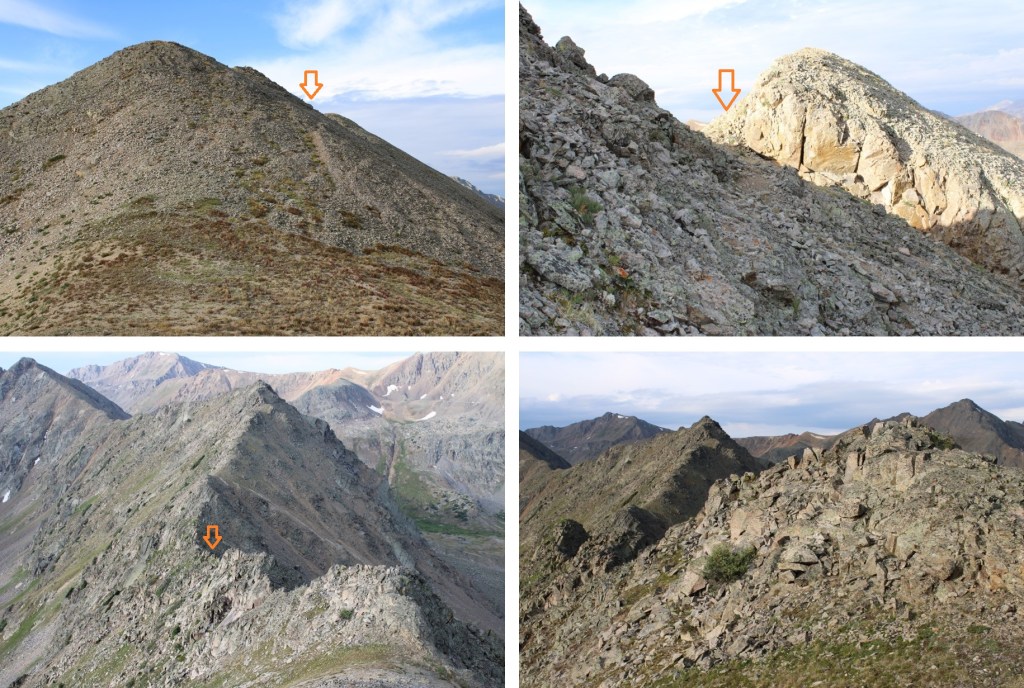
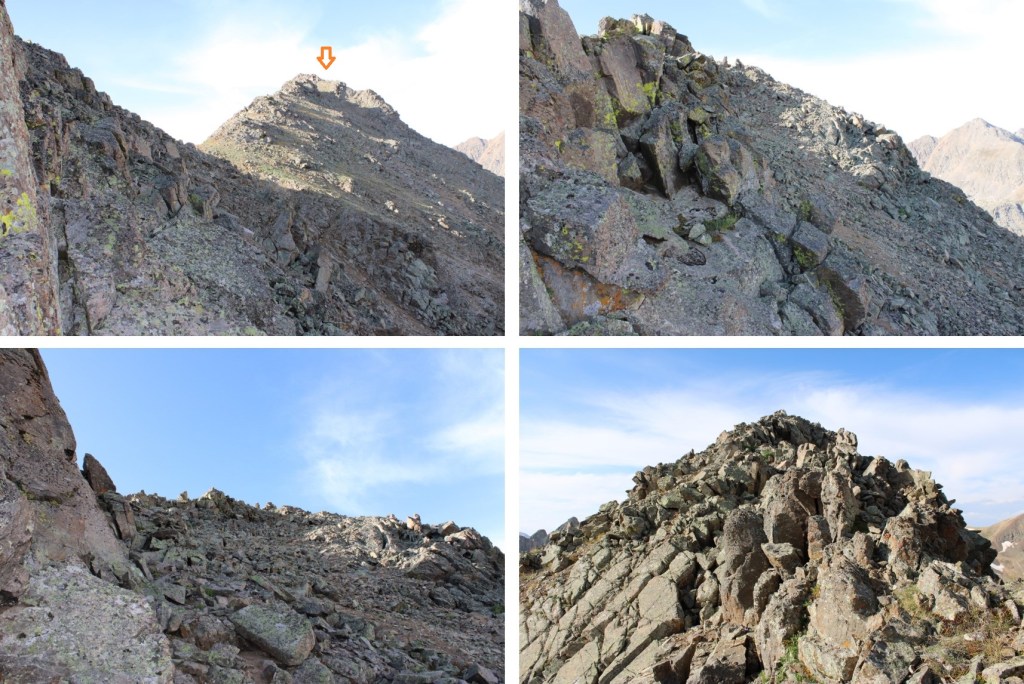
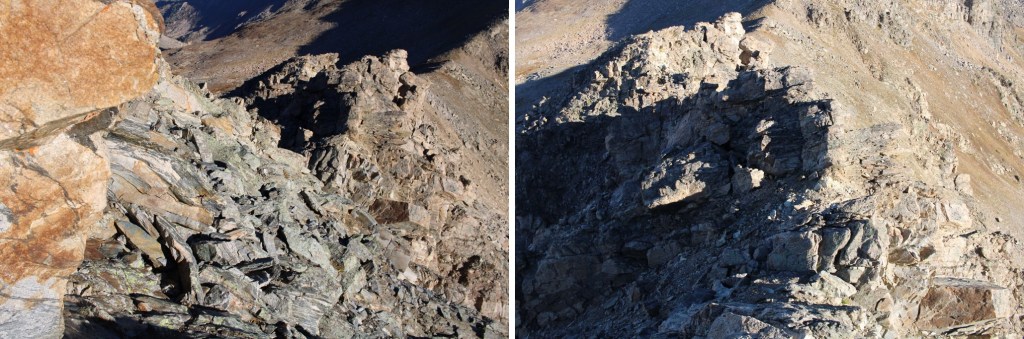
I was now halfway through the ridge to West Truro.  I sat down for a bit of a rest, and looked at the route before me.

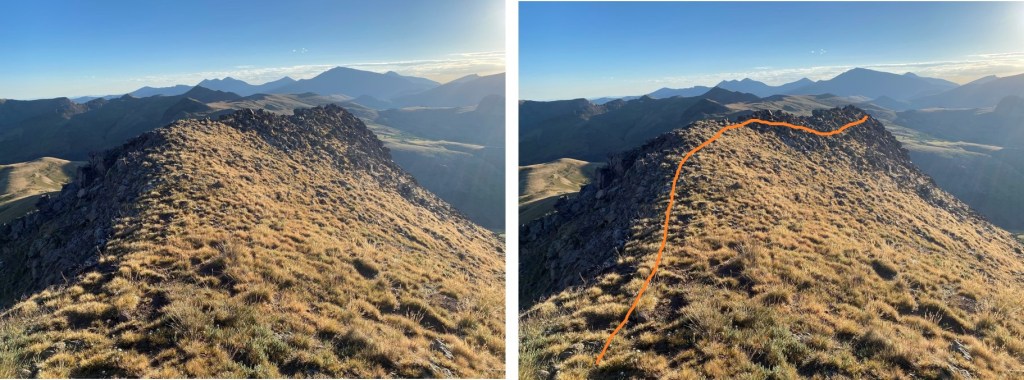
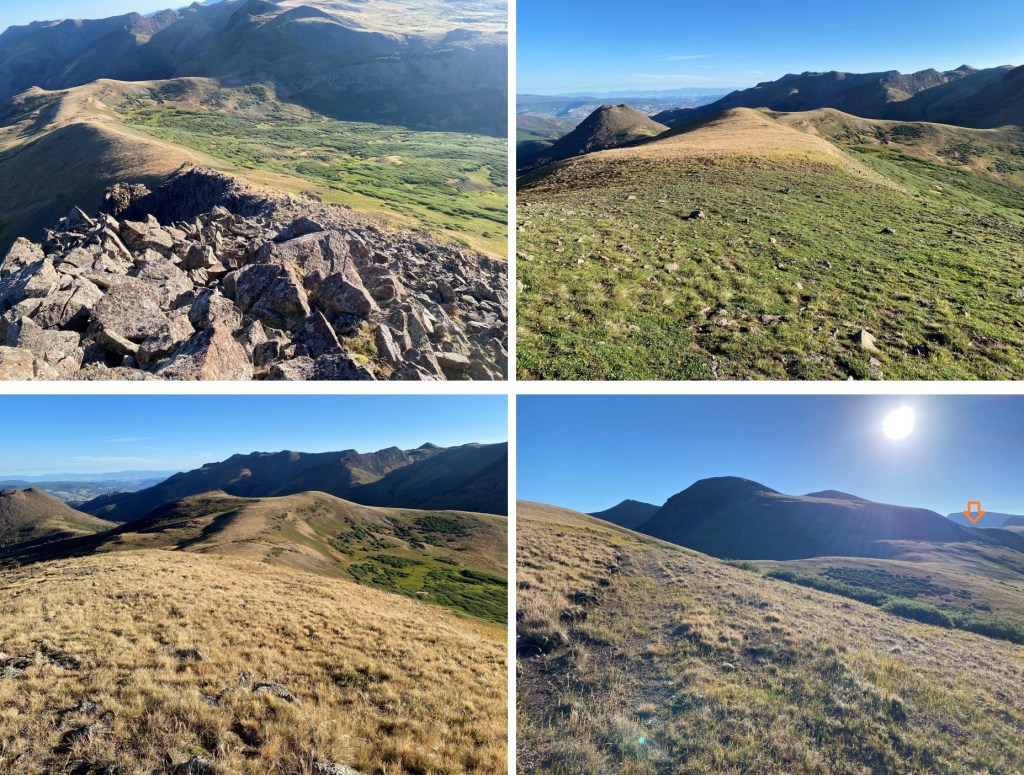
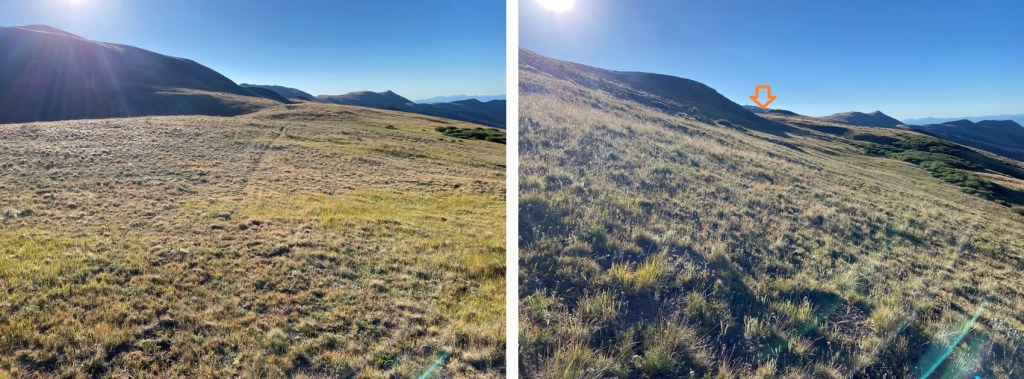
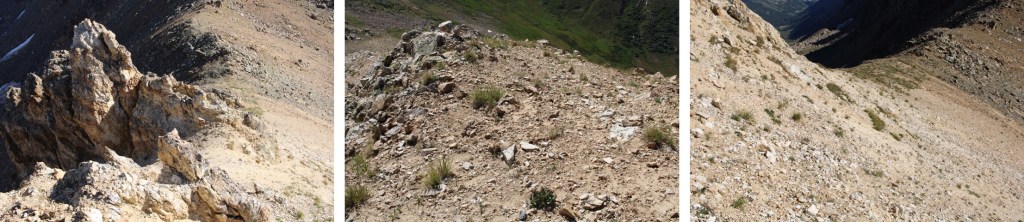
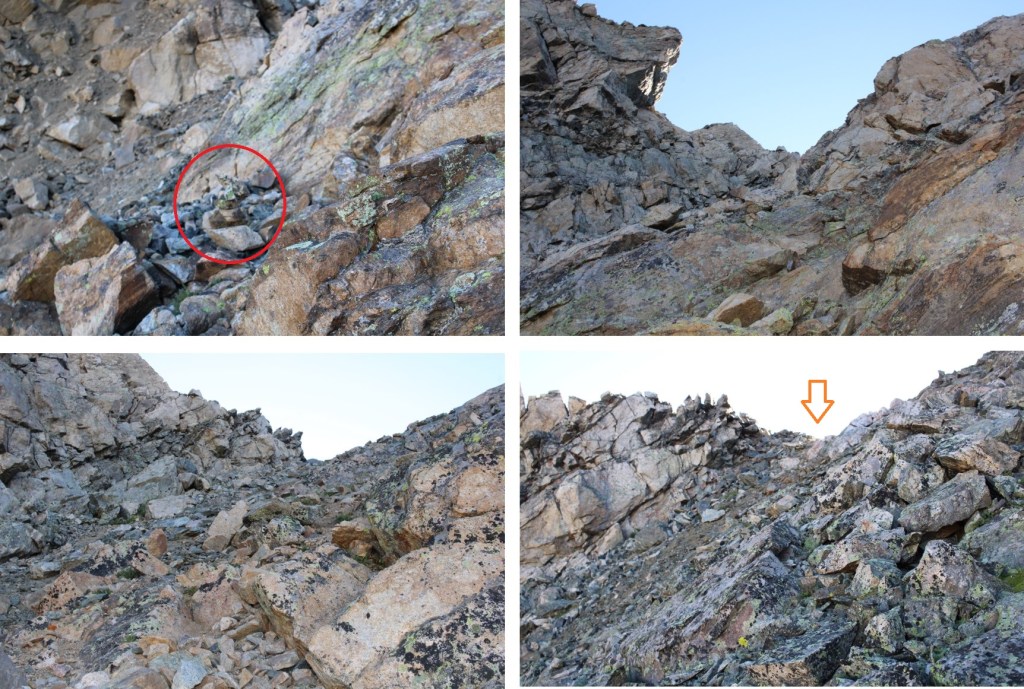
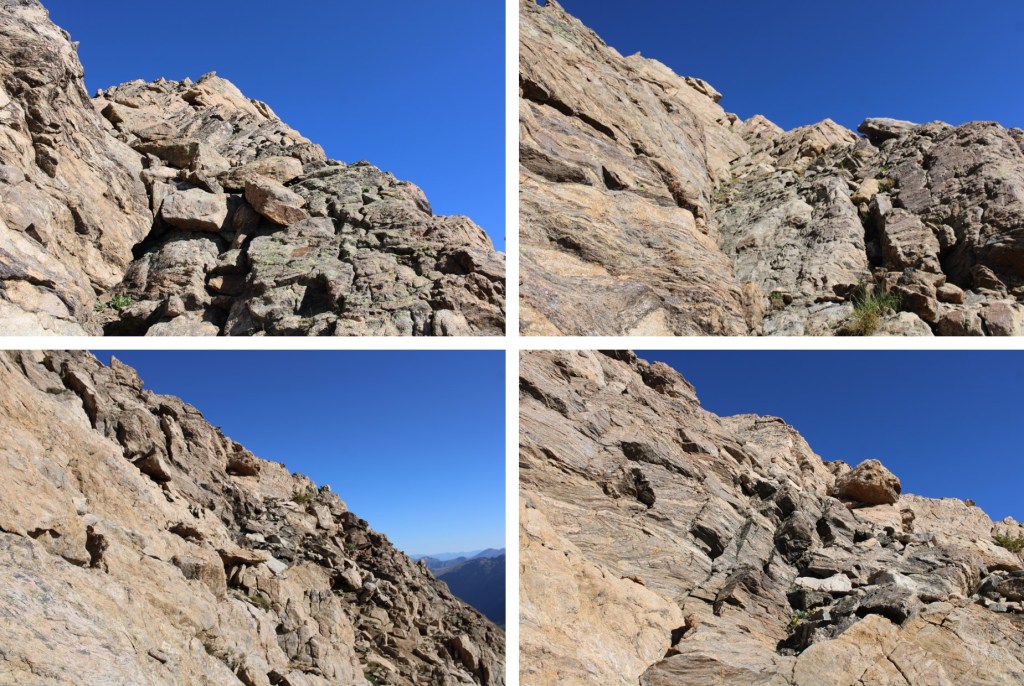
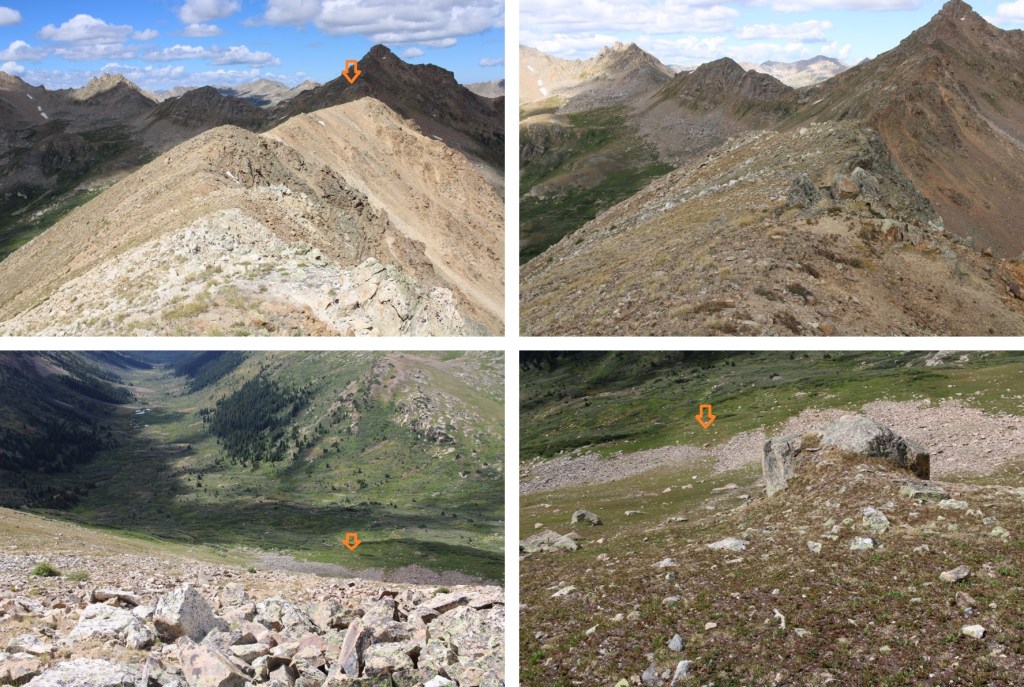
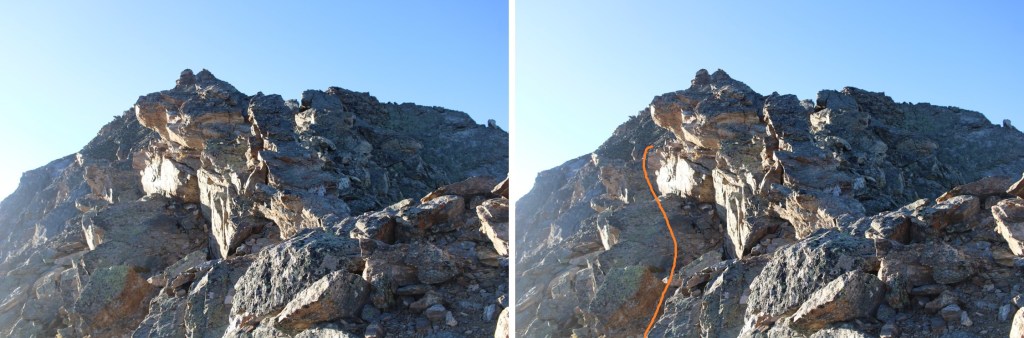
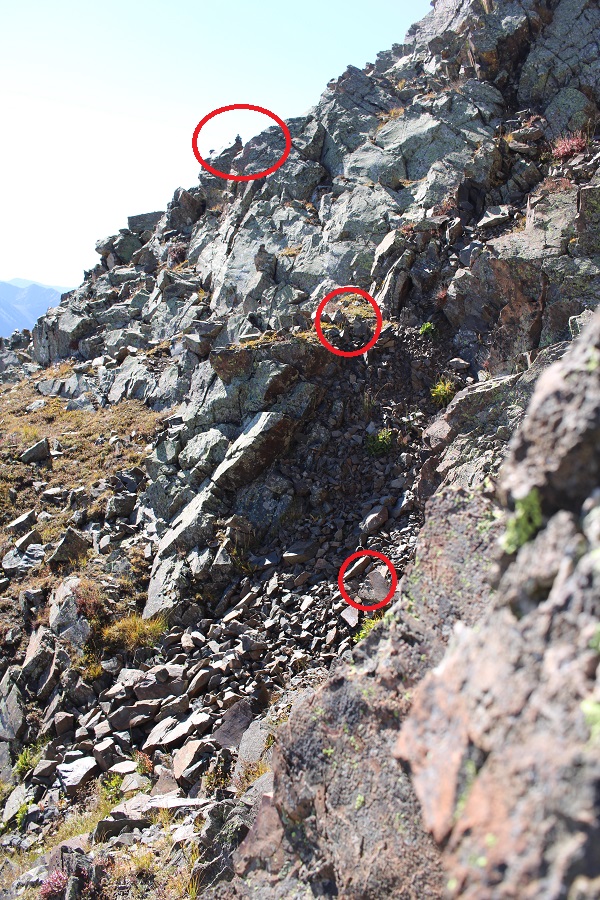
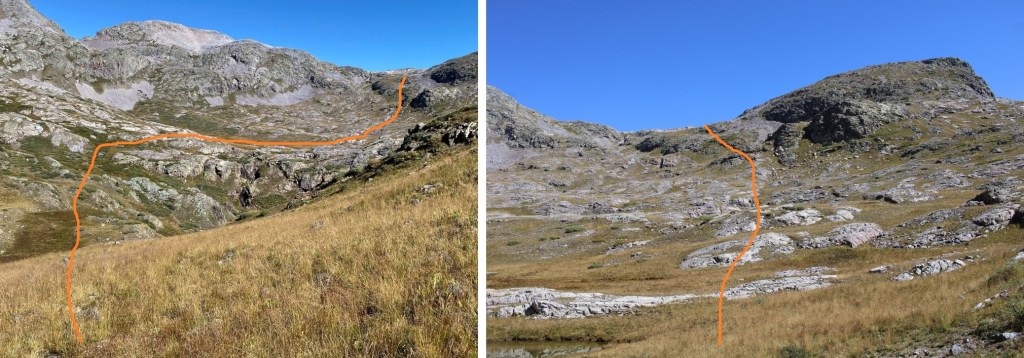
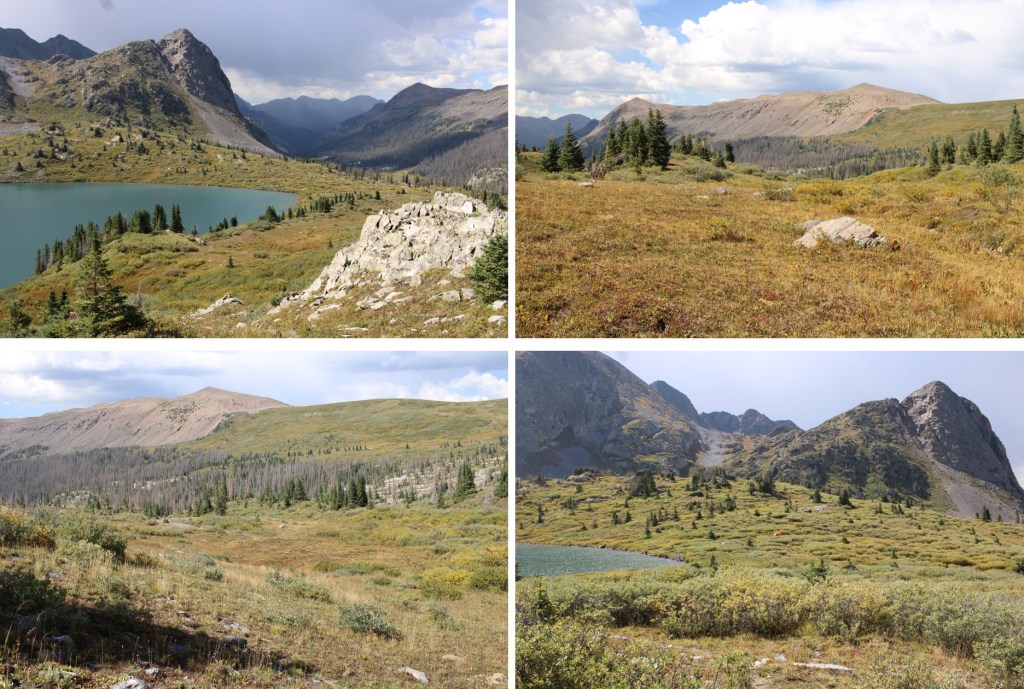
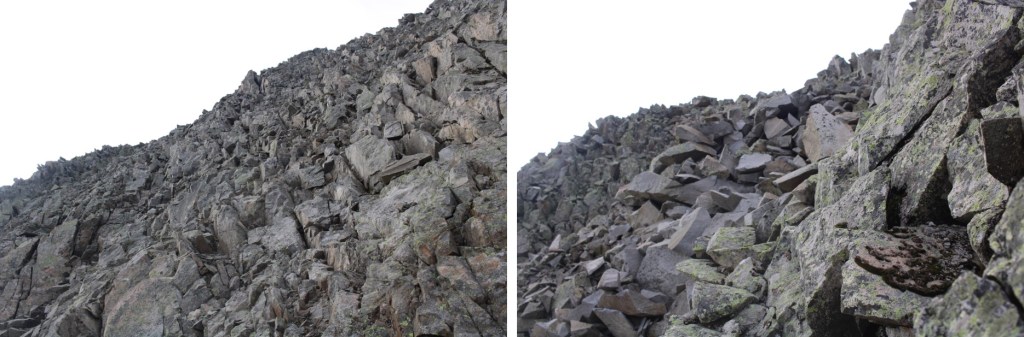
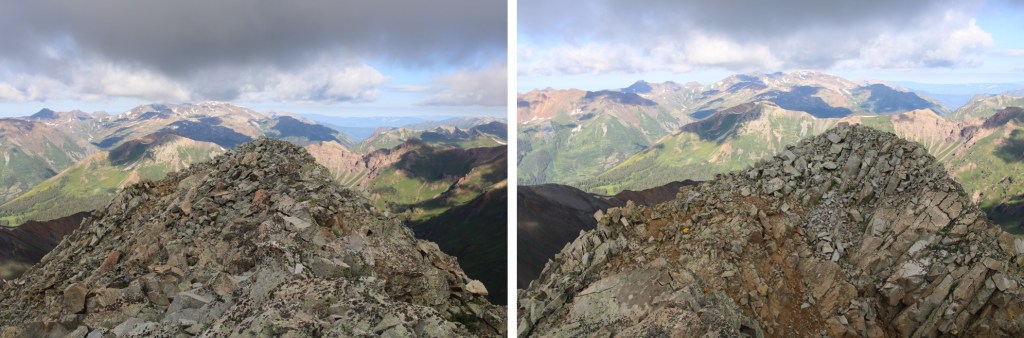
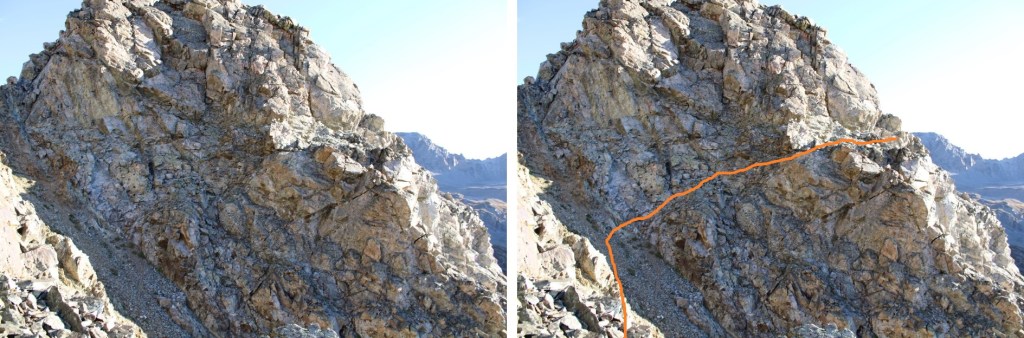
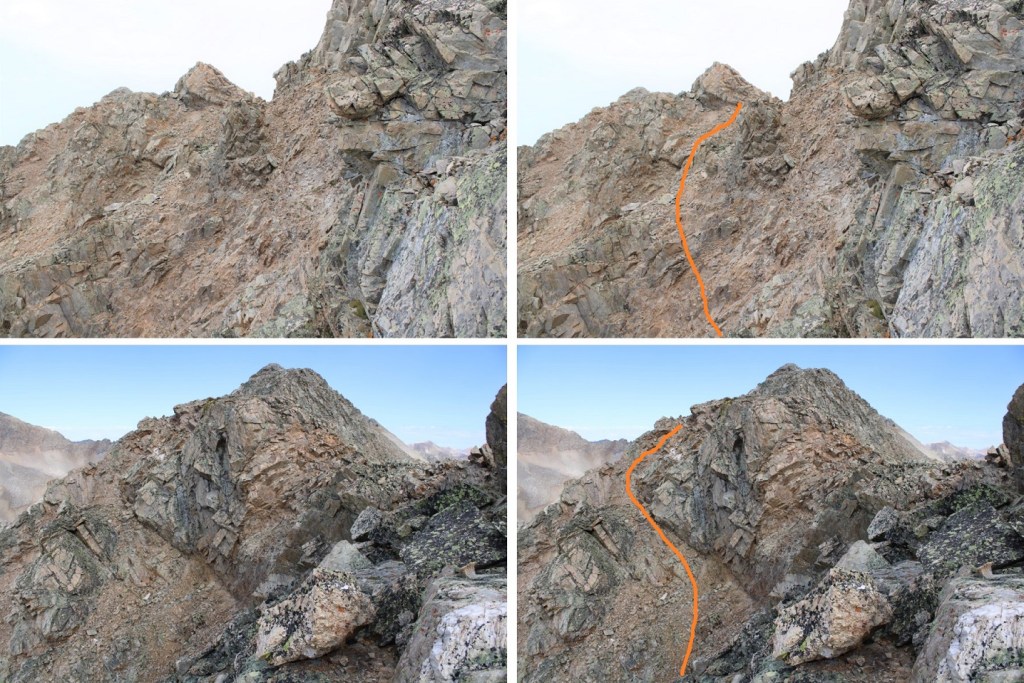
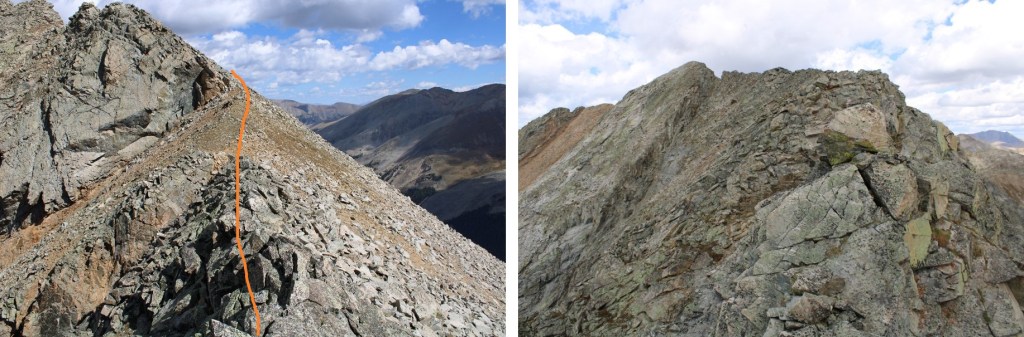
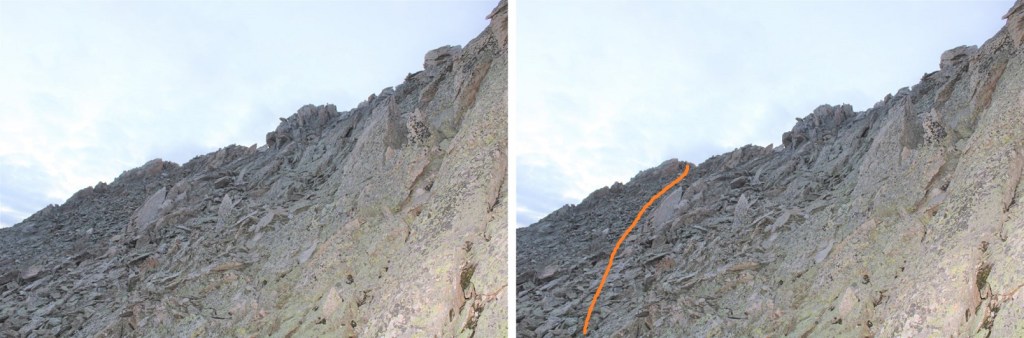
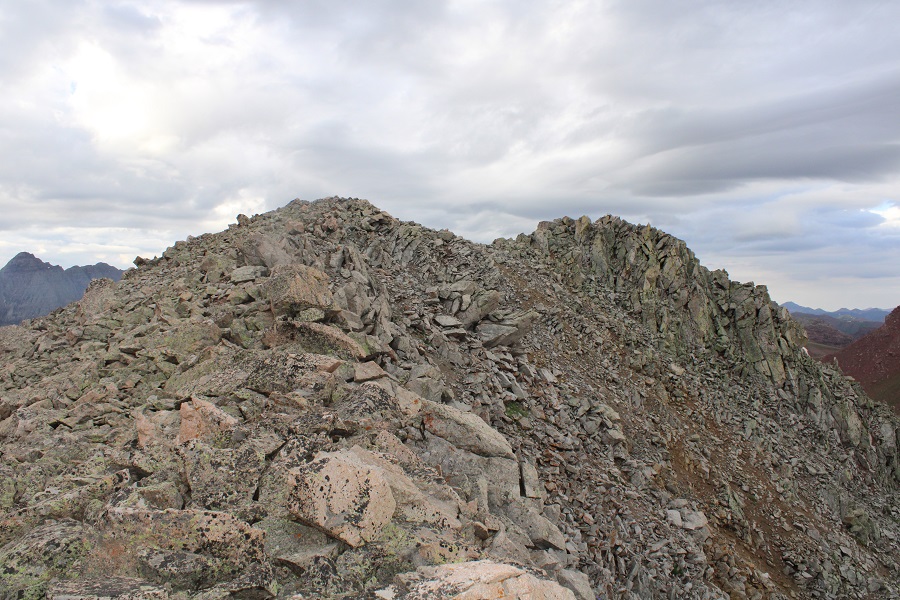
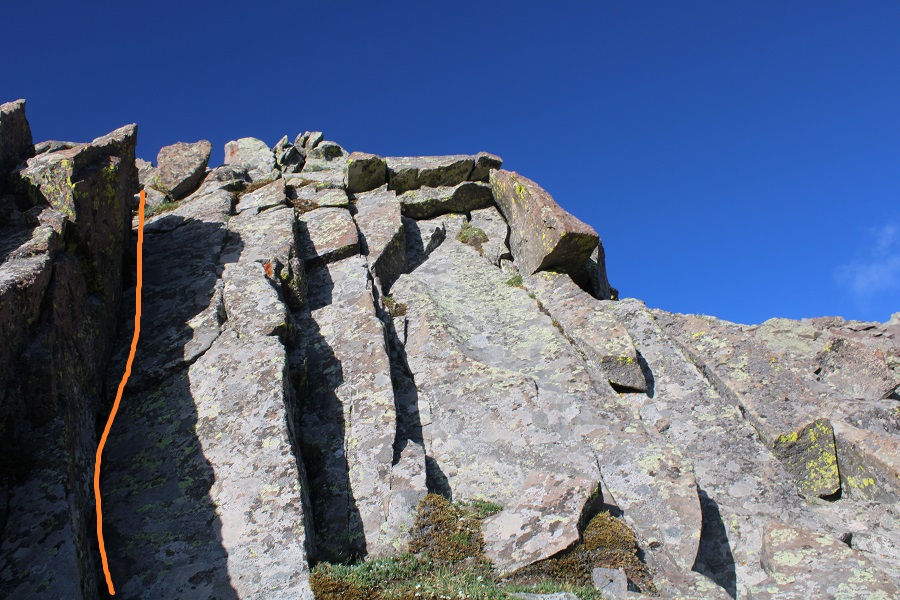
This second half of the ridge looked easier than the first, and indeed it was.  For this part of the ridge, I stayed mainly to the right.  Here are some pictures of this easier part of the ridge

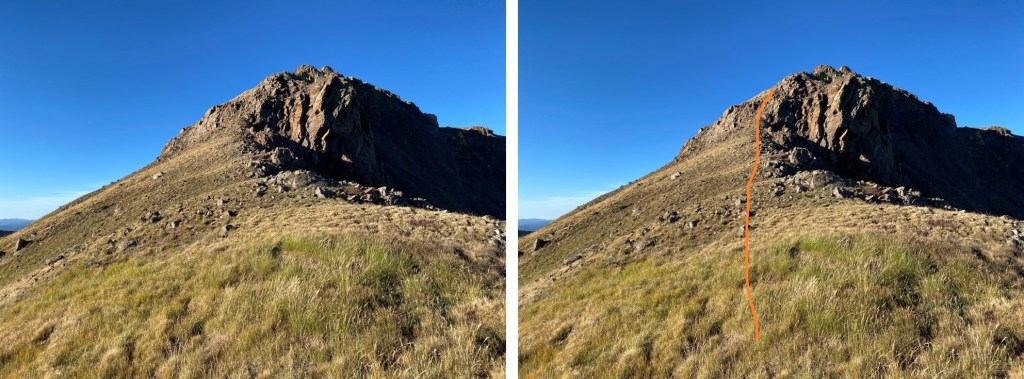
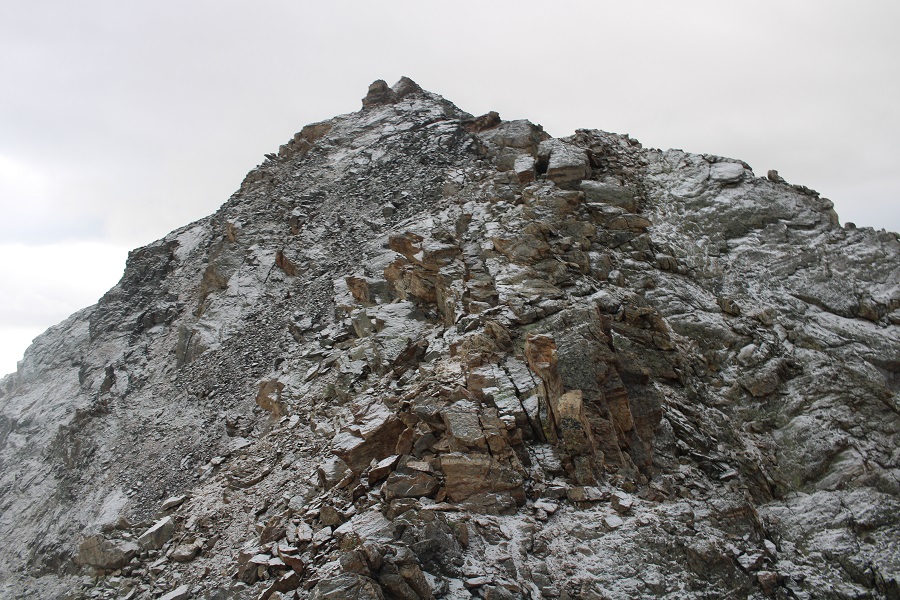
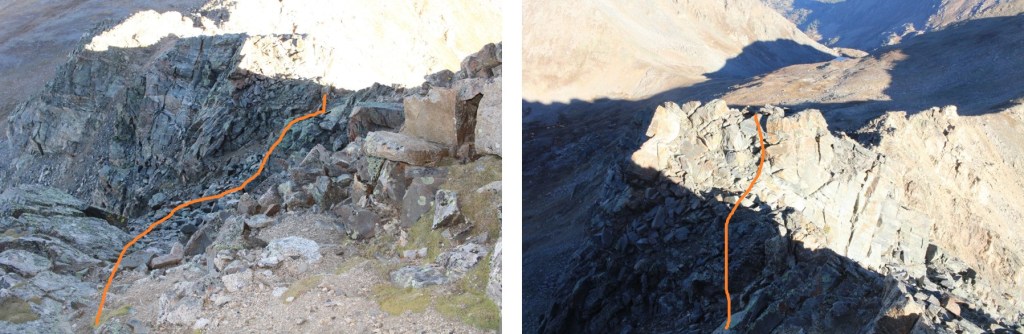
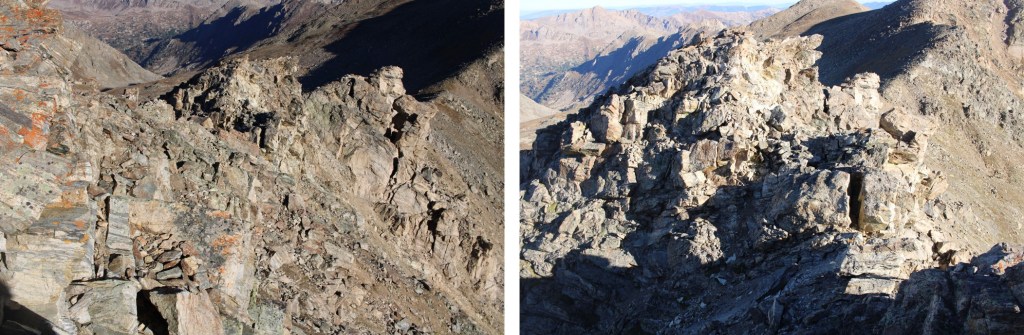
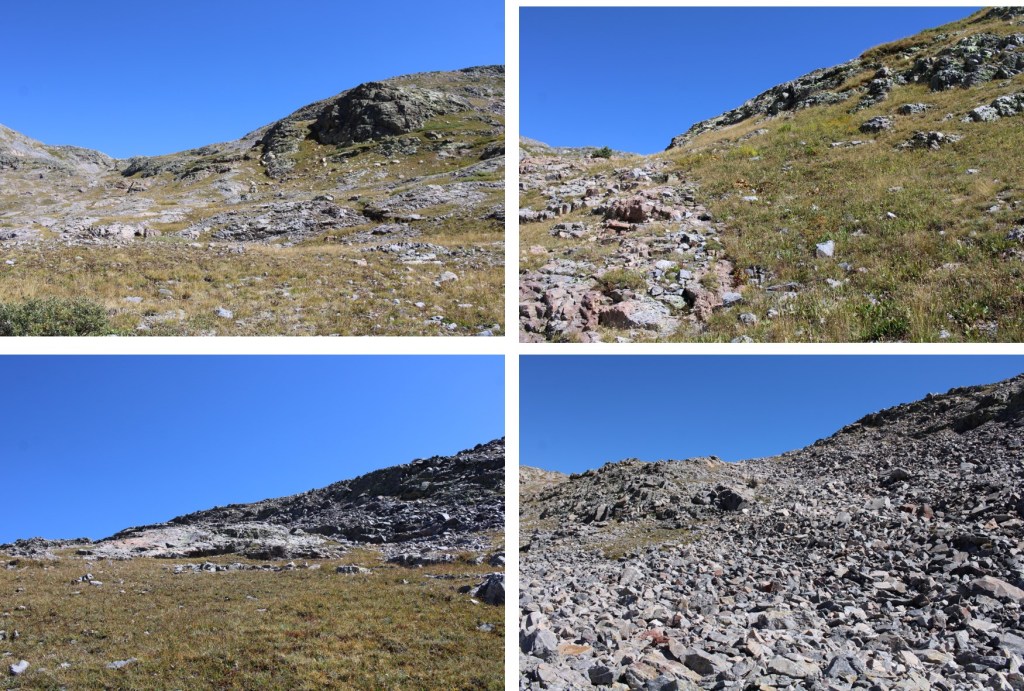
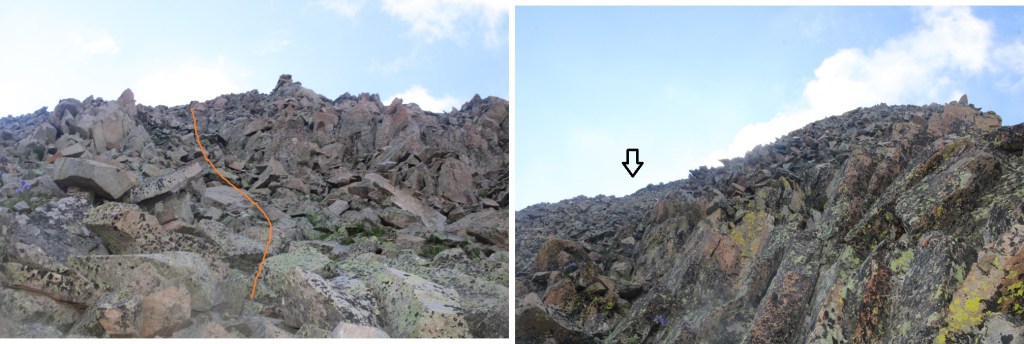
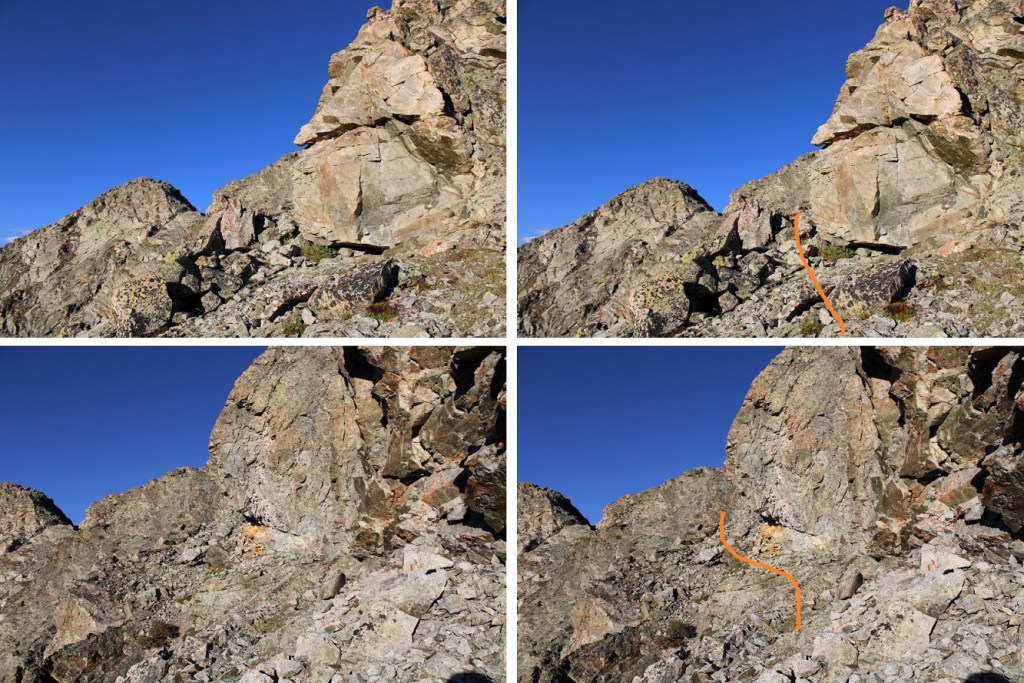
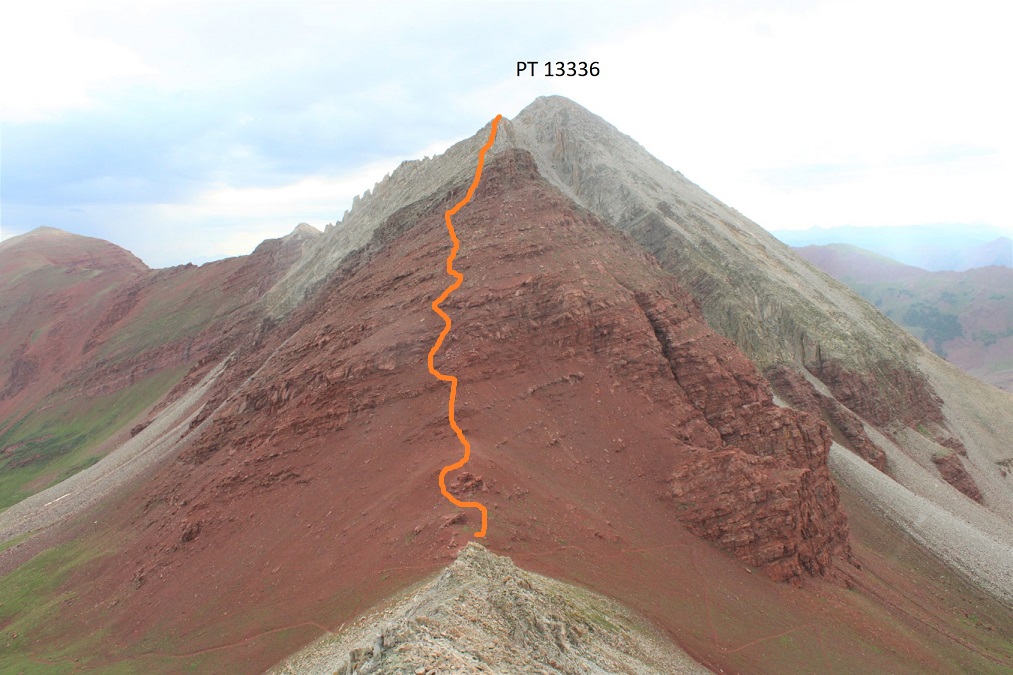
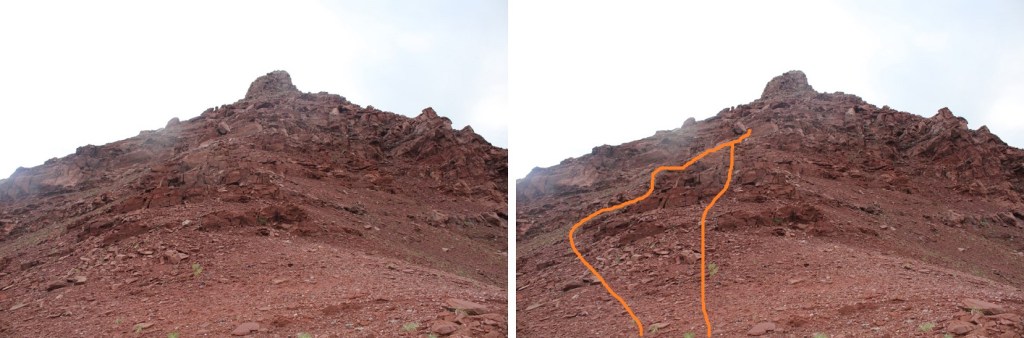
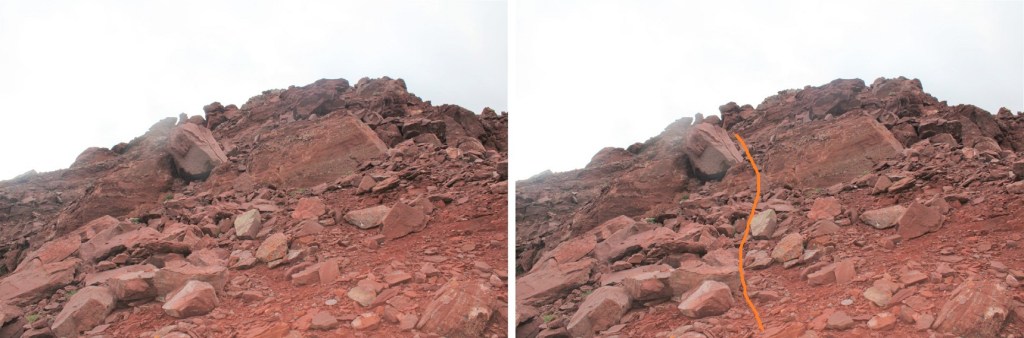
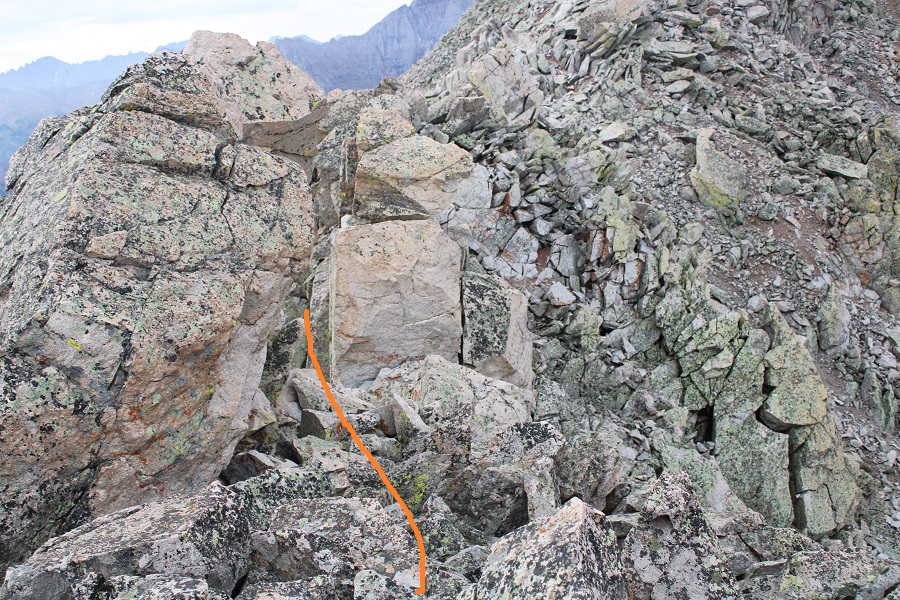
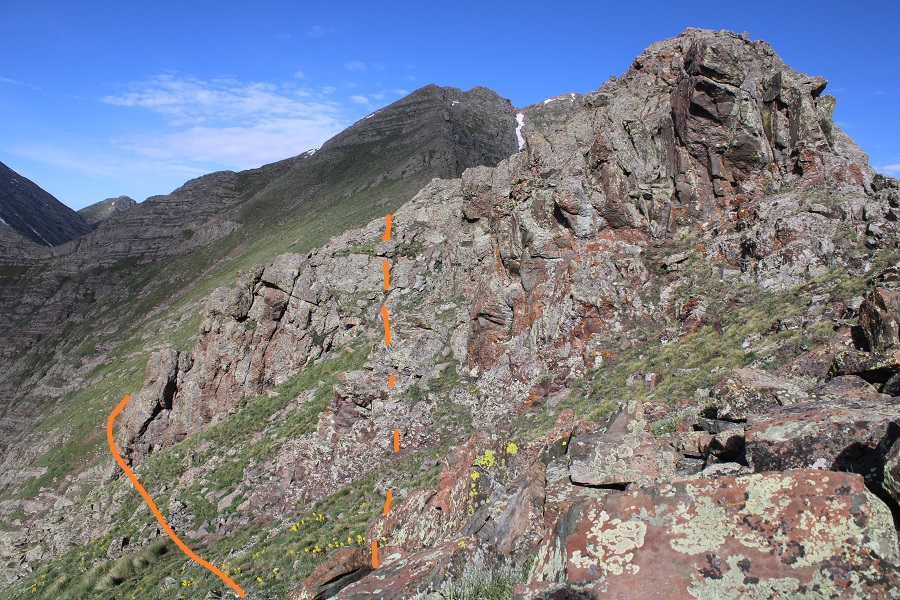
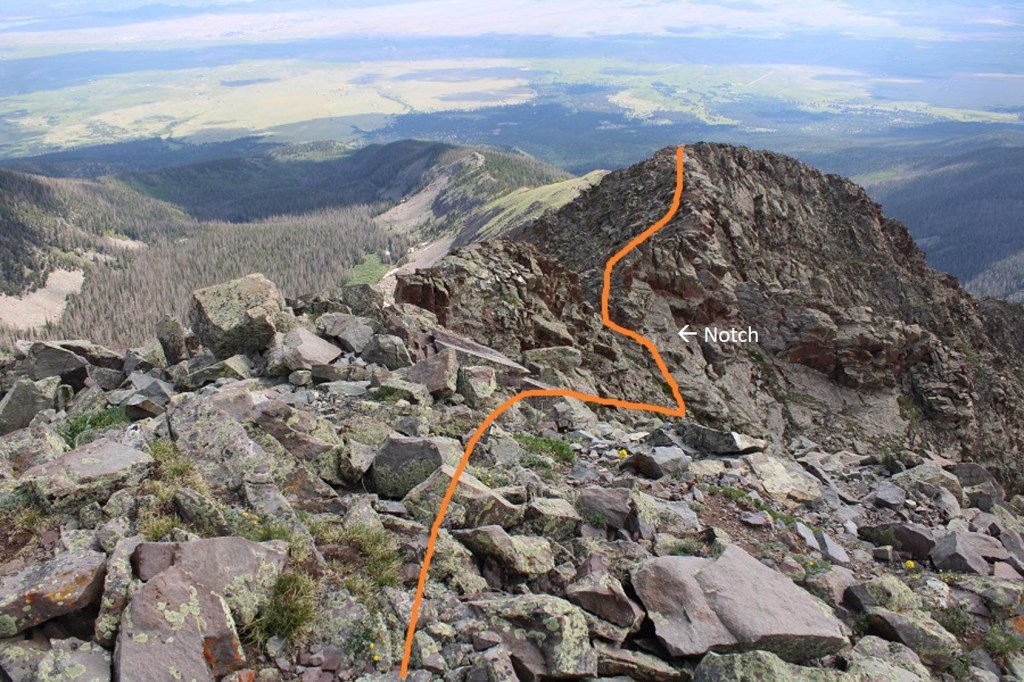
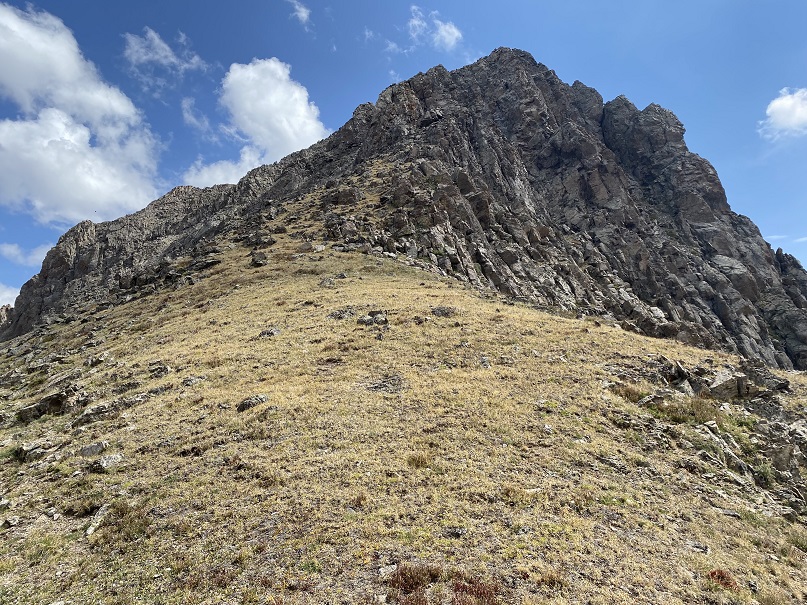
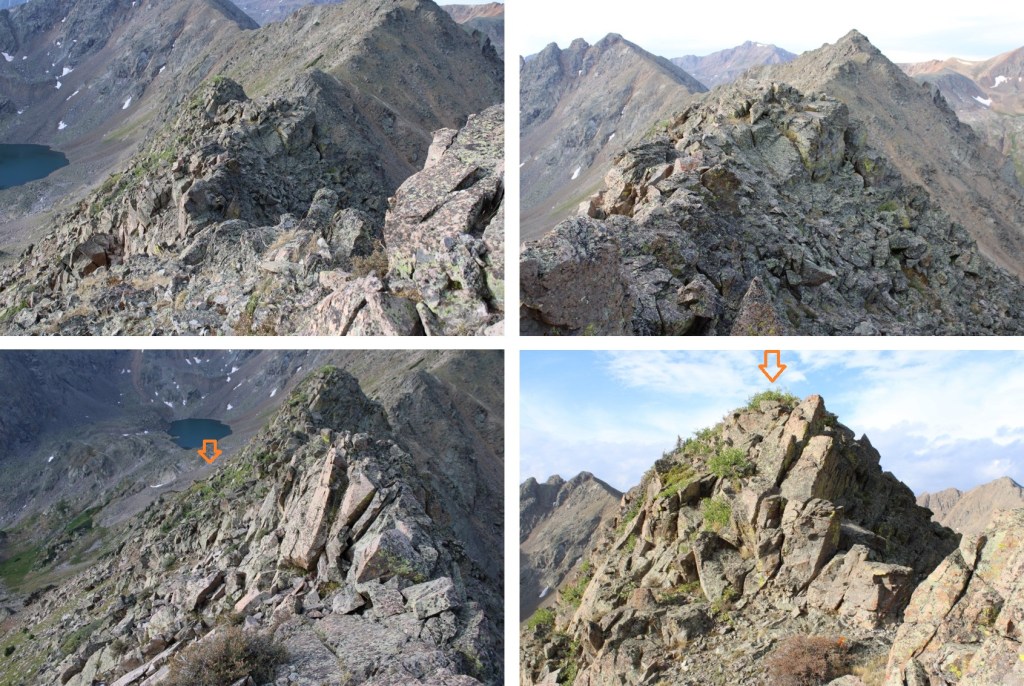
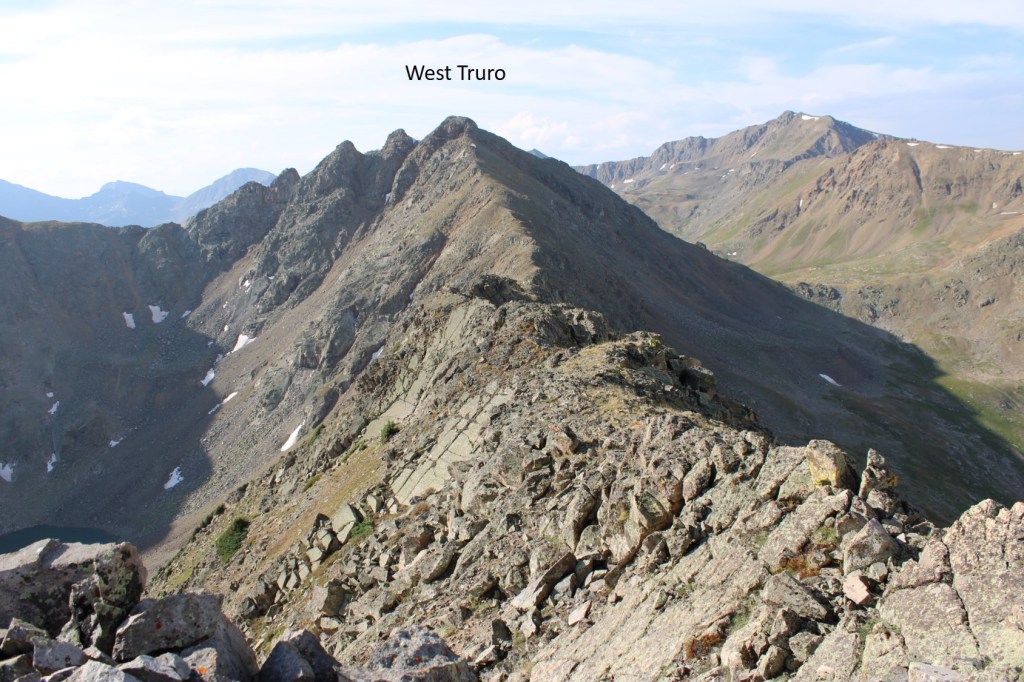
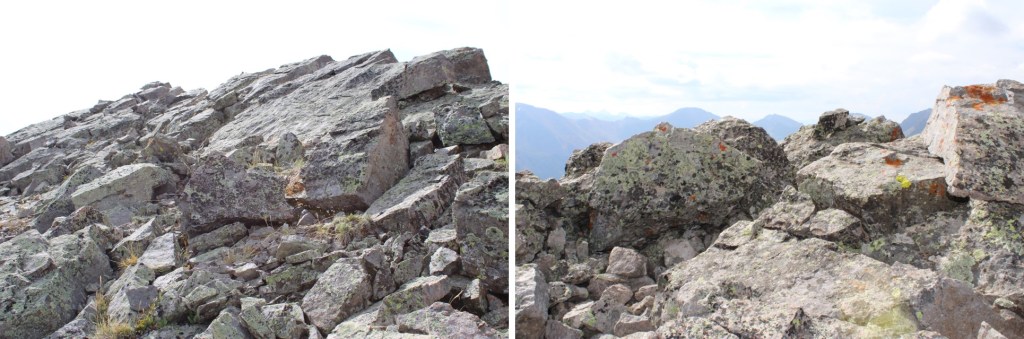
Most of the ascent up West Truro from the saddle was class 2 and stayed on the ridge, until just before the end.

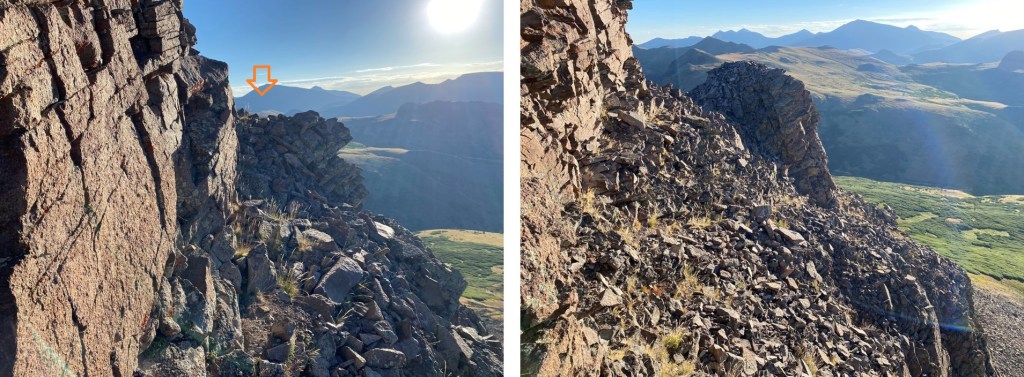
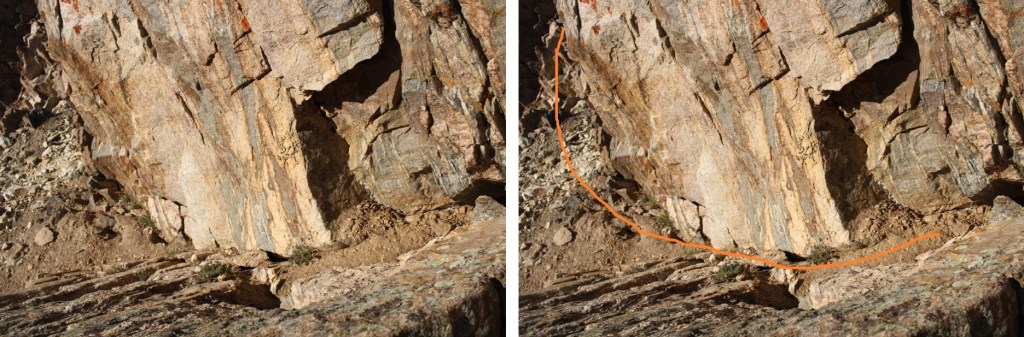
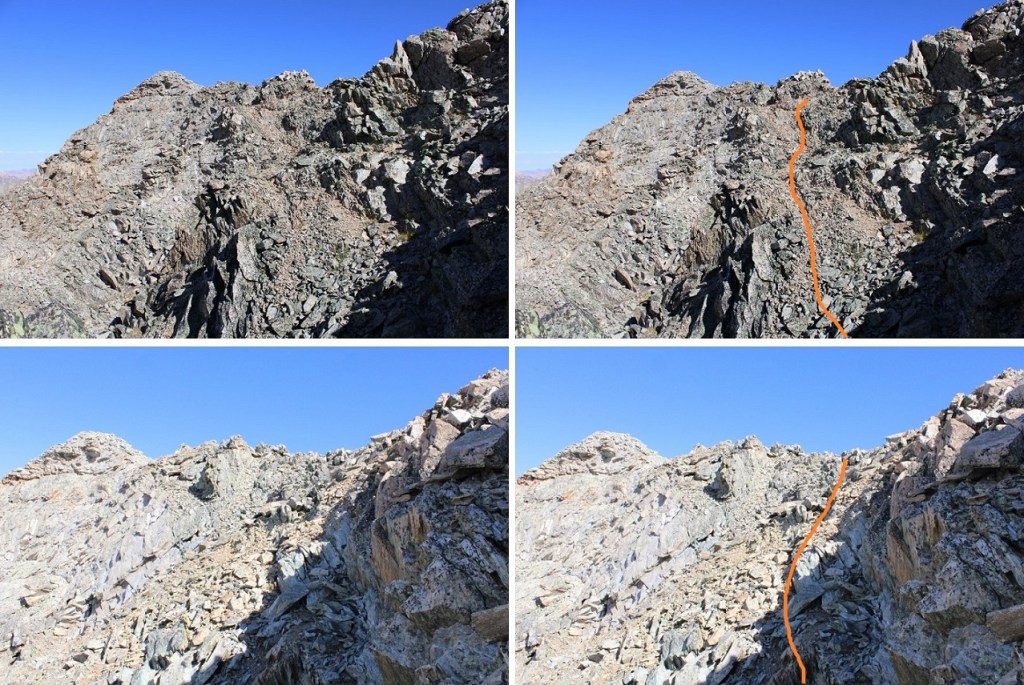
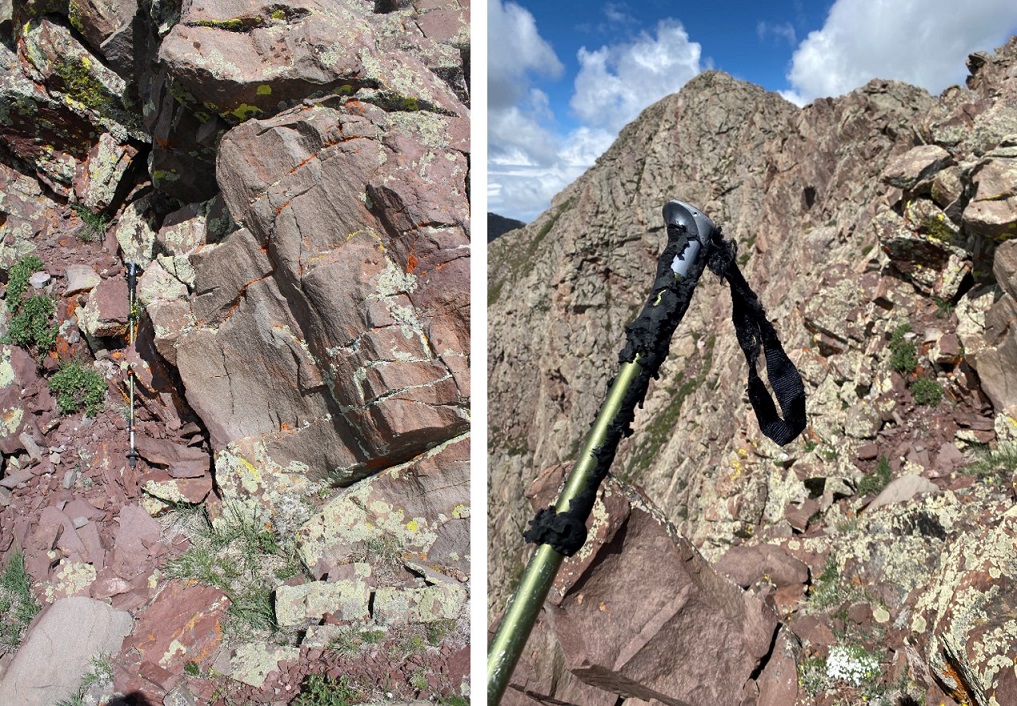
There was a short class 3 chimney to scramble (class 4 is to the right), and then a short scramble to the summit.

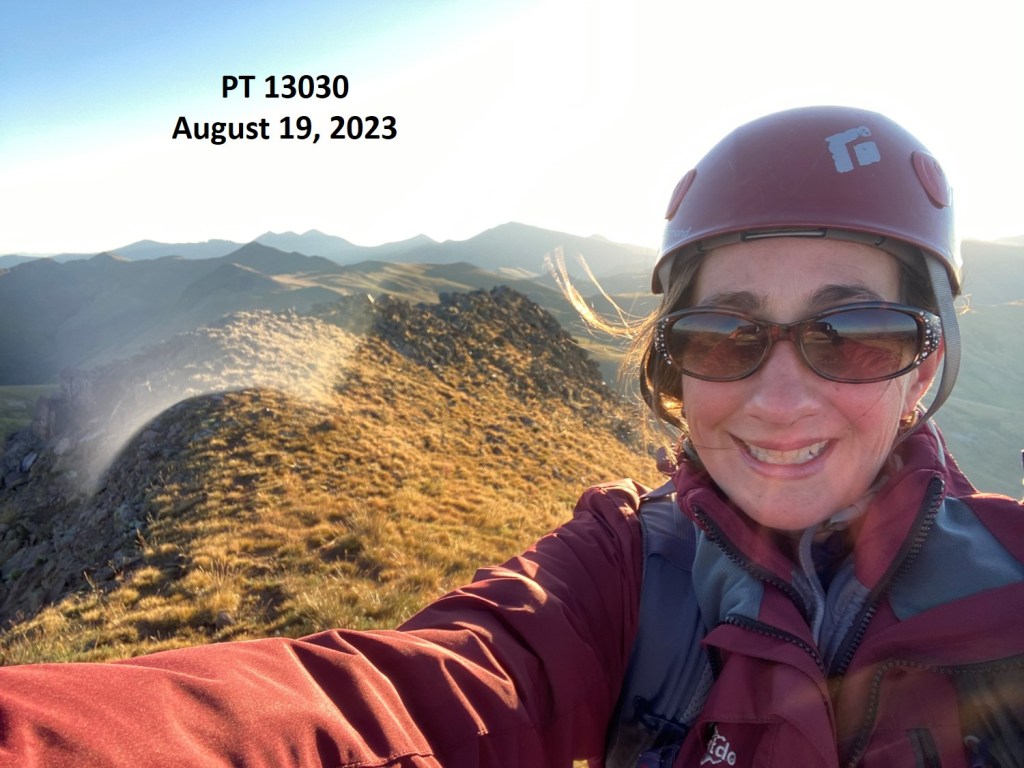
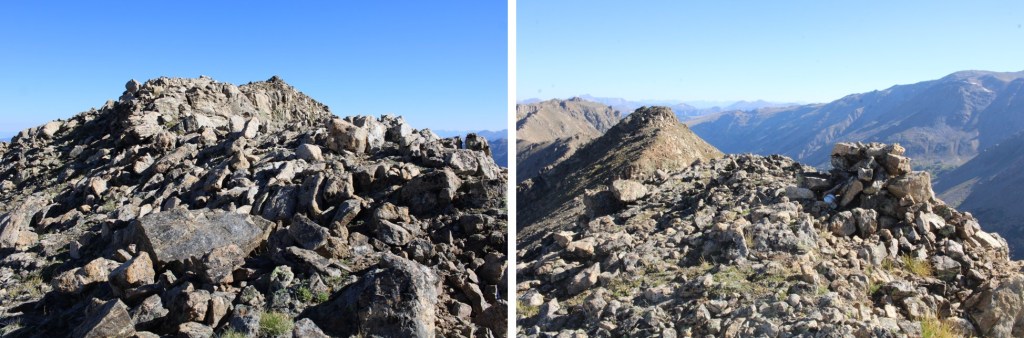
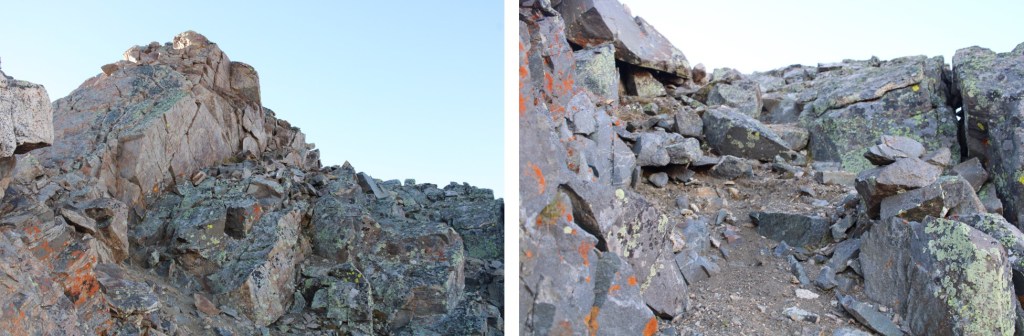
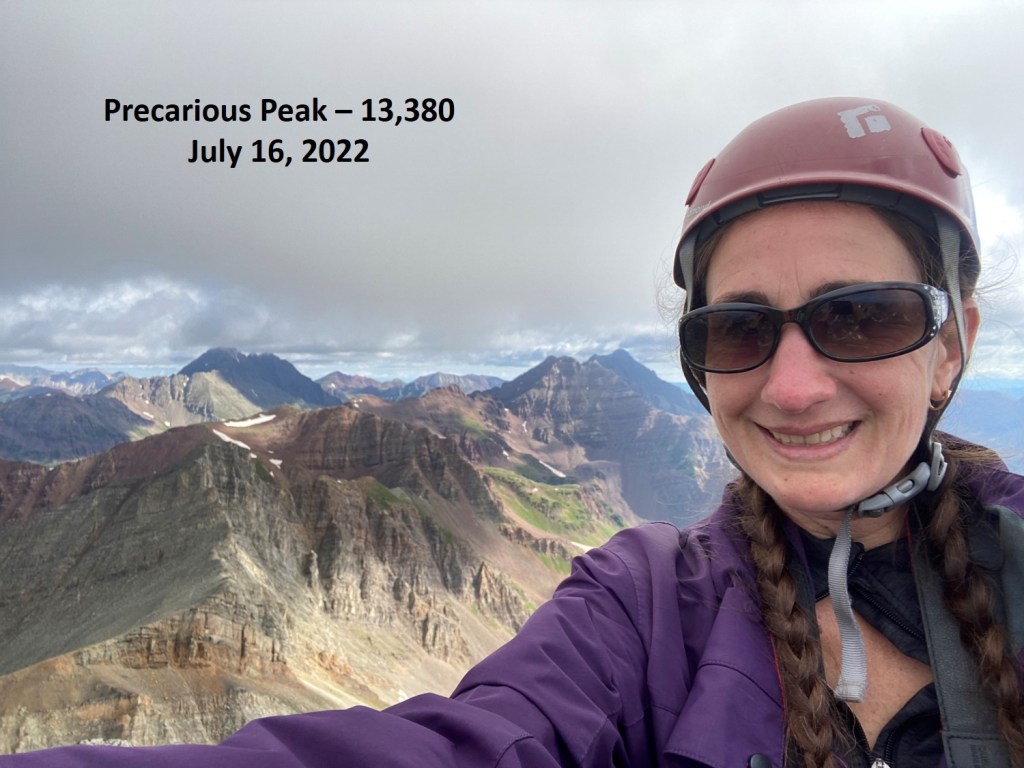
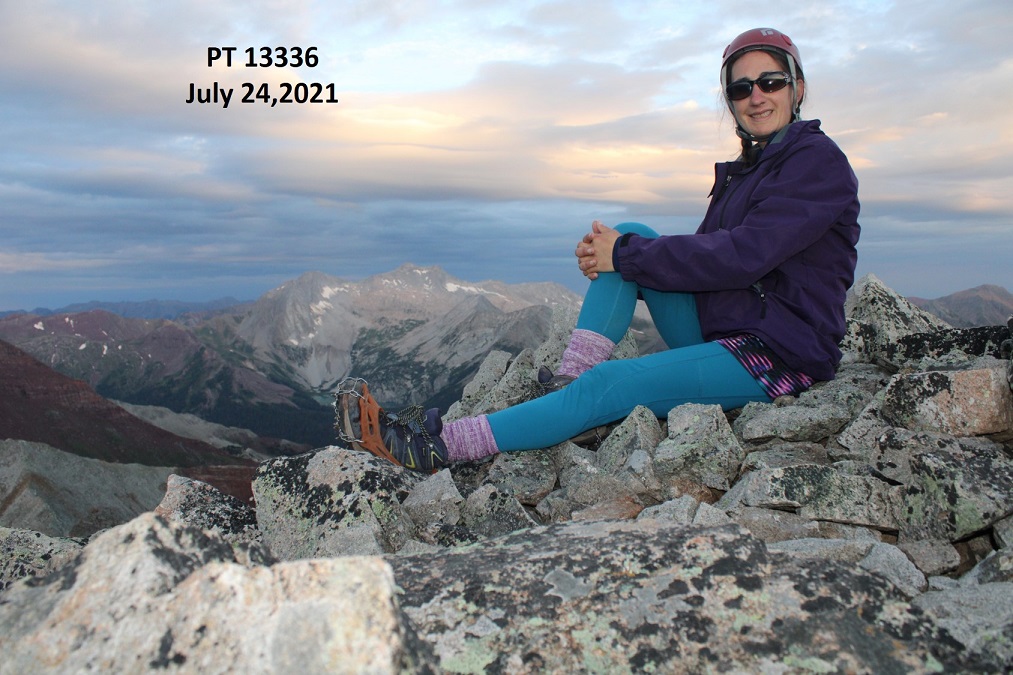
I summited West Truro at 9:30am
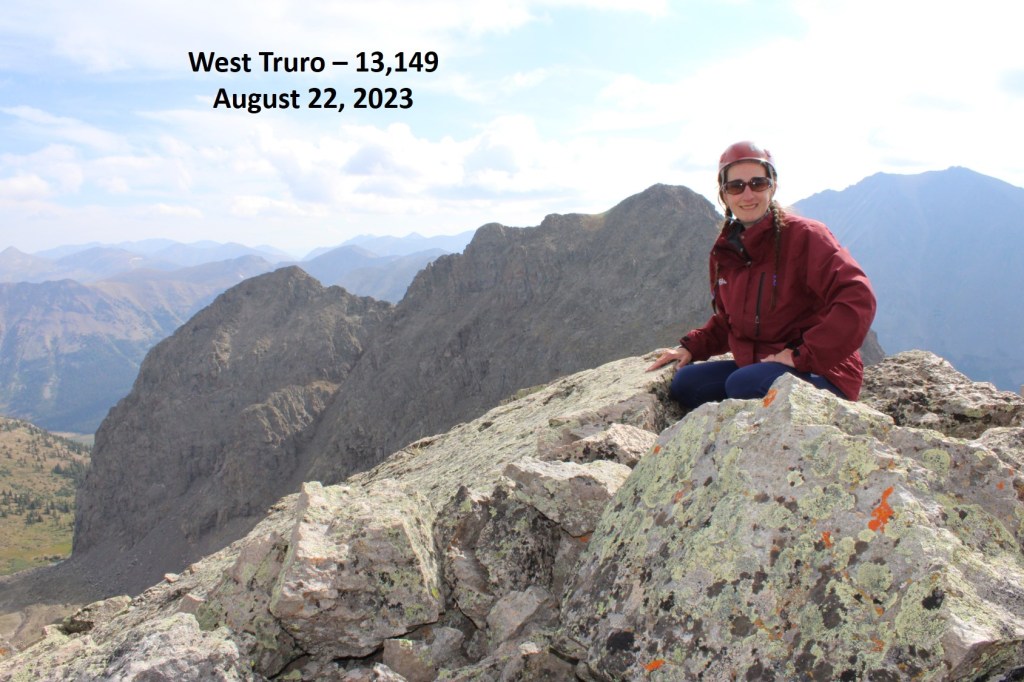
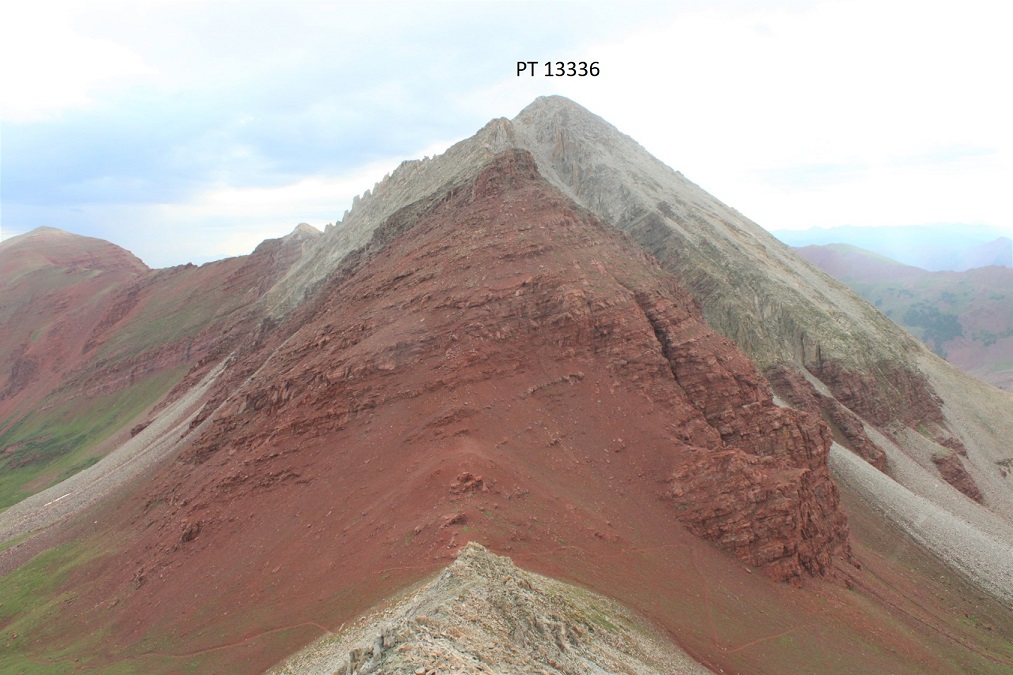
West Truro:

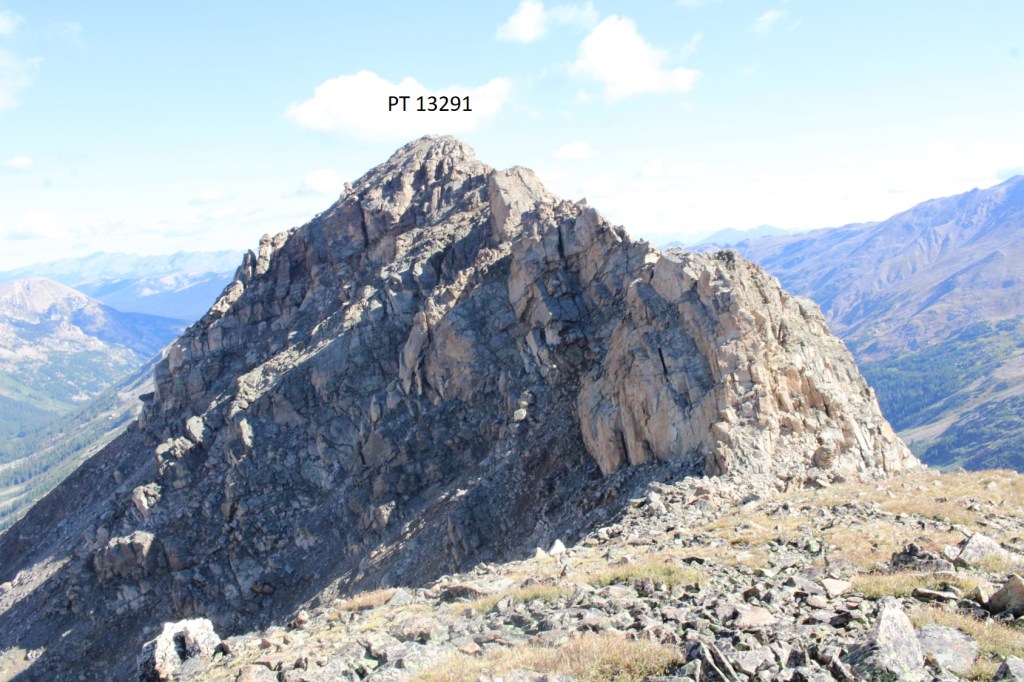
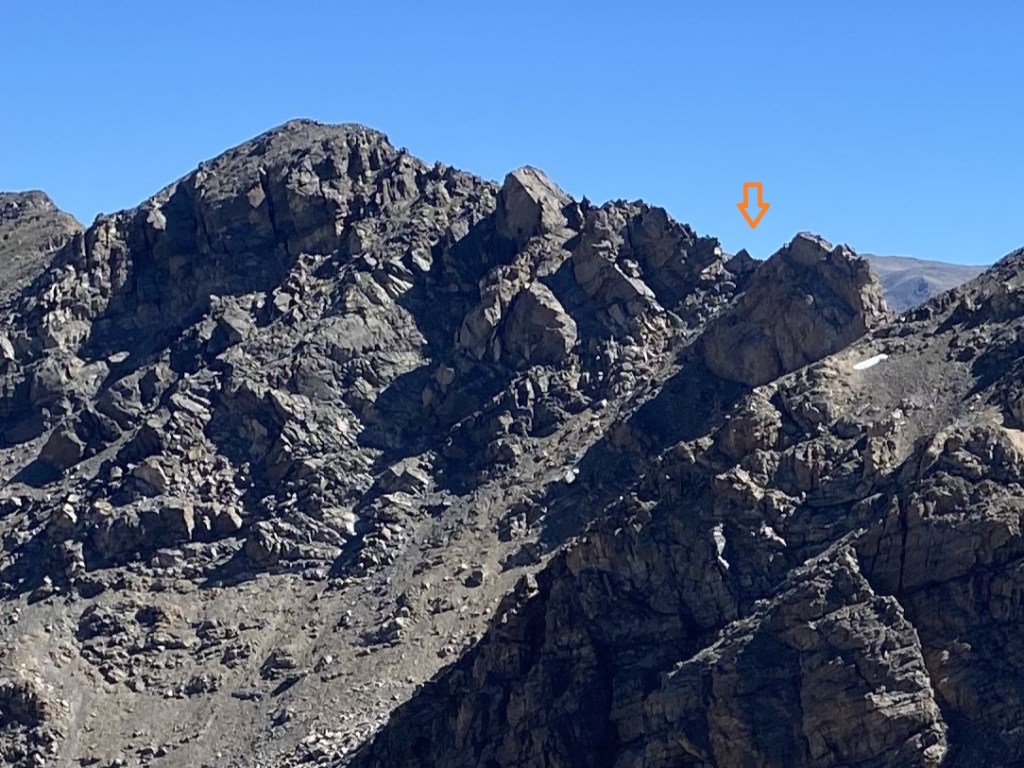
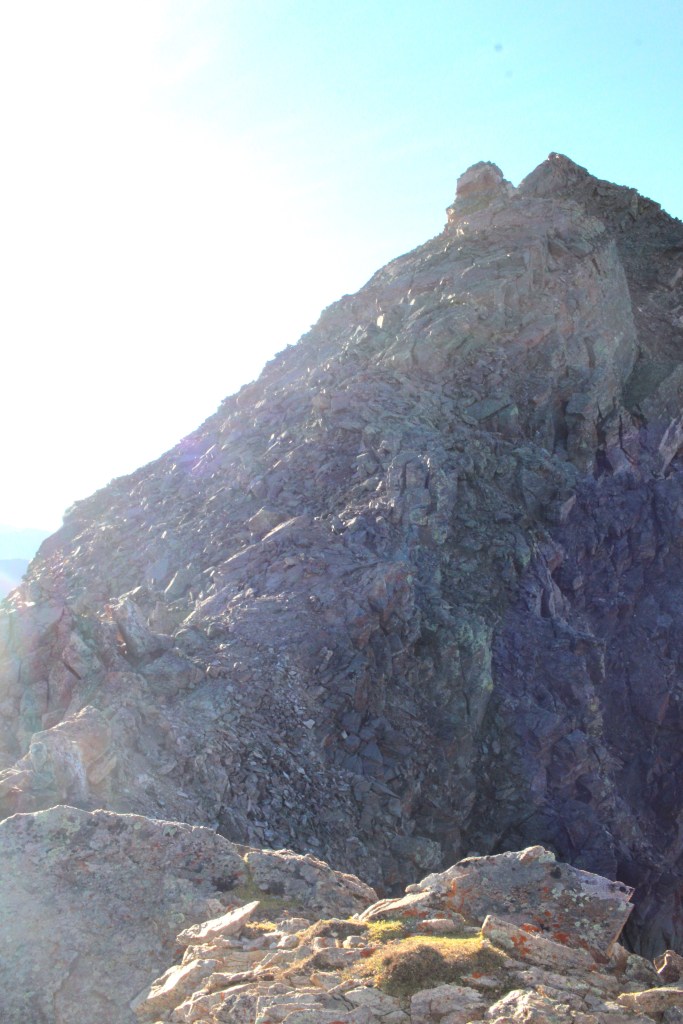
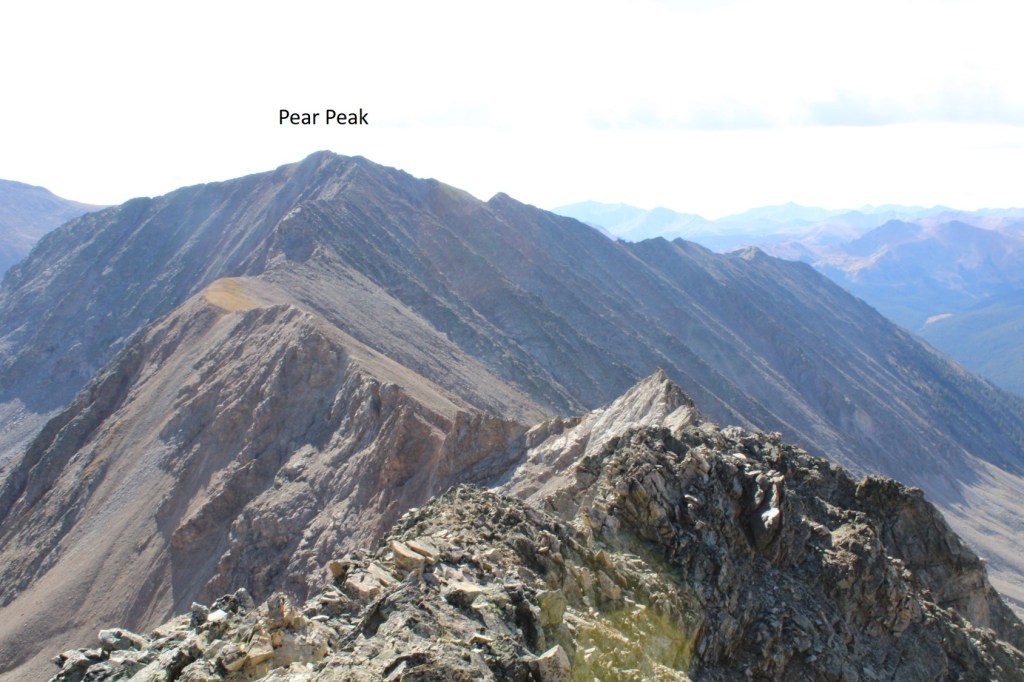
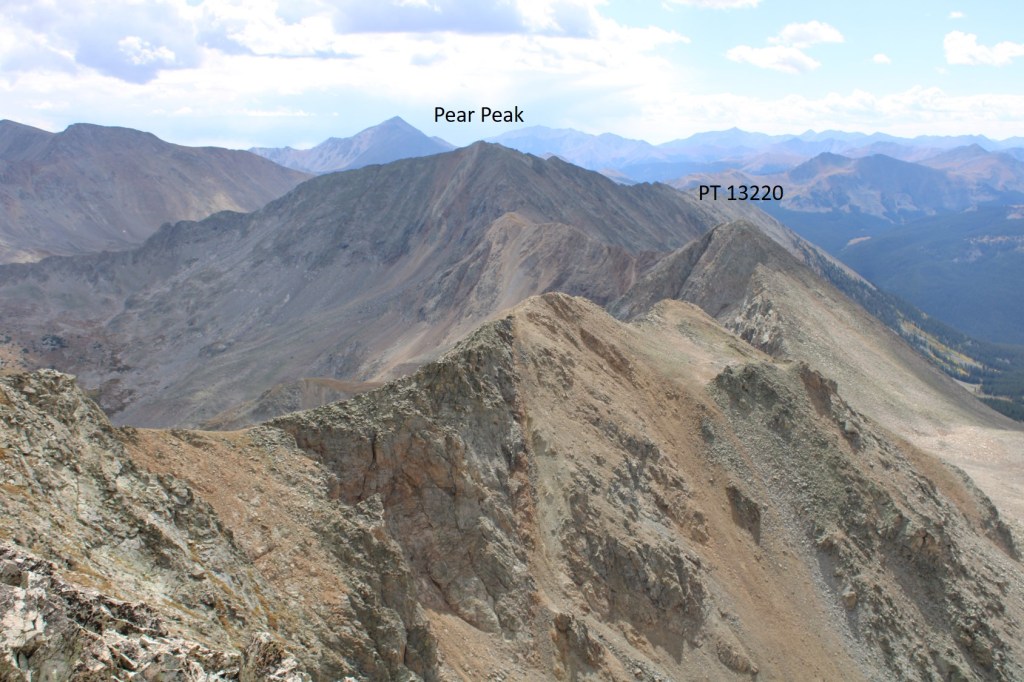
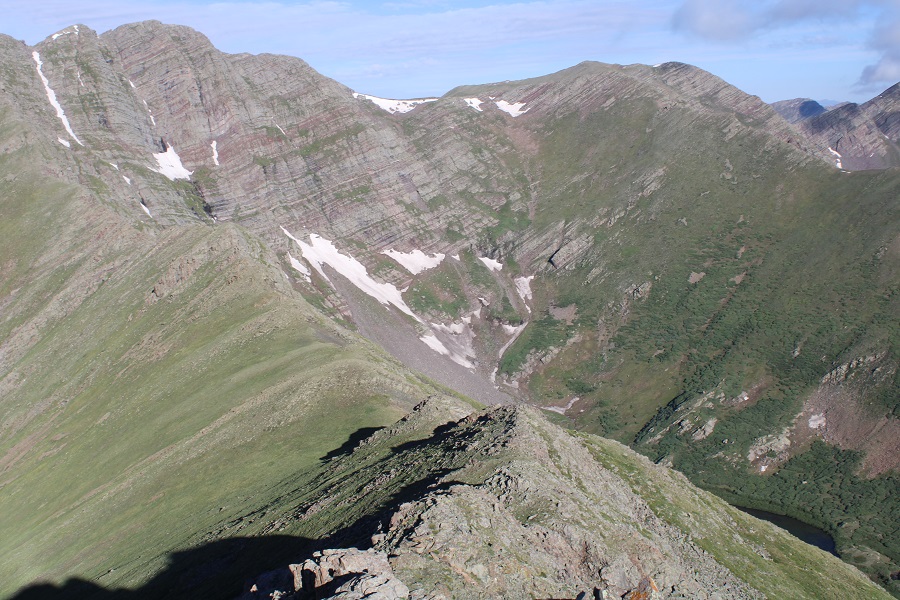
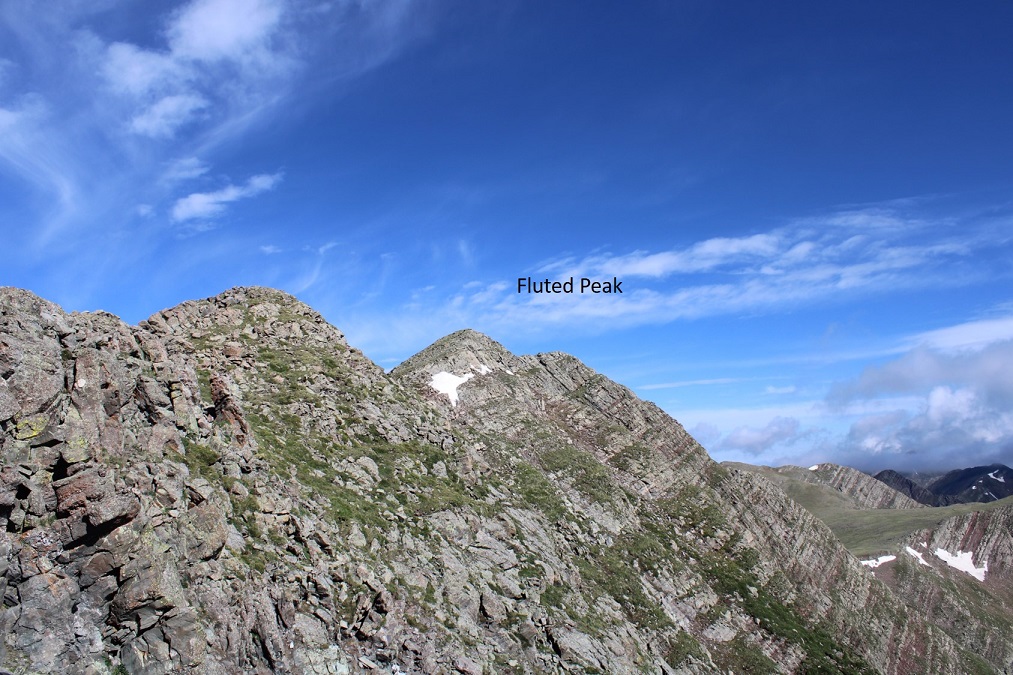
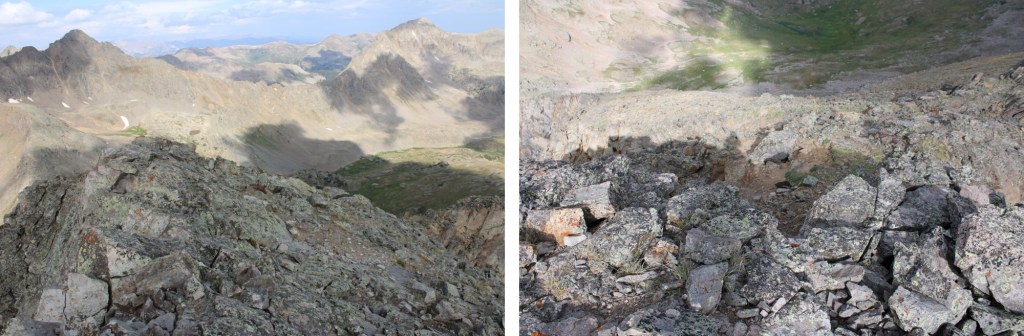
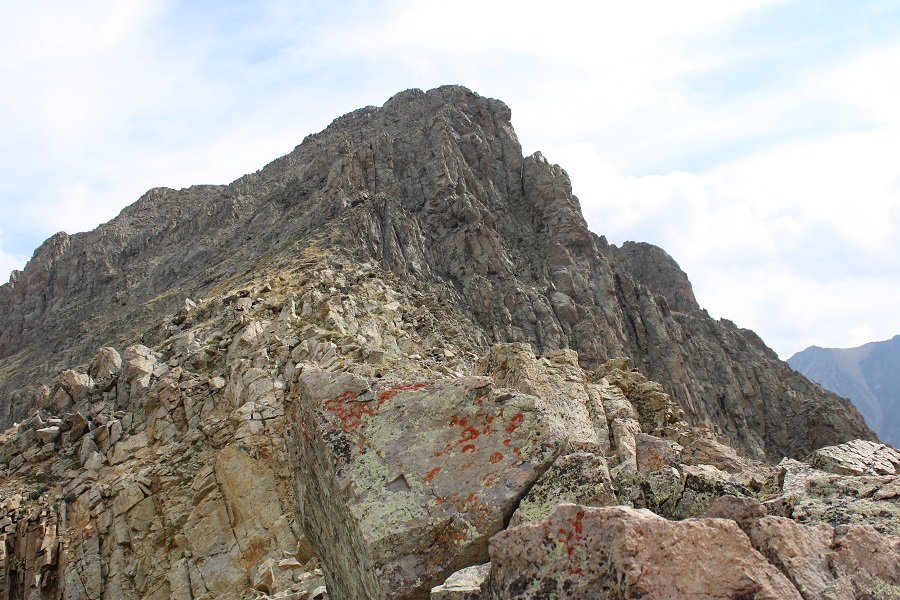
I could see Truro Peak to the northeast of me

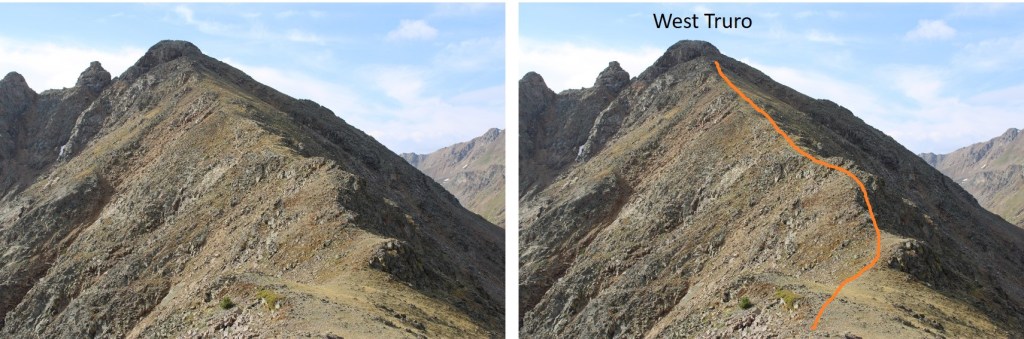
Just for reference, this is how I climbed it (although this is choose your own adventure as well)

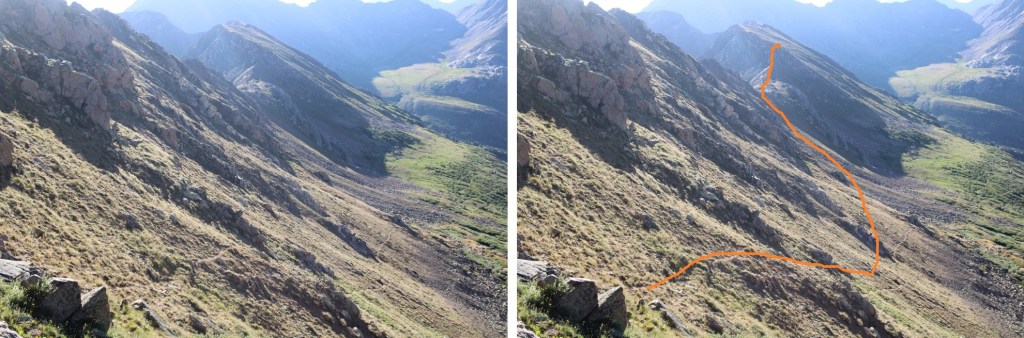
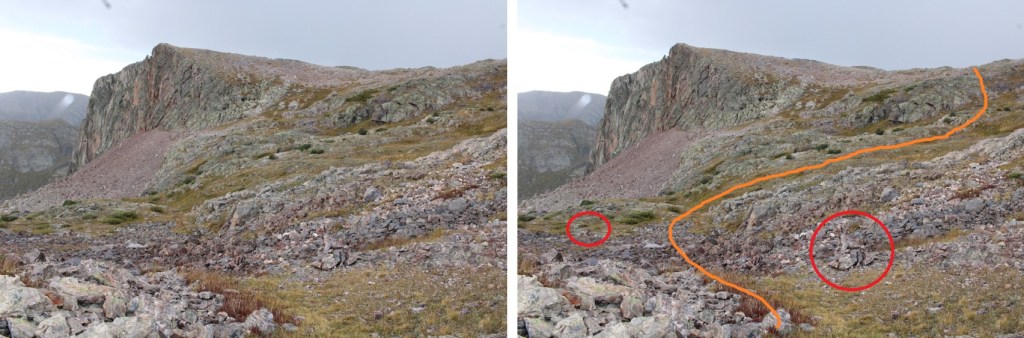
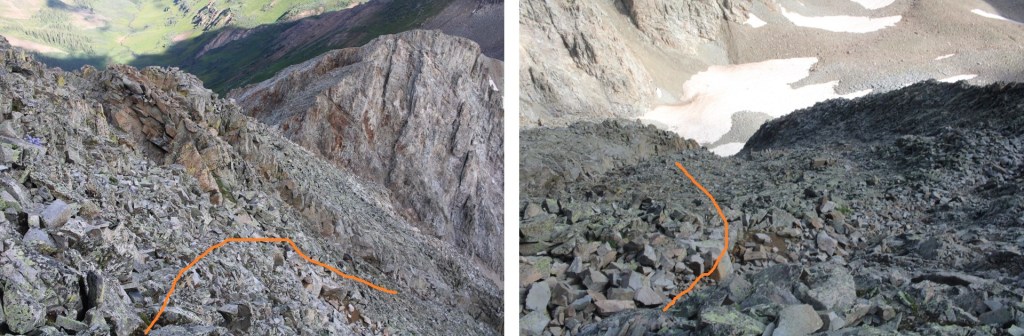
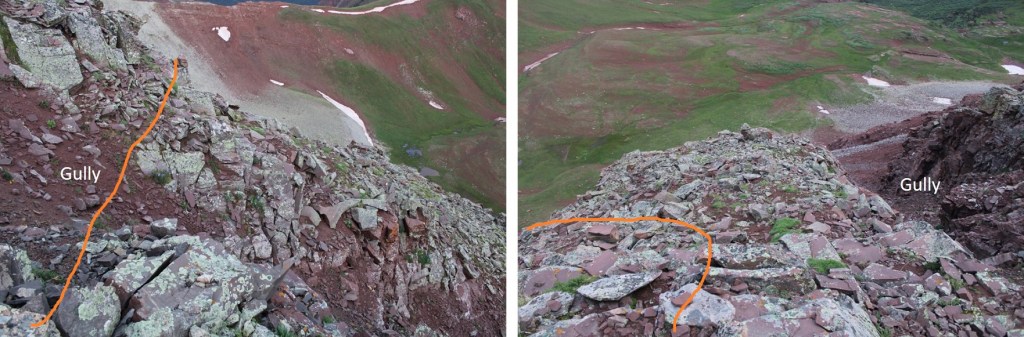
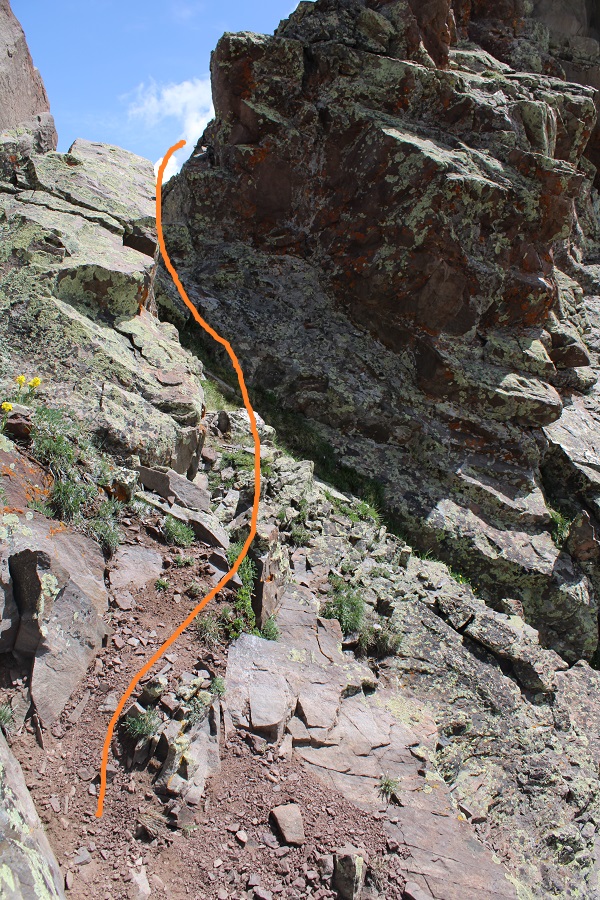
I wanted to skirt the south side of West Truro to make my way over to the West Truro/Truro saddle, so I made my way back down that class 3 chimney.

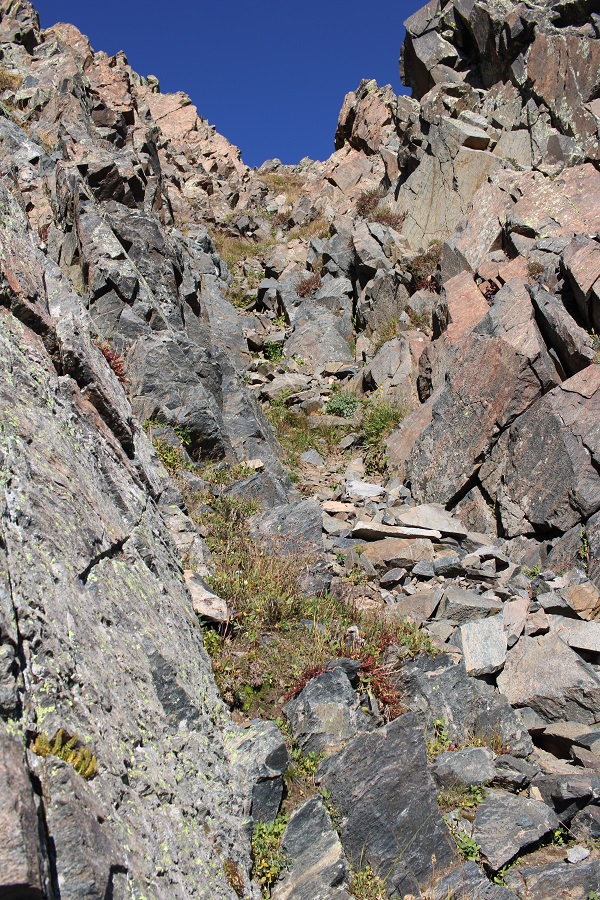
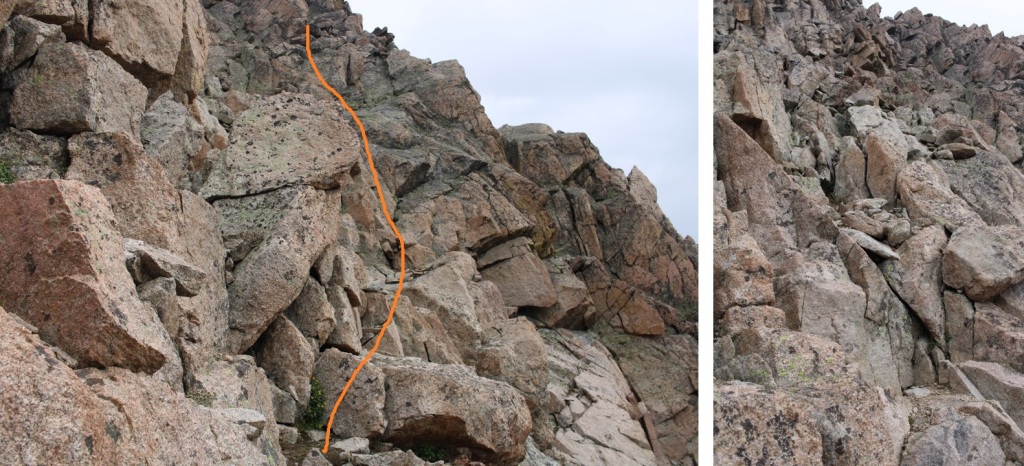
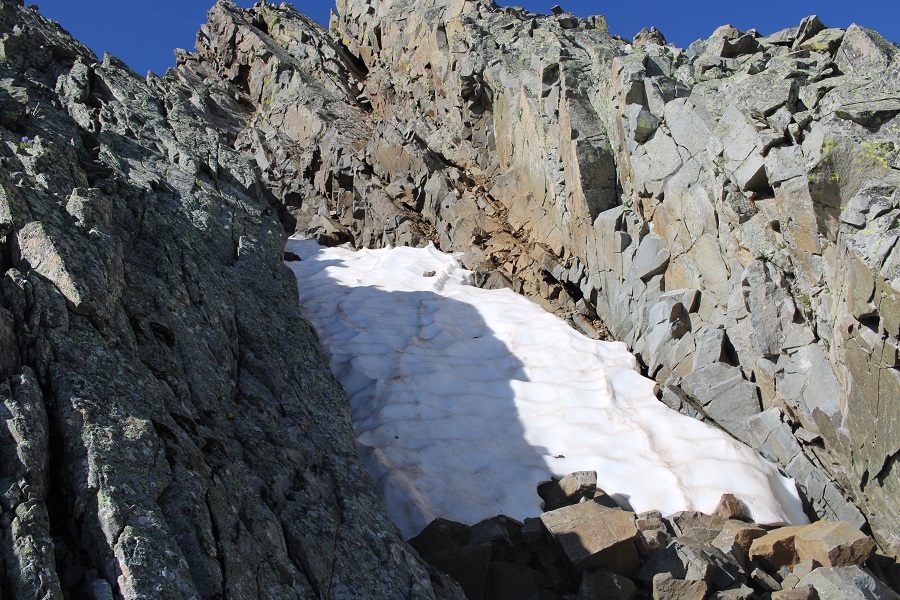
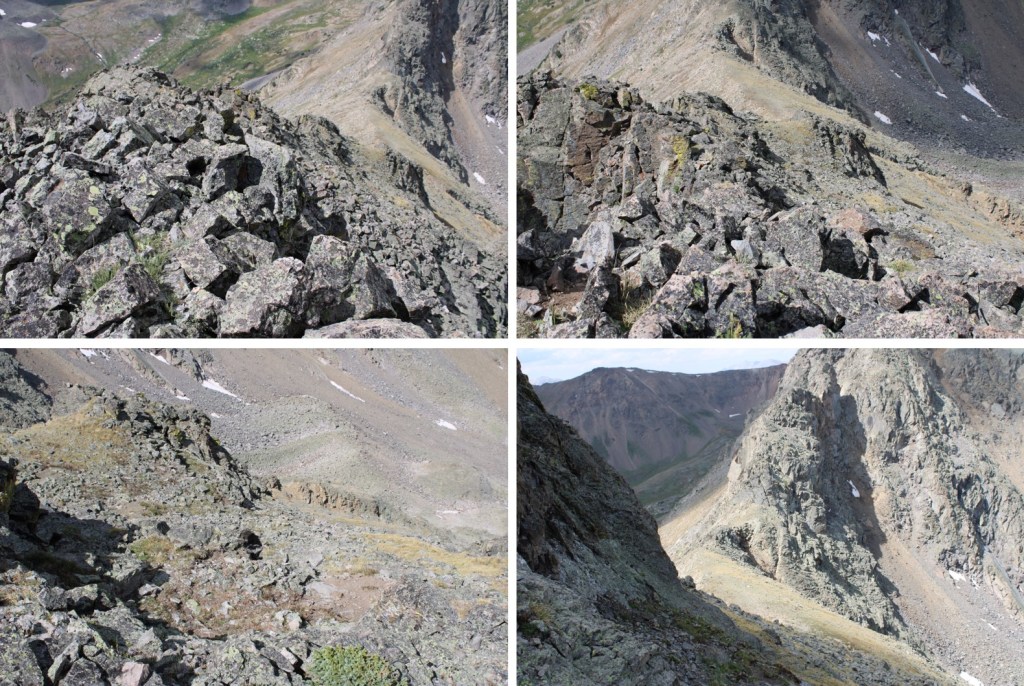
At 13050’ I descended down a game trail that led me to a scree filled gully.  I put on my microspikes for this part. 

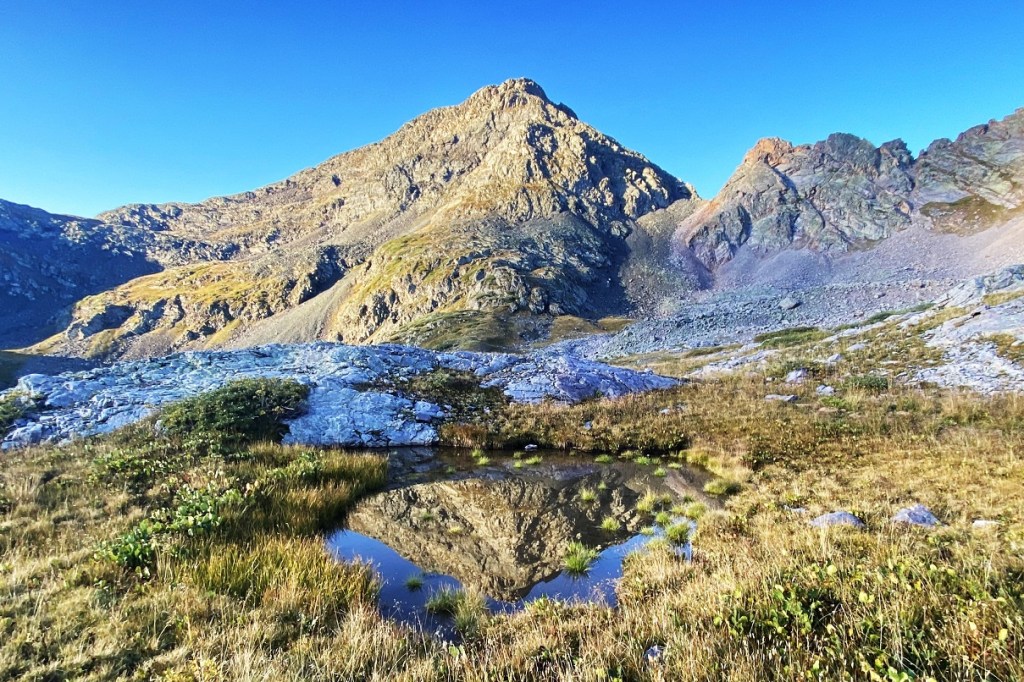
This is where I was headed, so I lost and then gained elevation back to this point.

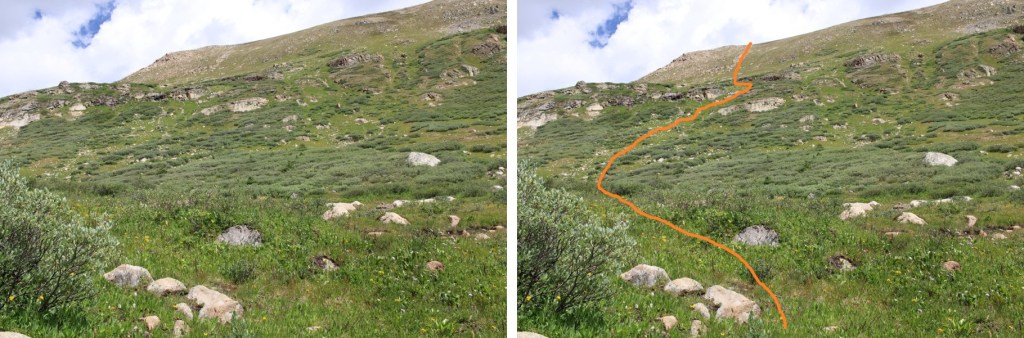
From here on our I just hugged the side of the mountain, making my way back up to the saddle.  This is also choose your own adventure, all class 2

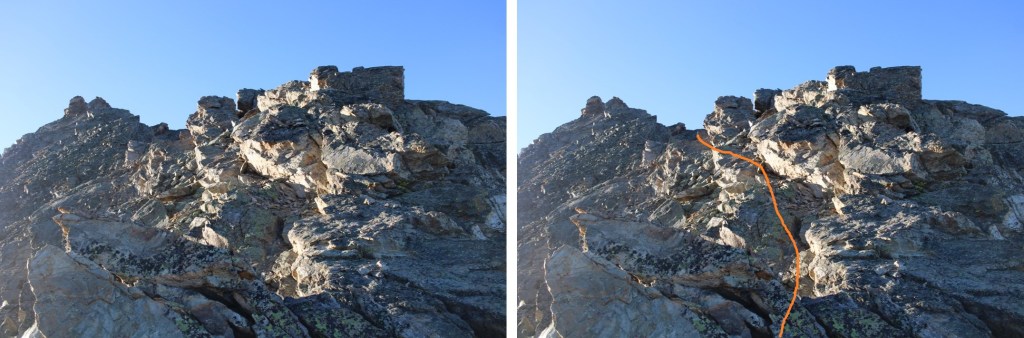
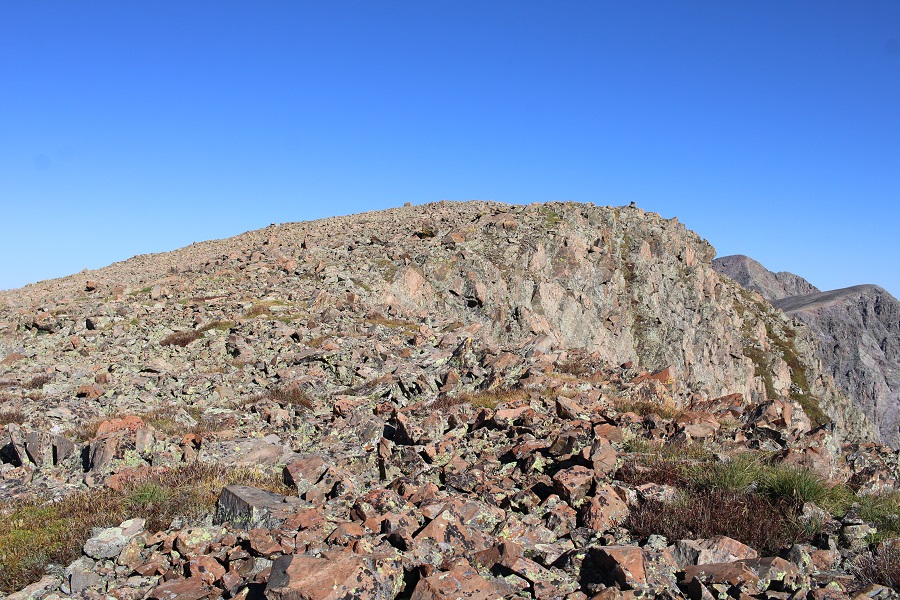
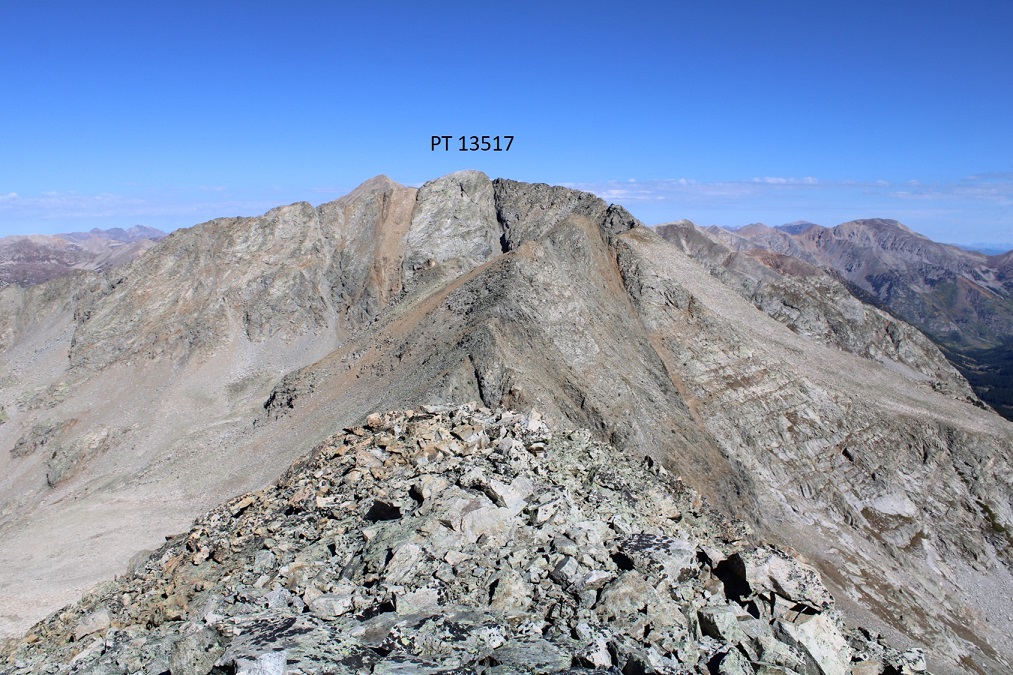
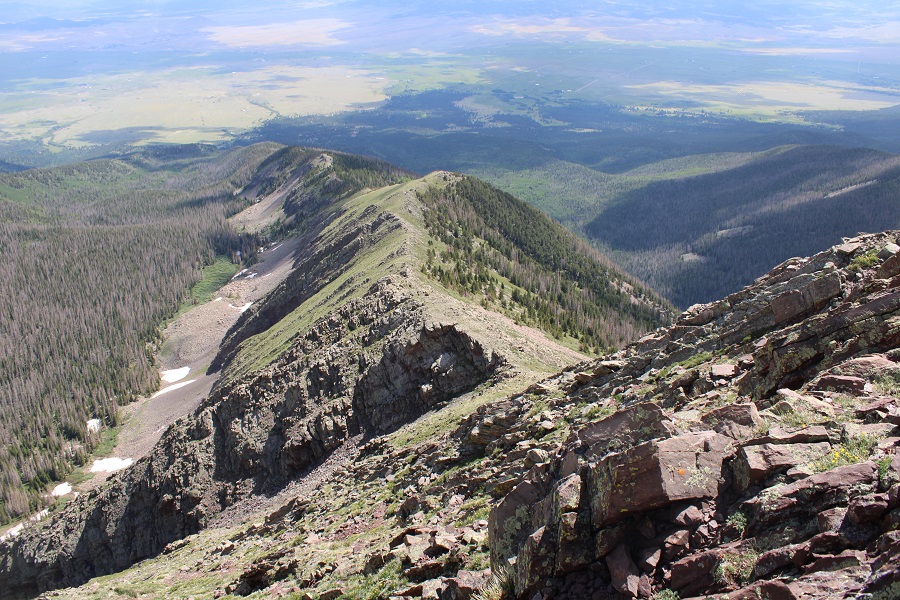
Now at the West Truro/Truro saddle, I had a good view of Truro Peak

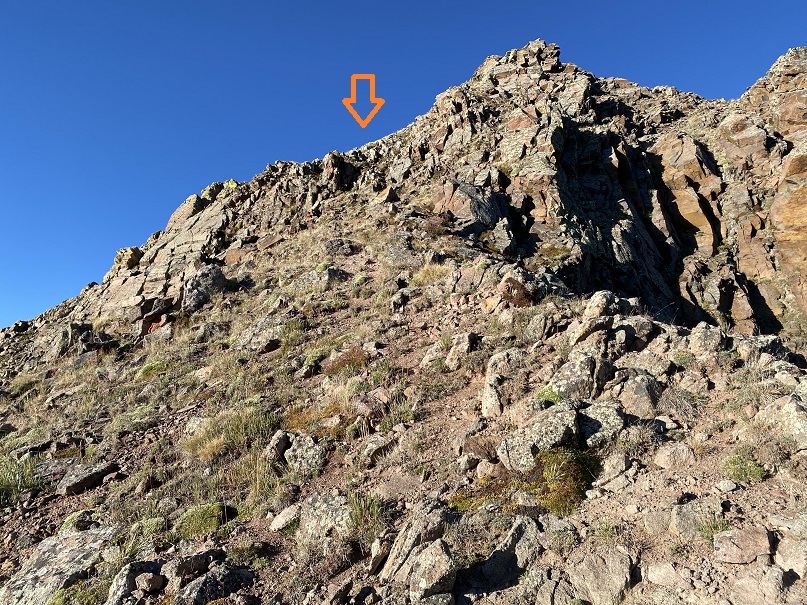
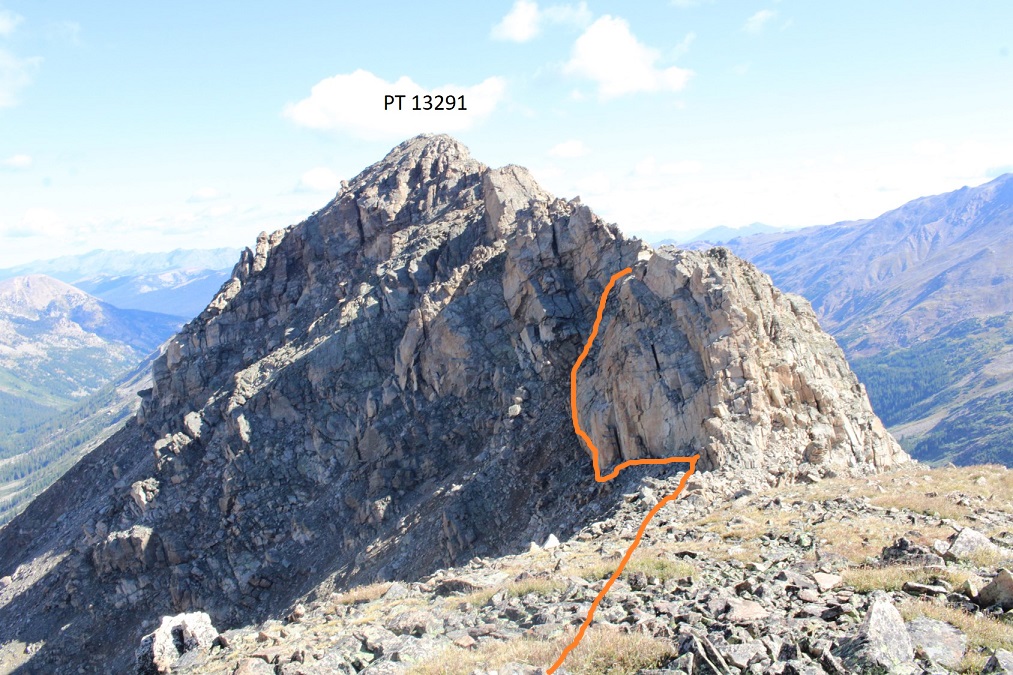
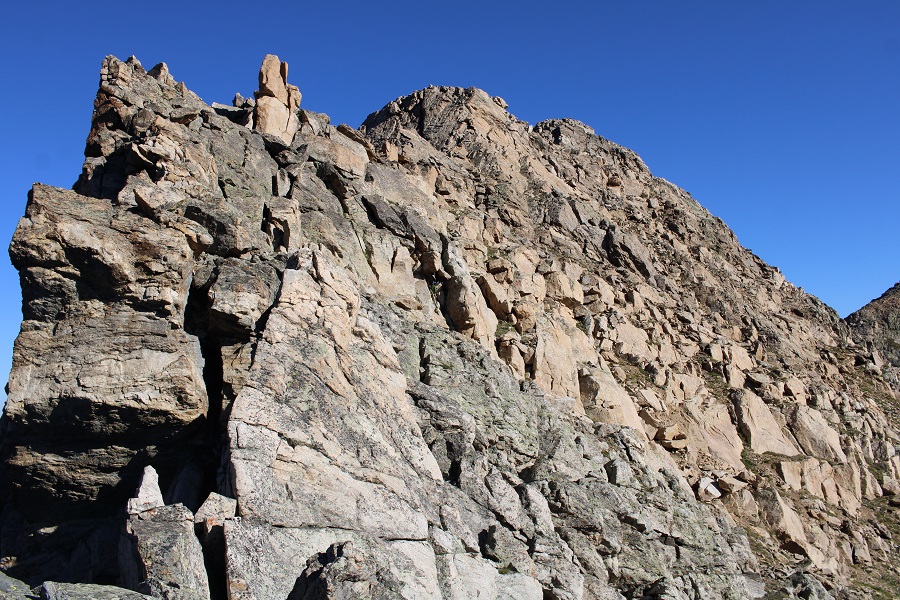
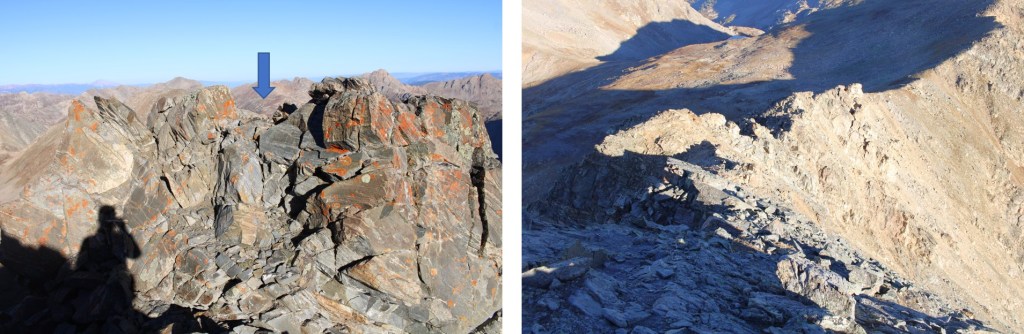
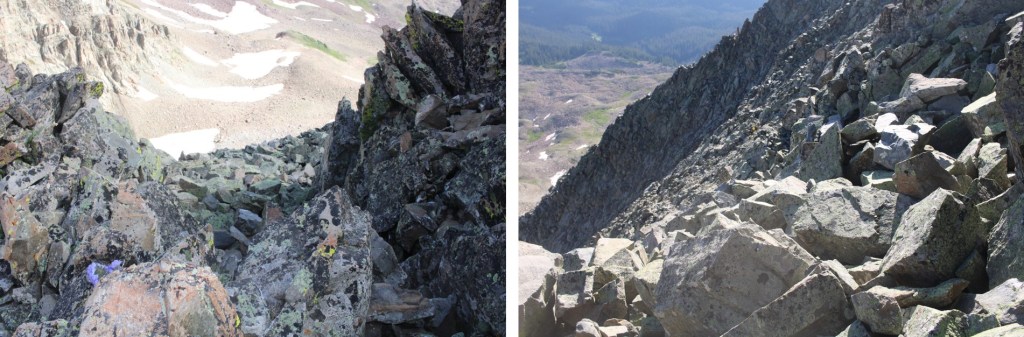
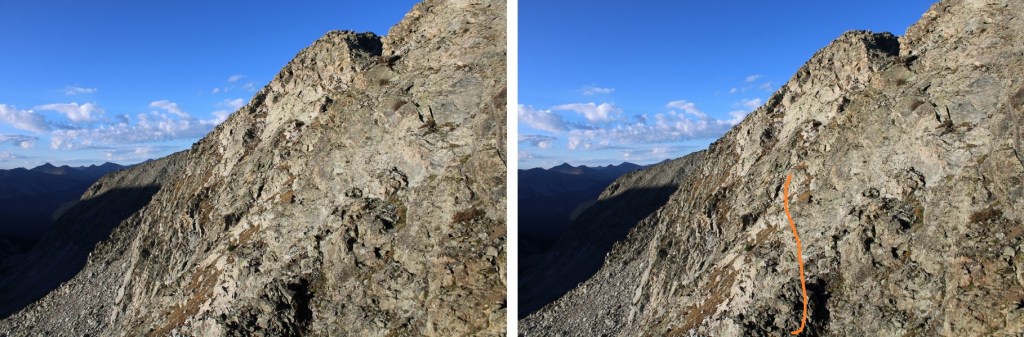
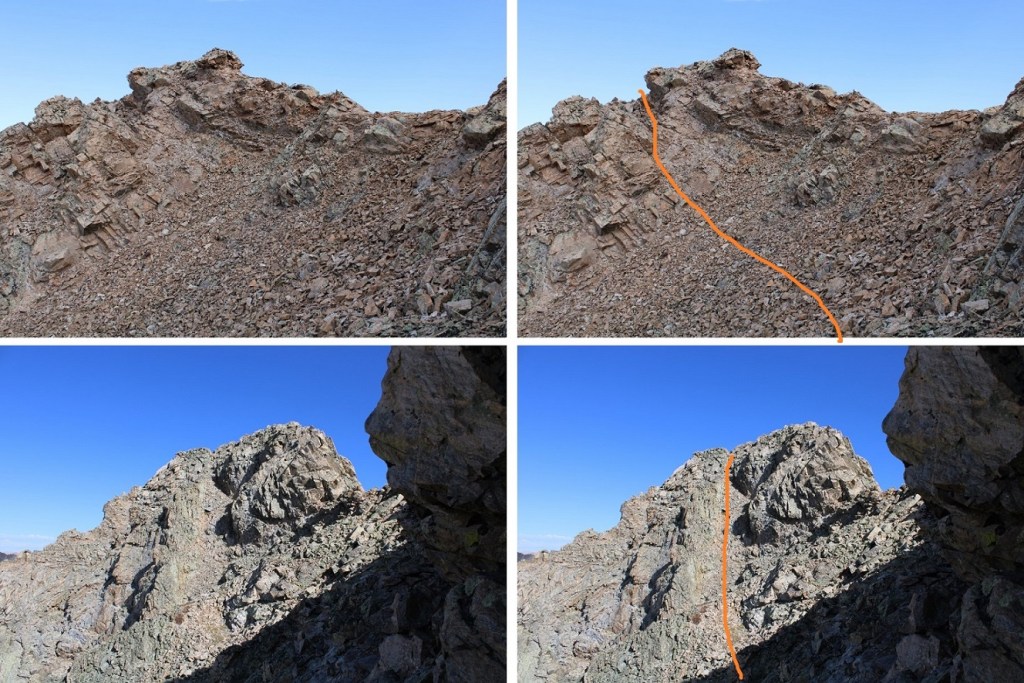
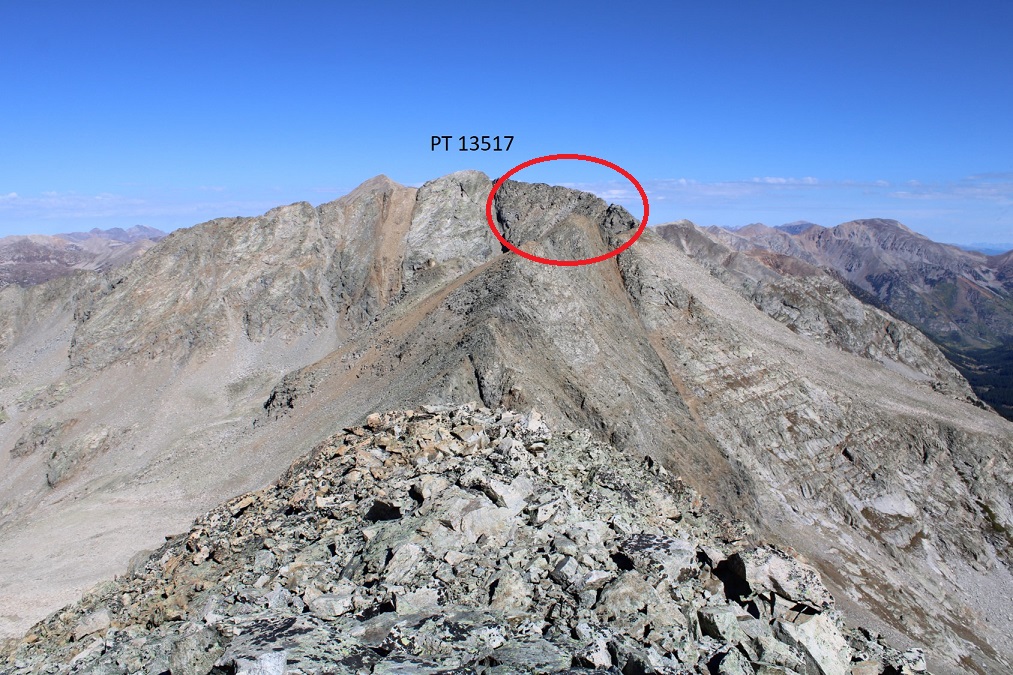
I stayed to the left on the tundra, and when the tundra ended the class 3 climbing began, and lasted until I made it to the summit.  On the class 3 section I stayed to the right and took the ridge, but it looks like there’s tons of class 3 options here.

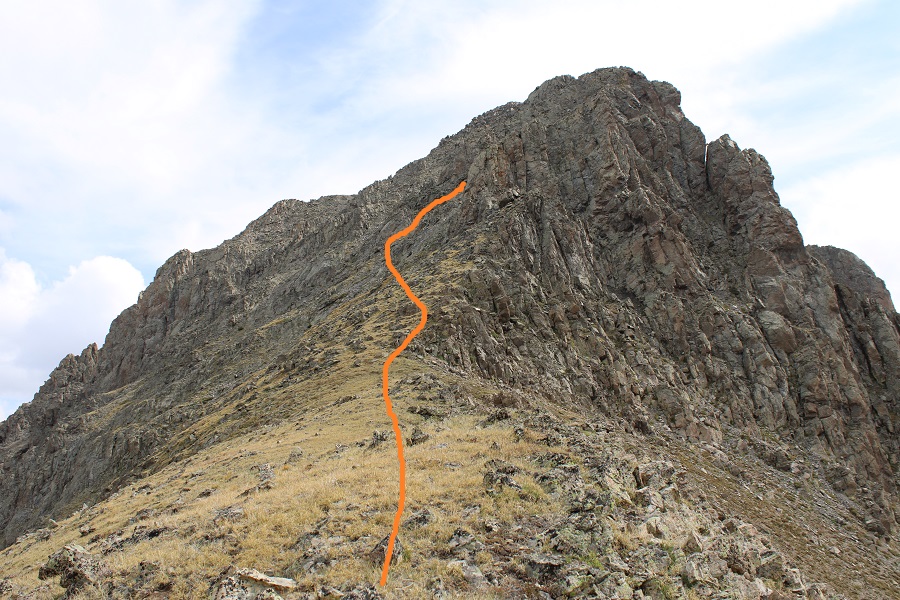
Just before the summit I dropped down to the left, then scrambled up.  There are game trails here to guide the way.

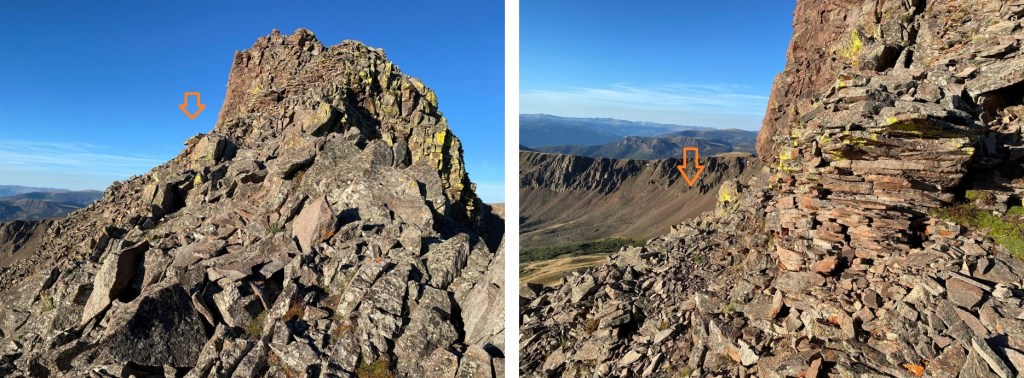
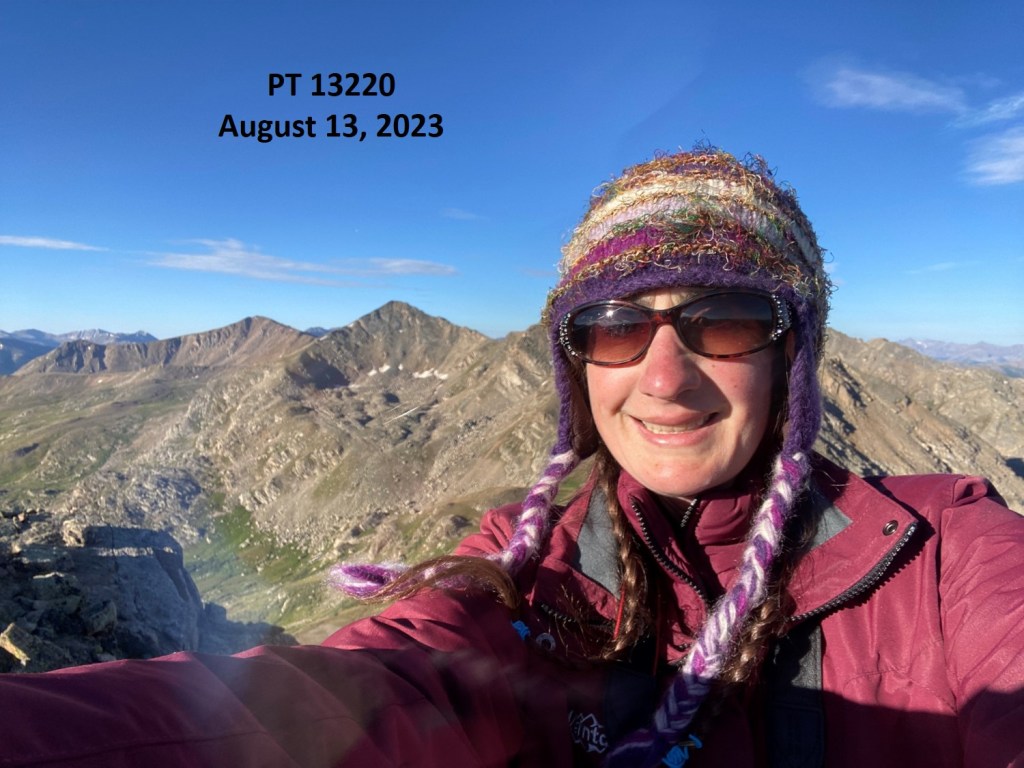
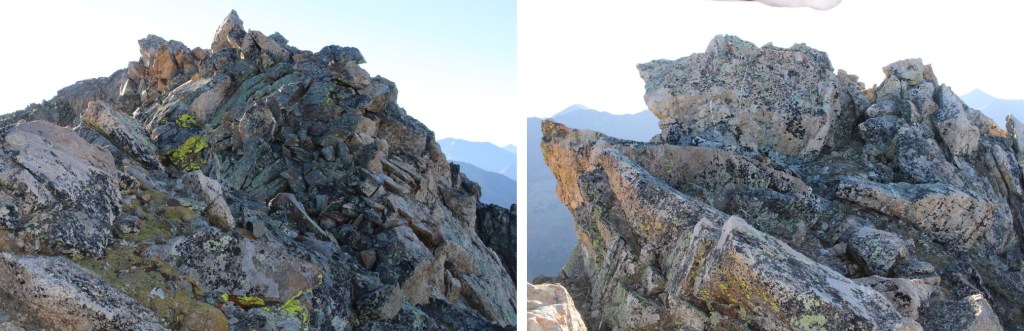
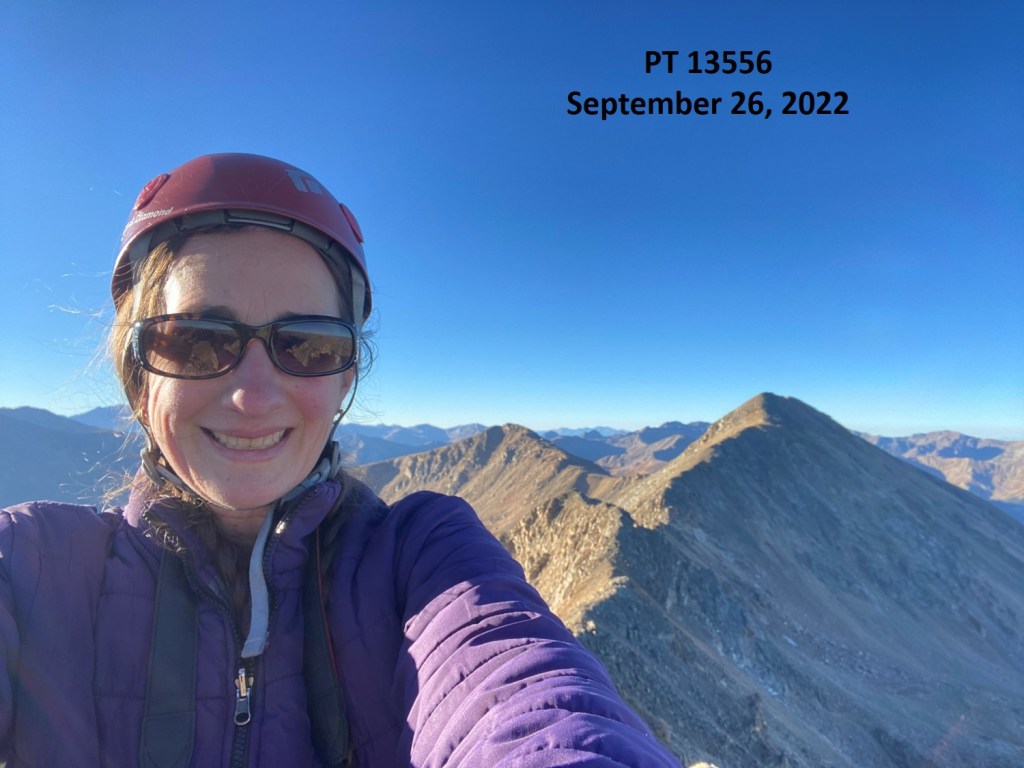
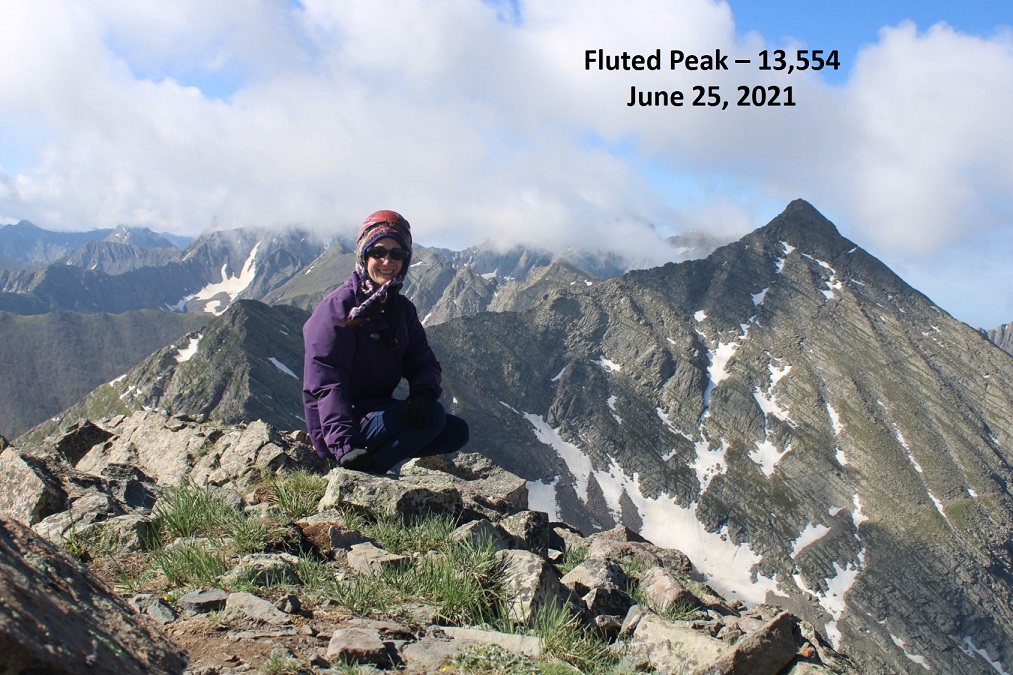
I summited Truro Peak at 10:45am
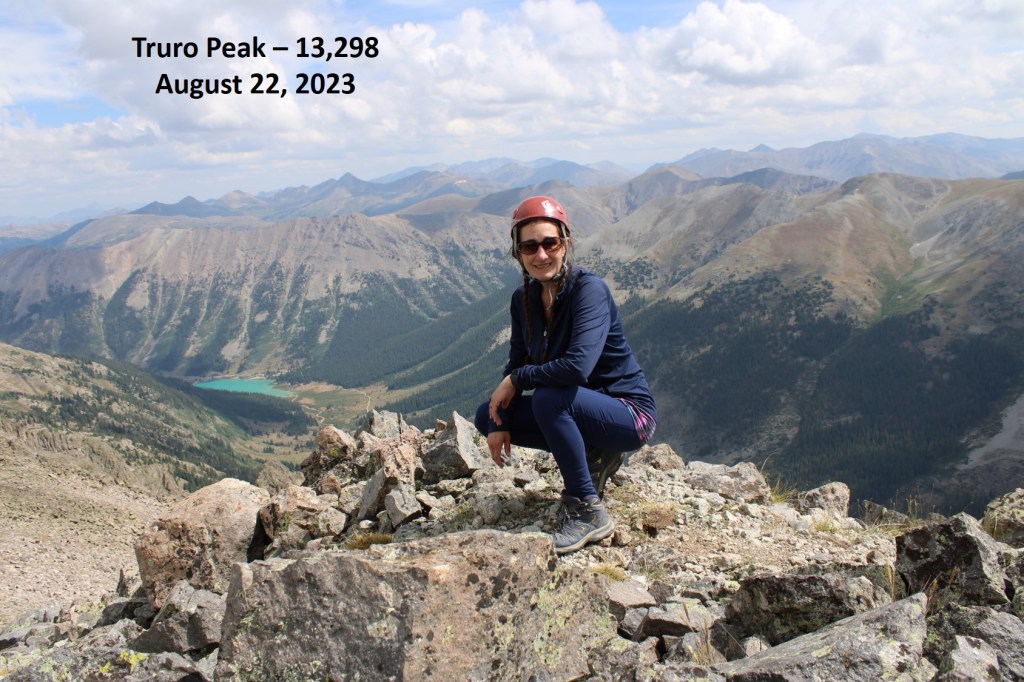
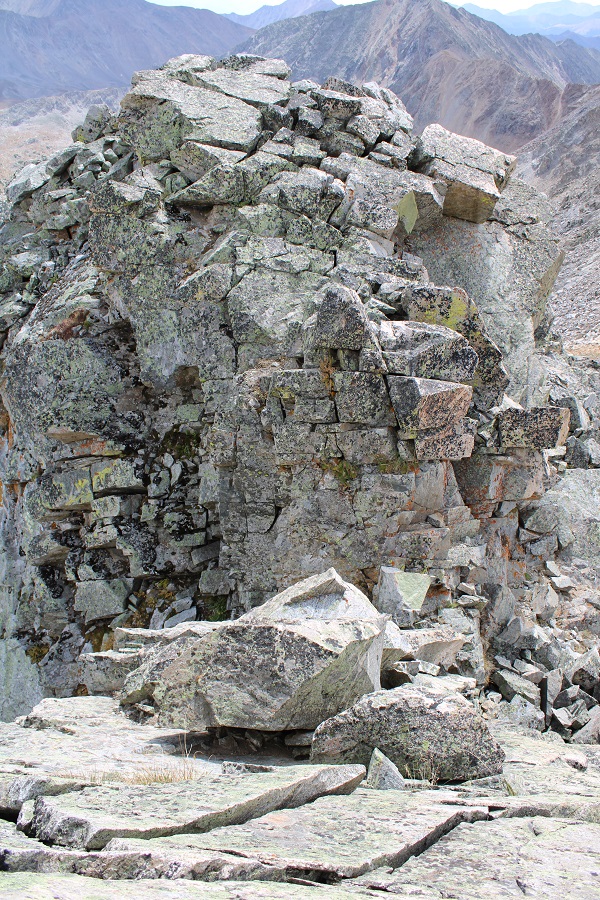
Truro Peak:

I turned and headed back to the Truro/West Truro saddle

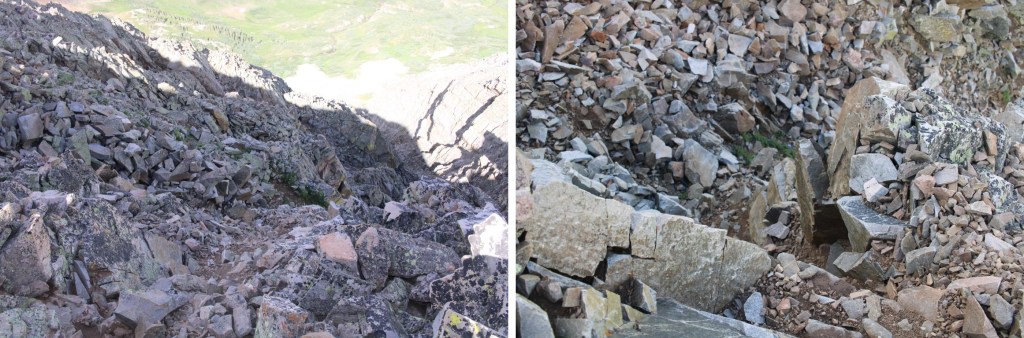
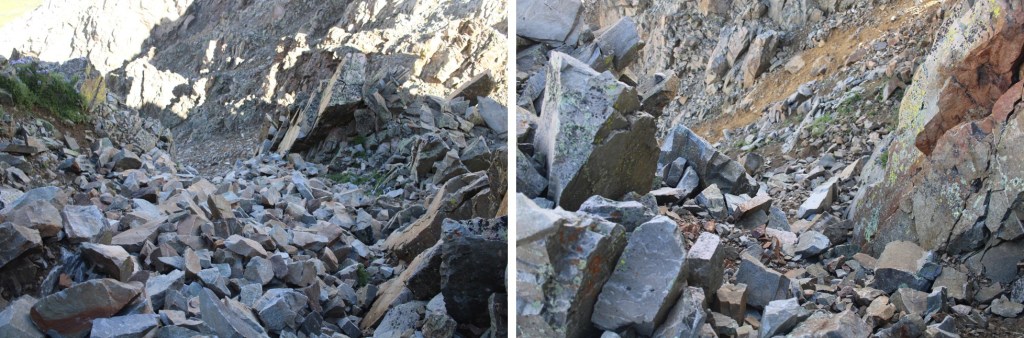
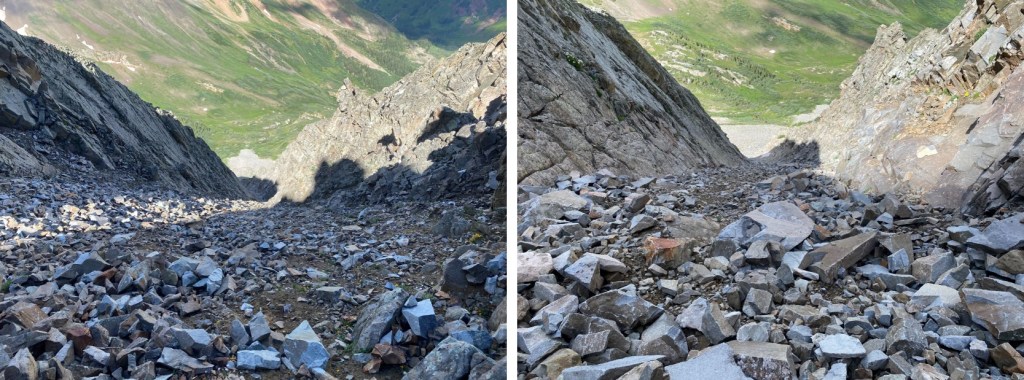
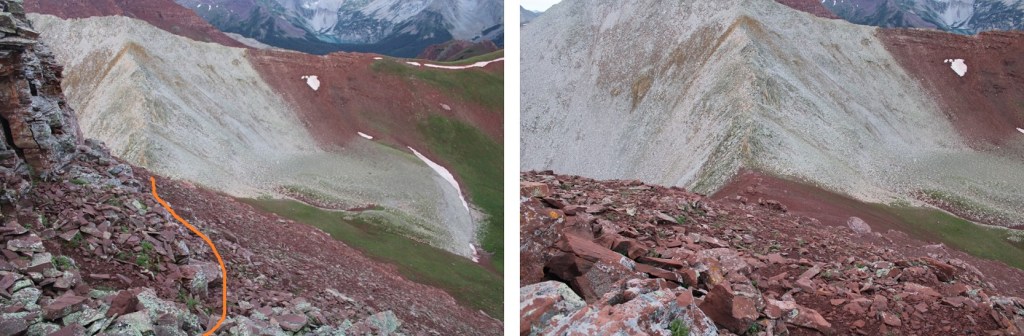
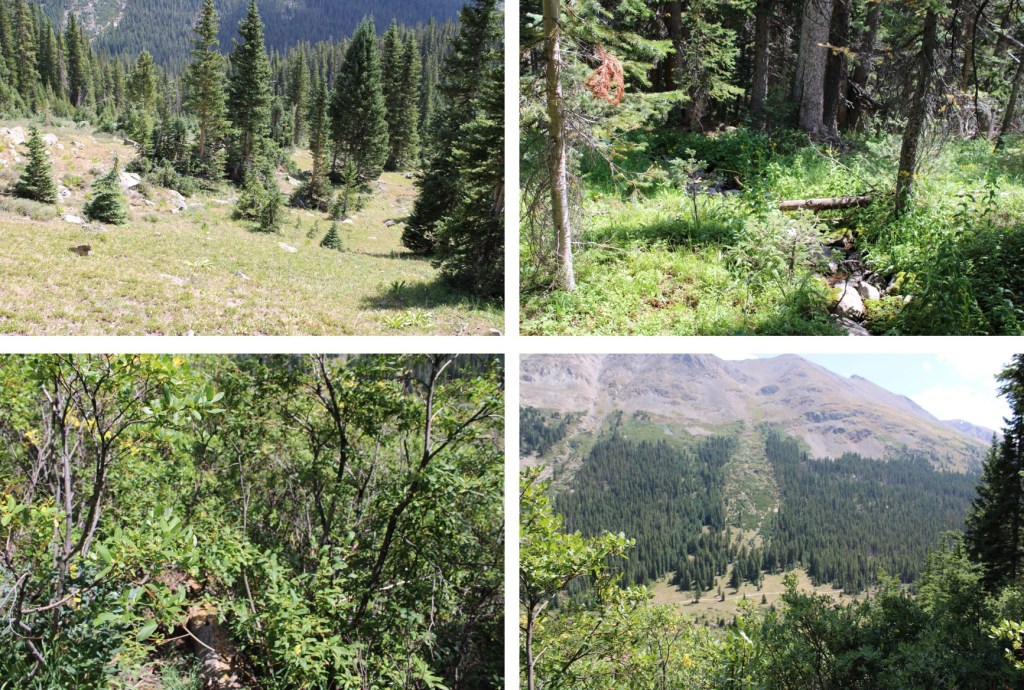
From the summit I had the brilliant idea to descend via the gully that goes left (south) and skirt the east side of the mountain to make it back to the trailhead.  My reasoning was I didn’t want to descend the steep, scree-filled east gully back to Truro Lake, and then rock hop for half a mile before hitting a trail.  Solid reasoning, but in implementation, I wouldn’t recommend the route I took.  Bushwhacking at the end proved cumbersome, whereas with the north gully, it would have all been above treeline.  In any event, this is how I descended.  I’d still recommend going right and taking the north gully if you’re ok with a steep, scree filled descent.

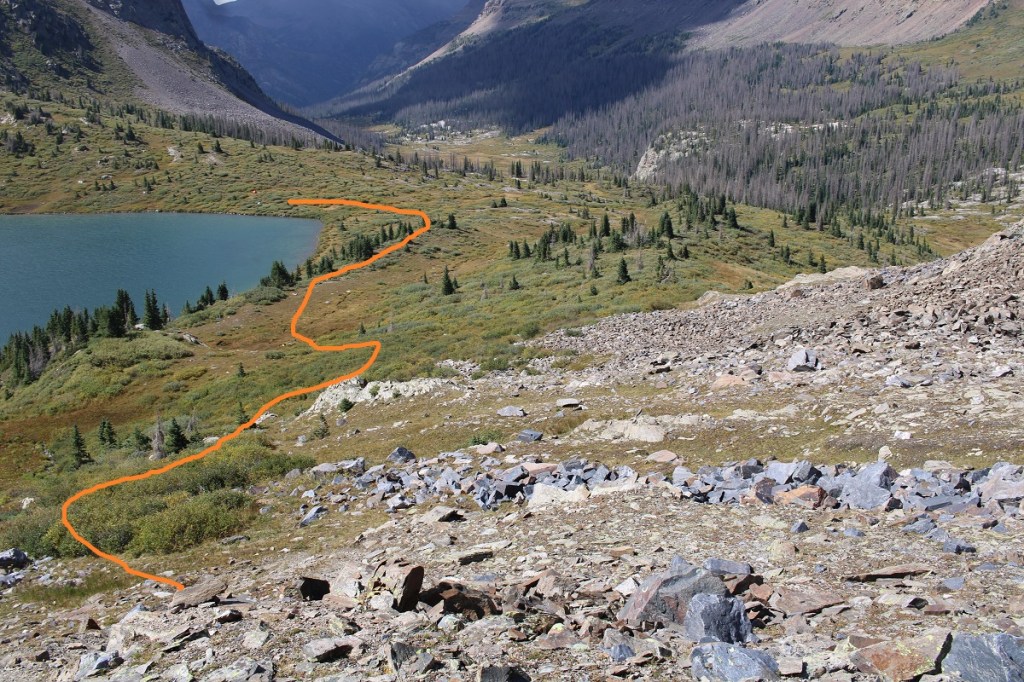
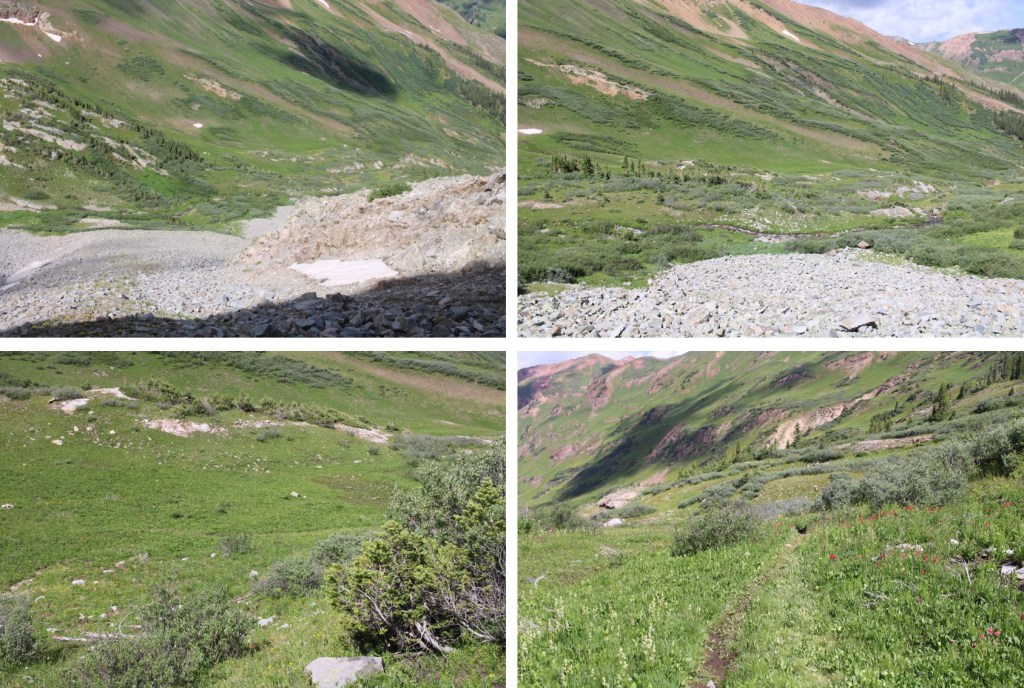
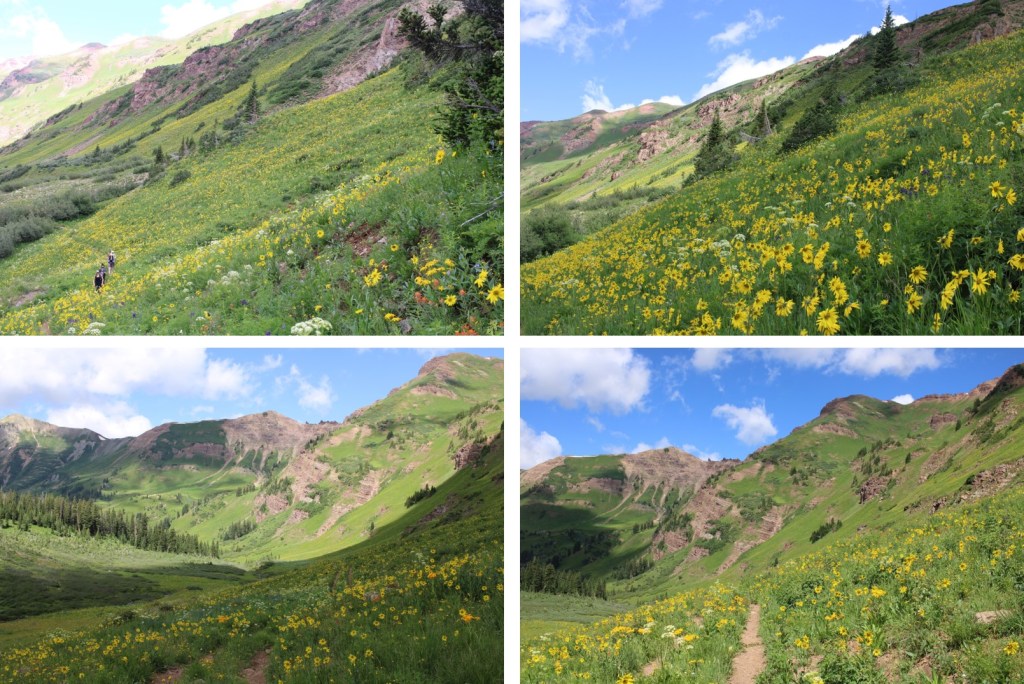
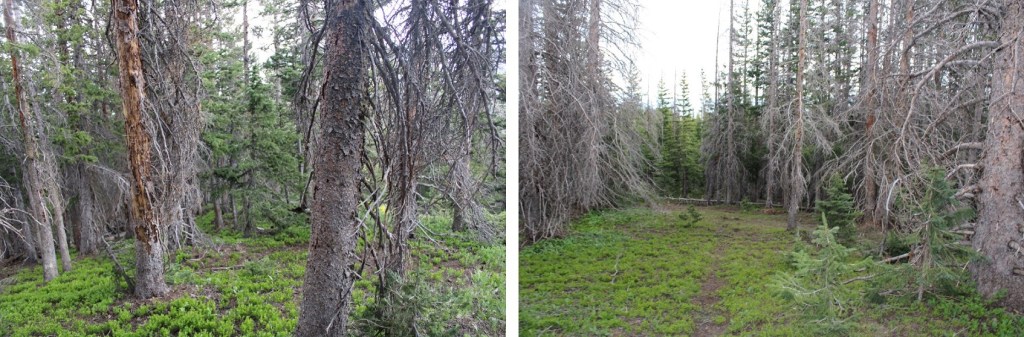
I stayed high to avoid the willows, and then dropped down into the trees.  I stayed climbers left of Galena Creek (east), and made y way back into the trees, following game trails where I could and getting whacked in the face with willows where I couldn’t.

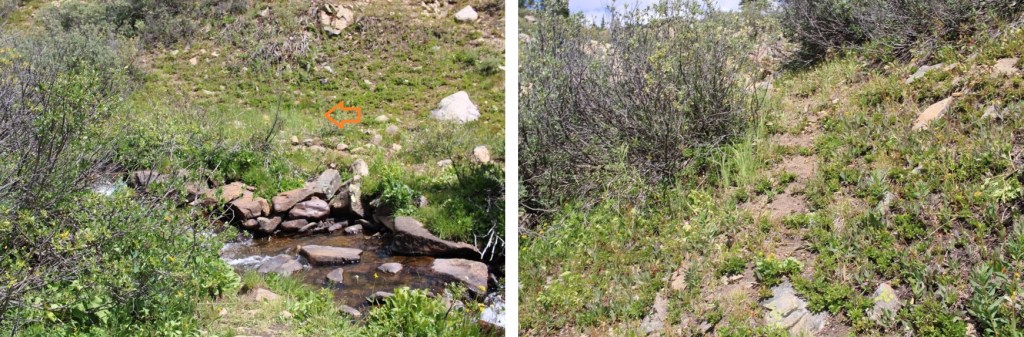
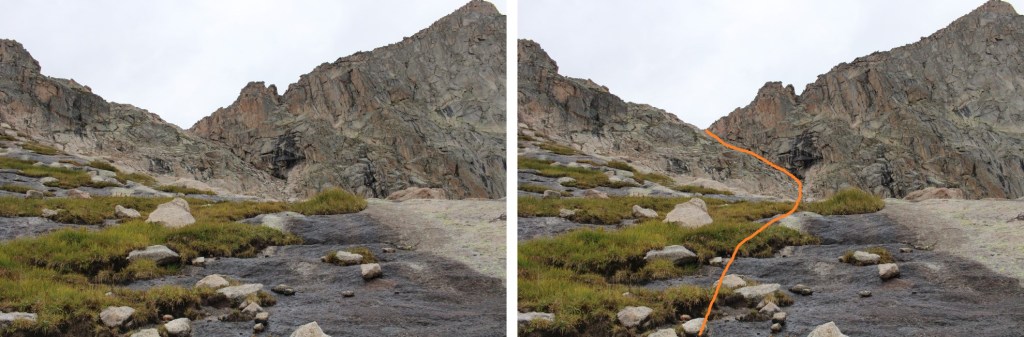
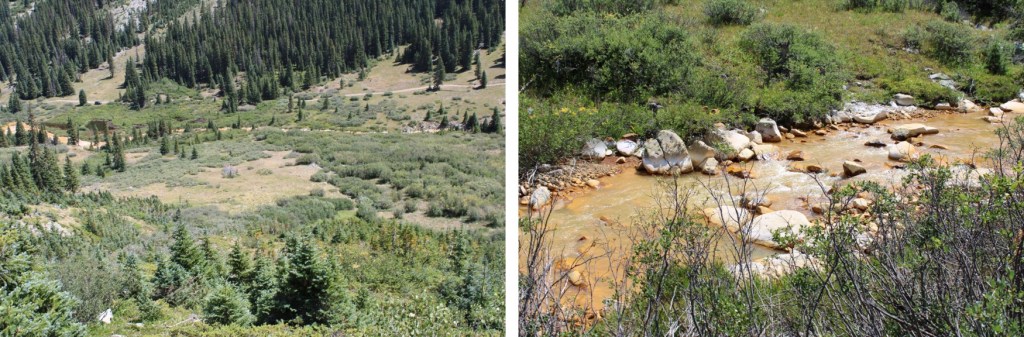
I could finally see the dirt road, and made my way towards it, crossing Lincoln Creek in the process. 

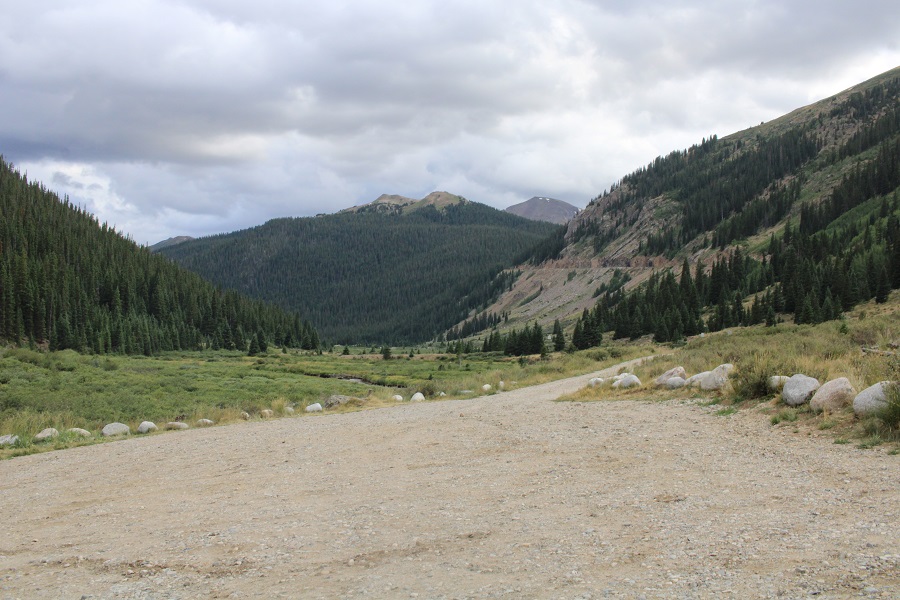
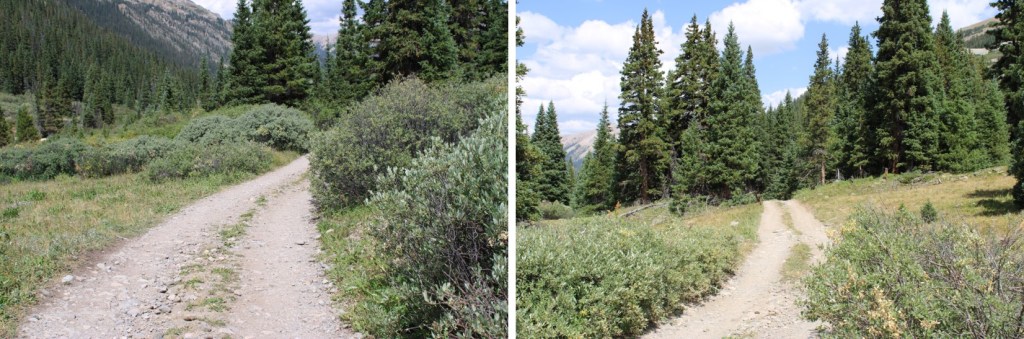
Back on the road, I turned left and followed it north back to my truck

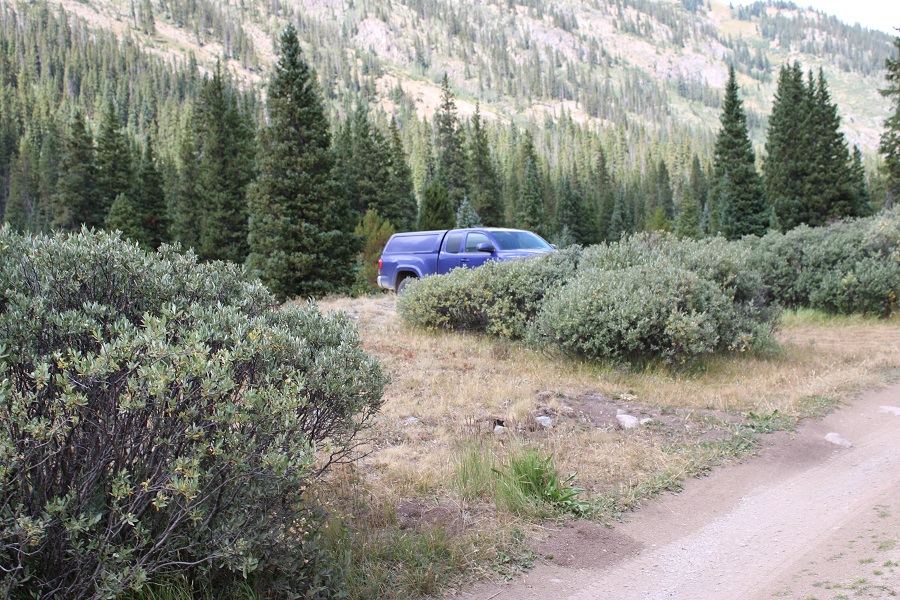
I made it back to my truck at 1pm, making this a 8.49 mile hike/climb with 3489’ of elevation gain in 7 hours, 15 minutes.

On to the next trailhead!

PT 13030

RT Length:  7.36 miles

Elevation Gain: 1920’

I started from the West Willow Creek 4WD trailhead at 11550’.  If you don’t have 4WD, park below, just before the road turns to 4WD.  This will add 3 miles and 500’ of elevation total to the hike.

Here are some pictures of the 4WD road in

There are a few dispersed campsites here, and a parking area for about 5 vehicles.

I was on the trail at 5am.  The trail actually continues following the 4WD road, and if you have gotten this far, you can do the next few miles on the dirt road.  I chose to hike in, to get some extra mileage.  I followed 4WD road 505.1 west for 1.5 miles as it climbed into the upper basin.

At the top f the pass I could see PT 13030.  At about 12500’ I left the road and headed for the ridge, staying at about 12,500’ of elevation.

Here’s an overall look at the route I took to the ridge.  CalTopo will tell you there’s a road here.  There isn’t.

And some step-by-step pictures

There’s a small game trail that will lead you up the saddle

Once on the saddle I turned left and followed it south to the rocky area

If you plan on rock scrambling, now is the time to put on your helmet.  I continued southwest up the ridge, following a tundra and rock filled slope

Then I went left, below this large boulder, keeping it class 2

From here you have two options.  You can either gain the ridge for a quick class 3 scramble to the summit, or stay about 20 feet below the ridge to the left, and keep it class 2+.  Here’s looking at the route to the ridge for the class 3 scramble, which is stable but narrow and airy.

And here’s the class 2+ option, heading southwest, and then gaining the ridge

Once on the ridge, it was a quick walk to the summit

I summited PT 13030 at 7am

PT 13030:

I took the class 3 ridge option on the way in, and decided to take the class 2+ option on the way out.  Here’s the route I took back

There are two rocks placed as if they had been a cairn at one point, indicating where to descend from the ridge to keep it class 2.  It’s not obvious, and might not even be a true cairn at all, but it’s a good place to descend.

Then it was back to navigating around the large boulders

And heading back down to the ridge

Here’s an overall look at the route out of the basin

This is the route I took

And some step-by-step pictures. Once I was on the ridge there was a faint game trail to follow much of the way back to the road.  Unlike you’ll see on CalTopo, there is no road here. I stayed above the willows but below the rock rubble.

Ahead of me I could see two roads in the distance.  I was aiming for the closer dirt road

Back on 4WD dirt road 505.1, I followed it east back to the trailhead.

I made it back to my truck at 8:30am, making this a 7.36 mile hike with 1920’ of elevation gain in 3 hours 30 minutes.

On to the next trailhead!

PT 13220 and PT 13291

RT Length: 11.89 miles

Elevation Gain: 3560’

Full disclosure, I did these peaks in two days.  The first day I got thunder stormed out just before the access gully of PT 13291, and had to turn around.  I came back 2 days later to finish the summit.

I stayed overnight at the North Fork Lake Creek Trailhead, and was on the trail at 5am the next morning.   The parking area has room for about 15 vehicles if everyone parks nicely, as well as some overflow spots on the short drive in.

The trail starts at the north end of the parking area, close to a locked gate.  It’s trail number 1483.

I followed this class 1 trail for 3 miles north into the basin

When I came to a creek, I crossed it and turned left. 

Here there is a faint trail for a few yards, and then it fades out.  I headed northwest into the upper basin.

Here’s an overall view of my route to the ridge

While there was no trail in the basin, I was easily able to follow dried up creek beds through the willows.  Staying on the dry rocks kept me mostly away from the willows, and became a great path to follow.

Once I got past the willows, I aimed for the ridge.  Specifically, this boulder first.

After making it to the boulder, a game trail picked up and took me to the ridge

Once making it to the ridge, I turned right, and followed it northeast to the summit.  This was all class 2.

Here are some pictures of this short ridge

 I turned right at the top of the small gully, and walked to the summit

I summited PT 13220 at 7:45am

PT 13320:

PT 13291 was to the northeast, but to get there I was going to retrace my steps down the ridge first.  I headed back to the ridge.

I picked up the game trail again, and skirted the rocky section that was on my left, and re-gained the ridge on a grassy slope.  Here’s my overall route

Once on the ridge again, I skirted this rocky section to the right.  Resist the temptation to ascend any higher until you get to the tundra and it will stay class 2.  Otherwise, you can go up the rocks at any point for some class 3 or 4 fun.

Now it was a class 2 stroll along the ridge as I headed east.

When I got to this point I put on my microspikes, turned right, and dropped down to navigate the formations.  This was class 2+, but the loose scree and exposure added a layer of fun.

This was my next obstacle.  My first thought was to go right up the center of the gully, but I ended up scouting around and found it was much easier, and still class 2, to skirt around and gain the ridge from the right side.

Back on rocky tundra, I now followed the ridge direct north.  This was all class 2.

At the top of the ridge I got my first good view of PT 13291.  Unfortunately, the first day I was here I had to stop at this point due to time constraints and an impending thunderstorm.  It sucked to turn around, but it was something I had to do. 

The next time I was here, two days later, this is the overall route I took to get past the steep rock in front of me.  Also, this is a good time to put on your helmet if you haven’t already done so. 

This looks loose and fraught with exposure, but the route is actually pretty solid and wider than it looks from a distance.  I started out rock-hoping on stable boulders, then descended west about 100 feet, staying as close as I could to the rock wall, to the base of a gully

At the base of the gully, I turned right and ascended the 100-foot gully.  Climbers left was extremely loose, but the right side was steep but stable rock.  I chose to stay on the stable rock.  There is a cairn (circled) at the base of the gully, indicating where to ascend.

Here’s a view from 13220 of the gully I went up to access 13291.

Now for the fun part!  It was time to scale the east side to the summit.  This is choose your own adventure.  I stayed on the east side the entire time.  The ridge proper looks like it goes at class 4.  I stayed more to the east while climbing.

This is the overall route I took, dropping down about 25 feet, aiming for a break in the rocks, and then heading up the east side, keeping it mostly class 3, but once again, it’s choose your own adventure.

Here are some pictures of the terrain to the summit.  I dropped my pack to make for easier climbing.  It also made it easier to find my way back, as I just aimed for my pack below.

Now the summit was in sight.  There was a short class 4 chimney to climb with solid hand/footholds.

And then a rocky walk to the summit.  There was a summit register, but it was closed so tight I couldn’t open it.

PT 13291

Now to head back down.  I descended the chimney, and headed back towards my pack. 

Then it was up to the gully, down the gully, and around the west side to head back to the saddle. 

Back up to the ridge

And then I followed the ridge, descending it to the left, and curving around the south side.  It’s a good idea to have your microspikes on for this part. It’s class 2+, but the rocks are loose and the angle is steep.

I followed the ridge until I made it to just before where I’d accessed the gully from 13220.  Instead of heading down that way, I descended south into the basin below.  This was the same way I’d ascended earlier that morning.  This would be a good option if just doing 13291. It’s class 2, and led me into the basin.  I aimed for the thinnest section of rock below. The entire time I was hiking down, I was looking for the dry creeks that led me in, knowing they’d eventually bring me back to the creek crossing and the trail.  They were easy to spot from above.

Once in the basin, I followed the dry creeks to the trail

Here’s a look back on my route down from the ridge (and how I hiked in that morning). Taking the dry creeks keeps you away from most of the willows.

Back on the trail, I followed it south back towards the trailhead

Doing the math by combing my two days of hiking, the total for the route in one day should be about 11.89 miles with 3560’ of elevation gain.

On to the next trailhead!

PT 13556

RT Length:  6.51 miles

Elevation Gain:  2015’

This was my second attempt at this peak.  On the first attempt, there was unexpected snow the night before, and I deemed the class 3 section too difficult with a dusting of snow and rocks covered in a thin layer of ice. 

So, I came back a week later, after the snow had melted out, and tried again.  I started at 6am from the Linkins Lake and Upper Lost Man Trailhead.

I followed the class 1 trail north, following Trail #1996, Lost Man Trail

Here’s a glimpse of PT 13556

To get there, I’d first have to pass Independence Lake, and make it to the pass, which was about 2.5 miles from the trailhead

Once at the pass, I turned right and followed a faint trail east that eventually petered out.  I was headed for the ridge.

I ascended the ridge, then turned right and followed it southeast towards the summit. Initially, the terrain started out as class 2 and I just followed the ridge

But pretty quickly I was in class 3 territory.  Most of the ridge goes at sustained class 3, with a lot of fun scrambling.  Here’s the route I took.  I initially dipped down a bit, finding a navigable hole in the ridge to pass

Next, I dropped down a few feet, and continued following the ridge

Now for the fun scrambling.  This is choose your own adventure, but this is the route I took

Eventually the ridge ran out, and I had to go to the right

Then it was an easy scramble to the summit

PT 13556:

PT 13556:

From the summit, I had great views of Twining Peak and 13500 to the south

Now for the route back down.  I just retraced my steps, but it looks a lot different heading back than it did going in.

Now back on the class 2 section of the ridge, I took it back to the saddle

Then I turned left onto trail 1996, and followed it south back to the trailhead

I made it back to my truck at 8:45am, making this a 6.51 mile hike with 2015’ of elevation gain in 3 hours, 45 minutes. 

While it had been beautiful being there with a dusting of snow last time, I was glad I’d turned around, as I now realized the scrambling on ice would have been dangerous:  There just hadn’t been enough snow to provide traction, and the ice had been slippery.

As an added bonus, this time I got to drive home while enjoying the fall colors

On to the next trailhead!

Mt Soso – 13,417

RT Length: 7.04 miles (From Rock Lake)

Elevation Gain:  2793’ (From Rock Lake)

This trip report starts at Rock Lake.  For instructions on the approach to Rock Lake, as well as the drive to Beartown from Silverton, click here.  

Since I was already at Rock Lake, at around 11850’, I made it a late start and was on the trail at 6am.  I was in the camping area directly in front of the lake, and from there I headed south towards the pass.

There is a trail that picks up on the east side of the lake, that will take you all the way to the pass on a class 1 trail

It’s rocky, but there is a well-defined trail here with cairns

At the top of the pass I headed southwest, following the cairns as they descended a bit. The trail goes on to Half Moon Lake, but I didn’t want to go there, so after descending down a small gully I changed directions, and gained the ridge to the west.

I spent a lot of time putting cairns in this area to help with navigation, but as long as you gain the ridge, the next part of the route will be obvious.

From the top of the ridge, this was my route up to the ridge of Mt Soso. 

It looks straightforward, but I ended up losing a lot more elevation than I wanted to, mainly because there’s a gorge that you can’t see from the pass.  I initially tried to go straight over the large boulders to the left, but it cliffed out.  You’ll need to stay more to the west. I lost almost 600’ of elevation making my way down into the basin.

This is all class 2, and easy to navigate.  Here’s a picture of the gully that will lead you to the ridge.  This is a class 2 gully, and you’ll find a game trail if you stick to climbers left.

From the top of the gully, looking back on the route I took there, I had a better view of the gorge I’d been trying to avoid.  There was a beautiful waterfall I hadn’t been able to see from the other side.

Once on the ridge, I turned right and followed it southwest. 

After about a quarter mile of class 2 terrain the ridge became class 3 for a bit.  I spent a lot of time putting together cairns for the rest of the route.  This is the route I took

Here are some step-by-step pictures.  Most of this is class 2, with some easy class 3 thrown in

Now is a good time to get a visual on the rest of your route.  The upper ridge is sustained class 3, but I dipped down a bit and took the grassy gully to the summit

Here’s a better look at the ridge

And some close-up pictures of the class 3 scramble.  I was able to stay directly on the top of the ridge for this, until I came to just below the grassy area.  If you’ve made it this far you can probably just go straight up and over the ridge, but I felt safer dropping down and taking the grassy gully up. I put a ton of cairns in the area to help guide the way.

Here’s where I dropped down about 20 feet

And then went up the grassy gully (class 2+)

Topping out of the grassy gully

And then it was a quick walk north to the summit

I summited Mt Soso at 9am

Mt Soso:

From the summit I could see my hike into the basin, and the cliff band I’d needed to avoid

I stayed on the summit longer than I normally would, because it was such a nice day.  Then I re-traced my steps back to Rock Lake, first by heading south to the ridge

And then taking the grassy gully down.  There’s an obvious willow bush in the path.  Turn right and head to the ridge BEFORE you make it to this lonely bush.

Then following the cairns back up to the ridge (circled in red)

Here’s the overall route down the ridge, back to the access gully that led up the ridge

And some step-by-step pictures

Then back down the gully, into the basin, avoiding the cliffs and waterfall

Then back up to the pass

From the top the view can get a little confusing, because there are a lot of rocks.  Here’s the route:

You’re aiming for this gully, which will have cairns that will lead you back down to Rock Lake

There is a trail here that will lead you back to the lake

Notice there are a lot of campsites in this valley area as well

I made it back to Rock Lake at 11:45am, making this a 7.04 mile hike with 2793’ of elevation gain in 5 hours, 45 minutes.

McHenrys Peak – 13,330

RT Length:  17.46 miles

Elevation Gain:  4442’

I started from the Glacier Gorge trailhead in Rocky Mountain National Park at 3:30am.  There were already several parties in the parking lot (probably 10 vehicles), but didn’t see another person on my route all day.   This is also a bus stop for access to Glacier Gorge (and lots of other hikes).  All this means is that it was overly crowded the last 2 miles of the hike on my way down.  Passing people became impossible, and more of a stroll as I hiked out with hundreds of other hikers. 

I followed the class 1 trail, staying on the Mills Lake trail.  There were wonderful signs that made getting lost difficult. 

I passed Alberta Falls at 1.15 miles, and continued following the trail to Mills Lake

After hiking for 3.35 miles I passed Mills Lake, and at 3.85 miles I passed Jewel Lake.  Side note:  there’s great fishing here.  Lots of hungry trout, eager to feast on any worm you drop in.  The larger trout are in the stream above Jewel Lake, and in Mills Lake.

I continued following the class 1 trail all the way to Black Lake (6 miles in).  This part of the trail had a lot of wood foot bridges, and rock slabs to cross.  All class 1, but the rock slabs were tricky to navigate in the dark.

I made it to Black Lake, and continued on the class 1 trail, up a waterfall, and across more rock slabs.

Here the trail kind of fizzled out, but I continued following cairns as I crossed a small creek, and headed southwest towards McHenrys Peak. There are a ton of cairns in this area (circled in red). 

Here’s the overall route to Frozen Lake (not pictured) and up Stone Man Pass.  There are plenty of cairns to guide you, but for the rest of the hike be careful:  there are a lot of granite slabs that are quite steep to navigate (all class 2), and slippery where wet.

Here are some close up pictures to Frozen Lake

I easily rock hopped and crossed the lake on its north side, and continued heading west towards Stone Man Pass

There are still tons of cairns in this area, but choose your route based on the best conditions.  The rocks are very slippery where they are wet.  I was aiming for the gully below Stone Man Pass.

I didn’t think the gully was that bad.  I stayed right on my way up, but took the other side down.  I’d recommend climbing up the left side of the gully, as it was more stable, but both were fine.  Here are some pictures of the gully

Once at the top of the gully, I turned right and headed northwest towards McHenrys Peak.  Everything you can see here is class 2, and there are cairns to guide your way.

I rounded the mountain, and was now on the west side of the peak.  Here is got a bit trickier.  There were still cairns to follow.  I headed up a rock slab, and rock filled gully.  This was easy class 3

Here’s the overall route of the rest of the climb.  I felt this was difficult class 3, with some exposure. 

There was a chimney to head up, and then a short but intense scramble to the summit

I summited McHenrys Peak at 9:50am

McHenrys Peak:

The summit looked like it could have several actual summits, so despite the large cairn and summit register, I made sure to walk all around the summit to make sure I’d actually summited.

Now to head back down. The trickiest part was descending the initial section, and finding my way back around the side of the mountain.  Once I was there, it was easy to find my way to Stone Man Pass, and then back down to Frozen Lake.

And then I followed the cairns northeast, back towards the trail that would lead me to Black Lake

Then followed the trail all the way back to the trailhead. 

I made it back to my truck at 2:30pm, making this a 17.46 mile hike with 4442’ of elevation gain, as per CalTopo.  Strava told me it was a 15.02 mile hike with 6573’ of elevation gain.  I tend to go with CalTopo when I write, for consistency purposes, especially since Strava tends to grossly exaggerate elevation gain. 

Also, there were a few elk along the trail who didn’t seem bothered by my presence… they wouldn’t even look up from whatever they were eating to acknowledge me.

On to the next trailhead!

Precarious Peak – 13,380

RT Length: 13.79 miles

Elevation Gain: 3714’

The Rustler Gulch Trailhead was full.  I tried to drive up the road several times, but kept getting greeted by vehicles coming down.  The drivers didn’t understand up had the right of way, and all of them seemed to be in vehicles too big for them to maneuver.  After backing up over half a mile for the third time, I decided to just park below.  I’d find out the next day it’s peak wildflower season in Rustler Gulch, and the tourists were flooding in to see them. Parking down below added about 2 miles to my trip and 500’ of elevation gain, which was negligible. Bonus:  There was a creek behind me to enjoy as well.

I was on the 4WD road that led to the trailhead at 3:30 am.

I followed it a mile to the actual trailhead, which was overflowing in the afternoon

I passed around the gate, and followed Rustler Gulch trail #599 north into the gulch.

There were several stream crossings to cross, all of which had rocks or logs so my feet didn’t get wet.

When I got to this creek crossing, I went right, and found a footbridge

I continued following the trail, and crossing creeks, through the gulch on a well-marked trail

Here’s my route into the upper basin.  This is all done on a class 1 trail

Here are some more pictures

After hiking for 5.3 miles, I crossed a creek, and left the trail.  I could see my route before me to Precarious’ access gully.

This is the route I took

And some step-by-step pictures to get there

At the base of the gully I put on my microspikes and started climbing.  This is choose your own adventure of 850’ of elevation gain.  This felt class 2+.  I’ve definitely been in worse gullies, but still be sure of every step.  I didn’t have any rocks fall down the gully, but I did make a few slide a few feet. It had rained the night before, so the scree was mushy and easy to grip.

There are two ways to top out of the gully.  I took the first one up, the last one down.  If I were to do this again, I’d take the one closest to the top up and down, as it felt more secure.  Here’s the one I took up, which still had snow in mid-July:

And the one I took down (snow free)

They both led to the same place:  Class 3 scrambling. 

I aimed south, towards what looked like the ridge, but went too far up, where the route cliffed out.  Instead, head east.  At around 13190 there’s a path to go around the mountain. I had to descend about 50’

When I got there this is what I saw:  A snow filled gully!!!  I was so upset, thinking my climb was over…

Until I realized I just needed to cross the gully, and then head towards the summit on the other side (all class 3 scrambling). 

I crossed the gully just at the base of the snow

And then scrambled to the top

To find I wasn’t yet at the top…  This was all class 3 scrambling as well

I summited Precarious Peak at 8:30am

Precarious Peak: (Yes, I called it the wrong name.  I knew it was wrong at the time, but didn’t care to take the video again)

There were two summit registers, and when I went to open them I found out why:  The older one was sealed shut.

I backtracked the way I’d summited back to the snow filled gully

Crossed the gully

And made my way back to the ridge

Then back down to the gully that would take me to the access gully

OK, time to put back on my microspikes to descend the 850’ that is the access gully

I stopped on my way down to get a video

Precarious Gully:

Then continued to its base

At the base of the access gully I took off my microspikes, and then headed for the obvious trail below.

I crossed the creek, and spent some time looking at some old mining equipment.

Then I followed the trail back down the gulch

There were so many people, and so many wildflowers!  I can see now why this trail was so popular.

Here are a few pictures of the way back to the trailhead

And from the trailhead to my parking spot

Here you can see even more of the overflow/2WD parking below

I made it back to my truck at noon, making this a 13.79 mile hike with 3714’ of elevation gain in 8.5 hours.

On to the next trailhead!

Pear Peak – 13,462, PT 13220, PT 13513

RT Length: 11.89 miles

Elevation Gain: 3995’

I’m not a fan of the Rockdale Trailhead. It’s an adventure in itself, starting with a drive through Clear Creek

And then the road to get to the trailhead is littered with dips and rocks. I feel I’m a pretty good driver on 4WD roads, but I have a hard time avoiding some of the obstacles on this one.  If you drive to the upper trailhead be sure of your driving skills/vehicle.

I made it to the trailhead and was on the trail at 5:30am. The trail is class 1, and starts out by heading south along trail 1461.

After hiking for less than half a mile I came to the avalanche area. Last time I was here was recently after the avalanche, and it was difficult to navigate.  They did a lot of work in this area, and now you can drive a car through it (if vehicles were allowed, that is).  I passed around the gate, and continued along the trail.

Just before making it to Clohsey Lake there’s a junction in the road and it becomes a trail.  You can take this, or continue taking the road to the lake and pick up the trail on the other side. I chose to take the trail up and over the small mountain

I followed this trail south for 3 miles from where I parked, through pine trees, willows, across streams, and eventually to treeline.

After about 3 miles the trail kind of disappeared/fizzled out.  Last time I was here I found cairns to take me to the ridge, but this time I didn’t see any.  No worries though, I just kept rounding the hillside, heading northeast towards the ridge. You’ll want to just head towards the ridge, but easier terrain is to your left (northeast).

It was 3.75 miles to the ridge.  Once on the ridge I turned right and followed the ridge south.  I could mainly stay on the top of the ridge, dipping to the left a few times when necessary.  I was headed towards the black arrow.

To continue to follow the ridge I had to make it around this point. I aimed for just below the large boulder, then went left, following dirt and scree and hugging the mountainside.

This part was easy, but as I rounded the corner, I came upon gullies full of choss. This area felt class 4.  To navigate these, I hugged the gullies, dipping down to cross the first big one, and then remaining level before eventually finding what looked like a game trail to the ridge.

Here’s the view and my route from the first big gully. I stayed level to get across the chossy gullies. It’s harder/steeper than it looks.

Safely across the first gully, here’s looking back at the route I took down

Now I continued at level elevation heading south, until I found an obvious route to the ridge.  Until this time the ridge had been rock slabs, spires, and choss, but once it became rocks and tundra I headed up, then turned left to follow the ridge.

From this point on, the ridge ‘goes’.  It’s mostly on large, solid rock, but remember, these rocks can move. It’s about three quarters of a mile from here to the summit of Pear Peak.  The ridge felt consistent class 2-3. I didn’t feel there were any class 4 moves on this ridge.

If I ever felt the need to dip off the ridge, I went left.  Pear Peak is actually to the left, past the false summit (which isn’t really a false summit because you can see the true summit most of the time)

Here are some more ridge pictures

I summited Pear Peak at 8:45am

Pear Peak:

Now the easy part, as I turned northwest and descended the ridge to the Pear Peak/PT 13220 saddle.  This was class 2, once again sticking to the ridge and dipping to the left when necessary.

Here’s an overview of the rest of my route, mostly following the ridge, except for a short area on the way to 13220 where I stayed left (more on this later).  You also have a good view of the decent route from here. Now’s a good time to study it.

Ok, down the ridge to the Pear Peak/PT 13220 saddle.  It’s all class 2, and you’re aiming for a scree filled gully, circled in red

Once you make it to the gully, the choss and adventure begins.

I dipped down into the gully, crossed it, and then stayed level in elevation as I rounded the south side of the peak, aiming for two protruding rocks.

Once I started heading north, I followed game trails up gullies and back to the ridge.  This area seemed to go on forever.  

Once on the ridge it was class 3 to the summit

I summited PT 13220 at 10am

PT 13220: 

Here’s looking back at the route from Pear to PT 13220.  It was 1.5 miles from Pear to 13220.

Next up, PT 13517 (more ridge work!)

I followed the ridge the entire time.  The ridge to the saddle was class 2.  The difficult part is the ridge circled in red, which I felt was consistent class 3, with a bunch of class 4 moves thrown in.

The trek to the saddle was mostly on rocks, with a short ridge at the end (yes, you can stick to this ridge too)

I entered the final ridge by going around to the east, then ascending the ridge by heading northeast.

As I said before, this is a class 3 and 4 ridge.  There are too many specific moves to illustrate here, as the climbing is consistent, so I’ll just show a few of the fun ones. While the rock looks solid, and mostly is, please be careful of the ones that look solid but roll. If you can’t go straight up the rocks, look for game trails to the left.  Nothing should feel over class 4.  To put it in perspective, I consider difficult class 4 anytime I need to remove my DSLR camera from around my neck, or put my trekking pole away to climb.  I didn’t have to do either of those things on this ridge, but it was the most difficult climbing of the day.

The last little dip before the final push to the summit was class 2

I summited PT 13517 at 11:15am

PT 13517: 

PT 13517 was a little over a mile away from PT 13220. Here’s looking back at PT 13220 and Pear Peak

I turned and retraced my steps back to the saddle. 

Here’s the other side of that initial class 4 move

Back at the saddle, I headed east, and took the gully to the left down

The gully had scree, tundra, and bounders.  I was easily able to find a way down this gully, but it looked challenging to find a good way to go up. I was glad I chose to do Pear first.

Here’s my overall route down the gully, across the small basin (I stayed high here) and back down to the trail.  I followed a waterfall northeast, keeping the waterfall to my left to exit so I wouldn’t need to cross the water. This brought me to willows and the trail I’d used to hike in.

The hike out was uneventful, except it rained.  I know it looks like it was a beautiful day, but in reality, just before PT 13220 it was snowing, and it rained/hailed/graupeled a bit on my way down. There were also people fishing at Clohsey Lake who had a few dogs. I was about 100 yards from them, but their dog wouldn’t stop barking at me.  I’m sure that made for wonderful fishing.

I made it back to my truck at 1:45pm, making this a 11.89 mile hike/scramble with 3995’ of elevation gain in 8 hours, 15 minutes.  And now, for the fun drive out!

Here’s a view of Clohsey Lake and the basin from Pear Peak

PT 13336 and PT 13015

RT Length:  16.3 miles

Elevation Gain:  5815’

I decided to hike these peaks from the Maroon Bells area because I had a pass and was already there.  I knew today was going to be a straightforward but long day, and it was supposed to storm in the morning, so I was up extra early and on the trail at 2am.  I started at the Maroon Lake trailhead, and passed a few deer grazing in the dark.   I skirted Maroon Lake to the right, and continued on the trail towards Crater Lake.

At the first junction I continued straight, and followed Maroon Snowmass Trail 1975 up into Minnehaha Gulch. 

I continued on this trail all the way to Willow Pass.

This is a class 1 trail that crosses a creek, then heads north through the basin.

Stay right at this sign

And follow the trail to Willow Pass.

CalTopo tells me I hiked 5 miles from the parking area to Willow Pass.  From Willow Pass you can see today’s peaks

From Willow Pass I descended 560’ into the basin

I came to the Junction for East Snowmass Trail/Willow Lake, and turned left, following the East Snowmass Trail.  

I was now following the trail towards the saddle of PT 13336 and PT 13020

The upper basin was really neat, as I could see two different types of rocks, one coming from each mountain.  The color contrast was interesting.  The trail was still class 1 to the saddle, staying on the tundra/red dirt.

Once at the saddle it’s a good idea to put your helmet on.  I decided to tackle PT 13336 first.  This is class 3, and takes place on loose rock.  You may want to put on your microspikes for added traction.  The red dirt was mushy because it had recently rained, but it was still loose.  Here’s the route I took, as seen from higher up on PT 13020 later in the morning:

And here are some step by step pictures of the route:

Easily walk around the first two obstacles to keep this part class 2

Next, you can either skirt the next obstacle to the left to keep this class 2, or go straight up and over if you like class 3

Now, keeping the ridge in front of you, the route becomes class 3.  Head between these two boulders and ease a little left

Look for a break in the rock formation and scramble up

You can now clearly see the ridge.  Keep the ridge to your right, and skirt the north side of the ridge.  There is no need to go up and over the ridge at this point.

The rock here is loose, and only gets looser. Follow the loose rock up a sort of side gully.

At the top of this rubble the rock changes.  It’s no longer the loose Maroon rock:  it now becomes the loose Snowmass rock.  This rock is very slippery when wet, and even when not, so take care.  These rocks are not stable.  Just assume they all move.  Cross this gully high.  There is still no need to gain the ridge, you can stay just a bit below

I have a feeling the terrain here shifts often, so pick your way carefully.  I traversed the ledge by staying about 50 feet below the ridge, and then gaining the ridge through a gully

At the top of the ridge you can see the true summit of PT 13336.  The terrain stays just as loose as before.

I summited PT 13336 at 6:10am

PT 13336: 

Here are some pictures of the way back to the saddle

Across the gully

And down the maroon scree

From here you can see the summit of PT 13020 and Buckskin Benchmark

It was a simple ridge hike, with just a few fun moves to the summit of PT 13020.  Here’s the overall route

And some step by step pictures. To gain the upper ridge, I skirted the rock formations to the left, but still stayed as close to the ridge as possible.

Once on the upper ridge I followed it to the summit of PT 13020, only dipping down to the left once through a gap in the rocks to keep this class 2

I summited PT 13020 at 7:20am. 

PT 13020:  

It was starting to rain, so I headed back down the ridge to the saddle.

Once at the saddle, I followed the class 1 trail back to Willow Pass

There was a large family of marmots at the Willow Lake/East Snowmass/Willow Pass Junction.  As I approached, several jumped underneath the grass, not wanting to be photographed.  I turned and headed southwest towards Willow Pass

And from Willow Pass I followed the trail back to the Maroon Lake Trailhead

I made it back to the trailhead at 10:45am, making this a 16.3 mile hike with 5815’ of elevation gain in 9 hours, 45 minutes

And, just because I have room for one more picture, can we all take a minute to appreciate jut how beautiful this area is?

Little Horn Peak – 13,143 and Fluted Peak – 13,576

RT Length:  12.35 miles

Elevation Gain: 5504’

I parked at the Horn Creek Trailhead, the only vehicle in the lot.  I’m always surprised at how few people take advantage of the free dispersed camping sites we have in Colorado, especially ones like this with a bathroom.  Eager to summit and get back to treeline before the incoming storm, I gathered my gear and was on the trail at 4:30am.  The trail starts by following the Rainbow Trail southwest for just over half a mile

Then I turned right onto Horn Creek Trail

I followed Horn Creek Trail for a short distance, about a tenth of a mile, before turning left at the junction towards Horn Creek Lakes.  Here there’s a register, that looks to be kept up.

I stayed on this trail for half a mile, before leaving the trail at 9590’ and heading north and then west up the ridge.  There is no trail here.  I left a small cairn to indicate where I left the trail, but I don’t expect it to be there long, as it was small.

Route finding here can be a bit tricky, but the goal is to gain the ridge.  I did this by heading west, through the pine and aspen trees.  Every once in a while, I’d come across a game trail.  They all fizzled out however.  This area is easy to navigate, as there aren’t too many downed trees.  I was able to avoid most of them.

Once I was on the ridge, I followed it southwest to treeline.  This is a long ridge, and it seemed to take forever to make it to treeline.  Here’s my first glimpse of Little Horn Peak

Like I said, this is a long ridge

The class 3 fun starts at the top of the ridge, which is a false summit.  From here you can see Little Horn Peak’s true summit

My trekking pole isn’t collapsible, so I left it at the start of the class 3 section, put on my helmet, and started heading straight over the ridge.  The class 3 section is consistent for another half mile to the summit. 

Start out by going straight over the ridge.  There is some exposure here. 

Then you’ll dip down to the right.  Look for a notch, go through it, and now you’re on the left side of the ridge. 

Go up the gully and cross back over to the right side of the ridge

There’s a section of rock to upclimb.  This was difficult class 3 / easy class 4 (and much more difficult and committing on the way back down later in the day).  

From the top of this section I could see the summit.  I stayed on the left side of the ridge from this point on, staying on class 2 terrain.

I summited Little Horn Peak at 7:45am

Little Horn Peak: 

That was it for the class 3 section of the hike.  The ridge over to Fluted Peak is class 2 (with the option to go up a class 3 chimney, but it’s avoidable).  Here’s Fluted Peak to the west.

This was a simple ridge hike to the saddle.  You can’t see them very well in this photo, but there was a mama bighorn sheep with her baby walking up the ridge.  The baby couldn’t have been more than a month old.

From the saddle, here’s how you keep this a class 2 hike (dotted lines show the class 3 route)

Here’s the first obstacle (class 2 solid, class 3 dotted):

And the second (class 2 solid, class 3 chimney dotted):

Here’s that chimney up close

After the chimney, it’s straightforward class 2 to the top of the ridge to the first false summit. 

Fluted Peak is actually here

There are two quick false summits to go up and over

And then the final summit

I summited Fluted Peak at 9am

Fluted Peak: 

The clouds were coming in fast, so I decided to re-trace my steps and head back to Little Horn Peak (I’ve already summited Horn Peak, so there was no need to make this a loop today).  I headed back to the ridge

Here’s a picture of Little Horn Peak from the Fluted Peak Ridge

It all stayed class 2 until I made it to the summit of Little Horn Peak

From there It was class 3 again until I made it to the ridge.

Here’s a closer look at that notch

And the last bit of scrambling to the ridge

I made it to the ridge and looked around for my trekking pole.  It wasn’t where I’d left it.  Instead, it was about 15 feet away, at the entrance to a marmot burrow. I picked it up and found some marmot had turned it into a snack.  Just adding more photographic evidence to prove the case “Marmots can’t be trusted with trekking poles”.

I sighed, took off my helmet, and headed back down the ridge (yes, I brought the trekking pole down). 

Once back at treeline I turned back for a last view as it started raining. 

The rain quickly turned to hail and I had to put my camera away. Here are some pictures of below treeline, in-between bouts of rain/hail. I just kept descending northeast, and when the ridge ended I continued east towards Horn Creek Trail.  Once again, I’d pick up game trails and then lose them.   A little advice:  you should be able to hear Horn Creek flowing below you to your right if you’re going in the correct direction.

Back on the trail I followed it to the trailhead.

I made it back to the trailhead at 1pm, making this a 12.35 mile hike with 5504’ of elevation gain in 8.5 hours.  That had been a fun day of scrambling!

I dried off and headed to the next trailhead.  When I got there it was still raining, so I decided to make dinner inside the topper of my truck.  I finished, cleaned up, and was sitting down to write notes in my journal when I heard a loud “BANG!” 

I looked up, and the back window to my topper crumpled and broke into thousands of pieces.  I honestly thought I’d been shot at, and turned around but didn’t see a bullet hole anywhere.  Next, I gingerly opened the window, crawled out of the truck and took a look around:  no one in sight (but it was still raining). 

I assessed the damage, and realized I needed to take care of this asap, so I put on gloves and cleaned up all the broken glass I could, still getting some small slivers of glass embedded in my fingers.  Next, I drove to where I could get cell reception, and found the nearest place that would be open the next day to fix the broken glass was 5 minutes from my home, and 6 hours from where I was right now.  I sighed:  It looked like I had a long night ahead of me. 

It turned out the auto glass store couldn’t help me, and told me to go to where I’d originally bought the topper.  They couldn’t help me for another 4-6 weeks (and $600), but referred me to another glass shop that didn’t open until Monday.  So, a quick trip to Walmart to pick up some duct tape and a tarp and I was able to create a makeshift door that does nothing to keep animals/intruders out, but has done a decent job keeping out the rain.  I’m still not sure why the window broke:  I was told sometimes there’s just a flaw in the glass.  That sounds bogus, but I’m getting a new one soon anyway, and I’ve learned not to get windows in my next topper (I don’t use them anyway).  I’m actually more upset I lost out on two days of hiking.