PT 13540 and PT 13403

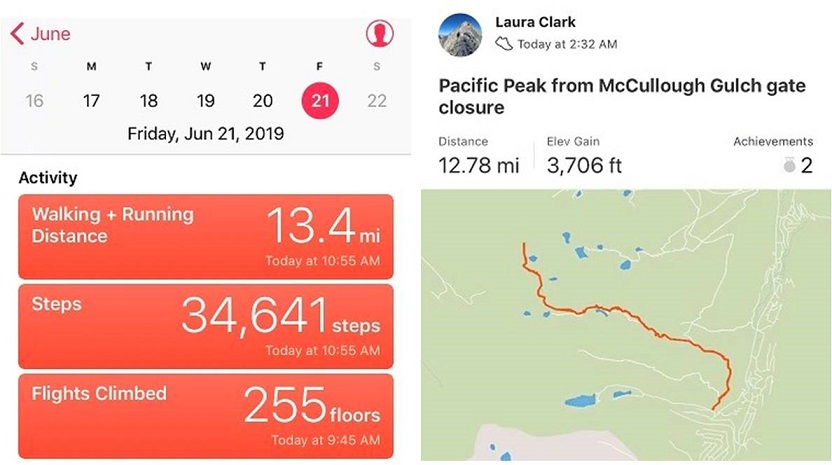
RT Length: 8.95 miles

Elevation Gain: 4206’

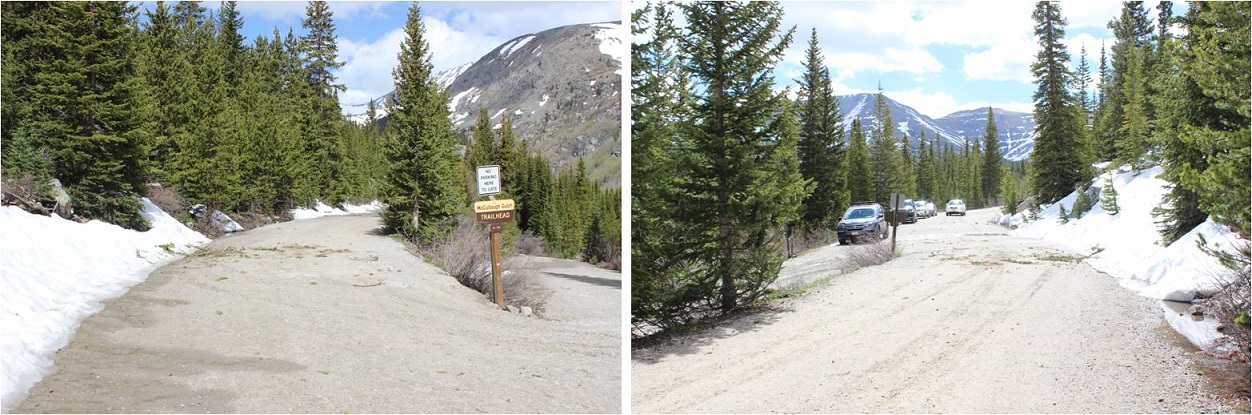
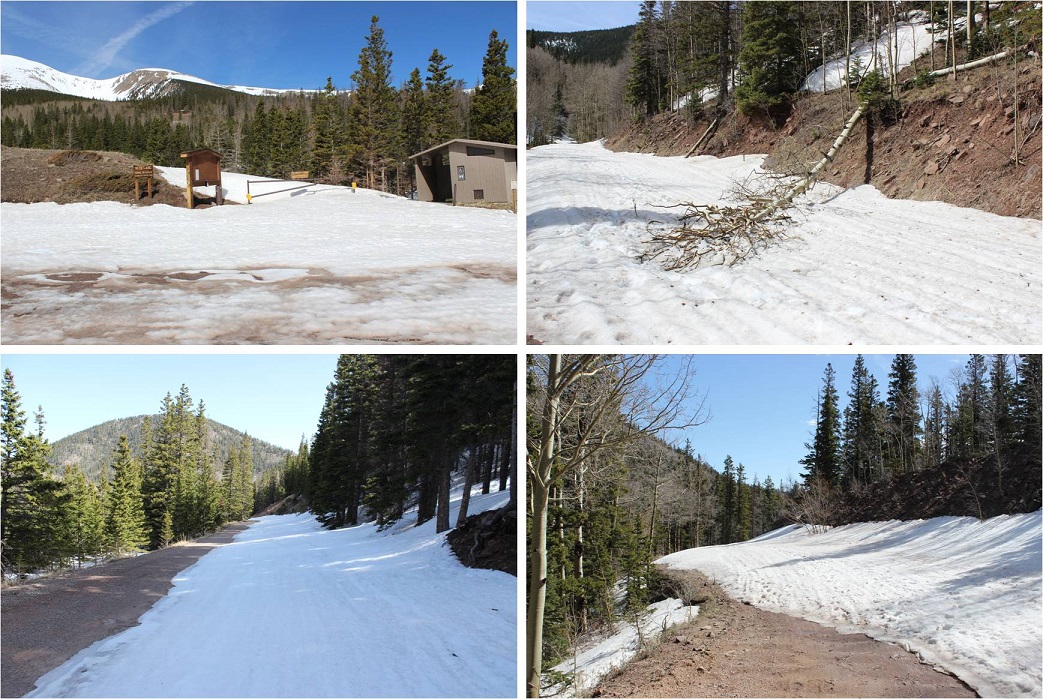
CR 30 has had some work:  the road was much nicer to drive than it was last year.  No more potholes!  At least the firsts 11 miles or so.  The last 5 were still a little rough.

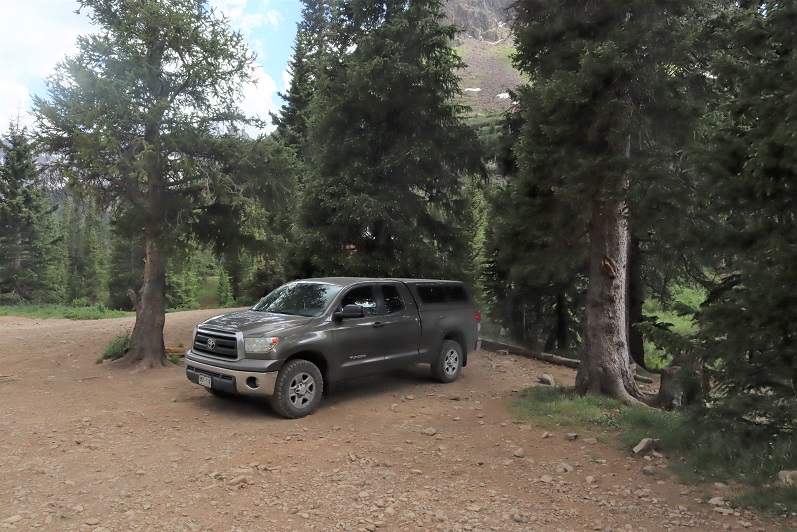
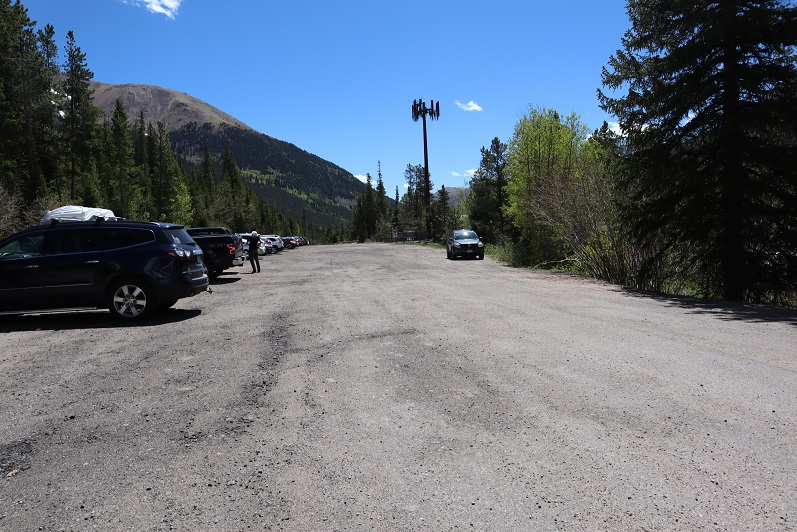
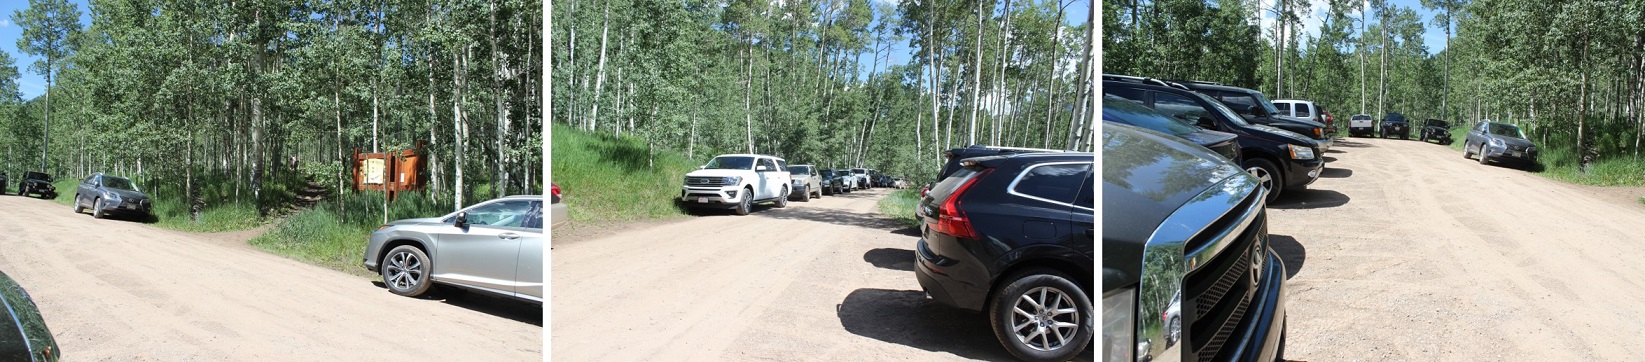
I parked near Cooper Creek and settled in for some dispersed camping.  There was a storm rolling in I and I got to listen to the thunder roll as I ate dinner (Pho, which was awesome) and read a little.  After a while campers set up across the way.  I went over and talked with them:  It was a father and son duo from Alabama, road-tripping because the son had just finished college.  Very cool father/son time. 

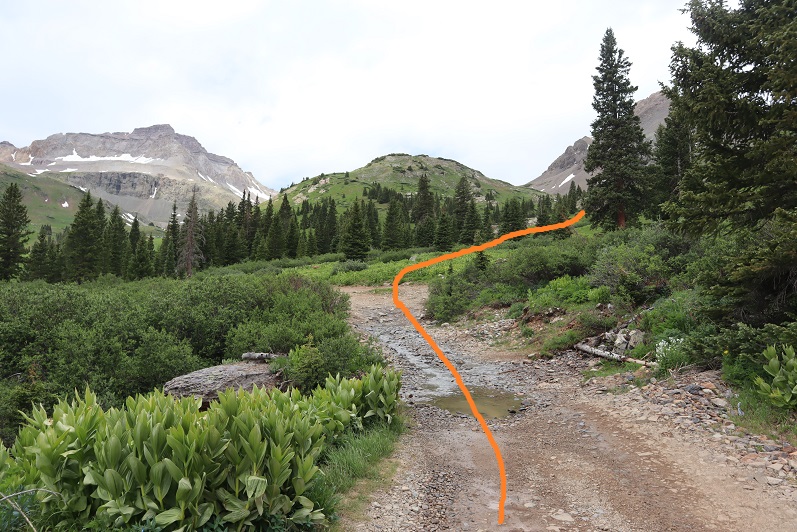
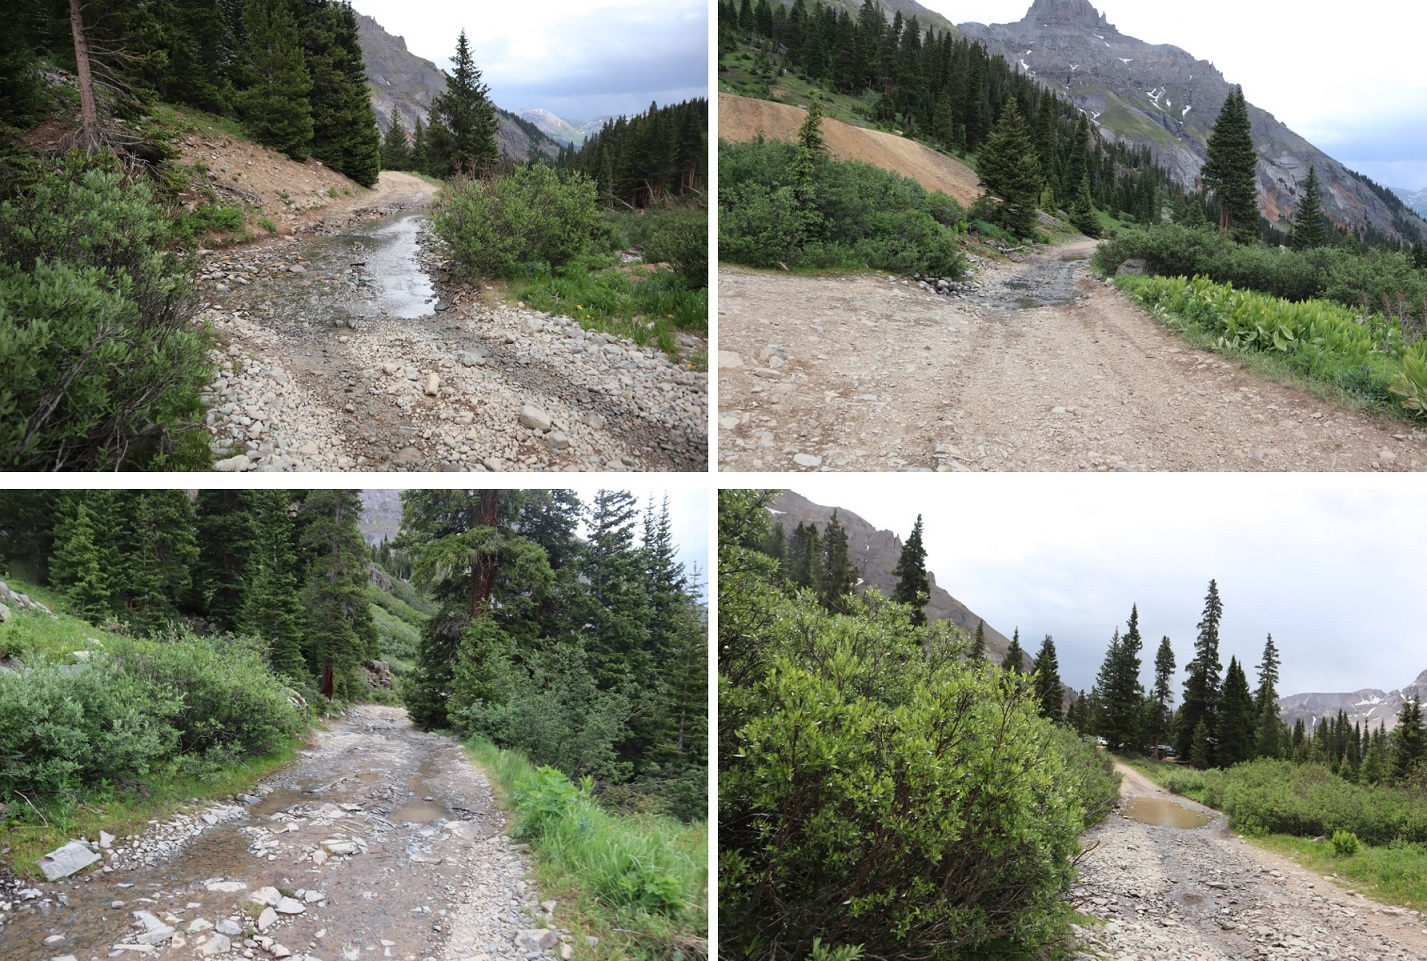
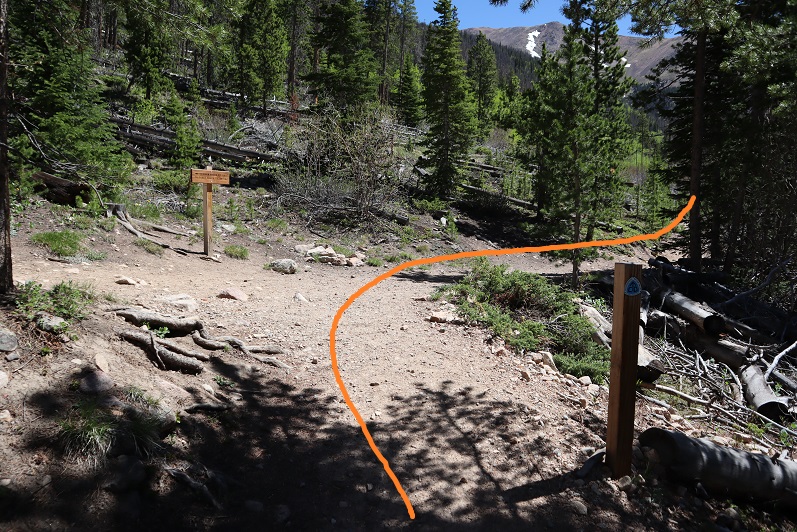
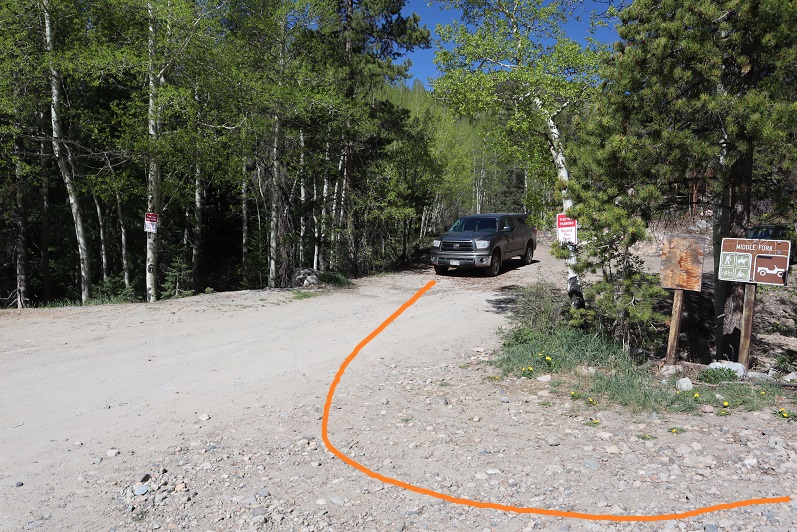
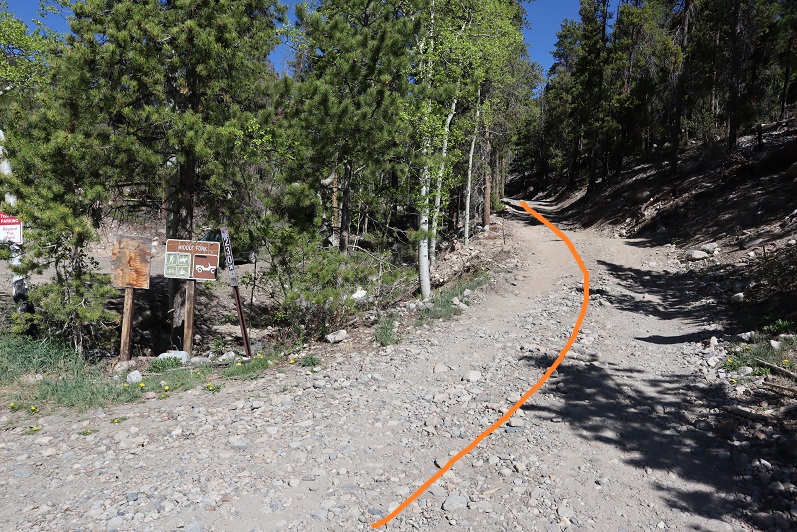
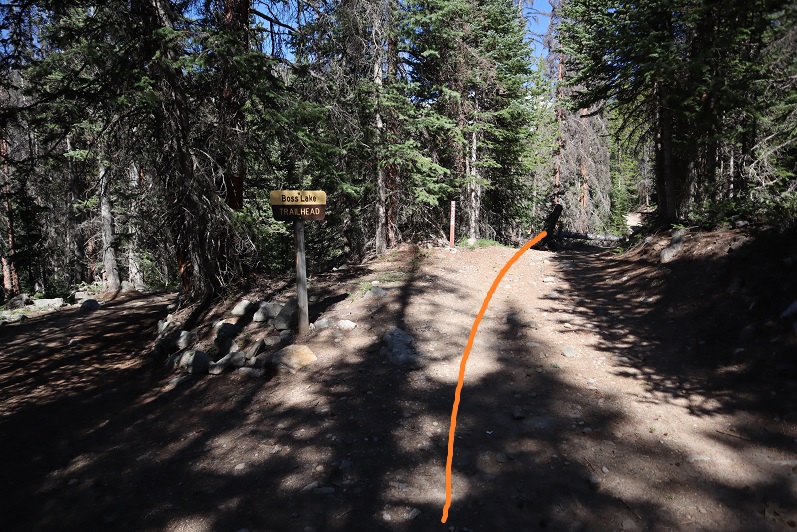
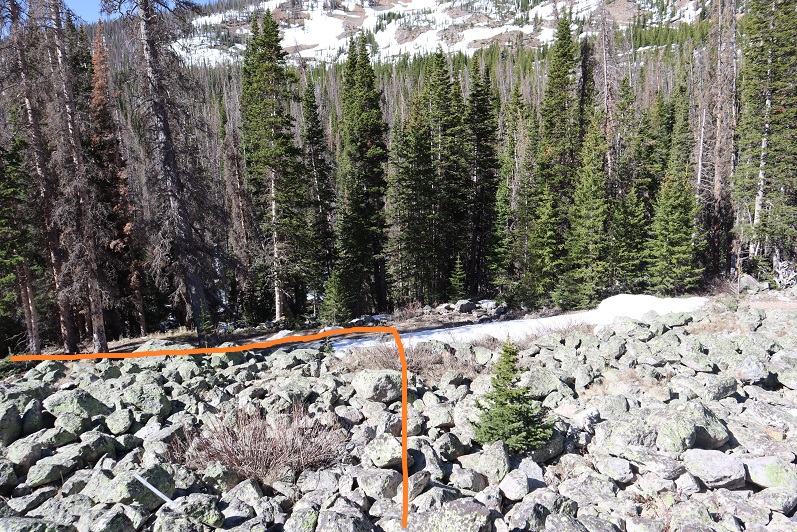
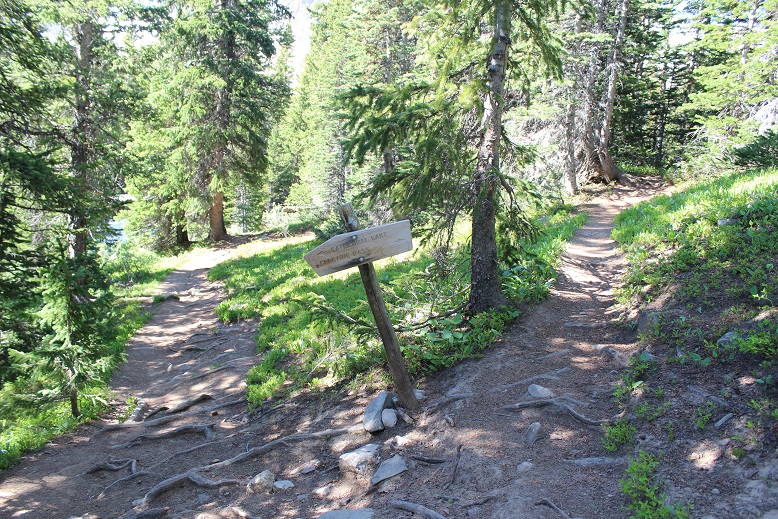
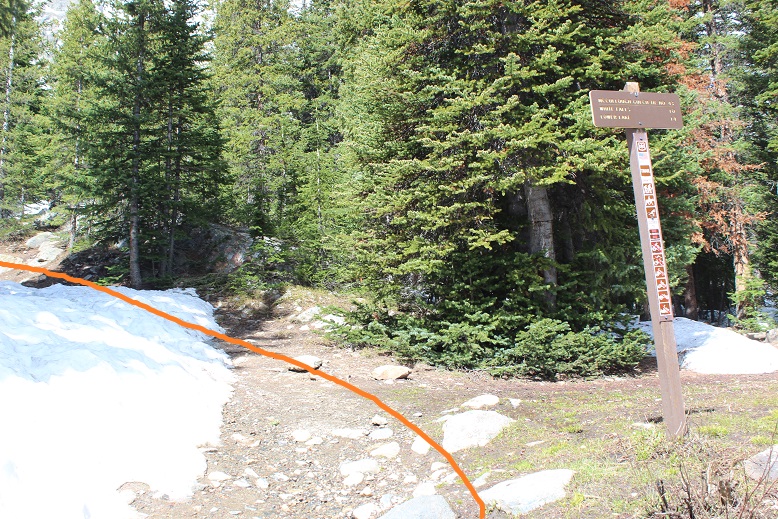
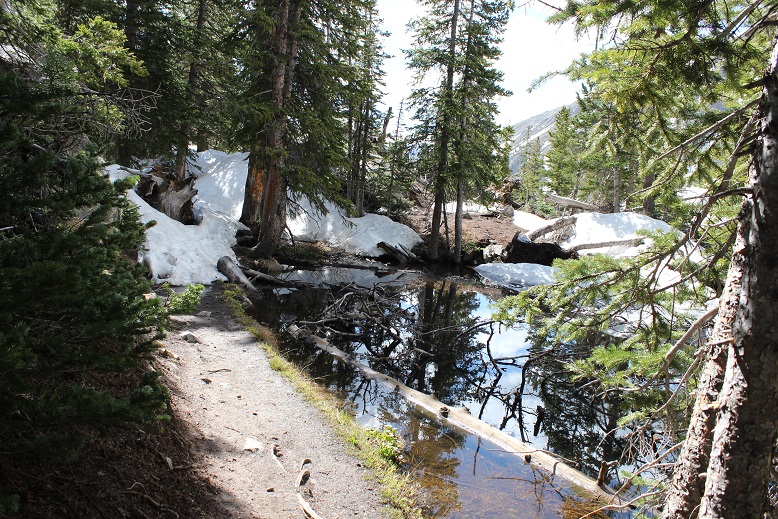
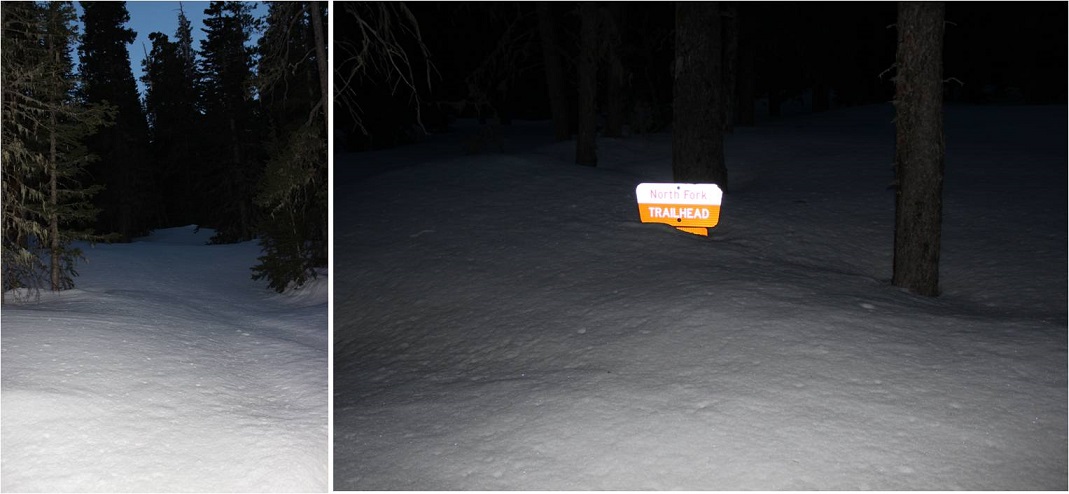
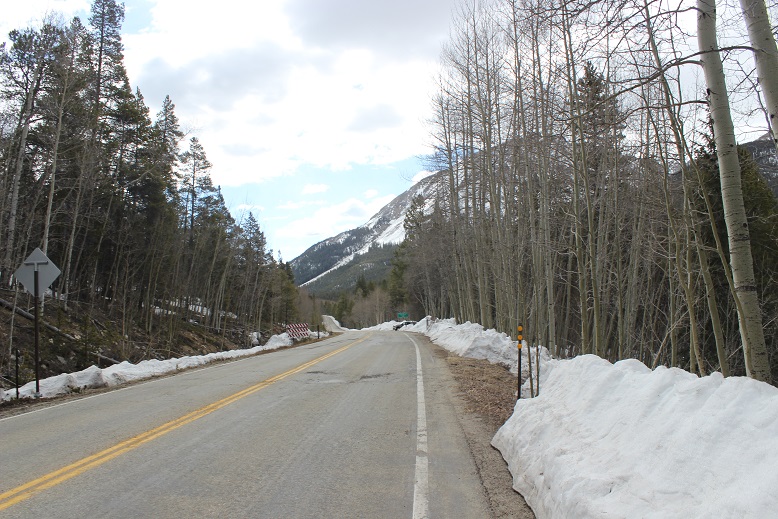
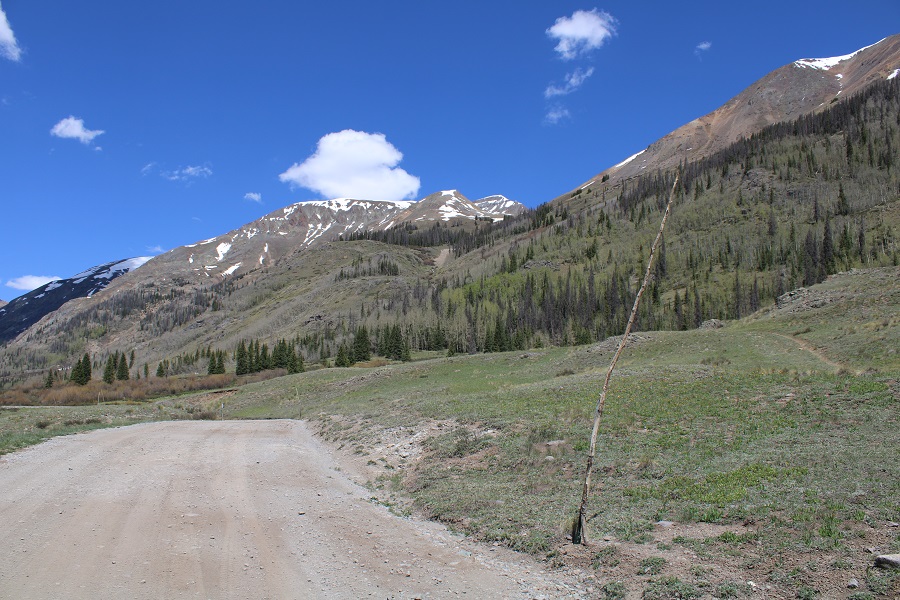
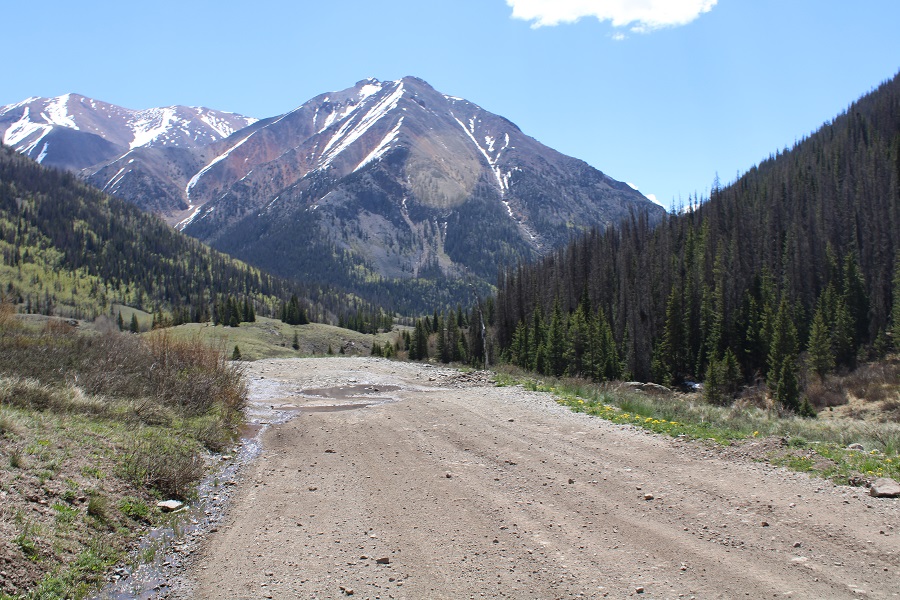
I made it an early night, sleeping until my alarm went off at 3am.  I hit snooze and was on the trail by 4am.  The route starts out following CR 30 west for about a third of a mile, then I left the road and followed the drainage/Rock Creek northwest.

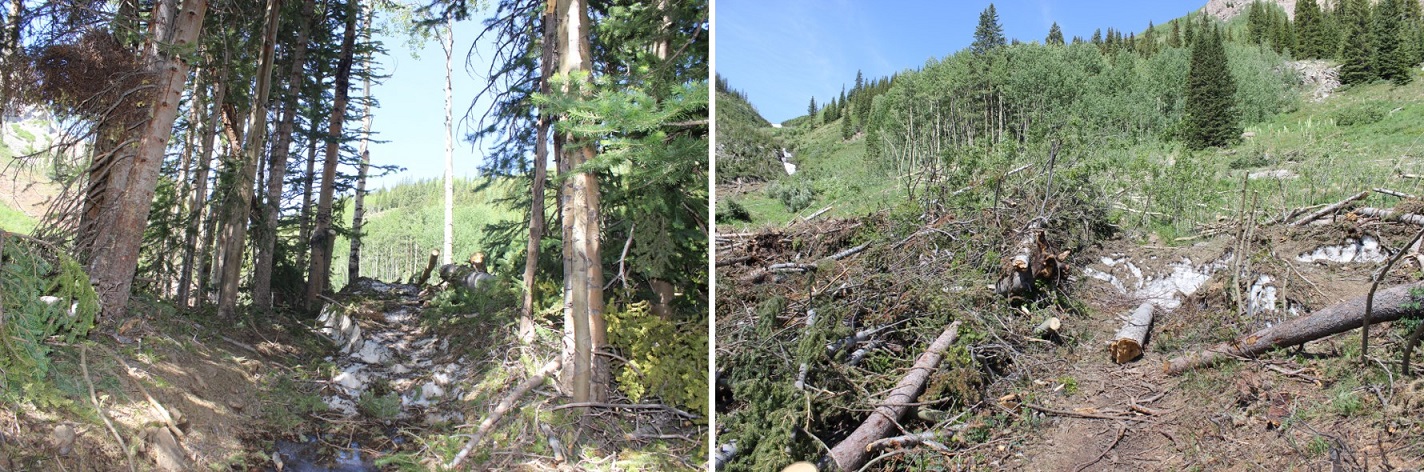
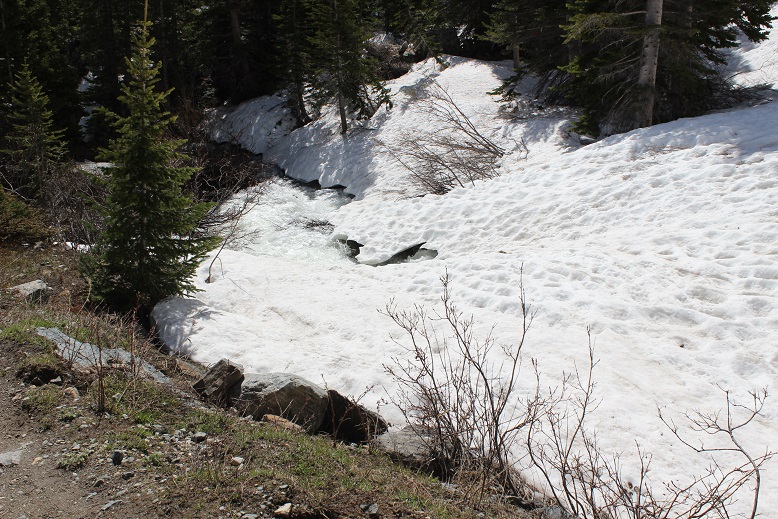
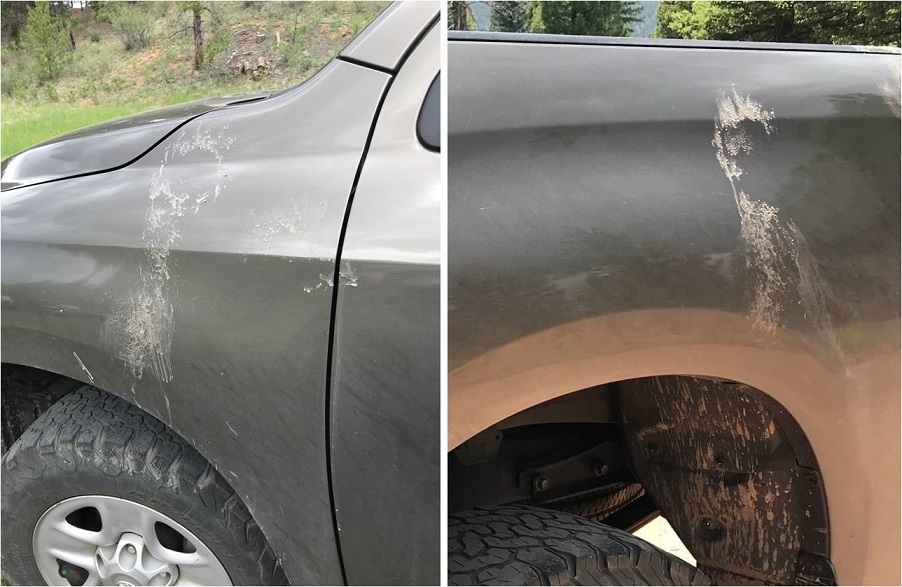
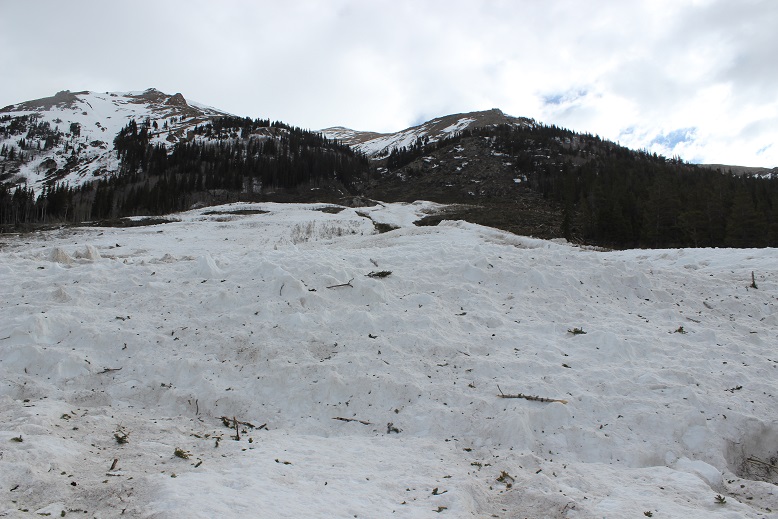
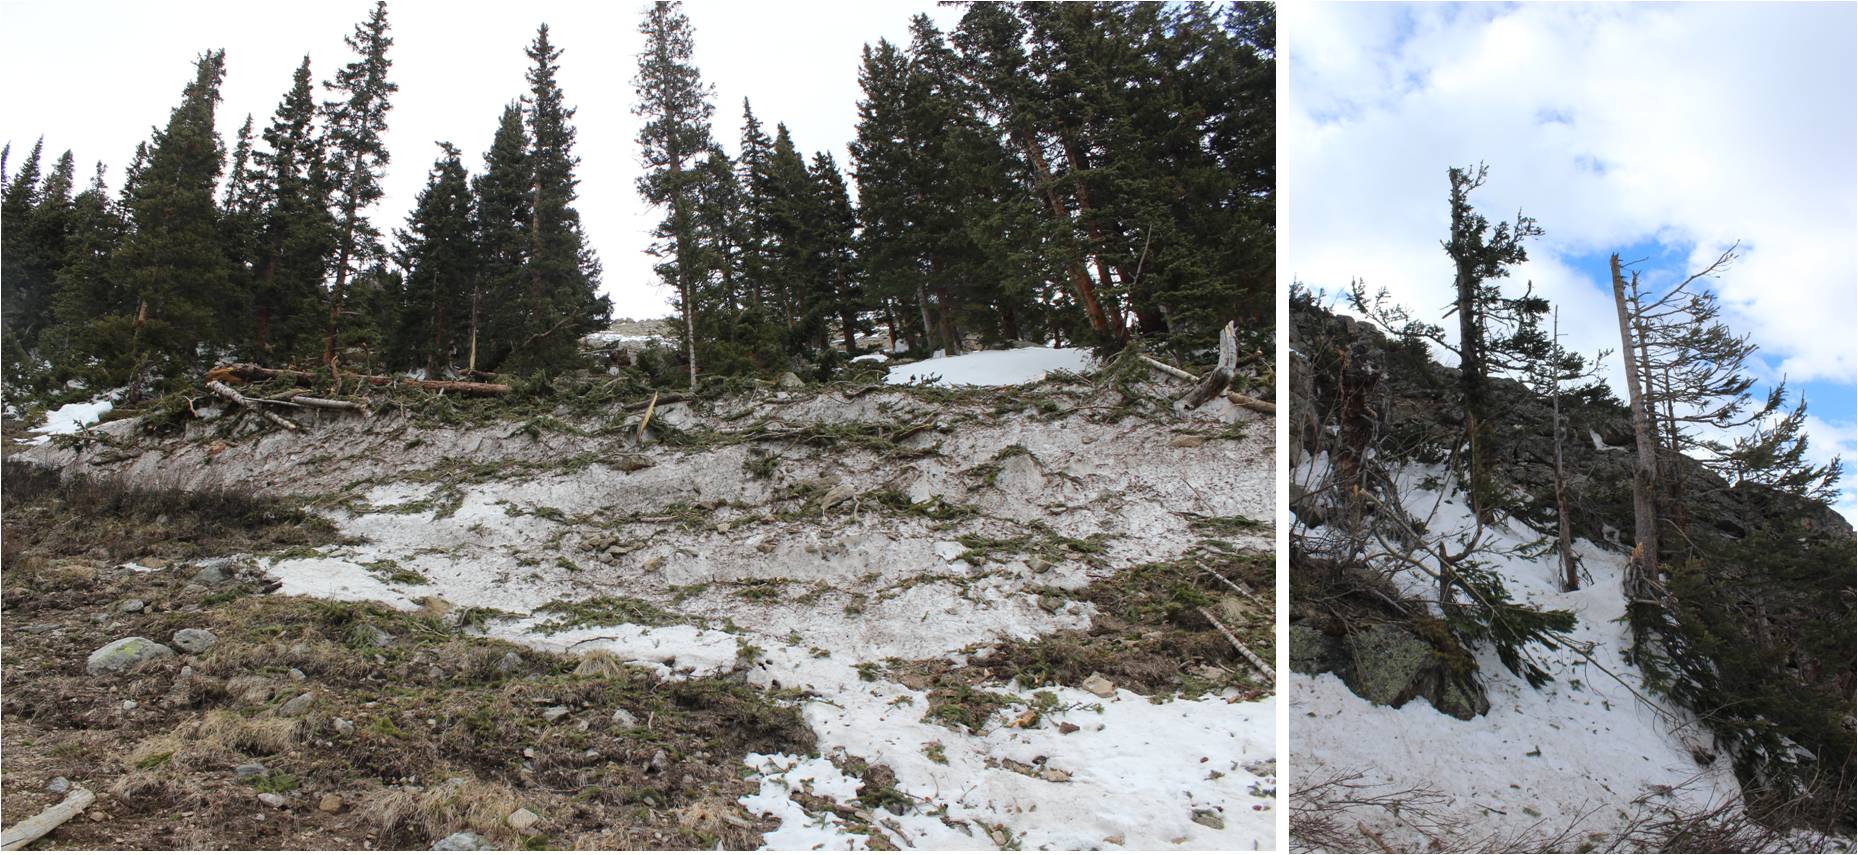
The area where you leave the road is also the site of a recent avalanche:  a house was destroyed, and there are pieces of the house, roof, furniture, shoes, etc. strewn about the area for about 100 yards.

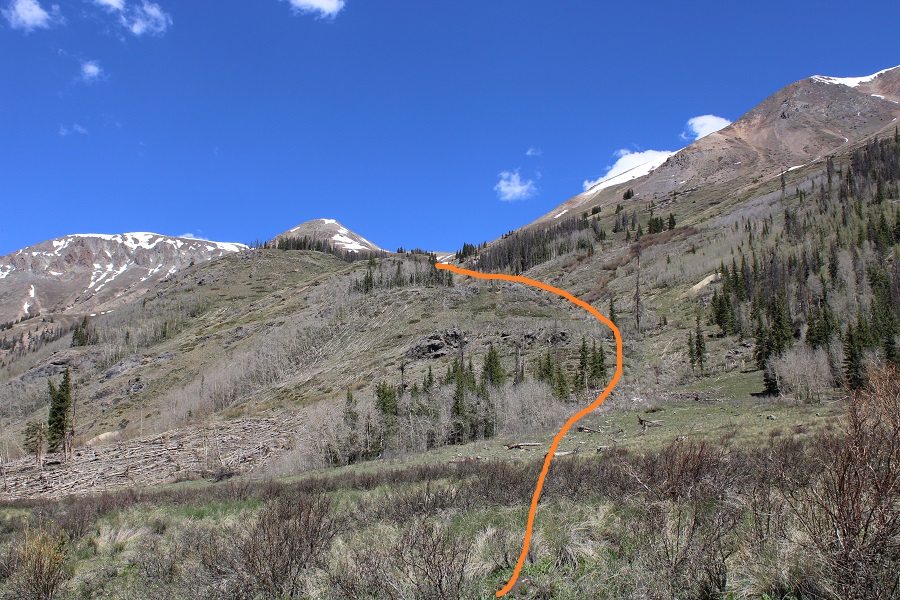
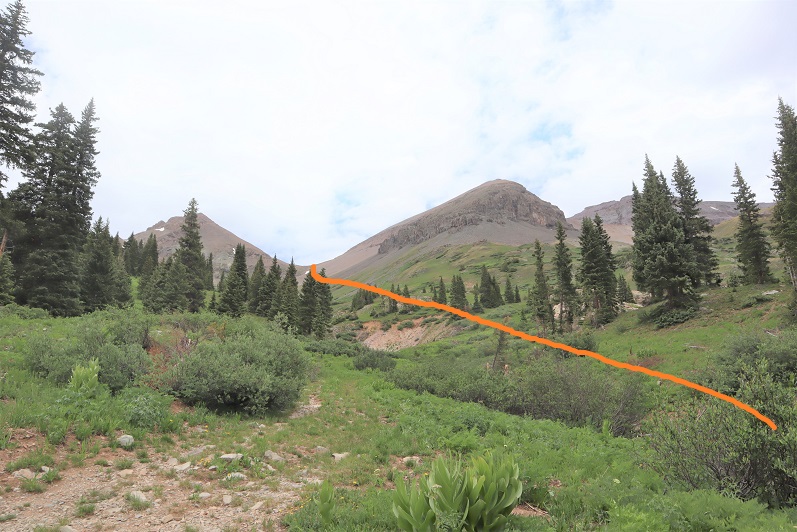
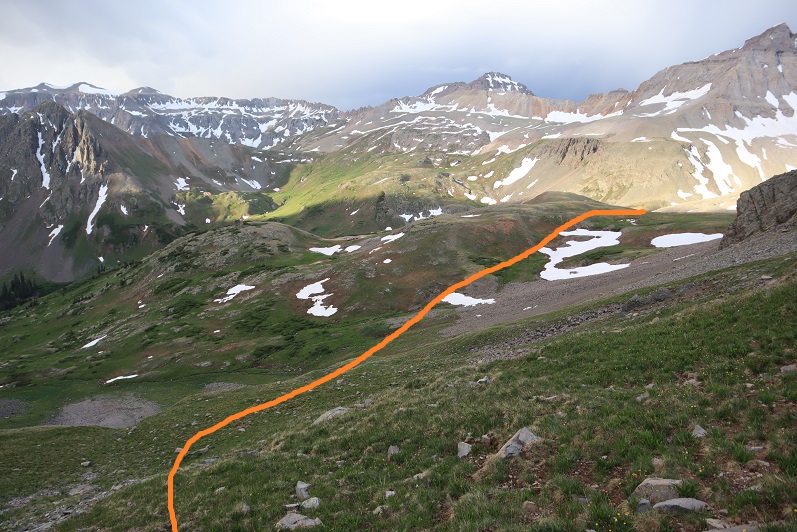
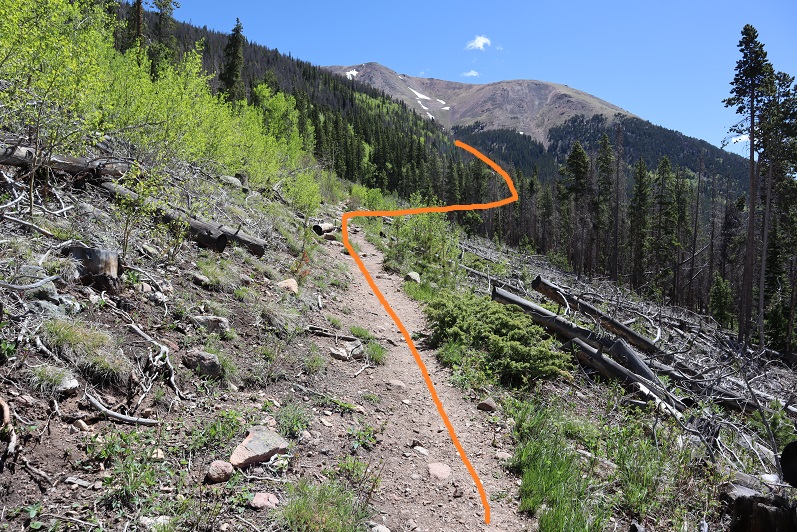
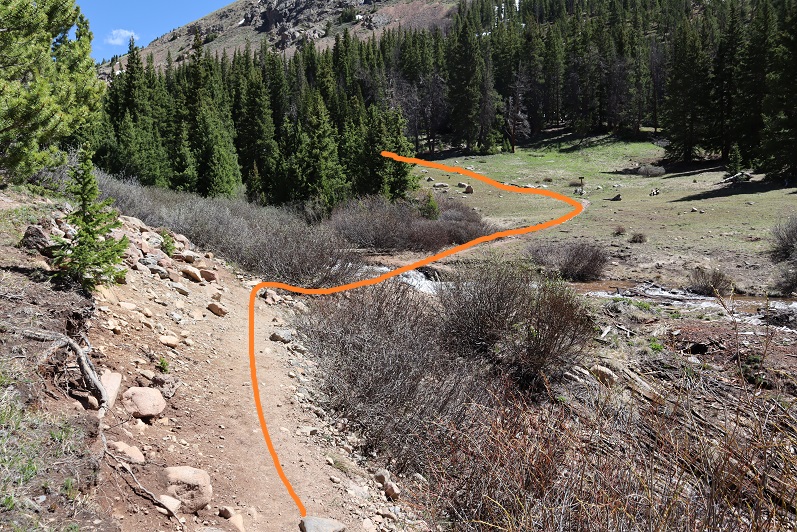
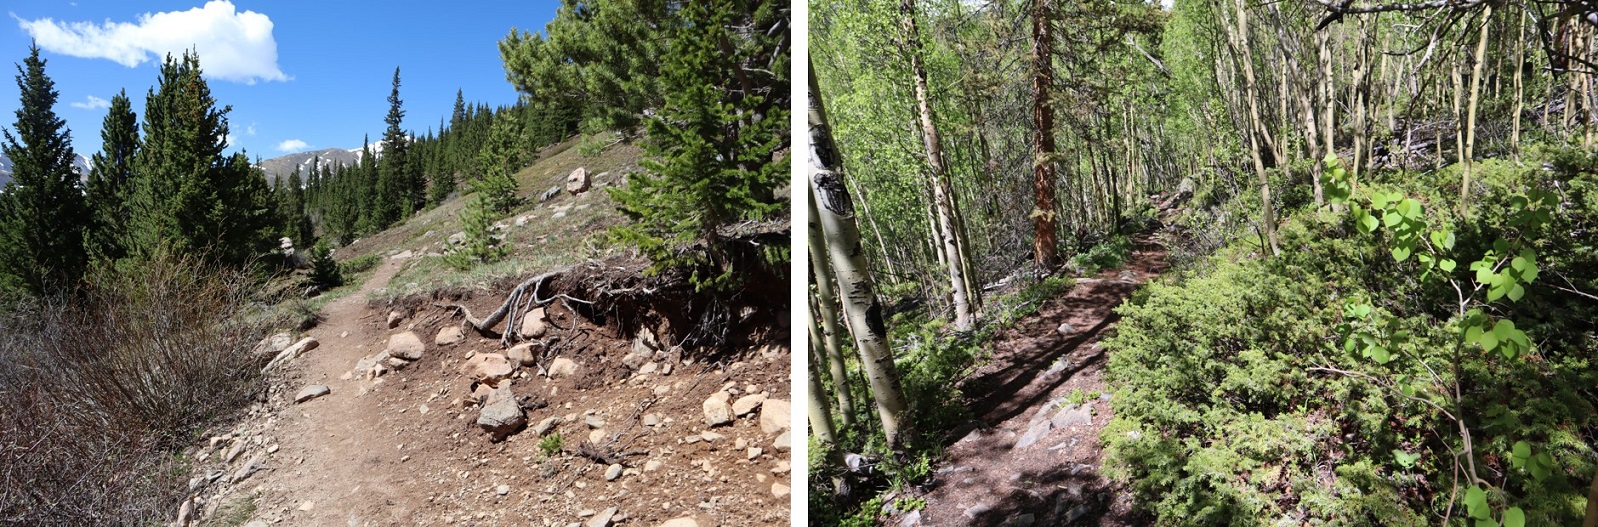
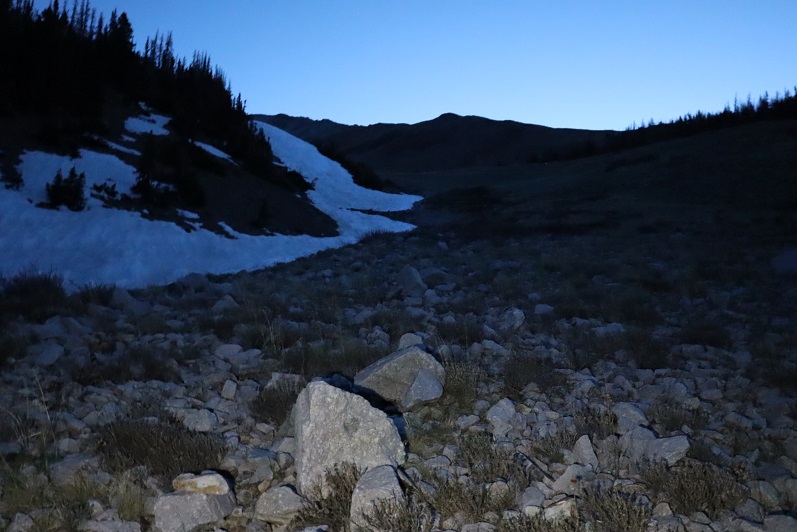
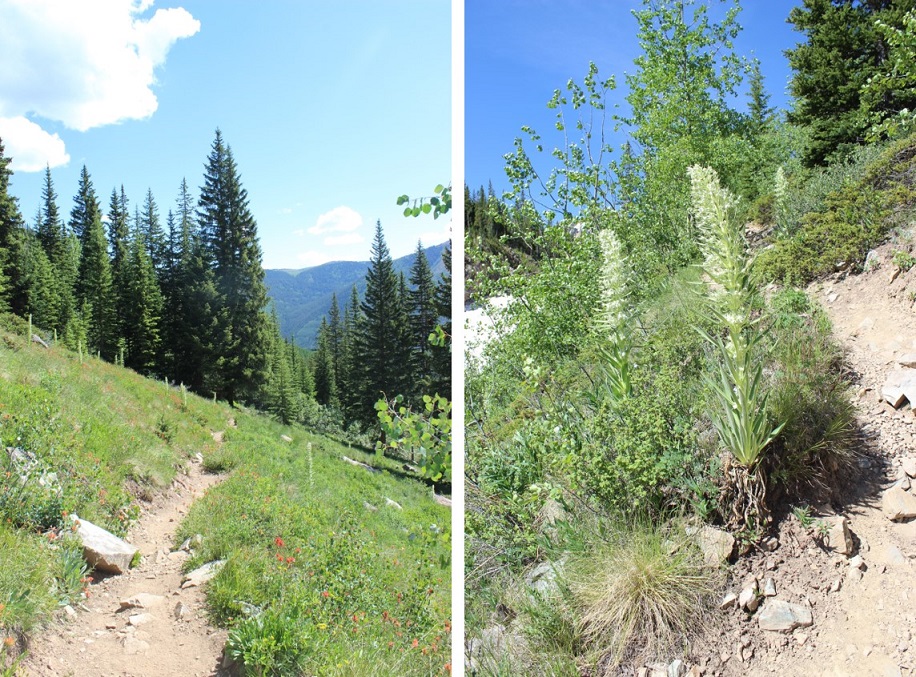
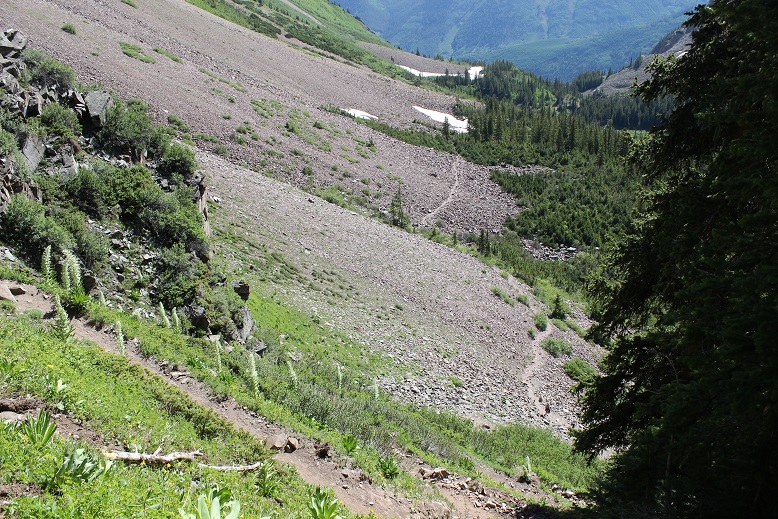
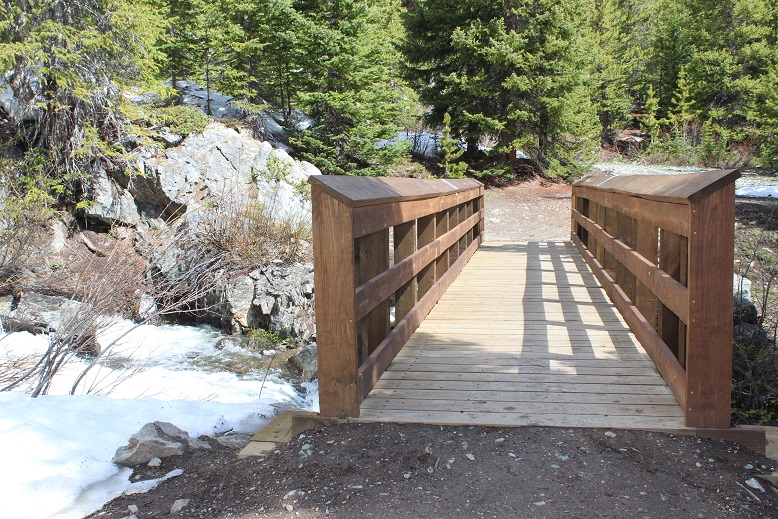
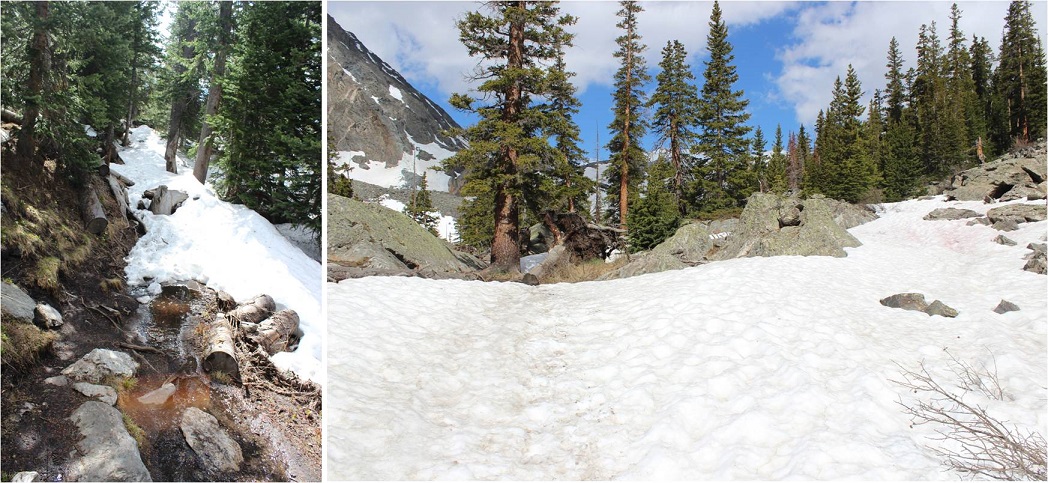
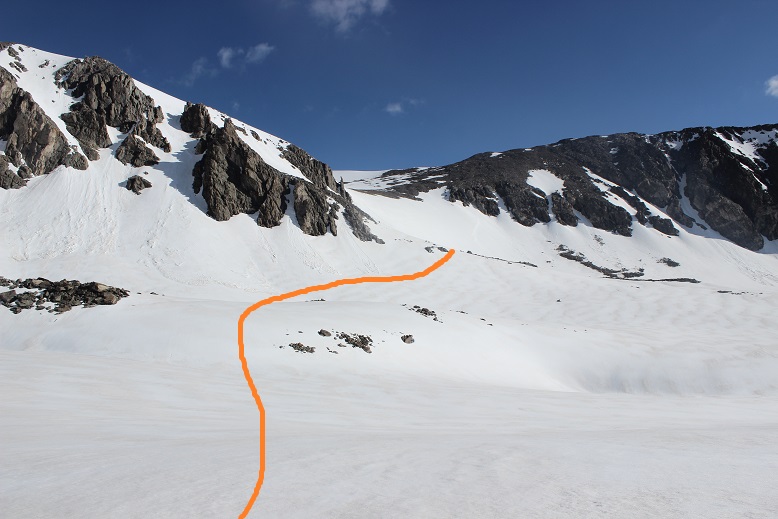
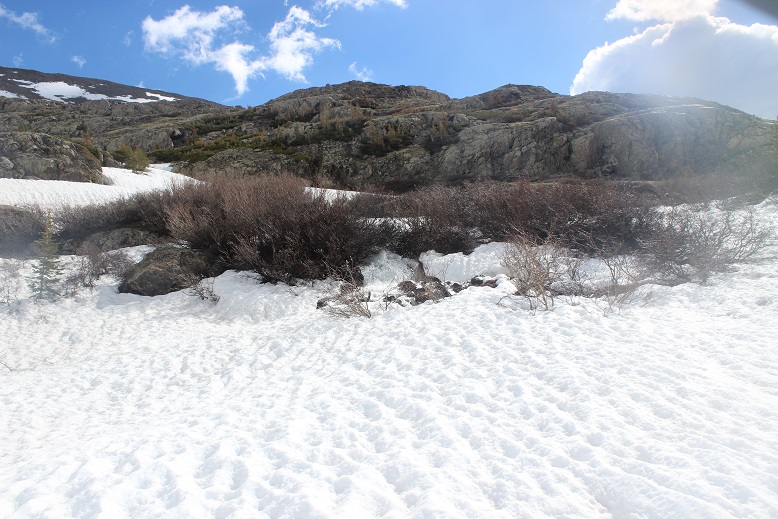
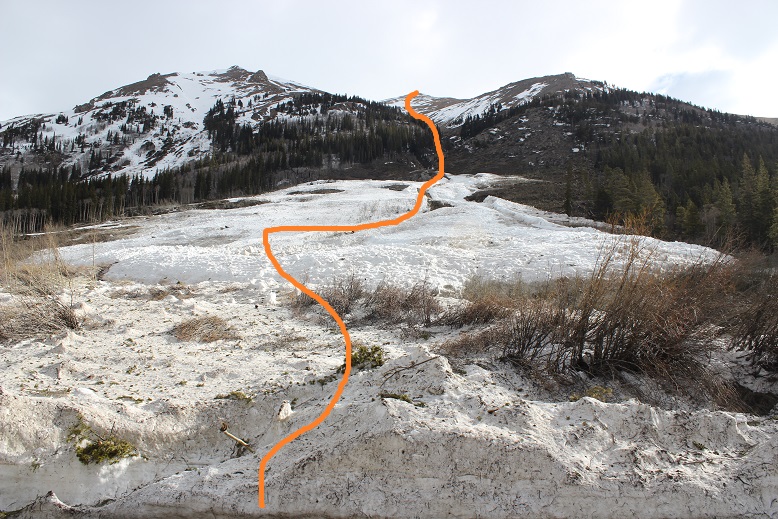
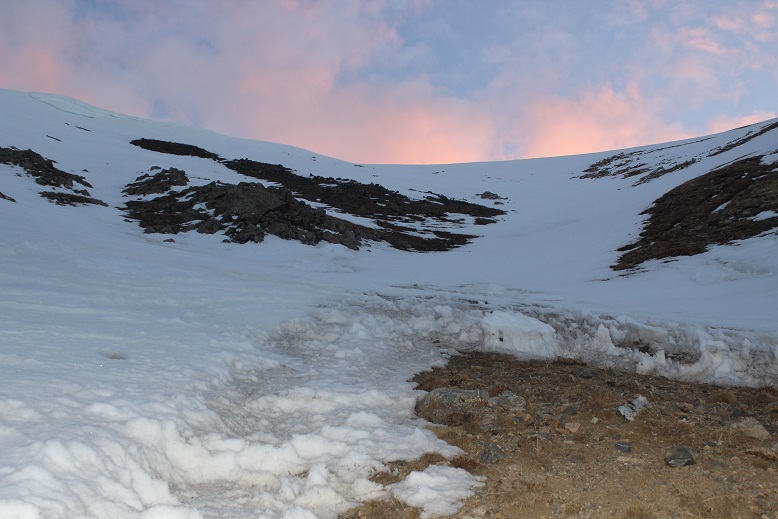
I followed Rock Creek into the upper basin, staying to the left of the creek (but hugging the creek the entire way).

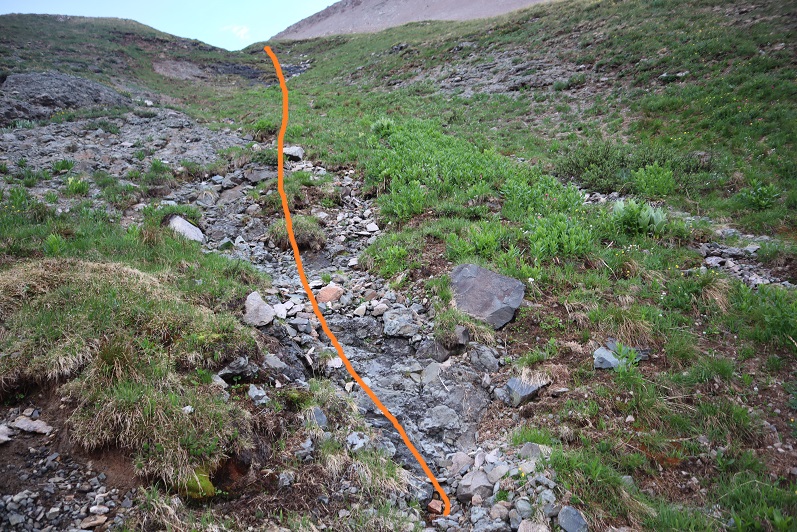
Once in the basin I followed it as it curved northwest.

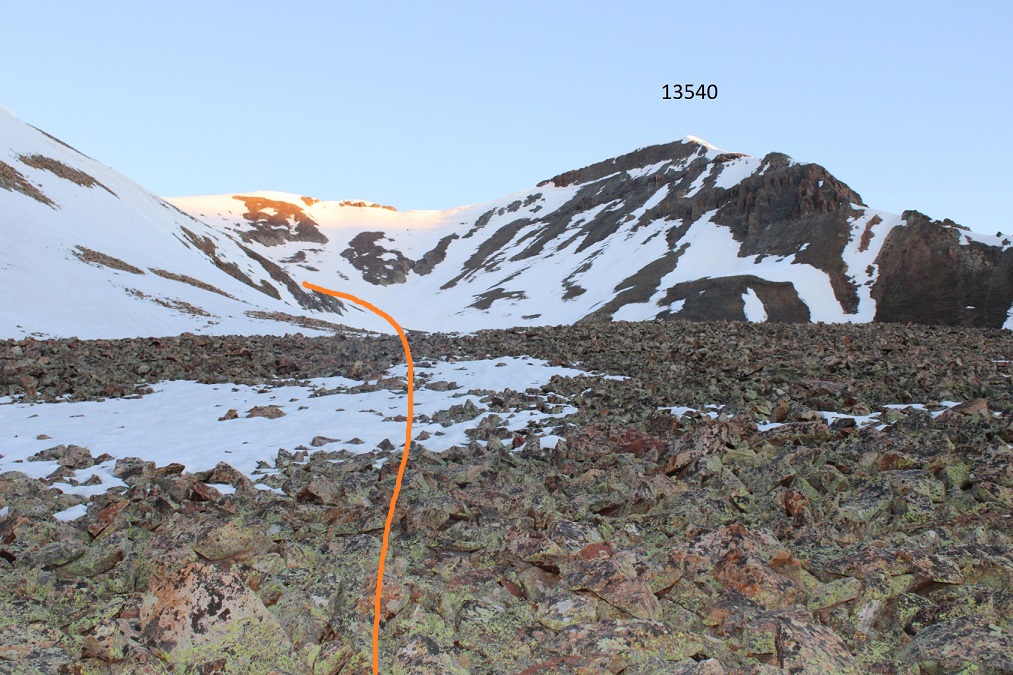
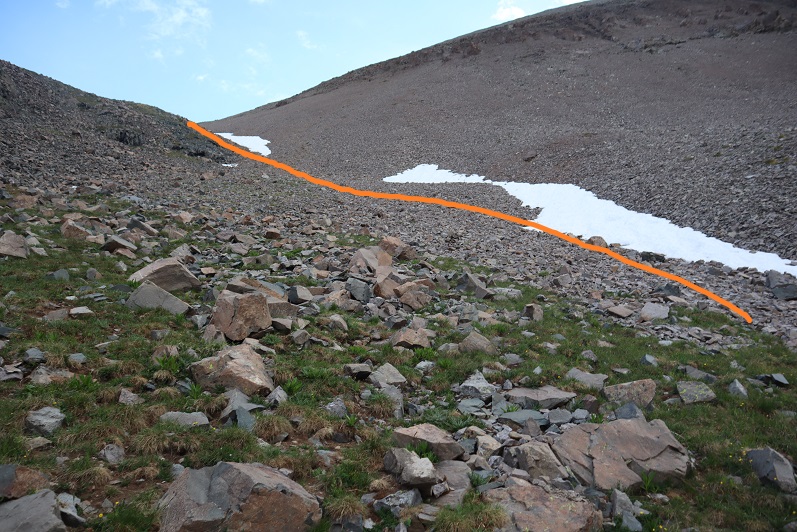
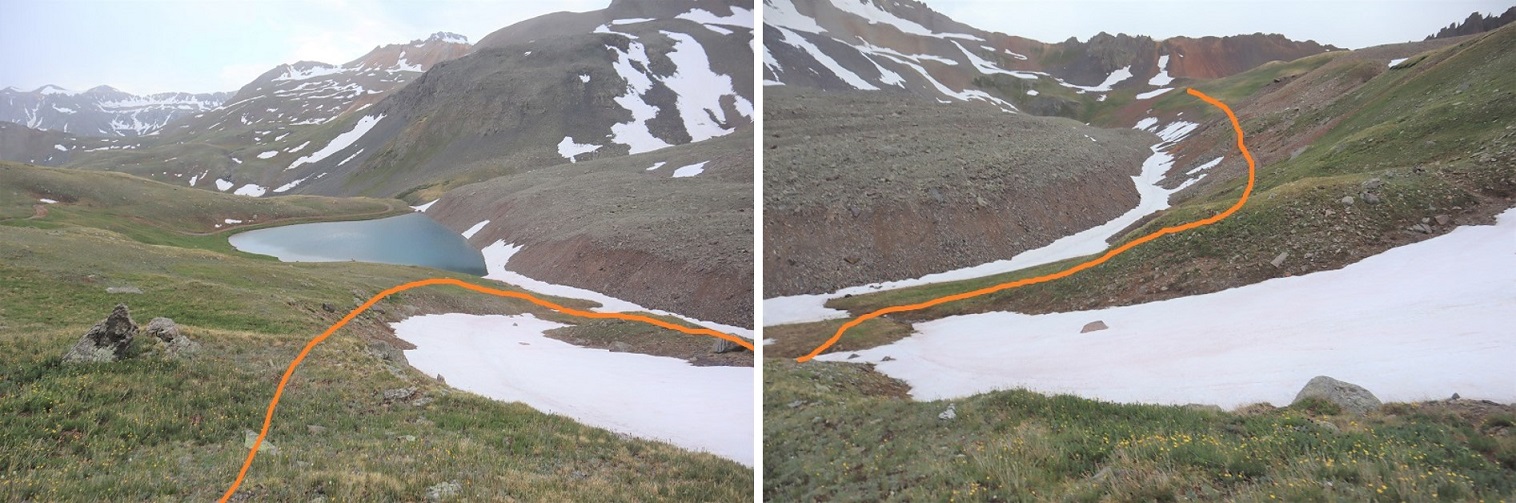
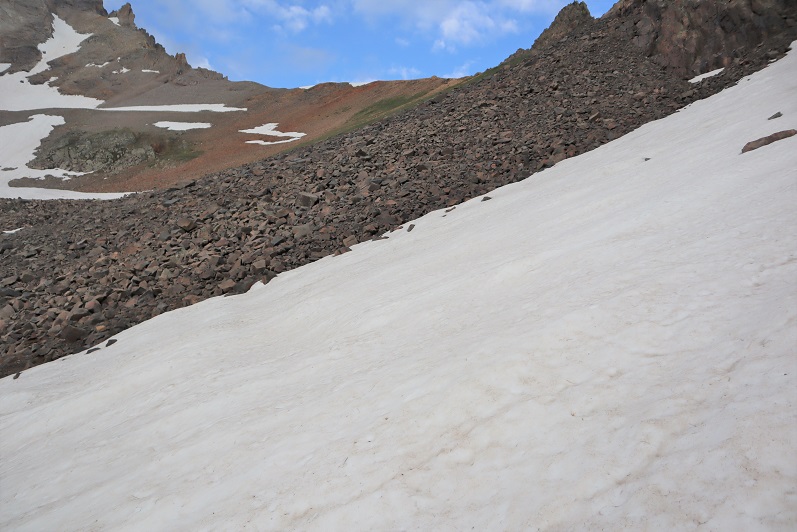
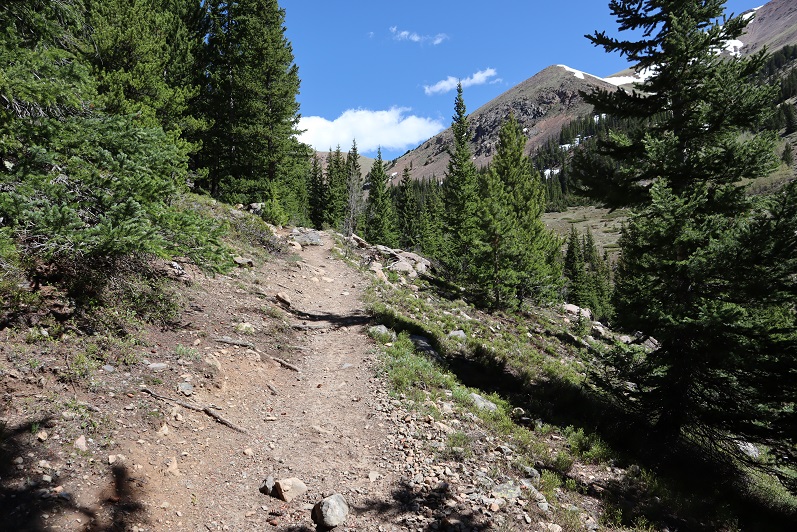
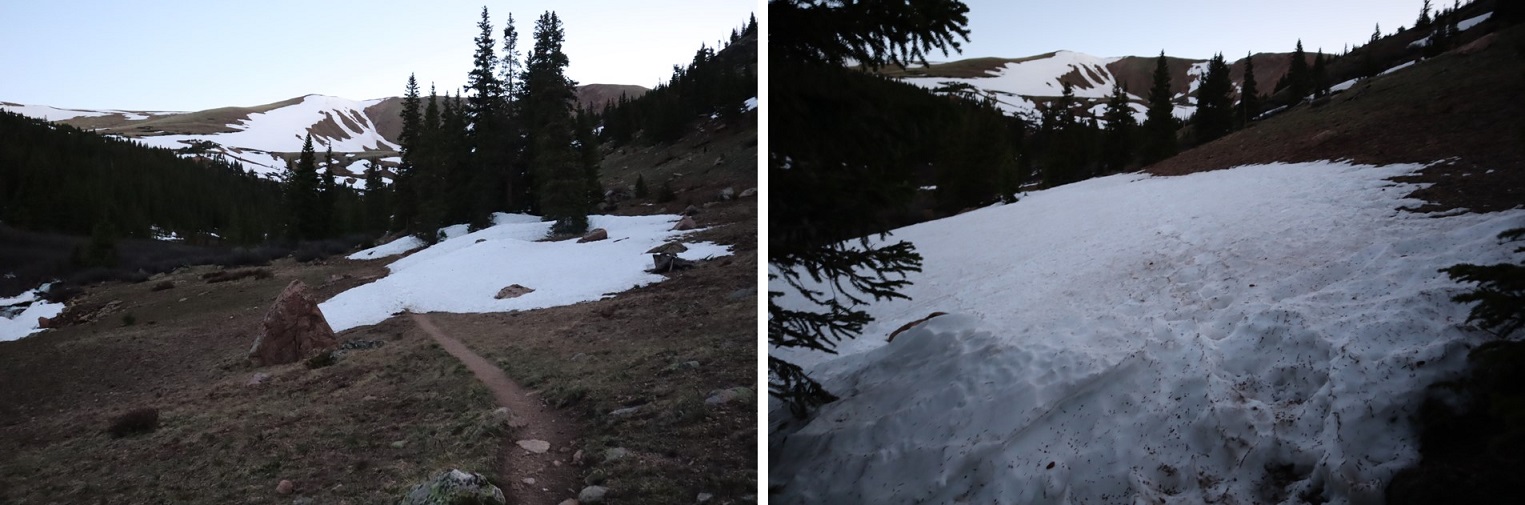
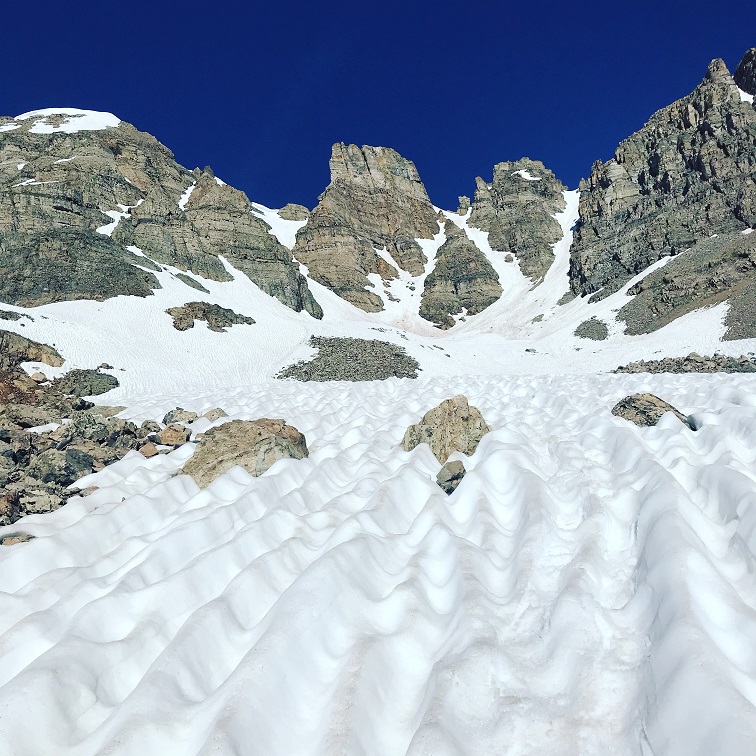
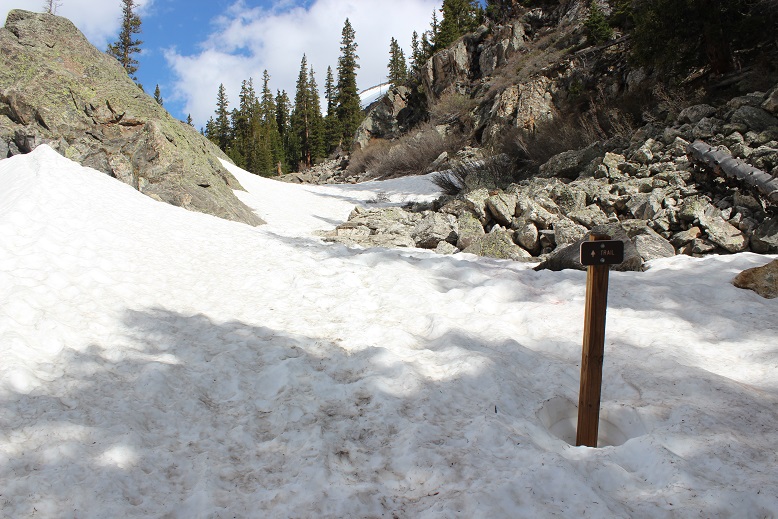
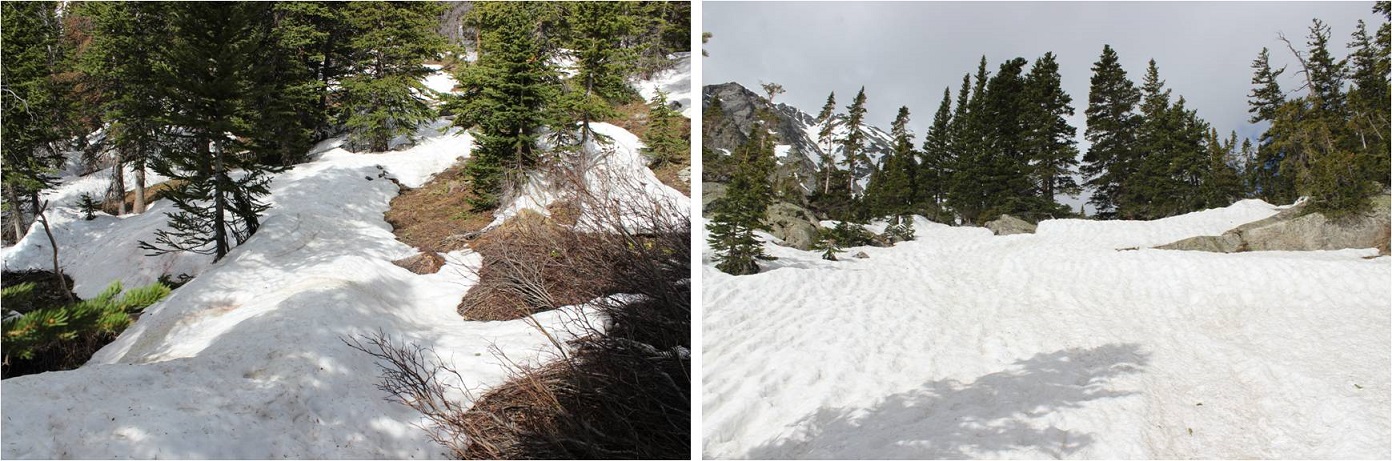
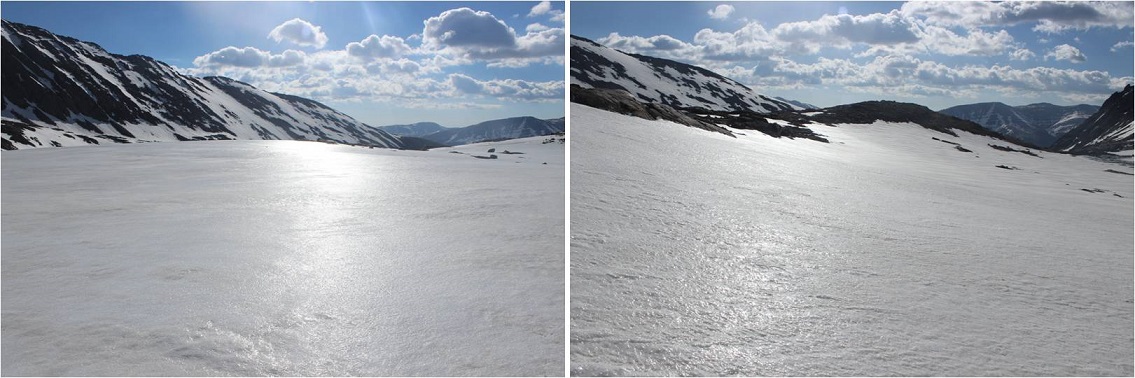
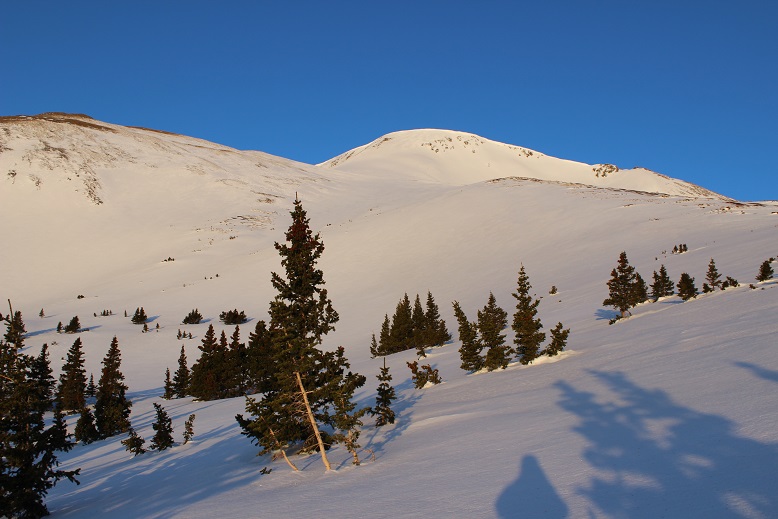
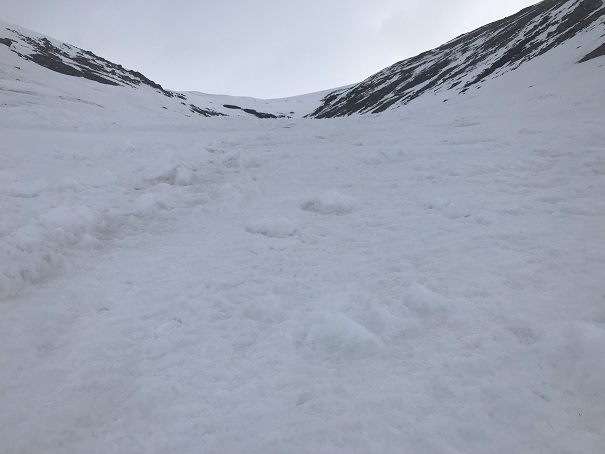
There was a lot more snow here than I’d expected:  I put on my microspikes and climbed into the upper basin.

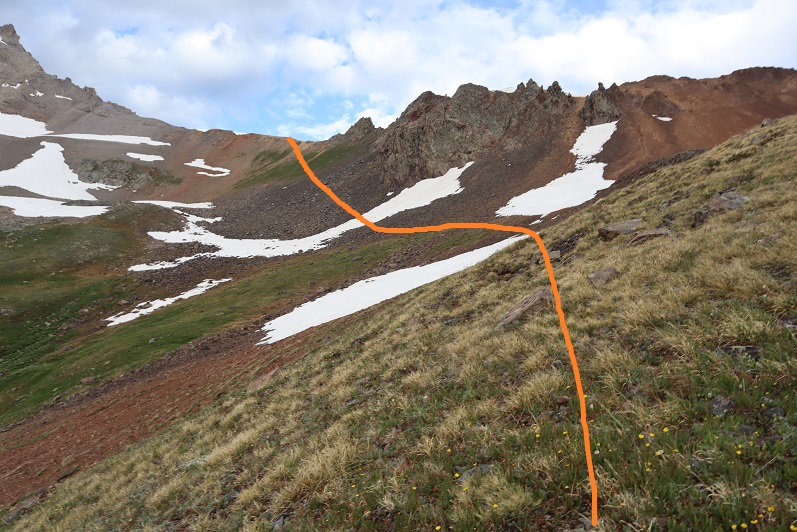
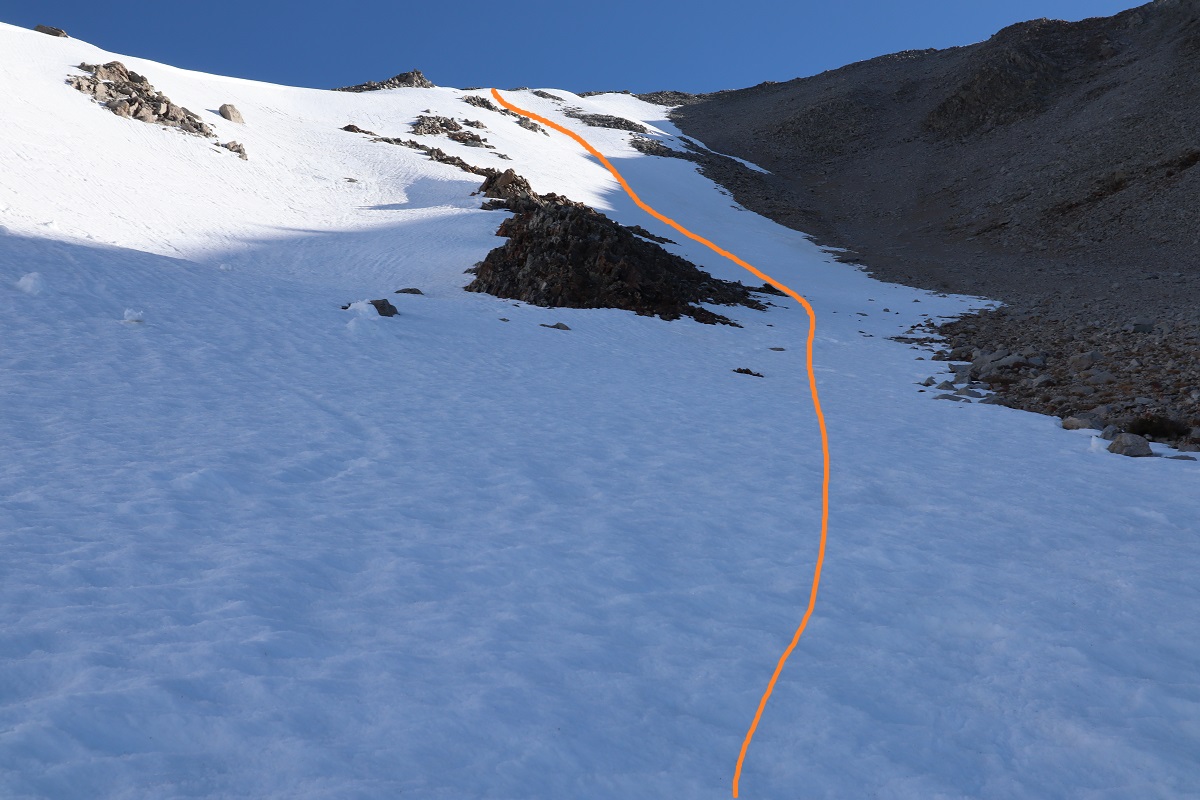
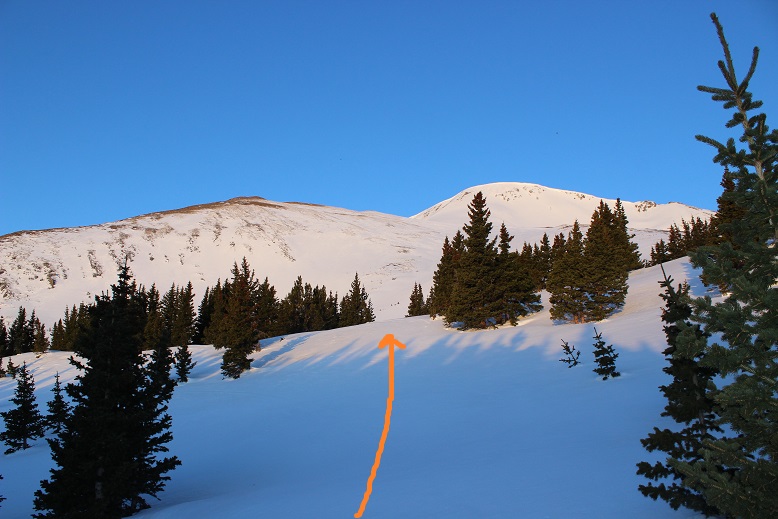
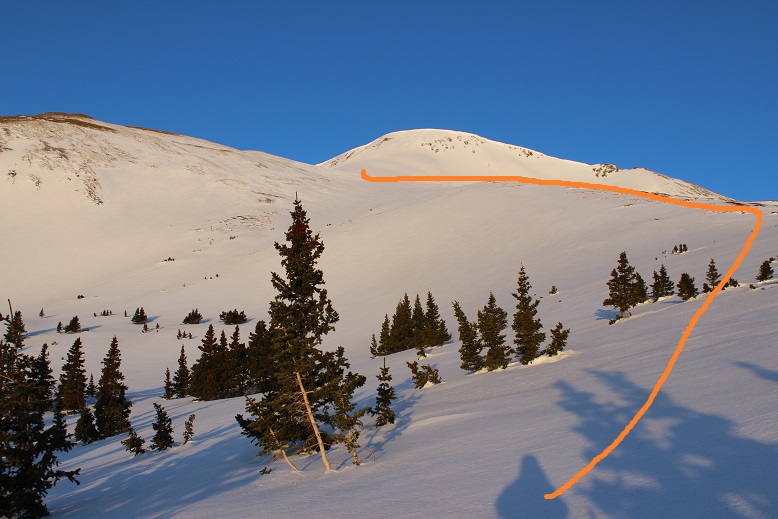
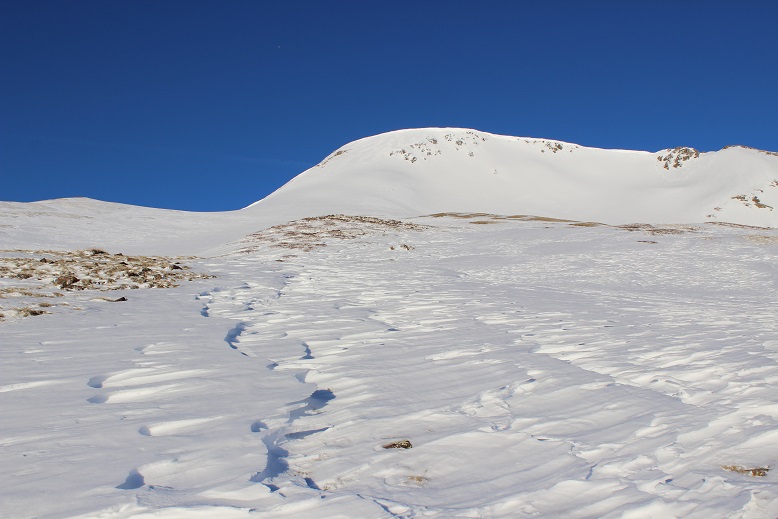
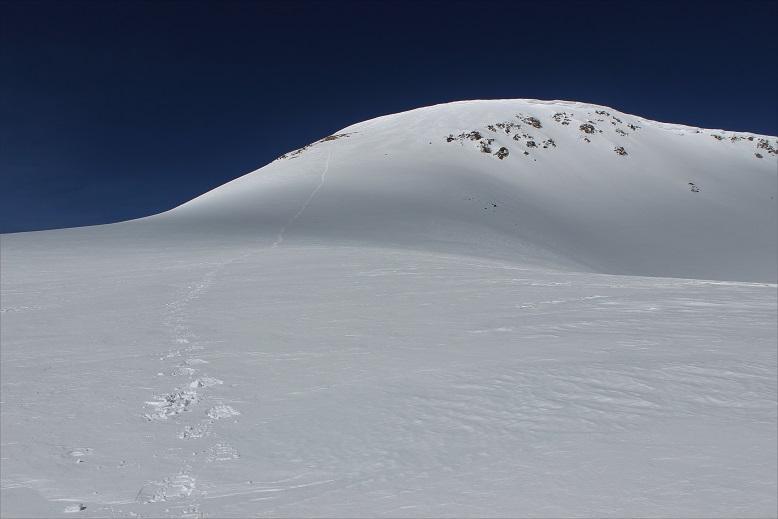
Once in the upper basin there was even more snow.  Microspikes were still ok at this time, but I knew I’d want to take a different route down, as the sun was going to warm up this snow quickly and there was no telling how deep I’d be postholing.  I aimed for the ridge, and once on the ridge, followed it west to a kind of saddle

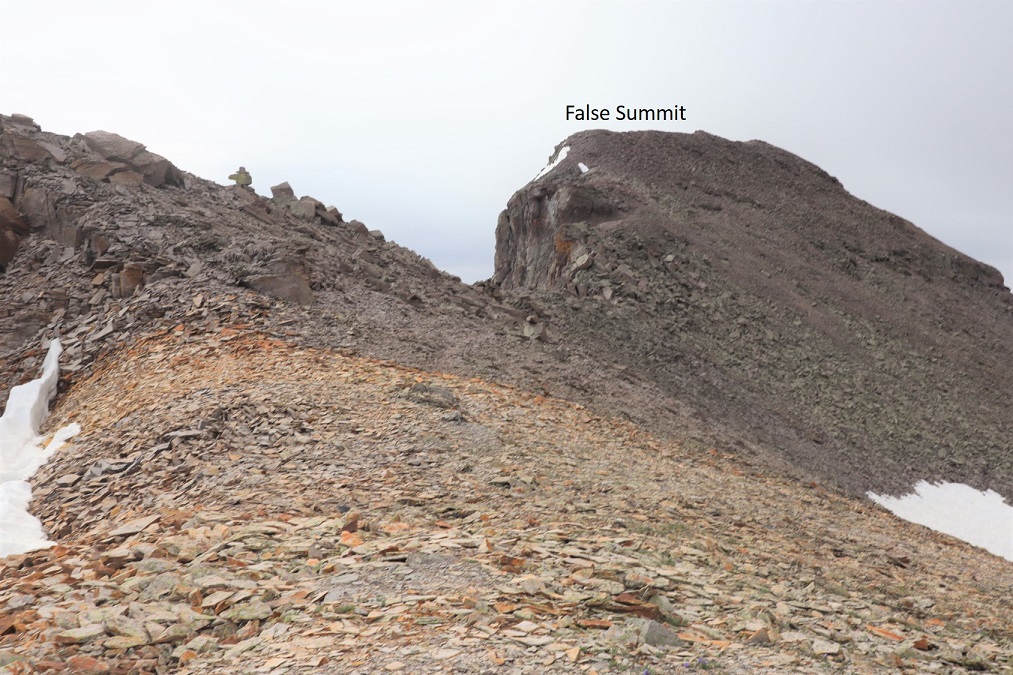
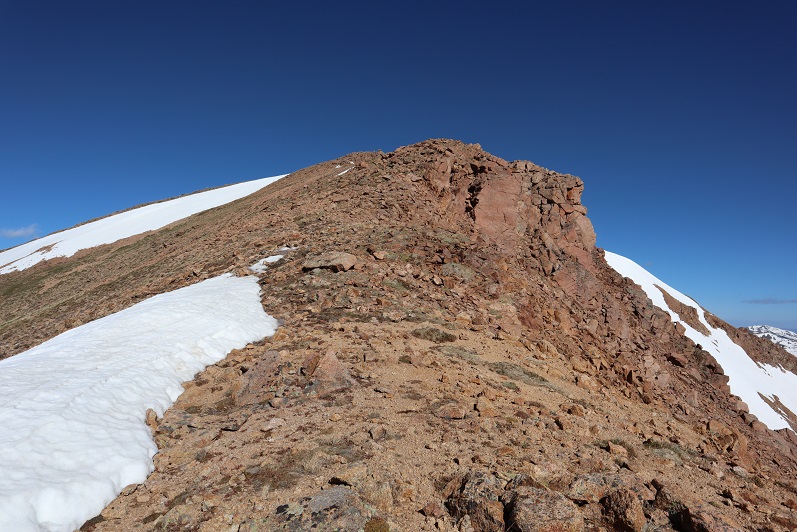
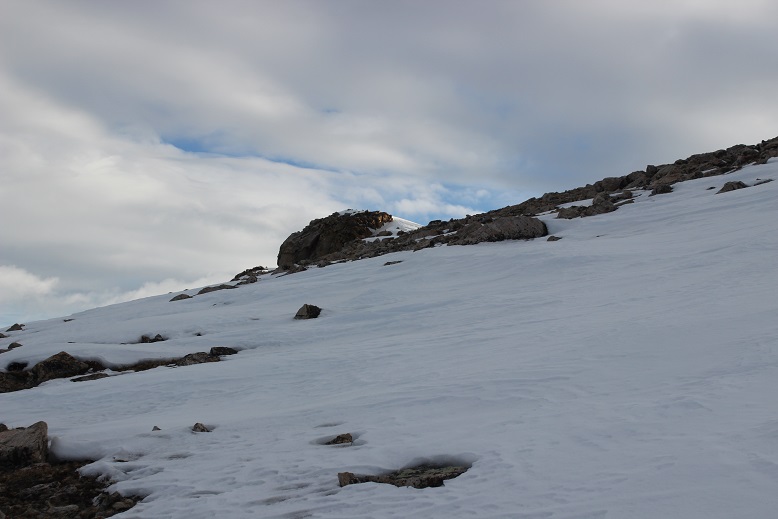
At the saddle I turned right and followed the ridge northeast to the summit of 13540.

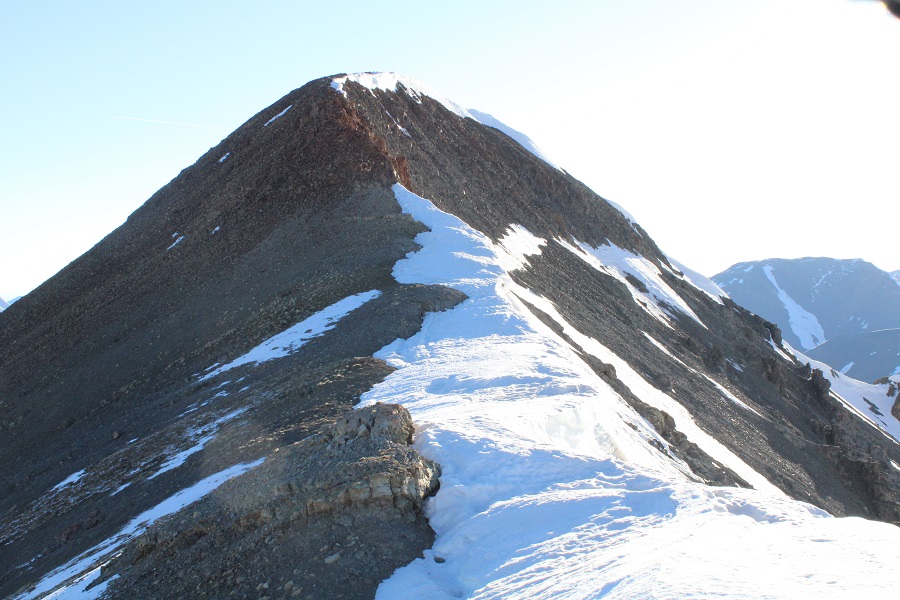
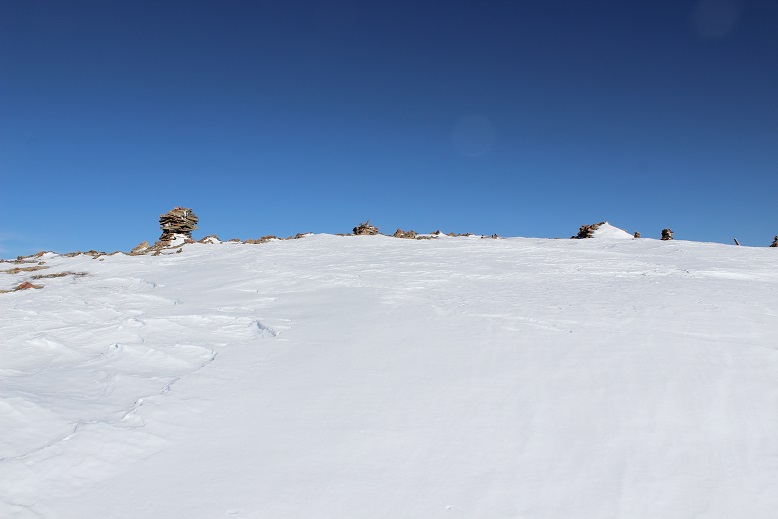
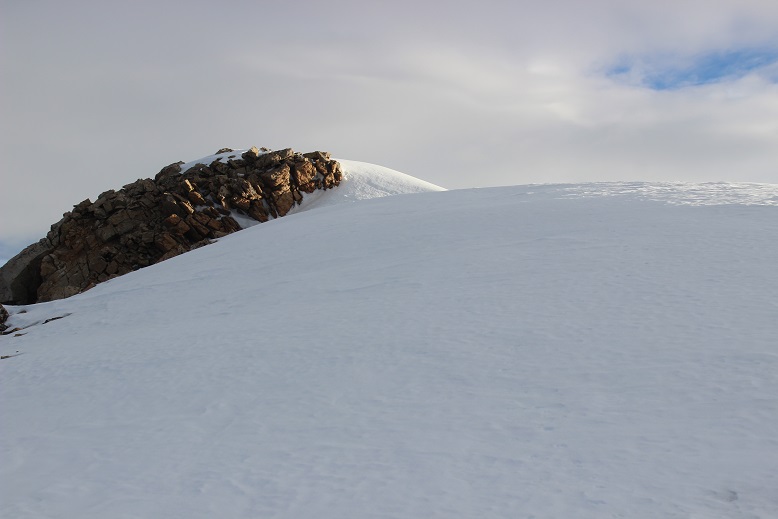
There was a class 2 rocky section to navigate.  I just went up and over this.

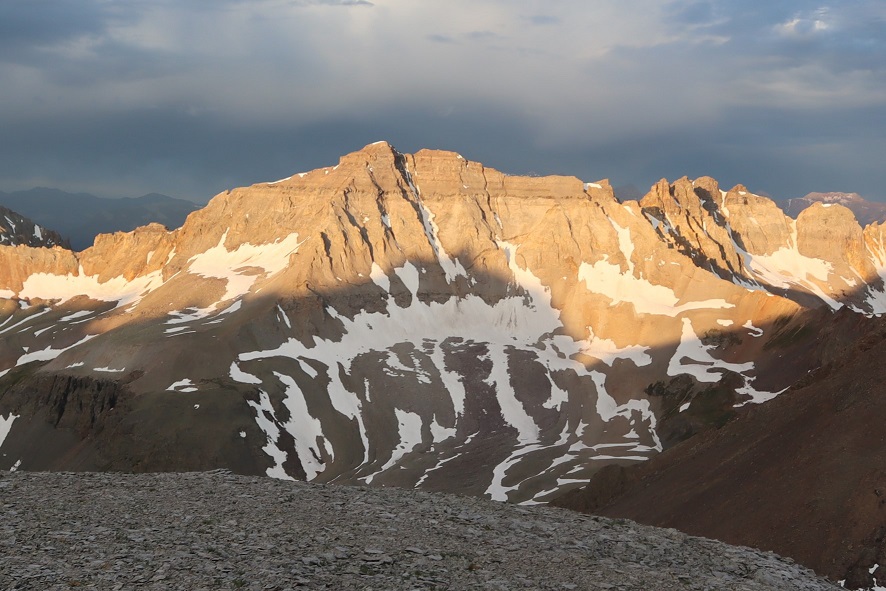
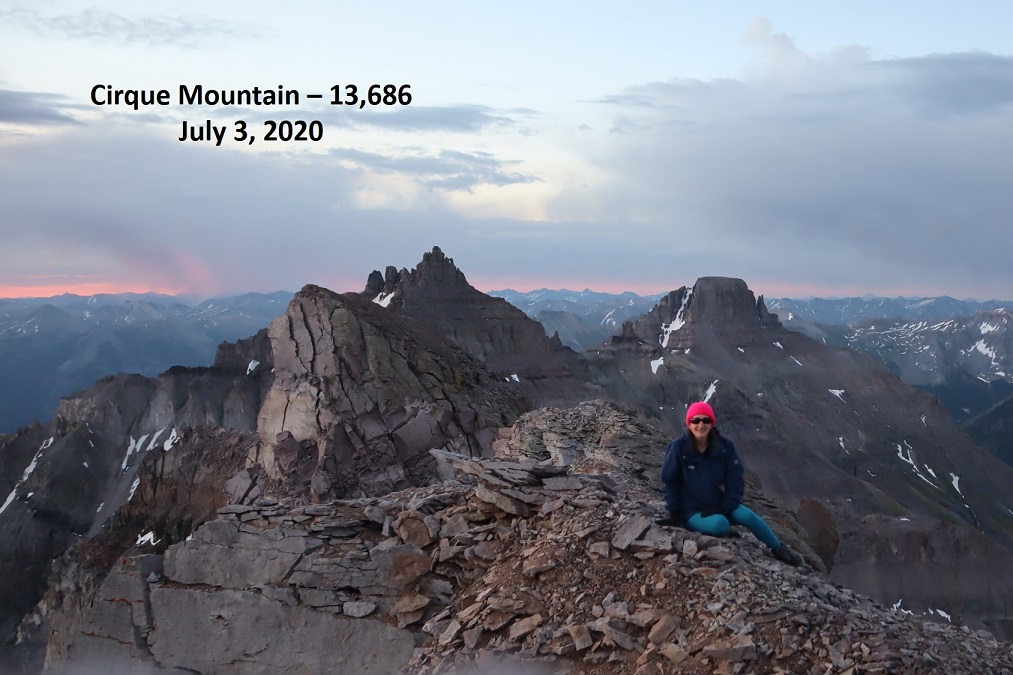
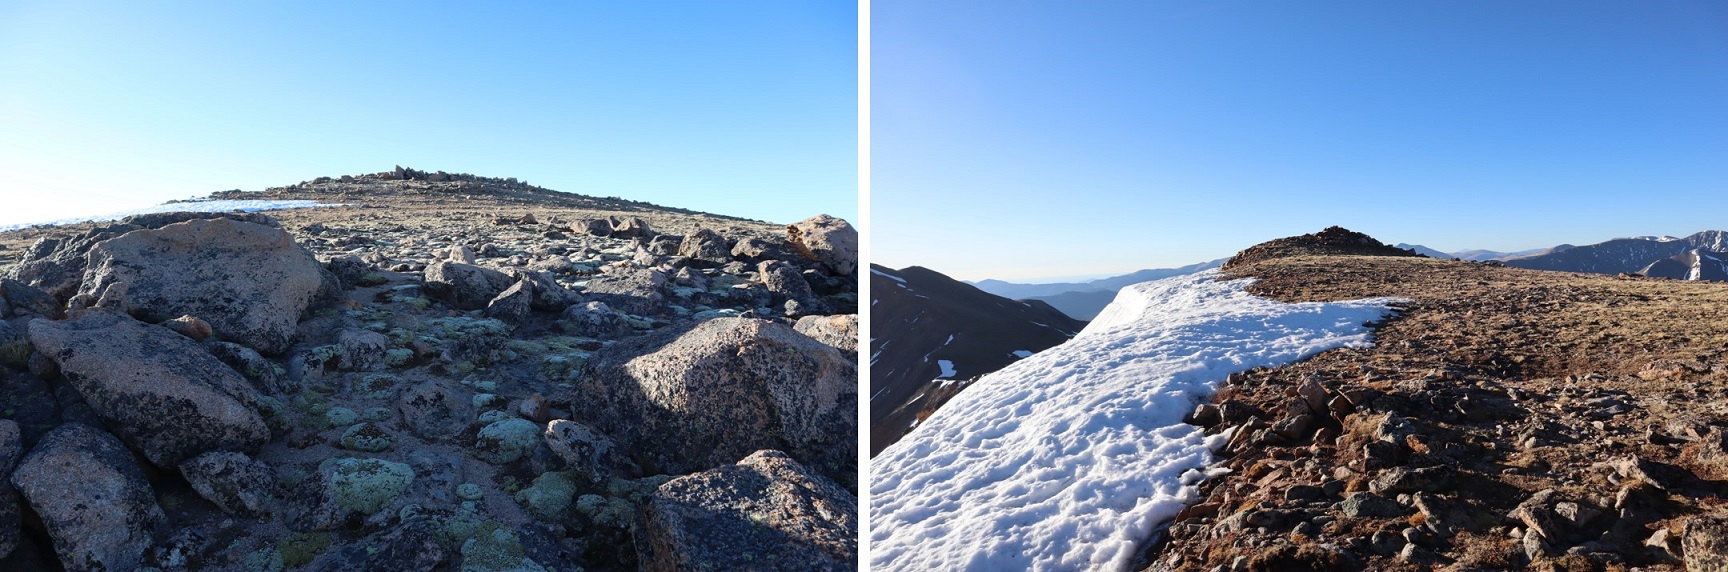
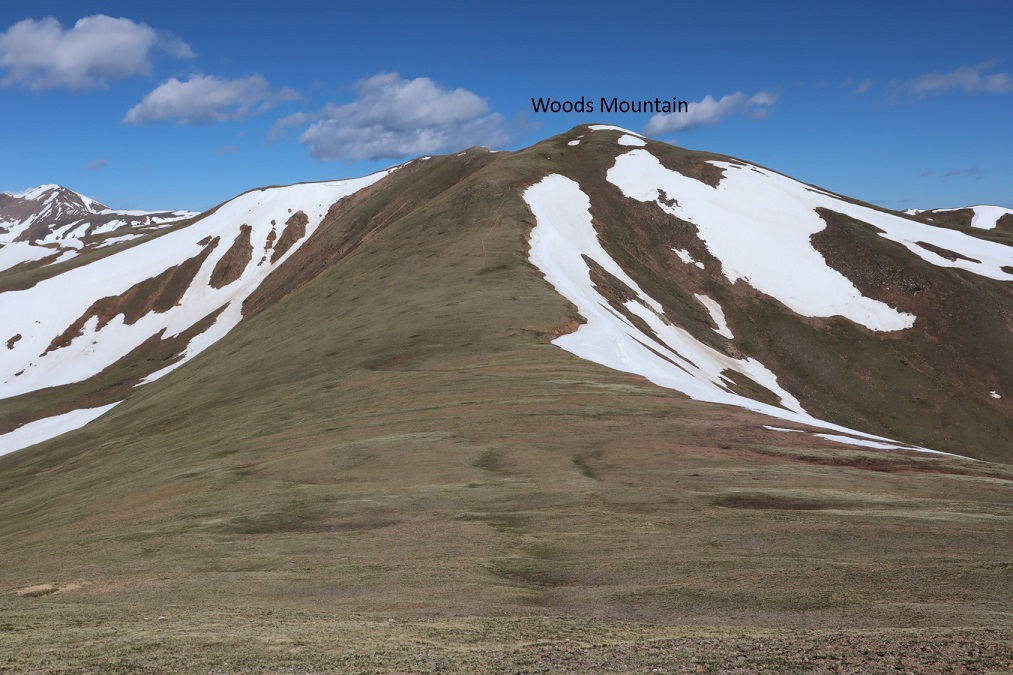
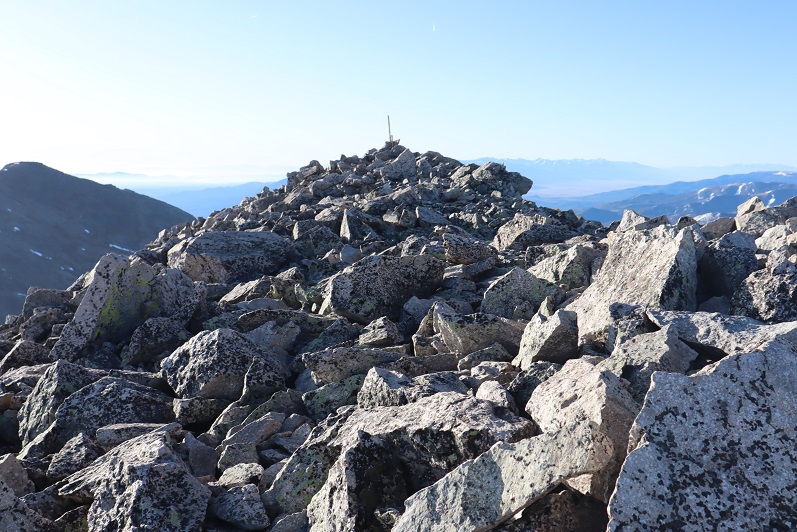
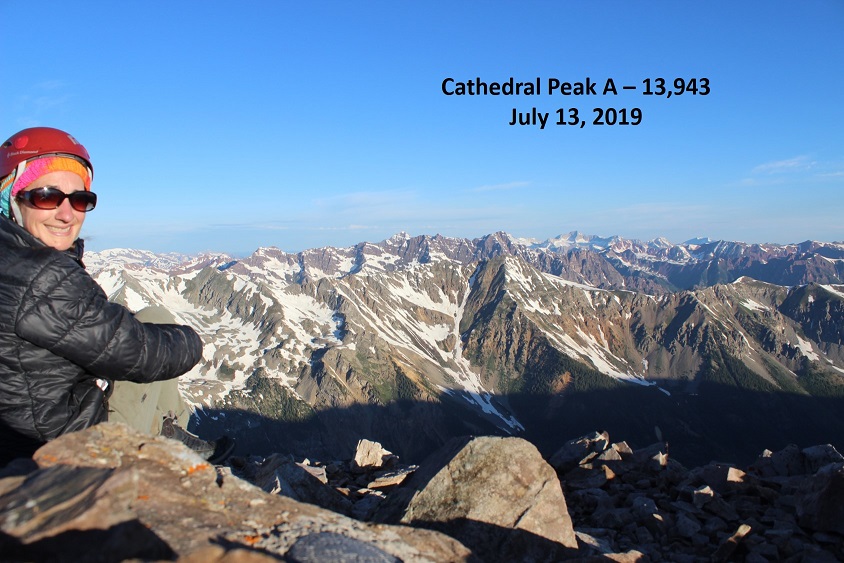
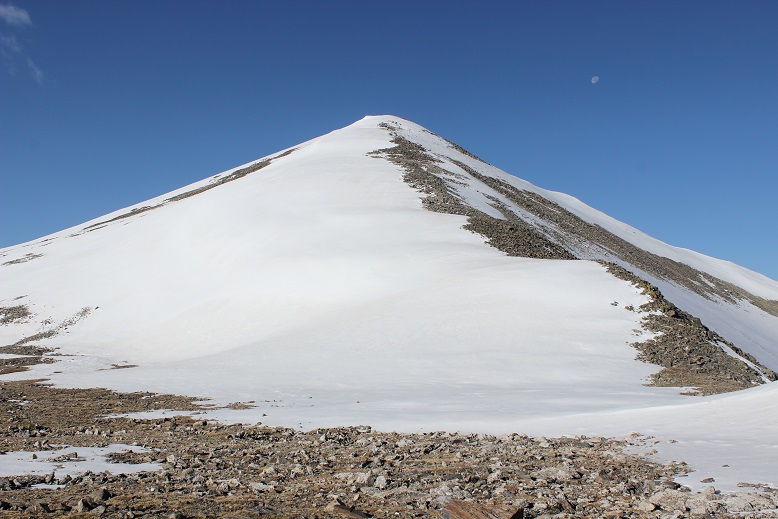
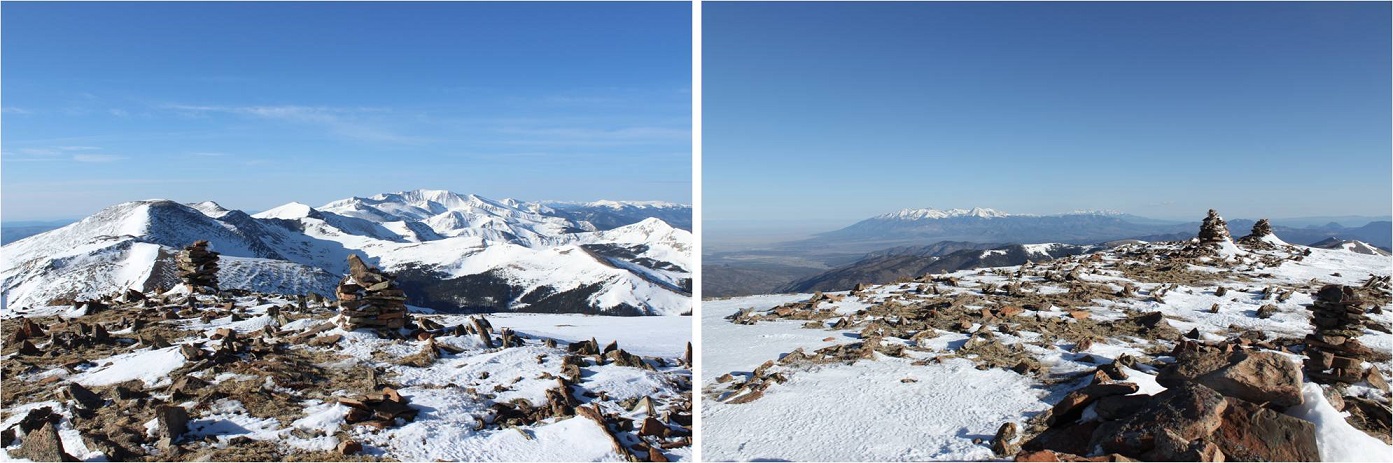
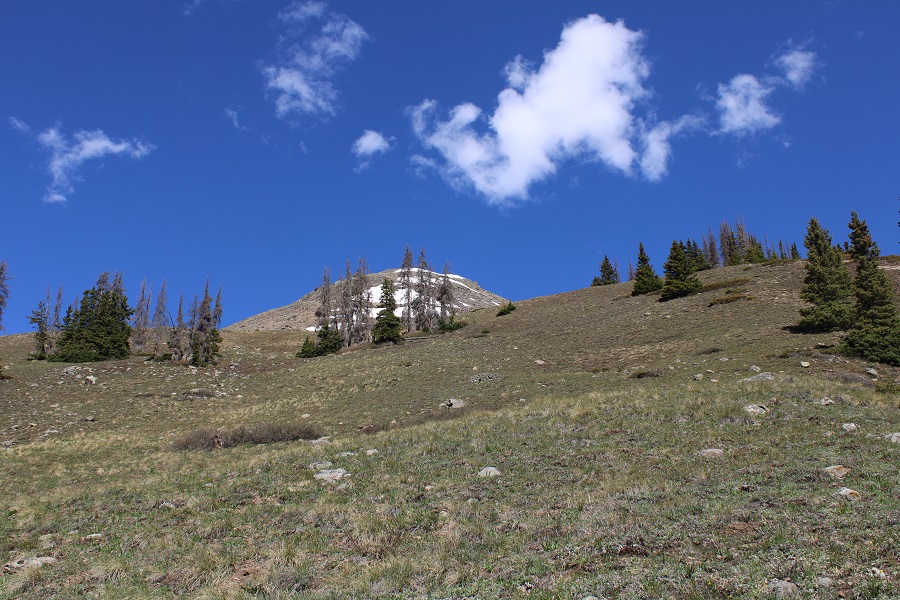
Here’s a look at the summit

I summited PT 13540 at 7am
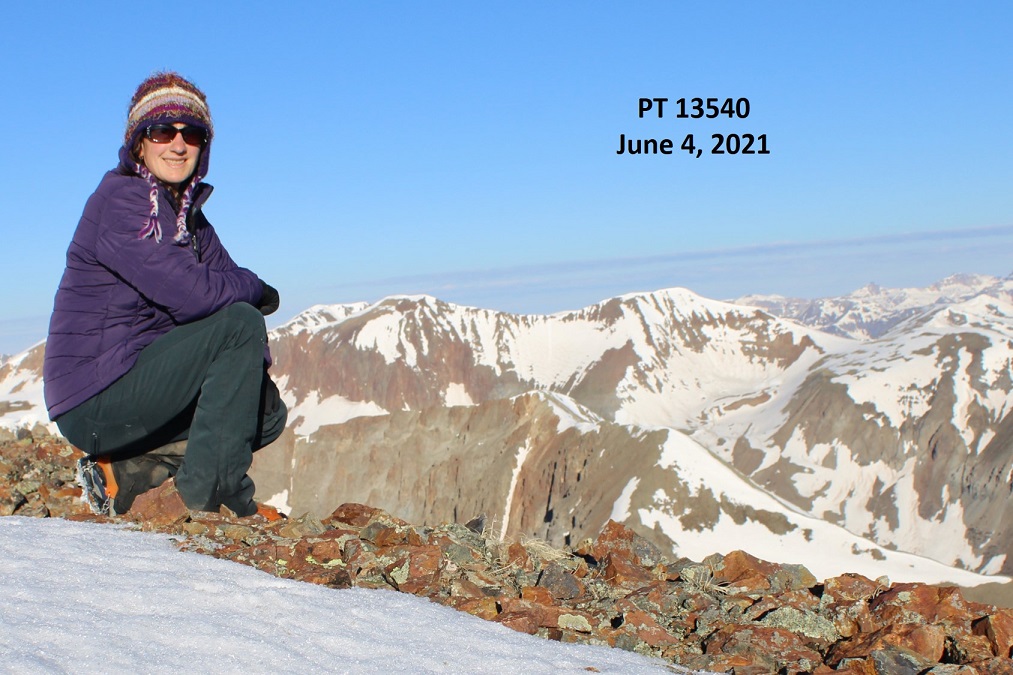
PT 13540: 

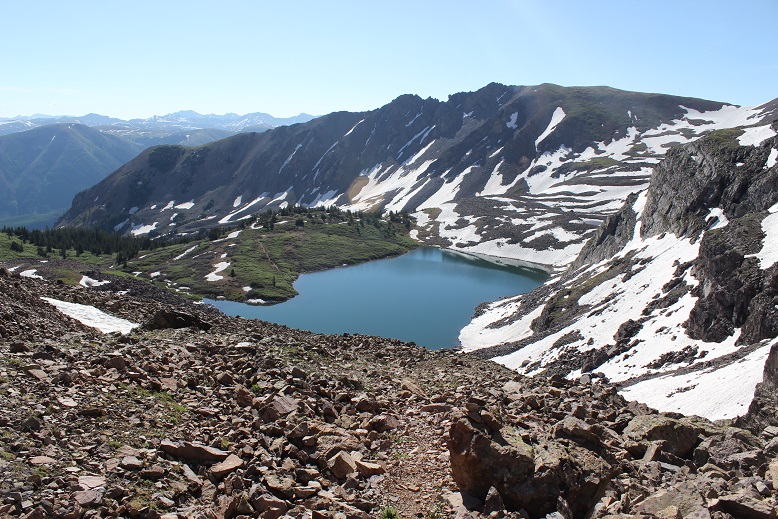
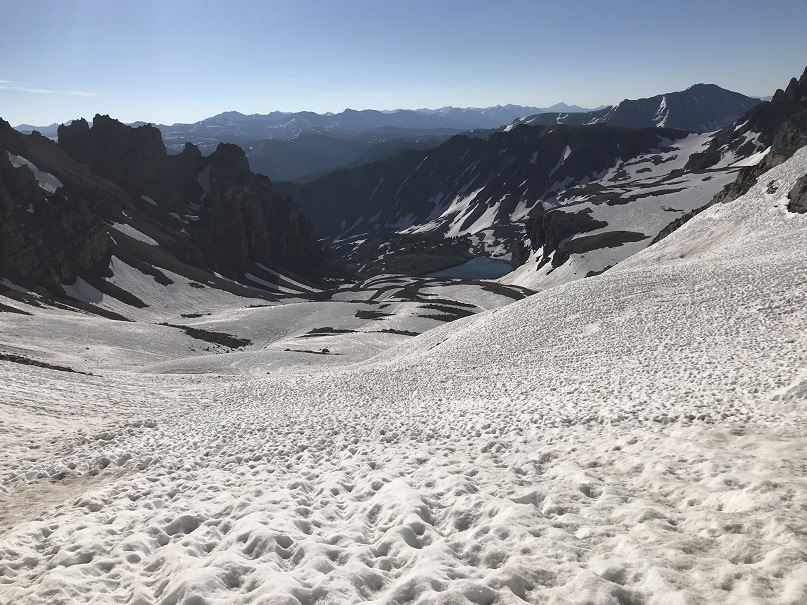
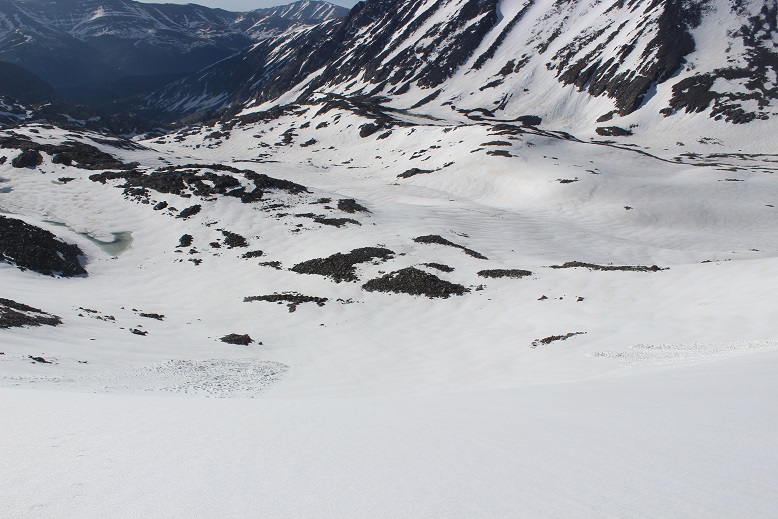
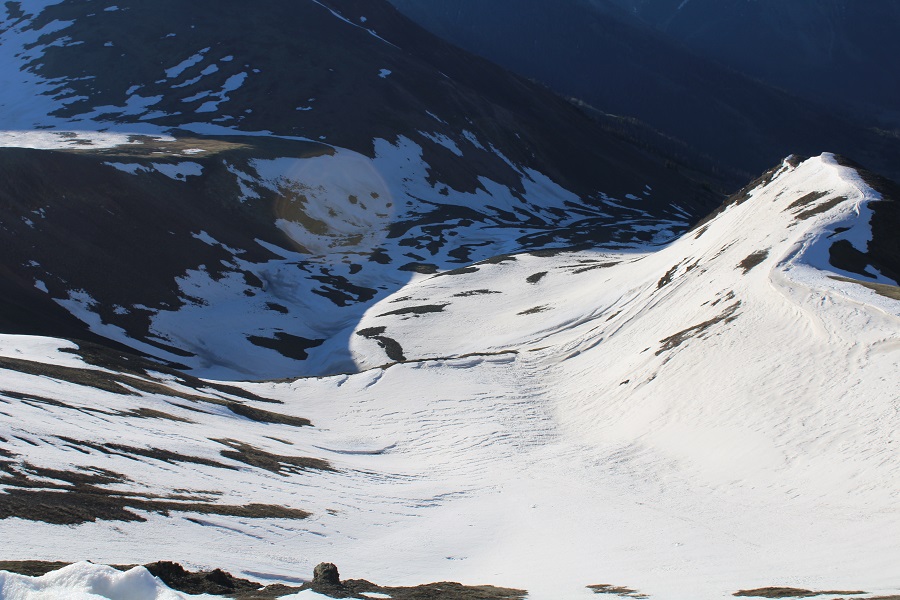
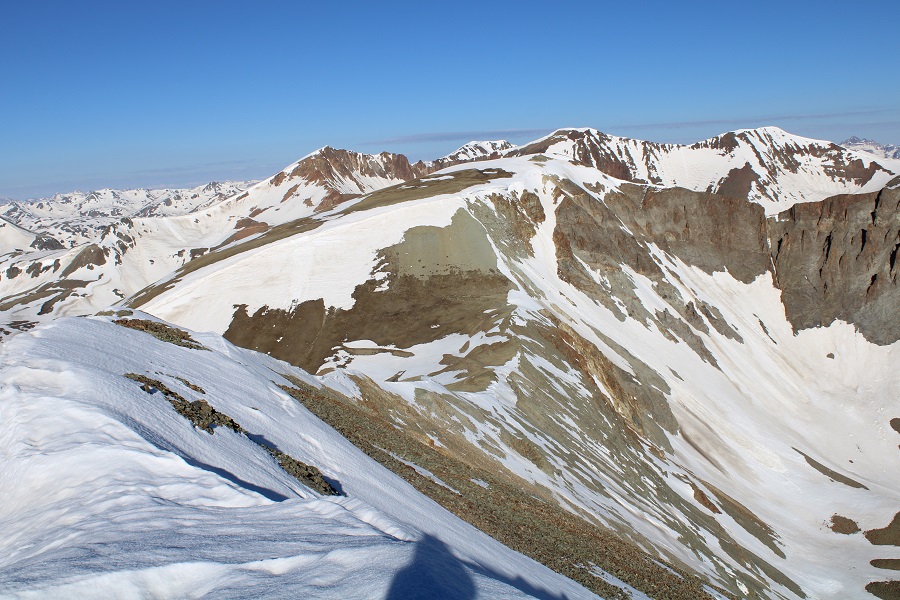
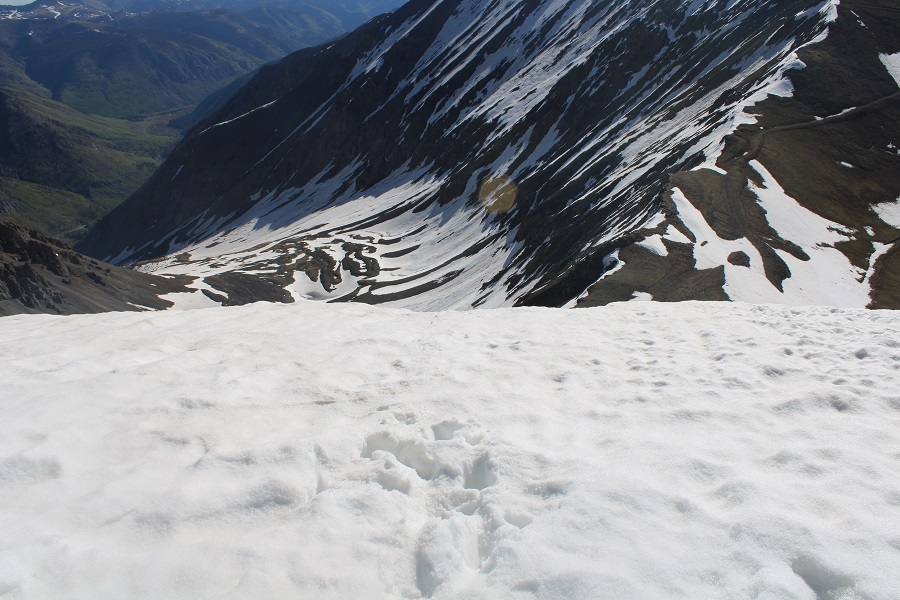
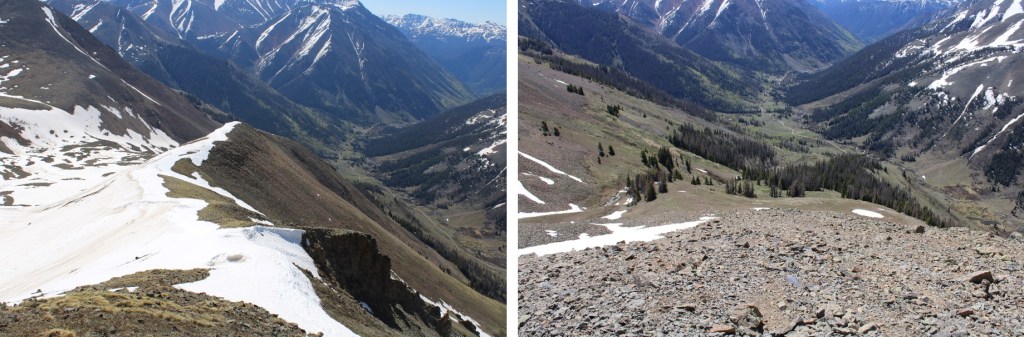
Here’s a look back down at the upper and lower basins. 

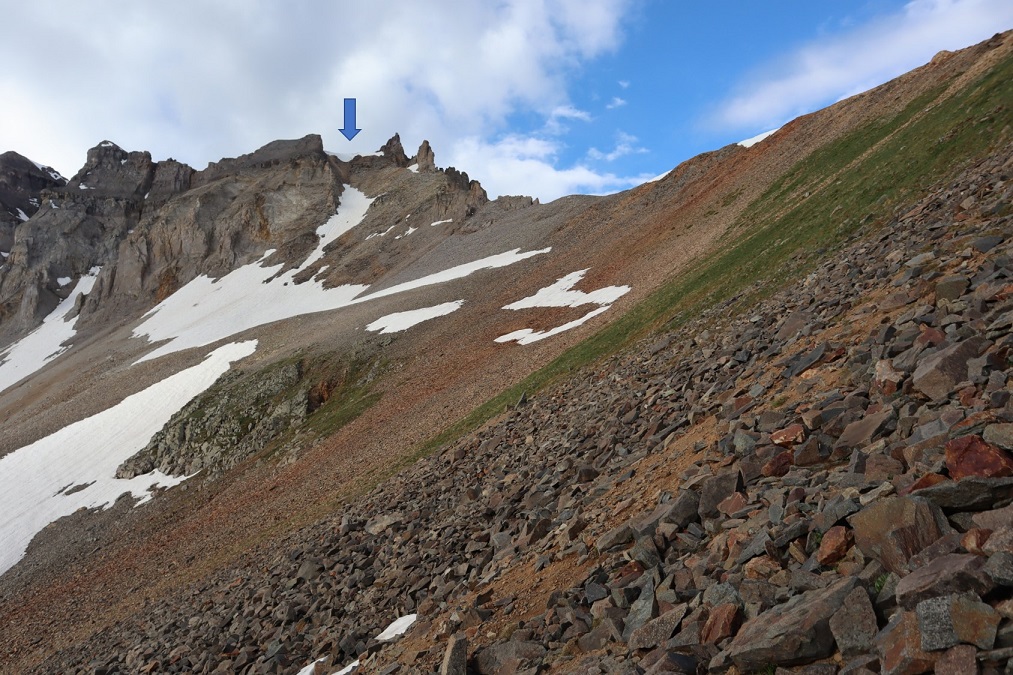
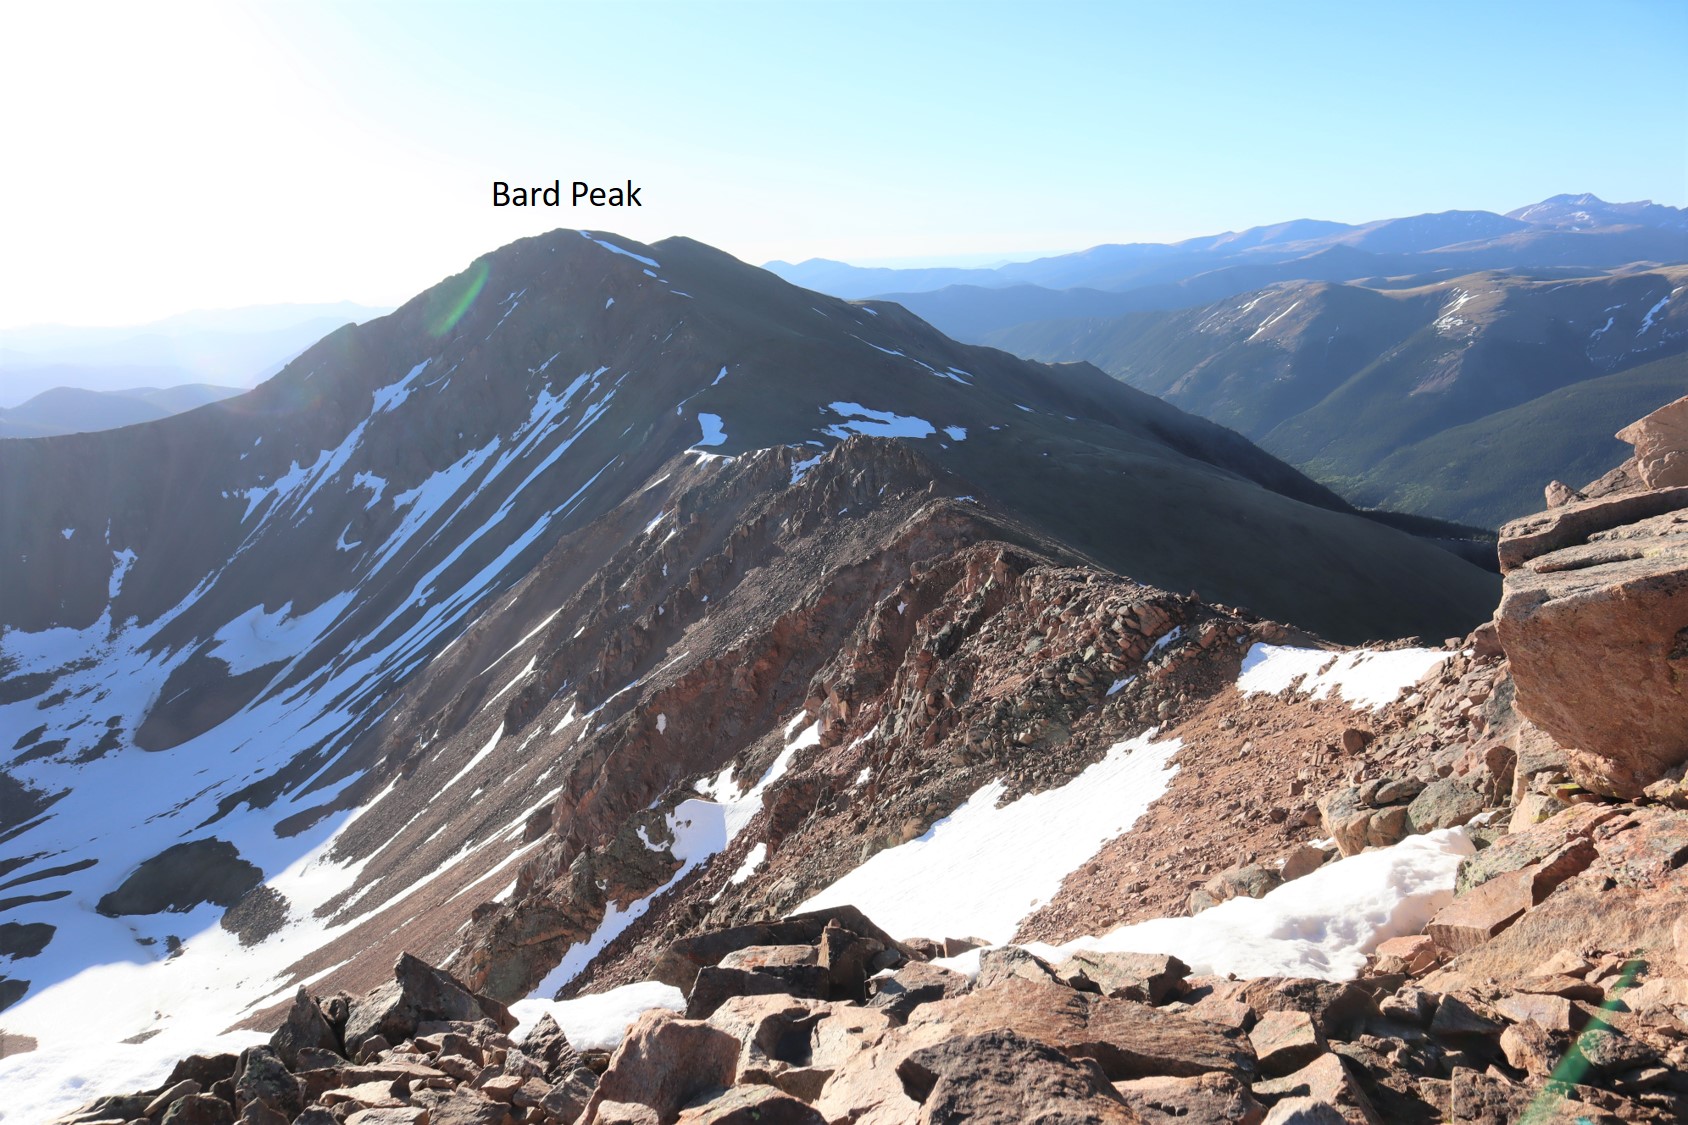
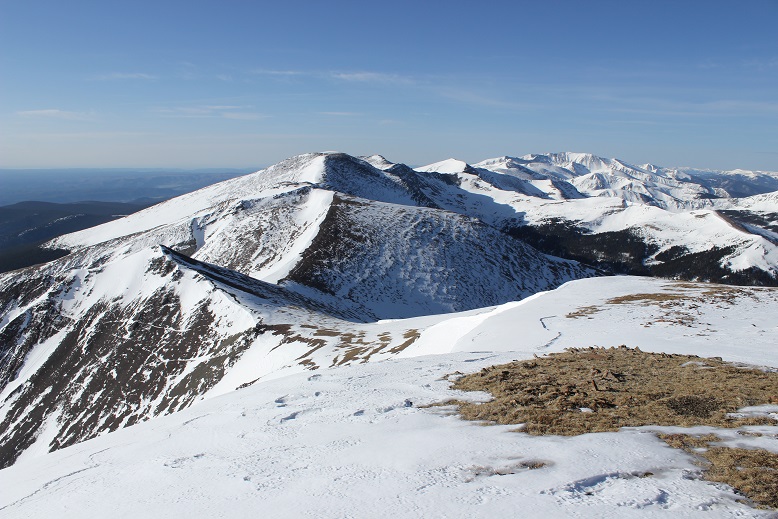
My next objective was PT 13427

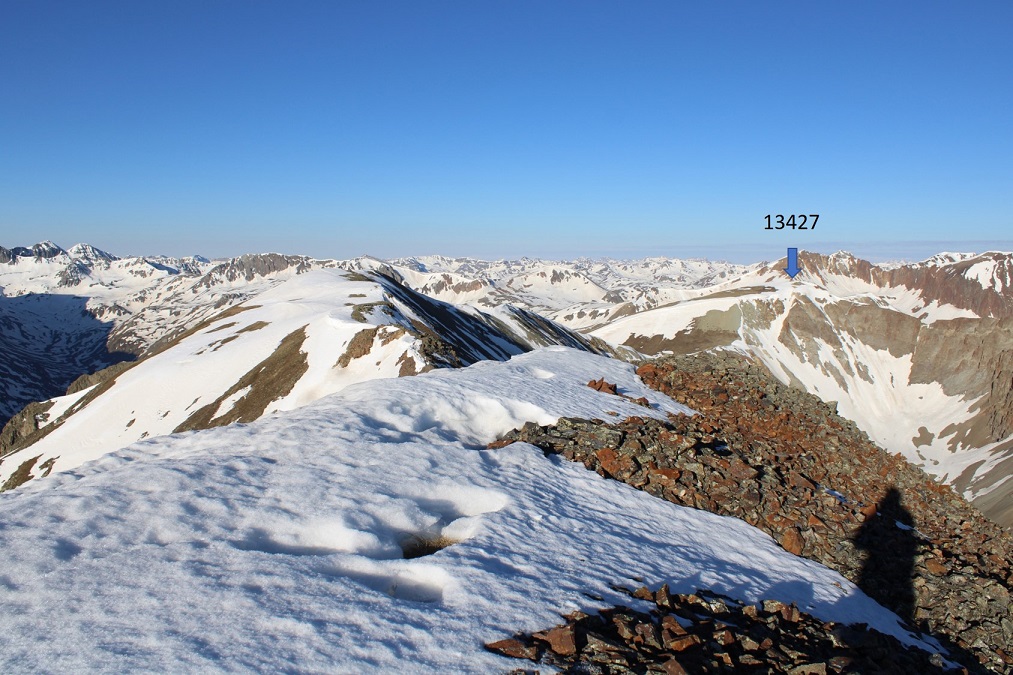
Here’s the route to get there

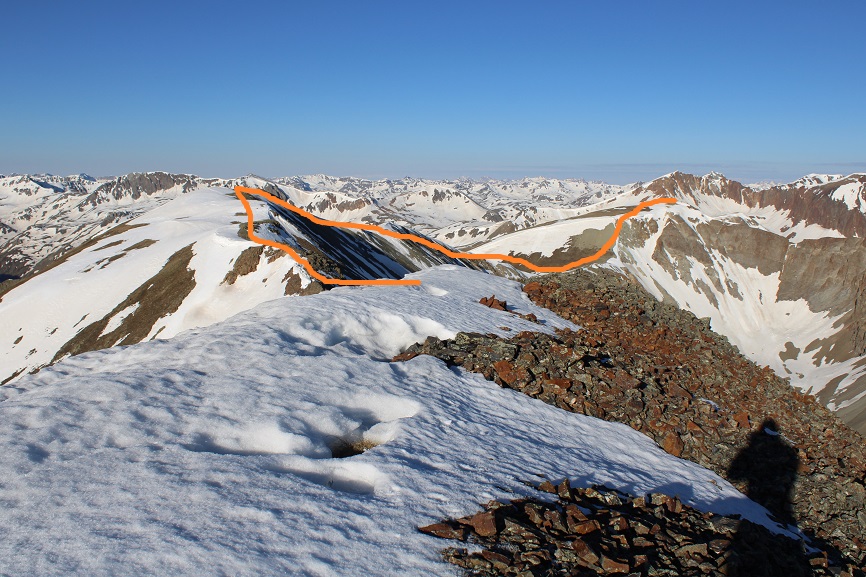
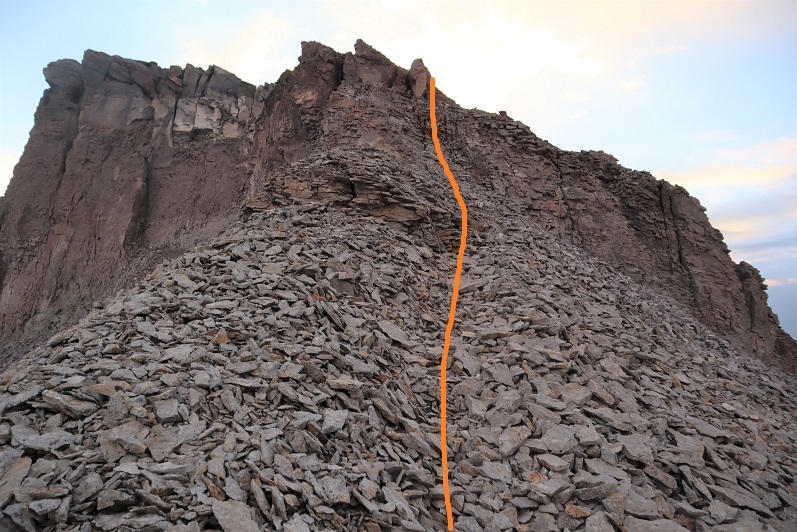
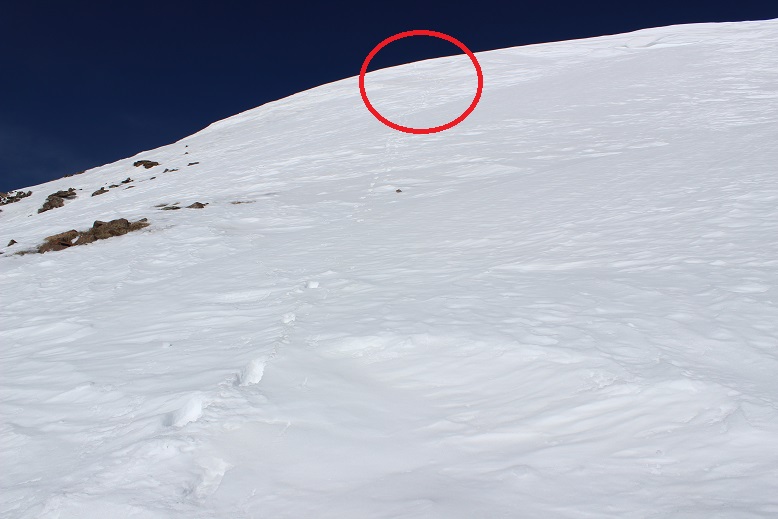
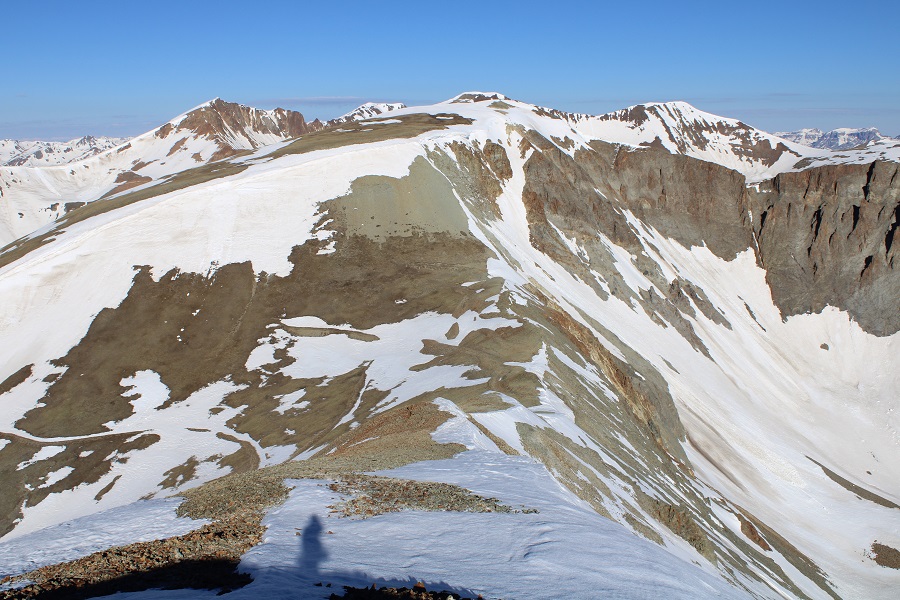
I turned and followed the ridge southeast.  Here are some step by step pictures

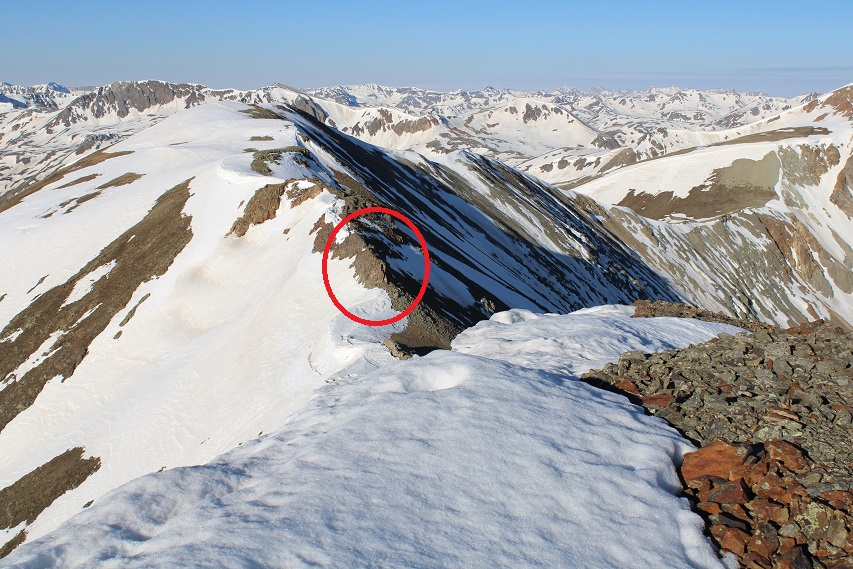
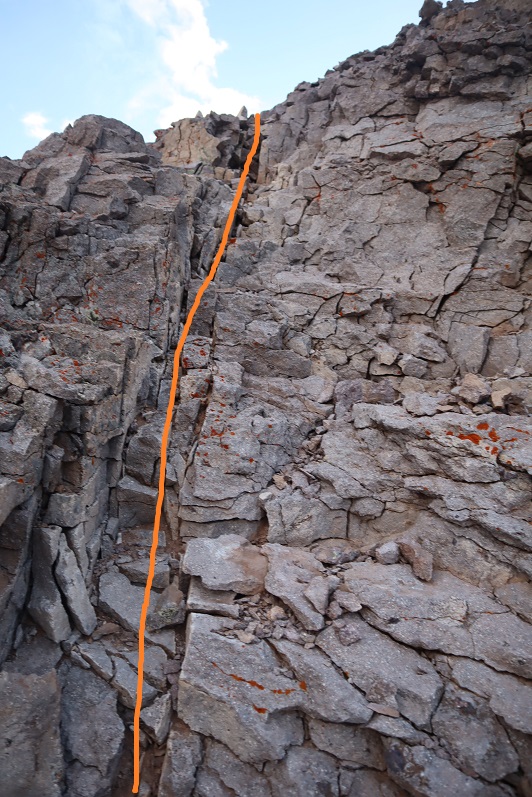
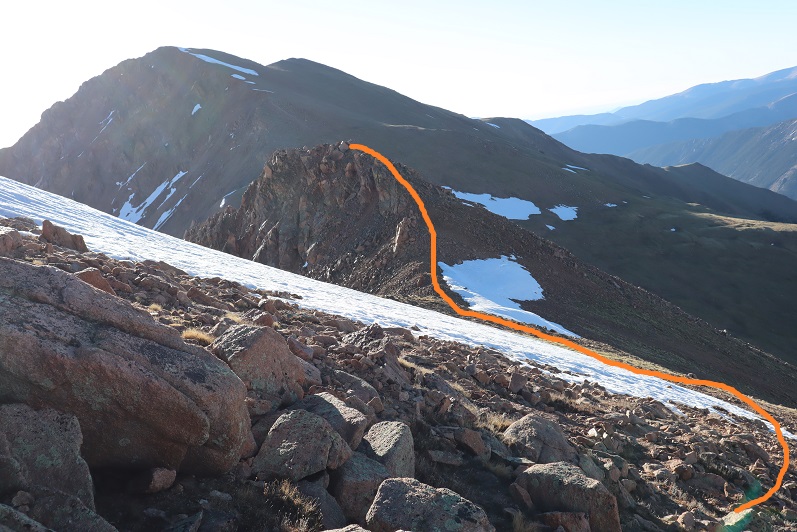
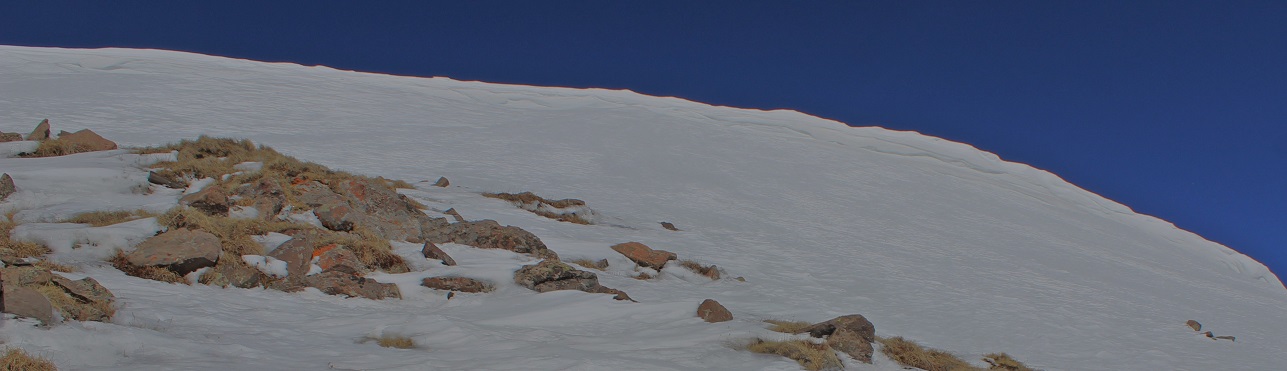
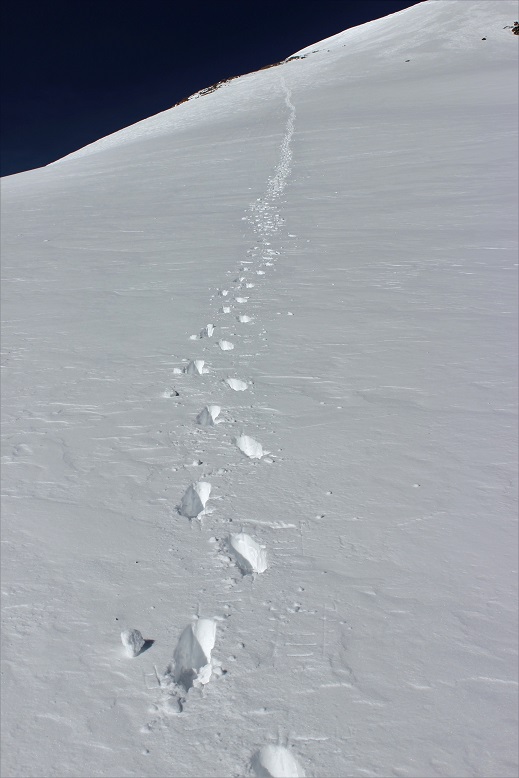
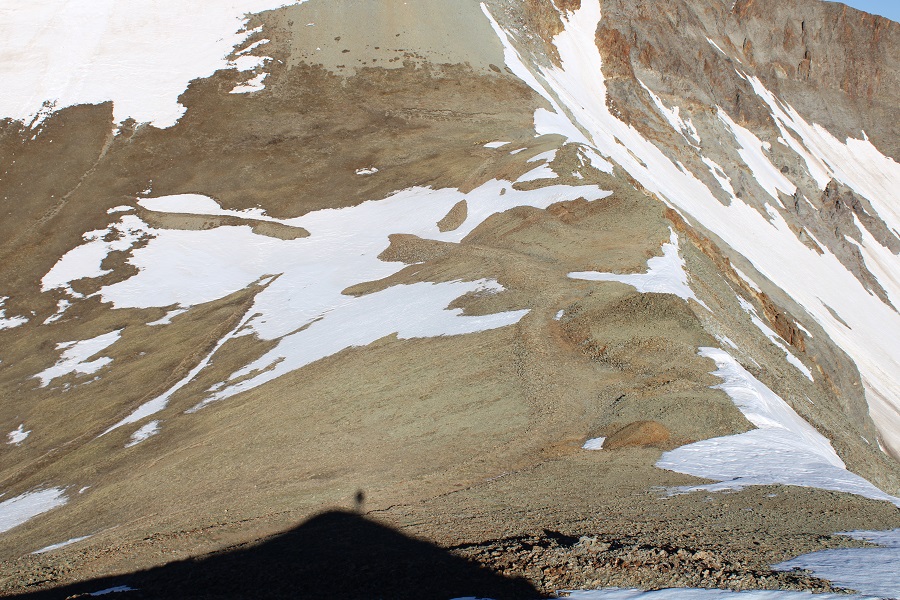
The area in the above picture, circled in red, is pictured below.  I skirted this to the right

Then followed the ridge, glad I’d put on my microspikes

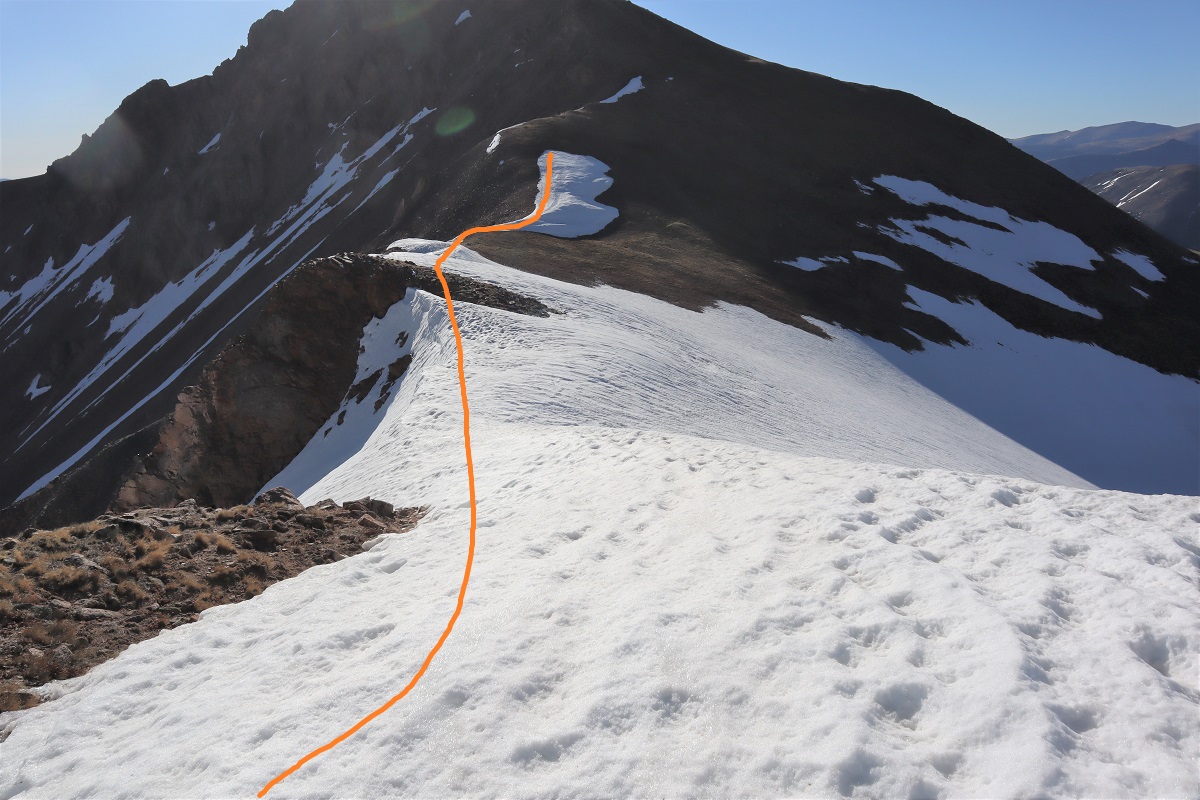
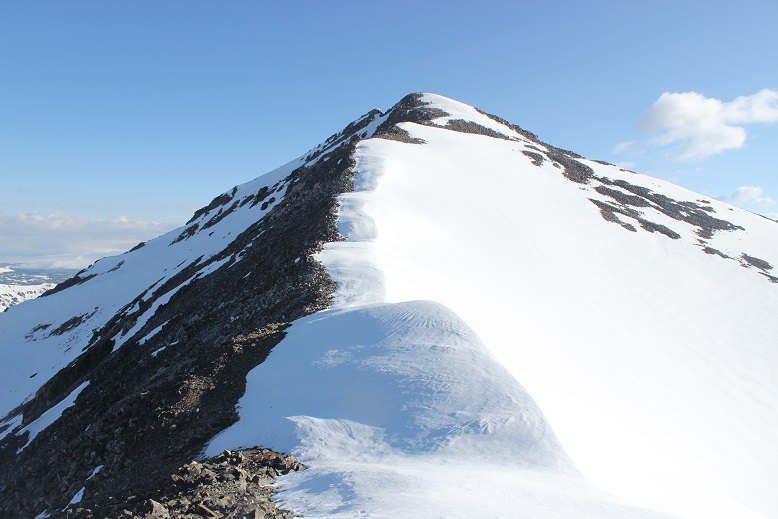
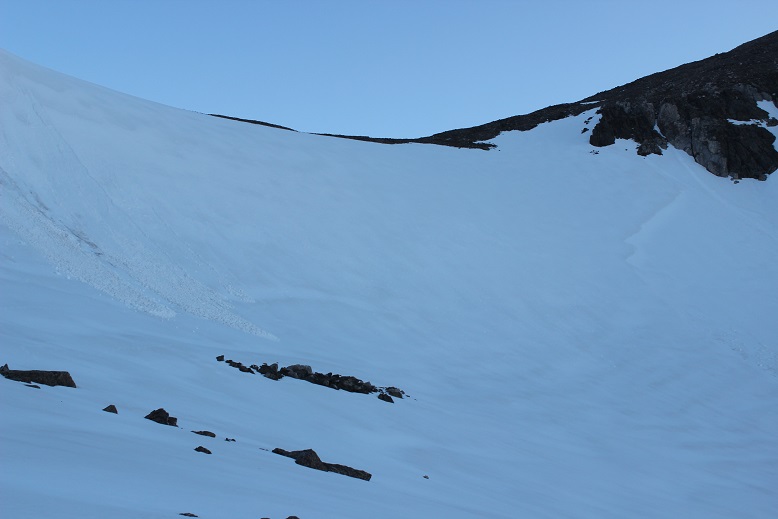
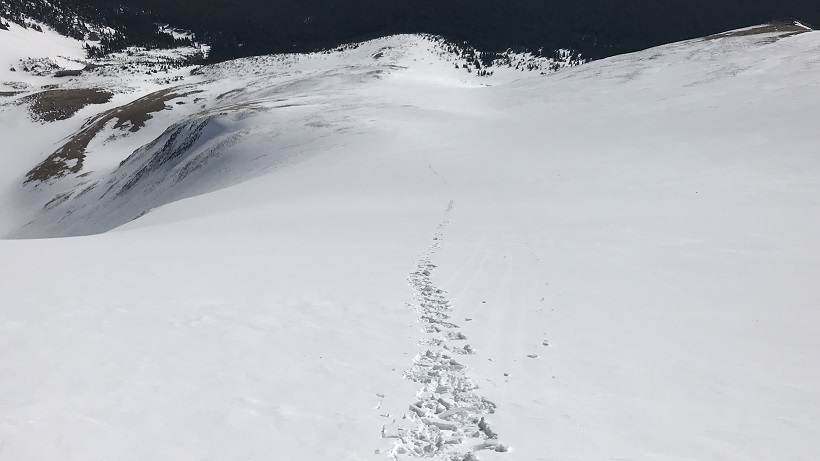
Eventually I came to an area where I started losing elevation.  The snow was largely avoidable by sticking to the left on the ridge.  I was a little worried about that cornice in front of me however

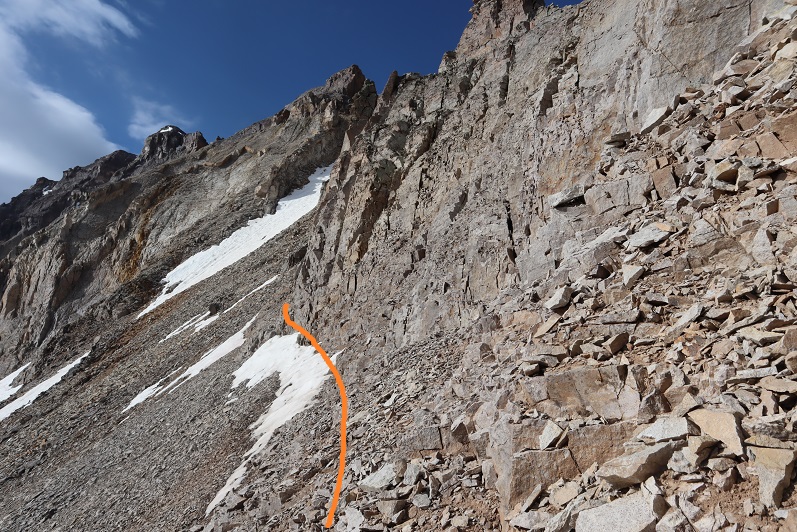
I lost about 475’ of elevation to the saddle

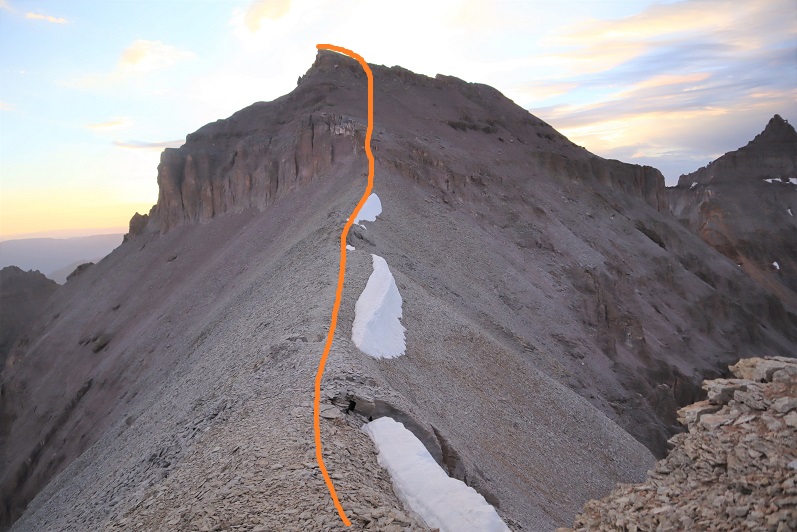
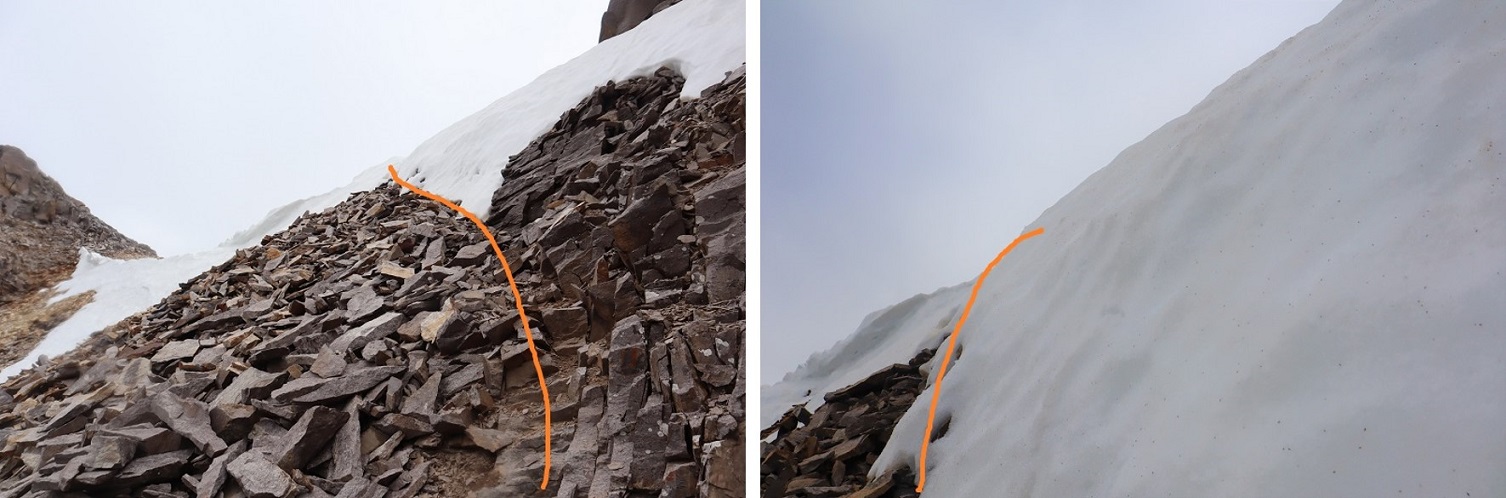
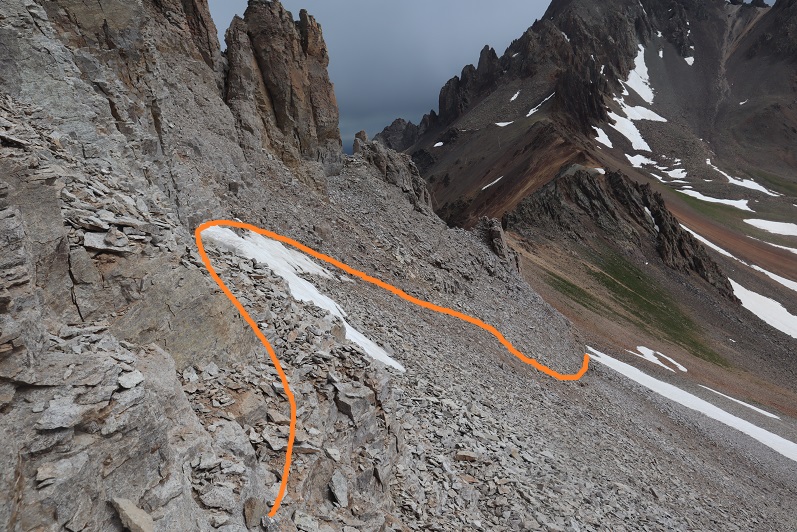
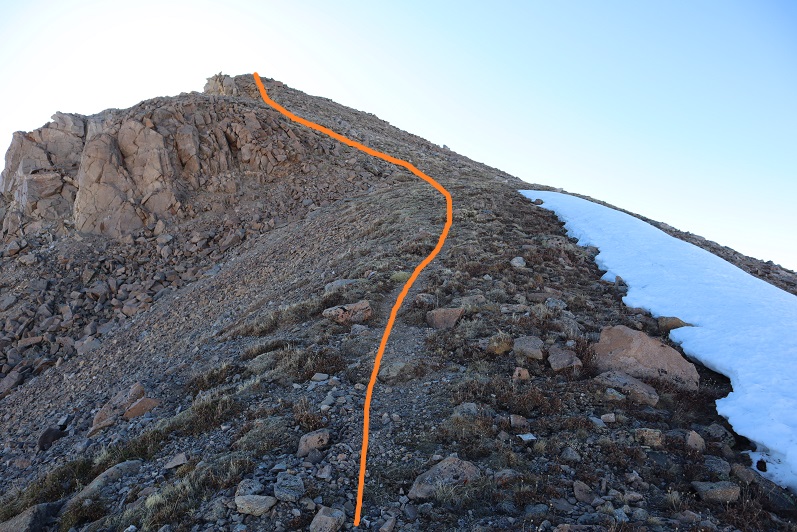
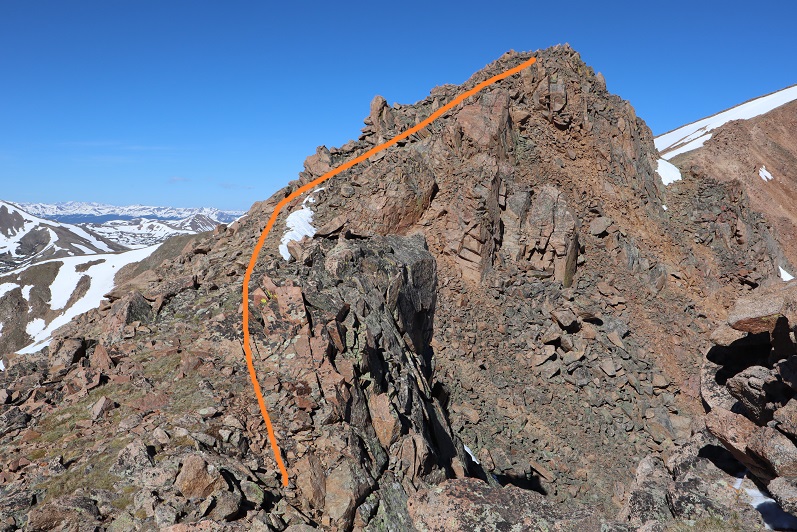
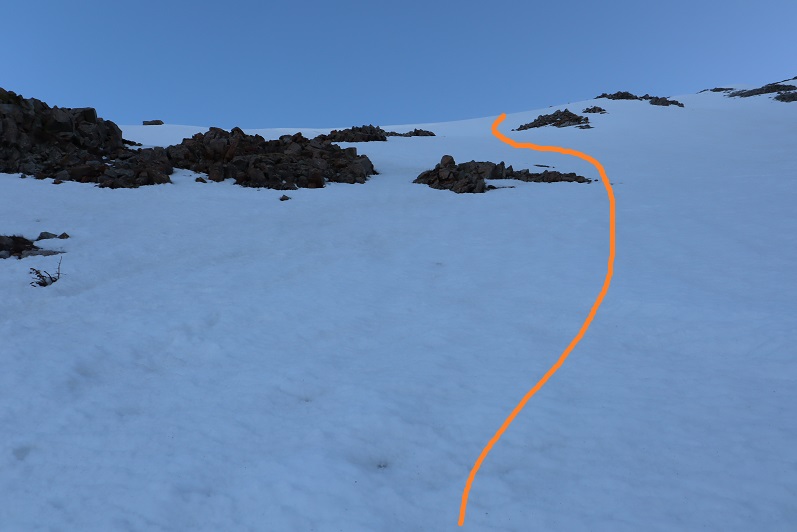
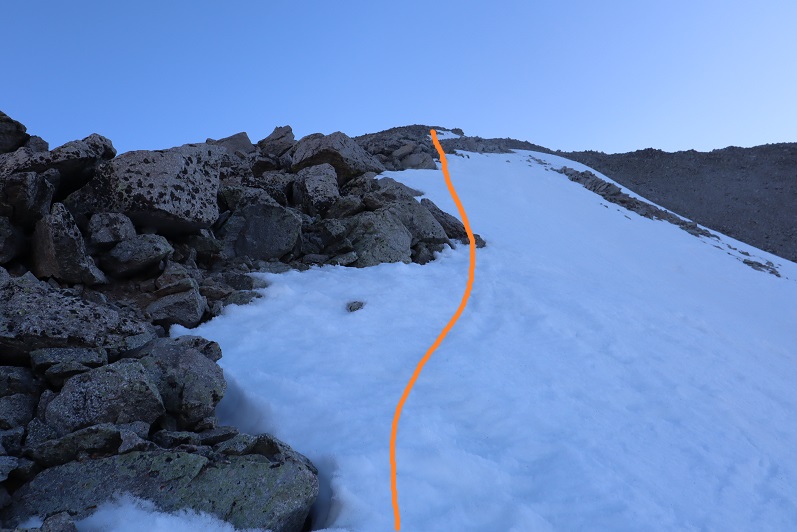
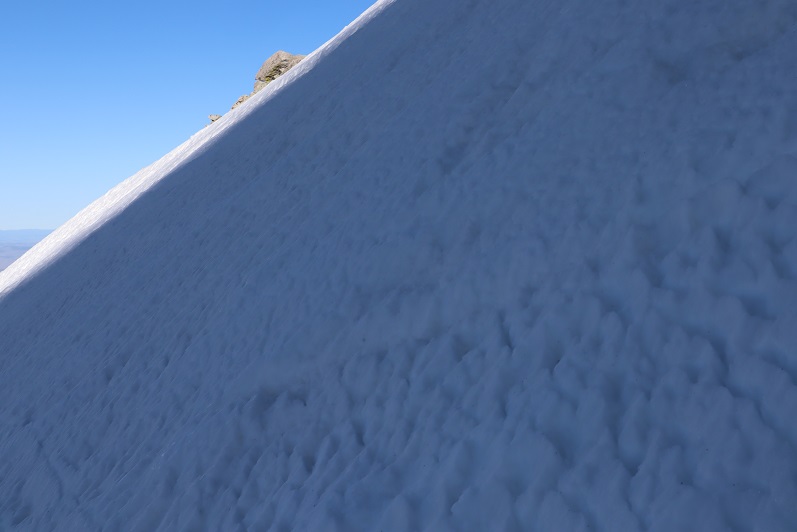
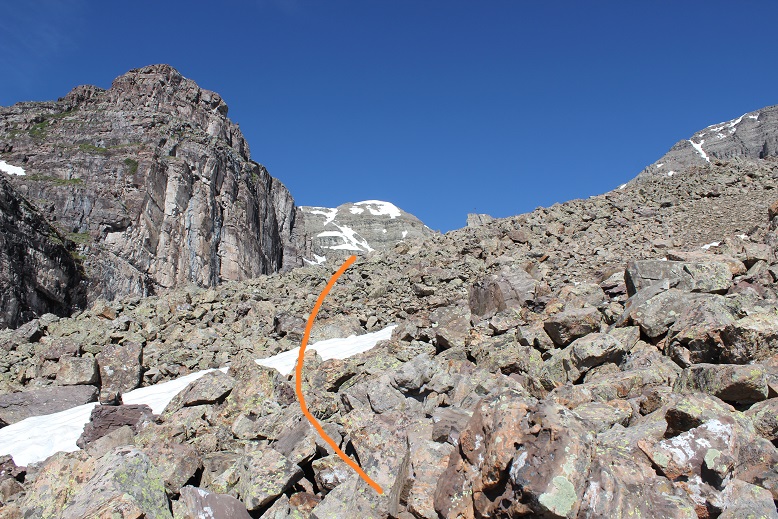
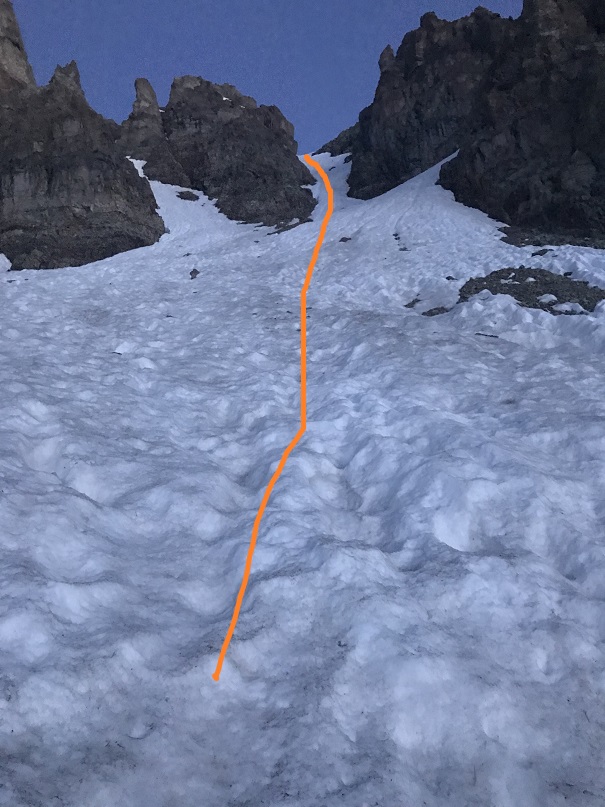
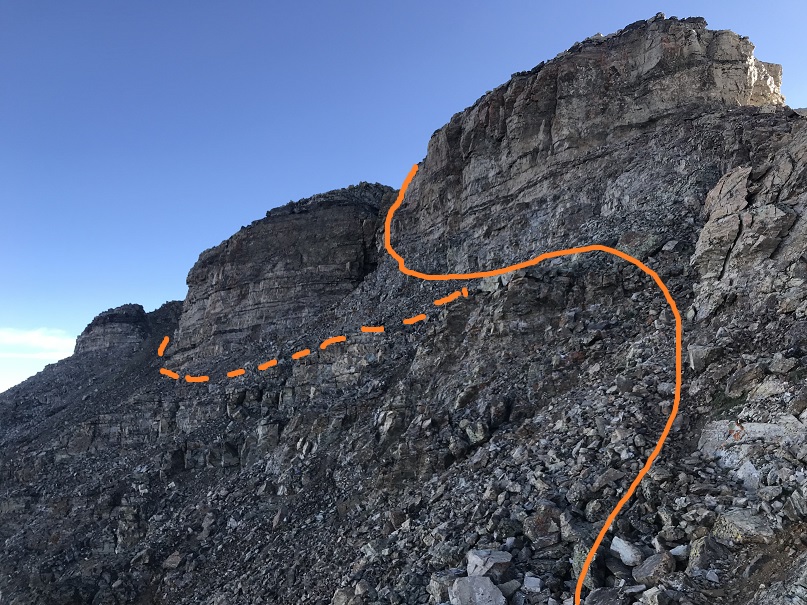
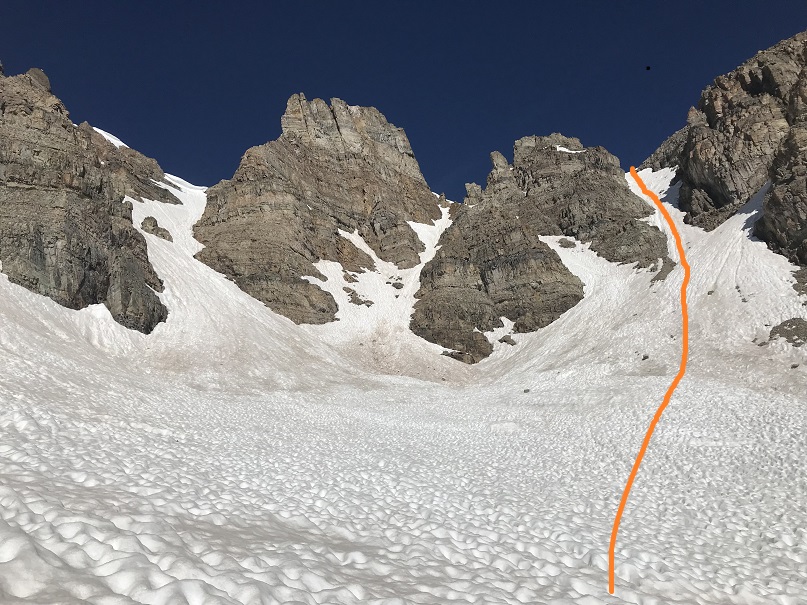
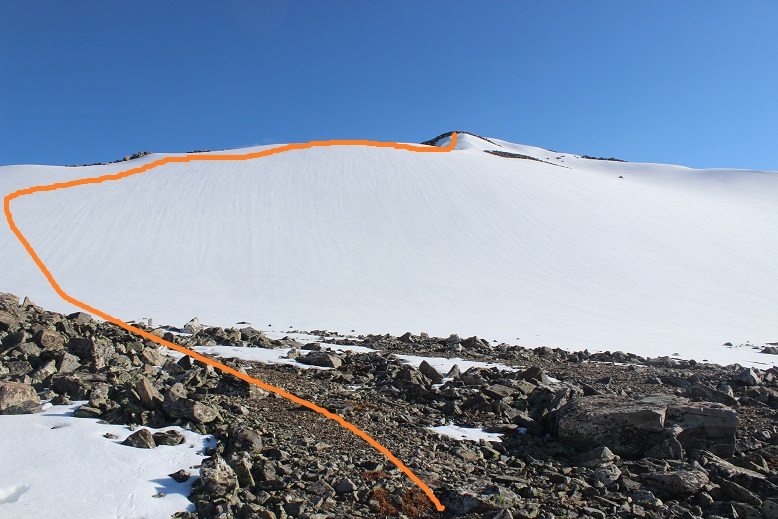
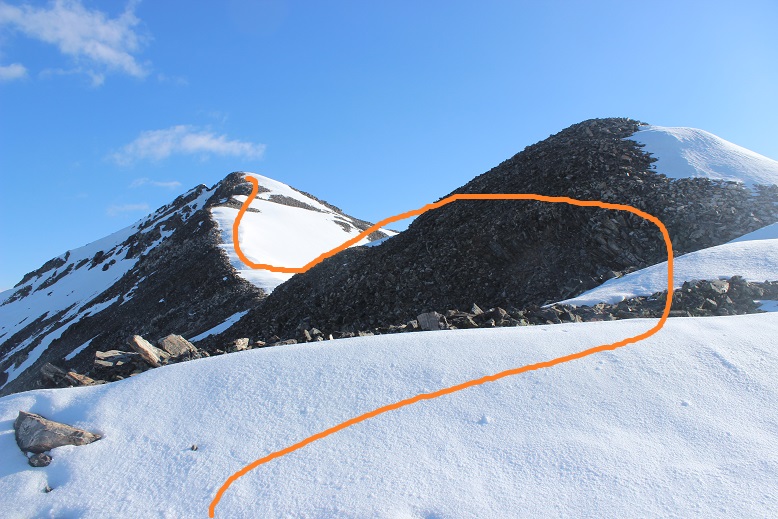
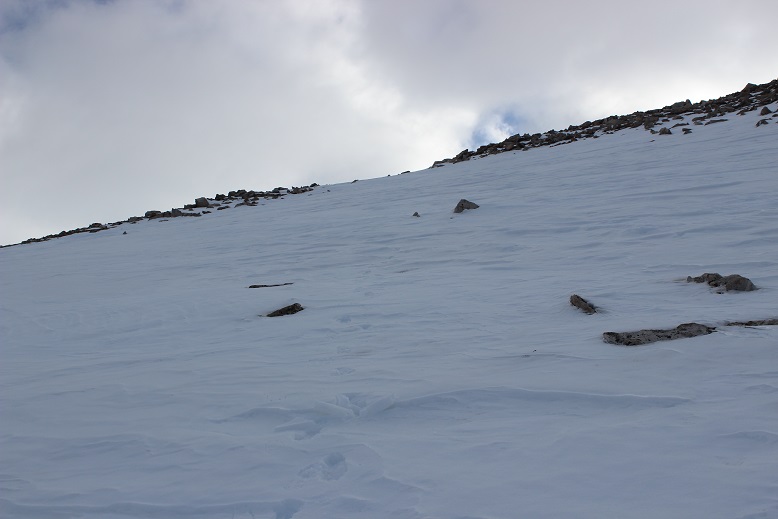
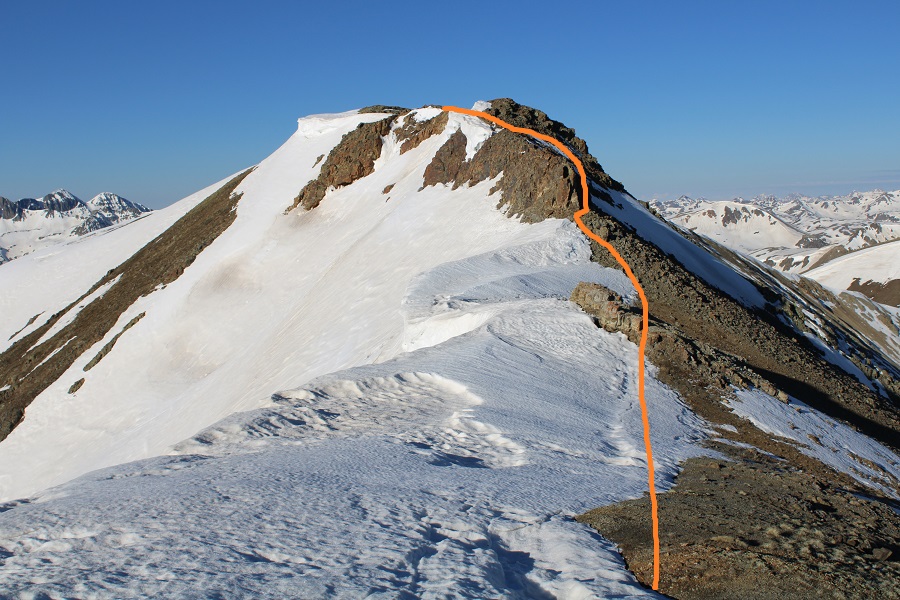
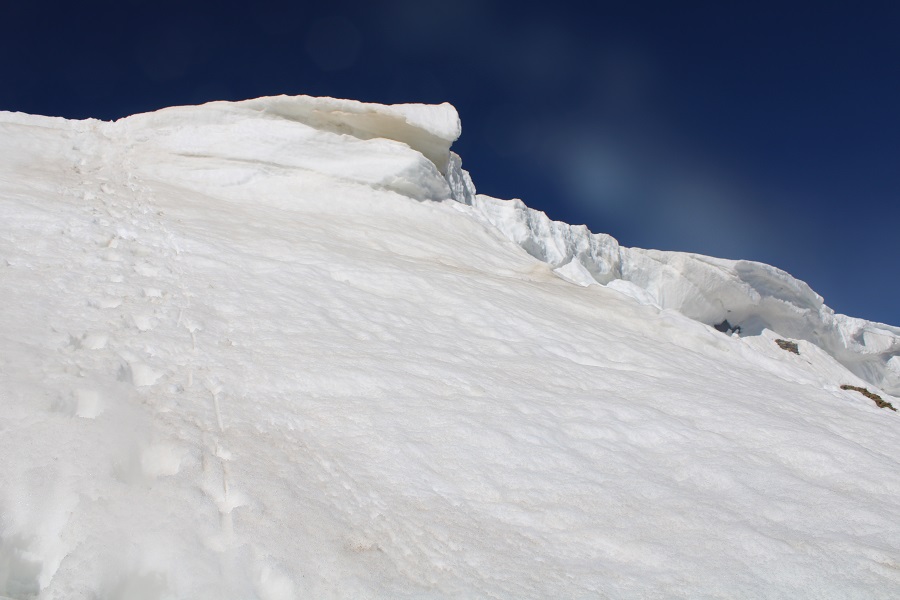
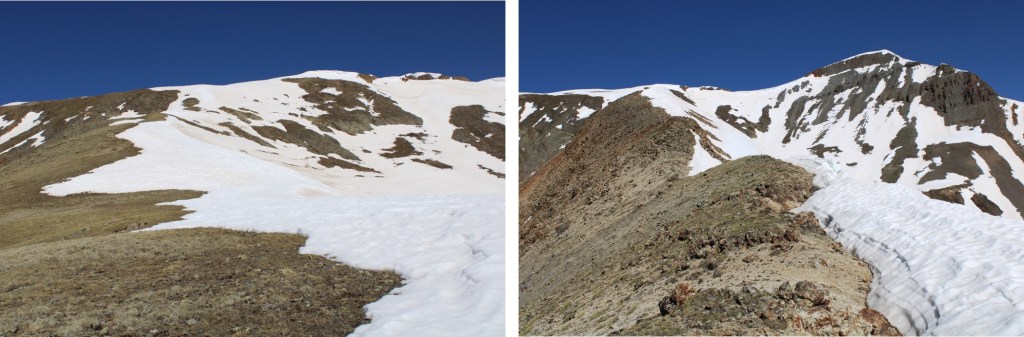
Then started up the east slope.  This area was covered in scree, and quite steep. I kept eyeing the cornice, trying to find the best way to ascend.  While I had snowshoes, I didn’t have crampons, so my microspikes would have to do if it came down to it.  Here’s the path I chose to take to the summit, looking for a stable but accessible part of the cornice to climb.

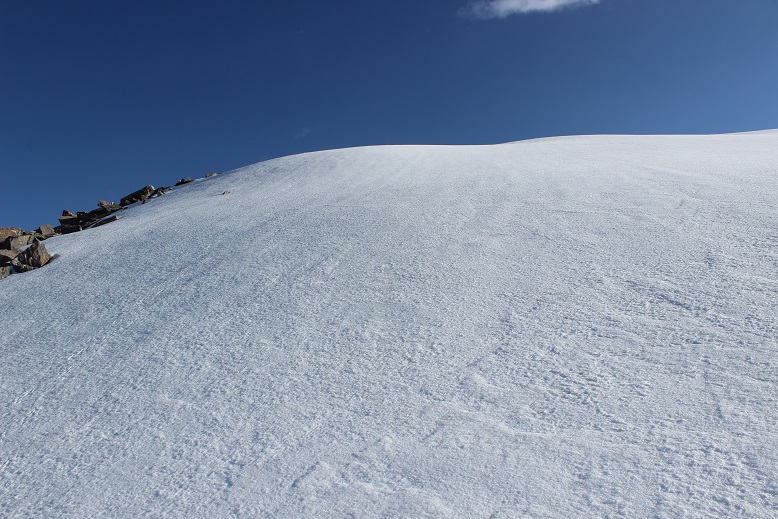
When I got to the cornice, I was able to kick in steps with just my microspikes, although, lacking in forward facing spikes, they needed a little creative help from my ice axe at times. 

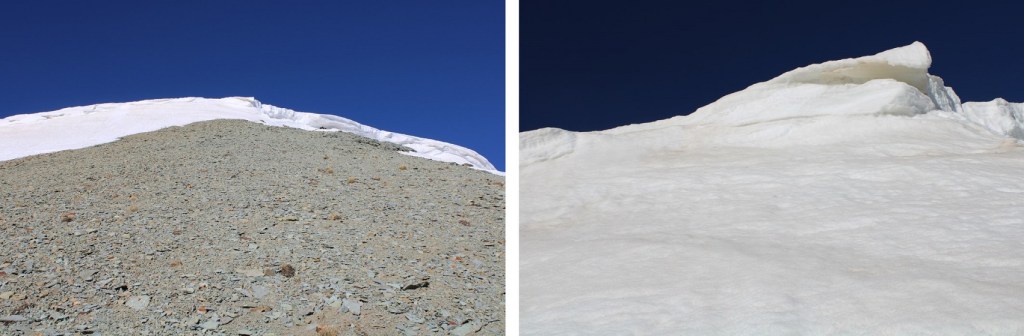
Towards the top I started postholing as the cornice leveled out, and had to slide on my belly the last few feet to make it to the tundra. Once over the cornice the summit was obvious, to the north

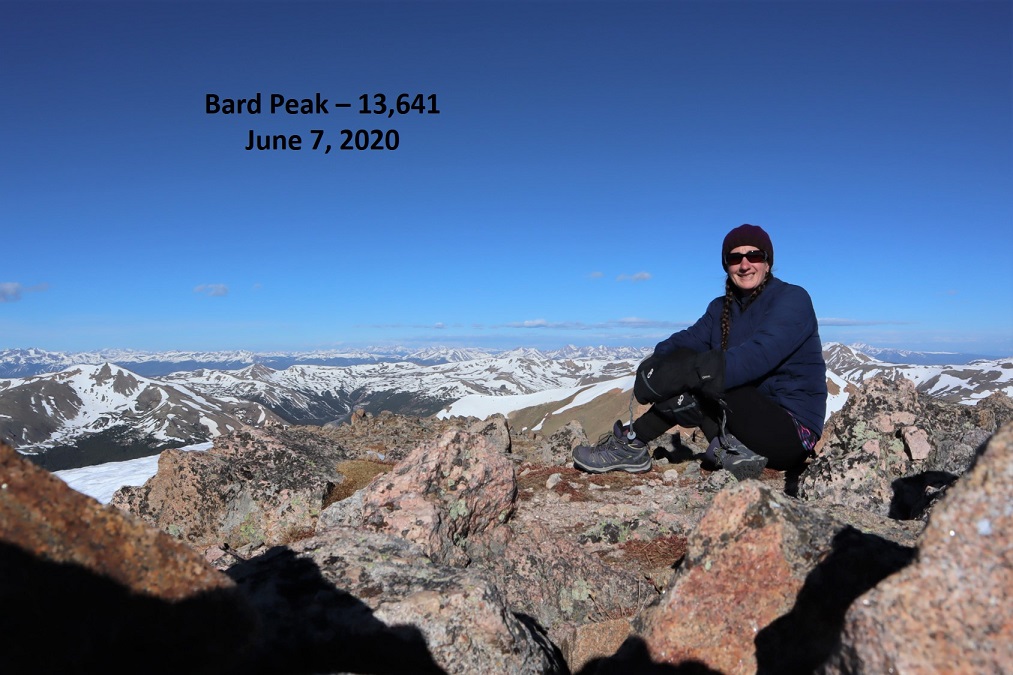
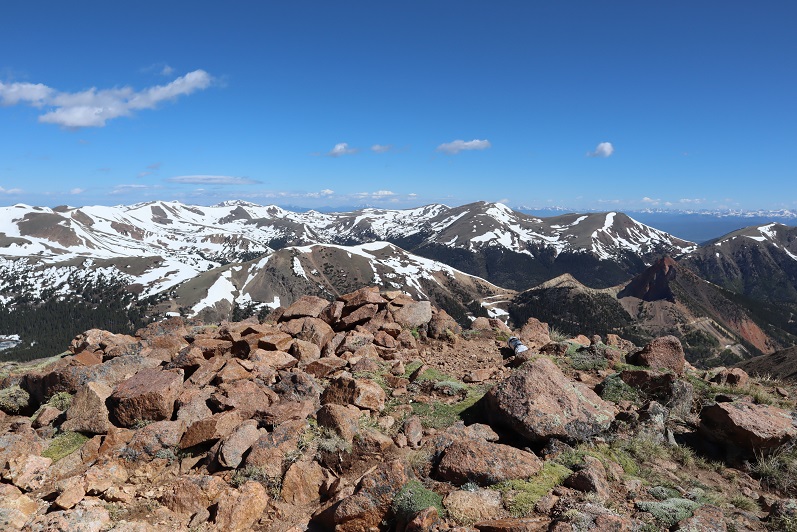
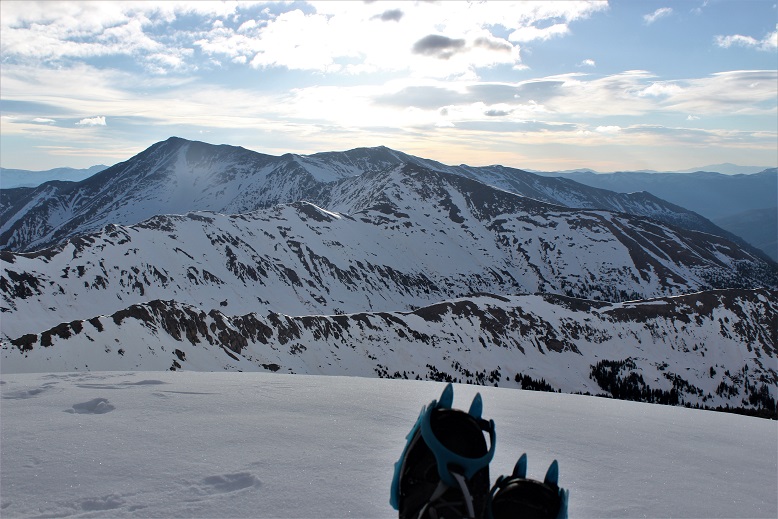
I summited PT 13427 at 8:30am
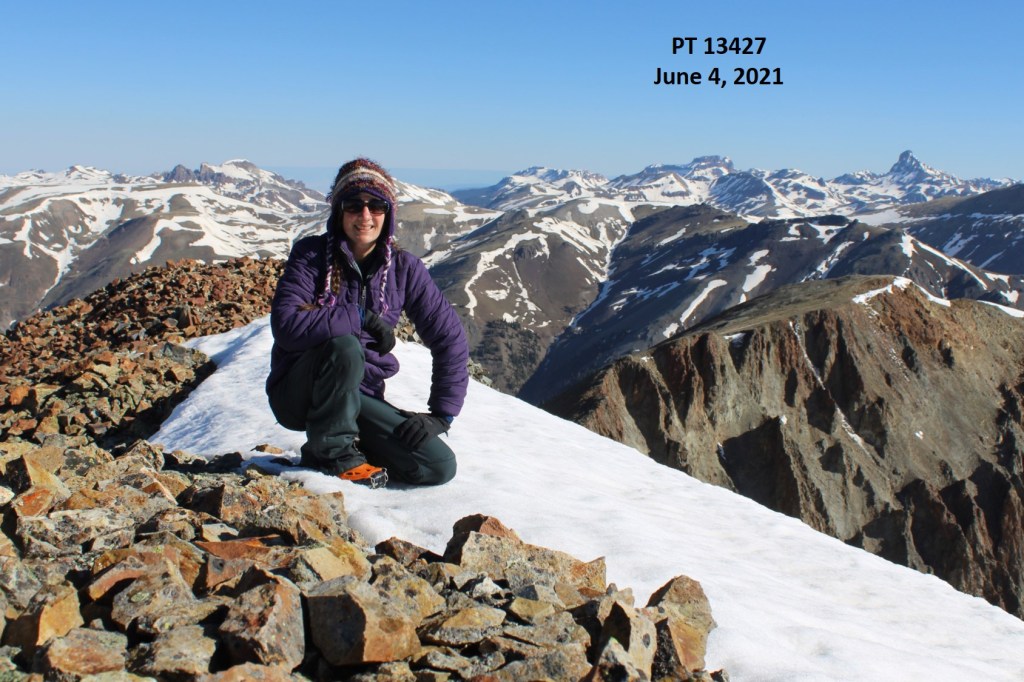
PT 13427:

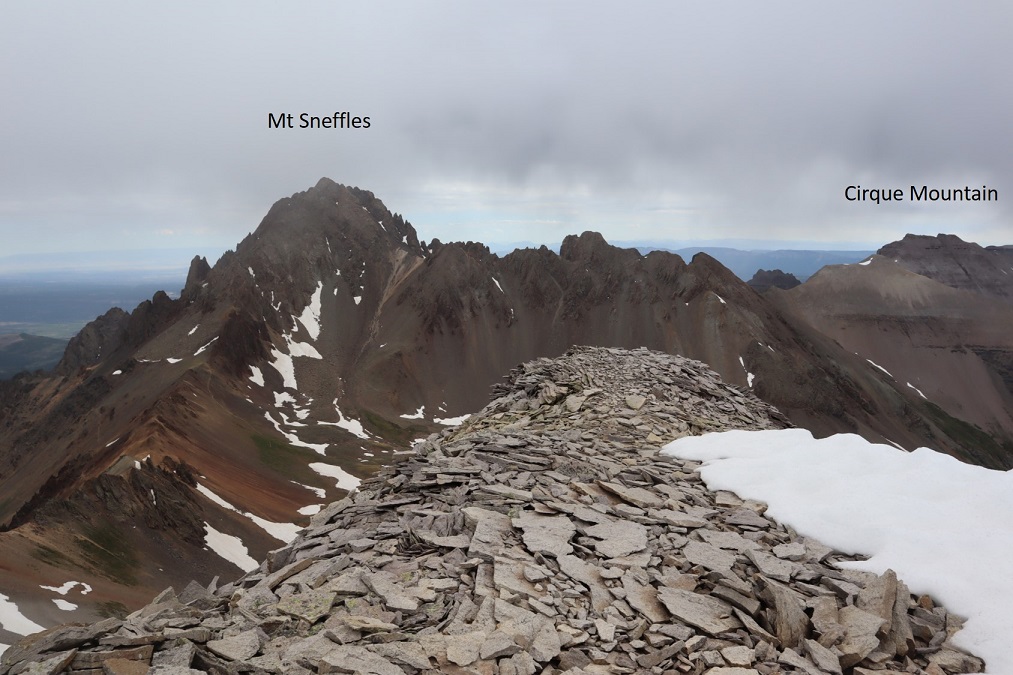
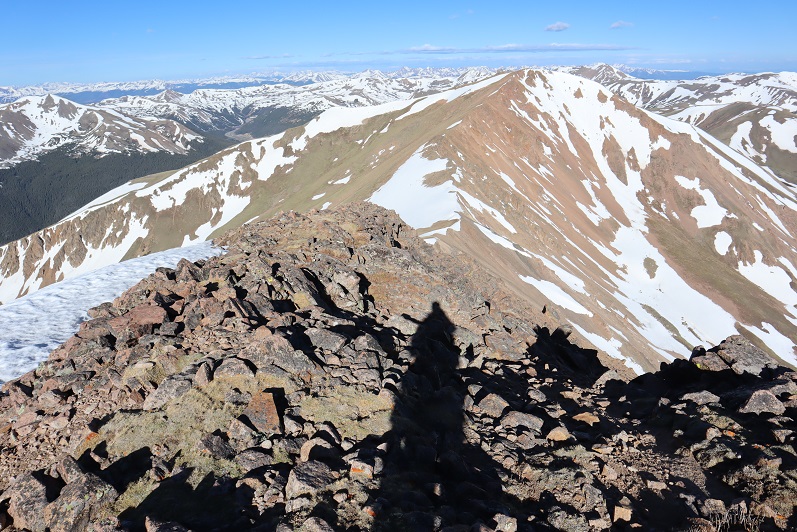
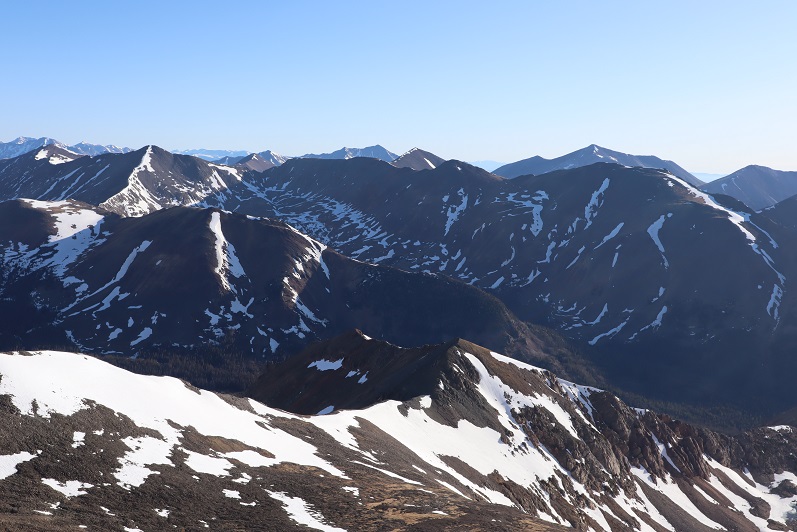
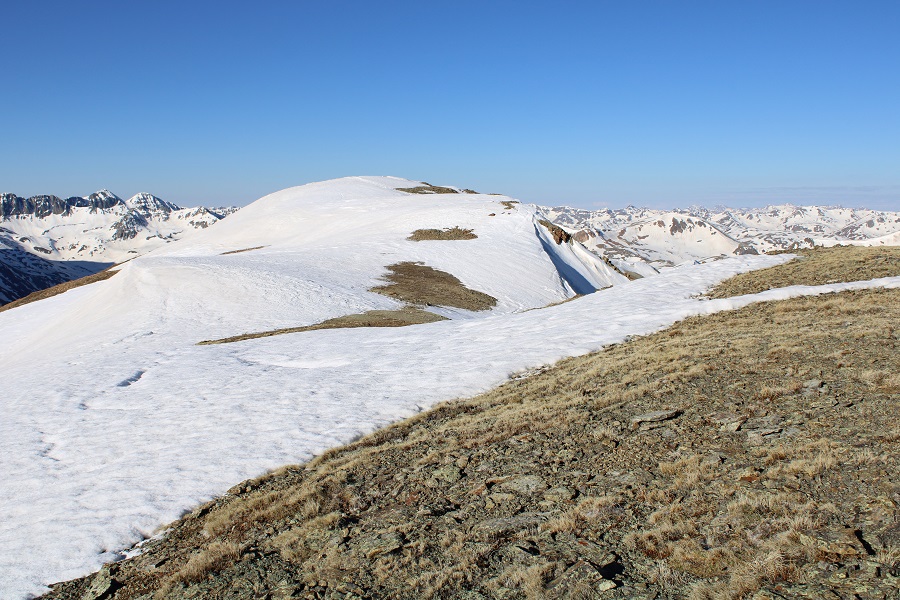
Here’s a look back on PT 13540

It was still morning, but the snow was softening up quickly.  I wanted to get back over that cornice asap. I turned and headed back towards the cornice

It was easy to find my entry/exit point, as I could still see the marks from where I army crawled a few minutes ago.

I did the same thing again, facing the mountain and using the steps I’d kicked in earlier.  It was rapidly warming up:  the tip of the cornice was now steadily reedripping water.

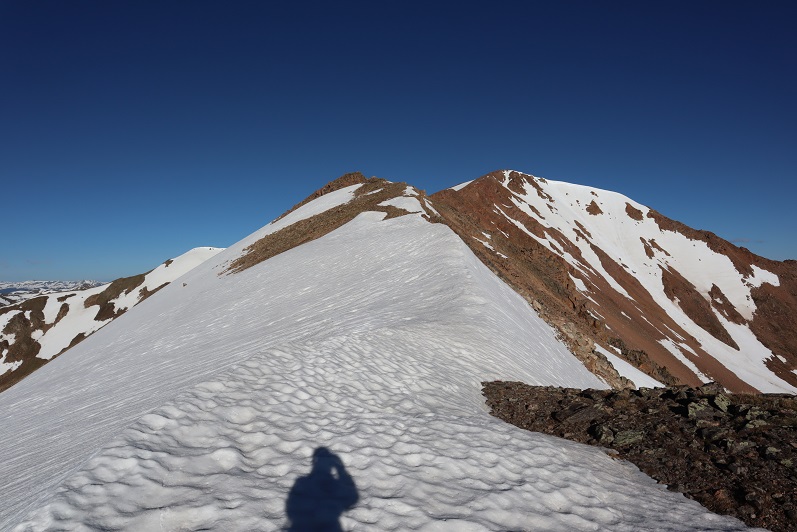
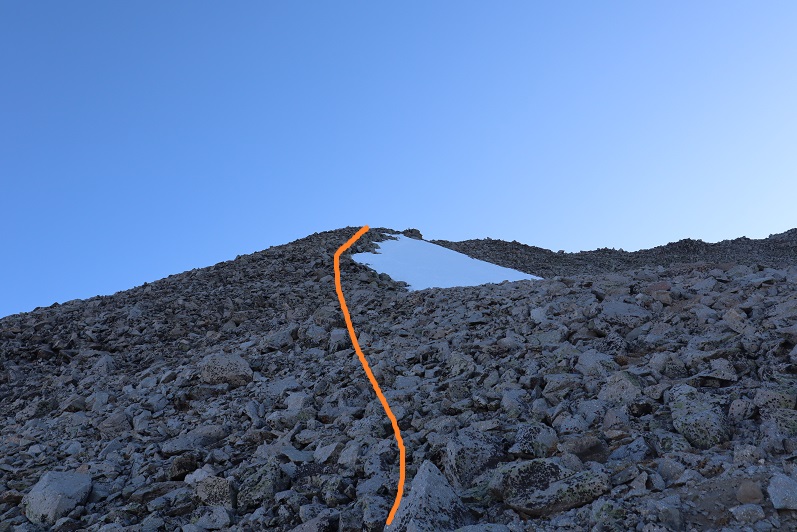
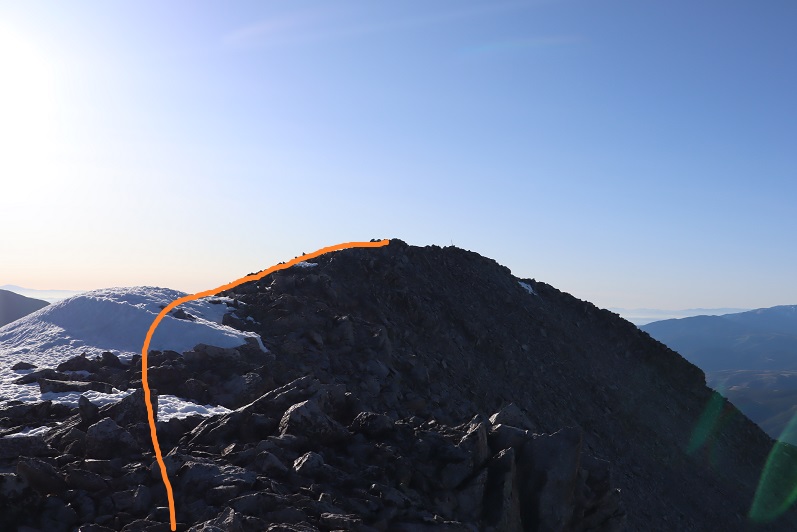
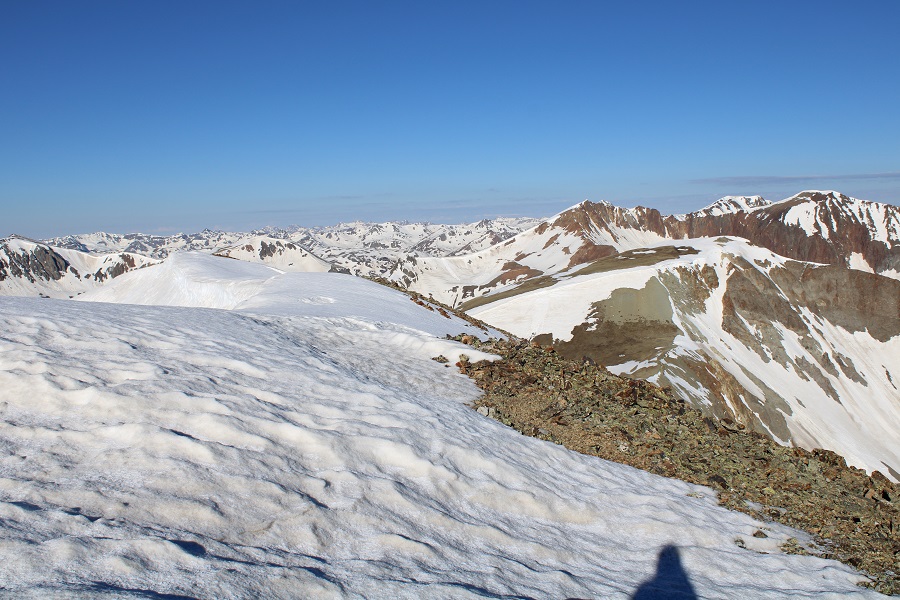
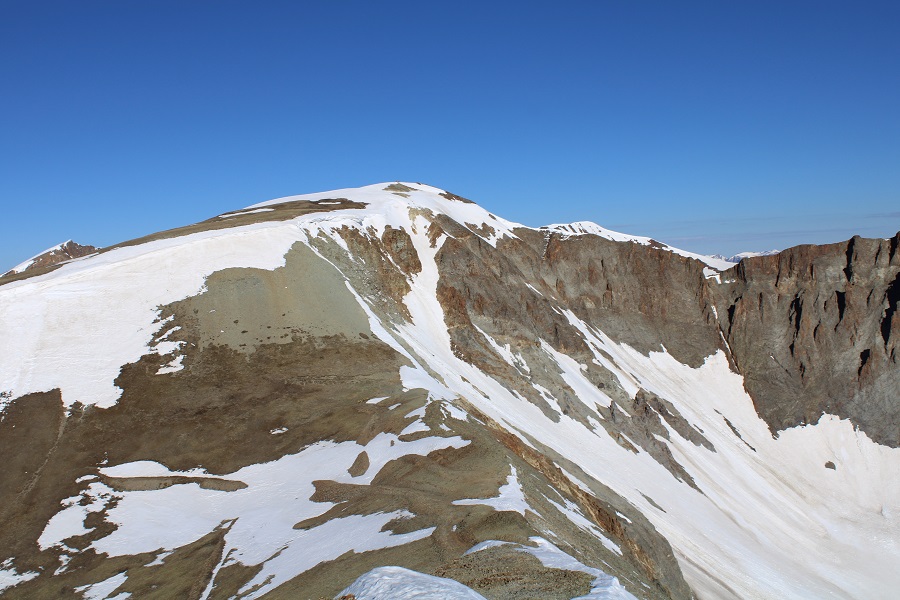
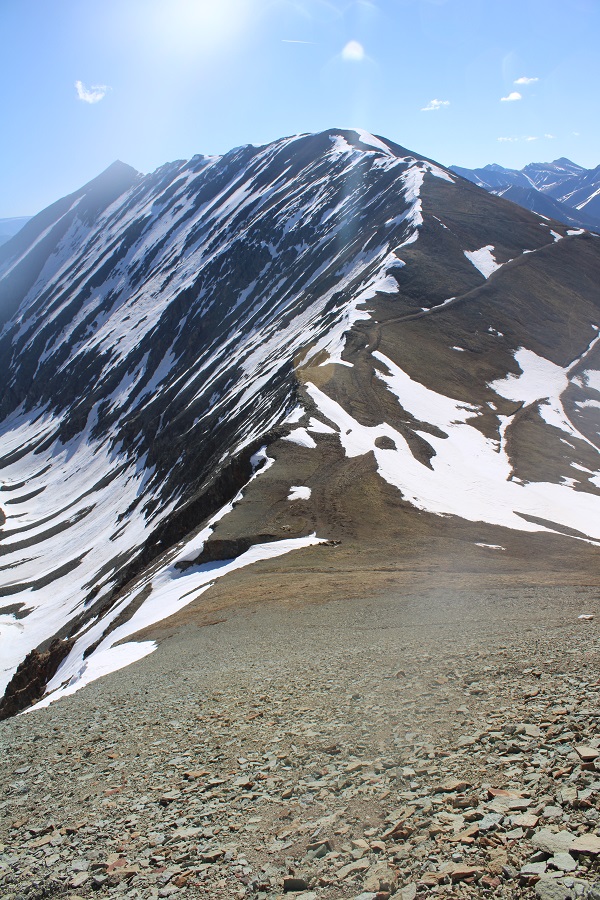
Here’s a look at the ridge back up towards PT 13540

I slid down the scree and followed the ridge back. 

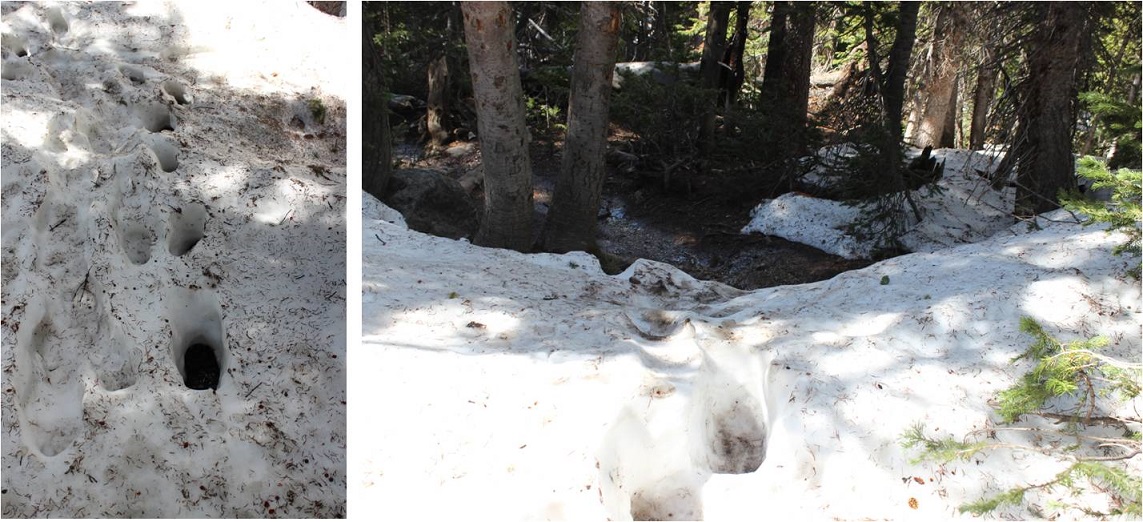
The snow was mostly avoidable until I made it to where the ridge kind of levels out for a while.  From then on it was posthole city

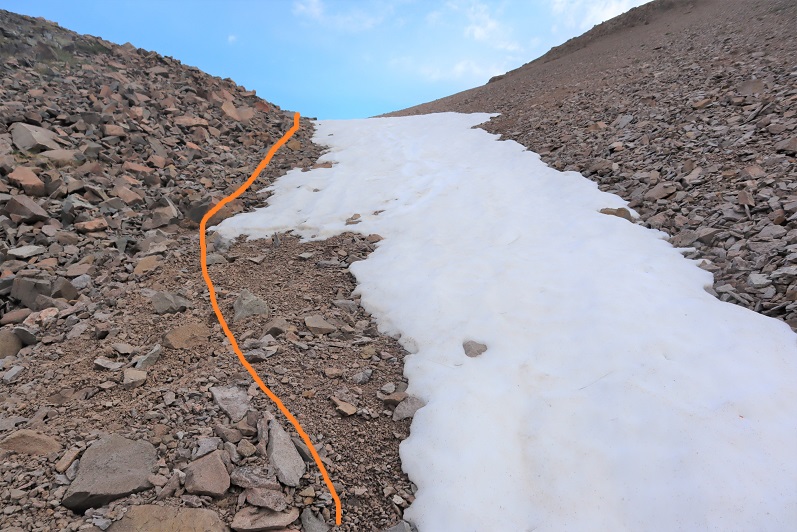
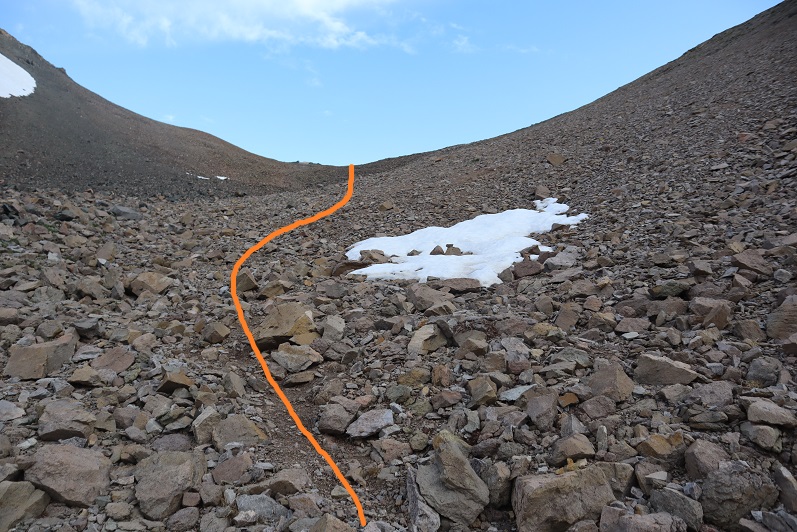
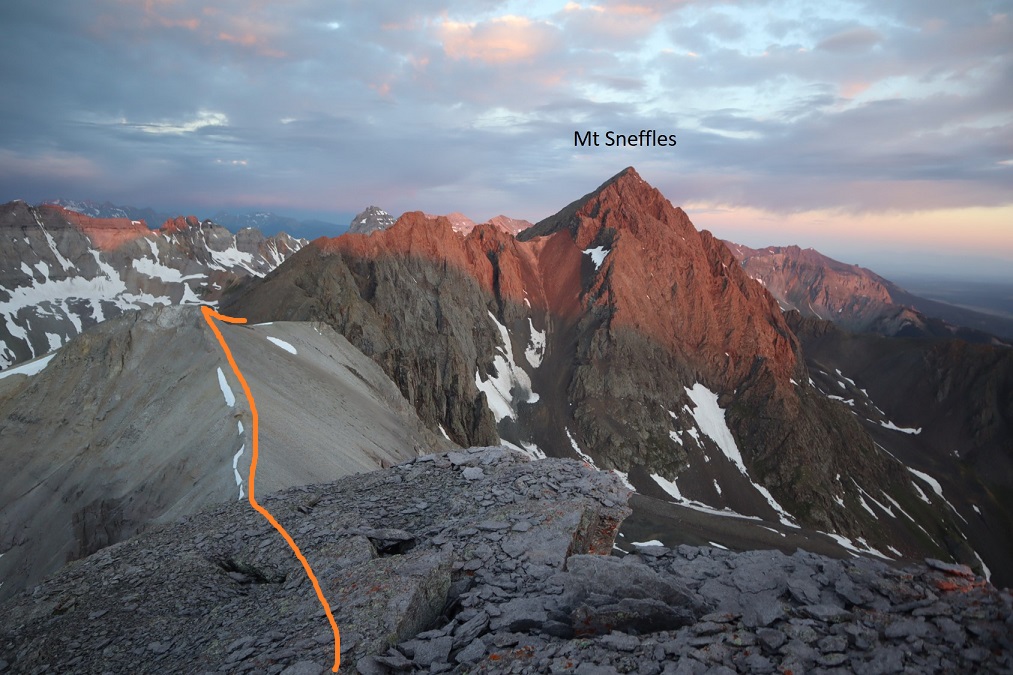
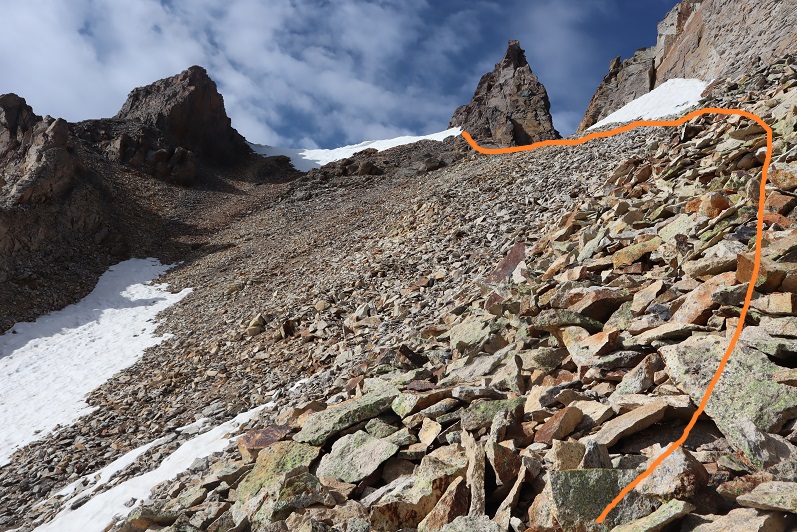
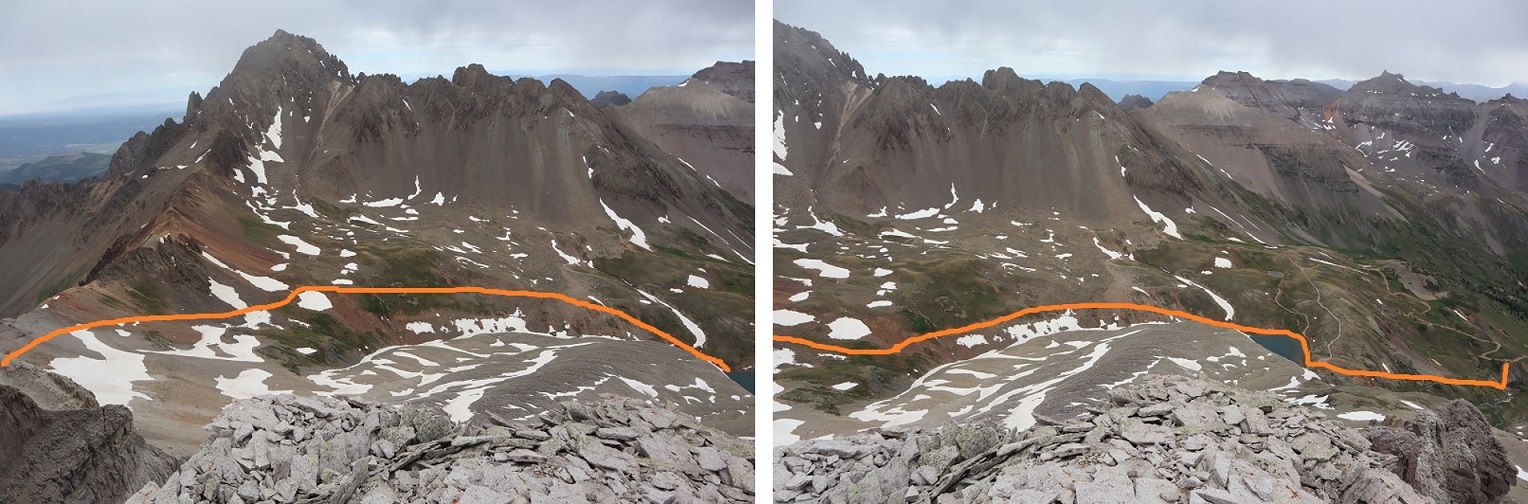
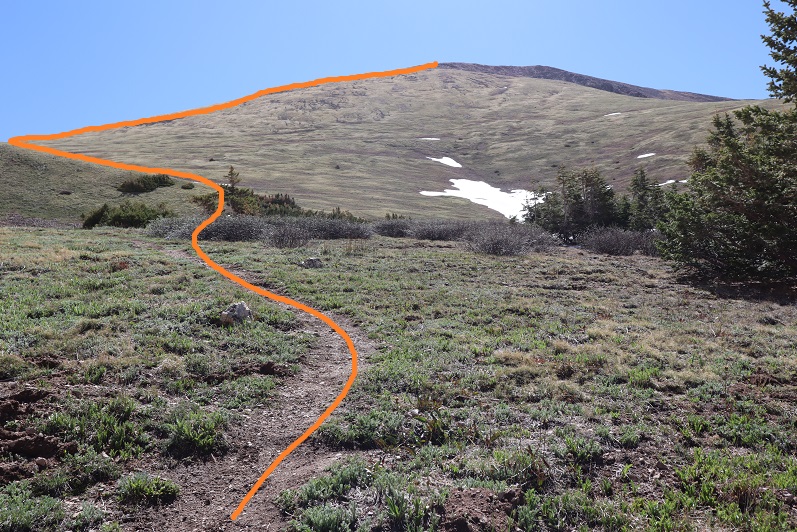
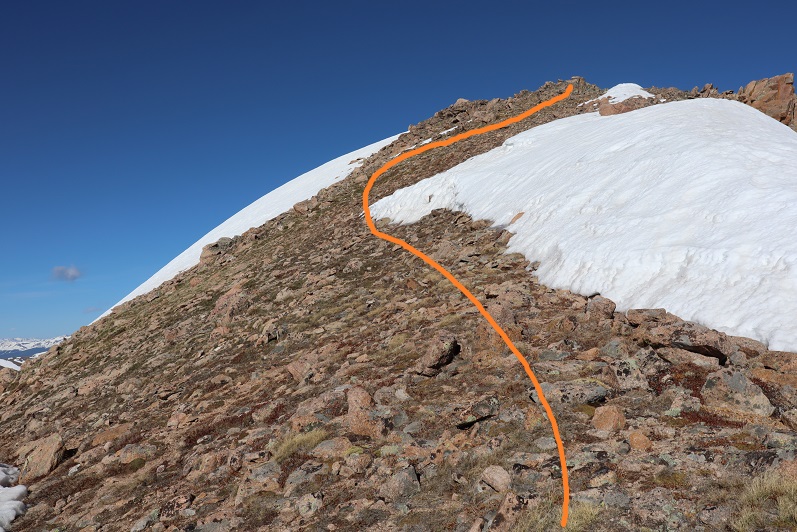
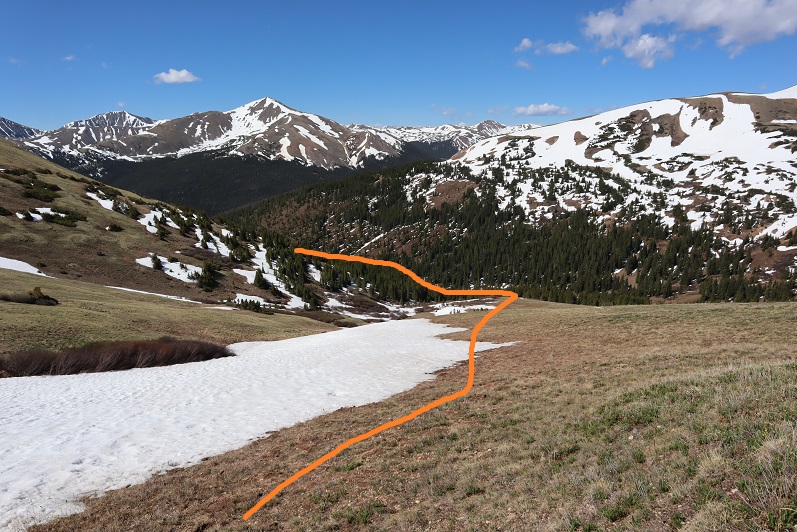
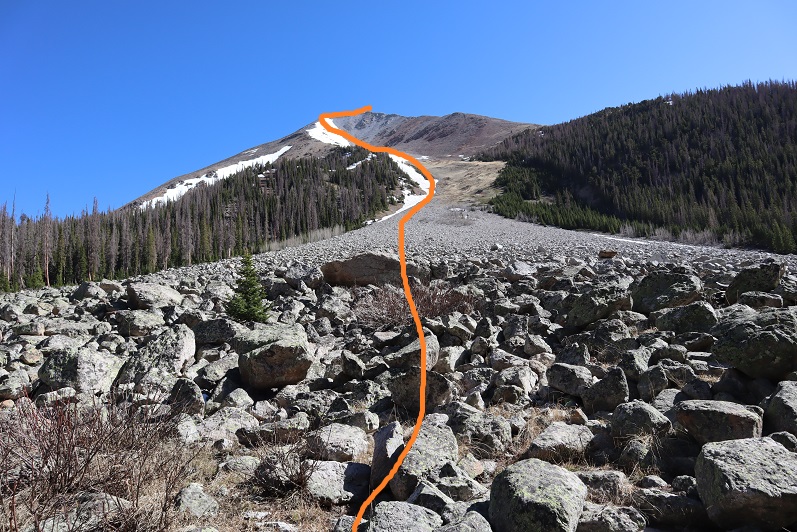
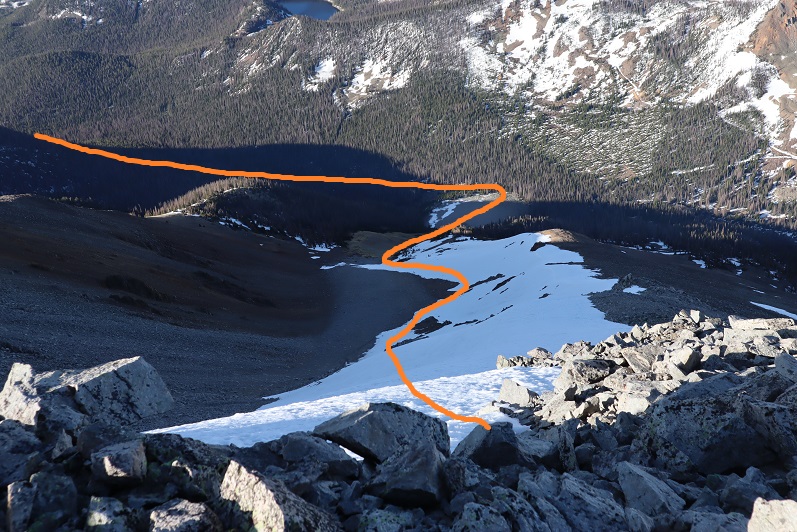
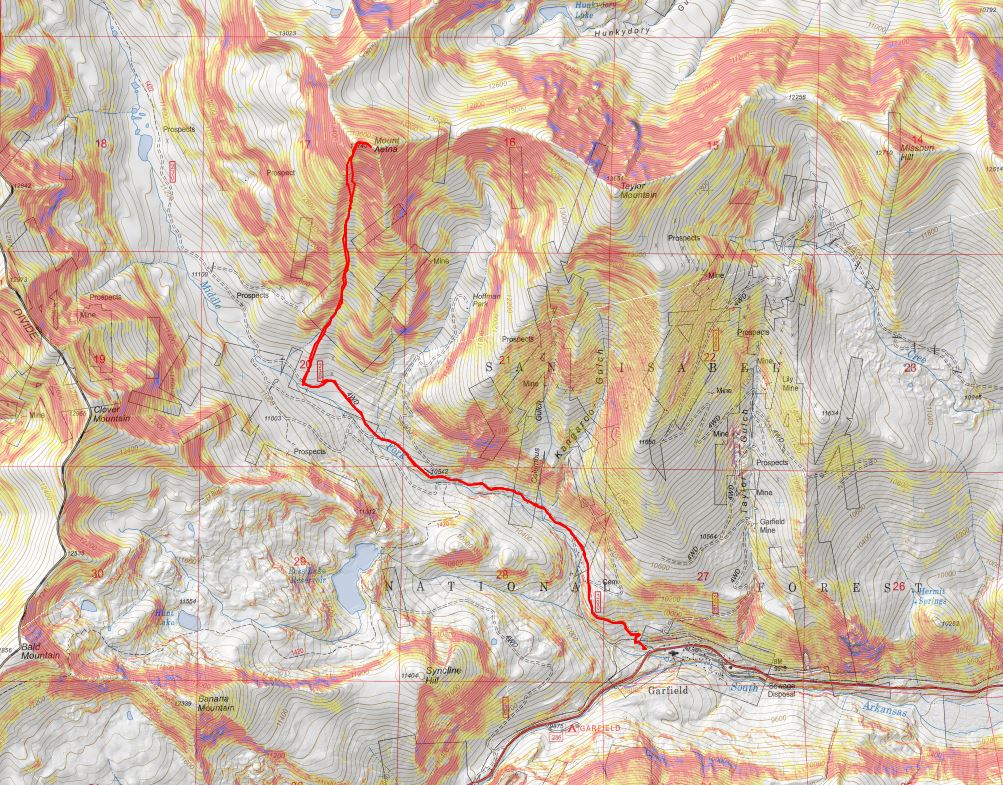
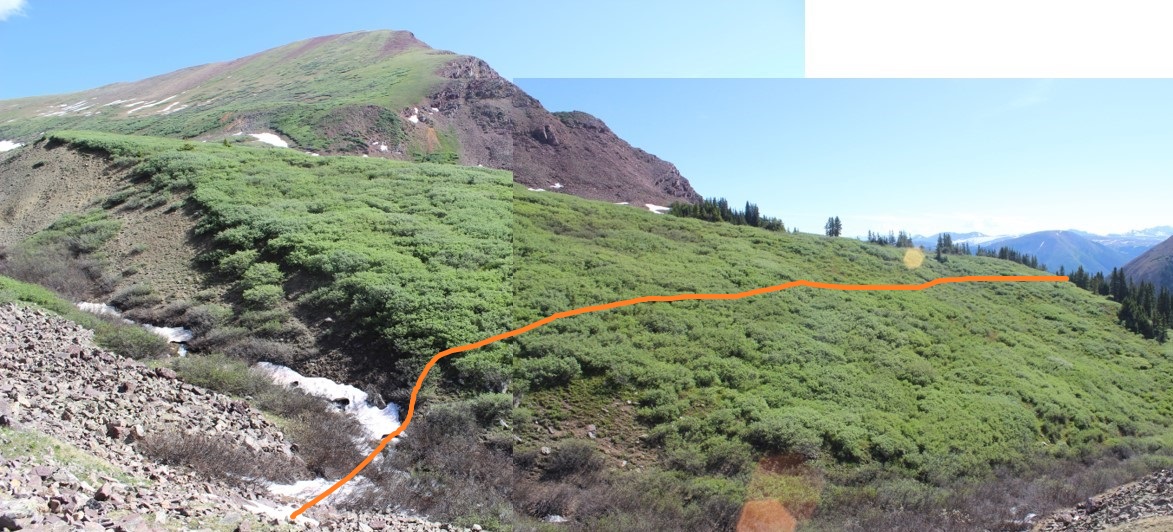
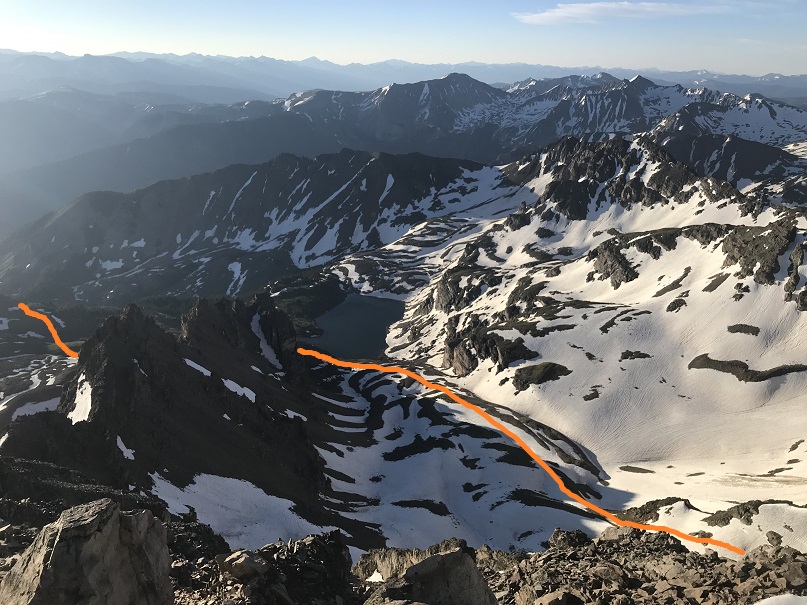
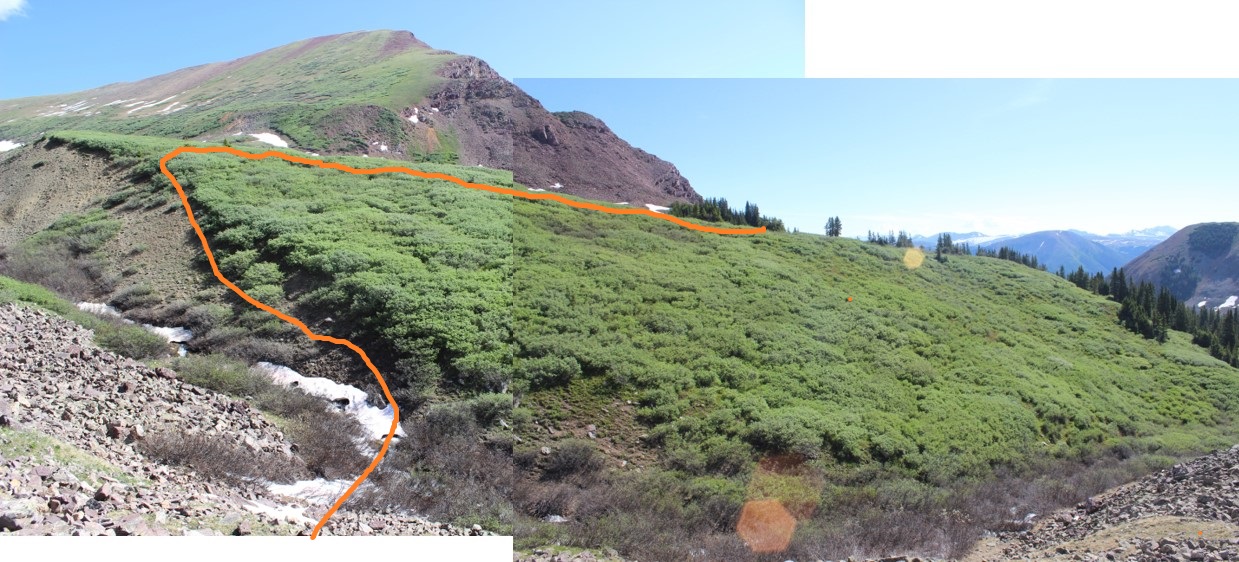
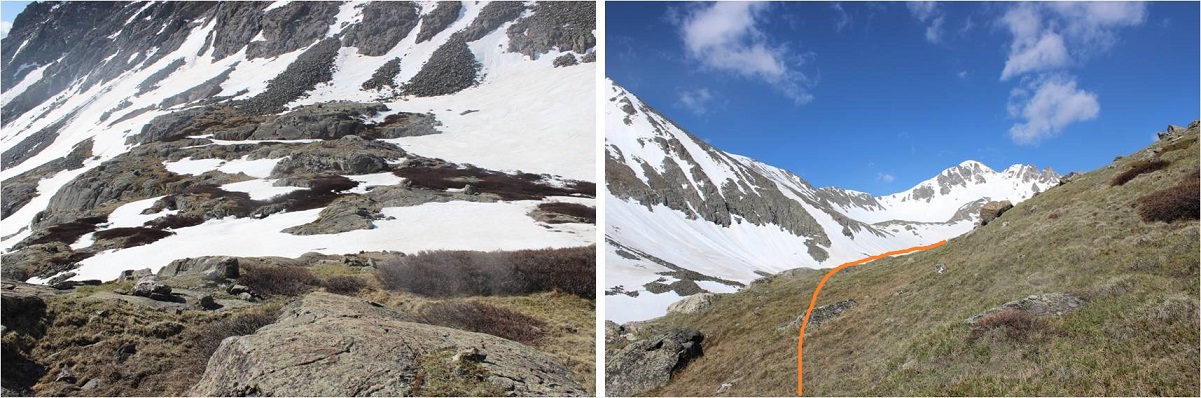
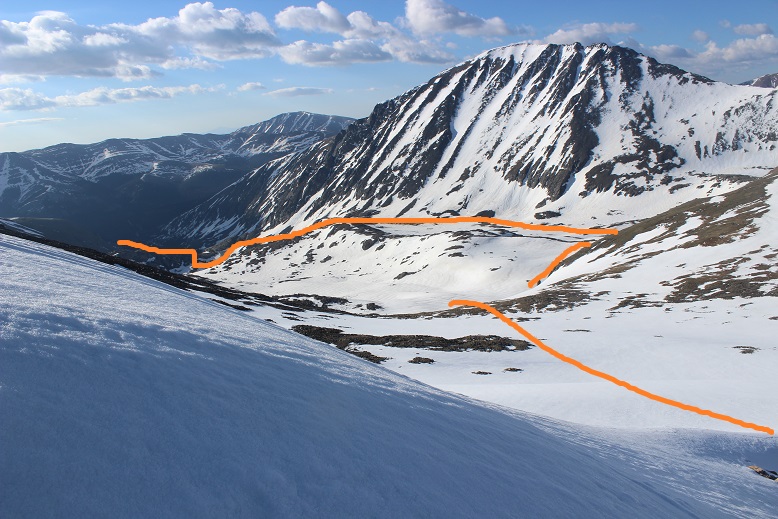
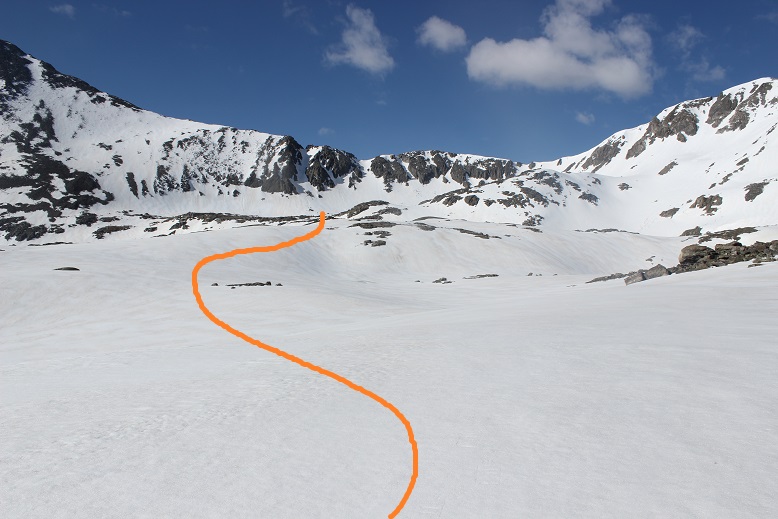
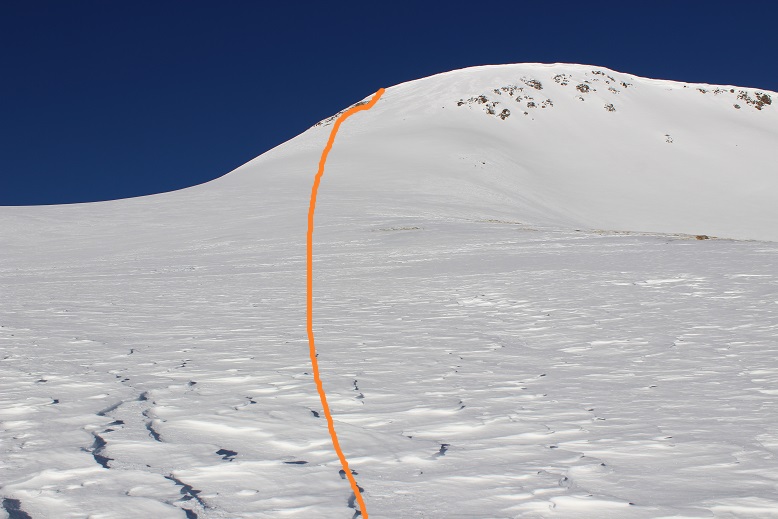
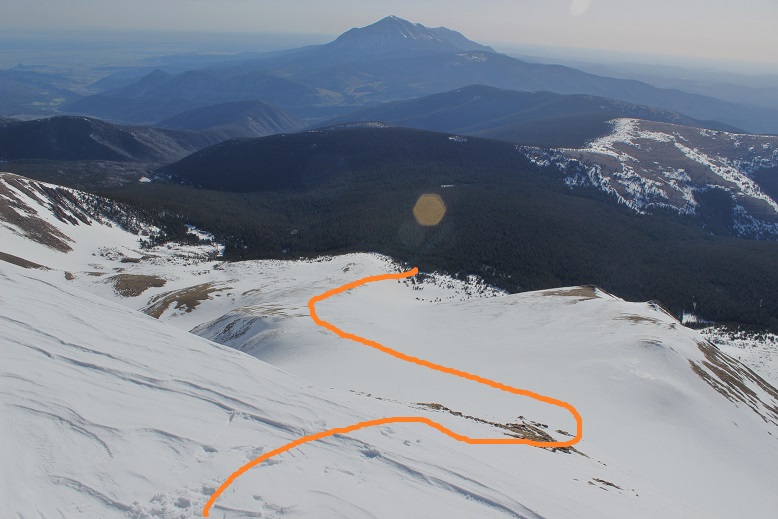
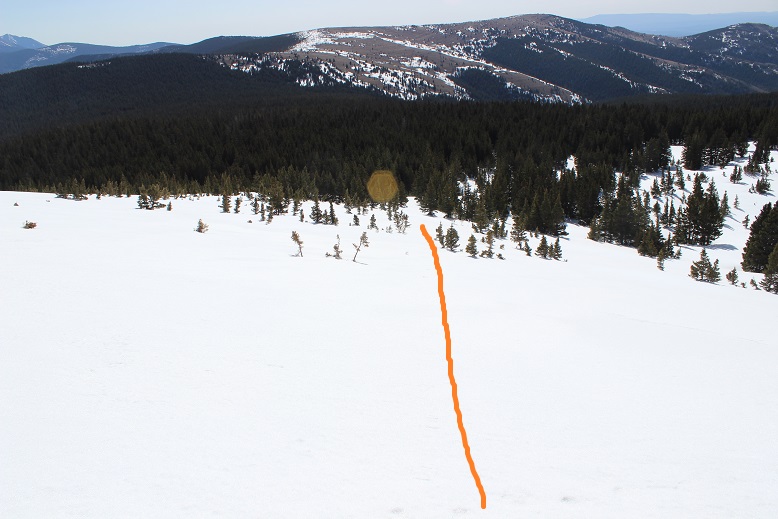
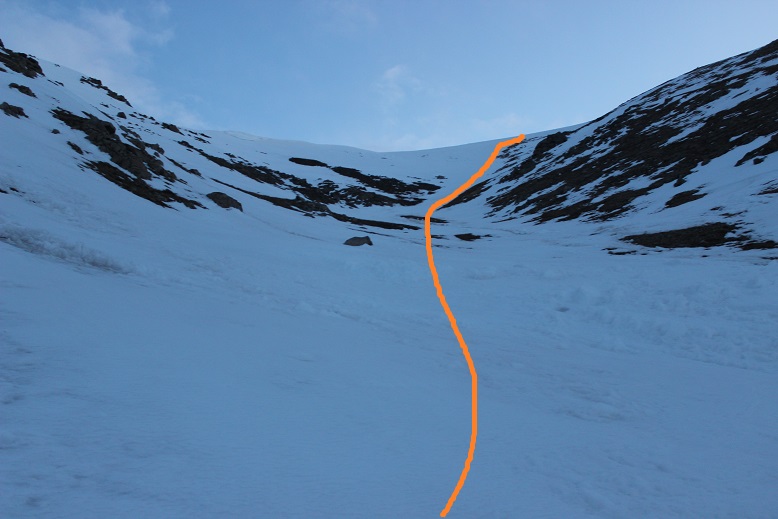
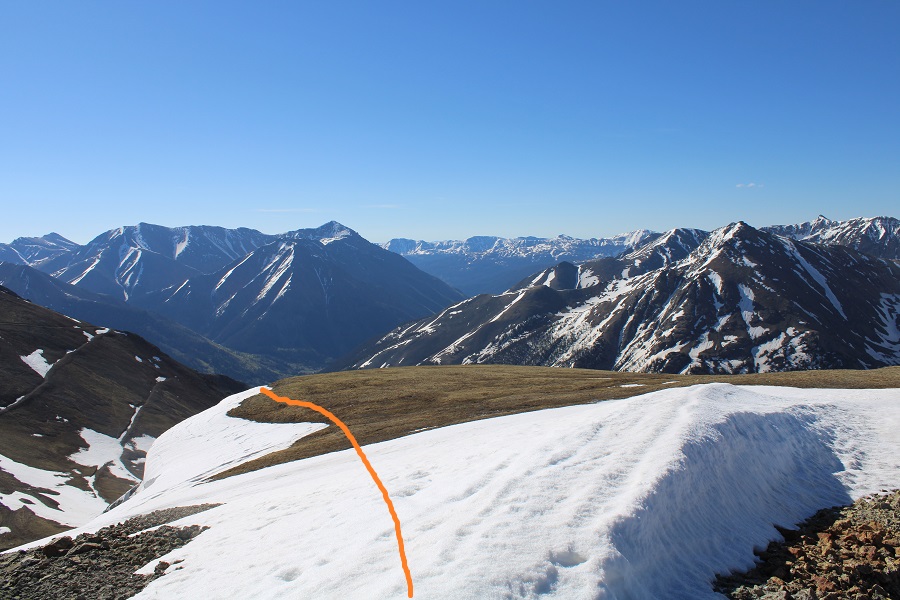
I knew there was no way I wanted to re-enter those basins, so I decided to take the southeast ridge down.  It parallels the basin, and while there was snow, a lot of it was avoidable.  Where it wasn’t I was postholing.  I had snowshoes, but was too stubborn to put them on.  Here’s the overall route out

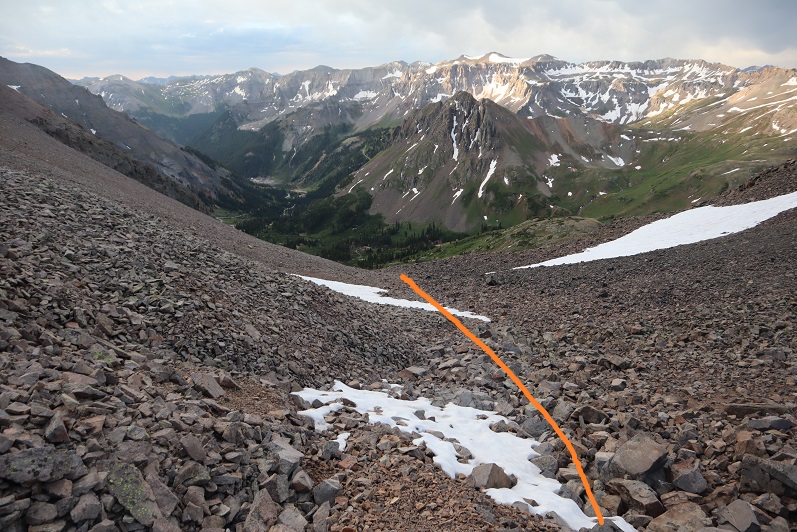
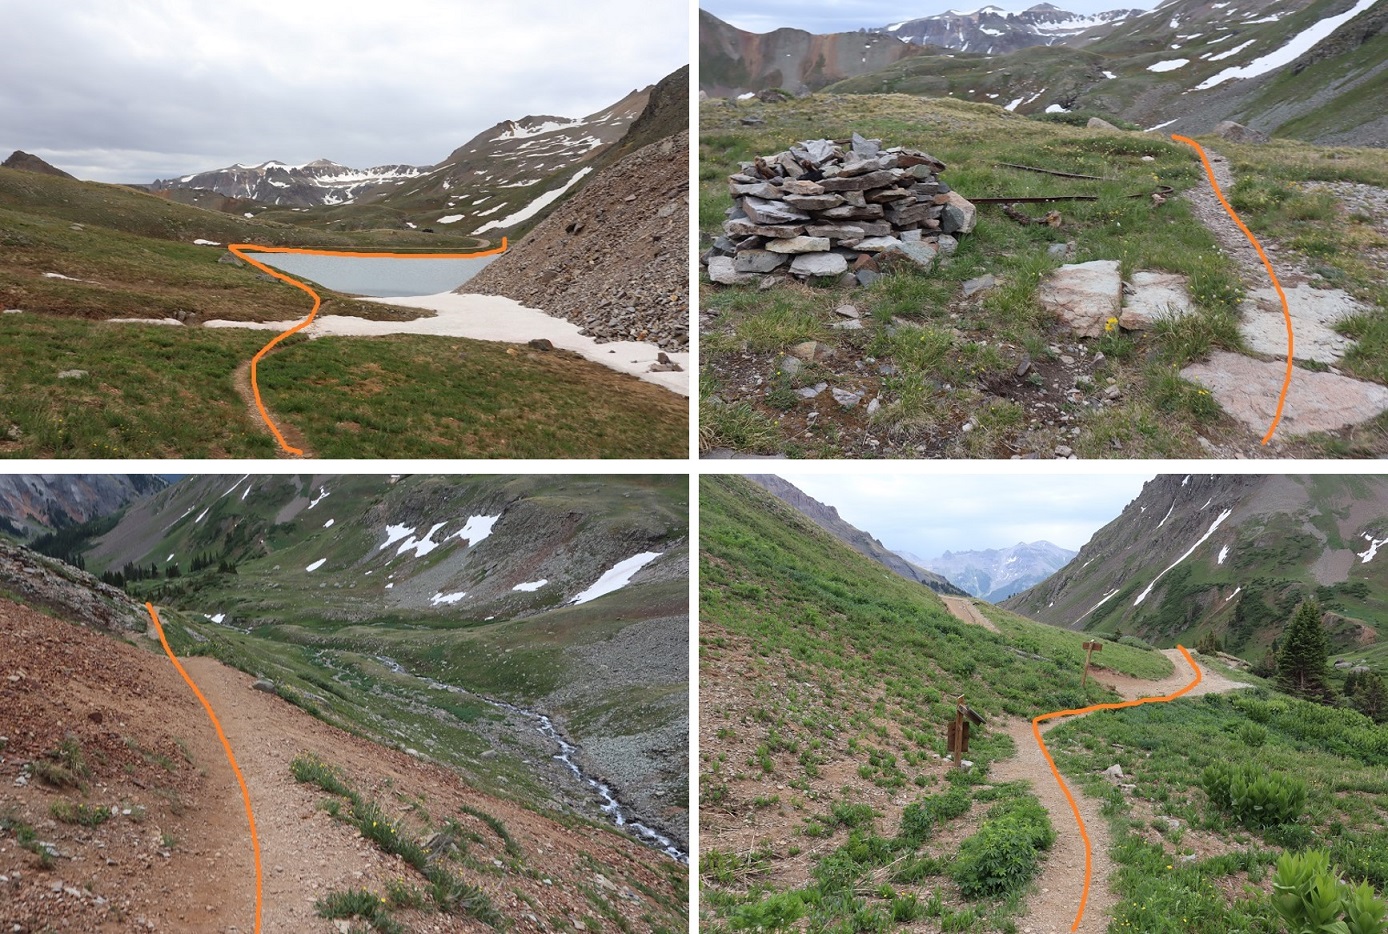
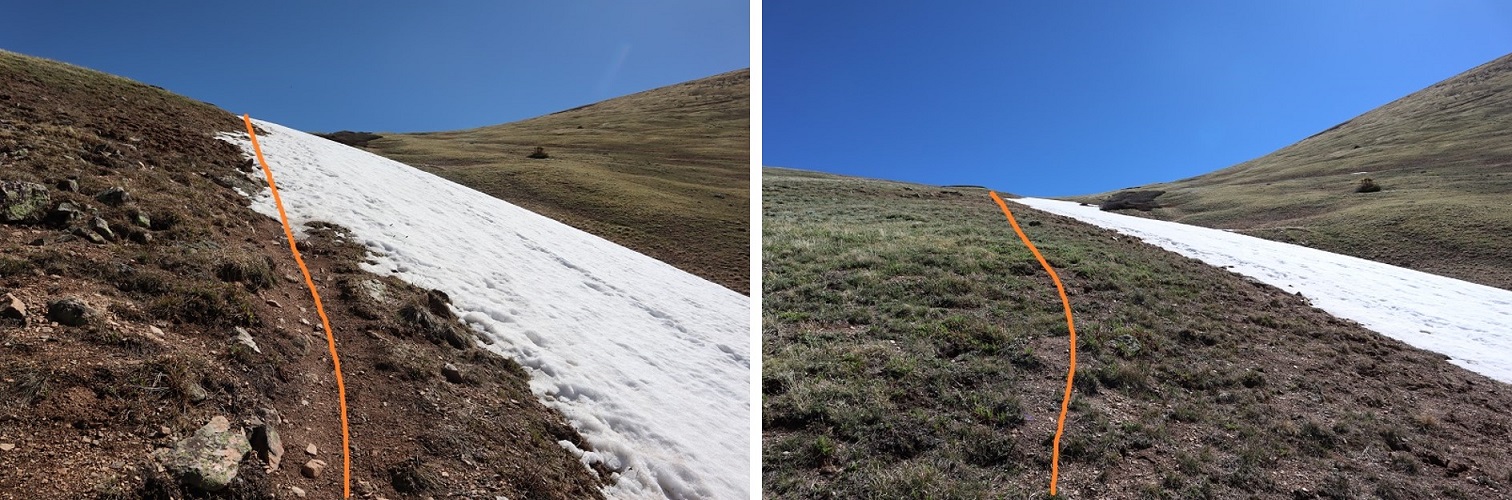
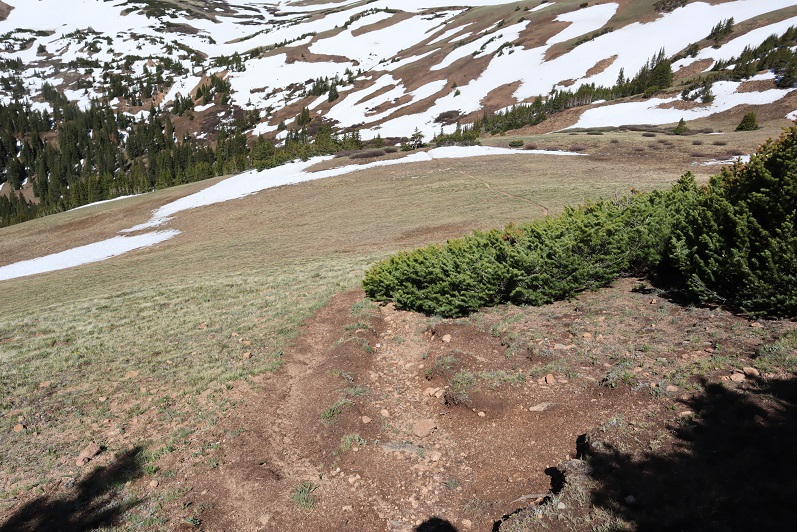
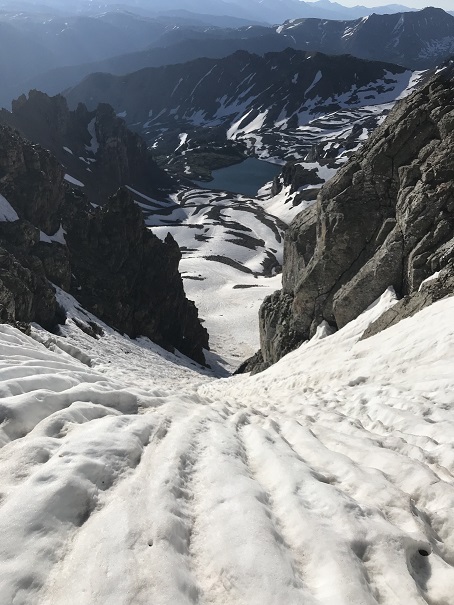
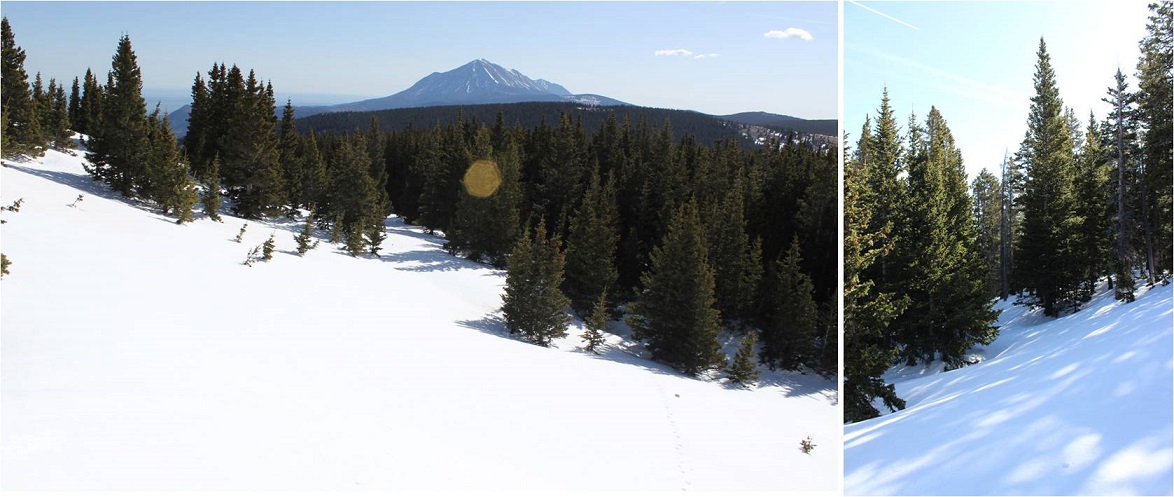
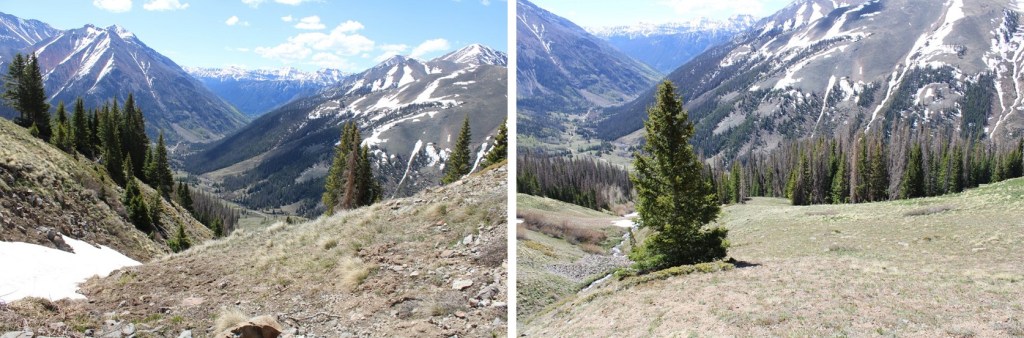
And step by step, first down the ridge

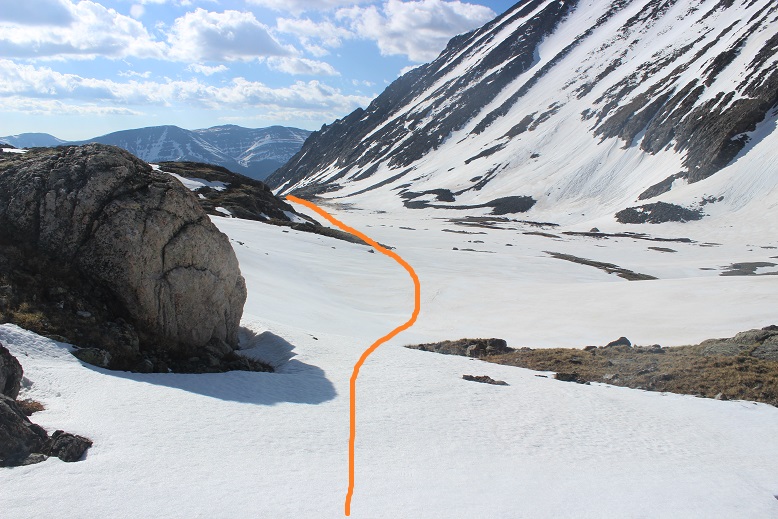
Then following Rock Creek back to CR 30

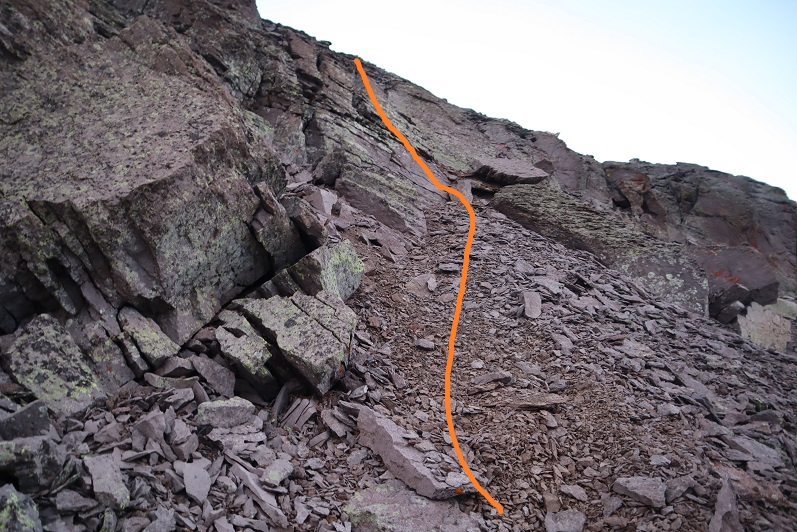
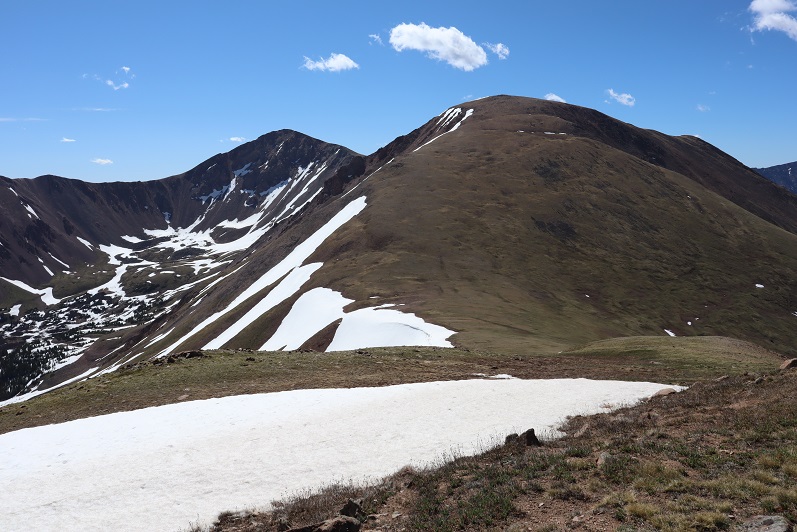
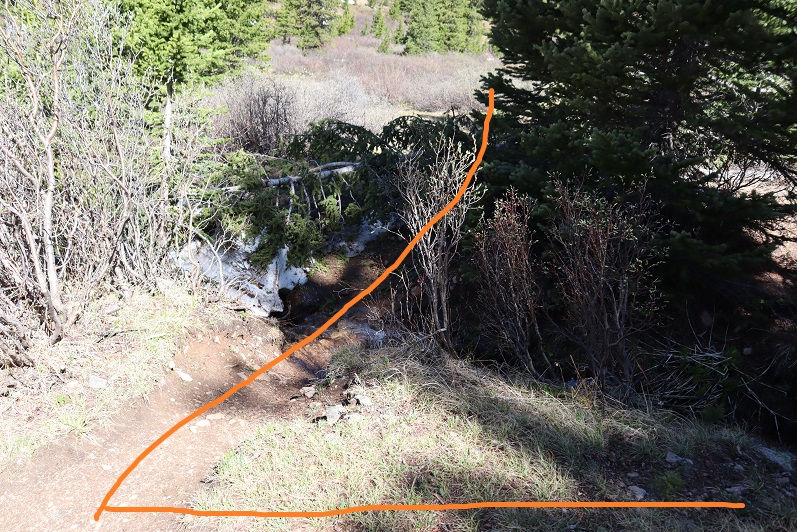
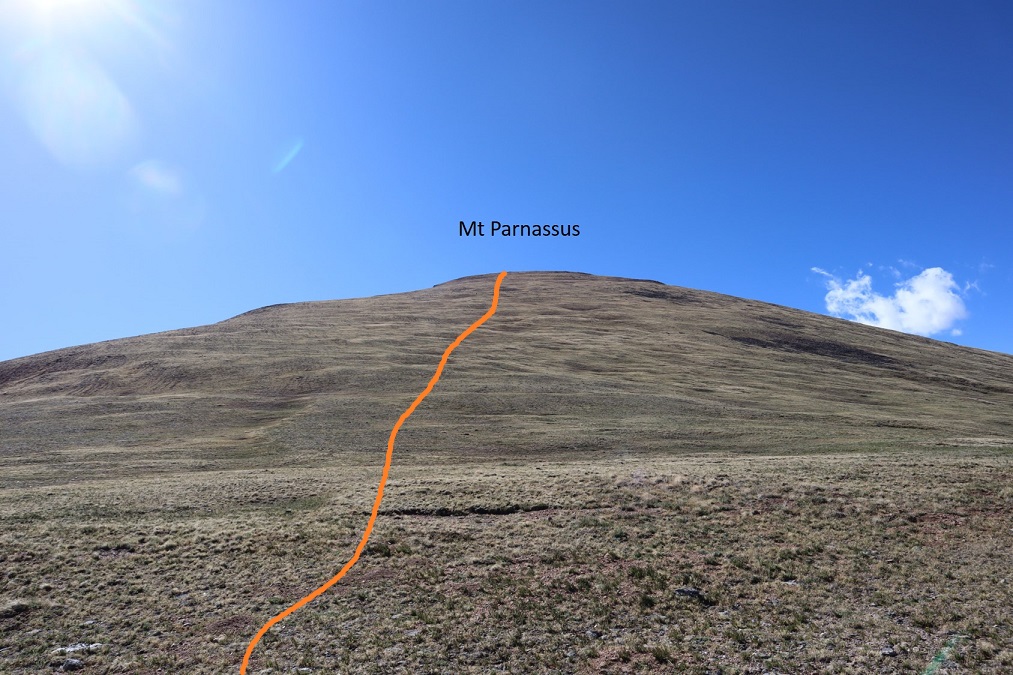
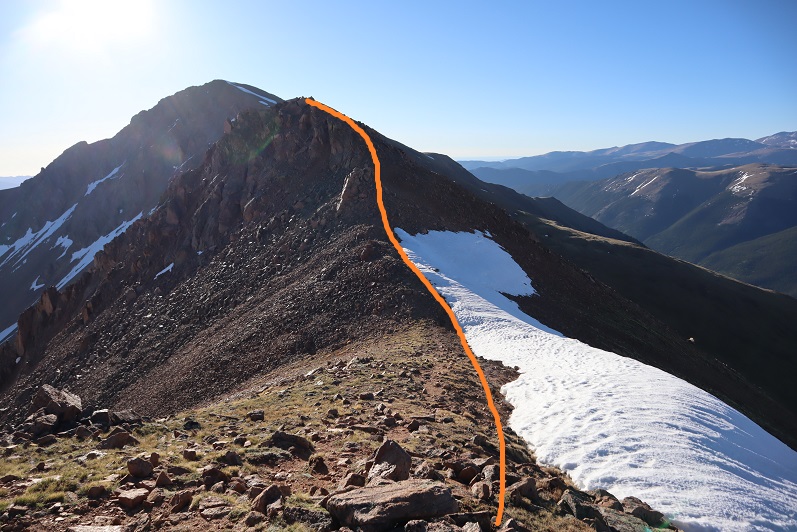
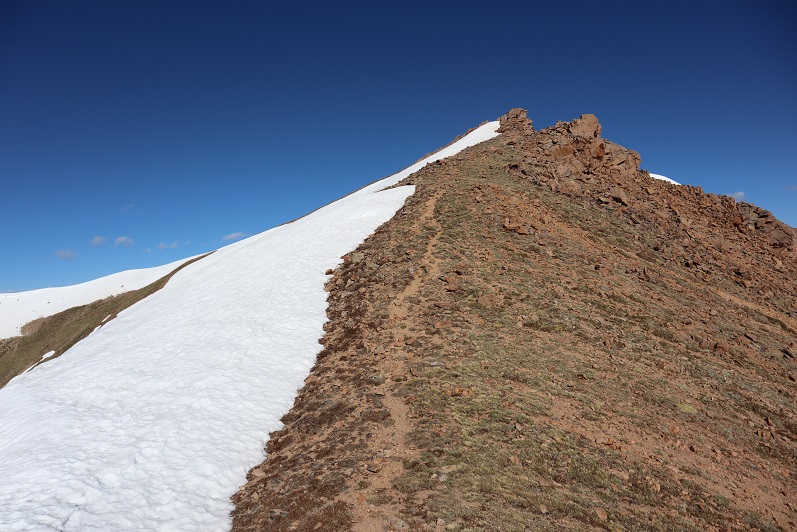
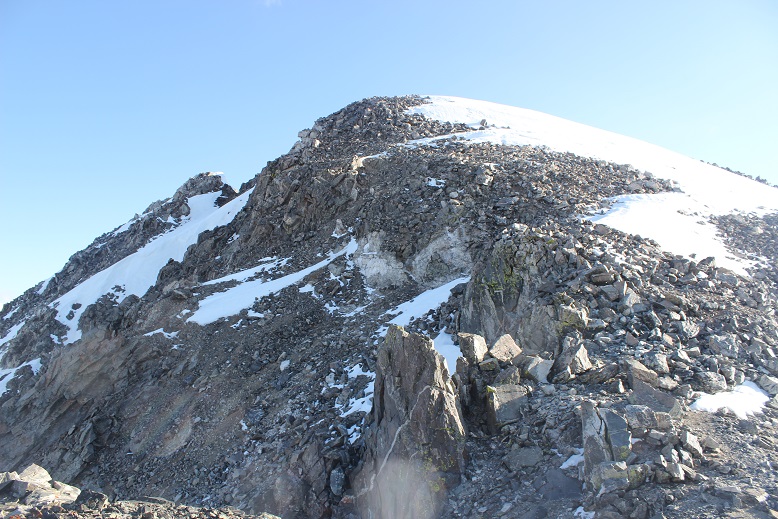
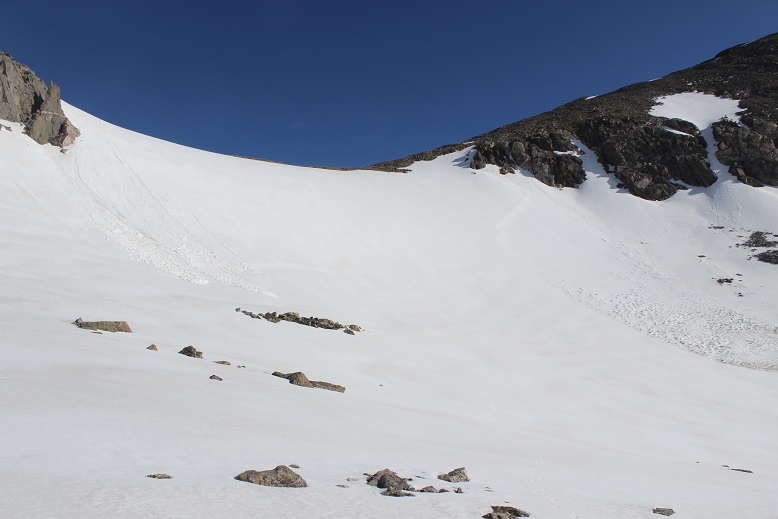
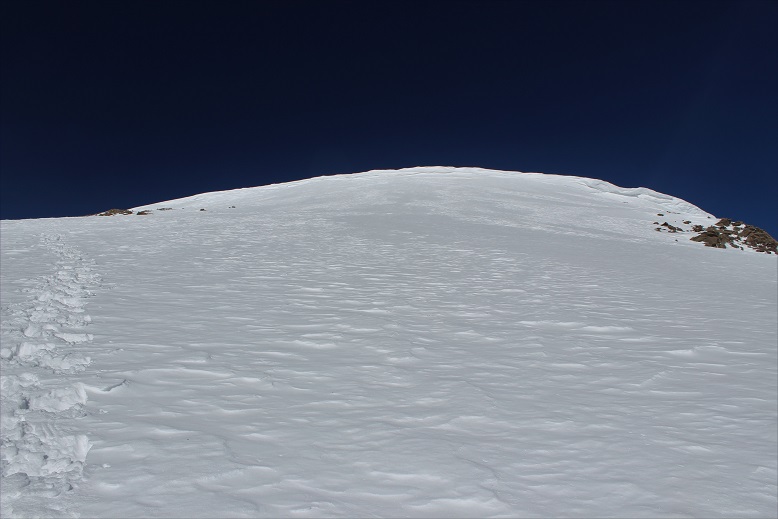
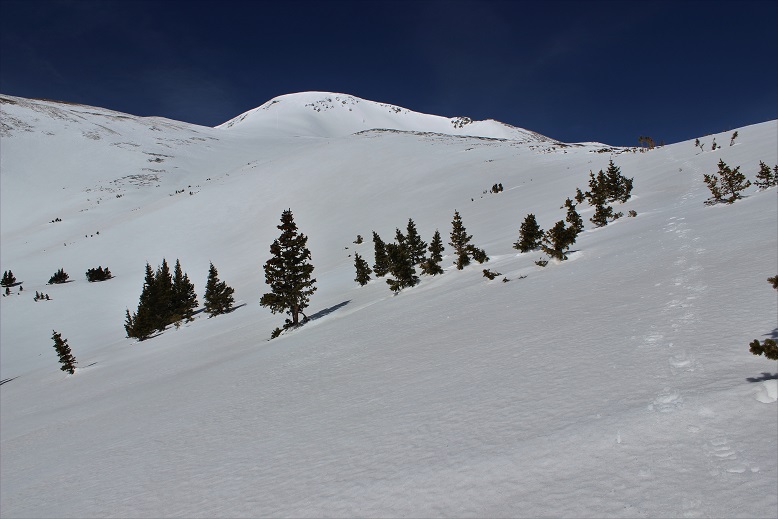
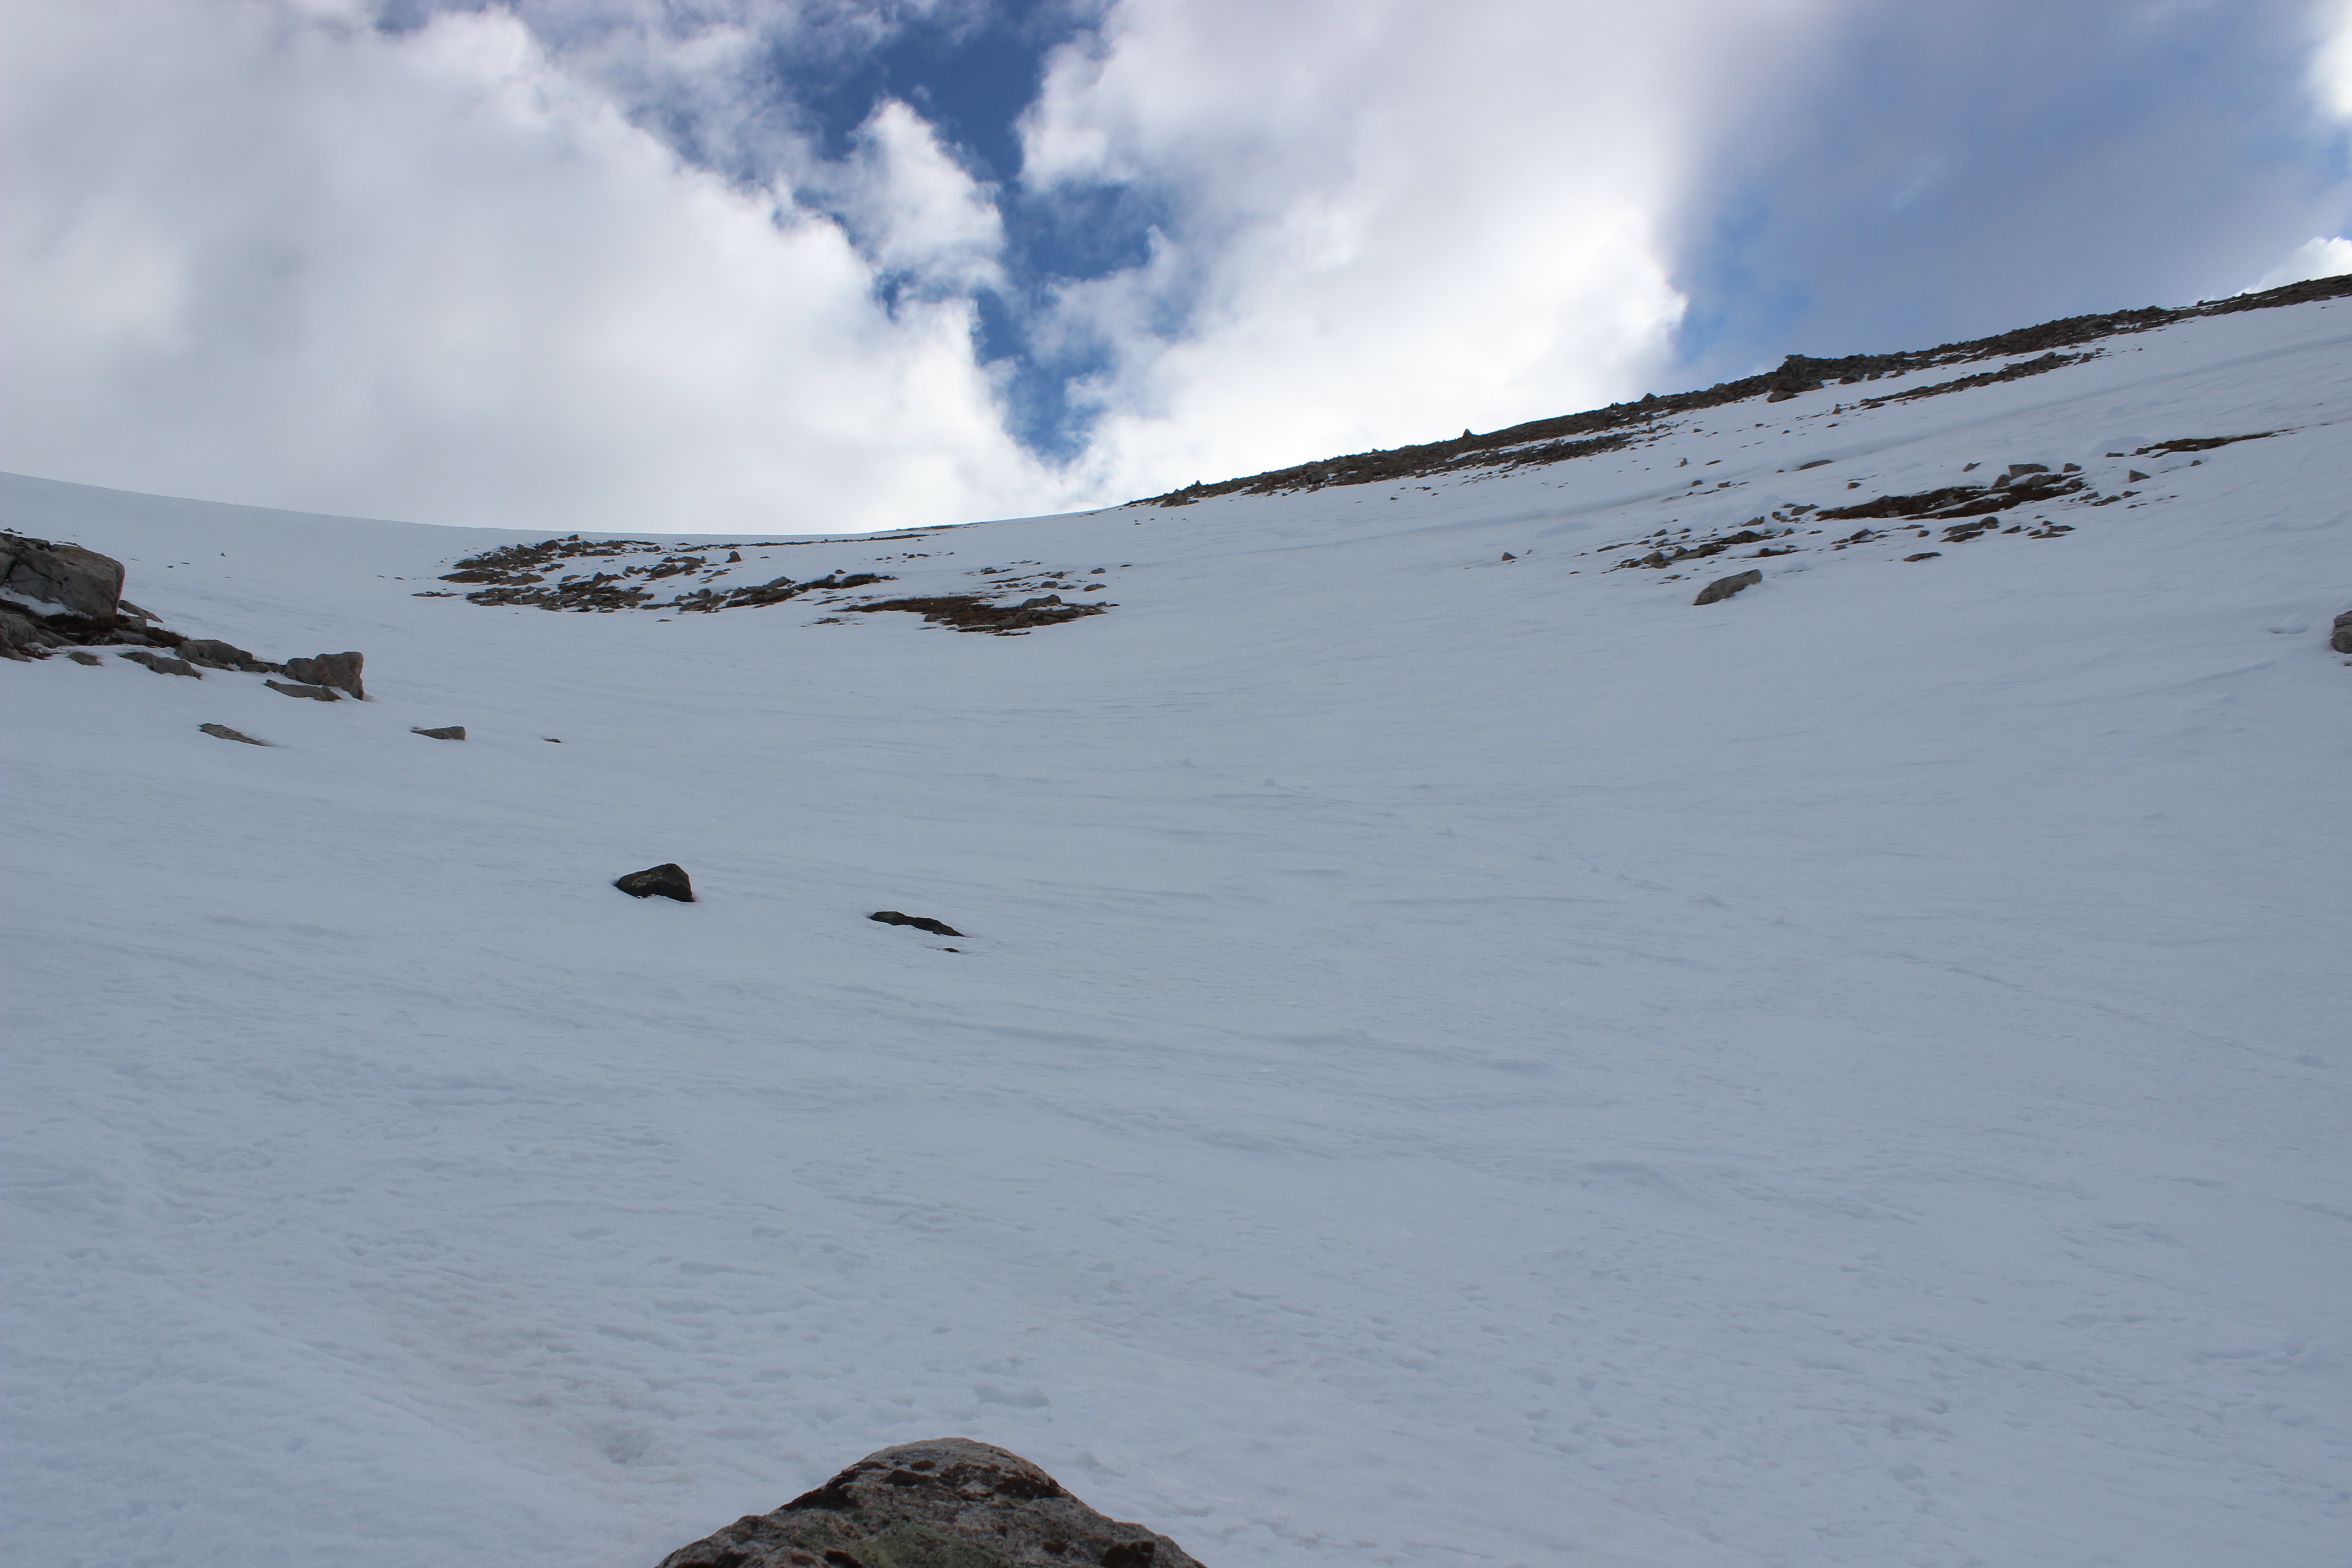
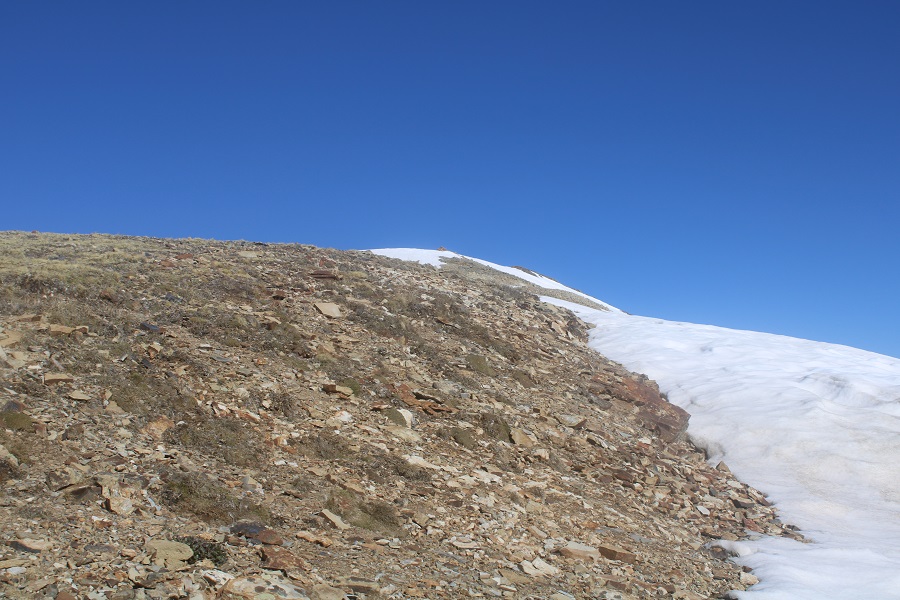
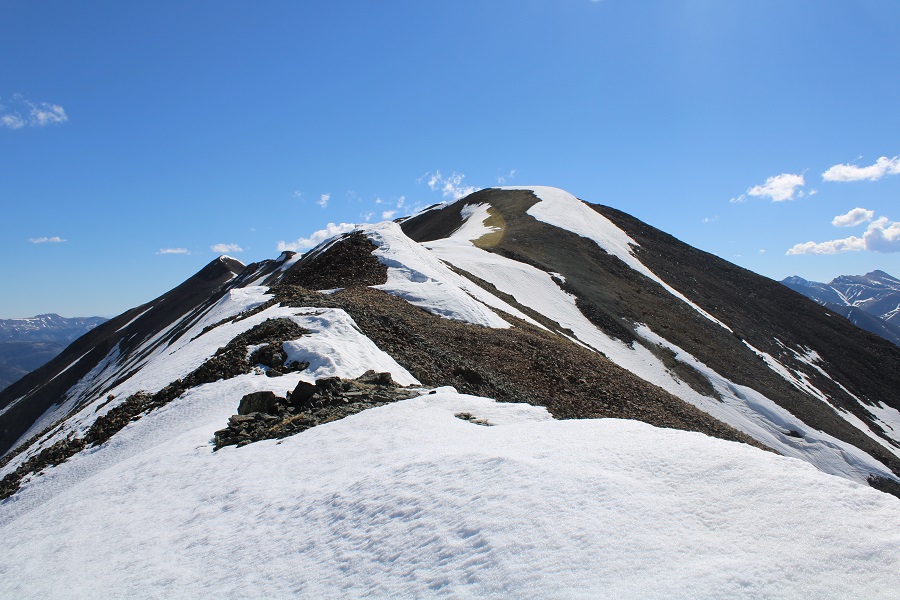
Here’s a picture looking up the ridge (in case you want to take the ridge up)

I came to the avalanche area, and it was then I realized a house had recently been destroyed (more on this in my next trip report on “C.T.” Peak). 

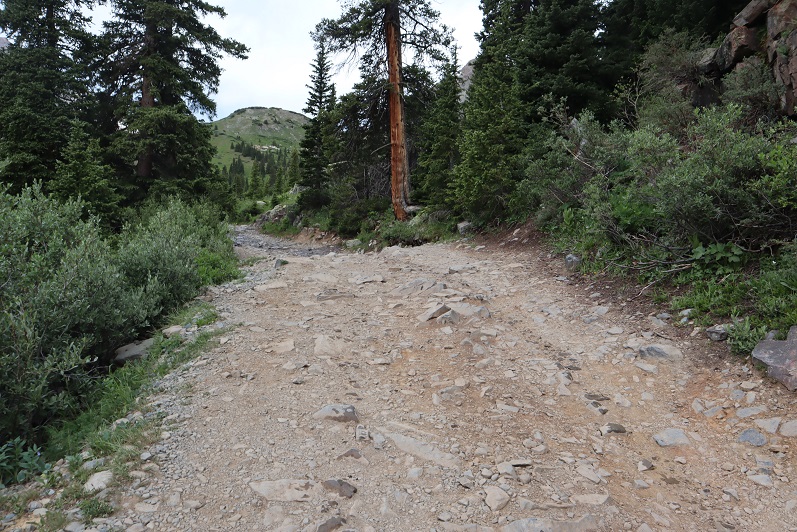
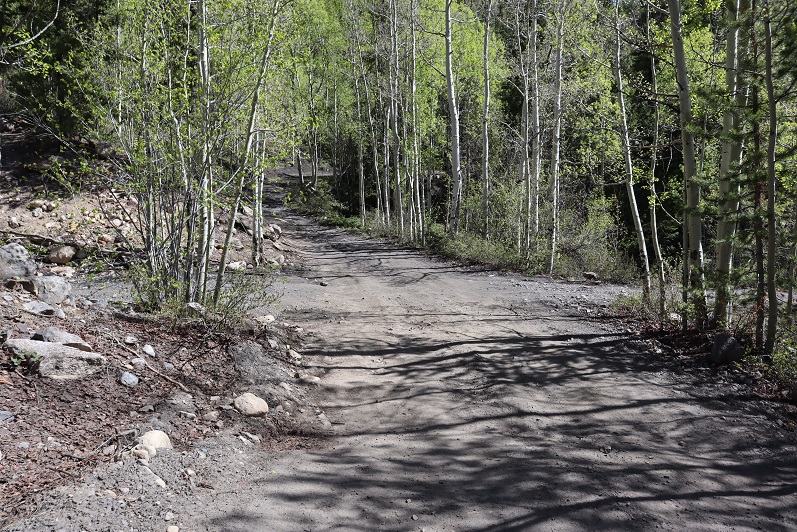
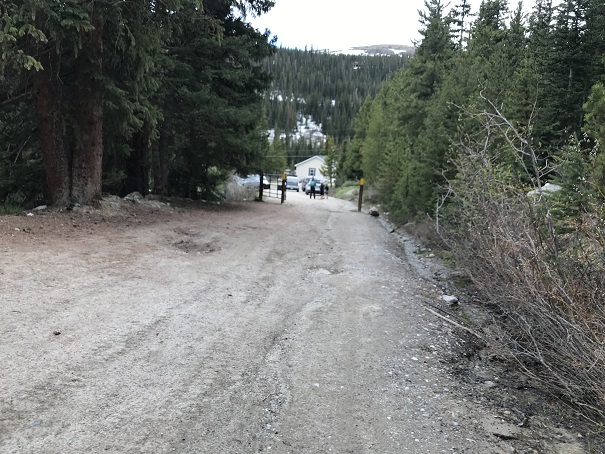
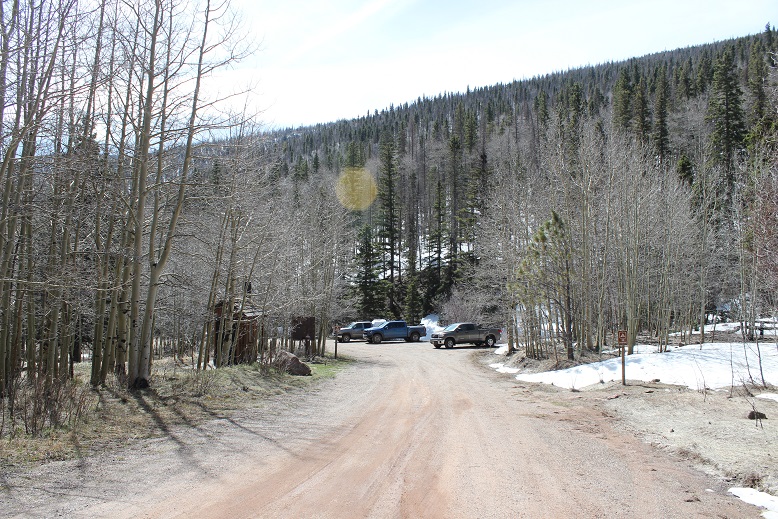
I made it back to the road and followed it back to my truck

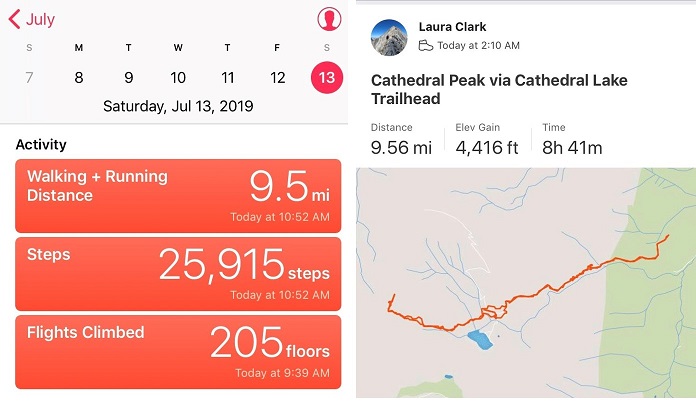
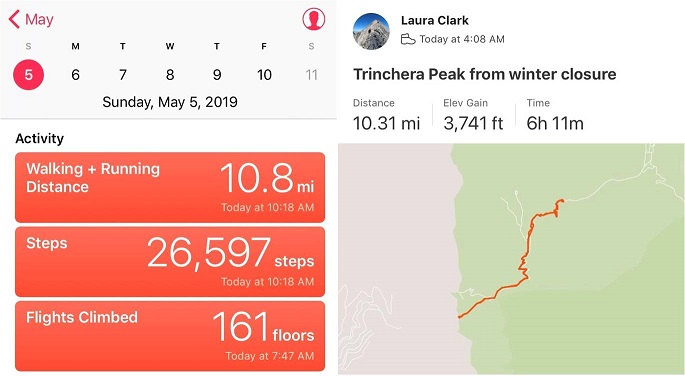
I made it back to my truck at 11:15am, making this an 8.95 mile hike with 4206’ of elevation gain in 7 hours, 15 minutes.

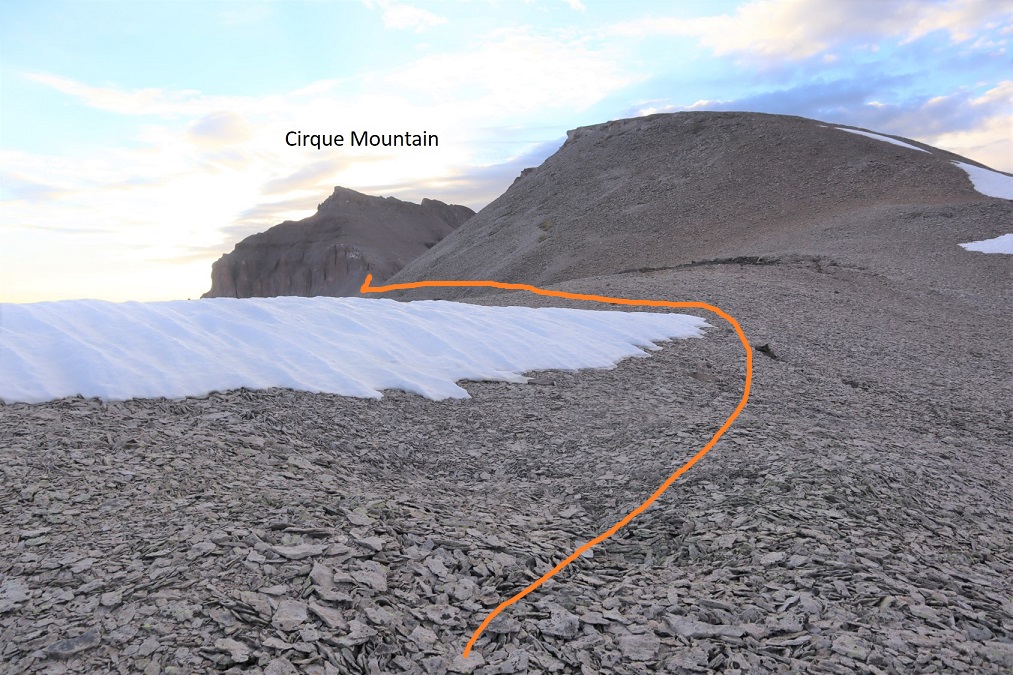
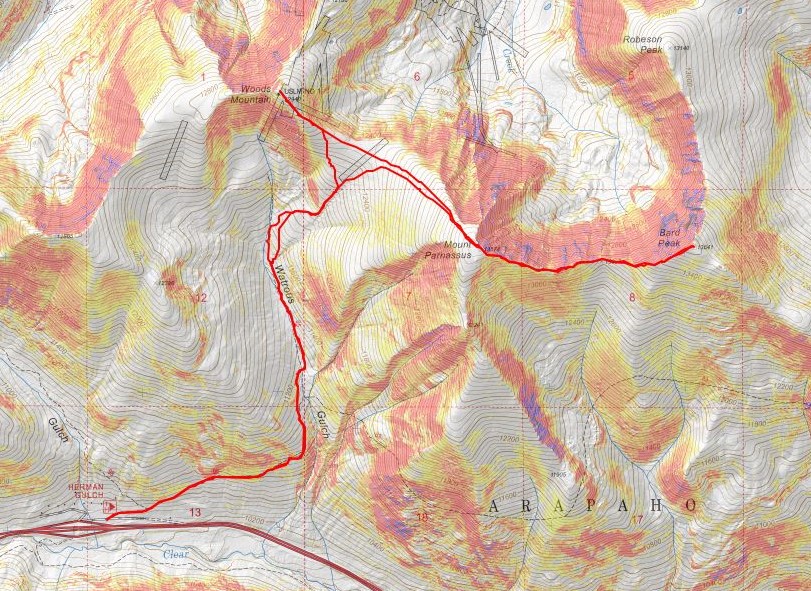
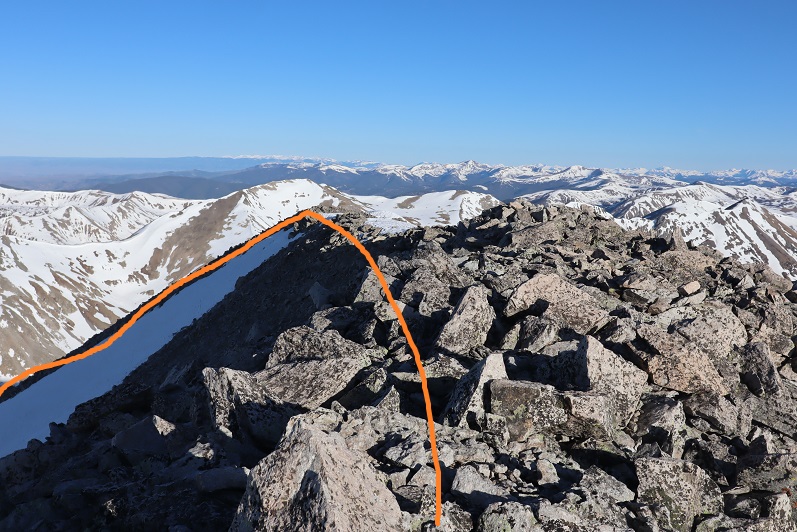
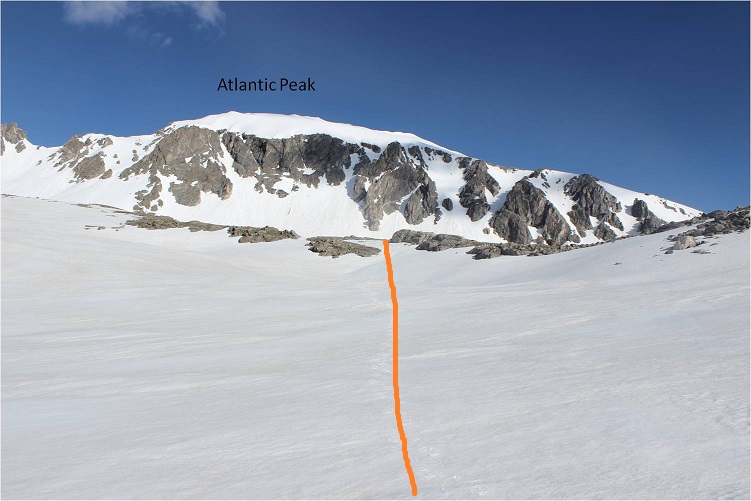
For reference, here’s a look at my route up to PT 13540 (solid line) and down (dotted line), as seen from the west ridge of “C.T” Peak.

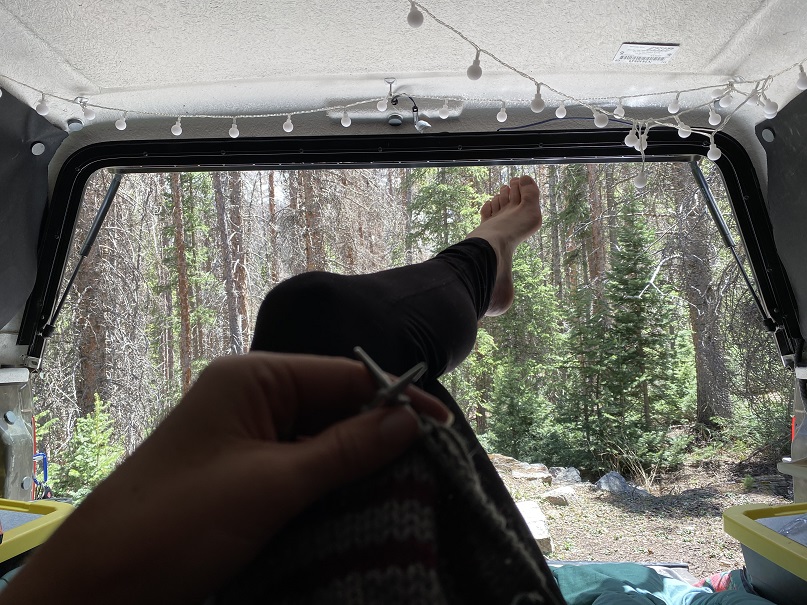
It was still early:  I’d initially intended to add “C.T” Peak on today as well, but didn’t want to re-enter the basin with the way the snow was warming up, so I switched my plans and was going to do that peak tomorrow.  Instead, I got out a book my daughter just finished reading and was eager for me to read as well so we could discuss it together.  I walked around Argentum, found some old structures hidden way up in the hills behind my campsite, relaxed, and sipped whiskey.  Dinner was a block of white cheddar cheese and some bacon.  I had new neighbors, so I welcomed them, and then made it an early night.  It rained.

Cirque Mountain – 13,686 & Gilpin Peak – 13,699

1

RT Length: 11.1 miles

Elevation Gain: 4382’


I’m kind of liking this ‘work from home’ thing that’s been going on for the past few months. Today I had a zoom meeting I attended at a Starbucks and then I was off to the Yankee Boy Basin (which I considered an appropriate place to spend the 4th of July weekend). The road to Yankee Boy Basin is easier than I remember. It’s only 4WD for the last mile or so. There’s a little bit of exposure but the road is plenty wide enough to pretend it’s not there.

2

I arrived at the trailhead and backed into a spot near the bathrooms (P.S. bring your own TP).

3

I got out and took a look around at the route I intended to take while it was still daylight. I was pretty sure I wanted to hit Cirque Mountain first, and then cross over to Gilpin Peak. Everything is different in the dark and a good visual in the daylight is helpful.

While I was looking around I heard a couple talking about Mt Sneffles. I went over to ask if they’d seen any snow on Cirque Mountain/Gilpin Peak while hiking. They were staying the night at the trailhead too, climbing Teakettle in the morning. We struck up a conversation and ended up exchanging beers and candy and 14er stories and caps full of whiskey. About an hour later two more of their friends showed up and we huddled around my truck as it rained a bit. When the rain stopped, they went over their gear and practiced some rappelling. They allowed me to tag along. I ended up calling it a night really early (I get up at 3am to work and get tired early in the evening). I’m sure I forgot to say it, so I’ll say it now: It was really nice getting to meet you all! Also, I will never be able to hear the word ‘traverse’ again and not say it twice @climbingcue, @dwoodward13, @hikesingeologictime, & @tallgrass!

4

I woke up at 3:30am, hit snooze once because I was really warm in the bed of my truck. I was ready to go a little before 4am. Tallgrass came to say goodbye and good luck. I was still groggy (I don’t wake up until about an hour into a hike). Thanks for the beer Tallgrass! I started by following the 4WD road northwest.

5

After hiking for almost half a mile I turned right and followed the small ridge up to the saddle of Kismet and Cirque.

6

7

The trail eventually narrowed and I went up a low flowing waterfall type gully

8

And then followed the scree filled gully to the saddle. All snow was avoidable.

9

10

11

At the saddle I turned right (east) and followed the ridge. Note, the point on the right isn’t a ranked peak. It’s easily bypassed by a trail to the left. I climbed it on my way back just to get in some added elevation and for the views.

12

I picked up my pace here because it looked like I could make it to the summit for the sunrise. Wow, that part of the hike hadn’t taken as long as I’d anticipated.

13

14

There was some choss and a chimney to climb. I put on my helmet and worked my way up.

15

16

There was some route finding for the last little bit as well as some easy scrambling

17

I summited Cirque Mountain at 5:45am

18

Cirque Mountain:

I made it a few minutes before sunrise and decided to stay to enjoy the show. It didn’t disappoint.

19

I also had some great views of Teakettle and Potosi to the southeast

20

I headed back the way I’d come, and decided to summit the small point and then head back down the gully

21

22

23

I didn’t go all the way down the gully. Instead when I hit tundra I turned right and headed west until I reached a small pond.

24

At the pond I hooked up with the Wrights Lake Spur trail and followed it until the first switchback.

25

Right about now it started to rain. I looked back on Teakettle and thought about my new friends hiking up there. I hoped they were staying dry.

26

The trail was an easy to follow, class 1 trail. At the first switchback I left the trail to continue heading west towards the saddle. There was a little bit of snow to contend with here so I put on my microspikes and walked across.

27

28

At this point I could see there was a gully I’d have to ascend that was still holding a little bit of snow at the top

29

Once on the saddle I followed it south. On the ascent I made the wrong choice and tried to ascend directly up the gully. This got me onto very loose, chossy terrain and took me longer than necessary to figure out. The rocks were the size of toasters and none of them were stable. Large sections would move below me at a time, taking me with them. On my way down I found a better route, so I’ll describe that route here.

From the ridge, dip down to the left to go around this first obstacle

30

Next, hug the area where the snow meets the rock. I’m pretty sure there’s an actual trail here under the snow

31

From here I’d wanted to ascend directly up the gully. DON’T DO THAT. Instead, try to make it as close to the ridge as you can

32

33

At the small saddle there was snow to contend with (a lot more snow than the pictures suggest). Glad to have brought my ice axe and crampons (something I do on every hike I don’t have beta on) and got to work kicking in steps and climbing over the snow. There was probably 30 feet worth of work to do over the snow at its narrowest point.

34

At the saddle I sat down to take off my crampons. From here it was a short trek to the summit, after first going over a false summit. This was all class 2, but I kept my helmet on.

35

36

37

I made it to the summit of Gilpin Peak at 9:30am. It was lightly snowing.

38

39

Gilpin Peak:

Here’s a look at the route I took out the basin from the summit

40

I turned and headed back over the false summit and headed back to the saddle

41

Because I’d already kicked in steps I made the decision to put on microspikes instead of crampons to go down the snow. This was a bad idea, but I didn’t realize it until I was already too committed. I made it down the snow safely, but I was shaking as I did so: crampons provide much more stability than microspikes (duh) and I wasn’t very stable on the downclimb. I relied a lot on my ice axe.

Here’s looking at the ridge back down

42

43

I re-crossed the snow below, this time without traction: I boot-slid my way across much of the snow.

44

I made it back to the trail and there was a family standing there, waiting for me. There was a mom and dad and grandparents with 6 kids who all had to be under 10 years old. They’d been watching my descent, and the father asked if I would show the kids my gear (crampons, helmet, ice axe). The kids were fascinated with the equipment, and proudly told me they were hiking to the lakes. I wished them luck and was on my way.

After making it to the pond I followed the class 1 trail above Sneffles Creek until I made it to a road, and followed the road back down to my truck.

45

Just before making it to the road I passed what I thought was a trail register. I opened it and found one of the most confusing maps ever! Not only did it not correspond with the visual direction of the peaks, north was at the bottom. This map is going to get a lot of people lost.

46

I passed a jeep that had gotten stuck. Everyone pitched in to get her un-stuck.

47

It was easy to follow the 4WD road back to where I’d parked my truck

48

I made it back to my truck at 11:15am, making this an 11.1 mile hike with 4382’ of elevation gain in 6 hours, 15 minutes.

49

I still had plenty of time left in the day, so I decided to drive to the next trailhead and attempt another mountain.

Mt Parnassus – 13,580, Bard Peak – 13,641 & Woods Mountain 12,940

1

RT Length: 10.25 miles

Elevation Gain: 4965’

This was my third attempt going for Bard Peak. The first time I made it as far as Parnassus, but the wind and cold temperatures (and Raynaud’s) prevented me from going any further. My second attempt was from the Berthoud Falls area, and the snow just wasn’t cooperating. Imagine my surprise when I found out today this is actually an easy trail when not in full winter conditions!

I parked at the Herman Gulch trailhead and was on the trail by 4:30am. This trailhead has tons of parking, but beware: it fills up fast. There was a full moon and I could see by looking at the mountains I wouldn’t be needing snowshoes today, so I left them in my truck.

2

The trail starts in the middle of the parking area. I took the Herman Gulch trail to begin, which is just behind the information signs.

3

4

After hiking .2 miles I turned right (east) at this junction to follow the Waterous Gulch Trail.

5

This trail is an easy, class 1 trail all the way to the basin. Last time I was here the area was covered in snow and I had no idea there was a trail that went that far. Today the hike was easy! No real route finding below treeline.

6

7

After hiking for about 1.5 miles I came to a creek crossing in Waterous Gulch, crossed the creek on an icy log by sitting down, straddling the log, and shimmying across (due to the ice I would definitely have slipped if I’d tried to cross standing up). I turned left and headed north through the gulch on a great trail (still the Waterous Gulch Trail).

8

9

10

Starting here there was snow on the trail, but just enough to be annoying: I could still figure out where the trail went

11

I crossed a small stream and continued on the trail. Note: You can also choose to go right and not cross the stream here and take a parallel trail that leads you to the exact same place as the Waterous Gulch trail. I stayed straight here and continued to the end of the gulch on the way in and took the parallel trail on the way out. They were similar, but the one that follows the gulch also follows the stream, which was nice.

12

I followed the class 1 trail to the end of the gulch, and after 2.2 miles of hiking turned right and continued following the trail up to the saddle of Woods/Parnassus. There are a lot of ways to gain the summit of Parnassus. Last time I hiked further south, avoiding the saddle, and I would not recommend that route. Instead, take the easy gully and aim for the saddle and go as far as you can before turning right and heading southeast towards the summit. This is where the intense wind started and didn’t stop. Forecasted winds were 17-24mph, but those winds don’t knock you over. For the rest of this hike I was using my trekking pole for stability, hiking sideways into the wind.

13

The trail stopped here somewhere under the snow. I paralleled the snow to the saddle

14

At the saddle I turned right and headed southeast towards the summit of Mt Parnassus. This is an easy hike on tundra.

15

The terrain gets a bit rockier near the top.

16

The summit is relatively flat. I summited Mt Parnassus at 6:40am, after just over 3.5 miles and 2 hours of hiking. Since this is my second summit of Mt Parnassus I’ll spare you the selfie and let you watch the summit video instead.

Mt Parnassus:

Bard Peak is just over a mile east of Mt Parnassus.

17

There’s a bit of a trail from Parnassus to Bard. I followed it where I could. It was faint, so sometimes I lost it, but mostly followed the ridge. It’s important to follow the ridge when snow is present. This ridge is easy class 2 ‘scrambling’. Just watch for loose rocks. I could see a faint trail go to the right of the ridge (south), but it became covered in snow and would have been difficult to cross. Here’s an overview of my route

18

And some close-ups in order:

19

20

21

When I got to this section I did not feel comfortable traversing without crampons and my ice axe (luckily I had both). I sat down, strapped on my crampons, and crossed the snow. The snow was slippery at this time in the morning (not mushy, more like icy). You could probably traverse this section with just microspikes if you were here at the right time of the day.

22

Because I could I kept the crampons on until the last of the snow.

23

Here’s looking back on the section you want to avoid, and the reason I stuck to the ridge. You can also see a slip here would take you a ways.

24

After taking off my crampons and putting them away I headed up to the summit of Bard Peak, keeping close to the ridge

25

26

I summited Bard Peak at 7:50am, after 4.7 miles of hiking.

27

Bard Peak:

There was a broken summit register and a benchmark on the summit

28

Now to head back to Mt Parnassus. I backtracked down to the saddle, put on my crampons again, got out my ice axe, and crossed the snow.

29

30

31

It was easy to avoid the snow on the rest of the way back to Parnassus

32

33

34

35

From the summit of Mt Parnassus I descended the way I’d summited, back down to the Woods/Parnassus saddle

36

When I made it to the saddle I still wasn’t tired so I decided to summit 12er Woods Mountain as well. This summit doesn’t require much guidance: it’s an easy tundra stroll to the top. This added 460’ of elevation gain to the hike. This is where the wind became the most intense (yes, it was still blowing). It was so windy I was hiking sideways with each step, and had to over-compensate each step to stay in a straight line, crisscrossing my steps as I went.

37

I reached the summit of Woods Mountain at 9:40am. I’ll spare you the selfie of this one as well, since I’ve already summited this peak. Here’s the summit register and a video

38

Woods Mountain:

This wind was insane! Time to head back down to the saddle and back down to the gulch

39

40

41

I followed the trail back down the gulch, over the log bridge, and back to the trailhead. This is where I started seeing a lot of other hikers. When I made it to the trailhead the large parking area was completely full.

42

43

44

I made it back to my truck at 11am, making this a 10.25 mile hike with 4965’ of elevation gain in 6.5 hours. Here’s a topo map of the route:

45

I felt really good about the hike today: The weather had been warm, no clouds, not much route finding, and when I made it back to my truck I wasn’t even tired yet. The only thing that could have been better was the wind. It’s amazing how good conditions can change the outcome of a hike!

Mt Aetna – 13,745

1

RT Length: 8 miles

Elevation Gain: 4103’

I’m not a fan of couloir climbs, but feel they are something I should practice. I intentionally chose to climb Mt Aetna when there wasn’t a ton of snow so I’d have the option of hiking on either snow or rock.

I left my house at midnight to a swirl of thousands of Miller moths. I’m not exaggerating; as I opened my garage door they swarmed my truck and at least 5 made it inside the cab with me. I spent the next few hours doing my best not to get frightened when one flew past my face.

The drive was uneventful, but I saw no less than 6 police vehicles in the short drive from 285 to the Boss Lake Trailhead (seemed excessive for such a remote area at this time of night). Memorial Day weekend should be interesting. I parked at the lower trailhead so I could add the 1.4 miles each way and hopefully some elevation gain: I’m still trying to keep my average at 10 miles per hike with 4000’ of elevation gain and I’m a little under that right now so every little bit helps.

2

I parked and was on the trail by 3:15am.

3

The 230 4WD road isn’t that bad to drive or to hike. I was glad I’d parked where I did because there were downed trees on the road before a little ways before the trailhead

4

At the trailhead sign I went right

5

And at the fork in the road I went left (the road has a chain across it and a “no trespassing” sign to the right)

6

The trail follows the 230 4WD road for 2.5 miles from the lower parking area. At 2.5 miles if it were light out you could see Mt Aetna on your right. I could have driven the entire way to this spot if there hadn’t been downed trees in the way.

7

I turned right and crossed a boulder field. These rocks were loose and rolled. Since it was still dark I couldn’t see where I was going, so I headed northeast. As the sun started to come up it was obvious I had a lot of options for today’s summit. Here’s an outline of the route I took:

8

There is actually a lot more snow than it looks like from far away. I followed the gully about a third of the way on rocks and tundra until I had a decision to make: take the ridge to the left, the ridge to the right, ascend the scree just to the right of center, or put on crampons and go straight up the snow

9

10

I decided today was a good day to practice my couloir climbing. The snow was firm and I wasn’t the slightest bit tired yet. I strapped on my crampons, got out my ice axe (I brought along two proper ice axes this time but only needed one) and got to climbing.

11

I changed my intended route several times because the snow was steeper than it looked in some sections.

12

13

Once I made it to the ridge I found it was easier to keep my crampons on and walk along the snow than it was to walk on the loose rocks, so for as long as I could I stuck to the snow

14

Eventually the snow ran out and I followed the rocky but (mostly) dry ridge to the summit

15

16

17

I summited at 7am and kept thinking to myself “that was much easier than I’d anticipated: why don’t I like couloir climbs again?”

18

Mt Aetna Summit:

I stayed longer at the summit than I usually do, taking a good look at the nearby mountains I wanted to summit tomorrow, checking to see if the crux area was free from snow. It looked like it was, but a lot of the area seemed to be hit or miss with snow and too much was still in shadows to be completely sure.

19

20

Here’s the route I took down, keeping to the snow as much as possible.

21

22

Make no mistake, it’s steeper than it looks but the snow was still firm and I was able to walk down the entire way without turning to face the mountain.

23

What’s nice about this climb is you have a visual the entire way up and down of where you need to go.

24

I made it back to the road, turned left, and followed it back to the trailhead.

25

26

27

I made it back to my truck at 10am, making this an 8 mile hike/climb with 4103’ of elevation gain in 6 hours, 45 minutes.

28

Here’s a topo map of my route.

29

Now I was off to the next trailhead. As soon as I came to an area with cell-service I pulled over to text my kids and see how they were doing (they were still sleeping). As I was sitting there an undercover cop pulled someone over for speeding right behind me. At first I only saw the flashing lights and thought I was in trouble for something. I sat there for a good 20 minutes and luckily for me, I was never approached and the police officer left before I did. But I got to see him again.

I turned onto CR 240 as I was headed to my next trailhead and saw two police vehicles parked on either side of the road. There were two police officers standing outside of their cars, stopping vehicles. I panicked and turned right into the (semi) residential area, drove for a bit, parked, and thought about my next move. Should I try to continue on to the trailhead, or turn around and go home? In the end I chose to continue to the trailhead: If I got stopped and ticketed or told to turn around at least I’d have beta for the next person.

I drove back the way I’d come and slowed down when I came to the police officers. I waved to them, and for some unexplainable reason, they waved me on! Woot! Maybe because I’d turned from the residential area and not the main highway they assumed I was a local? In any event, I drove the rough 4WD road to the next trailhead, found a place to park, made dinner, jotted down some trip notes, set out my gear for the next day, walked around the creek for a bit, knitted a hat for tomorrow, read a bit from a Colorado History book, had a few glasses of whiskey and went to bed early (tomorrow was going to be a long day). Oh, and I didn’t see one other vehicle drive down the road the entire time I was there, and it’s Friday to Memorial Day weekend at a well known dispersed camping area.

30

Peak A – 13,952

1

RT Length:  9.5 miles

Elevation Gain: 4416

This was my second attempt to summit Cathedral Peak this year.  The first time was back in April when I had to turn around due to avy debris I was unable to navigate in the dark.  I’d read a recent conditions report stating there was now a path around the avy debris and decided to attempt Cathedral Peak on my next free day.

My sleeping schedule is currently all messed up.  I’d woken up at 2pm, took my daughter to the art museum, and then left my house at 9:30pm to make it to the trailhead by 2am.  I wanted to get an early start on this one because of the potential thunderstorms later in the day, but mostly because I was worried the snow in the couloir would soften up early in the sunlight.

The trailhead had room for plenty of vehicles.  When I arrived, there were 4 or 5 cars in the lot, but when I left there were dozens, all lined up on the side of the road.  Also, apologies to the man I woke up who was trying to sleep in his vehicle:  apparently my trucks headlights were too bright.  I was on the trail at 2:10am.

2

The trail starts off meandering through an aspen grove.  Last time I was here this had been covered in 3-4 feet of snow and I’d missed the sign…

3

I made it to the avy debris area after about a mile and a half of hiking.  When I was here last I couldn’t see the top of the downed trees; they were supported by a huge layer of ice that was at least twice as tall as I am.  Today the area was much more manageable to navigate.

4

Next I followed the side of the mountain up some switchbacks on an obvious trail.  Side note:  Beargrass (the tall plant with lots of tiny white flowers) looks scary in the dark; kind of like children waiting for you silently in the night.  I like to keep my flashlight directly in front of me to keep myself from freaking out.

5

Once again, the trail is easy to follow.  Here’s a look back at the trail

6

I stayed left at this junction on the way in (but on the way out ended up coming back down the Electric Pass trail and rejoining the trail here)

7

The most difficult route finding occurred here, before the lake.  I knew I could pass the lake on either side but due to a creek crossing I didn’t want to take I navigated to the north.  I was told there was a miners trail here, but was unable to locate it in the dark.  I lost half an hour going up and down the trail, looking for the offshoot and was unsuccessful (although I did find a lot of trails that went in other directions).  Finally, I decided to just head northwest through the willows.  This sounds easy enough, but the willows here were several feet taller than I am.  I just turned my trekking pole parallel to the ground and held it out in front of me while I bushwhacked across them.  I only got hit in the face a few times (and had a swollen upper lip the rest of the day to prove it).  The good news is I made it across, and the willows were no worse for the wear.  On my way back I could see the miners trail in the daylight (more on this later).  Here’s the route I took through the willows and across the creek (which was small enough I could jump across here without getting my boots wet).

8

Next I rounded Cathedral’s east ridge and found a well cairned trail that led me into the basin

9

This trail brought me above Cathedral Lake

10

This route was well cairned, and the talus was terrible.  I got to be the first to experience the spider webs this morning.  Tons of fun in the dark!  Second only to phantom children.

11

Once in the basin you can see the route up the access gully.  Today the basin was half filled with snow and I couldn’t help but think how much easier it would have been to traverse if it had all just been snow.

12

In the morning I didn’t need snowshoes.   I made it to the base of the access gully at 5:25am and put on my crampons and helmet and got out my ice axe and garden tool (that tool’s really coming in helpful, but I may just break down and buy another full ice axe).  This is steeper than it looks, but luckily it ‘went’ all the way to the ridge

13

Here’s looking back at the basin

14

The snow was still really firm and I was unable to kick in steps but I was able to ascend with crampons and ice axe.  I was glad to have both my ice axe and (garden) tool.  I was about 30 feet from the top when I decided it was better to be on the left side of the gully rather than the right and started traversing sideways.  About 4 steps in my crampon hit the ice sideways and my boot slipped out of the bindings.  This was the worse possible place for this to happen:  I was balanced on the side of the wall of ice, with one foot in front of the other (I wasn’t able to kick in steps here, and was balancing on a very small mound of frozen snow with my right toe pointed at my left heel, sideways).  I needed to have an ice pick in the wall for balance or I was going to slide all the way down the gully.  My pulse rate quickened as I realized the severity of the situation.  Luckily I had two tools. I carefully balanced on the working crampon and tried to knock the other back into place with my ice axe.  No dice, my crampon wasn’t going back over my toe by sheer force (as well it shouldn’t;  I’d fastened it pretty tightly initially, and had no idea how it had been knocked loose from my boot).  That meant I was going to have to untie the crampon and re-tie it with one hand while holding onto the ice with the other:  Without losing my balance and sliding down a few hundred feet of ice.  It took me a solid 10 minutes to gingerly untie and re-tie the crampon, but I was able to do so from where I was perched.  I mentally praised my daily yoga routine for developing my balancing skills.  Here’s where my crampon was knocked sideways

15

Ok, crampon back on I carefully hustled my way to the top of the gully, topping out at 6:09am, a little shaky as I looked back down.

16

From the top of the gully I turned right and noticed the rest of the route was snow free.  Woot!  I took off my crampons and put them in my pack.  Time for some scrambling!  On the way up I took a class 3-4 route up and over the ridge (solid line) on the way down I found the cairns and took the class 2+ route along the side of the towers (dotted line).

17

The last bit to the summit was easy

18

I summited at 6:40am (it took me half an hour from the top of the gully to summit).

19

Summit Video

Check it out!  A summit marker!

20

Here’s a look back at the basin and my route up to the gully

21

Time to head back down.  I made it back to the top of the gully and met 3 other climbers.  We chatted for a bit.  They said they’d kicked in steps on the way up to make their descent easier.  It was 7:20am as I headed back down the gully. On my way up I’d forgotten to put on my gloves (it wasn’t cold) and my knuckles were a bit tore up, but that’s the best way to learn a lesson.  Also, I wasn’t sure I’d have been able to untie and then re-tie my crampon with gloves on.  At any rate, I was putting gloves on for my descent.

22

I turned, faced the gully, and began my descent.  It was only just after 7am, but there was a huge difference from when I was climbing at 6am.  The snow was quickly softening up.  I was careful to either avoid the kicked in steps, or if I had to use them to make sure I only made them better, but the softening snow wasn’t making things easy.  Sticking to the climbers left of the gully seemed the best way to go.  About ¾ of the way down the snow was slush and I really just wanted to glissade the rest of the way (but didn’t because I was worried I’d mess up what was left of the kicked in steps).

Here’s the route once again

23

I actually took more time than necessary heading back down, and as soon as I could I switched out my crampons for snowshoes to exit the basin.

24

I met a man starting his climb up the gully and was worried for two reasons:  #1, the three people I’d met at the top of the gully hadn’t yet began their descent, and #2, it was rather late in the day for someone to start their climb (the snow at this point was rubbish).  I figured the trio up top must have decided to picnic at the summit and asked the current climber to look out for them.  It was now 8:25am, and I knew I wouldn’t want to begin my descent at this time.  I figured I’d timed it pretty well starting at 2am: it would have been perfect if I hadn’t spent half an hour lost in the willows.

Speaking of willows, I made my way back to the small creek crossing and in the light of day was able to locate the miners trail.  I crossed the creek and headed up the slope, aiming at a small pine tree.  From here I was able to follow a faint trail, which eventually led me to the Electric Pass Peak trail, which I took back to the junction with the Cathedral Lake trail.

25

On my way out I couldn’t help but think how dreadful this climb would have been with snow all the way up to the lake!  I have no idea how I found my way so far the first time.  Here’s a look at some of the avalanche debris

26

I made it back to my truck at 10:55am, making this a 9.5 mile hike with 4416’ in elevation gain in 8.5 hours.  The hike felt longer than it was, most likely because much of the trek out was done in direct sunlight on the way out (no trees for shade).

27

Second Attempt for the Win!


Pacific Peak – 13,965

1

RT Length: 13 miles

Elevation Gain: 3706’ (From McCullough Gulch lower gate closure)

There are so many routes up Pacific Peak I wasn’t sure which one to take? I ended up making the decision the night before, and decided on the Southwest Slopes because I liked the way it looked best on a topo map (particularly the headwall area).  I arrived at the Blue Lakes road and found the gate closed to the McCullough Gulch Trailhead.  So I parked at the closed gate, right next to a small stream of water running off the road.  I gathered my gear and was off at 2:30am.

About 20 yards into my hike I heard a loud noise that sounded like a large animal slipping and sliding on the scree below the road and to the right of me. Well… at least whatever it was was running away from me.  Quickly.  The 2WD dirt road to the trailhead was clear, dry, and easy to follow.  I was confused as to why it was still closed, since besides some extremely minor avy debris and a short area with water running by the side of the road, the road was clear.

2

3

I hiked on this dirt road for 2.2 miles from the closed gate to the start of trailhead. This is where the snow started, and in the dark obscured the beginning of the trail.

4

For the next mile the snow was intermittent and soft. I’d need snowshoes for about 30 steps, then not need them for dozens of yards, and then I’d need them again for 30 steps or so.

5

I crossed a bridge

6

And headed left on a trail (the road ended here)

7

This is where I put snowshoes on and wore them for the rest of the hike. This is also where the trail finding became difficult.  I kept losing and finding the trail and losing it again, so I gave up trying to stay directly on trail and just headed northwest, keeping the creek to my left and the ridge to my right.

8

At the end of the boulder field I came across a sign indicating the trail kept going straight. Here I turned right (at the cairn) and followed the gully up and to the northwest, avoiding the large boulders

9

10

At the top of the gully I rounded the hillside and was deposited below a lake. I walked around the right side of the lake, found the rock rib, and decided to climb the snow next to it to the notch(so I didn’t need to take off my snowshoes again).

11

Here’s a look back down from the notch

12

I was at the top of the waterfall area and just needed to turn the corner to the right to see more of the basin

13

Wow! Lots of snow here!  I headed northeast, skirting what was probably a small lake to my left and couldn’t help but wonder how many feet of snow I was standing on top of?  Way to go June 2019 in Colorado!  You’ve got the snow thing down!

14

I kept rounding the basin, staying to the right

15

16

Once again: So.  Much.  Snow!  I kept heading northwest towards the end of the basin.  It’s best to stay high here so you don’t have to regain elevation.

17

I made it to the headwall. This is the crux of the route, and I decided it was time to take off my snowshoes and put on my crampons.  I got out my ice axe and garden tool (haven’t purchased a second ice tool yet).  The sun was just starting to rise

18

I was pleasantly surprised at the conditions of the headwall: continuous snow coverage that was consolidated just right for crampons.  It was tiring, but I had no difficulties gaining the top of the headwall.  I mentally high fived myself for choosing this route today.  Ok, just a few hundred more feet of elevation gain and I was there!  I made it to the saddle between Atlantic and Pacific, singing “Home for the Holidays” as I went.  To be honest, I that song was in my head for most of this hike.  Oh, and that’s a false summit…

19

There was a lot of snow here, and some of it felt steeper than the headwall

20

It seemed pointless to summit the false summit, so I skirted the bump to the left and continued towards Pacific.

21

From here the postholing began. The snow here looks solid, but it hugs a ridgeline and much of the snow underneath has melted away, leaving a hollow cap.  At times the cap was thick enough to support my weight, and at others I postholed up to my waist into (or between) large rocks.  I have a few bruises from the fun

22

Still, it was better than hiking with crampons on the rocks (I was too lazy to take them off, so I stuck to the snow)

23

I summited at 6:45am

24

Summit Video

Here’s a look back on the route from the saddle to the summit

25

The wind was intense here, so I decided to head back down. I made it to the saddle and Atlantic looked very inviting. I’ve already summited Atlantic, and I’m on a bit of a time limit today, so I didn’t feel it necessary to summit Atlantic as well (but it was tempting… you should do it!).

26

I had to stop and enjoy the view from the area just below the saddle (where the wind finally let up a bit). It was breathtaking!

Saddle

From here you can see most of the route back. It’s important to follow the basin and stay close to Quandary Peak on your way out to exit in the correct area.

27

OK, time to start down the headwall.

28

The headwall was steep (so steep you can’t see the route down it here), but not as bad as a lot of gullies I’ve done lately. It’s supposed to be 40-45 degrees at points, but I was able to walk down the entire headwall without turning and facing the mountain.

29

30

At the base of the headwall I switched out my crampons for snowshoes, but kept ahold of my ice axe. I followed my tracks southwest

31

Rounded the ridge, and walked out of the basin

32

The snow was really starting to soften up at this point. For June 21, this is a ton of snow!

33

I made it down past the rib area without incident, and was just getting ready to skirt the small lake when it happened.

34

I was stepping off a rock and into snow and immediately my left leg sank and slid up to my upper thigh. I’ve postholed thousands of times, but never experienced anything like this:  Try as I might, I couldn’t move my leg.  It wasn’t hurt, but my snowshoe was stuck in the snow and keeping me from being able to move my foot and leg.

As I’d stepped on and slid into the deeper snow the snow had immediately softened up and settled like concrete around my leg, making it immobile. I thought to myself  “So this is what they mean by not being able to get yourself out of an avalanche because the snow settles like concrete” and got to work.  Luckily, this hadn’t been an avalanche and I still had my ice axe in my hand, so I started digging myself out. It took me a solid 15 minutes of work to free my leg.  Also, my butt was now wet from sitting in the snow for so long.  Lovely.  At least no one was around to see.

The hike back to the trailhead was uneventful. In the light of day I was easily able to follow the trail and saw things I hadn’t before, like the log bridges and small pools and the actual trail itself…

35

36

There was also a lot of evidence of postholing from previous hikers using the trail. I hadn’t seen any of this in the dark (I’d paralleled the actual trail)

37

There was a snowbridge over the creek, and the creek was raging!

38

Stream

Back on the 2WD road I started seeing other hikers. Quite a few of them actually, and I figured they must have opened the gate. Sure enough, they had and there were cars parked at the summer trailhead as I passed.

39

I still had 2 miles to go however, but on a positive note, I saw a rather scruffy looking fox on my way back

40

Fox

Yep, the gate was now open

41

I made it back to my truck at 10:45am, making this a 13 mile hike with 3700’ in elevation gain in just over 8 hours.

42

Ugh! It looked like some kids had thrown mud at my truck!  There was dried mud/dirt on every corner, like someone had used my truck for target practice with mud pies.  I was going to have to wash it after picking my daughter up from camp (she’s a counselor at a Girl Scout Camp and off this weekend so I was on my way there now to pick her up).  It was a 3 hour drive, and I made it in plenty of time before release.  While we were walking back to the truck my daughter said “How did your truck get so dirty?”  I told her I it happened at the trailhead this morning.  She went and took a closer look, put each of her hands on two of the marks and said “Mom, how big are bears?”  That’s when I took a closer look at the blobs and realized no one had thrown mud at my truck:  It’d been visited by a bear!  I could see swishes of hair and even faint claw marks on the paint.  Cool!  Maybe that’s the animal I’d heard at the start of my hike?  Now I didn’t want to wash my truck!  Luckily, I took a few photos before it rained on my way home.  I just wish I’d looked at the ground around my truck when I’d noticed the mud… I would probably have seen bear tracks!

43

Trinchera Peak – 13,517

1

RT Length: 10.5 miles

Elevation Gain: 3741’

I changed my mind several times before setting off on this hike. This is not the peak I’d wanted to do today, but after some last minute research I realized the one I really wanted to hike isn’t achievable this time of year.  So I was bummed, but also glad I hadn’t attempted the peak just to have to turn back (that’s happened to me too many times this year as it is).

I arrived at the winter closure at 4am, surprised to find there was a winter closure? I was under the impression the winter closure was the Blue Lakes Campground, but here I was, faced with a locked gate 2 miles from the lake.  Oh well, this was supposed to be a short hike, so I welcomed the added mileage.

2

I parked at the picnic area and was the only one there when I arrived. I’m not sure this area gets much winter use.

3

The dirt road up to the campground is a well maintained 2WD road. It was clear of snow in places and covered in a few feet of snow in others.  It’s going to be a while before the FSR 422 road is opened this year.

4

Once I made it to the campground the snow coverage really picked up. Now the tricky part was trying to find the trail in the dark.

5

I’m sure this is a well maintained trail in the summertime, but it didn’t look like anyone had been out here in months, and certainly not since the last snow. At times the trail was obvious because there was a clear path through the trees, but most of the time I had to just keep heading southwest up towards treeline, making my own trench.   There seemed to be several switchbacks.

6

Once at treeline the rest of the route became obvious. I found a path between the trees

7

And then gained the ridge and followed it up

8

I took a shadowselfie because I could, and turned and watched the sun rise over West Spanish Peak

9

Once on the ridge I started to get worried. What I thought was going to be a very easy hike now included an unforeseen obstacle:  a HUGE cornice covering the entire summit.   At least it looked stable.

10

The closer I got the larger the cornice became

11

I tried my best to find a route up that didn’t include the cornice, but that just wasn’t going to happen, so I aimed for the route with the least amount of danger. Sticking to the left I thought I could avoid most of the cornice and climb straight up a wall of ice.  Here’s the route I took

12

The snow kept getting steeper and steeper, and the last 50 feet or so I continually used my ice axe and wished for my helmet. I just kept looking ahead and plugged in my ice axe, repositioned myself for stability, and hauled myself up.  The last 10 feet were brutal, but I was able to hoist myself up over the lip of the cornice and found I was on a lot of solid snow with a windblown summit just beyond.

13

I summited at 7:30am. I tried not to get too excited about what I’d just done as I took a few pictures

14

15

I’d intended on summiting a few other 13ers today (Leaning South Peak, Leaning North Peak, and possibly Cuatro) but the extra miles I hadn’t expected from the winter closure meant I was behind schedule and unfortunately, the snow was warming up. As I was debating go or no-go I looked for a good route towards the other 13ers, but all I could see were cornices blocking my way down.  Hmph.  Oh well, I’ll just have to make another trip out here:  In the summer when there aren’t any cornices.

16

Oh yeah, I still had to get down this cornice. I took a look over the edge…

17

Wow, that was steep! Here’s a look at the route from the summit back to treeline

18

I turned to face the cornice to head back and immediately realized snowshoes weren’t going to cut it on the way down. They’d been great for stability on the way up, but they would be in the way on the way down.  I switched to crampons and was immediately pleased with my choice.  OK, now to head down.  The first 50 feet or so were harrowing to say the least.  Wearing snowshoes on firm snow I hadn’t made steps on the way up but they were needed on the way down.  So I spent a lot of time kicking in steps, balancing, and slowly making my way down off the slab of ice.  I stopped when I felt safe and took a picture.  The steepest part is circled

19

I was thrilled when the crampons were no longer needed and switched back into my snowshoes. I took a second to breathe and looked back at what I’d just done.  Wow!  Yes, much, much steeper than this picture makes it look. That had been an adrenaline rush!

20

Here’s the route back down to the trees

21

The snow was quickly becoming soft and was fun to walk though. I was very, very glad I’d chosen to head back and not summit those other 13ers:  it was warming up fast!

22

Video:

Here’s a look back on the final push

23

24

As I hiked down I couldn’t help but think how this looked like a great mountain to ski, yet it was obvious no one had been here to do so in quite a while. There was continuous snow from the summit to treeline and honestly, all the way back to the campground. It seemed a shame no one was out here enjoying the skiable terrain.

25

I followed my tracks back to the “trail”

26

And through the forest

27

I made it back to my truck at 10am, making this a 10.5 mile hike in 6 hours.

28

Today was fantastic! All I can say is this peak needs more attention!  It was a beautiful day, which helped, but when I made it back to my truck I didn’t feel exhausted or even tired or sore.  The ice axe and crampon use had been a fun surprise, and the 10.5 miles had spread out the elevation gain nicely so I didn’t feel it much.  It’s a shame this peak doesn’t get visited more often.  If it’s on your list, you should move Trinchera to the top!

Relive:


Lackawanna – 13,826

1

RT Length – 6 miles

Elevation Gain – 3655’

I made it to the La Plata Trailhead a little after 4am and was surprised to see someone getting ready to hike La Plata. As I was getting my gear together I heard him trek off in his snowshoes.

I started at 4:20am, excited to find the 82 open well past the La Plata trailhead. I briefly considered moving my truck, but quickly thought this wasn’t a long hike anyway:  It would be nice to get in a few extra miles to make this hike a little longer.

2

The road was open, but there wasn’t a lot of parking available because of all the avalanche debris lining the roadway. Everything that could slide in the area apparently had slid at least once.

3

On a positive note, everything smelled like fresh cut pine. I followed the road for a mile in the dark and then turned right to begin the climb.  This area had seen an avalanche as well, and even though they weren’t completely necessary at this point I put on my crampons and left them on for the entire hike.  In the dark navigating the debris up the avalanche slide felt daunting, but in the light of day it looks pretty easy. Here’s the route I took

4

The gully was steep and filled with snow, so I just kept to the center and followed the gully. Even though this area had avalanched, as I neared the top of the gully I discovered it was loaded with snow ready to drop.  I didn’t want to be here when the weather warmed up today!

5

The sun started to rise, and at about 13,000’ I started using my ice axe, following the center of the gully.

6

7

The steepest part was just below the summit ridge. Here is where my ice axe proved extremely useful and my calves started screaming.  I just kept crawling forward, intent on summiting before the weather warmed the snow.

8

At the summit ridge the terrain became much easier. I stood up and walked toward the summit bump

9

This part was easy! There was a small section to climb

10

And I was on the summit by 7am.

11

Summit Video

The weather was absolutely perfect! It wasn’t warm, but it wasn’t cold either, and there wasn’t any wind!  I was able to get a video on the summit, and actually stayed and enjoyed the view for a while

12

13

OK, now it was time to head down.

14

In the light of day I could appreciate just how steep the gully was

15

16

17

About halfway down I paused to take a video of the water I could hear flowing under the snow below me. Yep, it was time to get off this waterfall

Gully Video:

I could see the effects of the avalanches all around me

18

After making it down the gully the last part to the road was easy, I just navigated my way around the solid ice towards the road.

19

From the road looking up you can see I just followed the avalanche slide up the gully

20

I made it back to my truck at 8:45am, making this a 6 mile hike/climb in 4.5 hours.

21

Relive: video

I decided to see just how far the 82 was open, so I drove down the road a bit in my truck. I made it 2.5 miles before the next closure sign, and saw evidence of multiple avalanches along the way.

22

With my morning over at 9am I decided to drive 4 hours to the next trailhead and rest a bit before my next adventure…