Click on a menu, or use the search feature to access hundreds of trip reports. Contact me if you'd like more information about a hike, or a GPX file
Author: Laura M Clark
Laura has summited over 500 peaks above 13,000' solo, including being the first woman to solo summit all of the Colorado 14ers, as well as the centennials. After each hike, she writes trip reports for each one and publishes them on her blog, which is read by fans all over the world. Author of Wild Wanderer: Summiting Colorado’s 200 Highest Peaks, which is available to purchase on Amazon.
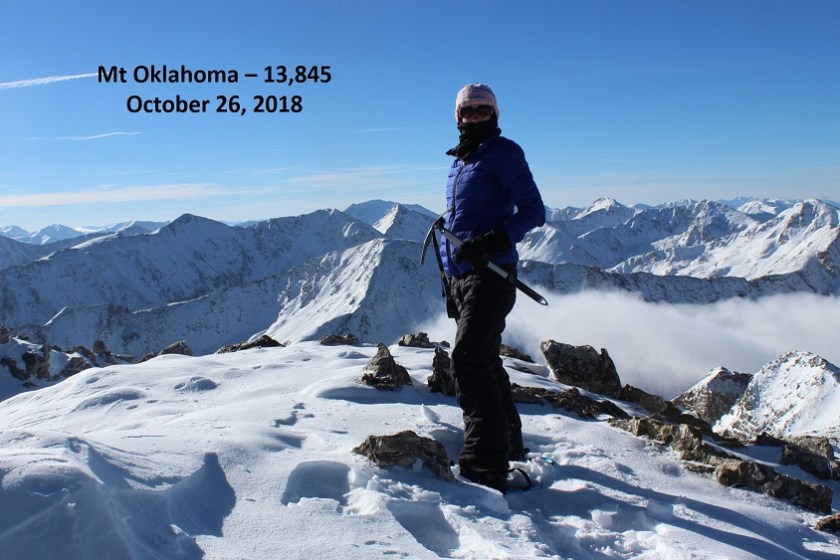
I made several spreadsheets this week outlining possible hikes, and finally settled on Mt Oklahoma. Imagine my surprise when I checked the weather forecast one more time at 2am and it switched from 15mph winds to 45mph winds! I considered changing my peak at the last minute, and then looked at the direction of the wind. I should be ok….
Speaking of OK, when I was about 8 or 9 years old I understood the joke for the first time that “Oklahoma is OK”. I thought this was hilarious, even though my friends didn’t ‘get it’. I told it over and over again and got blank stares. Maybe I just wasn’t telling it right? But I digress…
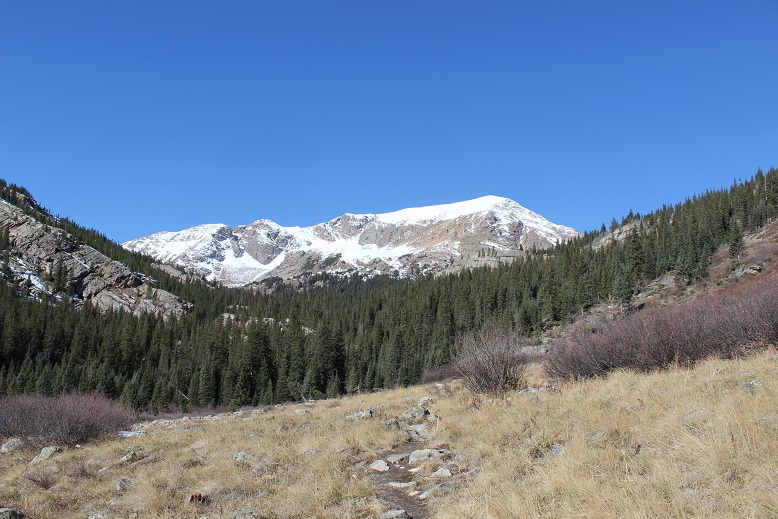
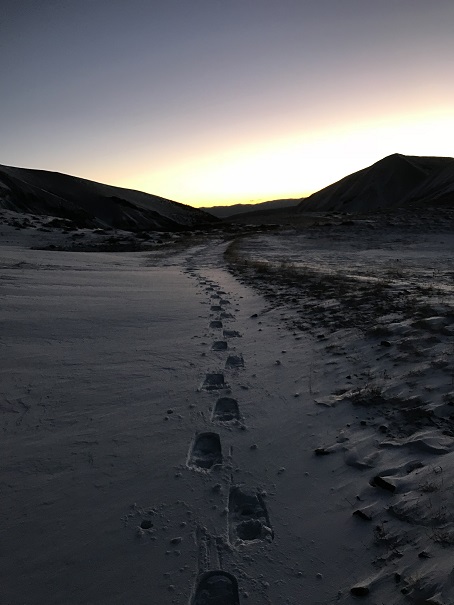
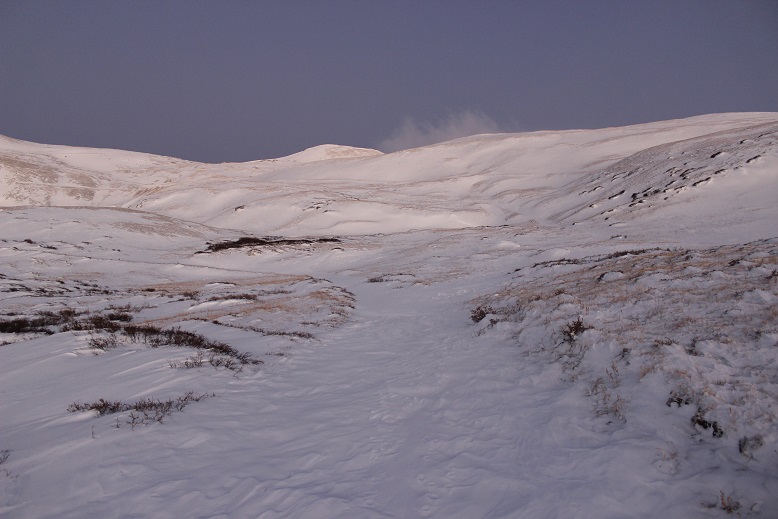
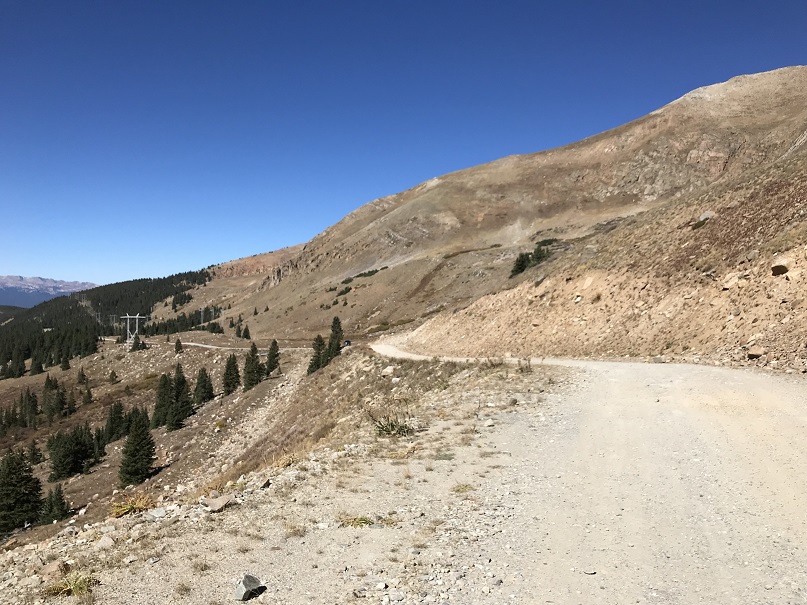
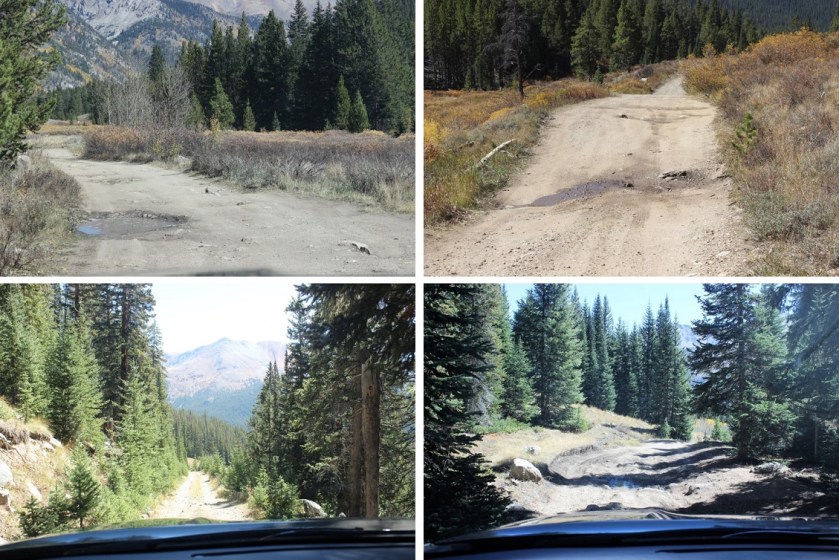
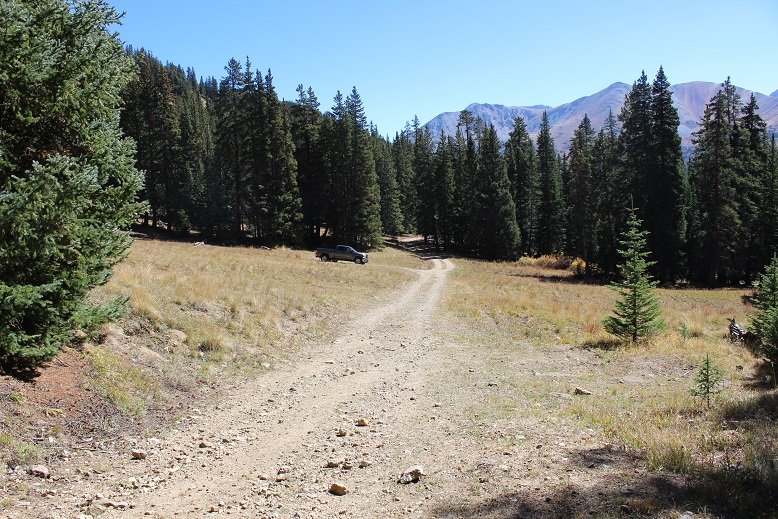
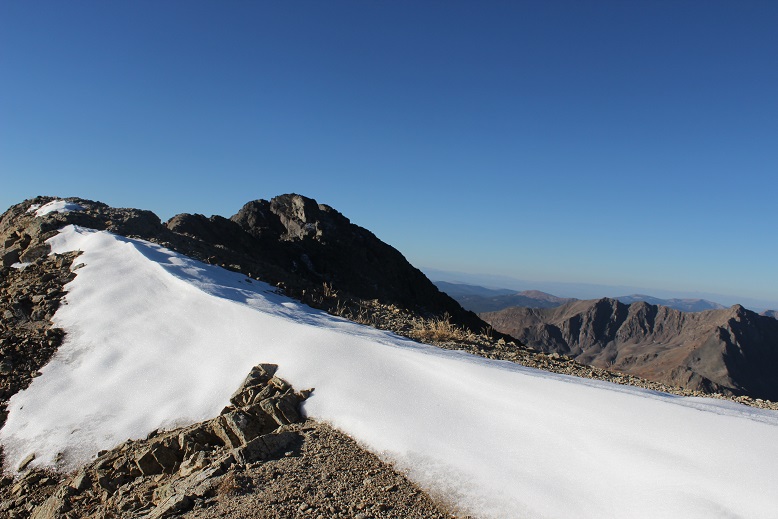
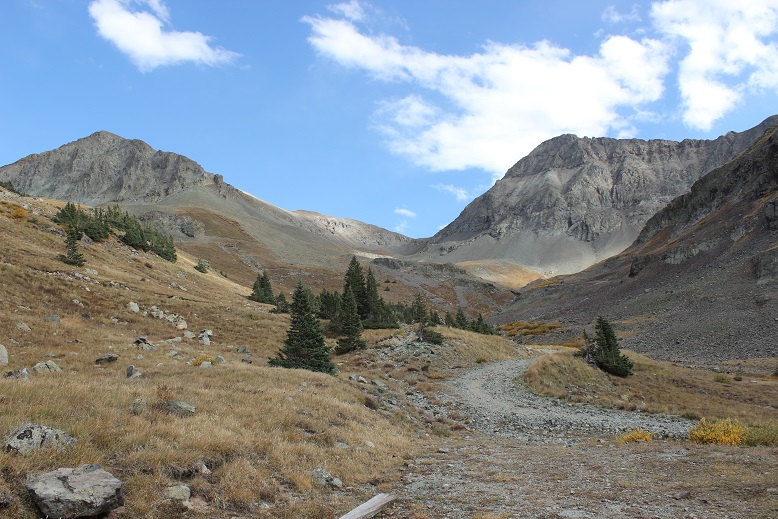
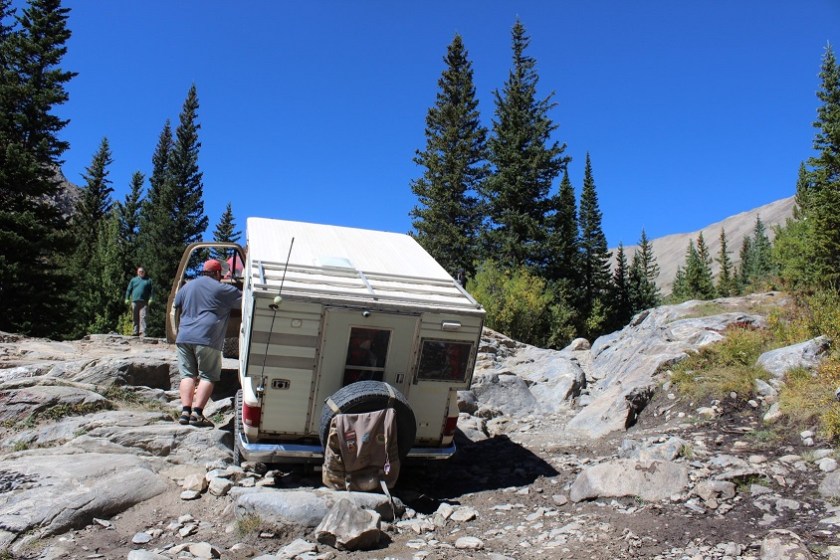
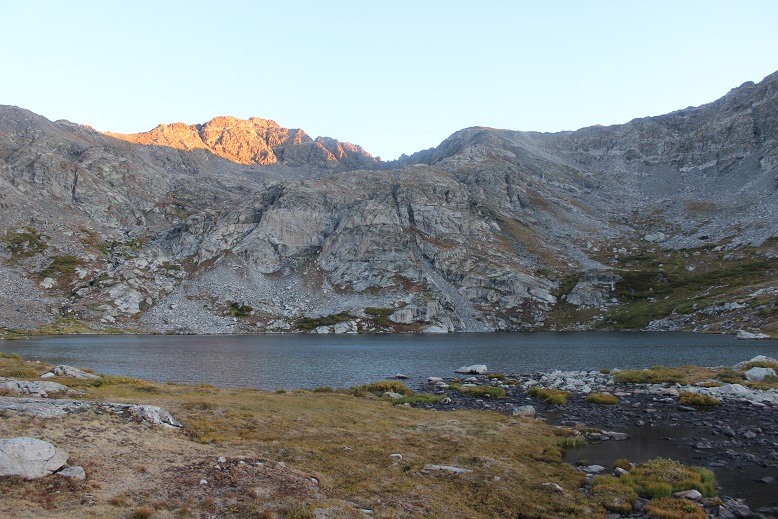
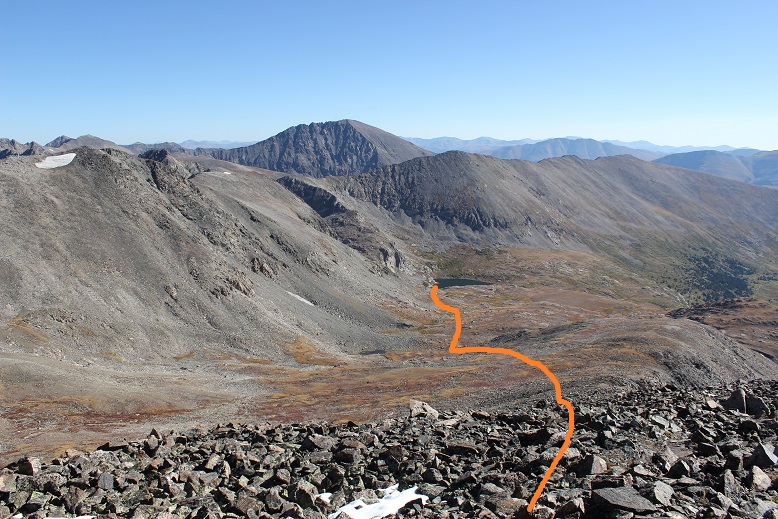
I arrived at the trailhead around 5:30am, surprised the 4WD road was clear of snow all the way to the upper trailhead, despite snow in the forecast for last night. Conditions of the road in are the same as the last time I was here (https://wildwandererlmc.wordpress.com/2018/07/20/55-mt-massive-14421/).
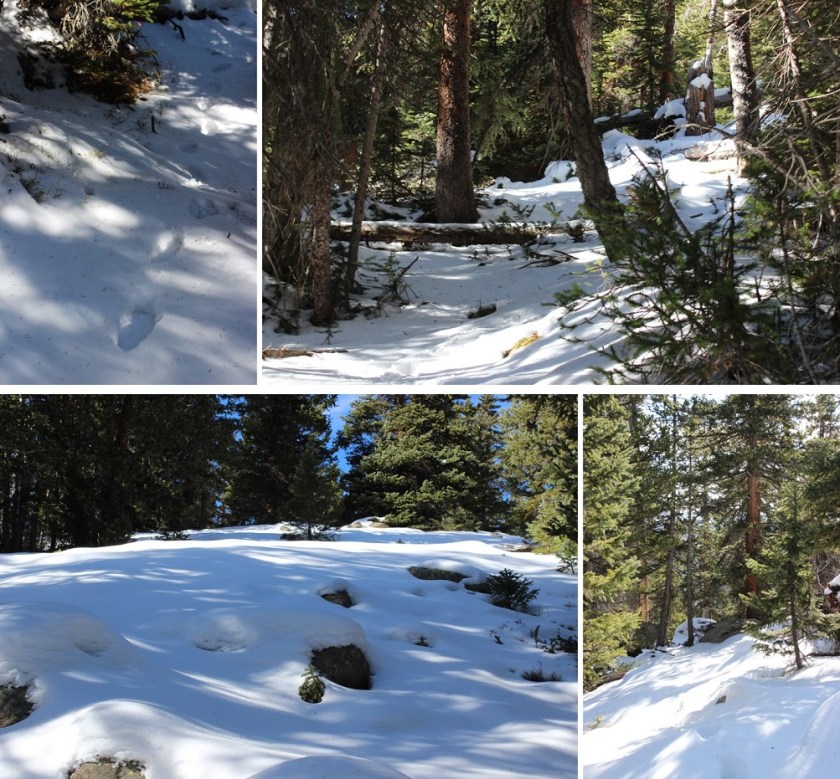
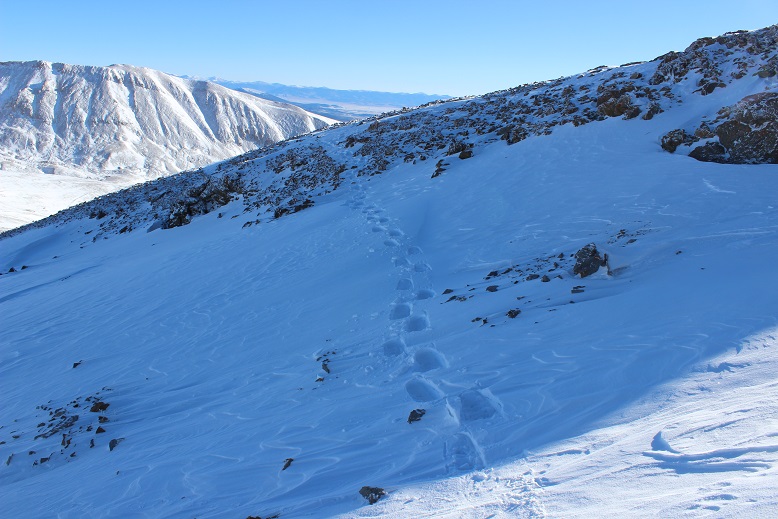
There were no other vehicles in the parking lot. I gathered my gear (whoops! I forgot my goggles, oh well, my sunglasses would have to do) and started just before 6am. I followed the Mt Massive/Halfmoon Lakes trail to the trail junction in the dark, but by the light of the full moon. The trail had pockets of snow, but no traction was needed.
The moon gave off enough light so I didn’t need my flashlight, but not enough light to get a good picture of the mountains in all their snow capped glory. They were beautiful, and I stopped several times to try and photograph them (none of which turned out). I was wasting serious time trying to get a picture I’d never be able to capture, so I put my camera(s) away and kept going.
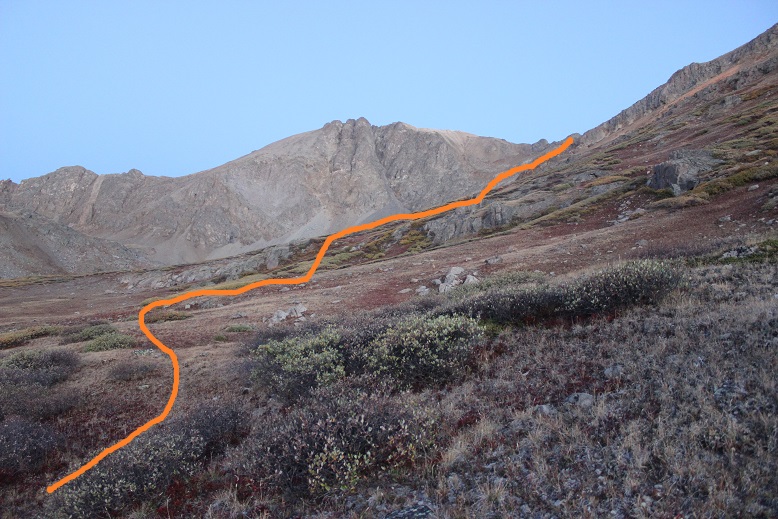
From the trail junction I continued west, back into the trees
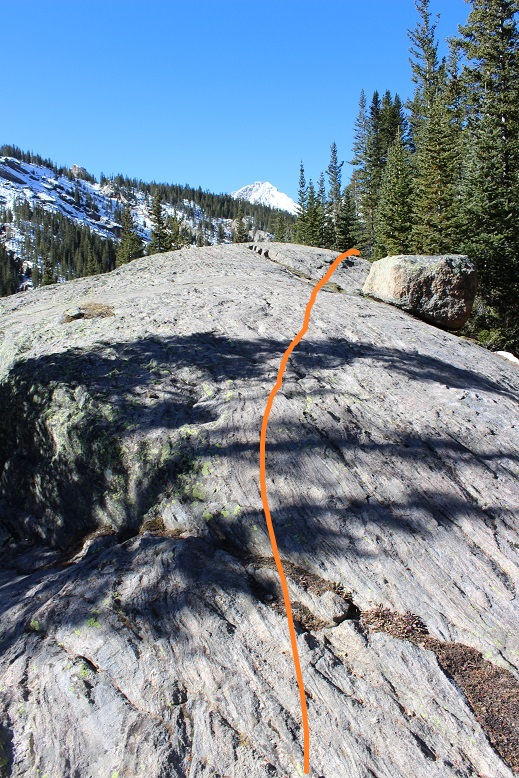
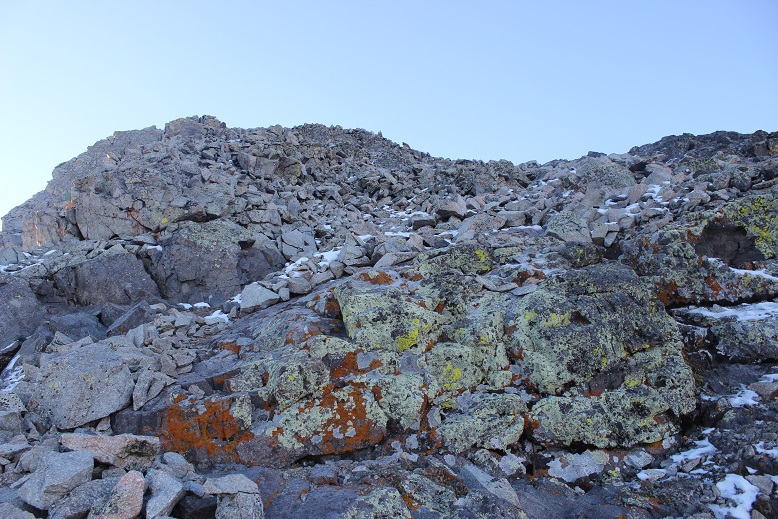
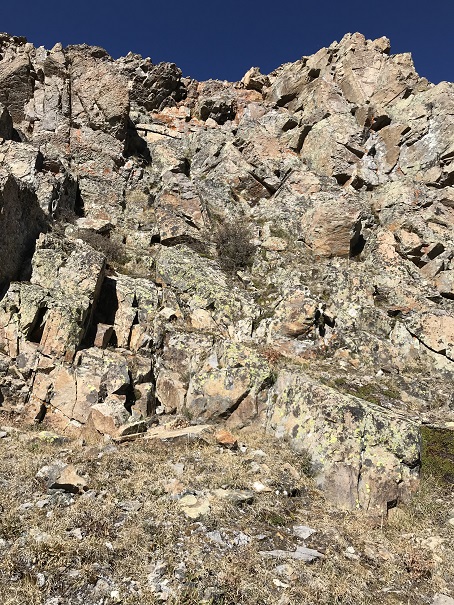
And up and over a very large rock (I’m guessing 50-70 feet long?)
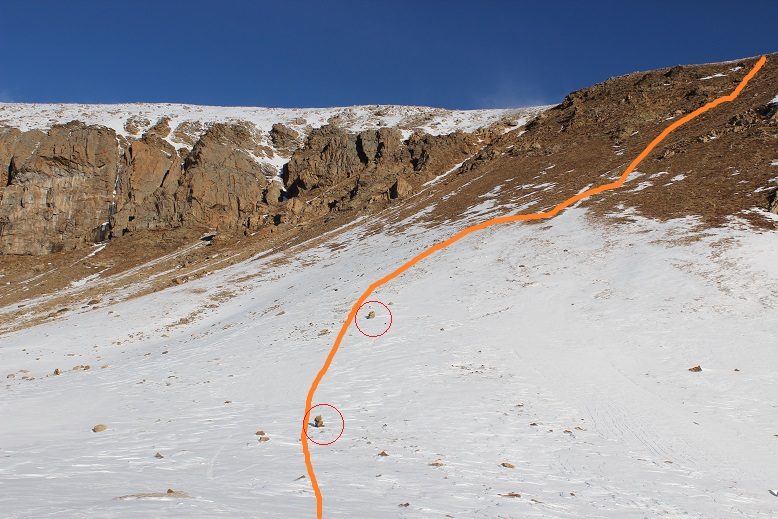
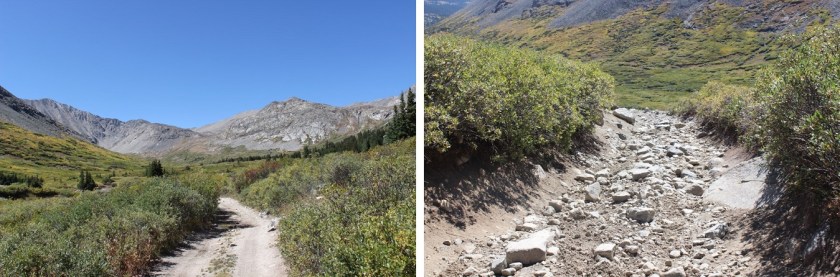
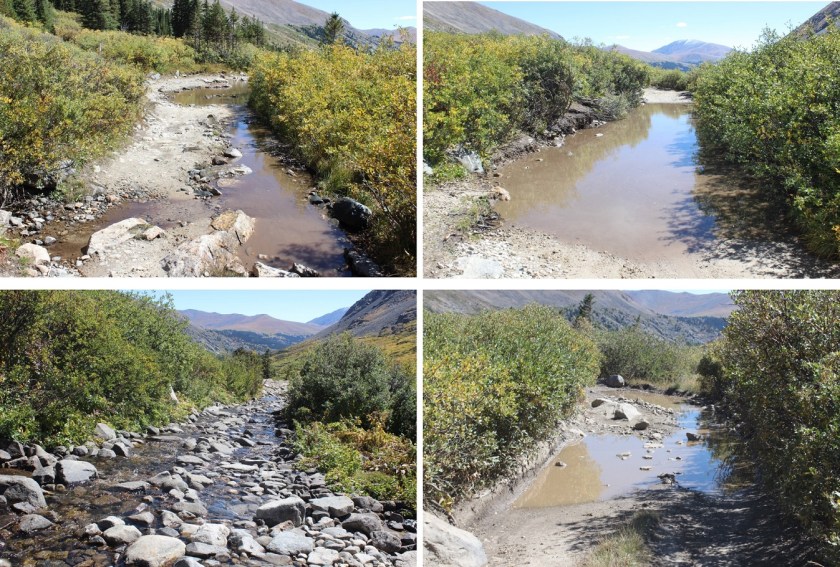
I kept thinking to myself how I wished the elevation gain would start soon. I was over 2 miles into a 4 mile summit, and still no real elevation gain. Those last few miles were going to be a killer! From here I left the North Halfmoon Lakes trail and the route-finding began. The trail was surprisingly free of snow until I passed the second creek crossing.
From here snowshoes would have been helpful, but I didn’t put them on. Route finding through the trees was interesting. At points I could tell there was a trail, or a heavily used path out there somewhere, but most of the time everything was covered under lots of snow.
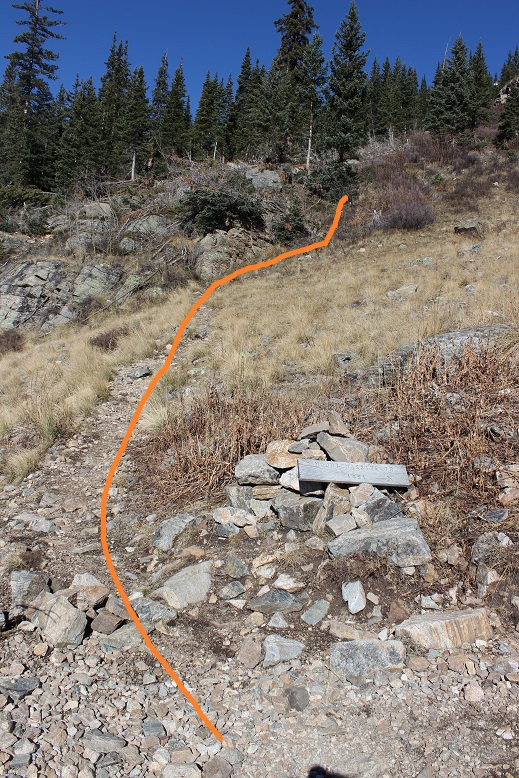
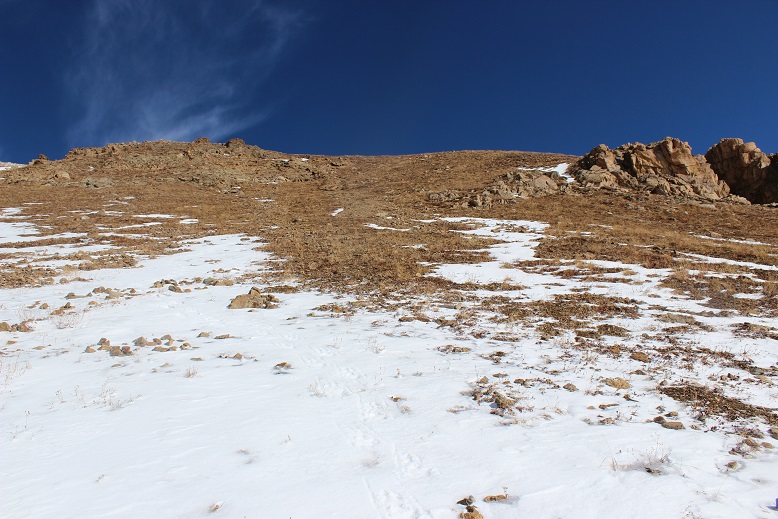
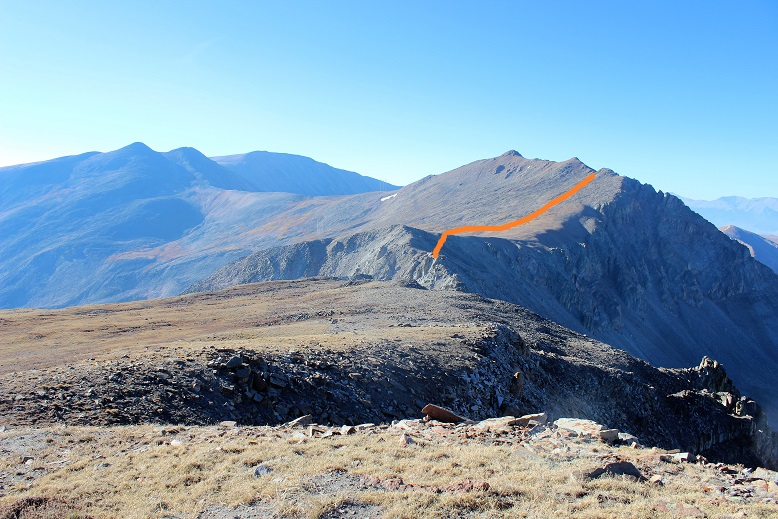
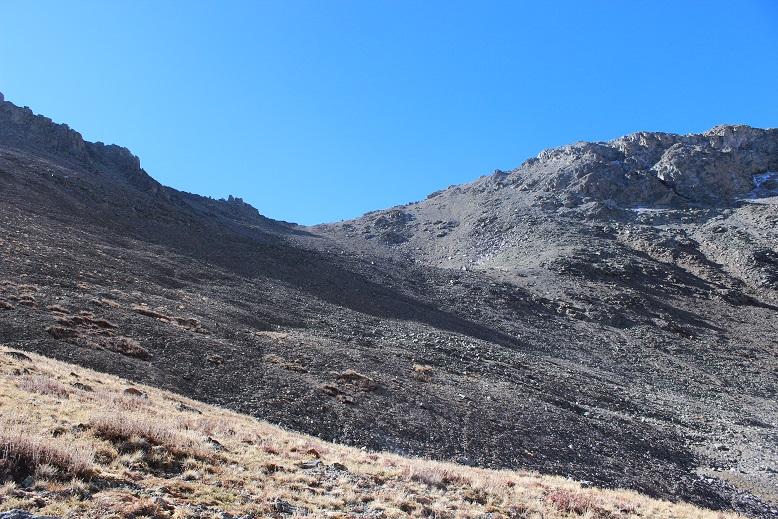
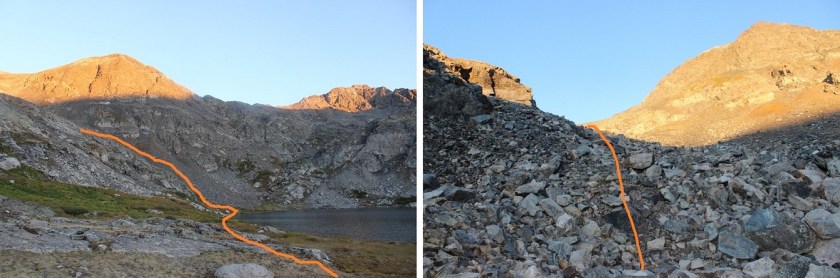
I had to backtrack once, but was able to find my way to the ridge and after exiting treeline I found a few cairns (not enough to rely on… maybe 5 total in the next 2 miles). At the ridge I continued left
Over this hill and up the drainage
And up some more drainage. This is where I put on my snowshoes. The snow is deceptively deep in some areas here (it is a drainage after all) and bare in other places. The snowshoes were worth it for the times I sank to my waist.
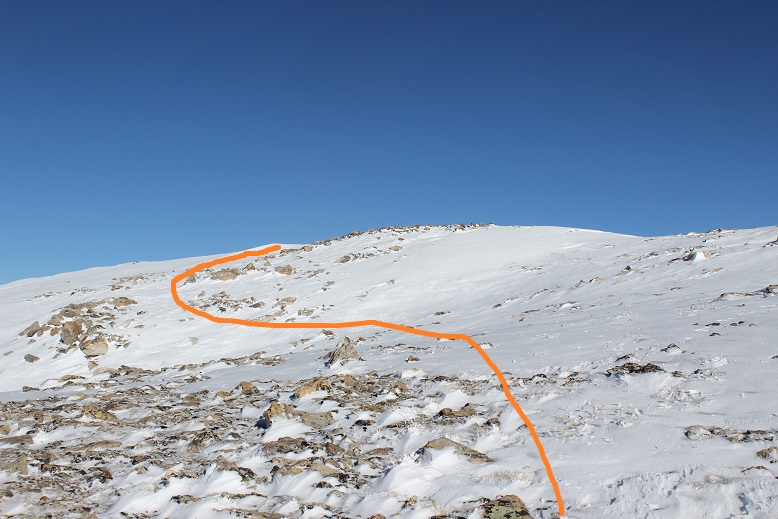
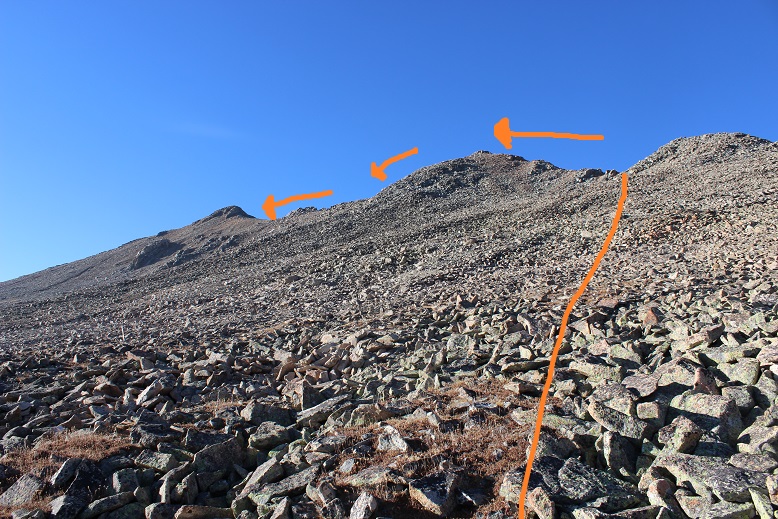
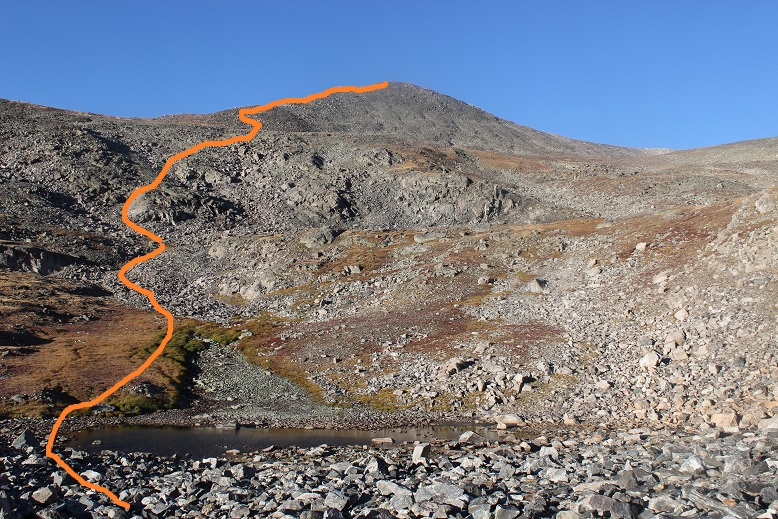
At the top of this drainage was a small basin
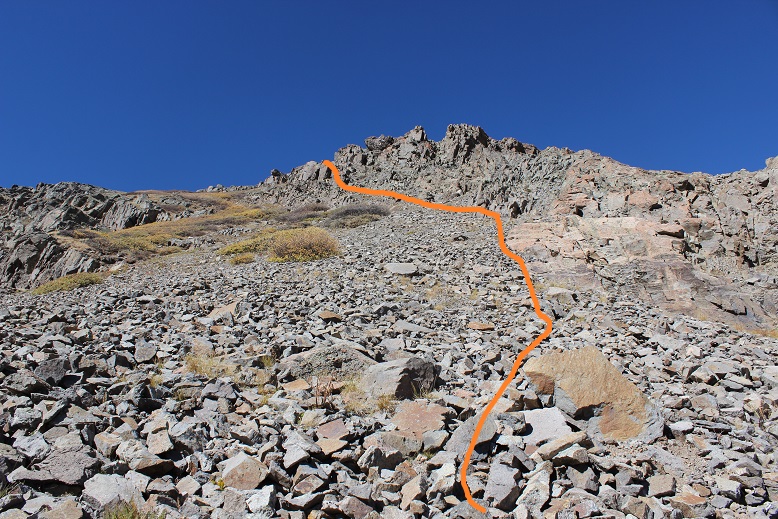
I found 2 cairns here, indicating the way I should take up the slope.
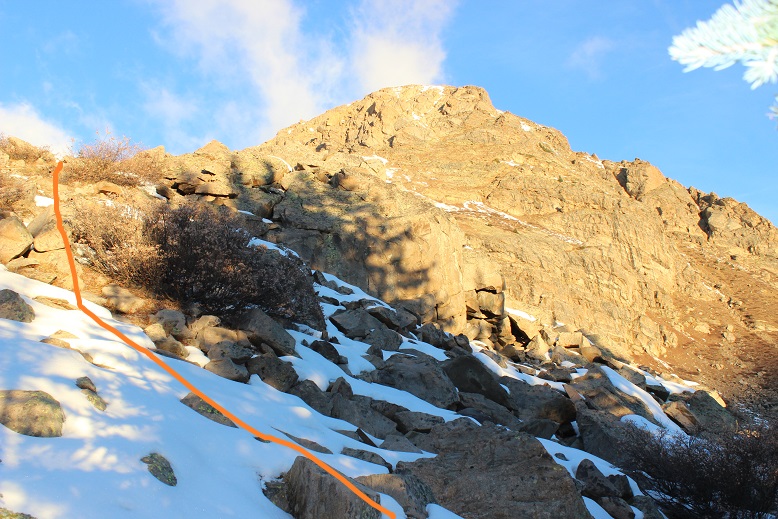
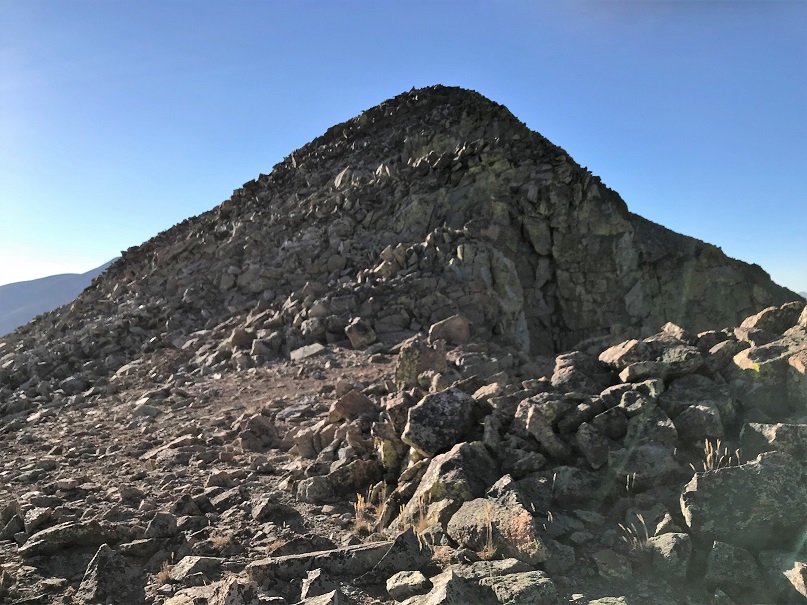
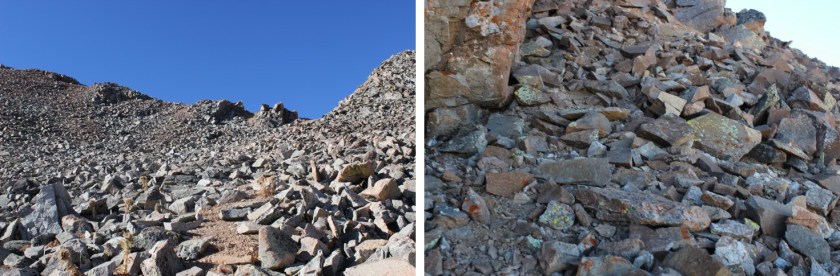
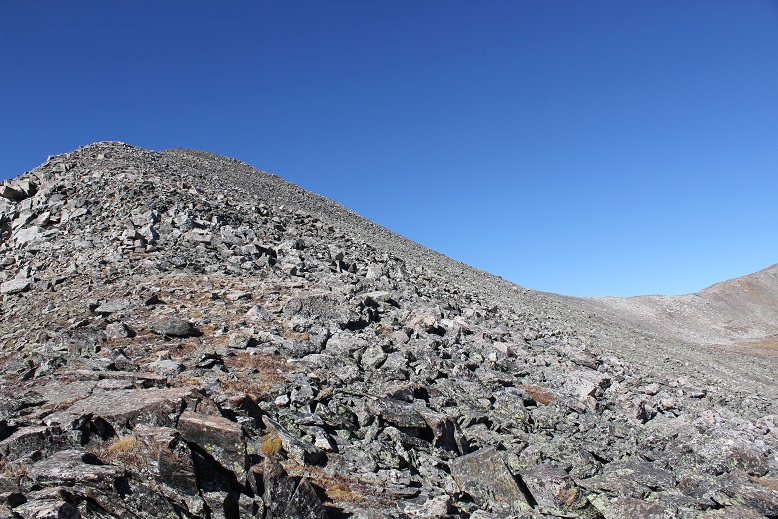
This is where the hike became challenging. That slope is much steeper than it looks, and just when you reach the top, there’s another slope just as long to navigate. I kept on my snowshoes until the snow stopped, and then put them in my pack and hiked up to the ridge. Hiking was much easier with the snowshoes! I’ll take snow over scree any day.
When I reached the ridge I was surprised to see more snow. A lot of it! But it didn’t look that deep, so I put on my microspikes and started forward.
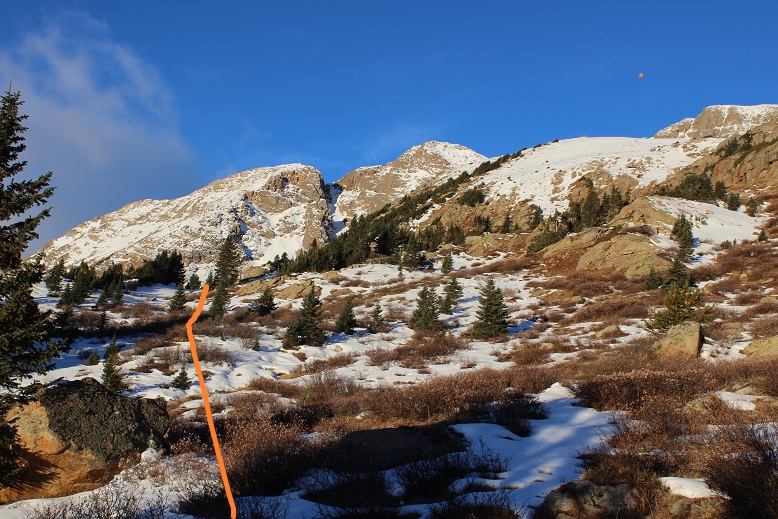
That lasted about 30 feet. There was no way this was going to work. I needed snowshoes. And goggles (that wind!). I stopped to put them on, realized I’d left my goggles in my truck (drat!) and looked at the task before me. I had less than an hour to make it to the top before my turn around time. My legs were burning, and it was slow going, but I knew I could do this. I trudged on. There isn’t an exact route to the top, just keep aiming for the highest point. I chose to go left instead of straight because the snow looked deeper and less stable directly in front of me.
Once again, it’s steeper than it looks and I had to stop every 50 feet or so just to catch my breath. My ice axe proved useful several times. The wind was picking up and I was getting cold. Those 2 miles without elevation gain were catching up on me!
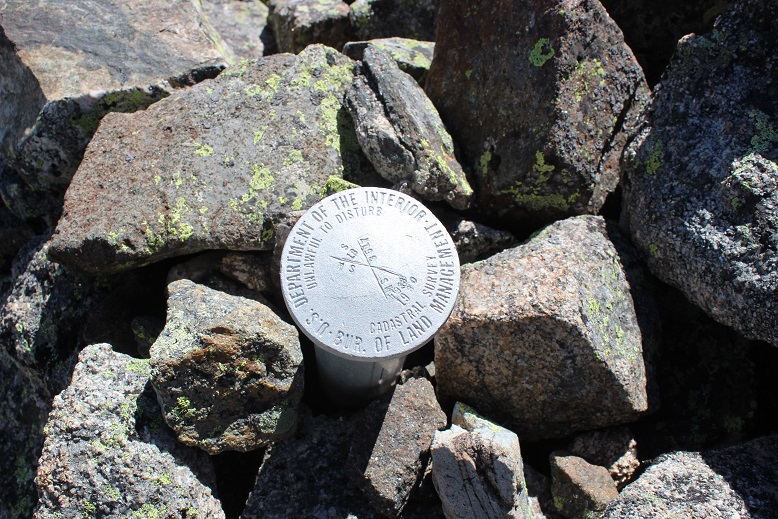
I summited at 9:25am (my turnaround time was 9:30am)
VIDEO:
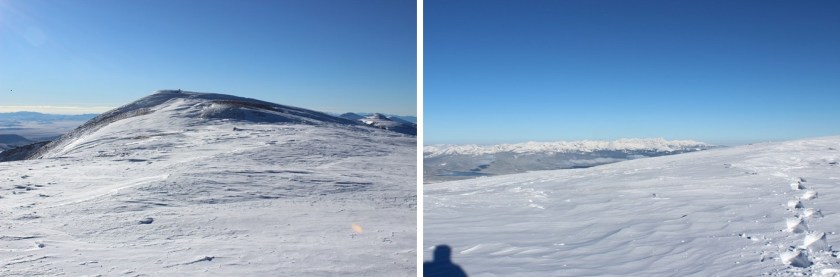
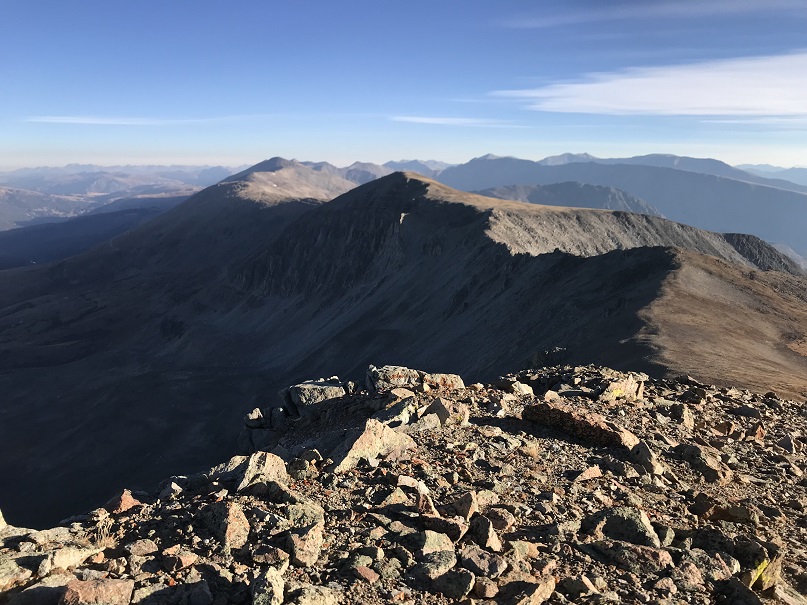
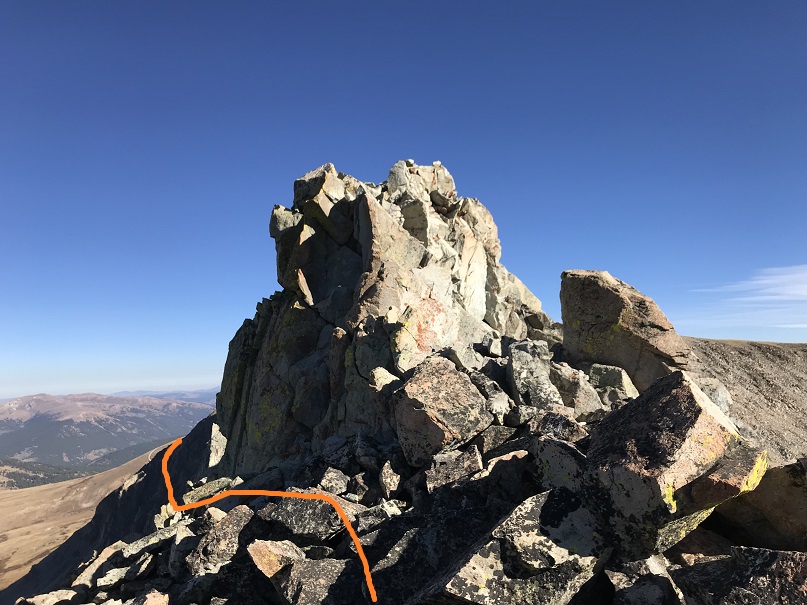
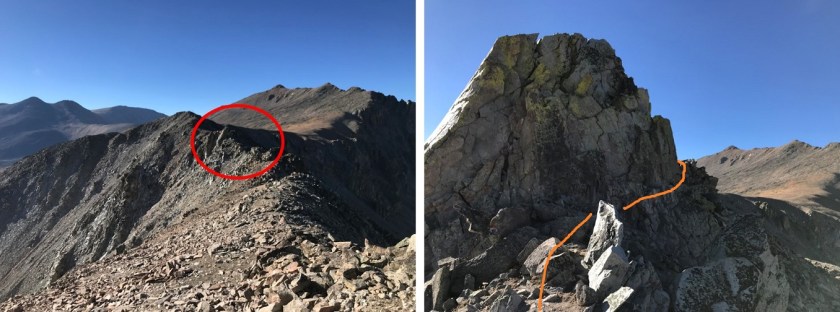
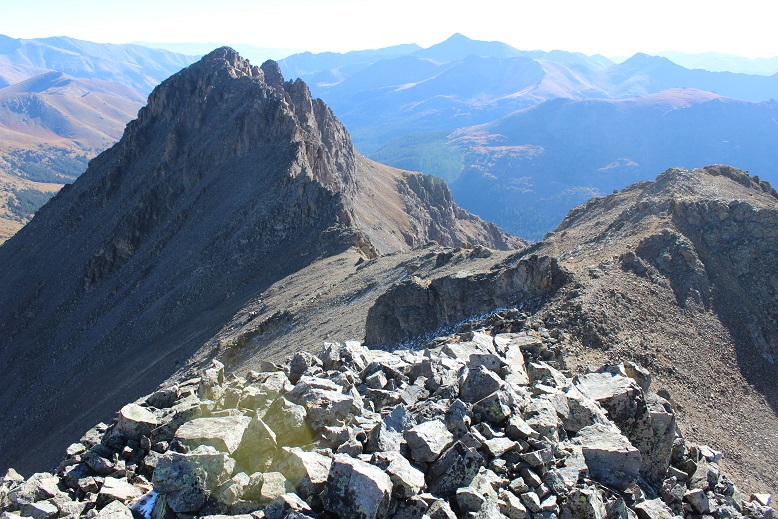
The summit is mostly flat, with a small cropping of rocks near the Mt Massive side.
Here’s a view to the south
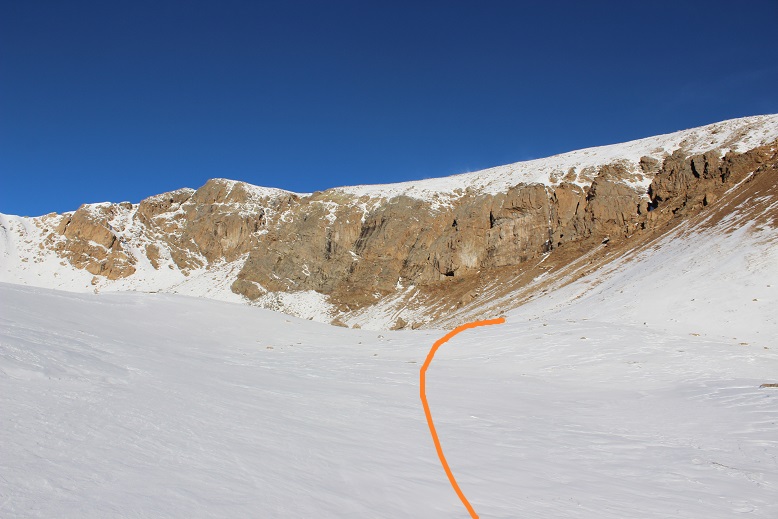
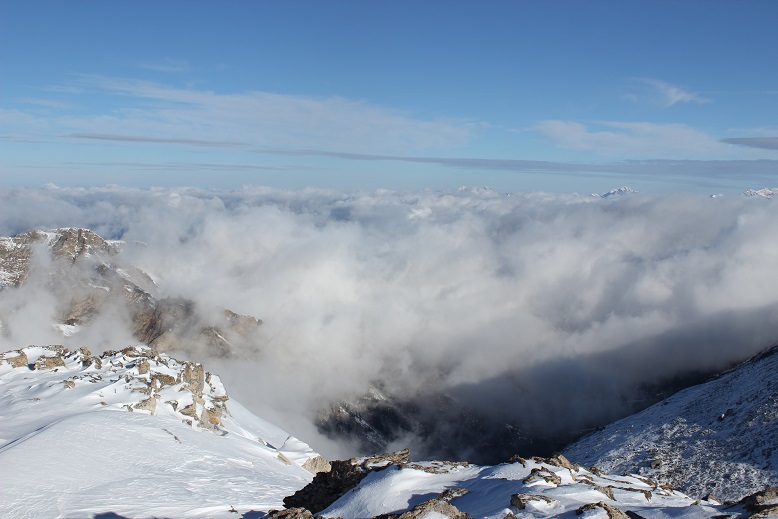
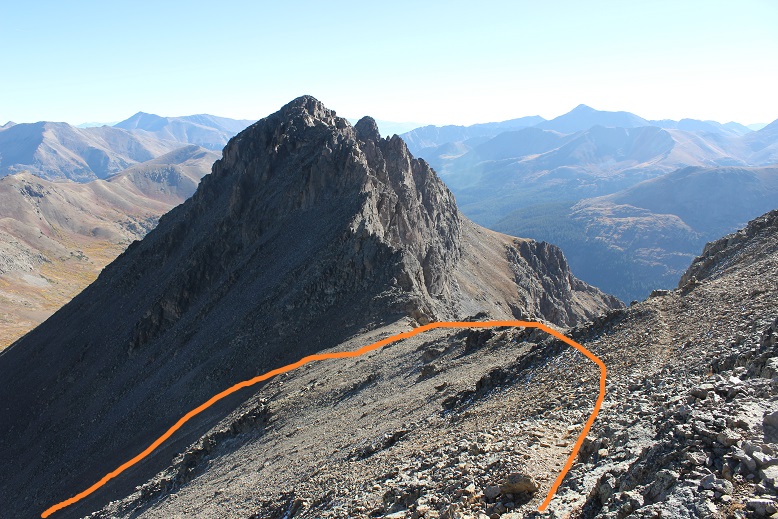
This is the way I came up
I turned and looked to the left of Massive, and there was the weather I’d been worried about. 45mph winds turning fresh snow into ice clouds, headed towards me. It was time to book it off this summit before those clouds reached me.
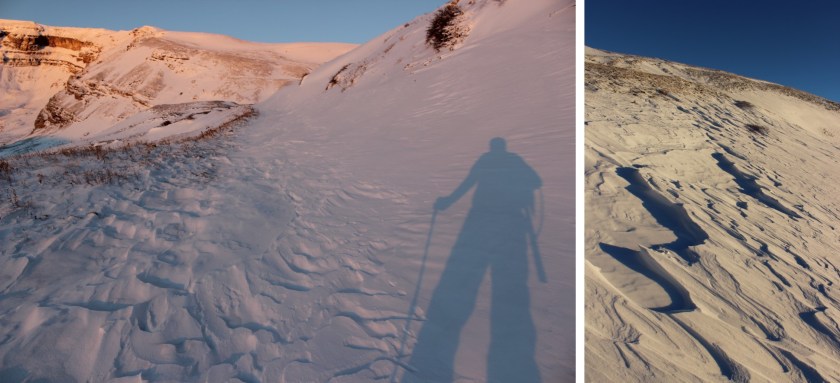
But first, a shadow selfie
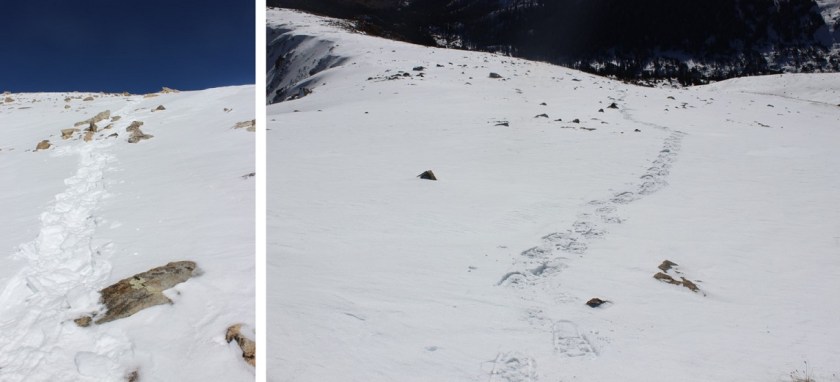
I backtracked the way I’d hiked in, following my tracks
The snow was soft, perfect for skiing. I didn’t have any skis, but I had fun gliding in strides in my snowshoes. I quickly made it back to the scree slope where the snow ended for about 200’ and the scree reigned.
I decided against taking off my snowshoes for this part. Snowshoes actually provide the same stability on scree as they do on snow. Plus I was too lazy to take them off just to put them back on again. (If your snowshoes are aluminum don’t try this. Also, get new snowshoes).
I made it down into the basin and stopped for a bit to reapply sunscreen and take off my gloves (I had on multiple pairs). This was also the last time I saw my hat. Since I had on a balaclava too I didn’t notice when it went missing. I’m not sure if I lost it here or in the trees, but if you find it please bring it down and donate it to a worthy organization (I knit about 300 a year and give them to low income elementary schools and teen homeless shelters in Colorado). This was the only time I wore it, and after washing it I’d planned on adding it to the donation pile.
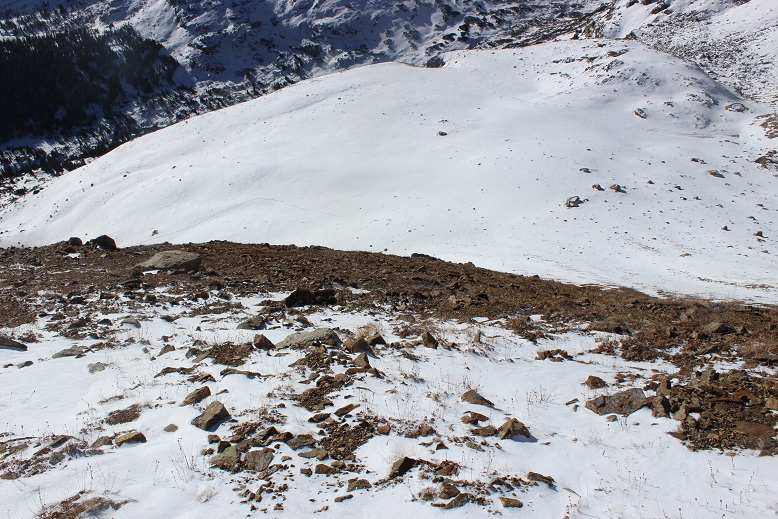
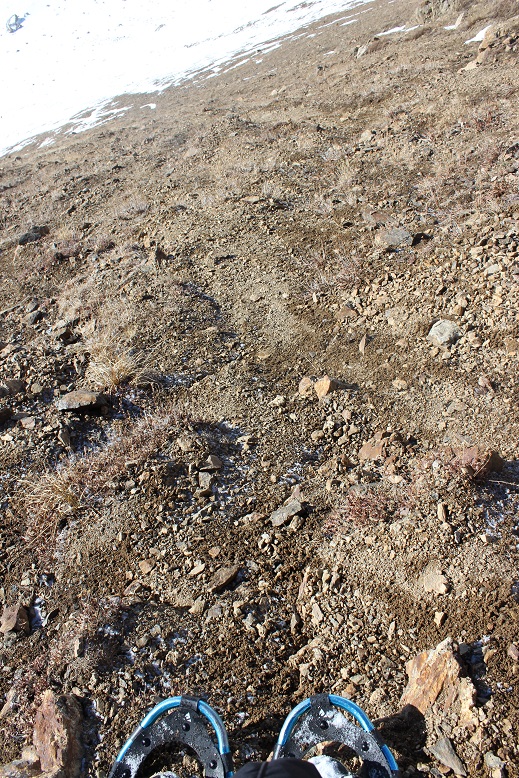
I continued following my tracks back down to treeline and back to the North Halfmoon Lakes trail. After the second stream crossing the snow virtually stopped, and when I hit the junction it was gone all except for when I was in the trees
I made it back to my truck at 11:50am, 10 minutes before my 12pm target time, making this an 8 mile hike/climb/snowshoe adventure in about 6 hours.
I didn’t see a single person the entire day, which I consider a win! There was a Tacoma in the parking lot when I left, and I did see at least 2 if not 4 sets of tracks on the trail going up to Mt Massive as I was heading down.
I needed a successful summit today. I mean I really needed one. The past two peaks I’ve attempted to summit have been thwarted by downed trees on the drive in or early season wind slab avalanche danger at treeline. If I didn’t get in a summit today I was ready to call off alpine hiking for the year. Maybe.
Last year I was new to alpine hiking and decided to take the winter off from 13ers and 14ers and instead map out the entire North Cheyenne Canyon area peaks, most of which do not have established routes. I was able to learn quite a bit about route finding and navigation below treeline, while still staying in the relative warmth of 8K to 12K peaks where I felt I couldn’t get ‘too lost’.
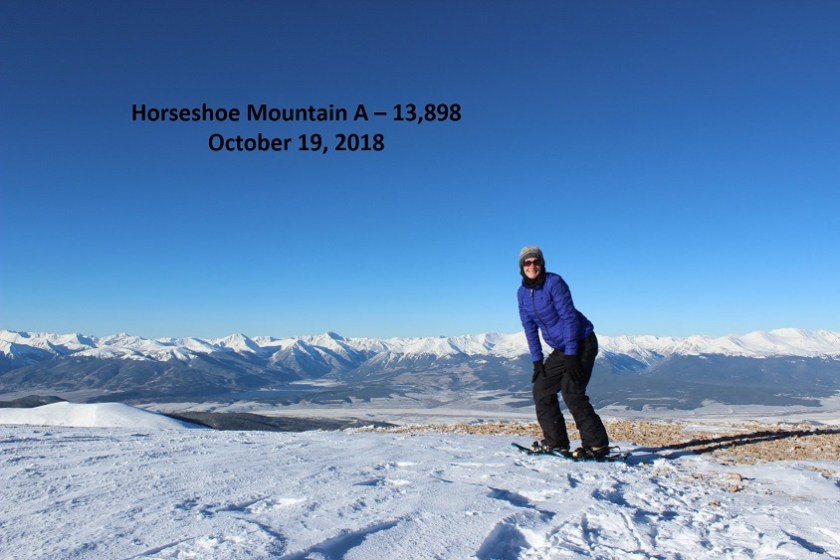
This winter I may choose to do the same in another area, depending on my success rate with hiking/climbing 13ers in winter conditions. But first, an ‘easy’ early season 13er with ‘perfect’ weather conditions (sunny at the summit and 35* with 5-10mph winds)
My alarm didn’t go off at 2am as planned, but fortuitously my internal alarm woke me up at 3am and I decided to still book it to the trailhead. Probably the most difficult part of this whole day was the 10 mile drive in on County Road 18. There was a 40% chance of snow last night, which I’ve found usually means if it does snow it’ll only be about an inch or so. Well, as soon as the road turned to dirt there was at least 4-6 inches of fresh snow on the road, which was unexpected. I’d been driving about 40 mph and quickly downgraded it to 10 mph (or slower).
Luckily there were fresh tire tracks ahead of me, so I knew someone must have made it down the road. I figured someone was attempting Sherman this morning and their alarm clock rang on time. From their tracks I could see where the snow became deeper in the road. At times the snow was a foot or more deep (from drifts) and at others it was non-existent. Unfortunately, the tire tracks abruptly turned off the road to the left after about a mile in, and I was now driving the road on my own.
I have a very capable 4WD Toyota Tundra that never says “no” to anything I’ve asked it to do, but I was still cautious: I knew this was a well maintained road but with all the snow I couldn’t tell how deep the snow actually was; and there were drifts. Multiple times I considered turning back, but my truck kept plowing through with no difficulties, so I kept driving on. Mental note: it’s now time to drive with a shovel in the back of my truck.
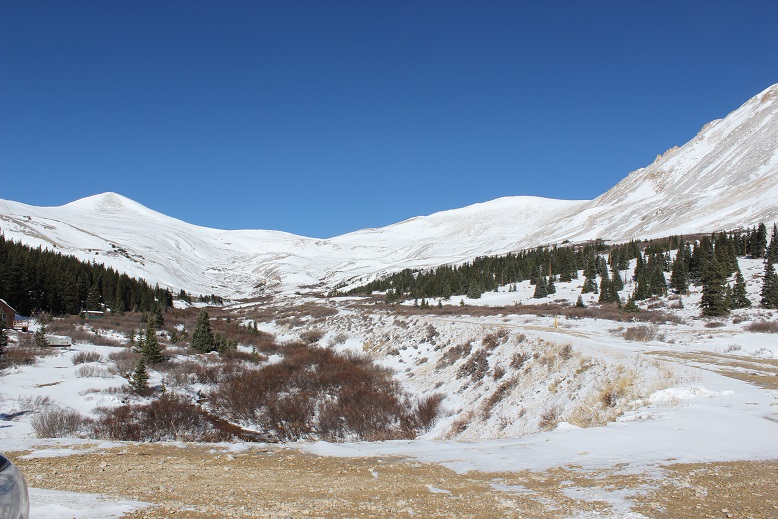
I drove too far. I made it all the way to the upper trailhead for Sherman, realized my mistake, and turned around and found the parking area after the Leavick Mine. I debated driving up the 4WD road to see how much further I could go, but decided against pushing my luck. I’d made it safely this far and didn’t want to chance my summit today by doing anything stupid. This ended up being a grand idea because less than a mile up the road there were several tracks in the snow indicating vehicles in the past few days had tried to continue further and failed. With the added snow from last night there’s no way I’d have made it. Here’s a picture from the drive on my way out. Most of the snow had melted or been packed down by this point.
I parked at the Silver Horseshoe Road junction and put on my snowshoes while sitting in my truck. I kept them on for the entire hike. I started at 6:25am. Here’s where I parked.
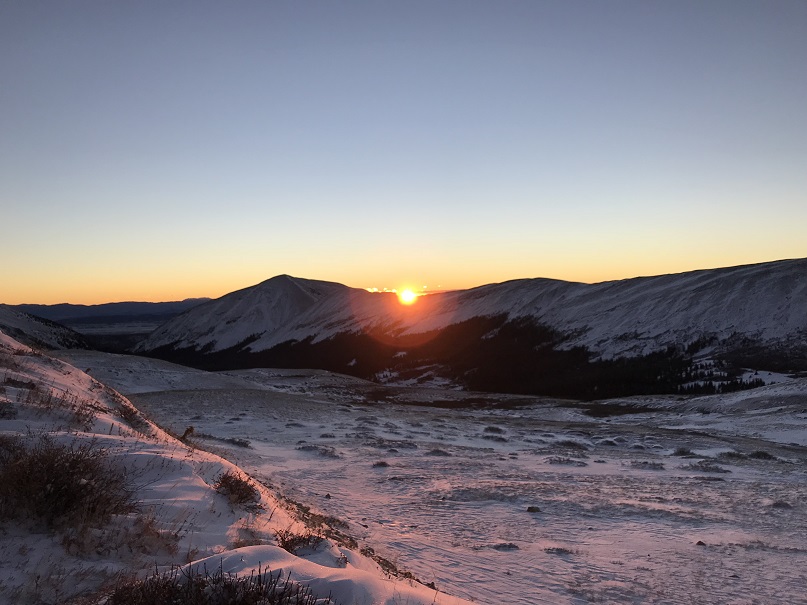
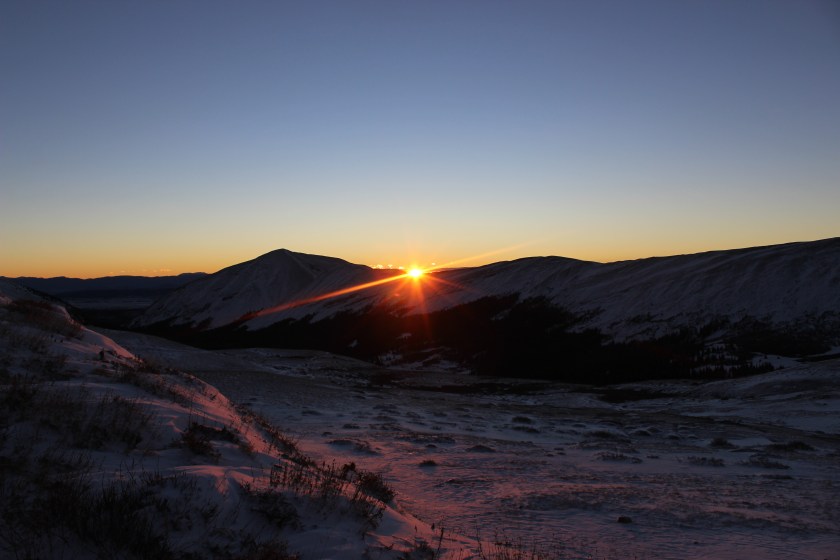
From the beginning the road was covered in snow. And it was dark. And silent. And beautiful. The first part of the hike was relatively easy: I just followed the snow covered dirt road.
Around 7am the sun began to rise. I slowed down to enjoy the experience. I love sunrises!
I got my first view of Horseshoe. What an amazing mountain!
And Peerless. It looked like there was wind up high, but the forecast said it was supposed to die down this morning, settling around 5-10mph. So I trudged on. Snowshoeing takes more energy than hiking!
Being the first one on the trail has it’s perks: I saw numerous animal tracks from the night before.
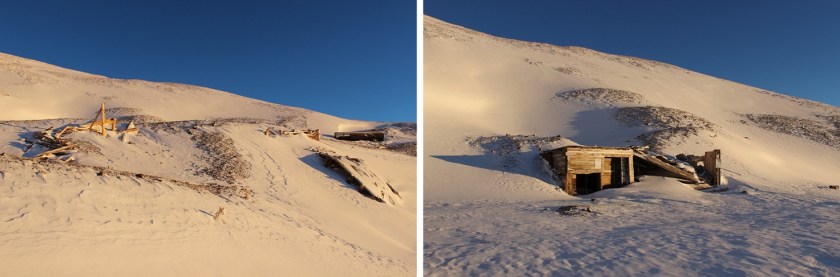
At 12,600’ I passed an old mine.
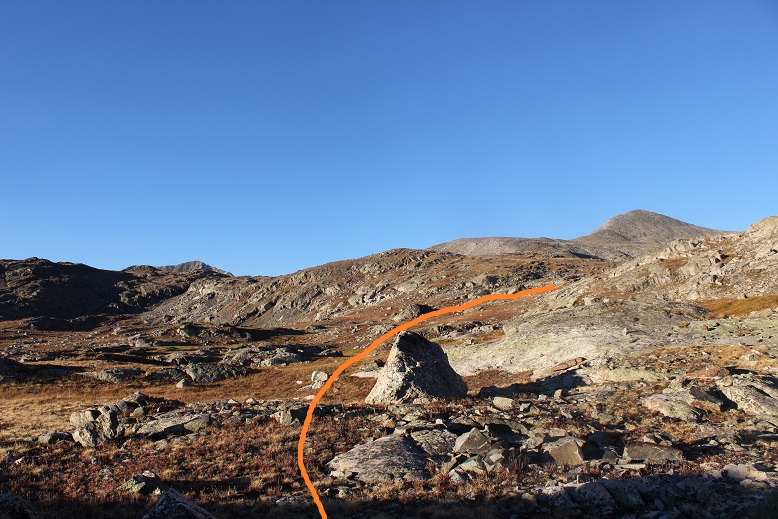
From here as I gained in elevation the road became more difficult to find. It was covered in snow drifts, making it blend in with the mountainside. I did my best to stay on route and probably didn’t, but could see my intended destination (the Peerless/Horseshoe saddle) and just kept aiming for that while avoiding pockets of soft snow.
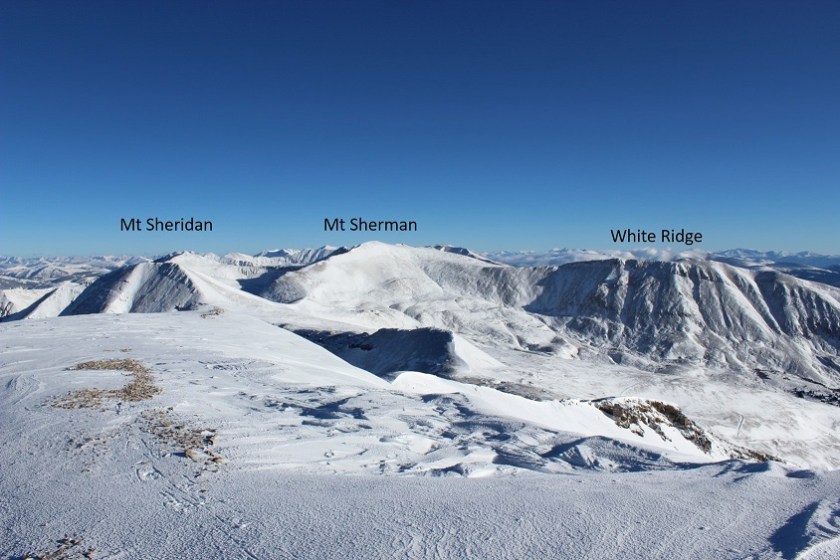
I made it to the 13,200’ saddle and turned left (south). I had a great view of the route before me.
I did a physical check here. The hike thus far had been tiring but not difficult. I was sweating and could still feel my fingers. I wasn’t a popsicle yet. This was fantastic! I decided to keep hiking. On the ridge the trail was either covered in snow or held no snow at all. I kept my snowshoes on either way.
The only part that gave me pause was here. I wasn’t sure if the snow was consolidated or not. I continued on, knowing if I slipped I wouldn’t be falling too far. Second mental note of the day: Bring an ice axe from now on.
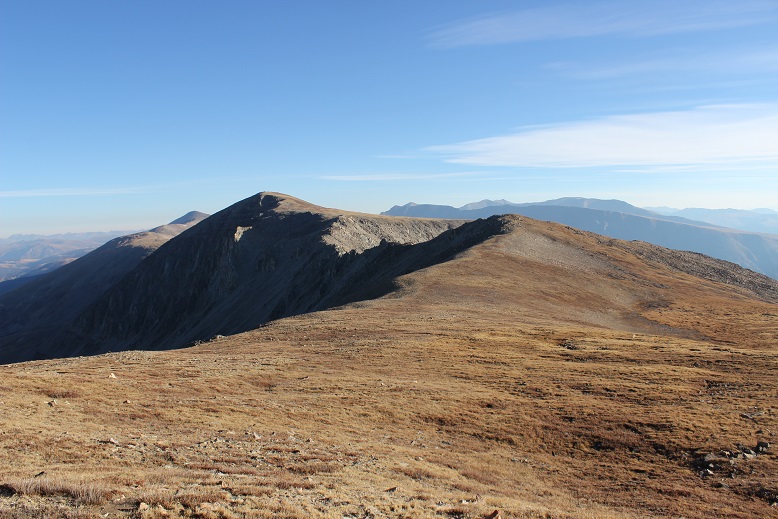
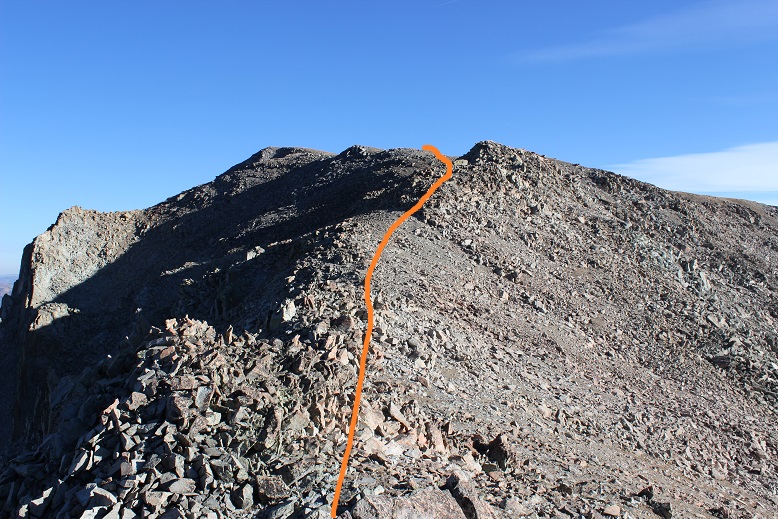
I followed the ridge and was surprised by a false summit. Well, surprised is the wrong word. I’ve come to expect them, but today it wasn’t appreciated because as soon as I made it to the top the wind picked up. Luckily, while it looked far it was actually an easy hike over to the true summit.
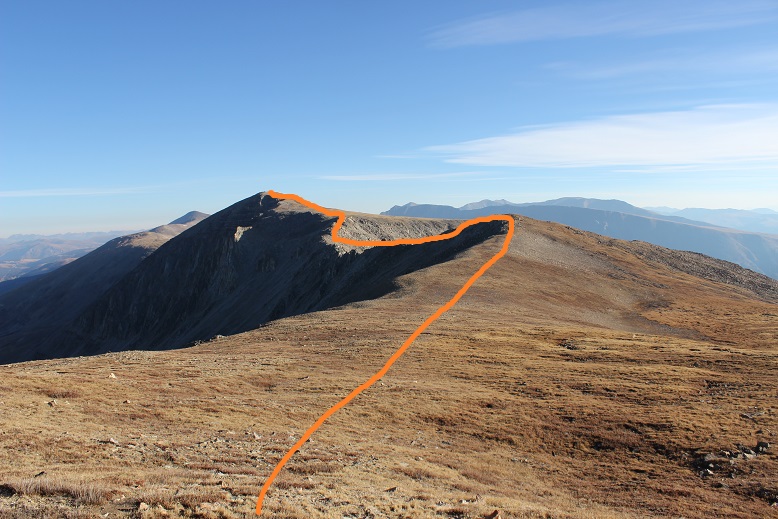
Here’s the route I took
I had fun here learning about different types of snow. I wasn’t able to always tell what was snow and what was ridge, so I traversed carefully. Luckily here the ridge was wide and most of the snow as consolidated.
I summited at 8:45am
VIDEO:
Up until now I hadn’t been too cold, but on the summit the wind picked up. I took a few pictures of the amazing view
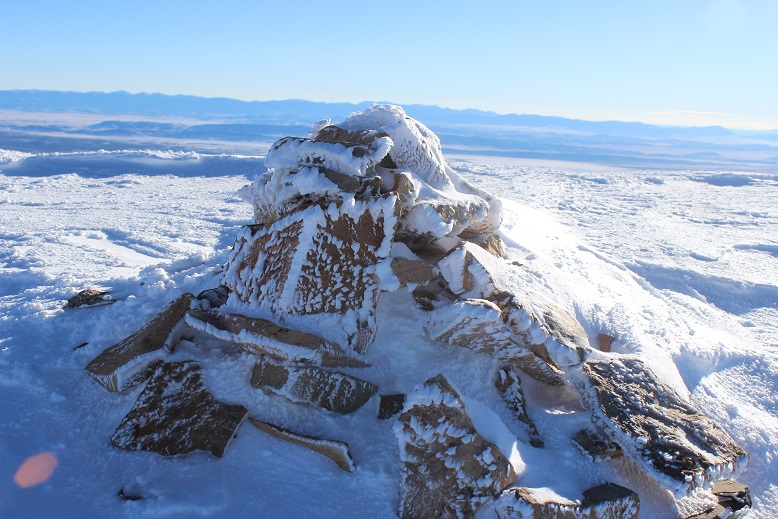
The summit cairn
And took a look at my route back down.
It had been my intention to summit Peerless as well (an unranked 13er) but my fingers were burning. I was clapping them together, putting them under my armpits, in my pockets, etc., but they just weren’t warming up. I needed the wind to settle down. I told myself I’d make the decision whether or not to climb Peerless when I made it back to the saddle.
Here’s my snowshoe tracks. I love snowshoe tracks!
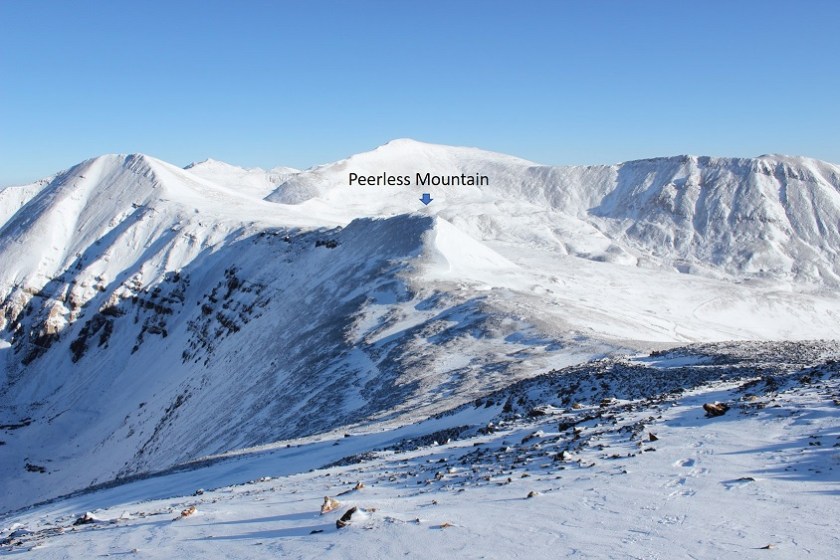
And here’s my next target: Peerless
I made it back to the saddle and looked at the route back up to Horseshoe
And up to Peerless
It looked like a cornice was forming on Peerless, but there was an open path if I stayed to the left and avoided the snow. The wind had stopped, and while I couldn’t feel my fingers they were no longer burning, so I decided to go for it. It was a quick 150’ trek to the summit. I summited at 9:25am
VIDEO:
Here’s a look back at Horseshoe from Peerless. The only difficult part was deciding which snow was stable to hike on, and which was part of the cornice/loose snow. In other words, I wasn’t sure where the mountain ended and cornice began, especially as I got higher up.
The trek back down was very easy as there hadn’t been much wind and I could just follow my snowshoe tracks. I noticed a lot of new holes in the snow from critters who weren’t quite ready yet for winter.
The entire hike in the snow seemed to continually change. It would be consolidated for 10 steps or so, and then suddenly become soft and I’d sink to my shins. On my way back I was able to capture the experience in a photo
Here’s what the 4WD road looked like on my way back out
And I know a lot of people are wondering what Sherman looks like right now…
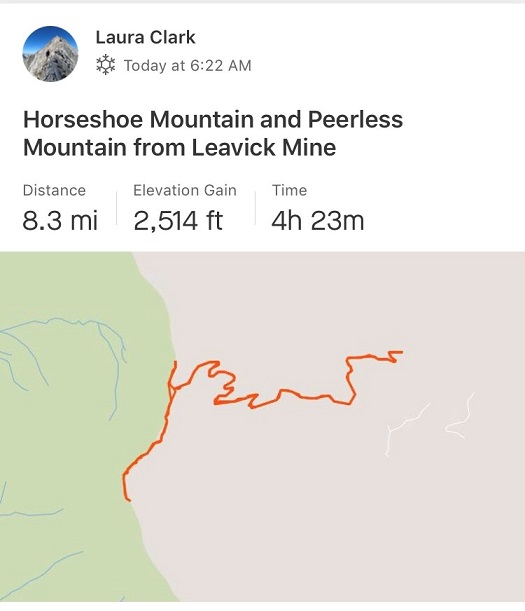
I made it back to my truck at 10:45am, making this an 8.3 mile hike with 2500’ of elevation gain in 4.5 hours.
Today was a huge learning experience for me. I know this wasn’t a difficult peak, but I learned a lot about how to navigate different types of snow, drifts, snow stability, and winter route finding. And I stayed (relatively) warm. I’m considering today a success!
Woohoo! The mountains got their first dusting of snow of the season, and I wanted to be a part of it. The only problem? Since the snowfall had just stopped last night all over Colorado there wasn’t any beta on snowfall amounts or the conditions of any of the trails. So I picked an ‘easy’ 13er and headed out at 2am. All was going well until I made it to the dirt road at the base of the Hermit Pass trailhead. It quickly turned into a 4WD road, which normally wouldn’t be a problem, but soon it became icy and my truck started slipping! This is the first time I’ve ever experienced my truck slip in any conditions. I’m guessing there was mud under the ice. I was a bit worried but also knew the road was supposed to level out pretty soon. In addition to the snow it had been windy this week, and I drove over a few downed trees. I was 4 miles from the trailhead when I was forced to turn around due to a downed tree too big for my truck to drive over. I was a bit bummed, but I’d also been prepared for this eventuality. I didn’t have time today to park where the downed tree was and hike 4 extra miles each way. Luckily there was another 13er 5 miles away with a 2WD trailhead. I hadn’t done much research on this peak, and it was my second choice because it was more difficult than the first, but it was accessible, so I drove towards the Gibson Creek Trailhead and made it there at 5am. The parking lot can easily hold about 20 vehicles.
From the trailhead I followed the fence to a trail junction and continued straight towards Gibson Creek.
It was obvious I was the first person to use this trail since the snow fell, and route finding was a bit challenging in the dark with all the snow (about 8-12 inches). I crossed the creek a couple of times and the trail ended completely. I was met with dense forest, but knew all I had to do was climb south and gain the ridge.
Sounds simple, right? Normally yes, but today this was a much more difficult feat than I’d anticipated. The snow kept getting deeper and deeper and the mountainside keeps getting steeper and steeper, and since I’m stubborn I refused to put on my snowshoes. That meant I was slipping quite a bit. The angle of the slope was intense. My quads and calves were screaming. I had to stop every few steps to rest my legs, which isn’t normal for me. Finally, after what seemed like forever I put on my snowshoes and reached the bristlecone pine trees at the base of treeline, around 12,000’. The wind was powerful (I’m guessing 40mph), which made the sugary snow feel like glass on my face when the wind blew. The wind also dropped the temperature quite a bit (read: I was frozen). The snow kept piling up as I reached the ridge. This is where I ran into trouble. I was supposed to cross the ridge, but there was quite a bit of snow, all piled up into a cornice, just waiting for me to trigger an early season soft snow avalanche.
I looked around for a safer route, but the only route was straight across the ridge (it dropped to either side). So I made the decision to turn around and hike this peak another time, when the snow was either more consolidated or gone altogether. I didn’t want to turn back, but I also didn’t want to risk causing an avalanche. Summiting is optional, making it back down is mandatory.
Since the sun was now up I could enjoy the beauty of the snow on the trees as I trekked back down.
Route finding was also much easier on my return trip, since all I had to do was follow my snowshoe tracks. Also, downhill in snowshoes is much easier than uphill without.
VIDEO:
I crossed the stream again several times.
And followed the snow and leaf covered trail back to the trailhead
At about 9500’ the snow was pretty much gone altogether
I made it back to the trailhead much earlier than anticipated, since I’d only hiked about 6 miles this morning. However, in the daylight I was greeted with fall colors I hadn’t seen this morning in the dark and about 10 forest service workers clearing downed trees.
I’d thought fall was over for Colorado, especially with the recent snow, but I guess not! All through Westcliffe I saw the leaves change.
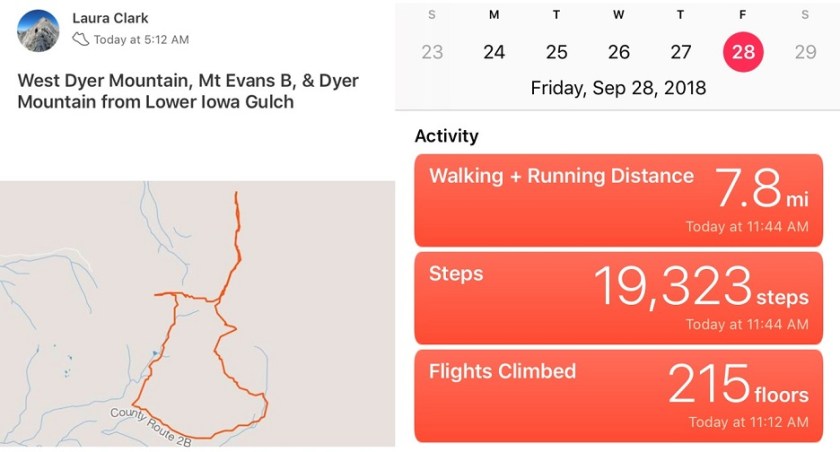
I woke up at 2am and made it to the Lower Iowa Gulch Trailhead at 5:15am, which was much earlier than I’d anticipated. The drive in is easy on a 2WD dirt road.
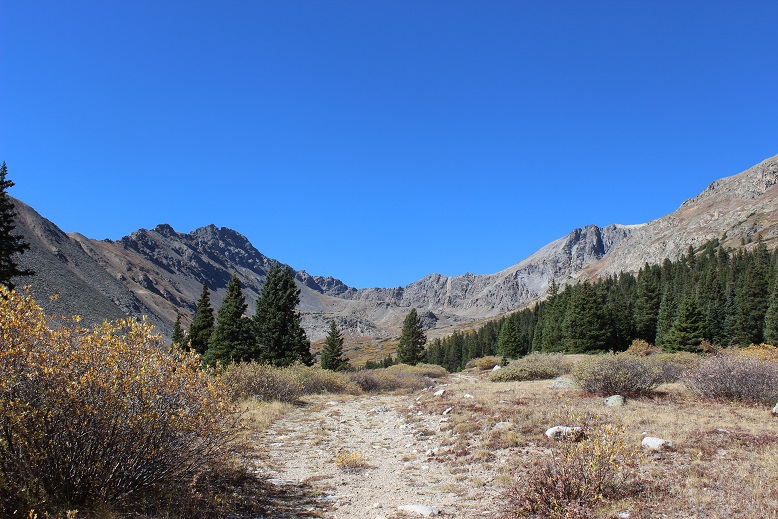
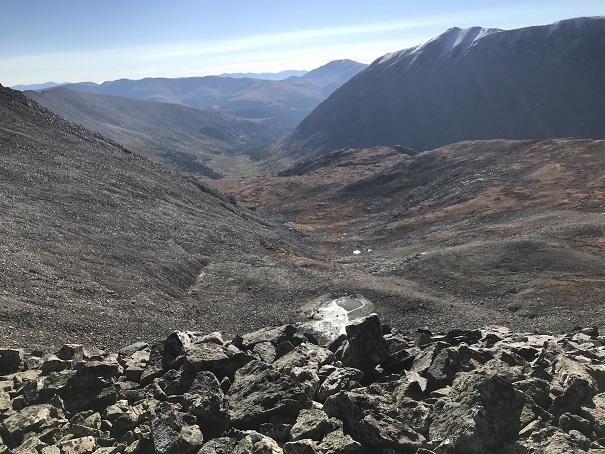
There is no official trailhead, so I parked near a tree, gathered my gear, and headed northwest through the base of the amphitheater towards the West Dyer/Dyer saddle.
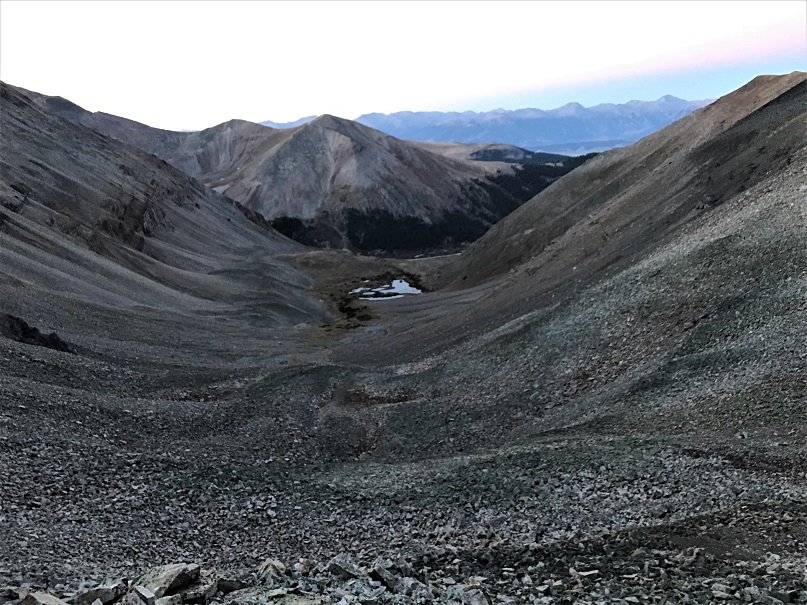
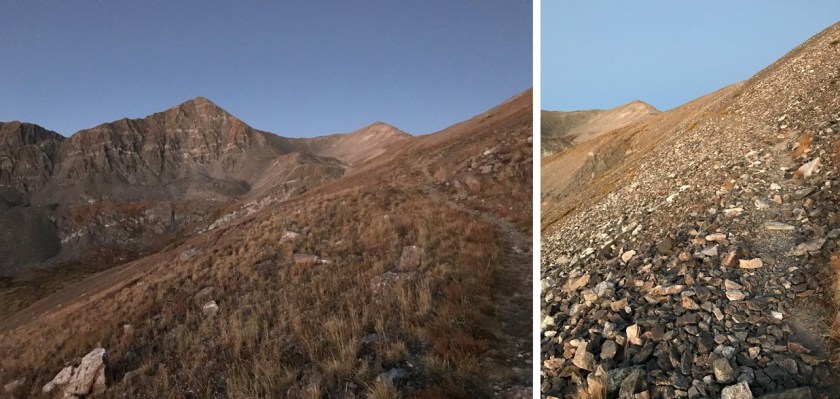
It was only 1.3 miles to the base of the West Dyer/Dyer saddle. There isn’t a trail, but the route is fairly obvious, even in the dark. Just keep heading for the saddle. Here’s a look back on the basin from the saddle
From the saddle I chose to summit West Dyer Mountain first, an unranked 13er. I chose my route to reflect my time constraints and sunrise/daylight limitations. For me it’s a delicate balance between hiking in the dark/daylight (pictures turn out better in the light) and being back at the TH by noon.
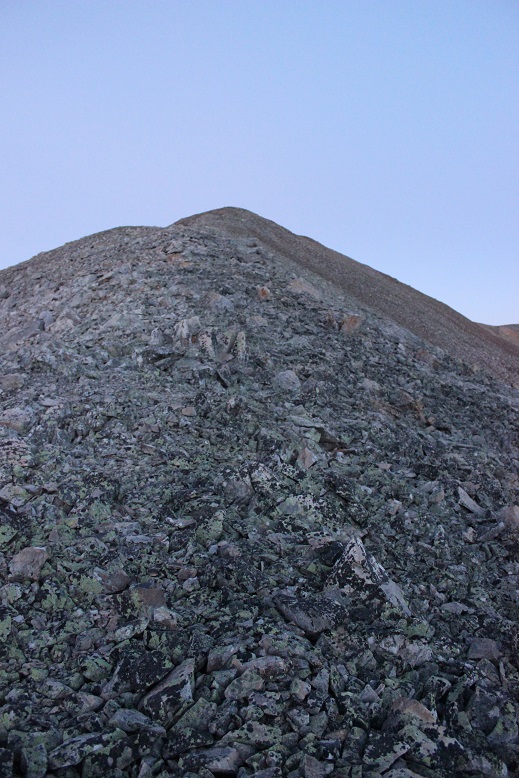
It takes so long for the sun to rise in the fall! I wanted to summit and get pictures, but I also needed to be back at my truck by noon so I could drive home in time to pick up my daughter from school and start our day. So while I was hiking slowly because I wanted to get pictures from the summit in the daylight, I also wanted to get in as much hiking as possible today. In any event, after the saddle I turned west and hiked .2 miles to the summit of West Dyer Mountain, slowly, willing the sun to rise. I summited at 6:20am, while it was still dark. I took some pictures of the summit and waited for the sun to rise. But it just wasn’t happening.
West Dyer:
So I turned back towards the West Dyer/Dyer saddle and put on my helmet.
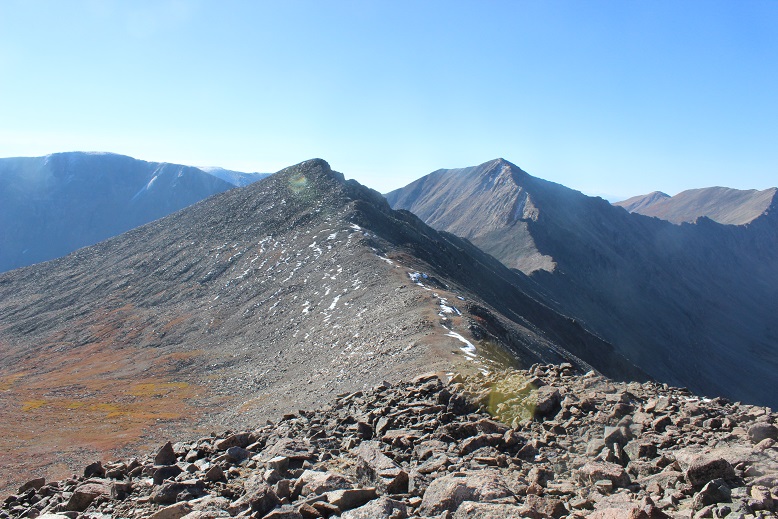
It was still dark and hard to make out the path I was supposed to take up Dyer’s West Ridge. I was hoping it would be more obvious as I got closer to the route. Here’s a look back on West Dyer from the saddle
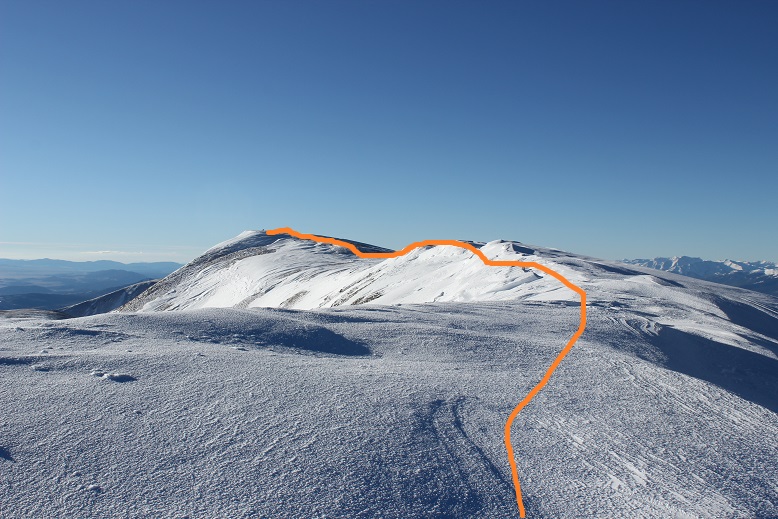
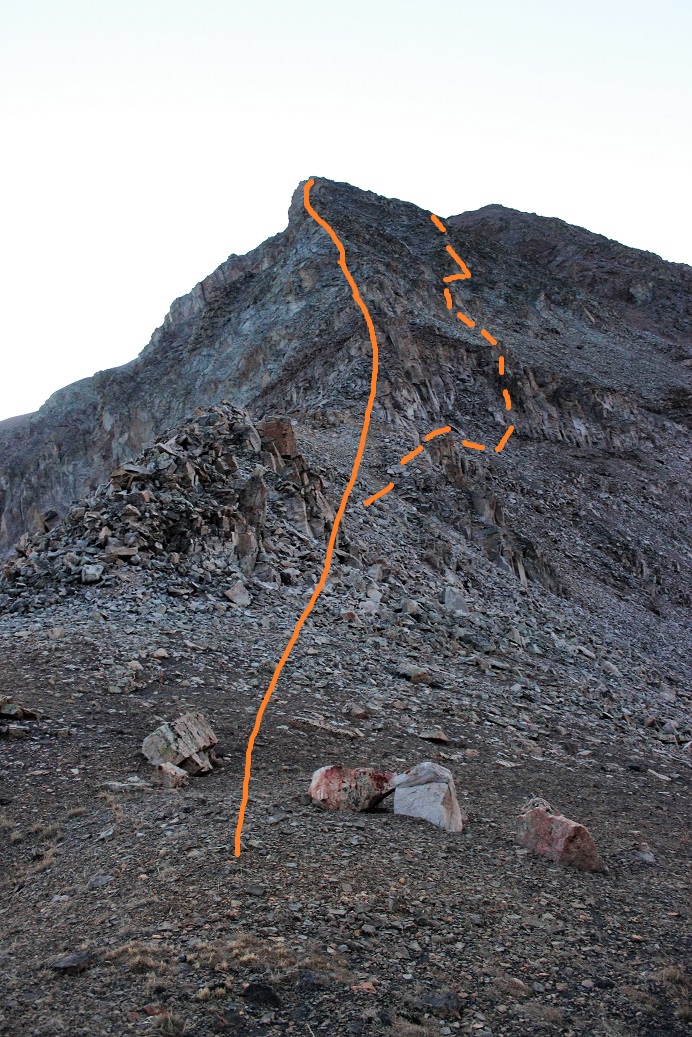
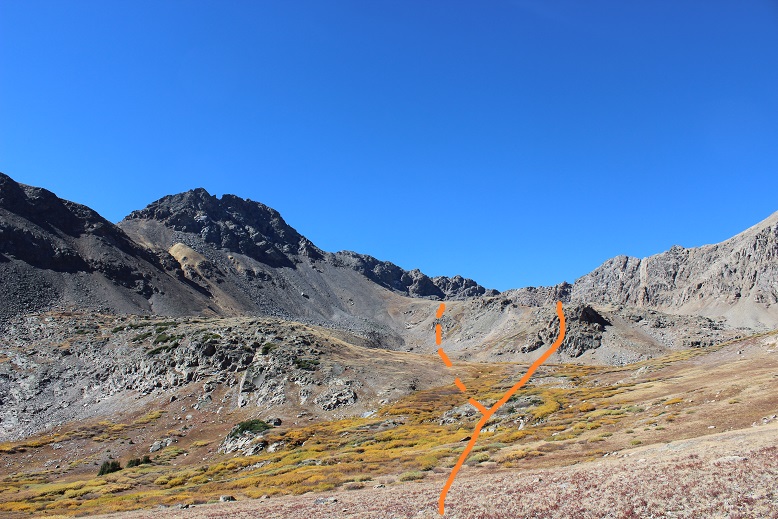
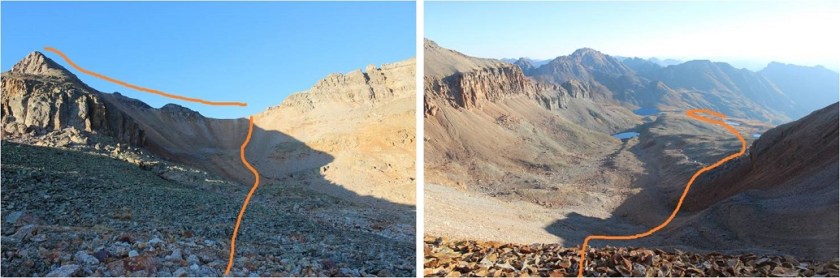
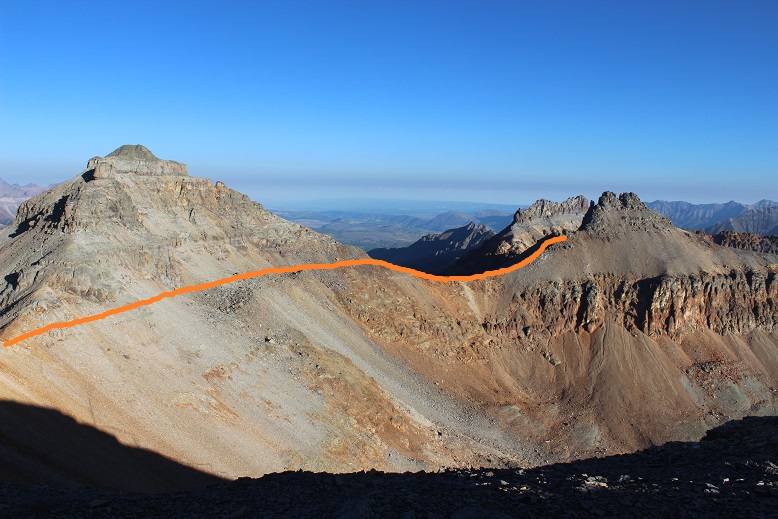
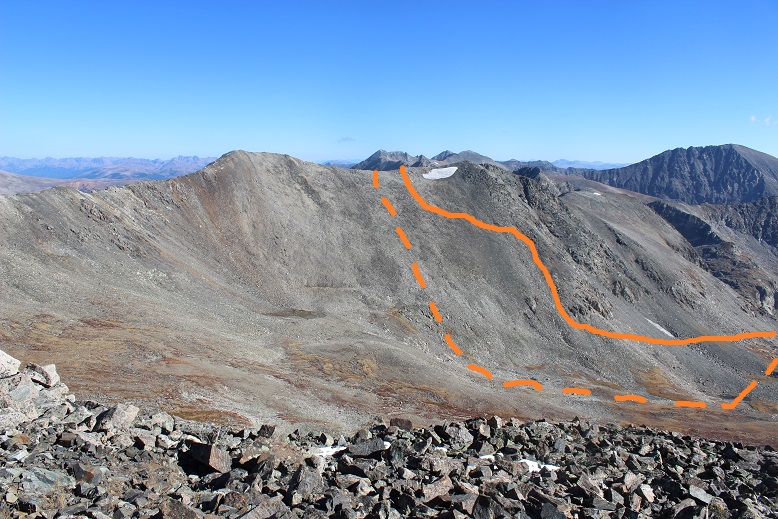
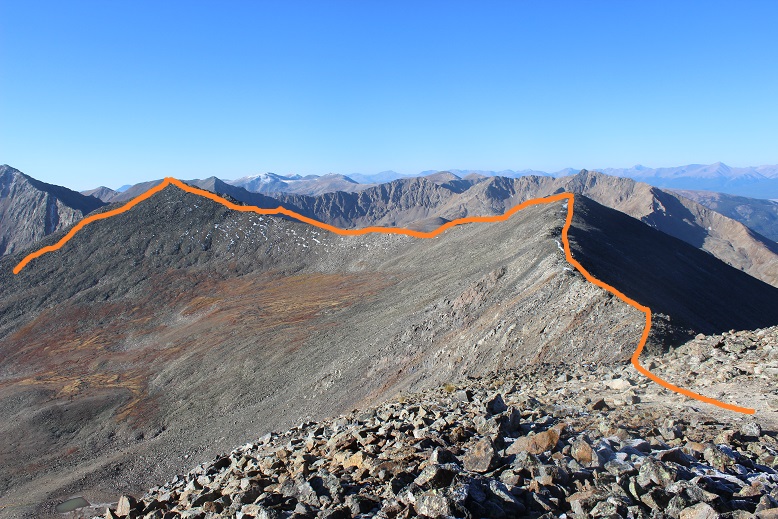
The route up Dyers West Ridge is a class 4 route. I knew I was supposed to look for the chimney to the right, climb it, and then stick to the right of the ridge to the summit. That didn’t happen. In the dark I never found the chimney, but I also didn’t look too hard. I was expecting a class 4 route, and I discovered if I stuck to the ridge, and once or twice went to the left when necessary (just a little to the left, not much) I was able to follow the ridge all the way to the false summit. Here’s the route I took (solid orange) and the suggested route (dotted line)
It was class 4 the entire way, but doable, spicy, and FUN!
In fact, I kept expecting to cliff out somewhere, and to need to retrace my steps and head more to the right, but that never happened.
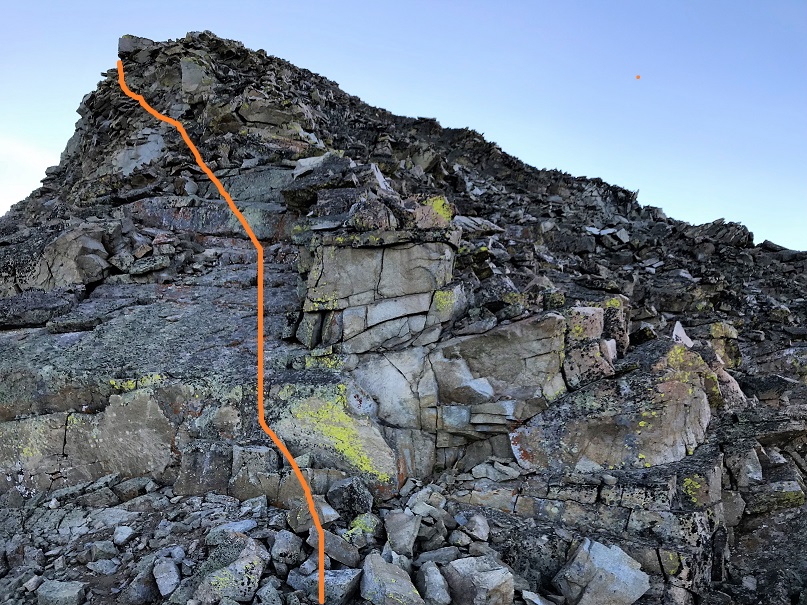
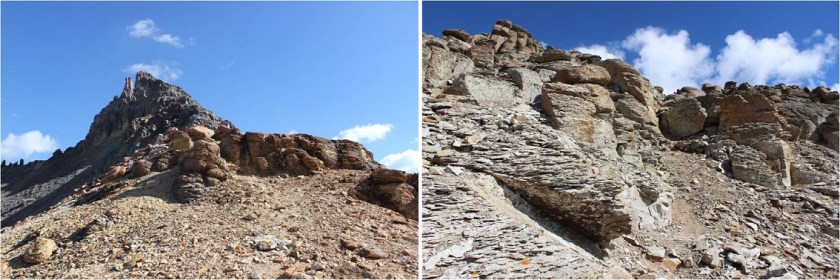
It was serious exposure and solid class 4 climbing for the entire ridge. I met up with the regular class 4 route here, just before the false summit. This area has much more exposure than it looks, and is both the most difficult climbing and also the end of the difficult climbing. This picture (below) doesn’t do the exposure justice: The dirt pyramid on the bottom is a 15 foot drop from where I was standing, and actually where two gullies meet, each dropping down on either side to an unclimbable area. I wish I had better pictures of the exposure, but honestly this was all class 4 and I needed my phone in my pocket and my hands gripping the rocks at all times.
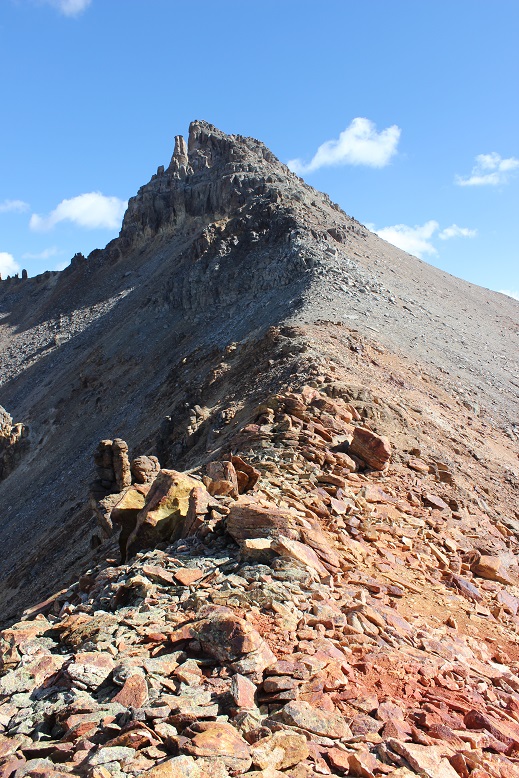
After navigating this area (to the left) I was quickly deposited at a false summit, with a great view of Mount Evans B
And Dyer’s false summit
Dyer Mountain was the closer 13er, but I didn’t want to summit it twice today. I’d intended on making this hike a loop, and Mount Evans B was my next goal. Unfortunately, there isn’t much beta on the ridge between Mount Evans B and Dyer Mountain. From where I was it looked doable, and I know it’s been done in the past, so I kept on my helmet and headed towards the ridge.
Here’s the route I took
I followed the ridge crest most of the way, only once or twice navigating to the left or right around some large boulders. This is a class 3 move where I hugged the wall as I traversed a crack in the rock. (There’s another picture later in the report that shows the other side of this wall and my route)
As you can imagine, climbing after point 13,383 is the crux of the route, but it stays at a class 3
After the most difficult climbing is over it’s a class 2 hike up the ledge
To a long grassy slope to the summit
I summited at 8:55am
VIDEO: Mount Evans B:
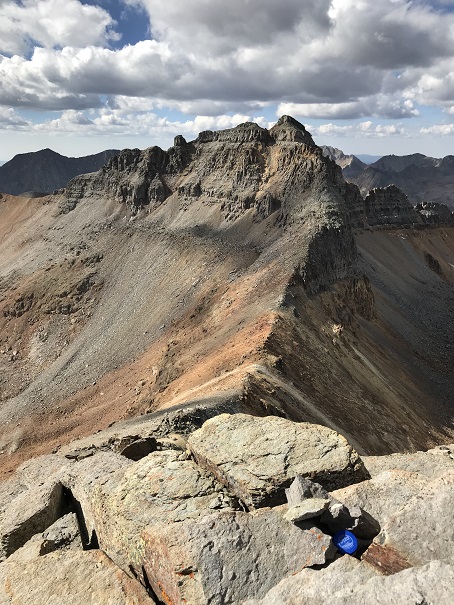
It was an absolutely beautiful day! Besides the wind it was perfect. Here’s a look back on the way I’d come, and the way I’d now need to retrace my steps to summit Dyer.
Here’s a look back on the Dyer/Mount Evans B Ridge
And the route I took
Here’s the class 3 part and the way I navigated around it
I decided not to re-summit point 13,383 but instead cut it to the right.
And headed up to the Dyer Mountain ridge and followed the ridge to the summit
As I ascended the ridge the rocks became loose and mixed with unstable gravel, but it was navigable.
Here’s a look at Dyer Mountain from the ridge
I summited at 10am
Dyer Mountain:
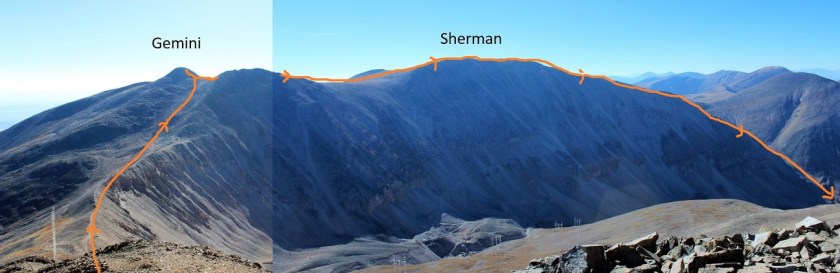
My next goal was Gemini, and then a trek over to Mt Sherman, and finally make it a loop back down to Iowa Gulch.
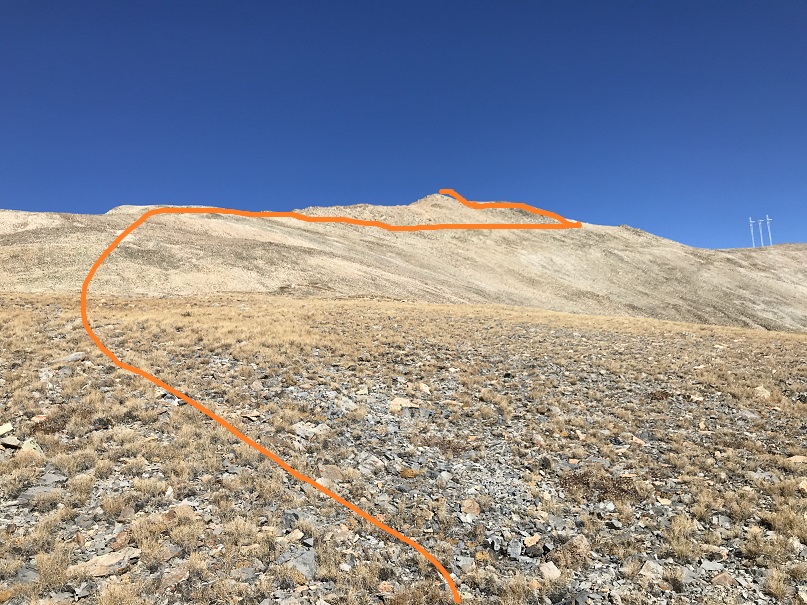
I made it about halfway down towards the Gemini/Dyer saddle, almost to the radio towers, when I pulled out my phone to take a picture and looked at the time. 10:10am! Whoops! I needed to turn back! Looking at my intended route there was no way I could hike the mile up to Gemini, .7 miles across to Sherman, and 2.5 miles back down to the trailhead before noon. Hmph! I was a bit mad at my circumstances, mainly because it was an absolutely beautiful day and I wasn’t even beginning to get tired. But I reminded myself in another few months my youngest would have her license and I’d rarely see her again (I know, it happened with my older two), so I’d better get a hustle on and enjoy the time I still have with her now. Besides, I’ve already summited Sherman, and combining it with Gemini would make for a good winter climb. I’d be back.
I was in a weird spot on the mountain when this realization occurred. I’m not entirely sure why, but instead of just heading towards the basin I cut across the mountain to the south, trying to link up with the south slope route off of Dyer Mountain. I hadn’t realized there wasn’t any established trail off the mountain, but did as soon as I linked back up with the route. Traversing back was time consuming through very large, loose rocks. Several microwave sized rocks slid below me, doing their best to take me with them.
As soon as I reconnected with the correct ridge I just aimed towards the road in the basin and the towers. It’s important to link up with the road in the correct place because otherwise you’ll end up needing to cross a drainage area
I saw some pretty amazing rocks on the way down
Once I met up with the road I followed it back to my truck. Here’s a look at the upper Iowa Gulch Trailhead
And where I parked my truck at the lower Iowa Gulch Trailhead
I made it back to my truck at 11:40am, making this a 7.5 mile hike/climb with 3350’ in elevation gain in 6.5 hours.
I made it home in time to pick up my daughter from school, take her to ice skating lessons, make dinner, and then headed over watch one of my Girl Scouts cheer at her High School Homecoming Football game, making this a very long day, but totally worth it!
The road past the La Plata Trailhead is 4WD the entire way to the upper trailhead. In fact, I felt the second 4WD portion was easier in many places than the early 4WD portion. Only one area gave me pause, about half a mile from the 394 junction. The dip in the road was bigger than it looked, wasn’t anticipated and caught me off guard.
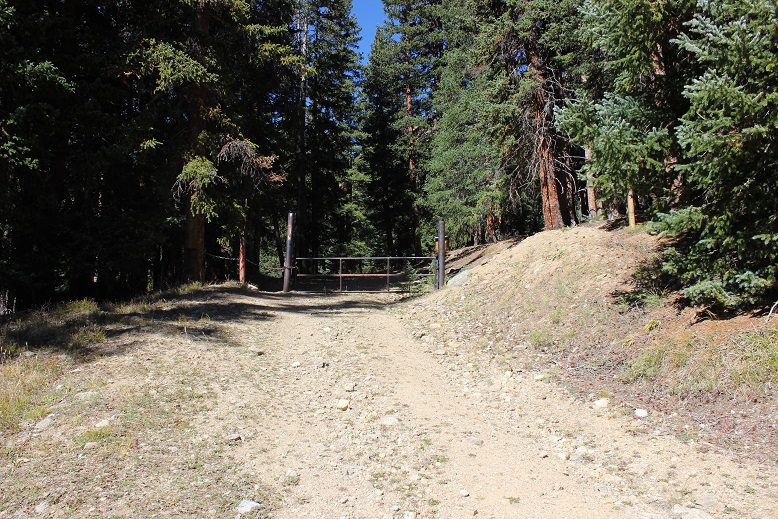
I parked in a grassy area just before reaching the gate and started out at 5:45am.
The gate was locked and it didn’t look like anyone had driven on the road past the gate in quite a while. This is where the trail starts.
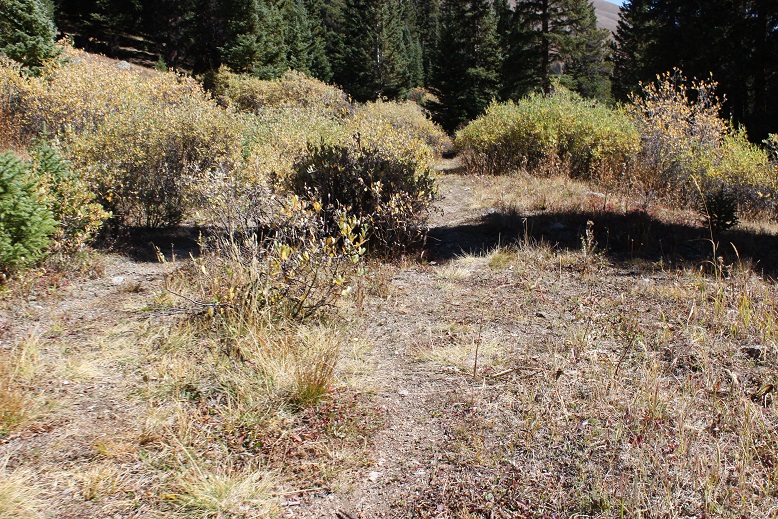
Follow the road west into McNasser Gulch. Almost all of this trail is above treeline, but until you make it to the mine you’re on a trail overgrown with willows.
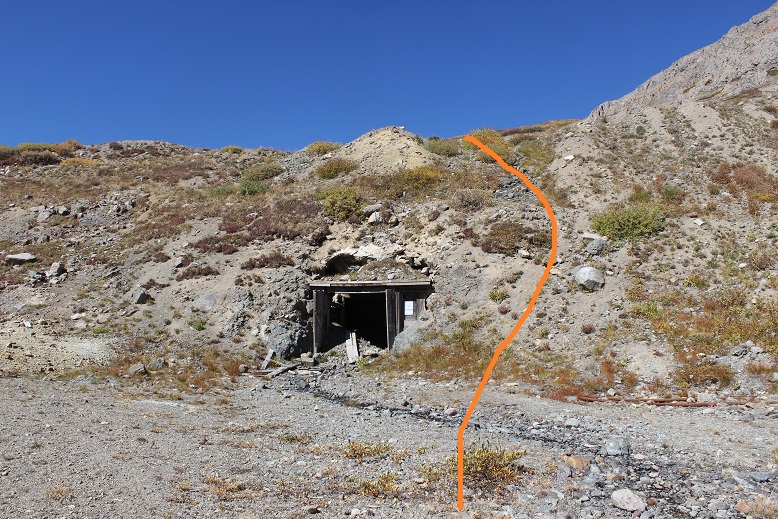
The mining area is at 12,100’. It’s boarded up pretty well, but still looks neat (and operational?).
The trail in this area gets kind of fuzzy, but it picks back up again directly over the mine (so make your way around it and head west/northwest/right).
From here there is no trail. Head northwest through the basin towards Grizzly Peak.
After rounding the basin and heading northwest (right) you aim for this bump:
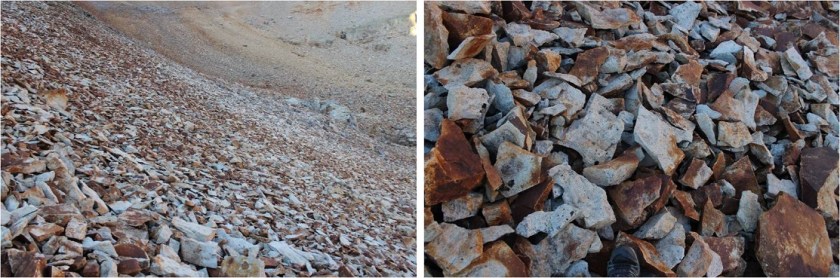
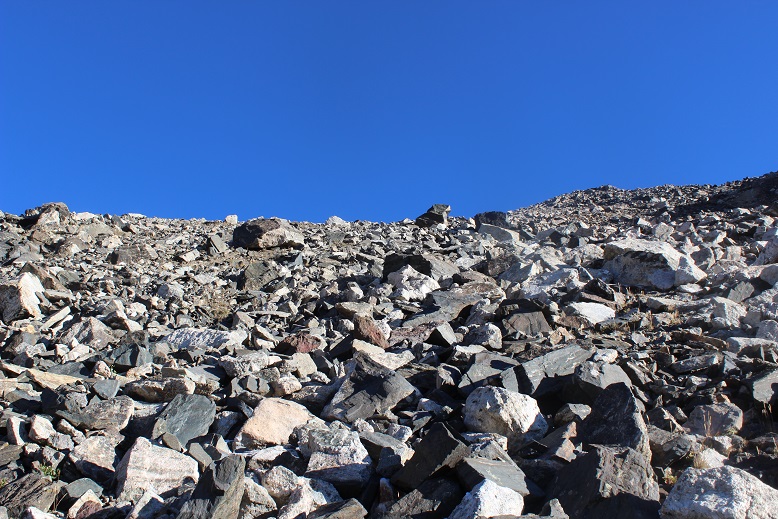
The terrain is much steeper and rockier than it looks. The ground was full of loose sand/scree.
Once you make it to the saddle turn left (west and follow the ridge).
This is done by initially sticking to the ridge crest and then skirting the 3 gendarmes to the left before regaining the ridge and following it to the top. Here’s the view looking back at the route so far
There was just a little bit of snow at the top
The rest of the route to Grizzly is only .2 miles. I followed the ridge to the south. There was an established trail here.
The final pitch was loose and made up of bowling ball sized unstable rocks but easy to navigate
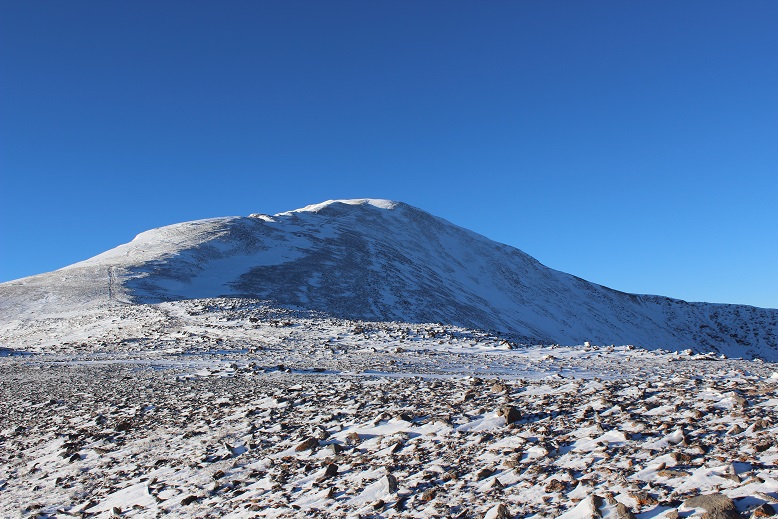
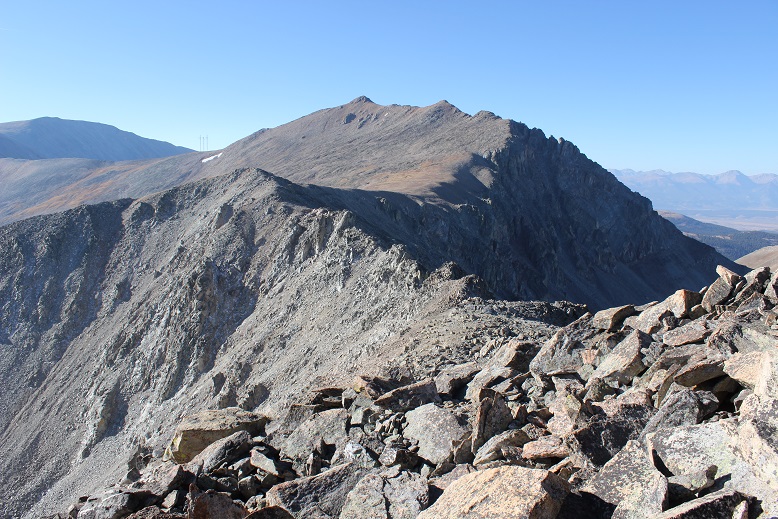
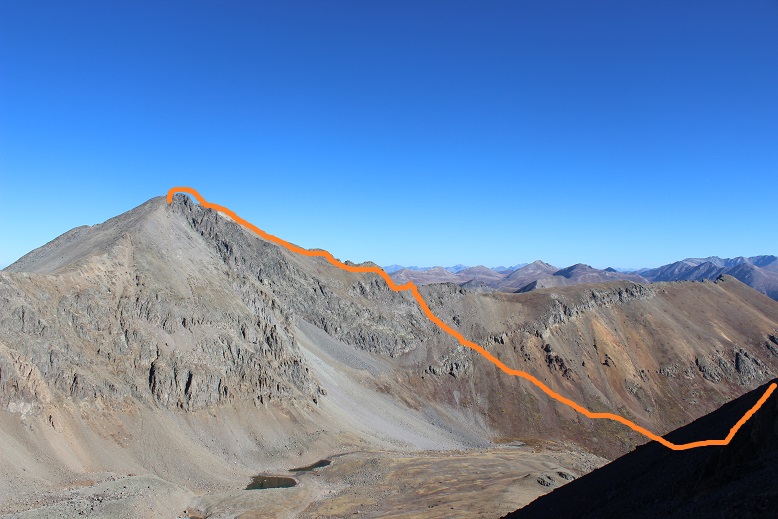
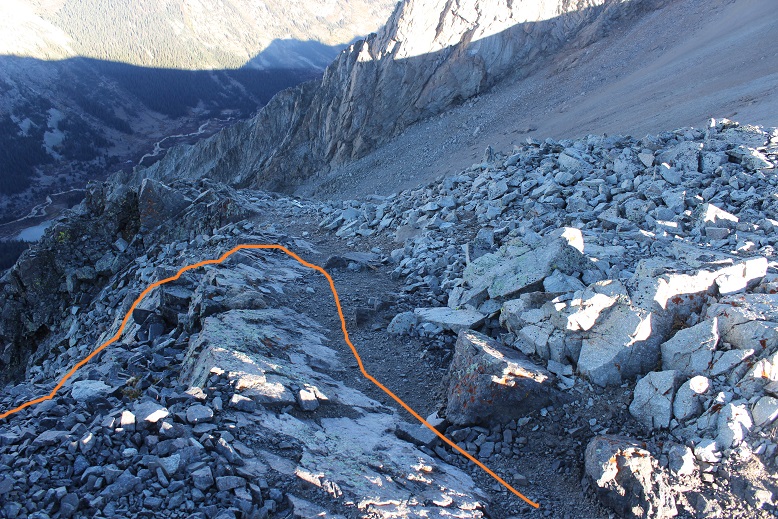
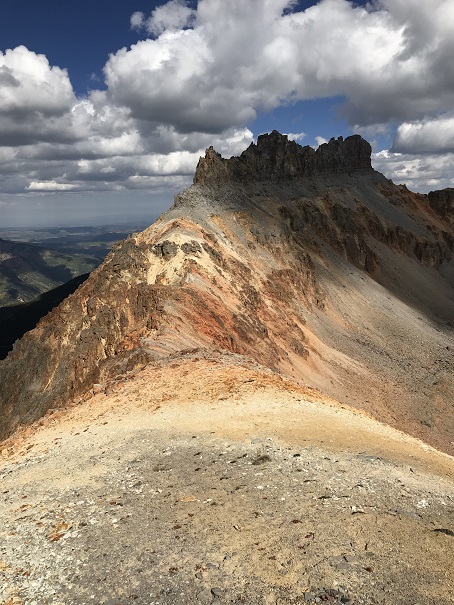
Here’s a view from Garfield looking at the route up Grizzly
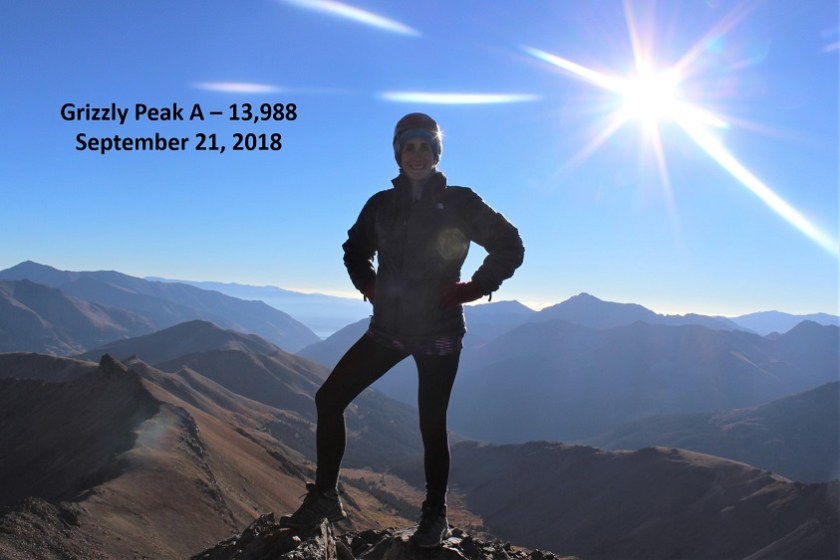
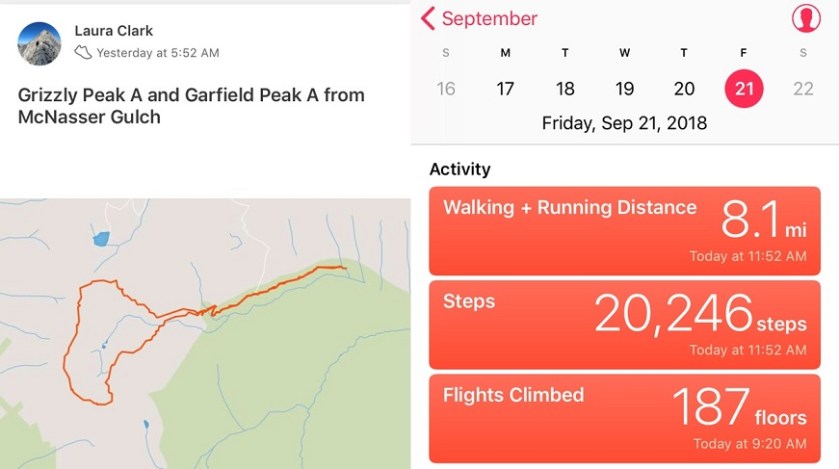
I summited Grizzly Peak A at 8:10am
Here’s a picture of Garfield from the summit of Grizzly.
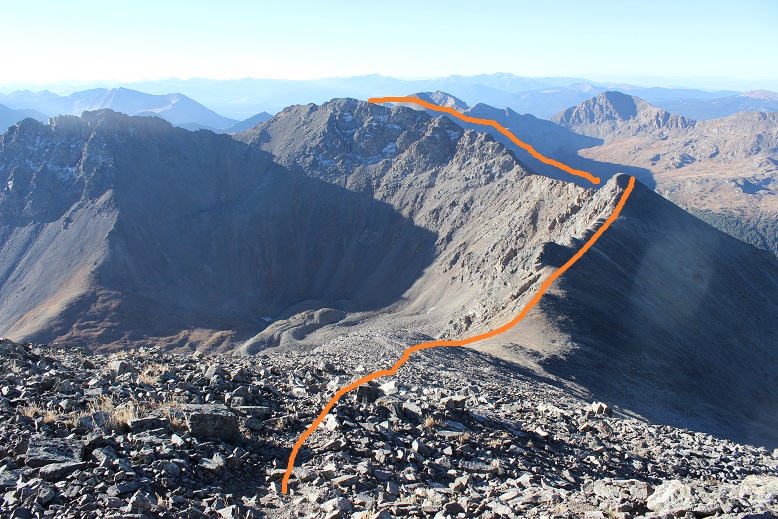
To get there you need to re-trace your steps, but not far. Head back the way you came and about 20 steps down from the summit you’ll turn left (south).
I had to do one class 3 move to get down this part of the ridge, and after completing it realized there was an easier way. Here’s the route from the Grizzly/Garfield Saddle
I followed the trail along the ridge and behind point 13,650. After rounding 13,650 (to the right) I followed another trail around the south slopes and gained the ridge.
From the ridge I climbed to the summit (no trail on this part)
I summited at 9:20am
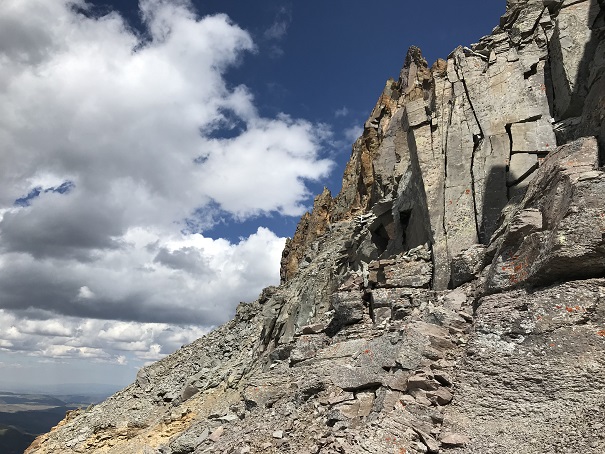
I was done summiting both peaks for the day, but from here the route actually became more difficult. I had a hard time finding a decent path off the summit of Garfield. I’m sure it was a height thing on my part. I could tell where I was supposed to downclimb, but it was a class 4 downclimb I needed a few more inches to be able to achieve. This was very frustrating. I had to backtrack and look for an easier way to Garfield’s Gully. Here’s where you’re supposed to leave the ridge
I eventually made it to the saddle. From here you strap on your microspikes and head straight down. There are a lot of trails down, and they all lead into the basin.
This was some of the worst scree I’ve ever encountered. I was so glad I’d chosen to do Grizzly First: there’s no way this would have been enjoyable trekking up (in the snow however it might be easier). If you’ve done the gully on Pyramid or the decent off Bross, this is worse.
It descends 1000’ to a small lake, but just when you think you’re finished with the scree you gain a small ledge and there’s tons more (so don’t get too excited the first time you think the scree’s over).
My advice is to aim (right/northeast) for the rocks near the grassy area. The rocks are stable, where nothing in the gully was. I took the gully and had large rocks tumble down from above me and I had to take cover several times (no one else was out there today, these rocks were just free falling from above). Here’s the route I took (as seen from Grizzly).
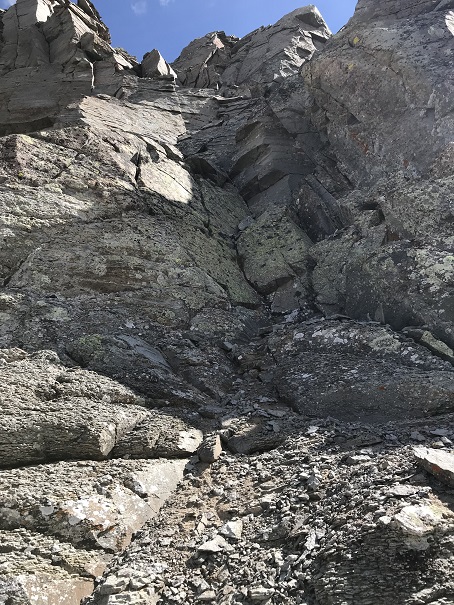
When you reach the grassy basin your troubles aren’t over yet. There’s more scree to traverse, or you can choose to downclimb rock ledges. I’d had it with the scree, so I downclimbed the class 3 & 4rock (which led to more loose talus)
Here’s a look back at what I downclimbed
And a closer look at the climbing
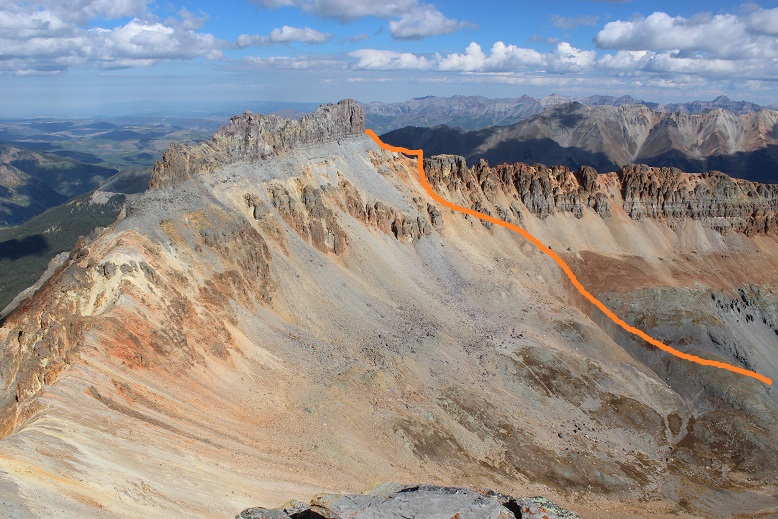
Here’s another look at how I came out of the basin. I took the solid orange line (rocks) over the scree route (dotted)
The good news is after this the hike got really easy! I just crossed the stream and followed the basin back to the mine, where the 4WD road picked back up.
Here’s a look back at the basin
I made it back to my truck at 11:30am, making this 8 mile climb in just over 6 hours
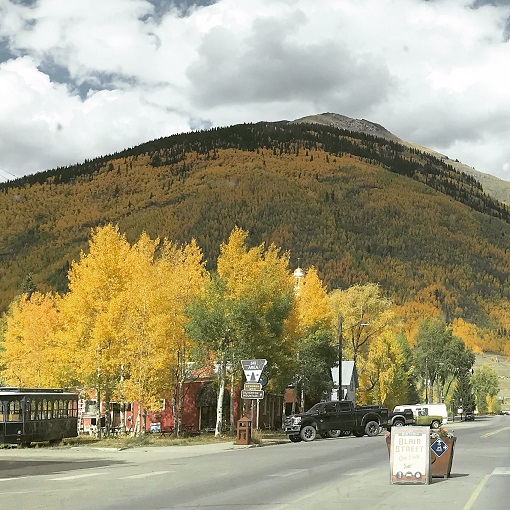
My drive to the trailhead took me through Silverton. I’d heard the fall colors weren’t supposed to peak here for another 2 weeks, but right now it looks beautiful.
I had conflicting directions on how to get to the Burns-Gulch trailhead, so I brought both with me. From Silverton I took County Road 2 past Eureka on a 2WD dirt road, and ate the dust from off road vehicles driving ahead of me the entire way. For a Monday afternoon it sure was crowded: Leaf peeping season is definitely in full swing!
I made it to the base of the trailhead on the Animas River and my directions ended but I knew this wasn’t where the 4WD trail began. So I pulled up a GPX file of the route to see where I needed to be: about 2 miles up a narrow shelf road.
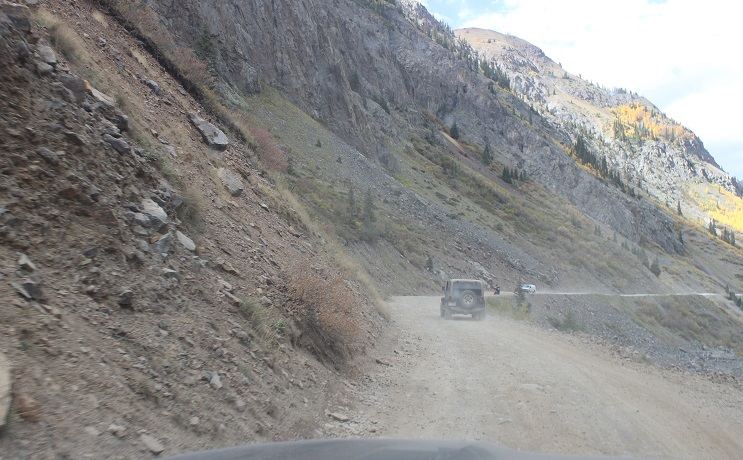
The road was much narrower and steeper than it looks and filled with bowling ball sized rocks. I took it slow: this road was more difficult than I’d anticipated (but nothing my truck couldn’t handle). I just hoped no one would drive towards me from the top: There was no way I could turn this truck around on such a narrow road, and passing another vehicle wouldn’t be easy.
There was a campsite at the 4WD trailhead at 11,720’ and no other vehicle in sight. Sweet! It looked like I was going to have the site all to myself for the night.
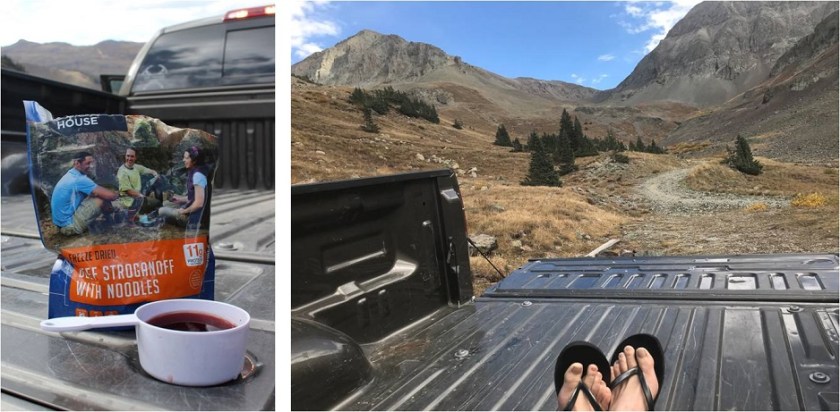
I got to work making dinner: Mountain House Beef Stroganoff. When it was ready I poured myself a glass of wine in the measuring cup I brought for making dinner, sat back, and enjoyed the view.
Life is good! Sitting in the bed of my truck looking at the mountains was so relaxing. As I was sitting there I heard a creek to my right and got up to investigate. This was wonderful! It was about 10 yards from where I’d parked my truck. I enthusiastically washed my hands in the running water. They were gross from today’s adventure and it felt good to have clean hands and fingernails again. I got up to turn around and head back when my left sandal broke. I mean really broke, like duct tape can’t fix it broke. Drat! I was going to have to tiptoe the 10 yards back to my truck without wearing shoes. The first step I took landed my left foot on a thistle. Wonderful. I made it back to my truck, poured myself another glass of wine and spent the next half hour picking splinters out of my foot (mostly on the heel and arch). I looked around at the mountains: Life was still good!
I got out my maps and route info for the next day and tried to identify the peaks around me and the best route to take (I had several options). I studied my chosen route until I felt it was time to get some sleep: it was starting to get cold.
I decided to sleep in the cab of my truck because I fit perfectly across the back seat and because I could. Two shots of whiskey later I was ready to go to sleep. I laid my head on my pillow and a fly landed on my arm. I thought about how much fun having a fly buzzing around me while I was trying to sleep would be and debated whether or not to open the door to let it out. In the end I decided I’d rather not let all the warm air out in doing so, so I made a deal with the fly: “Fred “(I named him Fred)”If you promise not to buzz around me all night I promise not to kill you right now”. Fred flew away to relax on my steering wheel and I fell asleep thinking this wasn’t a bad way to spend my last day of being 37.
I woke up at 11:11pm. This isn’t unusual, as I normally only get 4-6 hours of sleep a night. Obviously my body was ready to get up and start my day. I however was not. I took 3mg of melatonin, washed it down with another shot of whiskey, and spent 5 minutes star gazing before falling back to sleep.
My alarm woke me up at 5am. Why, oh why, oh why did I choose to sleep at a trailhead on my birthday? I hate sleeping at trailheads! I’m always cold and have a hard time getting going and all I really want to do is stay in my nice warm sleeping bag where it’s nice and warm. Sleeping.
Why hadn’t I done the sensible thing and reserved a hotel in Ouray?
Ugh. I could smell myself. Or was that my socks and shoes on the floor recovering from yesterday? Both. Definitely both. Well, the day wasn’t getting any younger. I needed to be off, so I slowly started through my morning machinations, taking much longer to get ready than it would have taken me at home. My coffee was cold. My hands were cold. It took me almost an hour but by 6am I was finally ready to go.
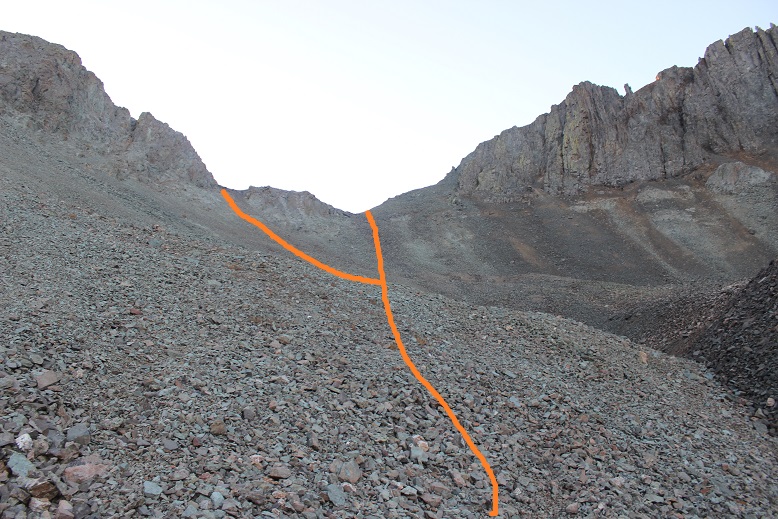
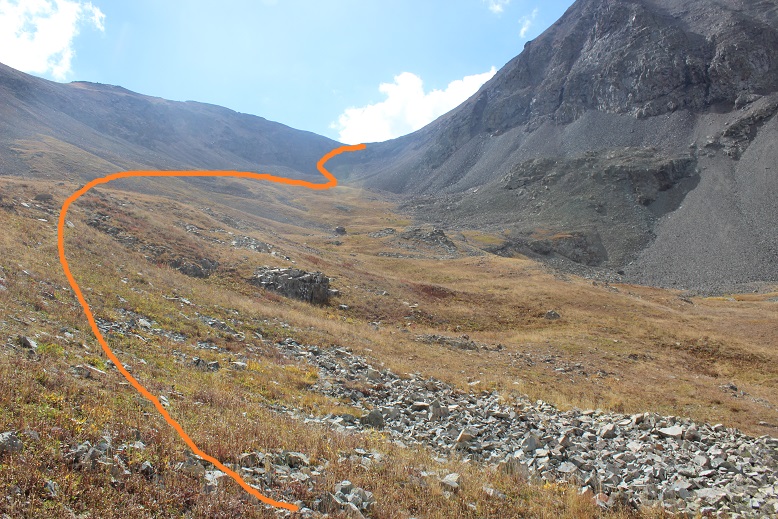
I decided to start by hiking to the Jones-American saddle, which I discovered isn’t a very popular route (most people start with the Jones/American saddle). The trail starts at the campsite and heads directly north up a hill, then east. (Sorry, no pictures: I did this in the dark and planned to get pictures on the way back, but there was an adventure that happened….)
I followed the road to a drainage and just headed up what was trying desperately and failing to be a waterfall.
From here I followed the drainage up a basin and to the right. Just continue sticking towards the bottom of the drainage and heading right.
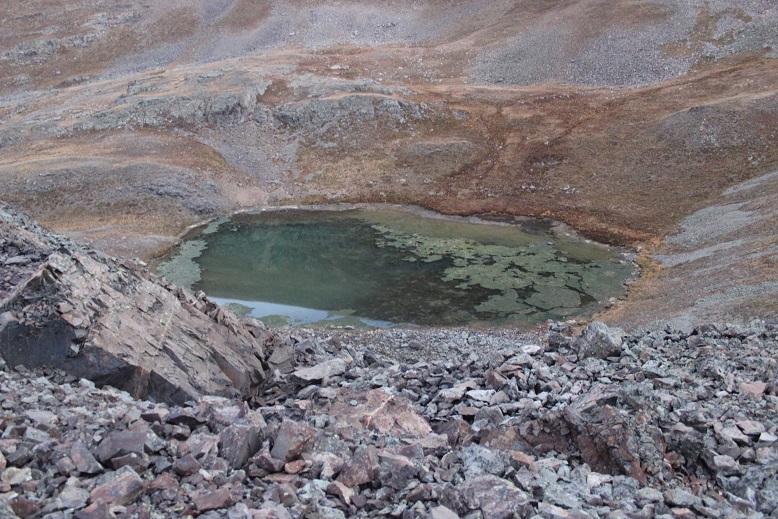
I passed a very small pond (it’s been a dry year)
and navigated up the rest of the basin. There’s no established trail or cairns. This looks like a great route to ski in the winter. This is the route I took to the saddle
The base of the saddle is where I ran into trouble. I knew I had to gain the saddle, but neither of the options I saw looked better than the other.
I could have gone either left or right. I chose left. I chose wrong. As I got closer and closer to the saddle the ground became less and less stable and the path to the right looked more and more appealing and less steep. The ground wasn’t like loose scree, but more like compact sand my shoes couldn’t grip. It was slippery and I was dangerously close to sliding all the way back down the slope. At this time I realized this must be a snow route: perfect for skiing down or snowshoeing up.
I decided to aim for the rock wall area to the left, as it looked like it had more stable dirt around it. It didn’t. In fact, it was just as loose and slippery as the rest of the scree. I made it to the rocks and my first thought was “Why don’t I have my helmet? I need a helmet for this!!!” I had a helmet, it was just back at the trailhead in my truck because this was supposed to be a class 2 hike. The rock I’d wanted to climb was more of a rock wall than a rock couch. I’m talking straight up with hand and foot holds that crumble out from under you when you grab them. But it felt safer than the dirt/scree area. I was shaking, but I made it. I wouldn’t recommend it to anyone, and I’m glad I did this route first instead of last (I’d of had to re-summit Jones again because there was no way I was going down that unless I was on skis).
Here’s a look at the route I took to the top of the saddle. I know it doesn’t look like it but this was the safest option since I hadn’t taken the route to the right.
OK, now that I’d gained the saddle I looked at my route to American Peak.
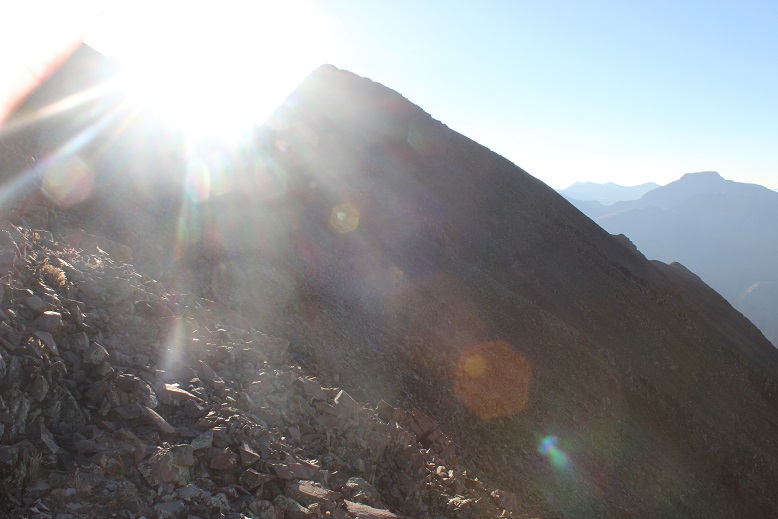
Oh yeah… it looked like I’d be hiking into the sun again today. I put on my sunglasses and had at it. Here’s a clearer picture of the route from later in the day. Why does the peak I’m climbing always have to be the LAST peak on the ridge?
Most of this hike across the ridge was easy. It was a well traveled path with even a few cairns in places. It became difficult at the base of the last bump before the summit. For about 200 feet the rock became extremely loose and there was evidence of rockslides everywhere. It was difficult to find good footing, and once again I longed for my helmet. I’d read this was the easier ridge of the three I’d do today, but I disagree: this West Ridge to American Peak was the most difficult ridge I did today, but only the last part of the ridge. Here’s the final pitch to the summit
I summited at 8am
American Peak:
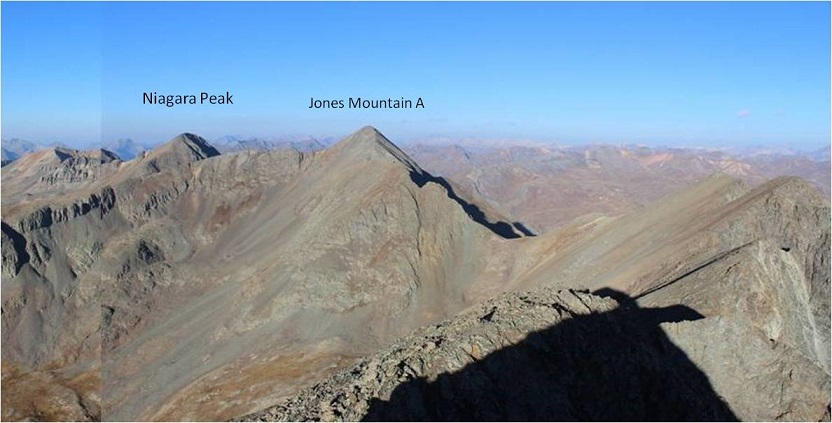
Here’s a look back on my route, and my next peak: Jones Mountain A.
I reversed my steps (the ridge was easier on the way back down) and made my way to the Jones/American saddle. I turned and faced the ridge. Here’s the route I took:
Believe it or not the initial climb up the ridge was more stable than the ridge on American Peak, it had some steps but still had scree.
About halfway up the terrain changed and I walked a class 2 ridge to the summit of Jones Mountain A
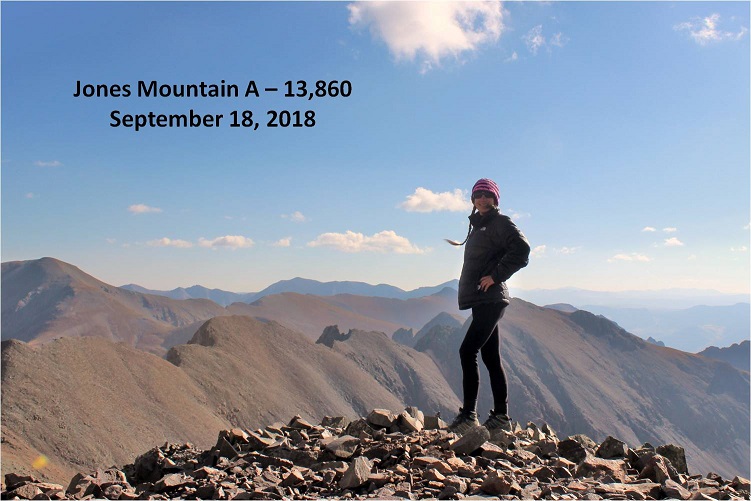
I summited at 9:15am
Jones Mountain A:
Here’s a look back at American Peak and what I consider the crux of that route
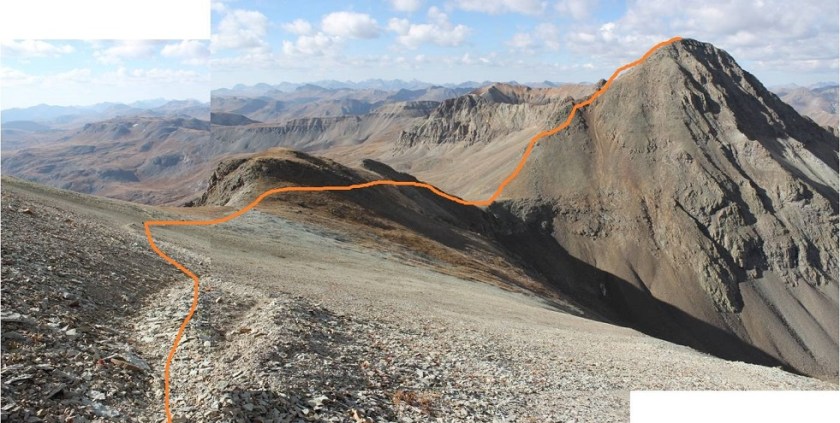
Now it was time to focus on Niagara Peak. The trail from here to the peak is well established. I just followed the trail down Jones Mountain A and up the ridge of Niagara Peak.
And a look back at Jones from the saddle
On my way down from Jones I saw a man hiking with his two dogs. I was surprised to see him, as I hadn’t expected to see anyone out here today. He was nicely and appropriately dressed for hiking with both a GPS and Walkie Talkie on either strap of his backpack. His dogs were leashed, well groomed and very well behaved. We stopped and discussed the Niagara/Jones saddle and descent, to which he didn’t think his dogs could make the loop. He would most likely head back the way he came. We parted ways, him to continue up Jones, and me towards Niagara Peak. He was the only hiker I saw all day.
Just after passing the hiker I was surrounded by a flock of birds. They kept following and avoiding me on the trail. I considered it good luck and figured there were 38 of them…
Birds:
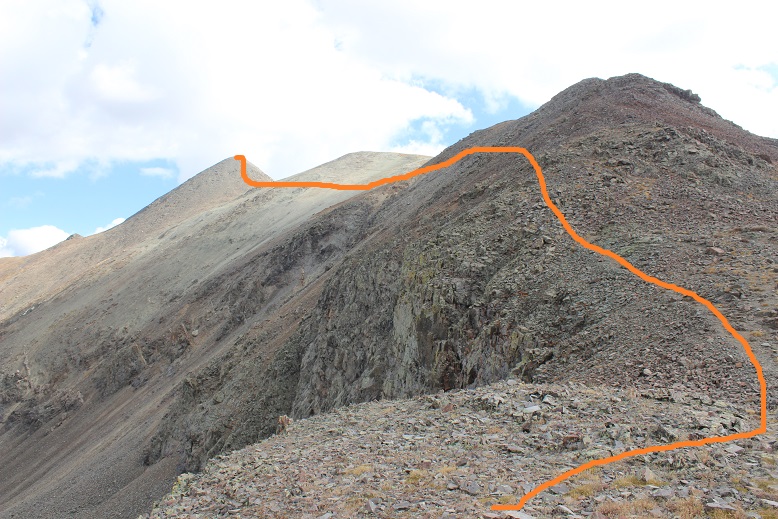
I made it to the saddle of Jones/Niagara and looked at the ridge. There is a path but this is another class 2 ridge that has some steep sections and lots of scree. If I haven’t already mentioned it, microspikes would be helpful on this route, even without snow.
Here’s a picture looking back on the ridge
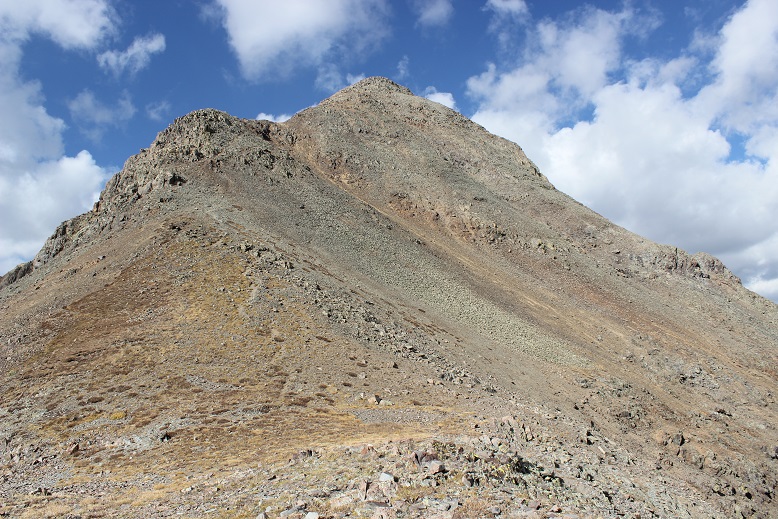
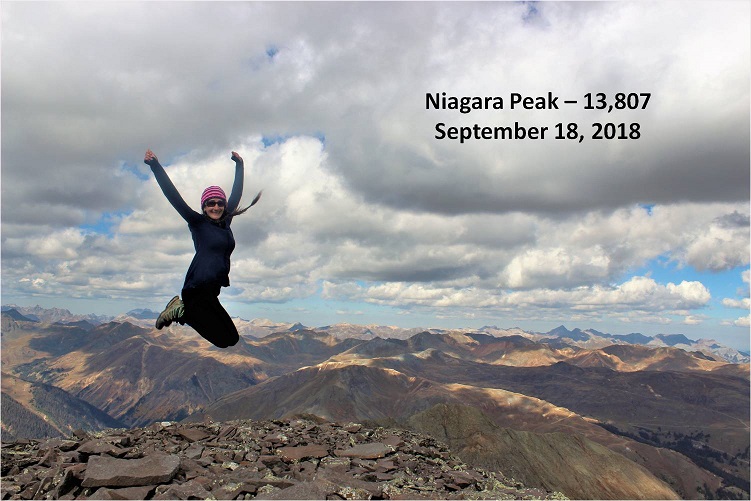
I summited Niagara Peak at 10am. Oh, and guess what? Niagara was my 38th 13er! I summited my 38th 13er on my 38th birthday! Very cool! BTW, 38 feels great!
Niagara Peak:
What a beautiful day! I’d considered hitting unranked 13ers Crown Mountain and North Crown Mountain, but I wanted to make it back to celebrate my birthday with my kids (and my son’s birthday: he’s headed for Basic training on Monday and he’ll turn 18 during boot camp, so I’d like to celebrate early). If I left now I could be home by 6pm, just as the kids were making it home as well.
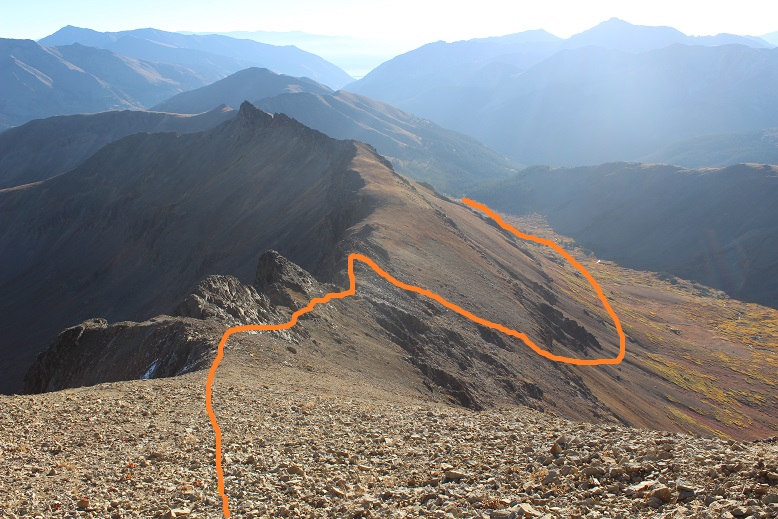
So I turned and headed back to the Jones/Niagara saddle. This trail was much easier to navigate than the route I’d taken up. This route had a trail for 90% of the way, and where there wasn’t a trail you could see where it connected further down.
This is the route I took down. It hugged the right (east) ridge. This path took me back to my truck and the 4WD road that was obvious from the Jones/Niagara saddle.
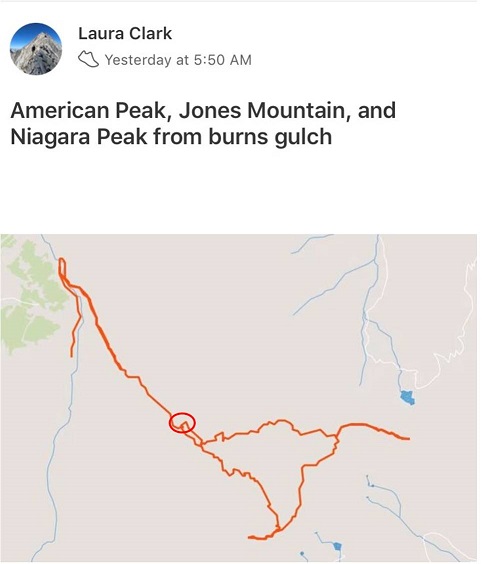
Here’s a copy of my GPS tracks. The red circle is where I parked my truck overnight and began/ended my hike. The tracks are a little off: I forgot to hit stop on my tracker because of the adventure below… but it might help others who want to know how to get to the upper trailhead
As I was descending back to the Burns Upper 4WD trailhead where I’d parked my truck I noticed the man I’d seen earlier and his dogs walking around, looking at my truck. Hmmmm…. That was odd, but maybe they were just taking a break and checking out my truck. It is an awesome truck. I kept an eye on them as I kept hiking. Within half an hour I was back at my truck, and the man and his dogs were still there. He asked me a bit sheepishly if he and his dogs could hitch a ride down to the lower trailhead: his dogs were tired and their feet were sore.
Of course they could ride down with me!
He was happy and let me know he’d hiked up with his wife but she’d turned back much earlier in the hike and he’d continued on with the dogs. She was waiting for them at the lower trailhead by the river crossing.
Immediately my estimation of him as a person grew: I love it when a man who’s married lets me know early on in conversation he has a wife. It sets the tone in a positive way, and I respect a man who wants other women to know he’s married.
I cleaned up my truck (it had stuff from the past few days strewn all over since I’d also used it as a tent) and apologized for the smell (both from my dirty clothes and, well, me). He was happy to have a ride down and put the dogs in the back of the truck. They indeed looked tired.
I navigated the 4WD road as slowly as I could, cognizant of the fact I had two dogs in the back. I usually take these roads at a quick speed, but right now I was gingerly maneuvering around the rocks and unfortunately not avoiding them all. We hit a few big bumps, and my passenger kept looking back to make sure the dogs were ok.
The 2 miles took us about 20 minutes, and we talked about our jobs, my kids (I can talk about them all day), vehicles, and his life as a Doctor and his wife being a Veterinarian. They were staying in Ouray for vacation and are 14er/13er/hiking enthusiasts.
He also mentioned this was the first time his dogs had ever been in the back of a truck. I tried to take it a little slower, knowing the road was rough. About halfway down the road we ran into a Jeep heading up. It took some careful maneuvering, but we were able to pass each other on the narrow road. I was pretty proud of my driving skills, and thankful the other driver was willing to work together so we could both pass each other.
When we made it back to the bottom of the road I decided to navigate around the river instead of driving across it because of the dogs in the back. We pulled up next to his vehicle, where his wife was waiting. I jumped out of the truck, opened the tailgate, and… no dogs! What? Where were they?!?!?
When I announced the dogs weren’t there the woman had a shocked look on her face, and I felt as shocked as she looked. After some quick discussion we came to the conclusion the last time we’d seen the dogs in the back of the truck was around the time we’d passed the Jeep (that was the last time we’d checked). Well, there was no way we were going to have two lost pups on my watch. I knew their car couldn’t make it up the road, and I was determined to find those dogs (once they were in my truck I felt responsible for them), so I offered to drive the couple back up the road to look.
I drove very quickly this time, driving across the river and up the side of the mountain at a swift speed, concerned time was against us. Also, without the dogs in the back I didn’t have to be gentle. It wasn’t lost on me how I’d thought this road was difficult the first time I’d driven it, but now I wasn’t quite so worried about the road: I was worried about finding those dogs.
One of the dogs was white and it’s currently fall so I figured it would be easy to spot in all the brown grass.
We ended up finding them about halfway up the road, just before where we’d passed the Jeep. They were sitting side by side in the shade under a tree, panting with happy smiles on their faces. Luckily the hike had exhausted them and they hadn’t felt like running. They were also well trained dogs.
This time we put the dogs in the cab of the truck for the ride down. I was able to make a 9 point turn on the shelf road and headed back down to the lower trailhead. It was a good ending to the hike.
I was in a bit of a hurry now to get home. As soon as I hit cell service my cell phone blew up with tons of messages and important things I needed to address. I had the whole 7 hour drive home to think about everything and make phone calls. As I exited Silverton Fred landed on my hand and then quickly flew away. Wow, he’d stuck with me that entire time!
After making it back home at 7pm and taking a quick shower I decided to take the kids out for Ice Cream to celebrate our birthdays. Emily jumped into the front passenger seat of the truck and closed the door behind her. Two seconds later I heard her hit the window with the bottom of the measuring up I’d used last night for my wine. Emily looked at me and said: “There was a fly on the window, but he’s dead now”.
The weather all over Colorado has been fantastic all month (meaning sunshine like summertime). In fact, Colorado Springs has had more days over 90* this year than it has in over a century. This is pretty surprising for September, and I’ve been doing my best not to waste every opportunity to get outdoors and hike.
Many of Colorado’s 13ers are in the San Juans, which is a good 7 hour drive from my house. The distance makes it difficult for me to make it there on my Friday hiking days (because I usually need to be home by 3pm to pick up my daughter from school). So I promised myself whenever I had 2 days free in a row I’d head down to the San Juans for some hiking, and do my best to hit as many peaks as possible in those 2 days by camping at the trailheads. Earlier this month I hiked Pigeon and Turret in a day, and my plan had been to hike the a few more peaks the next day. That obviously didn’t happen, but I was going to try my plan again of jumping around and trailhead camping two days in a row when I could make it to the San Juans.
The opportunity came faster than I’d anticipated. I found out on a Thursday my entire office (it’s a small office) would be gone Monday and Tuesday the next week, so I’d be working from home. Oh, and Tuesday was my birthday! I looked at the weather forecast (sunny on Monday and 20% chance of rain after noon on Tuesday), and decided right then and there I was making a trip to the San Juans for my birthday. This didn’t give me long to plan my routes, etc. but I was determined to make it happen. Unfortunately there isn’t a lot of recent beta on this area, so I did as much research as I could and told myself I’d just have to wing it.
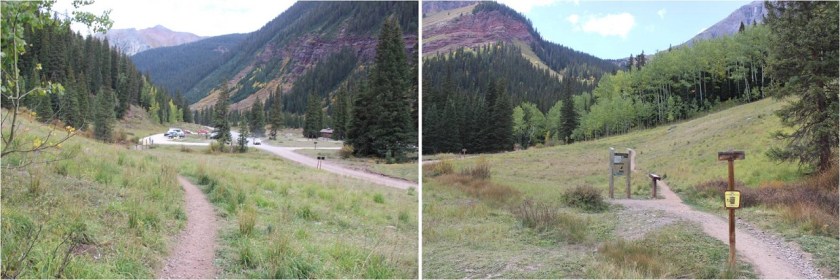
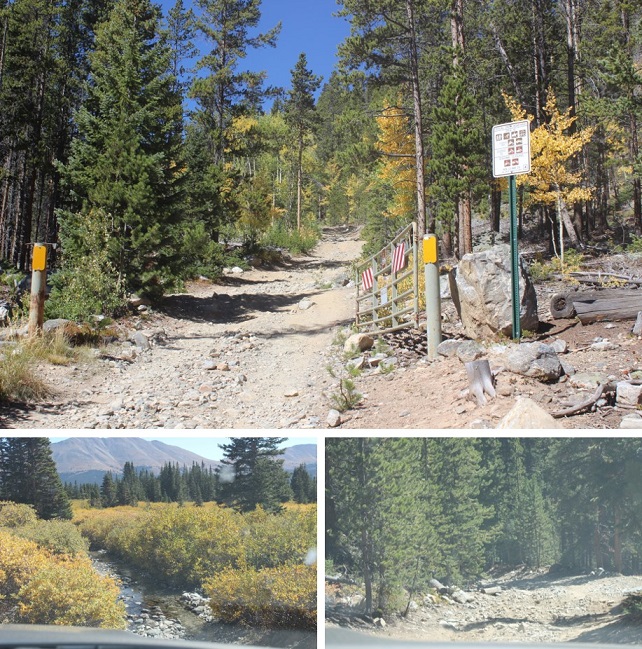
After tucking my kids in for bed I left my house on Sunday night around 8pm and made it to the trailhead earlier than anticipated (3:30am). The dirt road to South Mineral Campground is a 2WD dirt road, well maintained, and at the trailhead has room for about 20-30 vehicles.
Oh, and I’d seen no less than 7 porcupines waddling along the side of the 2WD dirt road in (not all in the same area). Drat: I’d forgotten my moth balls. Oh well, I’d have to cross my fingers this time. The moon was absent but the night sky was filled with millions of stars. I’d arrived early and because I wanted a good look at the basin in the daylight I decided to try and get in an hour nap before starting my hike. I was surprised at how well this worked. I closed my eyes and what seemed like a minute later my alarm rang, indicating it was time to get moving.
The trail starts on the west end of the parking lot. There’s a trail register to sign before heading out (one of the nicest and well kept registers I’ve ever seen at a trailhead). I started at 4:40am.
I took the Ice Lake Basin Approach, which is a very well maintained trail that crosses a small stream and switchbacks west. It looks like there’s been some recent trail overhaul and maintenance in the area, and even a shifting of much of the trail west, with lots of dead trees/branches covering the old trail. I was unable to find the 4WD parking area that’s been suggested as a possibility for shortening the hike in (I’ve also seen beta indicating this 4WD lot has been destroyed with “no parking” signs in the area now).
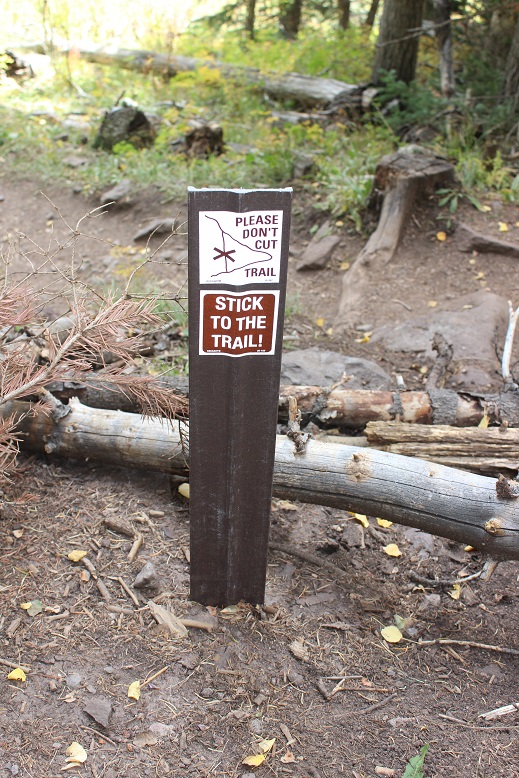
There were dozens of signs asking hikers not to cut trails.
The trail was easy to follow all the way to the Ice Lakes Basin, gaining in elevation steadily.
I made it to the Ice Lakes basin while the sun was beginning to rise.
Ice Lakes Basin:
Instead of stopping at Ice Lake I took a quick picture from the trail and turned south and hiked to Fuller Lake. I wanted to see the lake and old cabin. Had I realized how blue those lakes were when I first passed them I’d have taken the time to explore more, but in the early morning light they weren’t yet impressive.
There was a trail the entire way to Fuller Lake.
What I wasn’t prepared for were the amazing reflections of the mountains on the water as the sun rose. Pictures do not do this area justice!
Unfortunately, the cabin has been destroyed, most likely by weather.
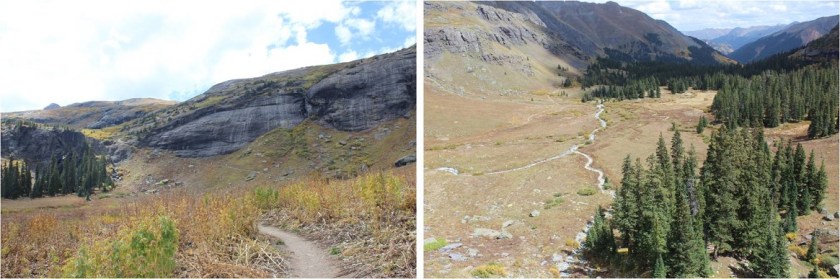
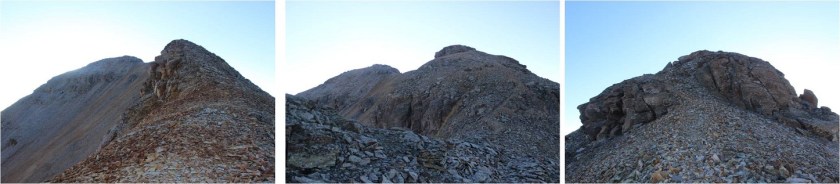
From here there was no trail for the rest of the hike. I could see Fuller Peak to the southeast, and hiked without a trail through the basin towards the saddle of Fuller and Vermilion.
Along the way I saw an old wheelbarrow. Of course this meant a picture was necessary
Here’s the route I took up to the saddle and over to Fuller Peak and a look back down the basin and the way I hiked in as seen from the saddle.
It’s steeper than it looks, and I was glad I was doing this part of the hike before the sun was too high in the sky. The rocks are semi loose talus. Annoying is what they are…
From the saddle turn left (southeast) and follow the ridge to the summit. It’s an easy class 2 hike with several small false summits.
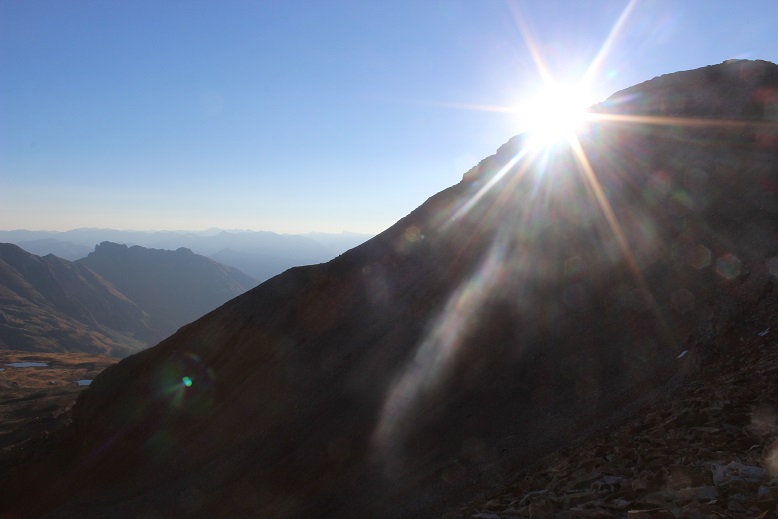
The only downside was I was hiking directly towards the rising sun. It made seeing anything clearly impossible.
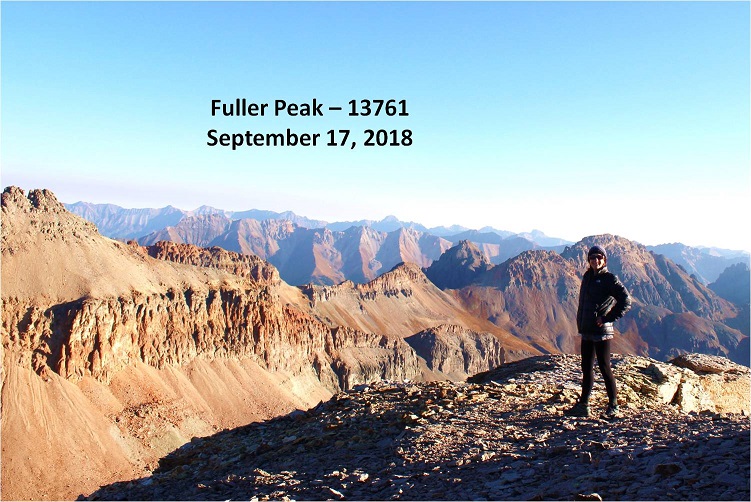
I made it to the summit of Fuller Peak at 8am
Fuller Peak:
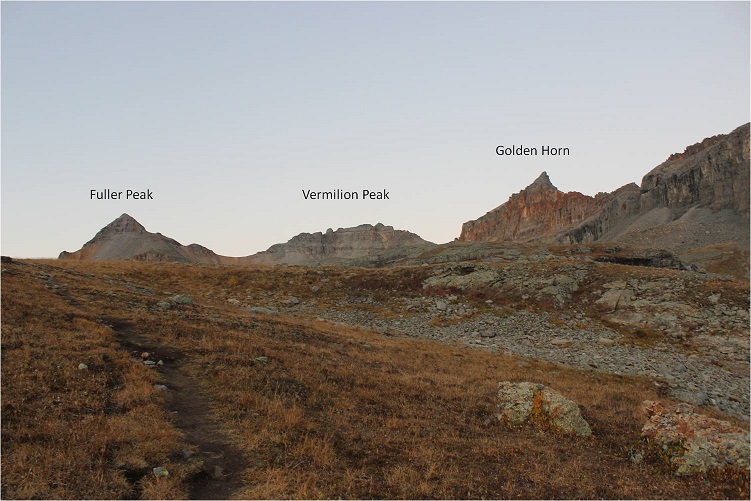
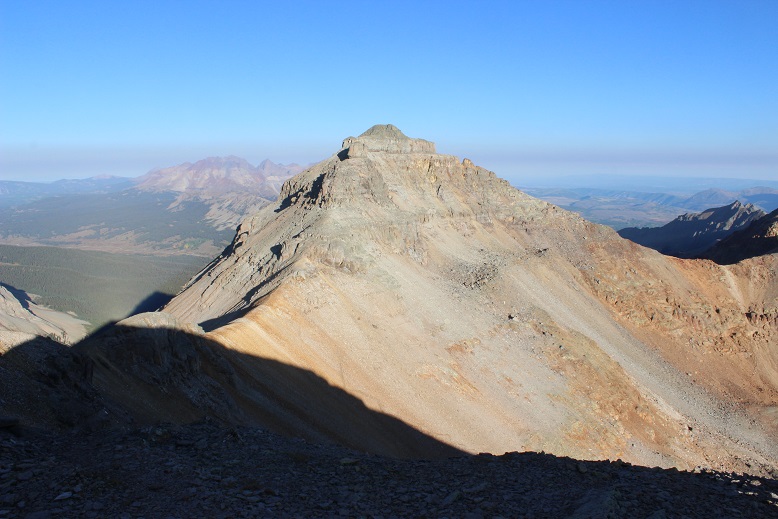
The views were amazing! I looked back at Vermilion and the route I needed to take to the summit. After returning to the Fuller/Vermilion saddle stick to the ridge
Here’s a view of the route from the saddle. Follow the ridge up and to the left
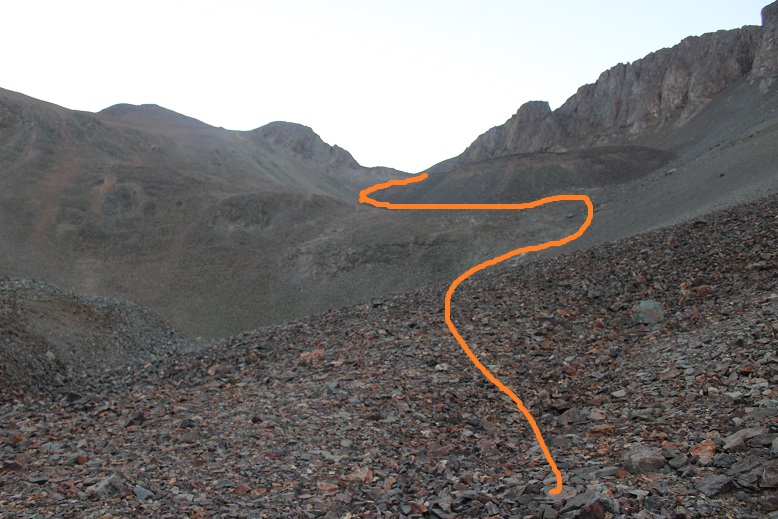
After you go left you’ll encounter a loose dirt gully. Climb the gully to the notch
At the top of the gully you’ll see two towers. Pass them to the left
And climb another gully
The gullies here seem to go down forever! (don’t worry, this isn’t the one I climbed, but one I wouldn’t want to fall down)
From here follow the rocks to the summit
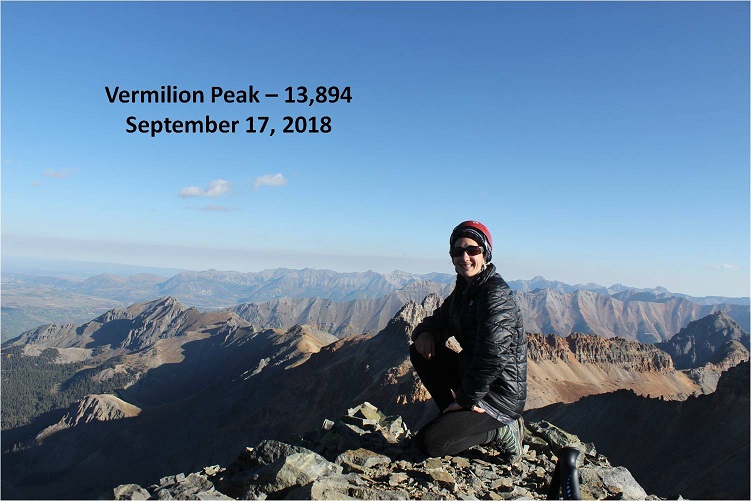
I summited at 8:45am
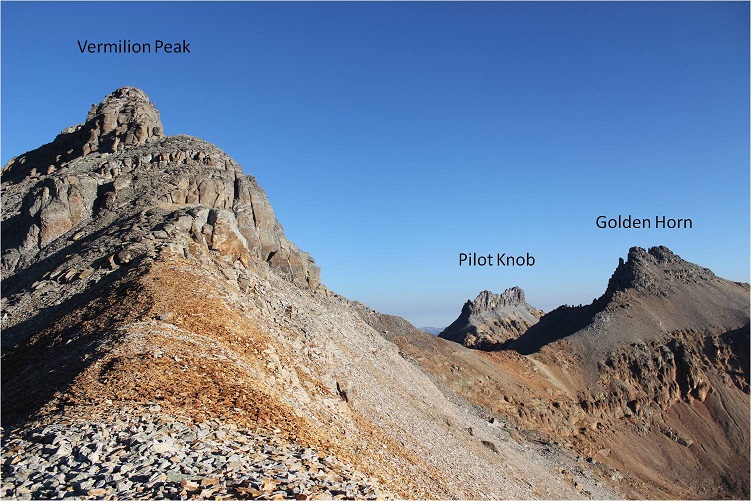
Vermilion:
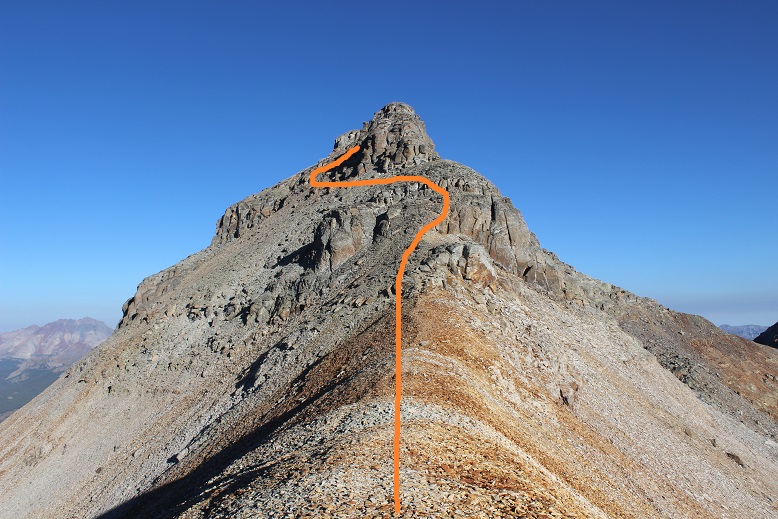
My next task was Golden Horn. I returned to the Fuller/Vermilion saddle and traversed the area on the northeast side of Vermilion between the cliffs and a scree ledge towards the Vermilion/Golden Horn Saddle. You’ll need to descend lower than you think you will. Follow this route (as seen from Fuller)
The scree & talus ledge is wider than it looks, with some large boulders thrown in. The rocks aren’t loose. Here’s a picture looking back from the Vermilion/Golden Horn Saddle
Here’s a look at the route from the saddle.
It’s a pretty straightforward climb, but about halfway up the ridge is when things get spicy. The scree intensifies and it can be difficult to find good footing. Luckily there’s not much exposure.
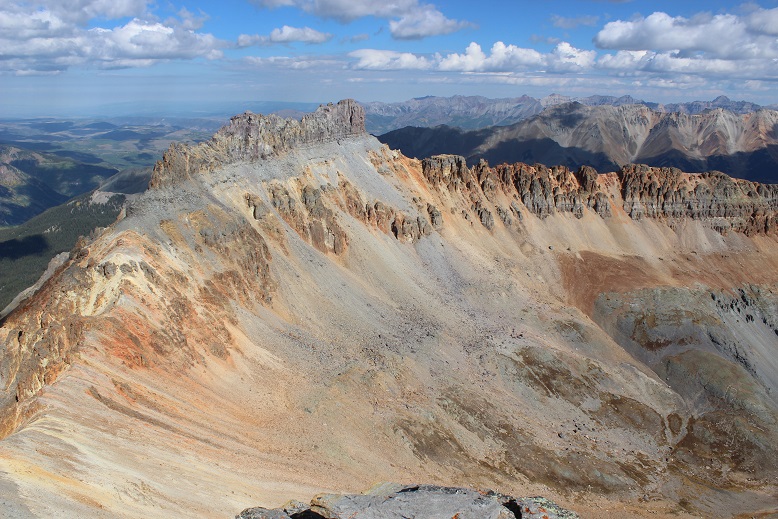
There aren’t any cairns but the route is obvious. There are two summits to Golden Horn. The summit register is on the summit to the west. Here’s a picture looking back at Vermilion
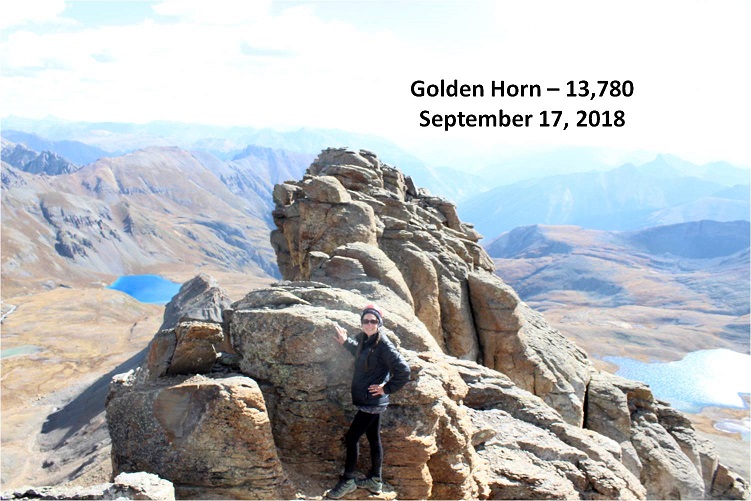
I summited at 10:15am
Golden Horn:
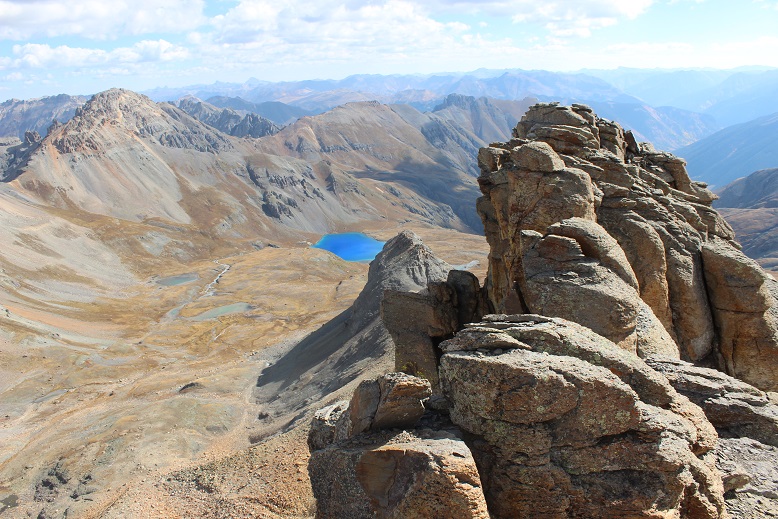
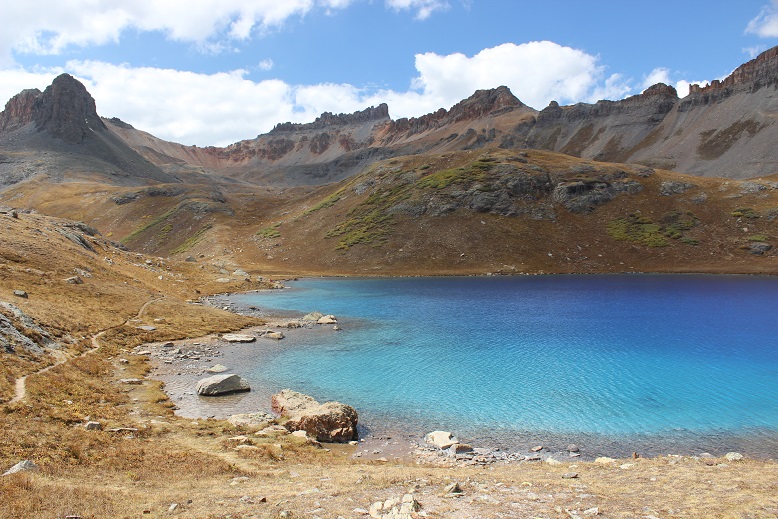
The views were amazing! I could see Ice Lake for the first time in the daylight and was immediately impressed: I had to make it down there!
My day had been going pretty good so far. It was still morning and I had the rest of the day ahead of me. The only thing that was troubling was the clouds creeping in. It was supposed to be sunny all day. There were way too many clouds for this forecast to be accurate. I had to keep an eye on the weather. I turned and looked northwest: Pilot Knob.
Hmmmm. It looked tempting. The only reservation I had (besides the weather) was beta. I had great information on Fuller, Vermilion, and Golden Horn, but there just wasn’t a lot of data out there on Pilot Knob. At least not much recent data. While planning this hike I’d been short on time and only planned on the three peaks I’d already summited. I mulled it over: I’d done some preliminary research on Pilot Knob (in fact, I’ve done enough on all the bicentennials to know which questions to ask, when I’d like to summit them, which routes I want to take, etc.). I knew I was supposed to summit Pilot Knob from the south and west face, looking for a chimney that would lead to a scramble to the ridge, and there was a crux I really wanted to get a first hand look at (a crack traverse/climb near the summit). Even though you summit from the south the approach is usually to the north (and I was south).
Trip reports last time I checked were few and far between, with the newest being 3 years old. The best beta was years before that. You were supposed to approach from the north and traverse southwest before summiting from the south/west, and I was on the south. I figured I could probably summit today, so I decided to descend Golden Horn the way I’d come by heading back to the Vermilion/Golden Horn saddle and look for a route over to Pilot Knob.
From the saddle I traversed west to the Golden Horn/Pilot Knob saddle.
The first part (before getting to the saddle) was a fun, difficult class 2 scramble. It was the most intense scrambling of the day so far. If you stick to the ridge you’ll do fine.
Here’s a look from the Golden Horn/Pilot Knob saddle, looking up at Pilot Knob
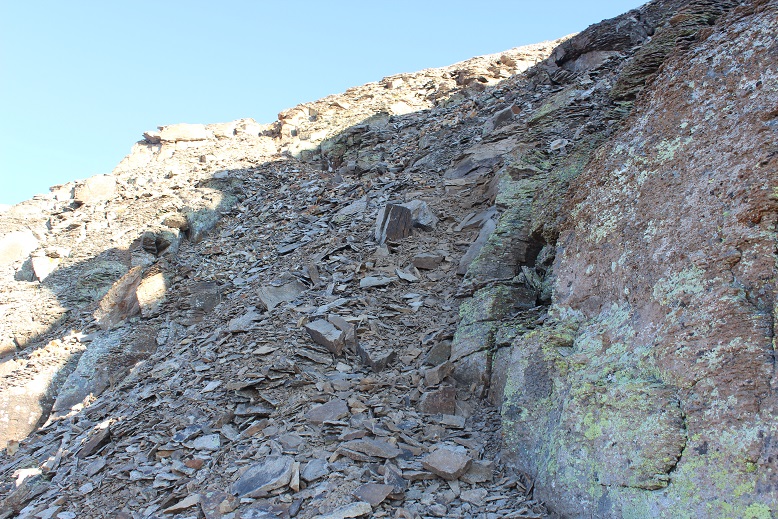
I kept watching those clouds. They were starting to bug me, blowing in and around with what looked like deep blue, rain filled centers. I made it up the ridge of Pilot Knob, and navigated to the southwest to look for a chimney that would lead me towards the summit. Instead I quickly encountered a very loose and scary talus filled gully.
It was obvious several large rock slides have occurred in the area since the last trip report. Many previous trip reports indicated a “well cairned route”. I didn’t see a single cairn, but there had been so many slides in the area they could have been destroyed by one. OK, back to the loose talus. This was unlike anything I’ve ever seen: I’d step on it and a 5 foot wide avalanche of rock would give way, tumbling down below me and gaining speed and larger boulders as it went. The first time it happened it startled me. Two steps later when it happened again I was seriously scared I was going to fall with it and braced myself: unfortunately there was nothing to grab onto.
I knew there was no way I could safely traverse any further west, but I needed to in order to find that rock wall. OK, so this wasn’t going to happen. Maybe I’d accidentally missed the rock wall I was supposed to climb? I’d just turn back and try again. It took me quite a while to backtrack to where I’d started on the south side of Pilot Knob: I was seriously scared I’d fall in an avalanche of talus with every step, but I made it back and decided to try again, thinking to myself traversing the area would be achievable and much safer in winter/spring with consolidated snow and crampons rather than all this talus/scree.
I just needed to gain the ridge. There had to be more than one way? I spent about an hour and a half trying to climb every area I could, but none of the routes I took went all the way to the top, and these were not class 3 moves as described in previous trip reports. They were class 4+ on loose and crumbling rock. Every time I found what looked like a solid route rocks would flake off both above and below me: Rocks the side of softballs and some the size of microwaves. I’d make it 20 feet up the side of a “wall” only to have to turn back and head back down. Rope wouldn’t have helped because none of the towers were stable enough to support a climber that way. I was glad I was the only one out there today.
I’m stubborn, so I did this fruitless climbing up and down walls for much longer than I should have and took more risks than I’m willing to admit to my mom. I even went over to the east side and tried that way. Nope, there wasn’t a way to gain the ridge from either side, and I couldn’t descend the slope and try to make my way to the north side to summit that way (it cliffed out). I was super frustrated. Hmph. I had to remind myself Pilot Knob wasn’t even on my list of climbs for today so I shouldn’t be too disappointed. But I was. I mean, I had hours left of daylight (it was only noon) and I really wanted this summit.
Wait! I know, I’ll just descend into the basin and re-gain the saddle from the north side, traverse southwest and try it that way! I was positive the right rock wall was on the other side of that talus/avalanche gully I couldn’t traverse. I made my way back to the saddle and looked at the route I wanted to take. Here’s a picture of that route from Golden Horn.
I looked up at the clouds, and it was obvious I was going to have to turn back. There wasn’t enough time to descend into the basin and re-ascend to try and summit. Oh well, I need US Grant too. I’d just combine the two the next time I was out here.
I made it back to the saddle and headed down into the basin. Here’s a look back at the route I took
I felt I was getting pretty good at this descending down a scree slope into a basin thing. As I was hiking down I thought to myself how the area looked like it usually held water. It was made up of tiny flat rocks about the size of a silver dollar but an inch thick. The kind you’d usually see on the bottom of a lake or pond. Hmmm. I guess since it was such a dry year there wasn’t any water. I was walking on a lake/pond bed. And it was squishy. In fact, walking across it felt just like walking over a bog. No sooner had this thought entered my mind than realization hit and it happened: I heard a sucking sound as my left foot sunk into the muck up past my ankle (mind you, I was walking on rocks at the time) and was almost impossible to dislodge my foot.
No. No. No, no, no! I know how to get myself out of a bog/quicksand if I have to, but I really didn’t want to end up covered head to toe in mud (I was camping tonight after all and wouldn’t see a shower anytime soon). So I dislodged my left foot and ran as fast as I could, kicking up my heels as I went, trying to escape the mud that was trying to pull me under with each step. All in all it wasn’t that bad: with the running I only sunk up to my ankles, but I could tell if my foot had rested in any one place I’d have sunk much further as the mud had great suctioning abilities. Then I’d really be stuck. I made it to stable ground and let out a sigh. Crisis averted! My shoes and pants were caked in mud, but that was the worst of it. Here are my footprints looking back
I turned east and was greeted with a daytime view of Ice Lake. Wow! This was beautiful!
As I got closer I could see how truly clear the water was.
Ice Lakes:
This was amazing! I stopped for a while, took a bunch of pictures, and then headed on my way back down the basin where I was greeted with aspens changing color. I’d missed them on the way in when it was dark.
There were tons of people on this trail! I must have passed dozens (and it’s a Monday). It was a long 4 miles back down. I made it back to my truck at 2pm. And it never did rain. Oh well, this gave me time to find my next trailhead in the daylight. I took off my muddy pants, socks, and shoes and put on my sandals for the drive. Near the 550 on the road out I got cell service and stopped by the side of the road for a bit to do some work (emails, etc) and text my kids to let them know I was down the mountain and headed to the next.
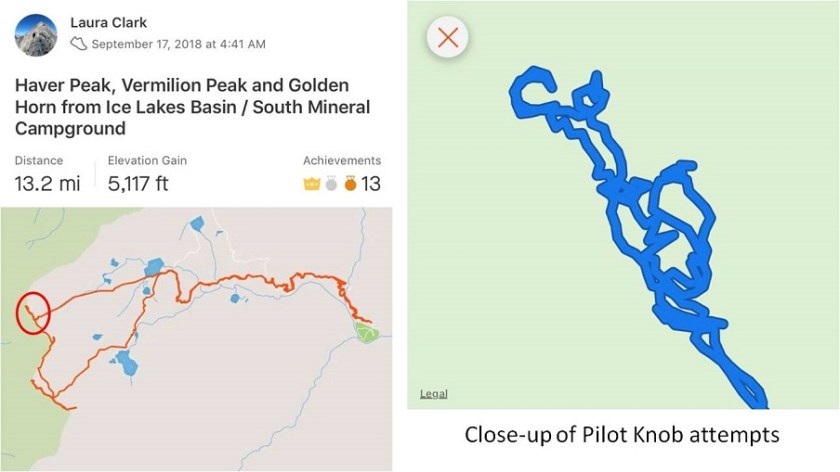
Here’s my route with a close-up of my Pilot Knob attempts. Don’t worry, I’ll be back for this one!
My drive took me through Silverton. I’d heard the fall colors weren’t supposed to peak here for another 2 weeks, but right now it looks beautiful.
I had conflicting directions on how to get to the Burns-Gulch trailhead, so I brought both with me. From Silverton I took County Road 2 past Eureka on a 2WD dirt road, and ate the dust from off road vehicles the entire way. For a Monday afternoon it sure was crowded! Leaf peeping season is definitely in full swing!
I made it to the base of the trailhead on the Animas River and my directions ended. So I pulled up a GPX file of the route to see where I needed to be: about 2 miles up a narrow shelf road.
The road was much narrower and steeper than it looks and filled with bowling ball sized rocks. I took it slow: this road was more difficult than I’d anticipated (but nothing my truck couldn’t handle). I just hoped no one would drive towards me from the top: There was no way I could turn this truck around on such a narrow road, and passing another vehicle wouldn’t be easy.
There was a campsite at the 4WD trailhead at 11,720’ and no other vehicle was in sight. Sweet! It looked like I was going to have the site all to myself for the night.
I got to work making dinner: Mountain House Beef Stroganoff. When it was ready I poured myself a glass of wine in the measuring cup I brought for making dinner, sat back, and enjoyed the view.
Life is good! Sitting in the bed of my truck looking at the mountains was so relaxing. As I was sitting there I heard a creek to my right and got up to investigate. This was wonderful! It was about 10 yards from where I’d parked my truck. I enthusiastically washed my hands in the running water. They were gross from today’s adventure and it felt good to have clean hands and fingernails again. I got up to turn around and head back when my left sandal broke. I mean really broke, like duct tape can’t fix it broke. Drat! I was going to have to tiptoe the 10 yards back to my truck without wearing shoes. The first step I took landed my left foot on a thistle. Wonderful. I made it back to my truck, poured myself another glass of wine and spent the next half hour picking splinters out of my foot (mostly on the heel and arch). I looked around at the mountains: Life was still good!
I got out my maps and route info for the next day and tried to identify the peaks around me and the best route to take (I had several options). I studied my chosen route until I felt it was time to get some sleep: it was starting to get cold.
I decided to sleep in the cab of my truck because I fit perfectly across the back seat and because I could. Two shots of whiskey later I was ready to go to sleep. I laid my head on my pillow and a fly landed on my arm. I thought about how much fun having a fly buzzing around me while I was trying to sleep would be and debated whether or not to open the door to let it out. In the end I decided I’d rather not let all the warm air out in doing so, so I made a deal with the fly: “Fred “(I named him Fred)”If you promise not to buzz around me all night I promise not to kill you right now”. Fred flew away to relax on my steering wheel and I fell asleep thinking this wasn’t a bad way to spend my last day of being 37.
I didn’t make it to the trailhead until almost 6am. This was due to my pressing snooze while my coffee brewed and thinking it would only take me 2.5 hours to get there instead of 3. Oh, and GoogleMaps gets you to Crystal Trailhead in Breckenridge, but not the one I was looking for. Luckily it was only a 15 minute fix (and the directions were eerily similar to the real ones, just 2 miles south on the 9 instead of 2 miles on South 9…). If you’re coming from Colorado Springs like me and taking the 24 to the 9, the trailhead is BEFORE you get to Breckenridge (but after the Quandary TH). If you get to Breckenridge you’ve gone too far.
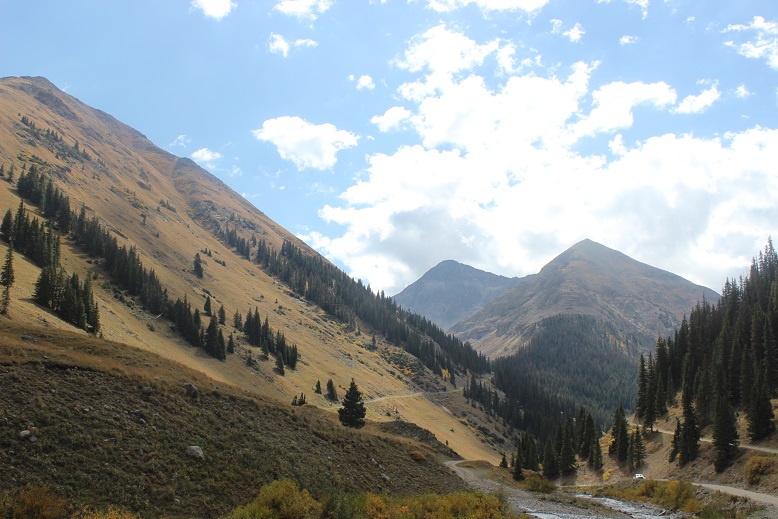
In any event, the road to the lower (Spruce Creek) trailhead is a 2WD dirt road that’s easy to navigate. As soon as you pass the gate and head towards Lower Crystal Lake things get 4WD fast. The road narrows and is scattered with rocks about the size of bowling balls, with a few microwaves thrown in. Most are sharp. It was worse driving up than driving down, and as long as you’re the only vehicle on the 2+ mile road and you have high clearance it’s no big deal. There aren’t many passing areas though, so if you do need to pass someone it’s a long backwards navigation to a pull off site. Luckily, I didn’t see anyone on the drive up or down (or anyone hiking on the trails for that matter).
My truck handled everything just fine, except for the narrow area through the willows: they scratched the sides of my truck (nothing a good wash won’t fix, but it hurts to hear it just the same).
VIDEO:
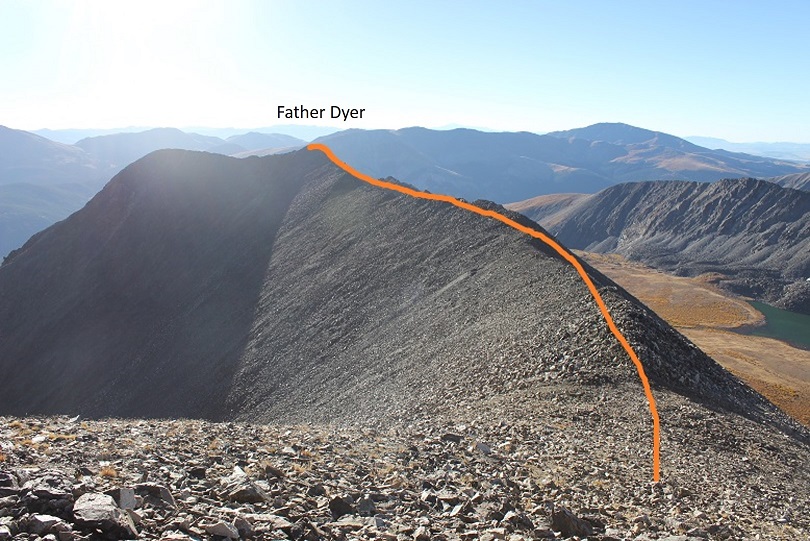
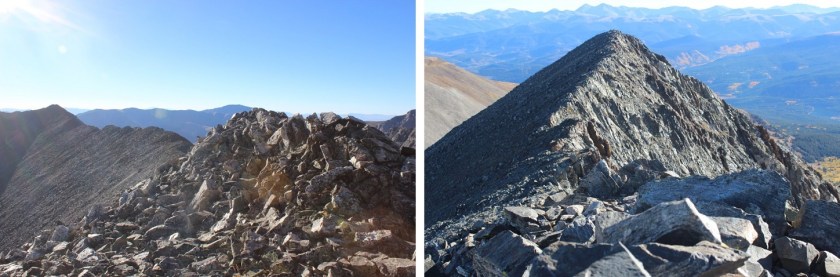
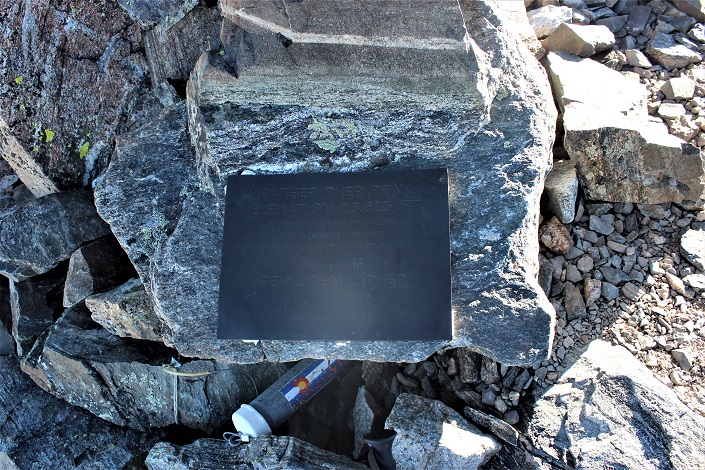
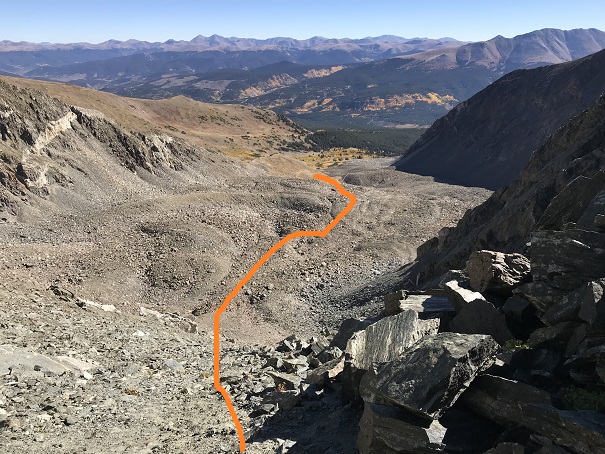
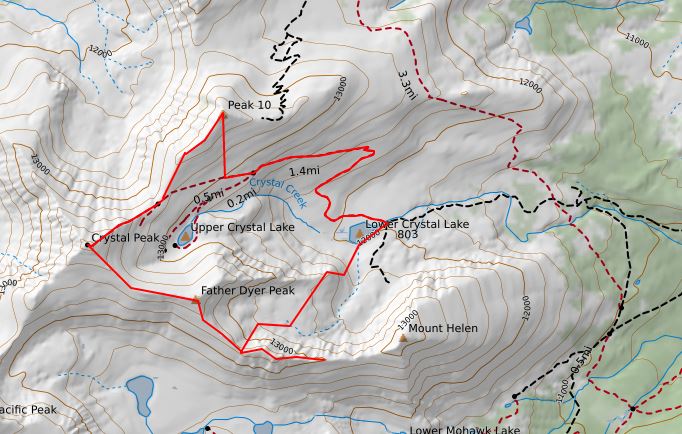
I was on the trail by 6am, but immediately knew something wasn’t right. I got out my map and realized while being at the upper trailhead sounded like a good idea, it actually wasn’t because the trail was a loop that started and ended at the LOWER trailhead. Whoops! At least I could do the hike backwards and start from where I was (Lower Crystal Lake, doing the hike in reverse, with Crystal Peak A first, then Father Dyer, and then Mount Helen).
But this meant I’d need to alter my decent route as well. It was dark so I couldn’t see if the terrain below Mount Helen cliffed out or not, so I wasn’t sure if I’d be able to alter my route at all. I got out another map (I had 4) and noticed I could backtrack if needed and take the basin between Father Dyer Peak and Mount Helen if I ran short on time (I was on a strict schedule again today: I had to be back at my truck by noon so I could pick my daughter up from school at 3). But I really wanted a visual, so I hiked a bit slowly and allowed the sun to rise.
I’d parked at the shambles of an old cabin near Lower Crystal Lake and hiked northwest on an established trail up the mountainside.
The sun began to rise and I got a better view of what I’d wanted to be my exit route off Mount Helen… nope, that wasn’t happening: I’d be cliffed out if I tried to make a beeline off the mountain for my truck, and hiking all the way back to the Spruce Creek Trailhead would add too much time. OK, plan B: I was going to have to backtrack after summiting Mount Helen. No worries though, because it all looked doable in the time I had.
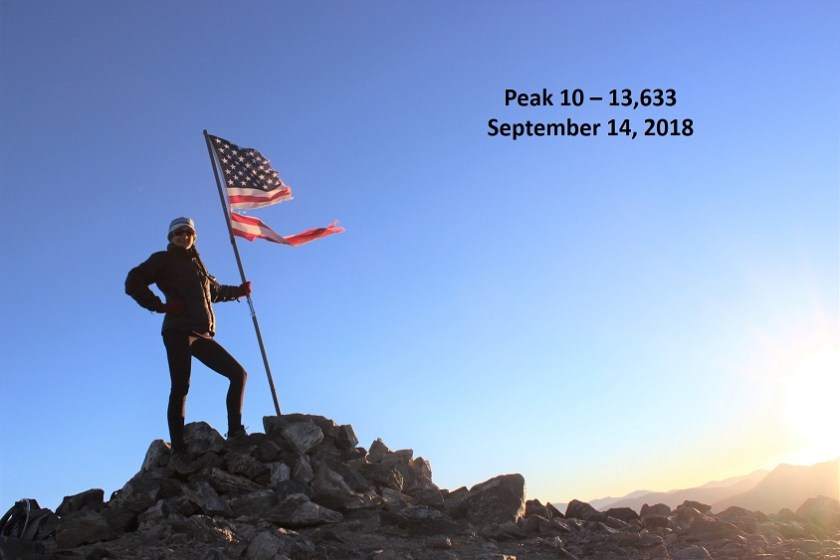
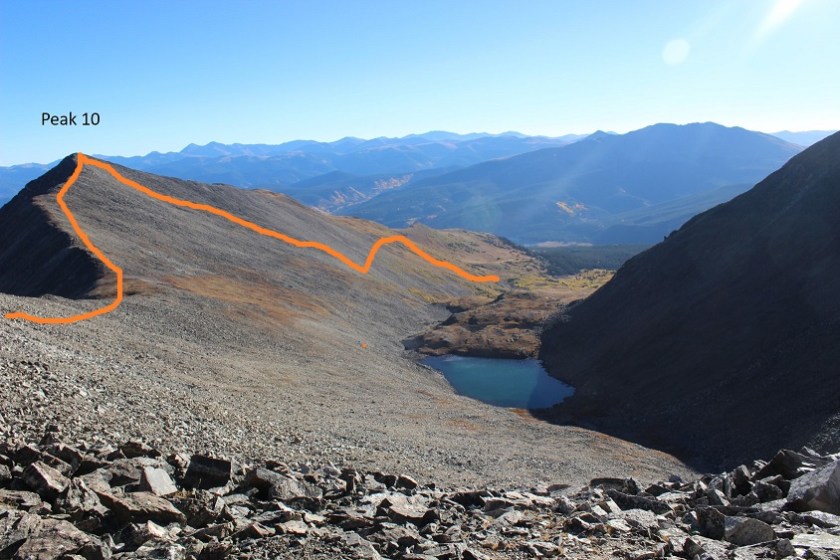
But then I looked up and noticed an American Flag on the peak above me. Oh yeah! Peak 10 (a Bicentennial). I was going to try for it if I had enough time after summiting the other 3 peaks, but since I was here now and so close (.3 miles, according to Peakbagger) I didn’t want to miss the opportunity. So I changed direction and headed north toward the summit of Peak 10. There was no path, and the terrain was rocky but easy to navigate.
I made it to the summit at 7am
VIDEO:
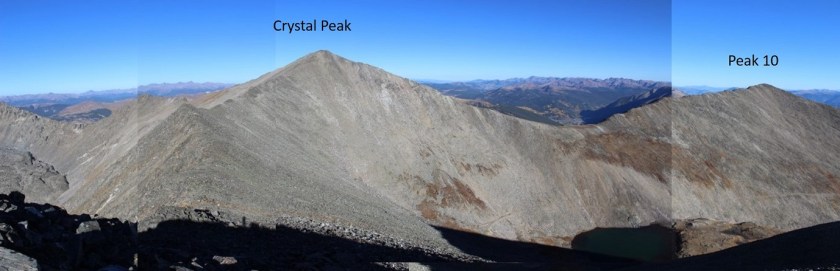
That had been too easy! I turned east and identified the reason I’d planned my hike today: Crystal Peak A (a Centennial).
No way. It had to be harder than this? I got out my map again. Yep, that was it. All I had to do was follow the class 2 ridge down to the saddle and up to the summit.
There was a small false summit, but this peak was also easily navigable, and at times there was a faint trail to follow. Just stick to the ridge and you’ll be fine.
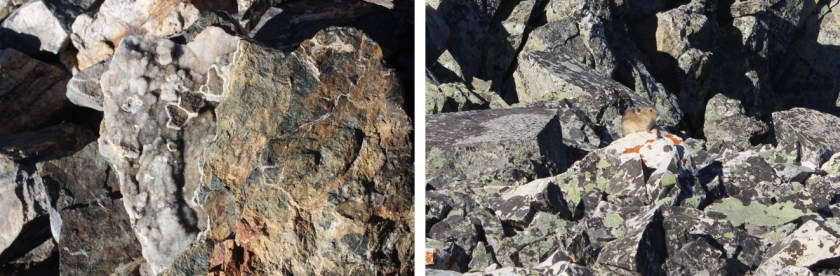
The rocks were beautiful, and a pika posed for me…
I summited at 7:50am.
VIDEO:
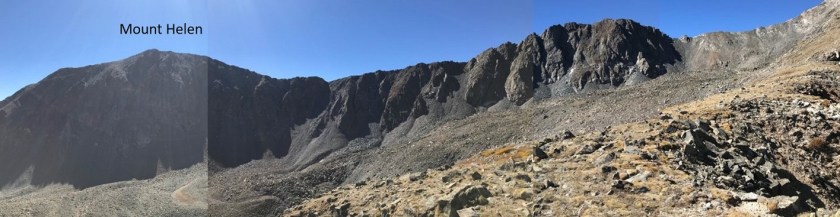
I hadn’t even been hiking 2 hours yet and I’d already summited two ranked 13ers. Pretty cool! BUT… a little voice in the back of my mind reminded me the hardest part was yet to come: The traverse between Mount Helen and Father Dyer Peak was supposed to be very time consuming, so I’d better get a move on. I turned and looked southeast for Father Dyer Mountain. You can’t see the route to Mount Helen from here.
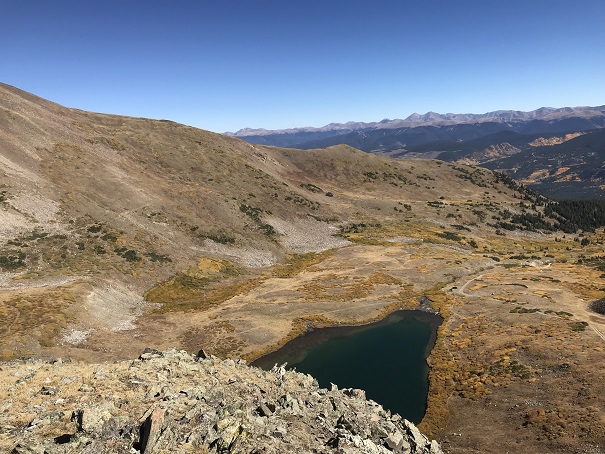
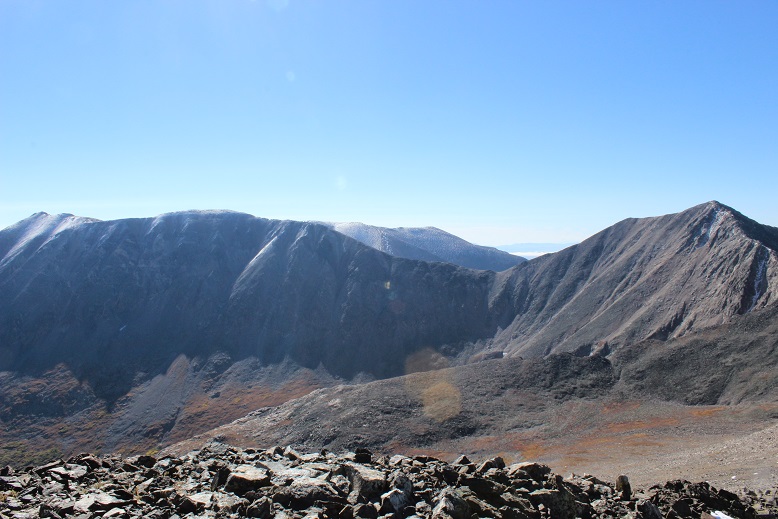
And looked back on the route I’d taken so far (note this is UPPER Crystal Lake in this picture, Lower Crystal Lake, where I parked, isn’t visible). Also note, there are lakes all over the place in this area! Ever ridge leads to multiple lakes, so make sure you know where you are and which lakes you’re aiming for/avoiding. I counted about 15…
The ridge to Father Dyer is a difficult class 2. I put on my helmet and had at it.
Once again, just stick to the ridge and you’ll be fine. There were a few parts where it helped to go a little left (north) but I mainly stuck to the ridge. I summited at 8:30am
VIDEO:
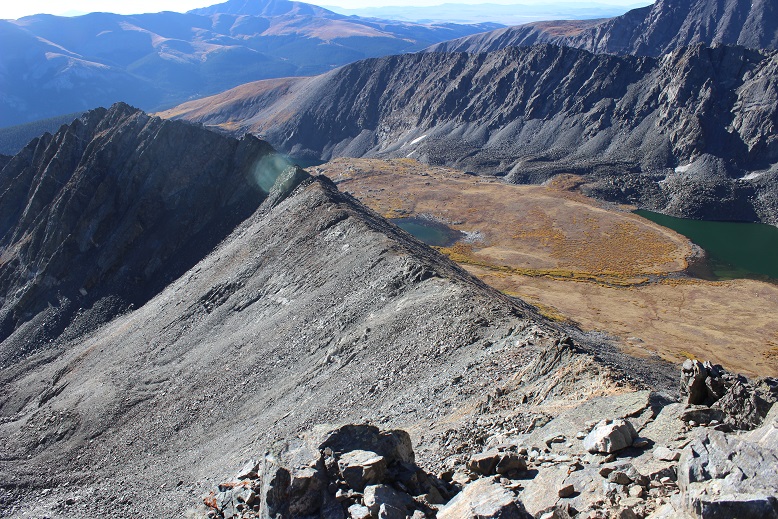
There’s a plaque on the summit commemorating the Methodist Church and Father Dyer
I was feeling pretty good about myself at this point. My turnaround time was 10am. I had an hour and a half to do the traverse. I turned and looked at the route before me and my jaw dropped:
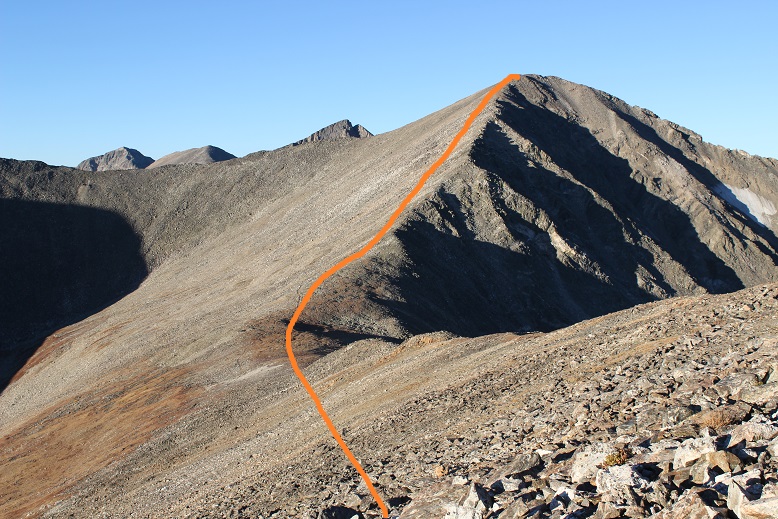
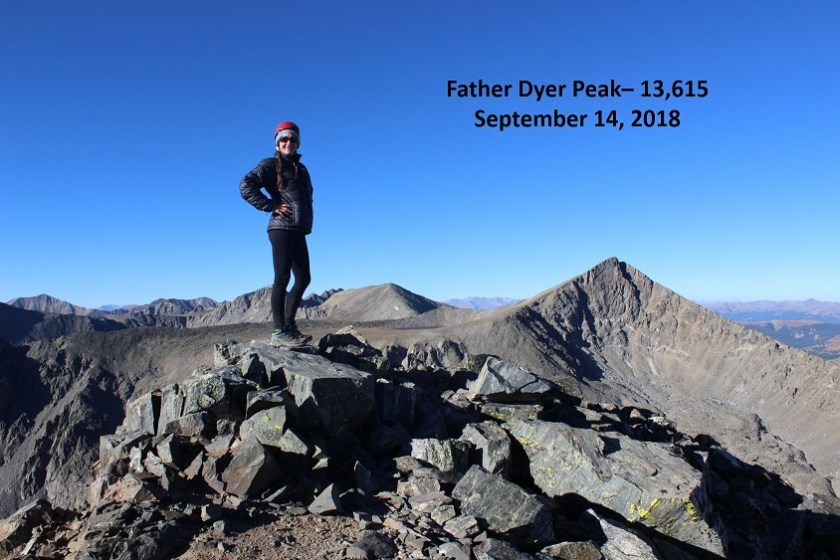
The beginning part of the ridge looked easy, and it was, but soon I encountered more difficult class 3 terrain. It’s been over a month since I’ve done anything class 3 or above, and I was in heaven!!!
The only downside? It was slow going. And yes, stick to the ridge (even when it doesn’t seem right)
I made it past the highest of the spires, started down again and ran into the gully I need to descend to hit the saddle for Mount Helen. I looked at my watch: it was 9:40am, and my turnaround time was 10am. I looked at what was left of the route before me:
There was no way I was going to make it to the summit of Mount Helen in 20 minutes. Could I summit successfully? Yes. In 20 minutes? Nope. Ugh!!! I had a decision to make: continue on until my alarm rings or turn back now. I was at a point where I needed to descend a gully about 200 feet and then continue on up the ridge to Mount Helen, and I knew I could descend the gully no problem, but making up the time on the way out wouldn’t work because I’d parked at the 4WD TH and couldn’t do the loop to exit (I also didn’t have the time to hike down to the 2WD and back up the to the 4WD TH). It seems the added time it took me to summit Peak 10 meant no Mount Helen for me today.
The bad news: I had to turn back and descend the saddle between Father Dyer and Mount Helen. The good news: I got to do the traverse twice, once each way! Woot! This was great! I haven’t done any climbing in a while, and now I had a full day of it, complete with exposure and route finding and, well, good times! I started back towards the saddle
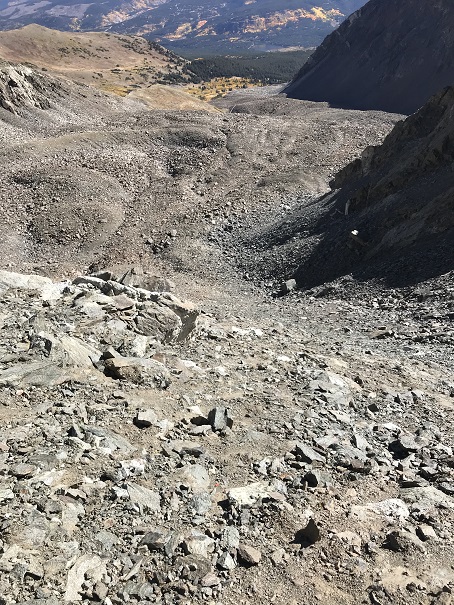
I’d already mapped in my mind the route I’d wanted to take back if I had to descend this way. There are a lot of areas on Mount Helen that cliff out, but if I descended here (near the saddle) I’d be able to descend into the basin and hike out towards Lower Crystal Lake (keeping to the left/north).
This is the route I took
Please note, this route is very steep, full of scree, slippery, and demands a helmet and more time than you think it will. It wasn’t fun, but it was productive
Here’s the route I took down from the ridge
Once I was in the basin I rock-hopped northwest. Here’s what it looked like looking back
The only problem? I was kind of cliffed out. Kind of, but not really.
It took some careful maneuvering down goat trails (NEVER say to yourself: if a goat can do it I can too!) but I eventually made it back down to my truck. Here’s my route:
I made it back at 11:20am, meaning I’d done my mental calculations correctly (turn back time of 20 minutes, etc.)
I was a bit disappointed I wasn’t able to summit Mount Helen, but as I was hiking down the basin towards my truck I thought about how I gained an extra ranked peak today (Peak 10) and how Mount Helen would be a great winter climb (accessible in winter and a great training hike for snowshoes/crampons?). So I considered it a win. Also, I was able to make it home to pick up my daughter from school on time, which is what really counts!
I didn’t want to get up when my alarm went off at 2am. I really didn’t. I rarely ever want to get up when my alarm rings, but today I was extra tired. I really wanted that extra sleep. I reminded myself while it’s typically difficult waking up early for a hike, I always thank myself for it later. So I dawdled and took extra time getting ready, trying to wake myself up. It was supposed to snow last night and there was as 40% chance of snow today, so I dressed in triple layers of pants and double jackets (necessary for me, not for most people). I also had 3 different pairs of gloves.
I drove to the trailhead and actually stopped at a gas station for 20 minutes to sleep for a bit before continuing on: I was more tired than I thought! I felt great after that quick cat nap though.
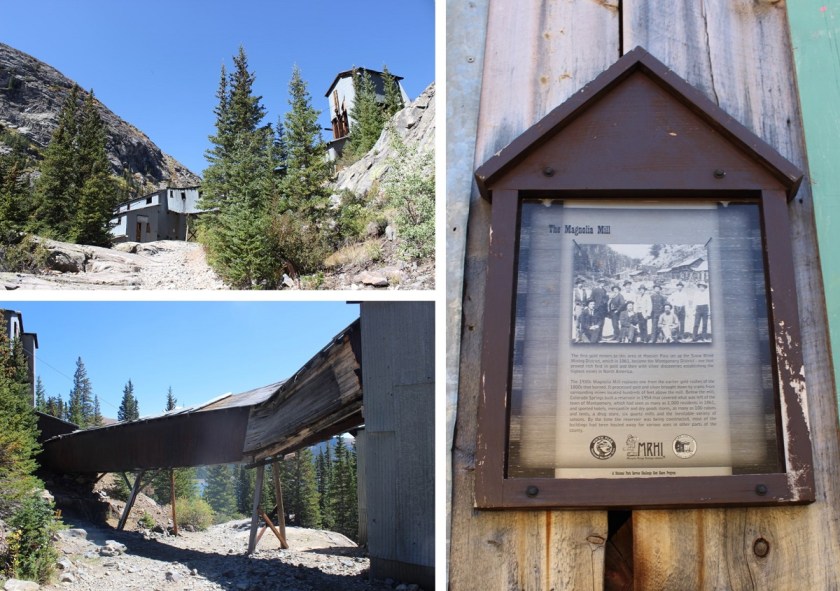
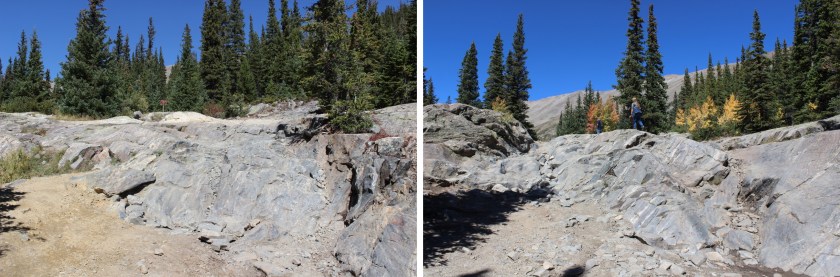
I finally made it to the trailhead at 5am and was ready to go by 5:15am. Already I could tell this was going to be a much different adventure than when I was here last March and the area was covered in feet of snow (https://wildwandererlmc.wordpress.com/2018/03/31/wheeler-lake-12168/). I’d had to turn back at the lake on that trip, but I’d learned a lot! Today the gate was open all the way to the mill, and there wasn’t any snow to be seen anywhere (in the dark that is). The road in is a 2WD dirt road all the way to the mill
There’s plenty of parking all along the way. I chose to park by the mill (the ‘lot’ there holds about 7 vehicles).
Here are some pictures of the Magnolia Mill, which I swear is going to collapse any minute…
Don’t go past the mill unless you have a heavily modified 4×4 vehicle. You will get stuck. Here are some pictures of the 4×4 road in
And one of a truck getting stuck on my way out
You can follow the 4×4 road all the way to Wheeler Lake: it’s about 3 miles. Wow! Was this a different experience than the snow-covered road I’d encountered back in March! Back then I wasn’t even aware there was a road… I kept looking for trails. It was obvious from my hike today I’d been way off route earlier this year. Way off. And the road had to be under a good 5 feet of snow at the time because these willows which were taller than me now were only about 6 inches high last time I was here. I’d gone in circles in the blowing snow trying to route find my way to the lake (and back). Today was a breeze!
I kept thinking to myself: those rocks are going to be a bugger to hike over on the way back down (they were).
What a difference the season makes! One bad part about no snow? The road was pretty much a river most of the way. Most of the areas of road covered in water had side trails going through the willows so you didn’t need to walk directly through the mud puddles, which I’m sure added to my route confusion in the snow as well.
Oh, but it was still early morning and I was hiking through all of this at night…
It’s about a 3 mile hike from the Mill to Wheeler Lake. I made it to the lake just as the sun began to rise (and thought back on how difficult this trudge had been in snowshoes: there were actual spots that had had exposure with all the snow and I’d been fearful I’d slip and slide down the mountain. Not so today.)
This is where the route ends and the creativity begins. Hike around the lake to the left about ¾ of the way around. You’ll notice an unmarked path left and up a drainage. (There’s no trail, make your own)
I turned back to watch the sunrise and take a Colorado Flag picture of the lake…
There are a lot of mines in the area. I counted at least 6
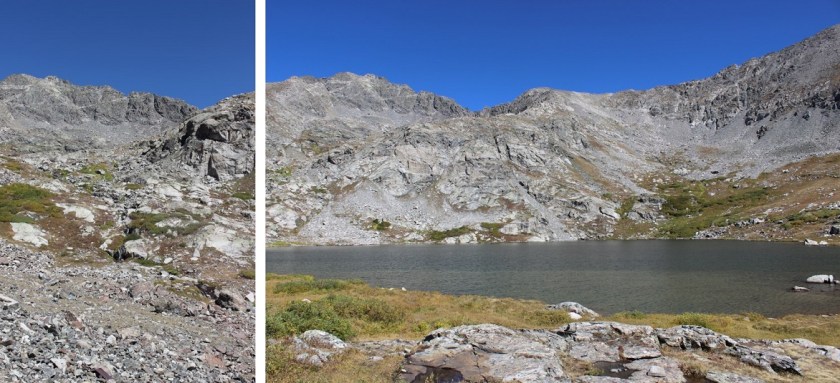
When you get to the top of the drainage you’ll find yourself in a small basin.
I tried to stay higher up to the right, and this ended up being a mistake: Stick to the middle, go up the area with small ponds and waterfalls, and head west.
I was trying not to lose my elevation gain, but all I ended up doing was complicating things with lots of rocks, slowing me down.
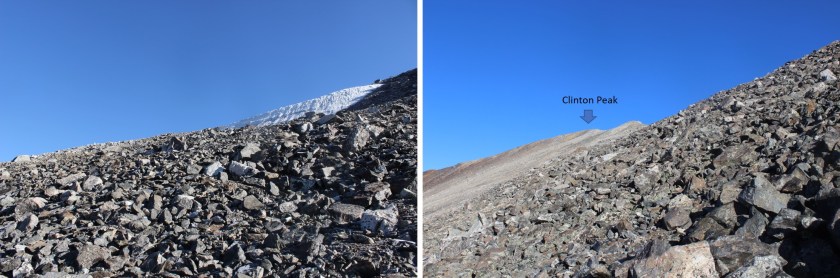
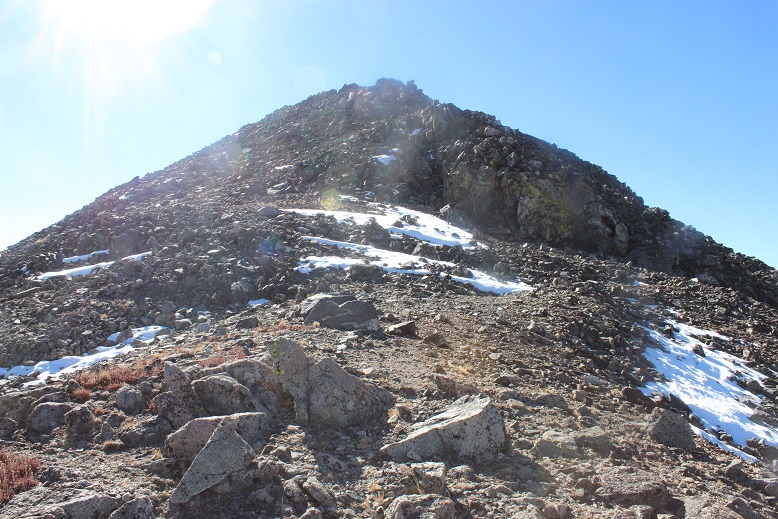
So my route had steeper elevation, lots of loose rocks and scree, and was thus very slow going. I rounded the corner and kept heading northwest. Finally I was able to see the summit! If you’re hiking this too you can breathe a sigh of relief now: the worst of the hike is over (yes, even if you’re doing all 3 summits)
As I rounded the slope the rocks became slippery: everything in the shadows (west) had a thin layer of frost covering it (slippery!)
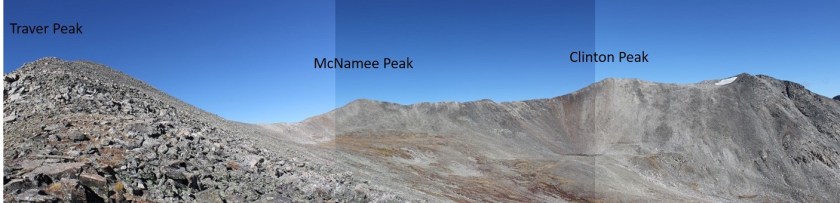
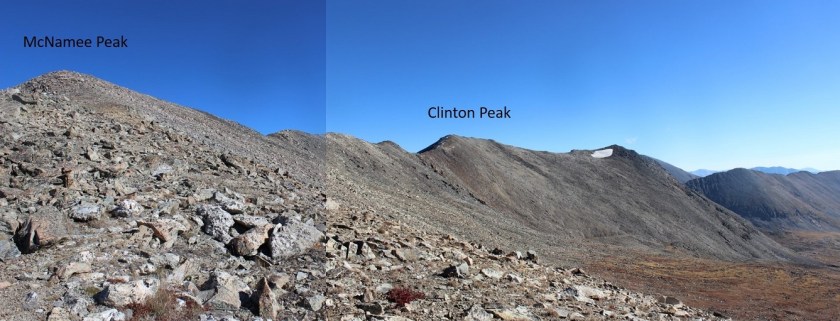
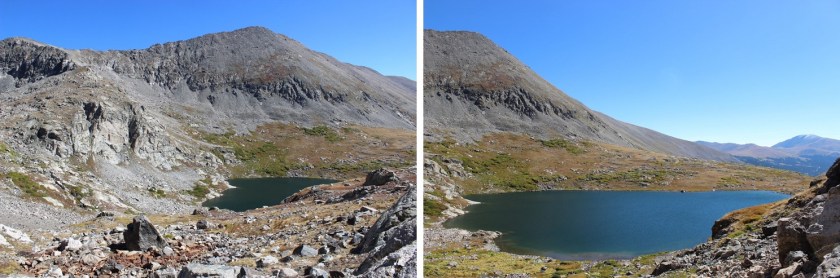
I gained the ridge and followed it to the summit of Clinton Peak.
I turned back and looked at the way I’d come: that had been a steep climb!
From Traver Peak, here’s a view of the route I took (solid line) versus the one I should have taken (dotted line)
I summited at 8:30am. Here’s proof I summited
VIDEO:
There were a lot of active mines in the area west of the peak and below as well
The rest of the route before me was very straightforward. It was class 2 ‘climbing’, following the ridge.
There were a few large rocks to contend with, but nothing class 3, and all avoidable if you went down the ridge a bit (go left (east) to avoid frost).
There were also small bits of snow, but nothing that got in the way or wasn’t easily avoidable
I couldn’t help but think as I reached the saddle of Clinton/McNamee how much easier this hike would have been to just continue straight all the way through the basin up to this saddle. It would have added maybe a mile to the hike (maybe) but also made the elevation gain so much simpler to deal with! I’m sure it would have cut my time down at least an hour.
The path to McNamee was about half a mile and easy to follow. I summited at 9am
VIDEO
There was a lot of mining trash on this summit!
Here’s the rest of the route to Traver Peak
Here’s a picture from the McNamee/Traver saddle looking back on the route so far
Summiting Traver was just a little more difficult than McNamee, but as long as I stuck to the ridge I was just fine (class 2). There were a couple of places I intentionally made it a class 3 climb, but they were completely unnecessary.
There was also a metal trash can full of rocks on the ridge?
I summited at 9:30am
VIDEO
There had been a light dusting on DeCaLiBron the night before
Ok, now it was time to head down. I turned east and looked at my route before me. All I had to do was follow the ridge down and head for Wheeler Lake. It was quite simple really
About ¼ of the way down the ridge I found this survey marker
And halfway down the ridge I saw a large cairn. Or at least that’s what I thought it was until I saw the stone with writing and a date. I couldn’t make out the writing, but the year is clearly 1881. When I got home I looked it up online, and couldn’t find any information about a possible grave/death/etc. It looks like a cairn grave to me (think Oatman family?). Thoughts?
The ridge was easy to follow with medium sized, mostly stable rocks. I couldn’t help but think how much easier it would have been to have done this hike in reverse, instead coming up the east ridge of Traver and down Clinton. My advice to anyone doing this hike: HIKE IT IN REVERSE. Or go up the McNamee/Clinton saddle, over to Clinton, and then back to McNamee and Traver. That trek up Clinton’s south slope is a bugger! And from what I experienced on the easy way down Traver, totally avoidable and unnecessary.
In any event, the cairn is clearly visible from a ways away. It’s a good marker to look for (especially if you’re hiking this in reverse). When I made it to the cairn I headed down the basin, over large rocks and some grassy areas. Before the bottom of the basin I was greeted with some large boulders. I didn’t have to climb down them… but I did.
Here’s the route I took. I obviously could have avoided the boulders by sticking to the north. (Note, this is NOT Wheeler Lake, but a small pond in the middle basin).
All morning and afternoon the weather had been perfect! The skies were clear and I’d way overdressed (no worries, this is better than the alternative). The basin was beautiful, and I got to thinking: Life for me has been extremely difficult in the past and I’ve been through some dreadful things no one should ever have to go through, but today, life is good. I mean really, really good! I’m the happiest I’ve been in years, my kids are all amazing and doing amazing things with their lives, I get to hike every Friday, I paid off my truck this month (woohoo! This means I’m debt free!), and I’ve now completed 28 13ers (think I can hit 30 by my birthday on the 18th?). I was in a great mood, and so glad I decided to go hiking today! (See? I told myself so!)
Here’s where the hike became beautiful. As I was exiting the basin and aiming towards Wheeler Lake I was able to notice all the fall colors. Here’s a look at the North side of Lincoln (14er)
And a look back down on Wheeler Lake
I passed by the waterfall and skirted the lake
Here is where I met back up with the road again. The 3 miles out would have been easier and much faster without all those rocks in the road, but at least route finding was easy!
I made it back to my truck around 12:15pm, making this a 10.9 mile hike with 3300’ in elevation gain in 7 hours with lots of summit time.
The fall colors are starting to change early this year. The drive through Alma was unexpectedly beautiful!