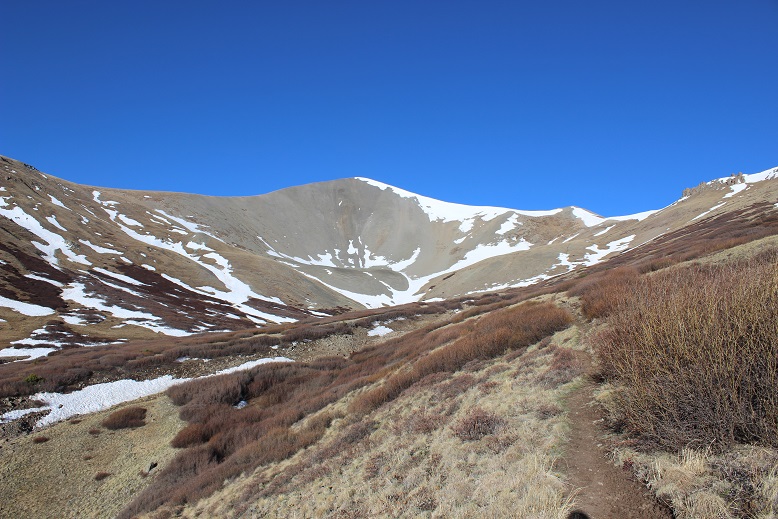
Mauna Kea – 13,796

1

RT Length: 15.2 miles

Elevation Gain: 4596’

June 11, 2018: This hike has been on my bucket list ever since I discovered it’s the highest mountain on earth when measured from the sea floor.  You see, Mountains are generally measured from sea level, in which case Mount Everest (29,028 feet; 8,848 meters) is king. Hawaii’s Mauna Kea, though, rises an astonishing 33,476 feet (10,203 meters) from the depths of the Pacific Ocean floor. Measuring from base to peak, Mauna Kea is the tallest mountain on earth.

We’re here in Hawaii on a family vacation, celebrating my son’s High School Graduation and enlistment in the United States Air Force. My mom and brother tried just about everything to get me not to hike this mountain. They hate that I hike alone, and kept coming up with excuses as to why I wouldn’t be able to go on a solo hike on this trip. (No, they didn’t want to hike with me). You see, we were so busy they just didn’t see how I could schedule it in. I told them I’d make it a sunrise hike (even though I hate those due to hiking in the dark and the cold), meaning I’d be back home no later than 10am, which wouldn’t interfere too much with our day. Well, maybe now we could find time on Tuesday or Wednesday (the only day snow was predicted on the mountain) as those were our late start days.

Then the volcano erupted and changed all our plans. My brother figured the eruption ensured I wouldn’t be able to hike, and let met me know the National Park was closed (our plan for Monday and Tuesday) thinking this would mean I couldn’t hike because the trail would be closed. Fortunately for me I knew Mauna Kea isn’t located anywhere near the National Park. I called the visitors center and Mauna Kea was open. Yes, I could hike all the way to the top, as the current eruption wasn’t interfering with Mauna Kea (although the areas usually erupt together). I saw this as my opportunity and took it! Since we could no longer visit the National Park on Monday I was going to hike while everyone else slept in.

I woke up at 1am. The wind was howling outside. My mom said that was reason enough not to hike because it had been rattling the windows all night and was sure to be intolerable on the summit, but Mountain Forecast said the winds were 5-10mph at the summit, so undeterred I drove to the Mauna Kea visitor’s center.

There were only about 6 spaces in the entire parking lot, with a lot of signage letting visitors know drones were not allowed in the area. When I got there I saw a couple of people in the parking lot with telescopes set up, pointing towards the stars. It was a very clear night, and since there are no big cities on the island of Hawaii and no bright lights to dampen the view the stargazing was phenomenal, even without a telescope.

The visitors’ center webpage (http://www.ifa.hawaii.edu/info/vis/visiting-mauna-kea/hiking.html) had a lot of information about hiking Mauna Kea. A lot of information!!! Most of it would be redundant to someone who regularly hikes 13ers and 14ers. I’d actually say it was overkill, but if you live in Hawaii or are a visiting hiker from sea level you probably could benefit from this information.

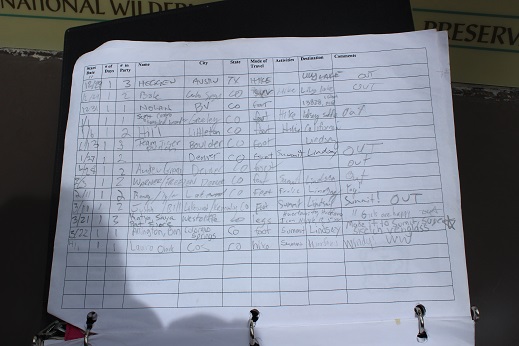
I was supposed to sign in at the trail register, but I couldn’t find it? I looked and looked and looked, but in the dark I just didn’t see a trail register. Oh well, my family knew where I was and when to expect me home. The visitors in the parking lot didn’t speak English, so we smiled at each other and I was on my way at 2:30am.

The trail actually starts about 1/10th of a mile up the road from the visitors center. I crossed the road and followed a 4WD trail to the left. The entire trail is located above treeline. It starts at 9200’, but since it’s actually a volcano very little grows on this mountain. I followed an old 4WD trail in the dark that led me to a station set up for me to clean off my shoes. I did so. This was the true start of the trail.

2 start of trail

I looked for a trail register here as well but didn’t see one. I hiked about half a mile and came upon another sign. This one was broken and missing most of the information.  Just imagine seeing this sign in the dark!  I wasn’t sure which way to go, as both right and left seemed like legitimate trails. Actually, they were, but one went up the mountain and the other went back and connected with another road.   I took the path to the left (which ended up being the correct path:  I fixed the sign on my way down).

3 Broken Signs imagine in dark

From this point on the trail passed through several different zones of lava, all with varying degrees of rock-like ground cover. It started out as a very sandy beach-like scree

4 beach sandy scree

And slowly changed into small rocks, and then medium sized rocks, and then large rocks. The terrain kept changing and changing as I hiked.  It was difficult to stay on the trail, as in the dark everything looked the same.  There was no clear trail visible in the sand and gravel.  On the way back in the light of day however a trail was clearly visible.
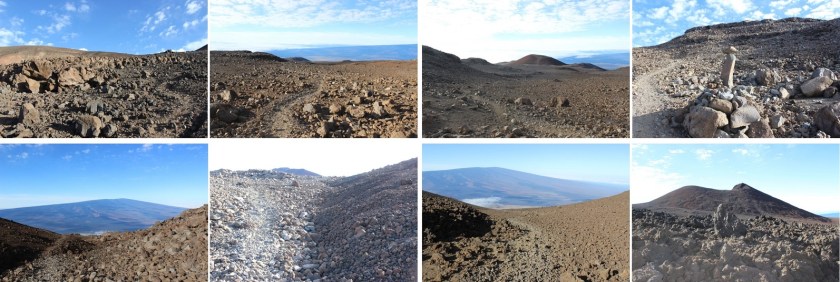
5 different lava

There were posts in the ground every 100 yards or so, indicating the trail. The posts let me know I was on track, but varied in where they were placed:  sometimes they were in front of the trail, sometimes behind, sometimes to the left or the right.  But as long as I was near a post I knew I was in relatively close proximity to the actual trail.

After hiking for about 2 miles I looked back and saw a glow in the distance. At first I thought I was looking at the town of Hilo, but that just didn’t make sense.  Hilo should have been further north, and the lights reflecting off the low lying clouds looked more red than what should have been yellow street lights.
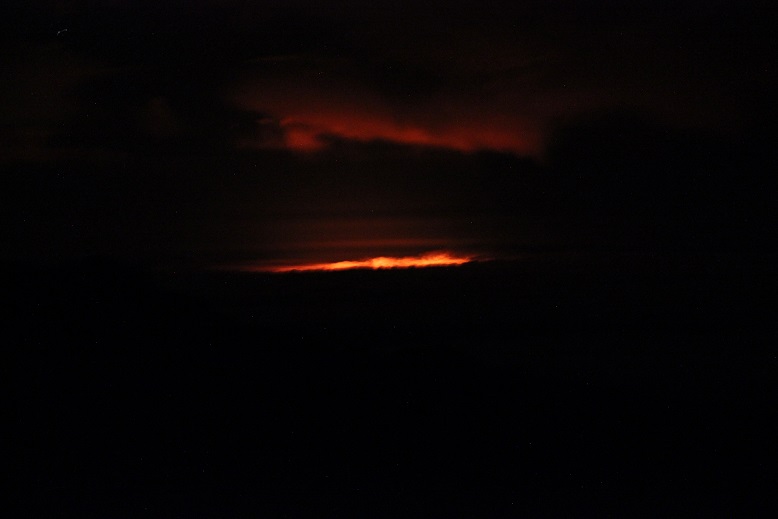
6

The further I hiked the more I kept stopping and looking behind me. Eventually it became clear I was looking at the glow of the volcanic eruption.  Wow!  What a sight to see!  The horizon came into focus and I could see the red glow of the lava in the distance.

7

Did I mention it was cold? And windy!  And really, really cold. And that wind!!! I’d brought my warm weather gear and North Face jacket with me on this trip, getting funny looks from employees at the Kona Airport as I wore it because it didn’t fit in my luggage.  But I was praising myself for my foresight now.  In fact, even with my snow gloves and knit hat I was shivering.  I kept wanting to turn and look around at the lava glow but was too cold to stop and truly appreciate the view for any real length of time.  My lips were frozen and my cheeks were numb.  I wished it would warm up!  I really didn’t like these sunrise summits: All this hiking in the dark and cold takes its toll on a hiker.

This hike seemed to go on and on and on with no clear gain in view. Everything looked the same in the dark:  flat and still yet full of shadows.  I was gaining in elevation, but it didn’t seem all that drastic.  All I could think about as I trudged on was how wonderful it would be to have my family’s blessing and support on these hikes, instead of their constant fear and displeasure each time I go. I shouldn’t feel guilty every time I go on a hike.  I’ve come to the realization I’m not going to change their views, so it’s something I’ll need to continue to enjoy for my own sake, and try my best to drown out their disappointment.

As the horizon started to lighten I saw the headlights from two cars come into view. There’s a paved road you can take to the summit (if you take a special tour and get a pass) that parallels the hiking trail for a bit.  These groups must have been visitors on a sunrise tour.

The end of the hike passes through the Mauna Kea Ice Age Natural Area Reserve, and then follows the paved road for the last mile to the summit.

8

This paved road also takes you to the Observatory.
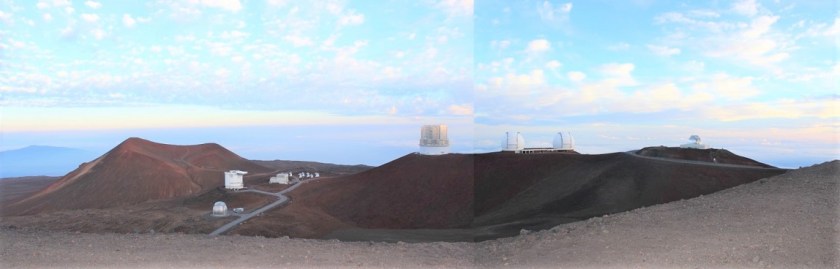
9 Observatory

This was the easiest part of the hike by far: hiking on a paved road is much easier than hiking on uneven gravel. It was my goal to make it to the summit before the sunrise, and it looked like I was pushing it.  The trail map said it was 6 miles to the summit, but it had obviously been longer than that, and my timing was off for a sunrise summit.

I looked to the left and could see a mountain in the morning light. This picture explains it all: the mountain in the middle is not a mountain at all, but the shadow of the volcano I was hiking, Mauna Kea, in the sunrise behind me.
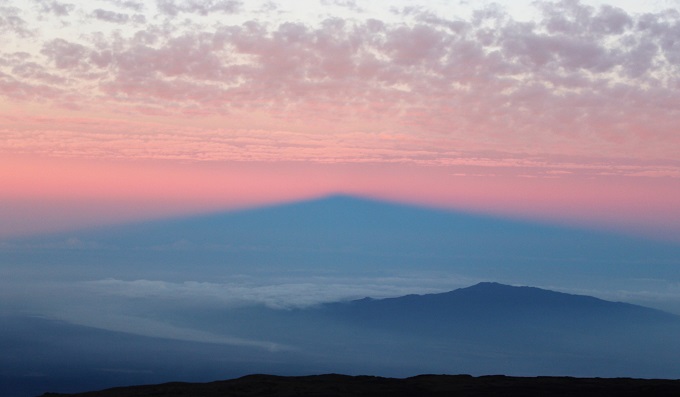
10

The sun was rising so I quickened my pace and made it around the last curve. But it wasn’t the last of the hike.  I still had a little ways to walk off the paved road to make it to the true summit. This was easy to navigate, only made difficult by the wind.
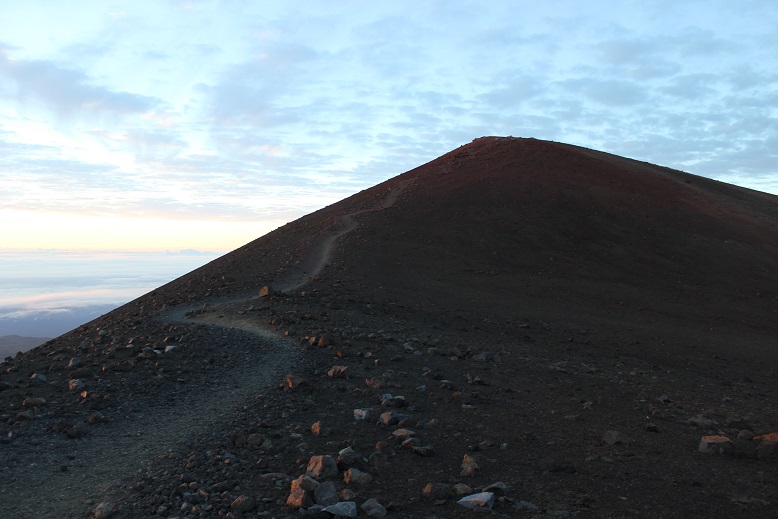
11

I summited at 5:30am, just as the sun was beginning to rise
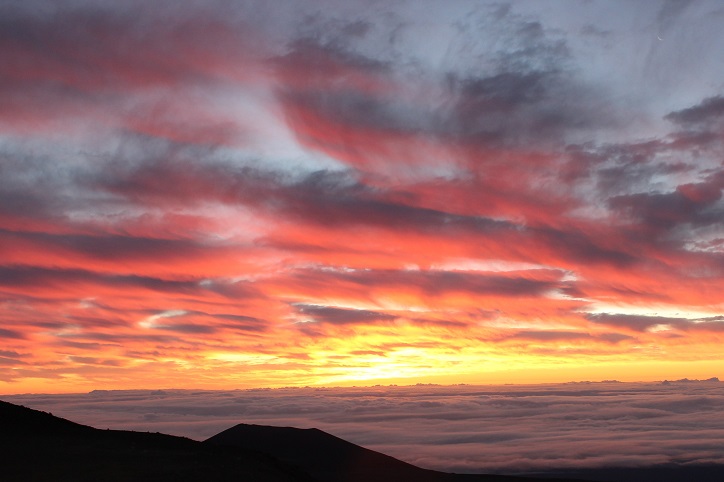
12

There was a shrine at the summit. I respected the shrine by not standing on it or even touching it, even though it would have been extremely helpful in taking my summit photo.

13

This site has religious significance to the Hawaiian natives, including who’s allowed to stand on the summit so I tried to remain as respectful as possible.
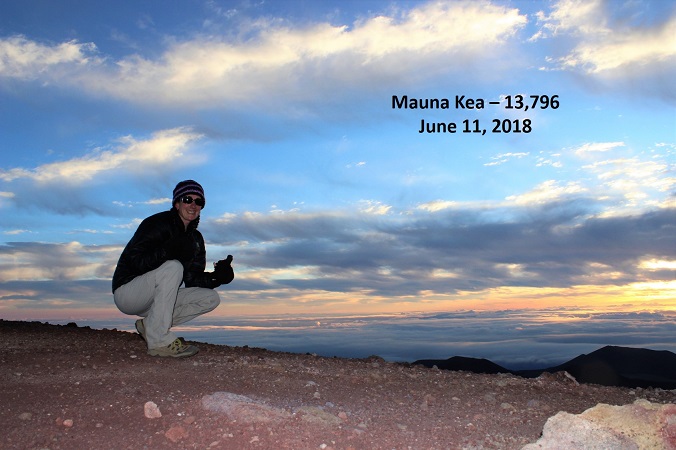
14 Mauna Kea 13,796

At this point I was above the clouds, looking east towards the ocean.
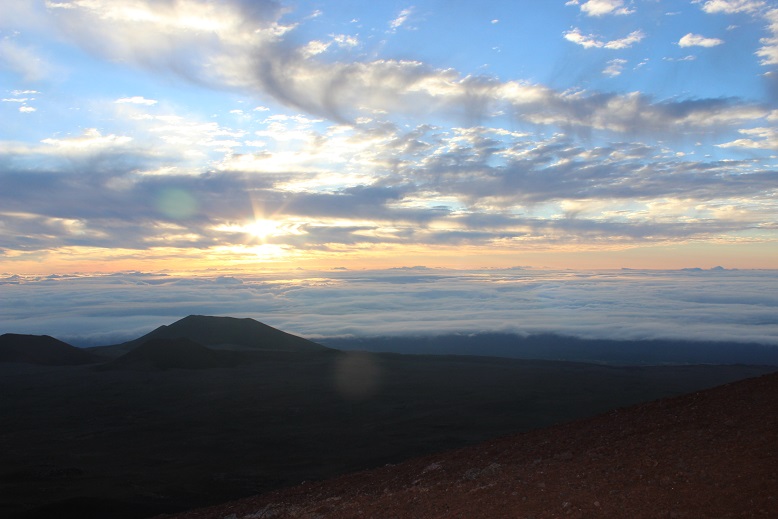
15

It was very, very cold and the winds were probably around 40mph, much faster than the 5-10mph predicted. I was completely numb, and headed back down quickly.  There were two couples on the paved road looking at the summit, dressed in parkas and huddling together to keep warm.  They were respecting the ancient rules and weren’t summiting today (you must start hiking at the bottom to stand on the summit).

Here’s a good picture of where the trail starts back down at the junction of the paved road. If you look at the picture on the left, just as the trail ends it actually gives you the option of turning right and visiting an alpine lake.
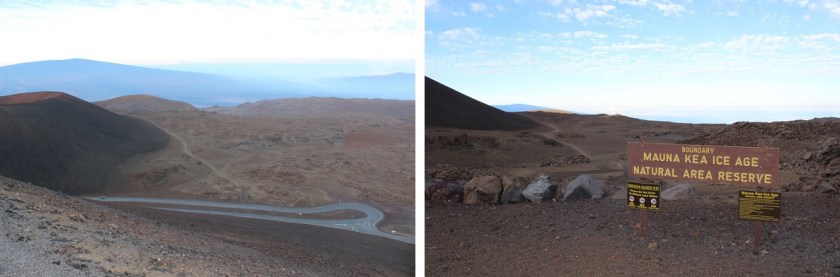
16

This lake is named Lake Waiau, and sits at an elevation of 13,020’. This lake is also a sacred site. Waiau means “swirling water” in the Hawaiian language, and this phrase is probably meant to evoke the myth that Lake Waiau is the portal to the spirit world or underworld. In ancient times, the ali’i, Hawaiian royalty, would throw the umbilical cord of their first-born son into the lake to ensure their future success as a chief.  When I visited the lake today I saw a shrine I expect was used for this purpose.
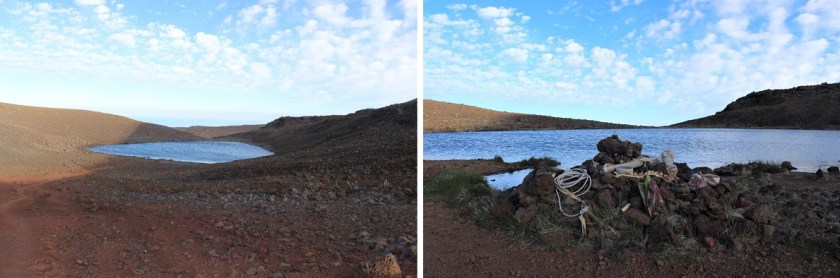
17

I turned around and descended through the varying degrees of decomposed lava. In the light of day the terrain looked like a moonscape, dry and barren with a large boulder thrown in here and there as if placed by an explosion.
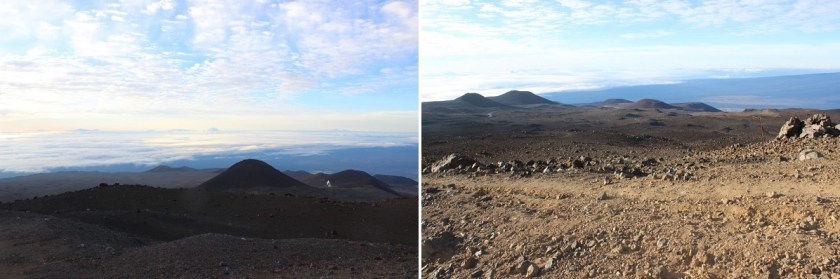
18

There were several calderas in view, and I thought once again of how Mauna Kea usually erupts simultaneously with Kilauea. There had also been numerous earthquakes on Mauna Kea in the past few days, so I crossed my fingers I’d make it safely off the mountain before another earthquake occurred (side note:  several occurred during our stay, with the largest registering 5.4:  another eruption is eminent).

19

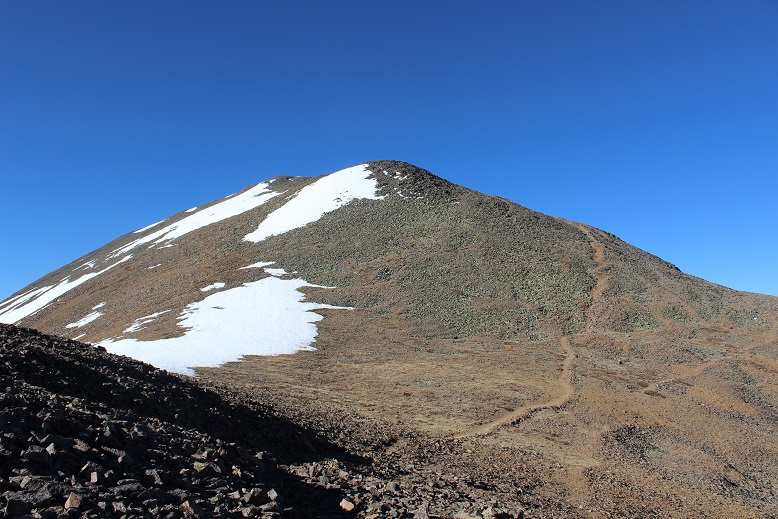
I turned around and looked back at the summit, in the light of day clearly being able to see the paved path to the top.

20 see path to summit

I stopped here to take a quick video of the landscape

The final descent took much longer than I remembered it taking to hike up. It was much steeper hiking back down than I’d remembered as well.  I could see the marine layer coming in from Hilo and the rest of my path down to the visitor’s center. If you look closely here, you can see there isn’t a shadow being cast by the sun, but different colors of lava from separate eruptions flowing into one area.
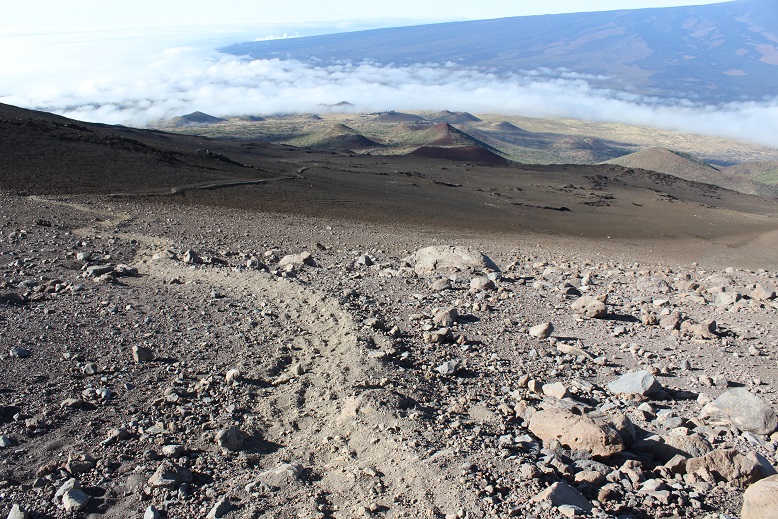
21 path down and marine layer

I fixed the broken sign and made it back to the visitors center at 8:30am, making this 15.2 mile trek of 4500+ feet in elevation gain in 6 hours. The website information page says most fit hikers complete the hike in 8 hours.  I was feeling pretty good about myself!
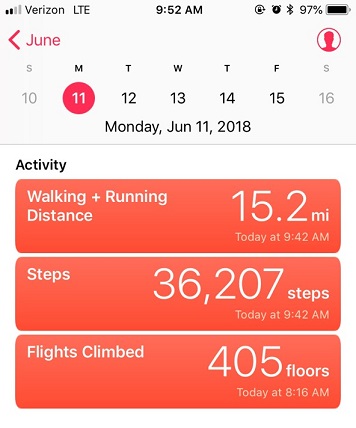
22 distance

I came back here the next day for the stargazing, and talked with the rangers about their registration box. This was it, located as far from the parking lot as possible, adjacent to the front door around the back of the building.  This doesn’t look like any hiker registration box I’ve ever seen, but for those of you intending to take this hike here’s what it looks like.  It’s right below the “Beware of Invisible Cows” sign…
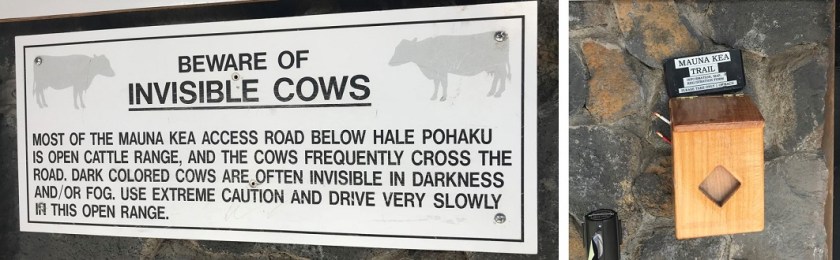
23 visitorcenter signs

I’m glad I did everything possible to make this hike possible, even though my family wasn’t on board with the whole thing. It was truly worth the experience!
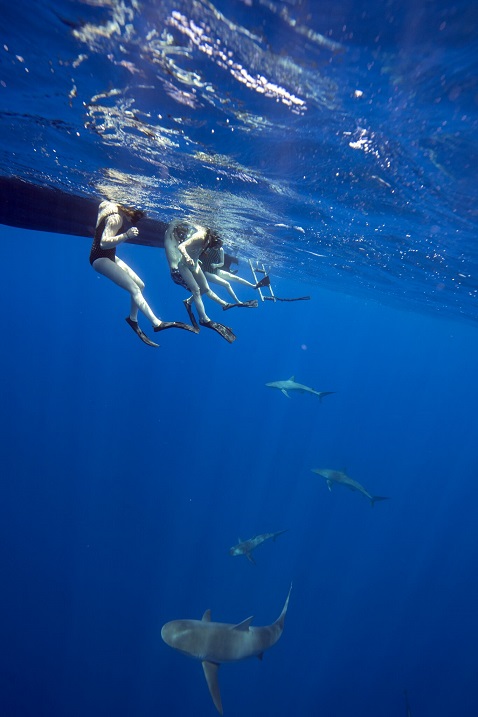
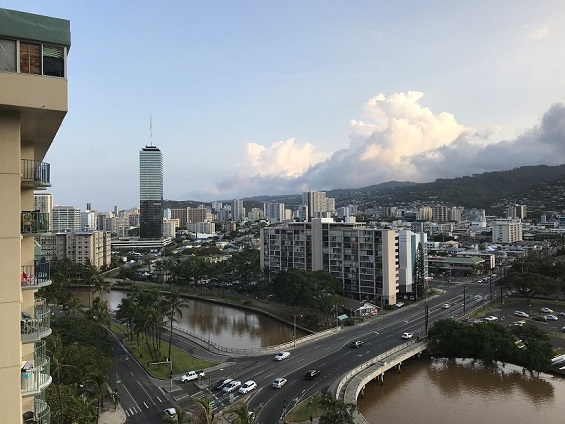
 

Shark Diving

1

Shark Diving – June 9, 2018

As we were planning this trip to Hawaii last March, I came across an ad for shark diving. I’ve been on a reef dive with sharks before, but it’s always been on my bucket list to swim with sharks in the open ocean.  I did some research, and unfortunately the only island in Hawaii that did shark diving was Oahu, and we were staying on the big island.

I’ve always loved sharks, and it seems my kids do too. When I was younger I’d wanted to be an Ichthyologist for a while, my goal being to study sharks and teaching people not to be afraid of them.  When I was I the 3rd grade I checked out the same book every time my class went to the school library:  a black and white book on sharks written by Jacques Cousteau.

I told the kids about it, and they were all extremely excited with the idea in general, so I decided to crunch some numbers to see if I could make it work. If I used all of my hotel points from work and we brought our own food on the airplane it was doable.  It meant leaving a day early and island hopping, but it was something we all really wanted to do and I hate to miss this type of opportunity, so I booked the tickets and made it my graduation gift to Thomas.  The only thing to decide now was which company to go through.

There were several to choose from, but the deciding factor was the shark cage. Only one company didn’t require a cage, and it was important to us we went on a free dive (no cage). This company also put a huge emphasis on education and conservation, so we went with One Ocean Diving.

After a very late arrival the night before we woke up in Honolulu. This was Hawaii as I’d never experienced it before:  a big city.  Everyone seemed to be in a hurry and there was no Aloha spirit here.  There were excessive signs with instructions (from closing windows to only 20 minutes on exercise equipment to no parking and security had to be asked before attempting to do anything).

2

Our first stop was a Starbucks, which was inside of a hotel. There was no parking, and we got into a bit of an argument with the valet guy before solving the parking situation by sending in one person at a time to get their coffee while the rest of us stayed in the car.  This meant we were in the area a lot longer than was necessary, but it got the valet attendant to stop yelling at us.

We’d secured a rental car for the day and were about halfway across the island on our way to see the sharks when my phone rang. I only answered it because it was a Hawaiian number.

They were sorry, but they were going to have to re-schedule our tour because the current and wind were too strong today. How did tomorrow look for us?

Ah!!!!! No!  This was the ONLY day we could do this, as our flight left at 7pm tonight to bring us to another island.  I begged and pleaded with them to see what they could do to get us in, letting them know we were strong swimmers and pretty adventurous.  The person on the other end said they’d talk with the captain and call me back.

I drove to the north shore anyway, just in case we were still able to do this, but it honestly didn’t look good. I’ve never known a company to cancel a tour unless they absolutely had to.   We arrived 30 minutes before we were supposed to board and headed to the kiosk to see what was up. They agreed to take us out today to see some sharks, but we would have to leave an hour later than we’d scheduled and we’d be going to a different location. But we’d still see sharks!  We were thrilled!

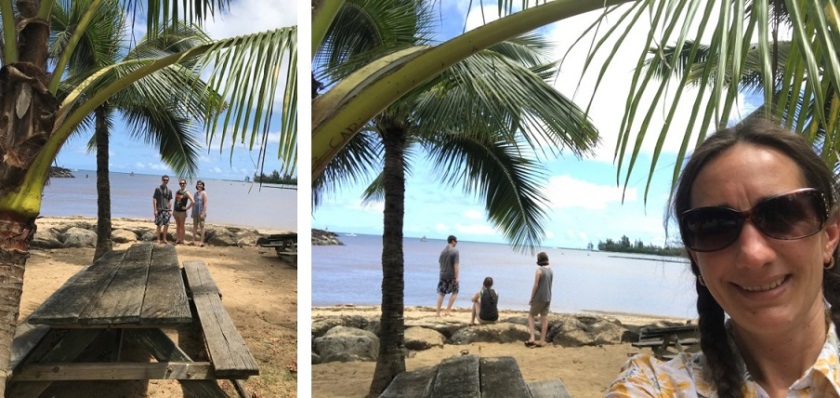
This meant we had an extra hour to do something with. We walked up and down the small town window shopping, and then went to a small beach.  We actually found a few pieces of sea glass here.

3

We were anxious, so we walked back to the place where we were planning on meeting our boat and sat and watched the other boats pull in.

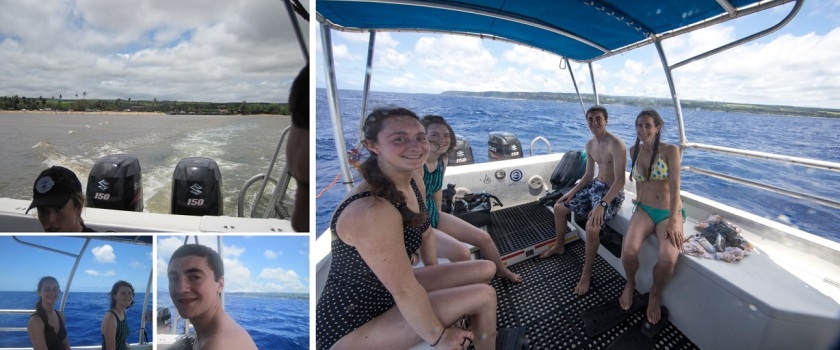
Woohoo! It was finally our turn to go!  When the boat pulled up I could see why they were so worried:  it wasn’t very big.  It would be easy for the Pono Kai to be pushed around in the current or with strong waves.  We had 3 crew members on board and just the 4 of us diving, so it was like having a private charter.  The captain took us about 4 miles off shore while we all applied sunscreen and had a safety briefing.  They told us what kids of behaviors to look out for, and what different behaviors and postures meant.

4

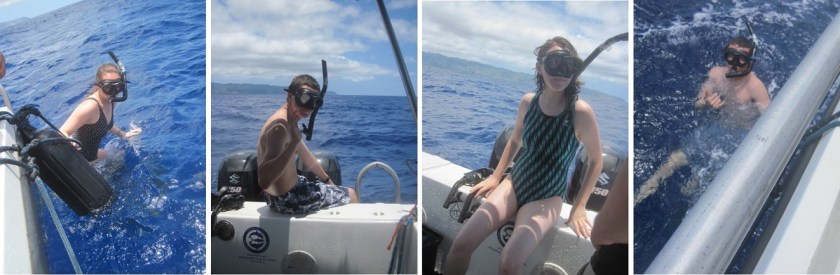
We donned our flippers and snorkel gear, and one by one walked down the ladder and into the water.

5

I let the kids go first. As soon as we entered the water we were asked to hold onto the rope on the side of the boat until we were all in, and then two at a time could go swim with the sharks.  It was very important we stayed near the boat because the current was strong.  Heading in was a surreal experience!
6

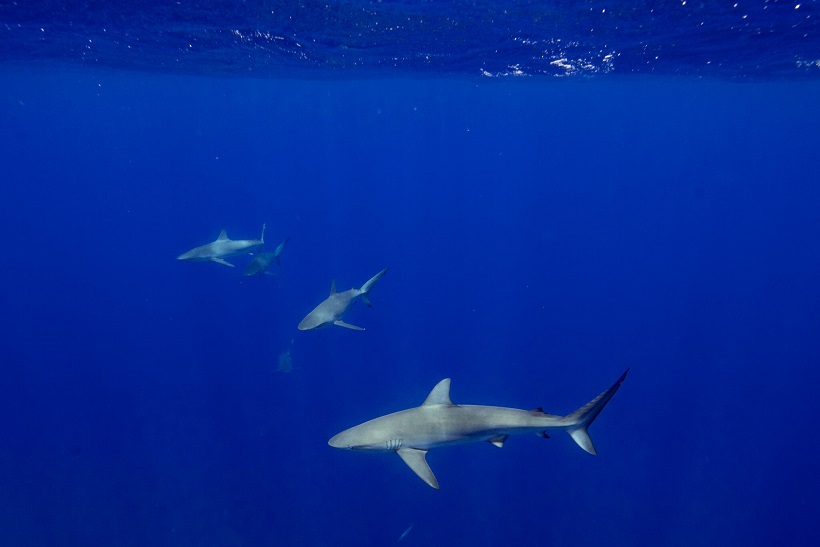
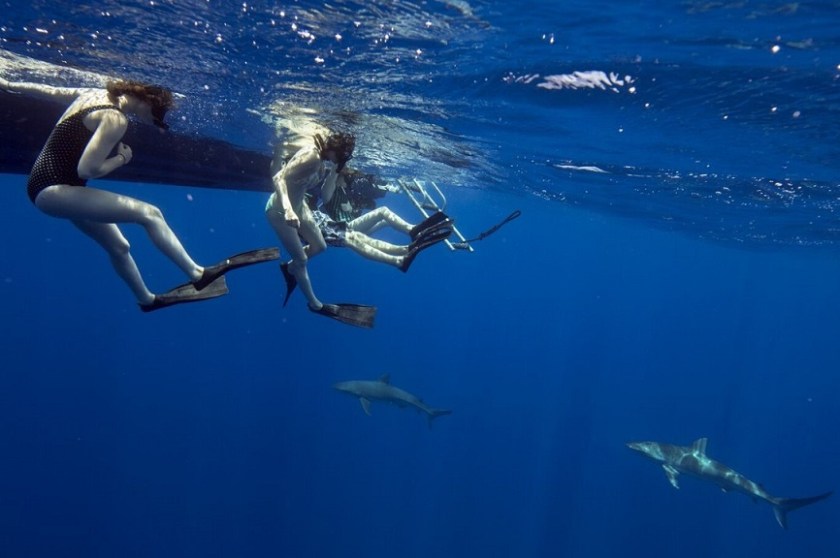
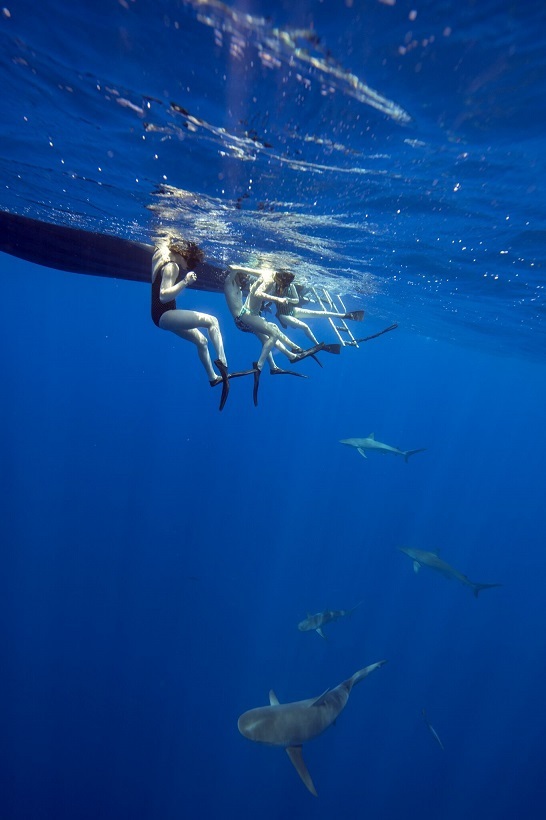
As soon as I was in the water I looked down and immediately saw a shark below me. I’d been expecting to feel fear or some other strong emotion but I only felt calm.  I positioned myself in the water so I could float and watch for a bit.  Very soon more sharks became visible, and they began swimming closer and closer.  It was obvious they were swimming in a column. I could only see about 80 feet down, but I saw several rows of sharks at each depth.

7

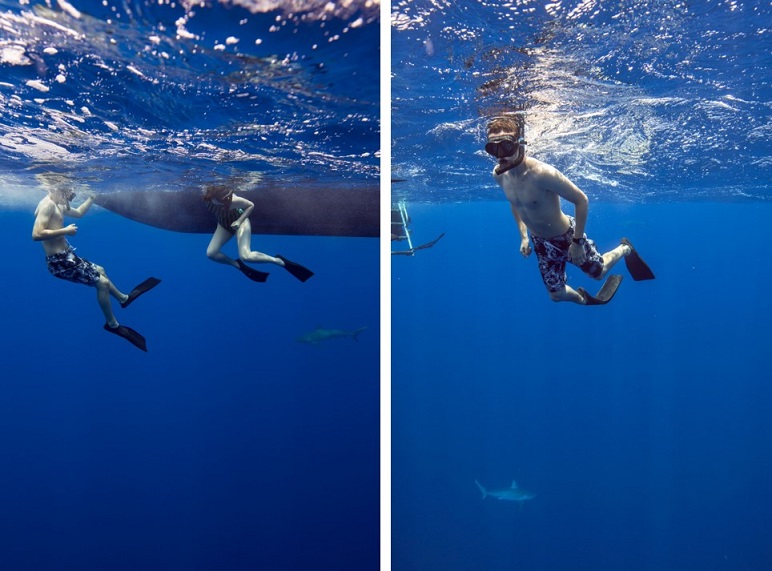
The whole experience was peaceful and even a bit calming. The sharks were Galapagos Sharks, anywhere from 6-10 feet in length.  As time went on they became more curious, some coming pretty close to us.  If I held onto the side of the boat and floated with my body parallel to the water a shark would swim directly underneath me.  This shark was sizing me up to see if I was a predator.  I enjoyed watching the shark move from side to side back and forth.  It was like they were floating instead of swimming (like I was).

8.jpeg

Every once in a while I’d change my position and be surprised to see another shark right next to me.

9

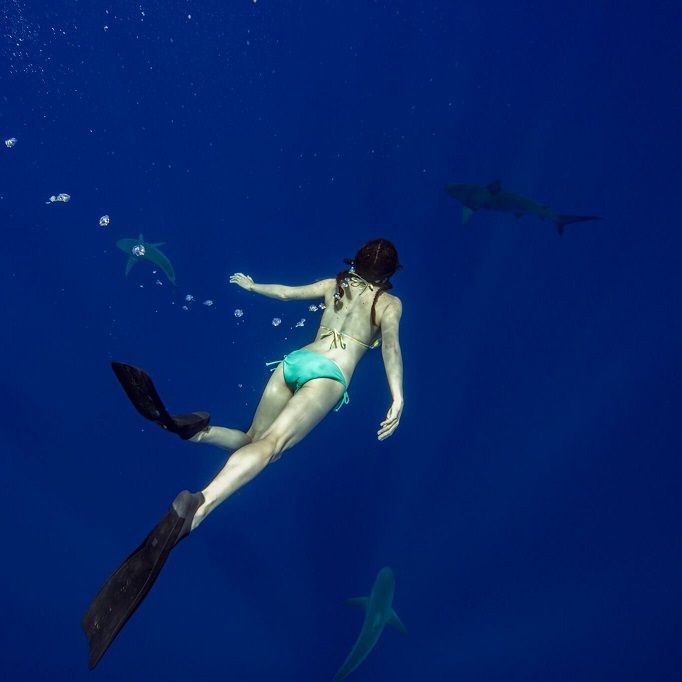
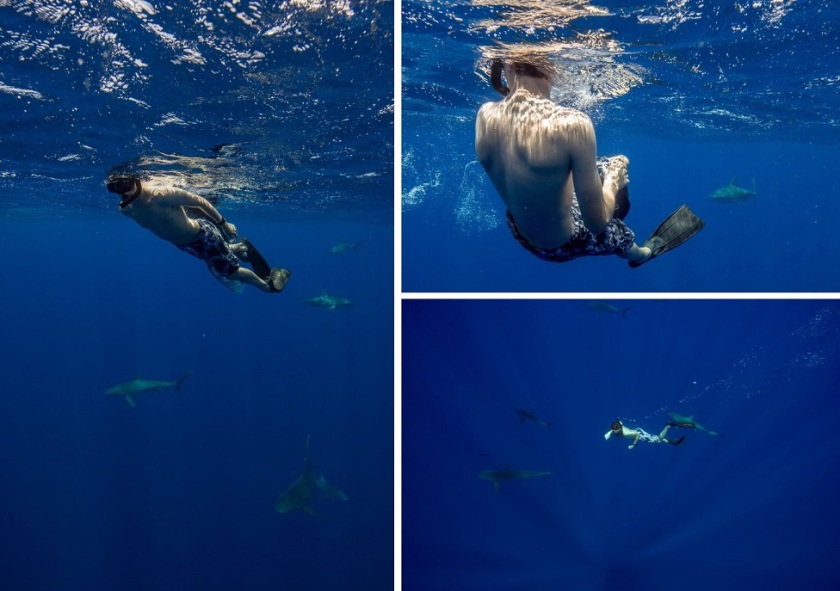
I didn’t just stay to the side of the boat however. I also dove down to actually swim with the sharks.  Since I only had snorkel gear I could only dive down about 20 feet, but it was still a really neat experience to be surrounded by sharks.  Every time I turned around I’d see more.

10

In the beginning of one dive I came up to ask the captain a question but didn’t get the chance: “Head gear on and face in the water!” he shouted to me before I could say anything. Oh yeah, right, this was dangerous.  Head back down and in the water it was.

The most difficult part about this dive was indeed the current. Every time I dove down I’d come back up about 40 feet away from the boat, and I’d have to swim against the current to make it back to safety.  This became tiring quickly, but it was and expected inconvenience and worth it to dive down and swim with the sharks.  We had at least a dozen sharks swimming around us.

The kids seemed to enjoy the experience as well. They weren’t scared, and took turns diving with the sharks.  Check out Rebecca!

11

Emily liked hanging onto the back of the boat, which was really the best and least physically taxing position to see the sharks: they liked riding in the boat’s wake.  She commandeered this position for most of the trip, and we all envied her for it.

12

Thomas was all over the water, taking dozens of dives and making the most of his experience.

13

We were in the water for over an hour, and when our time was up it really seemed like it was over all too soon.

14

On the boat ride back I discussed the experience with the kids. They’d loved it!  I asked them if they ever felt afraid or scared, and they did not.  They also said if they ever found themselves in the water with a shark unexpectedly they wouldn’t be afraid.  Woohoo!  The excursion was a success!

Side note: I paid extra for the photo package (quite a bit extra) and it was totally worth it!  I was told I’d get about 100 photos of everyone together and the sharks, and they couldn’t guarantee equal numbers of photos of everyone.  It took them 3 days to get me the photos, and when they came I was delighted to find out they’d taken 760 photos!  Woohoo!  They came unedited, but that didn’t matter.  They got some great shots!  If you decide to use One Ocean Diving, get the photo package, you won’t be disappointed!!!

When it was over we came back to the dock and saw someone sawing up a Marlin they’d just caught. That was pretty cool.  We made our way to the restrooms and took a bird bath in the sink before heading back to the airport and our flight to Hawaii.

Mt Sneffles – 14,150

1

RT Length: 6.5 Miles

Elevation Gain: 3000’

It has been a long weekend! Friday I did Snowmass and Saturday I took my High School aged Girl Scout Troop to Mt Princeton Hot Springs for the day.  That was a lot of driving, hiking, and adventure and not much sleep.  In fact, I’d only had 6 hours of sleep in the past 2 days.  That wasn’t keeping me from summiting again today though!  I had the day free, so I was going to hike!  I just picked an ‘easier’ mountain today that didn’t have much distance (I still have blisters and sores from where my boots rubbed my feet raw from that dip in the lake and long hike out).

I packed my gear the night before, including extra band aids for my tender feet and lots of moth balls. I’d heard of the trouble the marmots and other varmints do to parked vehicles while the owners are away, and I wanted to stop them before they started. Hence the moth balls.

The 2WD road in was a breeze. Nice and clear and wide enough to pass other vehicles when needed.

2 2wd road

I arrived at the trailhead and was on the trail by 5:30am. I decided to park below the lower trailhead to make up that extra 50’ in elevation gain, bringing the total to 3000’.  I didn’t want to risk having someone say it ‘didn’t count’ because I didn’t gain at least 3000’ in elevation, and this seemed like a simple solution.

There’s a fire in the area, and I could immediately smell the smoke. After about 5 minutes of hiking however I could no longer smell the fire and I couldn’t see smoke, so it couldn’t have been too close.  It was obvious a storm was moving in however, so I’d need to get a move on to successfully summit today.

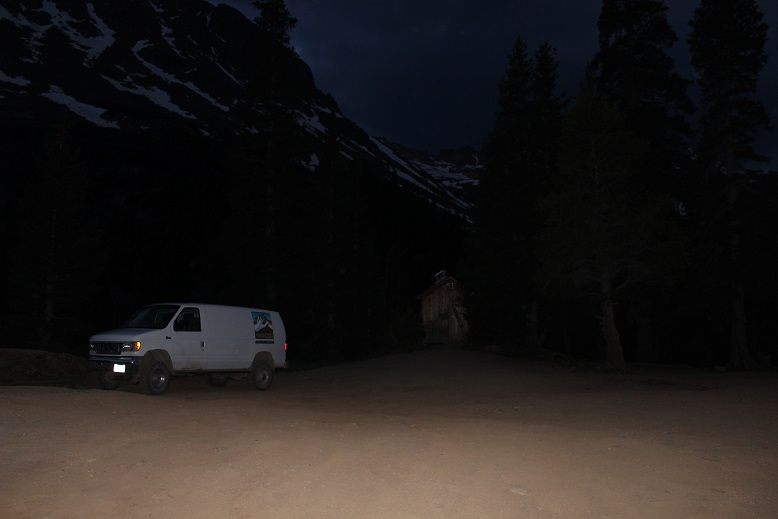
There was a San Juan guide vehicle parked at the lower trailhead (there’s a clean restroom here), and people camping in the basin. Since there was only one vehicle I assumed they belonged to each other.

3 TH outhouse and van

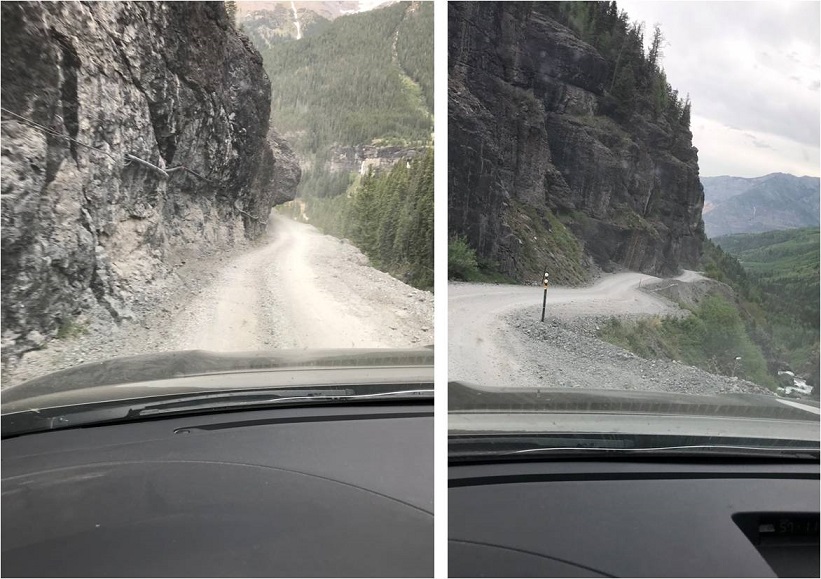
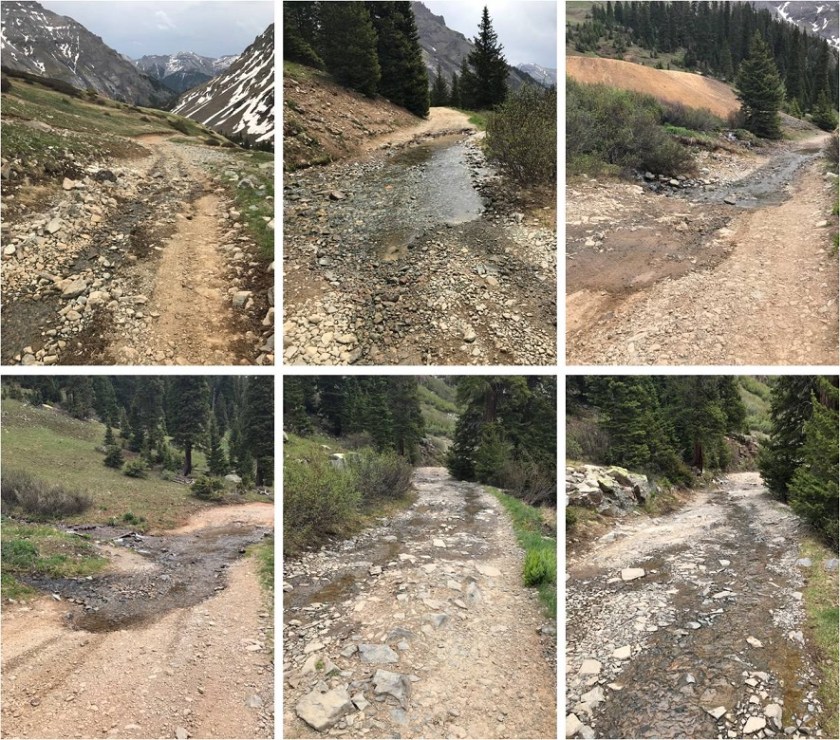
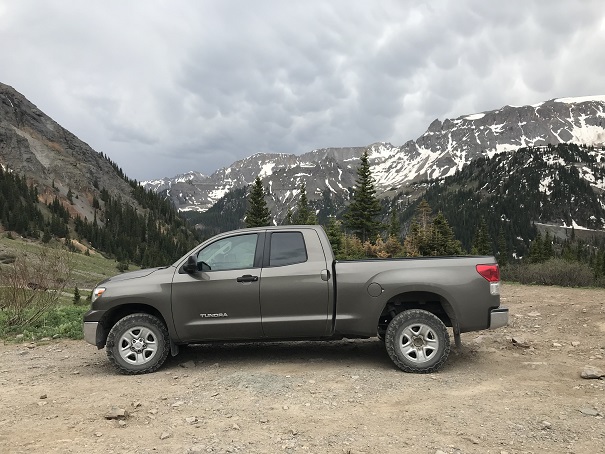
The 4WD part of this trail is indeed 4WD. My truck could have made it, but why risk it?  There were so many opportunities for popped tires!

4 4wd road

And a few spots had snow crossings. On my way out I did see a modified 4Runner up there, a Suburban, and a few off highway vehicles, but they’d all come just to off road for the day.

5 4wd snow

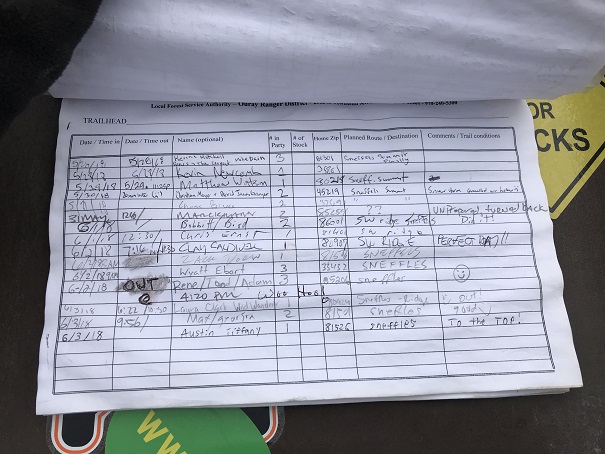
In the end the hike isn’t that long: I’d suggest playing it safe and parking at the lower lot and hiking the extra mile in. I didn’t have cell service, so getting a tow truck would have been a bit of an issue.  I made it to the trail register, signed in, and looked at my route.

6

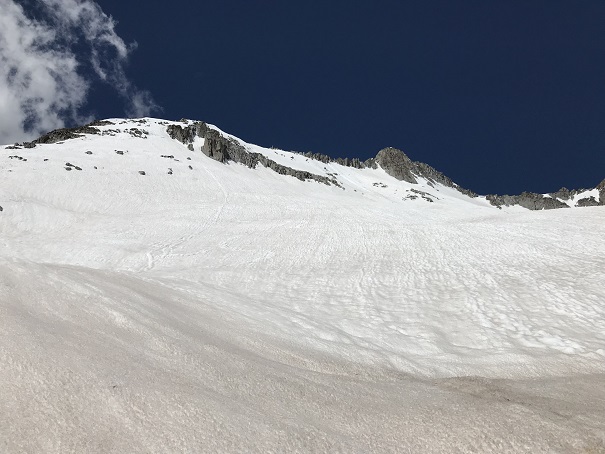
I was trying to decide whether to take the Southwest Ridge or the Lavender Couloir. I had mixed feelings about both.  There was a storm coming in, and I wanted to summit in the most efficient way possible.  The ridge might take longer, but everyone I talked to said to take the ridge.  I signed the log stating I was taking the ridge but reserved the right to change my mind when I could see both routes properly.

There didn’t seem to be much to the hike. I was already above treeline.  All I had to do was cross the basin and traverse the ridge or the Lav Col.

About halfway across the basin I got a good look at the Lavender Couloir and that settled it. Nope, nope, and more nope. After Snowmass on Friday I was done with scree filled gullies for the near future.  I was taking the ridge!  I’m only sharing this post because it has Mt Sneffles in it.

8 lav col post

This trail had tons of signs indicating the route up to the saddle.

7 Trail signs

I crossed the basin following a well established trail with large patches of consolidated snow throughout.

9 Snow oon trail

I had a great view of Gilpin Peak.

10 Gilpin Peak

And the ridge I’d need to cross. At this point my camera died.  It kept telling me to switch the battery pack.  Not my phone camera, but the DSLR I lug around.  I was shocked!  I’d just charged that battery 2 days ago and it usually lasted forever!  Drat!  I was going to have to rely on my iPhone from now on for pictures (which don’t turn out nearly as well) to conserve battery power.  Hopefully I’d still be able to take a summit photo.

11 looking down from saddle

I gained the ridge and looked back on the trail

12 View of Ridge

That seemed too easy! Next I looked at the ridge before me.  This looked like fun!  I’d need to pass in and out of the towers a few times Here’s the beginning of the route:

13 Ridge route from saddle

The first part of the ridge was easy and straight forward. Even the snow along the ridgeline was easily manageable

14

After the snow ended, the real work began. Luckily what this route lacks in distance it makes up for in climbing. The ridge route has gullies too.  These aren’t filled with scree, but with large rocks.  I much prefer rock scrambling gullies to scree filled gullies.  This route had a lot of scrambling!  Look at all those rocks!  And not one of them was stable.  I had to watch every hand and foothold to beware of a rock coming loose (and many did).

15

What was difficult was the route finding! I’d follow the directions I had, but they never seemed right.  I kept thinking to myself “there’s no way this is the right route” and apparently everyone else thought the same thing because trails went off in every direction, looking for a different alternative.  Nope, I really was supposed to go through that notch and descend into that gully, only to climb the next gully full of snow…

16

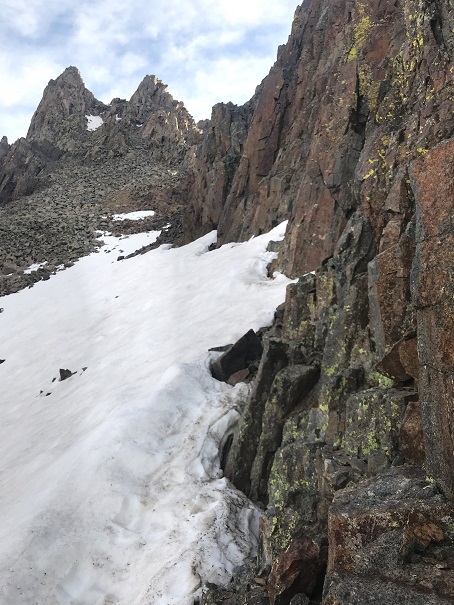
Here’s where it became seriously tricky. It was possible to climb this gully without touching the snow, but in order to do so some seriously clever moves were required on some seriously unstable rock with lots of exposure.  I know I got in some class 4 scrambling at this point.  I was going to have to figure out a safer way down when my pack put me off balance.

17 (2)

My directions said to exit the final) gully (there must have been 5 or 6) at the kissing camels. I missed them but I did end up exiting the correct way.  I’d been traversing between those pillars I’d seen earlier from the basin.  Once out of the gullies I just had to follow the ridge to the summit.  This was easier said than done, as there were dozens of routes visible.  Here’s a view of the final pitch to the summit. This was the most stable rock I’d encountered all day, and FUN to climb!!!

18 last scramble to wummit

I summited at 8:30am and turned on my camera for a summit photo. I was hoping I had enough battery to get a good summit shot. I got one in and it refused to turn on again, so this is what I got.  I swear I’m not as large and awkward as this photo makes me look!

19 Mt Sneffles 14150

I took a selfie with my phone I was much happier with and a video from the summit.

20

I looked back on the route down and saw what looked like people climbing. Cool, I’d get to meet people on my way down.

Following the path down was much more straightforward than following it up, but the exposure was real!

21

I made it to the kissing camels I’d missed on my way in. They really were a cool sight to see!

22

23

I was just getting to the point where I was wondering about the other climbers I’d seen? Maybe I hadn’t really seen them at all?  I turned the corner and there they were, halfway down (up) a gully.  There were three climbers: a couple with a guide, all roped in together, but not secured anywhere.  I don’t know much (anything) about roped in climbing, but this seemed really counterproductive.  If one person fell, wouldn’t they all fall because none of them were secured to anything?  Am I missing something to this?  (I know I am…).  How is this safe for anyone involved?

The couple didn’t talk with me, but the guide and I discussed gullies. His climbers looked exhausted and frightened.  I’m assuming they bit off more than they could chew.

I rounded the corner and saw the cairn I was looking for, and what looked like a rock bull standing sentinel.

24 IMG_6359 Cairn and Bull

This was the start of the gully I knew I wanted to climb down with my ice axe and crampons. I’m pretty sure I could have done it without them, staying to the rocks, but one false move/slip of my feet or the rock and I wasn’t surviving that fall.  So I did the wise thing and geared up.

25

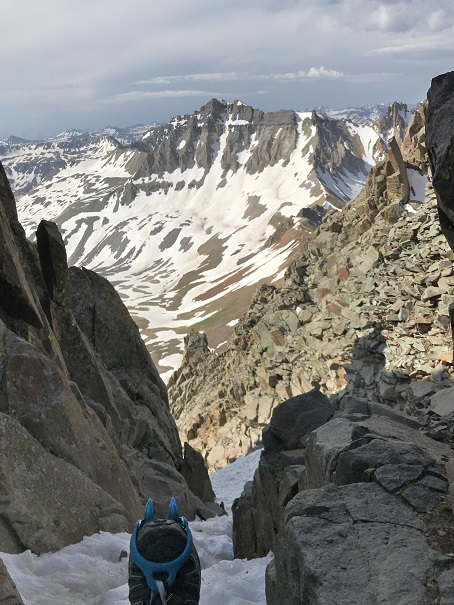
This ended up being a fantastic choice! I felt much more stable on my way down than I had climbing up.  Proper gear is the way to go!  Ice axe, crampons, and helmet all the way!  I made it down this gully and back over the notch and felt I was home free.  That to me had been the crux of this climb. From here on out I still had to watch every step, but it was all downhill from here!
26

A storm was indeed moving in, and I was glad I’d gotten such an early start. I met two more hikers on my way down who’d intended to climb the gully but were turning back due to weather.  I also saw two hikers halfway up the gully.  I seriously hope they made it back down safe.

I signed out of the trail register at 10:30am

27

And hiked happily back to my truck. That had been a fantastic climb!  I was so glad I took this route instead of the Lavender Couloir.  I would have been a miserable snot hiking that thing.  The ridge was much more technical, but a lot of fun!
Doesn’t my truck look like she enjoyed herself while I was away?

28

Well, remember those moth balls I’d brought to toss under my truck to ward off the marmots while I was hiking? In my excitement and eagerness to get started I’d left them inside my truck during the heat of the day, so when I went to open it I was blasted by an overwhelming scent that reminded me of my granny.  That smell’s not going away anytime soon.  Note to self:  Next time put the moth balls OUTSIDE!!!

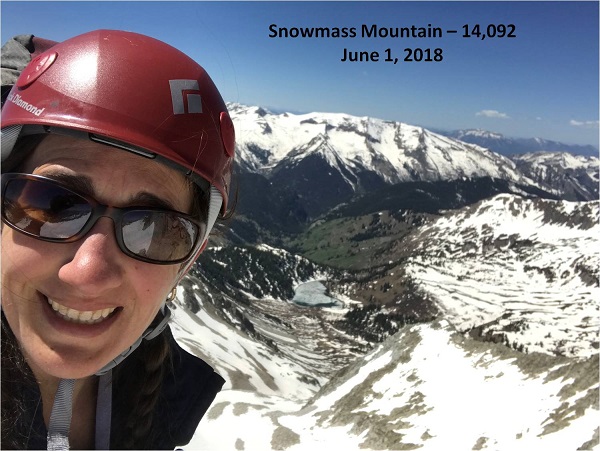
Snowmass Mountain – 14,092

1RT Mileage: 22 miles
Elevation Gain: 5800’

It‘d been a long week at work, so I needed a quick nap before heading to the trailhead. I got all my gear together and packed it into my backpacking pack and loaded it into my truck so I’d just need to get up and go.

My backpacking pack looked excessive for a day hike, but I was darned tired of carrying those snowshoes in my hands all the way up the trail again. They don’t strap to my day pack, and they’re a bugger to carry, but they fit nicely into my backpacking pack.  So today that’s where they went.  At least the pack was light.

My plan was to get to the trailhead at 1am and make it to the lake around 3:30am. That meant I needed to leave at 9:30pm.  That gave me 2.5 hours to rest if I fell asleep right now.  I jumped into bed, checked my alarm one more time to make sure it was set for 9pm, pulled the covers over my head and fell asleep.  Two seconds later I turned over and looked at my phone because I felt way too rested.  AGH!!!  10:33pm!  My alarm hadn’t gone off!  Drat!  I did the mental calculations:  Was it to late to start?  This is really a hike that needs to be started very early in the morning. Very early.  Did I just miss my shot?  I knew I could make up some of the time driving, and I was all packed, so…

I jumped out of bed, re-heated the morning’s coffee, and was out the door in 5 minutes.

Surprisingly there was no one on the road at 11pm on a Thursday night. I drove most of the way not seeing another vehicle.  I couldn’t speed however, because there were a lot of animals out.  Just after Buena Vista I saw about 20 deer trying to cross the road in front of me.  I had to slow down very quickly to avoid hitting them.  I’ll admit I was pretty close, but was able to stop in time.  I’m guessing we had 3 inches to spare.

Just as my truck came to a full stop, Wham! I heard a big thump on the back passenger side of the vehicle.  I’d just been hit by a deer!  I thought that kind of thing only happened in Gilmore Girls?  I didn’t want to get out of my truck because there were a bunch of deer around, so I slowly crept the vehicle forward and looked in my rear-view mirror to see if the deer was ok.  It was.  It had just gotten scared and done the prey thing where they try to zig and zag to confuse their predator into going the other way.  She’d zigged when she should have zagged, but all the deer were up and walking around behind me, so I continued on.  I’d look at the damage to my truck when I got to the trailhead.

My GPS stated I was making good time. I’d already cut off 30 minutes of drive time, making me only a little over an hour behind schedule.  That was promising.  Until I made it to the trailhead.  Or, what I thought was the trailhead.  Those of you familiar with the Maroon-Bells and Snowmass area might think this was a stupid mistake, but my GPS directions and the directions from the .com were pretty parallel, and after following them I ended up at the Maroon Bells Trailhead instead of the Snowmass Trailhead.  Both are referred to as the Maroon-Snowmass trailhead (side note:  there’s a sign at the park entrance saying the $10 fee to enter Maroon Bells starts June 10).

I was starting at the Maroon-Snowmass Trailhead, but apparently there are two of those?!?! Luckily I’d started the GPX file for the hike before leaving the house (something I learned to do dozens of 14ers ago for situations just like this) and saw where I needed to go to fix this problem.

It took me an hour, and just an FYI, when using the .com directions there is no Snowmass Creek Road: It’s now called Brush Creek, with no mention of Snowmass anywhere, even when it becomes a dirt road.

I made it to the correct trailhead (also named Maroon-Snowmass BTW) at 3am. I’d wanted to almost be at the lake by this point.  Now I was mad at myself.  The alarm thing was my fault (I’d accidentally set it for Friday at 9pm instead of Thursday at 9pm), and even though I’d found several different directions to the trailhead I messed that up too.  So all the time I’d “made up” driving was lost, and then some.

I jumped out of my truck, threw on my pack, and was on my way. I had serious time to make up.  Side note:  there was a huge tent set up in the parking area with a generator running?  That seemed a bit excessive.  There were 2 other cars in the lot, one I assumed belonged to the tent people and the other to another hiker(s).  The road in was a 2WD dirt road for some of the way. Here’s a picture from later in the day.

2

About a quarter mile in I realized I forgot to eat my bagel, and I wasn’t 100% sure I remembered to pack my gloves. I knew they’d made it to the truck, but I wasn’t sure they made it into my pack.  I was only a little ways in, but I wasn’t turning back.  I had food with me, and if my hands got cold I had an extra jacket.  I’d improvise.

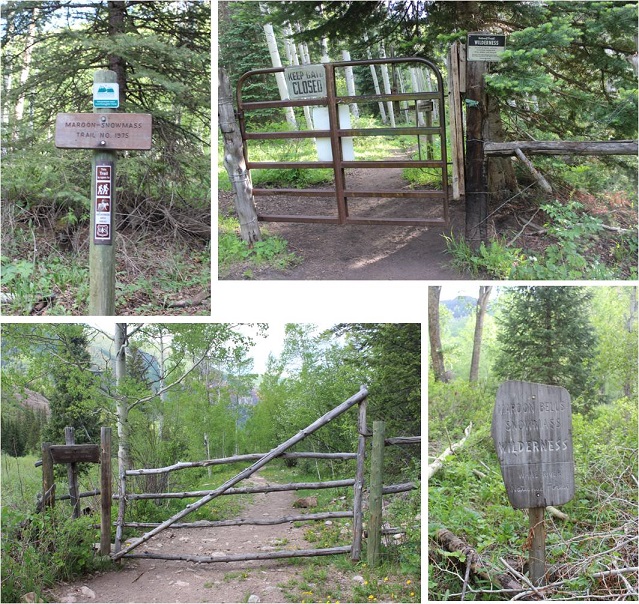
I passed several closed gates and great signs indicating the correct trail.

3

It was dark but I was hiking by the light of the moon. I could hear but not see the river, and was glad the path was so easy to follow.

The trail was very well maintained

4

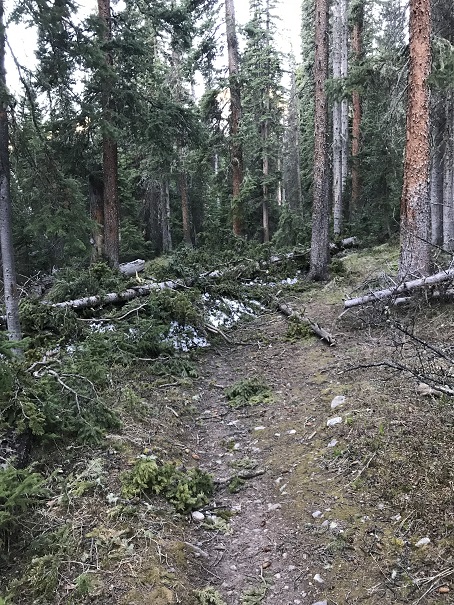
There were several downed trees directly on the trail, but they were (mostly) easily avoided).

5

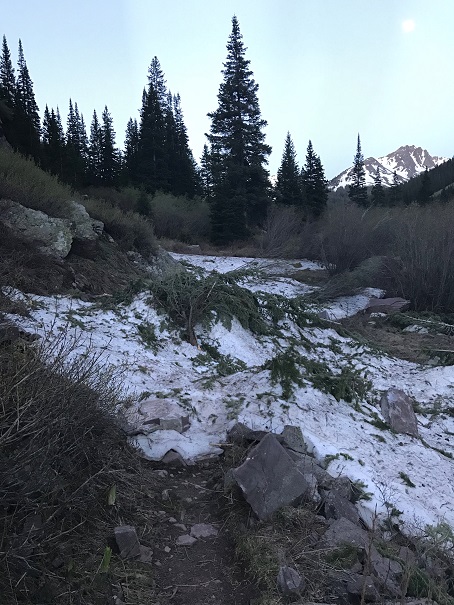
There was also evidence of avalanche activity in the area.

6

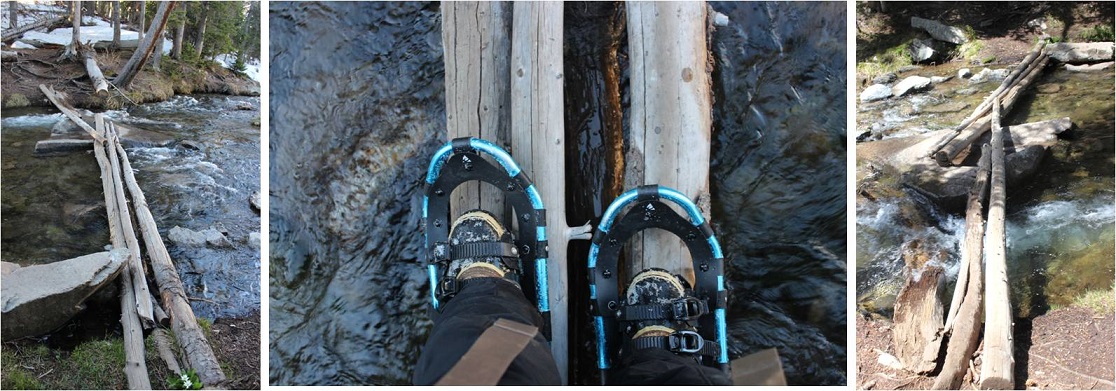
It stayed dark until 5:30am, just as I reached the log jam. (Note, there’s a video of my crossing the log jam later towards the end of this post for those interested in experiencing it with me).  The log jam was much easier to cross than I’d anticipated!  The only tricky part was all of the logs were floating on the top of the water, making them springy and not secure.  The lake was about 8 feet deep in the middle, so I didn’t want to accidentally fall and be a swimmer.  I just made sure I checked for stability with each step, and where possible used my trekking pole for balance.

7

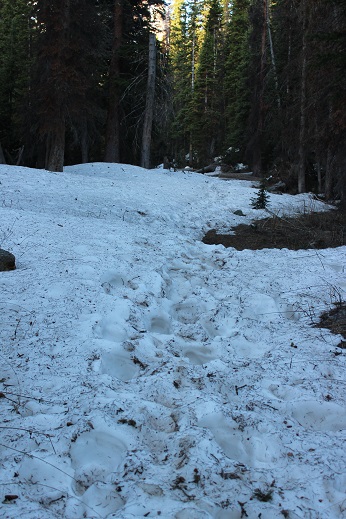
Snowshoes were needed about ¼ mile from the lake. I pulled them out to put them on and woot!  I had my gloves!  Things were looking up!

8

I kept the snowshoes on to cross this short log bridge, which actually ended up being a great idea: they gave me extra stability.

9

I’d made it to Snowmass Lake. It was beautiful in the morning light!

10

I made it the 8 miles to the lake at 6:45am, when my original intention was to be there at 3:30am. I was over 3 hours later than I’d wanted to be at this point.  I did a mental sigh, knowing it was unlikely I’d summit today because the sun would melt the snow to a point that made climbing impossible.  Even knowing this I continued on, telling myself there were probably more unknowns ahead and I’d want to be more prepared next time I attempted Snowmass.  I’d just keep trekking on and see how far I could get and how much I could learn about the route for next time.
There was no evidence anyone had camped at the lake, so I assumed the extra vehicle belonged to day hikers.

There was evidence of recent avalanche activity at the lake. It looked quite recent, and was coming from the east side.  The left banks of the lake were covered in snow I was sure should have melted out by now, and attributed it to an avalanche.  There were broken pieces of trees everywhere.  I kept my snowshoes on to cross the banks, which was extremely helpful.  It looked like others had postholed.  There was still ice on some of the lake.

11

Even after I made it past the lake I kept my snowshoes on as I headed towards the scree slope gully. This was 600’ in elevation gain of pure torture.  I don’t like gullies.  As far as I’m concerned a gully should either be full of climbable snow or not on the route.  It took me forever to climb this thing!  It was full of scree and large, loose rocks and boulders.  Nothing was stable.  It was like a bad Paula Abdul song:  two steps forward and two steps back.  I actually kept on the snowshoes until I was about halfway up the gully because they gave me added stability (don’t try this at home!!!).  I only took them off when the scree and rocks transitioned to boulders.   It was apparent they were now doing more harm than good and I didn’t want to risk a broken ankle.

12

I made it to the top of that very instable gully at 8:30am. I put back on my snowshoes and helmet, thinking to myself it probably would have been a good idea to put my helmet on before the gully.

13

I looked at the rest of the route before me. Snowmass is best done with snow in the mass, and boy did it have snow!

14

I started forward and noticed a guy glissading down towards me. This really ticked me off.  I was so mad at myself!  I should have been where he was right now, on my descent, but instead I still had 3 miles of difficult terrain ahead of me.  He made his way towards me and started some small talk about the climb, how many 14ers we’d done, and the generator at the trailhead.  He hadn’t seen anyone else all day, and was pretty cheerful.  I tried to make small talk, but it was hard for me to remain upbeat.  The sun was shining, the snow was melting, and I was behind schedule.  I’m sure I came across as rude, and while I regret that I couldn’t help it.  If you’re reading this, I apologize for my bad manners!
He told me he’d started at 1am, and was just going lightweight today (he noted, looking at my excessive pack). He didn’t have snowshoes, so he’d postholed around the lake, having a miserable time of it.  The snow up towards the top of the mountain was still pretty stable, so I shouldn’t have trouble summiting. I sat down and switched my snowshoes for crampons.  This putting on and taking off my snowshoes/crampons was getting exhausting!

We said goodbye, and I looked at the route before me and the way I’d traveled thus far (with the hiker to the right).

15

I steeled myself: If the snow was indeed still stable as the glissader said there was a small chance I could summit today, and I was going to do my best to make it happen if it was safe to do so. It looked like a long trudge, but doable if I could get there before the snow melted out too much.

Because the trail is covered in snow (if there even is a trail underneath?) you just need to aim for the ridge and make your own route. This mountain is much bigger than it looks, and those rocks and cliffs you see are at least 20 feet in width, some much larger.  I aimed for boulders in front of me and just kept going, making my way towards the ridge.

16

All was going pretty well and I was quite pleased with my progress. It looked like I was actually going to do this!  The snow was getting noticeably softer, but I was so close!  When I hit about 20 feet from the ridge I hit a big problem:  the snow became extremely soft.  Stepping on it was like what happens when grab a piece of cotton candy between your fingers and squash it, but slushy.  This was not good.  I tried to follow tracks made by others, but that ended up making things worse.  I was now going parallel to the ridge, trying to find a safe way to summit.  It just wasn’t happening, and I was making a mess of the mountain. I hadn’t realized it while I was doing it, but I’d chosen a path that got the most sun earliest in the day.  Ugh!  I wish I’d have angled toward the right more!  Then I wouldn’t have been in this situation.  Oh well, I’m a problem solver, so I kept at it until I found a stable route.  OK, I actually just tramped down the 5 feet or so of snow until I hit rock and made my way up that way.  I apologize to those following in my steps!  If you want to avoid this just gain the ridge more to the right…

At 10:30am, despite everything I had going against me, I gained the ridge! I was elated, but I knew one thing:  I did NOT want to go back down the way I’d come up.  Not only had I pretty much ruined that line it just wasn’t safe.  This meant I needed to look for a safer route down and I needed to summit asap because that wonderful sun wasn’t on my side.  I sat down to take off my crampons and took a look at the way I’d come and the ridge before me:

It took me about half an hour to travel those .2 miles. Not because the terrain was difficult but because the wind was insane!  It was much faster than the predicted 30mph, and COLD!!!  I was a popsicle, and could barely move.  I summited at 11am.  Snowmass is a small summit, and I was frozen and in a hurry to beat the sun, so no great summit photo.  Surprisingly, I wasn’t thrilled with this summit like I usually am when I make it to the top.  I did get (one) selfie that would have to do and booked it back to the ridge.

19 Snowmass Mountain 14092

The snow came all the way up to the ridge in most areas, so finding a different route down wasn’t too challenging. What was challenging was the angle of the down climb!

20

This was much steeper than the way I’d taken on the way up. I was surprised at how much firmer the snow was in this area.  The descent was easier than I’d anticipated (snow conditions wise) but it still took what seemed like forever!  Here’s a photo of the route I took:  I went to the left on the way up, and the right on the way down.

21

I finally made it back to a semi level area and sat down to glissade. Drat!  I couldn’t!  Because I was wearing my big pack!  Oh well, I’d just hike out and enjoy the view while I did so.

The top of the gully had a great view.

22

The trek down the gully wasn’t any better than the way up. What little snow there was was too soft to traverse.  The rocks were all unsable and it was impossible to get traction on the scree, so I had to carefully watch every step I took to avoid falling and creating a rockslide.  It was very slow-going and I couldn’t get down fast enough.  Have I mentioned I’m not a fan of gullies?

When I made it back down I got a quick video of the avalanche evidence. It looks pretty recent to me, with a lot of debris rolling on top of the snow in the wind.

23 Avalanche near lake

OK, here I was back at the lake.

24

To make up for my bad attitude I decided to follow the post-holes the glissader made on his way back and trench them with my snowshoes to create a nice path for the next hikers to follow. This was slow going, and took me over an hour.  I was making a nice, solid trail though!

I was half way across the lake when it happened. The section I was trenching calved while I was crossing it, right into the lake.

25

You’re probably thinking: Wasn’t the lake icy cold? Honestly, I couldn’t tell you.  It all occurred in slow motion, and luckily I realized what was happening while it was happening so I had some time to plan and prepare before hitting the water.

As the snow and ice disintegrated below me I took a deep breath, filled my lungs with air and steeled myself for the shock of landing in the ice water. I hit the water ready to spring up and stable myself.  I was still wearing my snowshoes, and had on my helmet and pack.  I stood up, made it as quickly as I could to the shore, climbed up the snow bank, threw off my pack, and rolled in the snow to dry off.  I was making snow angels and checking to make sure I hadn’t hurt any part of my body.

After a few good rolls I took off my outer layers of clothing and stripped down to my moisture wicking under-layers.   I rolled in the snow again.  When I felt I’d absorbed as much water as possible I got up and did jumping jacks for 2 minutes, warming up my body.  While doing the calisthenics I considered my options.  The next course of action should have been to start a fire and dry out my socks/shoes, but I was pretty sure there was a fire ban, and besides, it would take longer to dry out my stuff than it would take to hike the 8 miles out.  I needed to stay as warm as possible, and sitting in front of a fire would just take time and provide the opportunity for me to go into shock.  The best way to prevent shock (for me) is to keep moving.  My altruism was done for the day.  No more trenching:  I threw my wet clothes into my pack and began the long slog back to my truck in soaking wet socks and boots.  My new priority was making it back to my truck and the dry socks I had sitting on my passenger seat.

I made it to the log jam and decided to take a video of the crossing

26

In case you’re wondering, these ponds have fish in them. I saw dozens of trout near the shore.

27

It was a very long 8 miles back to my truck. Those 8 miles out were not as pleasant as I’m sure they were intended to be.
Around mile 18 is when I really got tired. My feet were rubbing against my wet socks and drenched shoes, creating terrible blisters.  They squished with every step, and at one point I felt my pinky toenail come off.  That stung.  My pack, now full of wet clothes, was heavy and eating into my shoulders.  Every quarter of a mile or so I had to stop and bend over to release some of the tension and weight from my shoulders.

I was following the creek back, and as I was relieving the pressure from my shoulders I heard it: singing.  I righted myself and looked around to see if anyone was there, but the forest was empty.  Yet I could distinctly hear singing.  I couldn’t make out the words, but it was a woman, singing softly and humming. It almost sounded like it was coming from a radio, faint in the distance.  I’ve often heard what sounds like music from a creek/flowing body of water, but that’s not what this was.

I shook it off and kept going, but every time I came close to the creek I heard it again. At one point it sounded like it was coming from a jukebox or an old staticky radio.  I looked over at the raging creek.  Water was a good conductor, maybe that’s where it was coming from?  I shook my head.  Ugh, not a conductor of sound Laura.

I knew what was happening: I’d only gotten 3 hours of sleep last night, and while I had food I hadn’t eaten all day because I didn’t feel like stopping to take it out of my pack (I don’t get hungry when I hike, so I have to force myself to eat).  I was in shock and suffering from low blood sugar, causing auditory hallucinations.  Not eating combined with lots of physical exercise and the distress of falling into the lake was causing me to go into shock.  That didn’t stop me from taking a video while I heard the singing to assess later (in case you’re wondering, no, you can’t hear the ‘singing’ in the video).

On the positive side, there were a lot of beautiful flowers.

28

I made it back to my truck at 6:30pm and assessed the deer damage: none!

It had been quite a day: 22 miles, 5800’ feet of elevation gain, and an unexpected dunk in Snowmass Lake in 15 hours. It was 26 hours door to door, and I was exhausted!

29


San Luis Peak – 14,014

1

RT Length:  13.8 miles
Elevation Gain:  3600’
I’ve never had a traffic ticket in my life, but I was pulled over by two different police officers on the drive to the trailhead this morning.  I left at 12:30am for this hike, and at about 1:30am I saw police lights flashing behind me.  I knew I wasn’t speeding.  I never speed when driving in Colorado at night.  I’ve had too many rabbit, deer, elk, bear, fox, porcupine, bear, squirrel, etc. dart in front of me at close range to drive over the speed limit.  It’s a death sentence for both you and the animal.   I actually drive slower at night than I do during the day.  Confused, I pulled over into a closed Sonic and looked for my license and registration.  The officer was very nice, and let me know I had a headlight out.  After making small talk for about 10 minutes he gave me his card and let me go.

About an hour later I saw flashing lights behind me again, and once again pulled over to the side of the road.  This time I was prepared (I hadn’t put away my license and registration yet, so it was still in my lap).  The officer walked up to my car:

Officer:  “Do you know why I pulled you over?”

Me (as nicely as possible): “Yes, I was just pulled over a little while ago.  I have a headlight out”

Officer:  “Nope, you were speeding”

Me (a bit shocked): “Isn’t the speed limit here 60mph?”

Officer:  “Yes, but I clocked you coming over that hill at 62.”

I took a deep breath and apologized for going over the speed limit.  He asked me for the card of the previous officer that pulled me over, and then went back to his truck for a minute.

You can imagine all the things I wanted to say at that point, but I just put on a smile and politely waited for him to return.  When he came back he gave me his business card (and kept the other officer’s card for himself).  He chatted with me for a bit about where I was going, and then eventually…

Officer: “I’m going to let you go with a warning, but from now on keep if 5 below the speed limit.  Here’s my card.  It has my phone number on it. See, right here (he pointed to the phone number he’d written on the back of the card).  If you have any questions about why I pulled you over today, call me.  If you get pulled over again for your headlight being out before you can fix it call me and I’ll take care of it for you.  My number is right here (he pointed again).  Call me if you have any questions”.

At this point I clearly knew what was going on, thanked him, and was on my way.  I had no intention of calling him.

I’d started the drive with a full tank of gas, and planned on getting gas before the turnoff to the dirt road that led to the trailhead, but unfortunately I drove for over 75 miles and never saw a gas station.  It was going to be tight, but I thought I could make it.  Note to others driving from the North:  The last gas station is in Saguache, and it’s closed overnight, so you need to get gas in Salida.
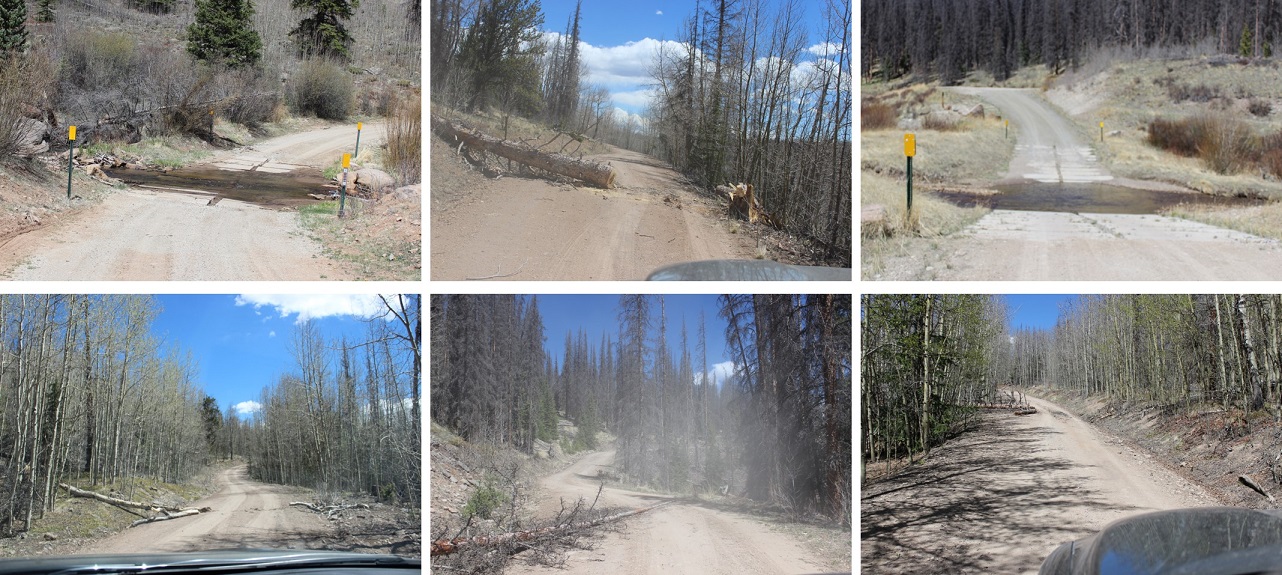
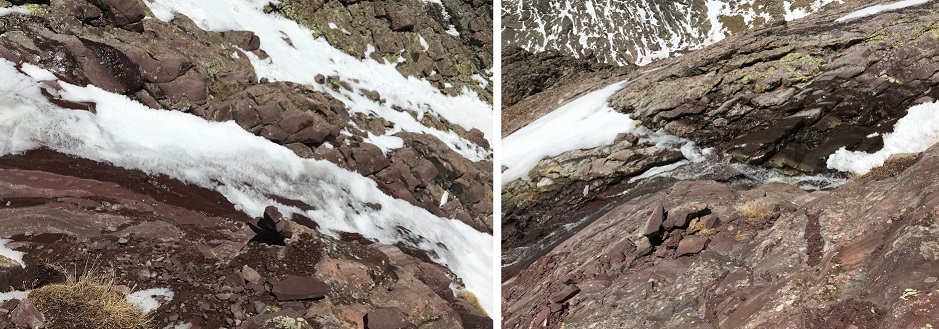
I drove down 27 miles of 2WD dirt road in the dark to the trailhead.  The conditions were actually pretty good. There were a few downed trees in the road, and the creeks were pretty low for this time of year.  Here are some pictures from the way back (note, the creeks rose about a foot during the day)
2

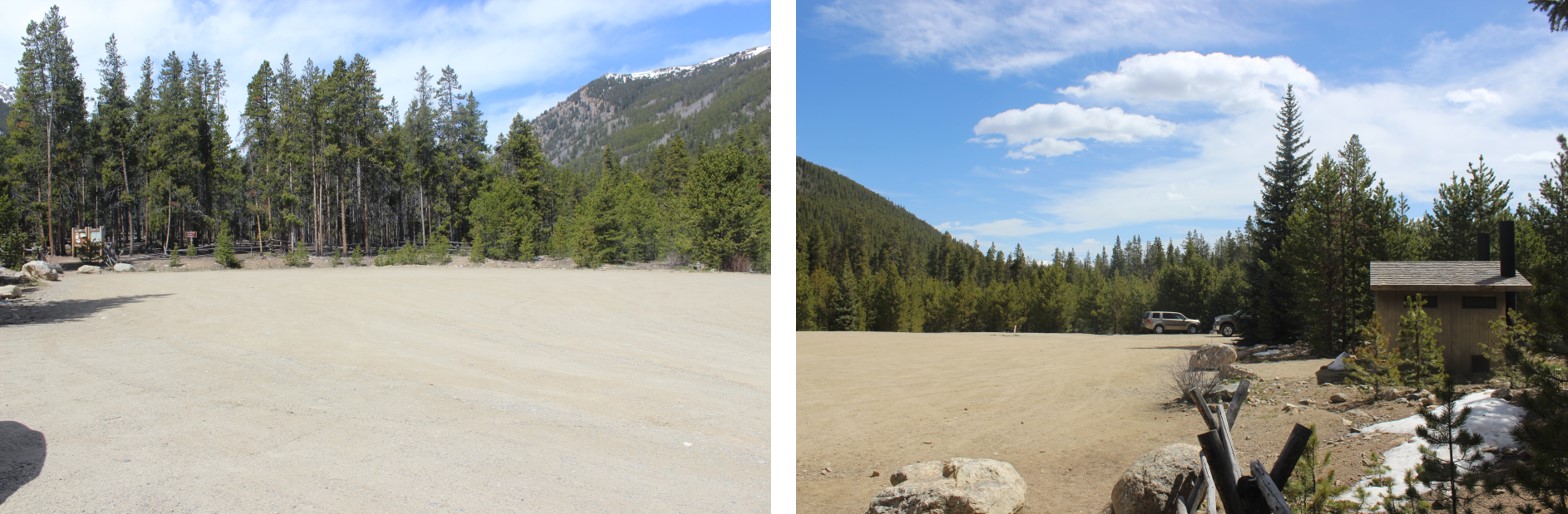
There isn’t actual parking at the trailhead, you just park on the side of the road.  So I parked, got my gear together, and was on my way at 5:15am.

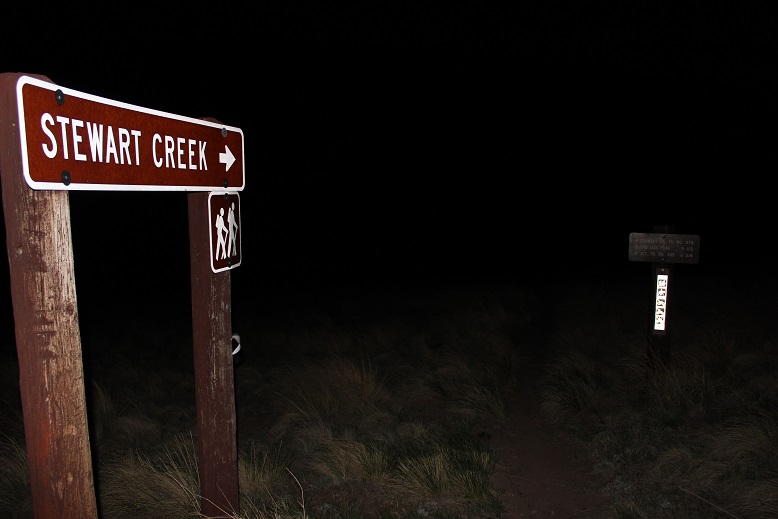
3 Trail in Dark

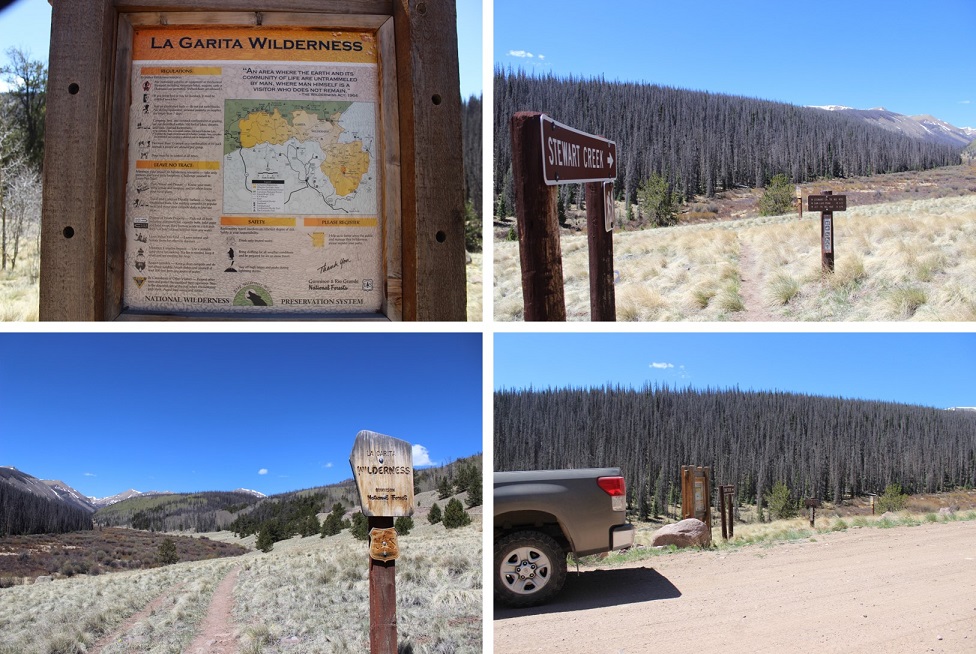
This trailhead has signs!  Woot! I love a trailhead with good signage.

4

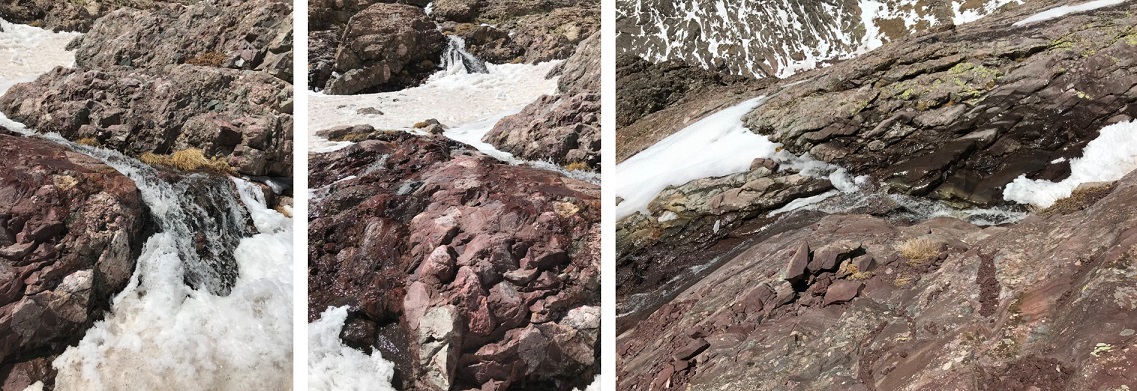
I followed the Stewart Creek for a couple of miles on easy terrain
5

Eventually coming to an area with a lot of beaver dams.

6

I saw a beaver swimming in the pond in front of me and decided to take a quick video.  The birds were chirping, the sun was rising, and the beaver was swimming peacefully from his den when all the sudden: Whap!  This happened:

https://youtu.be/frKwkqjOevY

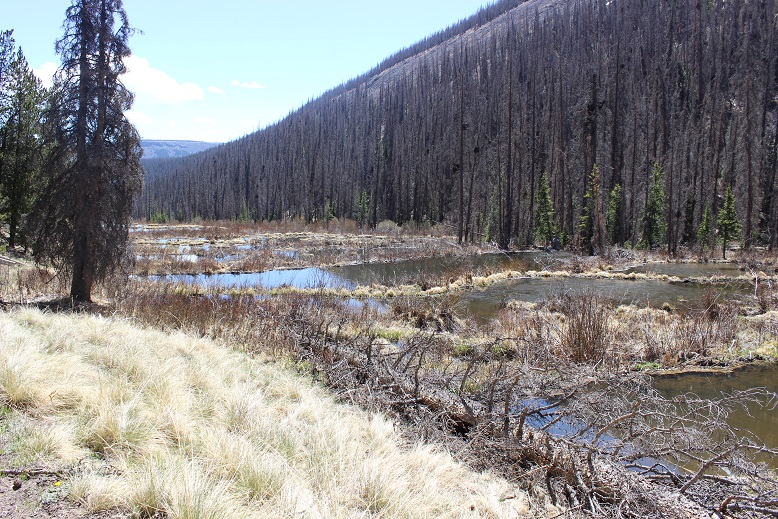
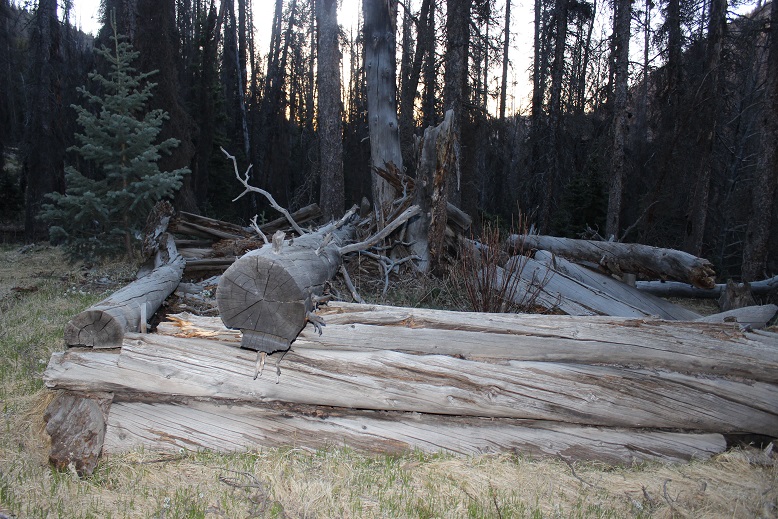
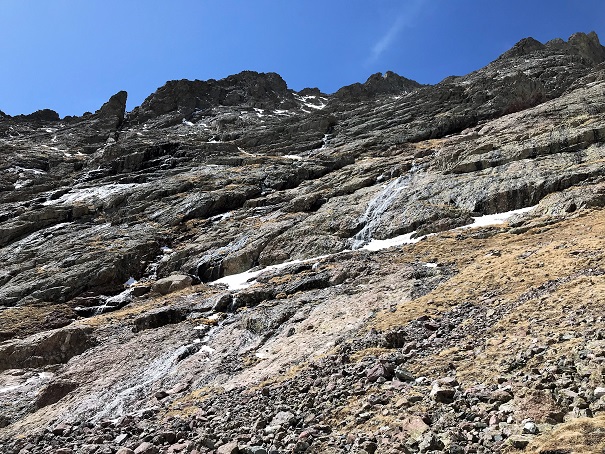
Hmmm… is it mating season?  I continued on, noting how most of the trees were dead here.  It was really quite sad.
7

I passed the remnants of a cabin

8

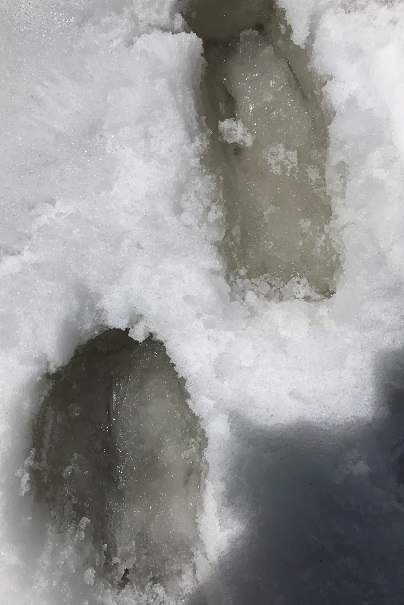
And started seeing tracks. Lots and lots of tracks.  I’d been seeing deer and cattle tracks (and scat), but these were different.  These were moose tracks.  It made sense:  The creek/willow area was prime moose habitat.  I’ve seen moose in the San Juans before, so I decided to keep a lookout for them. Oh, and there was moose scat too.  Lots of it!

9 Moose Tracks

The trail was very easy to follow for most of this hike.  The only time it was challenging was when it crossed the creek and came back.  There were so many dead trees on the trail there wasn’t a clear path to follow.  It was obvious people had broken branches and climbed over logs to try to make their way back to the trail.  This will not be fun when the trees here get their summer leaves…

I exited the trees and was immediately deposited in the willows.

10 Willows

It was here I saw the moose.  Or, well, what I thought was a moose.  I only saw it for about half a second, bounding away from me.  It looked too light colored to be a moose, and I couldn’t tell how tall it was because I only saw it’s ears above the willows.  I walked around a bit to see if I could see where it bounded off to, but was unsuccessful.  I rationalized it was probably a moose, because elk don’t usually travel alone and I’d seen moose tracks.  I spent the rest of the hike wondering if I’d seen a moose or an elk.

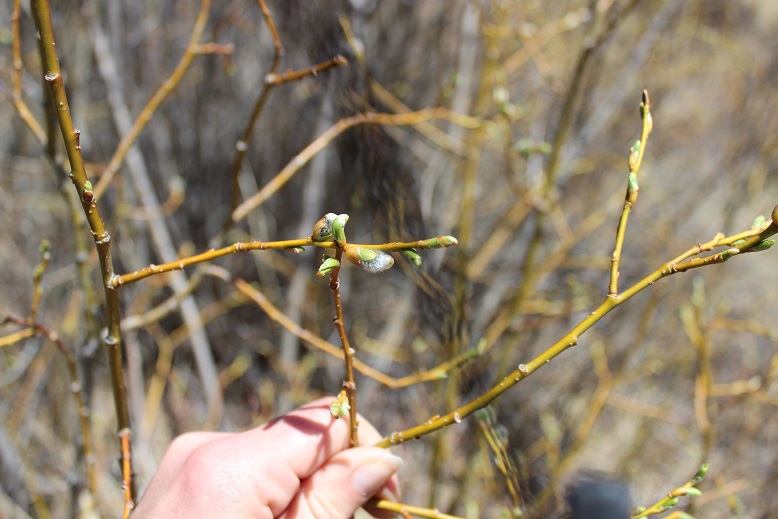
Well, here I was in the willows, so I decided to try out something.  I teach outdoor survival skills, and I’d recently learned you can eat willow buds, the inner bark, and leaves (remember, this is in a survival situation:  in reality this doesn’t offer many calories, but when there’s no food, it’s an option).  I like to actually try out the stuff I teach people before teaching it if possible, so I took off a few buds in varying states and ate them.

11

This is what I learned:

  • The small buds were actually not too bad.  They tasted a bit nutty.  The only problem is it would take tons of them to make much of a dietary difference.  They could be picked and put in your pocket to chew on though and to keep your spirits up.
  • As you can probably imagine, the catkins are terrible and fluffy.  Stay away from them.
  • I didn’t take apart the plant and try this, but I’d probably boil the inner bark before eating it.
  • The leaves were bitter.  Stick to the buds.
  • In the end I didn’t get sick, so I’m considering this experiment a success.

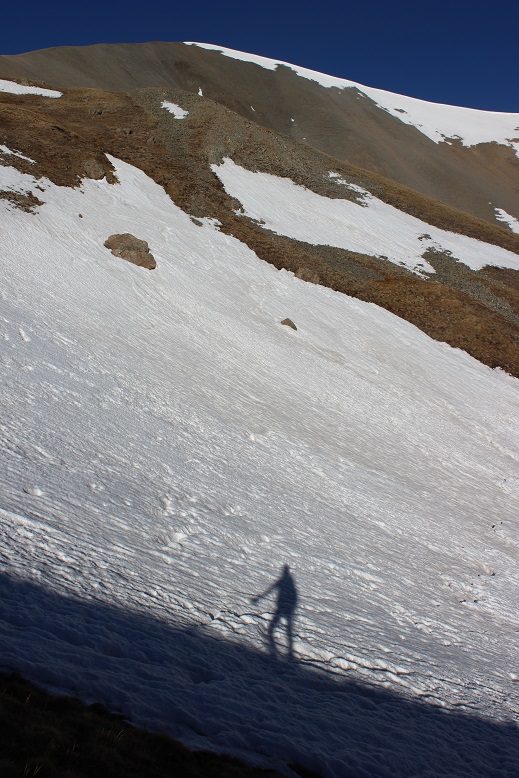
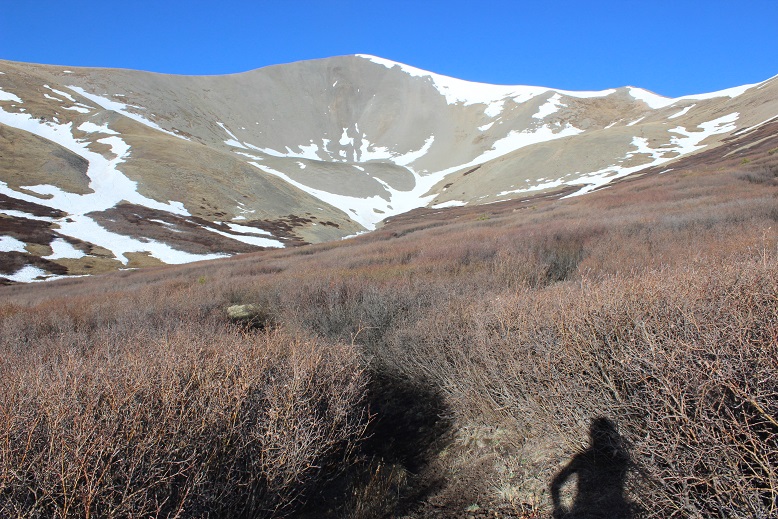
Shadowselfie with the willows!

12 Willows 1

Back to the trail.  I looked ahead of me and saw what I assumed was the peak.  It wasn’t.  The actual San Luis Peak is behind this peak (which is unnamed because it’s not really a peak)

13

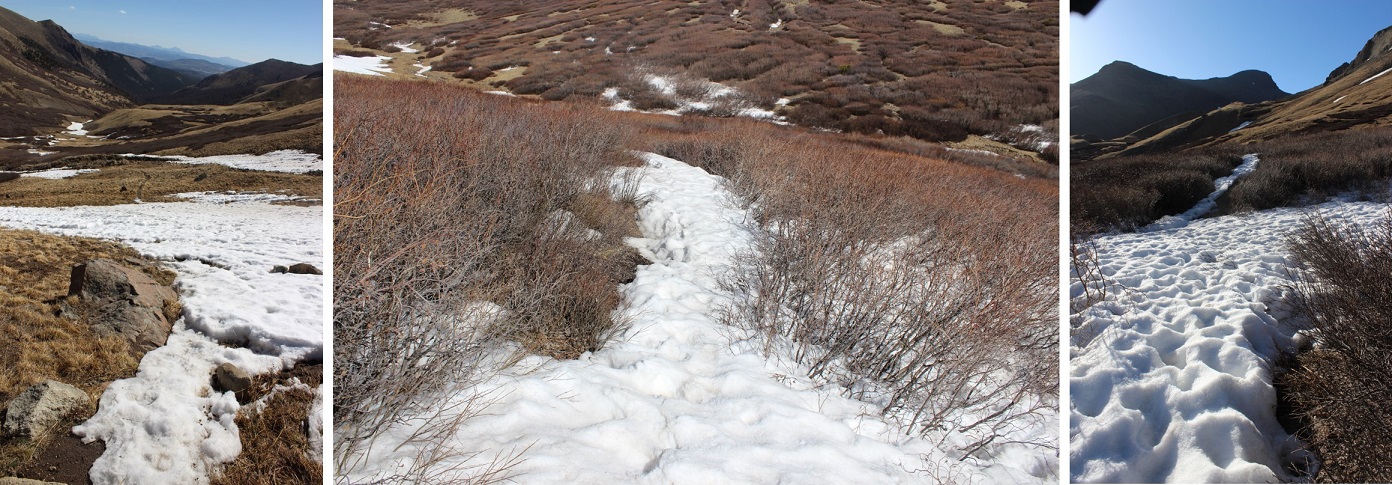
From here the trail had a little bit of snow in places.  It was consolidated and limited, and more of a minor annoyance than anything.  No traction (except shoes) needed.

14

Another shadowselfie because I do that kind of thing

15

The trail was actually very well maintained.

16

I made it to the saddle and took a look back down at the basin

17

Ahead of me I could see the actual San Luis Peak.  The trail was very easy to follow, and full of talus.

18

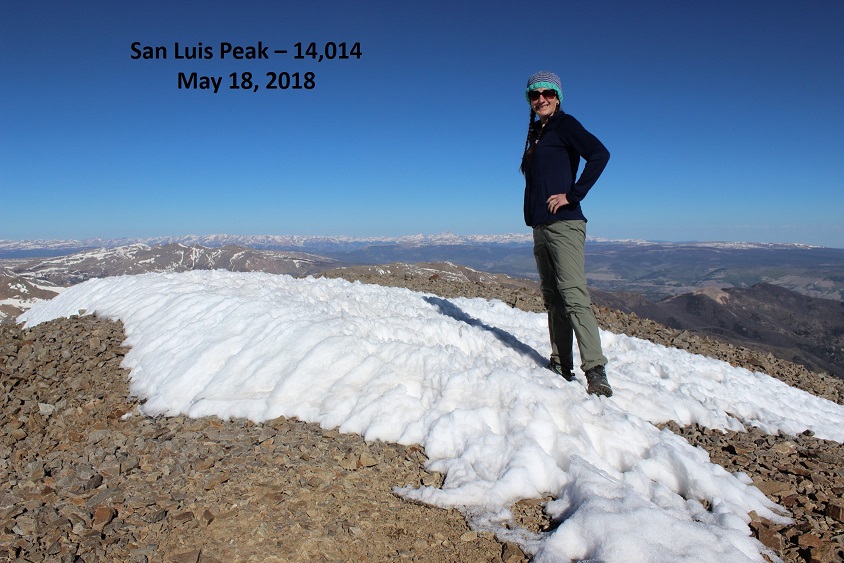
I summited at 8:30am.

19 San Luis Peak 14014

I love the summit marker!  So few peaks still have them.

20

Video from the summit: https://youtu.be/wP-qS_WAG4Q

The summit wasn’t that cold, so I spent a few minutes doing yoga before heading down. OK, I stood on my head and balanced because I was the only one there and could.

When I was hiking down I looked up at that peak that looks like it’s San Luis Peak but isn’t, and saw something there that wasn’t before.  It was far away and I couldn’t quite make it out. It was either a person or a goat.  I hadn’t seen anyone else today, or any other vehicles, so I assumed it was a goat.  It was!  (Sorry it’s not a great pic… I was pretty far away when I took it).

22

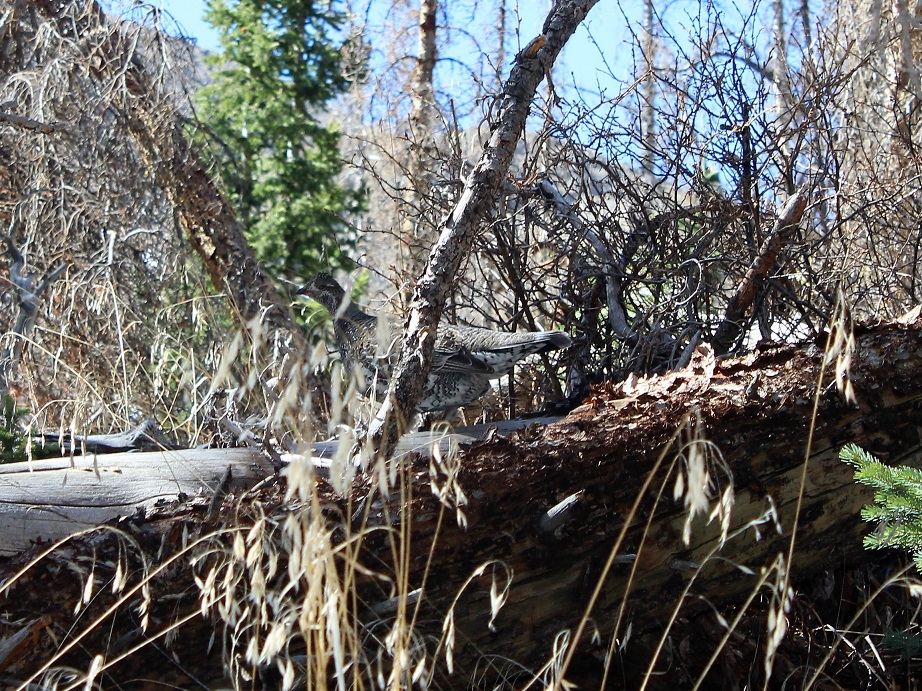
The entire way back I looked for that moose.  I was positive I was seeing moose tracks and scat, and this was the perfect area to see a moose!  Also, I didn’t want to be surprised by one.  I saw a grouse who didn’t like her picture taken…

22

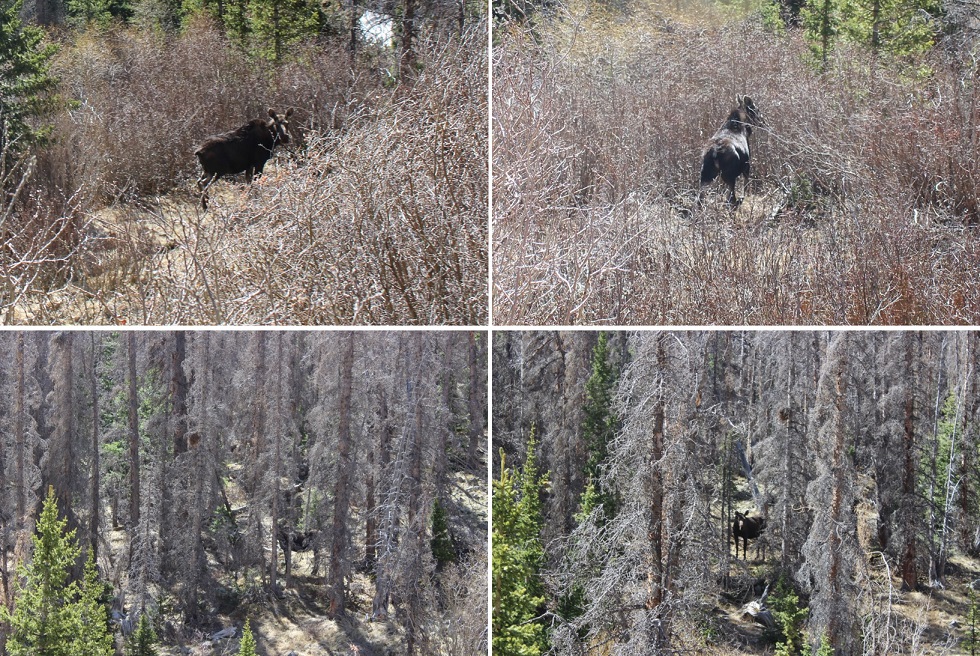
And when I was exactly 3.3 miles from the trailhead I heard a rustling, looked up, and there she was!  A beautiful cow moose!  This was not the same creature I’d seen before.  She trotted over to the opposite side of the creek and tried to hide in the trees by shielding her face with a trunk.  I found this comical, as the trees did little to actually hide her.

23

Without saying a word it was obvious we both wanted to adventure alone today, so we made a silent agreement: she’d stay on her side of the creek and I’d stay on the other. I let her win the staring contest.

24

I did my best to steer clear of her, but was able to get a few photos and a quick video.  I’ve seen moose while hiking before, and I understand their body language.  If this was a fight or flight decision, this moose would definitely have chosen the flight option.  She was skittish and wanted nothing to do with me.  She watched me carefully until I was gone.  I thought it odd she didn’t have a calf and was obviously not pregnant.  She looked fully grown.

https://youtu.be/ZNJfGE6x5ug

All in all it was a great hike today!  I made it back to my truck at 11am and checked my pedometer:  13.8 miles in just under 6 hours with lots of picture stops and summit playtime.  Total success!

I didn’t see anyone on the 27 mile dirt road drive out, so maybe no one knows the trailhead is open?  Oh, and my GPS stopped working on the dirt road and wouldn’t re-load, so I had to try and figure out directions in the daylight from the route I’d taken in the dark.  I had print directions, but they just didn’t seem right, so I didn’t use them and went by memory:  dangerous because I was very low on gas at this point.  I ended up choosing correctly, and made it to the Saguache gas station with about a gallon of gas to spare.  Next time I’ll fill up in Salida on the way to the trailhead, as apparently that’s the last stop for gas….

Mt Elbert – 14,433′

1

RT Length:  9.5 Miles

Elevation Gain:  4700’

I still have a handful of class 1 14ers I’ve ‘saved’to hike in May/early June, and after the past couple of 14ers I’ve experienced I figured it was time for a break.  Also, I had a board meeting to attend at 4pm today, so I needed something that wouldn’t take me all day to accomplish/leave me stranded on a mountain.

I woke up at 1am and made it to the trailhead around 4:30am.  There was only one other vehicle in the parking lot, and despite the signs stating “no overnight camping” it appeared someone was sleeping in their vehicle.  High-Five sir.

The road in was a 2WD dirt road.  This was the most ‘challenging’ part, so if your vehicle can make it past this obstacle, you’re good to go.

2

The parking lot is completely clear of snow and (today at least) mostly empty.

3 Parking Lot no overnight

I started at about 4:45am.  The snow cover started after the first junction (about a mile in) and was annoying but manageable without using traction.  OK, in reality, I’m just stubborn.  I should have put on my snowshoes, but I wanted to see how far I could make it without them.  The path was well defined in most areas, but in the dark and with the snow there were a few times I had to backtrack.  Nothing major though.

I was able to make it all the way to treeline without traction, although honestly snowshoes would have been helpful.  Don’t get me wrong, I HAD snowshoes, I just didn’t want to take the time to put them on because they “didn’t seem worth it”.  Every 100 feet or so I’d posthole up to my waist, which was always unexpected and a great workout, but very time consuming to extract myself.  You see, you can’t just get out of a posthole that deep like you get out of a pool by doing a push-up because your hands immediately sink in the snow (duh!).  I had to get creative.  Side note:  this would be a great idea for an exercise machine at the gym:  you’re walking and then all the sudden the machine holds you by your waist and won’t let you go until you figure your way out.  OK, probably not such a great idea.  But it was a good workout.  I digress…

Did I mention it was 5am?  (Yes, I looked at the weather, and it wasn’t supposed to get below freezing all night, but I could hope, right?).  And I should also mention it was obvious those hiking yesterday or earlier this week had it worse than I did.  Either that or they were really tall because their postholes went much deeper than mine.  This picture really doesn’t do them justice, but it’s all I have….

4

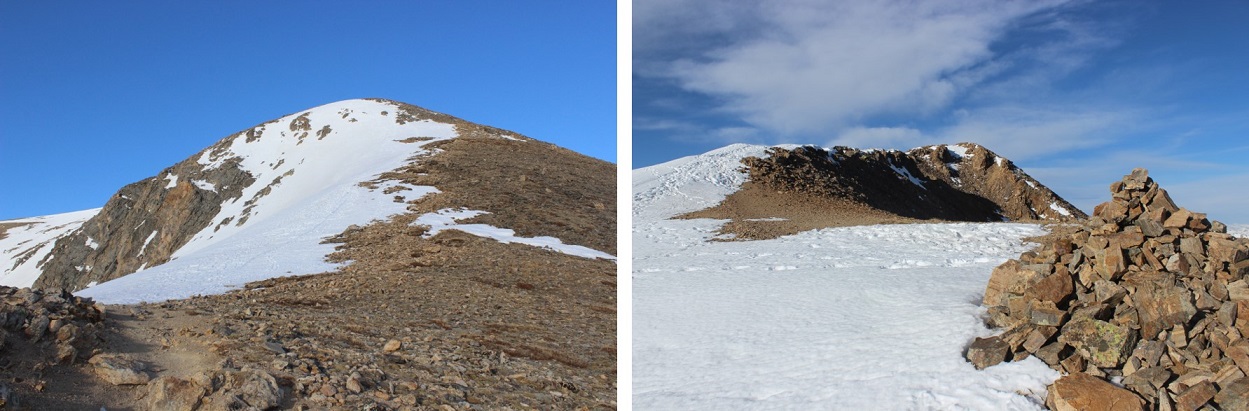
I made it to treeline just before sunrise and got my first view of Mt Elbert

5

I was excited with this view, because it meant I could most likely summit without traction (and I did).  As I started hiking above treeline the sun started to rise.  I love sunrises, and spent about 20 minutes just watching….

6

Above treeline the trail was pretty obvious

7

Well, at least for most of the way.  Once I got here I had the option of hiking on snow or trail.  I alternated between both.

My alarm rang. It was now 6:50 am and time for me to call my High Schooler to wake her up for school (I’m her 3rd alarm).  I was a little out of breath, but it looked like I was about half a mile from the summit, so I told her I was “almost there” and wished her well at school today.  I wasn’t.  In reality I was probably over a mile away from the true summit. But it looked so close!!!

The frustrating part were the false summits.  I made it around one turn, thinking I was close to the summit, but I actually had 2 more ‘summits’ and a few cairns to go….

10

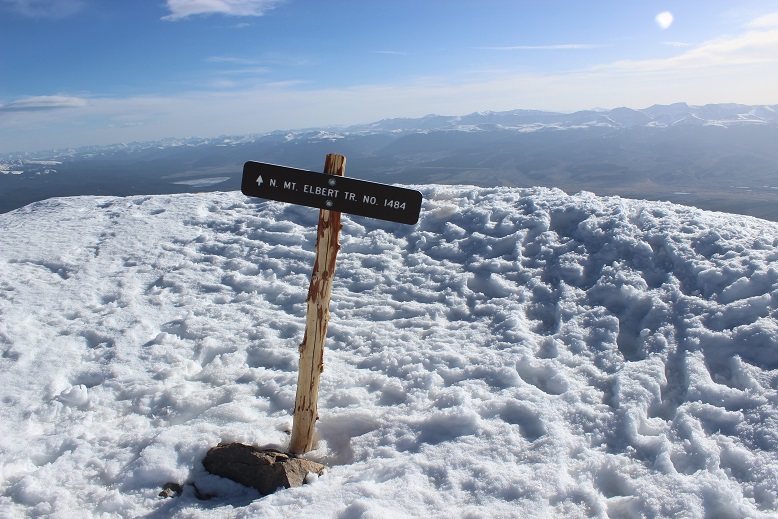
I love signs.  Love, Love, Love them.  Here’s a great one…

11

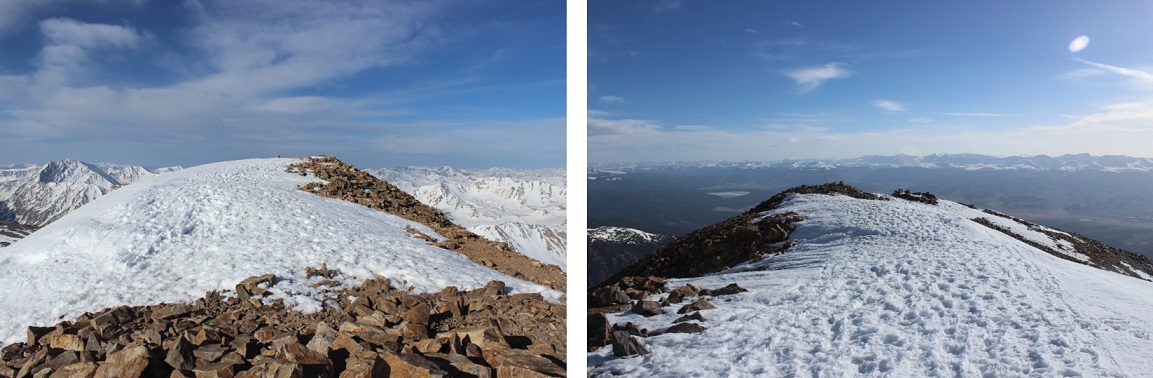
You see, it told me which way to take to go when I was headed back down.  That’s not always an issue, but this peak has several routes, so knowing the correct one to take back down can save you a lot of time if you accidentally get so excited about your summit views you forget which route you took because you weren’t paying attention on your hike up.  It also indicated I was close to the summit.  Here’s the summit view

12

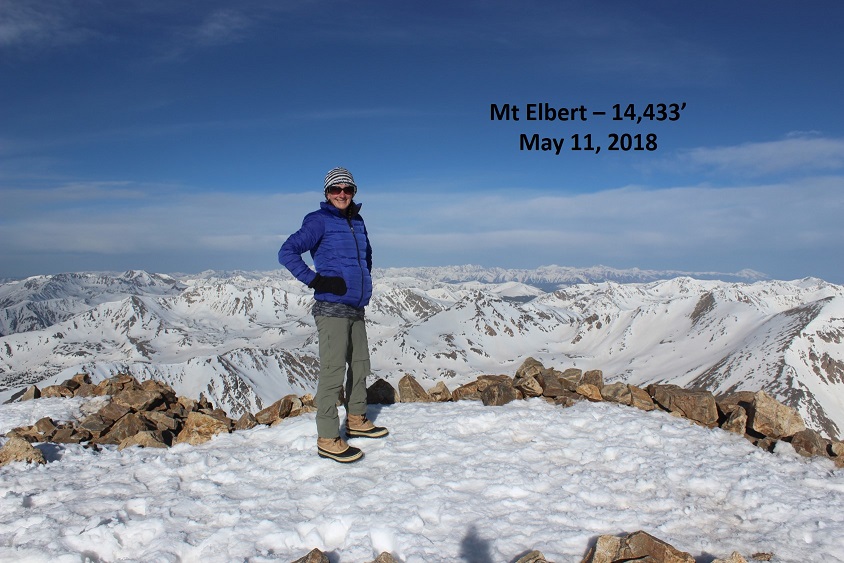
And picture proof I summited (8am)

13 Mt Elbert 14433

I’ve had a lot of people ask me how I get summit photos when I summit solo.  I usually get creative with my DSLR on automatic, my gorillapod and trekking pole, but today there was a post in the perfect spot, so I improvised…

14 how I take pictures

Did I mention the views were AMAZING?!?!?!?  I stopped for a minute just to enjoy (beef jerky was also involved).

15

It was COLD at the summit!  It was supposed to be 46 degrees today, and it might’ve been, but that 45+ mph wind was a killer! I couldn’t feel my fingers (OK, I actually kind of could, but it was more of a pain/throbbing/burning thing than an actual movement thing and I knew it wasn’t a positive thing…).  I took a selfie, checked in at Mt Elbert and wrote the obligatory “I’m the highest person in Colorado right now” post on facebook, and headed down so I could start thawing out my fingers.

The snow was definitely softer on the way down, but manageable without traction.

16

I made it back to treeline at 9am.  This is where the hike got fun.  I knew I was going to put on my snowshoes (I’d anticipated warmer temps + softer snow = put on those snowshoes), but they weren’t ALWAYS necessary, so I alternated for a bit between quickly trekking on lots of snow and slowly slogging through mud.

17 Start and Stop

I was now postholing with every step.  The good news?  Because of my snowshoes I was only postholing up to my knees, instead of up to my waist.  This was an improvement!  Once again, I could see others had it MUCH worse than me (or were VERY tall).

18 Postholing

This intense workout lasted for about half a mile, and then conditions alternated between snow on the trail (and pretty much only on the trail)

20 No Snow perfect

to no snow at all…

20 No Snow perfect

Did I mention I love signs?  This trail has great/amazing/wonderful/actually informative signs.  Check them out

21 signs

I made it back to my truck at 10:45am, making the 9.5 mile hike in about 6 hours, with generous time allotted for sunrises and summit exploring.

On the way out I couldn’t help but stare at Mt Massive…. Maybe next week?

22

Crestone Peak 14,294′

1

Elevation Gain 5700’

RT Mileage 14 miles

The drive to the trailhead was much easier than I’d remembered it from last time.  It’s still a 4WD trail in, but after some of the other 4WD roads I’ve navigated this one really isn’t so bad.  It was clear of ice and snow, and pretty much mud free.  On the way back there were a few more cars and a bit more mud.

I was the only one in the parking lot when I got there.  I gathered my gear and was off around 5am.  The first thing I saw after crossing the bridge were bear tracks…

4

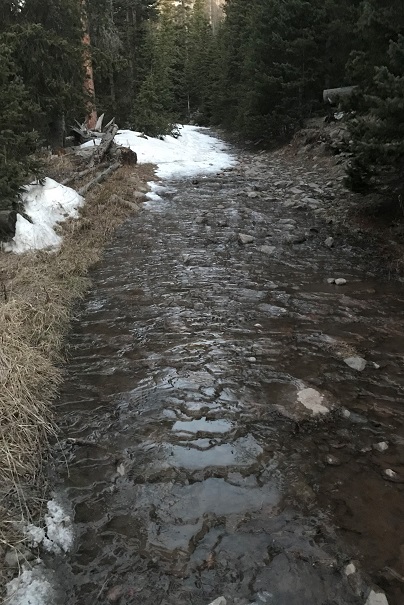
The 2.5 miles to the junction on the old (closed) 4WD road had lots of varying conditions.  There was mud, ice, snow, and water.  I was able to hike this part without traction, but it would have been helpful.

5

I came to the junction, turned left, and headed across a log bridge and followed the service road.

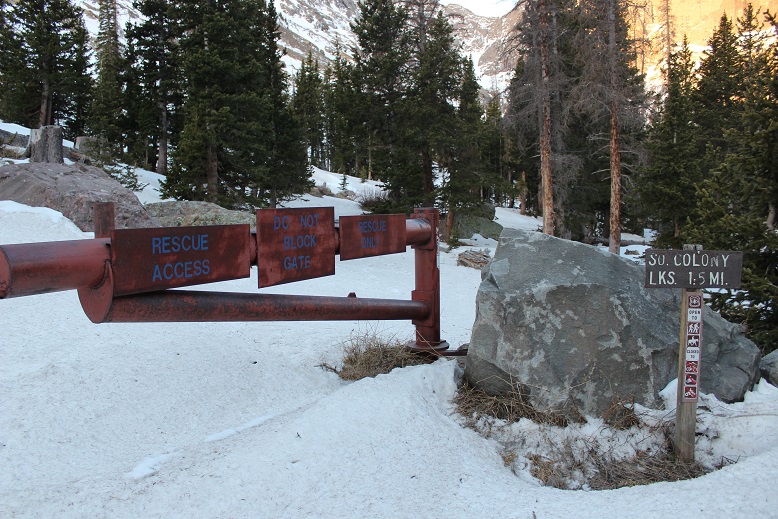
The road took me to the South Colony Lakes campground.   There was a gate for emergency access only.

8

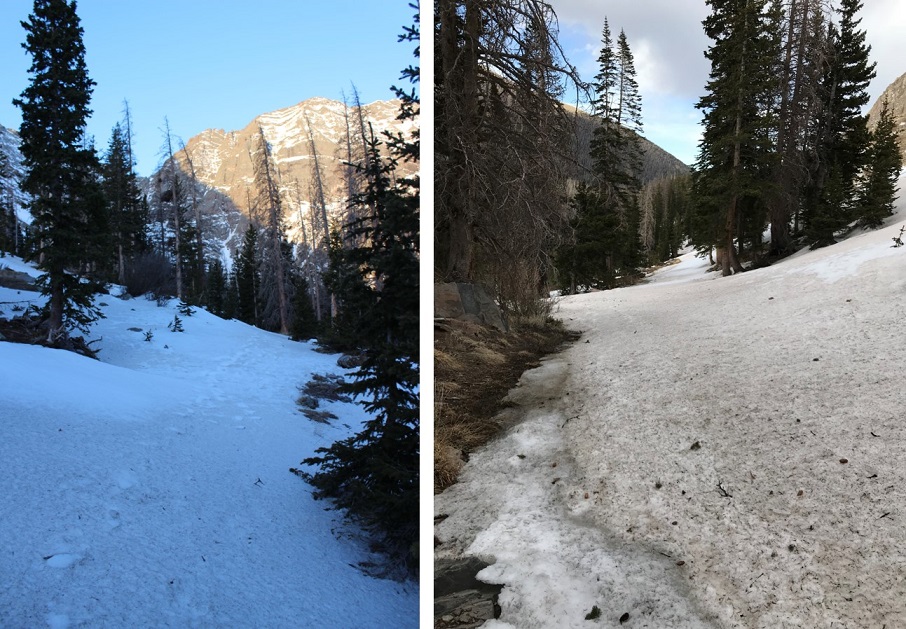
From here until I made it back to the trees traction was necessary.

9

Because of the snow it was difficult to stay on the correct trail, but that just meant a little more route finding.  When I was back in the trees I took off my crampons and made my way towards the lakes.  This part of the hike was frustrating because traction was needed for about 25% of the hiking.  Not enough to really put on snowshoes and crampons, but a bit miserable without them as well. Route finding was challenging here as well.

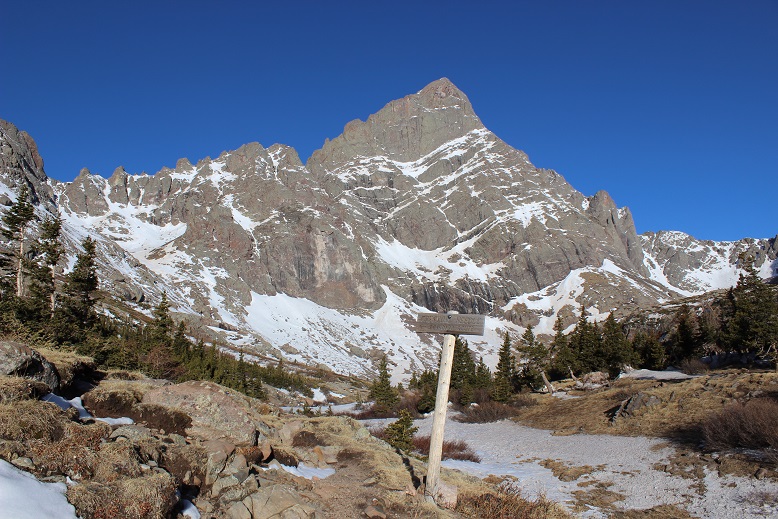
Here’s the trail junction.  I love obvious trail junctions!

10

I finally broke down and put on my crampons when I reached the base of Broken Hand Pass.

11

I’d been carrying my snowshoes as well, and decided to just stash them at the cairn.  It was obvious by looking at the route in front of me no one had been here in a few days at least (no foot tracks).  That meant I got to make my own!

12

I crossed the slope and looked up at the route before me.  Time for my ice ax!

13

I felt much more confident this time climbing.  I’m not sure if it was because I’d done it before or the conditions were easier (probably both) but I was much more confident in my abilities.  It wasn’t until I was at the crux I realized I’d forgotten to put on my helmet!  Whoops!  I felt like a total idiot, but at this point it would have been more dangerous to take out my pack and put it on, so I carefully navigated my way around the difficult part and climbed to the top of Broken Hand Pass.

14

The trail down to Cottonwood Lake was dry.

15

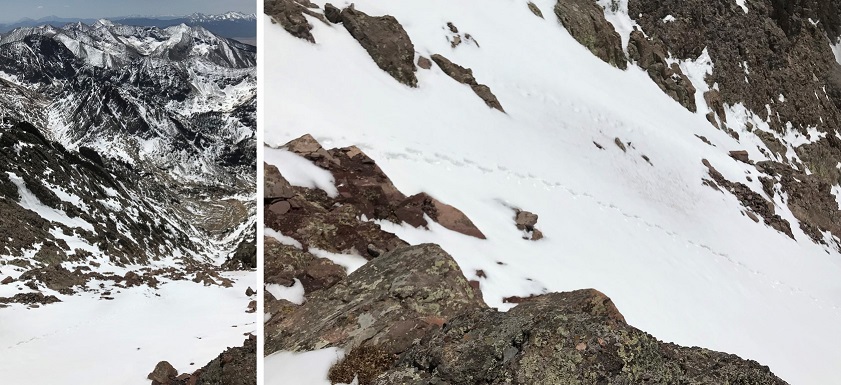
I made my way around the lake to the right, and curved towards the Crestone Basin.  Here’s where I got my first look at Crestone Peak.  It was full of ice.

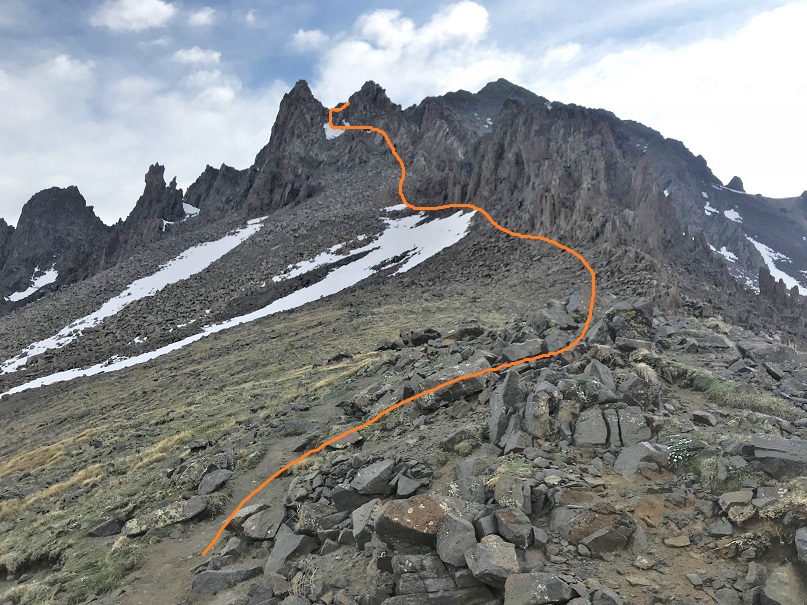
I was supposed to hike straight up the red gully.  It looked daunting, but I’ve found things that look daunting from far away are actually not that bad up close, so I continued on.  Here’s the route I took.

18

This definitely has some class 3 scrambling!  More than once I patted myself on the back for joining a climbing gym this winter.  Those tiny holds (pinches) that make rock climbing so difficult and frustrating at the gym?  I encountered several of them here, and was glad I knew how to navigate them!  The only downside is my backpack made me unsteady.  I think from now on I’ll practice climbing at the gym with my backpack on.  I also would have felt much more comfortable with different shoes.  I had on my winter boots, which don’t exactly make rock climbing easy.

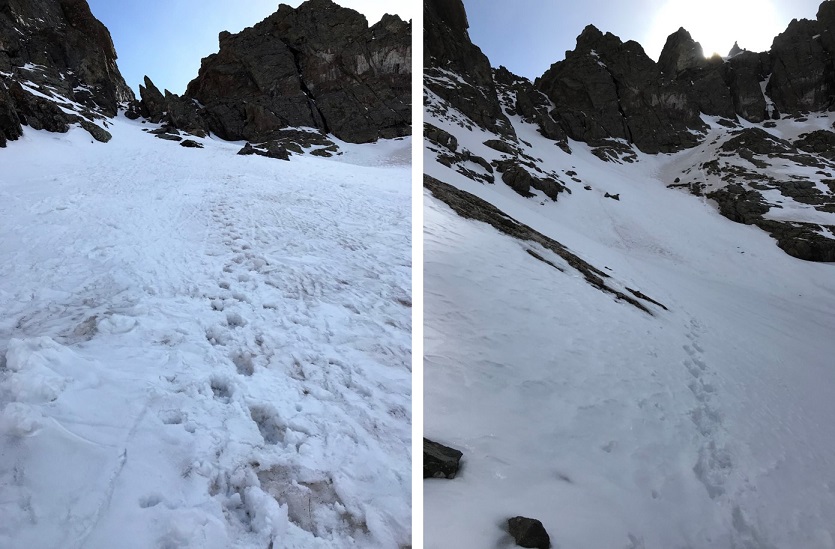
Much of the route was navigable without crampons until I made it about ¾ of the way up just scrambling.  That’s when I ran into a problem:  snow, and lots of it.  The last trip report indicated a dry scramble to the top, but it had obviously snowed quite a bit since then because I had to put back on my crampons and ice ax (and my helmet) to navigate this part.  I took one step onto the snow, and sank up to my thigh.

19

Ugh!  Not fair!  I was so close!  This didn’t look doable, but there was no way I was turning back now, so I kept prodding around until I found a stable route and started climbing again.  That meant being closer to the ice (which didn’t make me comfortable) but at least I was making progress.

This gully was about 1500 feet in elevation, and just didn’t quit!  It kept going and going and going.  Just as soon as I felt I must be near the top I’d turn and see another stretch of gully.  And it was getting warmer.  The snow was melting and becoming soft underneath me.

20

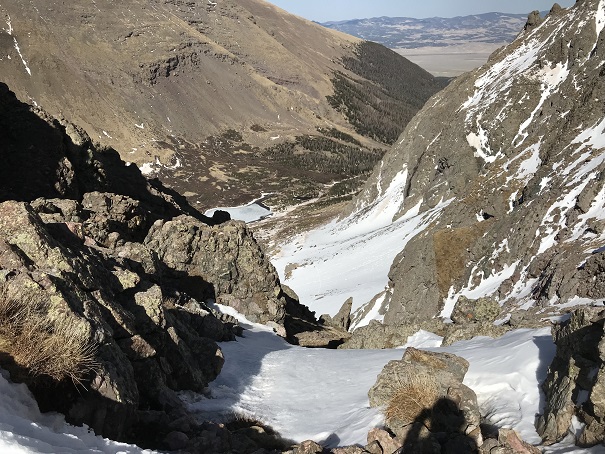
I finally made it to the notch, and while crampons would have been helpful in a lot of areas, I took them off because they were a hinderance for most of the remaining route.  Check out the view from the top of the red gully!

21

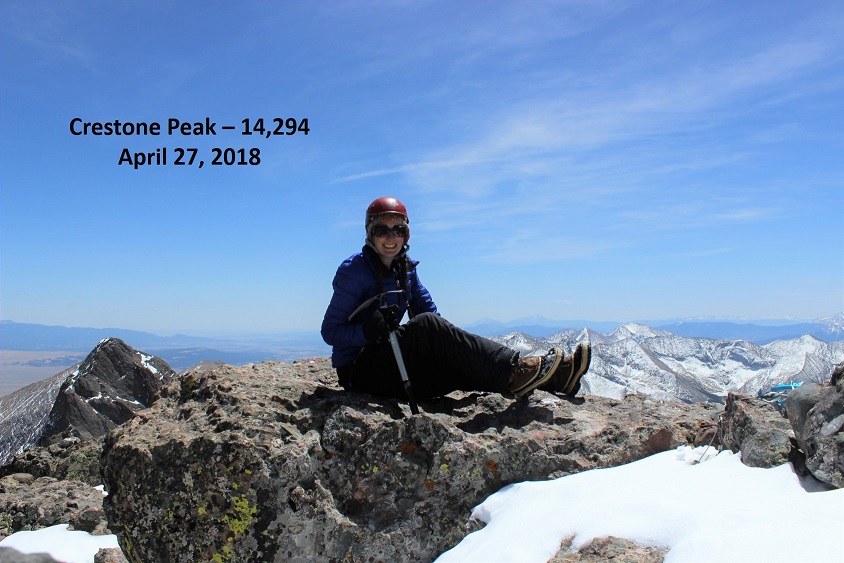
I summited around 12:30pm, and stayed there for longer than I usually stay on a summit.

22 Crestone Peak 14294

View from Summit:

https://youtu.be/5QiolJ815o4

It was incredibly perfect conditions!  Very little wind, and warm but not hot.  I took some pictures and made my way back down to the notch.

This is where it got dicey.  That perfect weather I’d had on the peak was quickly melting the route I’d taken to summit.  This was not good.  I sat down and put on my crampons and developed a plan.

23

My plan?  Get down this gully as quickly as I could.  Now.

I turned and faced the mountain and began my descent.  The first bit wasn’t too difficult, but that quickly changed.  I’d step into the snow, and immediately my footprints would fill with water melting beneath me.  This was instantaneous and terrifying.  There’s just no way to describe the feeling I was having knowing my route was quickly turning to slush.

24

https://youtu.be/U81heaTYFfQ

I could hear the ice turning to water and flowing underneath me, and the ice wasn’t condensed.  Several times I thought about how to handle this situation if I got to a place where I couldn’t continue.  I was prepared to spend the night in that gully if necessary (hoping the water would freeze and I could navigate back down in the morning).

I downclimbed as quickly as I safely could, but was on edge of my comfort level the entire time.  The water just kept coming and coming and the ice and snow was rapidly disappearing from underneath me as I descended the mountain.  I was aware I needed to reapply sunscreen, but terrified to do so, as I’d have to take off my backpack to get it and I knew I couldn’t do that without falling.  I gave up and mentally prepared for a nasty sunburn on my face.

I got back to the place where I’d initially put on my crampons for the gully climb and took them off, thankful I’d made it this far.  I then looked at the remaining route below me:  waterfalls.  Lots of waterfalls and water running down the exact path I needed to take.  This is not a route you want to do when it’s raining, or now when ice was melting into waterfalls.  Added to that bouldering down rocks is more difficult than climbing up.  I was extremely careful and spent a lot of time crawling to stay safe.  Once again, I was thankful for my time spent at the climbing gym.  There were several moves I wouldn’t have been able to pull off had I not known how to execute them.  There were a few close calls and I knocked my shins a few times on my way down, but I made it safely.

25

When I turned back to look at the mountain there were waterfalls everywhere!  It was beautiful, and I was glad to be alive!

26

27

https://youtu.be/aGzm5kwfoj8

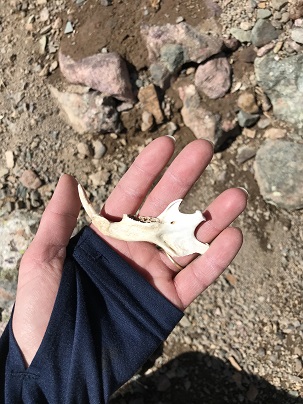
I hiked back to Cottonwood Lake and up Broken Hand Pass.  This part of the hike was difficult for me.  Not because of the terrain, but because I was physically exhausted by this point.  It was my third time going up a gully for the day, and I hate gullies.  The hike was slow going, with lots of slow steps.  I found a pretty cool jaw bone though.

28

I made it to the top of Broken Hand pass for the second time that day at 4pm.  I’d really wanted to try and get Crestone Needle today too because this route included 3 gullies and I wanted to make the effort worth it, but at this point my time was running out.  I didn’t want to hike back down in the dark, and while I knew the North Facing gully below me would most likely not have been affected like the South Gullies, I wanted to get down it just in case.

I looked down at the route below me:  still snow!

29

It was obvious I’d been the only one up today, so I put back on my equipment, turned and faced the mountain again and began my descent.  This was a breeze!  I’d done a terrific job last time making steps, and I was really getting the hang of this crampon/ice ax/climbing thing.  This was much easier than Little Bear!  The angle of the slope probably helped as well.

Now all that was left was to traverse the slope and head back down.

30

The only difficult part was avoiding the snow rollers.  They were silent, and quickly picked up both speed and mass.  I did not want to be hit by one of those things.  They ranged in size from a baseball to car tire.  I narrowly escaped at least a dozen in the 15 minutes it took me to navigate this area.  But once again, I made it!

31

The hike out was frustrating.  The varying conditions made it not worth putting on crampons or snowshoes, but they were needed as well.  The trail was mostly clear, with areas of consolidated snow, and every 100 feet or so on the snow I’d posthole up to my thighs.  It was like playing wack-a-mole in reverse:  I never knew when I was going to end up in a posthole!  Most of the time I was ok though.

The sun began to set and the mosquitoes came out.  Tons of them!  I just wanted down this mountain and back to my truck, so I picked up my speed and booked it down.  I made it back to my truck at 7:30pm.  That’s by far the longest day I’ve ever spend hiking a 14er!  Frustrating too because it was only 14 miles, but 14 intense miles with 3 gullies and a lot of work in the ice and snow.

I have a major sunburn on just my face (it wasn’t safe to stop while downclimbing to take off my backpack to re-apply sunscreen), but it was worth it!

Little Bear Peak – 14,037’

1

RT Length: 14 miles

Elevation Gain: 6200’

I’ve been obsessed with Little Bear Peak since I decided to hike all the 14ers. I knew if I wanted to hike them all I’d eventually have to hike this one, so I immediately began researching routes and difficulty levels.  I do my best to attend all the 14er Happy Hours, and pick the brains of anyone who’s done the “harder peaks”.  I read dozens of online reports, and came to the conclusion this was a summit I’d need to attempt in winter like conditions.  The only problem is this year we haven’t actually had much winter like conditions.  I’d like to complete all the 14ers by the end of this summer, and here we are in April and the conditions never really hit winter proportions for Little Bear.  This was frustrating!

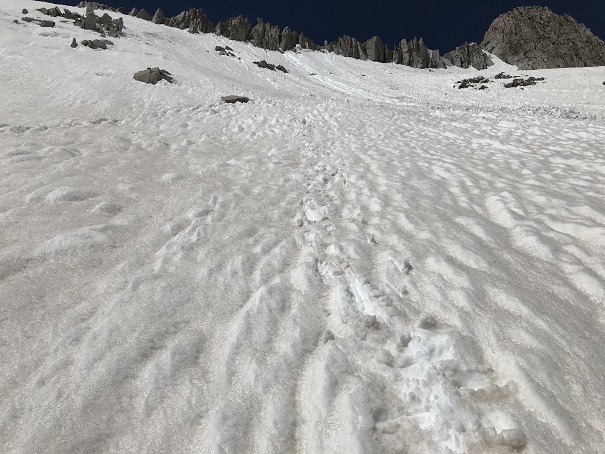
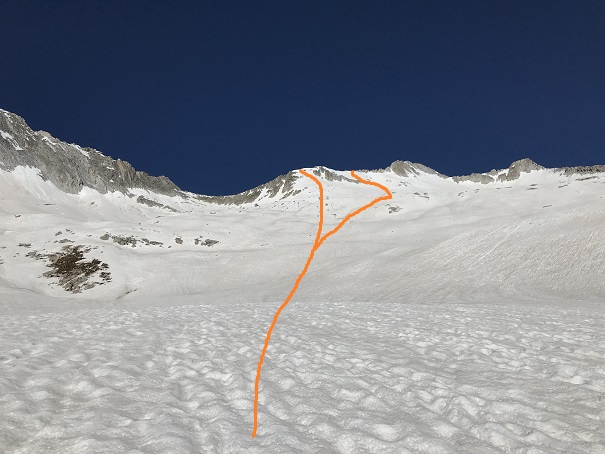
I’ve been desperately looking for current trip reports, but none of them have corresponded with recent weather, so my goal this morning was to hike up Lake Como Road and see for myself what the mountain looked like. Then I could assess when I’d be able to hike it (hopefully next week?).

I woke up at midnight with a low grade fever.   This was not acceptable so I took a few Tylenol, and in the end didn’t end up leaving the house until 2am (dishes, laundry, etc. needed to be started or completed before I could head out).  That meant I didn’t make it to the trailhead until 5am, which was later than I’d wanted to start.  I parked my truck a little further up the Lake Como road than I had last time because I knew my truck could make it.  I could have driven (much) further, but I wanted to make this hike count, and I love elevation gain.

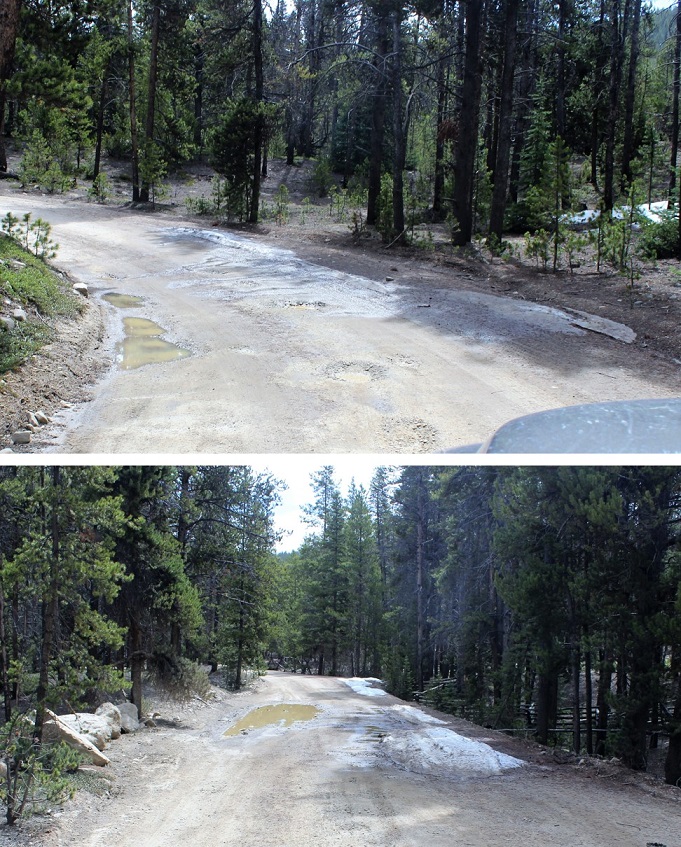
It was a beautiful morning to hike! Lake Como Road was pretty much clear of snow and mud.  If you have a vehicle that can normally make it to Lake Como the current conditions wouldn’t have prevented you from making it there.  There was too much snow however past the lake to continue in a vehicle.

2 Lake Como Road

I made it to Lake Como just as the sun was rising. I’d carried my microspikes, crampons, and snowshoes the entire way.  I never ended up needing the microspikes or the snowshoes.  Here are the current conditions of Lake Como.  Snowshoes would have been overkill (I wasn’t postholing, even on my way out).

3 Lake Como

For those of you who’ve never been to Lake Como, here’s what the camping situation looks like:

4 Camping options

If it’s free you can bunk in the small cabin, or snow camp around the lake.

5 Hut

Snow camping isn’t an option for me personally, and I don’t like to chance it on cabins, so I hiked in instead.

This is where I got my first view of Little Bear Peak. The sun was just starting to rise, and the mountain looked magnificent!

6 051

I hiked around the lake, mentally cursed myself for bringing those snowshoes all this way and not needing them, and made my way to the cairn indicating the route to Little Bear. I was surprised to see two men sitting at the cairn, putting on their crampons. We had a quick chat.  Here’s what I learned:

They’d spent the night at the lake. It seems one of them had hiked Little Bear before.  The conditions in the hourglass were perfect today (I’m not sure how they knew this) so if I was even thinking of attempting it, today was the day to do it.

I told them I was going to see how far I could get today, but I probably wouldn’t summit. I’d also try to stay as far out of their way as possible.

What I didn’t tell them was I’ve never used crampons before, and I’ve never snow climbed. In fact, the first time I’d used snowshoes was two weeks ago.  Now, I’m not completely daft.  I have a lot of outdoor skills and I’m in excellent shape.  I do 4000’+ feet of elevation gain daily (and have for 10 years), as well as an hour of yoga and 100 pushups a day.  I boulder/climb at a local climbing gym.  I’ve been mountaineering my whole life, just not in snow/ice conditions.  I have a lot of theoretical knowledge when it comes to winter climbing.  I’ve done tons of research and watched videos/talked with people about what to do in these sorts of scenarios.  I just don’t have the actual practice.

I looked up at the route before me… (no pictures at the time because my hands were frozen, so here’s one from later in the day).

7 Route

I contemplated my options. That gully looked mean.  I hate gullies.  Hate them.  I’d rather do a class 4 any day than a class 2 with a gully (I love to boulder).  This gully looked steep, but this gully had snow.  Would that make it easier? (This picture was also taken later in the day).

8 First Gully

I knew I’d need to do this hike with snow, but I have Raynauds, complicating the matter. I can’t hike when the weather’s too cold because my body over reacts and shuts down, telling itself I have frostbite (basically, that’s a condensed version). The weather today was pretty ideal for this time of year:  36* with 20mph winds.  I took my crampons out of my bag and decided to put them on.  Next I put on my balaclava, helmet, and goggles.  I told myself I could always turn back if I didn’t feel safe, but I’d kick myself if I didn’t at least try.

I did my best to keep distance between the climbers ahead of me and myself, but watched them carefully for the first few minutes. Then I got out my ice ax and began my climb.  Oh my gosh!  Crampons are phenomenal!!!  Yes, this was work, but they were actually sticking into the ice and snow, making me feel secure.  This was much better than climbing up scree!

It was actually easier than I’d anticipated, and I kind of got carried away. What I mean is I just kept going without looking back down the route, and when I finally did my heart leapt into my throat.  Holy Cow!  That looked much steeper going back down than it did when I was going up, and the route ahead of me looked steeper still.  I had a brief moment of panic (sanity?) where I thought about turning back, and then wondered how to even attempt that at this point?  I took a deep breath and figured I’d gone this far and done fine:  I’d worry about how to get down later.  (Side note:  it would have been safer to go back down at this point before the sun/shade changed conditions).

I made it to the top of the gully and was surprised to see the two hikers ahead of me taking a break at the top. In fact, they kind of startled me.  I took a picture of where I came out of the gully to remember it for my return (the exit was at a notch, parallel to a small pond) and sat down to take off my crampons

9 Pond after notch

And looked at the ridge ahead of me.

10 West Ridge Route

This was the west ridge. I was to follow it to the hourglass.  It was actually pretty easy to follow, but had several cairned routes, making a direct route confusing.  I have to say, this part of the hike looked nothing like any of the photos I’d seen of the route before.  Probably because today the route had snow off and on.  I ended up putting my crampons back on about halfway across the ridge, and then I just followed the ridge until I came to the base of the hourglass.  Here’s what the route looked like turning back.

11 West ridge route look back

Woohoo! I’d made it to the hourglass!  Over the traverse I’d played leapfrog with the other hikers a few times.  I hate playing leapfrog with other hikers!  It’s why I like to hike early and alone.  I decided to sit and wait for a bit and let one of the hikers start up the hourglass to try and put some distance between us.  (They weren’t hiking together at this point).

I gave him about 10 minutes and then looked at the route before me.

12 hourglass

This looked sketchy, and it was. There wasn’t really enough snow to make this easy.  The ice and what snow there was made crampons necessary, but cumbersome/slippery on areas where there wasn’t ice or snow.  It was steep, and those ropes did not look safe.  I didn’t use them, but for anyone thinking about using the ropes keep in mind several parts of the rope were secured to the rock by ice formed from melting snow, and that connection wasn’t very thick.  In other words, by pulling on the rope you could dislodge the rope from the ice connecting it to the rock and fall back a foot or two (it would knock you off balance).  Also, weather isn’t your friend and these ropes are left outside 24/7/365.

The hiker ahead of me was using the rope, and unbeknownst to him making my climb all the more difficult. The rope would swing back and forth, getting caught in my crampons as I tried to climb. Added to that he was kicking snow and ice down onto me.  I decided to book it and climb past him.  This ended up being a fabulous idea! I felt very confident at this point of my climbing abilities, and I was able to climb the rest of the way at my own pace.  Oh, and the snow increased, making it that much easier.

A huge downside to the hourglass are the rocks that fall through the gully and down on you when you’re climbing up, and I have to say this isn’t just because of hikers above you. I was the first climber at this point, and the wind was so strong above the hourglass it was pushing rocks down into the gully.  Big rocks.  Wear your helmet, even if you’re the only one on the mountain.

I looked down and saw four climbers below me instead of two. Next I looked up at the rest of the route and decided to exit left.  I love scrambling!  This was going to be fun!  I took off my crampons and had at it.

13

There was no clear path to the summit, and in fact what was South Little Bear actually looked like the summit and was confusing until I checked my topo map. After rounding a couple of outcroppings I found the correct summit of Little Bear and climbed to the top.  Woot!  I’d made it!  I looked back behind me and saw climbers scrambling towards the summit as well.  You can also see a look back at the west ridge route (the snow free part).

14 Cadets

I had one of the hikers take a summit photo of me

15 38 Little Bear Peak 14037

Here’s South Little Bear from Little Bear

16 South Little Bear

We chatted for a bit. It seems they were two cadets stationed at the USAFA.  They seemed like great young men:  very nice and respectful, but obviously kids having fun.  I thought how nice it would be to have one of them date my 19 year old daughter…

I’d debated taking the Little Bear / Blanca traverse, but decided not to because I knew the way down and the conditions were already sketchy enough. It did look enticing though!

17 Little Bear Blanca Traverse

I don’t stay at summits long as a rule because I freeze, and I knew the hardest part of my hike was yet to come, so I was quickly off and on my way back down. I made it to the hourglass just as the last hiker was making it up.  I called down and listened to make sure no one was below me, and then began my descent.

I’m not gonna lie, I slipped a few times. Down climbing is much more difficult than climbing up.  The ice and crampons complicated matters.  I slipped, but I didn’t fall.  Actually, the scariest part of this part of the climb were the people down climbing above me.  Just as I was finishing they started, and I’m sure they didn’t realize it, but they were kicking down quite a few rocks that chipped against larger rocks and started small landslides.  More than once I heard the whooshing of rocks tumbling towards me, ducked, hugged the mountainside and put my hands up to protect my neck from rocks raining down.  Several hit my helmet.

The traverse back to the notch took a lot longer than I’d remembered hiking in. I was really glad I’d taken that picture of the pond to remind me just how far I had to hike.  I made it to the notch and looked down the gully.  This picture does not do it justice!  It.  Was.  Steep.

18 Looking back at first gully

Well, there was nothing for it. I had to make it back down, and to do so I had to start.  I turned and faced the mountainside and slowly began down climbing.  The first 20 feet or so was pretty easy and I was able to figure out what I was doing.  I practiced securing footholds and locking in my ice ax inbetween taking deep breaths.

And then everything changed. The snow became very consolidated and the tracks from this morning disappeared.  I had to kick my crampons into the ice no less than 20-25 times to get each foothold.  I mentally praised myself for investing in 14 point crampons.  It was slow going and very physically exhausting.   I could have used two ice picks instead of one ax.  Despite what you may be thinking of me at this point, I’m overly cautions by nature.  These toeholds were exhausting to form.  I felt as if I was vertical down climbing, and the angle was very steep so I made sure each step was extra secure before starting on the next one.  My footholds were probably 6-8 inches apart, and I had about 600’ to get through.

At this point I made the mistake of looking down behind me. In reality it was unavoidable because I had to make sure I was on a safe route, but the magnitude of what I was doing hit me, and hit me hard.

I’ve done some pretty scary things in my life: I’ve been shark diving without a cage, cliff jumping off 50 foot waterfalls, I’ve been in a car accident that took me off a gorge and into a raging river (I wasn’t driving), and I’ve raised 3 teenagers. This was by far the scariest thing I’ve ever done.

Here are some things that went through my head:

“That’s a very long drop. A very, very long drop”

“I can’t slip, and I can’t fall because I’ll just keep sliding”

“OMG, ok, if I do slip remember to self arrest”

“You’re wearing crampons, if you fall your feet need to be up in the air”

“Why am I not secured to a rope? This seems like something I should be roped in for”

“The mountains are very unforgiving of mistakes:  One wrong move and I’m dead.  I can’t be wrong”

My adrenaline was pumping. I decided the best thing to do was to focus on the task at hand and take it one foothold at a time.  About halfway down the cadets made it to the top of the gully and began their descent.  I tried to yell up at them to wait.  All I could think about was them falling and sliding into me and me with nowhere to go to avoid this from happening.  It wasn’t like I could dodge out of the way or anything.  But they couldn’t hear me and began their descent.  I’m sure they weren’t meaning to, but they were raining snow and ice down on me as they descended.  I tried to move sideways and out of their direct path when possible.

Eventually I climbed out of the shadows and into the sun and the snow became softer and more pliable. This was great, except now I was postholing and it was hard to get a direct grip with my crampons and ice ax.  This is when the cadets caught up to me (they’d been using my footholds so they were much quicker than I’d been).  It was another 200 feet before it became safe to glissade (the slope had been too steep prior).  They slid down (I didn’t because I had on crampons).

Once I made it safely to the bottom I took a good look at what I’d just done. Pictures simply do not do this feat justice:  Down climbing that gully was much more dangerous in my opinion than anything the hourglass had to offer.

19 First Gully at the end

I’d been exposed for quite a long time on that slope. But I’d made it. I made it up and down that gully, and I’d done it on my own.  I felt extremely satisfied with myself, and could now breathe a sigh of relief that the worst it was over.  It was now I felt like I’d truly completed a summit of Little Bear Peak.

I chatted a bit more with the cadets, and then was off to hike the rest of the way back down to my truck. Along the way I came across several hikers who’d attempted Blanca but hadn’t summited due to wind.   I’d had perfect weather on Little Bear, and thought how funny it is two mountains right next to each other can have such different weather, and then of how ‘smart; I was not to have taken the traverse.

I made it back to my truck and started the long drive home. It was 8pm before I realized I hadn’t eaten anything today:  Nothing besides half a cup of coffee this morning and 4 small pretzels from a leftover snack pack at 2am.  I’d brought food with me, but I never get hungry when I hike, so I never eat.  I stopped at a Subway in Pueblo and got a 6 inch sandwich before finishing the drive home.

When I finally made it to bed I couldn’t settle down. My body was singing, but in a good way.

Huerfano Peak – 13,828 & Iron Nipple – 13,500

1-15

RT Length: 13 miles (from lower trailhead)

Elevation Gain: 4400’

Today’s Easter, and when I asked my 3 (older) teenagers what they wanted to do they said “Sleep in until 3pm and stay in our pajamas all day”. This is something completely doable for them, so I decided to let them do this and go hiking in the morning by myself.  I figured I’d be back by 3pm no problem.

After Friday’s hike (trudge) through lots of snow I was looking for something a little warmer. The Sangre de Cristo range looked relatively warm, so I focused on Huerfano Peak and the Iron Nipple.  I figured this was a safe route to take since I’ve already done Lindsey and am familiar with the area.  Also, it was supposed to be 41 degrees with 25mph winds above treeline.  That was the best forecast for the state!

I made it to the trailhead at 6am. I parked in the lower trailhead/avalanche area.  The 4WD road was open but there weren’t any tire tracks heading up the trail, just footprints.  I debated trying it out in my truck (I’d just had quite a bit of fun racing through some mud puddles on the say in) but figured there weren’t tracks in for a reason.  This ended up being a good choice.  I could have driven maybe another half mile up the trail, but after that it was covered in lots of ice and snow. And a few downed trees.

2 Lower trailhead

3 4WD road in morning

Parking at the lower trailhead added 4 miles to my round trip, which wasn’t too bad because those 4 miles don’t have any intense elevation gain.

And the view was totally worth it! Check out Blanca and Ellingwood!

4

I stalled as long as I could with putting on snowshoes. I don’t know why I do this:  If I need them early I usually need them for a while.  I guess I just don’t want to stop and put them on.  It was well worth the effort though:  I needed them for most of the hike.  (Side note:  I postholed at minimum up to my ankles, and up to my elbows the entire time I was wearing snowshoes, both on the way in and out.  Postholing averaged at about my knees).

The Upper Huerfano / Lily Lake trailhead actually looked pretty clear (it was just the trail getting in that was difficult to drive). I signed the trail register, noticed no one had signed it in quite some time (10 or more days) and headed out.

5 Upper trailhead and register

The meadow was pretty clear of snow, but it was here I saw my first mosquitoes of the day. They were everywhere below treeline, and didn’t let up!

6

The Lily Lake turnoff was covered in snow.

7

At this point I saw the stream for the first time. It was beautiful, covered in snow, with holes where the water flowed.  It was not completely covered in ice (as I’d read in previous conditions reports).

8

This is where the hike got a little sketchy. I was following a poorly defined trench, and at one point it split:  one patch going towards a river, the other up this gully.

9

Neither paths were correct on either my map or GPS. Since I’d seen the river wasn’t completely solid less than ¼ of a mile ago I decided to take the gully, but when I got halfway I realized what a mistake that was.  I was way off route, and not sure the way I was headed up would connect with where I needed to be.  So I backtracked and tried to follow my GPS through the trees.

This was as really, really bad idea. I was on course, but the snow was soft and powdery and up to my elbows (yes, I still had those snowshoes on).  And it was slippery.  I kept sliding, and I was on a steep hillside.  Added to that I was making a trench others may think was safe in what was actually a dangerous place.  This was not good.  I chose the safest path I could, exited the trees, and came to the river.

At this point the river was completely frozen, and I could see faint tracks where others had walked up the river in days prior. I walked up to the edge, used my ice ax to pound on the ice a bit and estimate the thickness of the ice, and determined it was much thicker here than the 3 inches necessary needed to hold my weight.

This was something new! I was hiking over a solid river (hey, walking on (frozen) water on Easter…) covered by about 2 inches of powdered snow.  It was a bit slippery in places, but manageable. Crampons would have made this easier, but my snowshoes worked just fine.  At places I could hear the water running under me, and the ice was so blue/teal/clear!

10 River morning

I kept following the river, and quickly came to the mine. I’d wanted to explore the mine a bit today, but obviously that wasn’t going to be possible since it was almost completely covered in snow.  Yes, the whole Easter/tomb thing came to mind here as well…

11 Mine

12

The trail continued up, up, and up, over what felt like a waterfall and eventually came to a gully. All the visible tracks (they’d been gone for a while) showed footprints going to the right, up the gully.  Even though I knew I was supposed to go left eventually, I followed the tracks.

13

That was a long trek up a steep slope!

14

It was a long uphill battle that put me on the far west upper end of the basin when I was done.

4

I side tracked and snow-shoed my way east towards where I knew the trail picked up on the other side of the basin (there weren’t any trails visible due to the snow). I needed to use my GPS to find the exact location of the point where the trail climbed the mountain, but once I did the route wasn’t difficult to follow.

16

I took off my snowshoes at this point and headed up the mountainside. Now I was starting to get a bit tired.  All those gullies and postholing in snowshoes was starting to take its toll!

When I made it to just below the saddle I had a good view of Mt Lindsey

17

At the saddle at 13,100’ I turned north away from Lindsey and headed towards the Iron Nipple. The trick is to aim for the U-shaped notch in the center.

18

Here’s what that looked like up close

19

This is where the wind really started to pick up. It was way more intense than the 25mph predicted, and turned the snowshoes I was carrying into a kite.  I stashed my snowshoes and trekking pole, got out my ice ax, and started towards the Iron Nipple.  I’m not a big fan of the name (it gets its name because from far away it looks like a big nipple (just the nipple) and it’s a mountain made of iron.  I know, who’d have thought?).  From here I think it kind of looks like a Jaguar taking a rest.

20

Anyway, I didn’t want to climb this peak first because they I’d have to refer to it first in all of my postings, and I mentor Junior and High School aged adventurists and I really didn’t want to keep bringing this up when talking about summit Huerfano, so I descended some class 3 boulders down the side of the cliff and followed the ridge towards Huerfano Peak.

21

22

There wasn’t a lot of snow here, but just enough to make me need to watch every foot placing. I stayed towards the top of the ridge, ice ax in hand (and used several times).  When I got to the saddle I took a look back… it kind of looks more like a nipple from here.  The black arrow points the route I took to descend.

23

The rest of the route was pretty straightforward: I just aimed towards Huerfano and walked towards the peak for about half a mile.  Here’s a summit photo to prove I summited

24

And some views of the surrounding mountains

25

Check out Lindsey! Almost no snow!

26

Here’s a bird’s eye view of the basin I’d entered through

27

And now I was on my way back towards the Iron Nipple. Did I mention it was windy?  I’m guessing winds were at 50-55mph, and they didn’t let up.  This wasn’t a big problem while I was hiking the saddle or talus below the ridge, but once I reached the ridge I had to keep my profile low.

I know this is going to sound like a bad joke, but the nipple actually had a lot of exposure.  I wasn’t prepared for this, and it was quite exciting!  I tried to get a picture to prove I was there and experiencing this exposure, but the wind kept knocking over my gorillapod with my DSLR camera.  The third time it happened I almost lost my camera down the side of the cliff (ice ax to the rescue!) and I gave up getting the photo (I probably should have quit a bit earlier).  There was a very substantial drop on either side, but especially the northeast side of this part of the route.

28

29

I summited and took a picture back at the ridge and Huerfano

30

I turned around and started heading back towards the notch. Mt Lindsey looks beautiful!

31

And Blanca as well

32

I hiked past the saddle and down the hillside towards the basin. The end provided some fun glissading!

33

From here I didn’t want to hike back down that gully I’d hiked up, mainly because it meant hiking up out of the basin just to hike back down the gully.   So I took a look at my topo map.  It looked like the gully in front of me was less steep and connected with where I needed to be, so I took that route instead, and indeed ended up where I needed to be:  right back on that frozen river.  It was beautiful!  I couldn’t help but take more photos

34 Up and down river

And a video

https://youtu.be/YDJ8fHkVQqk

I decided the smart thing to do would be to follow the river down past where I’d entered and look for a logical exit point. I followed it for much longer than I felt comfortable, but a look at my topo map kept telling me I was on course with picking up the actual trail.  The river did begin to open up due to weakness in the ice and I needed to exit to stay safe, but where  exited was very close to the actual trail.

35

This was close to the Lily Lake trailhead, but 3 miles from where I’d parked my truck. Those last 3 miles took FOREVER!  I don’t know if it’s because my 9 mile hike turned into a 13 mile hike, because I’m out of shape (I’m most definitely not) or because I was postholing in heavy winter boots and snowshoes up to my knees for most of this hike (that’s my story) but I was physically exhausted.  My back and shoulders hurt, not to mention my quads.  This isn’t normal for me while hiking:  I loved every minute of it!  What I didn’t love however, were those mosquitoes!  It was actually quite pleasant outside, but I refused to take off layers because they were keeping me from getting bitten.  I kept swatting the little buggers out of my face.  I could see them everywhere (there were birds feasting everywhere as well).

I made it back to the trailhead and signed out of the register.

36

The ice on the road had melted a bit on the way out

37 Uper 4WD trail out

Here’s a daylight view of the avalanche area at the lower trailhead.

38

There was a lot of mud on the trail on the way out. I had fun driving through several very large mud puddles in my truck, making a mess of things.  I absolutely LOVE my truck, and this was fun! Side note:  everyone should own a truck for times like this.

39

I didn’t get any great photos of the big puddles or videos while mudding (because that required two hands on the wheel) but I did get a short video just driving out. The deer weren’t planned

https://youtu.be/vjg2uA114Cs

I made it back down to my truck at 4:15pm, but didn’t get cell reception until about 5pm (that dirt road and drive in takes forever!). When I finally was able to call the kids and tell them I’d be home around 7pm I found out they’d just woken up, so no worries.  Oh, to be a teenager again!  It seems we all enjoyed our holiday!

Wheeler Lake – 12,168

1

I got my new ice axe in the mail yesterday, but unfortunately I didn’t get my crampons, so I was at a loss as to where to hike today.  I spent a LOT of time researching potential hikes, and maddingly there just weren’t many posted trip reports, so any hike would be a gamble.  I decided to just pick a hike I knew would have a little snow and go for it.  I wanted to summit something, but didn’t necessarily have to.  I also wanted to practice self arrest with my new ice axe.

The trailhead (Montgomery Reservoir) looked easily accessible, and there were 3 potential 13er summits, so I chose to try Clinton Peak.

It was cold this morning!  The road in was an easy 2WD dirt road, closed at the 4WD trailhead.

2 Trailhead

As soon as I started hiking it became apparent I’d need snowshoes.  I didn’t take them off until I made it back to my truck.  I was also glad I had my GPS because there was a lot of snow and the beginning of the trail was at the beginning of 2 other trails as well.  I’m pretty sure I’d have chosen the wrong one.  The correct trail goes past the old mill…

3 Mill

This mill was non operational and looked like a small gust of wind would take it down any minute.  There were beams missing, nails exposed, and supports splitting in half.  There was a sign telling people to “Enjoy but not Destroy” their Colorado history.  I thought it was lacking more safety notices.  I high tailed it out of there before the mill collapsed on me.

As soon as I passed the mill the trail was lost.  Kind of. You see, this is what it looked like:

4

The snow was so deep you couldn’t see the trail!  This trail was supposed to be really easy:  just follow the 4WD trail for 3 miles to the lake, but the snow was so thick it obscured the road and everything else.  There was no road!  That meant a lot of GPS’n and Guessin’

5 Trail

This part of the hike was an exercise in patience.  What I thought couldn’t possibly be the road actually was, and what I thought was obviously the road wasn’t.  I kept looking at my GPS and altering course.  That took up a lot of time and a lot of battery. And I was post-holing pretty deep.  Here’s a picture of a typical part of the trail. Yes, I was supposed to hike over that snow berm and around it to the right.

6

Luckily I’ve found it’s usually difficult to get lost in a basin, and this basin was no different.

7 Down the Basin

Unfortunately, basins are formed by wind, and this basin gave me an in depth tutorial of how that happens.  Luckily the wind wasn’t too intense (20mph).  It was cold however, and the weather on top of the peaks looked nasty (so much for no snow predicted today!)  At this point I realized a summit wouldn’t be likely.

This hike was long.  And windy.  I was breaking trail and confused as to where the trail was most of the time, but learning a lot in the process.  I loved looking back at where I’d been (most prints were quickly filled up with blowing snow).  Also, I need a solar powered cell phone charger battery pack thingy.

8 IMG_8855

Of course once the sun came up I took a snow shadow selfie because I could

9

After trudging along for about 2.5 miles I went back through some trees (off course, but not by much, and honestly, my route was better anyway) and then came to the hill below the lake.  This looked like it should have had an established trail, but once again the snow covered it, so I just hiked the lane of snow parallel until I reached the top.  Have I mentioned I love snowshoes?

10

This was a long trudge!  Snowshoeing actually takes a lot more energy out of you than hiking does (especially when post holing in wind).  I’d expected to see Wheeler Lake when I finally made it to the top, but it was covered in snow and ice.

11

This drastically changed my plans.  I was supposed to skirt the lake and find a trail to the left, but that obviously wasn’t possible in these conditions.  I didn’t know where the lake was, how deep it was, how thick the ice was, etc.  and I couldn’t see any trails on the other side.

This was supposed to be an easy 13er… one I should be able to just walk up, but with the snow obscuring everything it changed the difficulty.  I briefly considered going for it and just hiking over the lake, but just as quickly dismissed the idea as being idiotic.  I didn’t have enough conditions information and I wasn’t sure about the snow I’d encounter on the other side.  I’m sure others would have done it, but I’m just not ready to take those kinds of chances.

So I took a lake photo to prove I’d made it this far and was off

12

The hike back down was a bit disappointing and took forever!  Disappointing because I didn’t summit anything today.  I made a lot of snowshoeing progress, and learned how to carry my ice axe comfortably, but I wasn’t challenged at all. (besides route finding).  I wasn’t even tired!  Turning back was absolutely the right decision, but it made today’s hike too easy (no intense elevation gain).

And that trip back!  Those 3 miles kept going and going and going!  I was able to (mostly) follow my tracks back, and the trail was much easier to figure out hiking towards the sun (the shadows helped me see where the road was). I corrected my path several times from the way in (just to make a more accurate trench, assuming my tracks stayed).

I was hot because of the mileage, but also because it got warm. I mean really arm.  My balaclava and goggles and jacket and snow clothes all became too much, but I didn’t want to stop to take them off, so I kept trudging on in the heat.  (OK, so I really just didn’t want to put on sunscreen… It wouldn’t have mattered if I’d just made it back to the truck already!!!)

The weather cleared up from the cold and windy morning, and I was able to get a few pictures of the mining equipment

13

the ice flows on the hillsides

14

and the reservoir I’d passed in the dark on the way in

15

I hopped back in my truck, found out my son needed a new car battery (long story) and headed home to assist.  I only stopped briefly at the 9/24 junction when I saw a herd of bison.  I actually turned around because I didn’t want to miss the shot…  Colorado is amazing!!!

16 Bison

All in all, a great (if a little disappointing) day.  It’s always a bummer when you have to turn back, but I don’t do it often and only when I feel it’s absolutely necessary.  Hey, any day above treeline is a great day!

… I’ll be heading back to hike this route again.  Without snow.