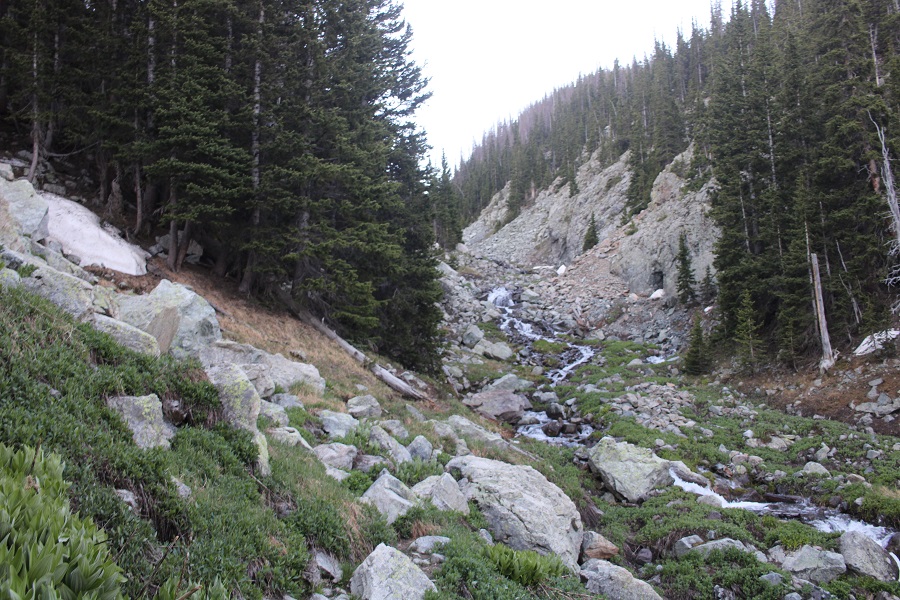
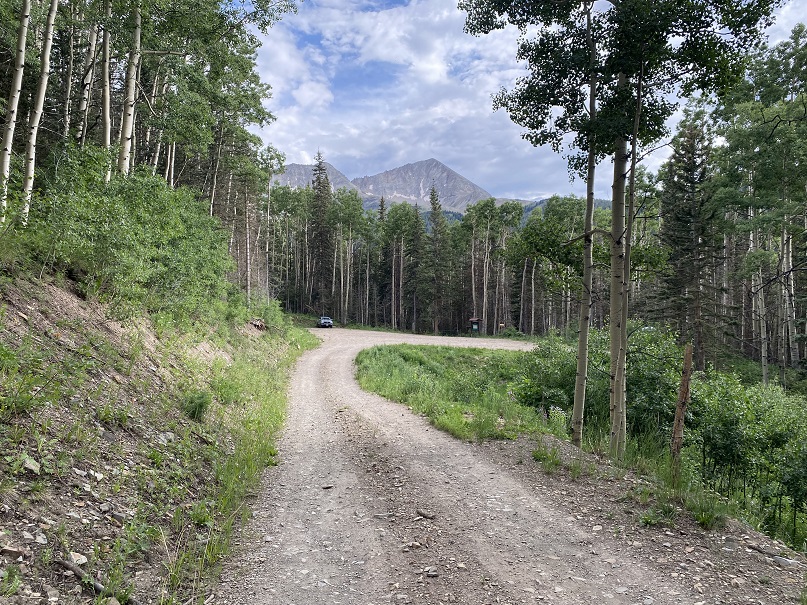
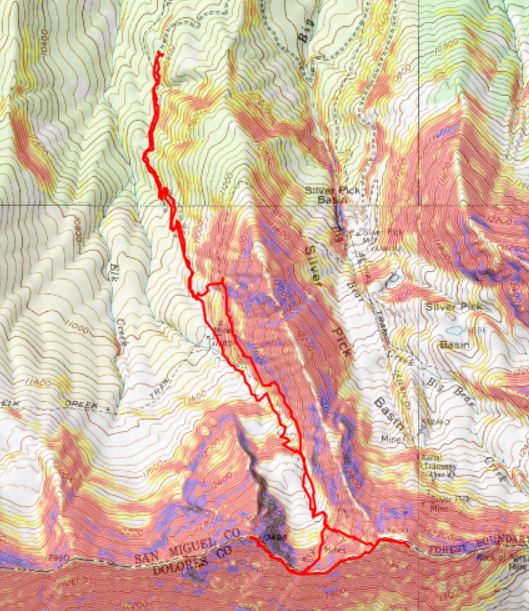
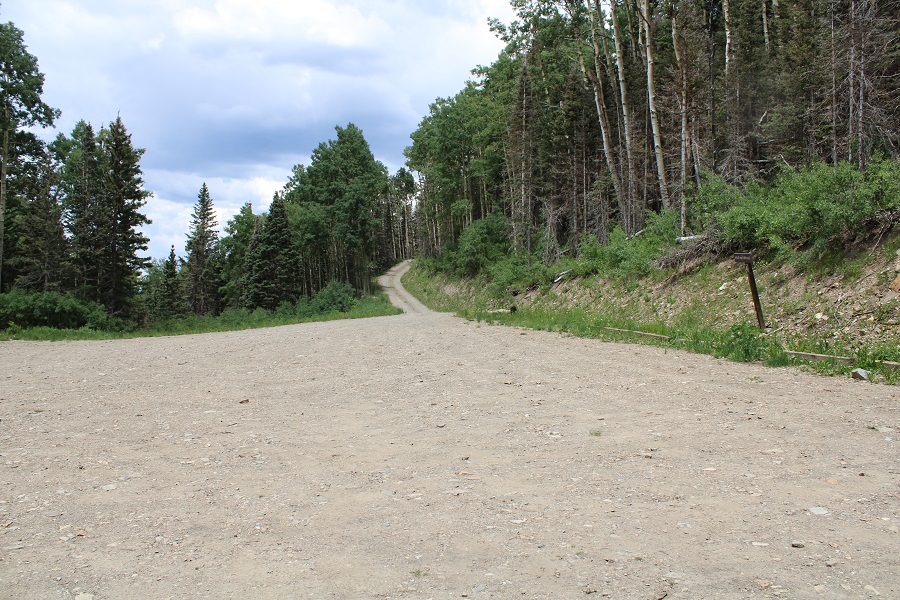
First of all, parking in Telluride is challenging. I arrived the day before and when I got to the trailhead there weren’t any parking spaces available for any vehicles to park there at all, so I turned around and looked for a place to park in town. Nope. Nothing. There were signs everywhere stating it is illegal in Telluride to sleep in your vehicle (how can THAT be legal?), and all lots had 2am-6am “No Parking or you’ll get towed” restrictions. Street parking was limited to 2 hours unless you were a resident and had a pass. This was frustrating! I was glad I’d arrived a day early. Not sure of what to do, I called the Chamber of Commerce/Tourism and they told me I could park in the parking garage ($2 per hour, but $50 if I stayed overnight), or try the residential area off Galena and park in front of someone’s house. I couldn’t park there overnight, but it should be ok for day use. I found a dispersed campsite away from town and came back early in the morning to try Galena Street. I was able to find a spot in front of someone’s house, which I felt weird parking in, and I was on my way. With all of the crazy restrictions I hoped no one would tow my vehicle. I took Galena to Tomboy and hiked the road to the trailhead.
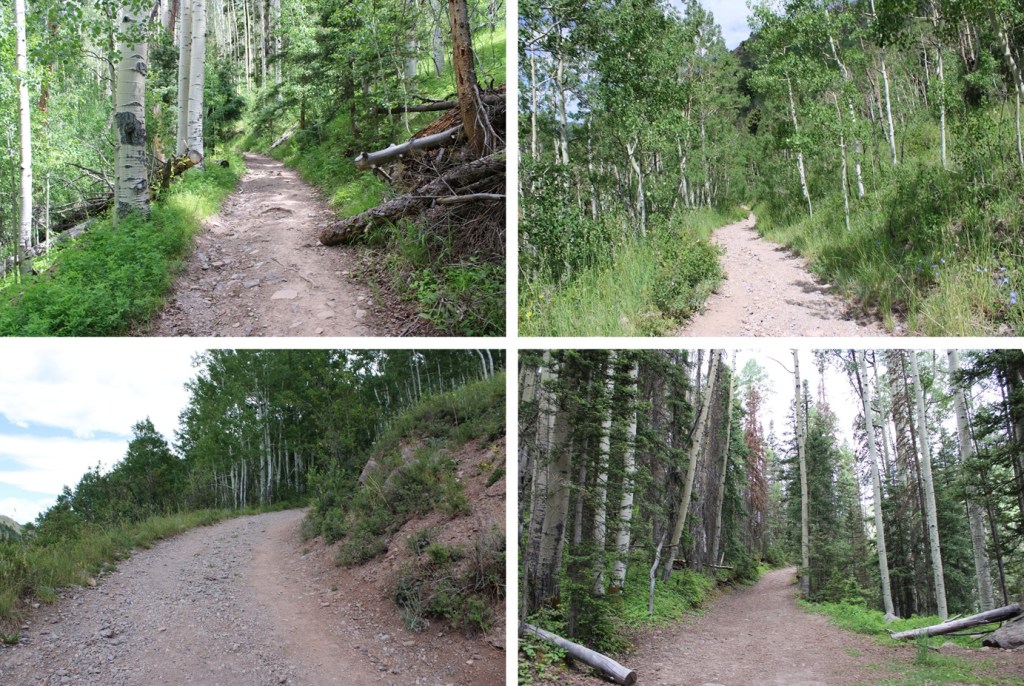
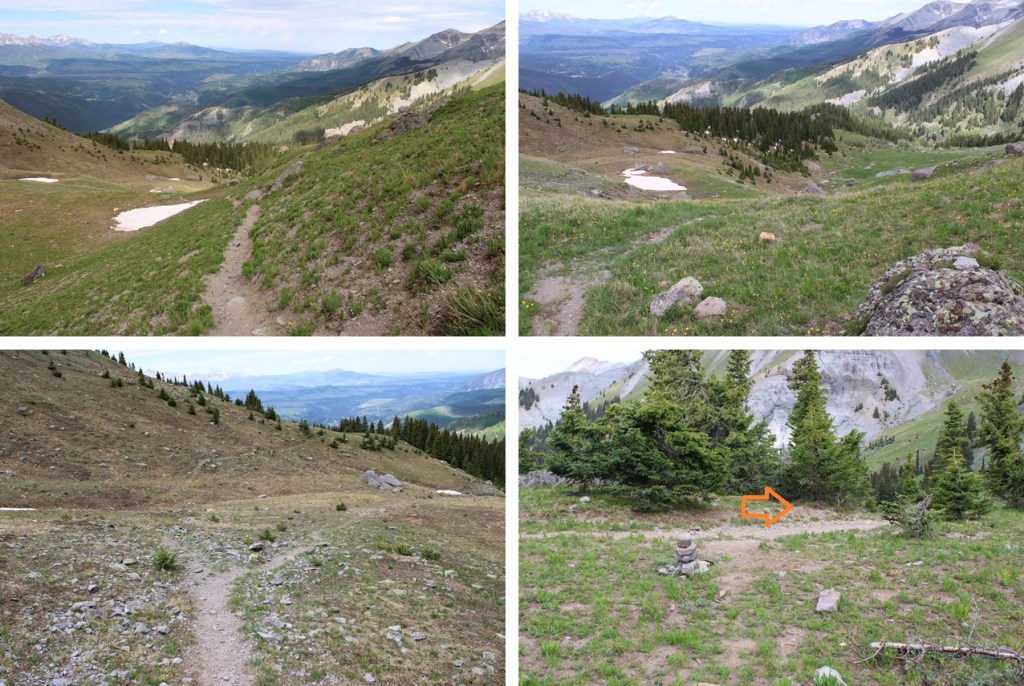
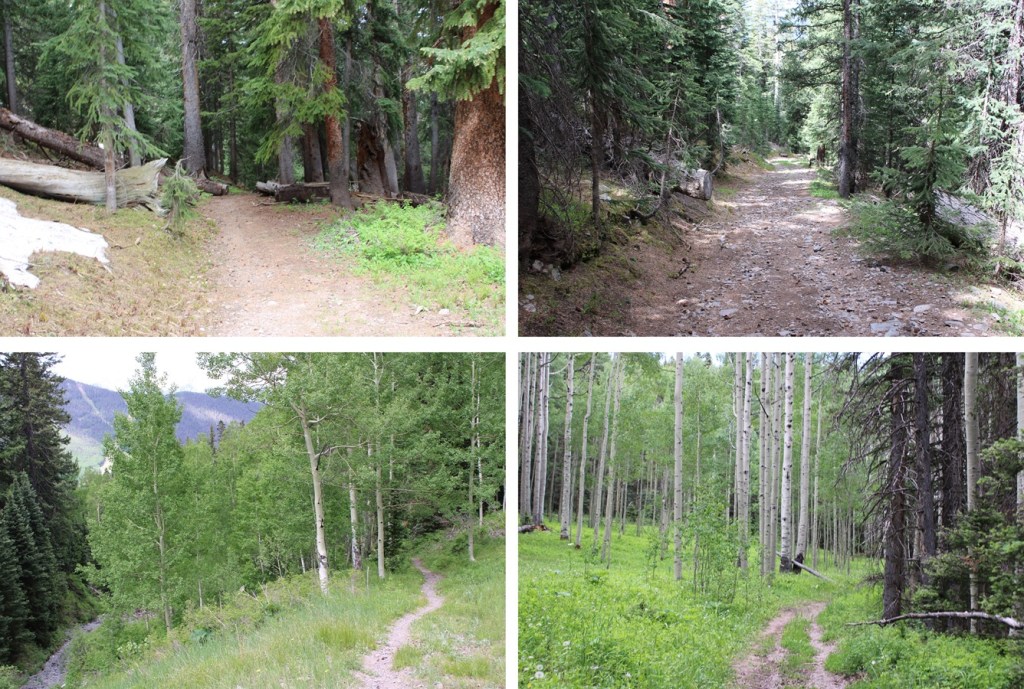
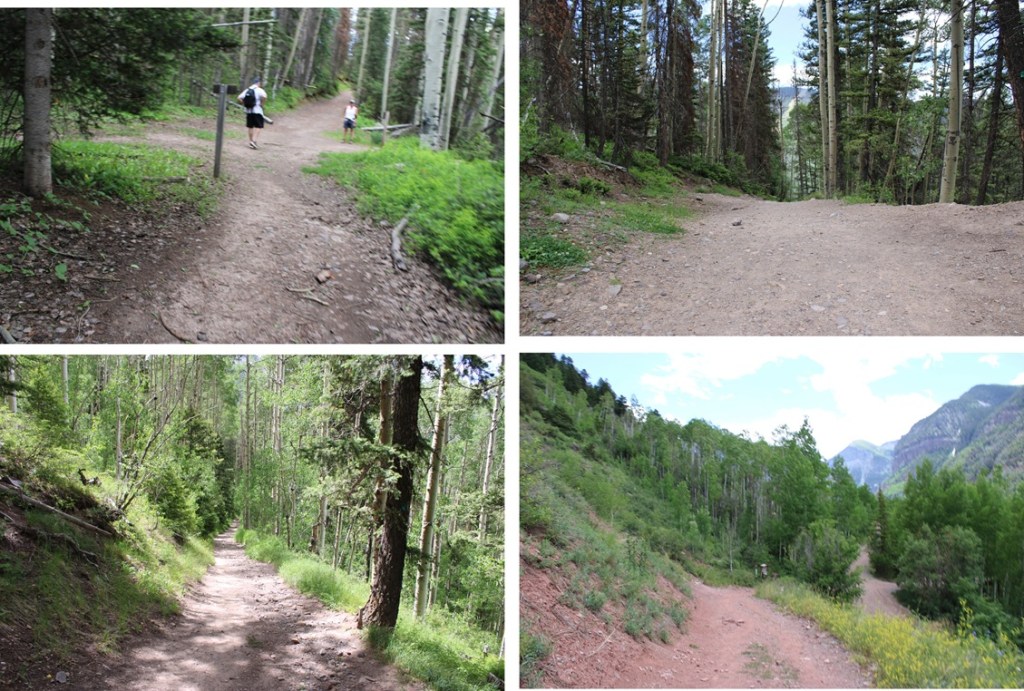
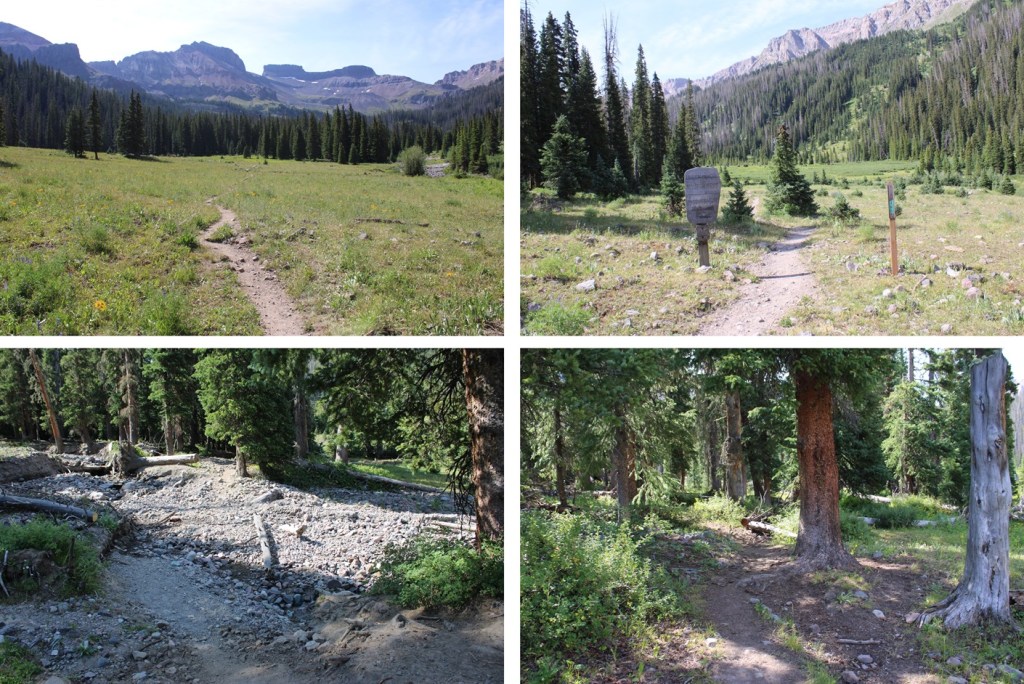
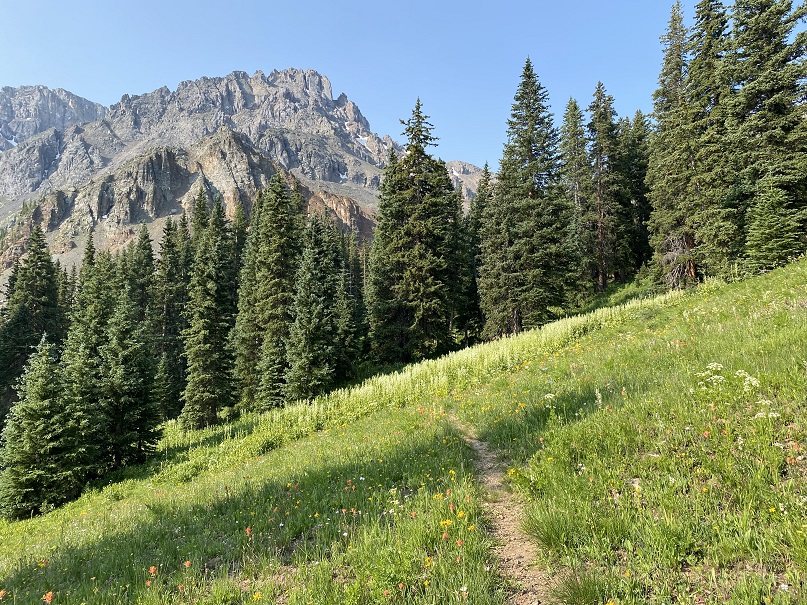
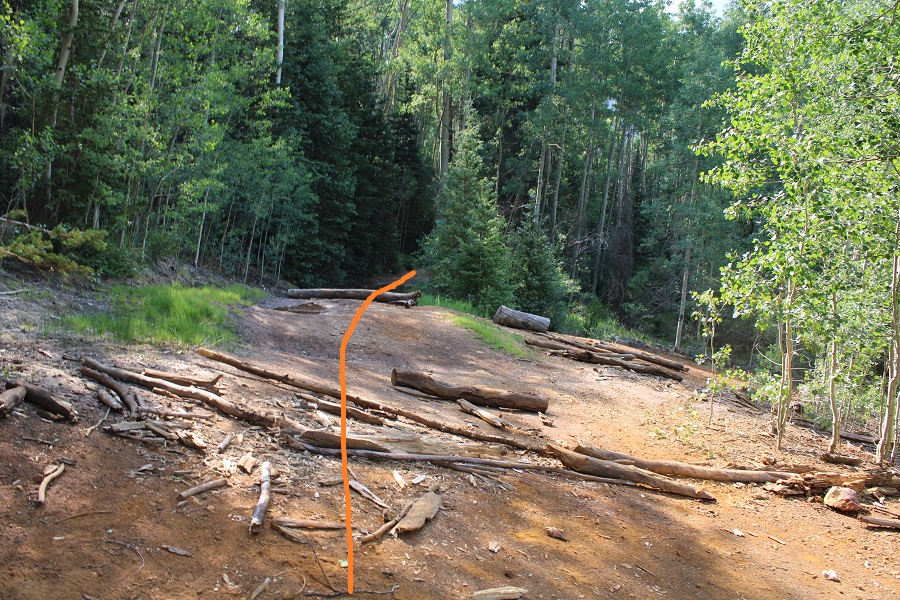
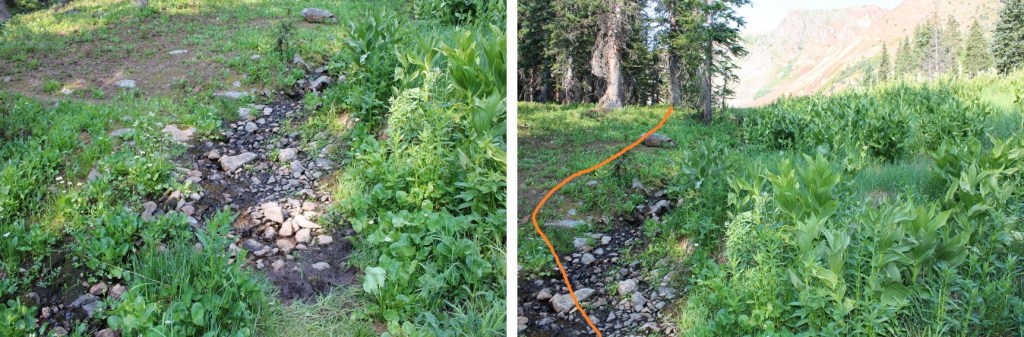
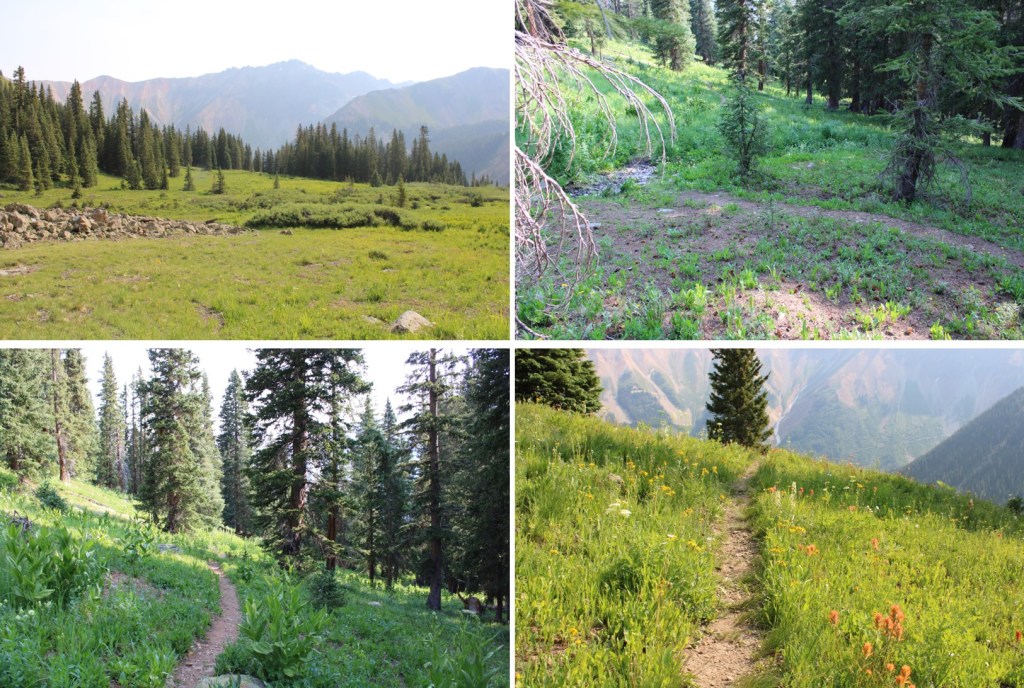
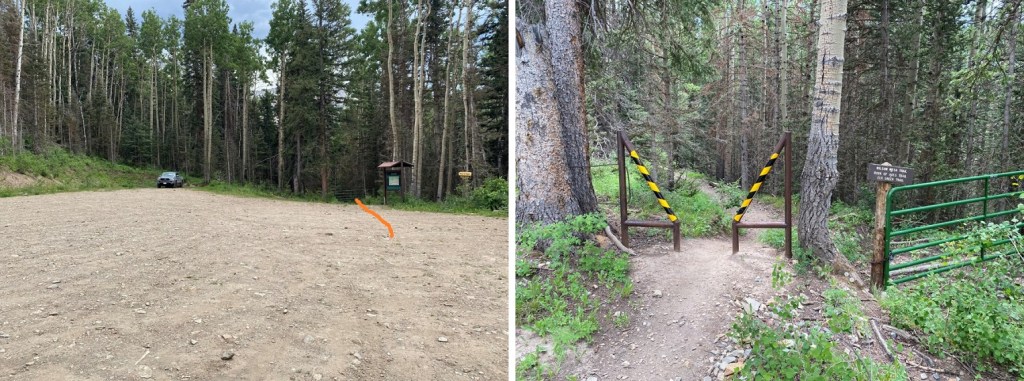
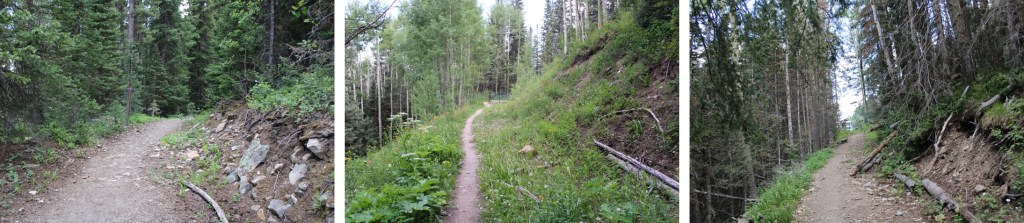
This was labeled on CalTopo as Liberty Bells Trail, but the trailhead called it the Jud Wiebe Trail. I’ve found a lot of inconsistencies with Telluride trail names. The gate was locked to vehicles so I walked under it and was on my way. The trail starts out heading northwest towards some water tanks and then continues heading northeast to treeline. The trail was very well maintained and easy to follow. The wildflowers were on point.
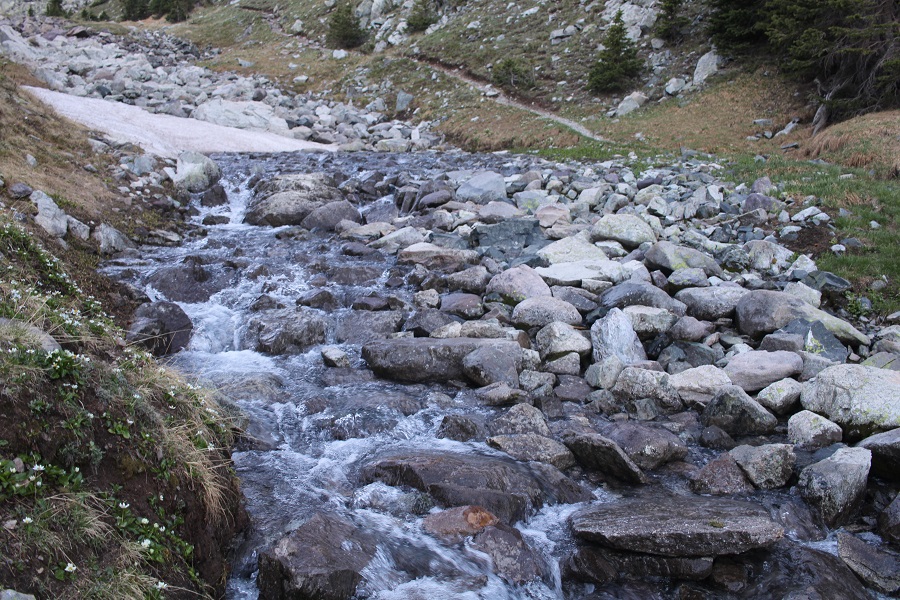
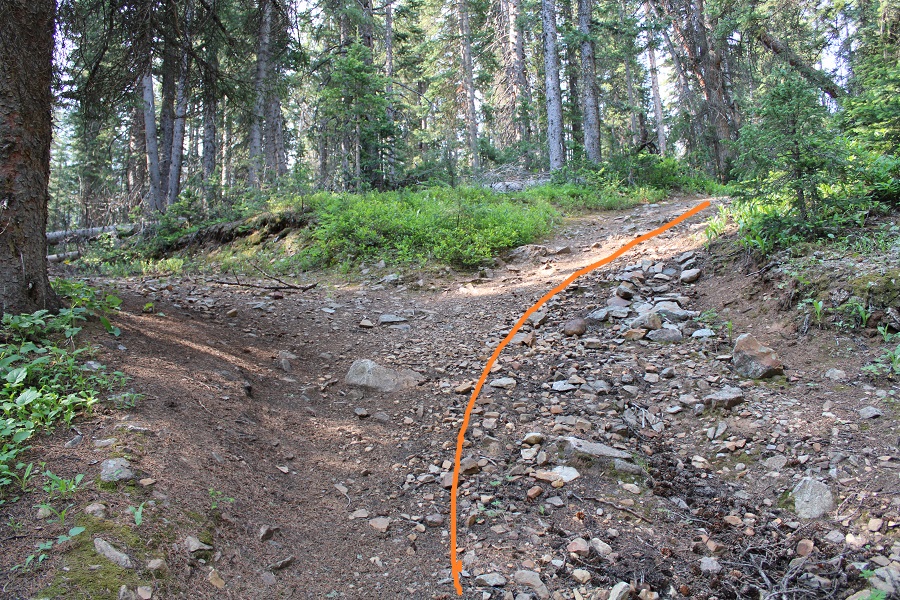
On CalTopo this trail is labeled as the Liberty Bell Trail, and it goes through Liberty Flats. Let me tell you, there was nothing flat about this trail. It kept climbing up, up, up, alternating from being a trail to being an old 4WD road.
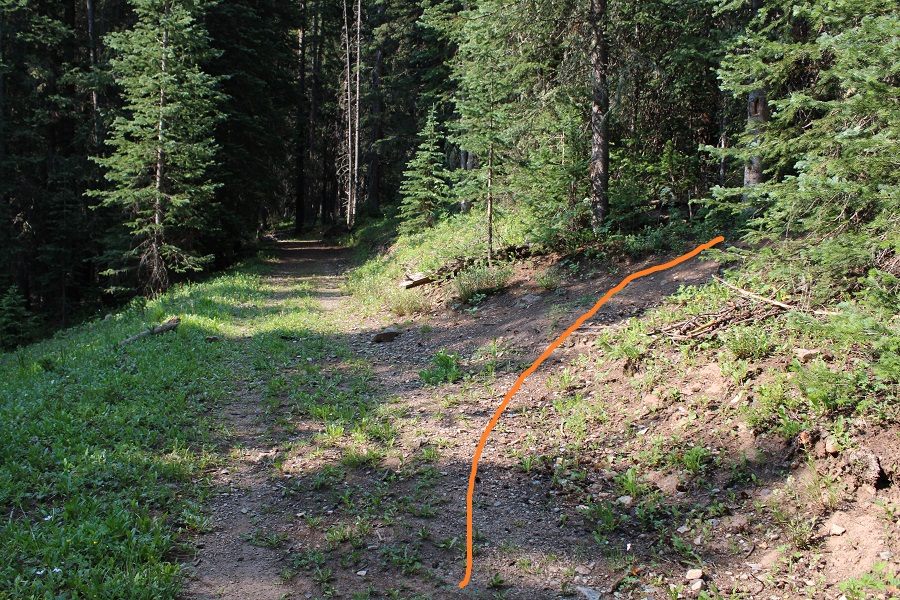
After hiking for around 1.3 miles (from where I’d started) I came to a junction for the Jud Wiebe Trail. I continued straight on the Liberty Bells Trail.
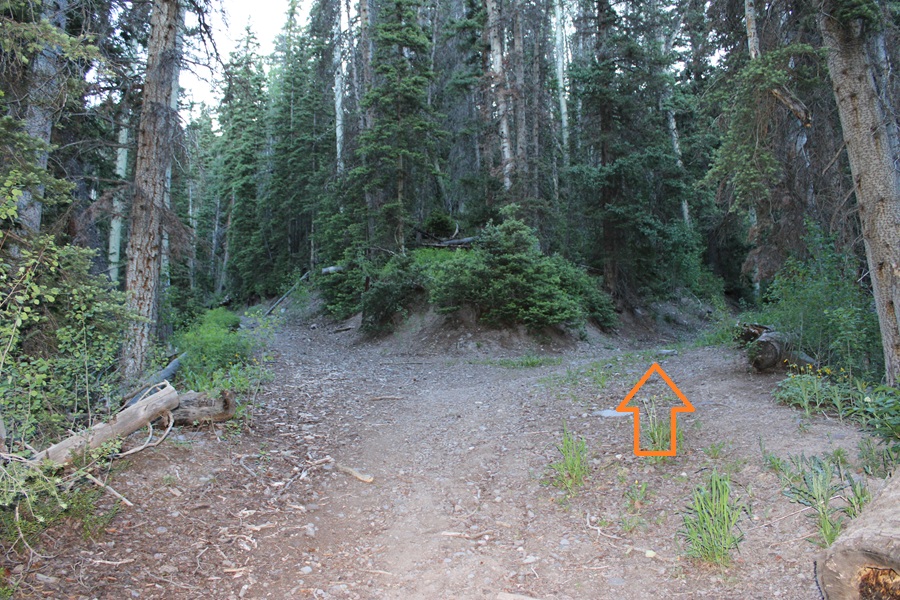
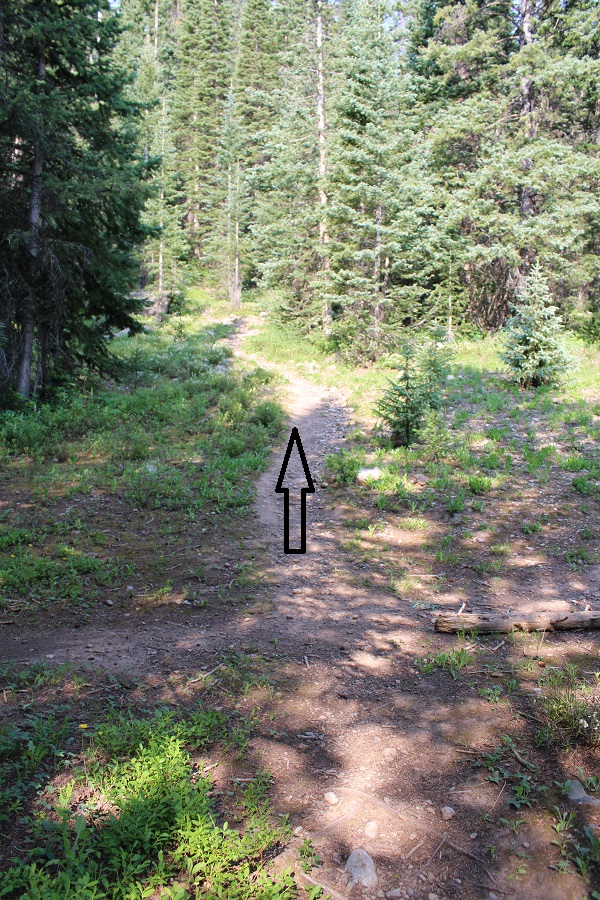
I came to another unnamed junction, and not really knowing which way to go since it wasn’t on any of my maps I went right. This happened to be the correct choice.
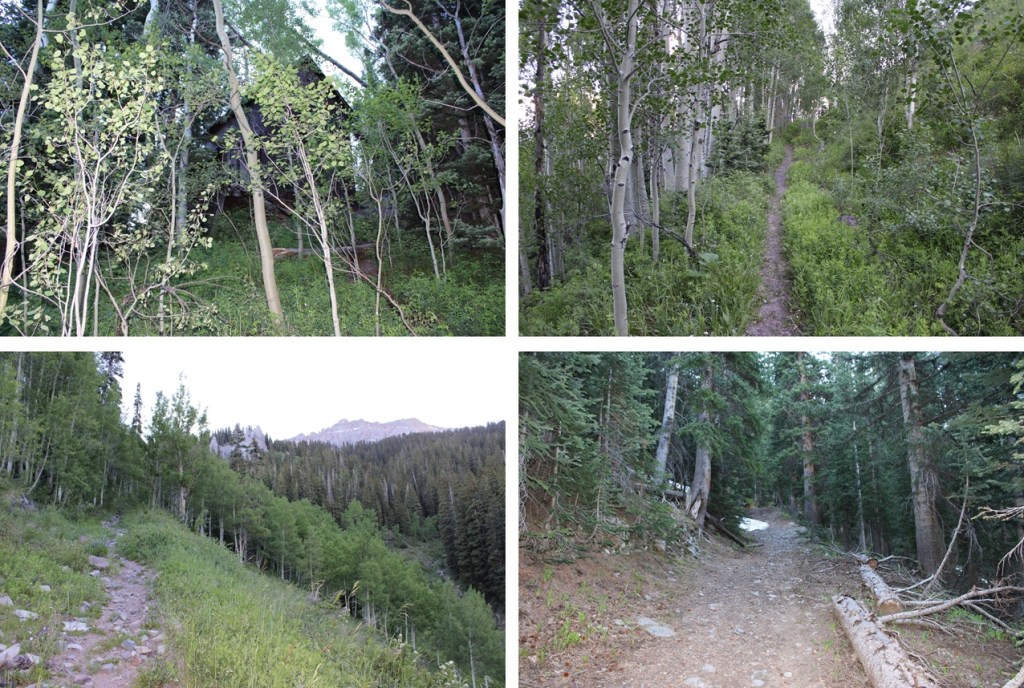
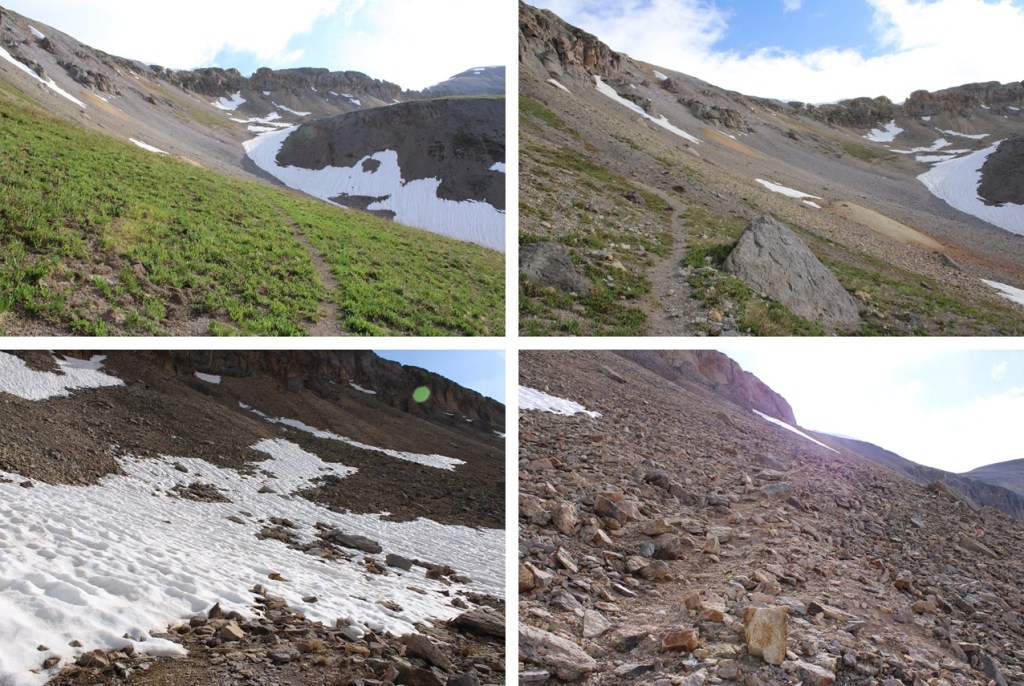
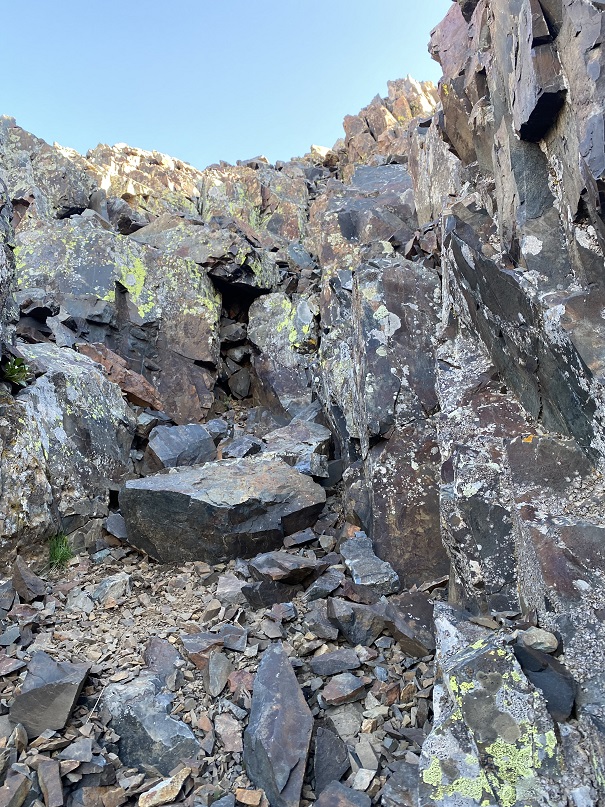
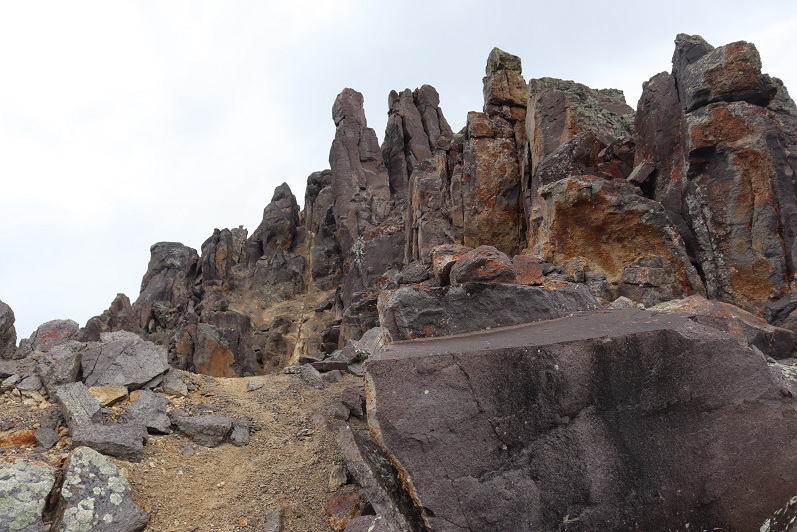
I continued following the trail past an old mine and up to treeline.
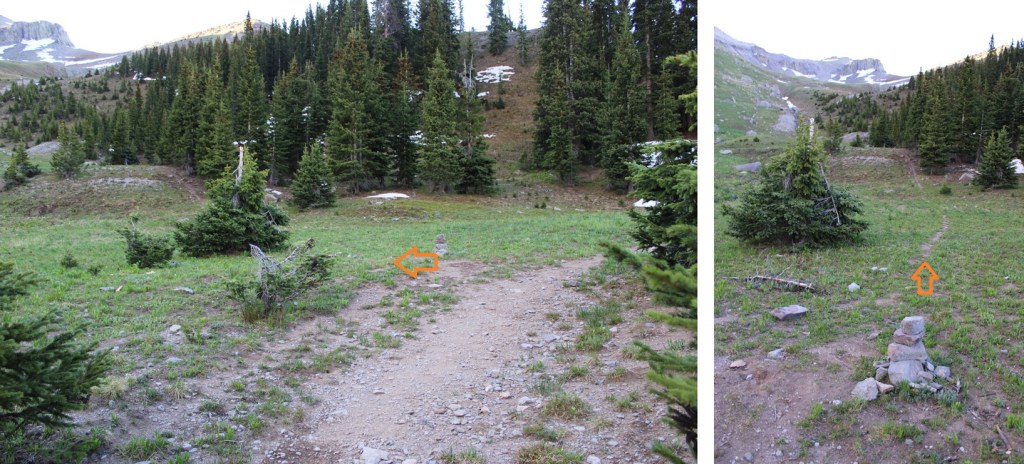
At treeline I came to a junction with the Sheridan Crosscut Trail and turned left.
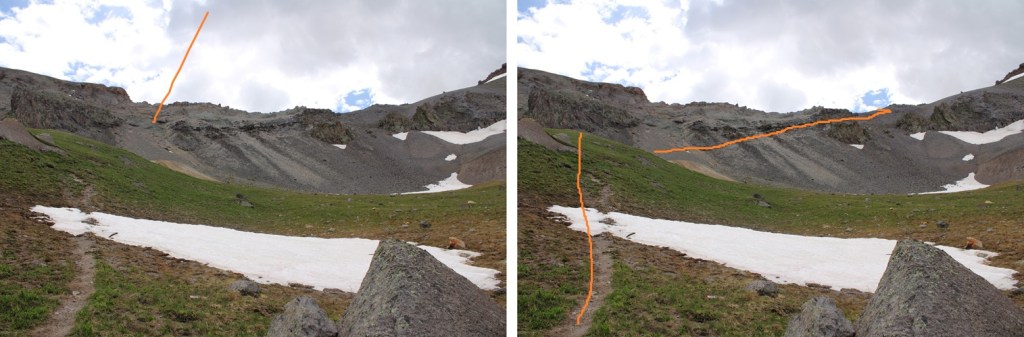
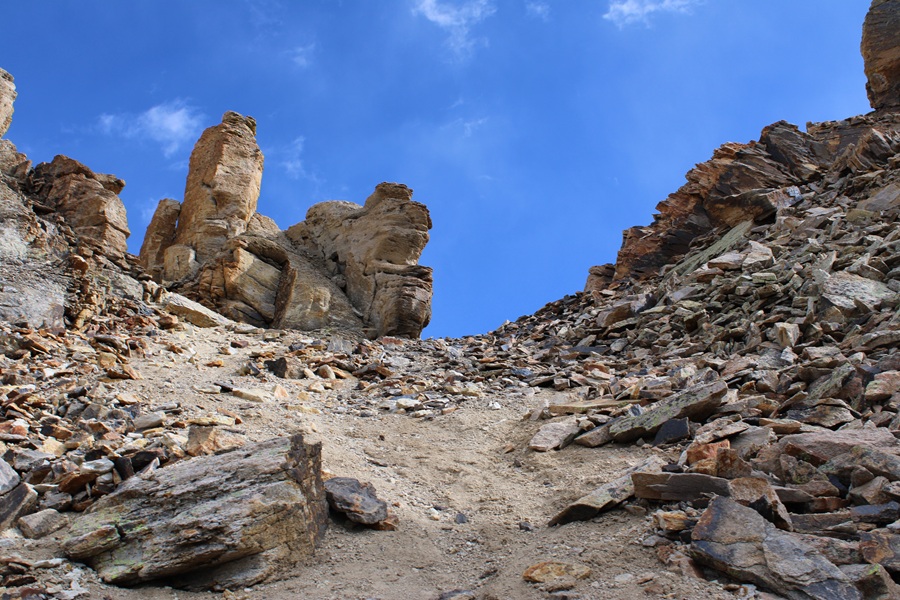
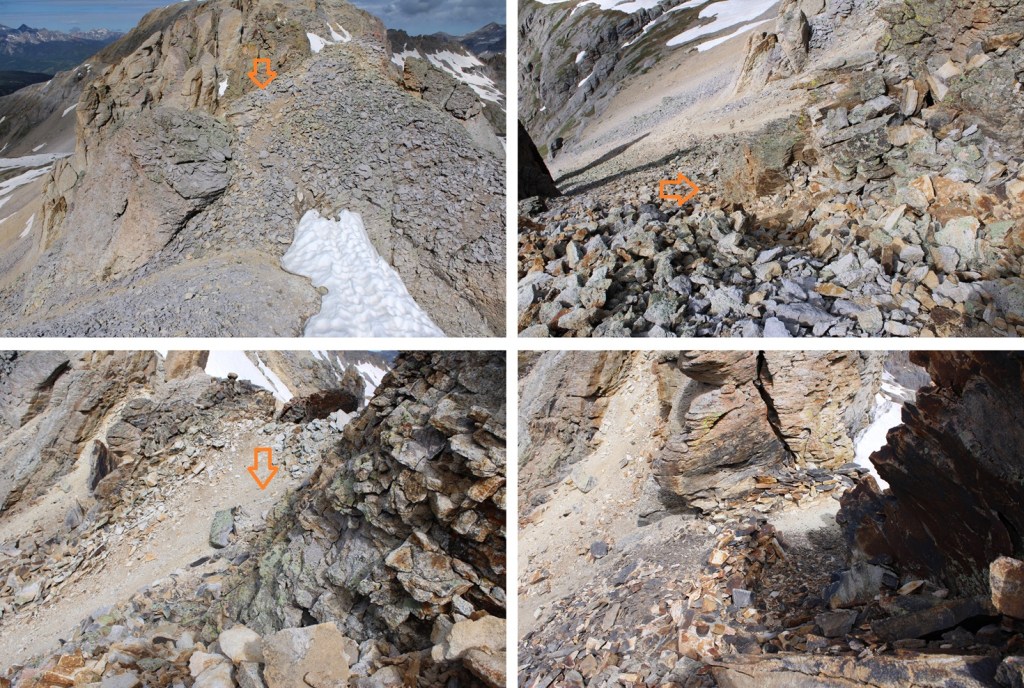
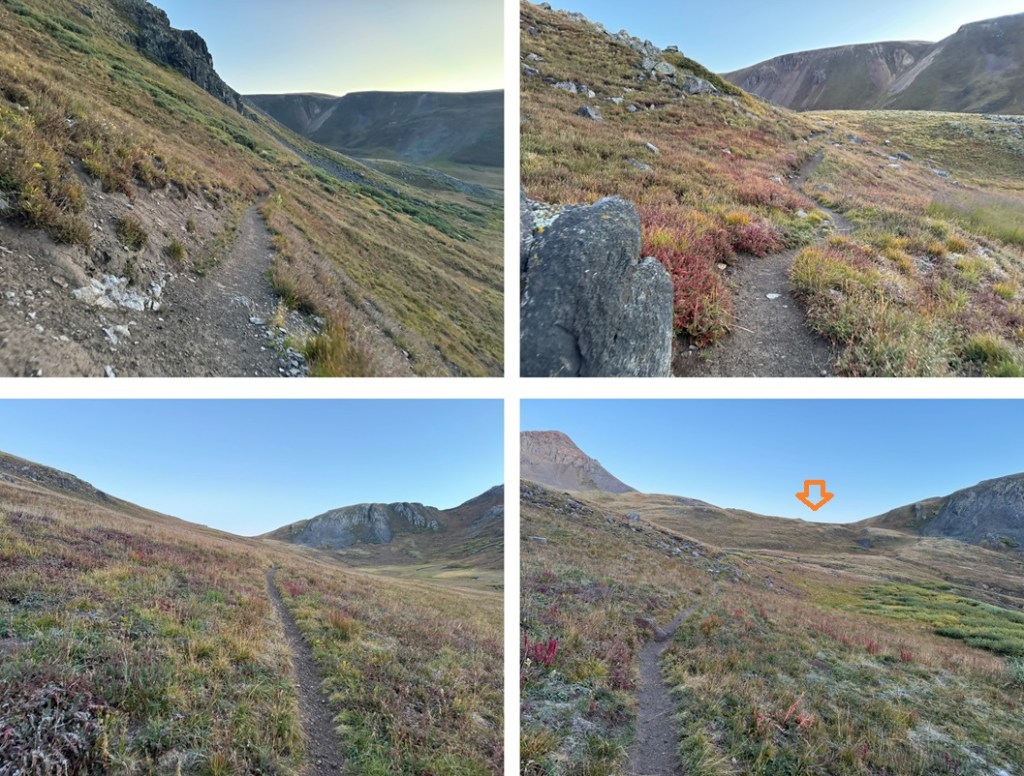
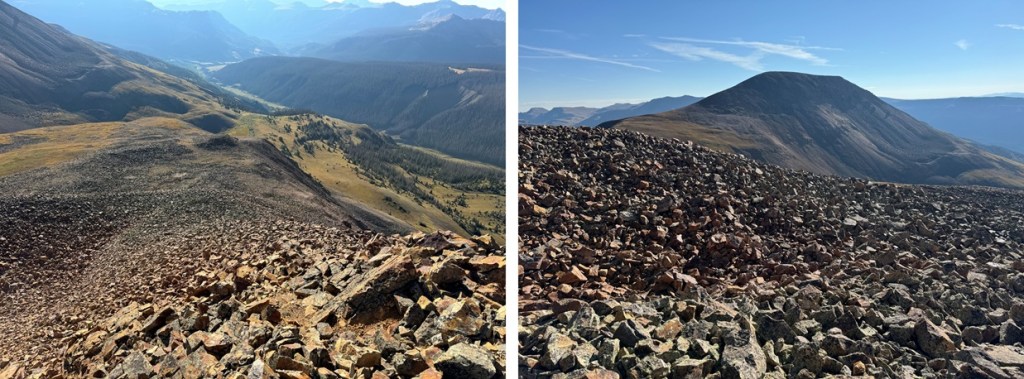
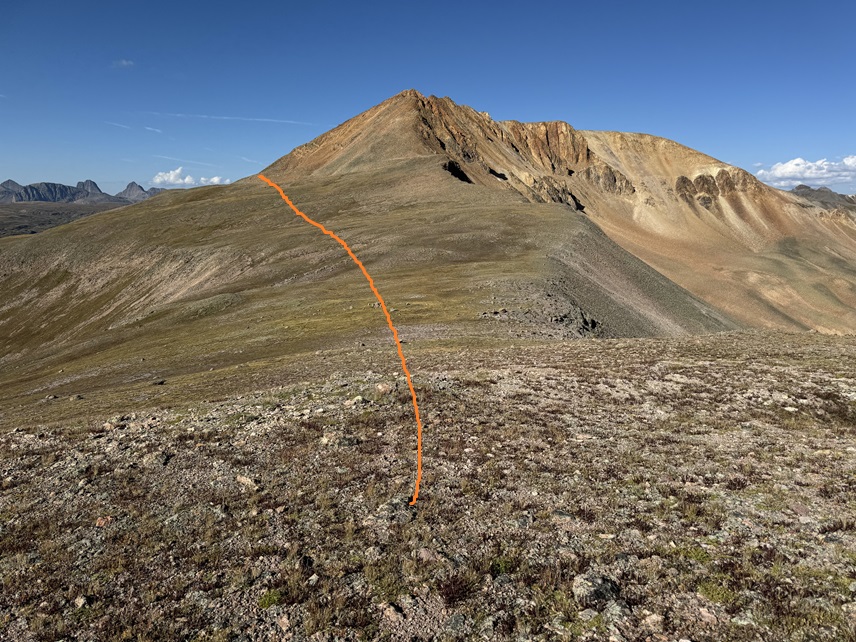
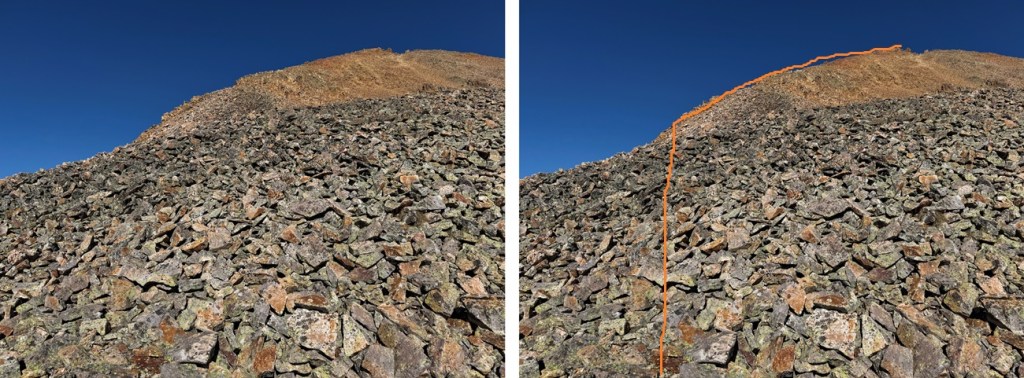
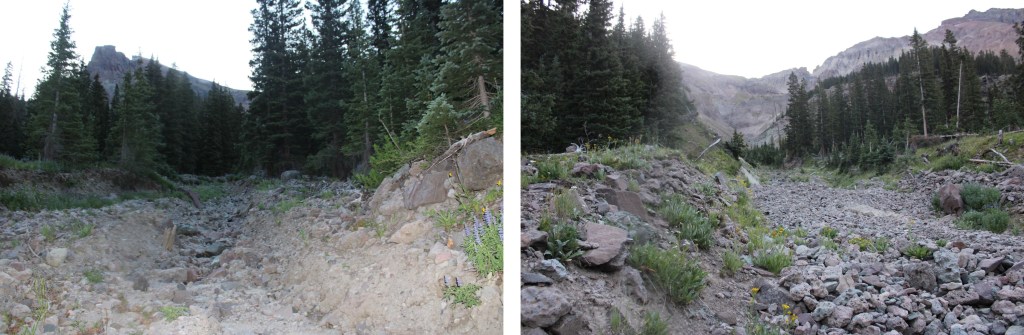
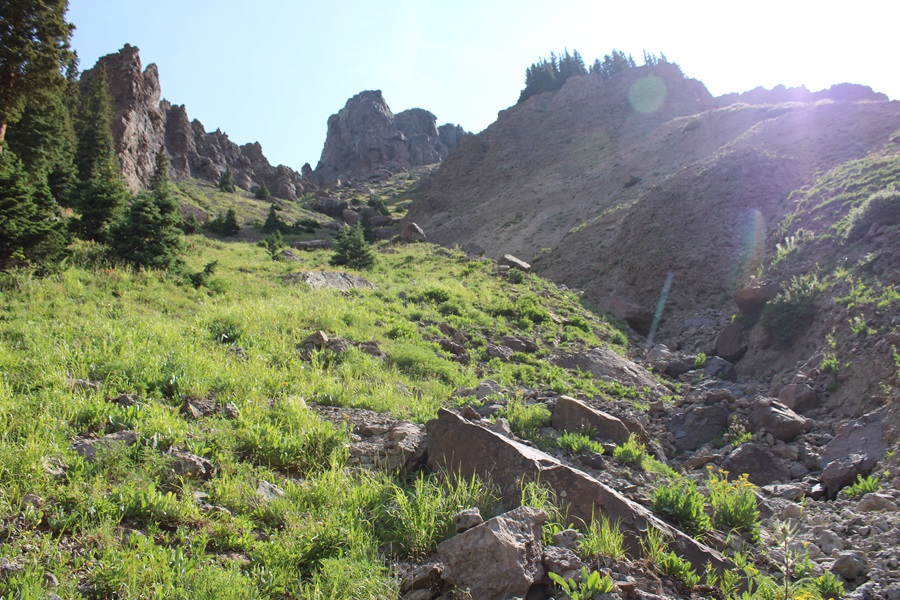
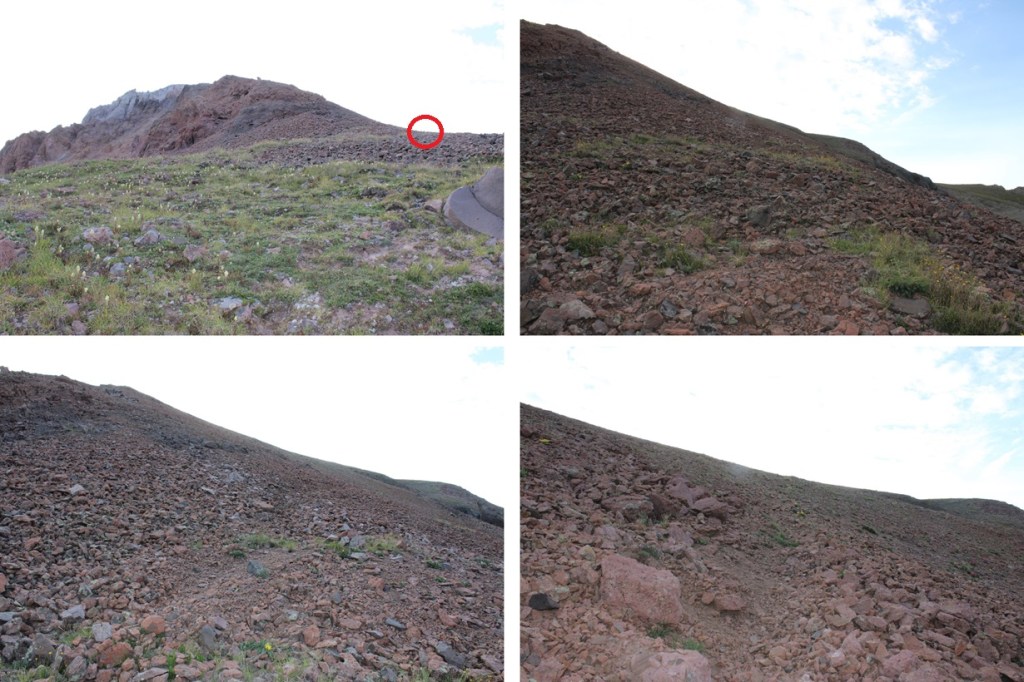
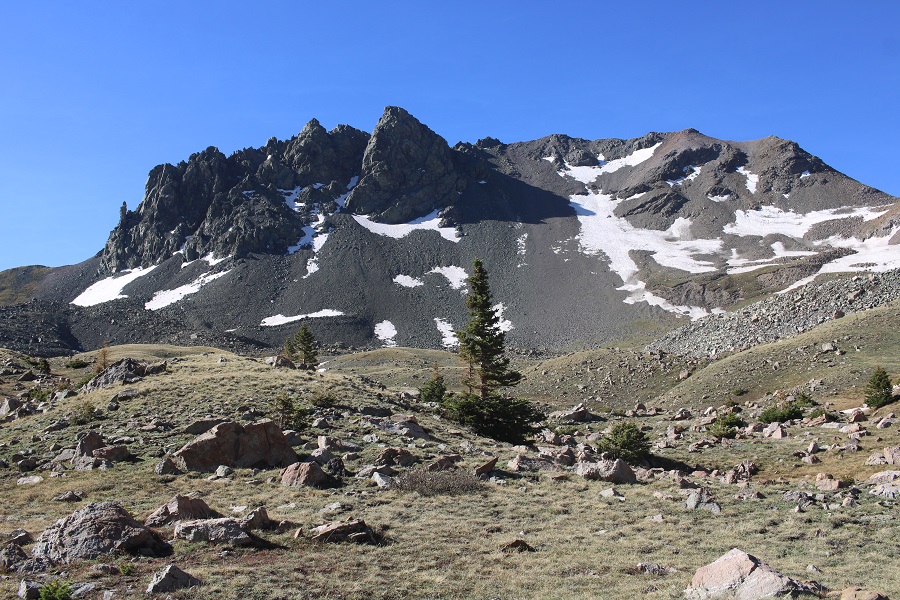
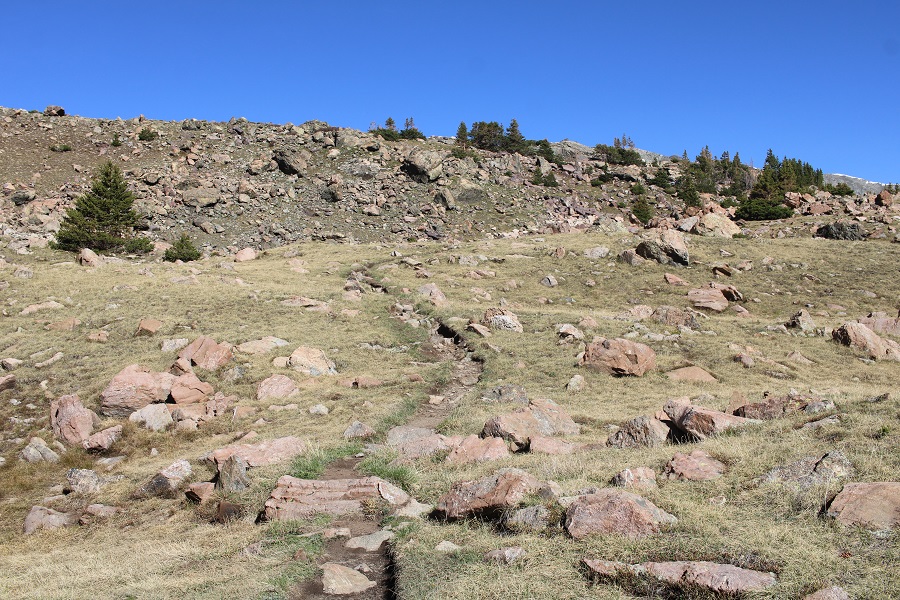
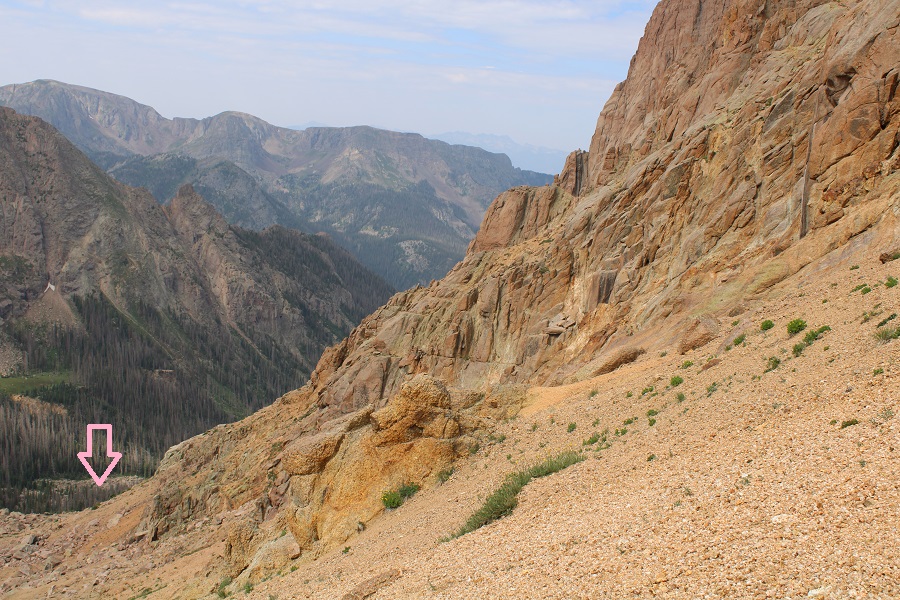
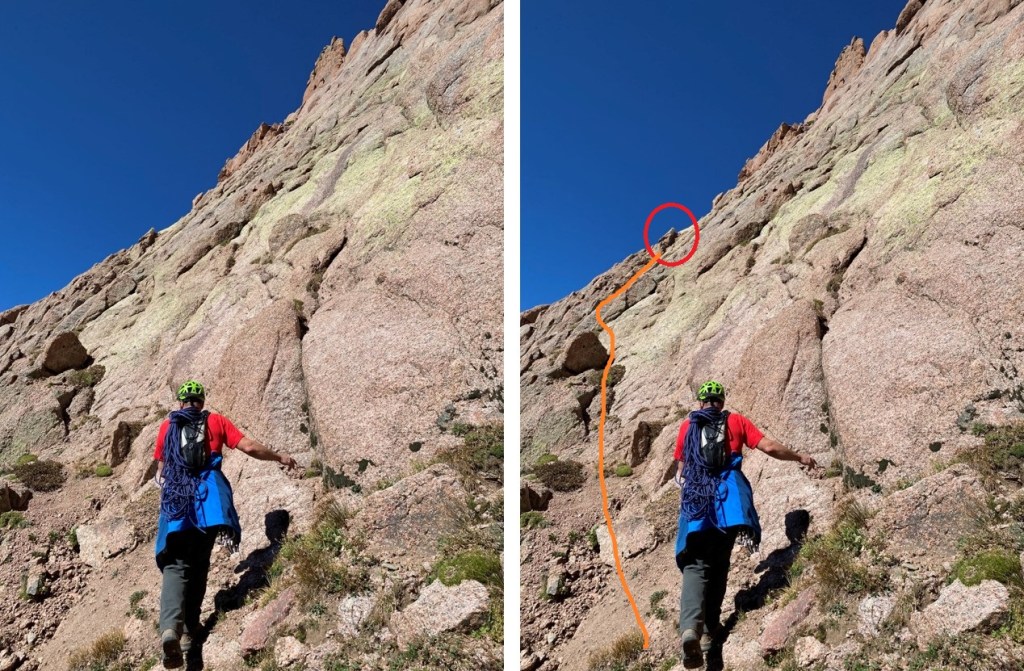
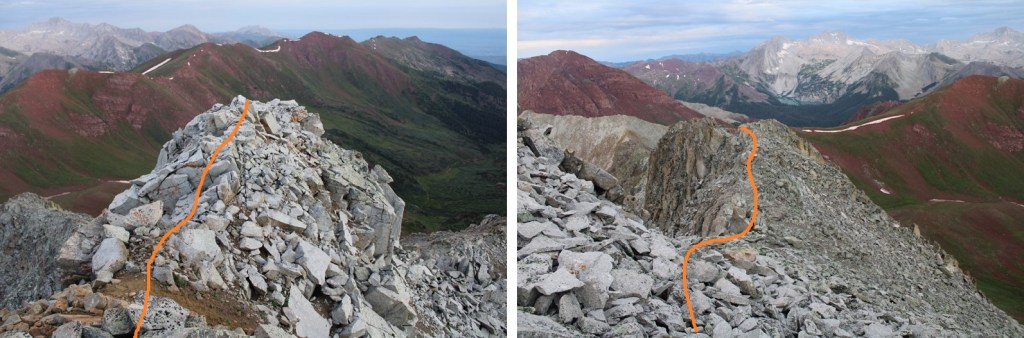
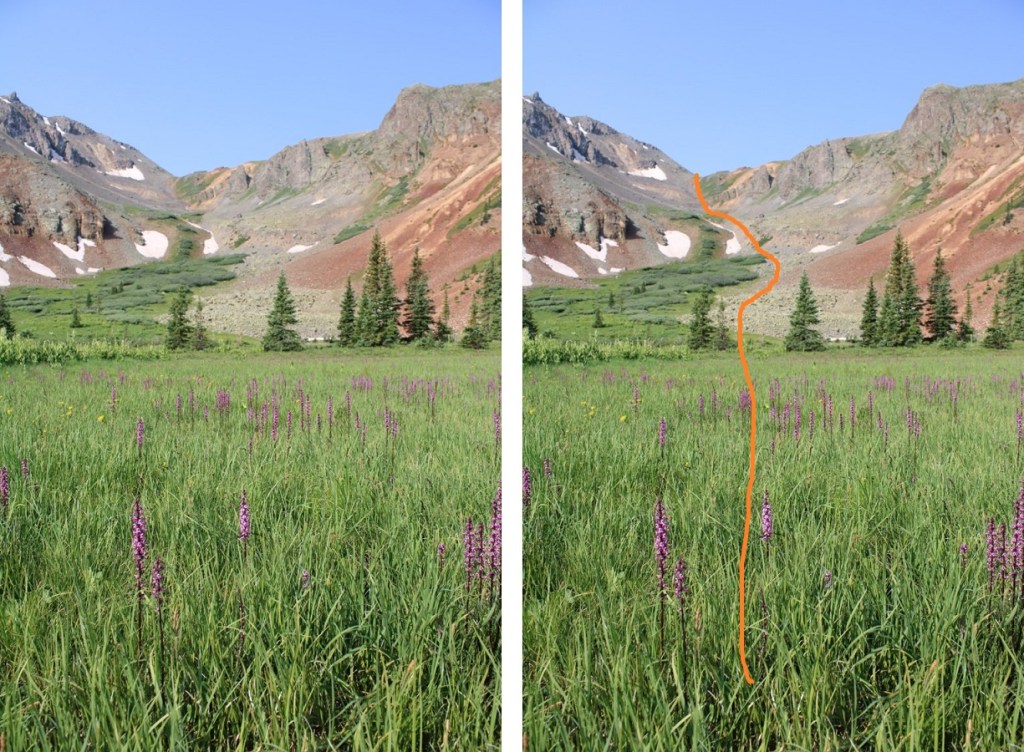
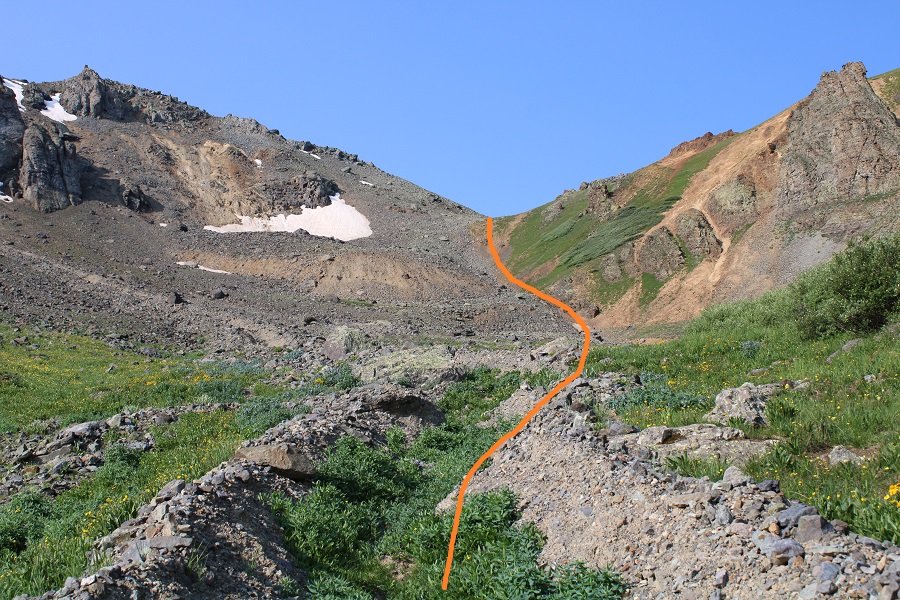
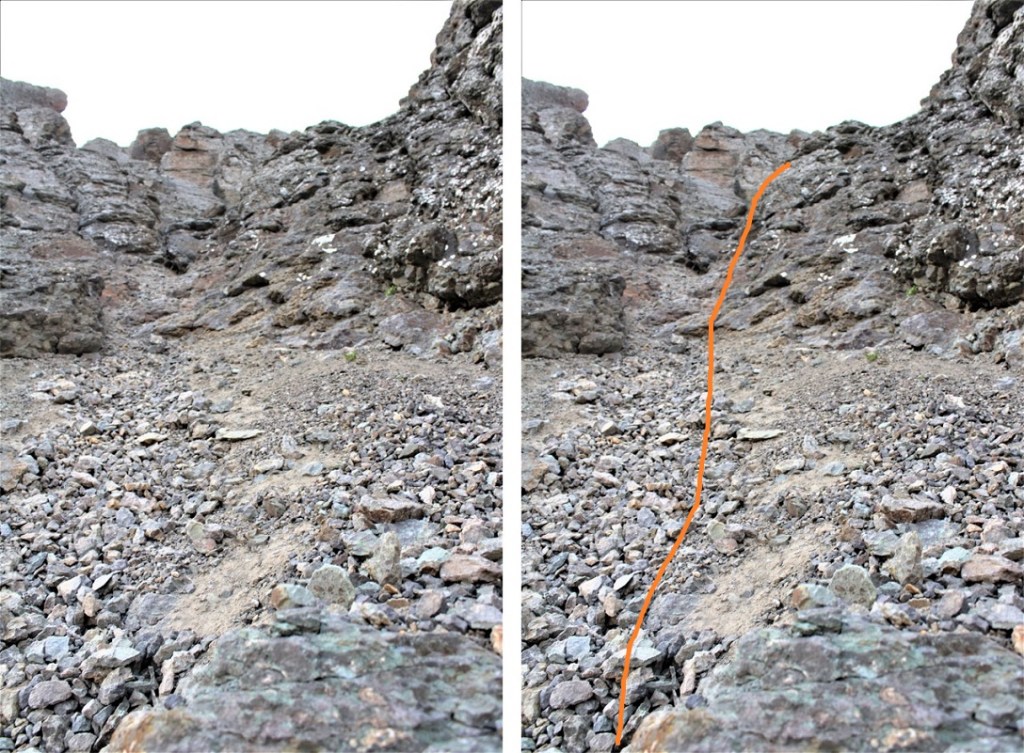
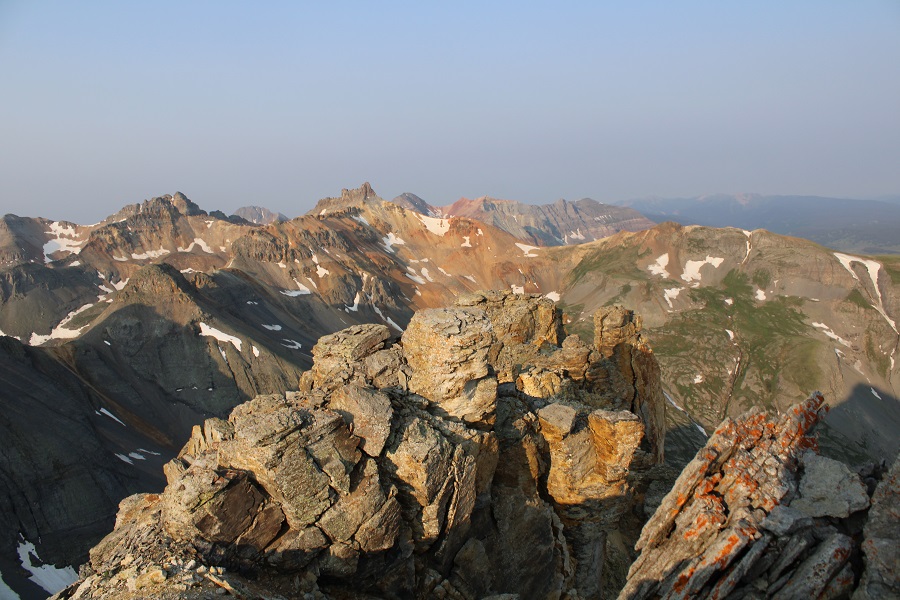
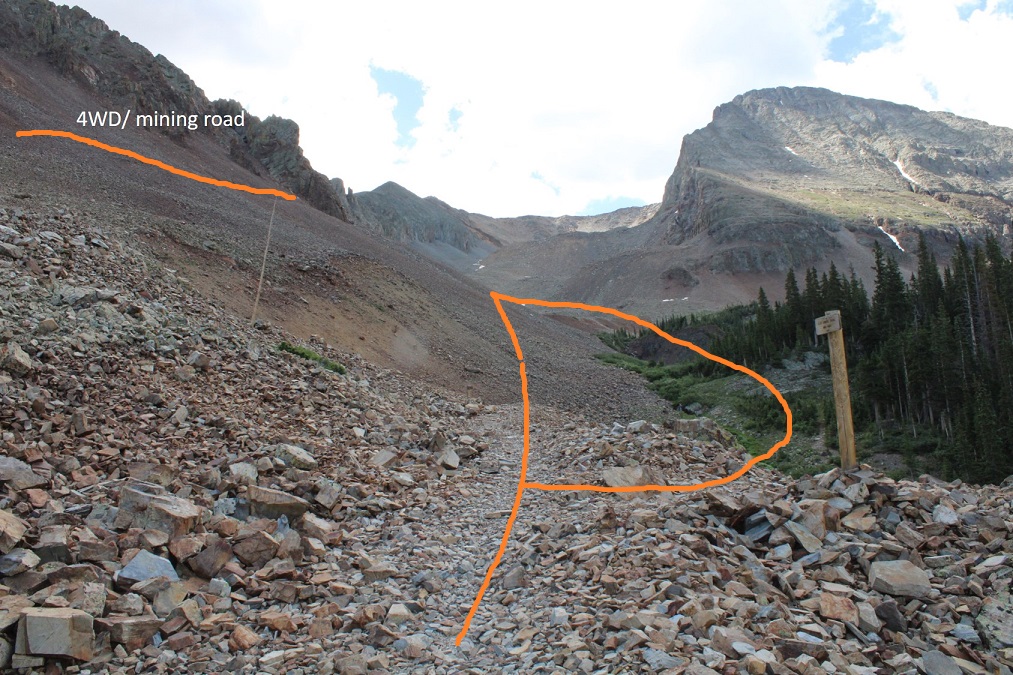
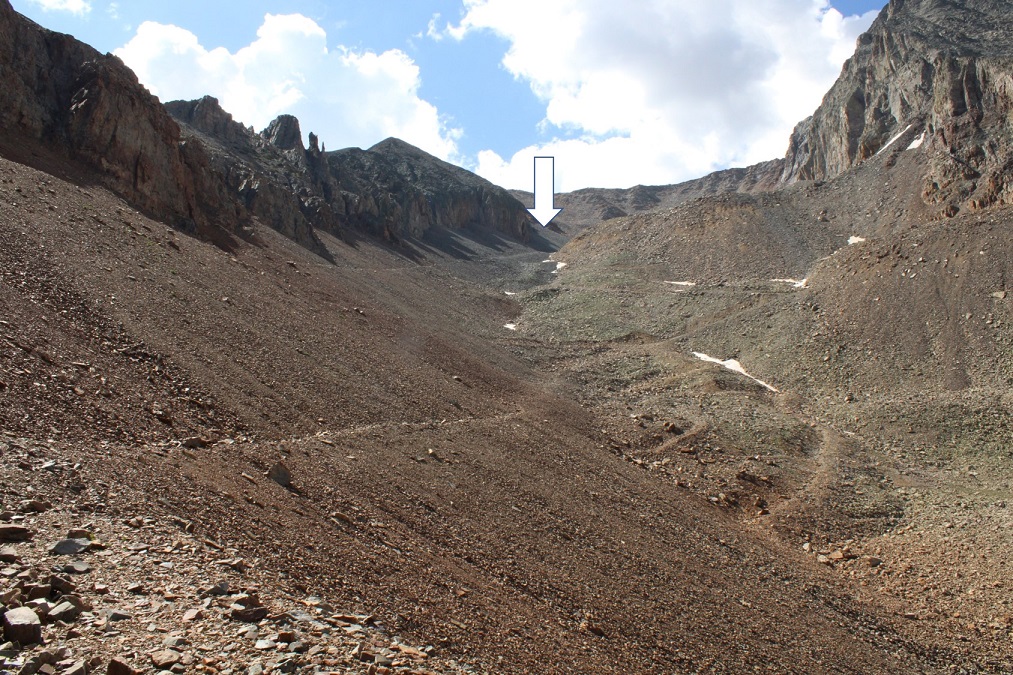
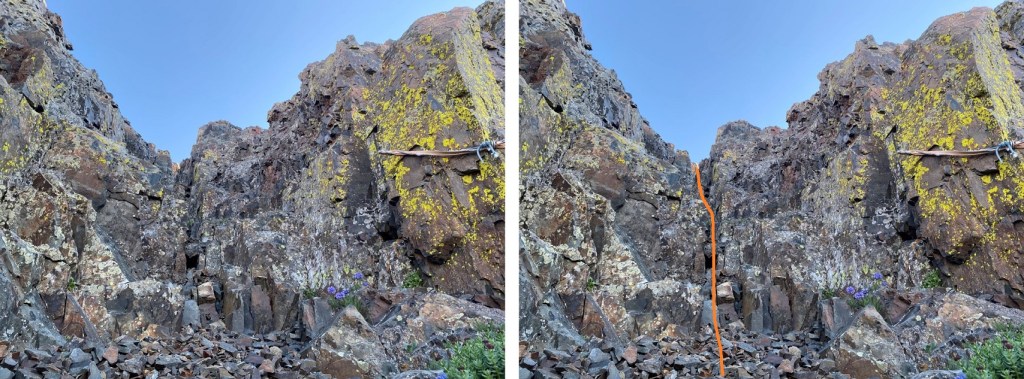
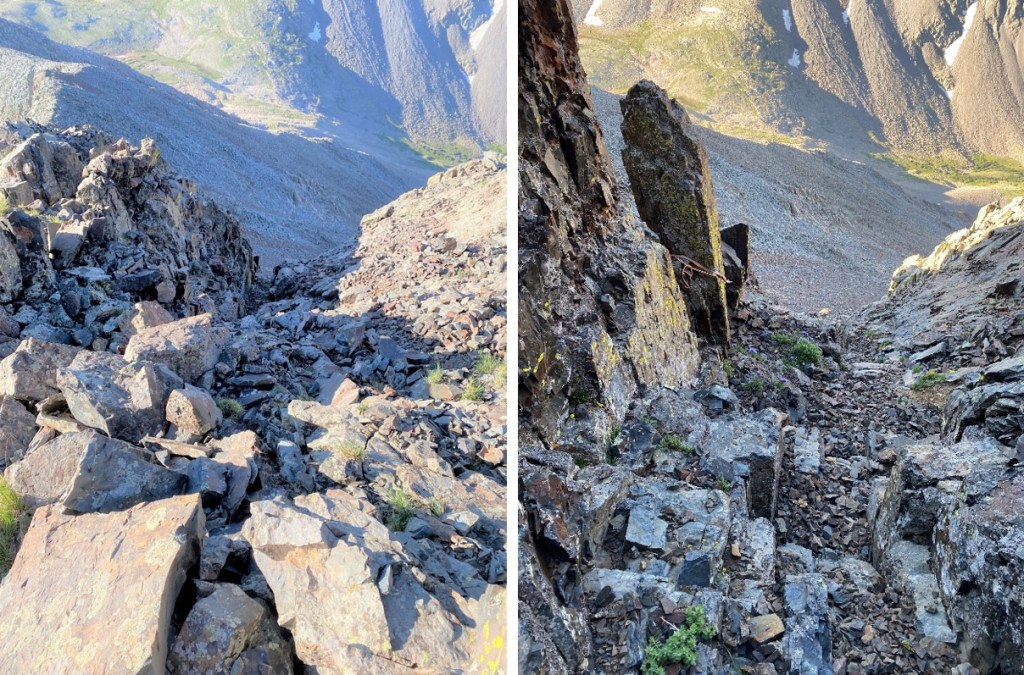
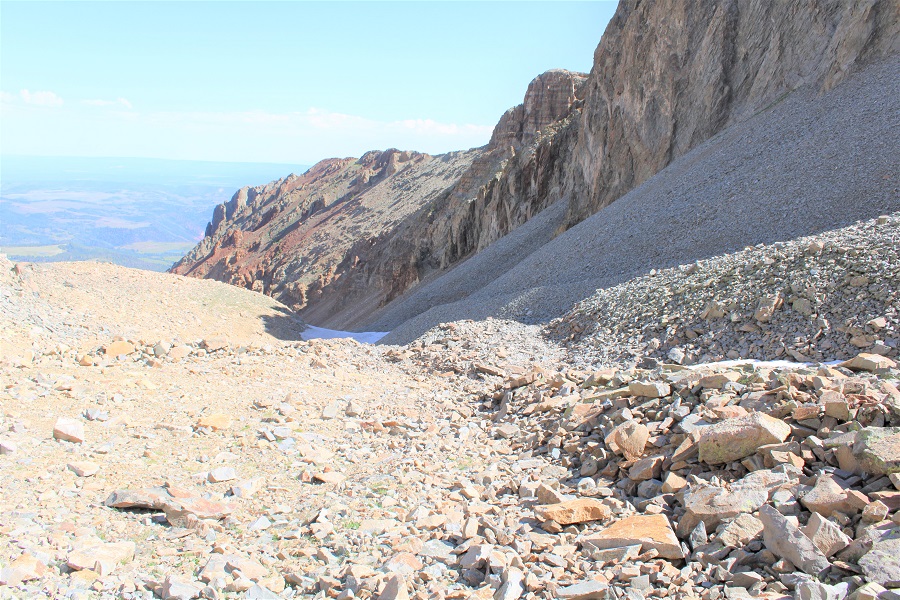
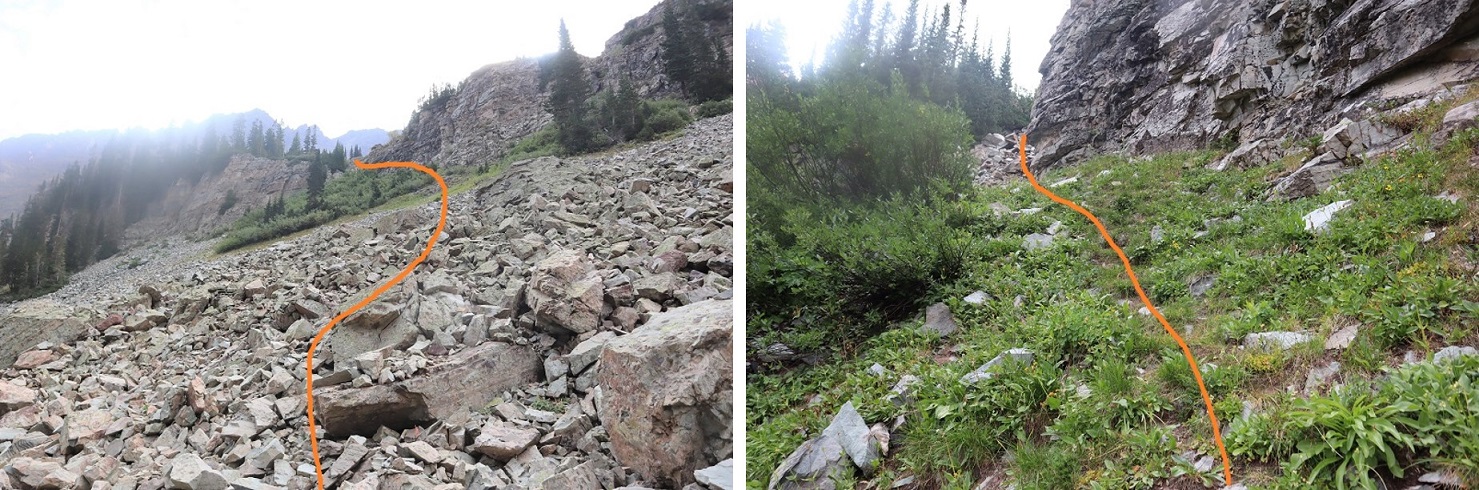
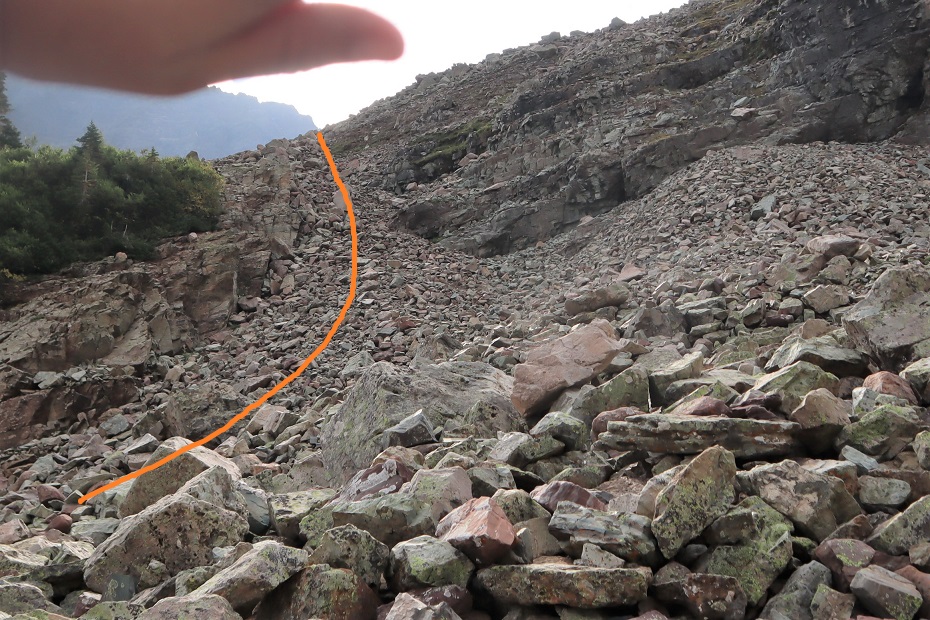
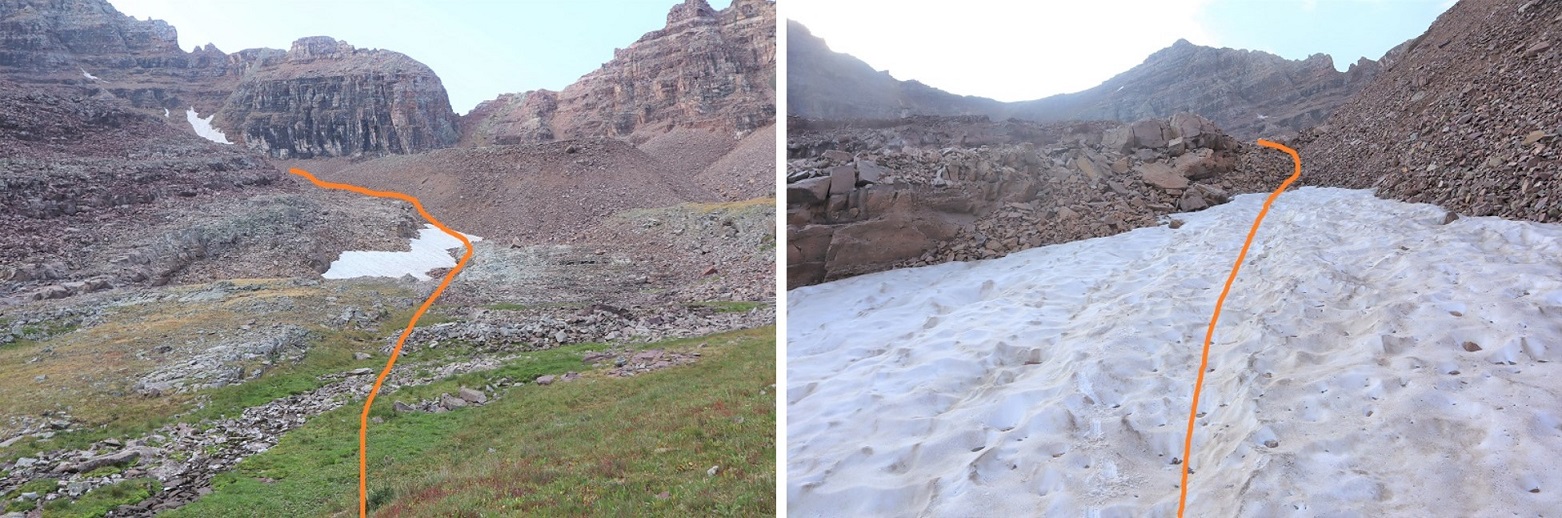
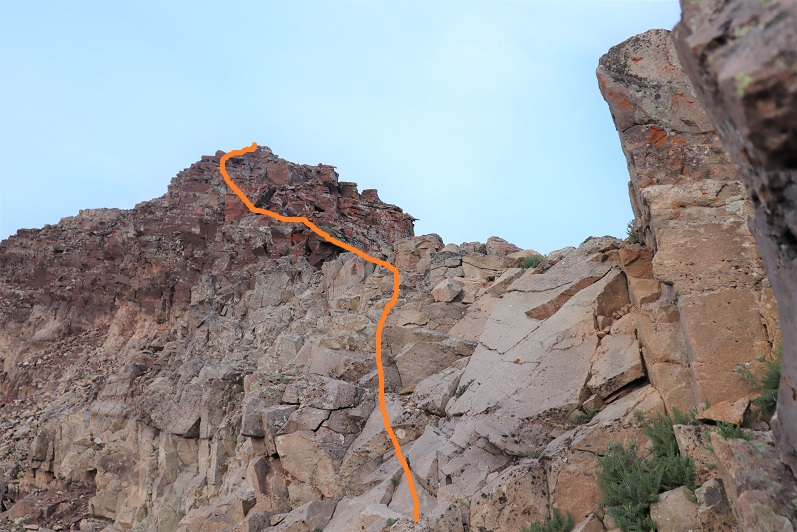
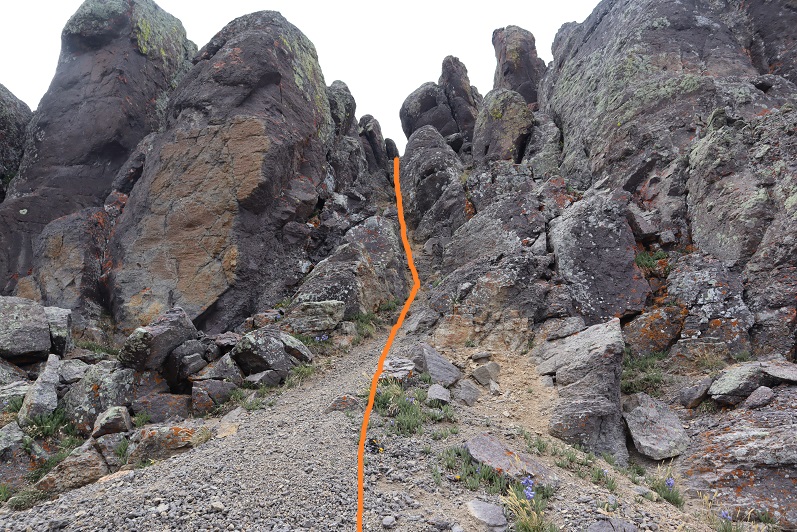
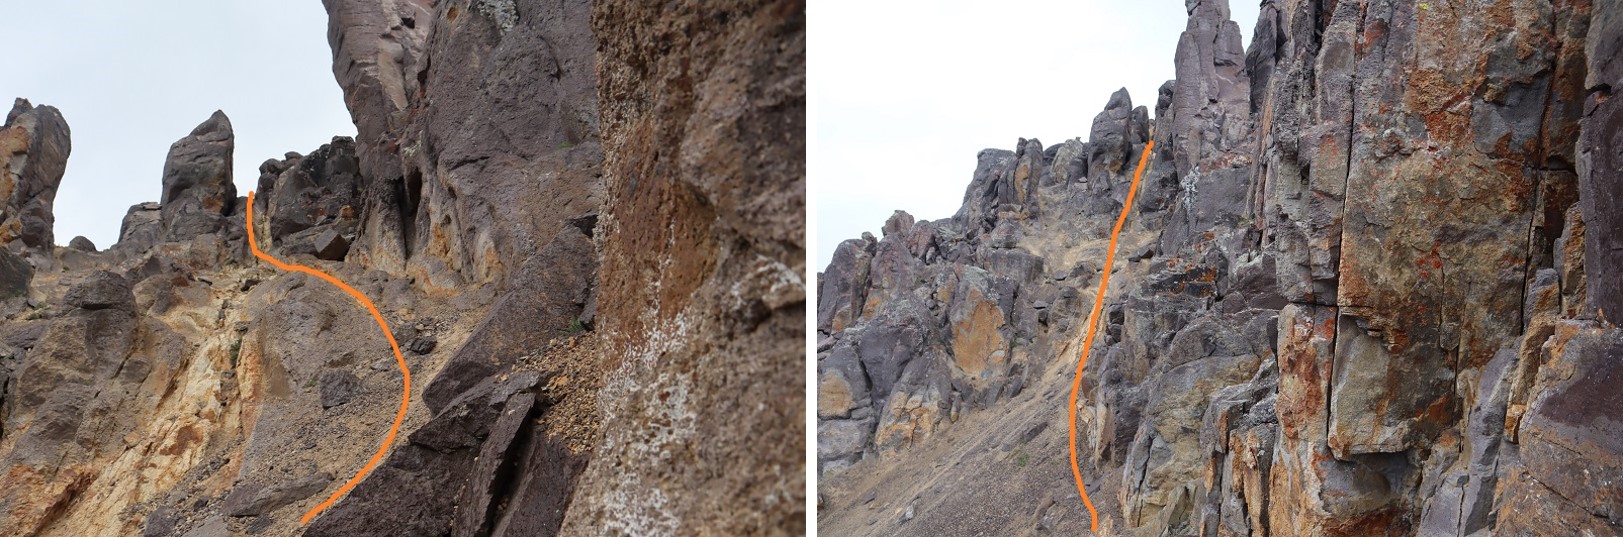
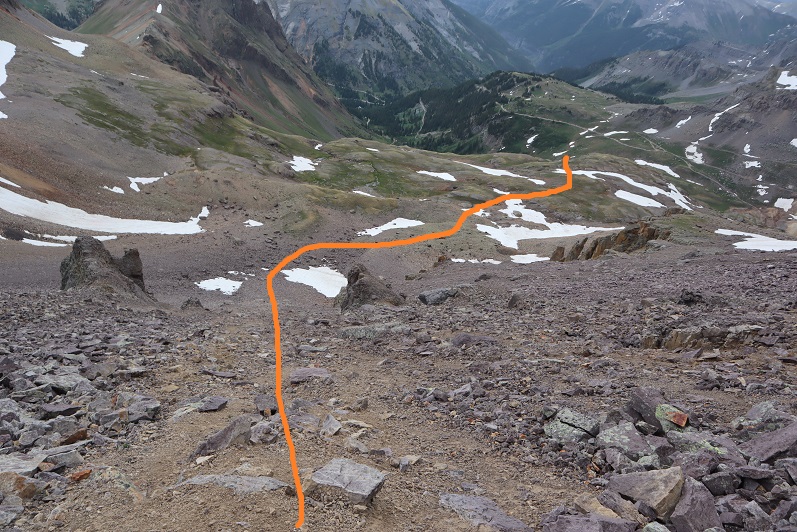
This trail was a bit fainter but still easy to follow. I headed northeast up the basin to a ridge. Here’s an overview of the route:
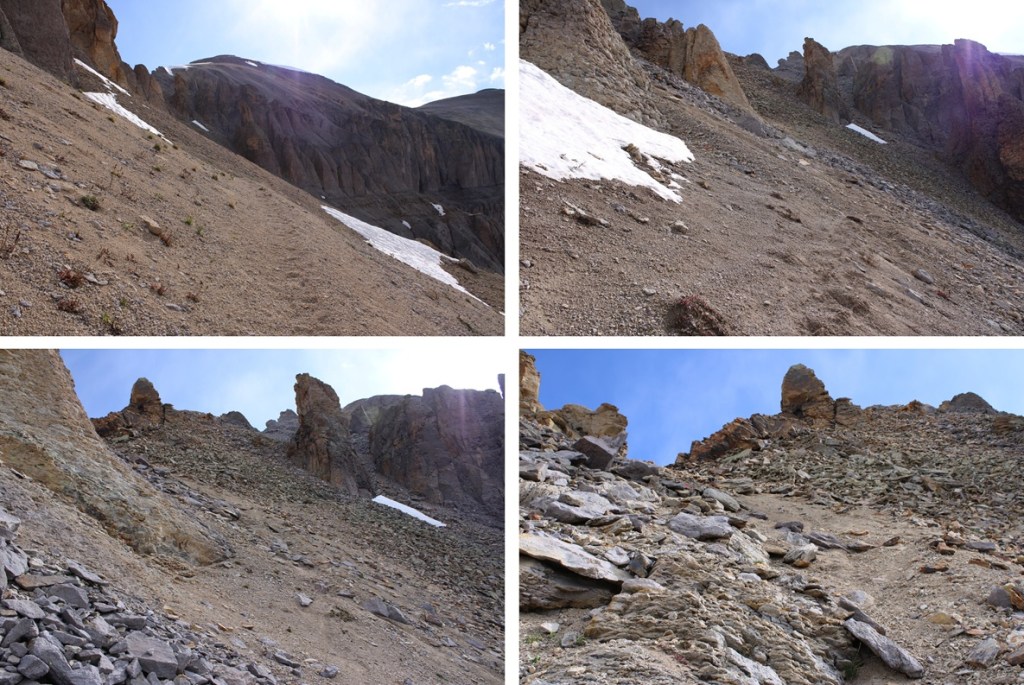
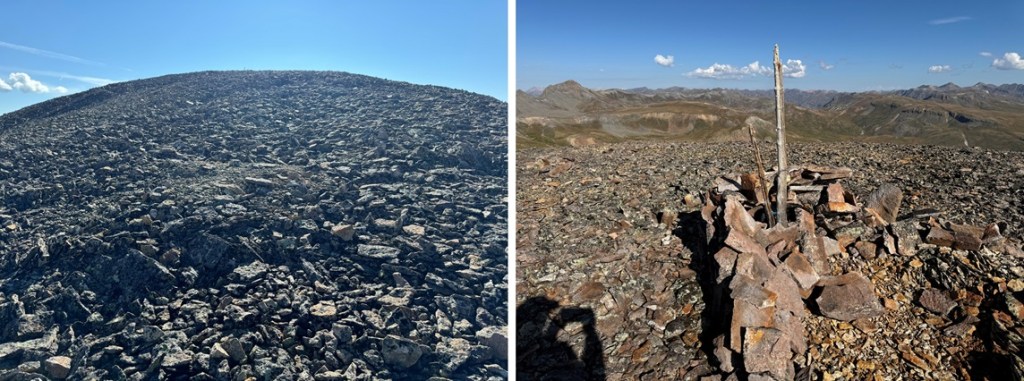
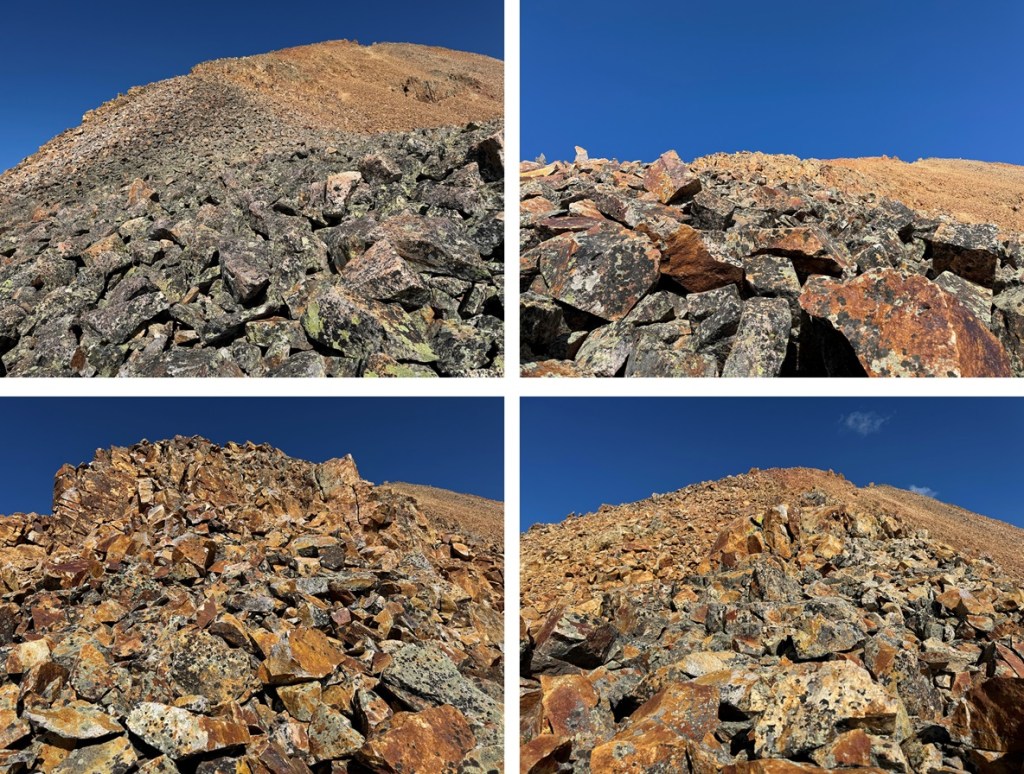
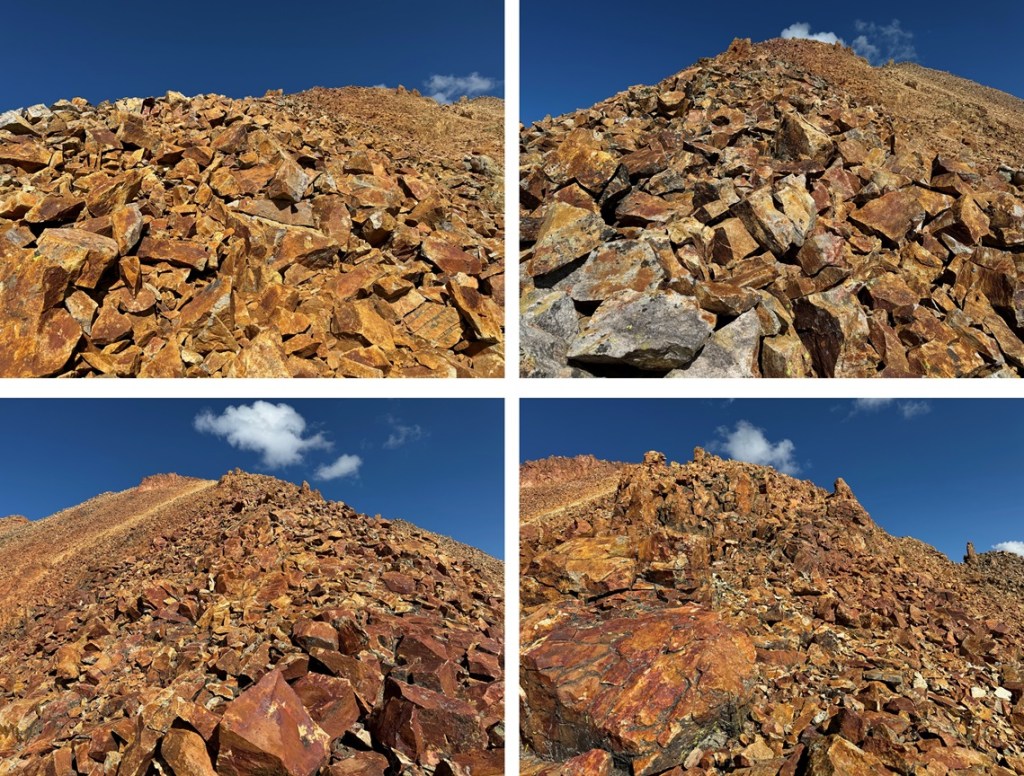
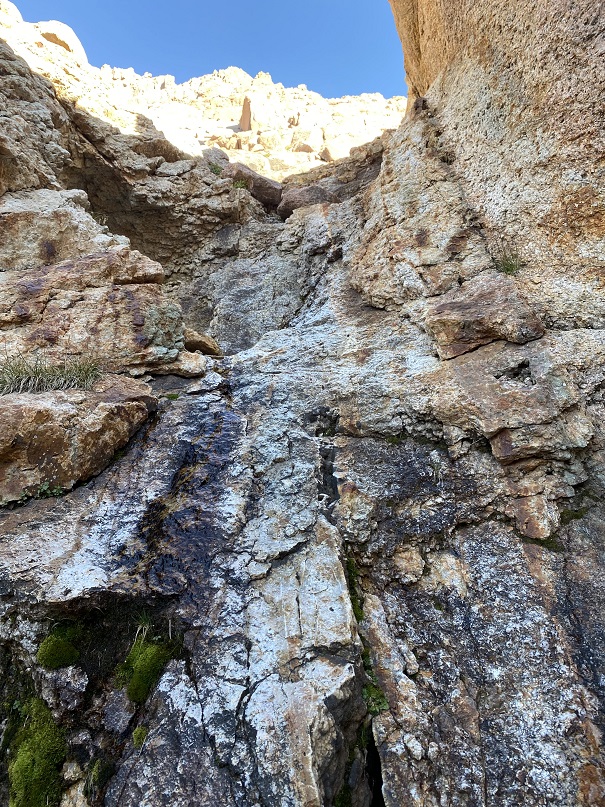
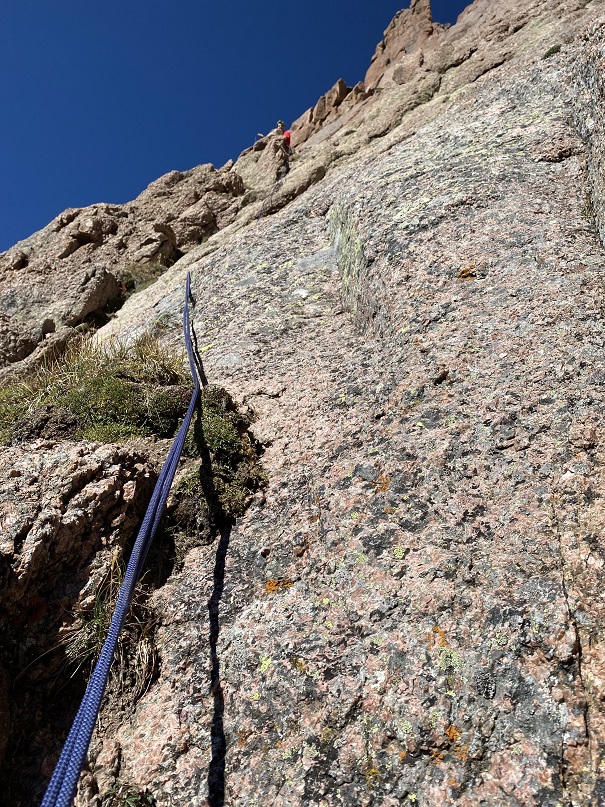
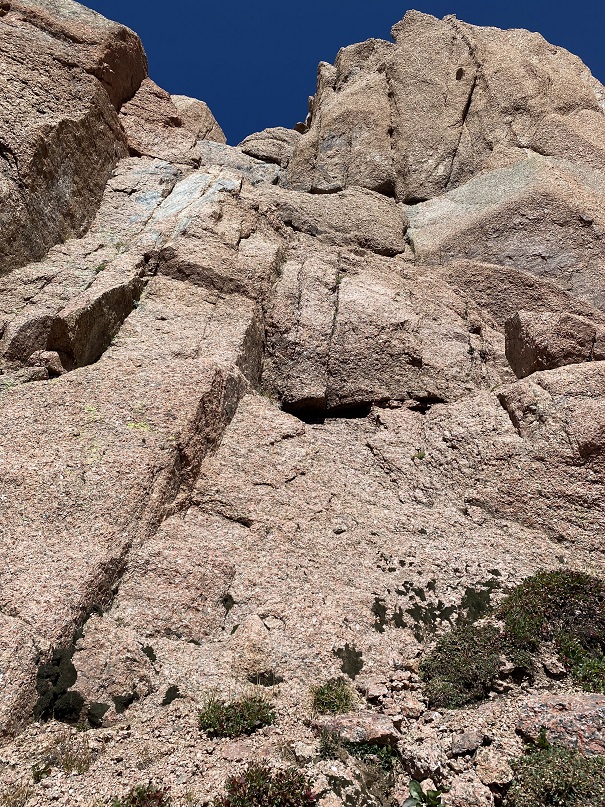
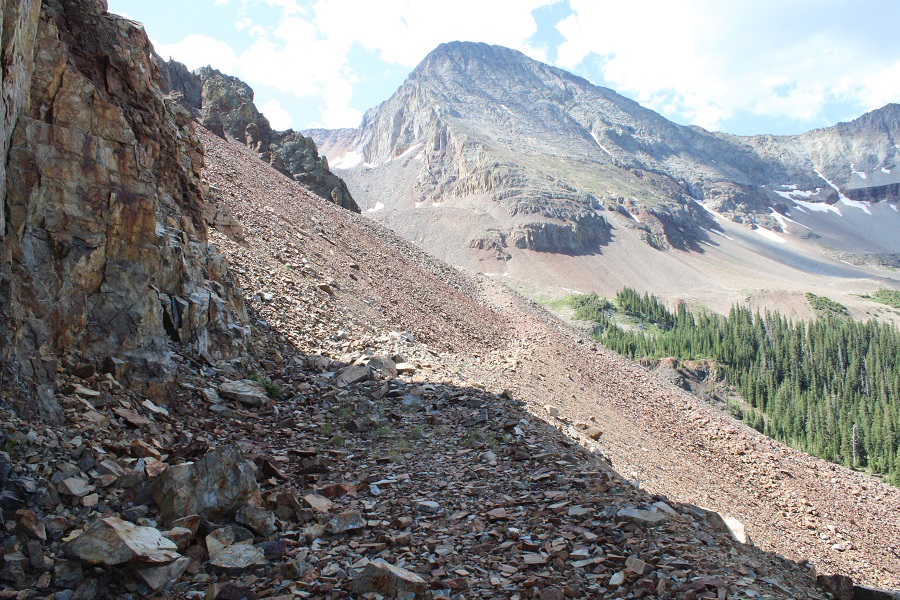
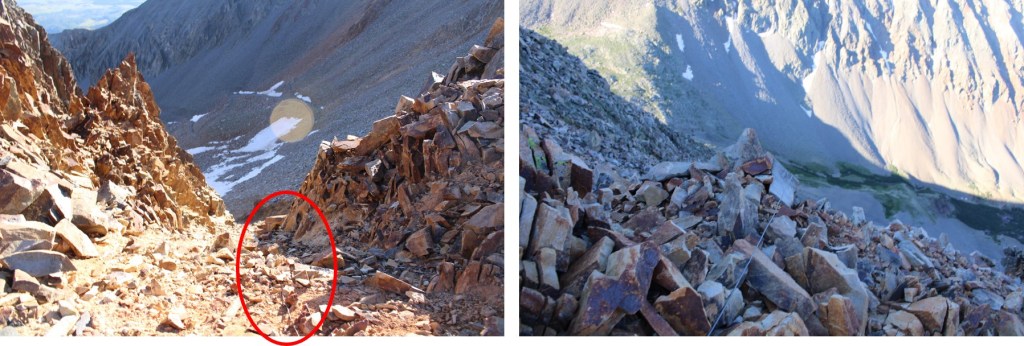
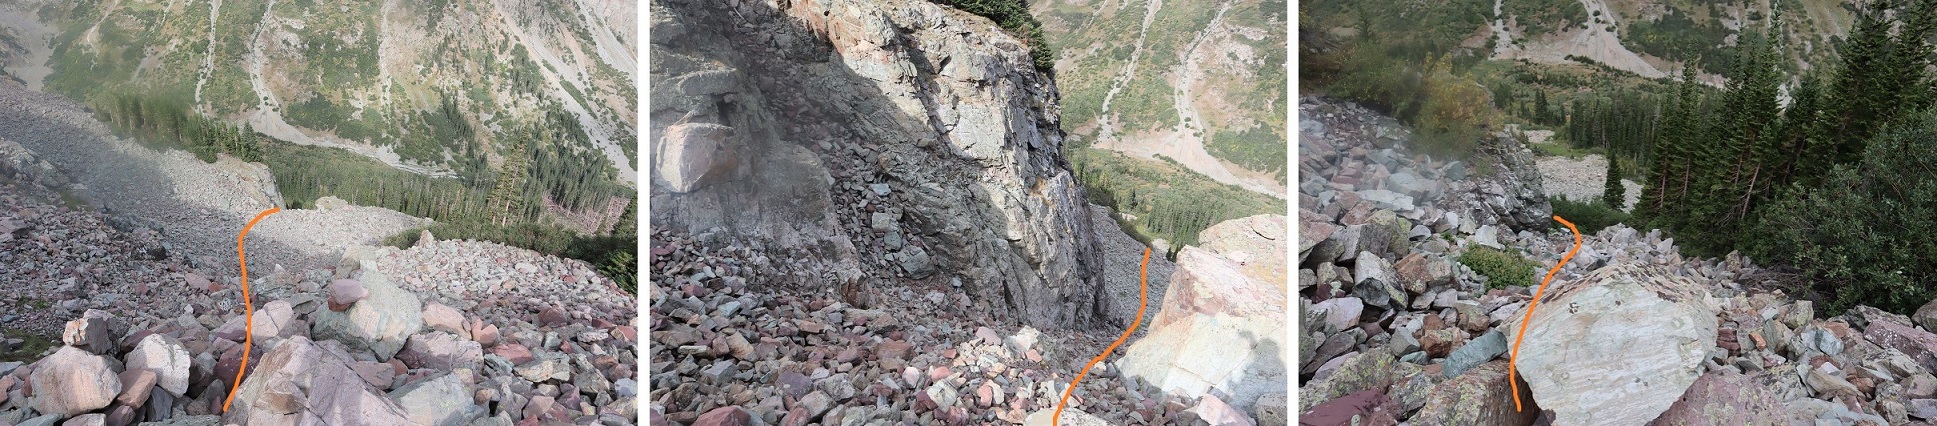
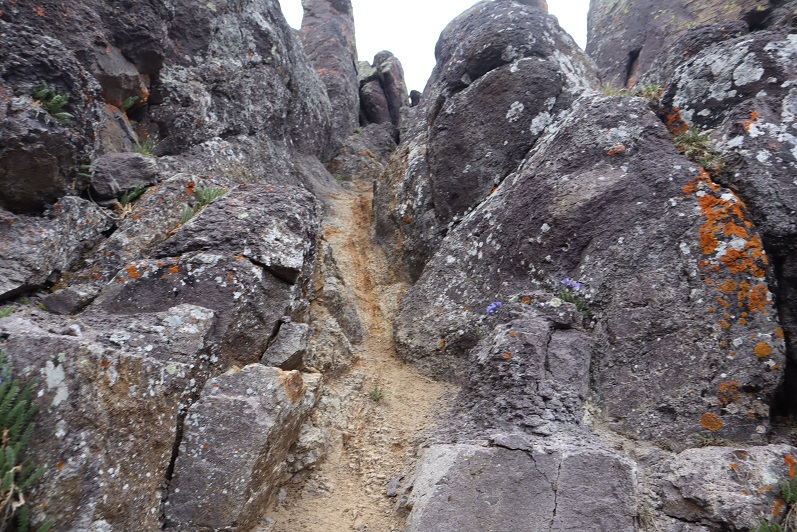
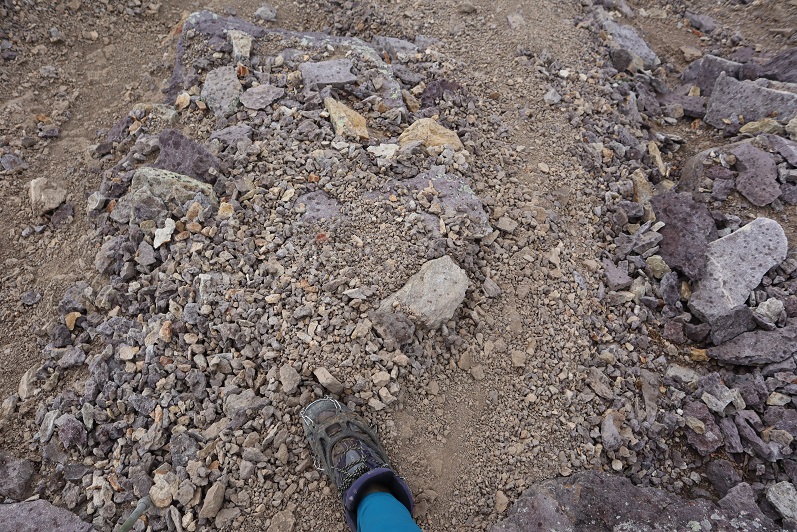
And some pictures to that ridge. Here is where I put on my microspikes and kept them on to the summit. The trail in many areas looks like it has been washed out due to rockslides/snow and some of the areas are sketchy. Unstable scree abounds.
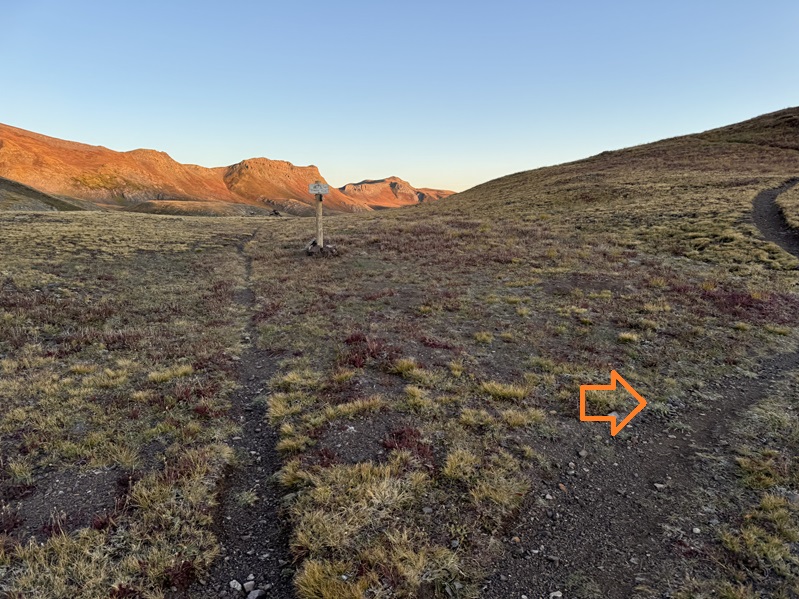
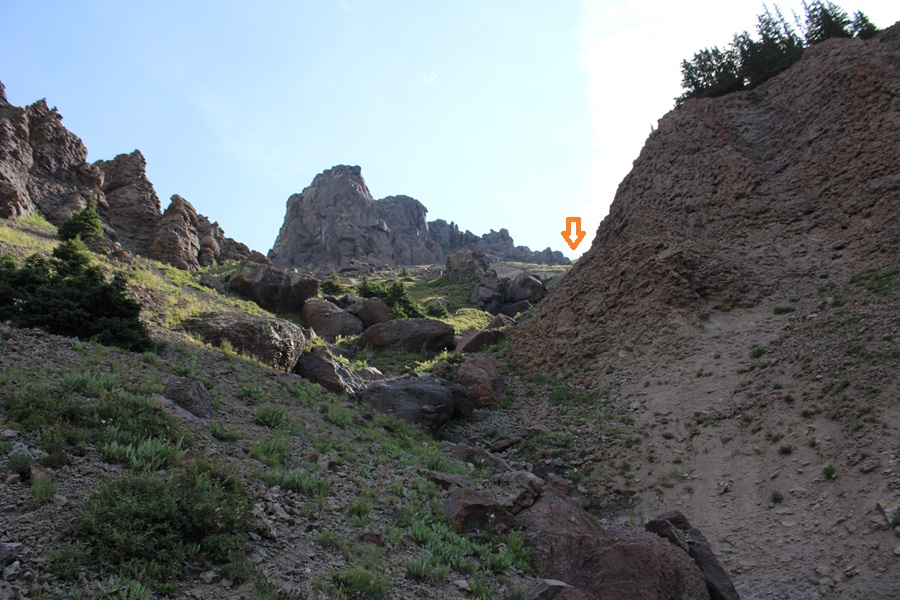
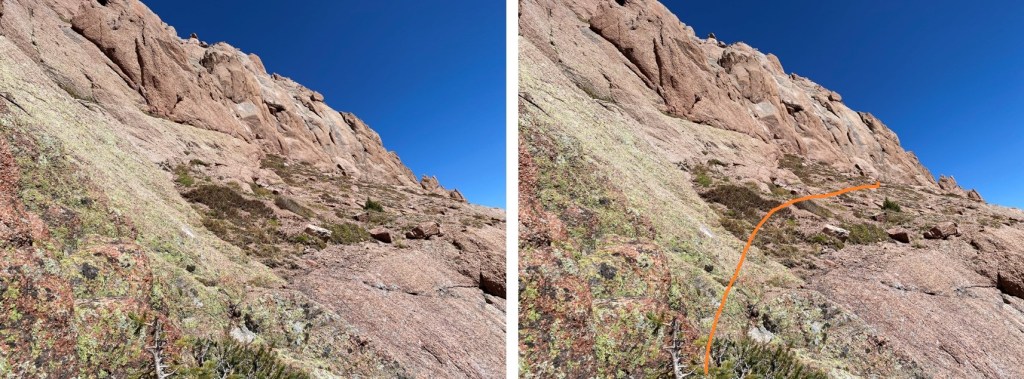
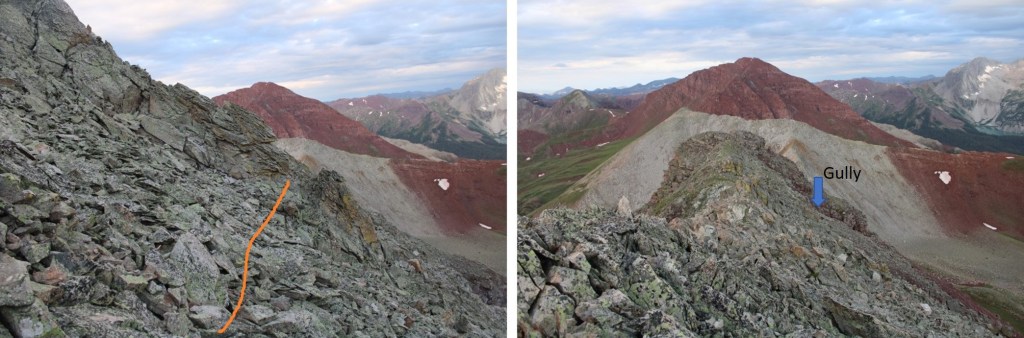
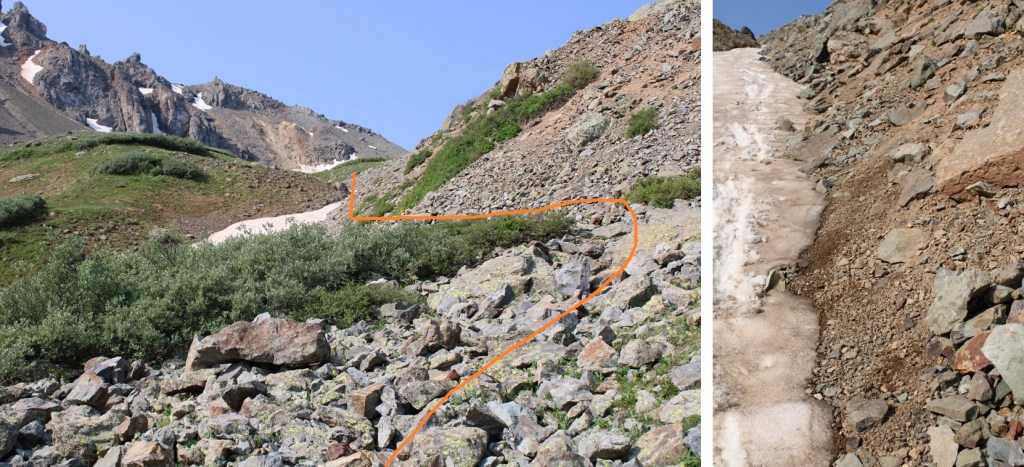
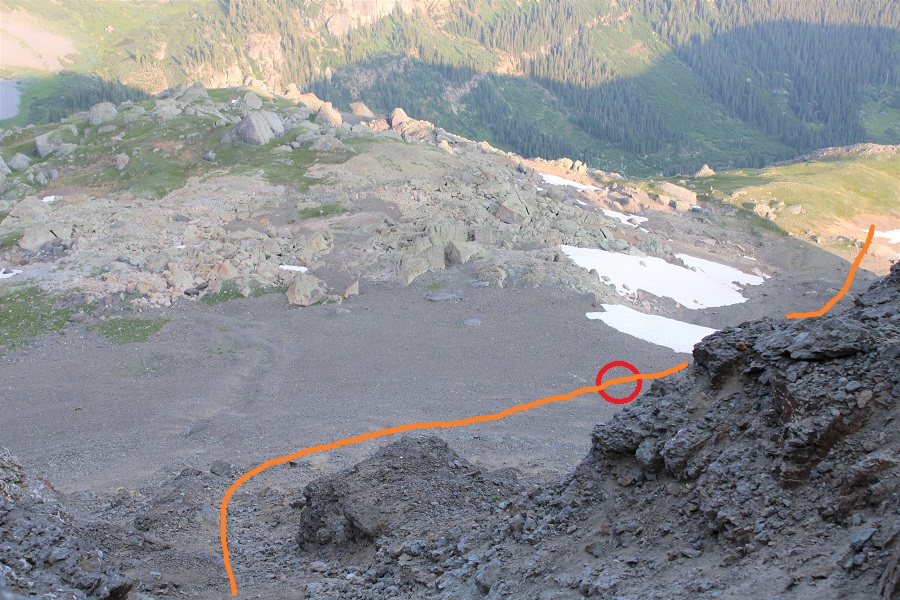
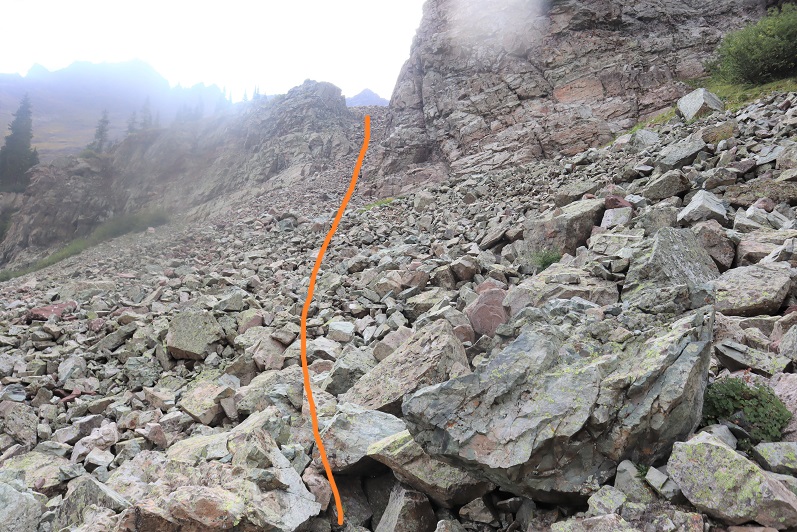
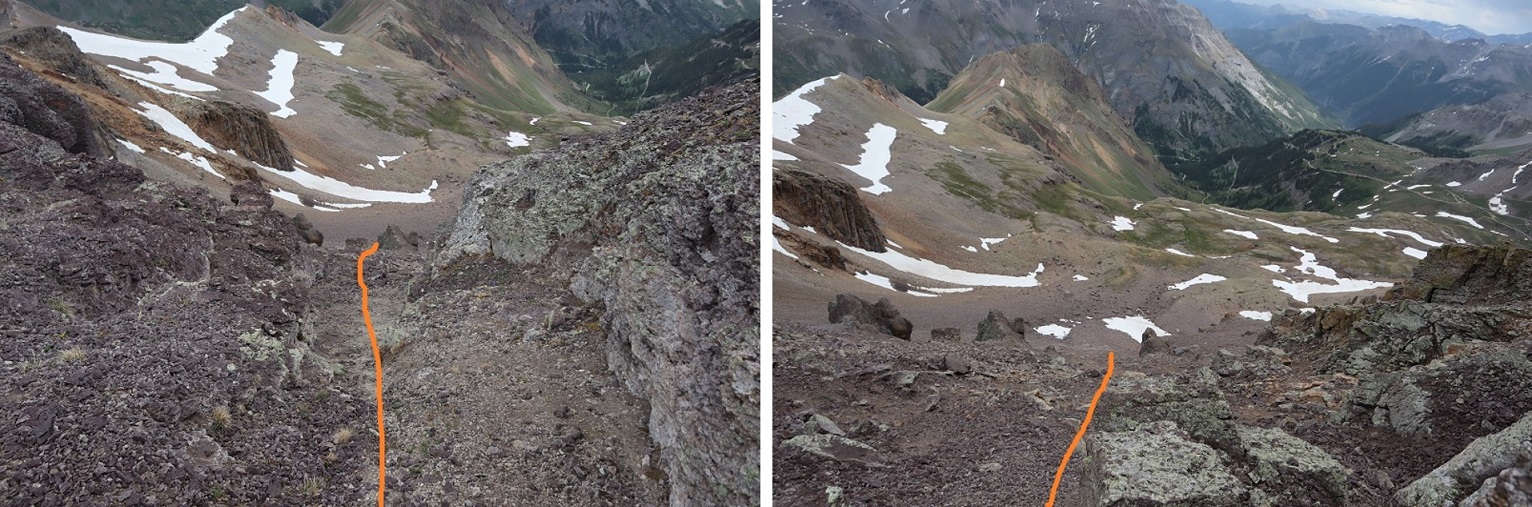
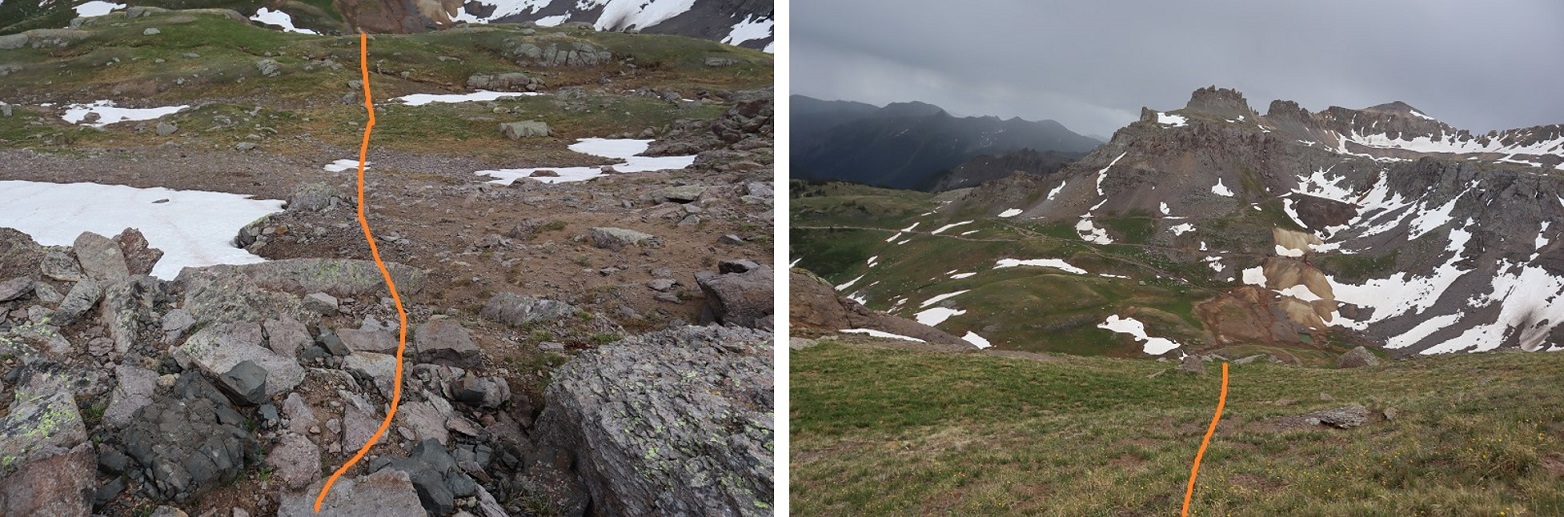
At the top of this ridge the trail turned and started heading northeast, rounding down into the basin and then gaining the ridge.
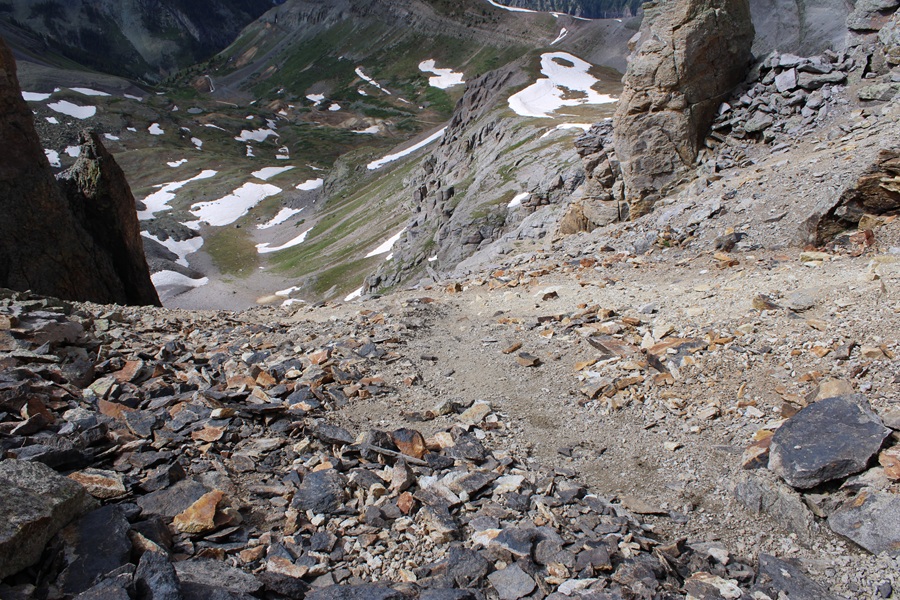
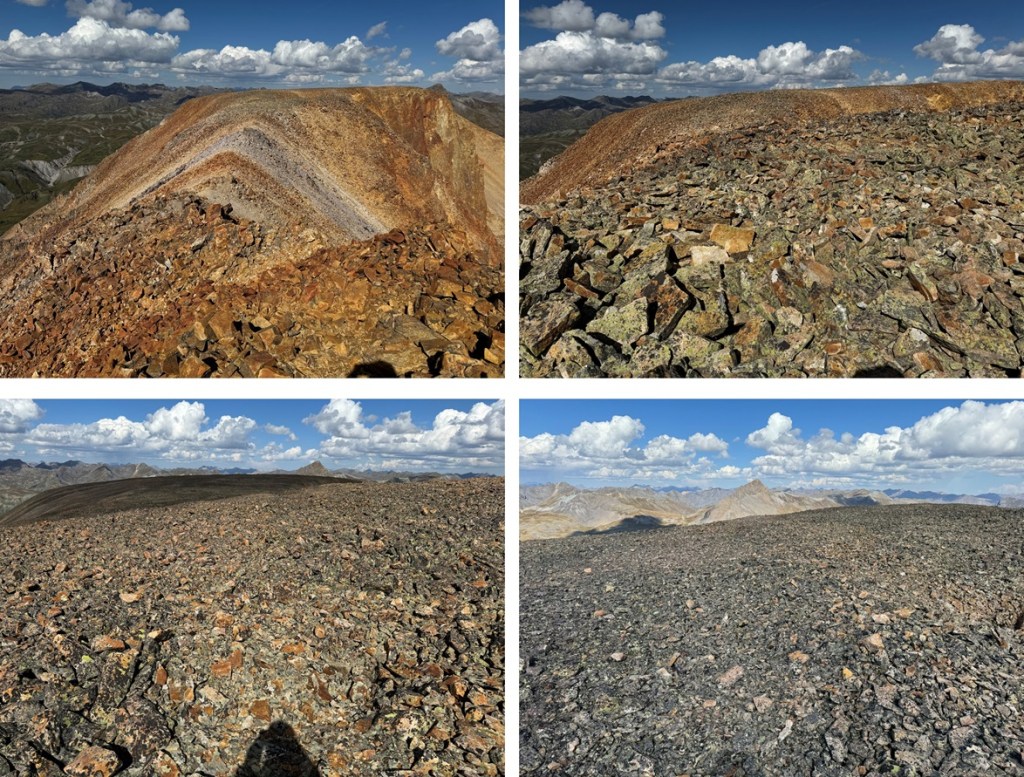
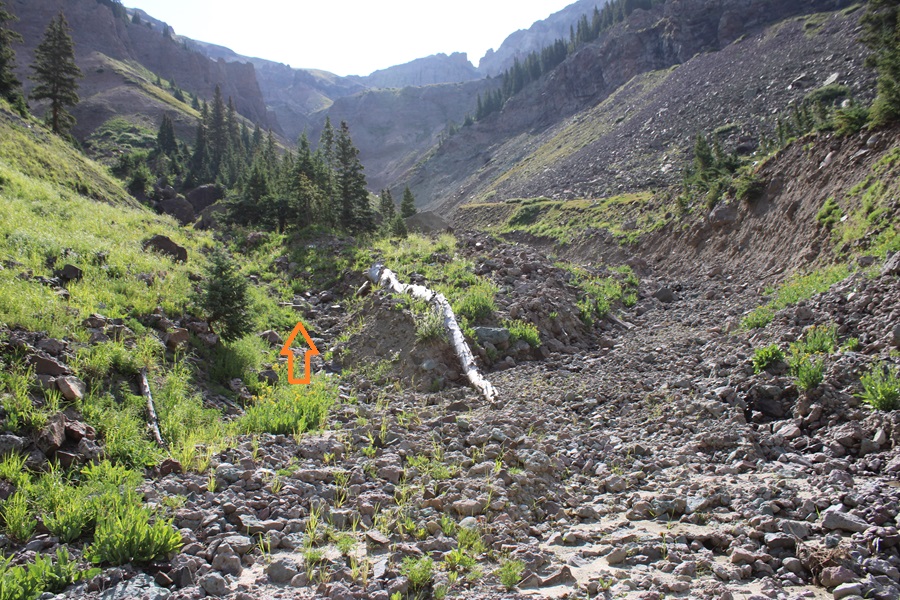
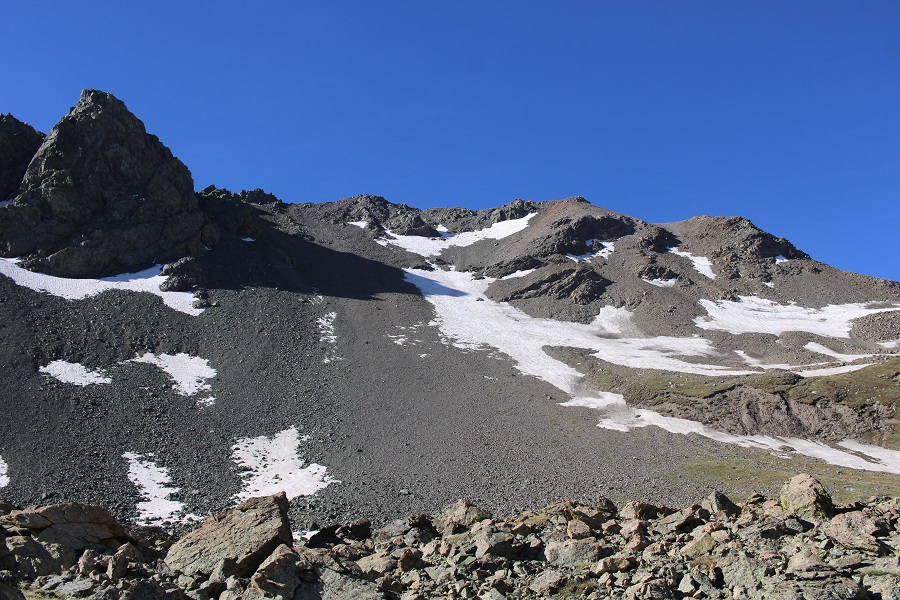
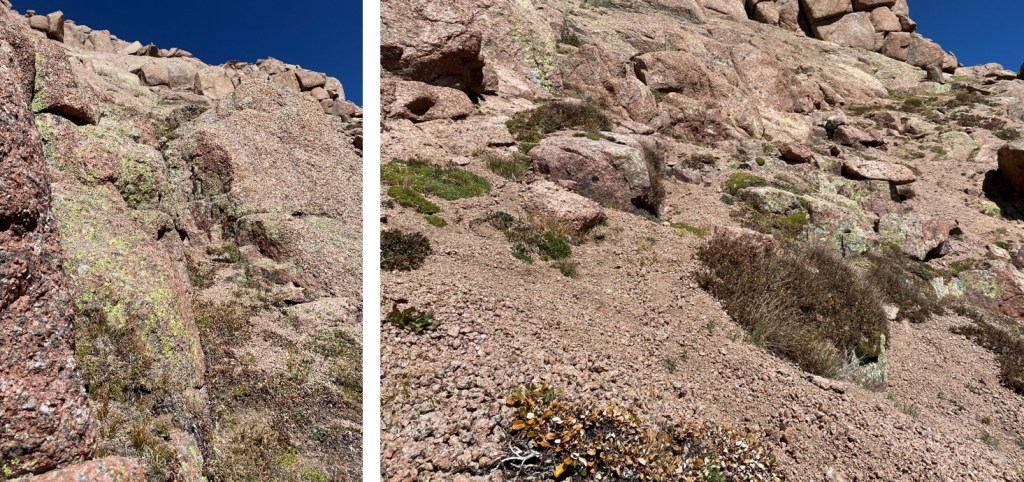
Here’s an overall picture of where you’re headed. There’s a good trail to get you to the base of a gully in the distance (but still keep an eye out for loose rocks/scree).
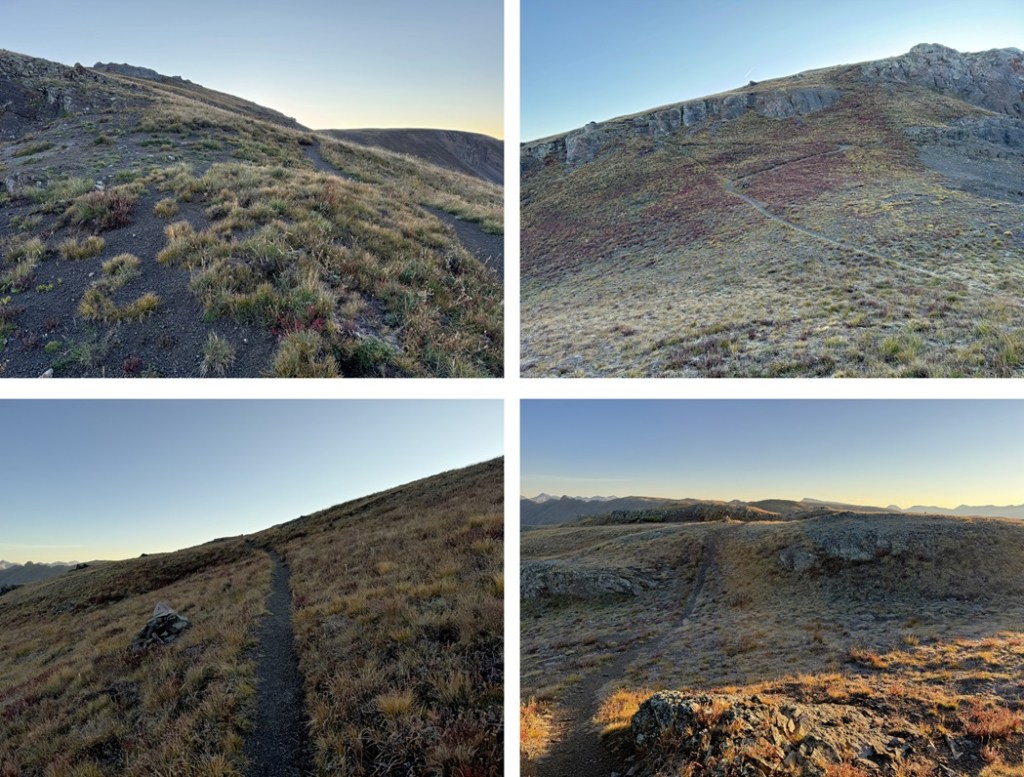
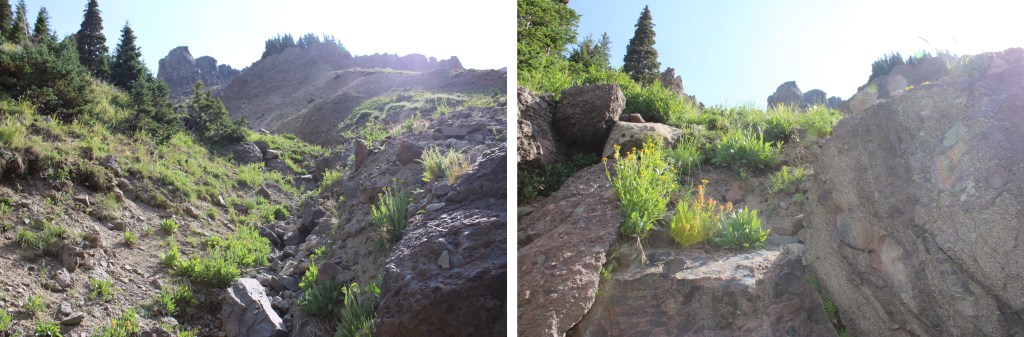
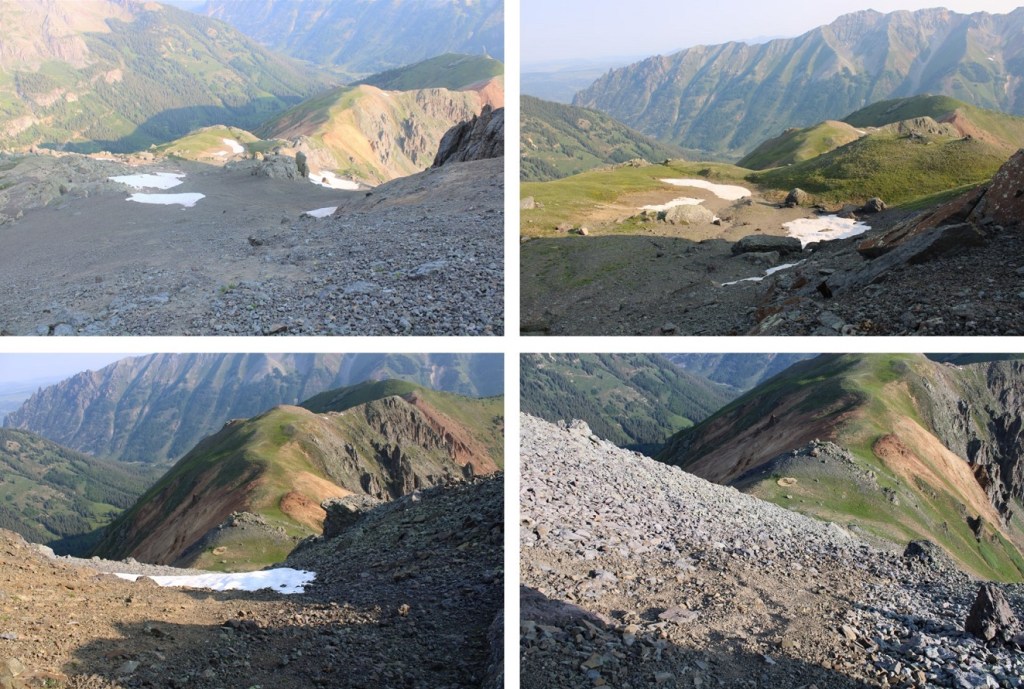
And some pictures along the way to the small gully
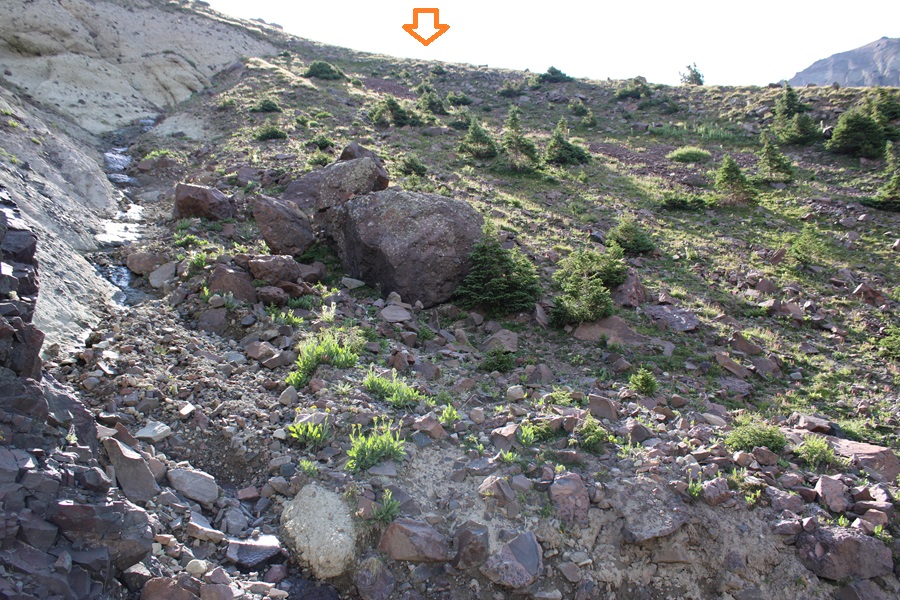
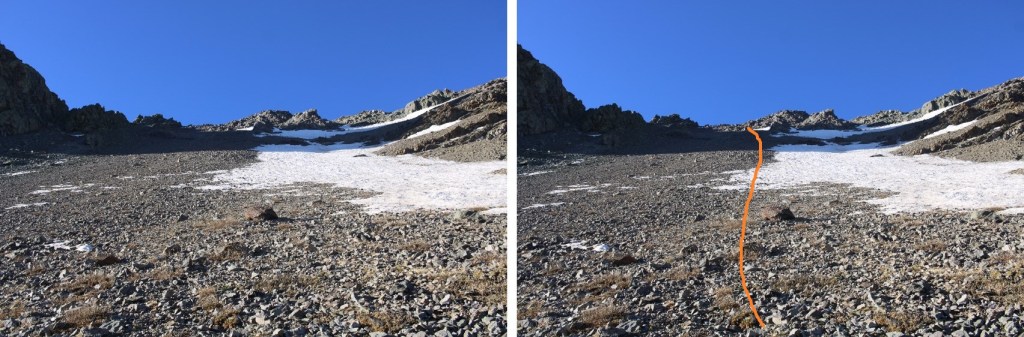
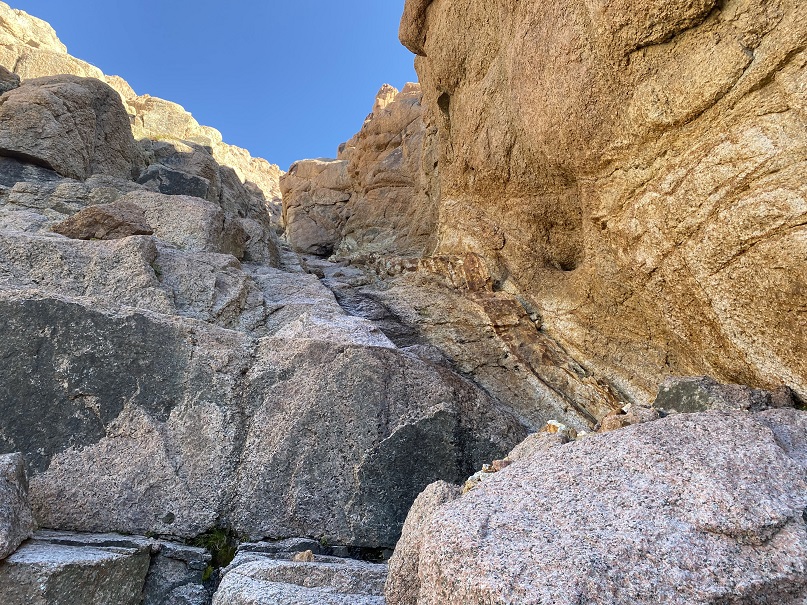
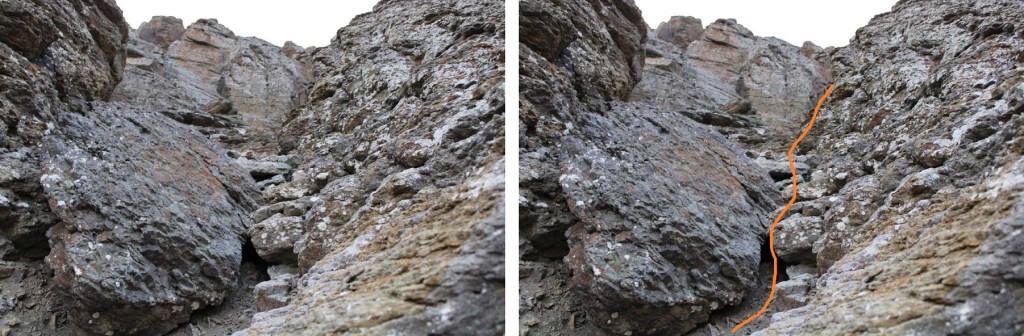
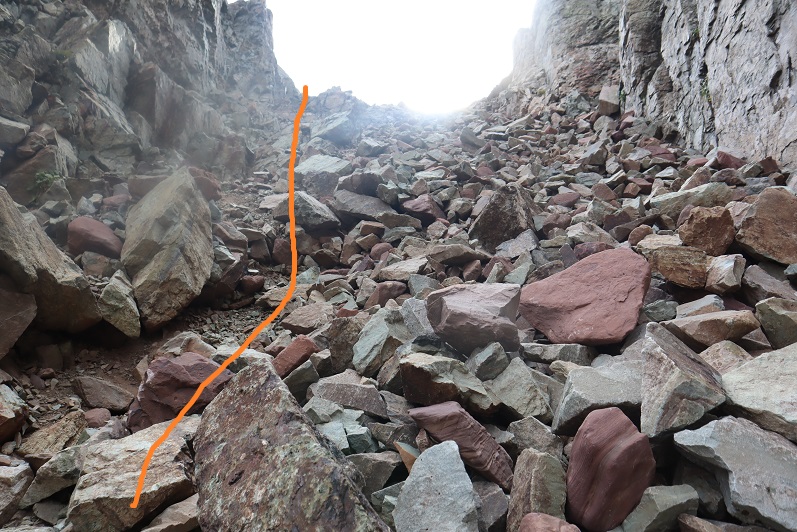
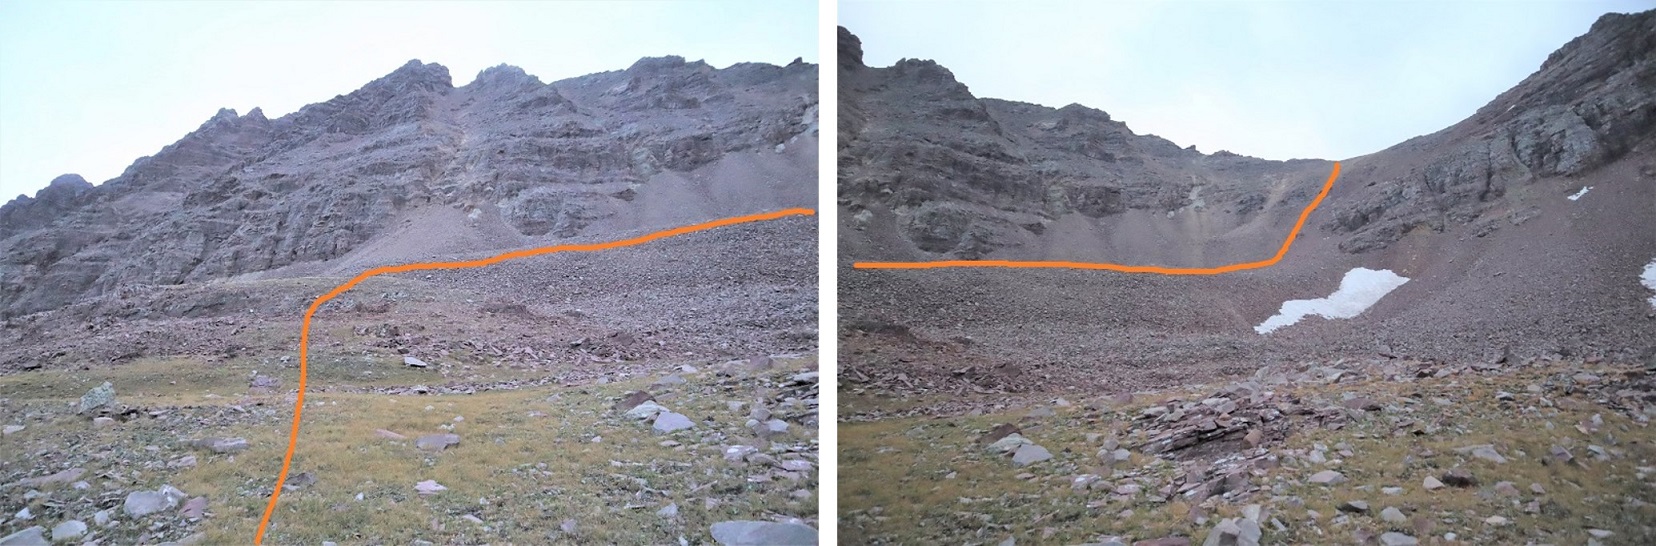
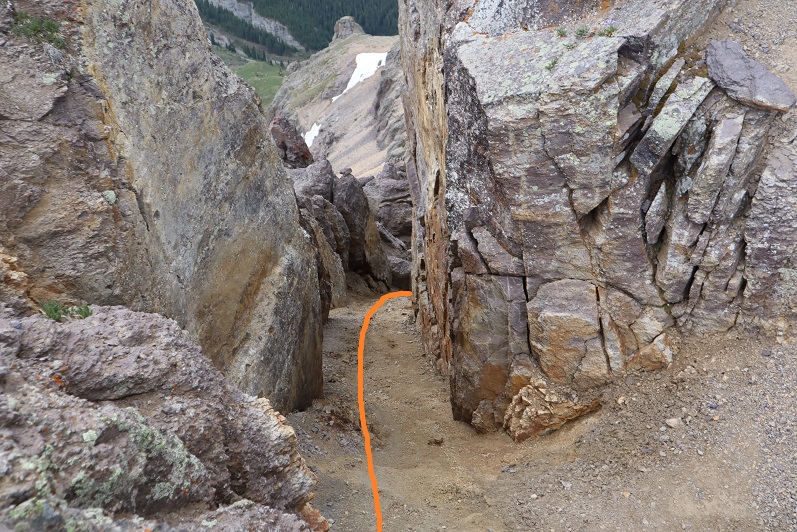
It’s obvious where to ascend the gully, as the trail stops. I turned and headed north to the ridge. The gully isn’t very long, maybe 100 feet or so of elevation gain.
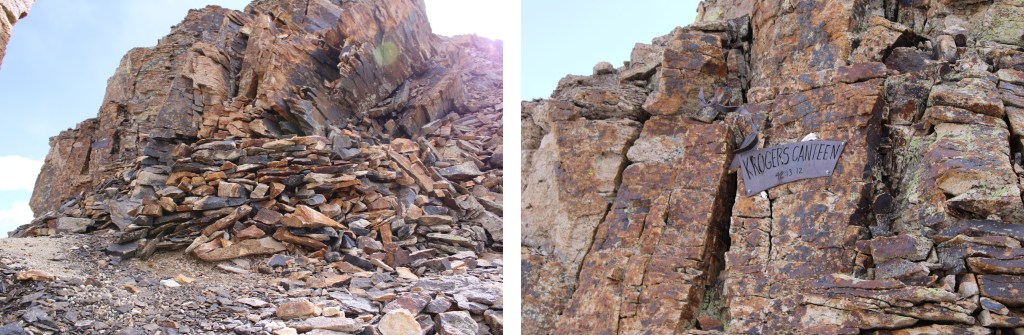
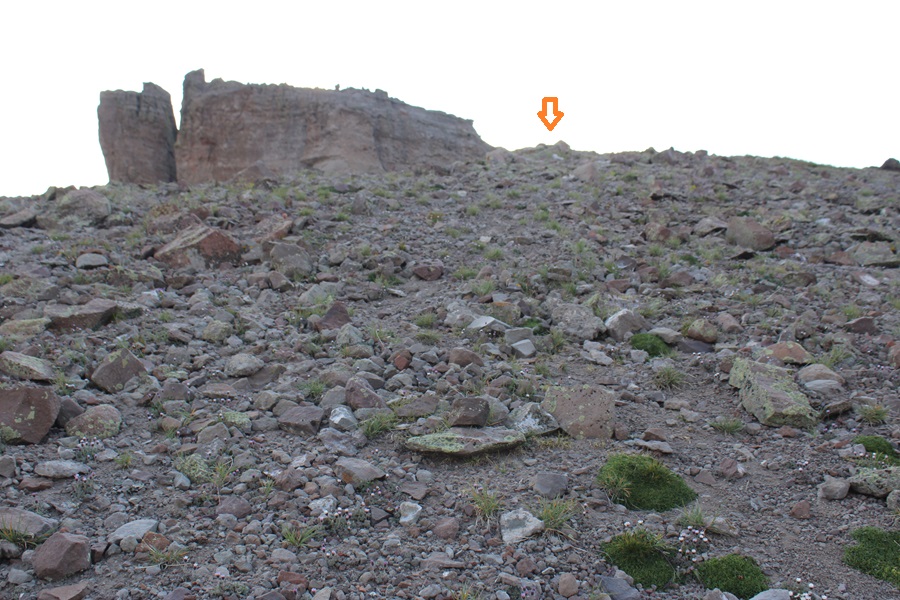
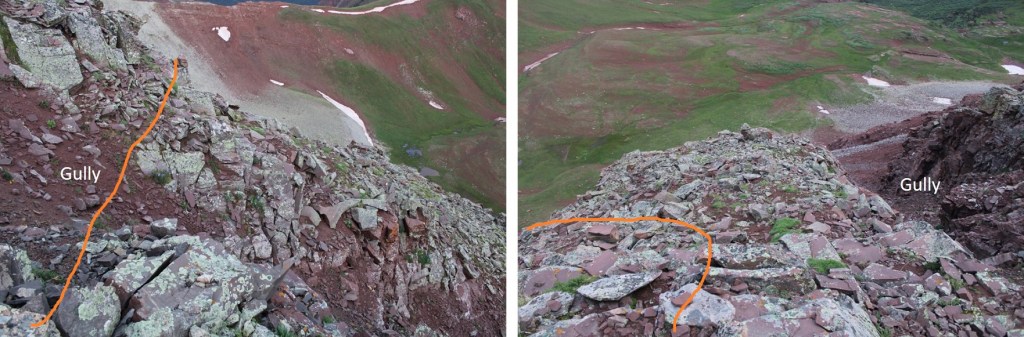
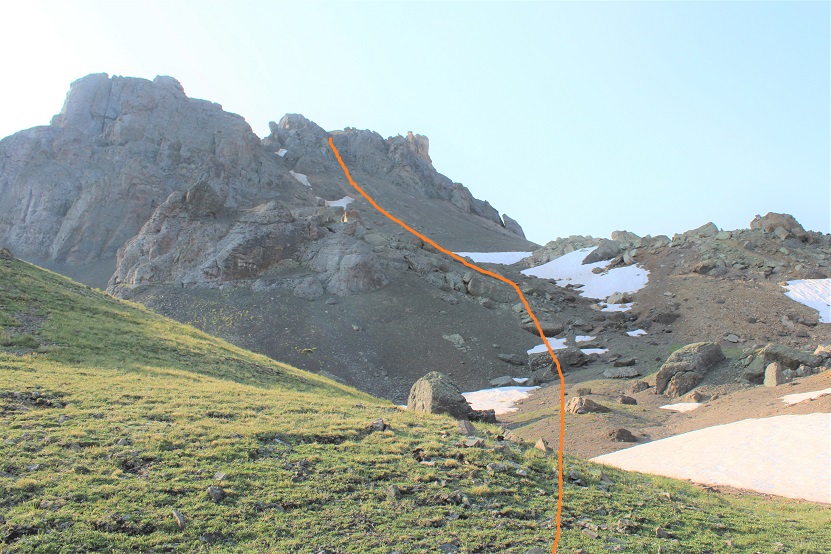
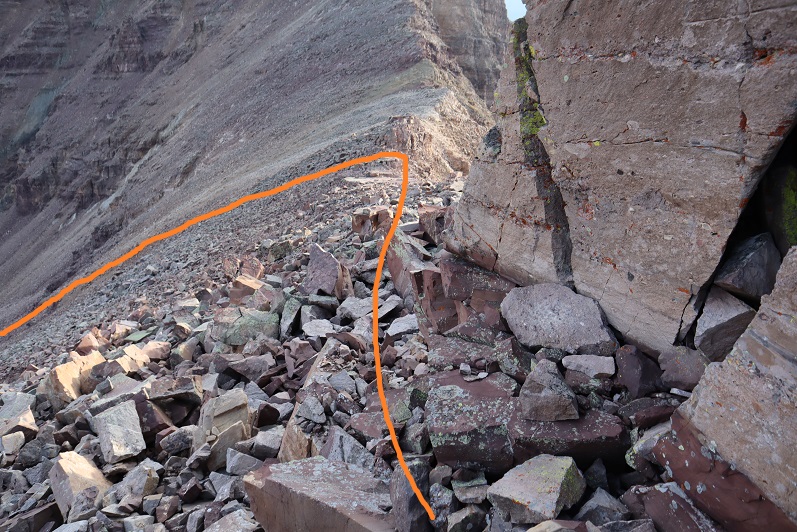
At the top of the gully is a wind break made out of rocks, and a sign that says “Krogers Canteen”. There were also beer bottles on the ground that hadn’t been opened (but were only halfway full).
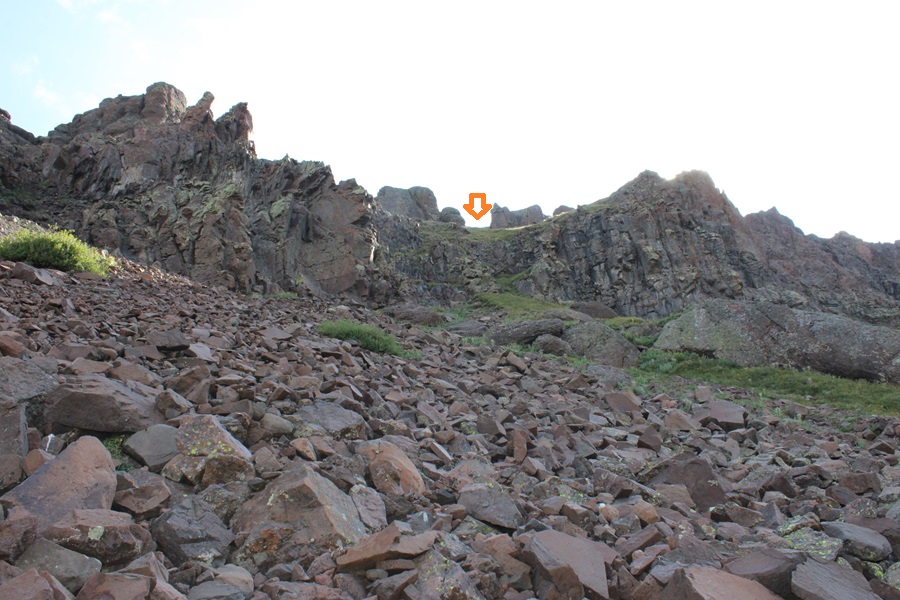
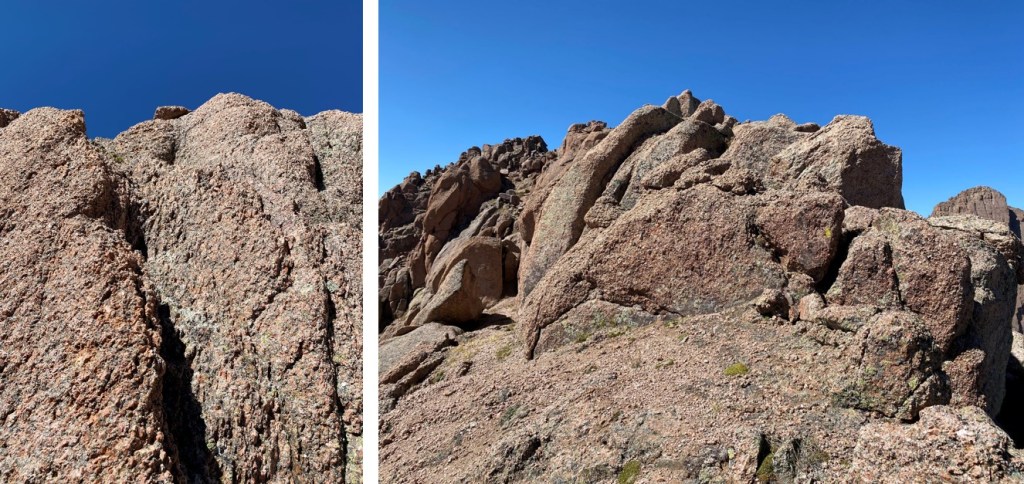
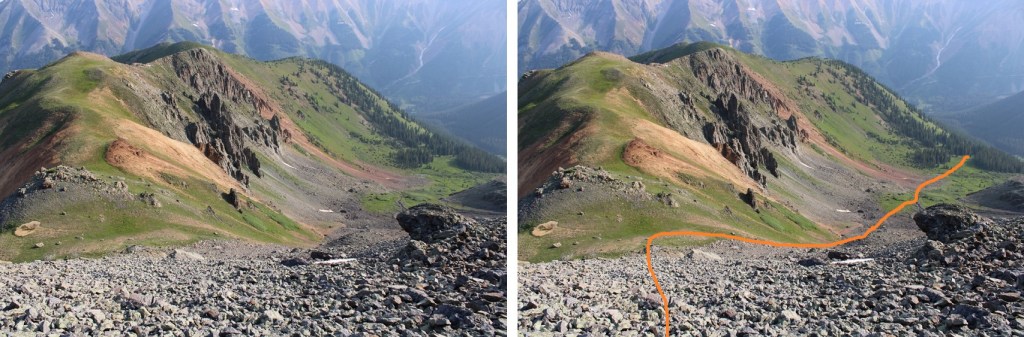
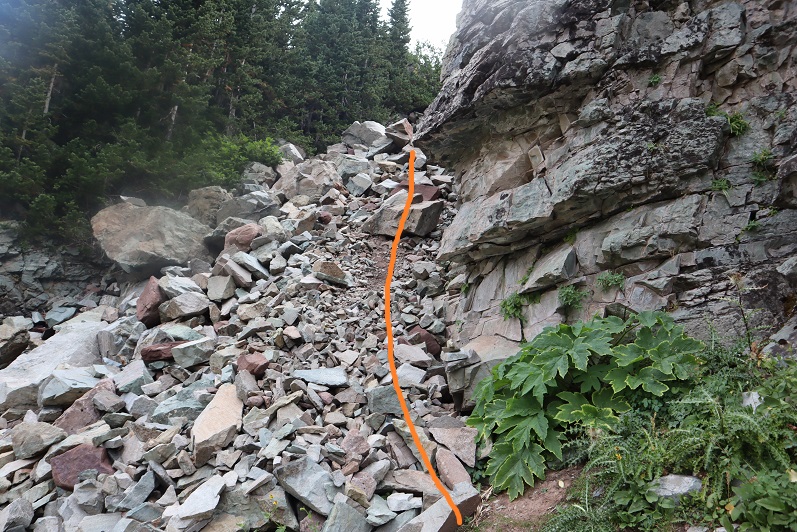
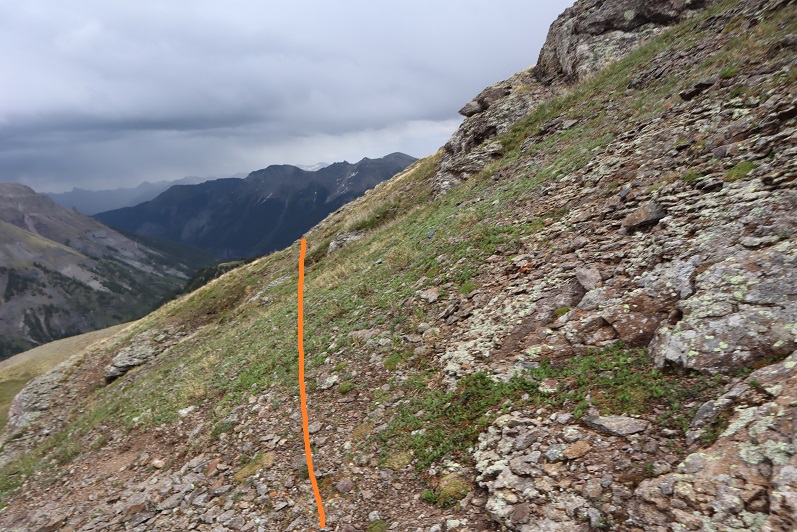
I walked through the wind break and followed the ridge east
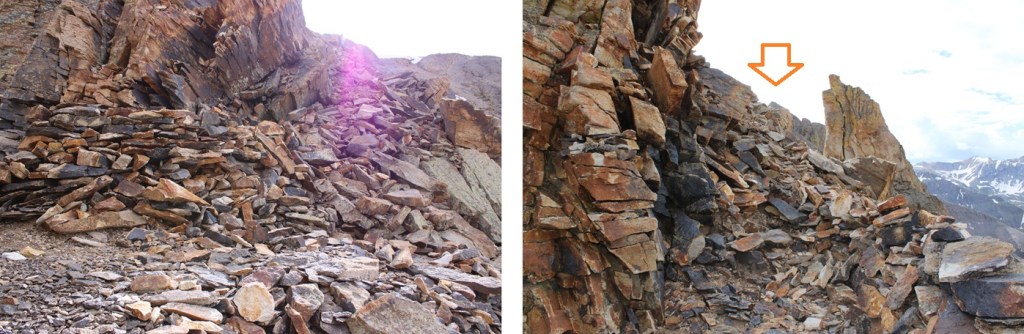
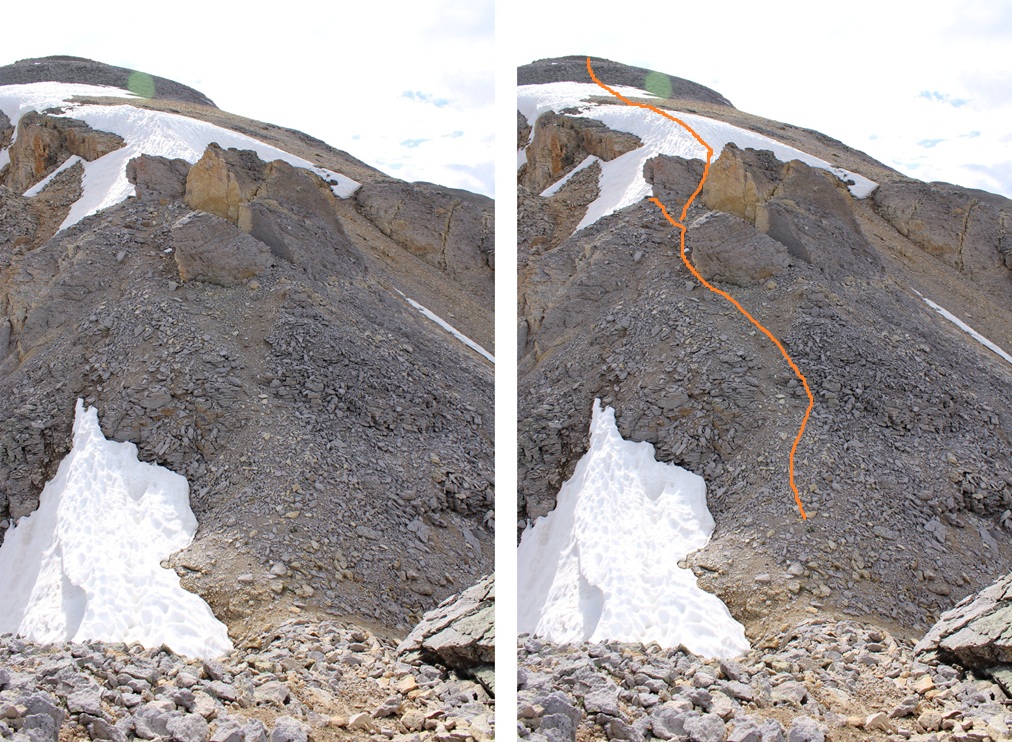
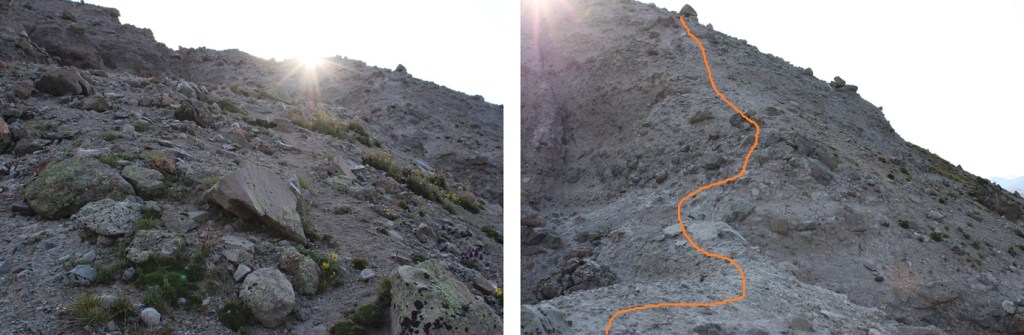
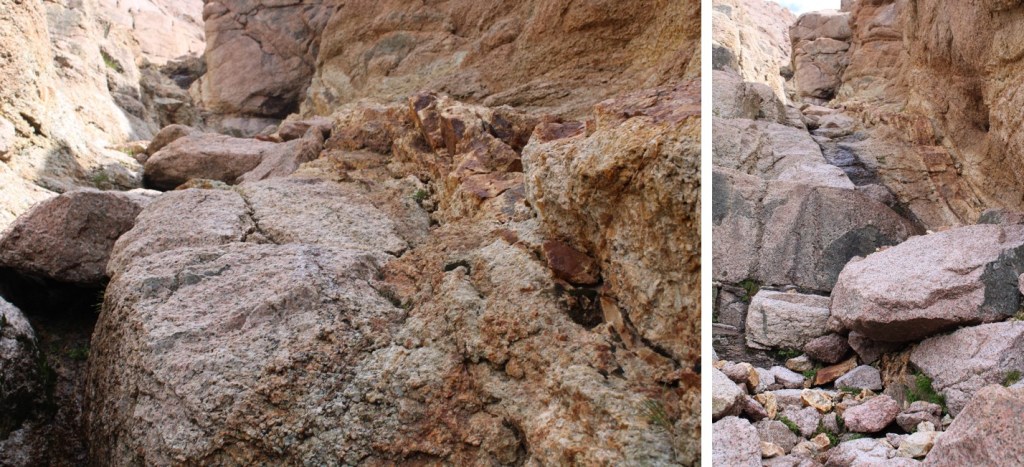
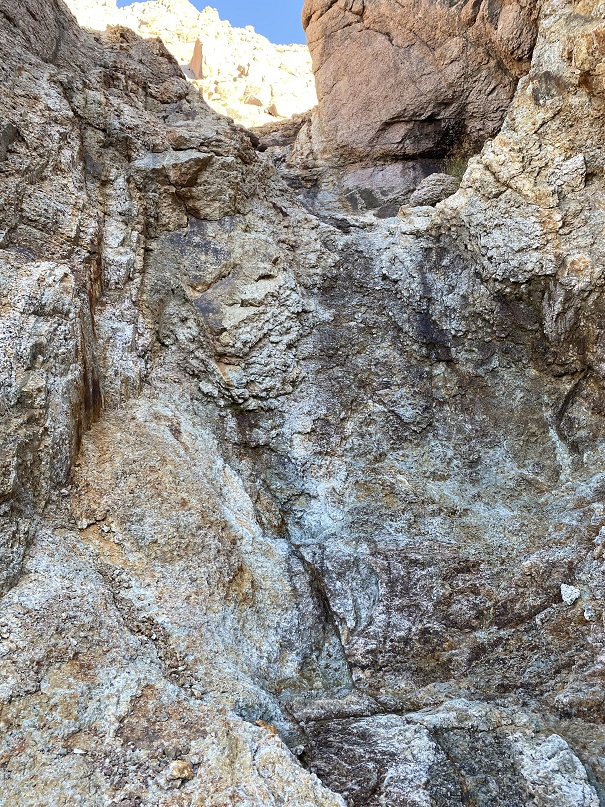
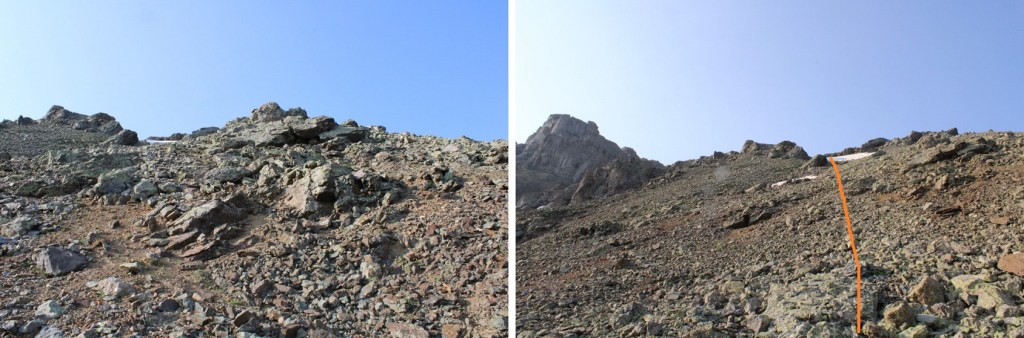
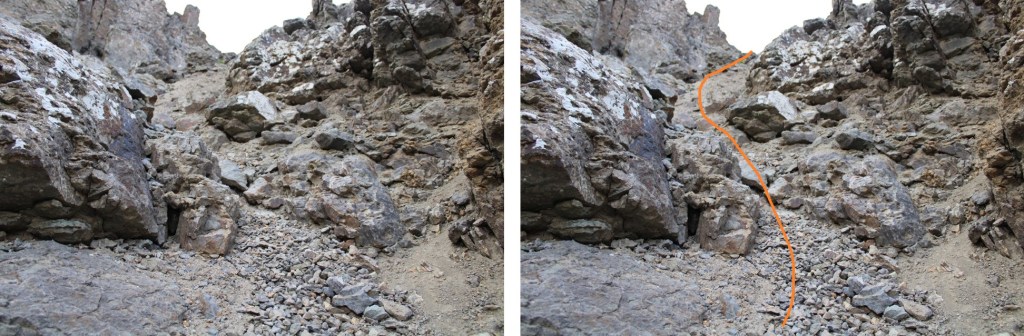
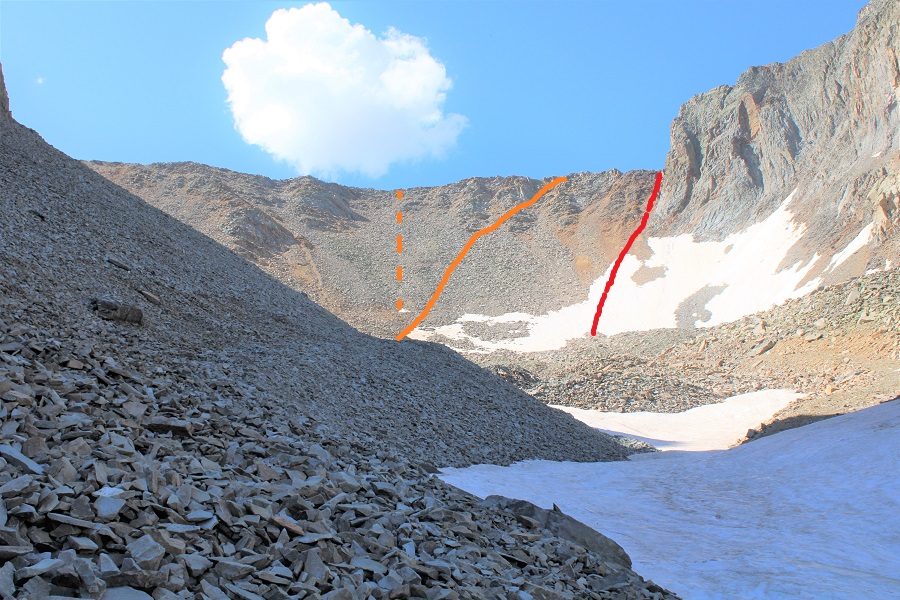
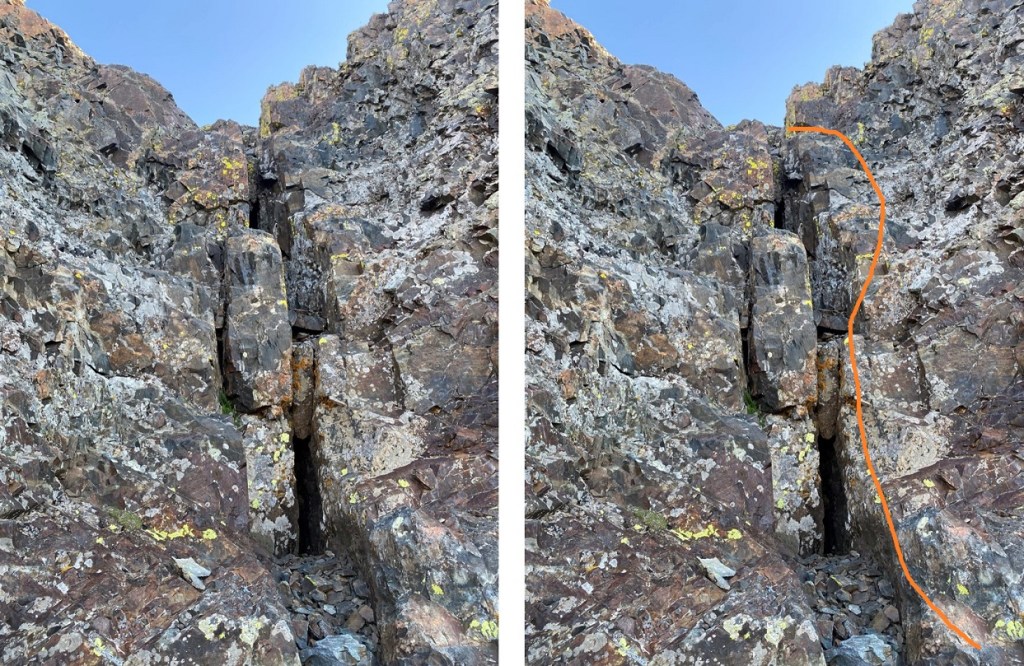
This is what I considered the “spiciest” part of the route. I’ve outlined the route up, but recent rockfall has made this area especially unstable. Scree-valanches will start from underneath you and rocks will fall like an hourglass from above and below. It looks like there used to be an easier way to ascend, but recent rockfall has changed the route. There are parts of what used to be a trail here.
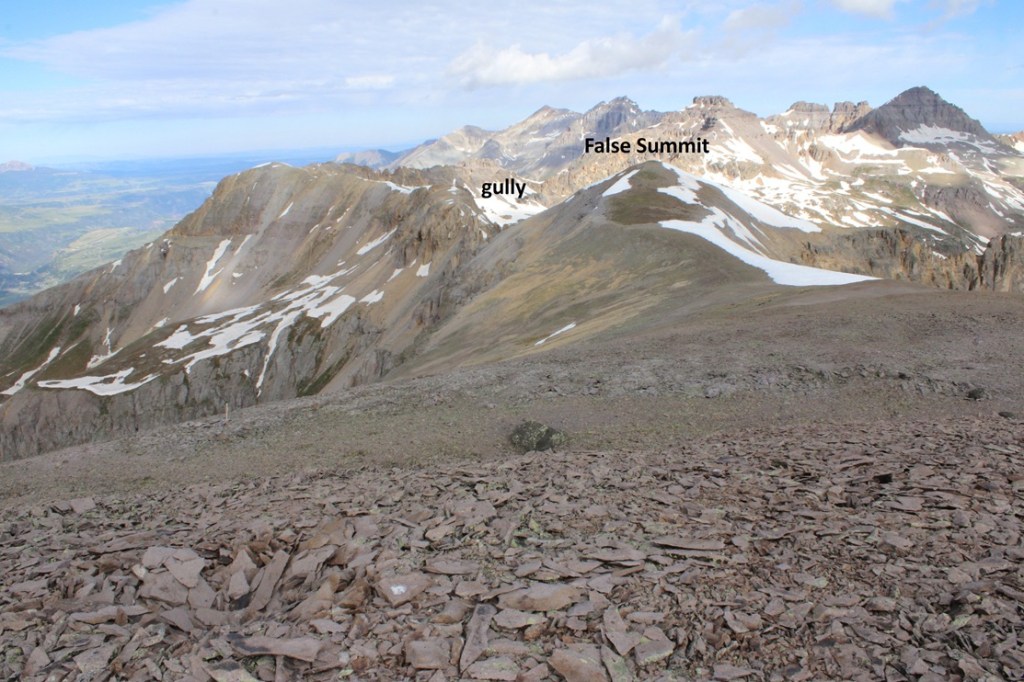
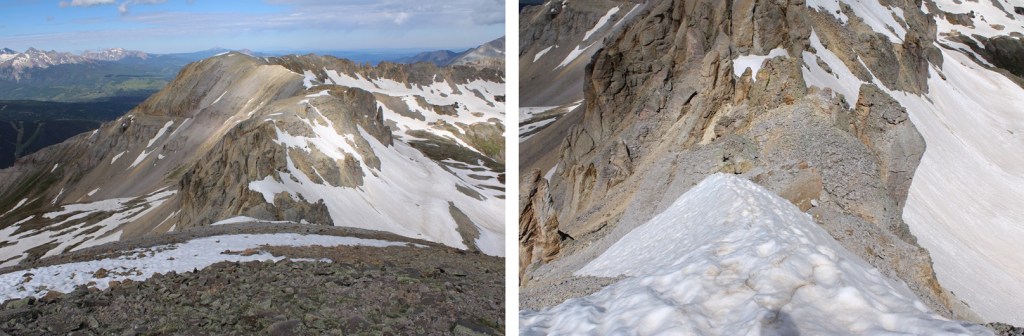
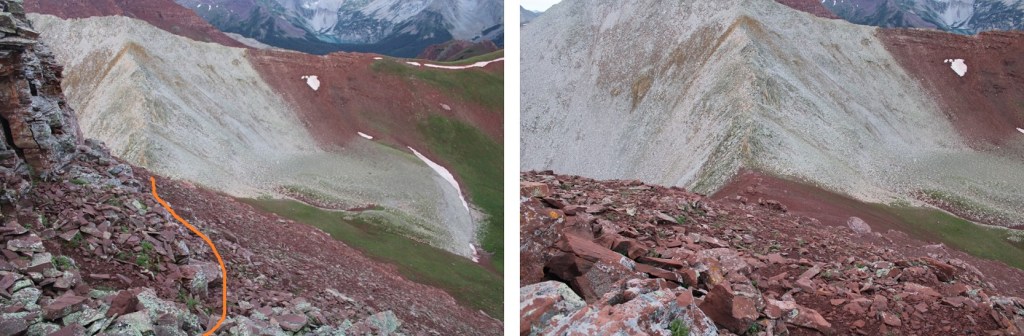
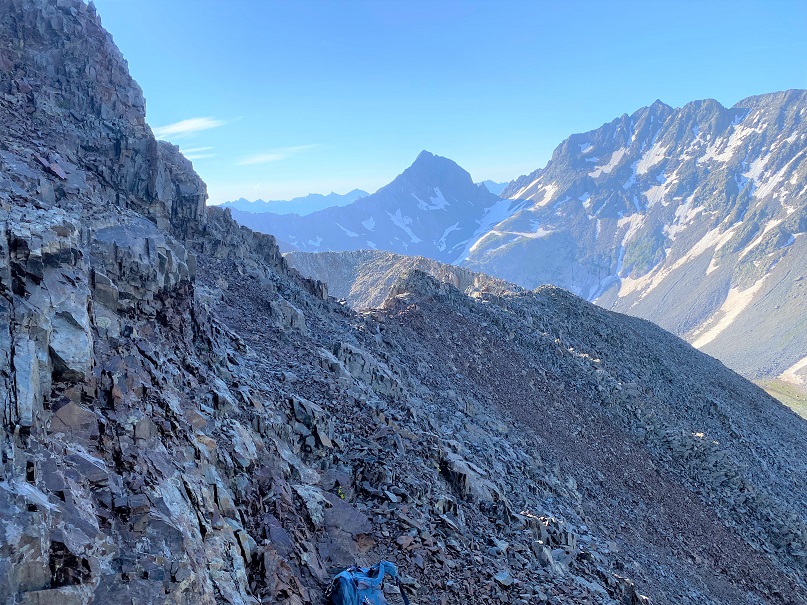
Now on the ridge I followed it east towards 13337 (false summit). There was some unavoidable snow to traverse. I went both ways around the boulder in the middle, one on the ascent, the other on the descent. Both were class 2.
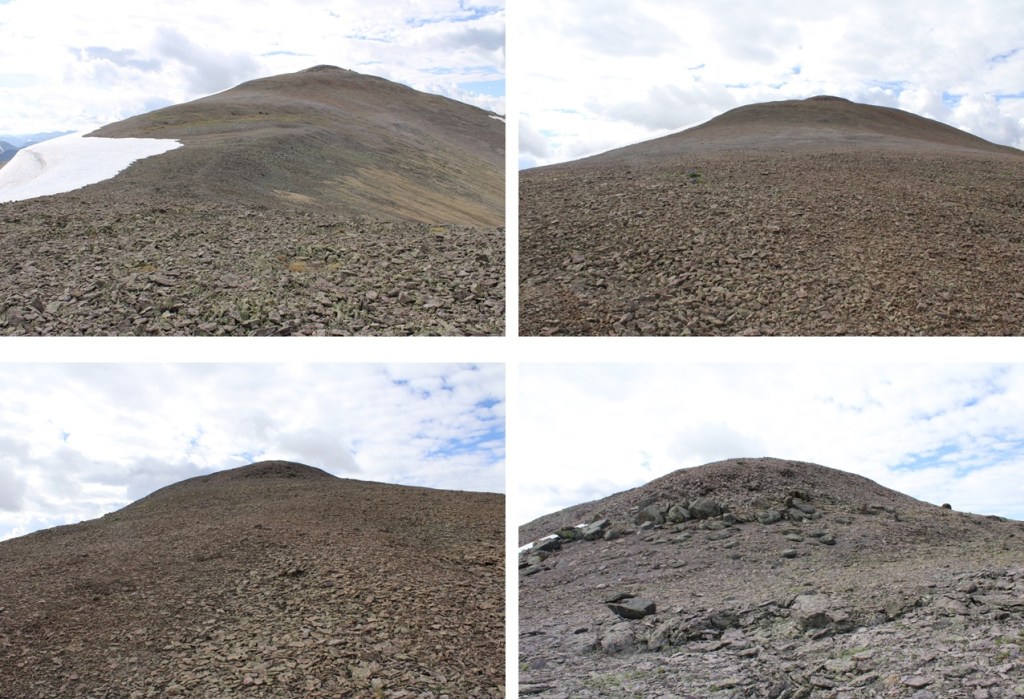
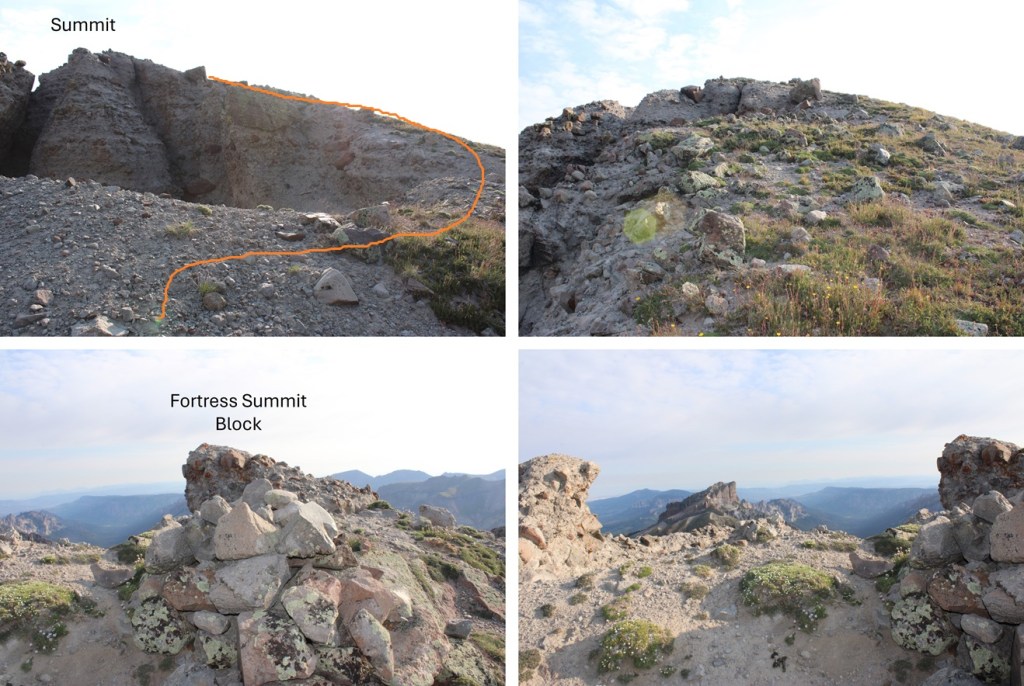
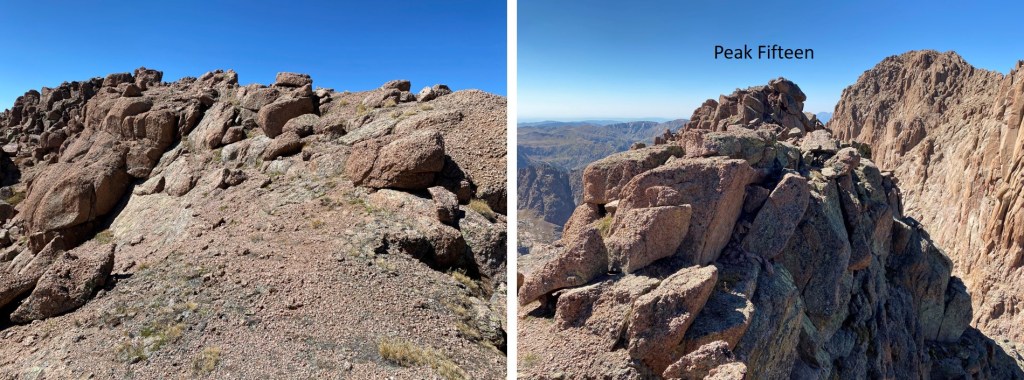
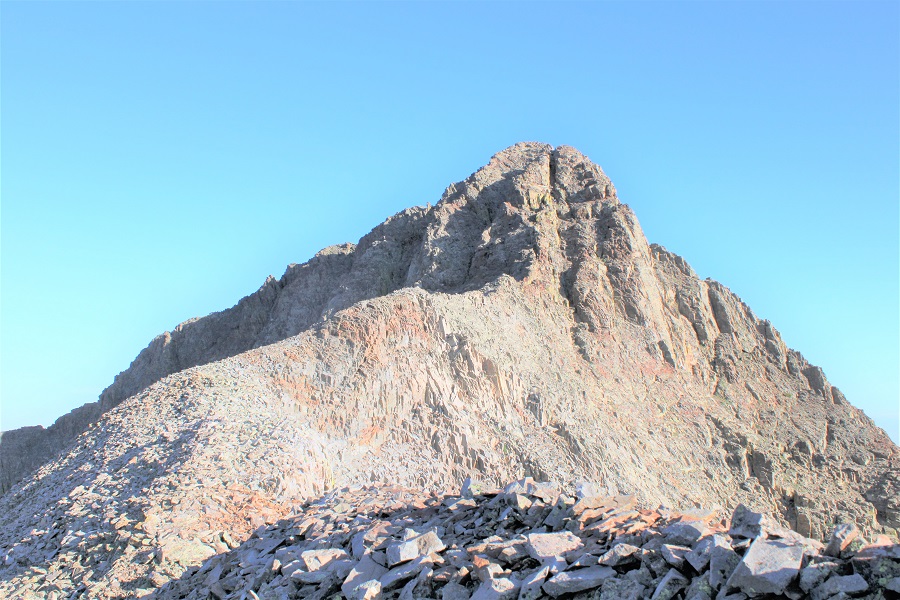
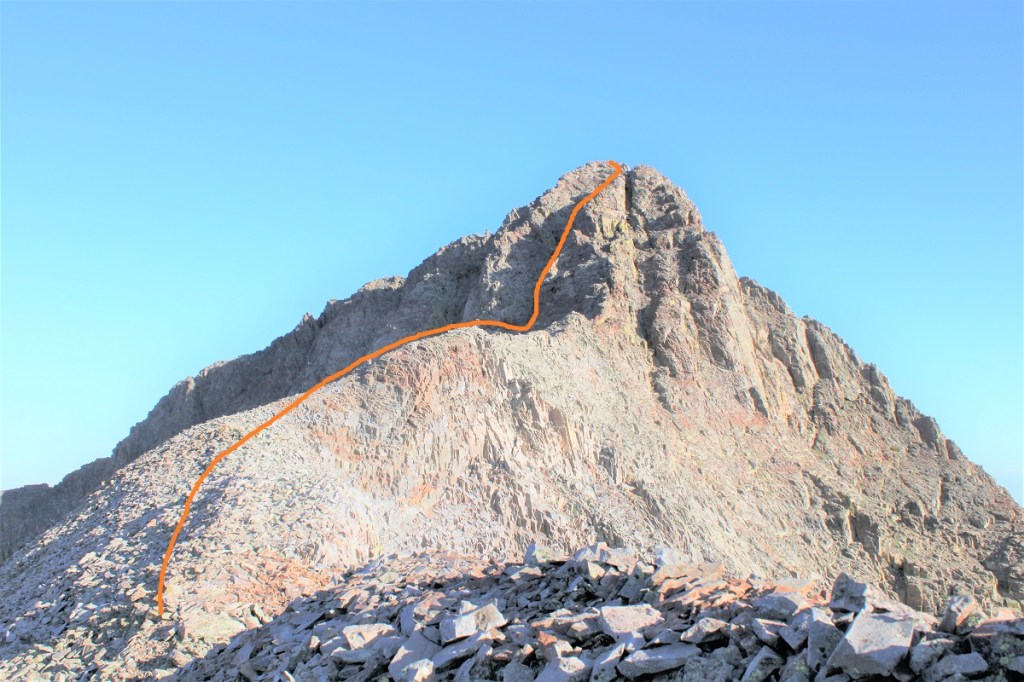
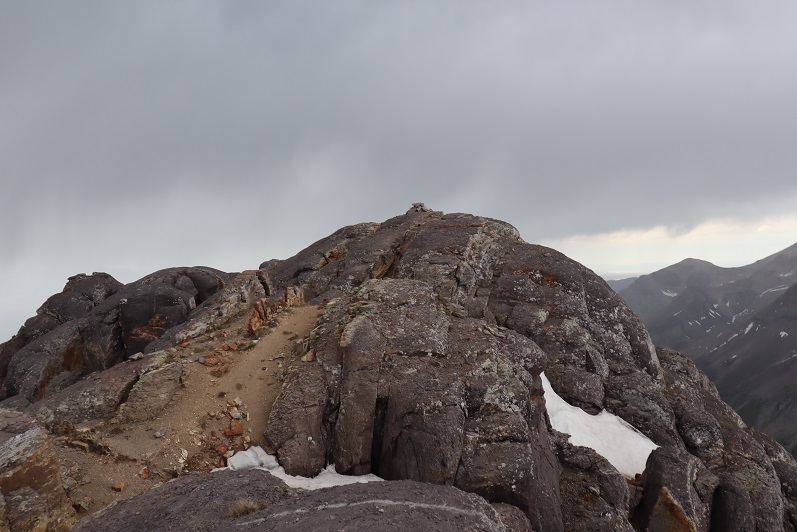
The toughest part was over, now it was a class 2 ridge hike following the ridge to the summit (after going over the false summit first).
From the top of the false summit it was an easy ridge hike to the summit of T5
I summited T5 at 9am
T5:
Now to head back down. This was an out and back hike for me, so I turned around and headed back the way I came.
I headed back towards the false summit
And then back down the snow to the gully
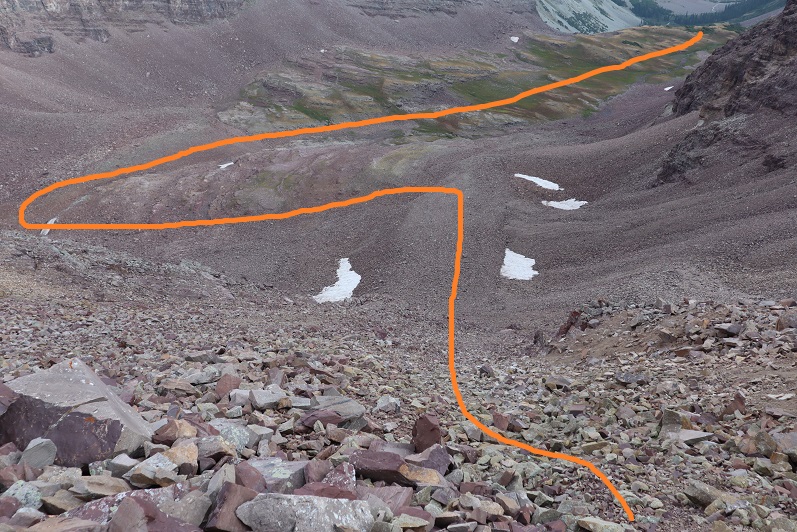
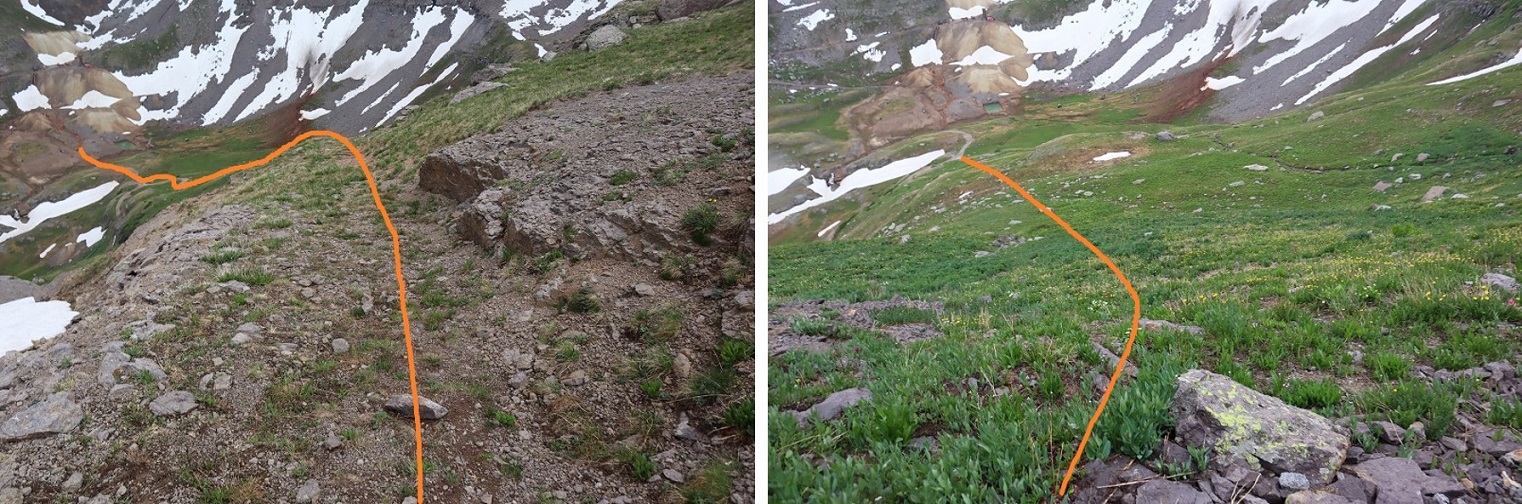
I then carefully navigated my way back down the to the gully and back to the trail below.
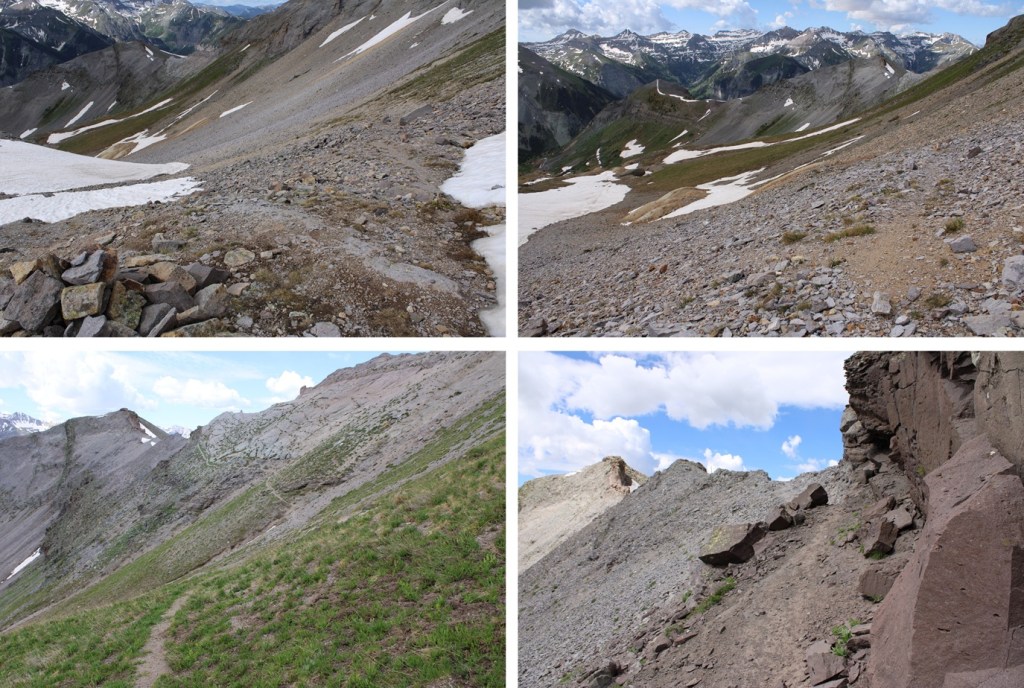
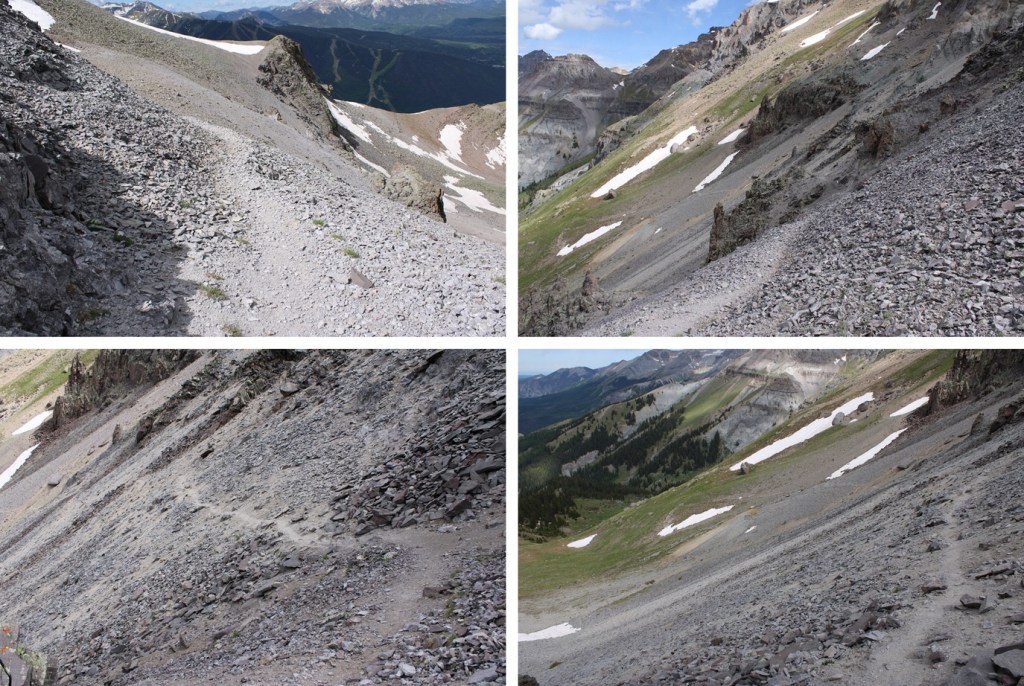
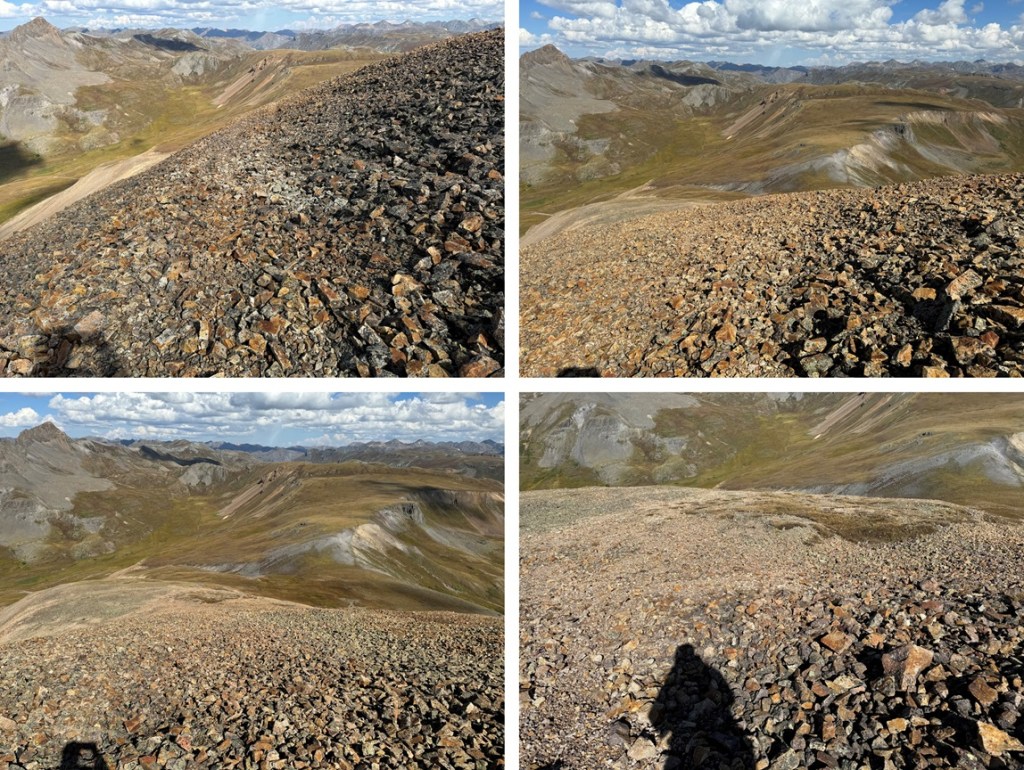
Once on the trail I followed it around 4 miles back to the trailhead.
I made it back to my truck at 11:45am, making this a 10.6 mile hike with 4688’ of elevation gain in 6 hours 30 minutes. Sorry about the poor topo. Something happened with Strava halfway through my hike and it pinged back near 145, then back up to me for the descent. Gotta love technology.
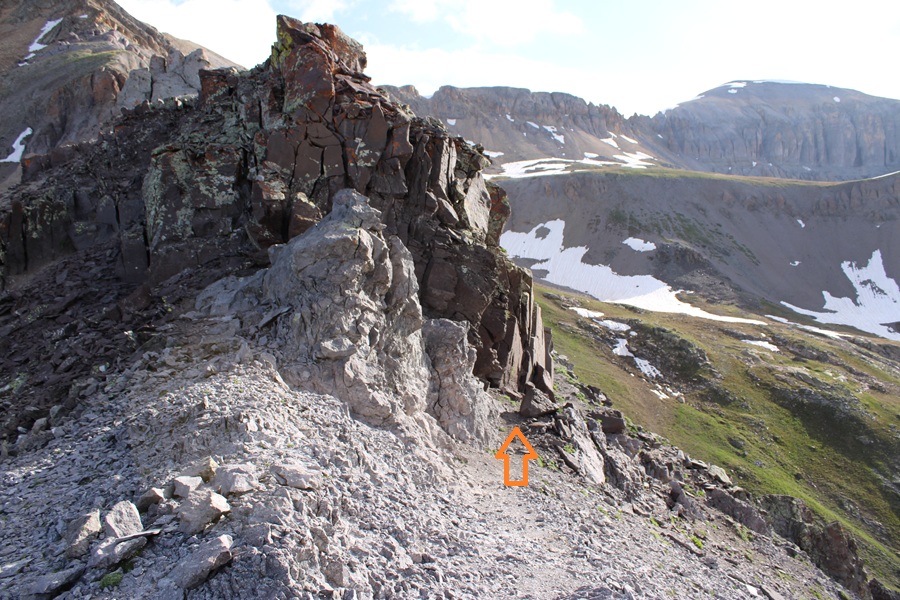
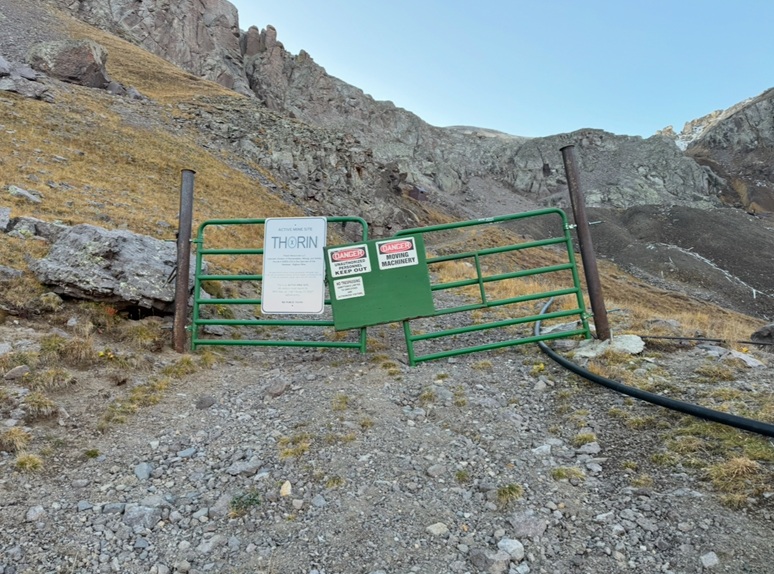
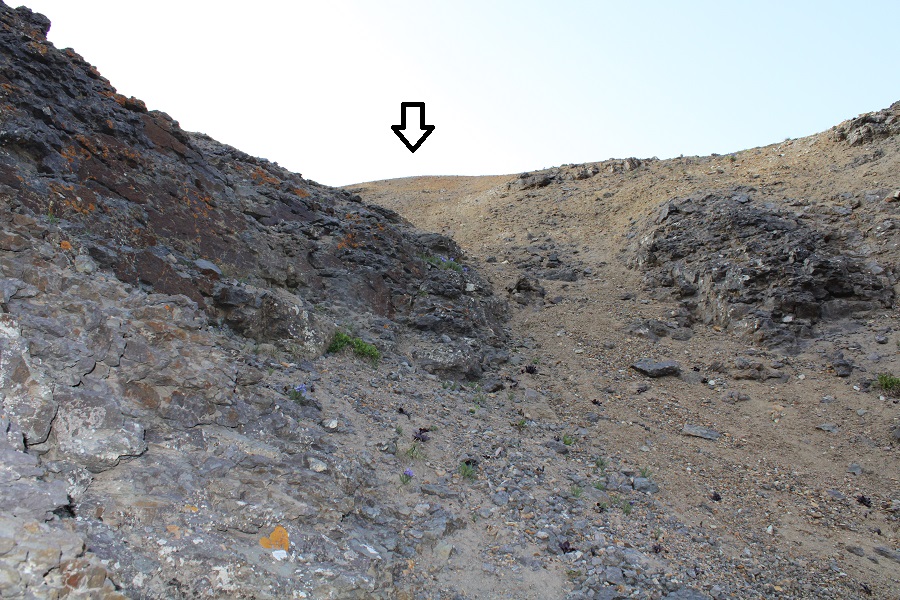
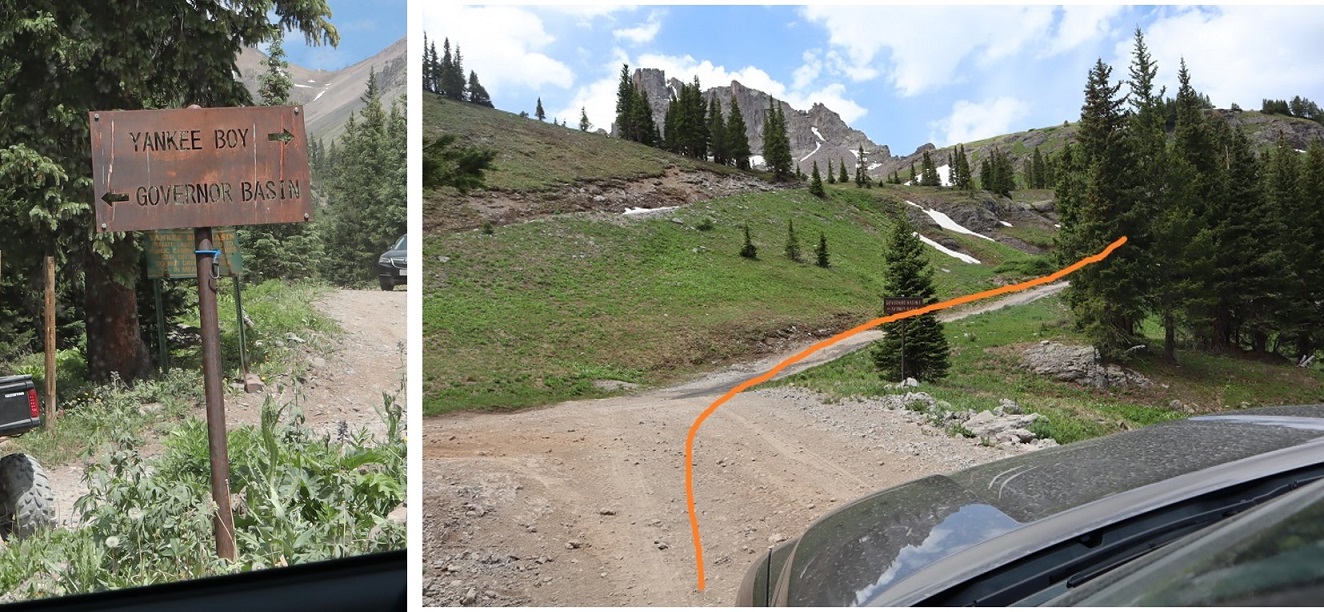
Also, I’d already attempted this peak the easier way, through Governor Basin, but there’s now a sign saying it’s a working mine and you need permission to hike through there, so I turned around and tried a different route.
I was parked at Stony Pass, and was up and on the trail at 6:30am, heading east towards the CDT.
I followed the CDT north for 2.2 miles.
At the junction with Moose Gulch, I turned right to stay on the CDT, and continued on the trail until I made it to 12800’.
After passing a small pond to my right, at around 12800’, I left the CDT and followed the tundra ridge southeast.
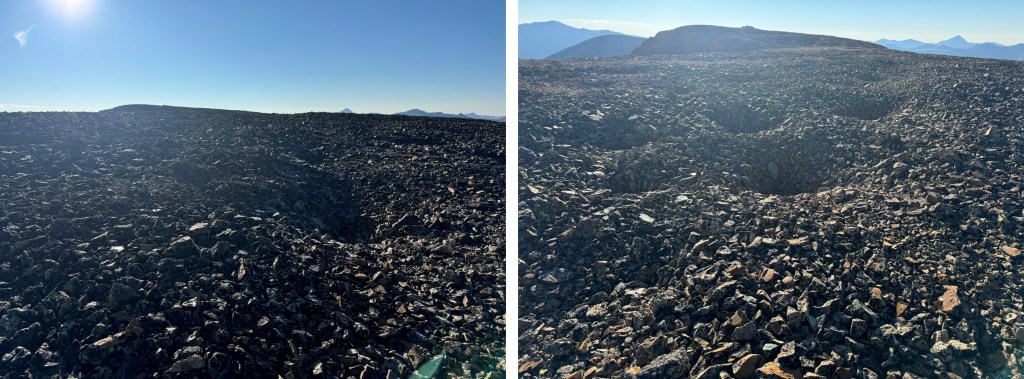
I kept following the ridge, and eventually I could see Sheep Mountain to the southeast. The ridge eventually became a mesa, and the route to the base of Sheep Mountain became obvious.
I needed to get to the ridge, and did so on tundra mixed with scree. This is the overall route I took to get to the ridge
Once on the ridge, I turned left and headed southeast up the ridge. This is where the terrain changed to small talus. It was very loose. The further you climb, the steeper and looser it will be, but you might encounter a game trail to follow.
At the top is a wide, flat expanse, full of holes about 5 feet wide. I kept heading east, towards the summit.
The rest of the route to the summit can be done on the ridge proper and kept at class 2. The only difficulty here is the talus, scree, and exposure that might make it feel more difficult.
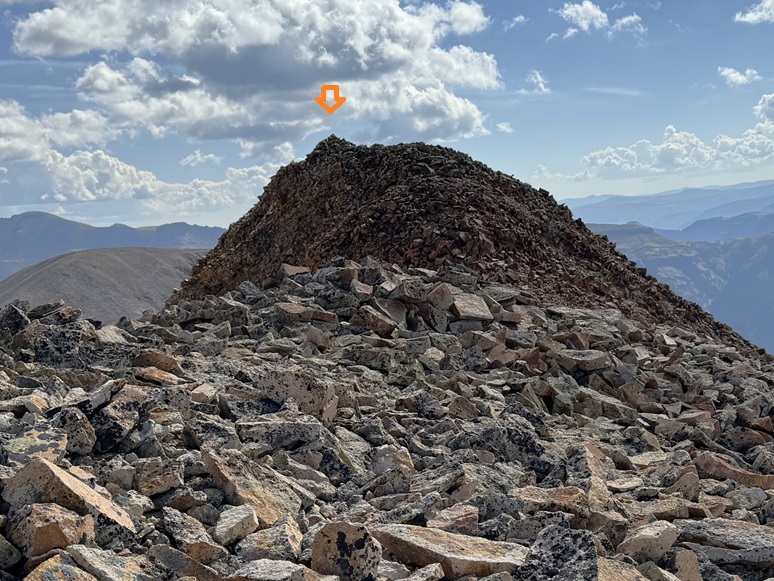
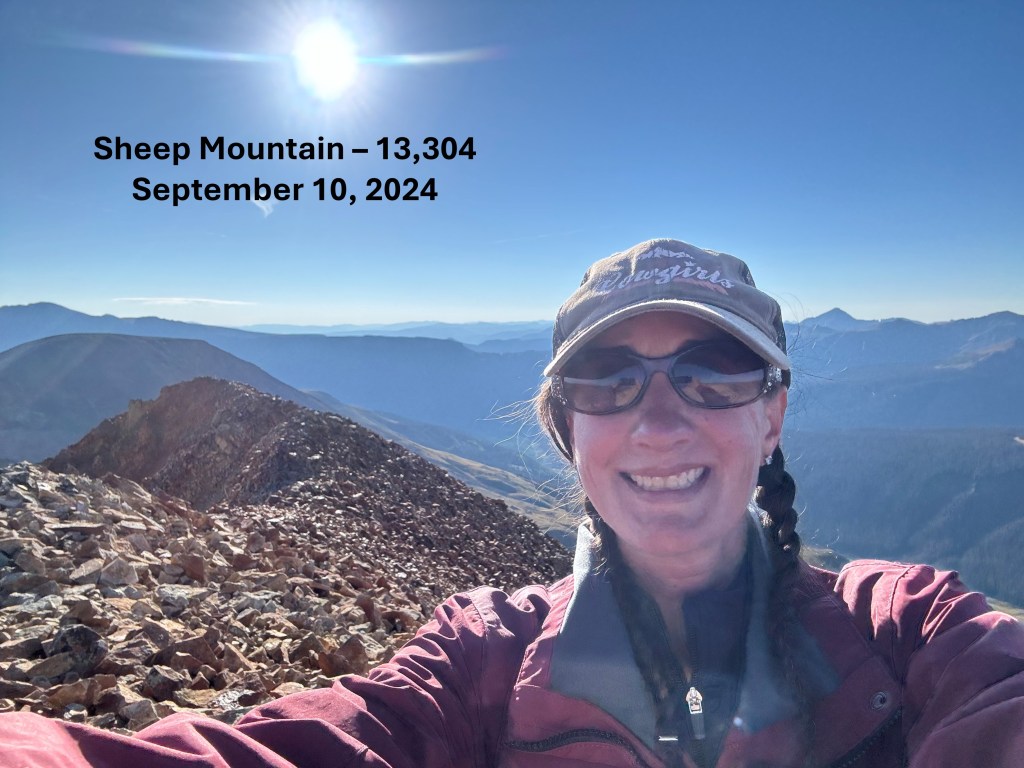
I summited Sheep Mountain at 8:20am
Sheep Mountain:
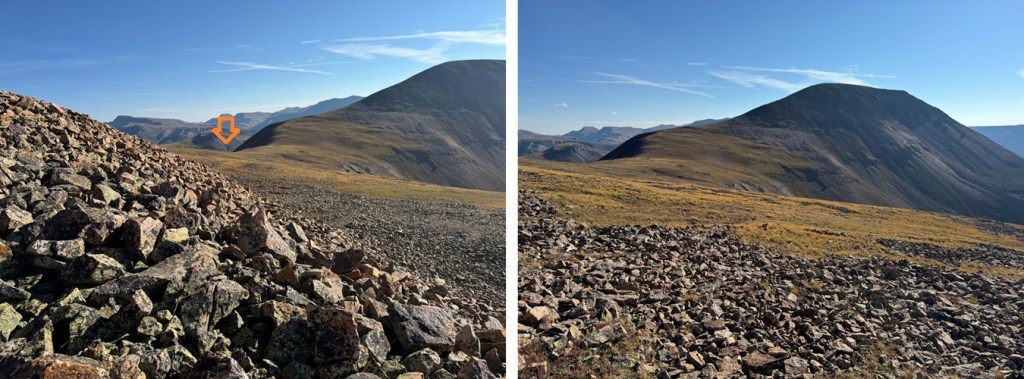
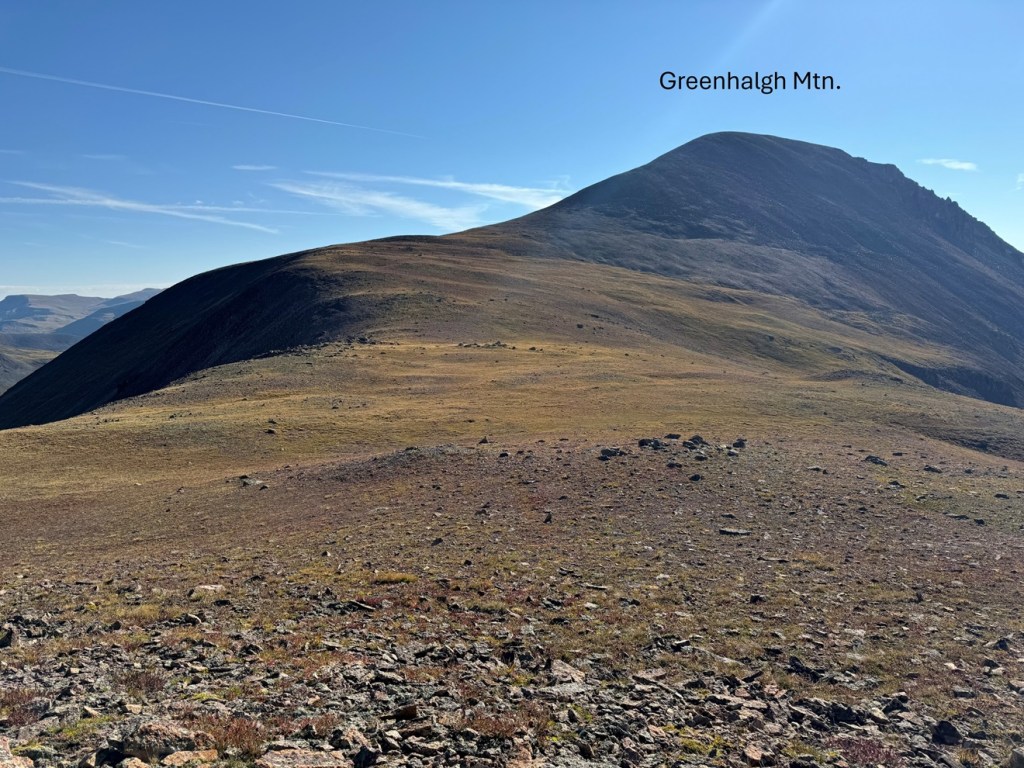
My next goal for the day was Greenhalgh Mountain, to the east
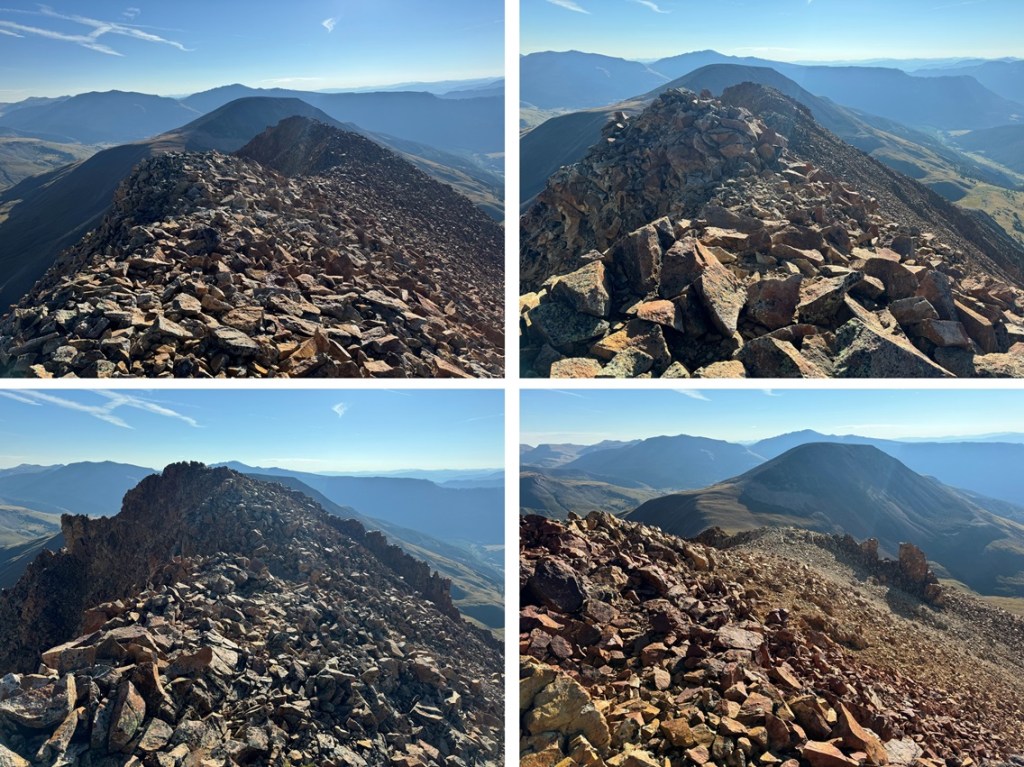
I continued along the rocky, class 2 ridge east
I followed the ridge east, until I came to a dropoff of sorts. Visually, it looked like the scree was continuous and went all the way to the rocks at the bottom. However, that was not the case. I ended up descending about 100 feet on scree, and then everything was loose talus, and steep, so I made my way climbers right to the ridge, and descended that way. If I were to do this again, I would have just taken the ridge to the right. It goes at easy class 3, and there’s talus, but it was much more stable than the talus below the scree. Also, EVERYTHING moves here. More info/pictures to come on my return route of this area.
From the bottom of the ridge, I headed northeast towards the Sheep/Greenhalgh saddle on class 2 terrain.
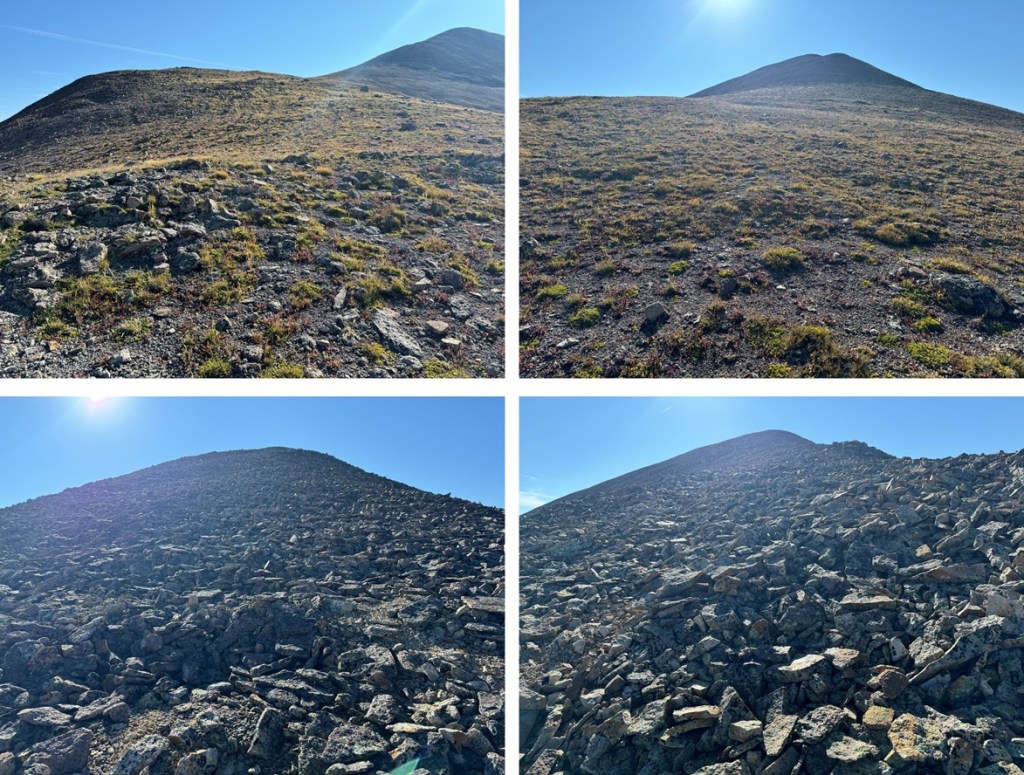
Then I ascended the ridge to the summit of Greenhalgh Mountain. This part of the route was actually very enjoyable, on class 2 terrain, with rocks that stayed put and didn’t roll.
I summited Greenhalgh Mountain at 9:20am
Greenhalgh Mountain:
In order to get back to the trailhead, I was going to need to descend Greenhalgh and then re-ascend Sheep Mountain, so I turned around and made my way back to the Greenhalgh/Sheep saddle.
At the saddle, I then aimed for the left ridge of Sheep Mountain.
Once there, I ascended the LOOSE rocks up to the ridge, then followed the ridge to the summit. The rocky area went at easy class 3, and is more stable than it looks. In this picture you can see the scree to the center. That’s the way I came down, and I don’t recommend that route. Instead, stick to the ridge.
I then turned left, and re-summited Sheep Mountain, following the ridge west,
Then it was back across the hole filled rock field mesa
And back towards the tundra mesa I’d hiked in on.
However, when I got back to the tundra mesa, instead of heading back towards the CDT, I turned left and headed towards Stony Pass. I could see the road in the distance, and was able to hike down the entire slope on tundra (except for a brief rocky section where I took a game trail), avoiding the willows.
Back on the road, I followed it northwest back to Stony Pass
I made it back to my truck at 11:30am, making this an 8.97 mile hike with 2714’ of elevation gain in 5 hours.
I spent the rest of the day playing Trail Angel for CDT and CT thru-hikers. I met a ton of really cool people from all over the world, gave them snacks, water, and beer, let them re-charge their devices, and had some great conversations. What upset me though, was the Colorado Trail hikers told me I was the first person they’d seen doing trail magic on the trail. Considering they probably only had 2 days left of a 30 day or so hike, this upset me. We can do better Colorado! If you have a free weekend next summer, I’d encourage you to do some trail magic. You won’t regret it!
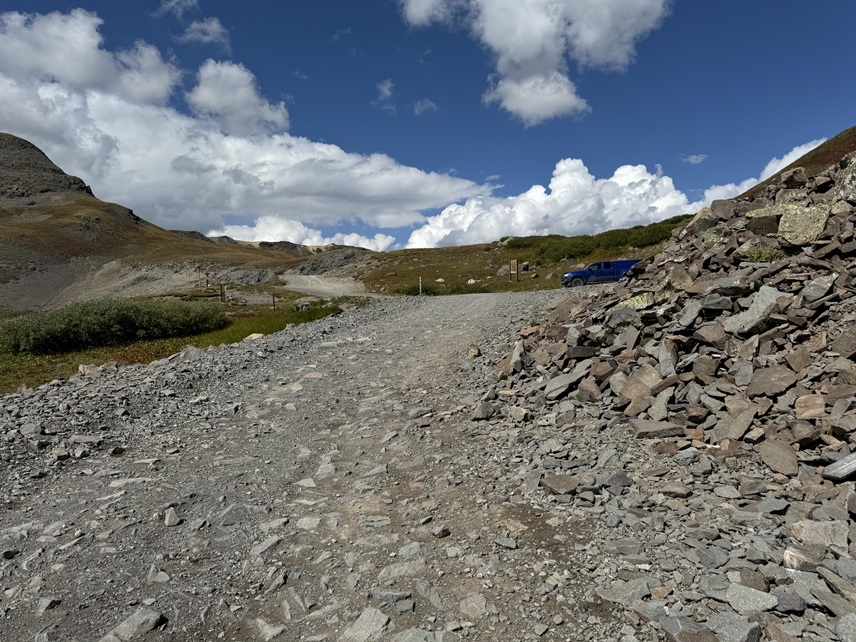
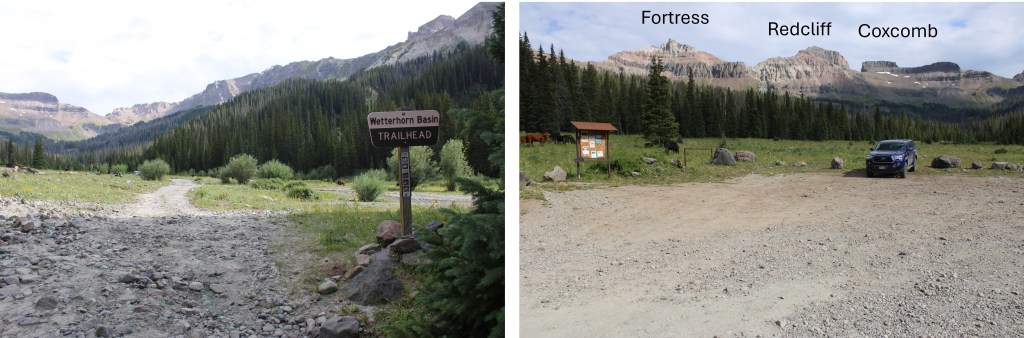
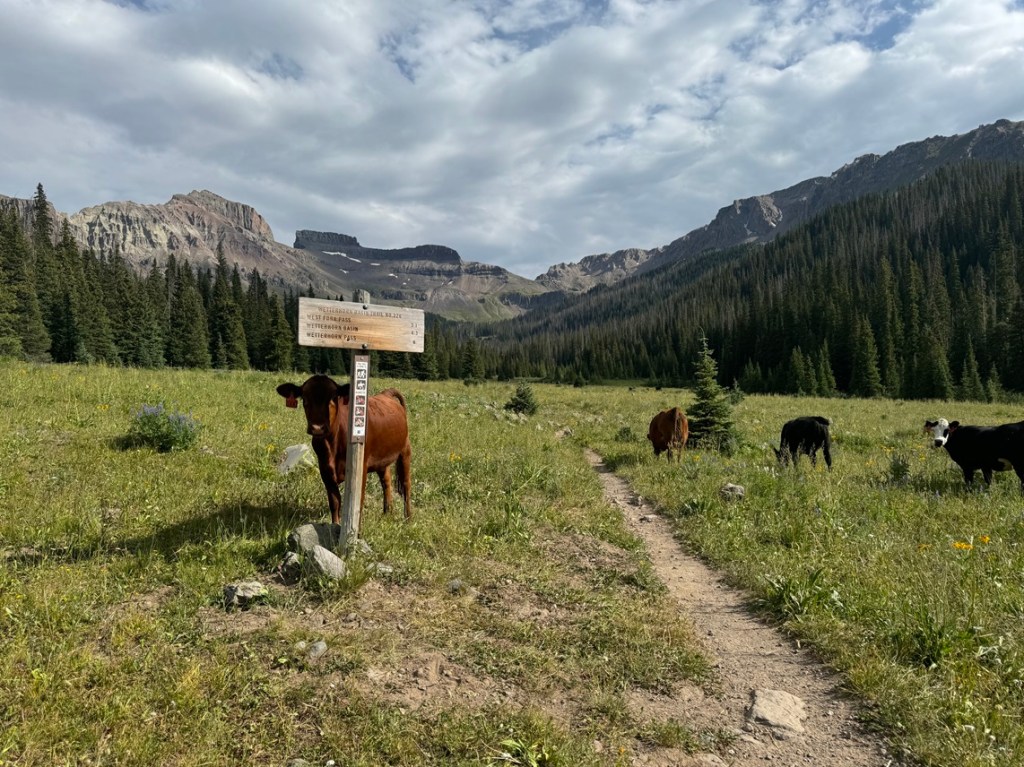
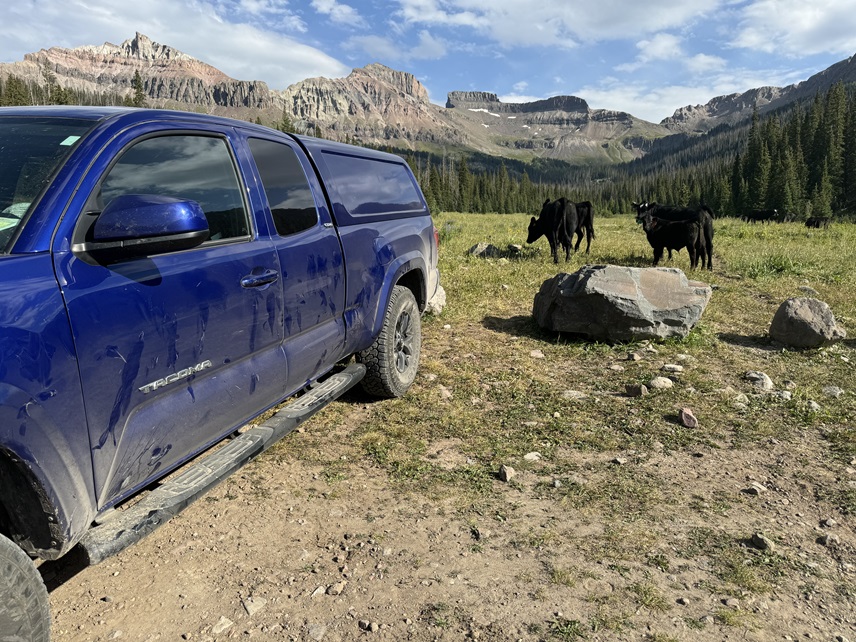
I parked at the Wetterhorn Basin Trailhead, and was greeted to a herd of cows. They were all over the basin, and would be my companions for the next few days. They had a penchant for licking my truck. The drive in is 2WD on a dirt road until 2 miles before the trailhead, where it becomes 4WD and requires clearance. None of these pictures are as clear as I’d like. The fires weren’t helping in the morning, and the sun wasn’t helping with shadows in the early afternoon. I know not to head east early in the morning, but I did it anyway. Sorry!
I was on the trail at 6am, following Wetterhorn Basin Trail No 226 south for just under 1.5 miles.
After hiking for 1.4 miles, and at around 11050’, I came to a drainage, and followed it east
I came to an obvious “y” in the drainage, and went left, still following a drainage.
The drainage became narrower, so now I hiked to the left, trying to stay on tundra, but mostly staying on rocks
This next part is difficult to explain. You’re going to WANT to head straight up to the rock formation in front of you, but don’t do that. Instead, continue following the drainage, but aim to the right of the rock formation.
You’re trying to avoid the mess to the right of this picture… loose kitty litter on solid rock
Now is the time to put on your helmet. Ahead there’s a more solid gully to climb. You can climb either to the left or right, I chose right.
At the top of this gully is another gully to the northeast.
This one was more difficult then the last. Solid on the sides with large scree down the center. I went straight up the center
And then walked on tundra to the ridge.
Once on the ridge, I turned right and followed it east, staying below the ridge. I noticed a cairn that marked an ok game trail, and followed that trail as it skirted below the ridge. The cairns especially helped in this area.
At 12700’, just before the rock formations directly in front of the trail, I left the trail and headed northeast for the ridge once again, this time on scree.
Back on the ridge, I followed it east towards the summit. The terrain here became slippery. Rocks the size of softballs and footballs were held together by dirt, and that’s what I was walking on. There were steep runnels on either side of the trail, which at times was less than 2 feet wide. A slip would have been dangerous here, on either side. This was all class 2, but I’d advise wearing microspikes for traction.
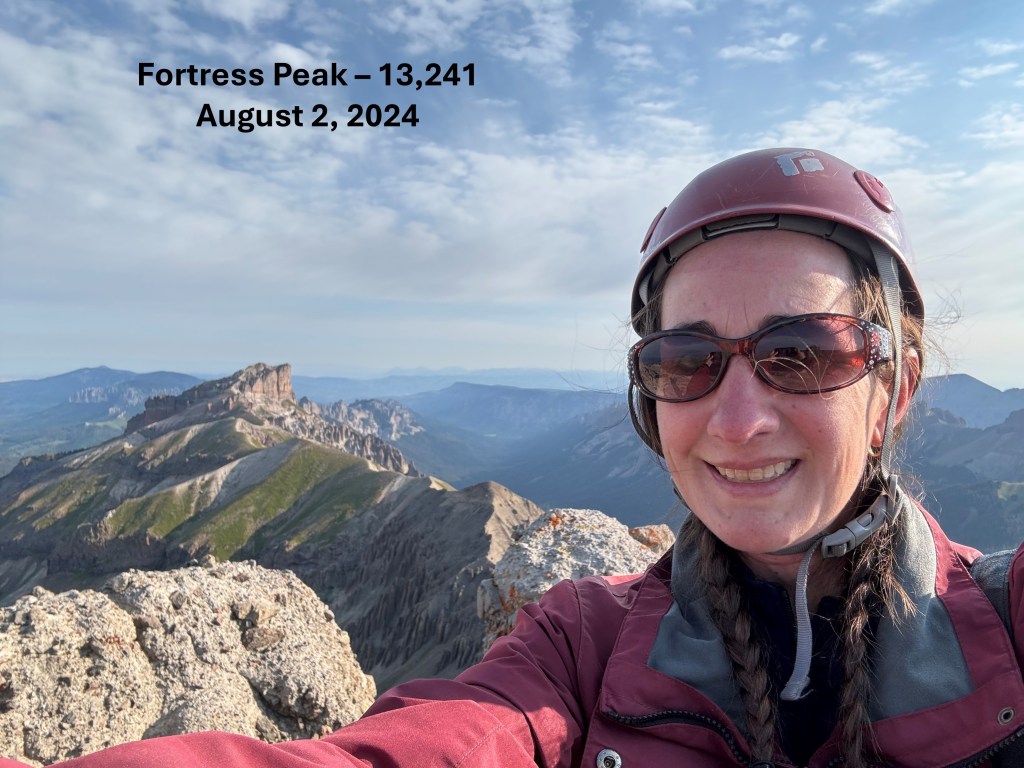
I summited Fortress Peak at 8:15am. There was a summit register in one of those pipe tubes, but the paper inside was so wet I didn’t want to disturb it, so I left it alone.
Fortress Peak:
Here’s what some of that exposure looks like
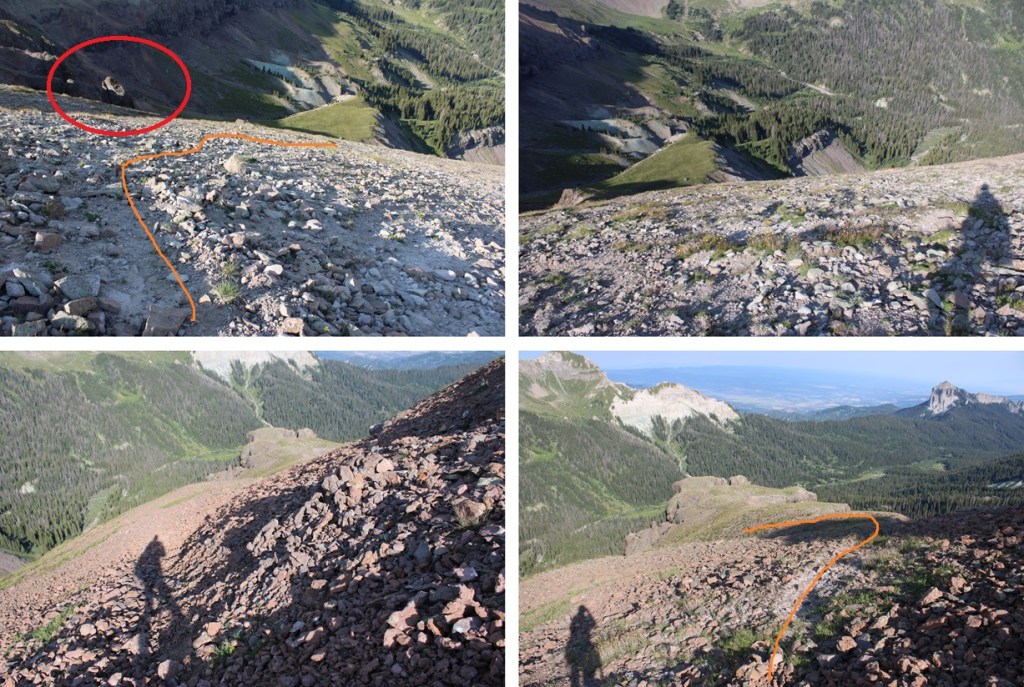
Now to head back down. This was an out and back hike for me, so I just retraced my steps, back down the sketchy section with no traction just below the summit.
Then I hiked down the ridge until I was parallel with the rock formations on my left (circled). Here I turned and headed southwest towards the game trail.
I then followed the game trail south, back to the gullies. I descended near this big rock (circled).
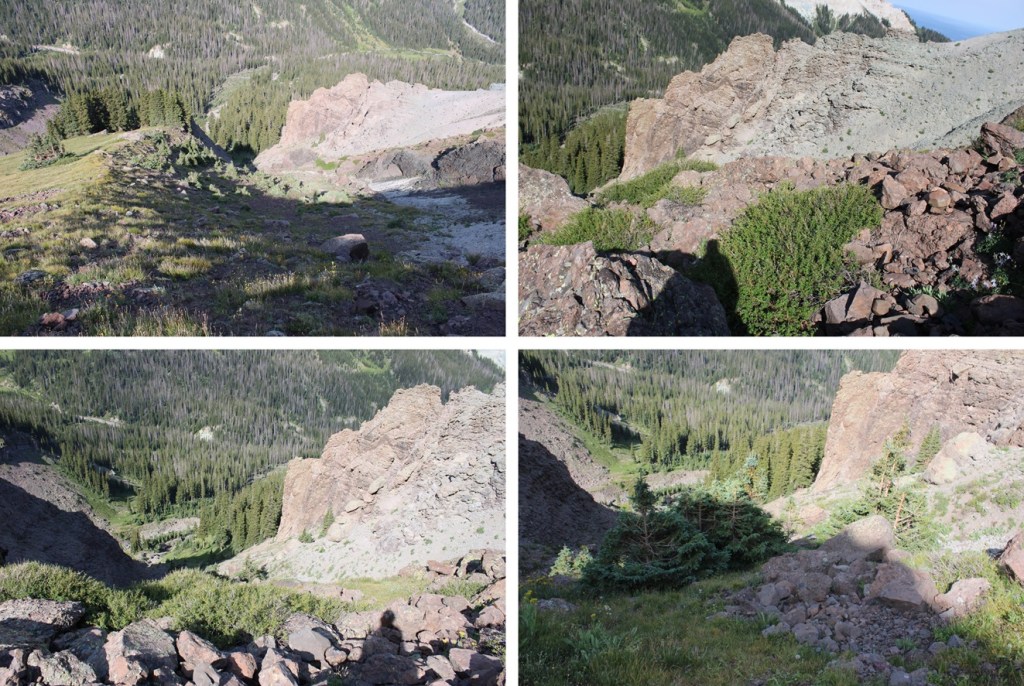
Now for the second gully.
At the base of the second gully, I headed west towards the tundra ridge that would bring me to the drainage.
And now to follow the drainage back to Wetterhorn Basin Trail No 226
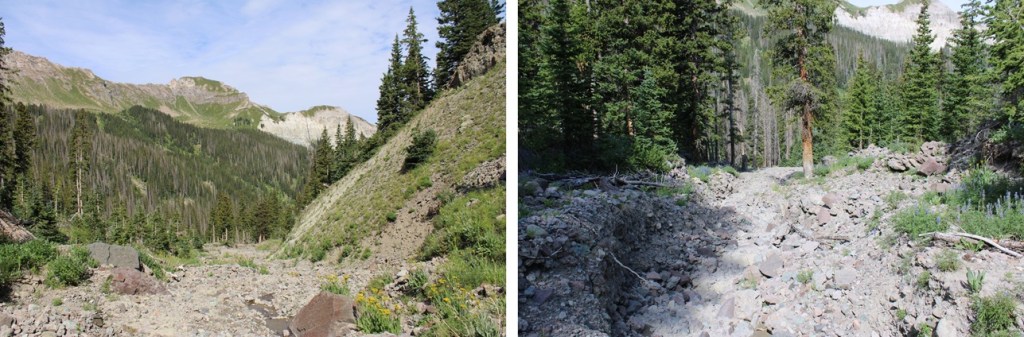
Back on Wetterhorn Basin Trail No 226, I followed it 1.4 miles north back to the trailhead.
Where the cows were still licking my truck
I made it back down to the trailhead at 10:30am, making this a 5.76 mile hike with 2482’ of elevation gain in 4.5 hours.
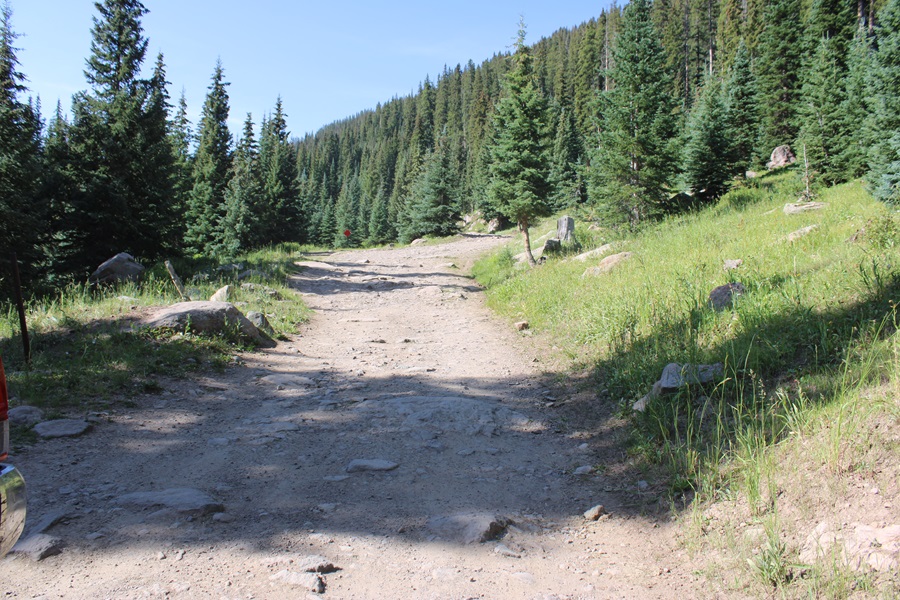
Here are pictures of the start of the 4WD road, and where to park if you have a 2WD vehicle
I moved my truck. Just a little bit. I noticed as I was sitting around during the day there was a rather large tree poised to fall directly on my truck if the wind blew too hard, which it was currently doing. I moved it about 50 feet away, but still in the same area.
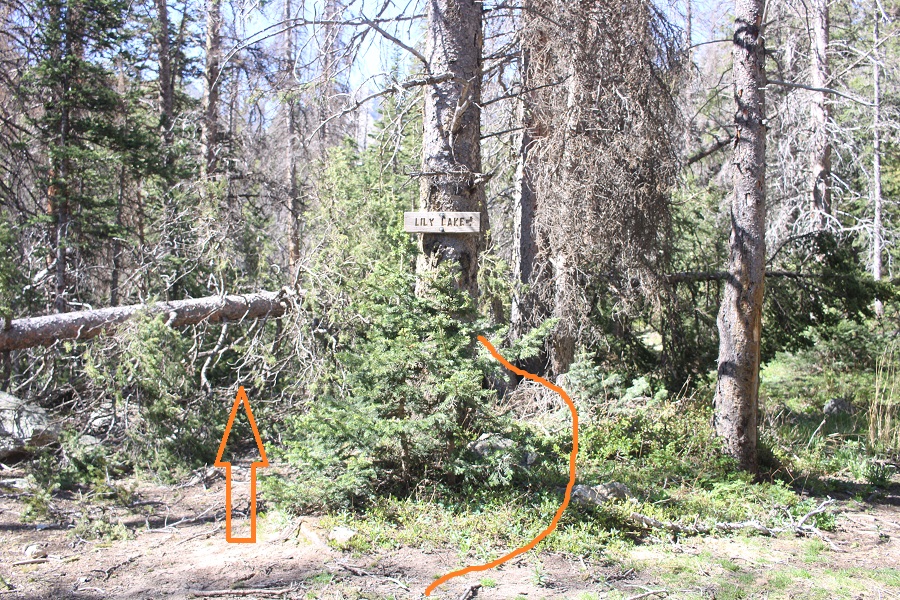
I slept much better that night. I woke up and was on the trail at 4:30am, following the road south to the Lily Lake Trailhead.
The road was clearer than it was 2 days ago, which I thought was suspicious, because I’d been in the area and hadn’t heard any chainsaws. The road was cleared almost right up to the trailhead, but the path was tiny. It looked like it was made just for ATVs, so imagine my surprise when I made it to the trailhead and saw a 4Runner and several trucks parked there (sporting Colorado pinstripes, of course).
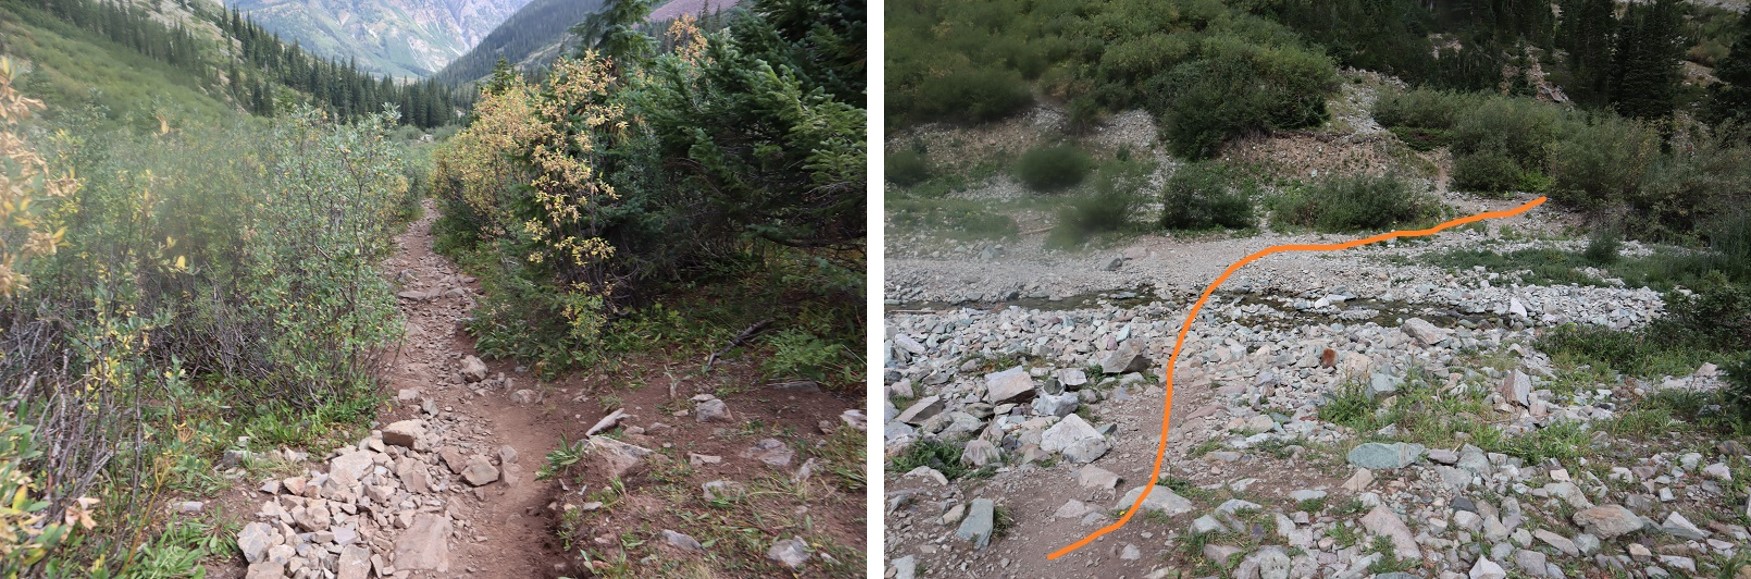
I headed south on the Lily Lake Trail
I signed the trail register and was on my way
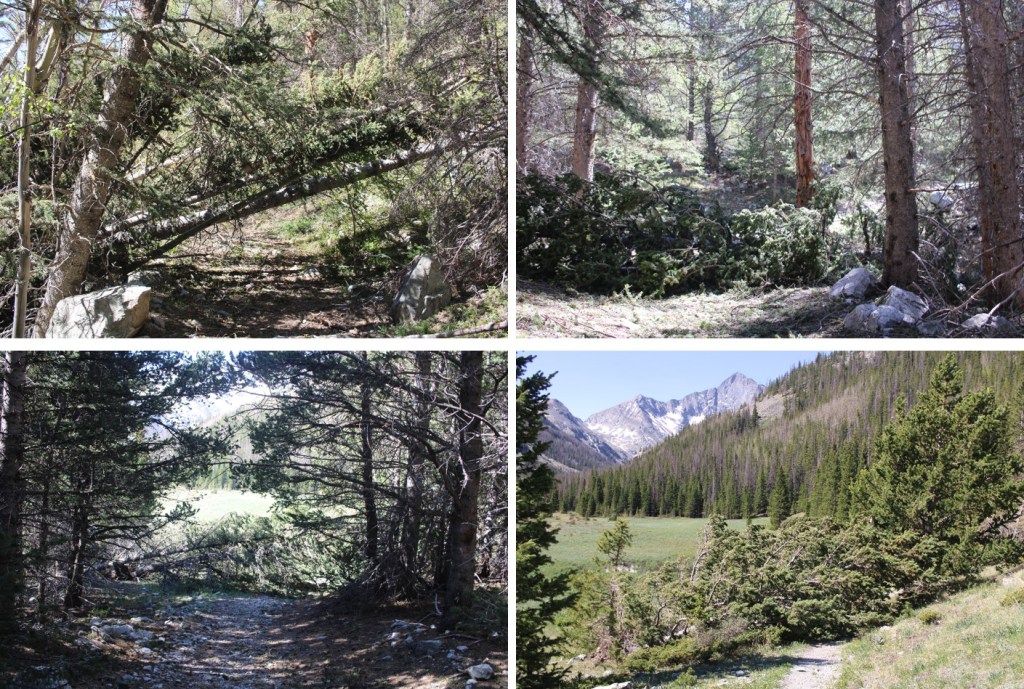
While the road in was almost completely free of deadfall, the trail was not. There were still several large, downed trees lining the trail.
The trail was still easy to follow, with a few minor creek crossings.
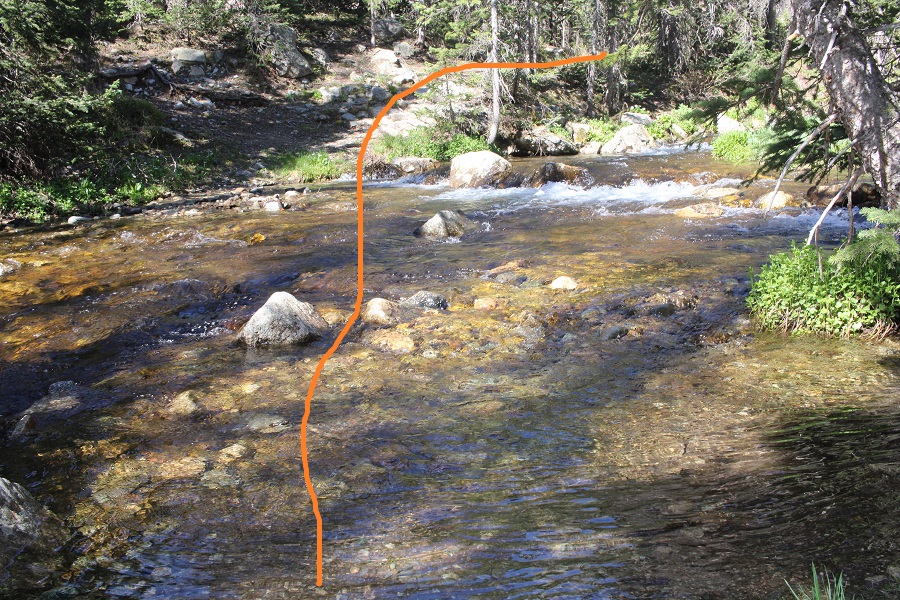
After hiking for 1.85 miles, I came to a junction and continued south, going around this downed tree to find the trail
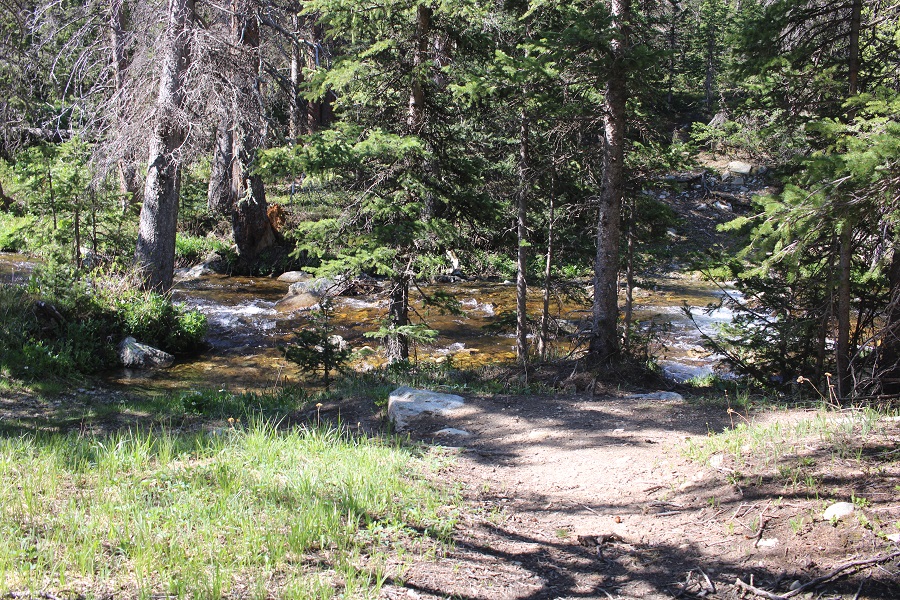
I came to the Huerfano River Crossing, and cursed myself for not bringing my creek crossing shoes. Luckily, the water only went up to my knees.
I crossed the river and followed the trail to the right.
The trail picked up again at the other side, and I had no problem following it south…
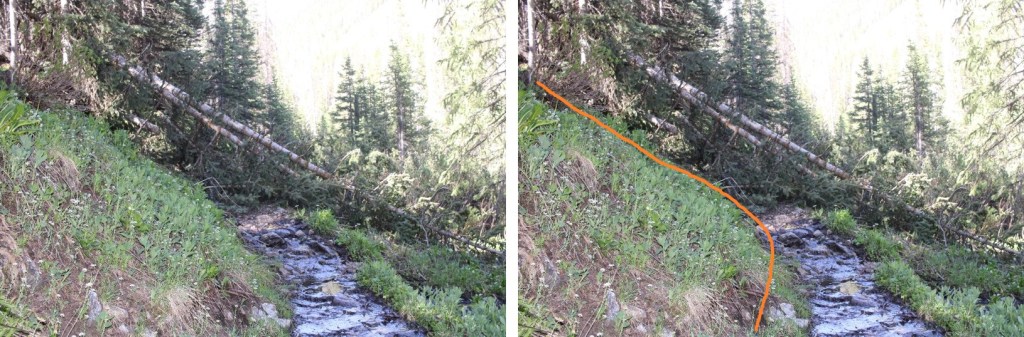
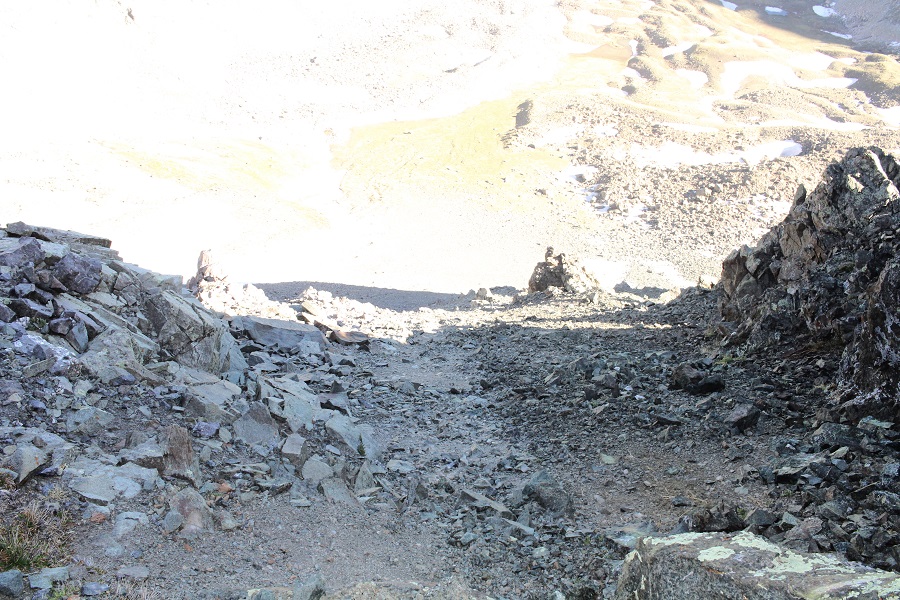
Until I had a problem following it south. This is where the fun route finding begins. Right where these trees cross the trail, turn left and go up the little waterfall trickling down. I was at 10720’ of elevation
There was a trail here, and I was able to pick it up at times, but there are also tons of social trails. The area hasn’t had much use since the Lindsey closure, and it’s apparent. It would be a good idea to have a GPX file for this area.
It helps if you follow the boulder field southeast, and keep the stream to your right
Eventually the trail will cross the creek
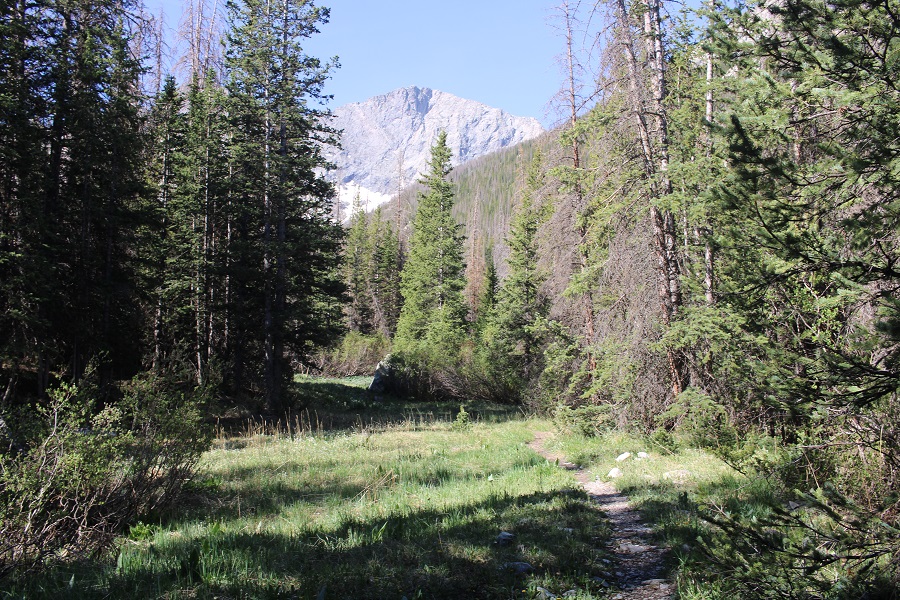
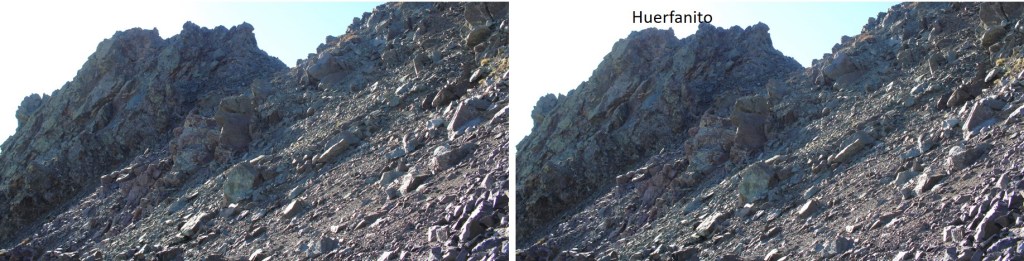
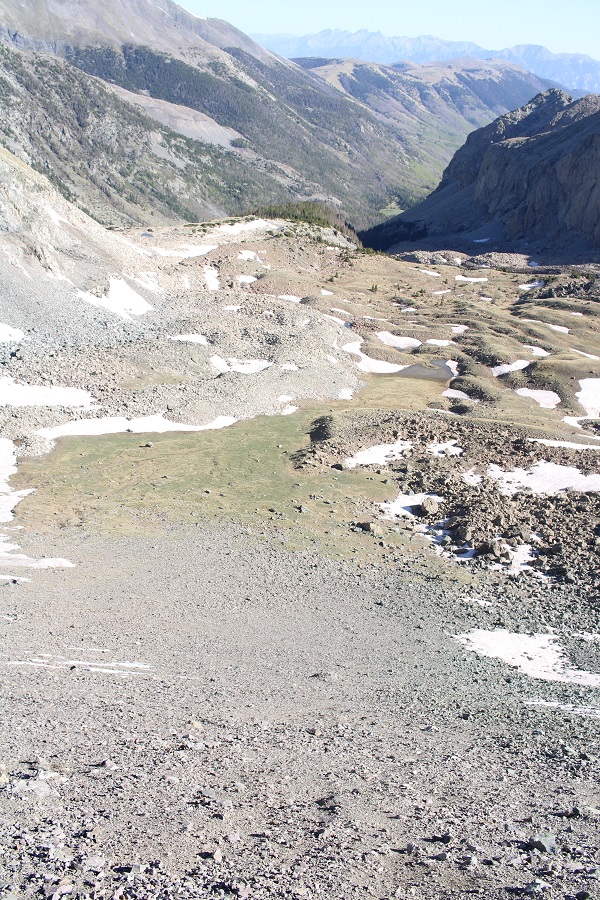
This trail will bring you to the upper basin
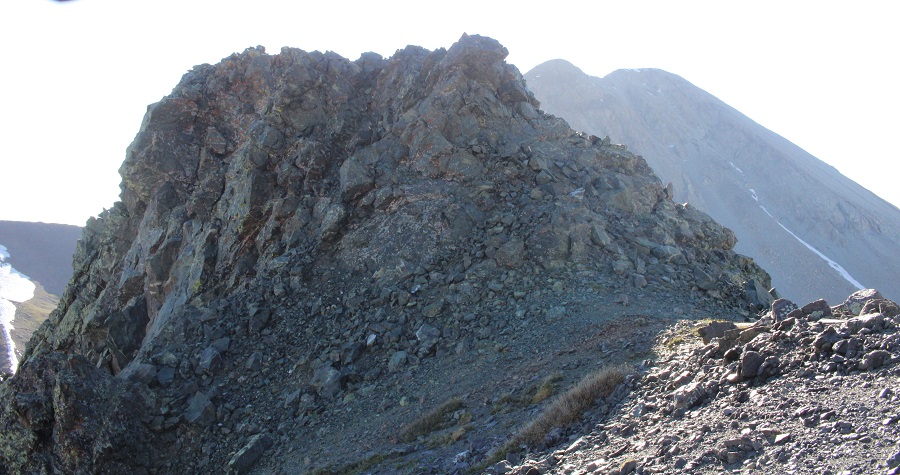
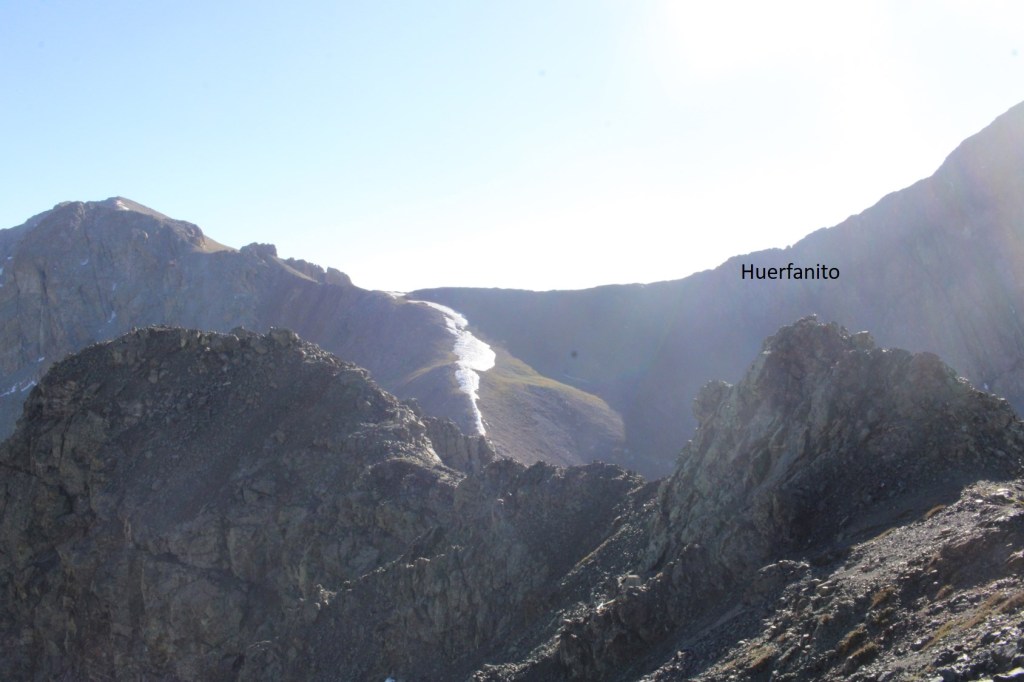
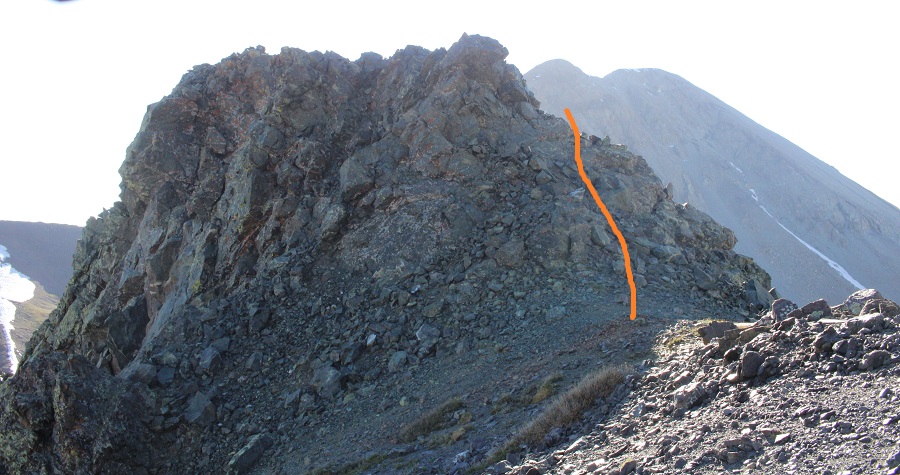
Here’s the route to took to the summit of Huerfanito from the upper basin. I took the dotted route up, the solid route down. If I had to do this again, I’d take the solid route up and back.
I left the trail at 11995’, and headed south. When I reached the bottom of the slope I put on my microspikes and headed straight up, following the line of snow. The scree here was rotten, definitely 2+
Here are pictures of the route up. This is definitely choose your own adventure, and I’m sure the conditions change from year to year, so stay safe and have fun!
Once at the saddle, I turned and headed left
There are a lot of places that look like the summit, but this is the summit block
I rounded the summit block to the south and headed east. This was class 2 to the summit
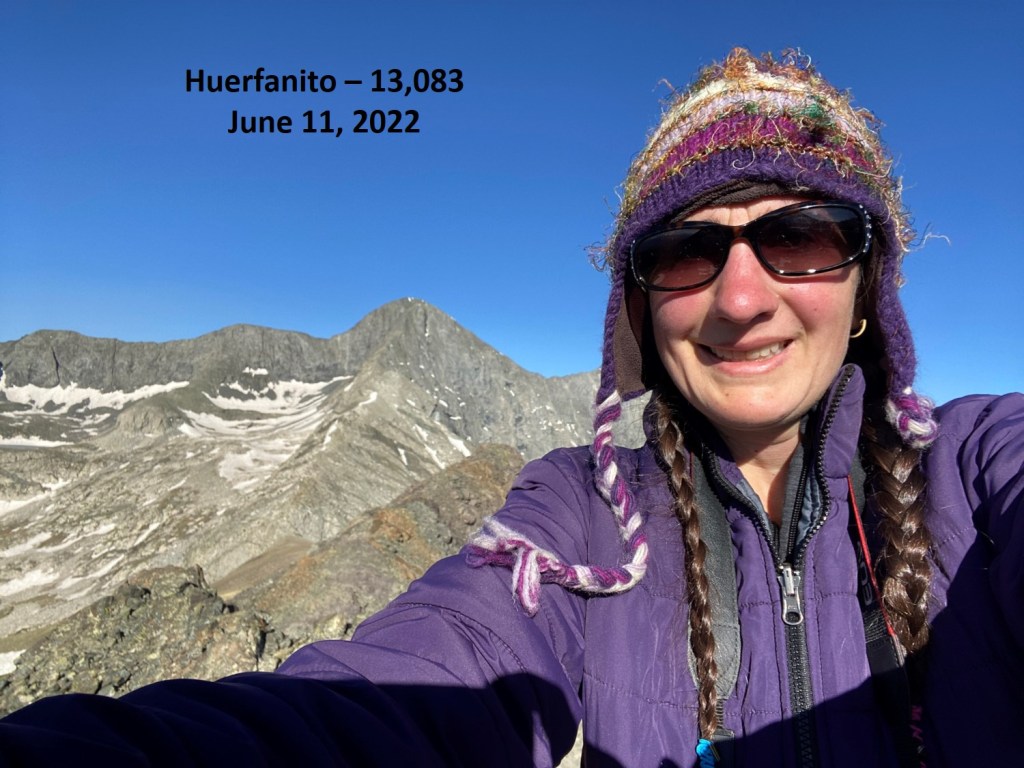
I summited Huerfanito at 7:45am. There was no place to set the camera, so I took a selfie with my phone.
Huerfanito:
While there was a cairn there, I spent a lot of time making sure I was at the true summit of Huerfanito, since I had a lot of conflicting information. I went back and forth on the ridge, took pictures from every angle, and was certain I was on the true summit.
Now to head back down. I retraced my steps back to the small saddle
From the saddle I had a great view of my route in, which I would follow back
I scree-surfed down the scree. The route I took on the way down had scree that made for the best scree-surfing I’ve ever done. I was back down to the tundra in no time.
At the bottom I took off my microspikes, and headed north to find the trail.
I then followed the trail back to the river crossing
I crossed the river, once again taking off my shoes, and then followed the trail back to the trailhead
I signed out of the register, and followed the 4WD road back to my truck
I made it back to my truck at 10:15am, making this a 9.66 mile hike with 3008’ of elevation gain in 5 hours, 45 minutes.
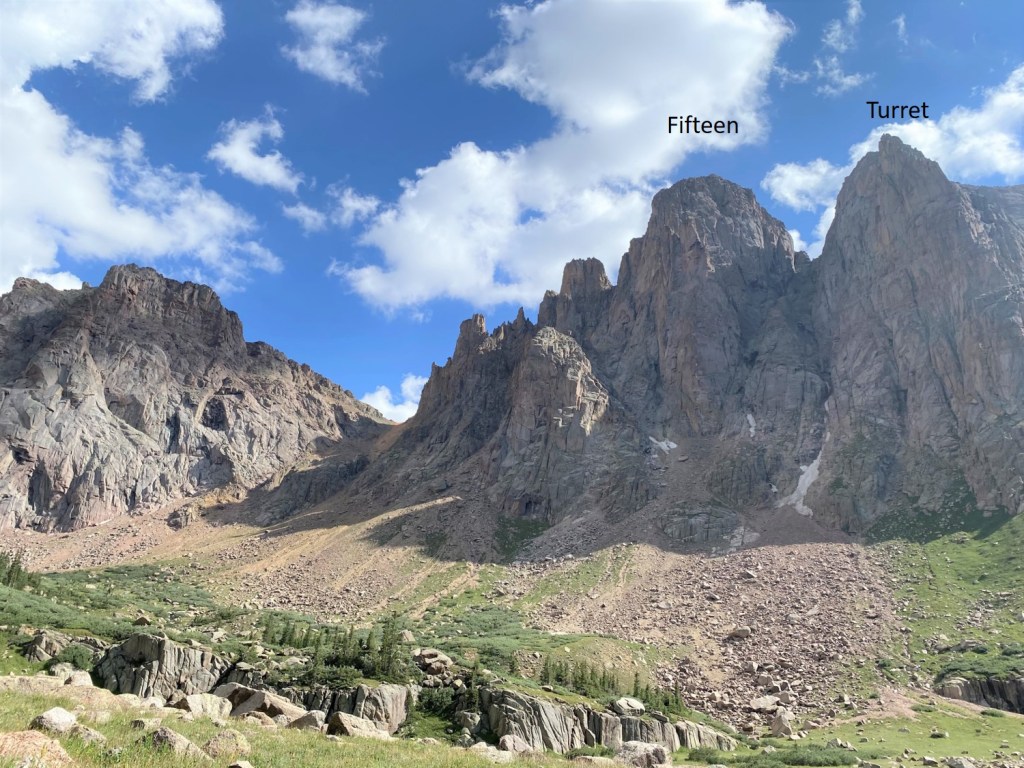
I didn’t want Peak Fifteen to be my Bicentennial Finisher. I really didn’t. In fact, last month I attempted Peak Fifteen, but had to turn around due to several factors: There was too much water in the couloir and if the section I was in was really class 4… my skills had gone south. It hurt to hike all the way in from Purgatory and not get a summit, but I knew the conditions weren’t safe. So, I turned around, went back home, and did more research.
This time, I brought my friend and climbing mentor, Tim. My thoughts were to climb this peak with him, get the hang of it, and attempt it solo at a later date. Spoiler alert: After successfully summiting this peak, I do not think I’ll be attempting it solo.
It was a long hike in from Purgatory. We ended up hiking a little slower than anticipated, so we stayed the night at the campsite at Ruby Lake; something I’ve always wanted to do. It was already dark when we arrived, and I’d only brought one set of clothing, so it was a cold night for me as my sweat turned to ice at night inside my bivy. This made for interesting (zombie filled ) nightmares.
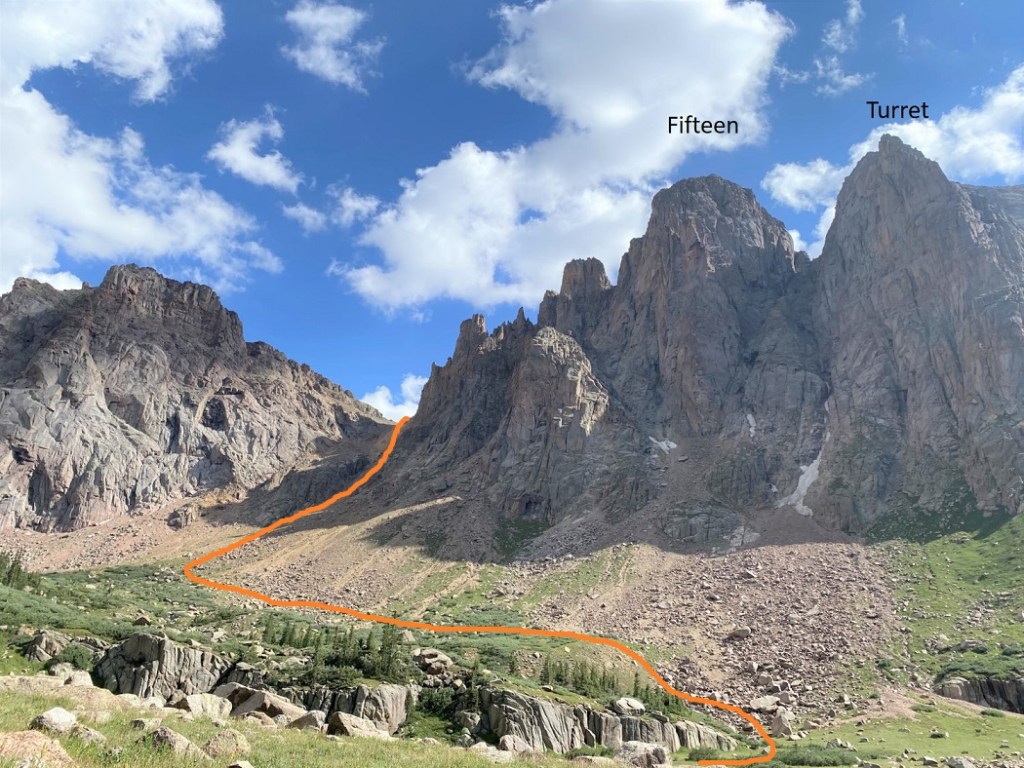
The next morning, we were up before sunrise to be willow warriors and thrash our way into Ruby Basin. We made it just as the sun rose.
Here’s the route we took up the gully to the saddle. We stayed just above the willows, and hiked southeast across the basin until we were directly below the gully, then ascended the gully.
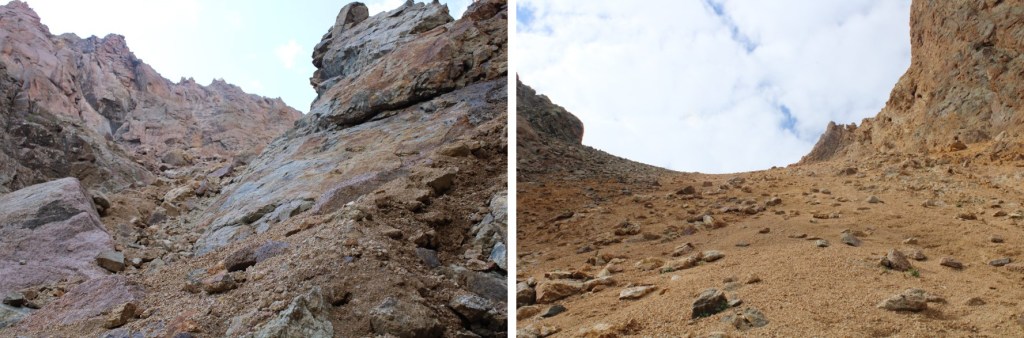
When I was here in August, there was snow under the scree in this gully. Because it was under the scree, I didn’t see it and it caught me by surprise when I unexpectedly sank up to my waist in slush. Back in August, I made it up this gully by going right, but this time we went left. It looks like the conditions change here frequently, so pick the line that goes best for you. Also, microspikes help here with the scree (if you don’t use microspikes on scree you’re making it more difficult than it needs to be: get some spikes for summer too). Here are some pictures of the gully
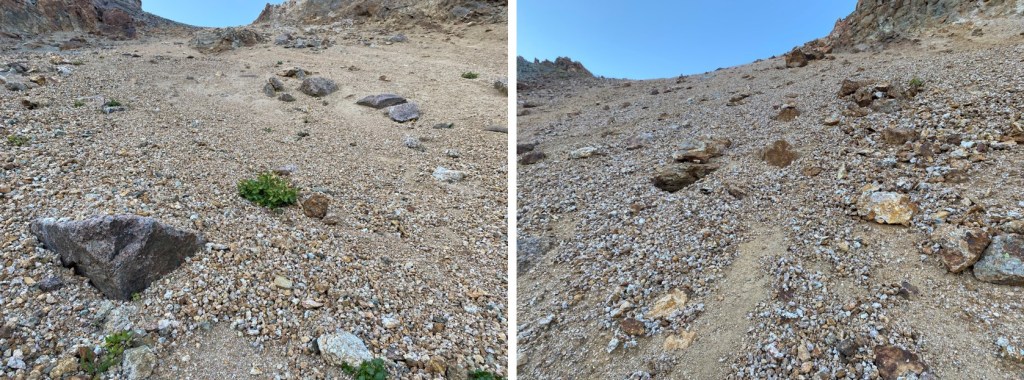
The second half of the gully is full of large rocks, which eventually give way to scree. This scree is some of the worst scree I’ve experienced. This is where your microspikes really come in handy. Back in August I followed fresh goat tracks to the saddle. Those tracks in September had been used several times and formed nice switchbacks. However, it appears these tracks are destroyed every winter, and need to be remade every summer/fall.
Once at the top of the gully it was time to lose about 350’ of elevation. We did this by following the scree southwest, staying high but just below the rock outcroppings (we took a different approach on the way back).
We continued down to about 12,500’, and then entered the Peak 15/Peak 16 gully
This is the gully you’re looking for. There are cairns here, and it’s the first, obvious route ‘up’
The first part of the gully is class 3, and just requires some rock hopping.
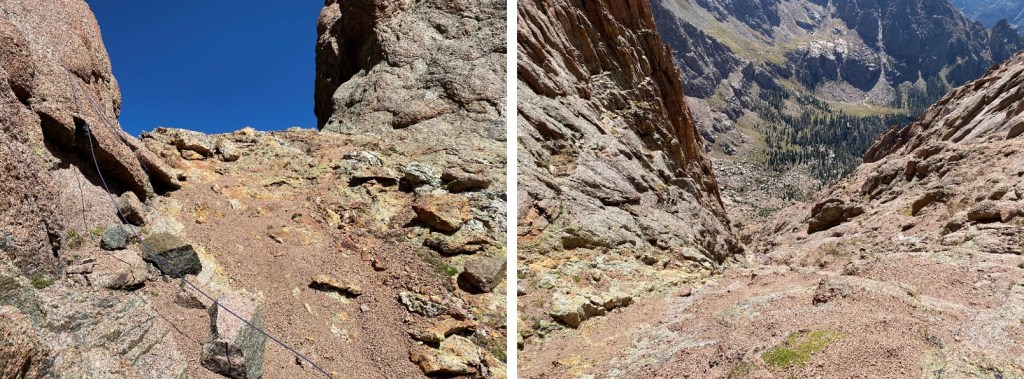
This gully turns into a couloir, and becomes easy to follow, but difficult to climb. This is the first class 4 section. There were no good hand/foot holds, as everything crumbled in my hands. In August it was running with water. Tim spent some time cleaning away the loose rock, making climbing easier. Even in mid-September, there was still water here. Wearing a pack with climbing gear/rope makes the ascent that much more difficult.
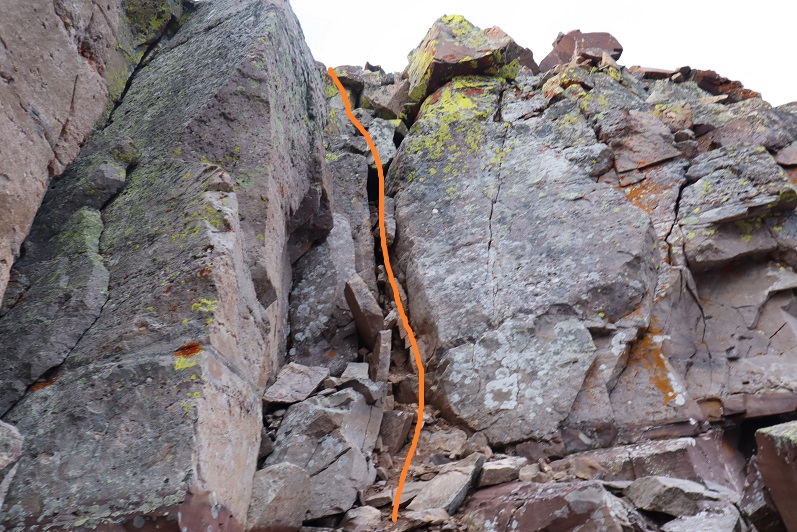
The second class 4 section of the couloir was… more than class 4. I started up, and when I got about halfway through realized I may have been in over my head. I couldn’t climb down, so I had to keep going up. Since I was ‘stuck’ it became a mental exercise, where I told myself “If I can do this while on rope, I can do it off rope as well”, but to be honest it was intense and I didn’t feel comfortable soloing this (but I did). There was a lot of deep breathing involved. I’d recommend roping up here, if you can find a way to do so. Climbing shoes would have been helpful (but they were in my pack…). We both felt this was class 5, not class 4. I belayed my partner on this section from above.
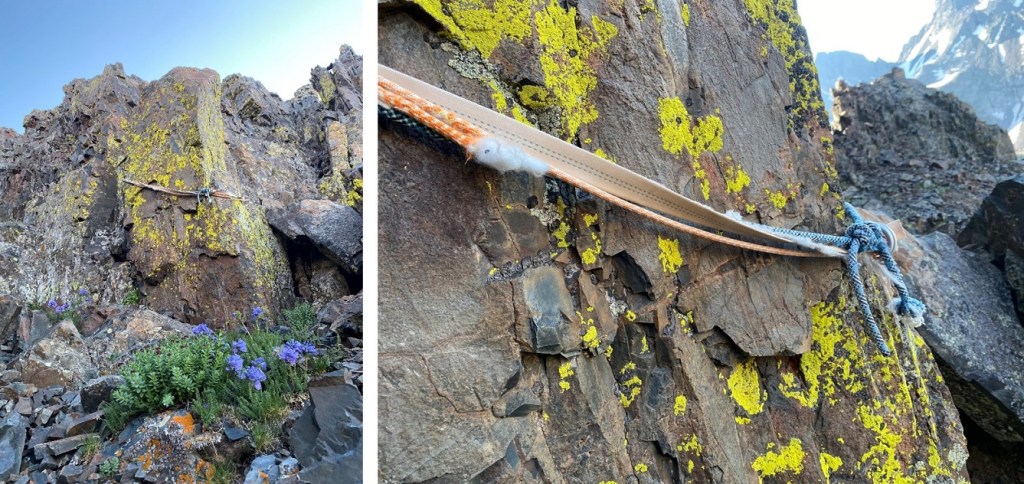
Just above this section there are anchors set up. It’s good to take note of where they’re at as you’re passing them. There will be three sets of anchors in the couloir. Here are some more pictures of the couloir. A lot of the webbing set up looks faded, but there’s plenty there. We cleaned up some of the older webbing and hiked it out (the stuff we didn’t even need to cut because it was frayed and falling apart).
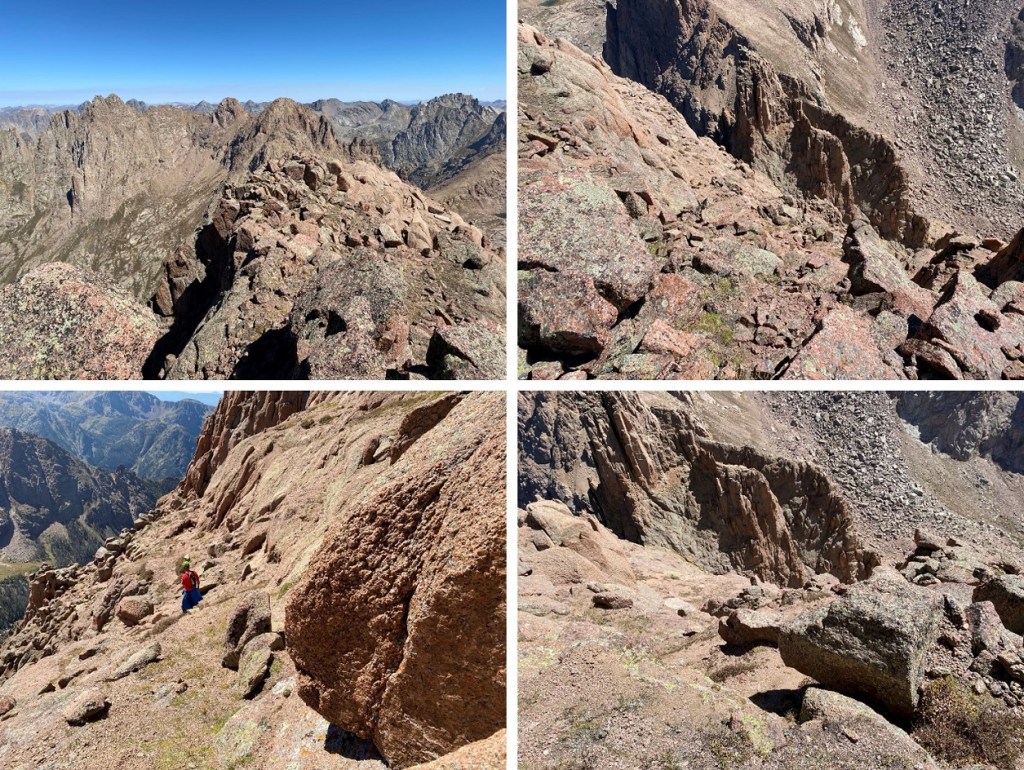
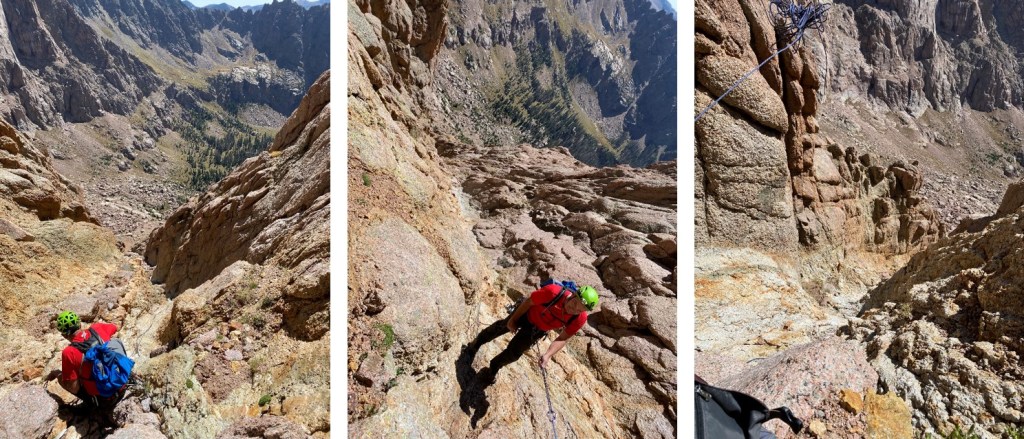
The couloir seemed to last forever. At 13,050’ we exited the couloir, below the 15/16 saddle, and went left up the ledges to 13,300’. This was class 3 scrambling with a lot of kitty litter (kitty litter is the name of the game on this climb). Where applicable, I noted Tim tossed unnecessary obstacles aside, like tumbling rocks and kitty litter, to help clear the route.
When we were about 50’ below the Peak 15/16 saddle it was time to rope up for the slabs. This picture looks at the saddle, but we were headed the opposite way, left/west (this picture is just a good visual of where you’ll be)
We were headed west, across the ledge system.
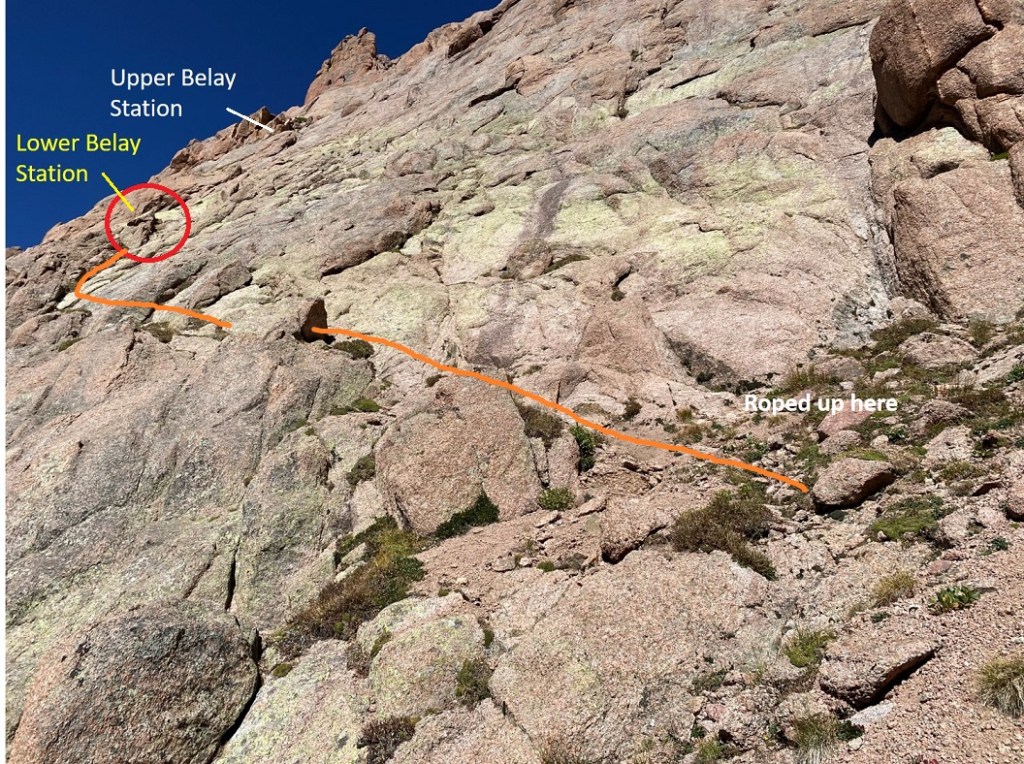
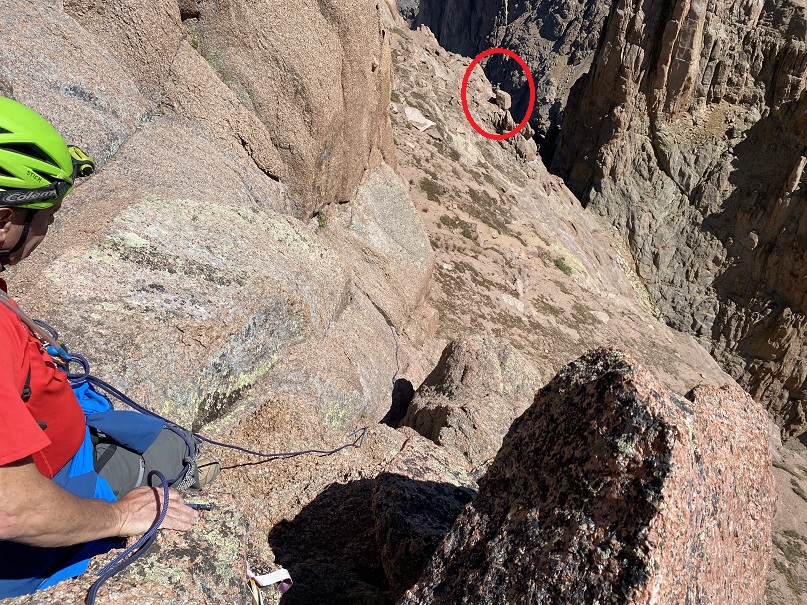
While we were still on level ground, we roped up. Then Tim led the way across the slab. It was good to get roped up first because there wasn’t a lot of room at the rappel area to do so. Here’s an overall view of our roped ascent and the belay stations. I put on my climbing shoes, but Tim didn’t feel his were necessary.
This is what it looked like getting there. We are aiming for the red circle to get to the lower belay station.
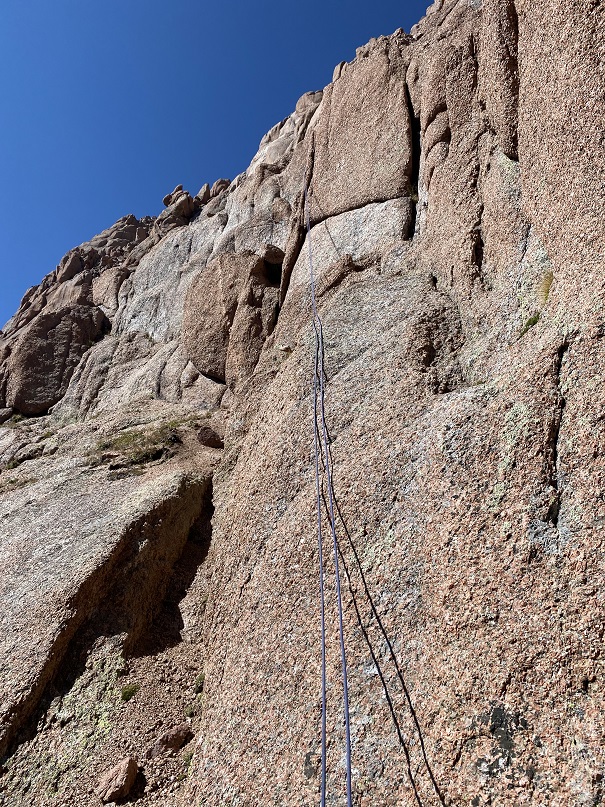
Once at the lower belay station I was set up to belay Tim from below as he set the protection and climbed first. Here’s looking back at the traverse
Oh, there’s some exposure here.
Since Tim’s the more experienced climber (WAY more experienced) I’ll let him describe this part of the route, starting with his overview:
Look for a series of shallow ledges that leads to a three foot wide ledge with a horn big enough to straddle. This is still 4th class terrain, so you can simply belay sitting next to the horn without an anchor.
If you feel you need one, wrap the rope end around the horn three times to make a tensionless hitch or use a cordalette. Bring your second up and have them belay from the three foot wide ledge below you. There will be about three horizontal seams you can place pro in ranging from #3 Camalots to .25. I managed to place five pieces total.
After your last piece you want to head for a shallow V slot next to some bulges. This is the 4th class exit and leads past a rock with a crack in it you could build an anchor in. This is exposed and one could fall from there, and you may be out of gear as I was. Continue then above this to where the steepness of the pitch eases off and there are two scrubby evergreen bushes. You can sling some of the roots for a sketchy, but adequate anchor. Once your second is up, you can both walk to the right towards a large, grassy ledge where the final 3rd class gully is.
I’m not a serious climber: I’ve been climbing for a few years, but I’m no expert. I was glad to be roped in, and wouldn’t have wanted to do this part without someone belaying me (or the other way around). A fall would have been fatal. Tim called it “poorly protected 5.4”. He placed 5 pieces of protection.
From the upper belay station, we turned right and followed the slopes east, looking for an access gully/kind of a small chimney.
The gully is about halfway to the saddle. This is what it looks like from below
From the east side it’s easier to see. This is class 3, with a cairn at the bottom.
Once up the gully, we followed the ledges northeast to the ridge. This was “choose your own adventure”, but we aimed for the northeast corner of the ridge
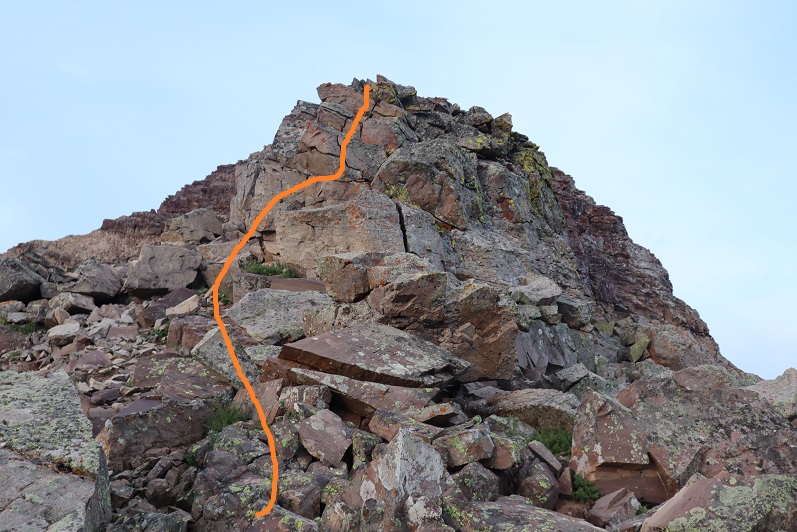
Once the furthest northeast we could go, we ascended the ridge via a short, easy class 3 ramp, and scrambled west to the summit
Final, class 2 scramble to the summit (easier than it looks)
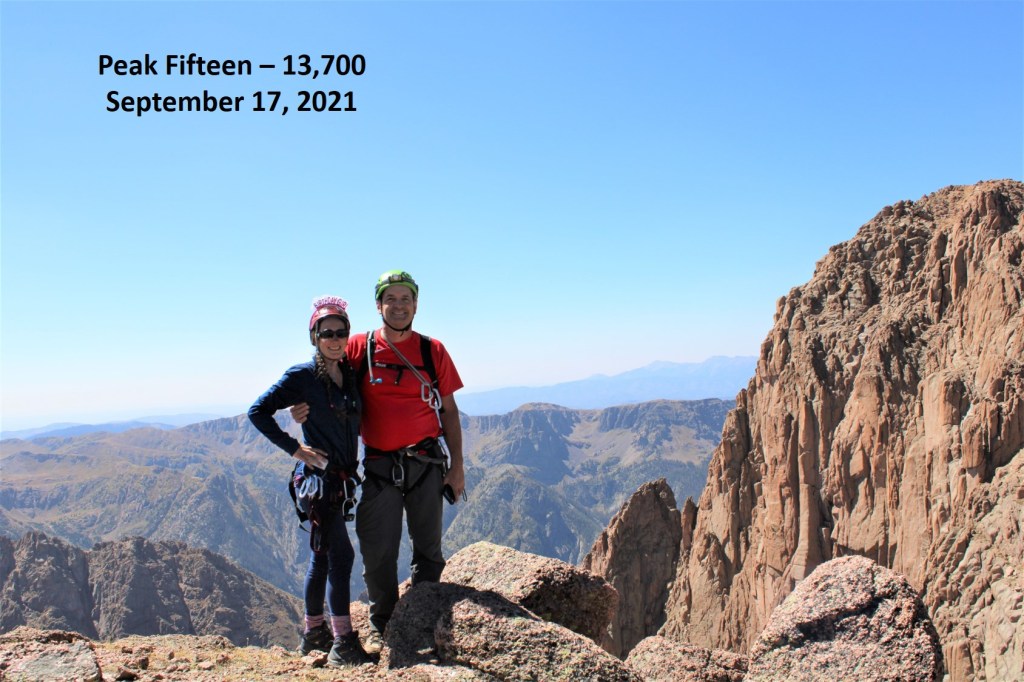
We summited Peak Fifteen at 12.30pm. Also, yes, it was my birthday, so I was celebrating not only my bicentennial finisher, bust also turning 41. Woot!
Peak Fifteen:
We stayed at the summit for quite a while, enjoying the beautiful day and awesome views. The summit register was a tube, so naturally the paper inside was wet. I added a pencil to the register, signed my WW’s, and we headed back down.
Note: we rappelled 6 times before making it to the bottom of the couloir. That’s a lot of rope work! There were adequate webbing/rings set up, which held just fine but are bleaching and might need to be replaced next season (see pictures). We cleaned up some of the ripped/damaged rope and brought it out. We brought a 60 meter, 7.9mm rope. It worked perfectly for the ascent and rappelling down, but being smaller in diameter, tended to get stuck in the cracks. Also, this is where I learned Tim curses when ropes get stuck.
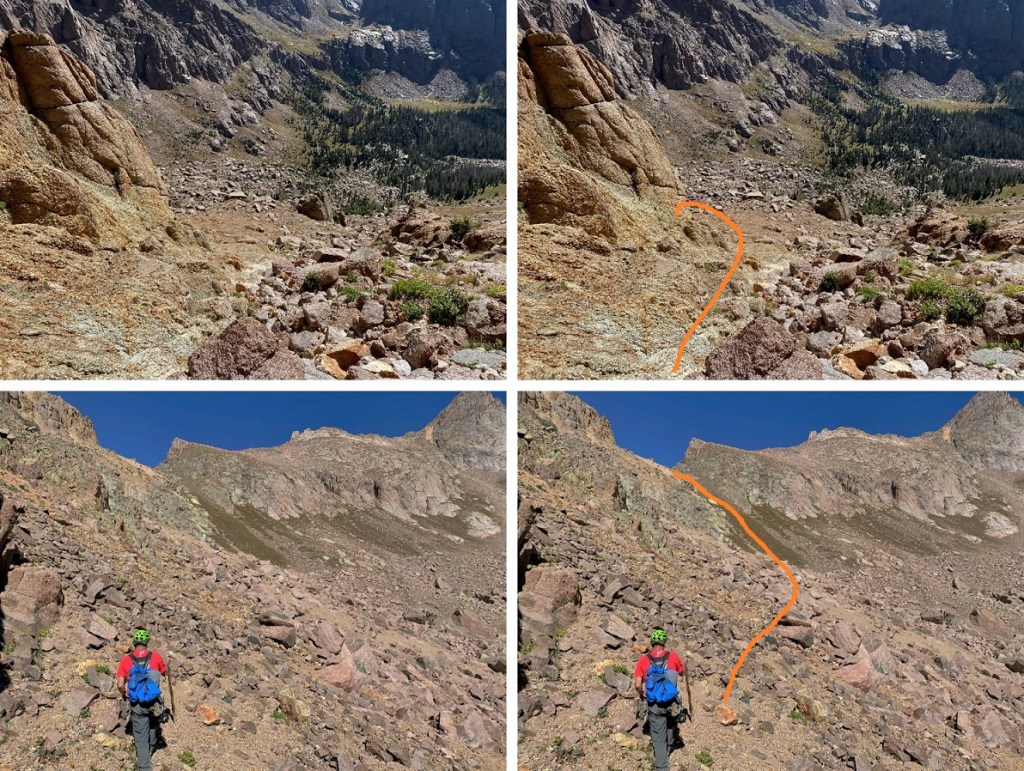
We followed the ridge east back to the ledges, which we followed southwest.
At 13570’ we headed back towards the saddle and the anchors. We rappelled down from the first anchor, and afterwards headed towards the second anchor, circled in red.
The second rappel
Here’s looking up from the bottom of the second rappel
The third rappel brought us to the Peak 15/16 saddle
Here’s looking up and down from the saddle
Once at the saddle, we went southwest on slopes, following the couloir to the right
We made our way back to the couloir, and rapped 3 more times to the bottom. We counted 6 rappels in all.
From the base of the couloir, we made our way back to the scree-saddle, this time taking the direct, grassy/tundra approach, to avoid the scree. We saw mountain goats here.
And then back down the scree filed gully, scree surfing to the basin
From the basin we hiked back through the willows to our campsite at Ruby Lake, making it back around 6pm. Round trip from Ruby Lake to the summit of Peak 15 and back to Ruby Lake made for about a 13 hour day. All that rope work sure took its time! We celebrated with some whiskey and wine; after all, this was my bicentennial finisher, and it was my birthday… no one got hurt, and, this was much harder than anticipated by both of us for different reasons and we were successful. All reasons to celebrate!
We made it an early night and were up at 6am to hike back to Purgatory. The night was much warmer, if only because I didn’t go to sleep in wet, sweat filled clothing. The hike out went fast, as we talked much of the time. We made it to the Animas River/Purgatory trail bridge, and were surprised to see people in sandals carrying small children (some of them crying). Apparently, the train stops at Cascade Wye now for passengers to get off and walk around (not sure if it’s ever done that before?).
We made it back to Purgatory Trailhead around 2:30pm. My tracker says we went 53.34 miles, with 13765’ of elevation gain.
I would like to thank Tim for being my climbing partner and accompanying me on this trek, which I’m sure ended up being more of an adventure than he bargained for! I believe this climb takes two experienced climbers to complete safely; It was nice to have someone I could trust join me. In addition, he’s been my climbing mentor, voluntarily taking me climbing and ‘teaching me the ropes’ for years. He’s the one who taught me how to set up anchors, how to climb and rappel safely, and all about proper gear. I couldn’t have done all the other class 5 bicentennial peaks without his instructions. I still keep his safety checklist with me in my climbing gear.
I also want to thank everyone who has posted trip reports in general, but specifically trip reports for Peak Fifteen, as for me it was the hardest of the bicentennials. We all experience hikes/climbs differently, and it was nice hearing the difficulty/route finding levels from other climbers. If you plan to climb this peak, please take it seriously, and read all trip reports you can find on this peak before attempting a climb, as they all offer great insights.
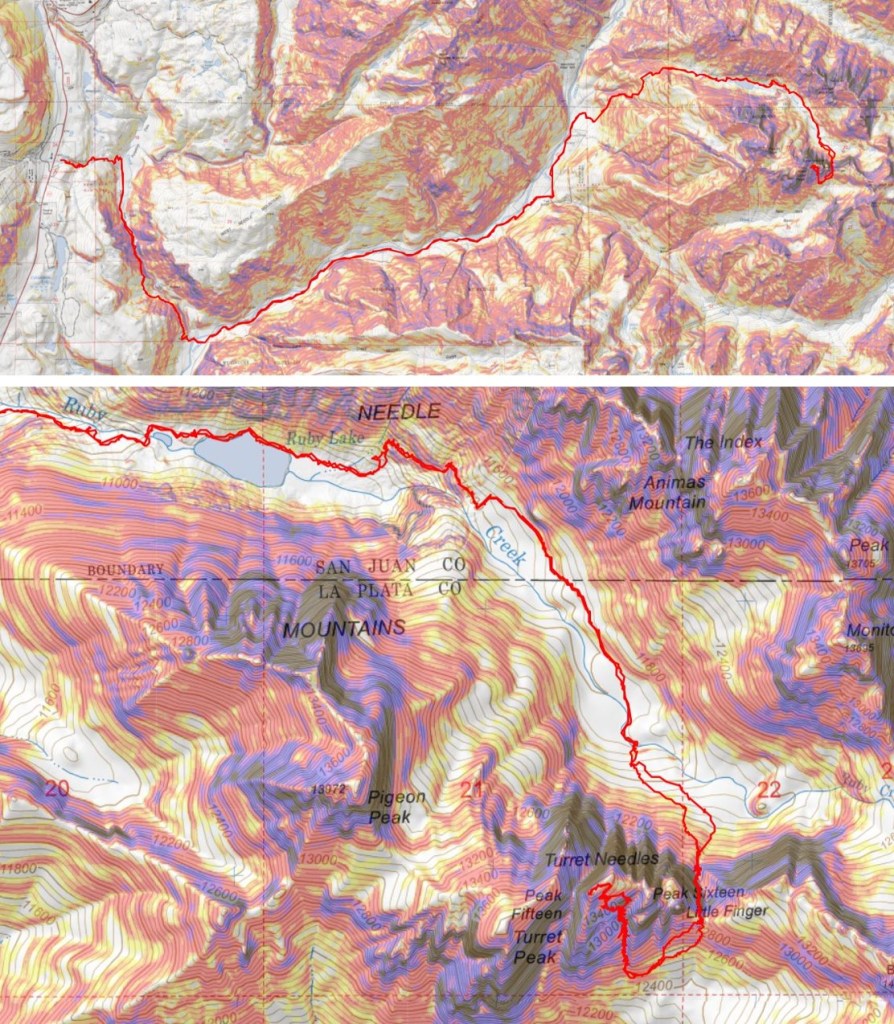
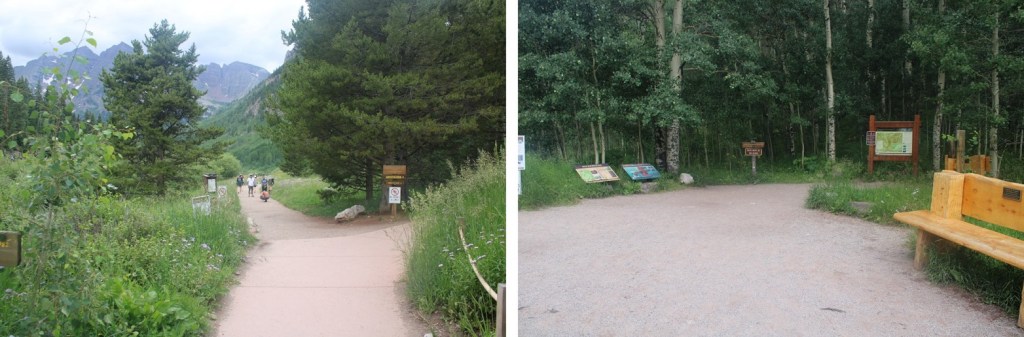
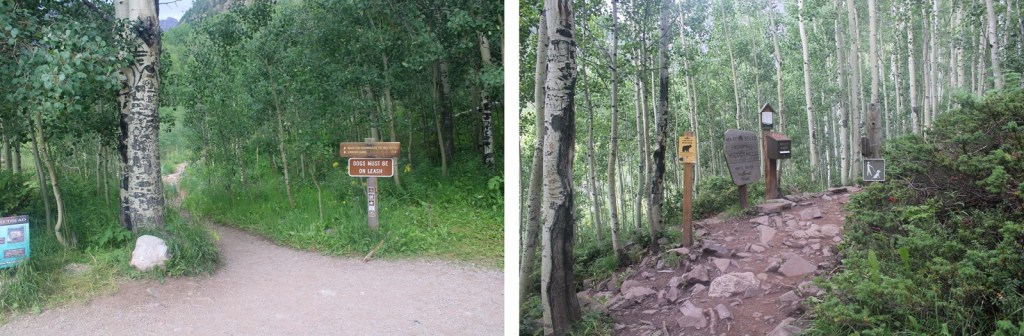
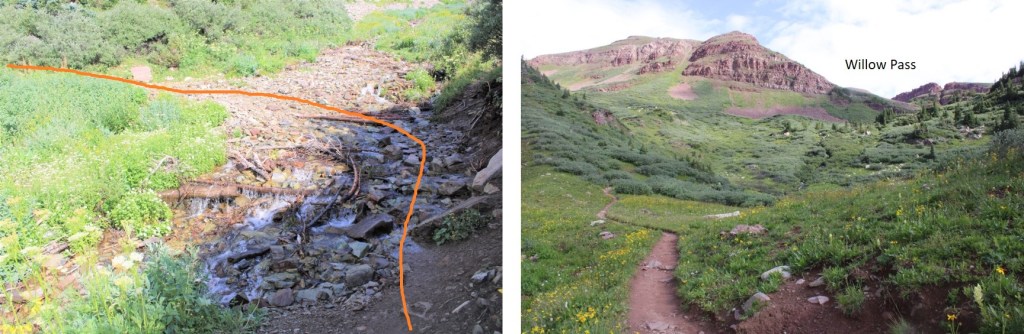
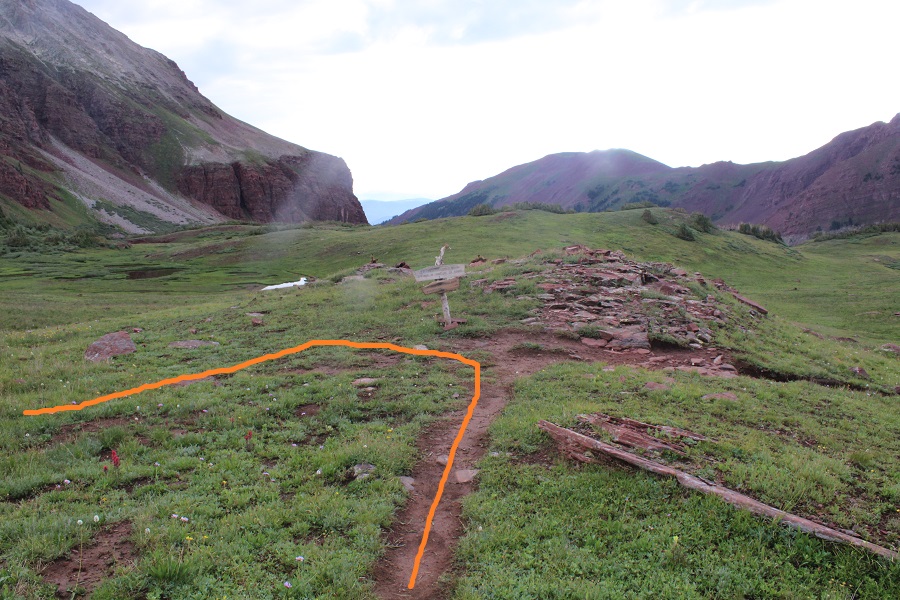
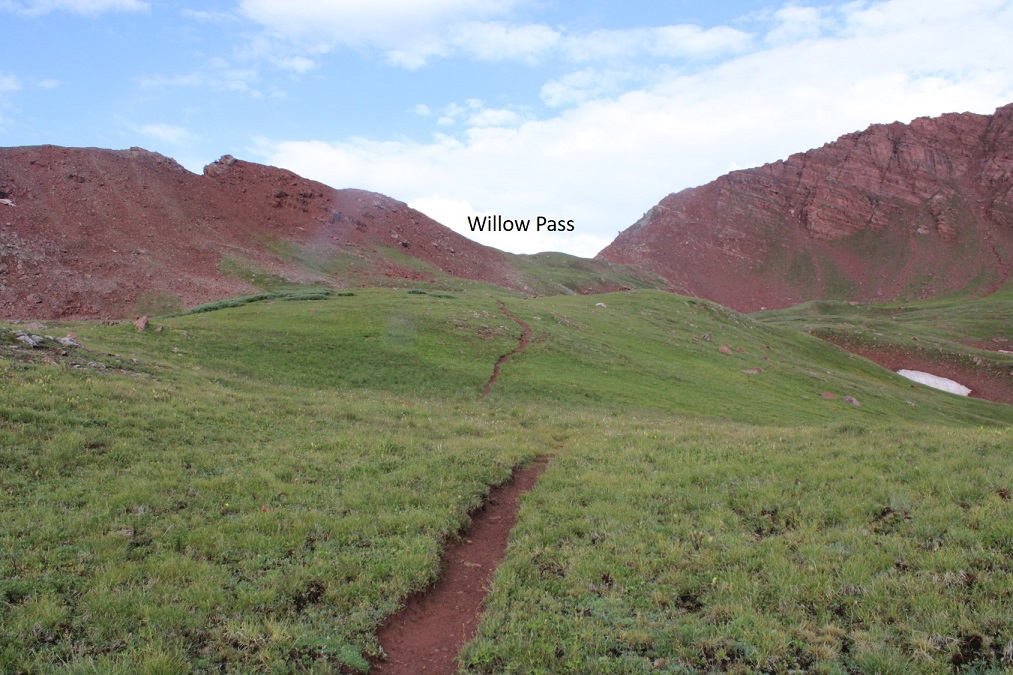
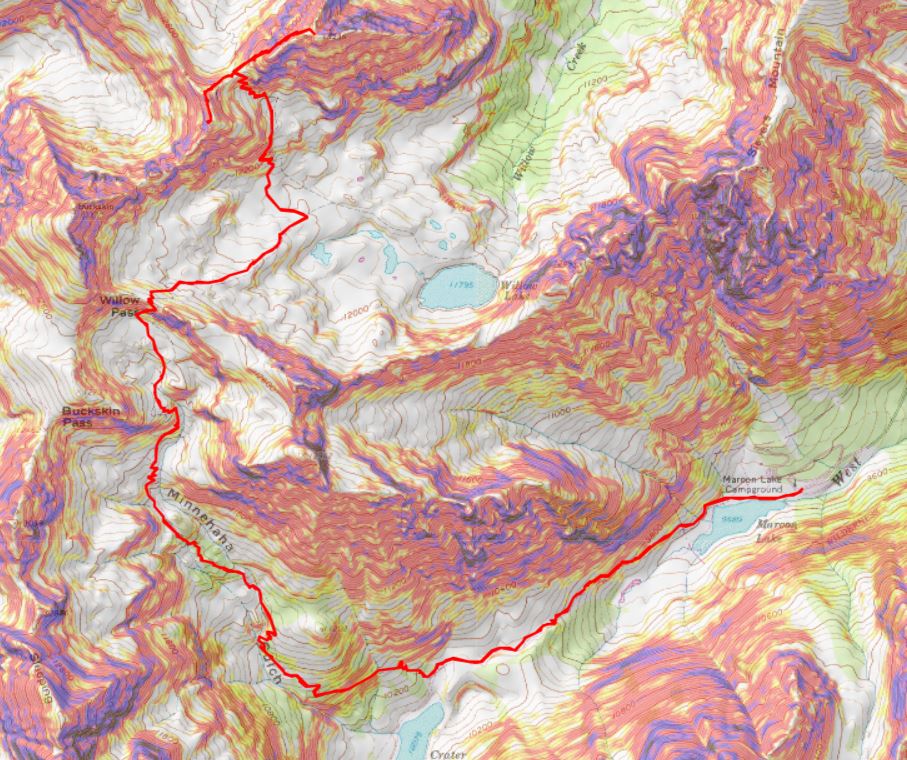
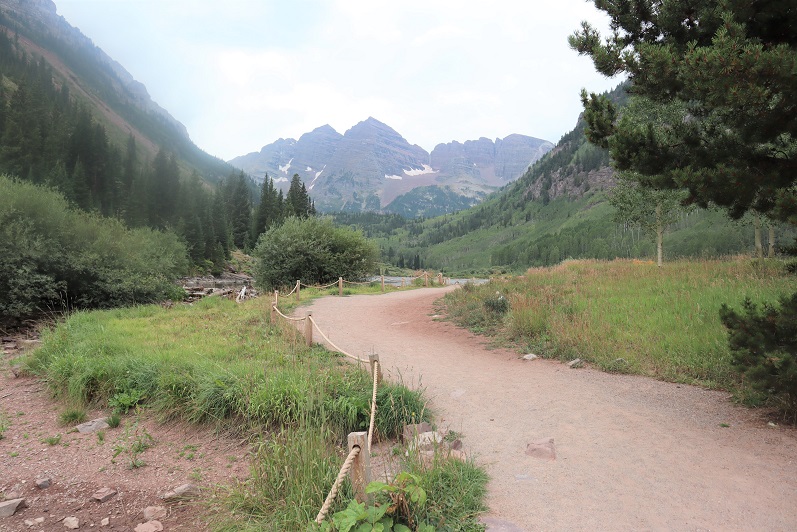
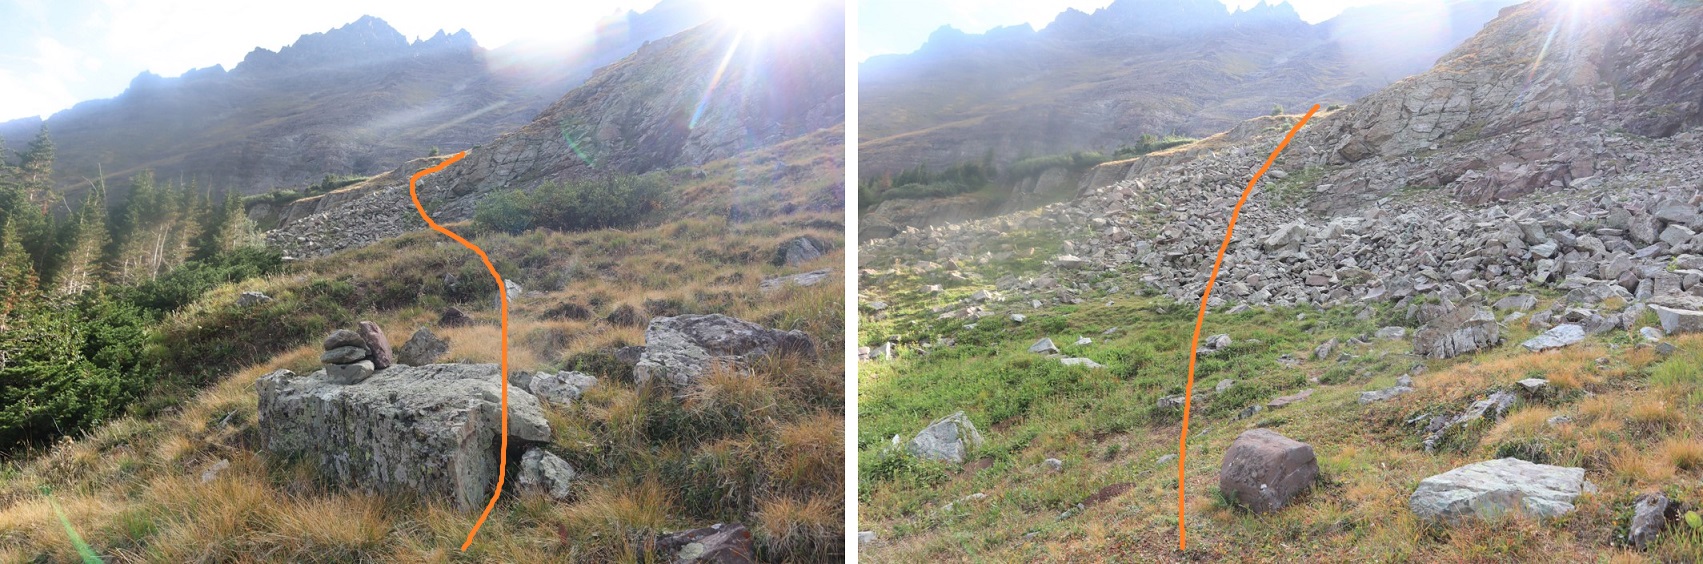
I decided to hike these peaks from the Maroon Bells area because I had a pass and was already there. I knew today was going to be a straightforward but long day, and it was supposed to storm in the morning, so I was up extra early and on the trail at 2am. I started at the Maroon Lake trailhead, and passed a few deer grazing in the dark. I skirted Maroon Lake to the right, and continued on the trail towards Crater Lake.
At the first junction I continued straight, and followed Maroon Snowmass Trail 1975 up into Minnehaha Gulch.
I continued on this trail all the way to Willow Pass.
This is a class 1 trail that crosses a creek, then heads north through the basin.
Stay right at this sign
And follow the trail to Willow Pass.
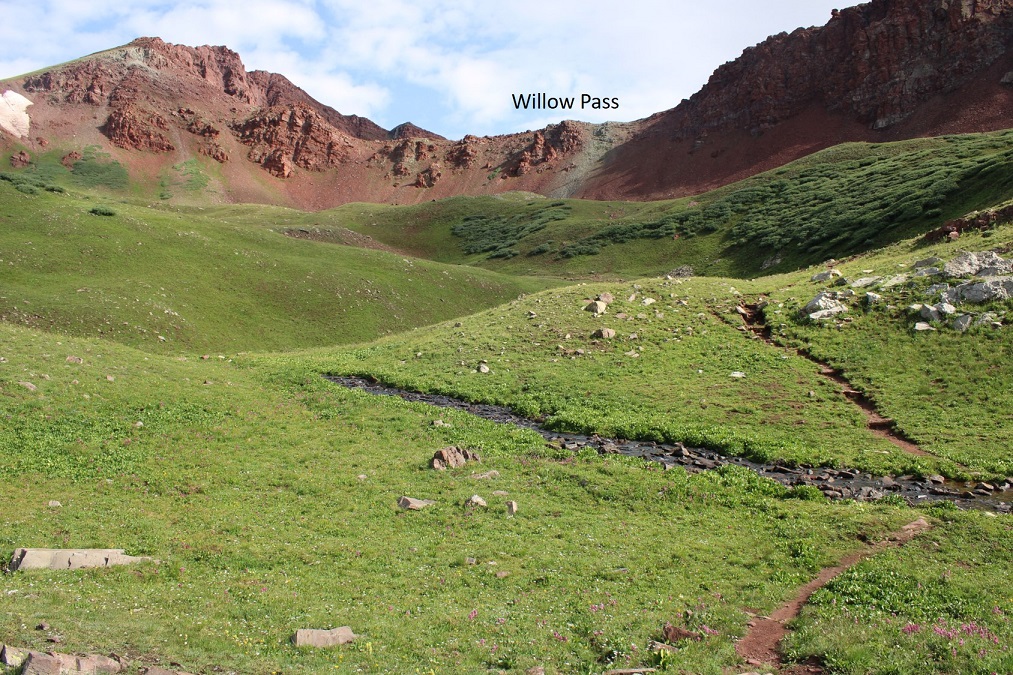
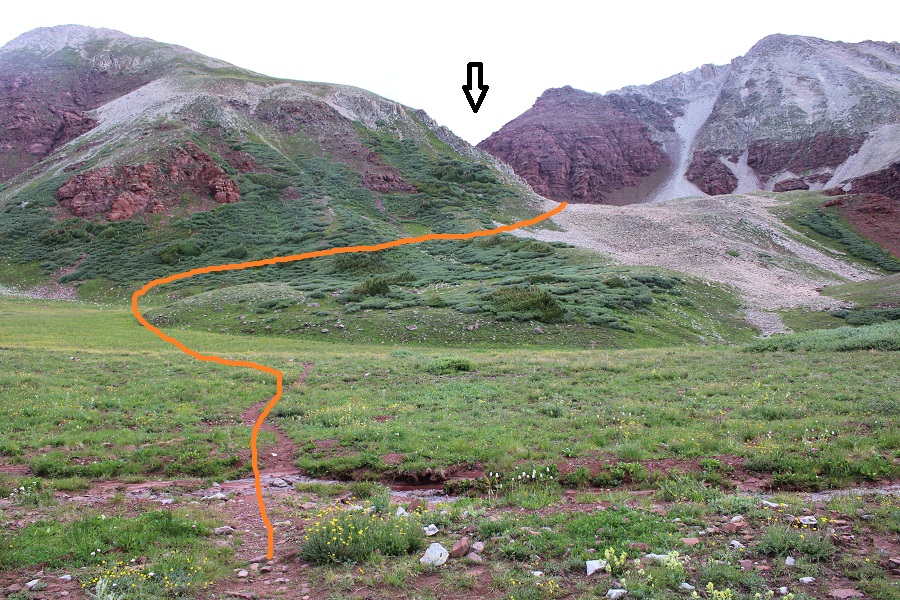
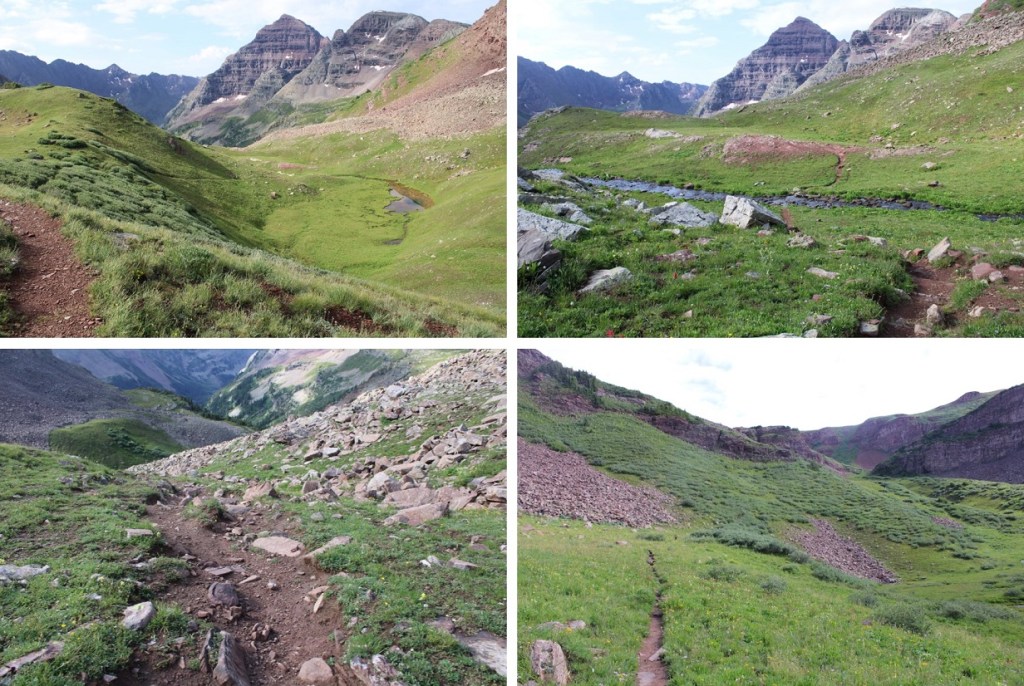
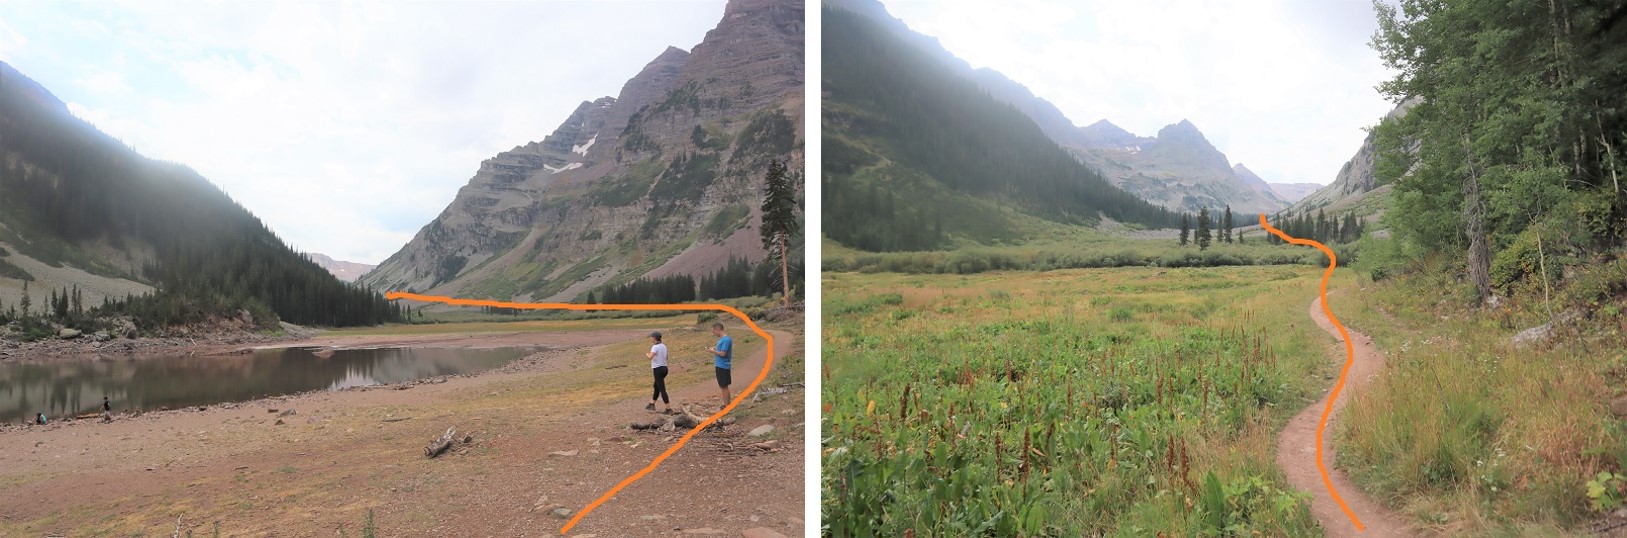
CalTopo tells me I hiked 5 miles from the parking area to Willow Pass. From Willow Pass you can see today’s peaks
From Willow Pass I descended 560’ into the basin
I came to the Junction for East Snowmass Trail/Willow Lake, and turned left, following the East Snowmass Trail.
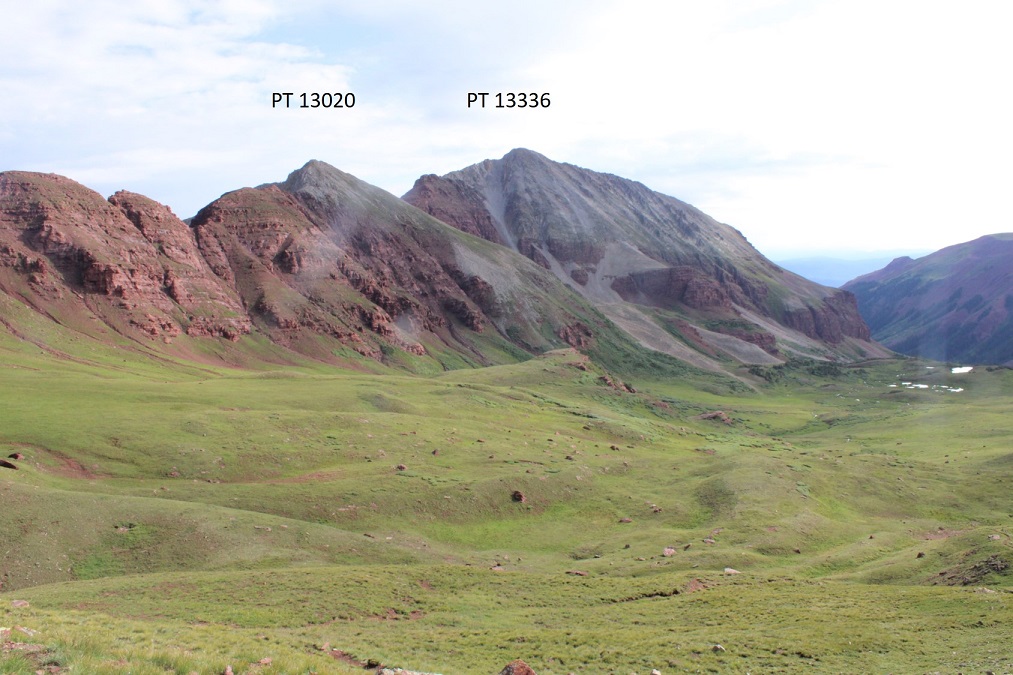
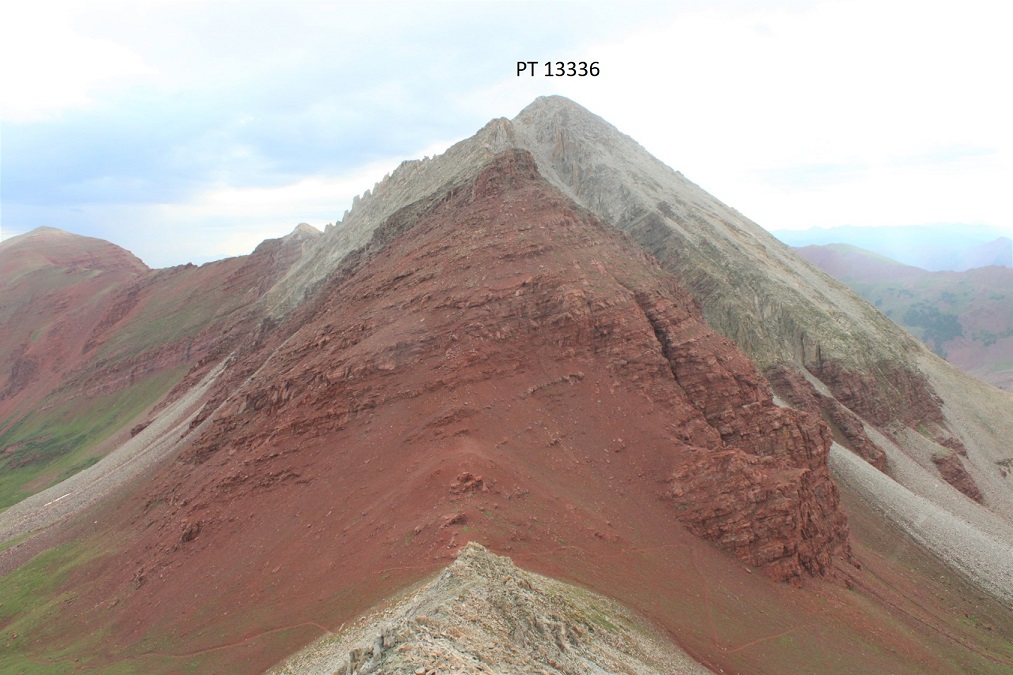
I was now following the trail towards the saddle of PT 13336 and PT 13020
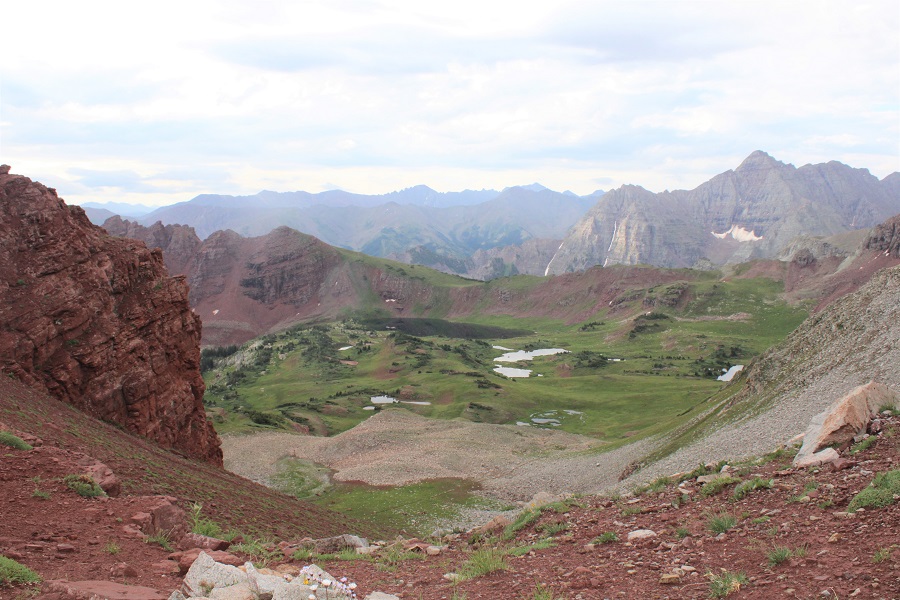
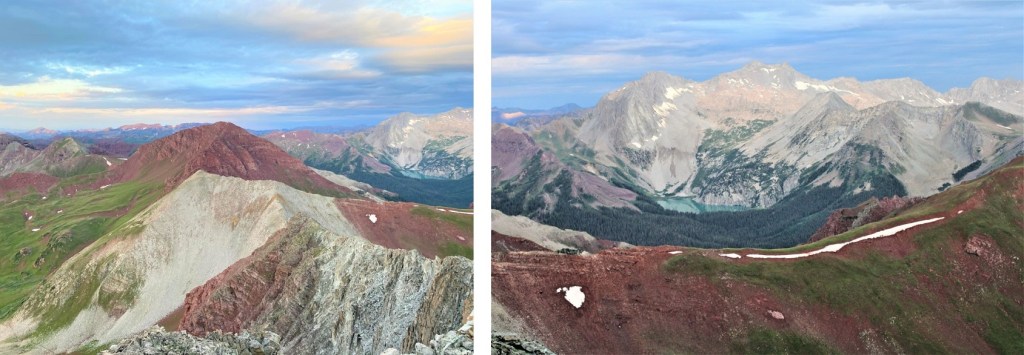
The upper basin was really neat, as I could see two different types of rocks, one coming from each mountain. The color contrast was interesting. The trail was still class 1 to the saddle, staying on the tundra/red dirt.
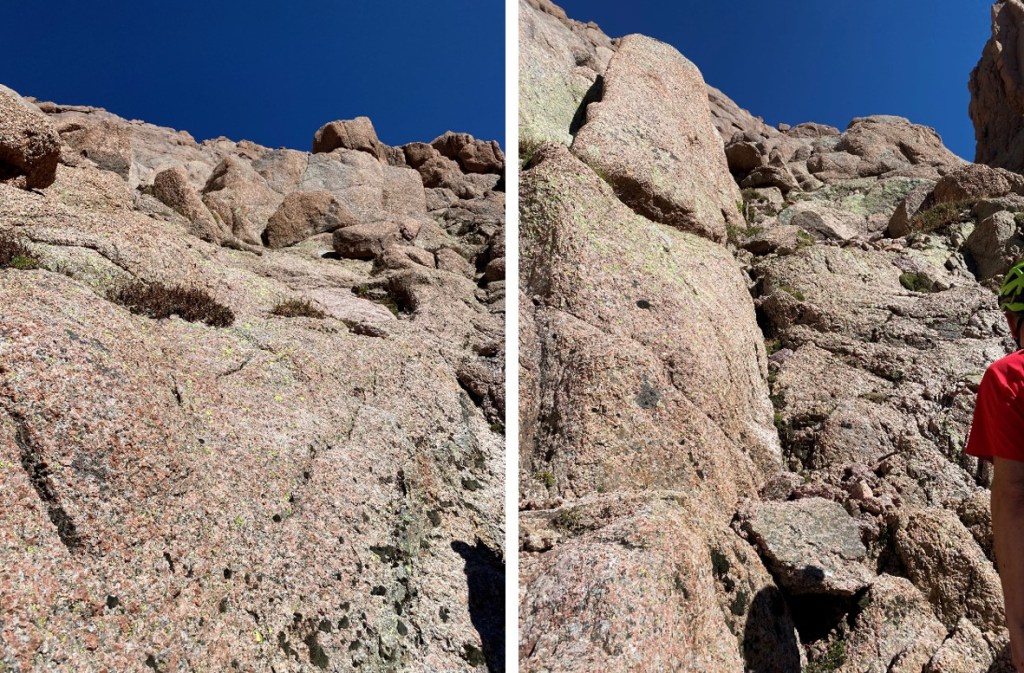
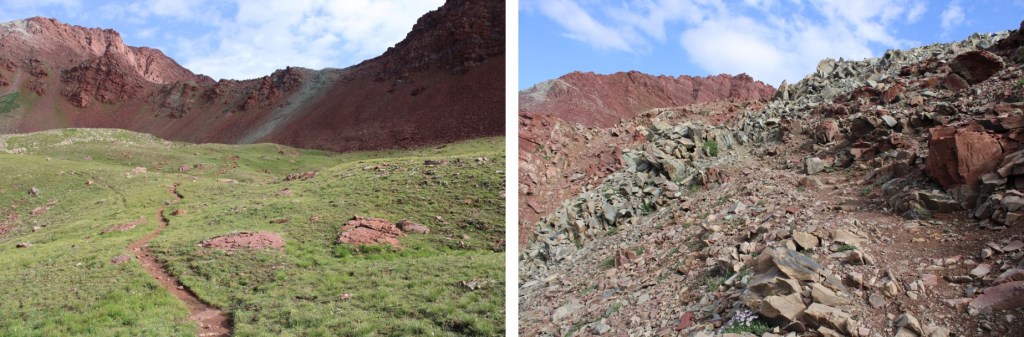
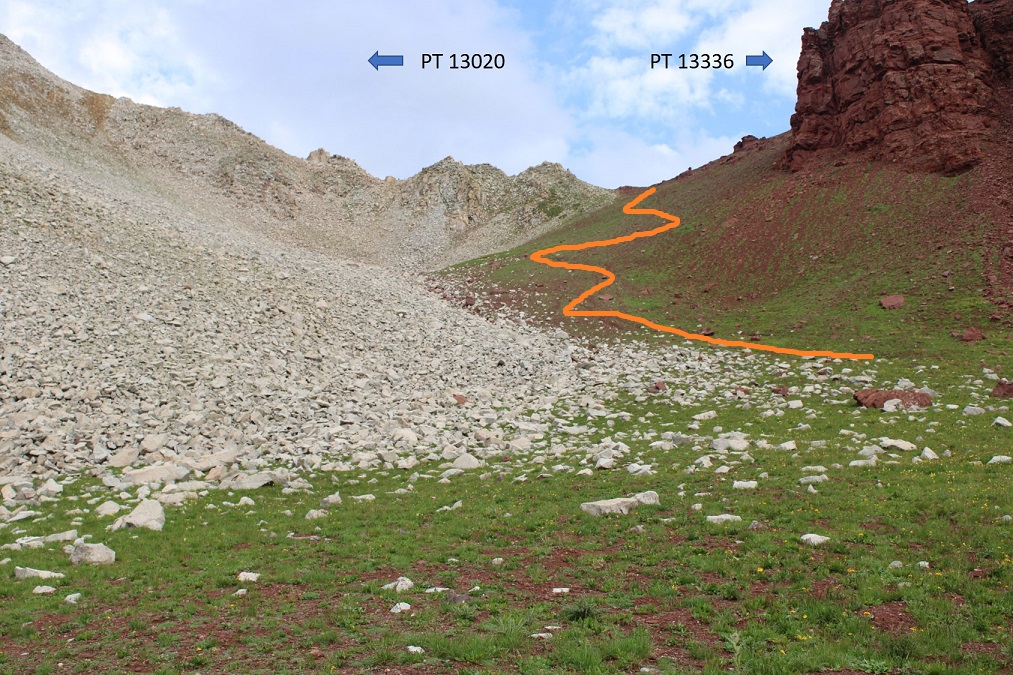
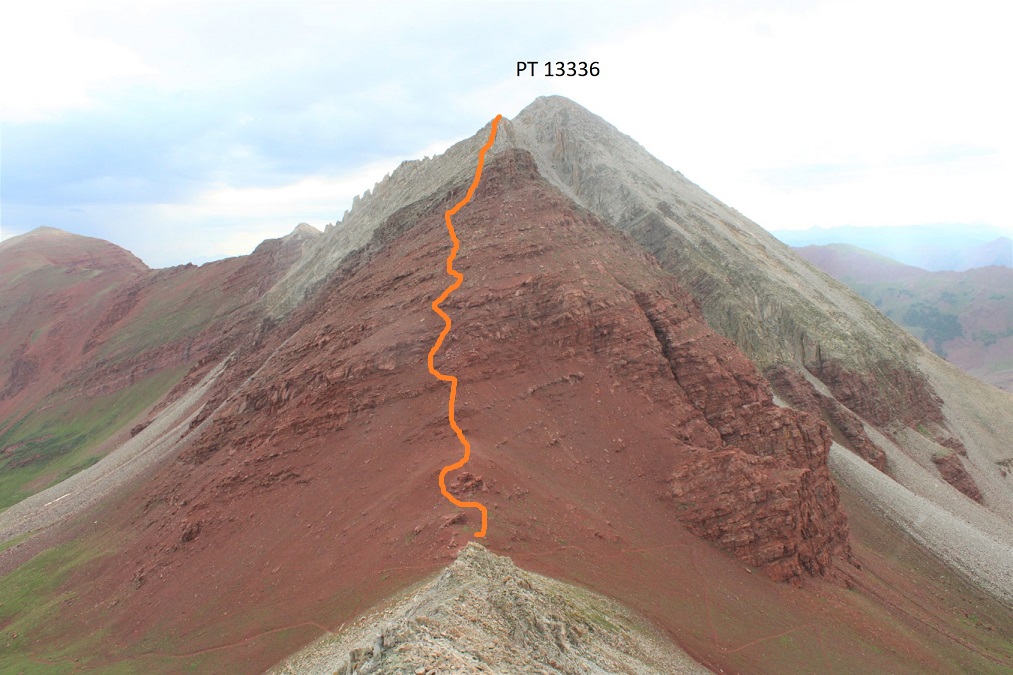
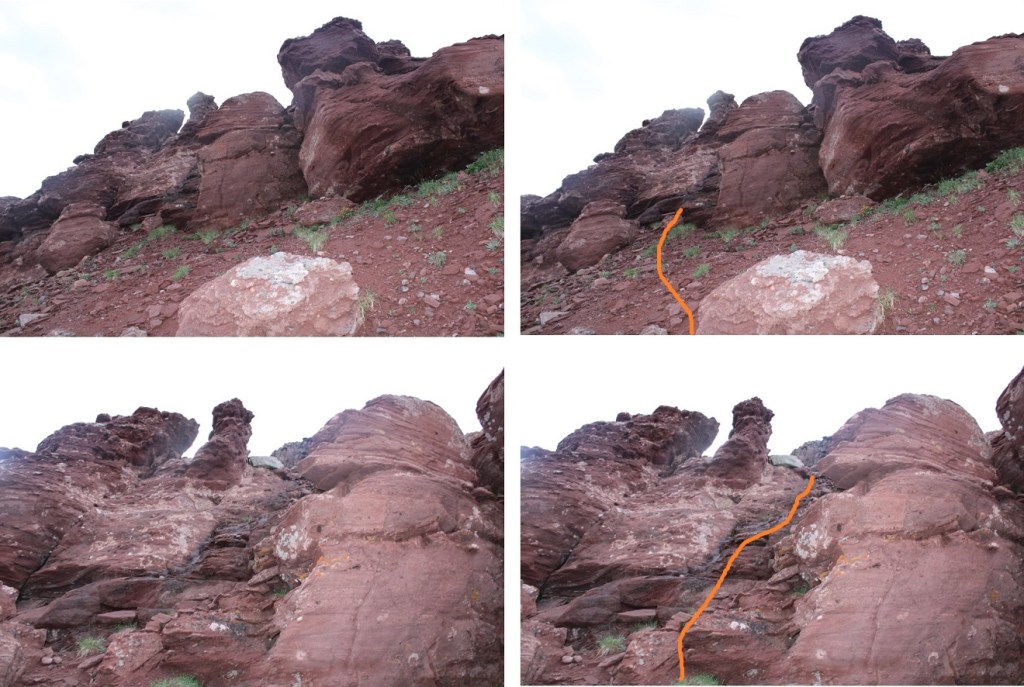
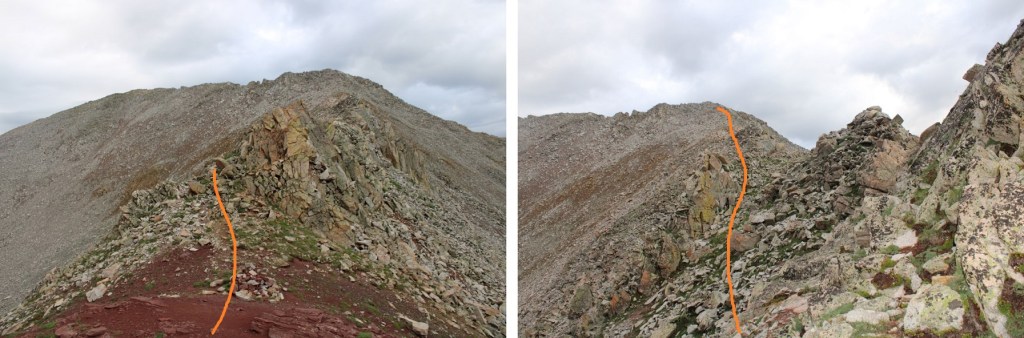
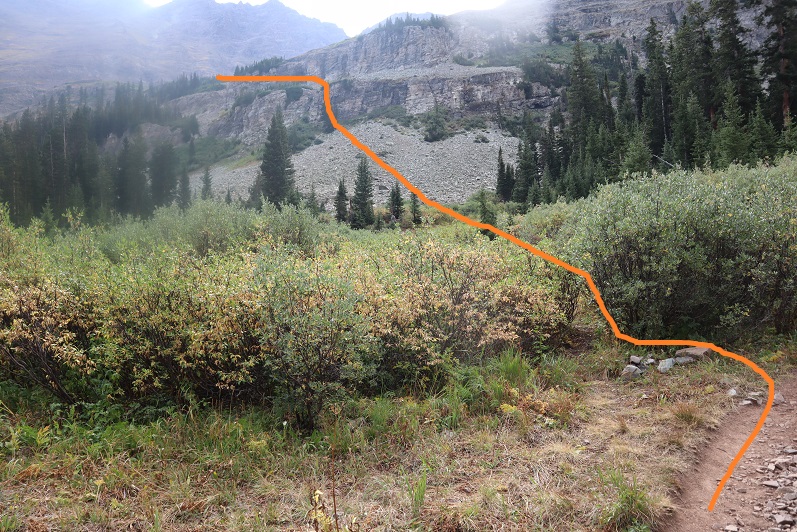
Once at the saddle it’s a good idea to put your helmet on. I decided to tackle PT 13336 first. This is class 3, and takes place on loose rock. You may want to put on your microspikes for added traction. The red dirt was mushy because it had recently rained, but it was still loose. Here’s the route I took, as seen from higher up on PT 13020 later in the morning:
And here are some step by step pictures of the route:
Easily walk around the first two obstacles to keep this part class 2
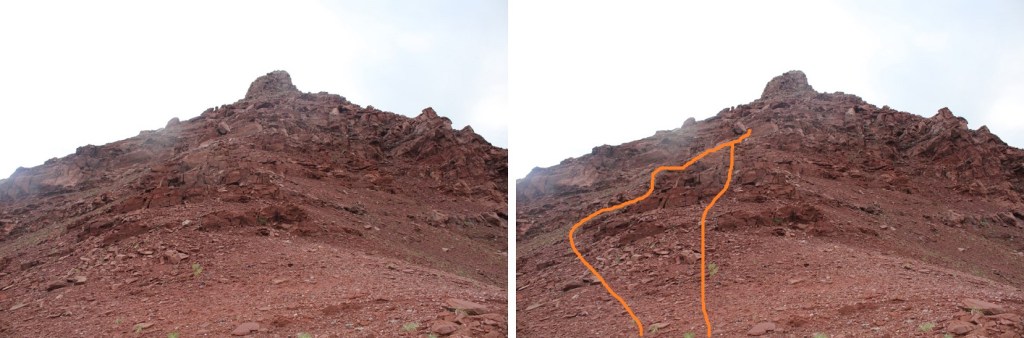
Next, you can either skirt the next obstacle to the left to keep this class 2, or go straight up and over if you like class 3
Now, keeping the ridge in front of you, the route becomes class 3. Head between these two boulders and ease a little left
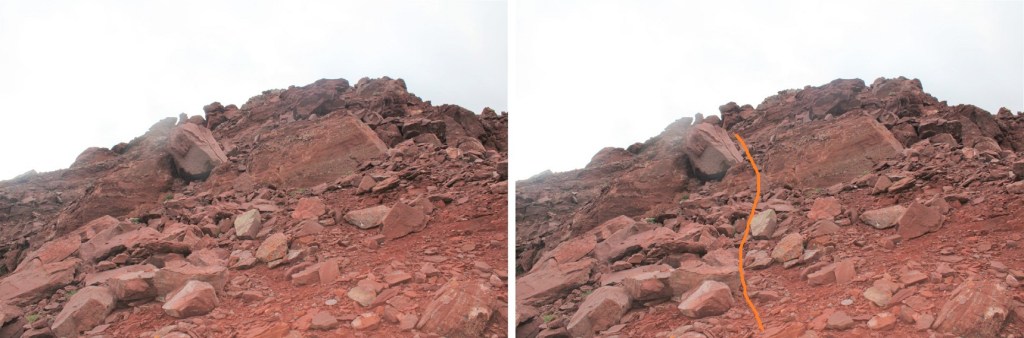
Look for a break in the rock formation and scramble up
You can now clearly see the ridge. Keep the ridge to your right, and skirt the north side of the ridge. There is no need to go up and over the ridge at this point.
The rock here is loose, and only gets looser. Follow the loose rock up a sort of side gully.
At the top of this rubble the rock changes. It’s no longer the loose Maroon rock: it now becomes the loose Snowmass rock. This rock is very slippery when wet, and even when not, so take care. These rocks are not stable. Just assume they all move. Cross this gully high. There is still no need to gain the ridge, you can stay just a bit below
I have a feeling the terrain here shifts often, so pick your way carefully. I traversed the ledge by staying about 50 feet below the ridge, and then gaining the ridge through a gully
At the top of the ridge you can see the true summit of PT 13336. The terrain stays just as loose as before.
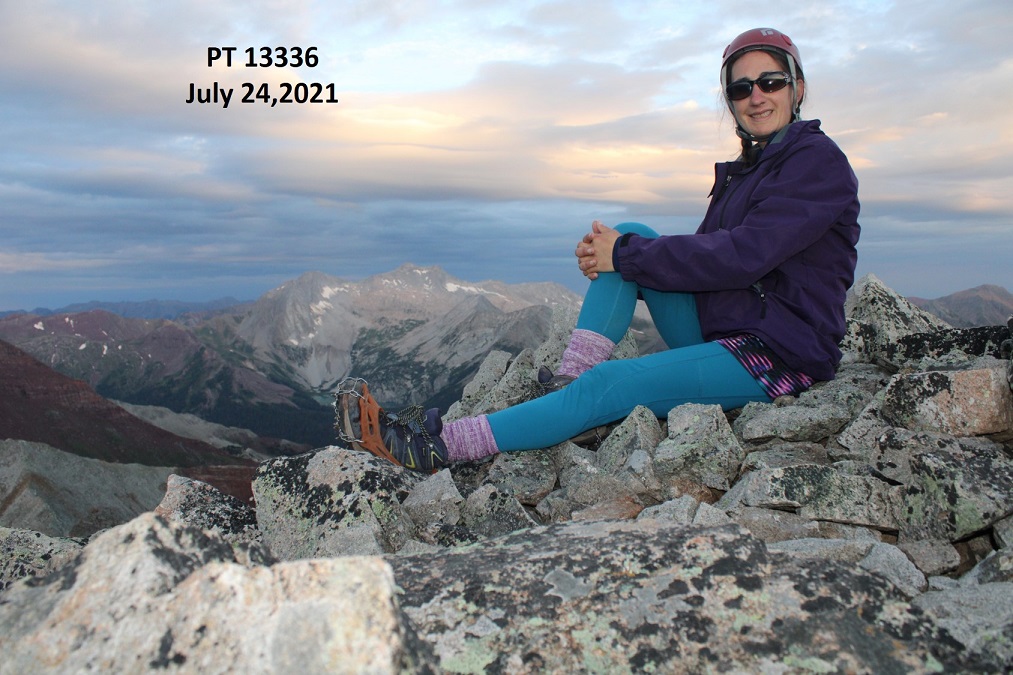
I summited PT 13336 at 6:10am
PT 13336:
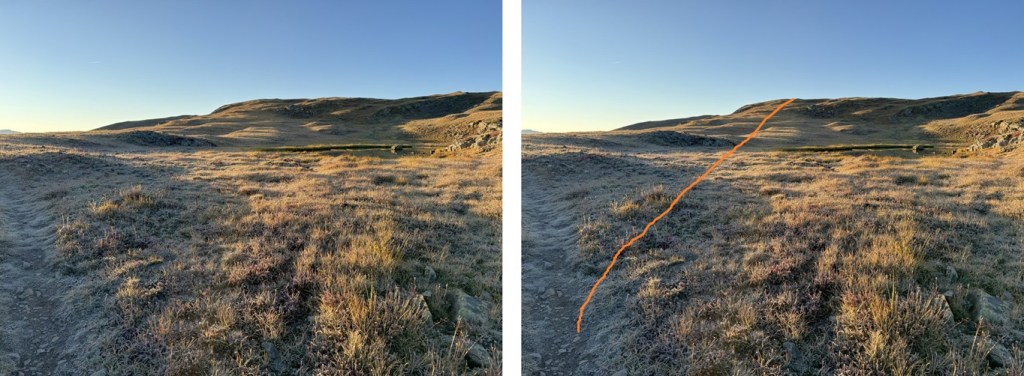
Here are some pictures of the way back to the saddle
Across the gully
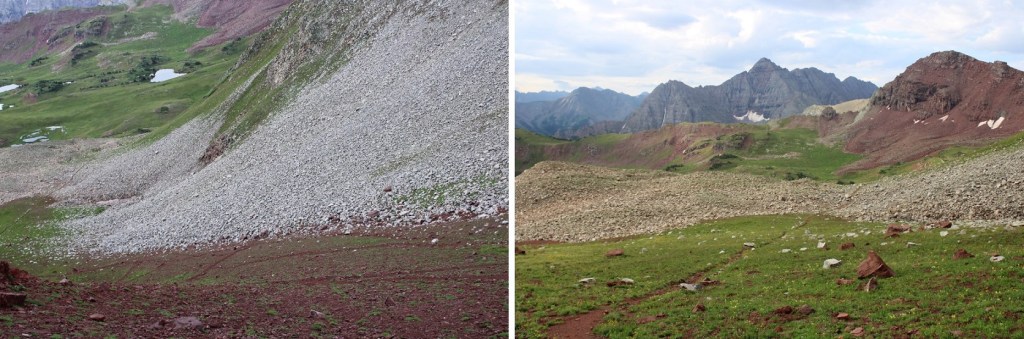
And down the maroon scree
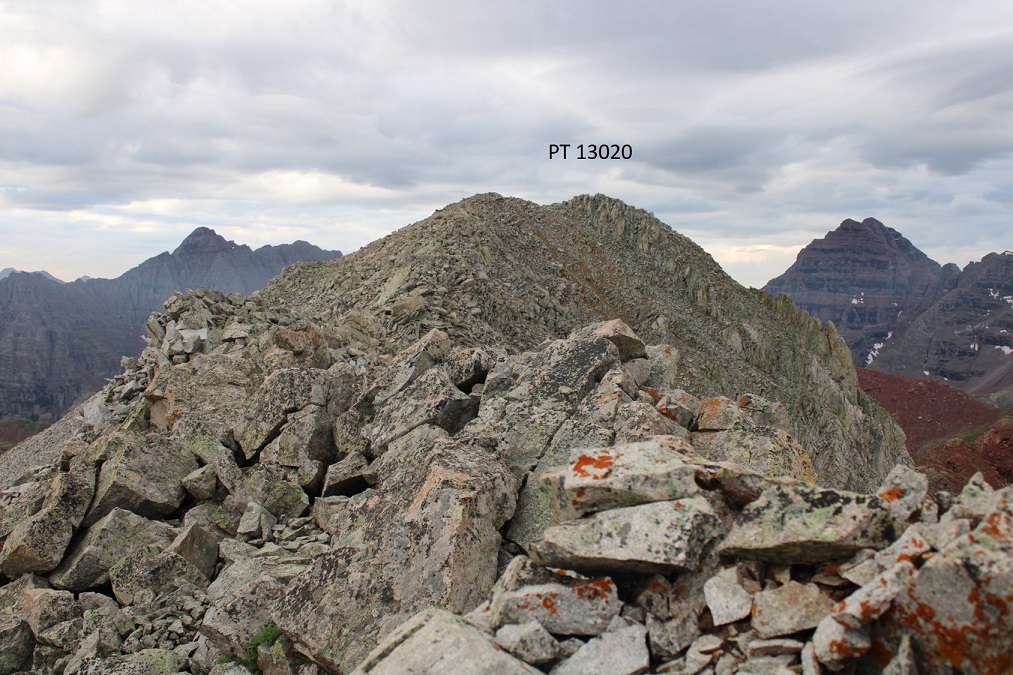
From here you can see the summit of PT 13020 and Buckskin Benchmark
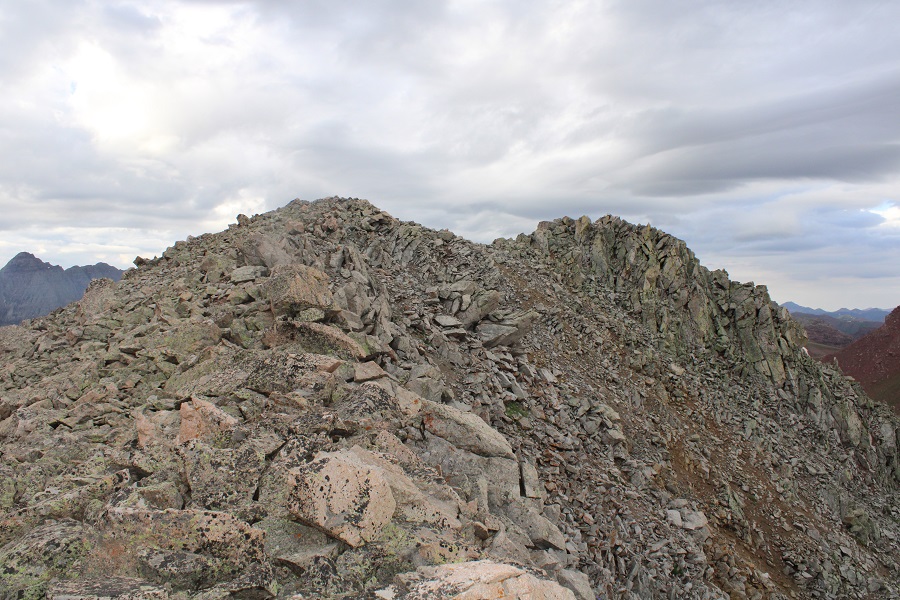
It was a simple ridge hike, with just a few fun moves to the summit of PT 13020. Here’s the overall route
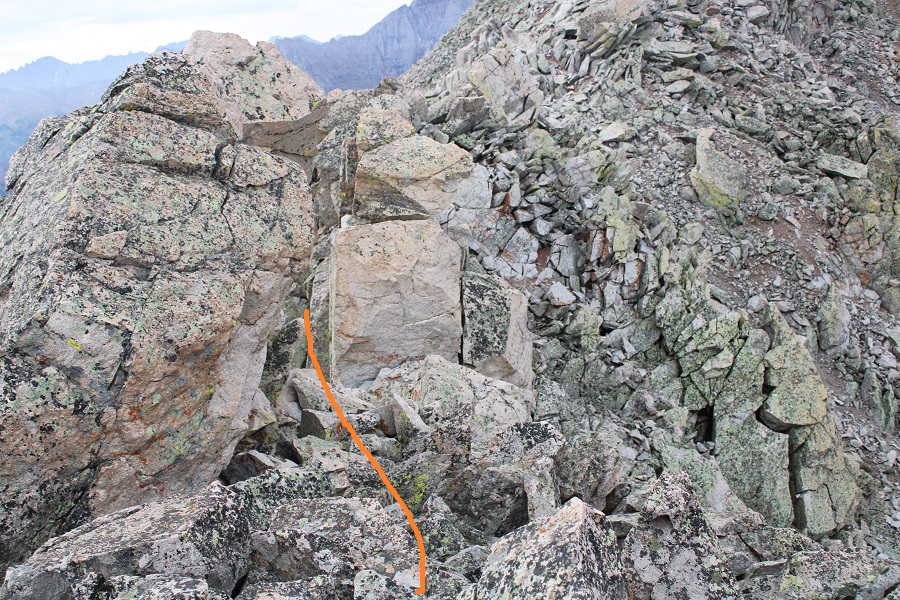
And some step by step pictures. To gain the upper ridge, I skirted the rock formations to the left, but still stayed as close to the ridge as possible.
Once on the upper ridge I followed it to the summit of PT 13020, only dipping down to the left once through a gap in the rocks to keep this class 2
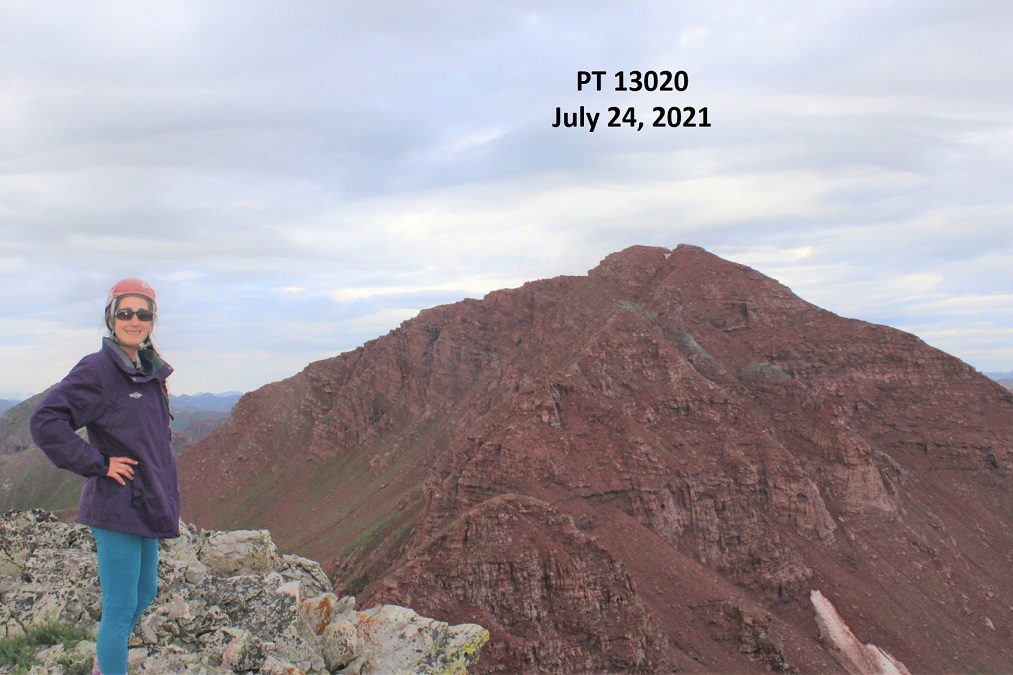
I summited PT 13020 at 7:20am.
PT 13020:
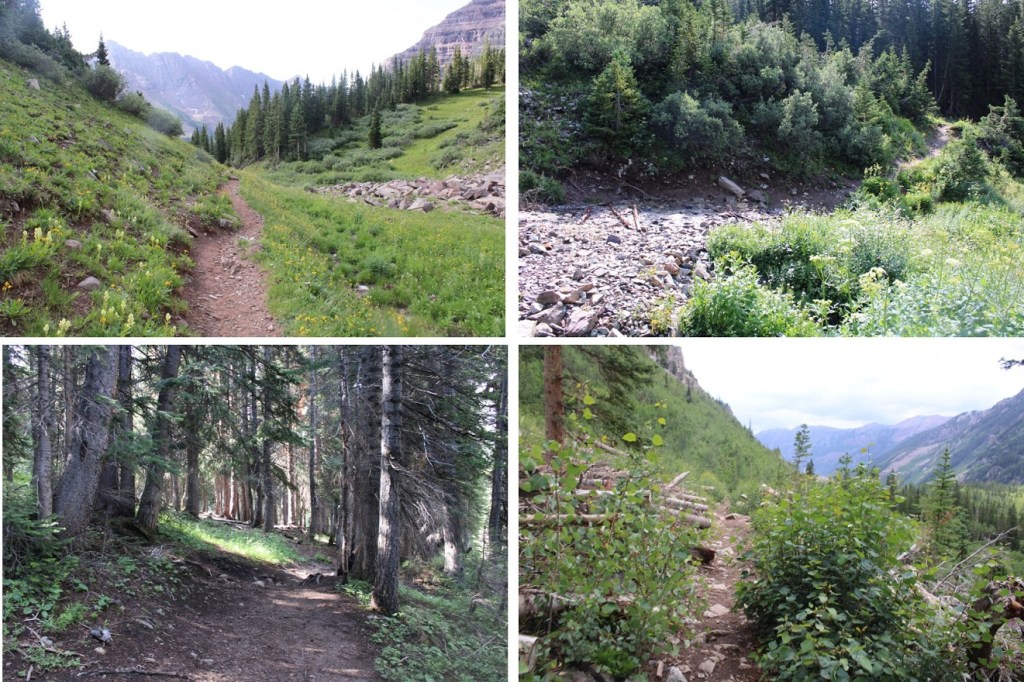
It was starting to rain, so I headed back down the ridge to the saddle.
Once at the saddle, I followed the class 1 trail back to Willow Pass
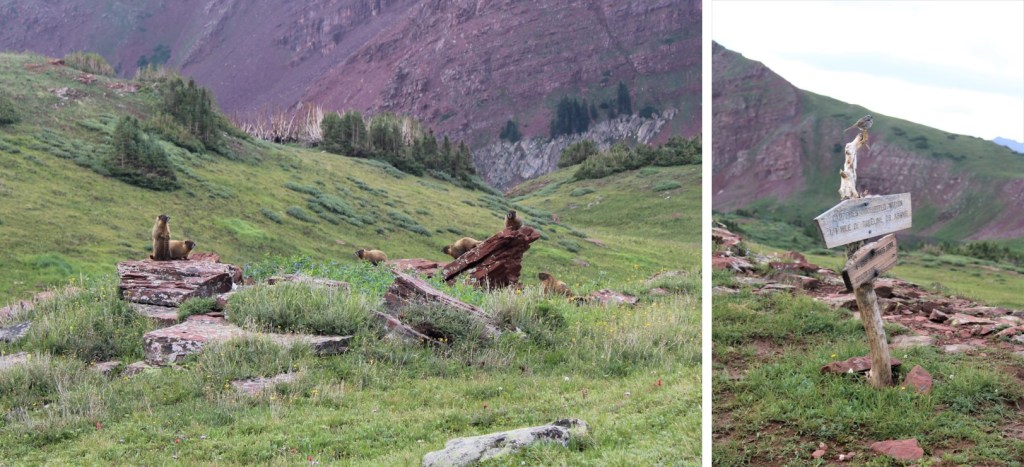
There was a large family of marmots at the Willow Lake/East Snowmass/Willow Pass Junction. As I approached, several jumped underneath the grass, not wanting to be photographed. I turned and headed southwest towards Willow Pass
And from Willow Pass I followed the trail back to the Maroon Lake Trailhead
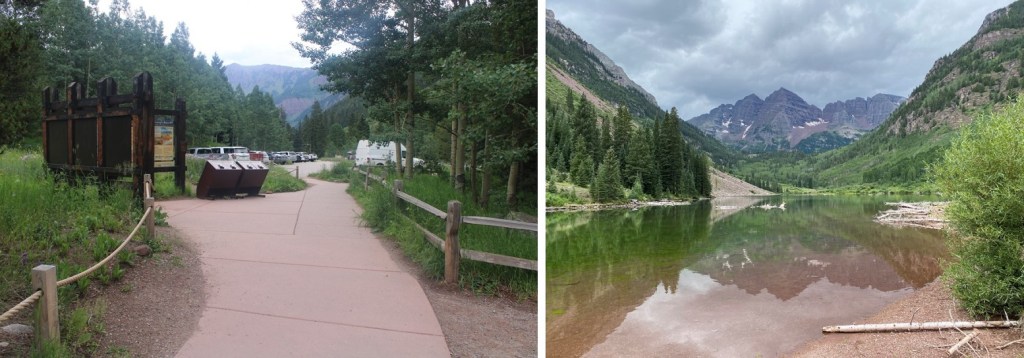
I made it back to the trailhead at 10:45am, making this a 16.3 mile hike with 5815’ of elevation gain in 9 hours, 45 minutes
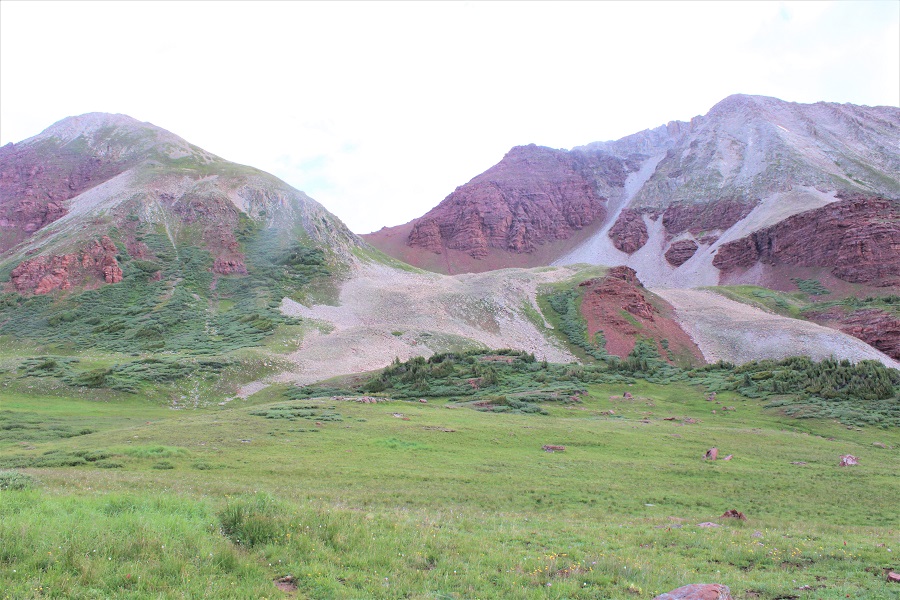
And, just because I have room for one more picture, can we all take a minute to appreciate jut how beautiful this area is?
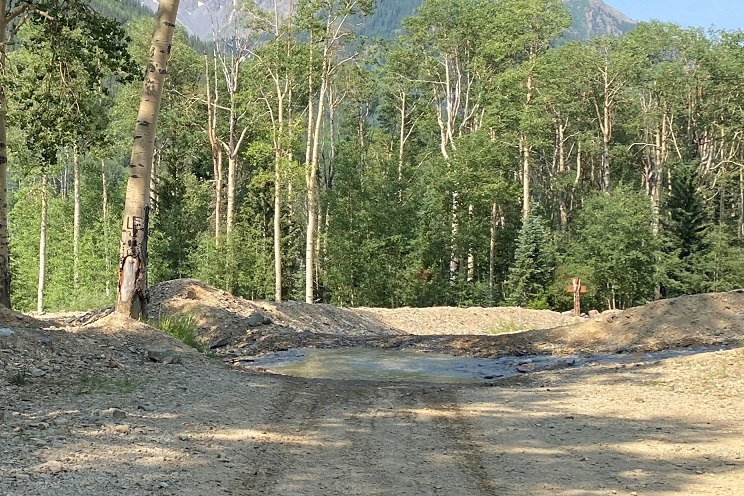
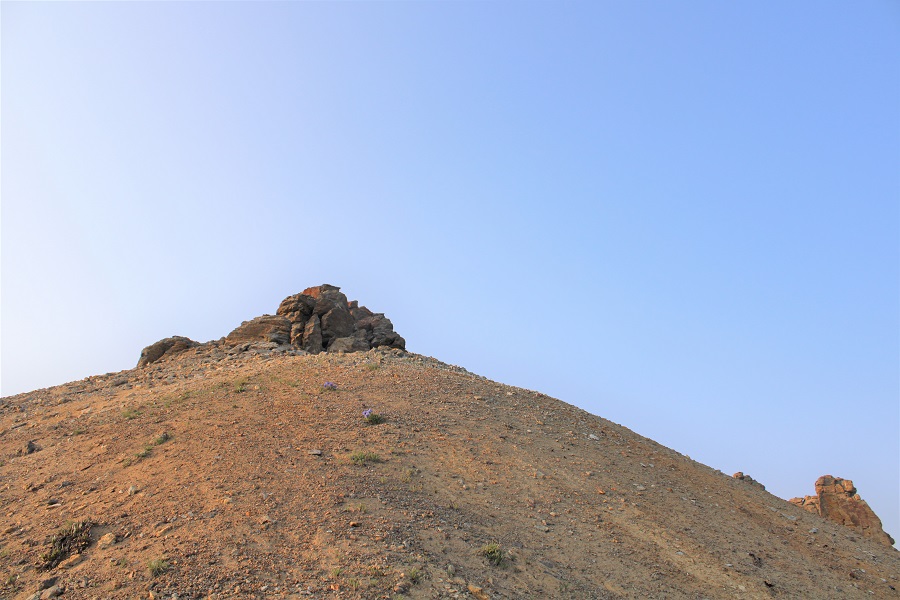
Ophir Pass Road is a serious 4WD road, but the trailhead for this peak can be accessed from the Ophir city side with just a high clearance vehicle. There were a few small water crossings, but 4WD was never needed.
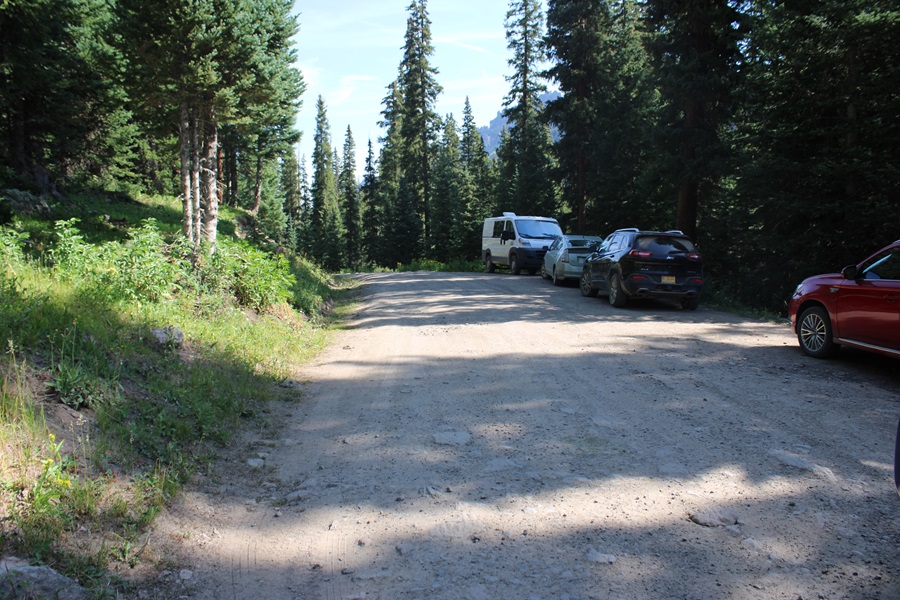
I parked in a parking area about 1.3 miles east of the town of Ophir, on Ophir Pass Road, in the Iron Spring area. All the parking spots were taken but 1, and every vehicle was parked there overnight. This is a popular spot to park to backpack/hike in the area.
The mosquitoes were out here as well, so I made it an early night and got some sleep. I was up and on the trail by 3:45am. The trail starts on a blocked 4WD road to the south of the parking area.
I followed this road southeast and then south, through gates, aspen trees and two stream crossings with easily crossable bridges
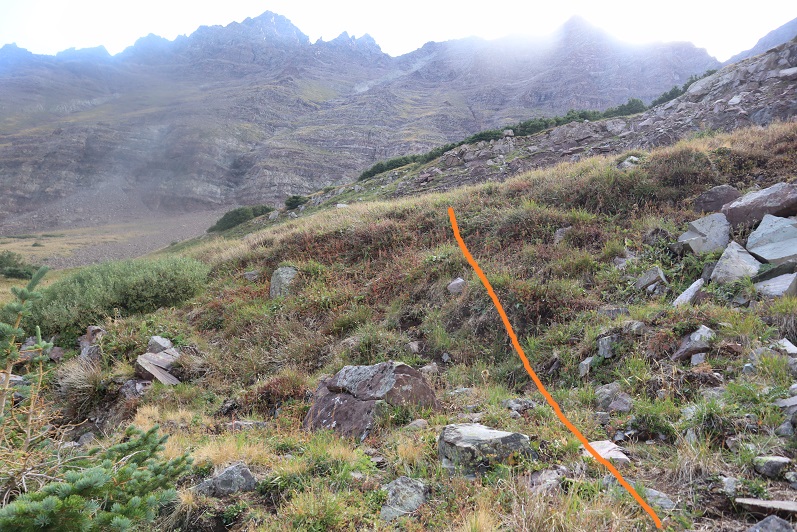
After the second stream crossing, I passed below some power lines, turned left to follow the trail, and started gaining elevation.
The hike below treeline was nice, and the trails were class 1, but there were no trail signs or numbers, and several trail crossings. I’ll do my best to describe the correct route.
I followed a well-defined path south.
At the first fork in the road, I turned right
At the second fork I turned right again, off the road and onto a trail (I’d hiked a total of 1.15 miles at this point)
I hiked west for a few yards, and then came across a trail junction. I continued heading straight
I was now on the trail that heads south/southwest up the hillside. This is also where I ran into a porcupine. Porcupines don’t run, but we noticed each other while we were about 3 feet away from each other: He quickly turned and waddled away in the dark, showing me his full backside of quills as he did so.
I continued on this well defined trail
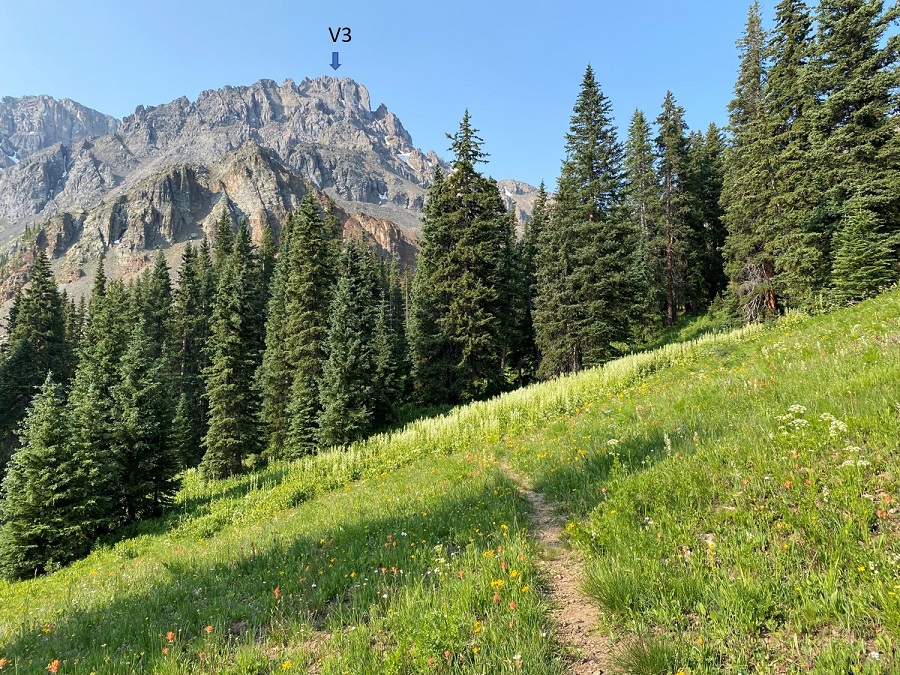
Here’s your first glimpse of V3. Look carefully, the arrow points to the exact summit, which you won’t see again until you’re there.
After hiking for a total of 2.25 miles and 11350’ I came to a small water crossing over the trail, and a meadow to my right. I left the trail and headed through the meadow. It was still dark, and there was a camper with a bright headlamp getting ready for the day. He was confused why I was ‘off trail’ and tried to direct me back to the proper trail. I assured him I was going in the right direction, apologized for walking so close to his campsite, and nicely told him I didn’t expect to find a trail to the summit.
I was now in a meadow and basin. There were wildflowers I couldn’t yet see in the dark, and willows I kept encountering. I found out the hard way to stay right to avoid the willows. The path is obvious in the daylight. Here’s the route I took.
And some step-by-step pictures of my way to the saddle, first hopping across a small stream
Staying right to avoid the willows and ascending a small gully that still had snow. Microspikes were helpful here, both on the scree and snow.
At the top of the gully, I was now in a rocky upper basin. I crossed a boulderfield and headed towards the saddle.
Here’s a look at the last bit of hiking to the saddle
Once on the saddle I turned left and followed the ridge southeast, staying to the left of the snow.
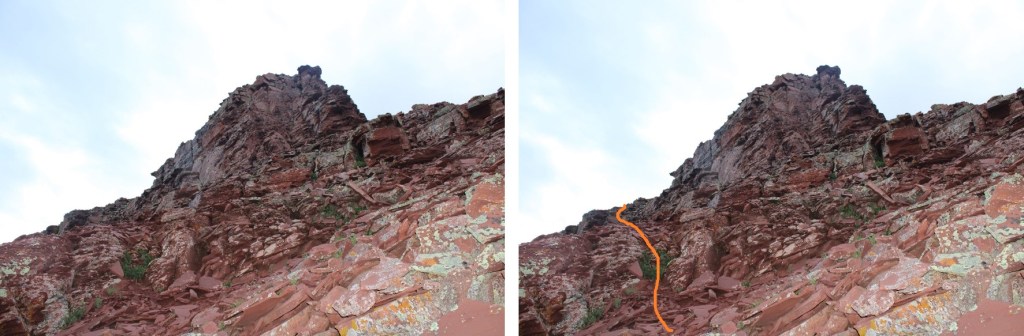
At the top of this area you can see the crux of the route. Now is a good time to put on your microspikes and helmet, if you haven’t already. It’s much steeper than it looks, and the scree isn’t manageable without microspikes (trust me on this one).
Here’s your intended route:
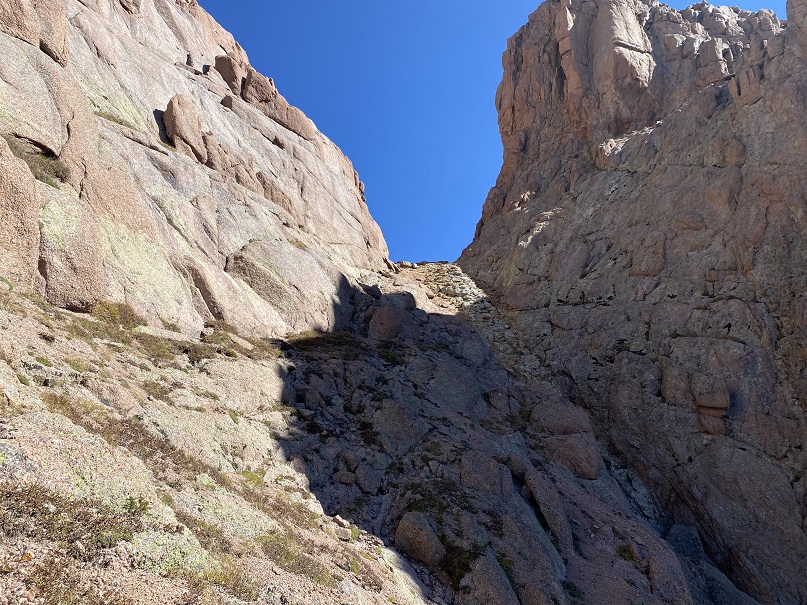
You’re aiming for this gully. The scree here is steep; a 45 degree angle for an extended amount of time.
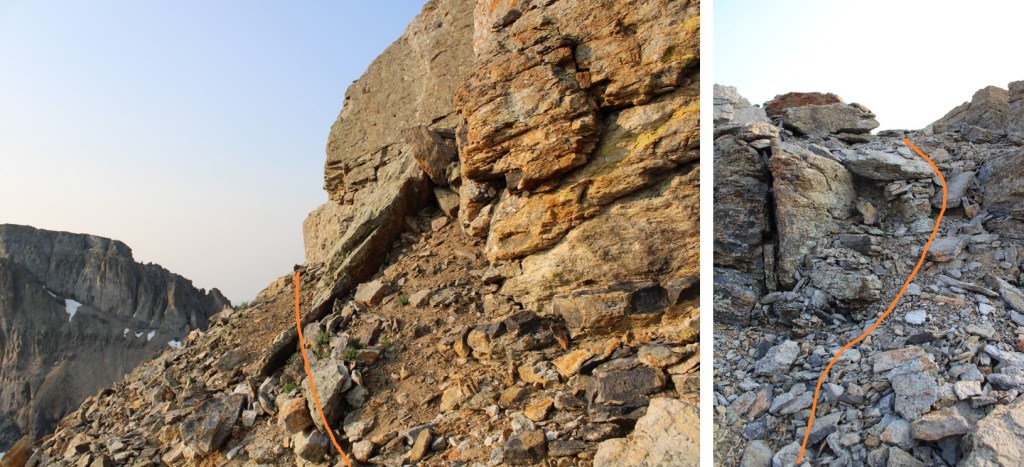
Once at the base of the gully the class 4 climbing begins. The route is obvious, curving around to the right. There is really only one way to go: follow the trail set out for you from the fallen scree. Also note: the scree and rocks here are loose. Very loose. I wouldn’t attempt to upclimb or downclimb this area with another person: take turns the entire way up and down. You will be causing screevalanches on climbers below you.
Here are some pictures from the inside of the gully. Pictures do not do the steepness justice (although the pictures down give you a better perspective). When heading up, continue climbing southeast.
Here’s a look at the exit of the gully
At this point it became even steeper. I did not have on my microspikes, lost grip, and slid on my stomach backwards for a full 12 feet. I seriously thought I was going to slide all the way back down that gully. I braced myself, and without taking off my pack located my microspikes in my backpack pocket and gingerly put them on while trying to balance without much traction. It was much easier to upclimb once I put on my spikes. Here is where I aimed
I then turned right, and hiked south towards the summit block.
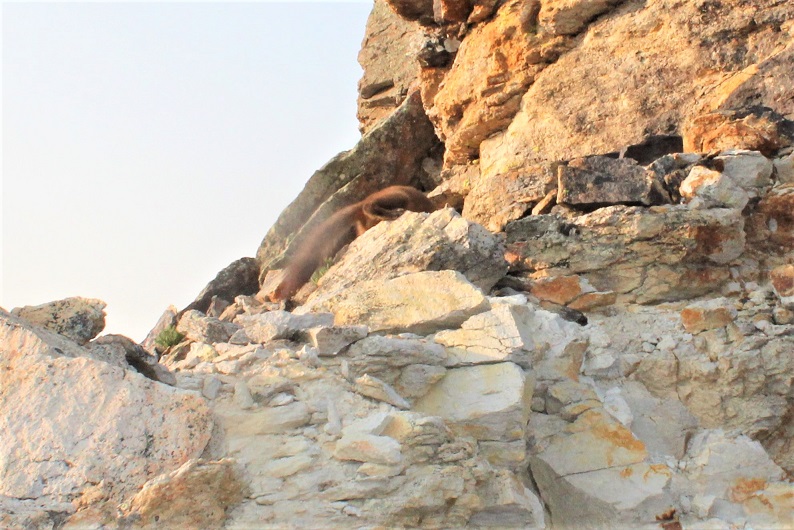
I made it to the base of the summit block and was surprised to see a pine marten. He sat there and looked at me. I tried to get a picture, but he quickly turned around and all I got was a picture of his tail and backside. Why are all of my wildlife pictures of animal butts?
Ok, now, don’t let this summit block scare you: yes, you can upclimb it, but you can also skirt it to the left and follow it around and have a class 2 trek to the summit, which is what I did.
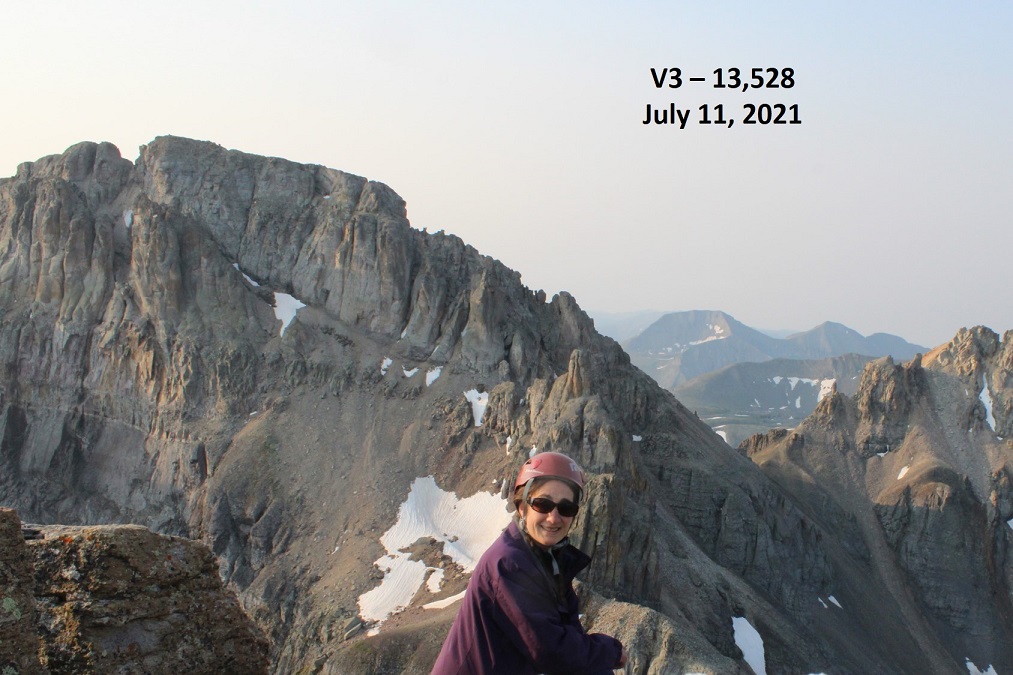
I summited V3 at 7:15am. There was a lot of smoke in the air from far away fires this morning.
V3:
I was surprised there wasn’t a summit register, so I left one. It was obvious this peak does not get a lot of visitors.
I kept my microspikes on for the trek back down, which seemed easier than the trek up. Here are some pictures of the way back down the gully. Once again, do this one person at a time, and when you’re done, head far away from the gully, as the rocks will slide and they will pick up speed as they do so.
Once out of the gully, the scree-surfing will begin. It’s always fun when you can ride the same pile of rocks all the way down the hillside.
Scree Surfing:
Here’s where you’re aiming. If you’re doing this with another person, you should be standing far away from the rockslide area while they’re ascending/descending. I’ve circled a good place to stand out of the way.
And now to hike down the ridge to the saddle, and exit the basin.
I made it back to the meadow, marveled again the wildflowers, and saw the group of campers were almost done taking down camp (I guess the man I talked to this morning was part of a larger group). I made it to the trail, turned left, and followed it back to the trailhead.
I made it back to my truck at 9:45am, making this an 8.29 mile hike with 3542’ of elevation gain in 6 hours.
I’d already been away from home a few days before this trip, so I stopped at Ouray Hot Springs to get in a quick workout and a shower (they only charge $4 for a shower, which might be nice if you’re hiking around Ouray and want to freshen up every few days). The only downside? The parking was terrible, even on a weekday in the morning.
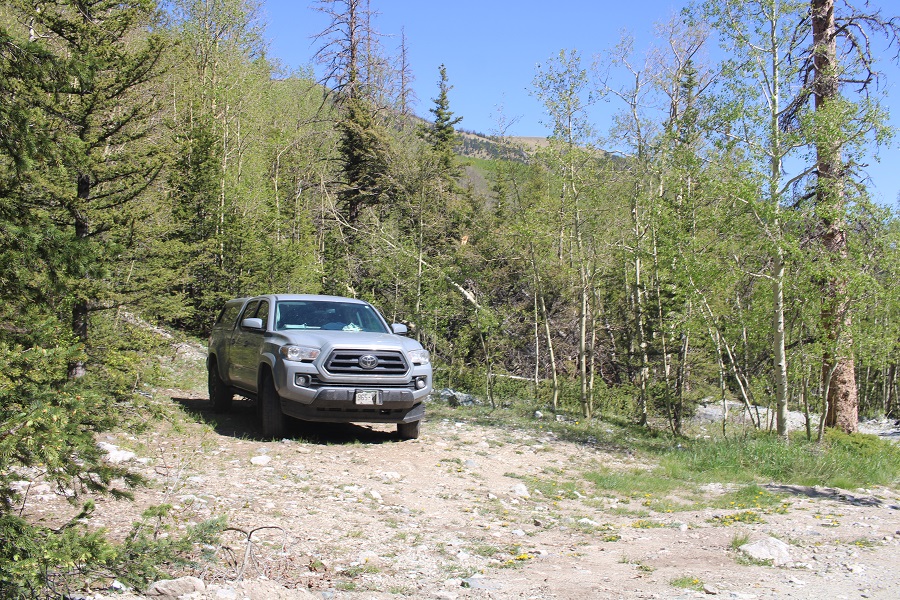
After cleaning up I drove to the Rock of Ages Trailhead. The drive in was a bit bumpier than I remembered, but also fun, because I was seeing what Miles (my new Tacoma) can do. He handled the stream crossing and ruts in the 4WD road without needing to be put into 4WD.
I made it to the trailhead and was the only one in the lot (another good thing about arriving on a Thursday).
I walked around for a bit, and immediately realized the mosquitoes were going to be a problem. I’ve ordered a topper for Miles, but it’ll take up to 3 months to get here, so until then I’m sleeping in the back seat of the cab (It’s a tight fit but luckily I’m small). I made the decision to get to bed as soon as possible. I ended up waking up several times during the night because I was so warm, but at least waking up ended one of my nightmares: a dream about sharks in a swimming pool swallowing children whole.
Ok. So, I woke up and was on the trail at 4:15am. The route starts at the south end of the parking area, and follows a well-defined trail south.
I quickly came to a gate, and walked around it.
Next, I saw this sign to my right, and continued on the trail
I followed the trail to treeline.
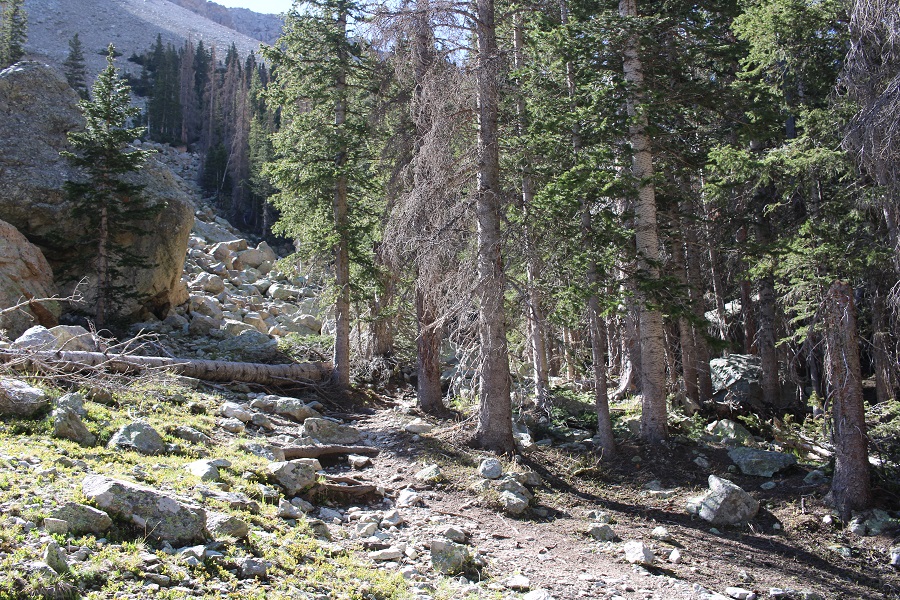
Shortly after making it to treeline I came to the Elk Creek Trail junction. From here there are several options, but your main goal is to make it into the basin. You can follow Elk Creek Trail and lose some elevation, then follow a faint road into the basin. Or, you could continue along the Rock of Ages trail and eventually hook up with the 4WD road that enters the basin from above (a bit chossy, but I chose to take it on the way out). On my way in it was dark, I couldn’t see any of these ‘routes’, and I chose to just head straight into the basin.
If you take the mining road, here’s what the entrance looks like from the Rock of Ages trail. It’s about half a mile past the Elk Creek Trail junction, on your right.
If you take the upper road, this is what the junction from the trail to the road looks like
In any event, I made my way into the basin. Here are the routes. To the left you can see the mining road, and to the right you can see the abandoned dirt road. They both lead to the same place. (On my way in I didn’t see either of these roads and just headed south through the basin).
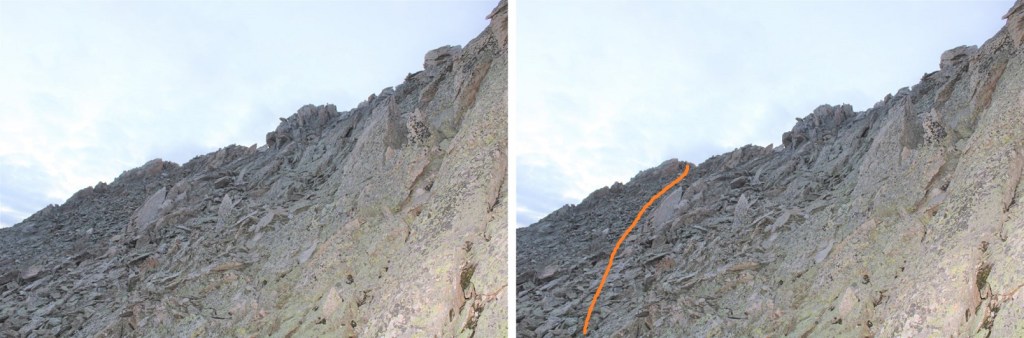
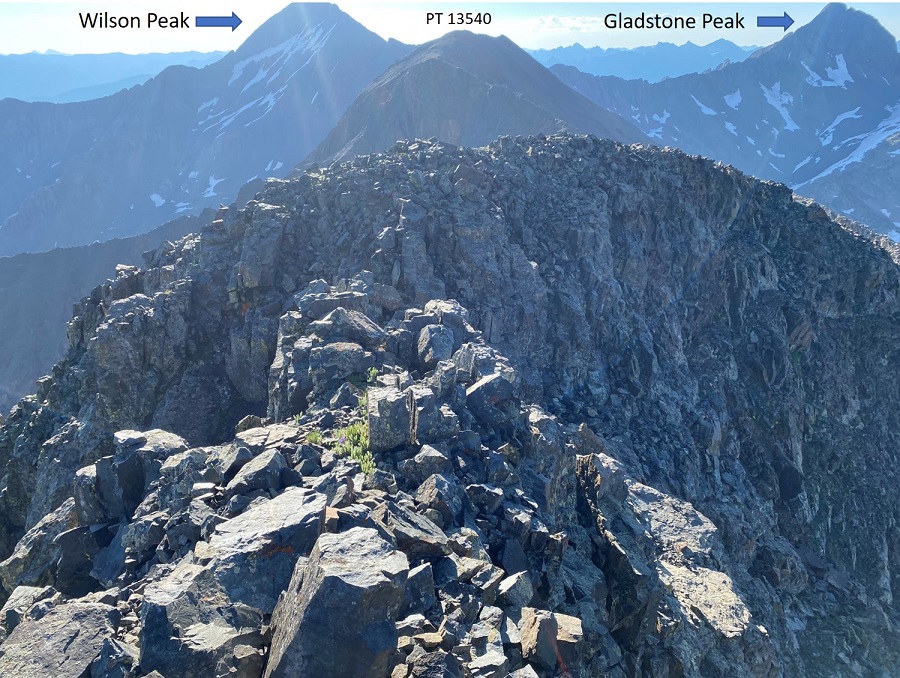
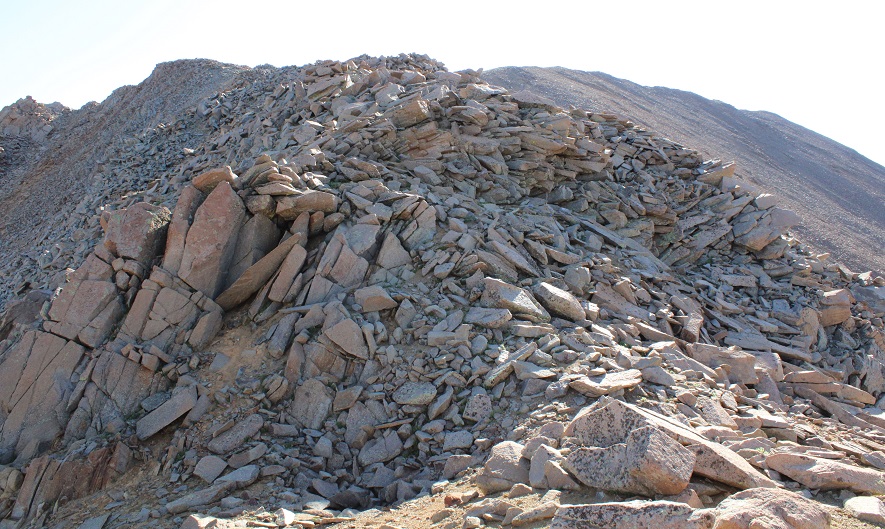
Once in the upper basin you want to gain the ridge. This sounds easier than it turned out to be. It’s “choose your own adventure”, and on the way up I chose wrong. I ended up getting into some class 4 scrambling, which was unnecessary. It’s my advice to do PT 13540 first, and gain the ridge to the left (southeast). However, all areas here ‘go’, if you’re willing to do some scrambling. When I made it to the ridge I found thick wire cording going where the red line is (I’m guessing that could be used as leverage if needed: it wasn’t moving anywhere). I ascended via the orange line. The dotted orange line is probably a better route. The best route is my descent route (pictured later).
I’ll spare you the scree-y and large-loose-rocky gully details of ascending the ridge. Once on the ridge I turned right and followed the ridge southwest towards Fowler. The ridge was all class 2
If you haven’t already, now is a good time to put on your helmet. Here’s a picture of that cable I was telling you about. It goes up and over both sides of the saddle.
Here’s an overall view of the rest of the route to summit Fowler.
And step by step: It started out chossy as I ascended the ridge
I made my way to the gully to the left/middle. This area had more solid rock, but it was littered with scree/rubble. At the base of the gully I took off my pack and decided to go up with just my cell phone (and a summit register in my pocket, just in case).
This is the class 4 part of the climb, and lasted for about 120 feet of vertical gain. I started by going straight up the gully. Here’s my route:
Step 1: ascend the chimney. I went to the right of the chimney, and found adequate hand/foot holds.
Step 2: Once above the chimney I stayed to the center of the gully. This is also where I saw an anchor set up (circled in red).
If you decide to rappel here, bring a new anchor, as this one looks like it’s been here for a while, and what’s been added to it doesn’t look recent either.
Step 3: From the anchor I continued straight up the gully (still class 4)
Step 4: Here’s a view of the last bit of the gully, before topping out. This felt class 3
At the top of the gully I turned left and headed towards the summit. It was a bit of a false summit, but all class 2/easy 3
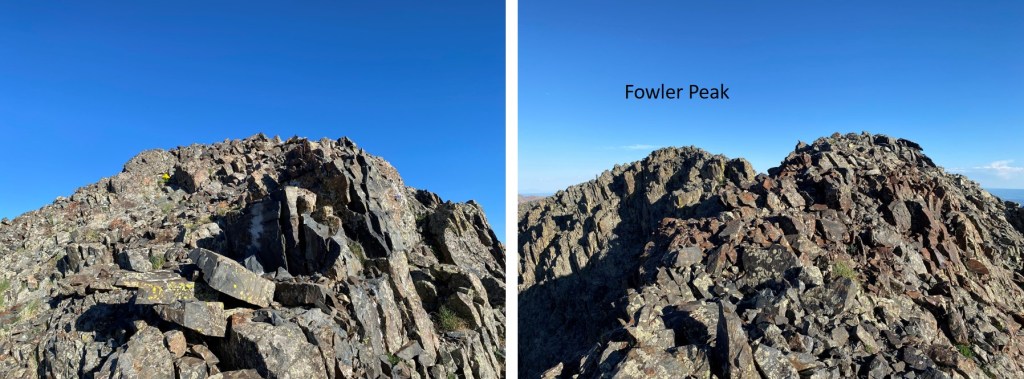
I summited Fowler Peak at 7:45am
Fowler Peak:
I sat and enjoyed my views of the Wilson/El Diente Traverse for a few minutes before heading back.
There was a summit register, but it was one of those tube ones. It hadn’t been closed properly and all the papers inside were wet, so I left it and also added a new register with dry paper to write on. And a new pencil. Here are some pictures of the trek back to the saddle
Back down the gully
To my stashed gear and back to the ridge.
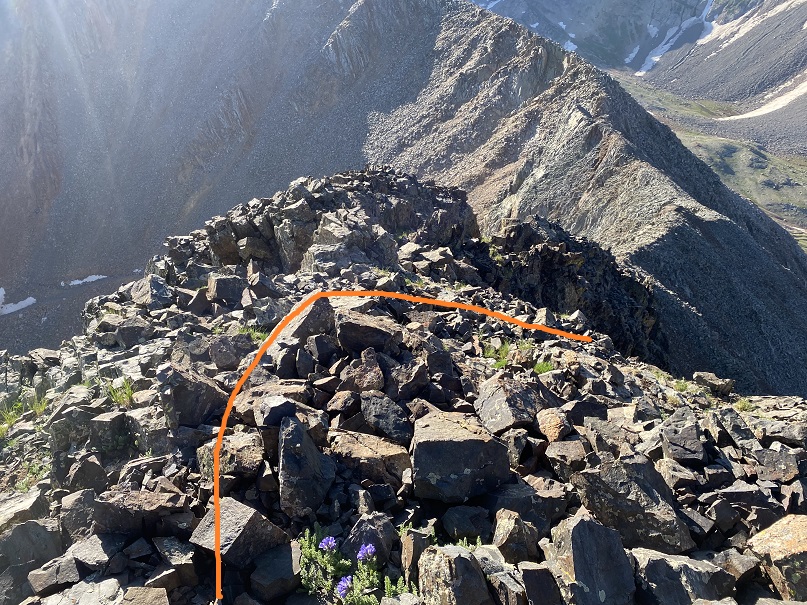
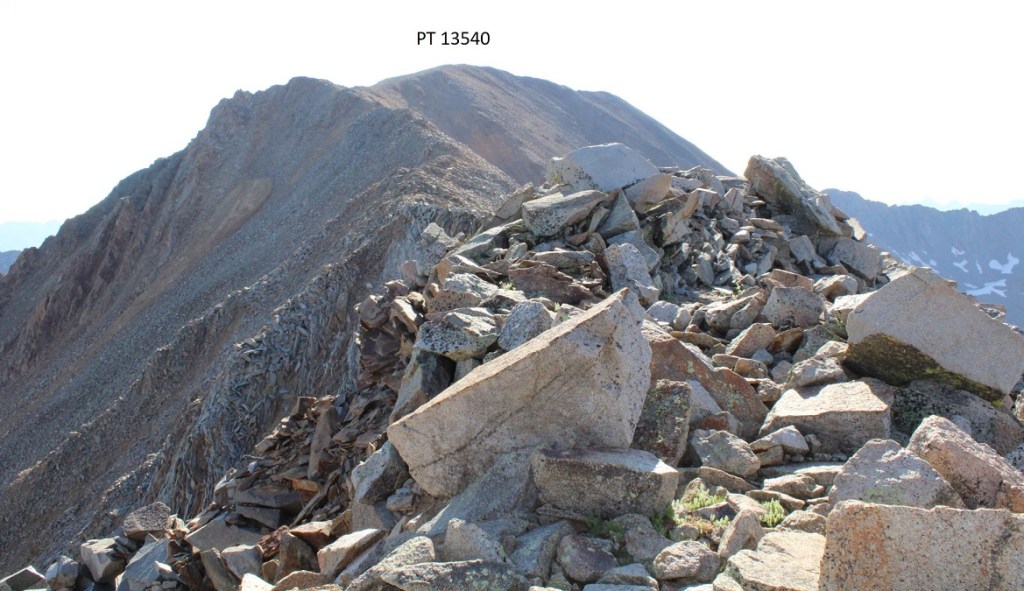
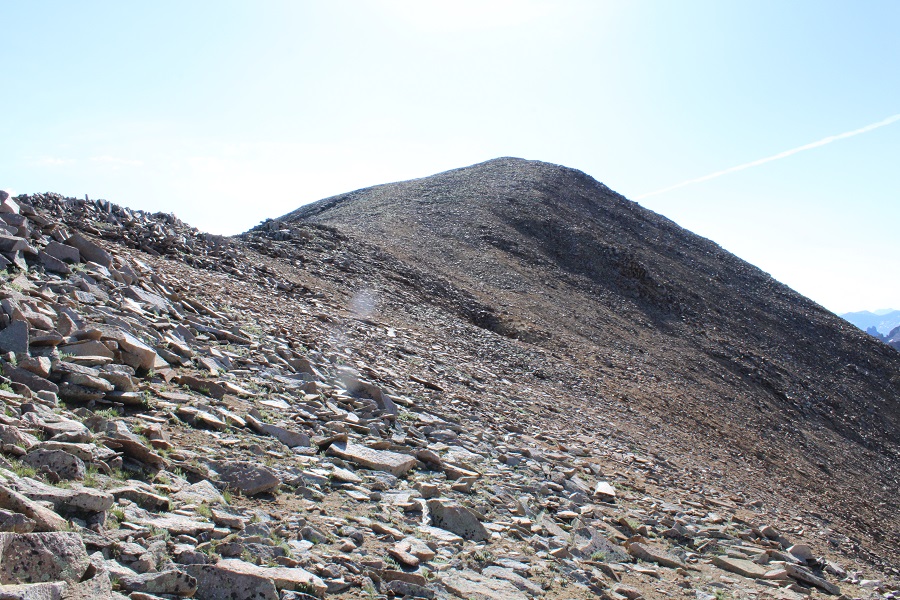
I followed the ridge over to PT 13540. This was a simple ridge hike, if a bit loose. Lots of rocks here. I stuck mostly to the ridge the entire time, only dipping to the right a few times when necessary.
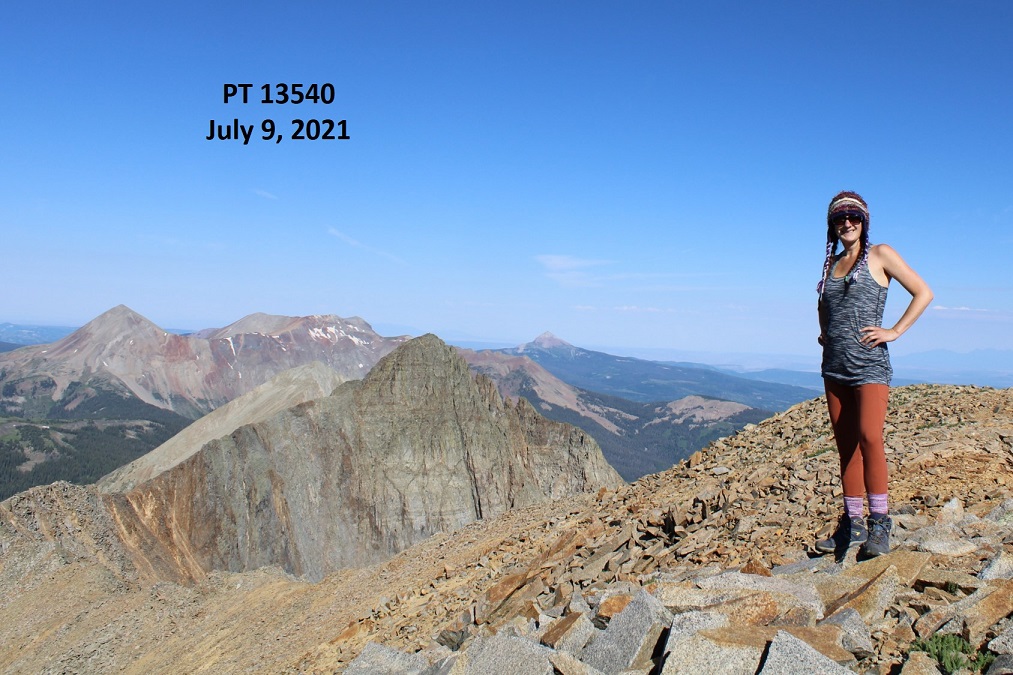
I summited PT 13540 at 9am
PT 13540:
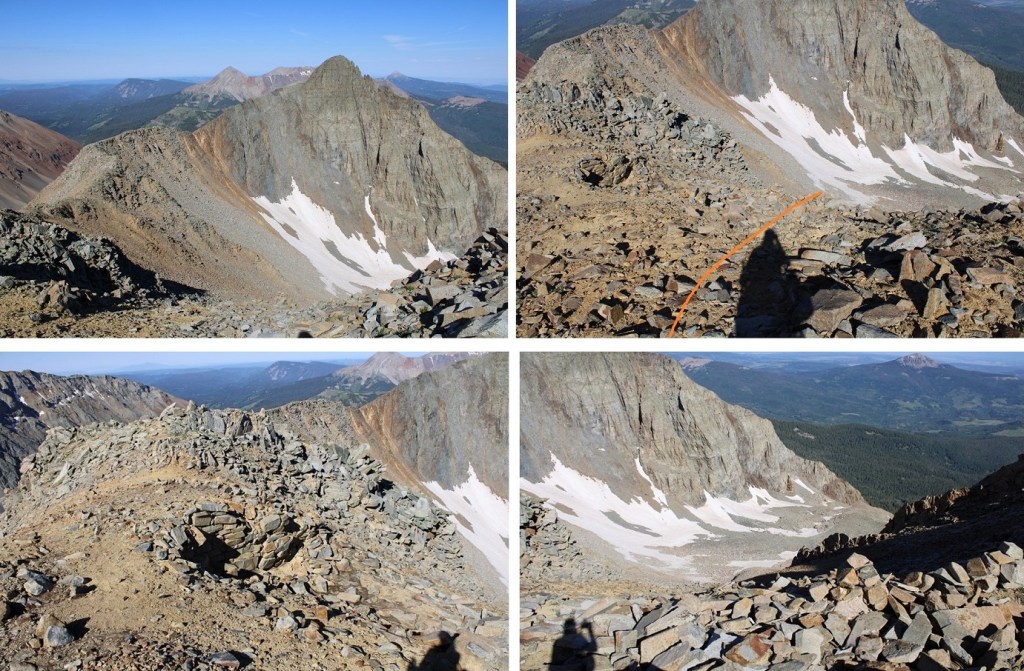
I worked my way back towards the Fowler/PT 13540 saddle
Once at the saddle there was what looked to be a boarded-up mine. In fact, it looked like everything here had been blown up at some point, except this area, which was strategically filled with large rocks (but may have been blown up too). I passed it and headed northeast back to the old mining road
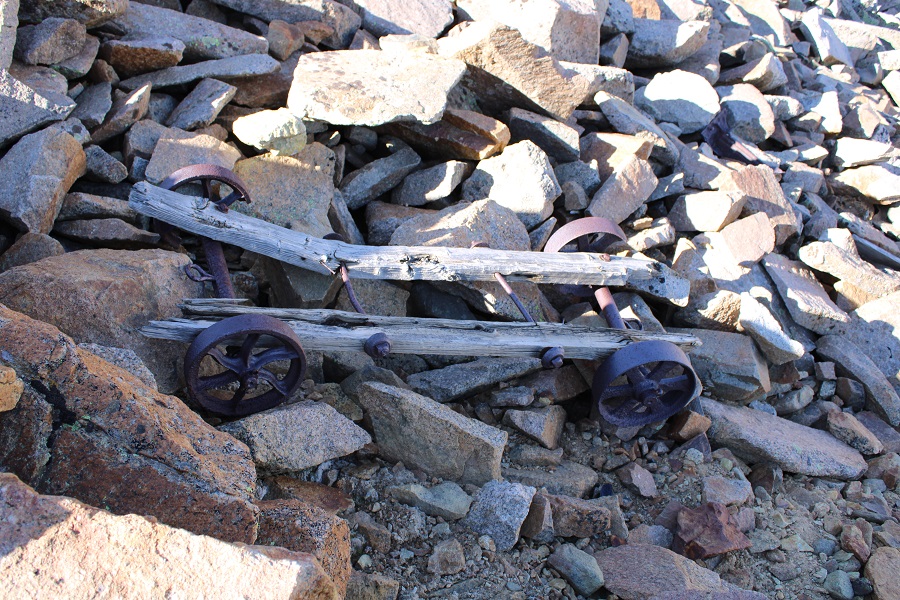
This area was steep, and I did some scree surfing, but it was much easier to navigate when compared to the route I took to ascend the ridge. I saw tons of mining trash here: lots of old cans and pieces of mining equipment, most of which were in small pieces, all made out of cast iron. This was the most intact item I came across
Here’s the route I took down from the ridge (I’d recommend ascending this way as well)
Once back on the road you once again have options to exit the basin. You can stay high, to the right/east, and follow the old mining road, or you can stay low and left/west, and follow an old dirt road.
Here’s a better look at both roads. Both take you out of the basin, and back to Elk Creek Trail / Rock of Ages trail (If you take the mining road all the way to the Rock of Ages trail, turn left and follow it to the Elk Creek Trail junction, and then continue following the Rock of Ages trail).
Once back on the trail I followed it through the trees northwest, back to the trailhead.
I made it back to my truck at 11:15am, making this a 10.53 mile hike with 3985’ of elevation gain in 7 hours.
It was still early, and quite warm, and the mosquitoes hadn’t magically disappeared overnight. I had a friend meeting me here at 6pm to hike Wilson Peak tomorrow, so I’d planned on staying at the trailhead until he got there, then heading to bed. I’d brought a lot of things to do, but they all required sitting down, and once I did that the mosquitoes swarmed me. It was like one would find me and sing its song to its friends and there’d be dozens to shoo away.
If I was outside I needed to have a jacket on, but it was hot! I tried sitting in my truck with the air conditioning on, but that wasn’t going to work for 7 hours straight. It was kind of funny watching the mosquitoes (and flies!!!) swarm my truck: they seemed to know I was in there with the air conditioning on.
So, I entertained myself for the next 7 hours by reading. I got out my current book (On the Road by Jack Kerouac) and read while steadily walking around the trailhead in circles. Continuously moving seemed to keep the mosquitoes at bay. Luckily, the trailhead has a large parking area and I was the only one there. Every few hours I’d take a break in my truck, and then get out and read again. I would have started a campfire to shoo the bugs away, but they’re currently banned. I can’t wait to get the topper on my truck! It would have solved the mosquito/heat problem.
This is the third time I’ve been to Maroon Bells this month. I was able to secure 3 separate permits, and the past few weeks went with friends to summit North Maroon and Pyramid. Today I was here to tag a new 13er for myself: PT 13631. Since I70 is now open (it was closed due to fires) I was the only one driving on HWY 82. I didn’t pass one vehicle between Granite and Aspen. It was awesome. I did see 2 vehicles parked at a trailhead near Independence Pass, and two scruffy porcupines to go with them, merrily munching on the wires underneath. The owners of those vehicles were not going to be happy when then made it back to their cars. I’d have gotten out and shooed them, but, you know, they may be slow but they have quills. I saw three other porcupines waddling along the highway as I drove. HWY 82 is popular among porcupines.
As I passed the parking structure for Maroon Bells I saw a pear shaped bear butt running away from a trash can and then jump over a fence. It was cute to see it bounding away (although I kind of wanted to get a picture so I wished it had stood still for a second).
I had a permit to park at Maroon Bells from 12am-4:30pm. It was 1am when I arrived and I felt it was still a little too early to head out so I took a quick nap. A large group of hikers passed by at 2:40am and woke me up, so I was on the trail by 2:45am.
The trail starts at the west end of the parking area
And follows a well-defined path around Maroon Lake
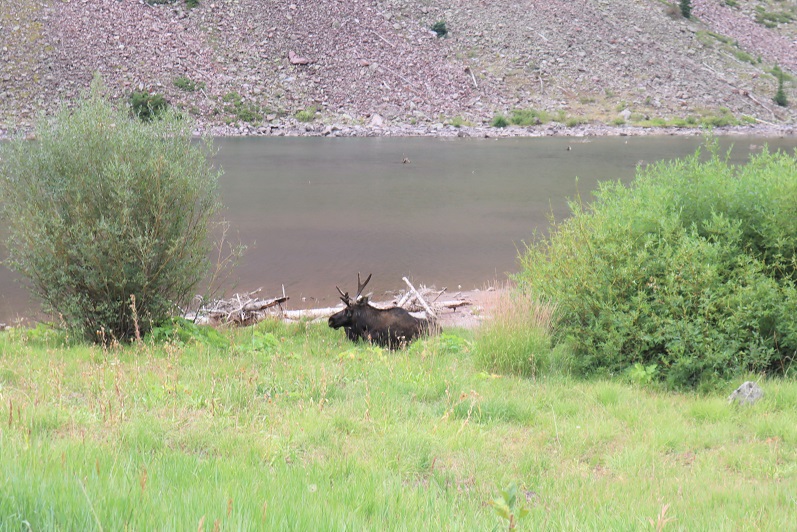
At the end of the lake I followed the trail towards crater lake. I noted the signs: One said “bear activity in area” as of August 23 (August 1st had been crossed out) and there was also a sign saying there was a moose in the area. In the last few weeks I’ve seen a bear standing on the side of the road while taking the shuttle ride out and a moose standing in Maroon Lake, so I knew these signs to be true.
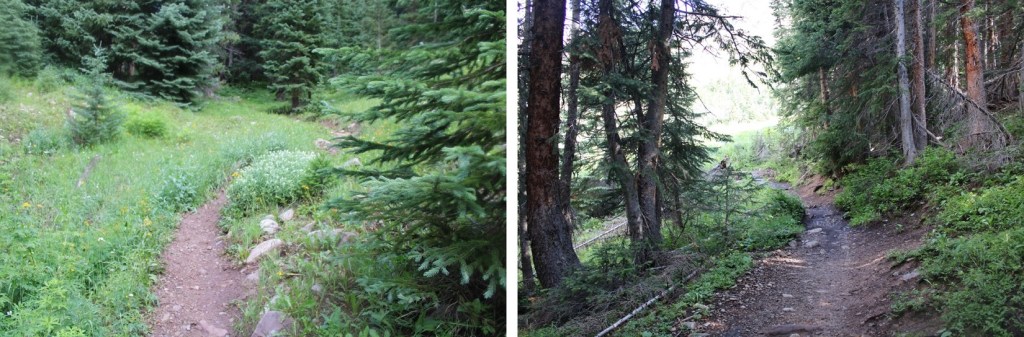
This is a class 1 trail to Crater Lake
I turned left at the junction for Crater Lake
And then followed the trail (still class 1) around the ‘lake’ and up the basin.
I passed a few camping areas while it was still dark. In one a large man was standing by the trail, bald, shirtless, and in possession of a rather hairy pot belly. He seemed to be waiting for me to pass by. Luckily this is a well-travelled trail, especially at this time in the morning when others are looking to summit Maroon Peak (I count the flashlights so I know who’s ahead of/behind me when it’s dark out: that large group of hikers wasn’t too far away). I could see him because he had a headlamp shining from his forehead. I didn’t see his dog, who started barking at me as I neared. Of course, I jumped. The man seemed to think it was funny. I continued on. Also, it wasn’t funny. Here’s an overview of the next few steps, as I made my way up to Len Shoemaker Basin
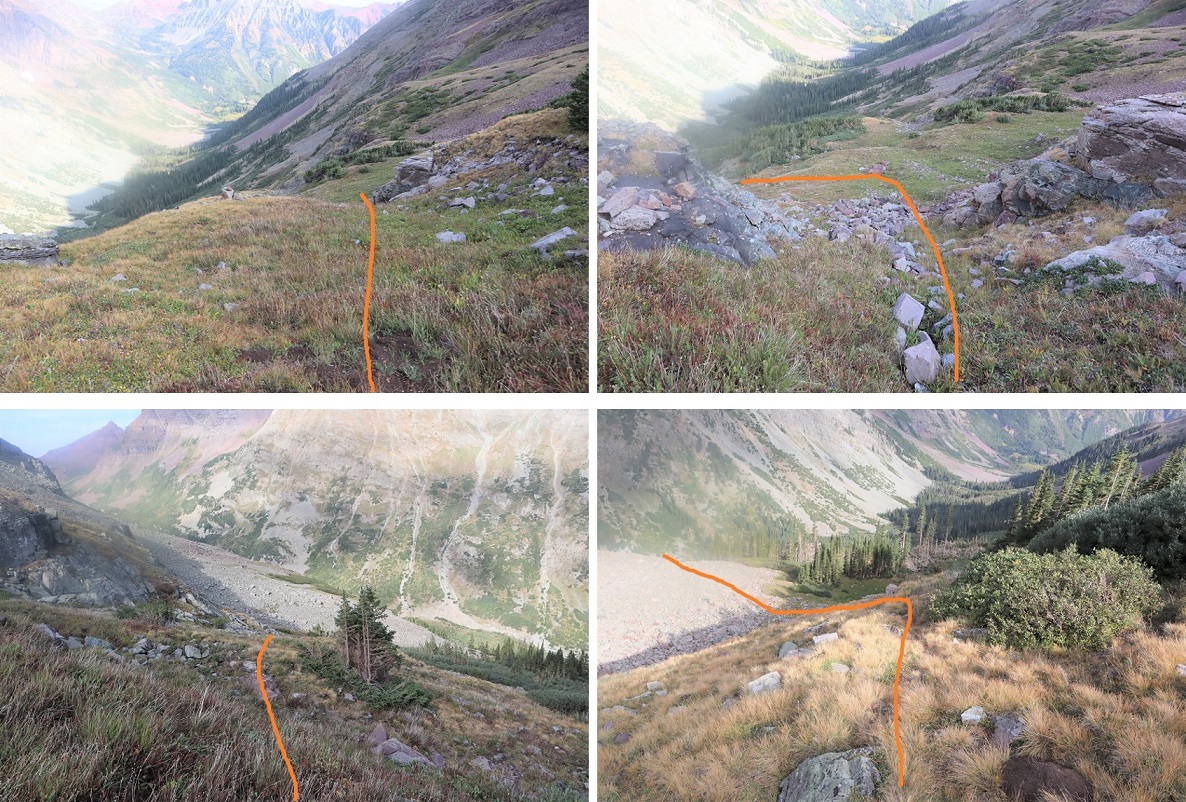
After hiking for 4 miles from the trailhead, and at 10515’ I left the trail to cross Maroon Creek (which at this point of the year isn’t flowing much, but earlier in the season is several feet deep). There are cairns in the area. An obvious trail picks up on the other side.
I followed this trail for .25 miles, until I saw a cairn to my left and then followed a very faint trail east through and then out of the willows, and up the side of the mountain, towards the basin.
Making it to the basin required ascending a series of gullies. I’ve been here several times, and the route gets easier to find each time. This time there were plenty of cairns indicating the way. However, the route sometimes doesn’t seem like it should follow the cairns, but trust me, it does. Here’s the route step by step into the basin. After exiting the willows and crossing a small boulder field there is a faint trail behind the next set of bushes/willows that will lead to the first gully. Now’s a good time to put on your helmet.
I ascended the loose gully, staying to the right for more traction
At the top of the first gully you’ll see another gully to your left. (These are tons of fun in winter BTW, so bring your crampons and ice axe if you expect snow). Ascend the second gully, this time sticking to the left for more stable ground
At the top of this gully is… another gully. Sorry for the hand in this picture: the sun was at an unfortunate place in the sky while I was trying to take pictures and this was my solution.
From here I aimed for the grassy slope and went behind it, angling towards the ridge
And could see another gully to my left. (This entire time I was heading east)
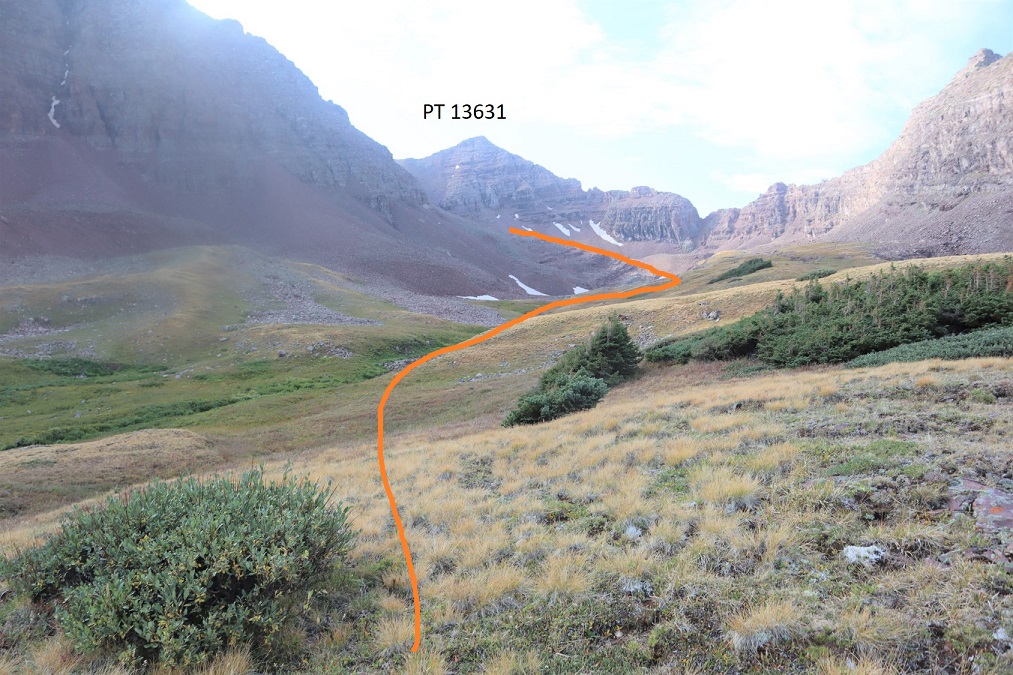
Next, I aimed for the grassy slopes, and the final gully that would take me to the upper basin.
Here I got my first view of PT 13631. I just followed the basin south towards the end
The end of the basin was still holding some snow. This was a light snow year, so I expect there’s snow here almost year-round. The snow can be avoided, but I just walked over it into another basin
I followed the talus rib towards the base of the gully that would lead me to the saddle of Lightening Pyramid and PT 13631
This is the last gully of the day. It’s class 2 but the scree is loose. I looked for larger rocks whenever possible. There is no direct path but there are a bunch of game trails. No area seems to cliff out, so you can pick your line depending on conditions.
At the saddle I turned right and headed southwest up the ridge. Most of this was easy scrambling, after first initially gaining the ridge. To do this I went right, found a class 3 chimney and ascended it. This was the most difficult part of the entire hike, and I probably could have found a class 2 option around this if I tried harder. I felt this chimney was pretty easy.
Here’s looking up at the chimney. There are plenty of hand/foot holds. It’s only about 8 feet high and all of the rocks are stable.
Once on the ridge I scrambled my way to the summit. This is all easy class 3, just scout around for the best route.
The summit is relatively flat. There’s a summit cairn with two summit registers. The metal one is closed and has 2 pens inside. The white one is open (without a lid) and is empty. Bring some paper if you want to sign this register.
I summited PT 13631 at 7:20am
PT 13631:
The views were great, but the smoke from nearby fires shaded them a bit.
Here’s the route back down the ridge
Down the chimney (you can see my trekking pole below for reference)
And back around to the saddle.
Once again, great views
Back down the gully and through the basin
And back down the gullies, following the cairns west along the way.
Through the willows
Back to the trail that would lead me across the creek
And back to West Maroon Creek Trail 1975 and Maroon Lake
When I was here last week there’d been a moose standing in the lake. Guess what? He was still there (this time lounging by the lakeshore). Pretty cool!
I made it back to my truck at 11:45am, making this a 14.93 mile hike with 4584’ of elevation gain in 9 hours (with some time spent ogling the moose).
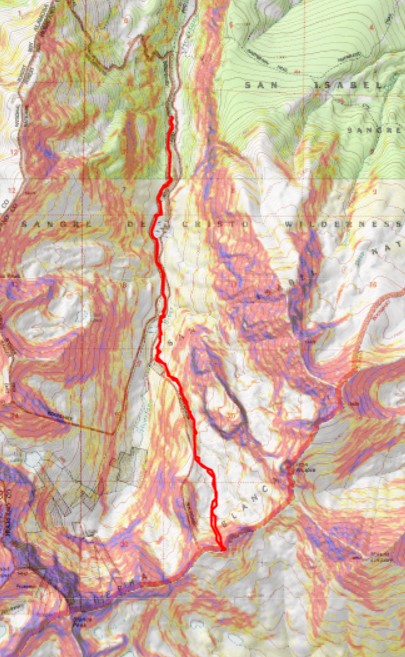
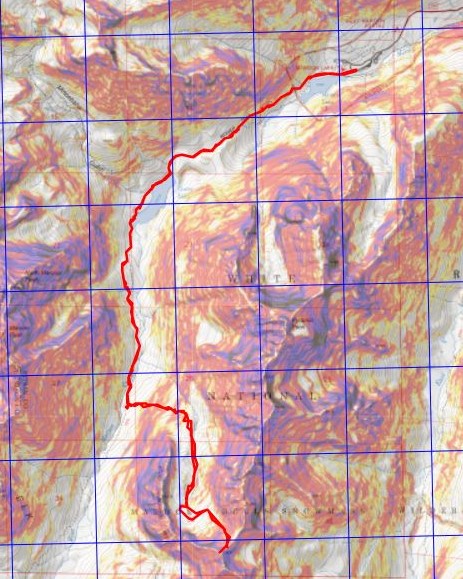
Here’s a topo map of my route. I have to say, the views were incredible but the peak itself was kind of a letdown. It had just been too easy, when I’d been expecting the more intense scramble over crummy rock the Elks are known for. It almost wasn’t worth bringing my helmet, but the moose was an added bonus.
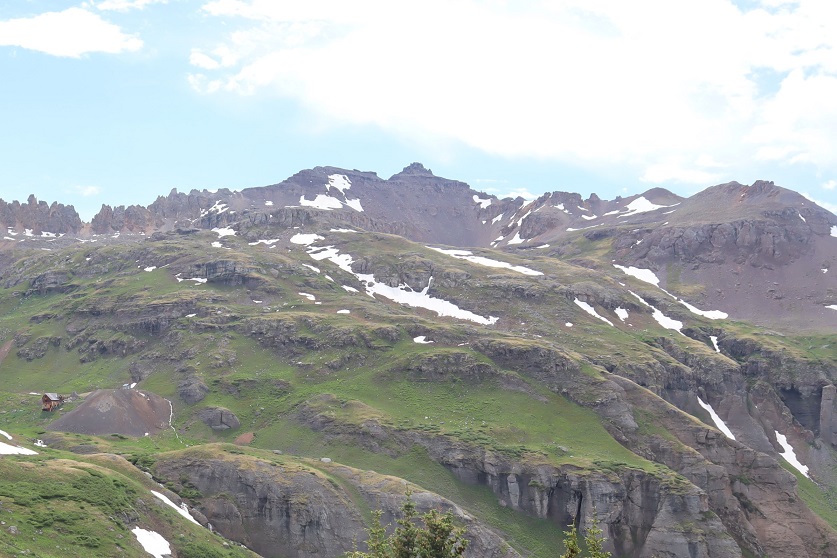
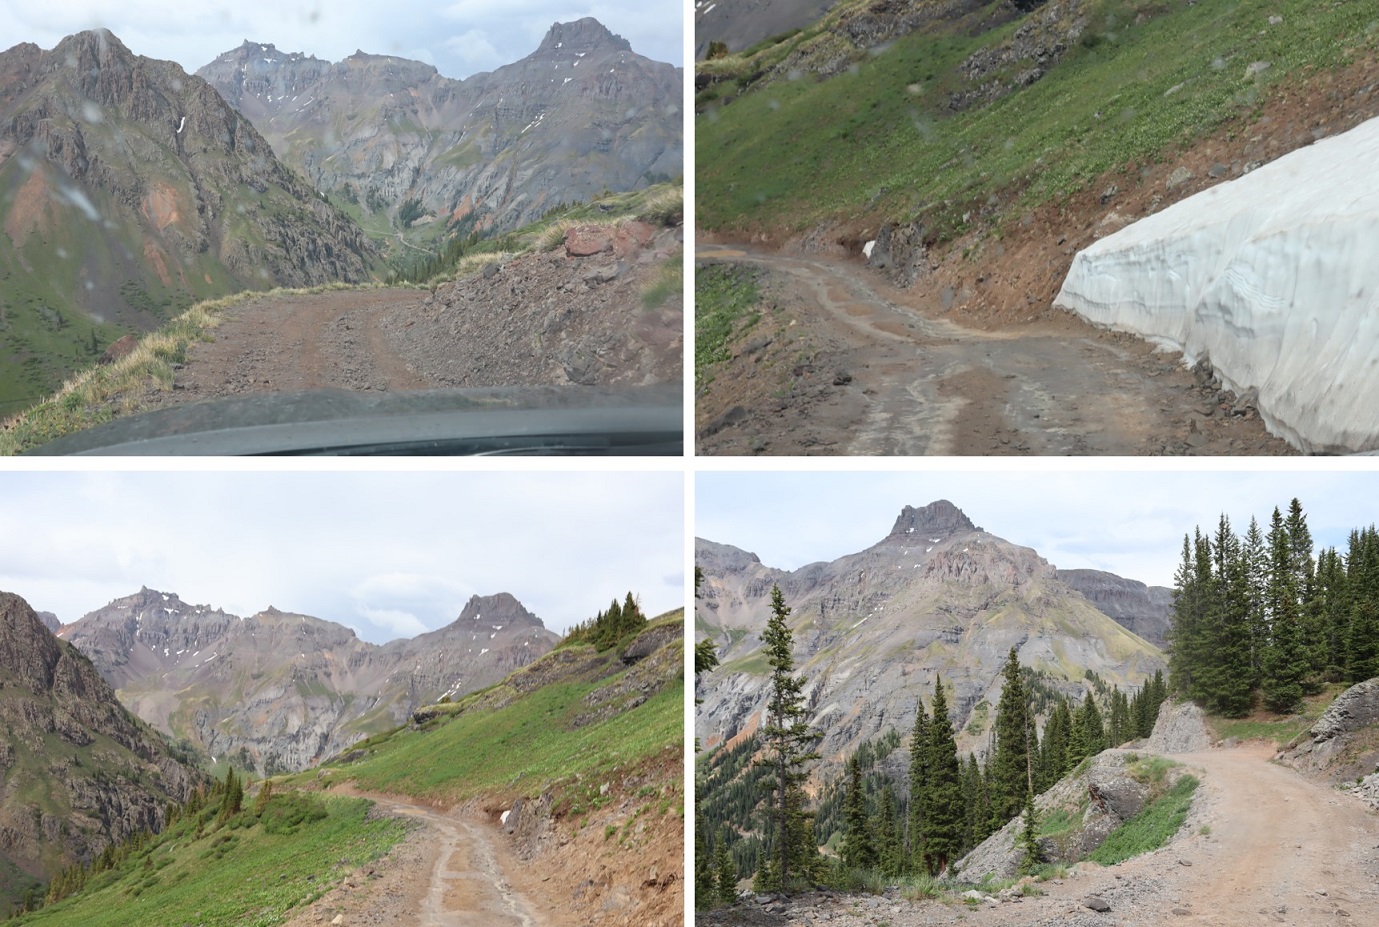
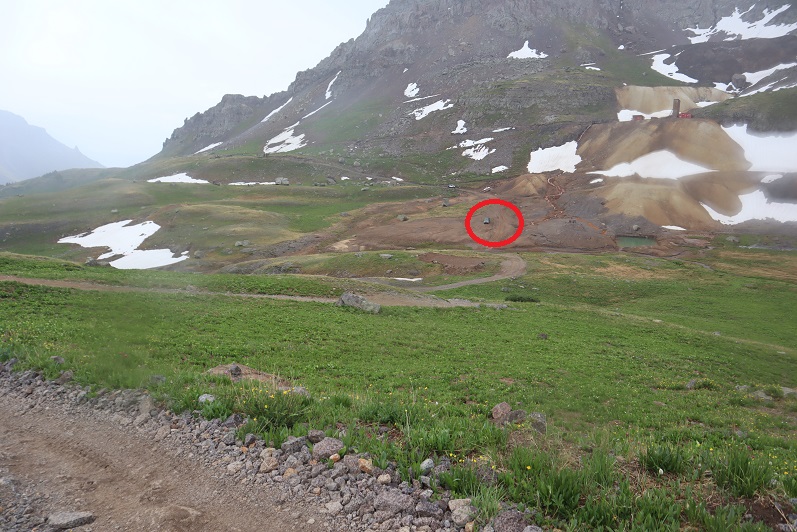
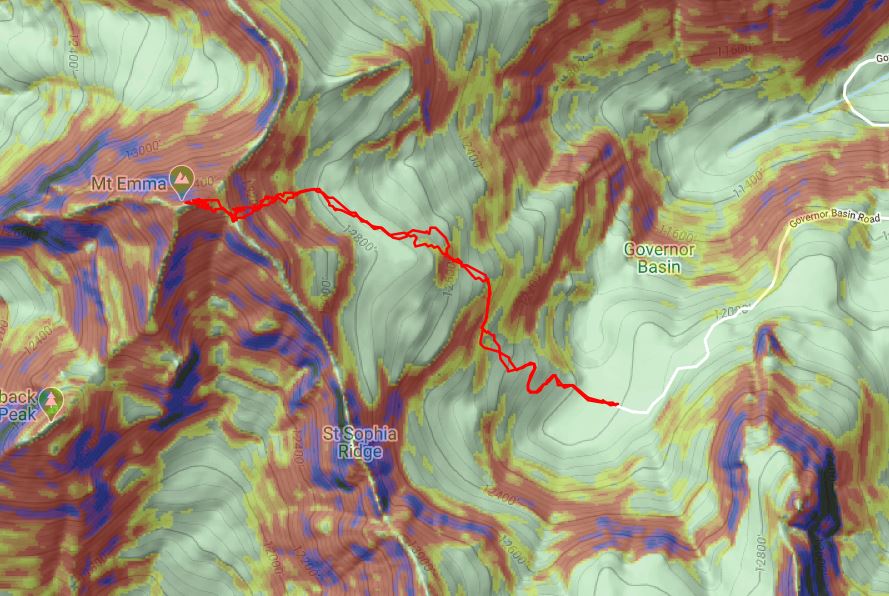
After summiting Cirque and Gilpin it was still early in the day and the weather seemed to be holding so I decided to try and get one more bicentennial in. I drove down from Yankee Boy Basin to the junction with Governor Basin Road and took that 4WD road all the way up to Governor Basin. This is a narrow road and 4WD but luckily I only had to pass OHVs.
Originally, I parked at the top of the hill and started walking down into the basin, but when I saw other vehicles parked below I got back in my truck and drove all the way to the bottom.
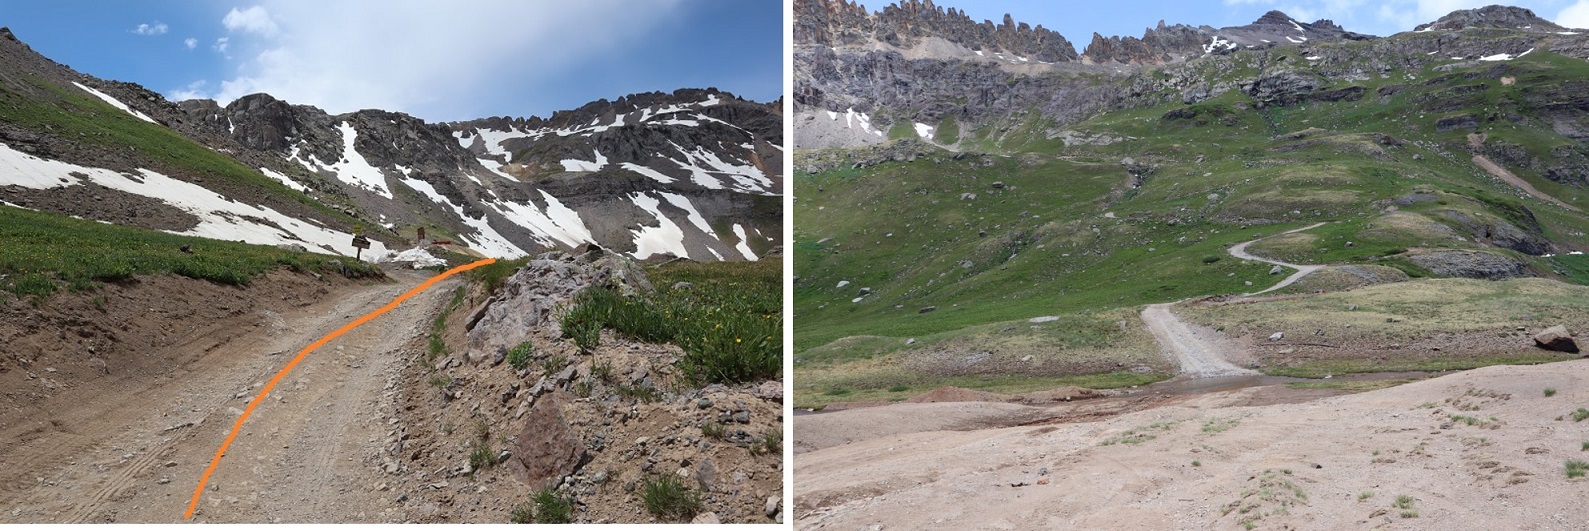
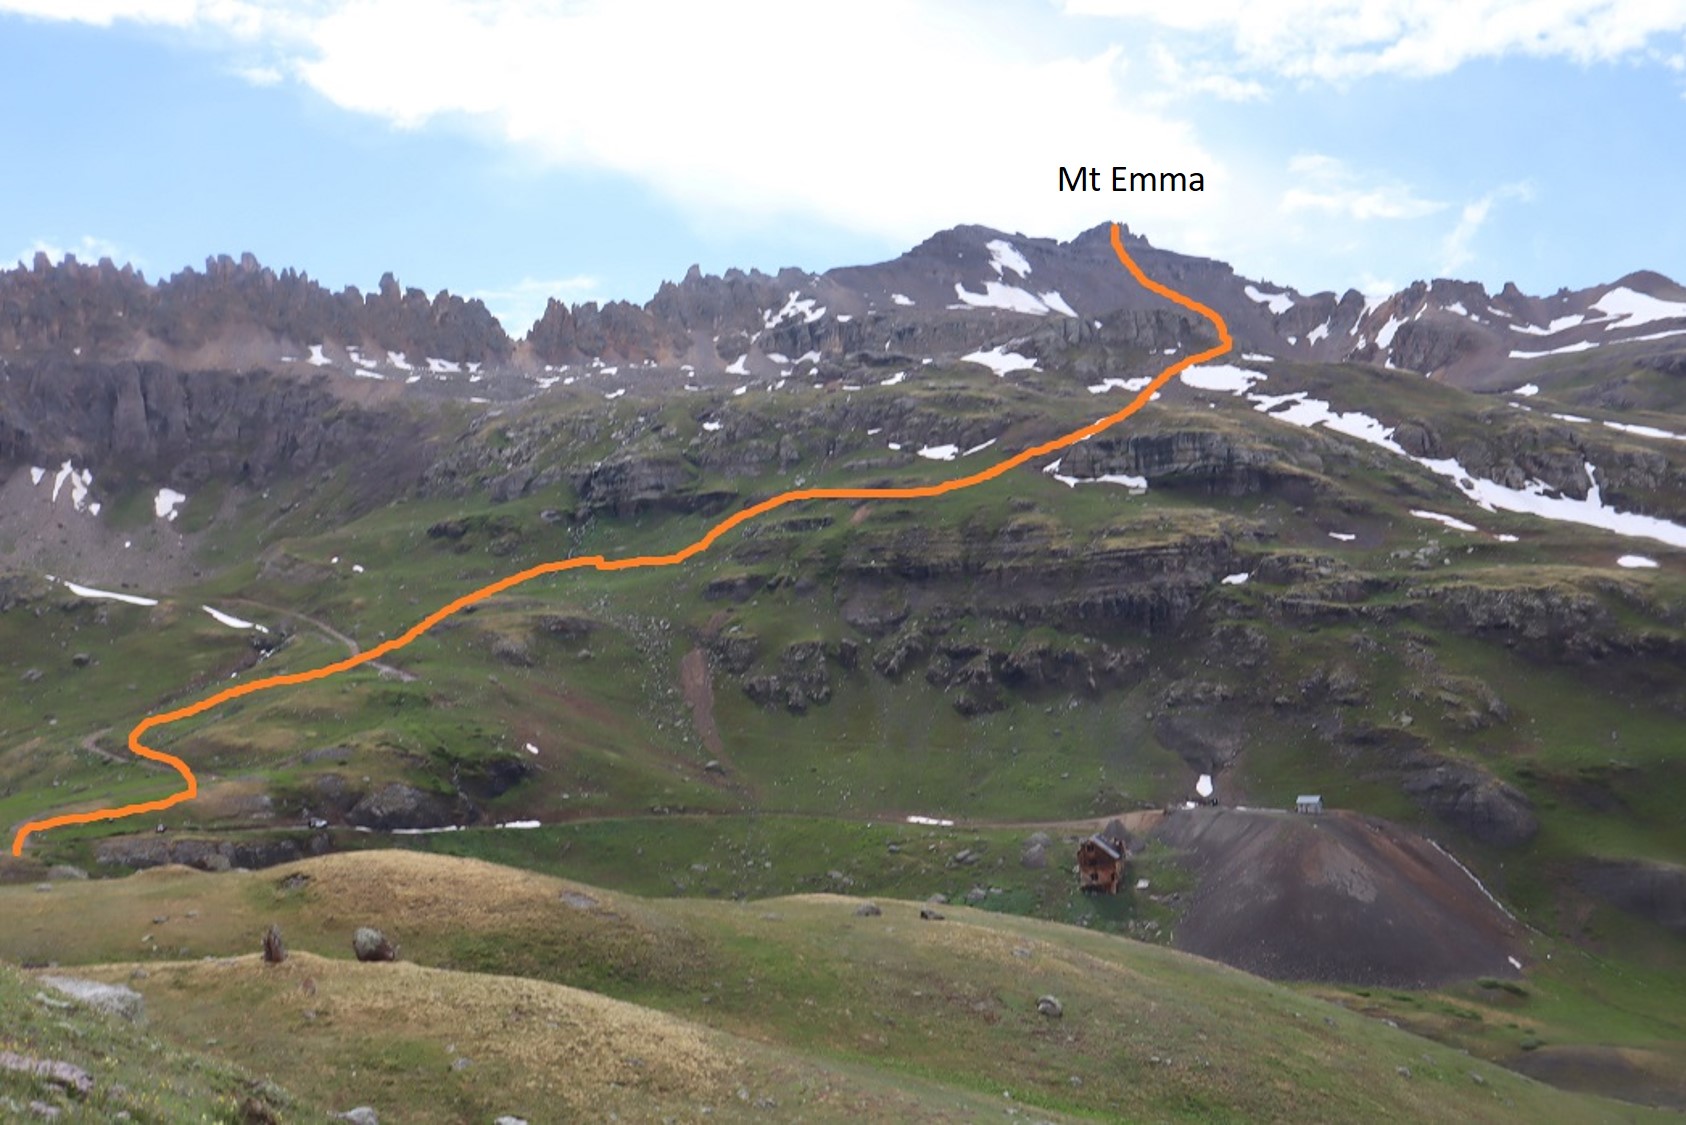
Here’s an overview of the entire route:
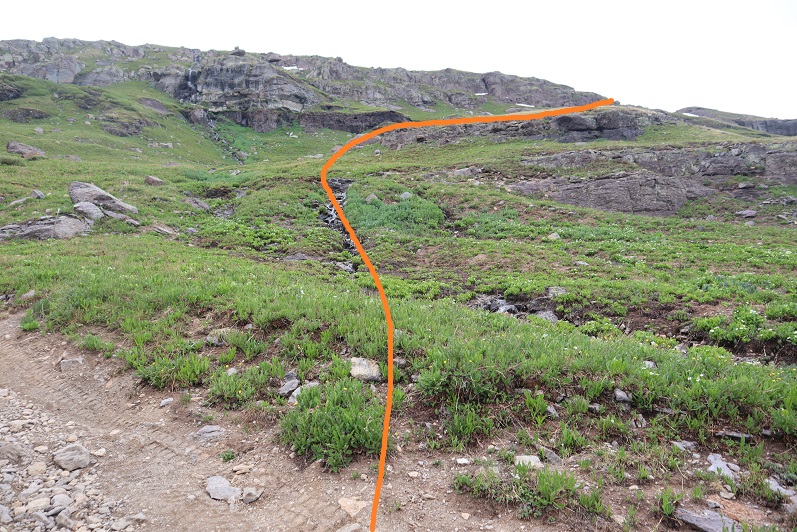
From the parking area I crossed a small creek and followed the 4WD road.
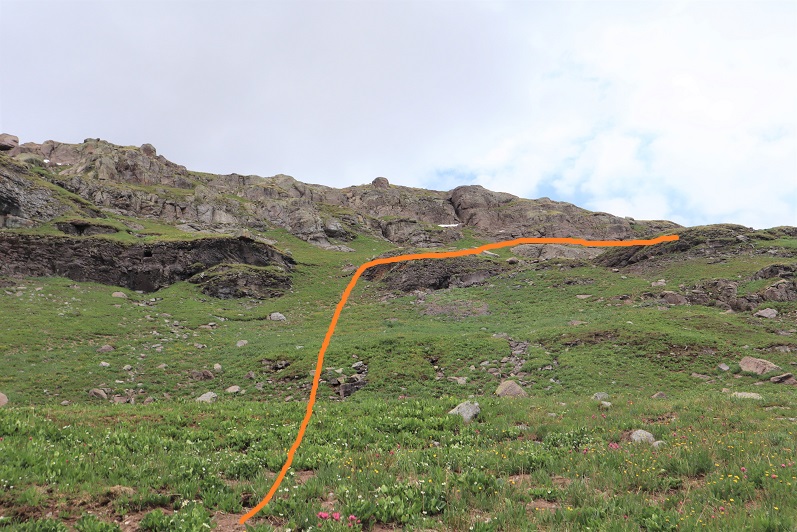
When the 4WD road intersected with a small waterfall/drainage I turned right and headed northwest up the side of the mountain
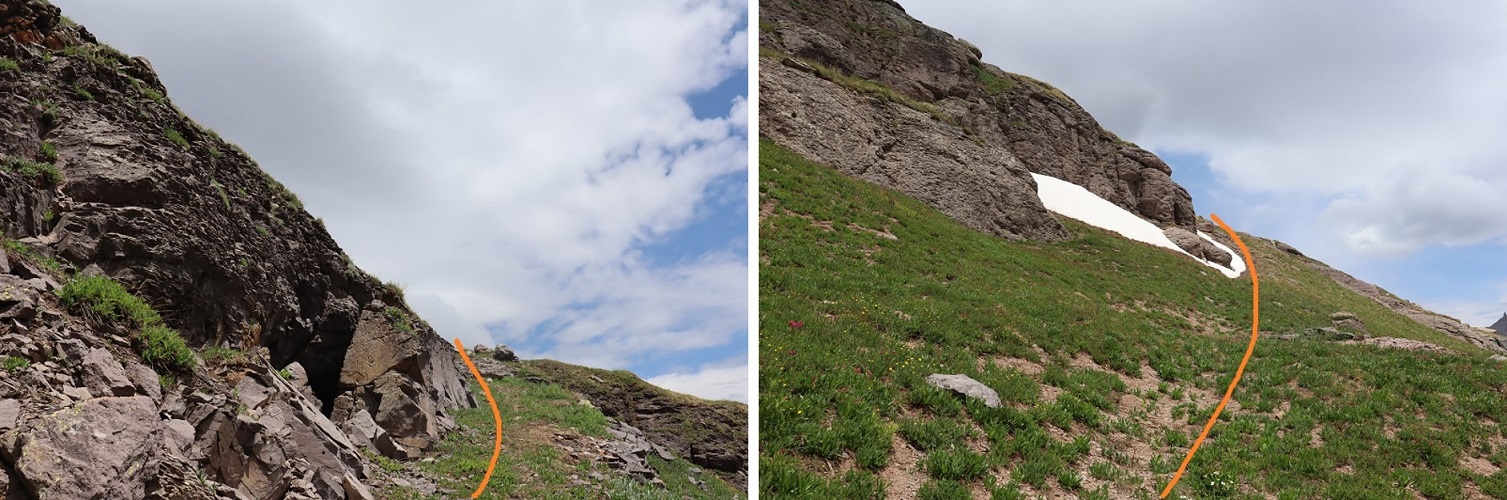
This led me to a faint game trail that brought me around the mountain
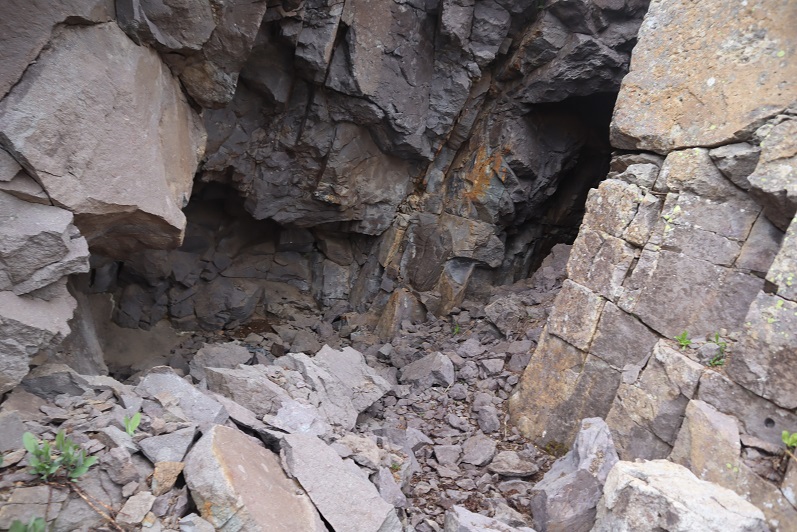
There was a neat cave here that looks like it used to be a mine but now belongs to an animal (hence the game trail)
I rounded the corner of the mountain and Mt Emma came into view
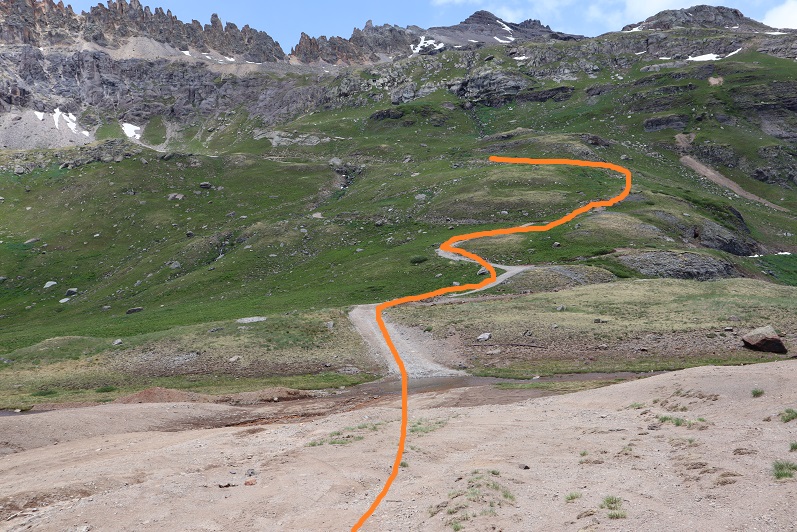
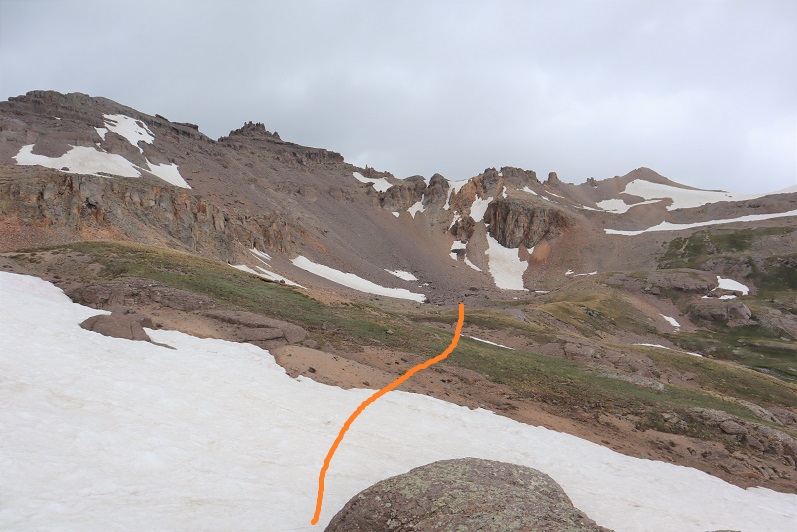
I walked across the basin, crossing a small area of firm snow, and then continued hiking up the scree filled gully
This gully was very loose and for every two steps I took forwards I took a step back sliding down scree. I tried to stick towards the larger rocks when possible because they afforded me more traction hiking up.
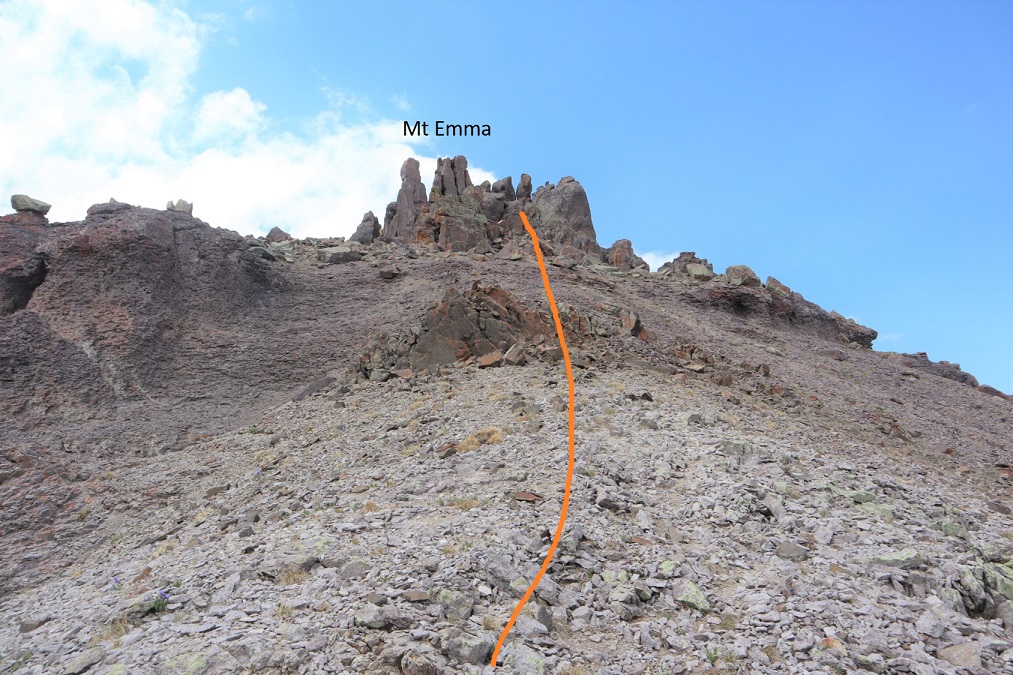
Towards the top of the gully the scree changed to rocks and I did a little scrambling to gain the ridge.
Once on the ridge I turned right and headed northwest towards the summit towers, putting on my helmet as I went.
There seem to be endless ways to summit Mt Emma from this area, all class 3 and above. I summited by going right first, up a small gully and then back down another before ascending a third to summit. I took a different, more direct route on my way back. These gullies ranged from bare, solid rock walls to being filled with soft sand. Microspikes helped here. I wore them until I made it back down to tundra later in the day.
Route on the way in:
Back down another gully
And back up a third gully
As soon as I went up this last gully I could see the summit
That had been easier than I’d expected. I snapped a picture, took two giant steps towards the summit, and felt it: Zzzzzzp! Zzzzzzp! Two quick buzzes just under my helmet accompanied by a tingling sensation. Even though I’d never felt this before I instantly knew what it was: indication of an imminent strike of lightning. I was just feet from the summit but I immediately turned and bolted for the gully I’d just ascended.
Well, that was unexpected! Sure, there were clouds and mist all around me, but none of the clouds looked threatening. As I sat there in the gully, looking at the summit just a few yards away, it started graupeling. Then raining. Then graupeling again. I sat and considered my options.
I could hike back down the mountain, but as soon as I left these gullies I’d be exposed for the rest of the hike. I did not want to be the tallest thing above treeline. I licked my finger and held it in the air to test the wind and watched the clouds: the storm was moving away from me. I looked all around and no, the clouds didn’t look menacing (even though it was raining all over). I decided to sit and wait the storm out. After about 30 minutes of sitting on the summit, not seeing any lightning or hearing any thunder, I tried again.
I quickly left my spot and scrambled the last few yards to the summit
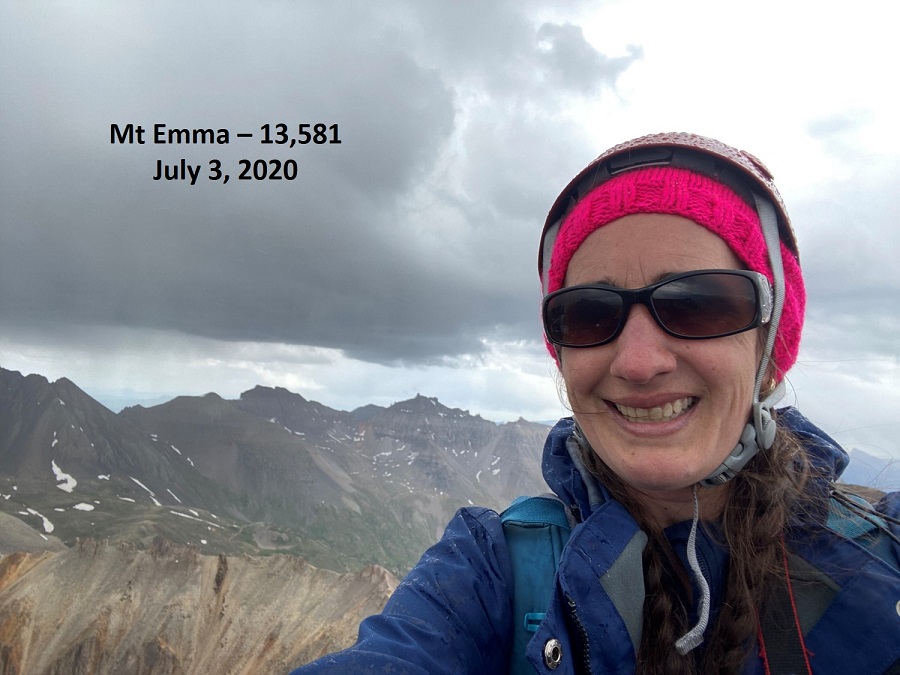
I summited at 2:15pm. I was still very scared of lightning and instead of taking the time to set up my camera I took a selfie with my cell phone and a very quick summit video. That’s a nervous smile by the way: I still didn’t completely trust the weather and wanted to get out of there.
Mt Emma:
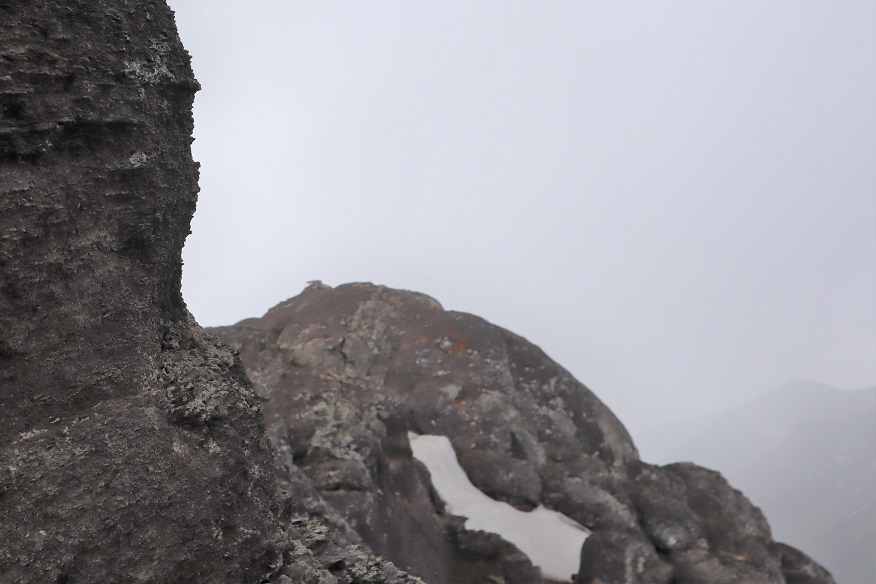
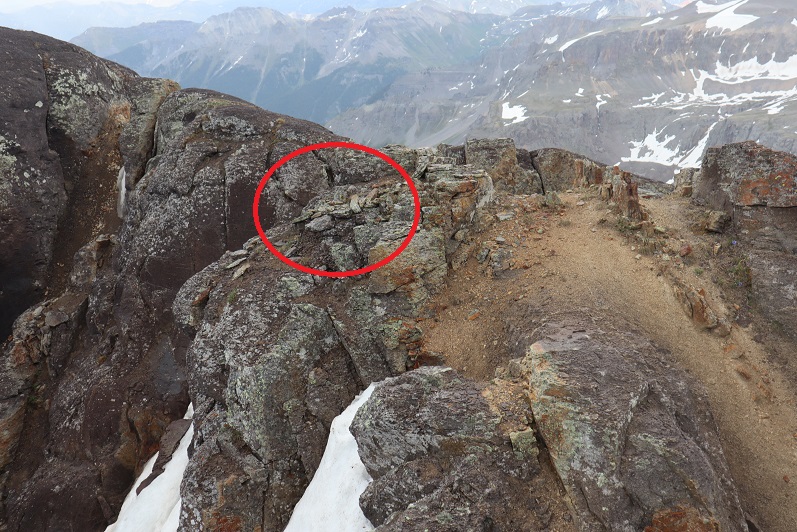
Despite my earlier plan of taking the time to check out the conditions of the peak for tomorrows hike I didn’t spend more than 30 seconds on that summit. I quickly turned around to head back. Circled in red is where I’d spent the past 30 minutes waiting out the weather. This is also the access point to the gully I descended on my way back.
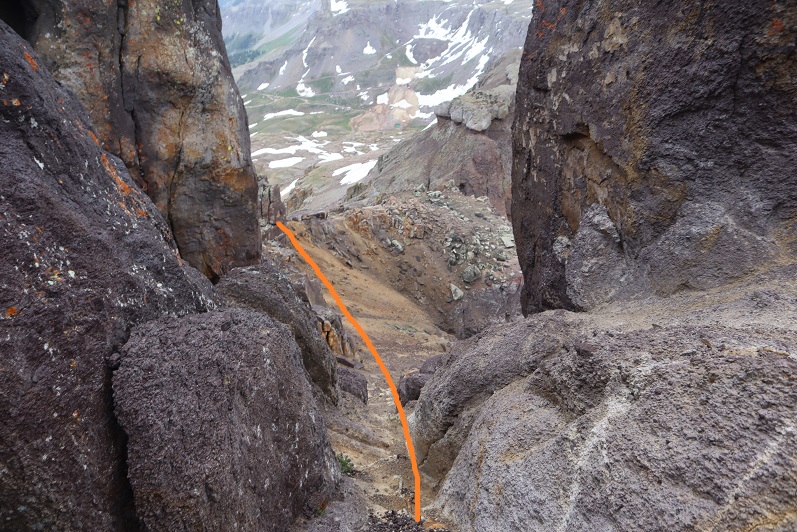
From the summit I could see a more direct route back through a different gully and decided to take that route down. It’s still class 3, but you can see your objective the entire time. I went back down the last gully I’d ascended
And east towards the small saddle
Here’s looking back for those of you who want to ascend this way (I’d recommend doing so, it’s entrance is to the left of center of the summit area)
Back on the saddle the weather looked to be improving. I found the access point and headed back down the gully.
While descending I stuck to the areas of dirt and scree. My microspikes helped tremendously. At times the scree would give way and there would be sections of 10 feet or so where all of the rocks would loosen and slide together for a few yards. At one point my leg became buried in scree past my shin. My shoes had so much scree in them I had to take them off and shake them out twice before making it to the bottom. Tons of fun!
I retraced my steps out of the basin back down to my truck
The small waterfall/creek/runoff is a great visual for how to make it back to the 4WD road
I made it back to my truck at 3:10pm, making this a 4.48 mile hike with 1861’ of elevation gain in 3 hours (including the half hour spent waiting out the weather). It was raining as I made it back to my truck. Here’s a topo map of my route