Rito Alto Peak – 13,794, Hermit Peak – 13,350 and Eureka Mountain – 13,507

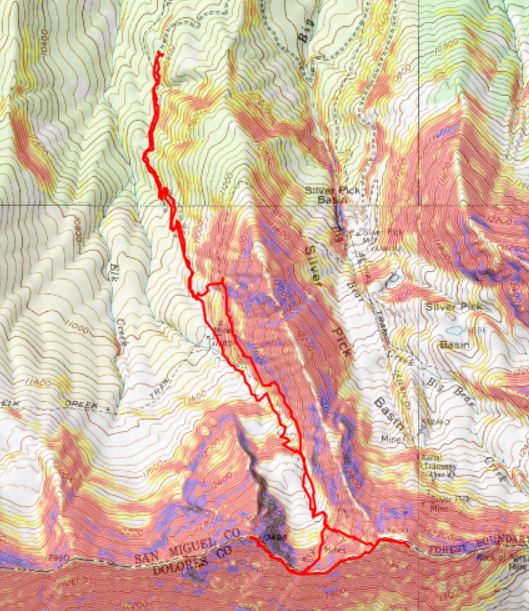
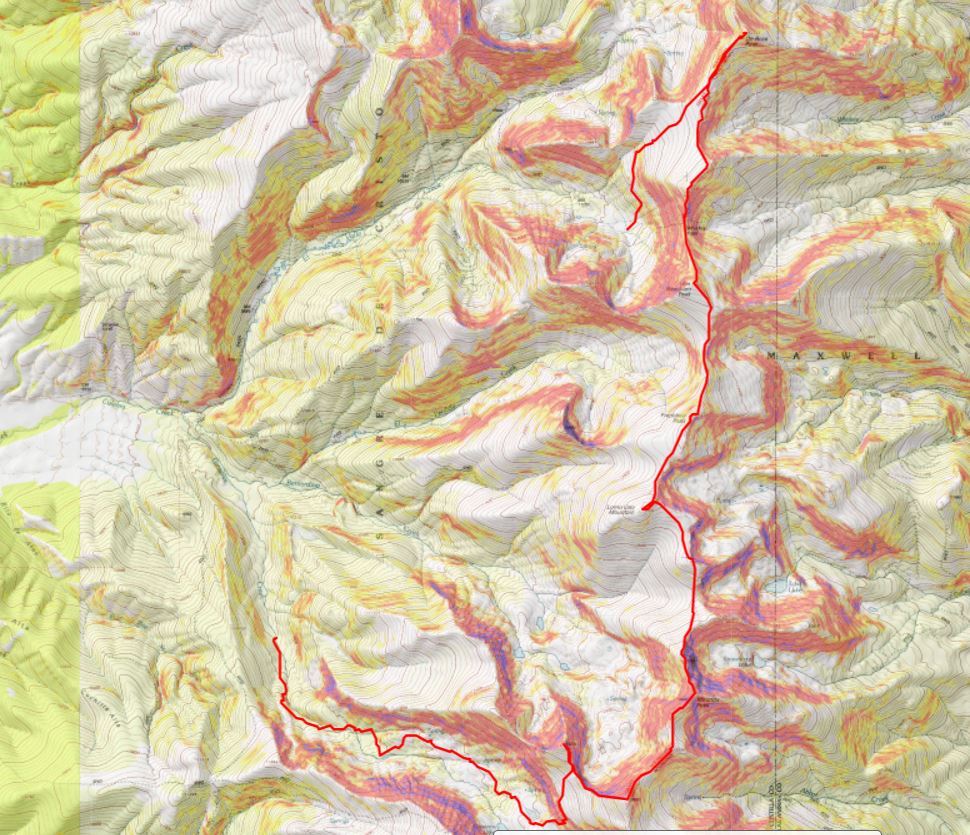
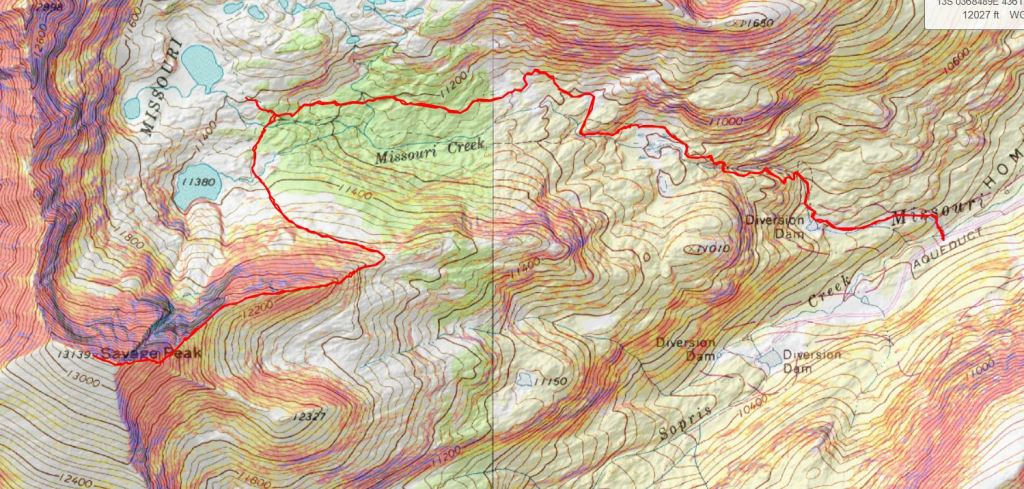
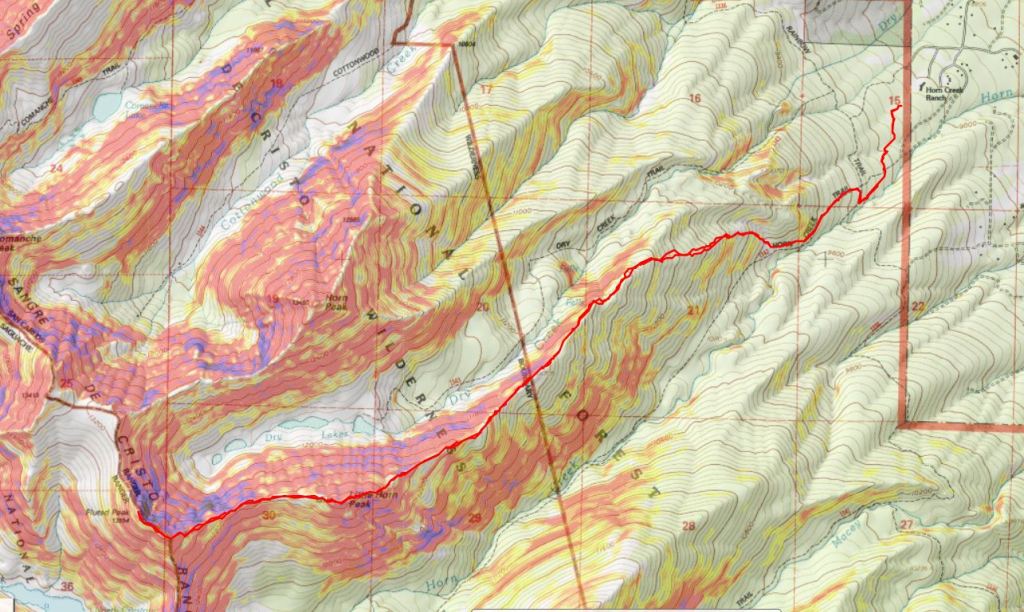
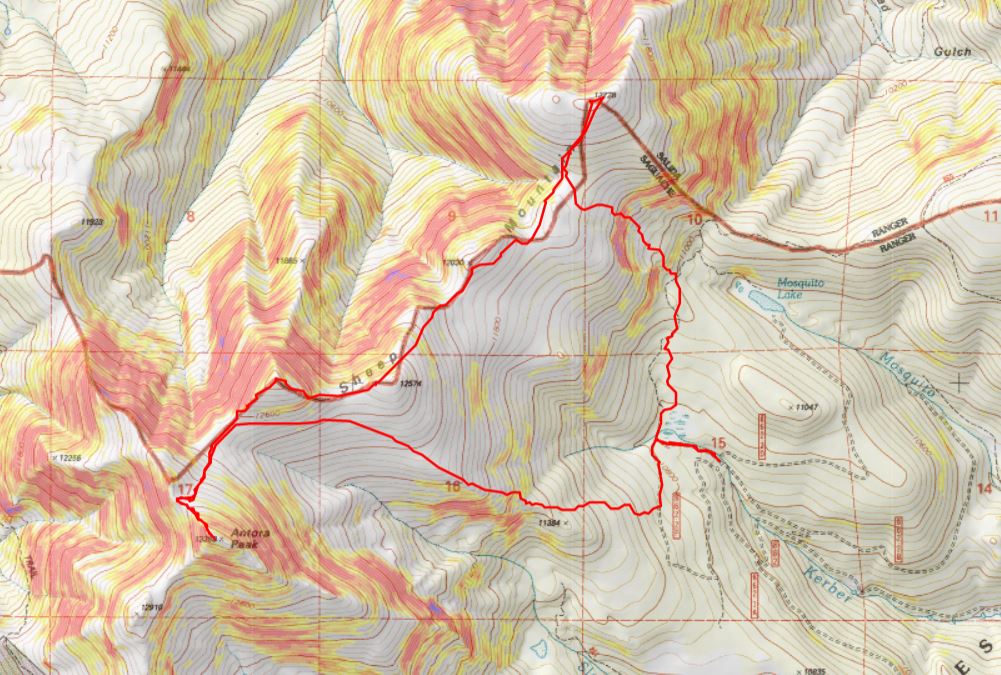
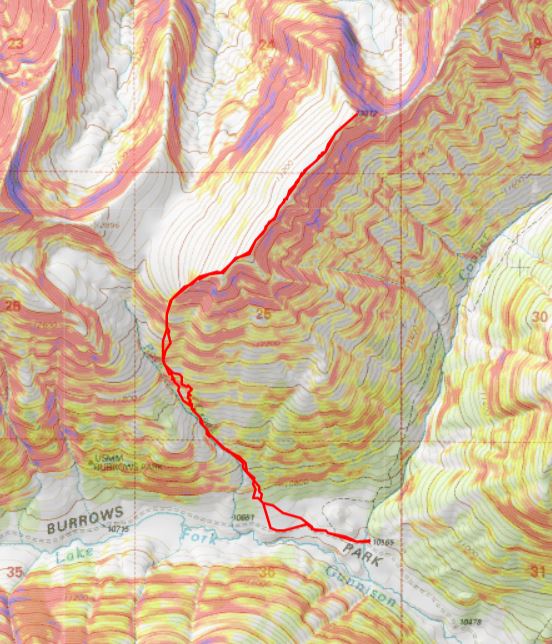
RT Length:  12.2 miles

Elevation Gain: 4551’

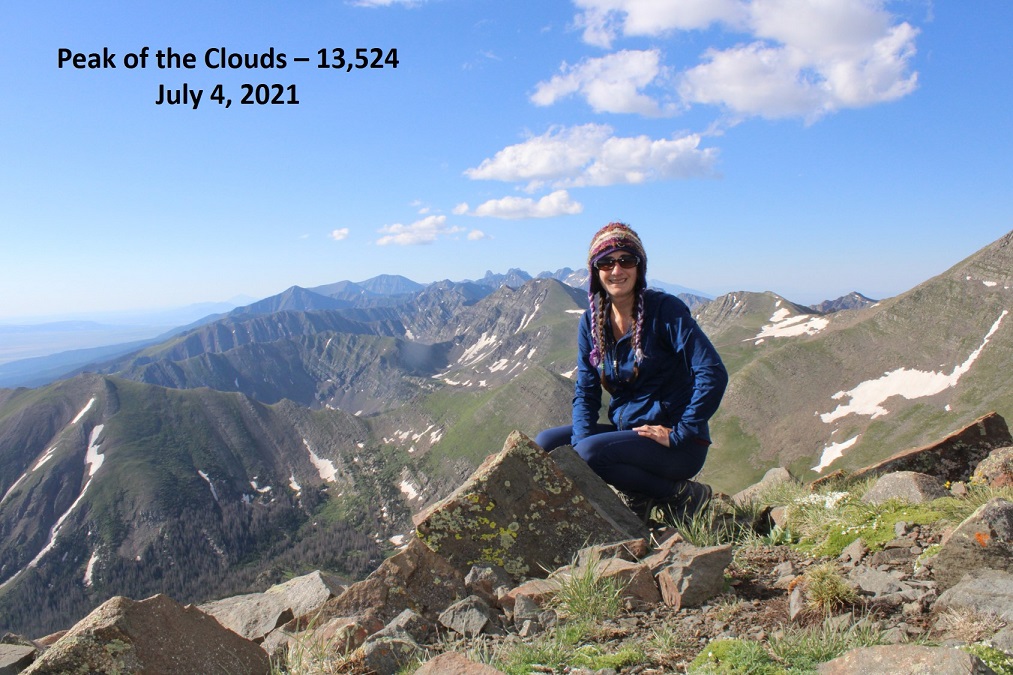
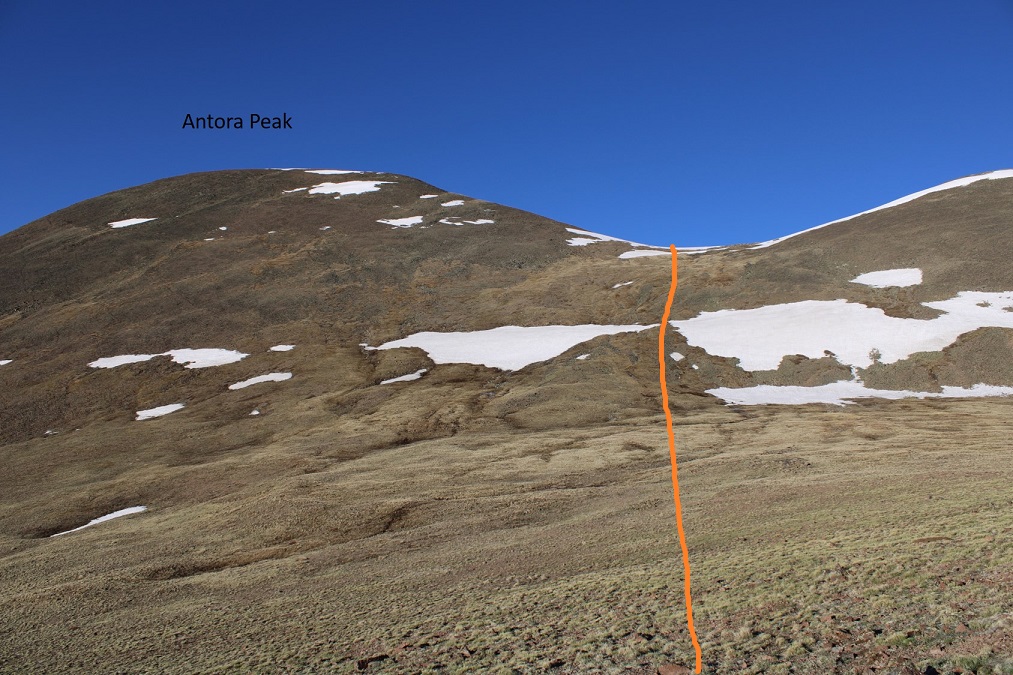
I’ve hiked Rito Alto Peak before, but due to an early snowstorm had to skip Hermit and Eureka.  Today I was going back for those two (but hit Rito Alto again as well because I didn’t get good photographs).

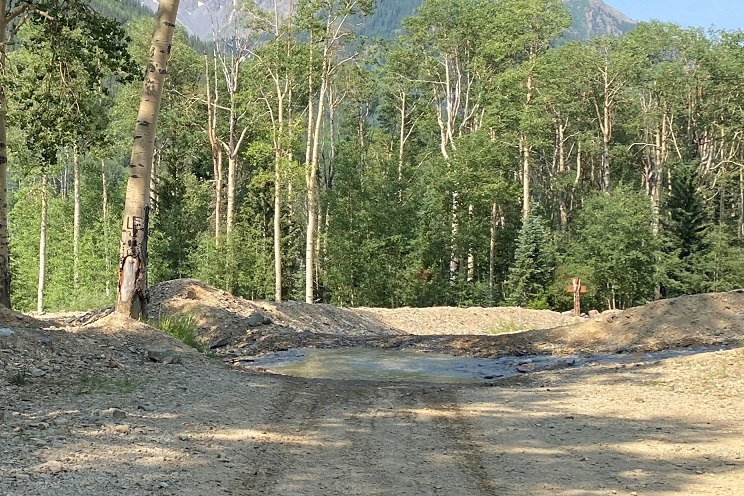
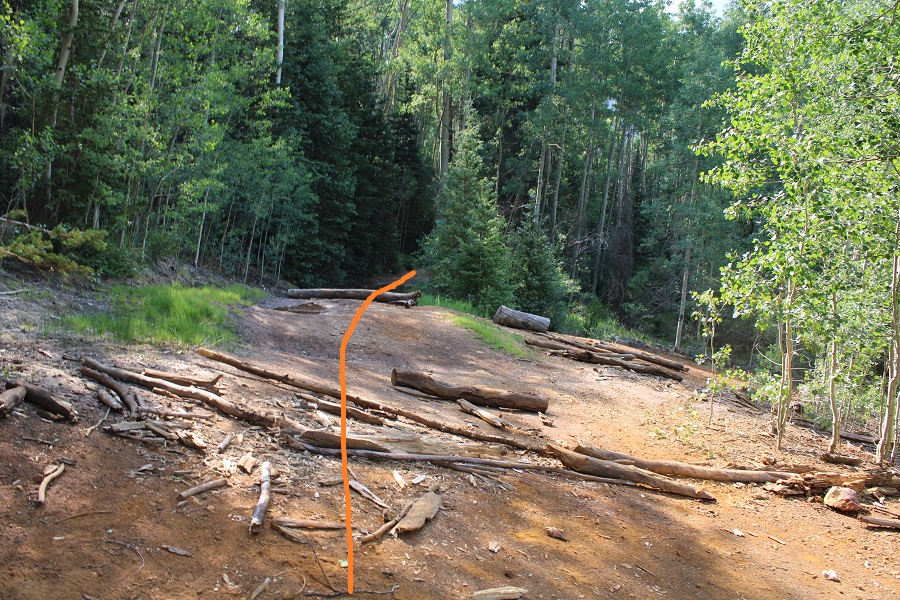
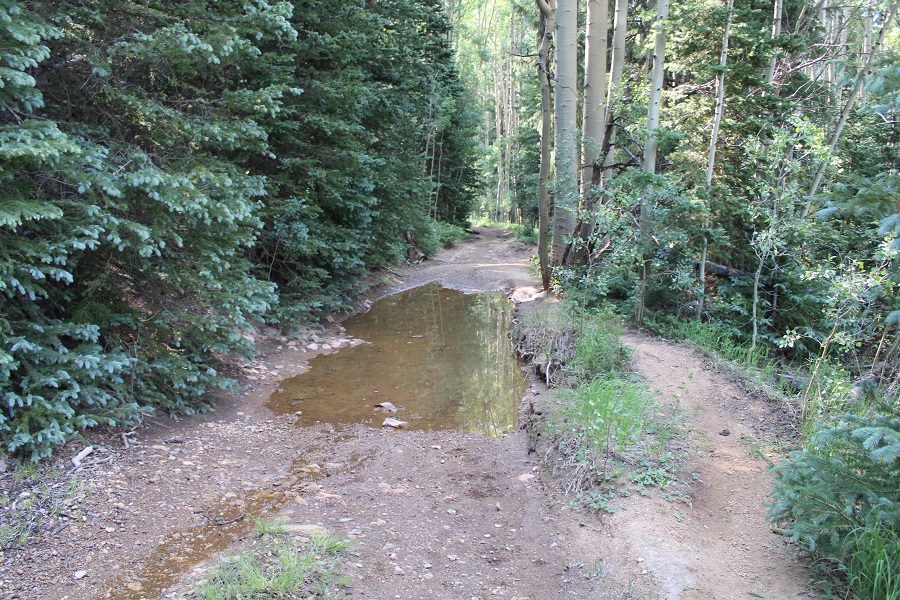
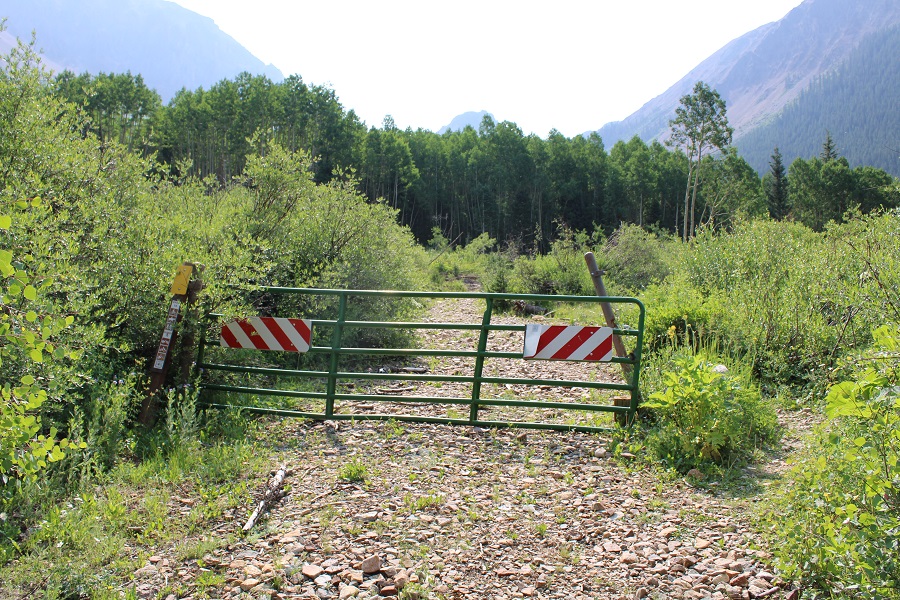
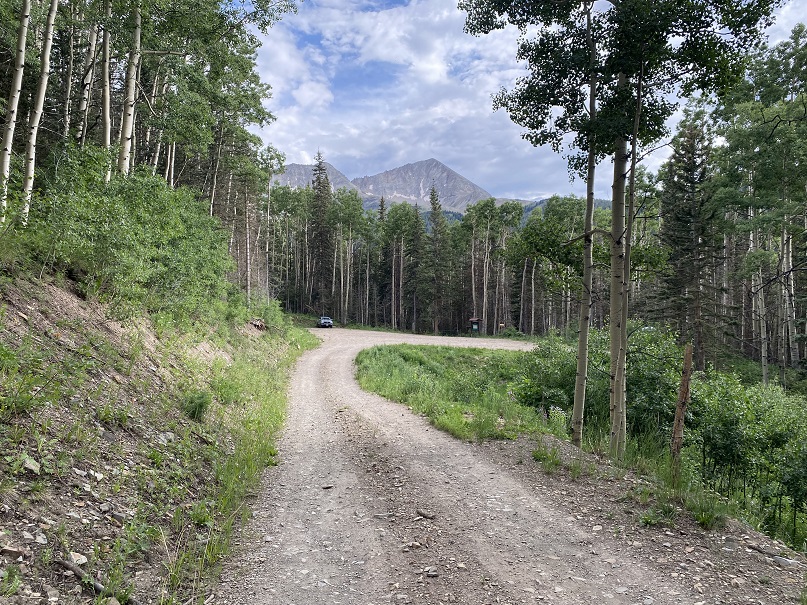
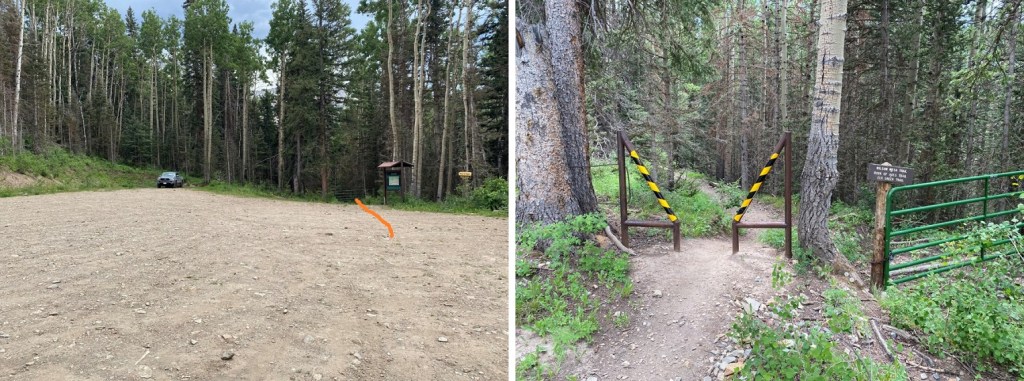
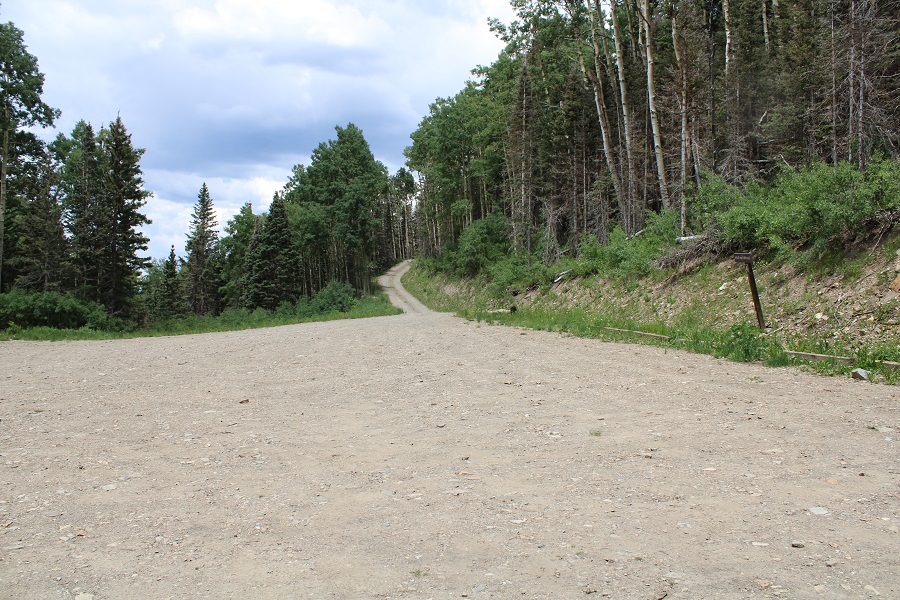
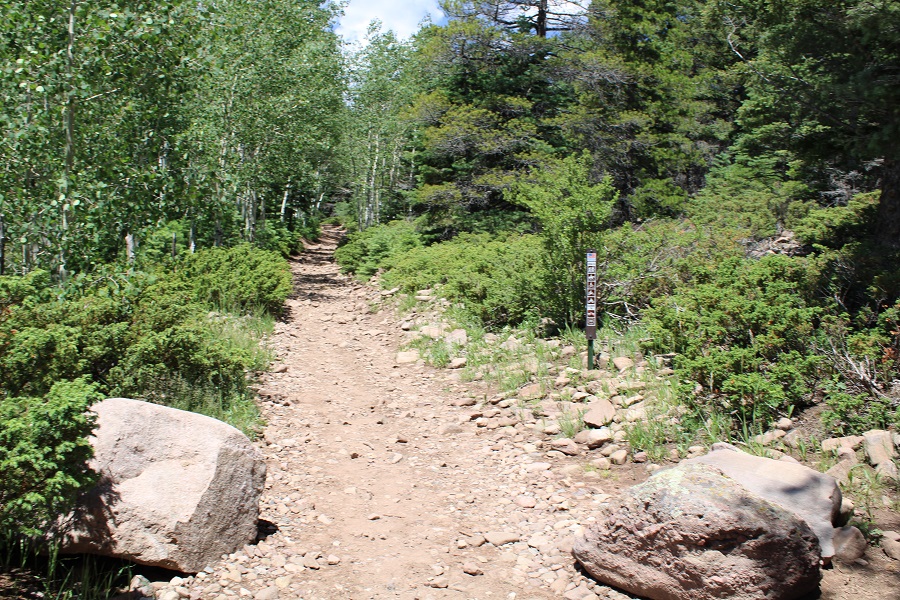
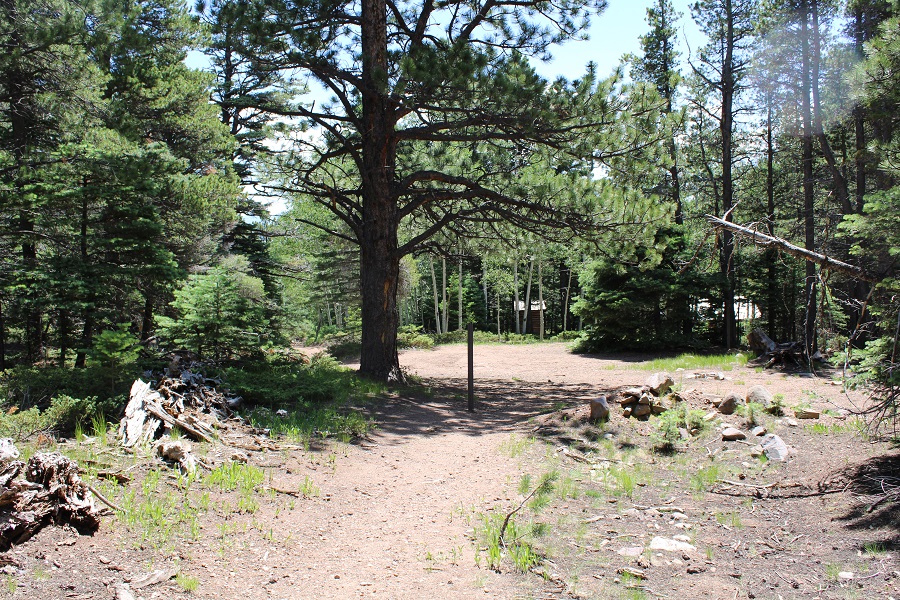
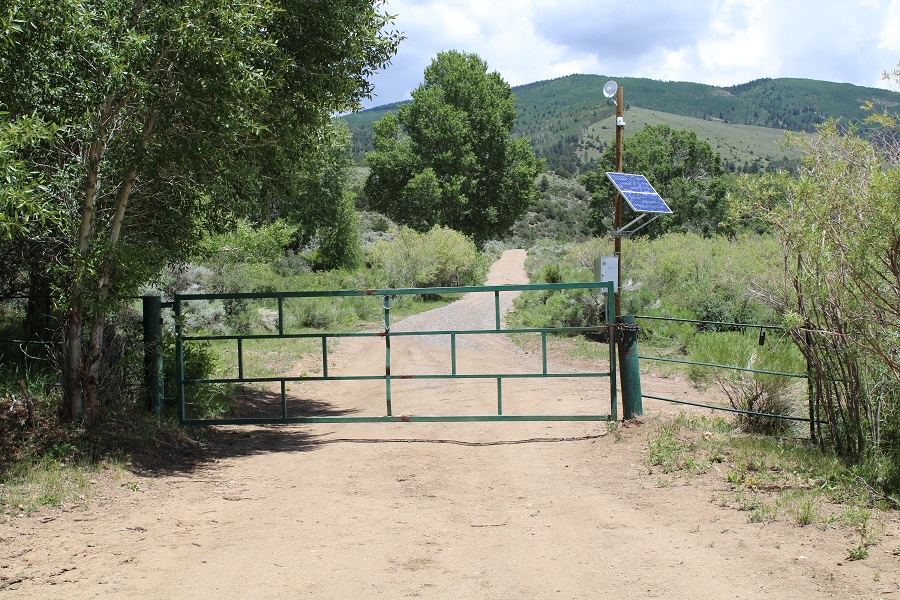
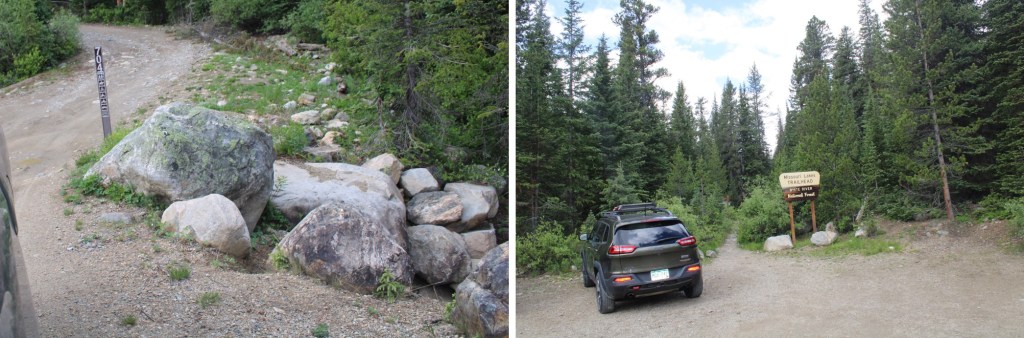
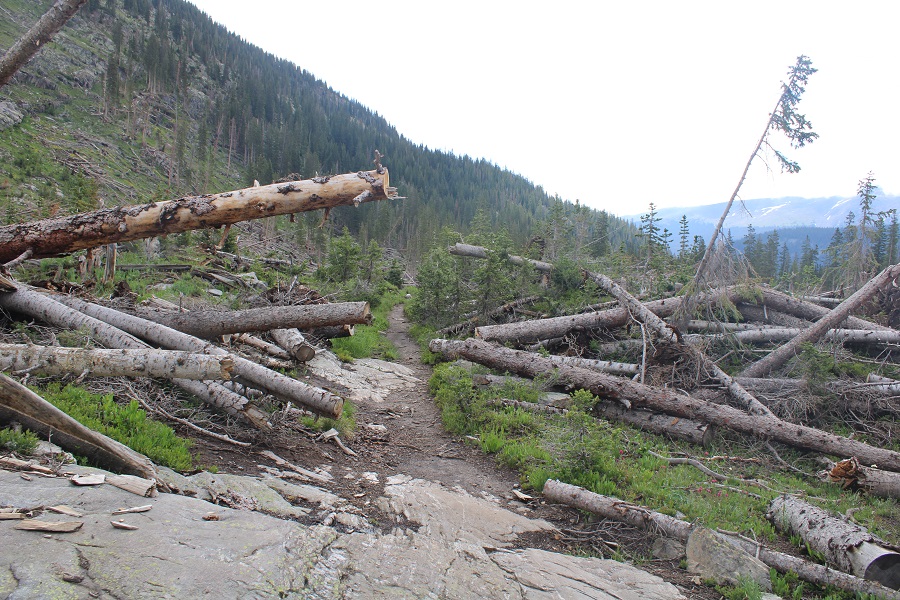
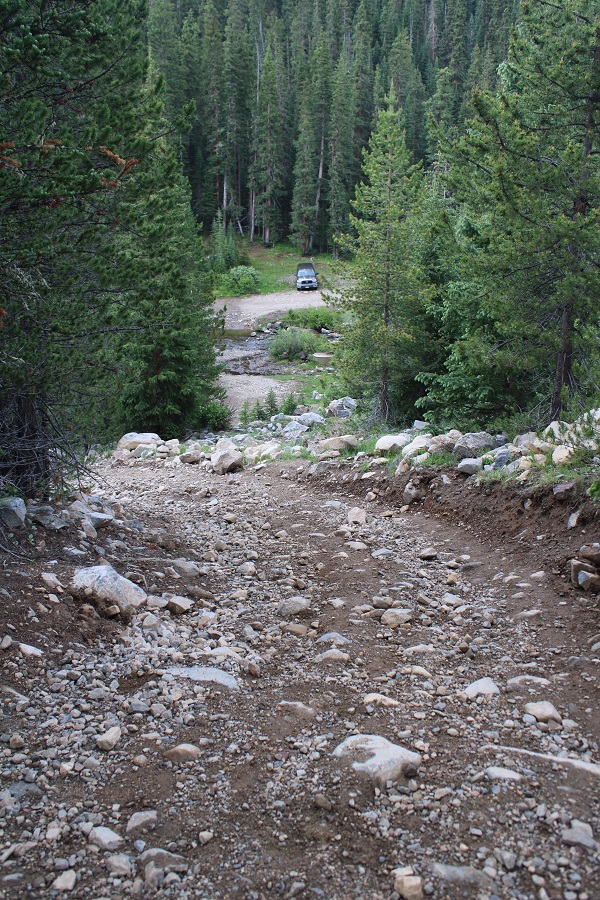
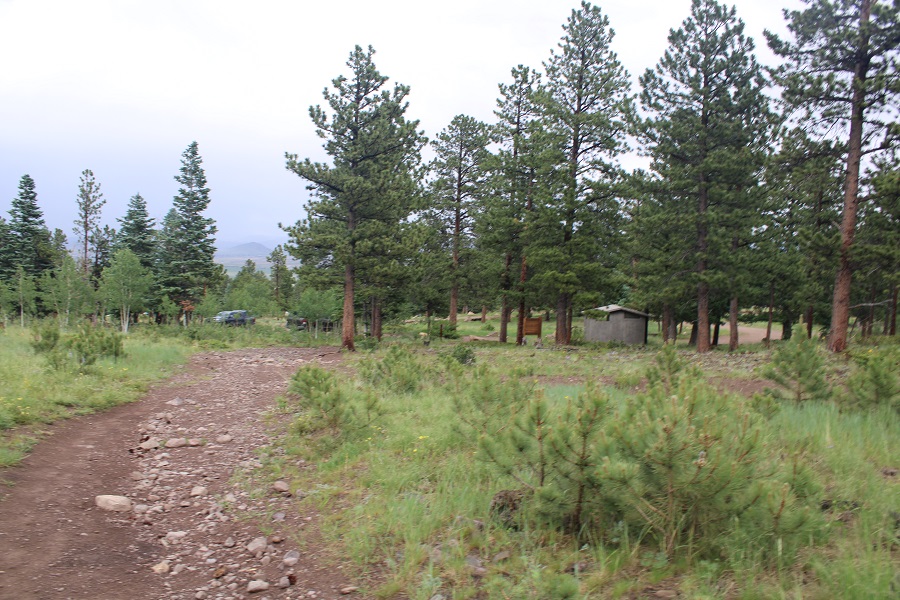
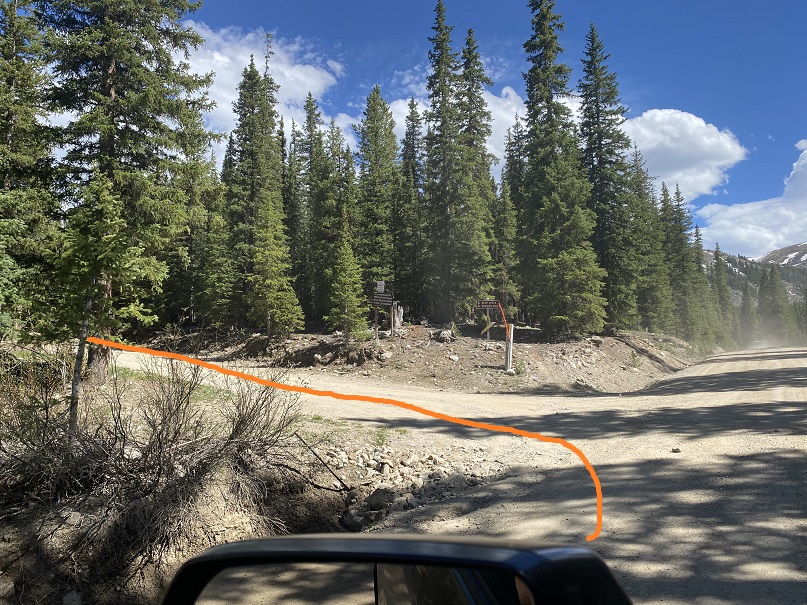
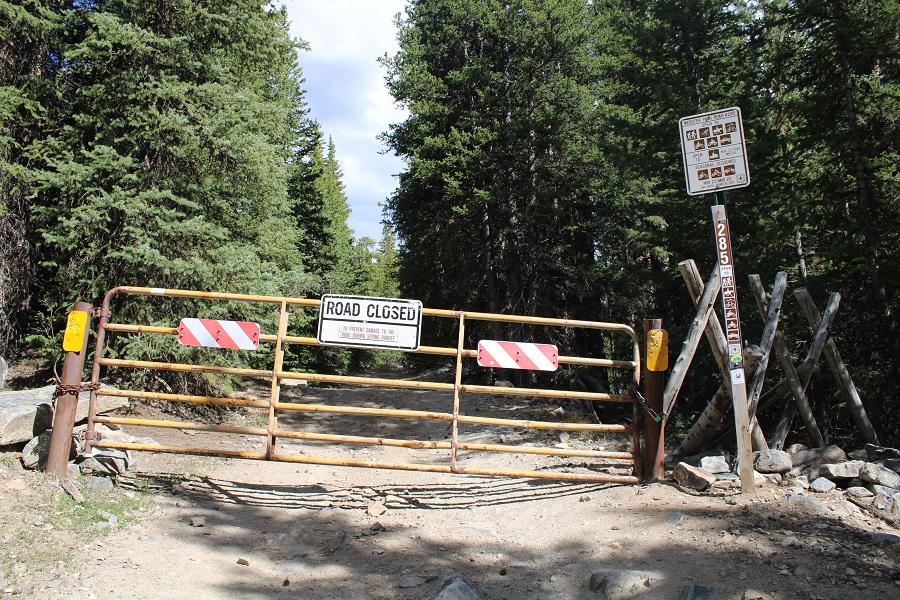
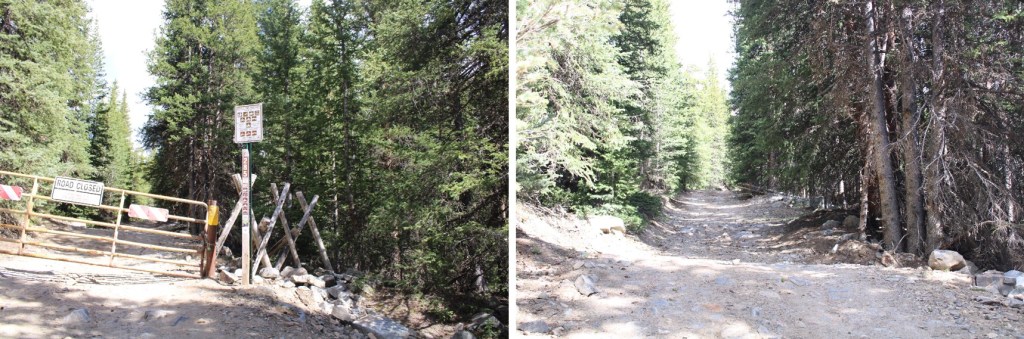
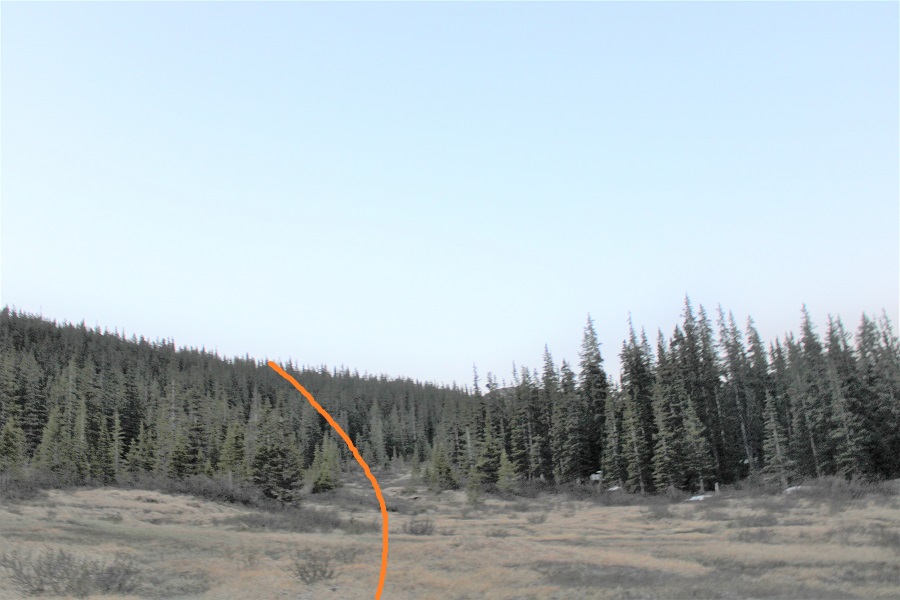
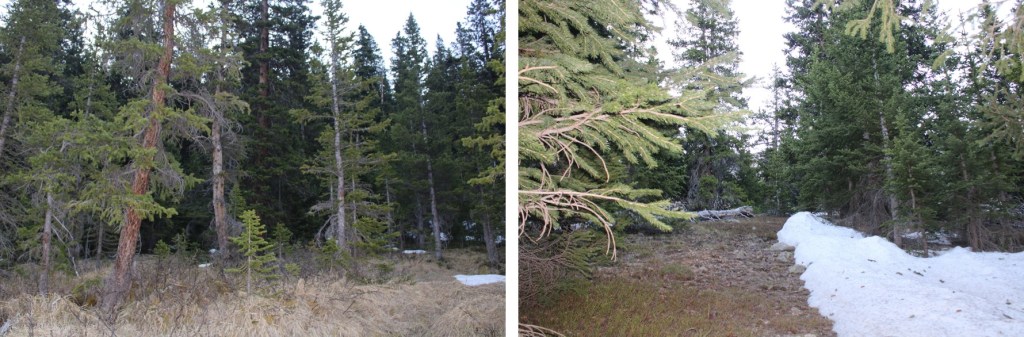
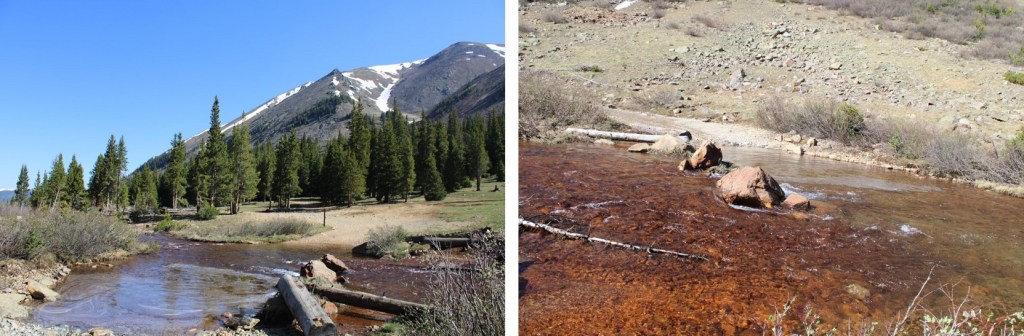
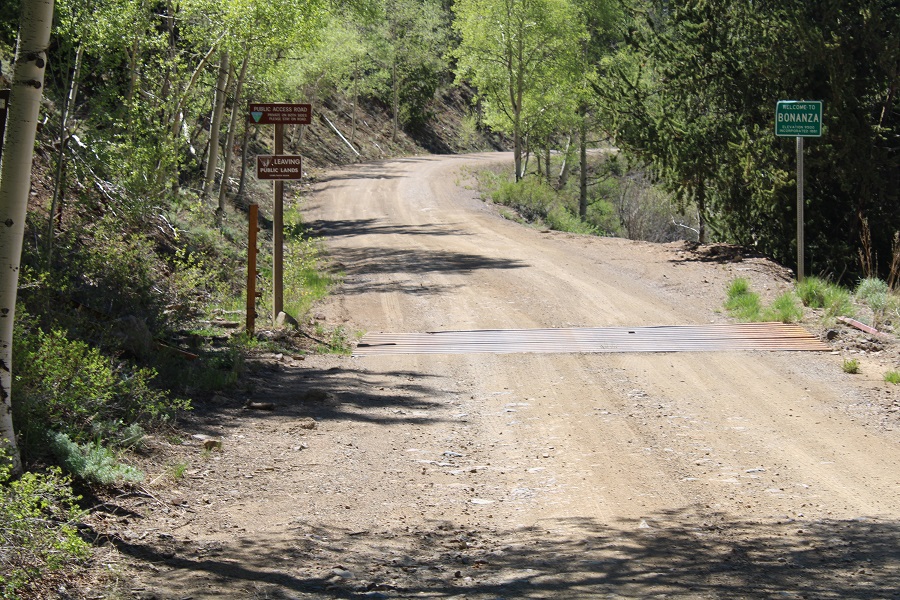
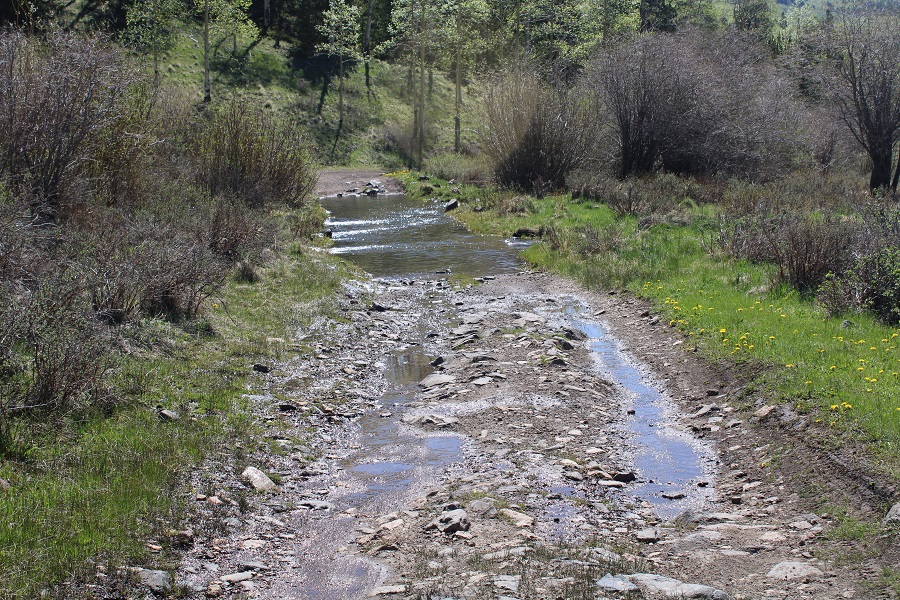
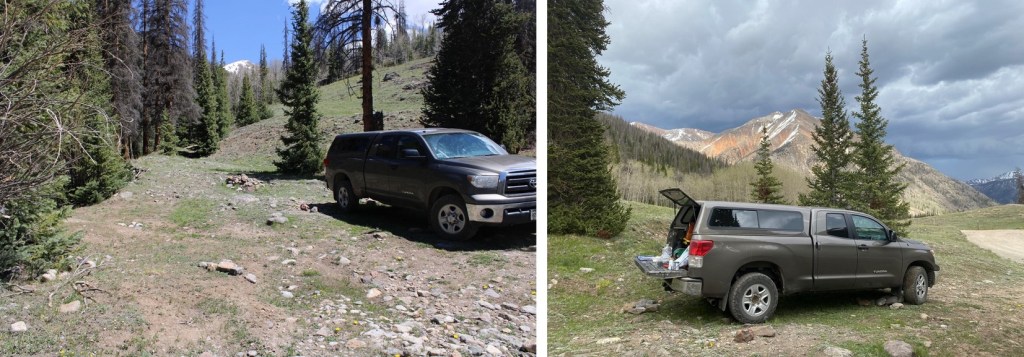
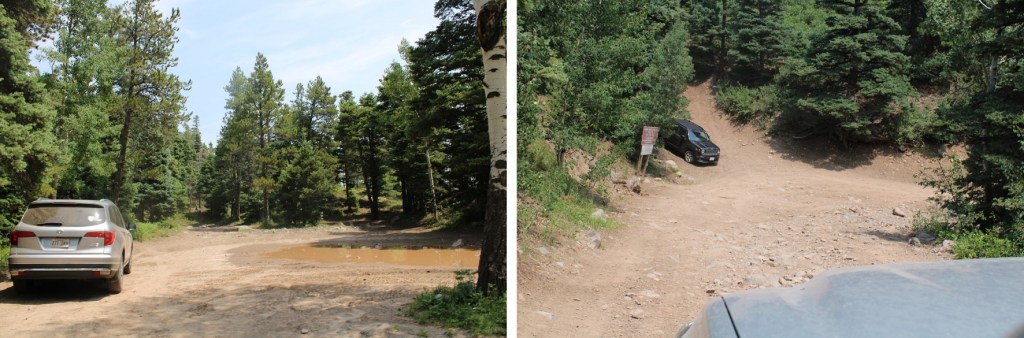
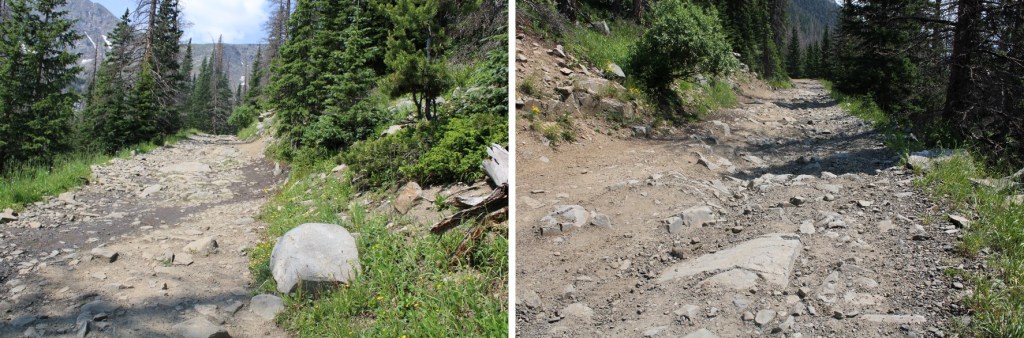
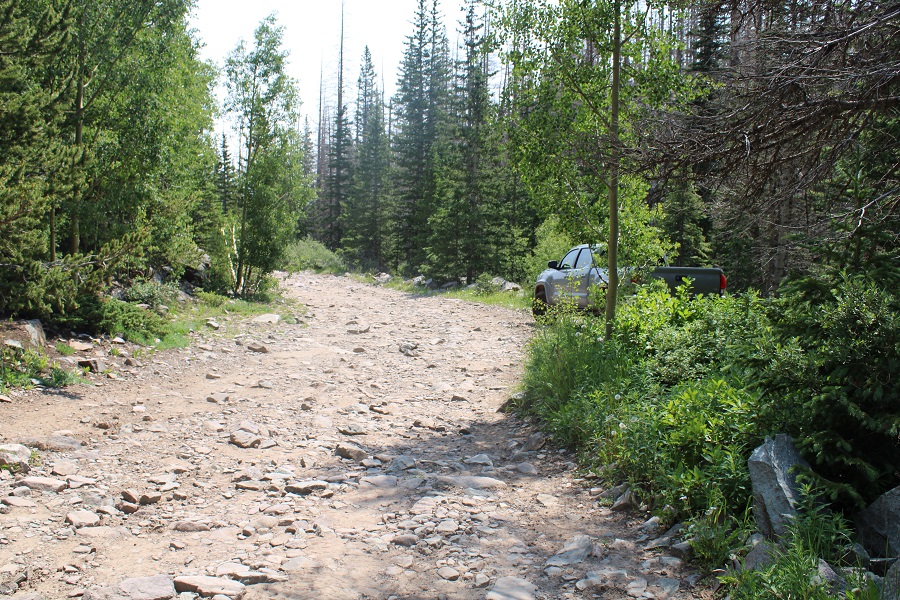
If you love your vehicle, park at around 9000’.  Seriously.  This road is a lot worse than it was the last time I was here, and even then it was pretty bad.  Here’s the parking area(s) around 9000’

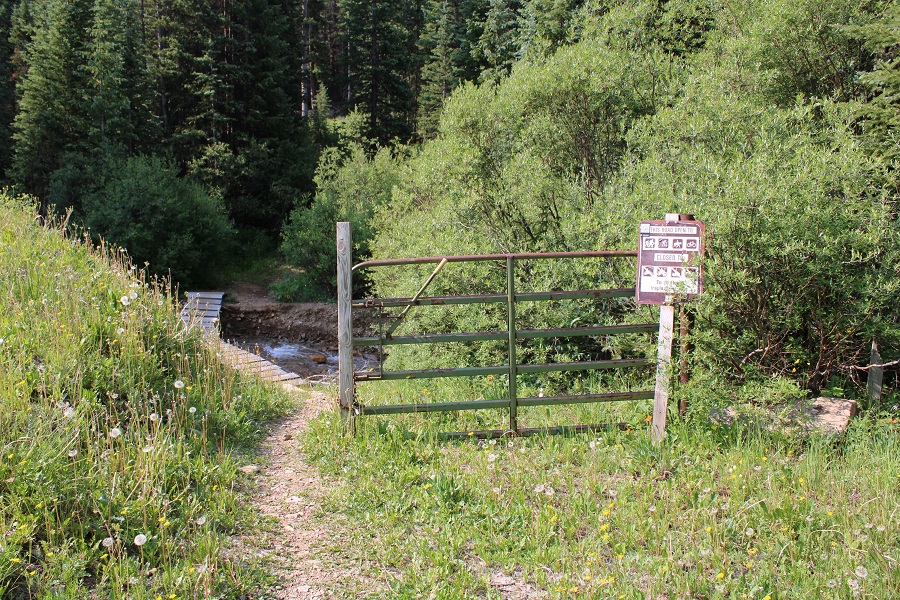
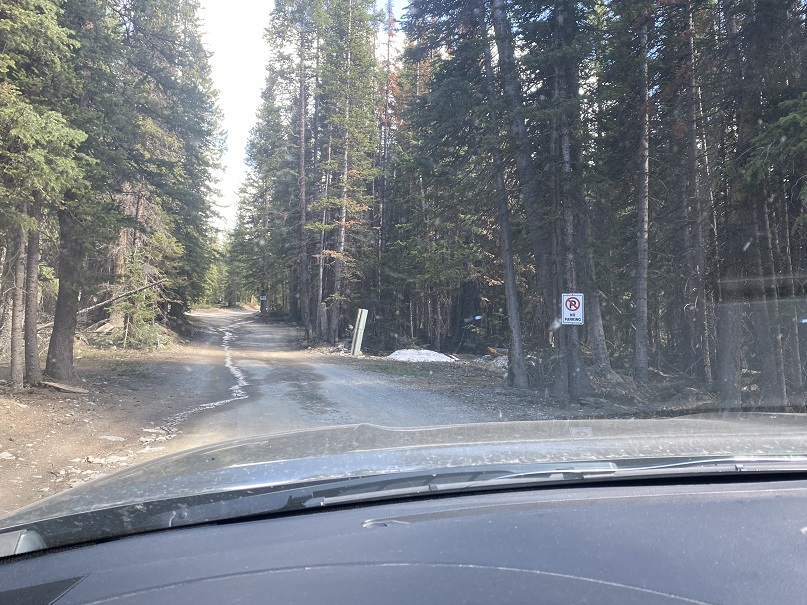
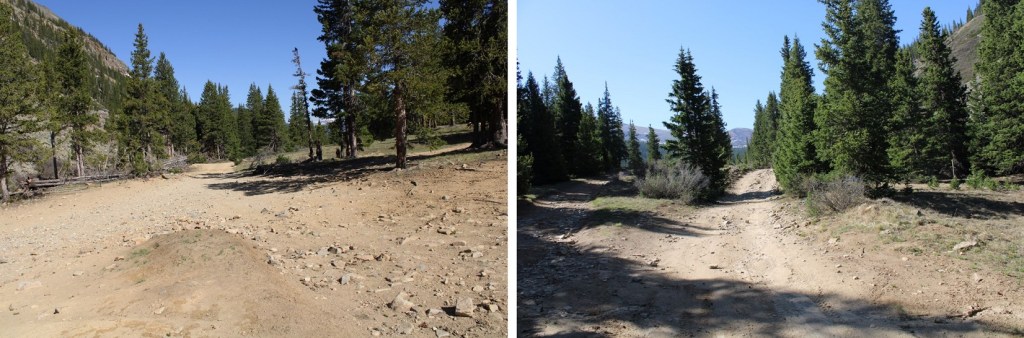
I have a new Tacoma, and wanted to see what it could do, so I continued driving further.  You’ll definitely want both high clearance and 4WD to continue.

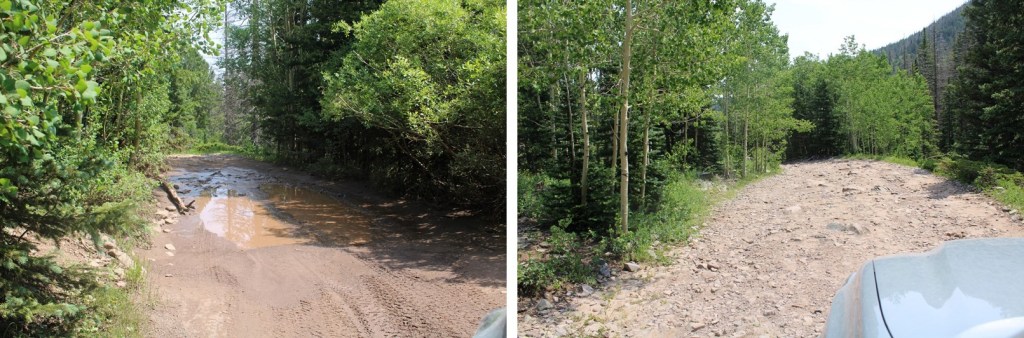
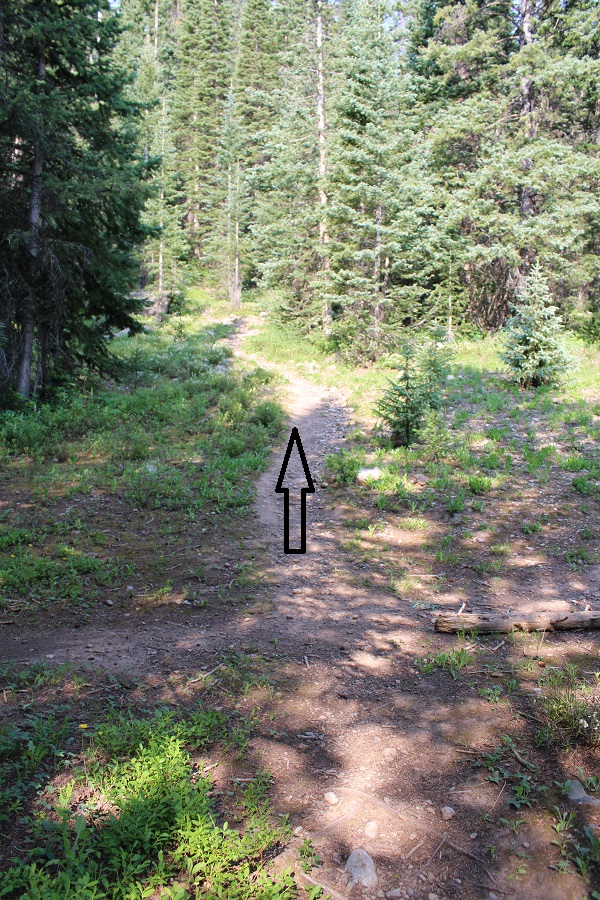
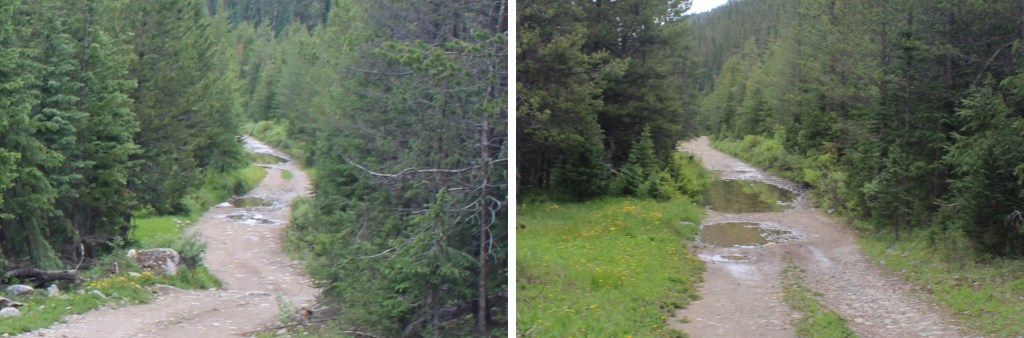
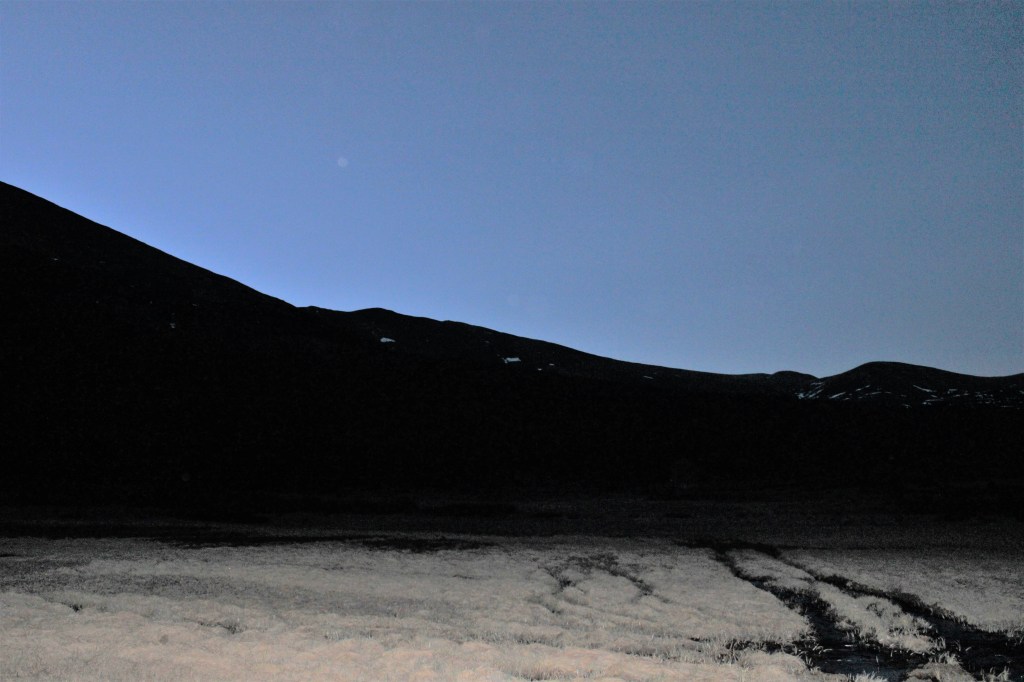
If you can make it past 10,500’ you can make it all the way to the pass.  I stopped and parked at a camping area at 10,800’ because that was where I’d parked last time.  I gathered my gear and was on the trail at 4:30am.

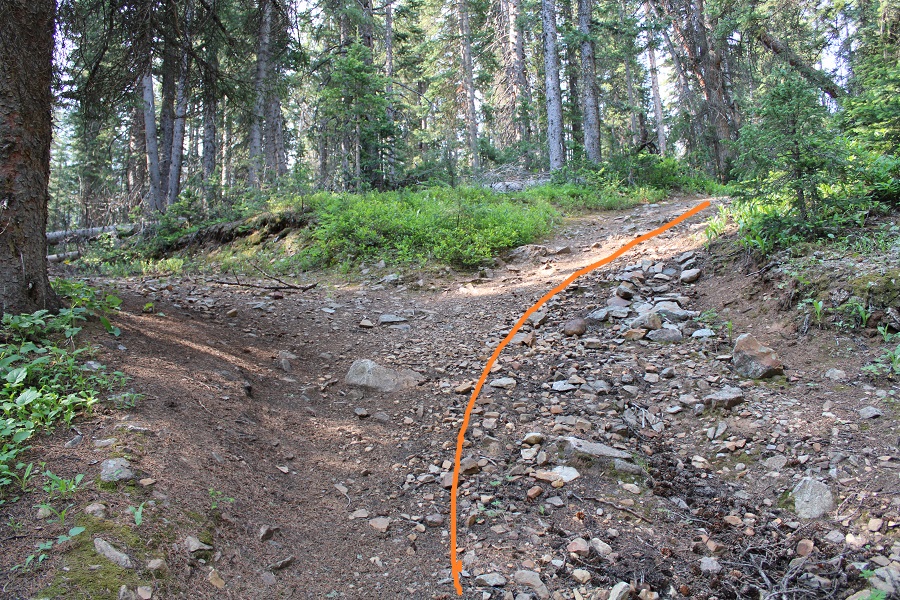
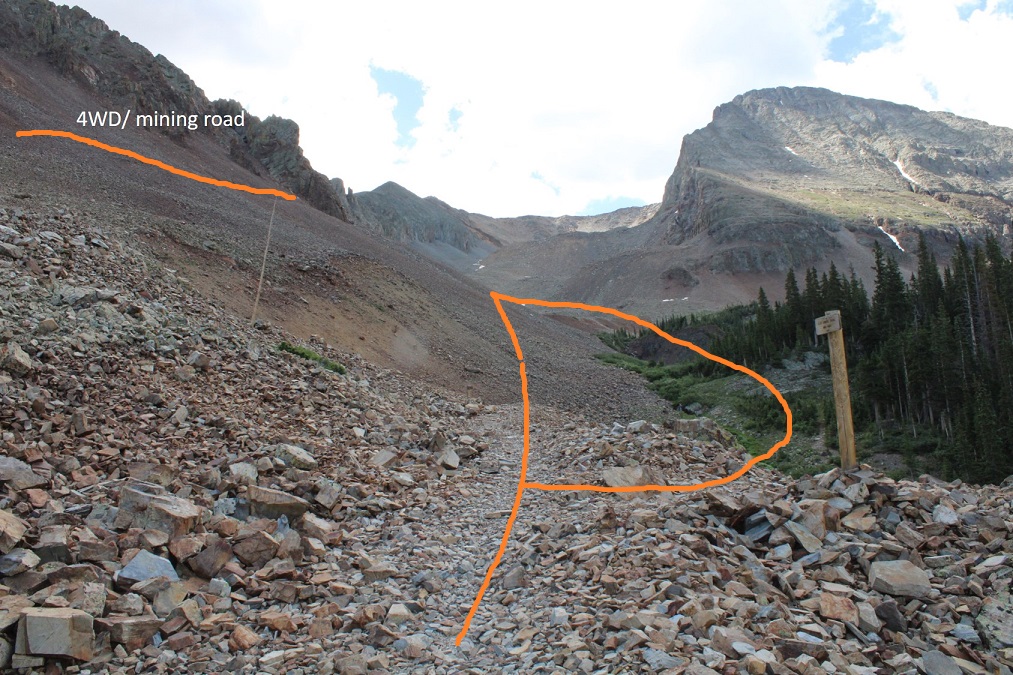
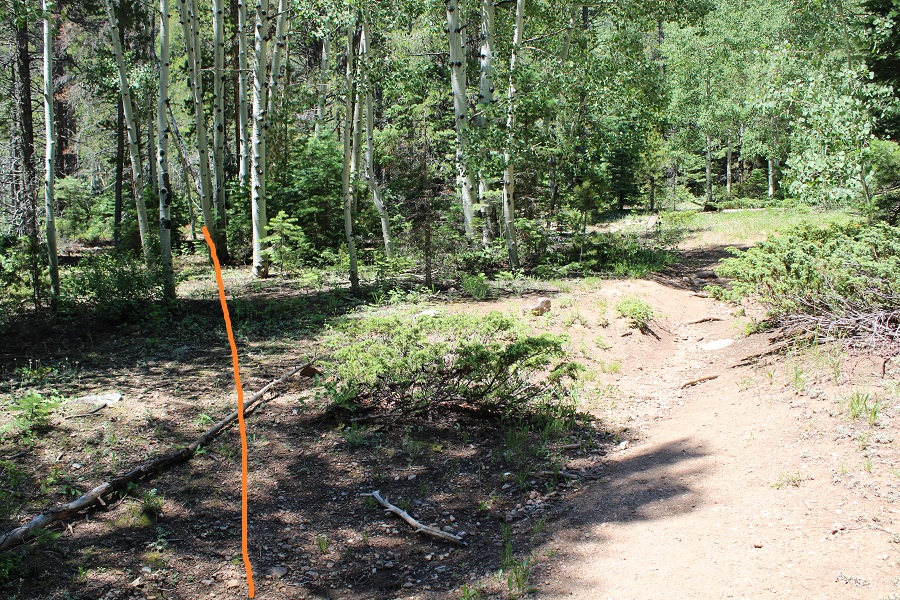
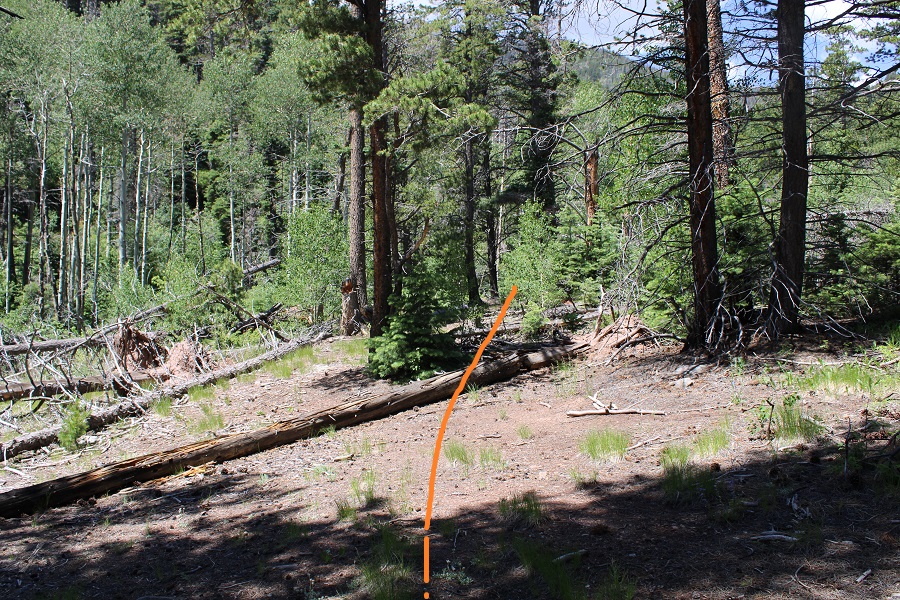
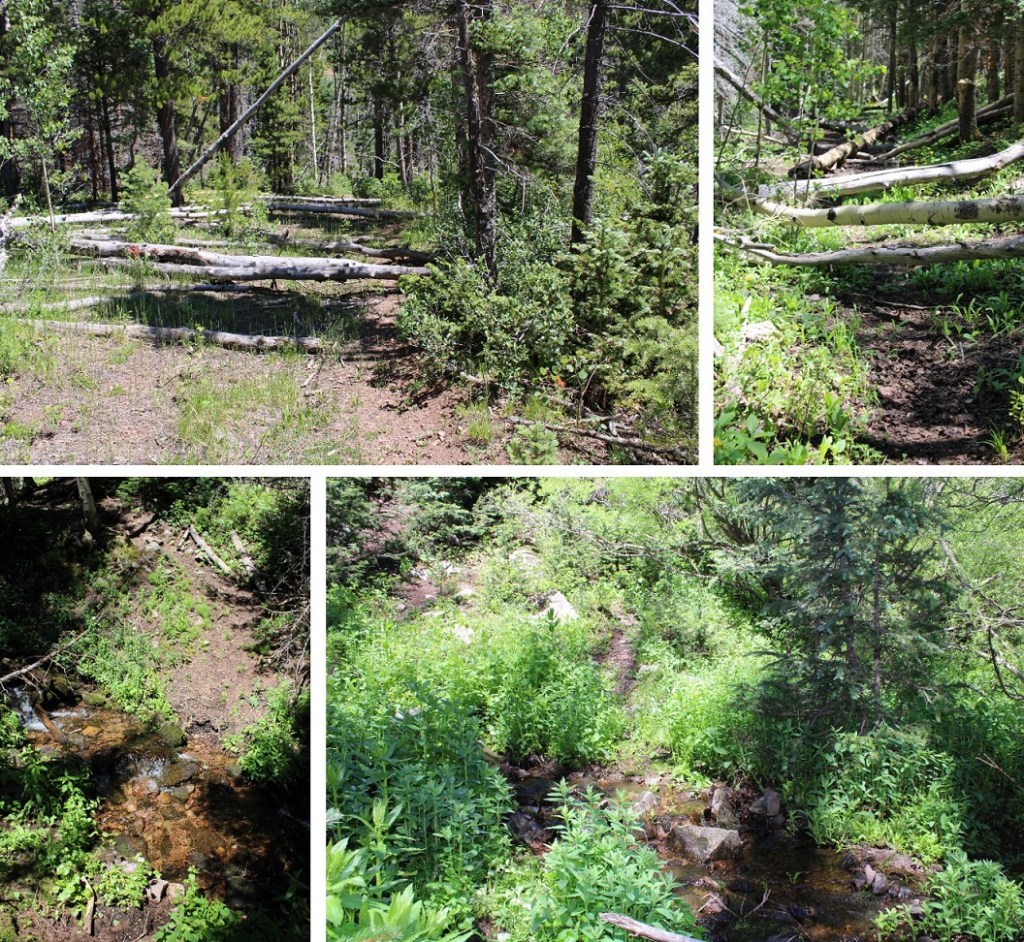
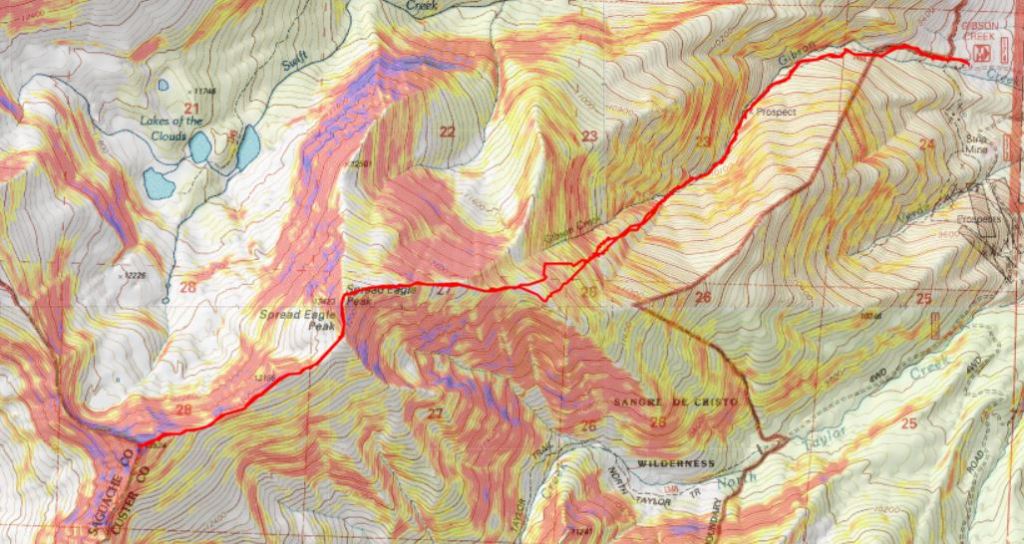
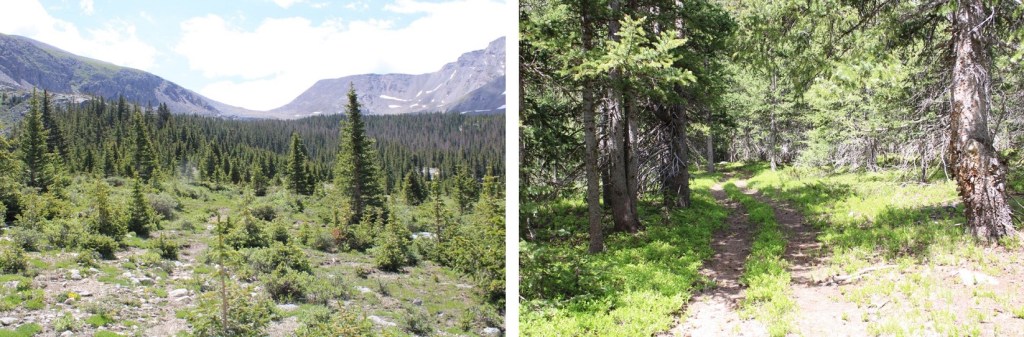
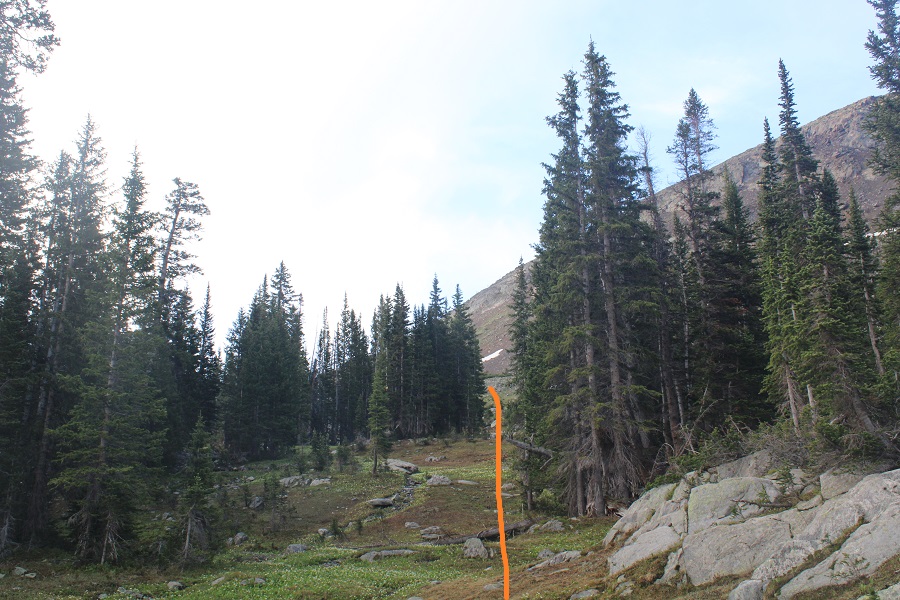
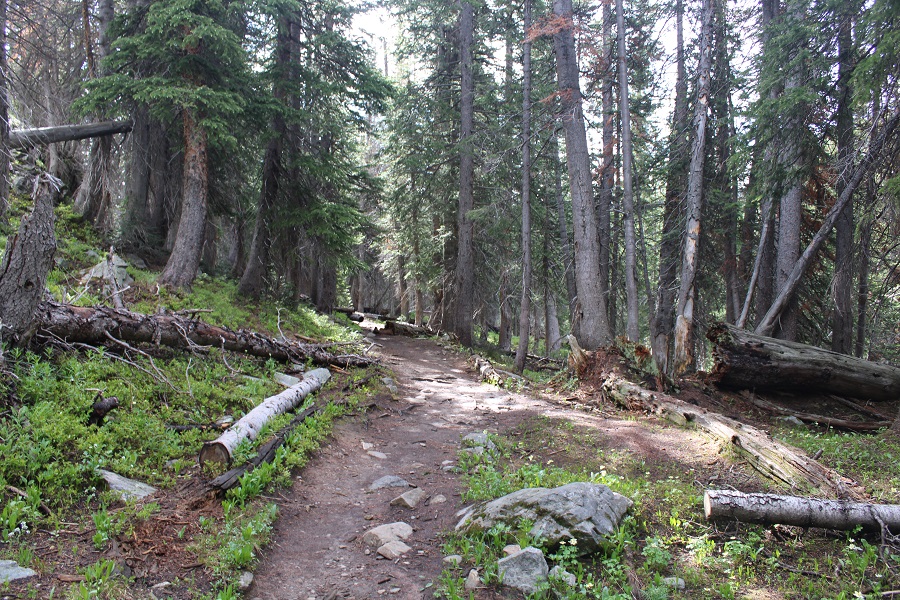
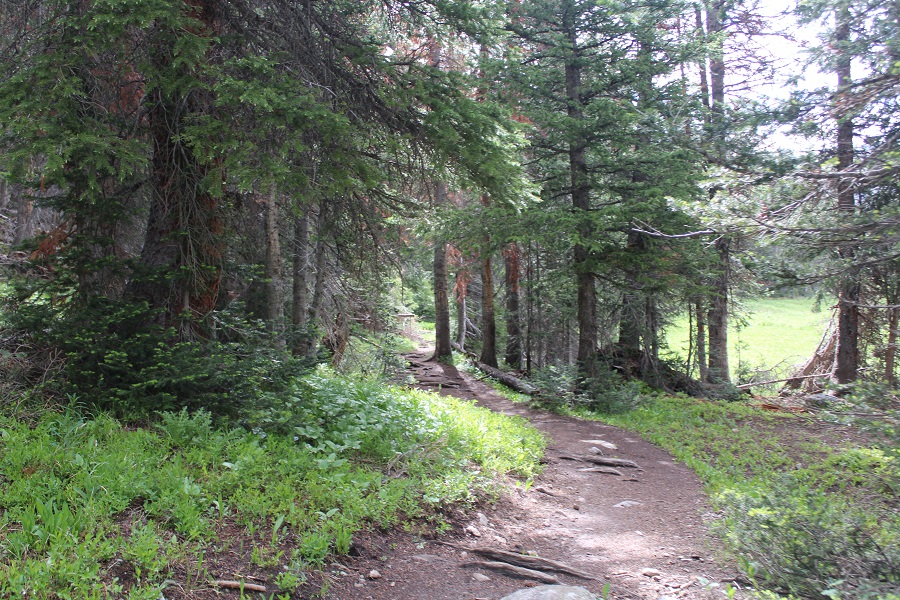
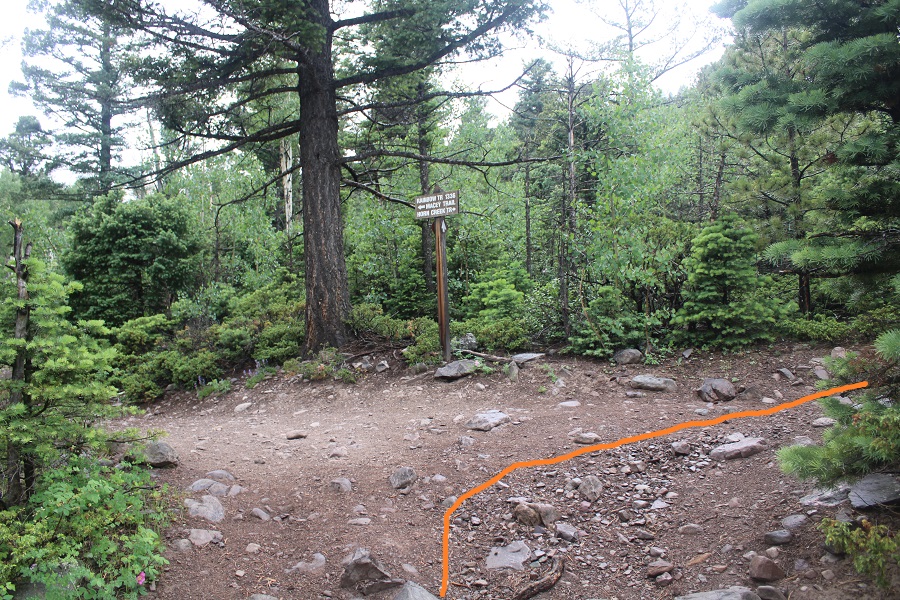
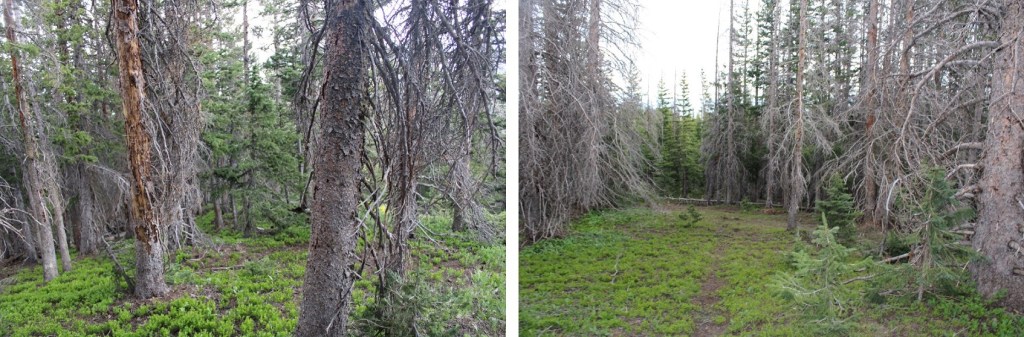
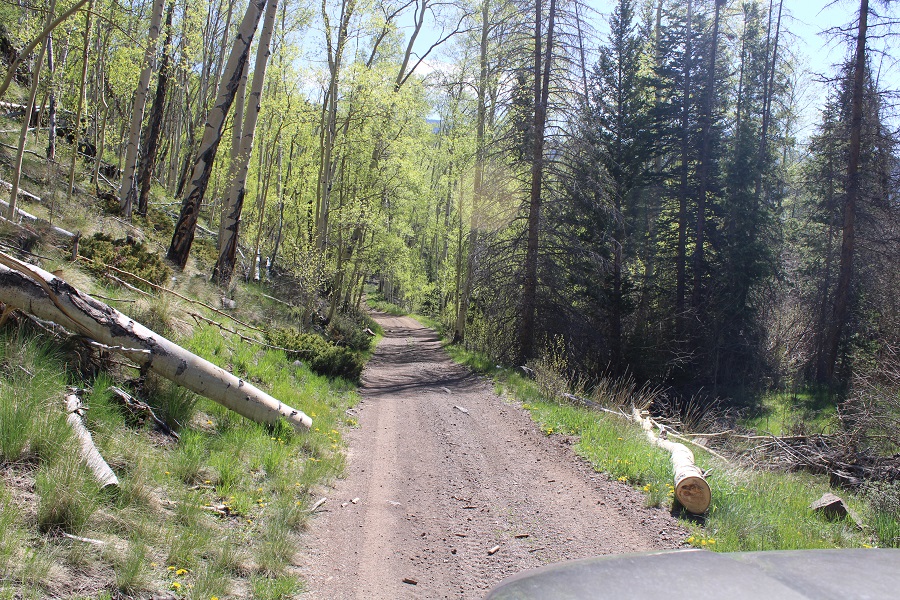
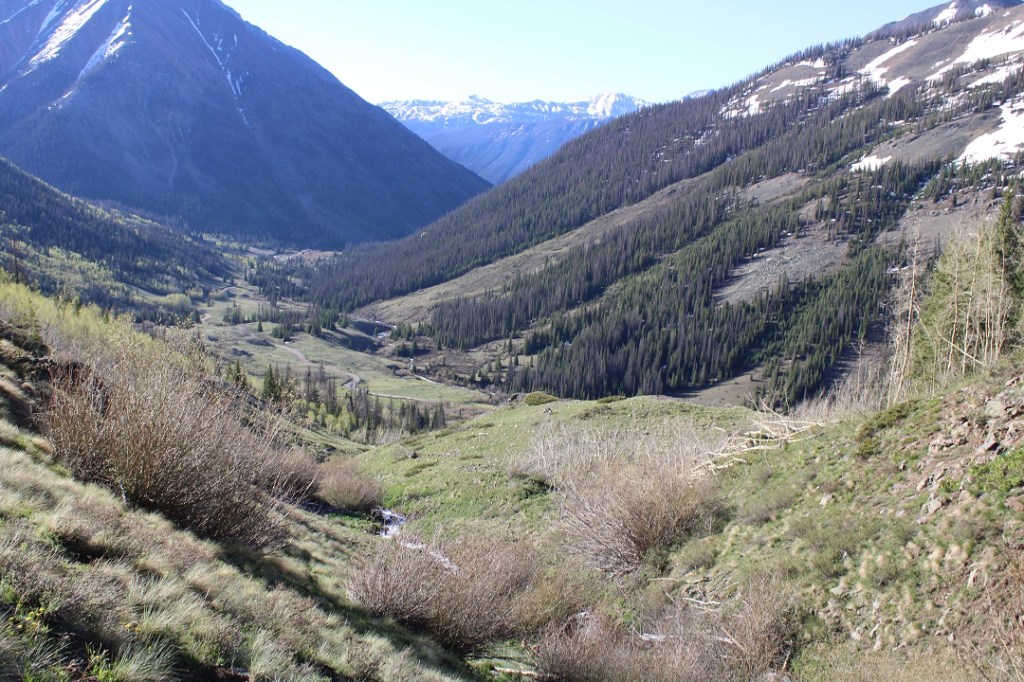
I followed the 4WD road west towards Hermit Pass.

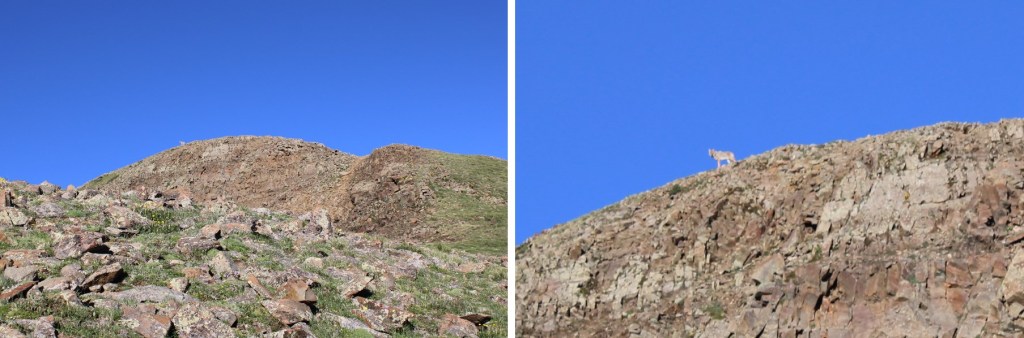
It was early morning, and I could hear the coyotes calling to each other.  This lasted for about 10 minutes.  I was actually a little concerned when they stopped yipping.

Coyotes: 

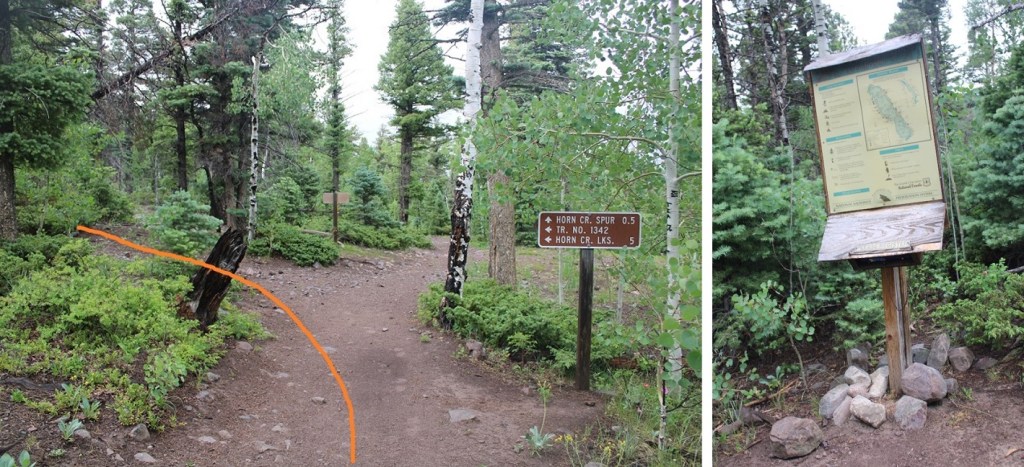
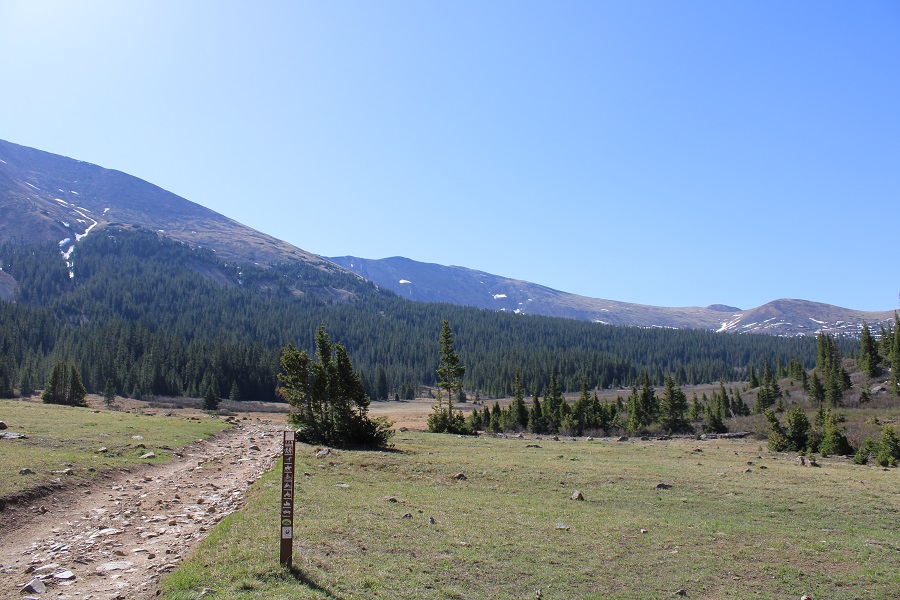
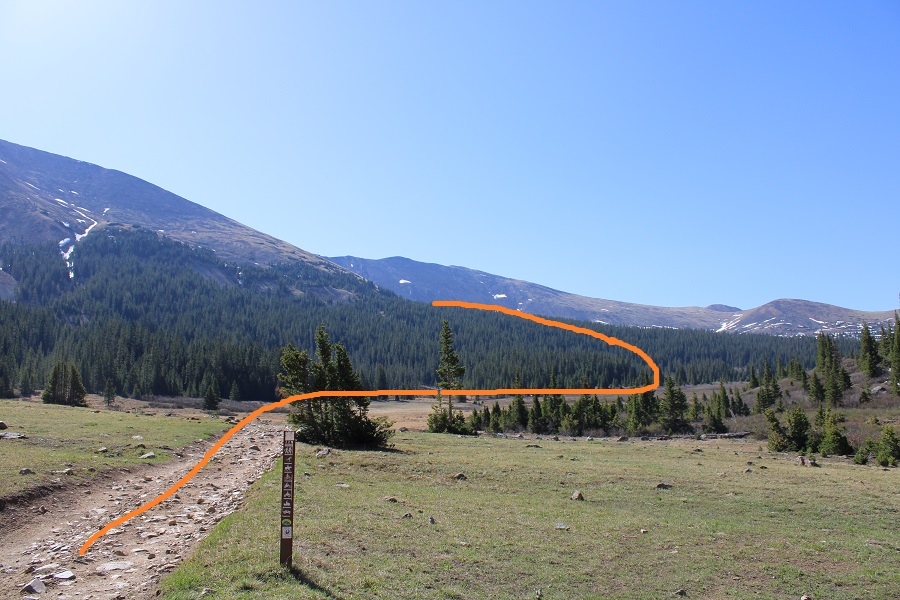
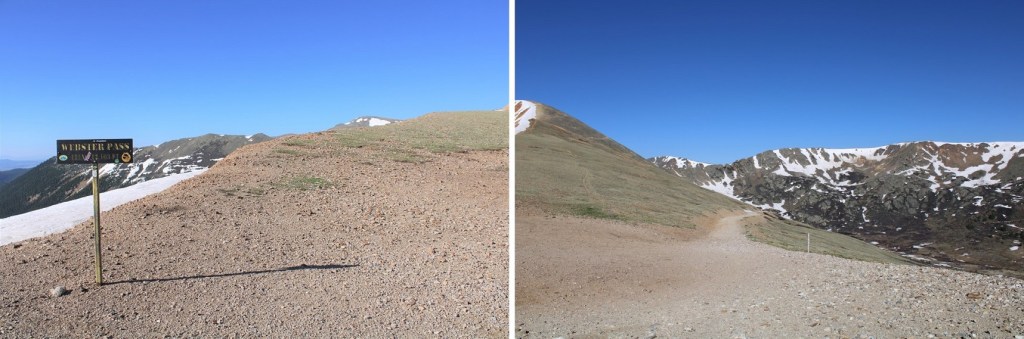
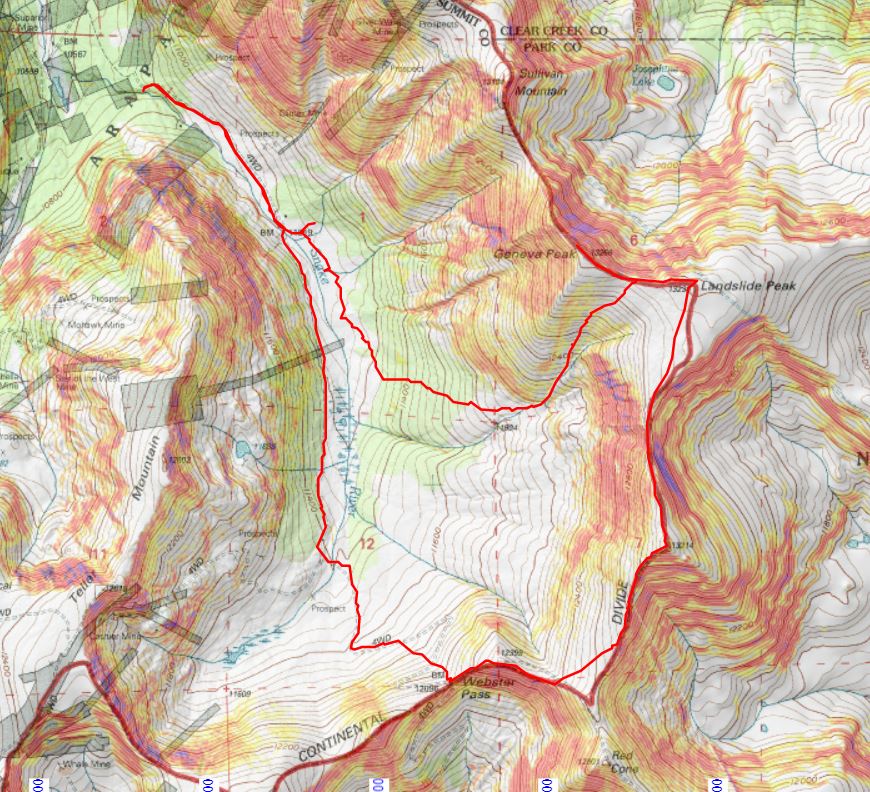
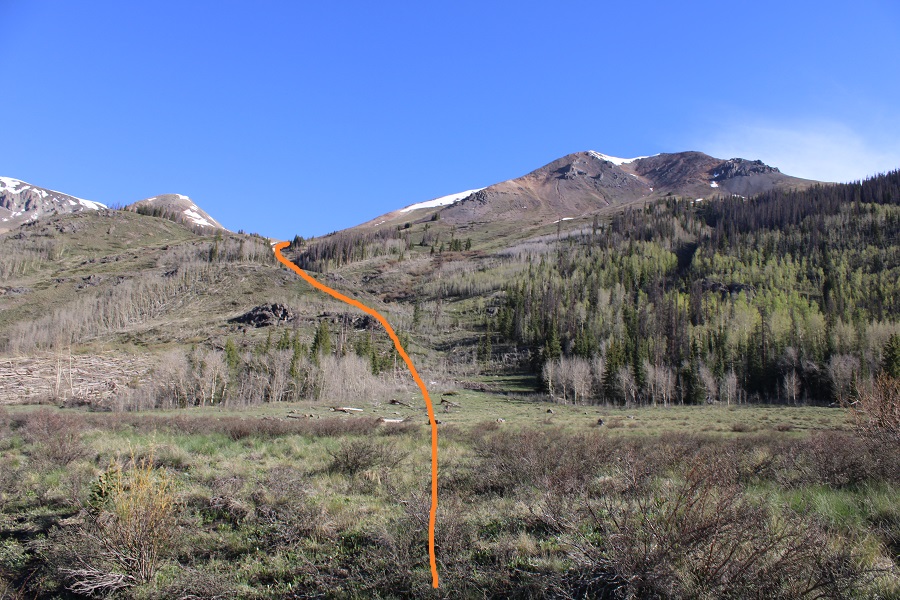
From my parking spot I hiked 4.2 miles to Hermit Pass

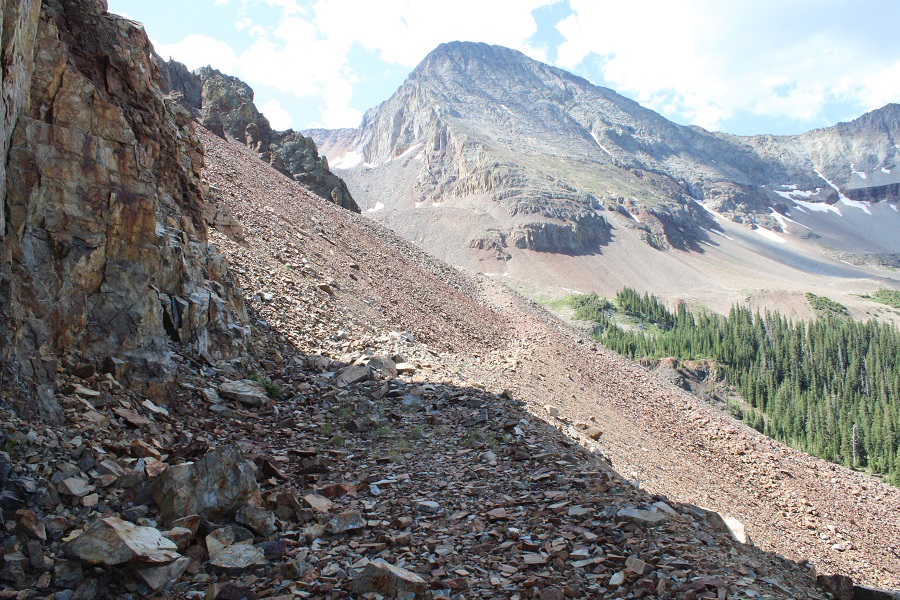
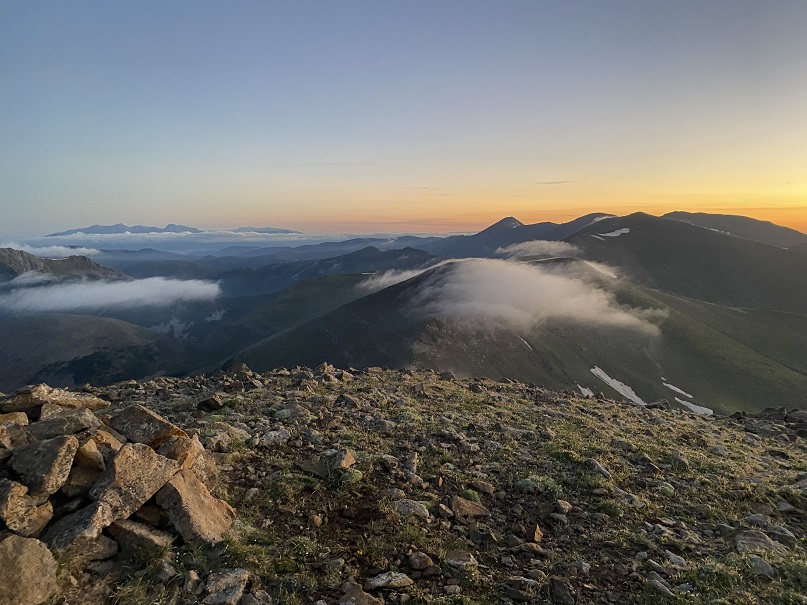
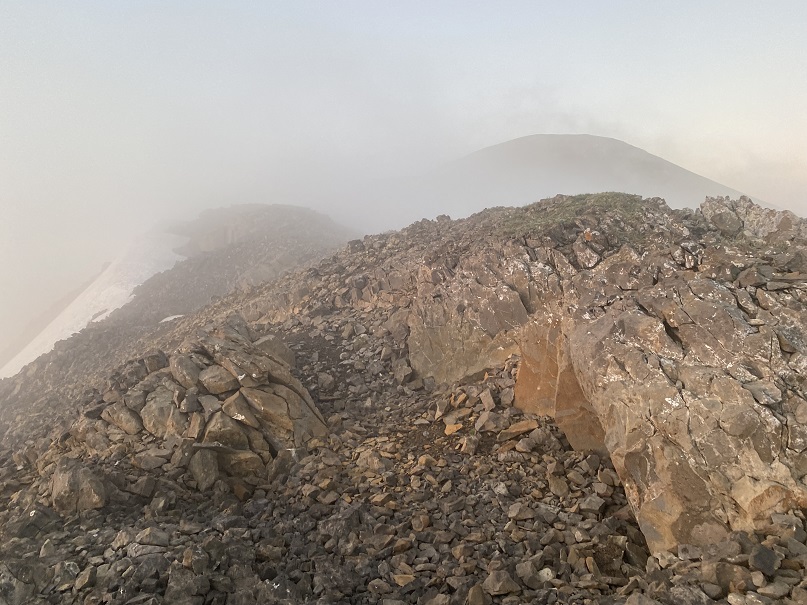
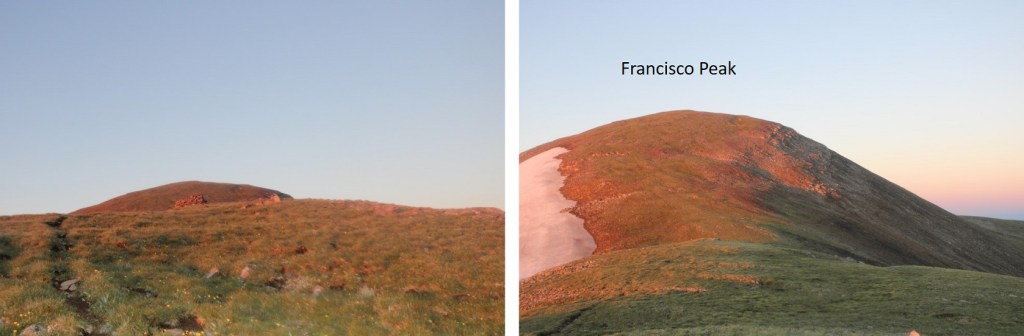
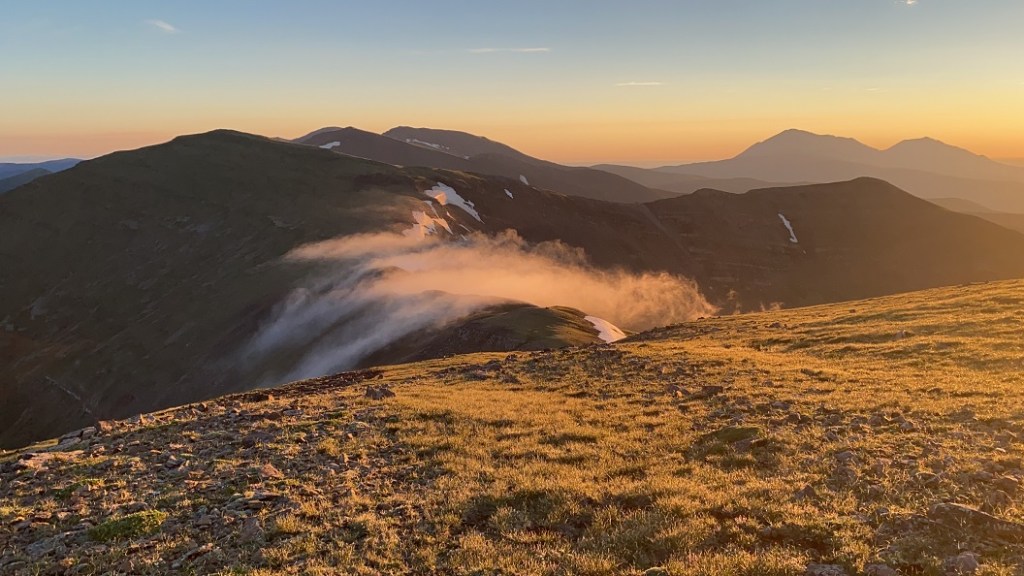
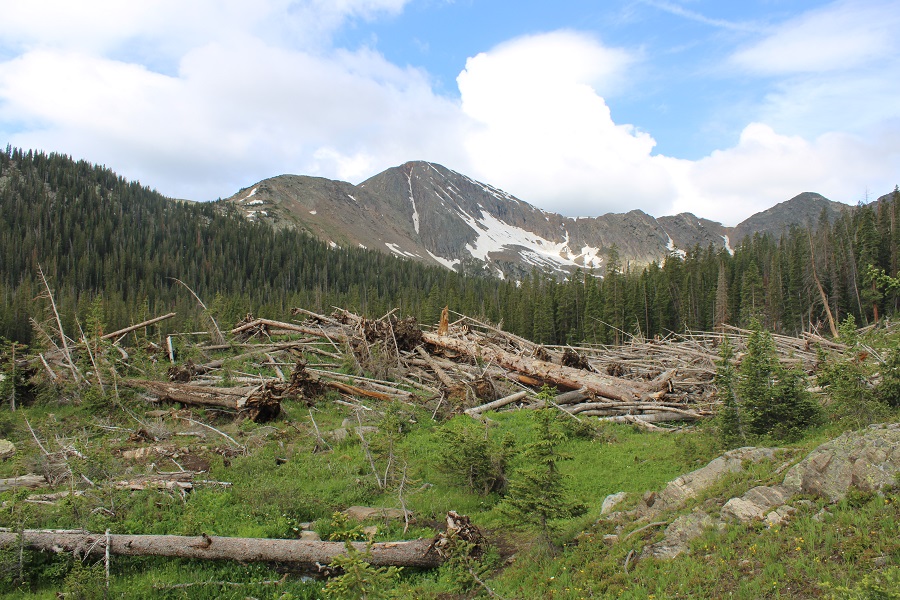
As the sun rose, I could already tell I wouldn’t be getting great pictures today: the haze from the fires wasn’t going to cooperate.

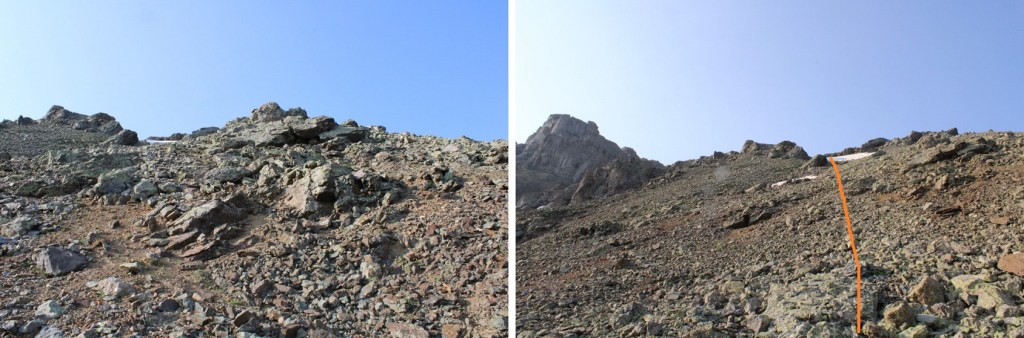
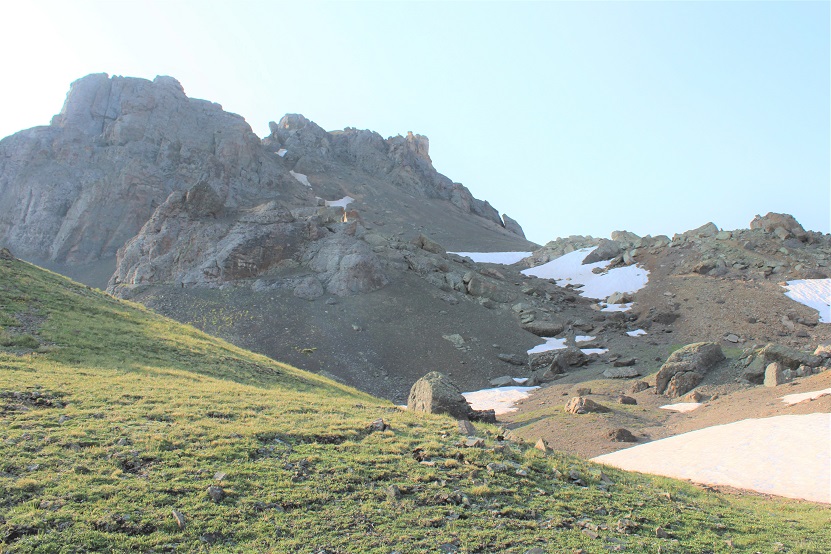
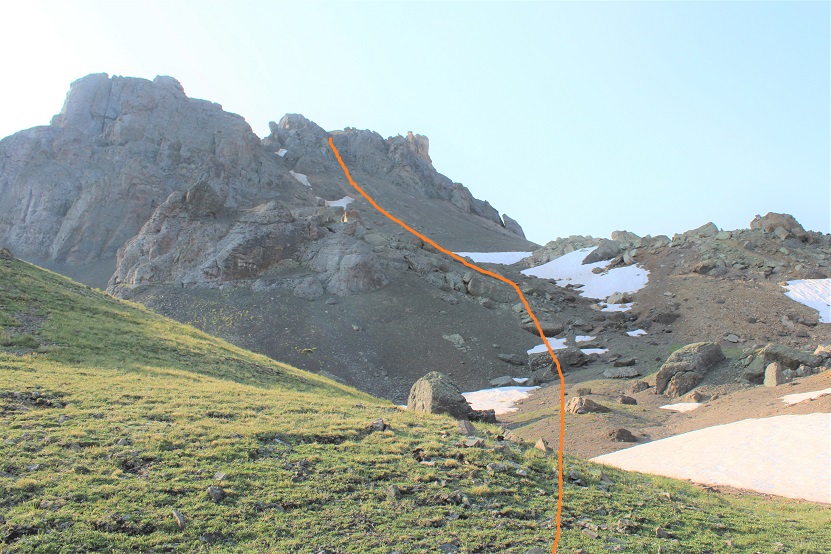
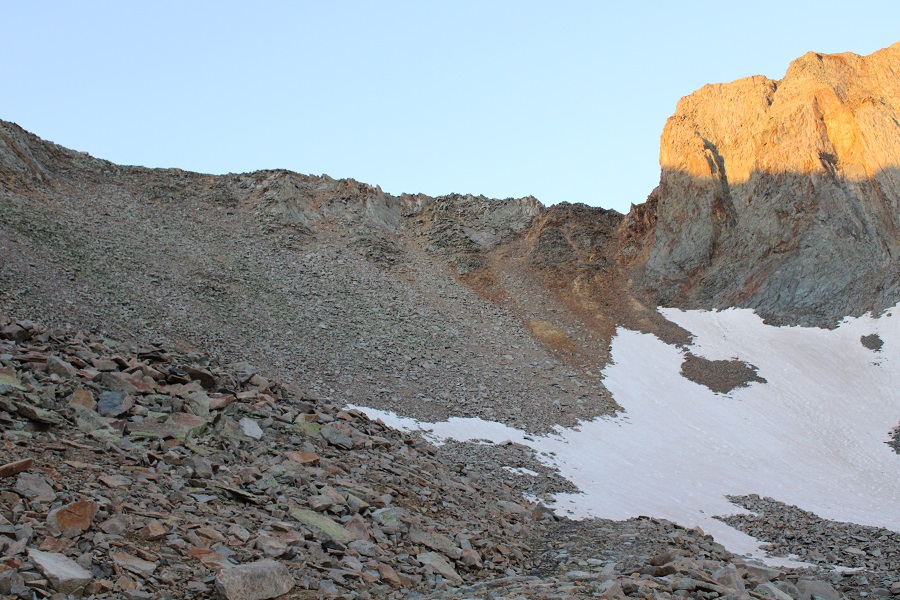
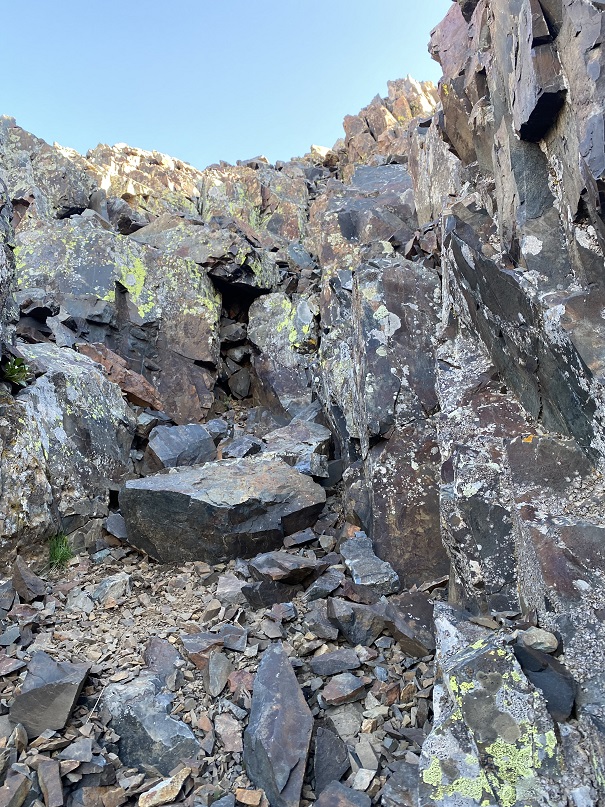
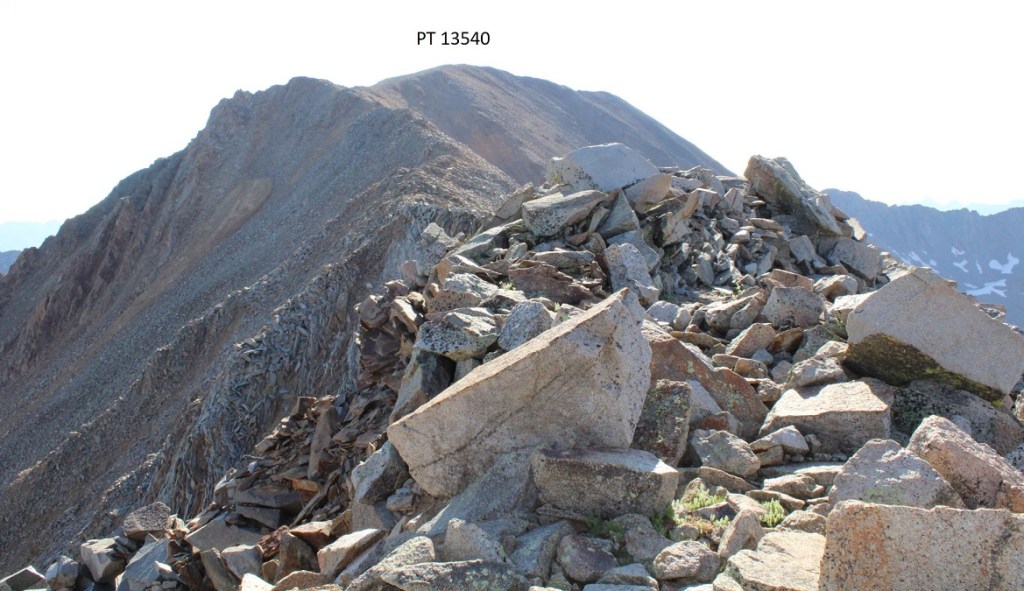
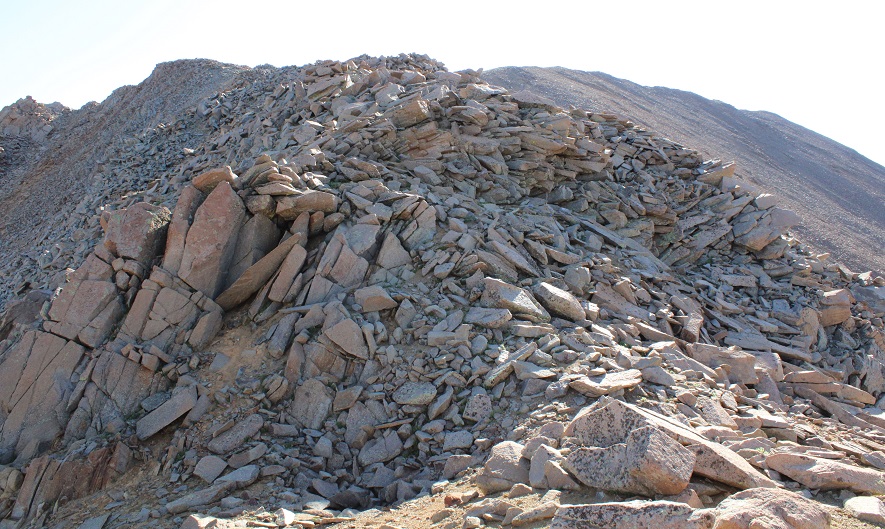
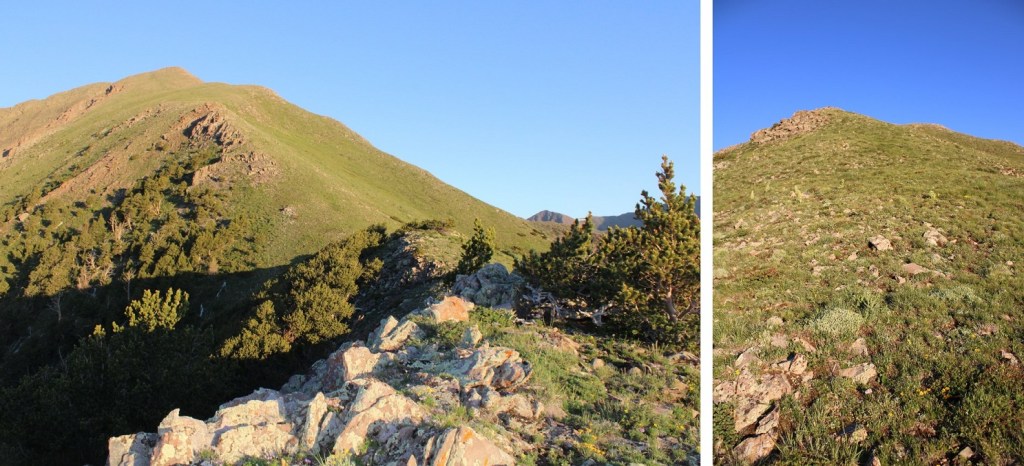
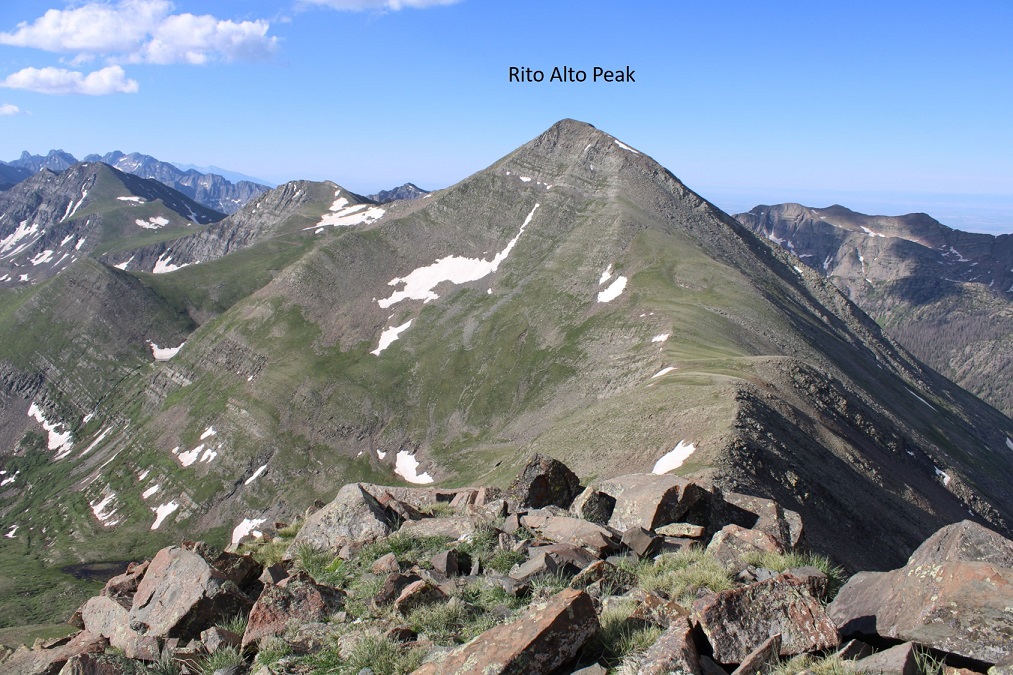
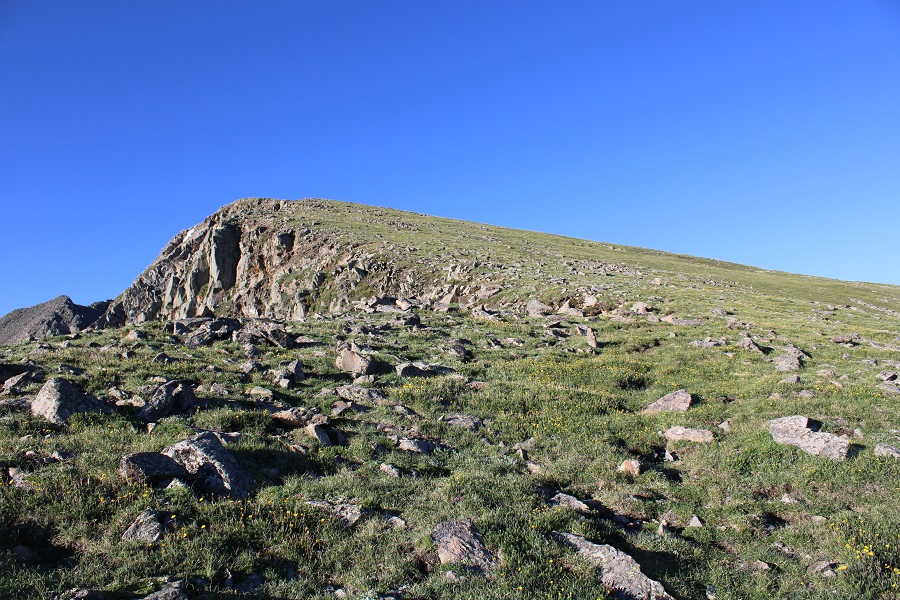
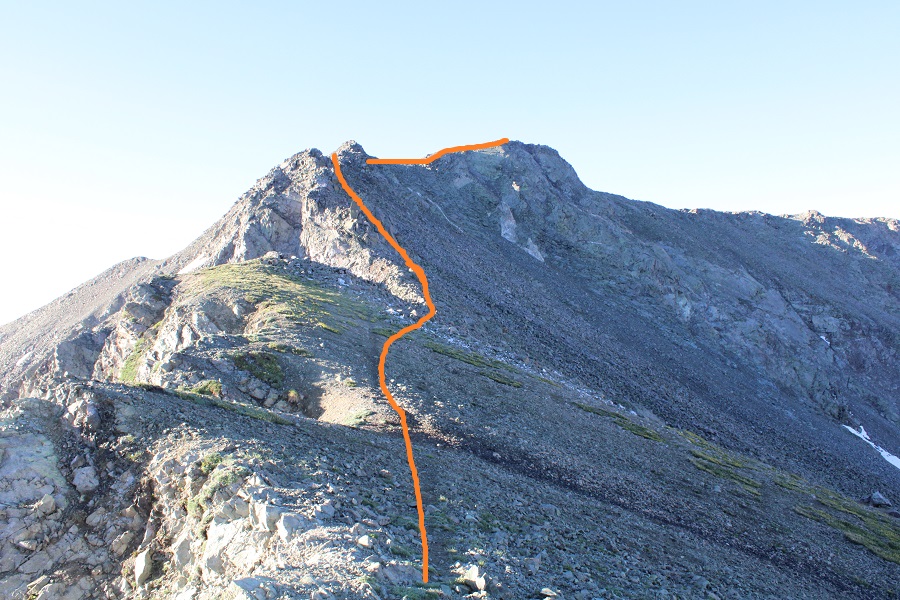
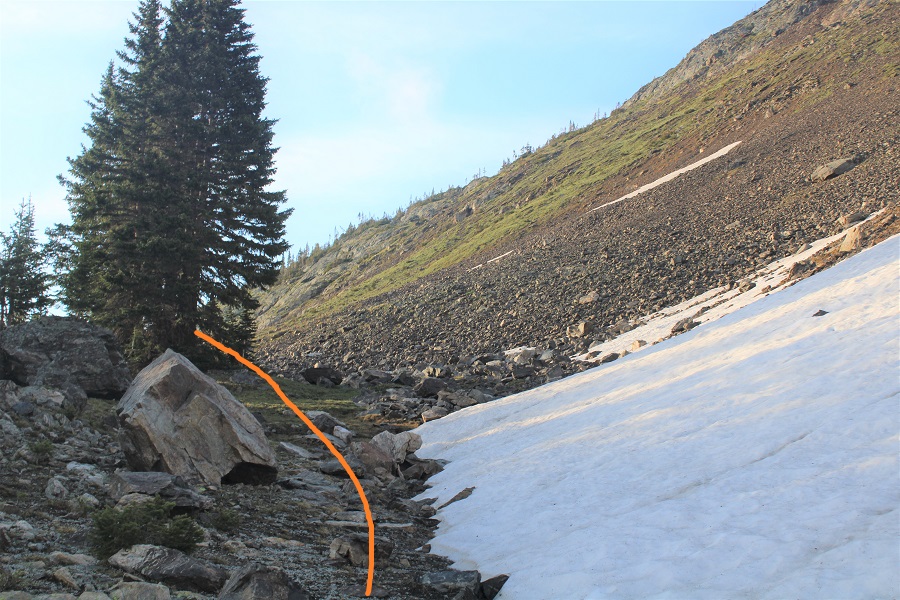
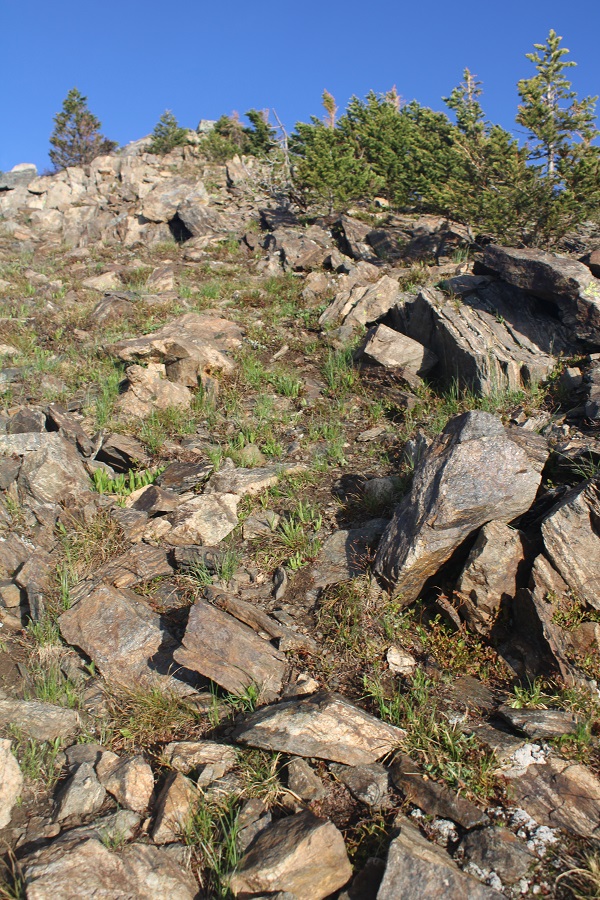
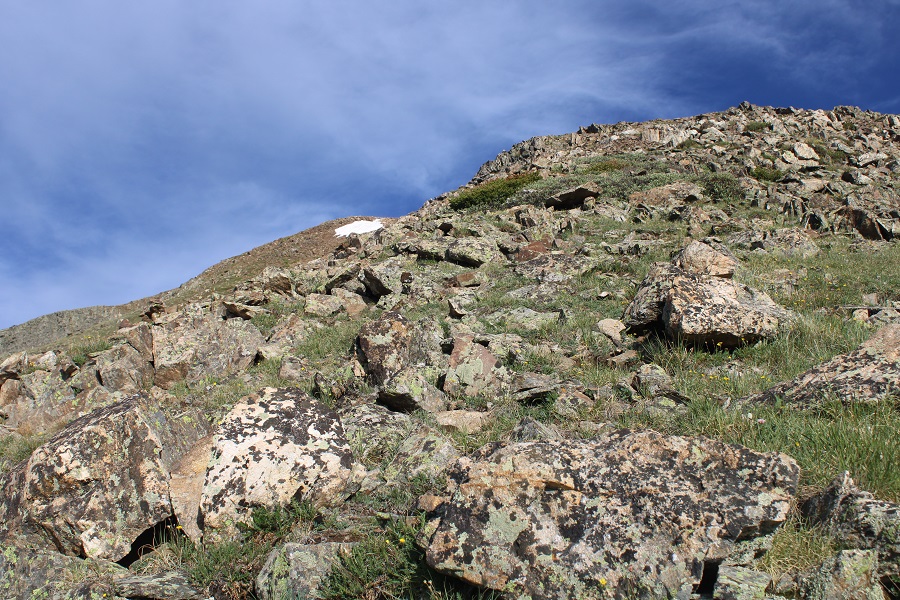
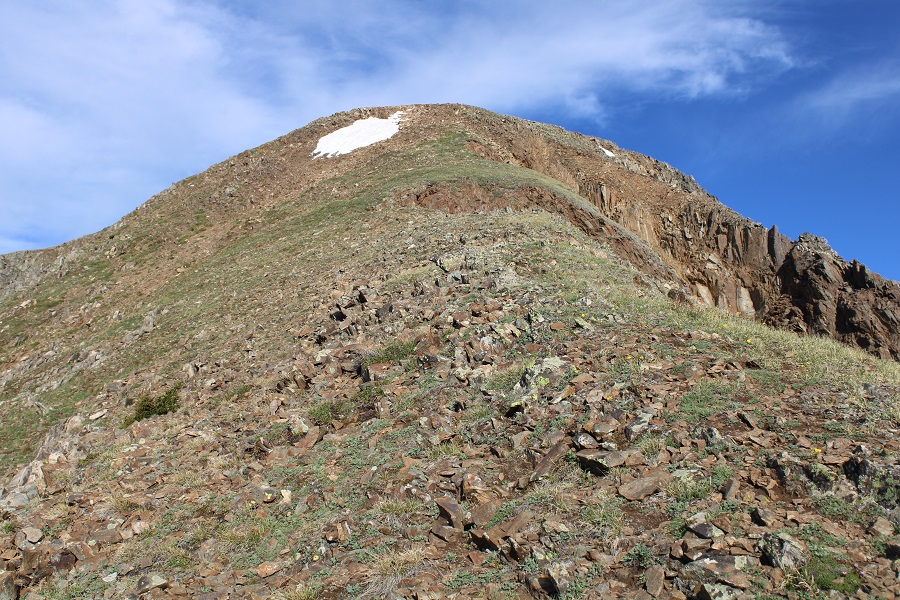
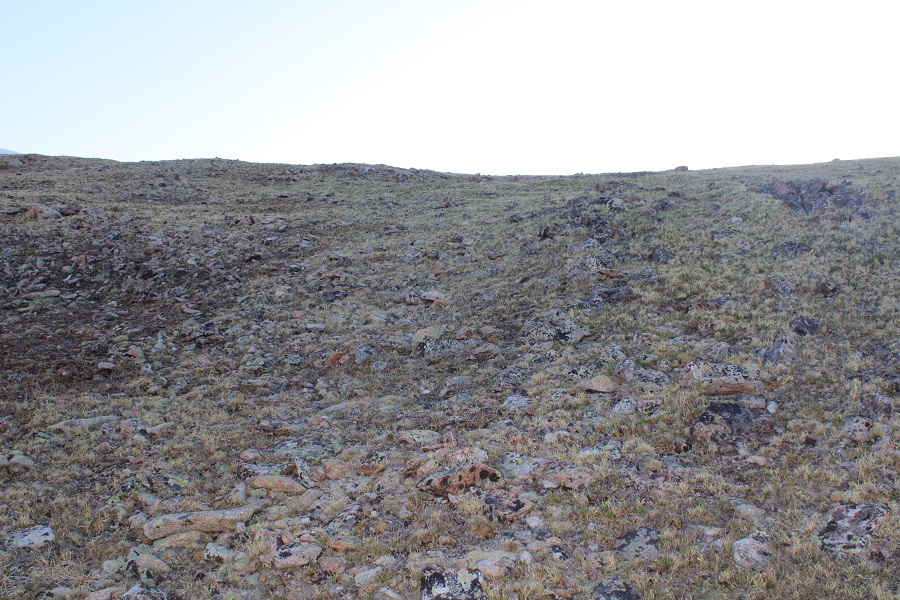
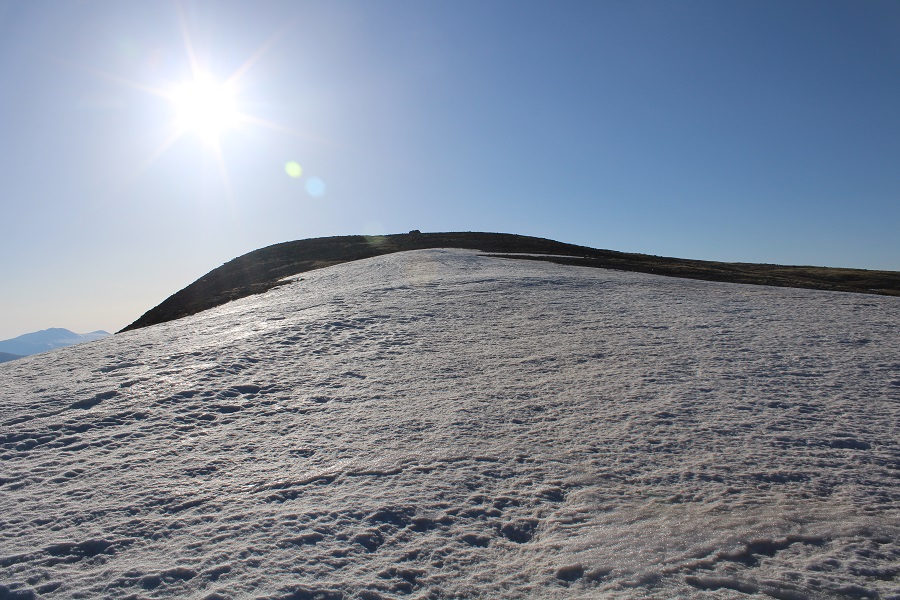
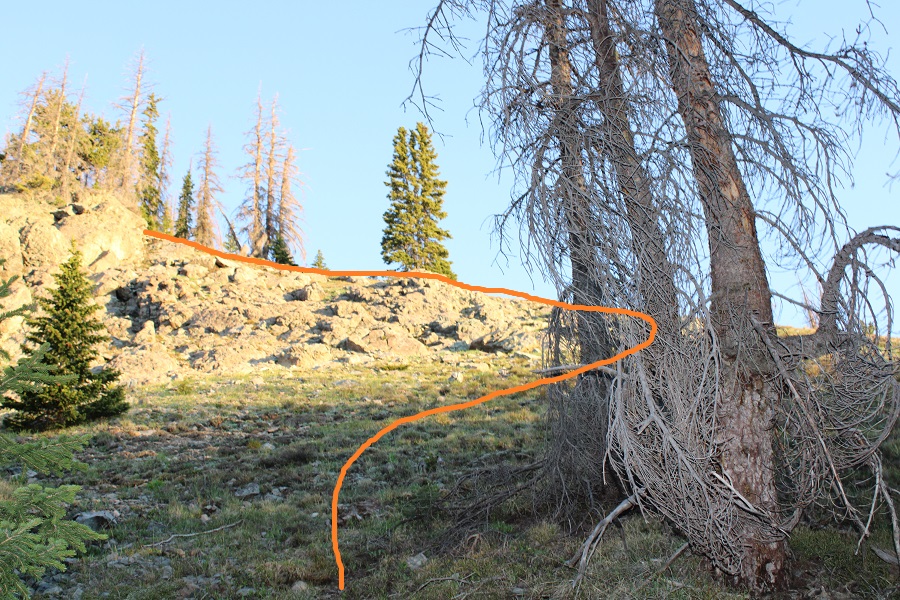
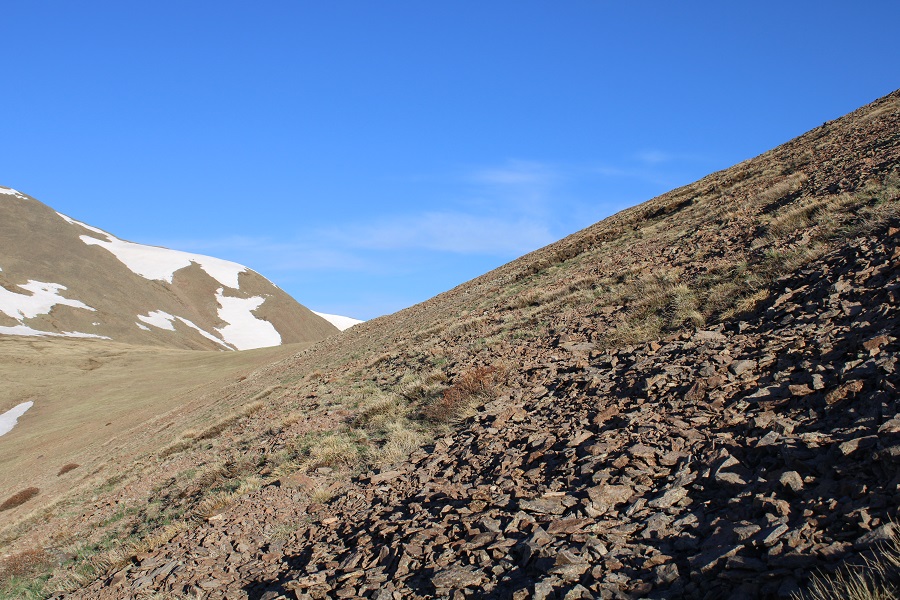
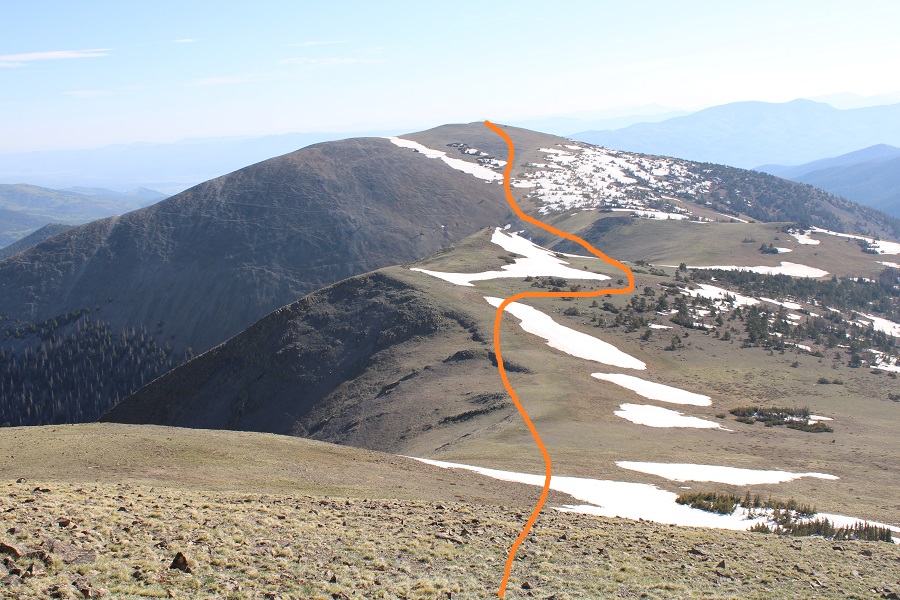
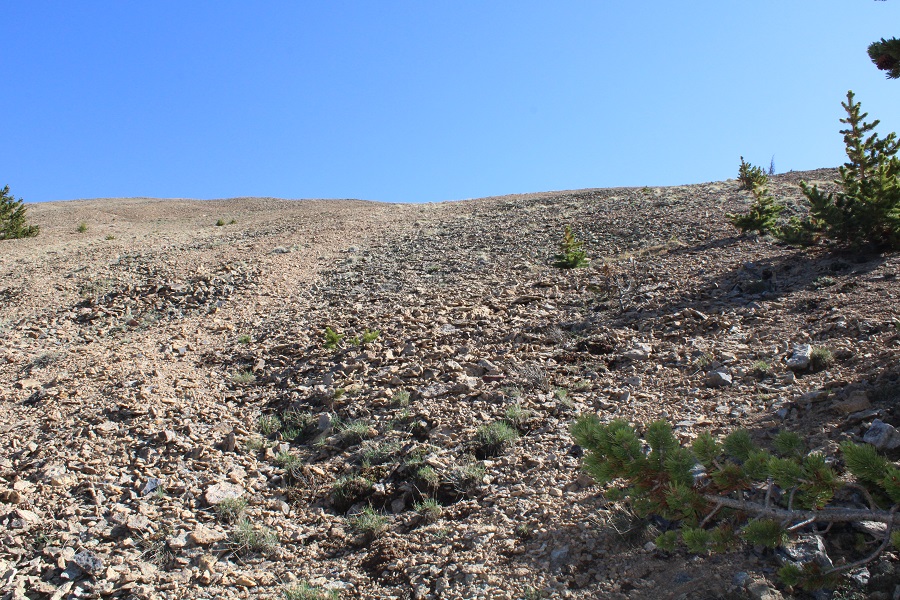
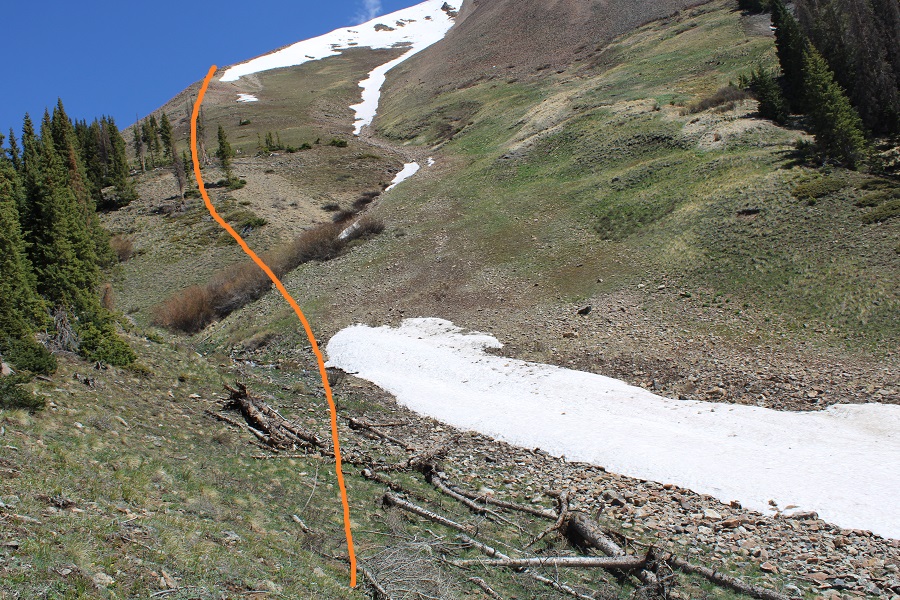
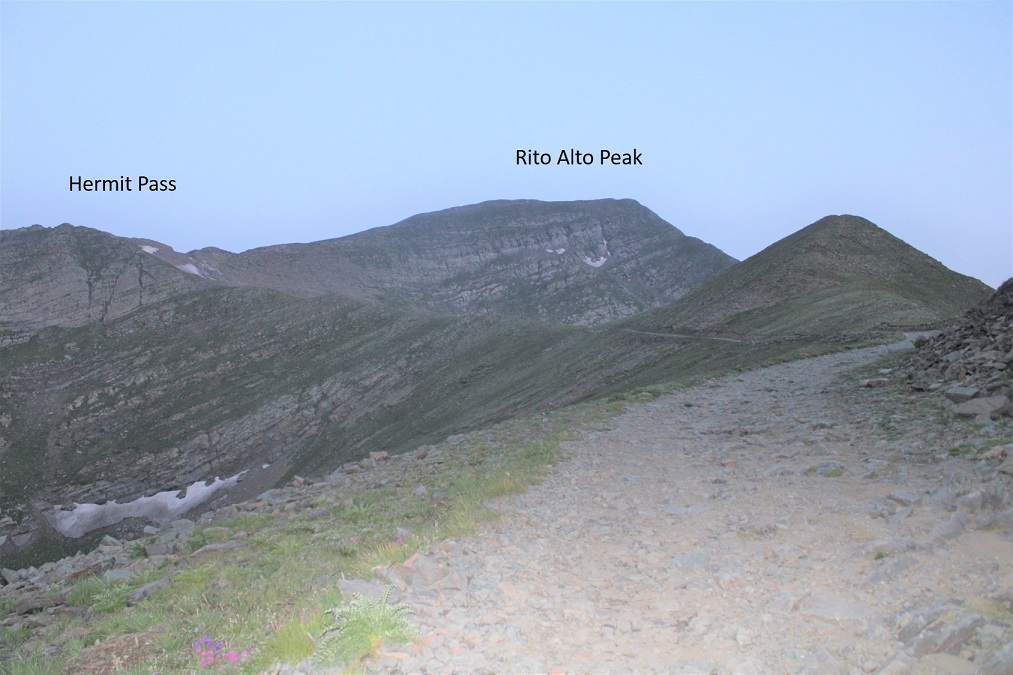
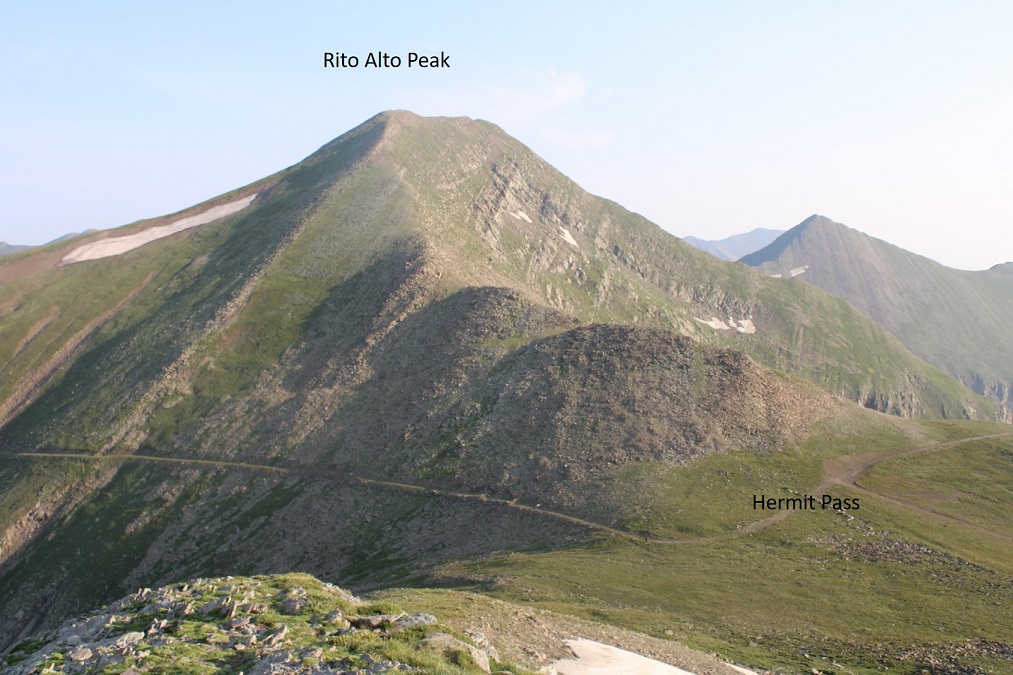
I made it to Hermit Pass, turned right, and followed the ridge northeast to the summit of Rito Alto Peak.  This ridge has a lot of large rocks, mixed with tundra.  The rocks have the Crestone-grip and most don’t roll. 

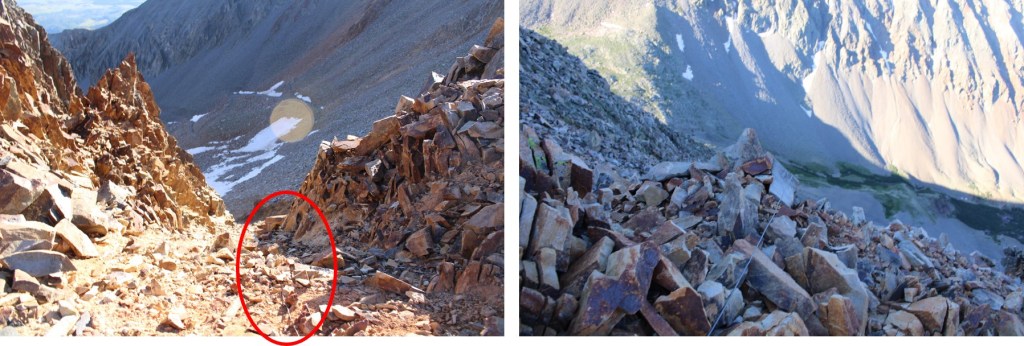
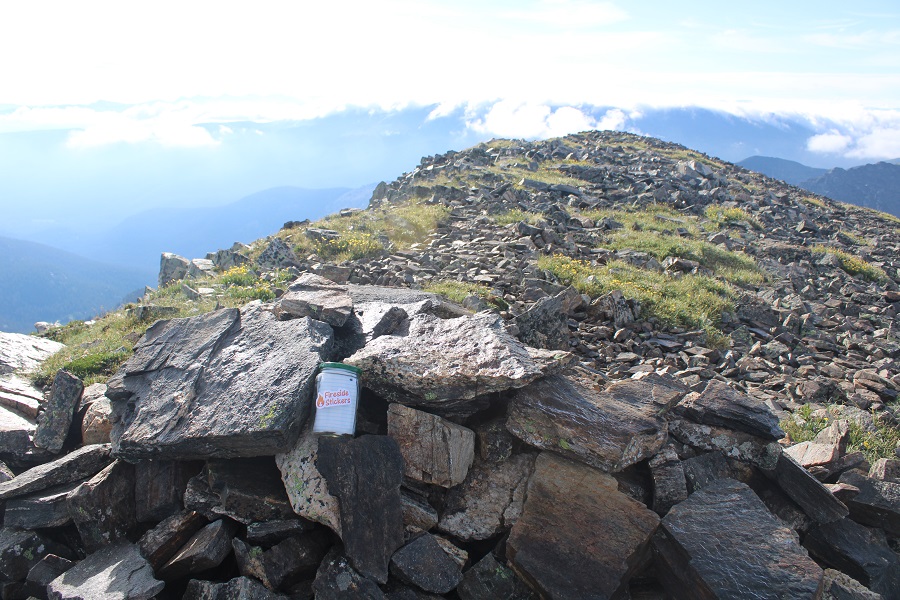
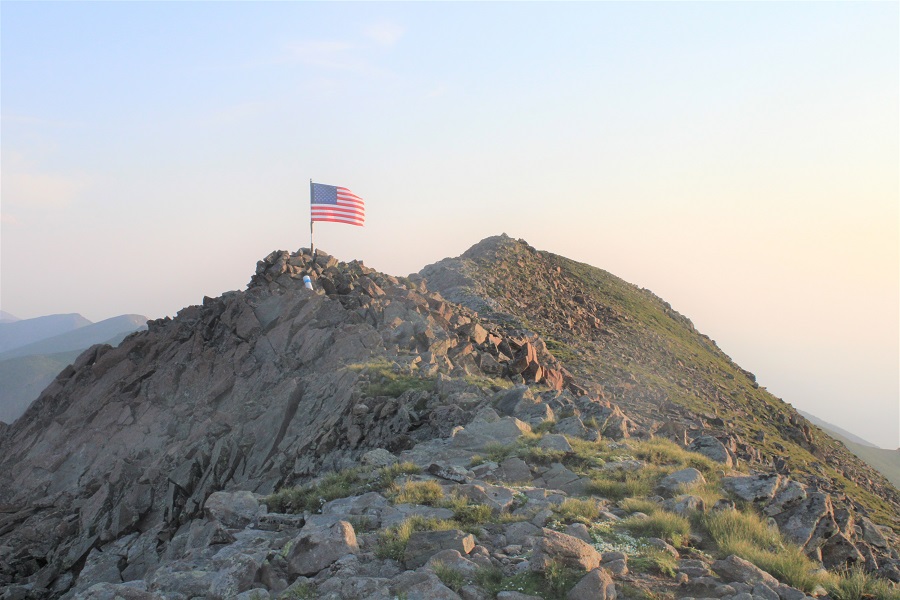
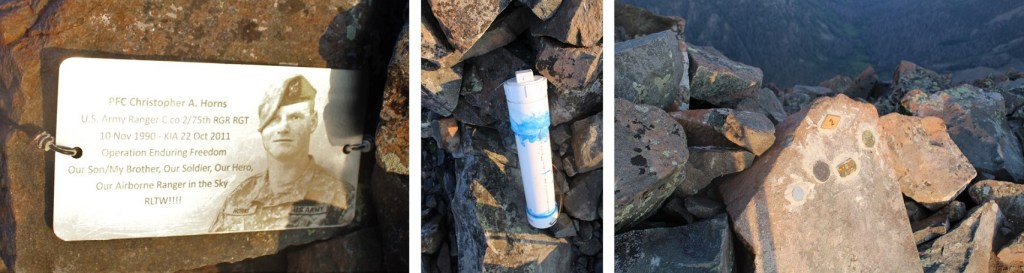
Just before the summit there’s a ‘false summit’ with a memorial to Christopher Horns.  They’ve replaced the flag since the last time I was here, and added a large summit register tube.

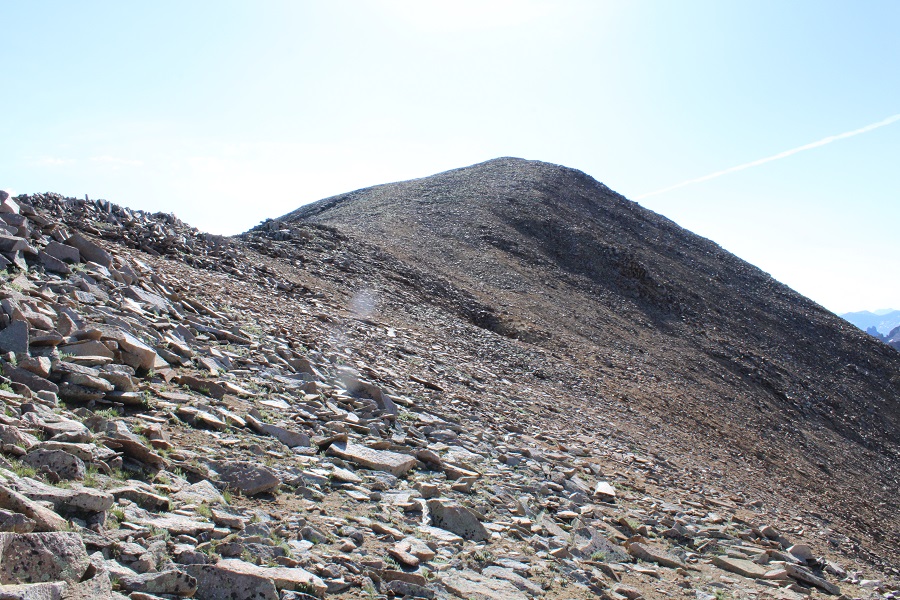
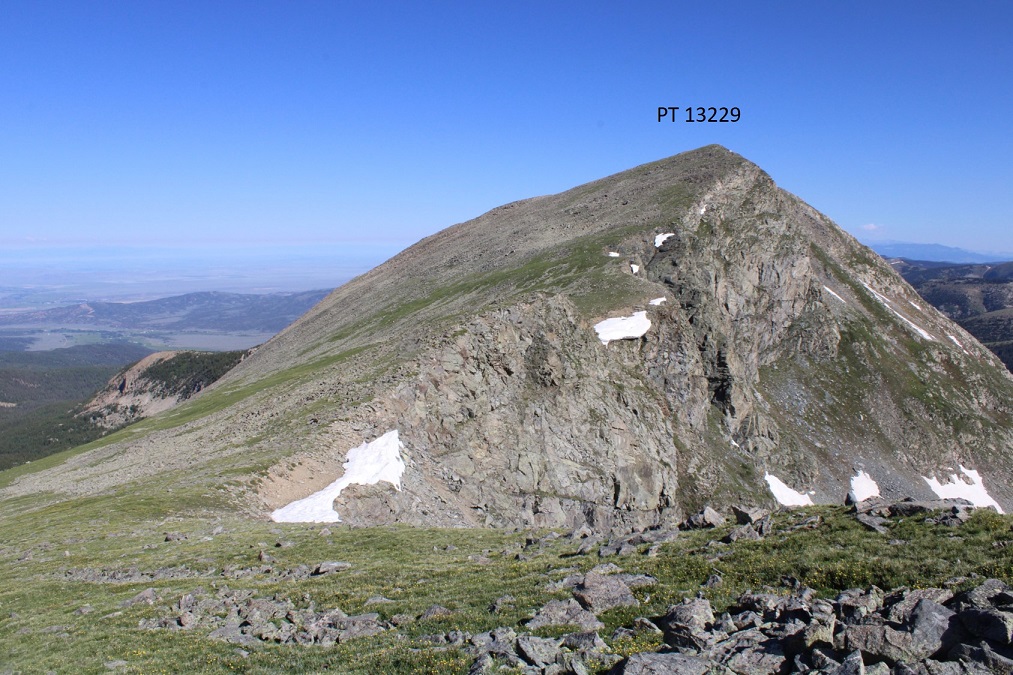
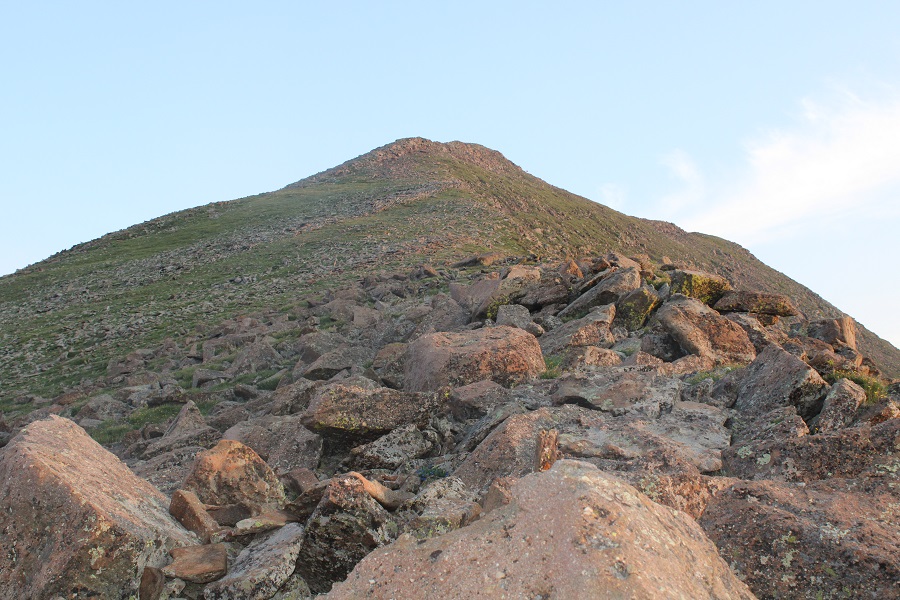
I continued heading north to the summit of Rito Alto Peak. 

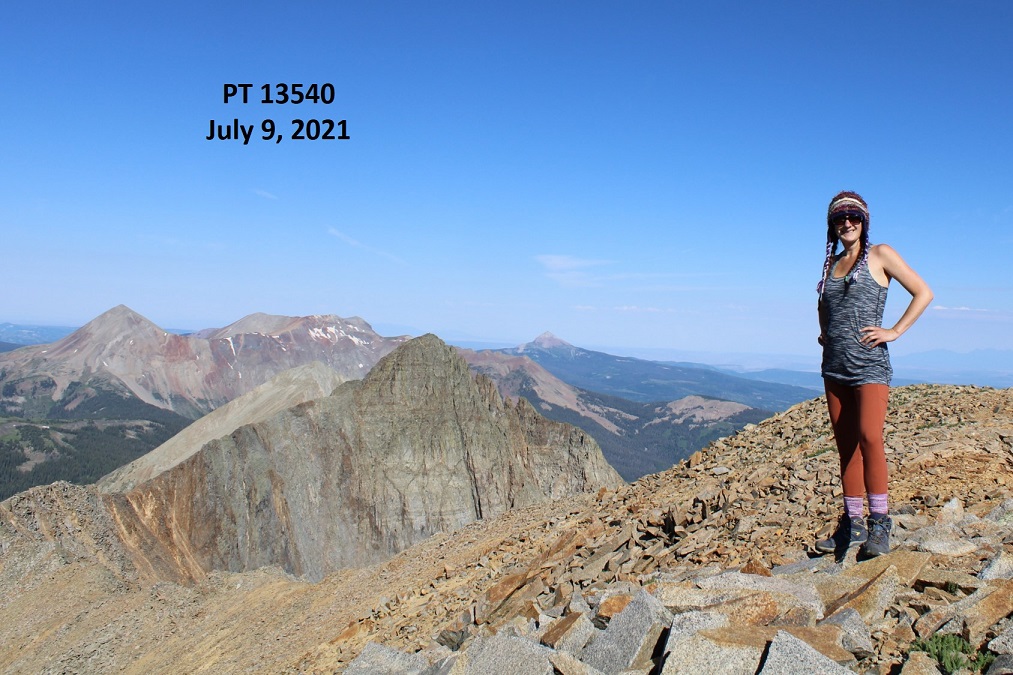
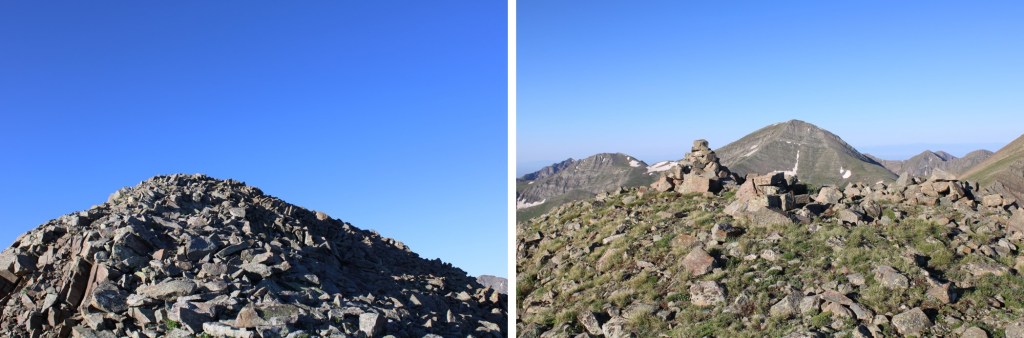
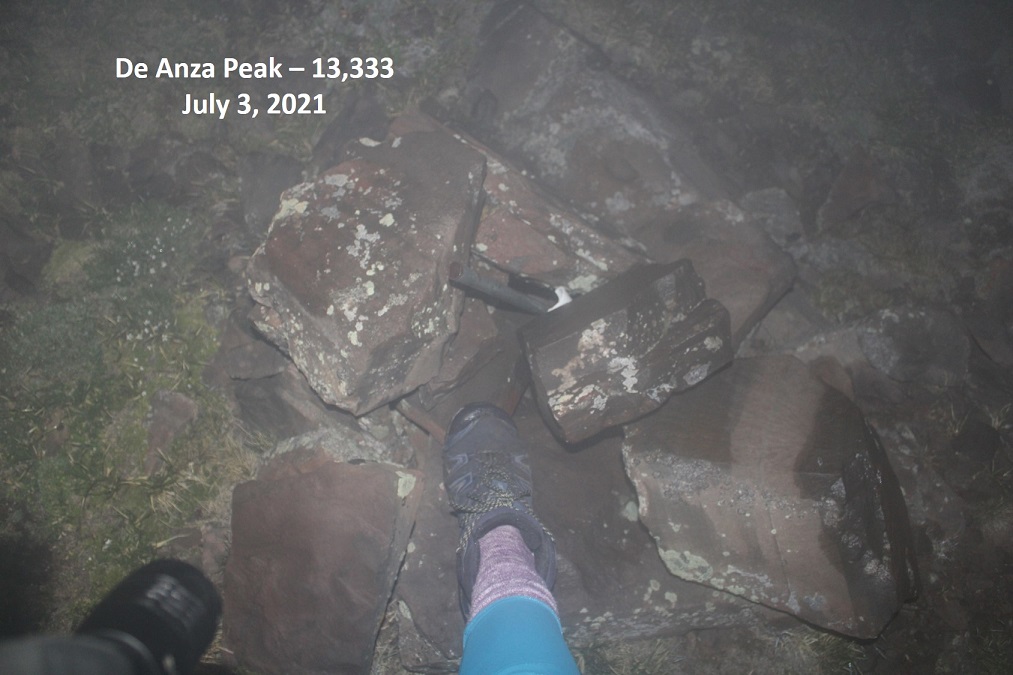
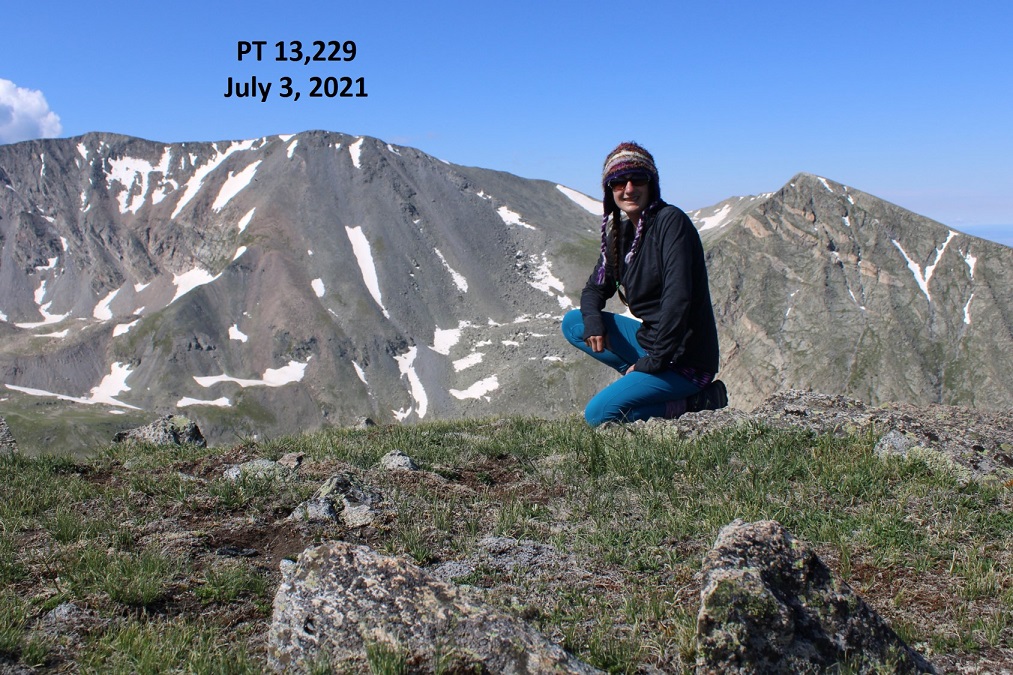
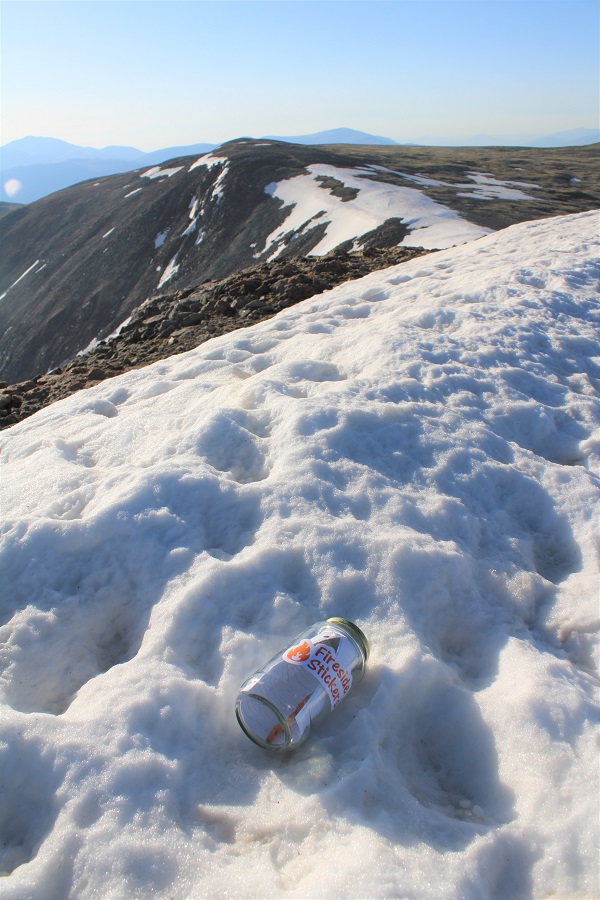
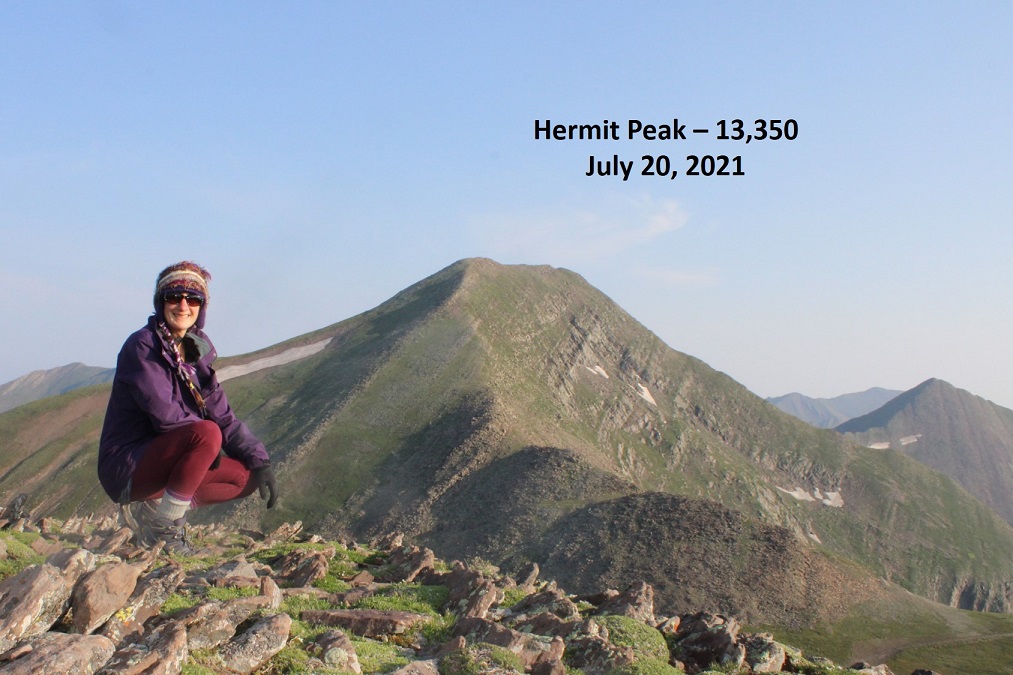
I summited Rito Alto Peak at 6:45am.  Note, there was a very small summit register here, in a jar that looked to be about 1.5 inches  in diameter:  like one of those sample jam jars.  I left it where it was.
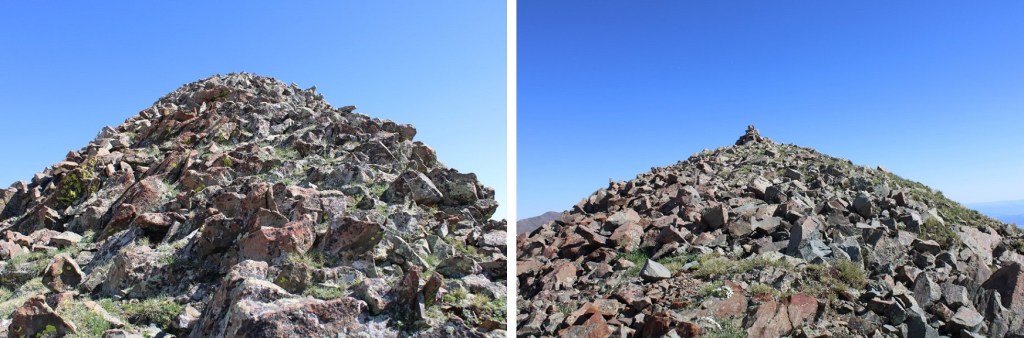
Rito Alto Peak: 

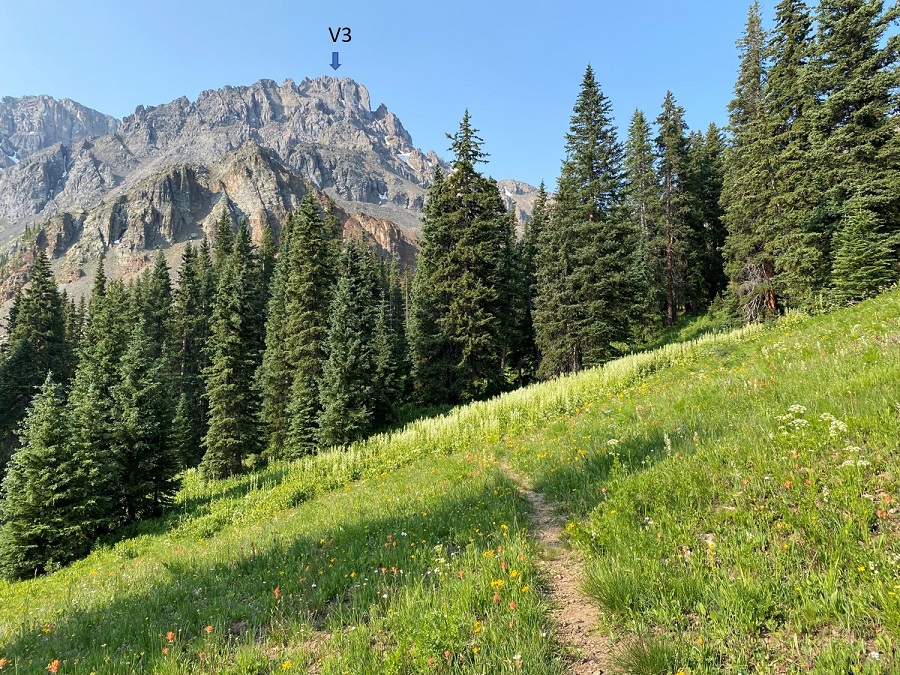
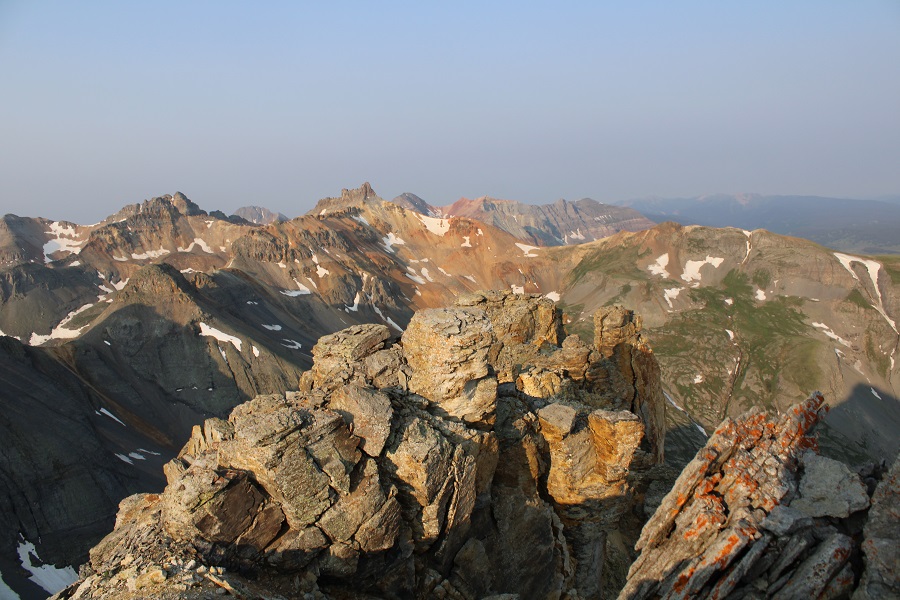
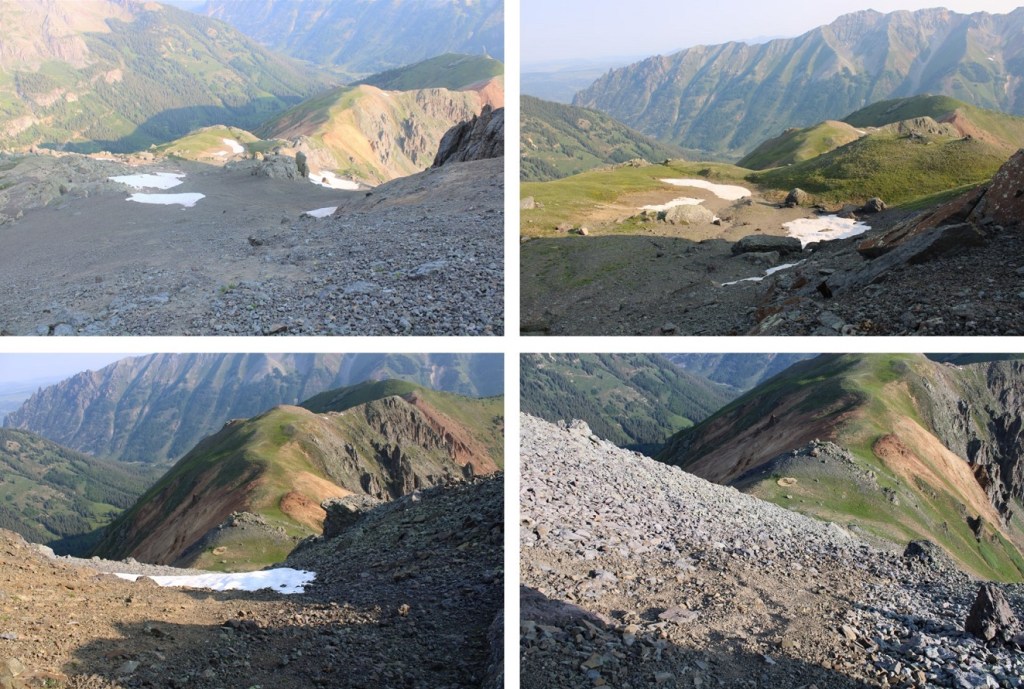
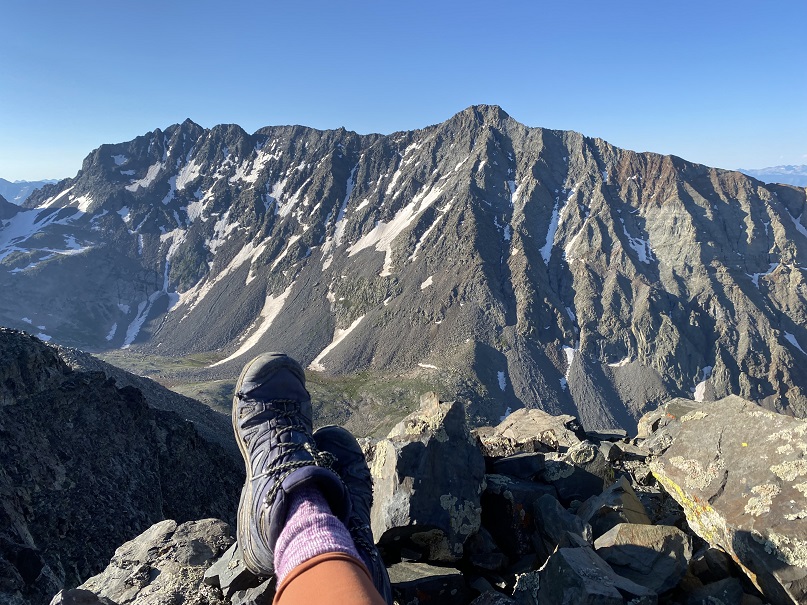
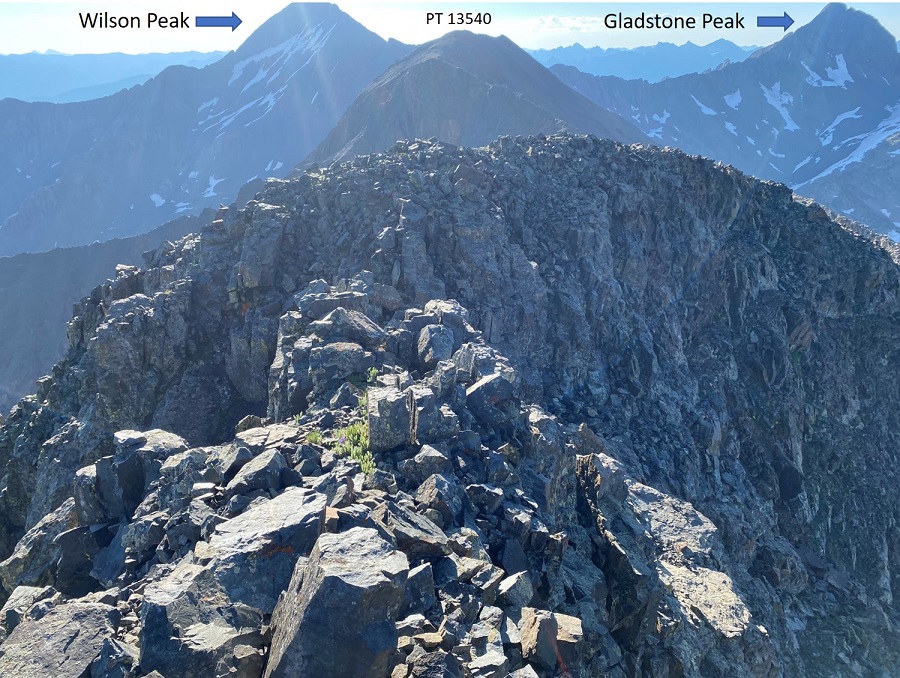
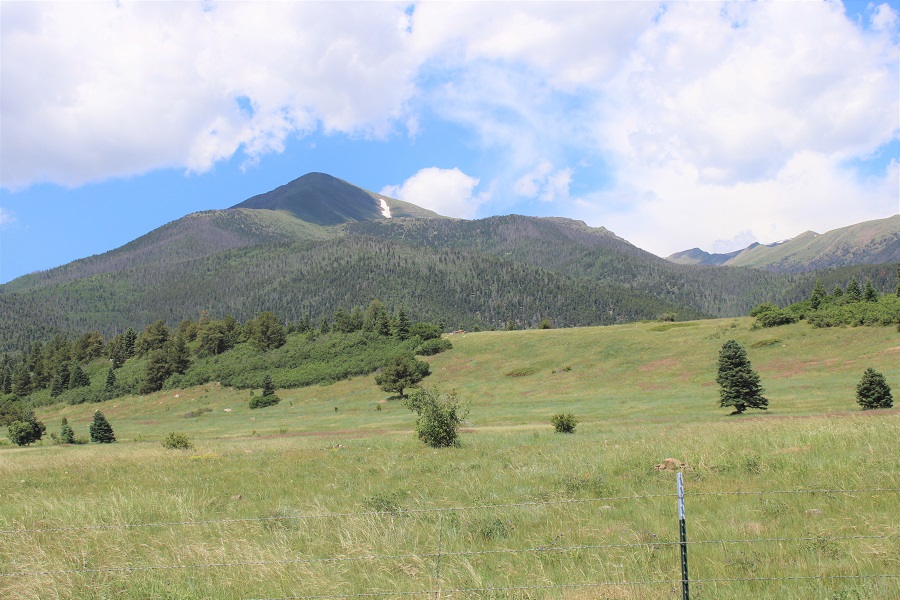
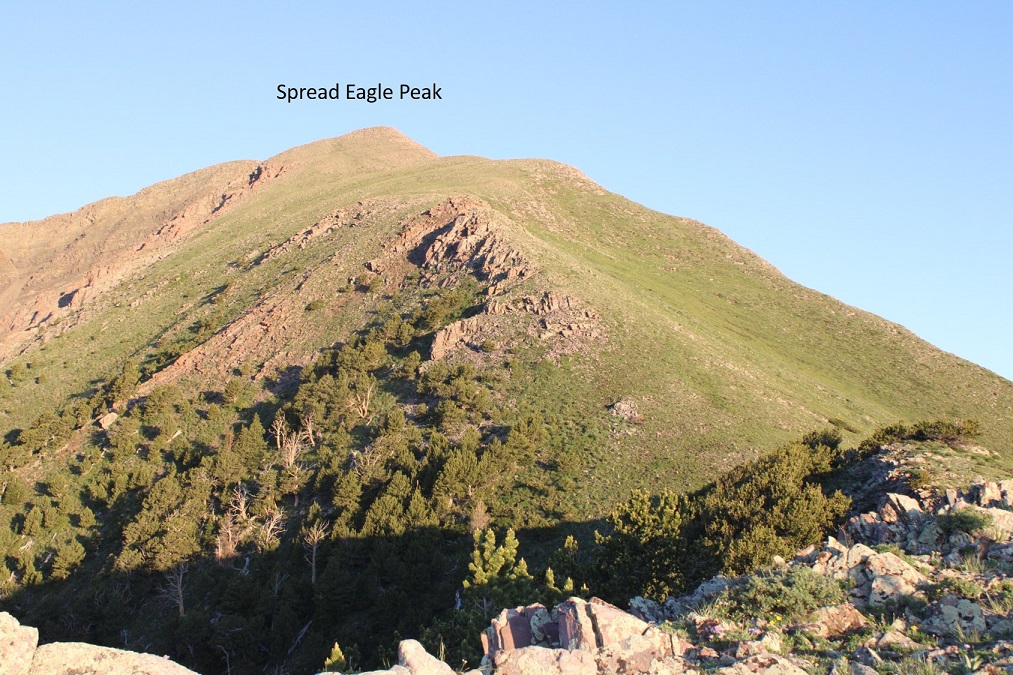
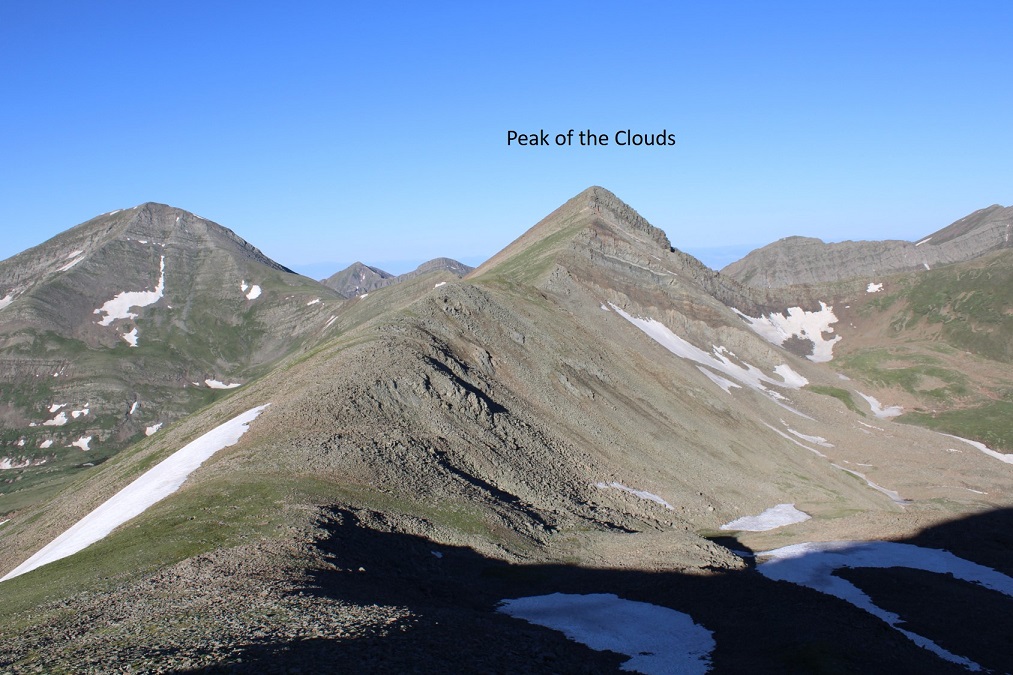
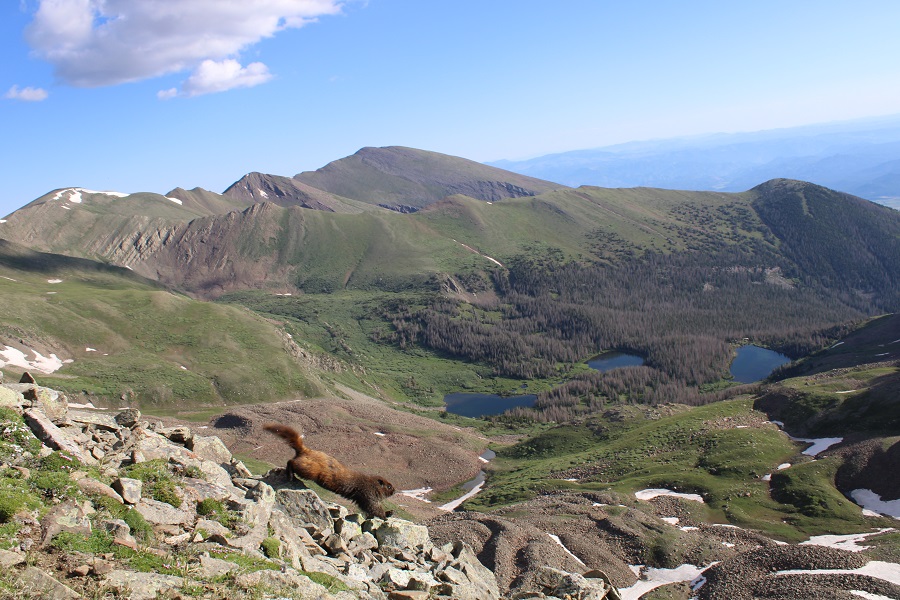
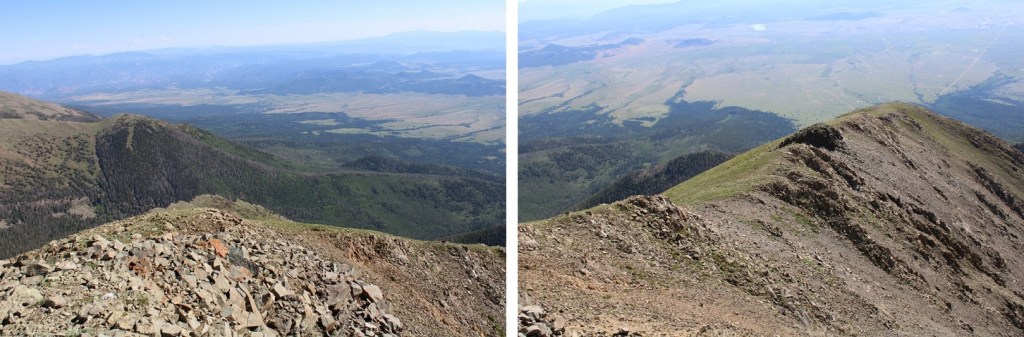
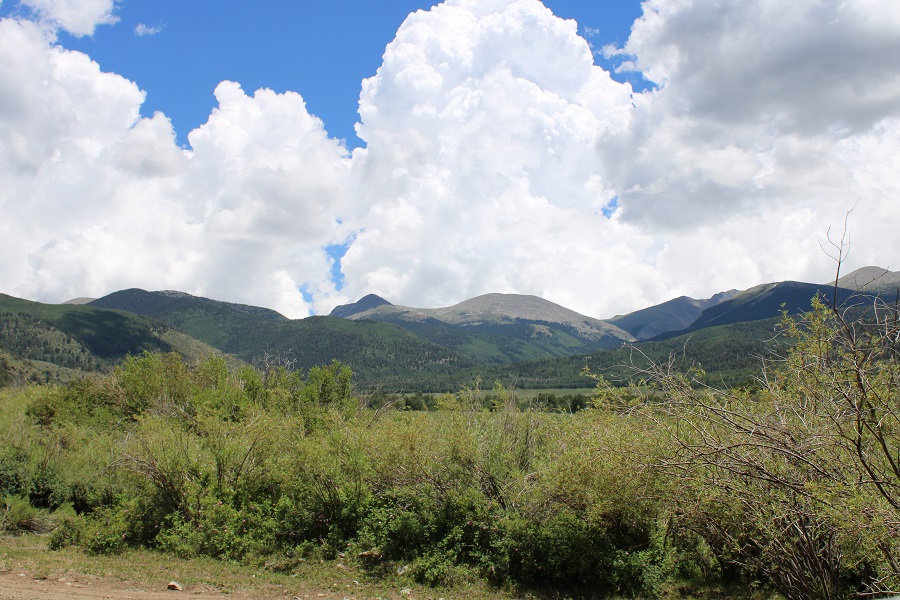
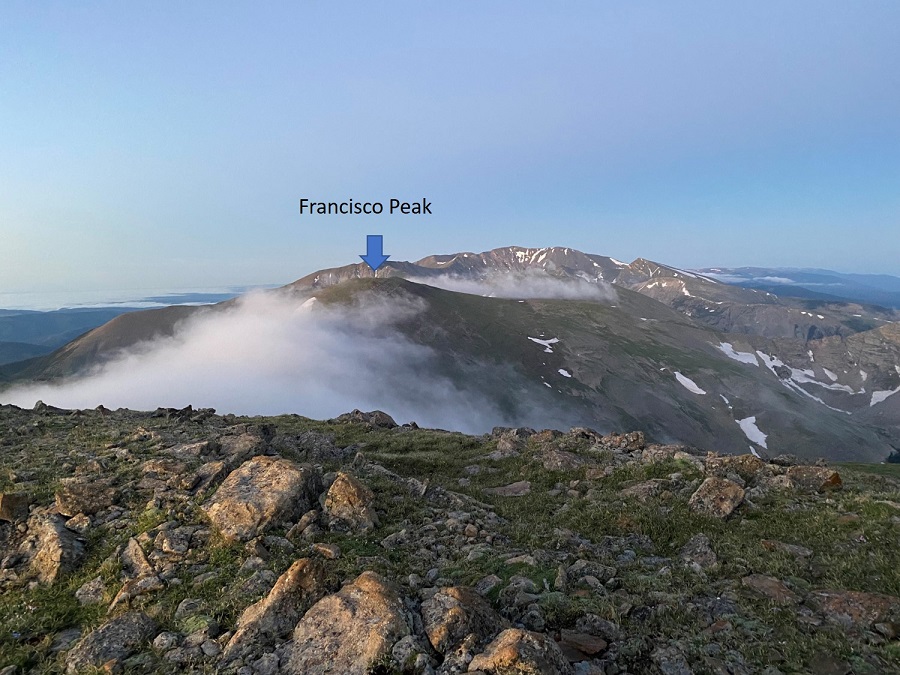
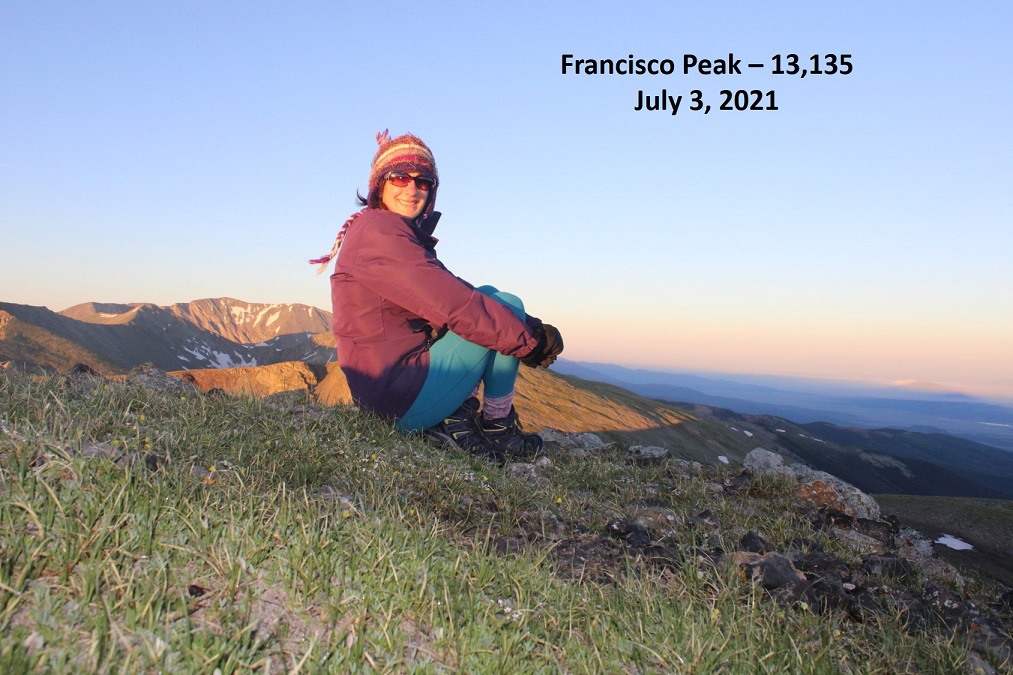
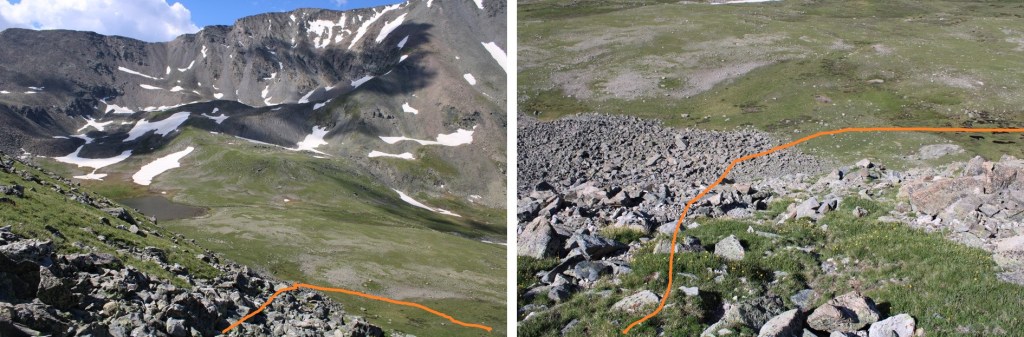
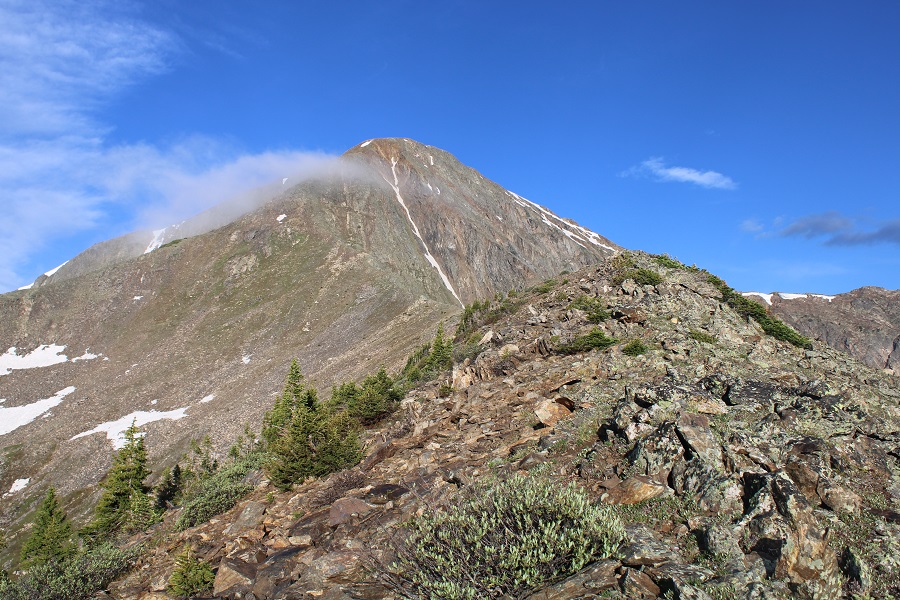
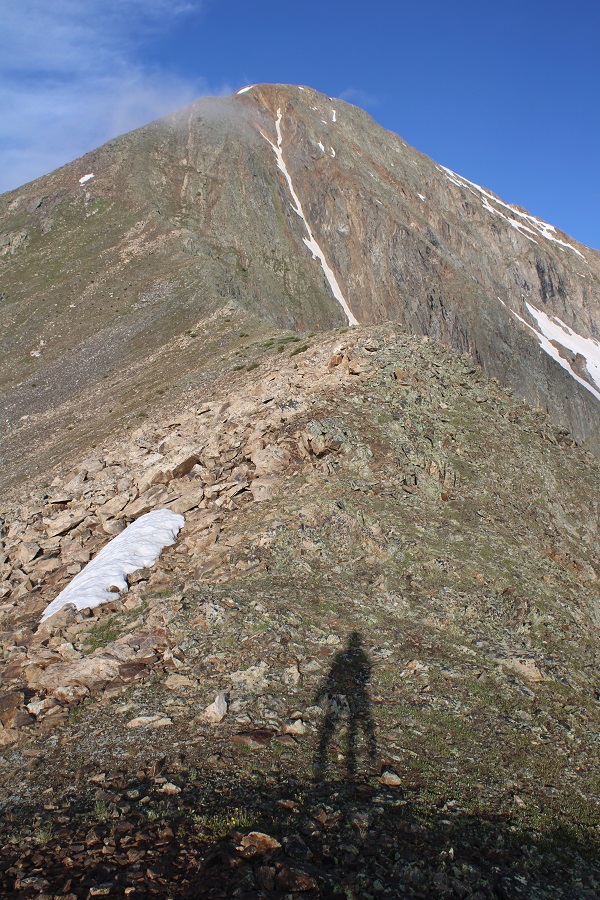
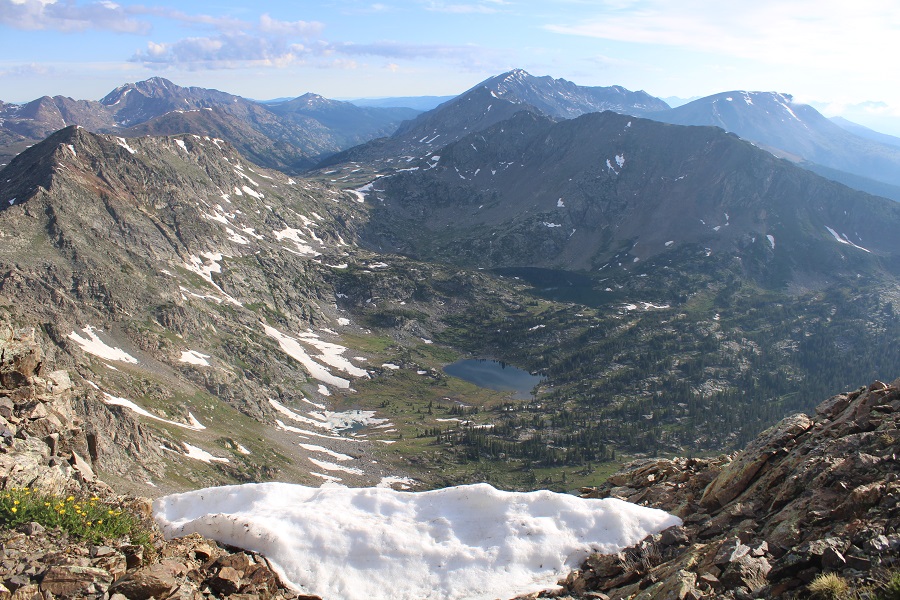
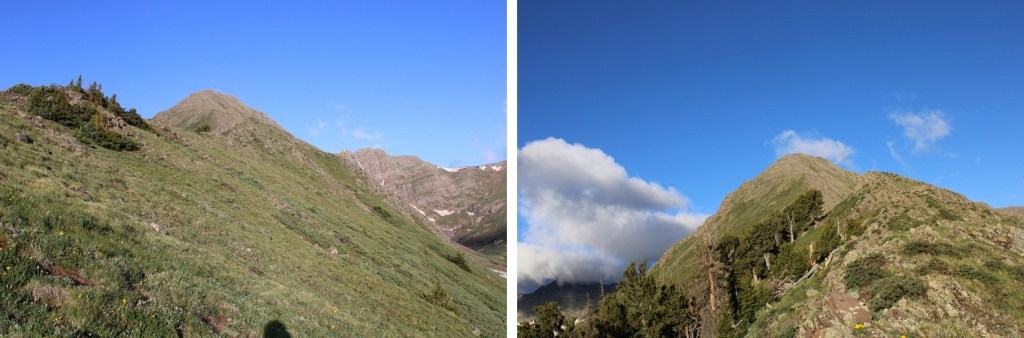
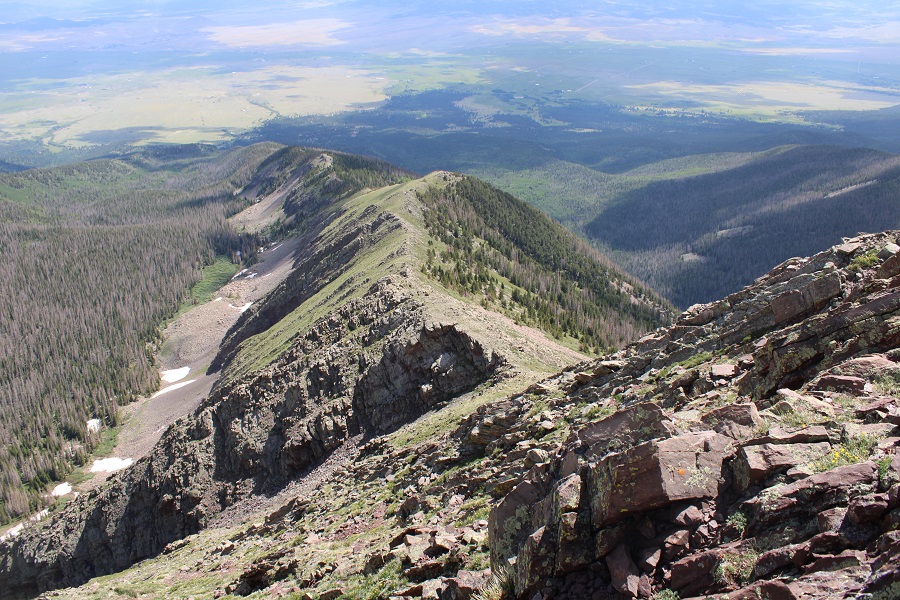
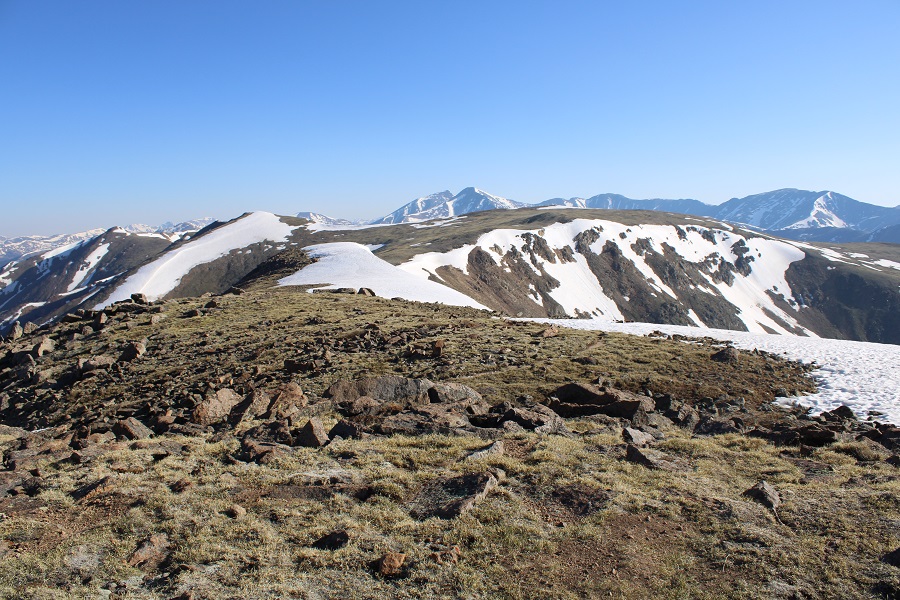
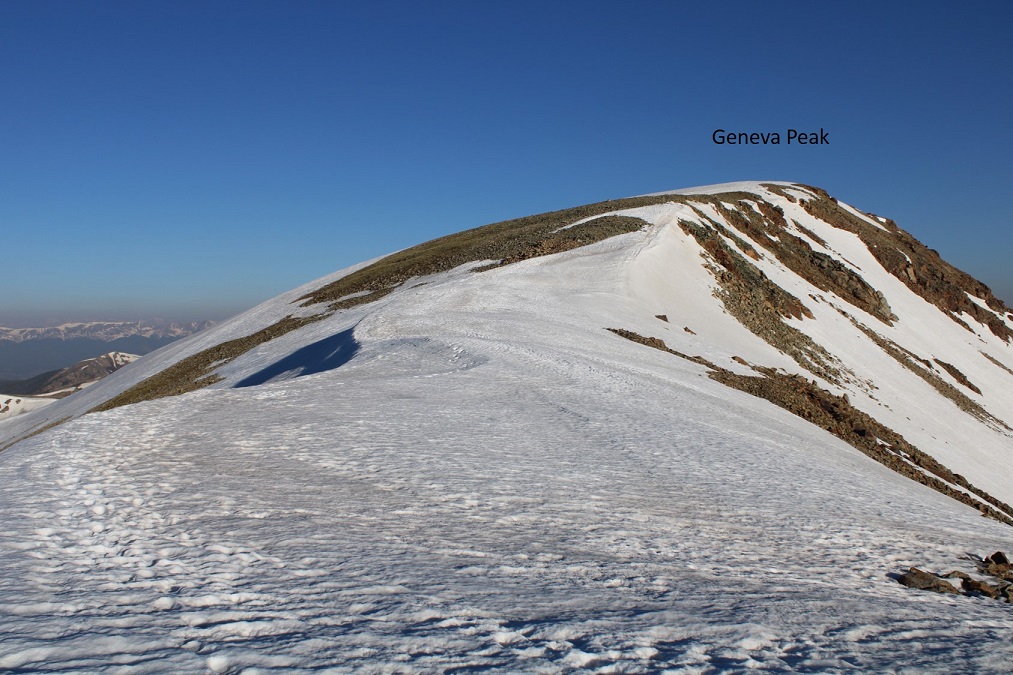
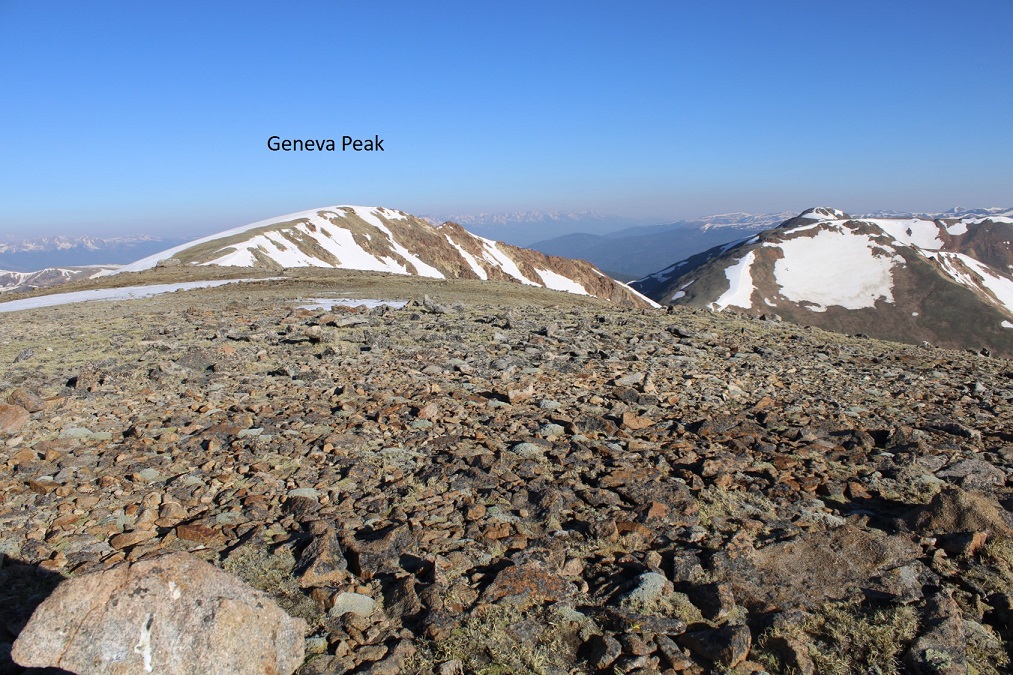
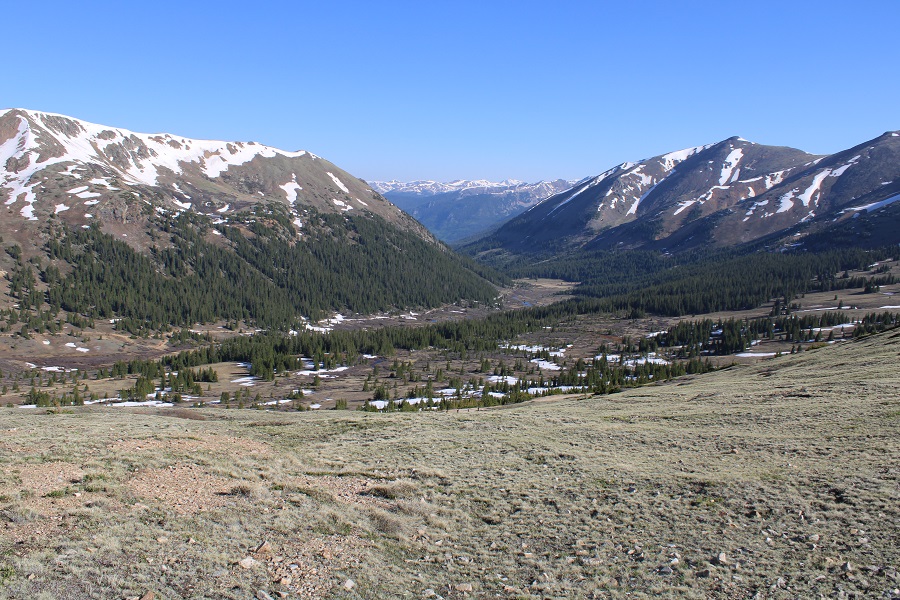
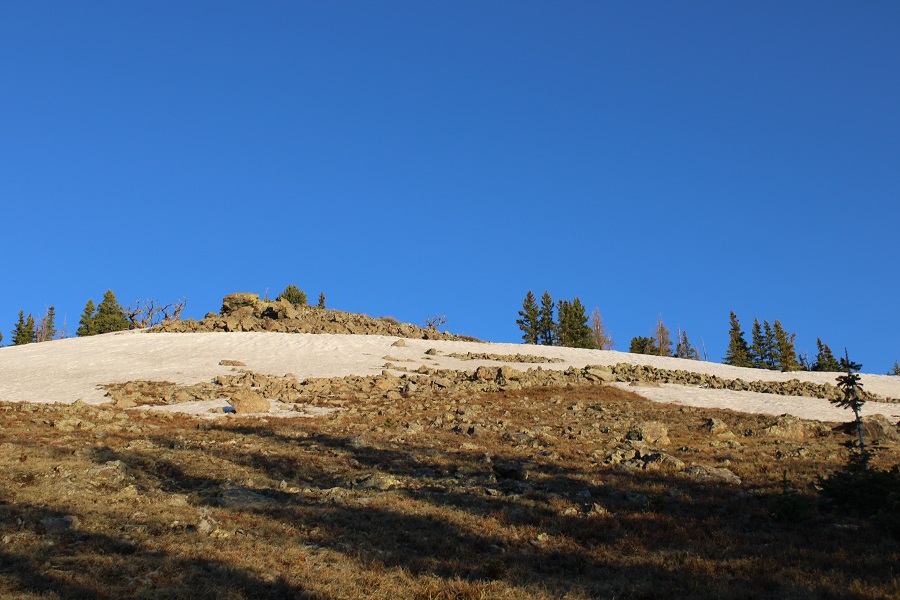
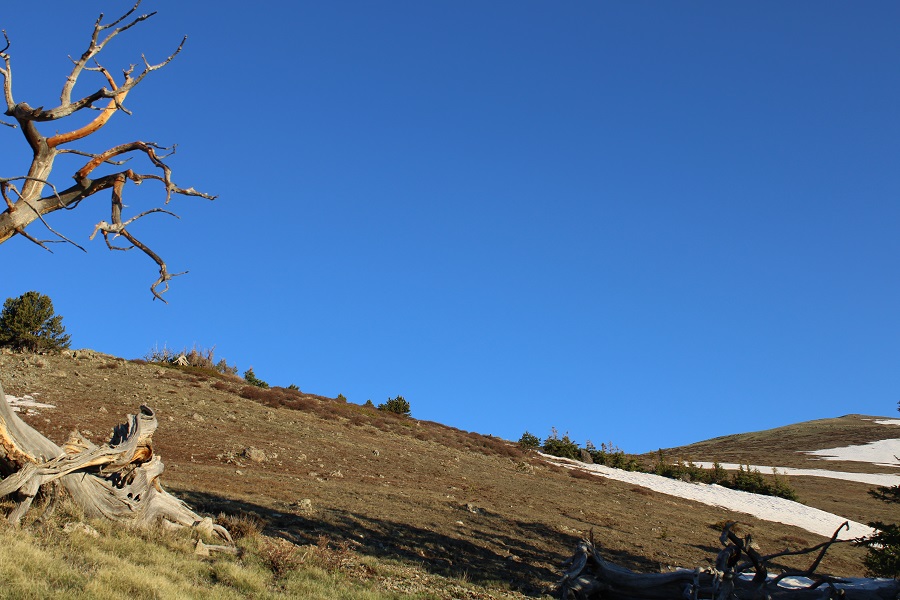
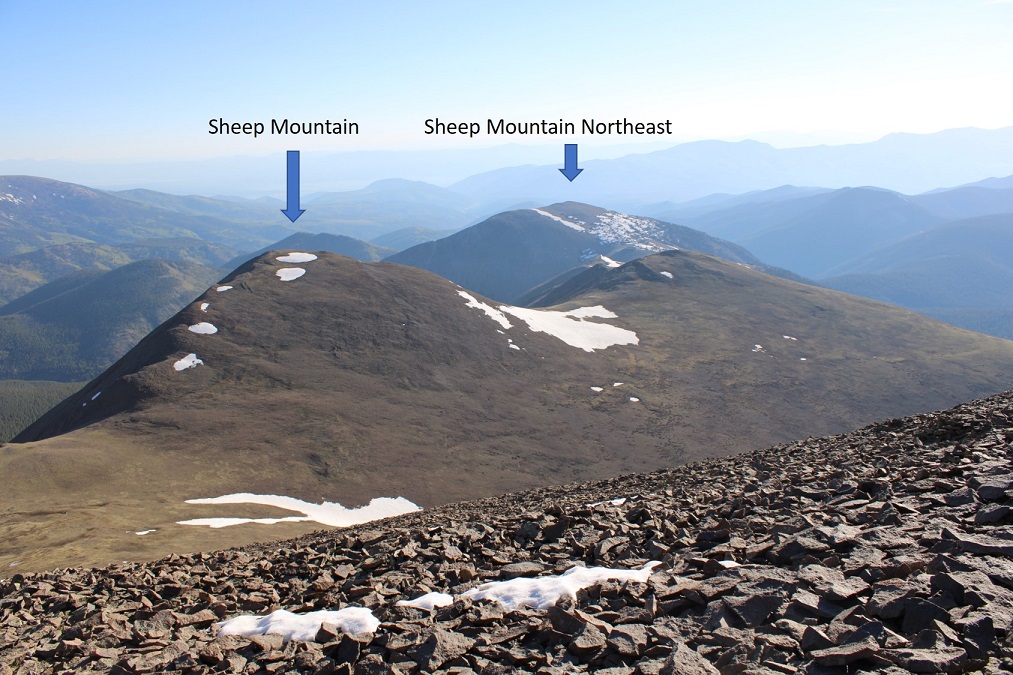
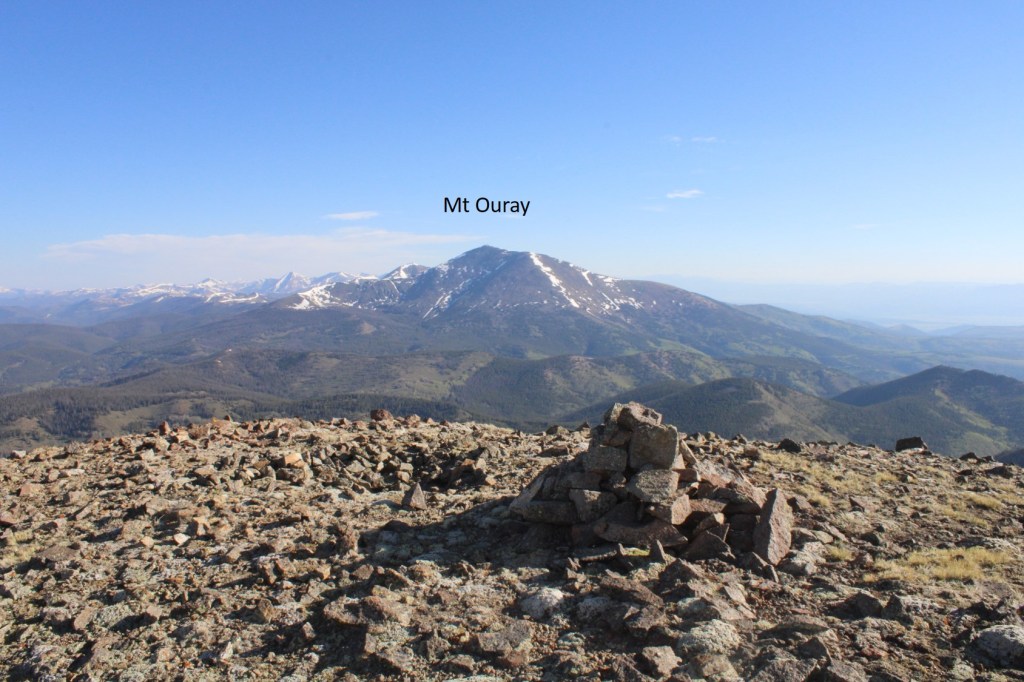
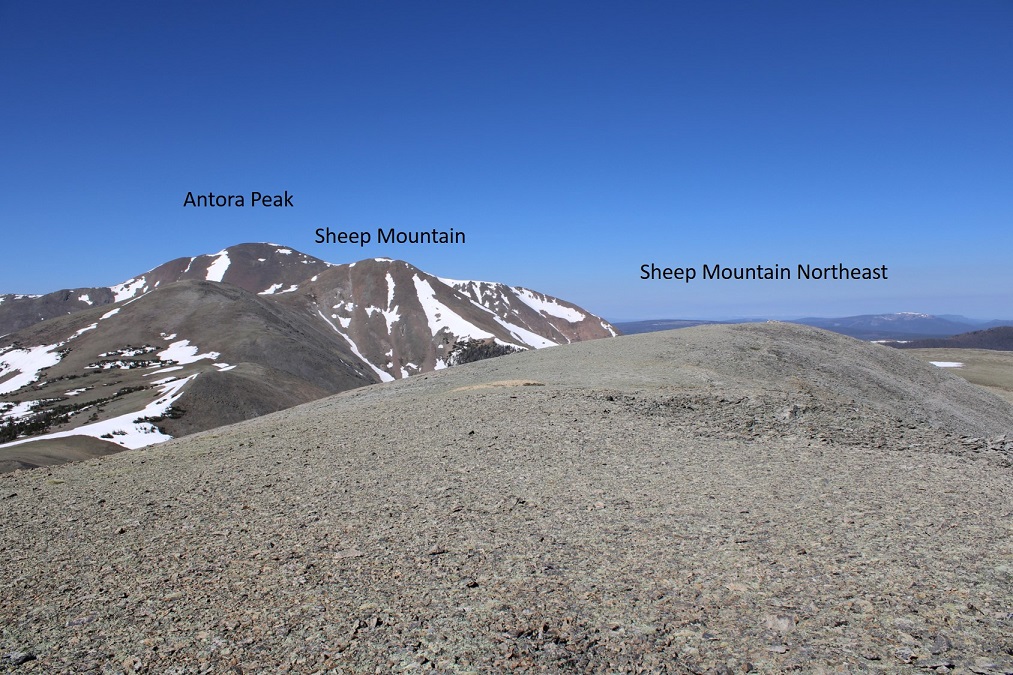
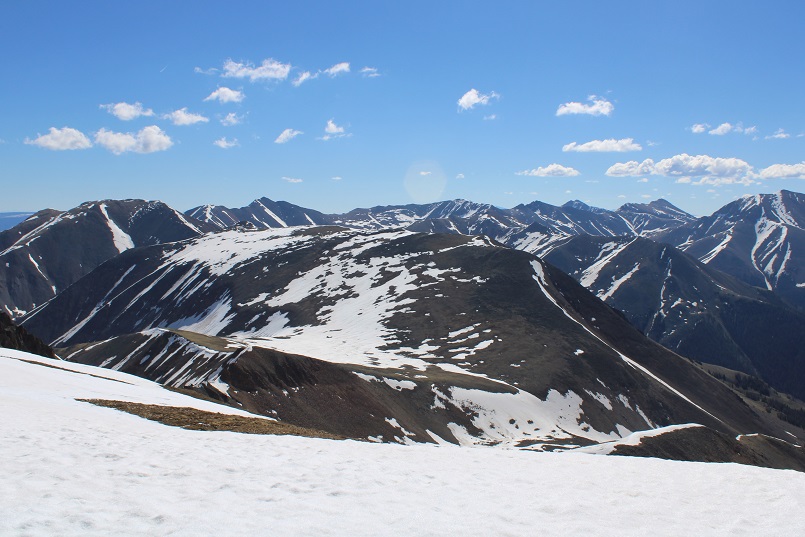
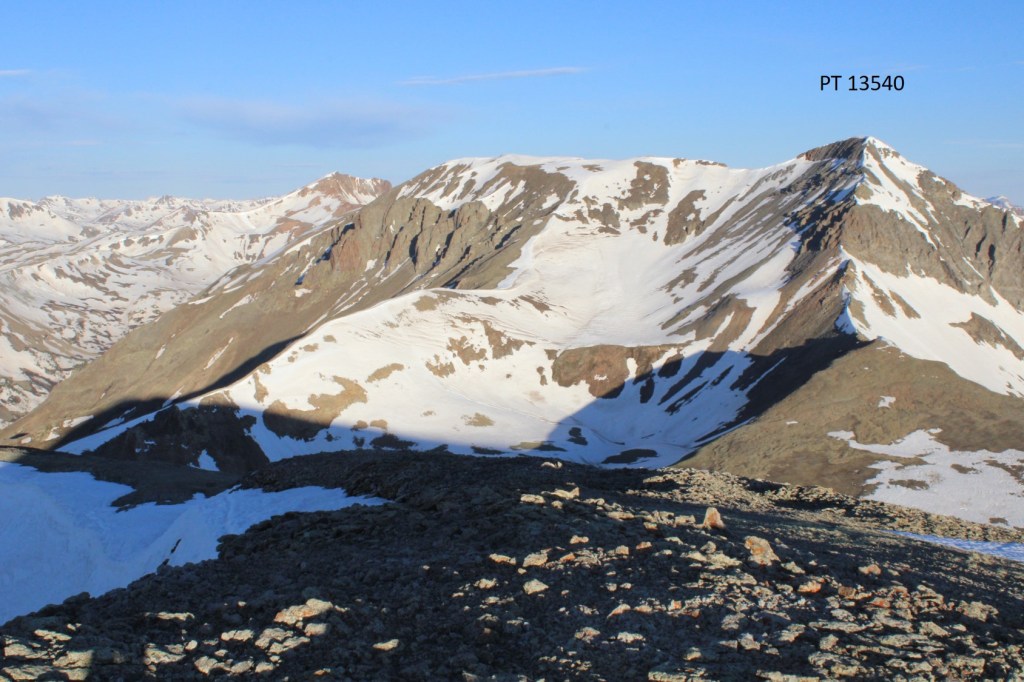
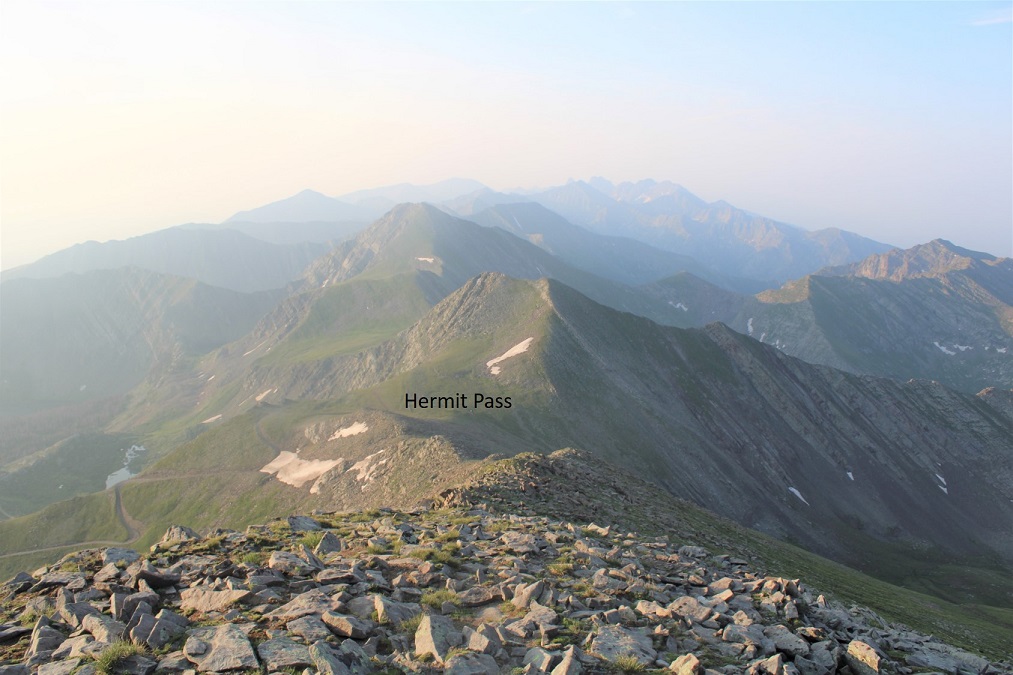
From the summit I had a good view of the other peaks I intended to summit today (if not a good view of the area overall).

I turned and headed back towards Hermit Pass.

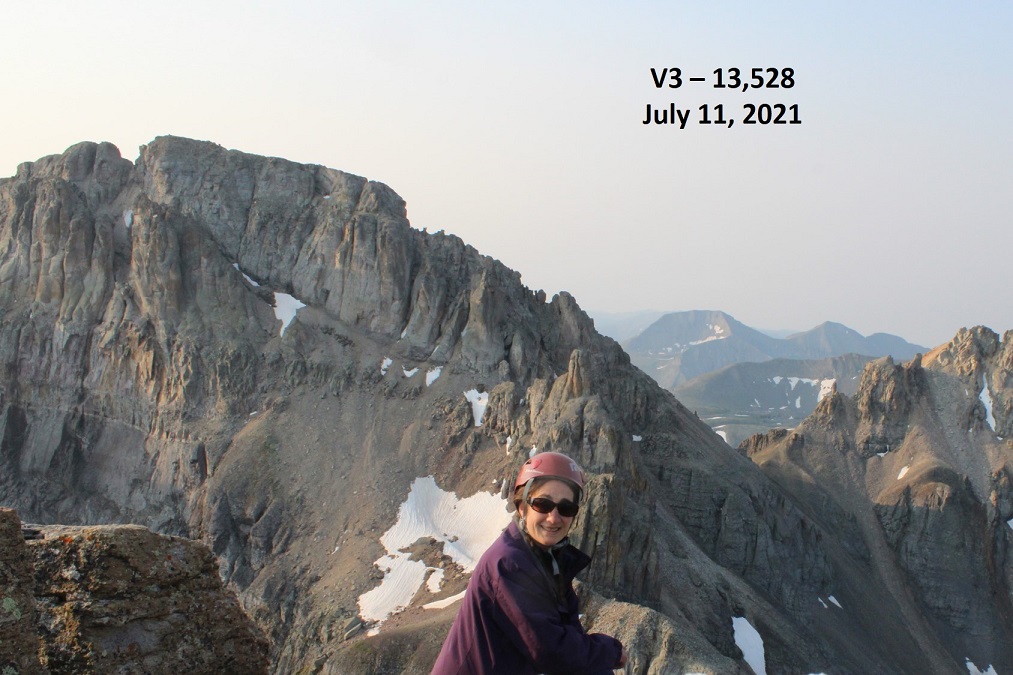
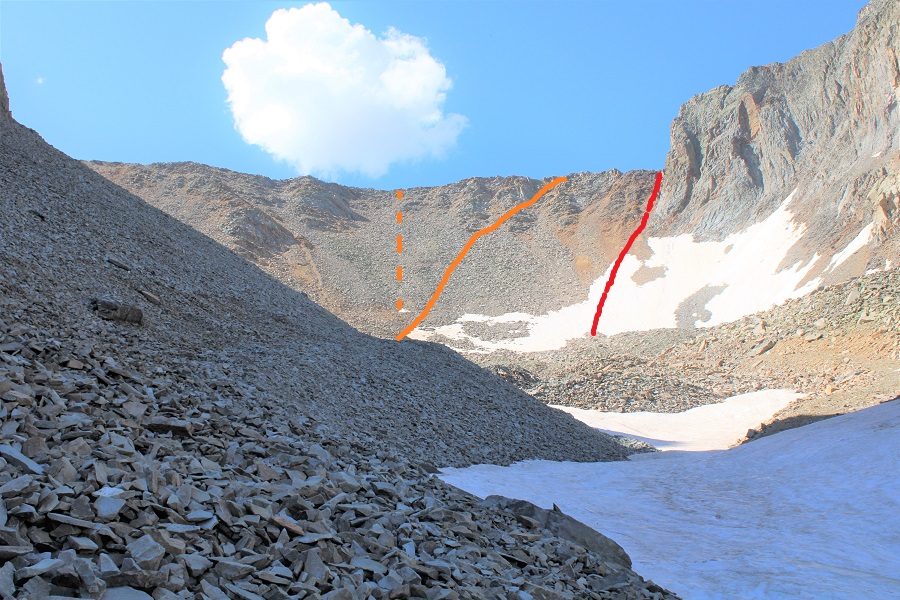
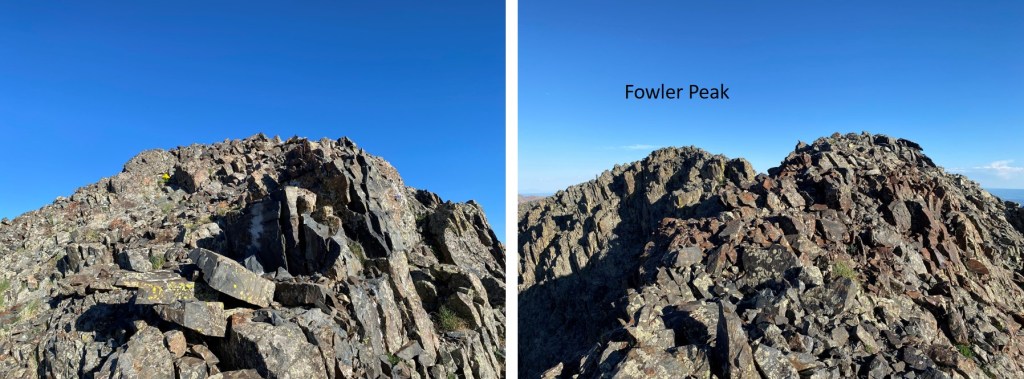
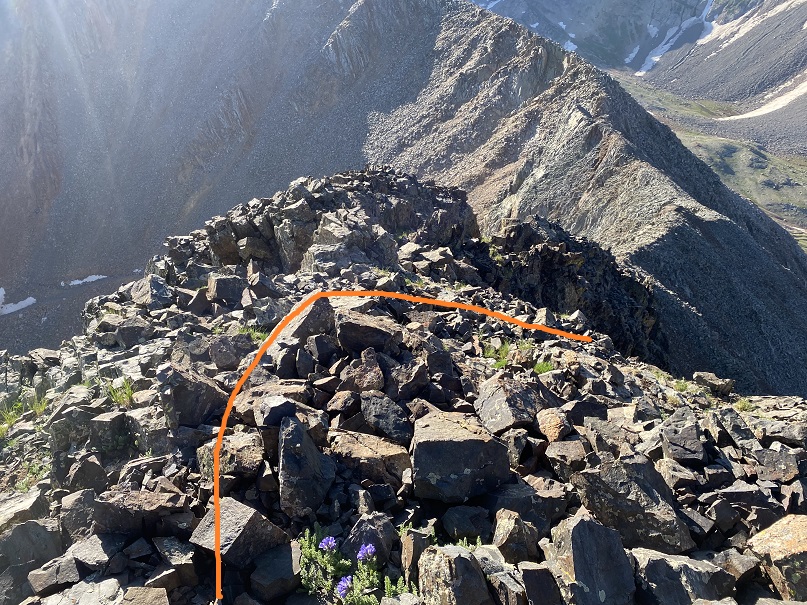
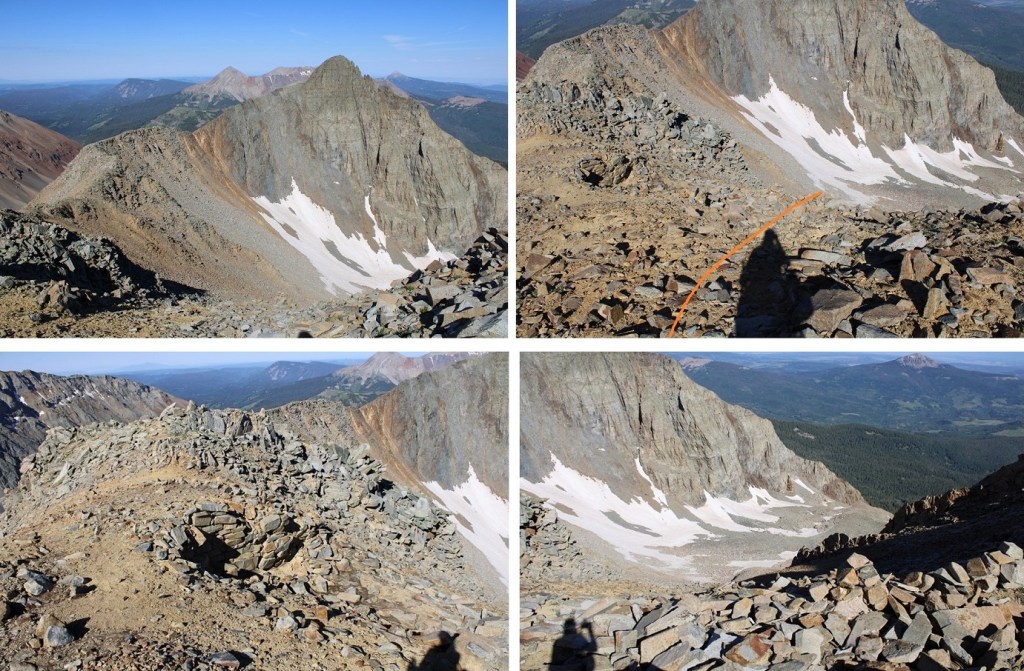
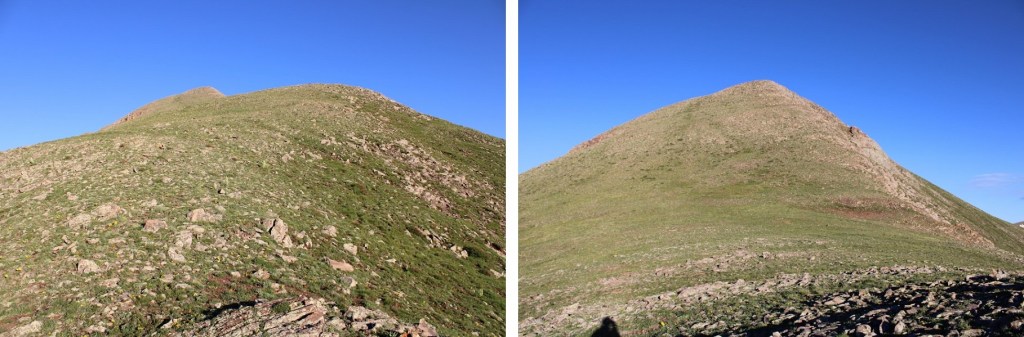
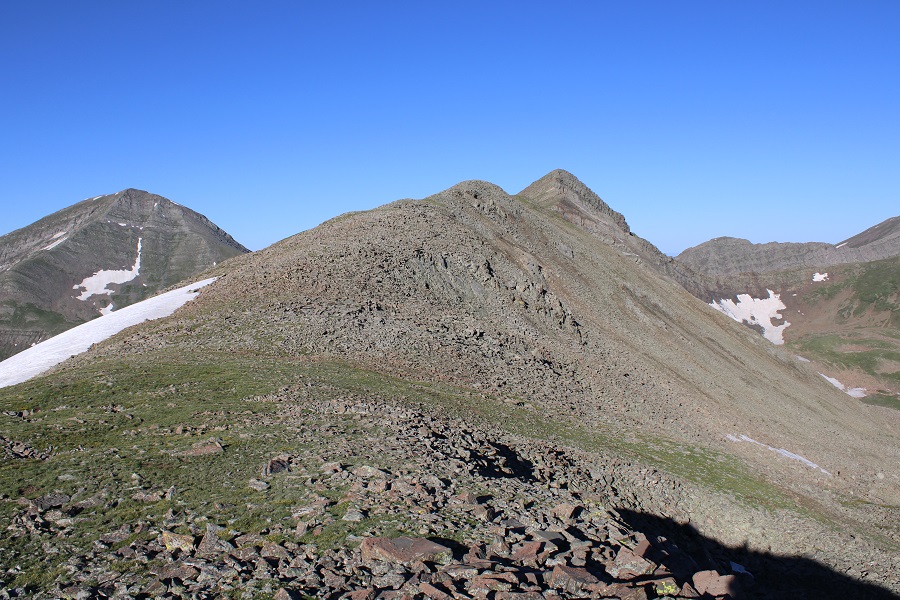
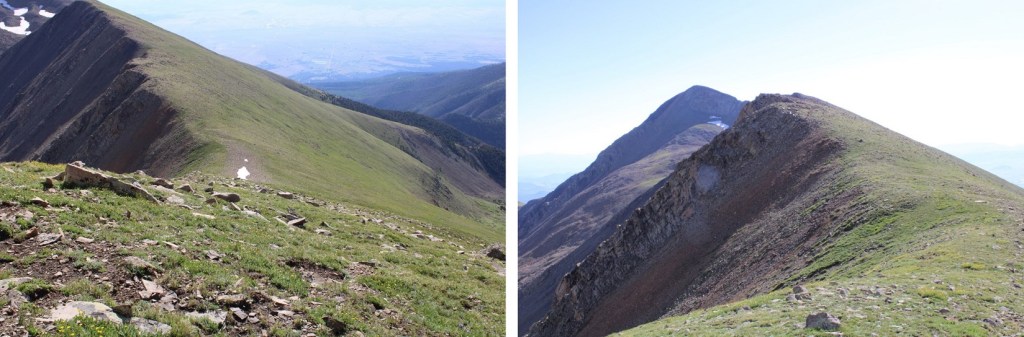
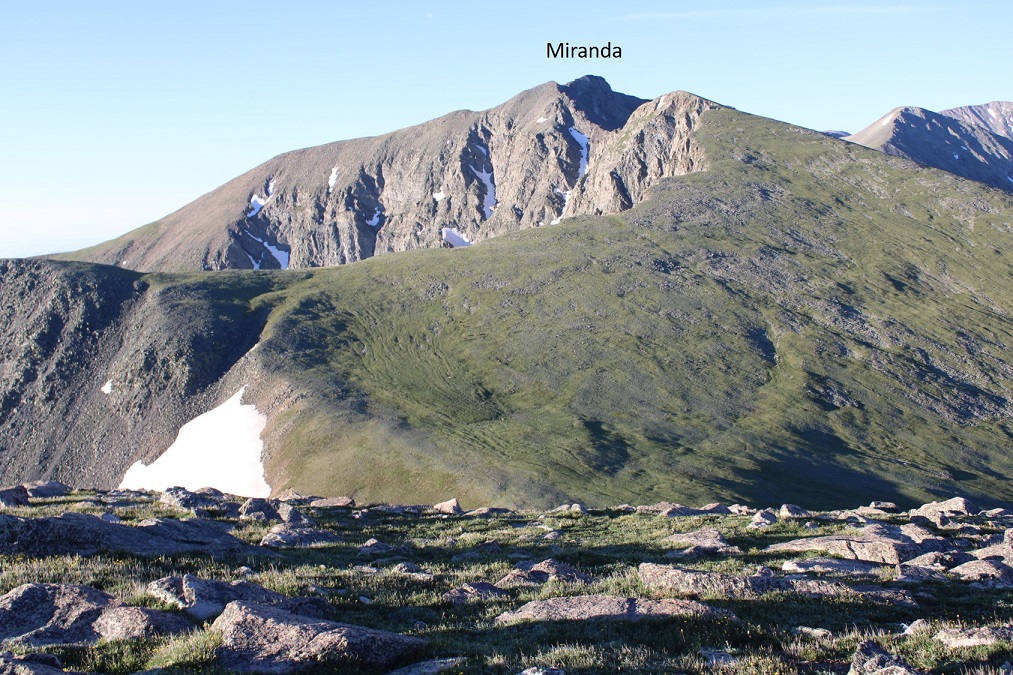
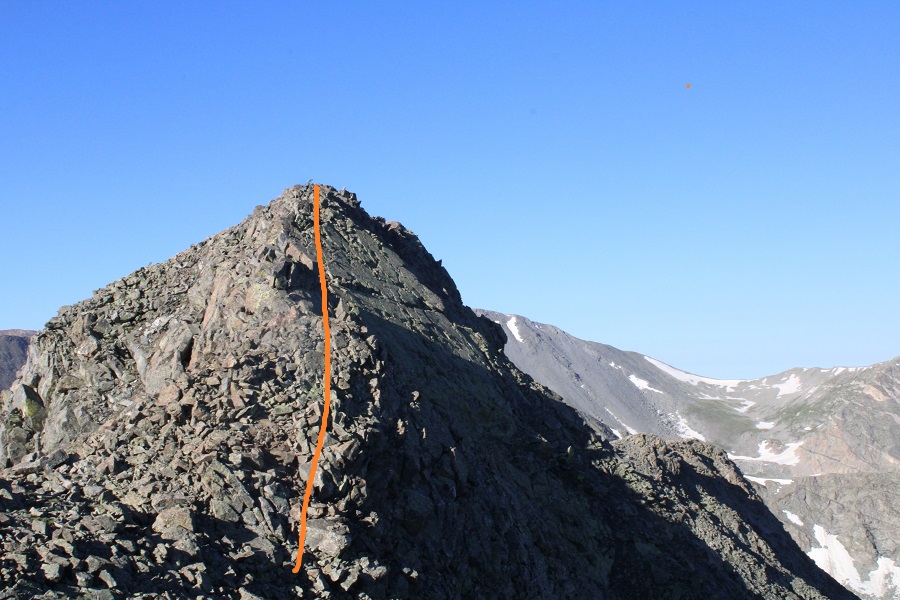
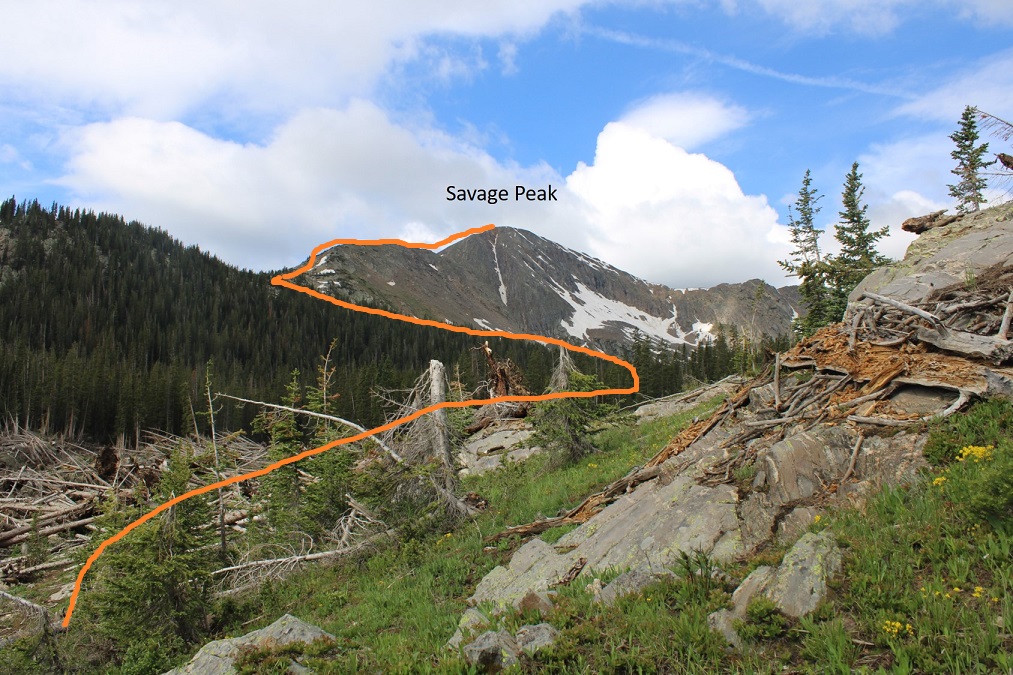
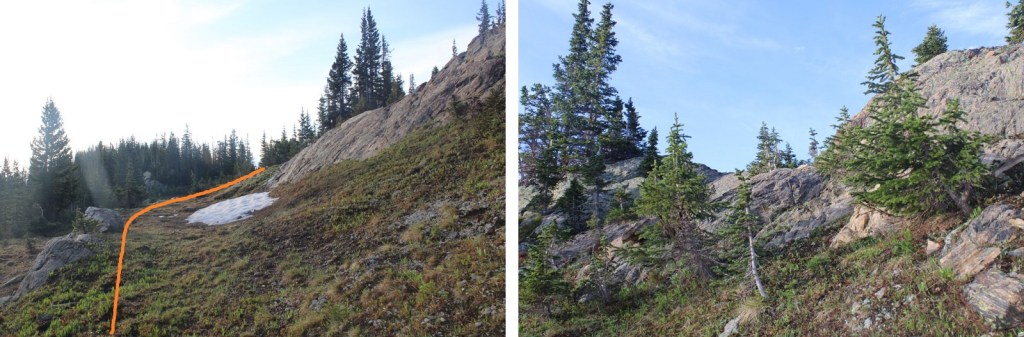
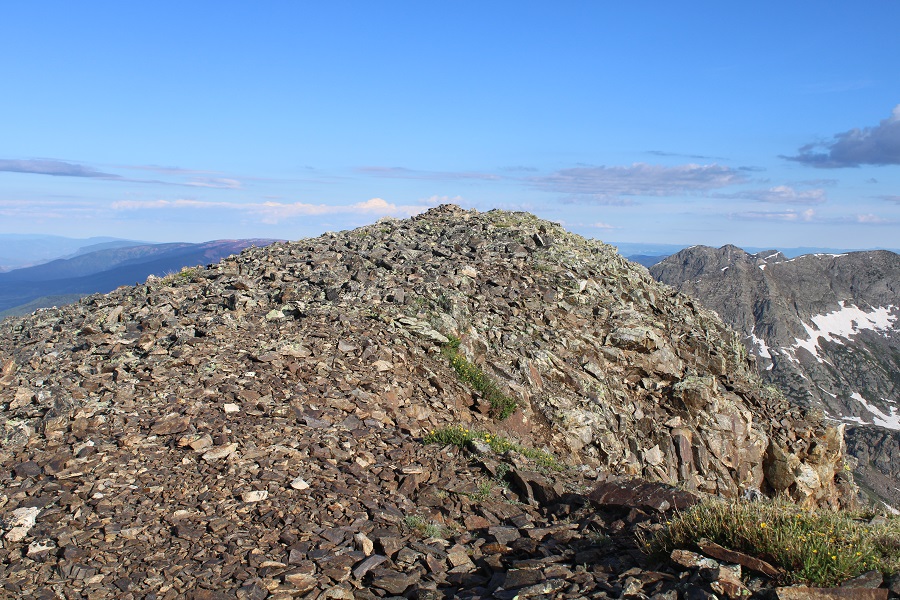
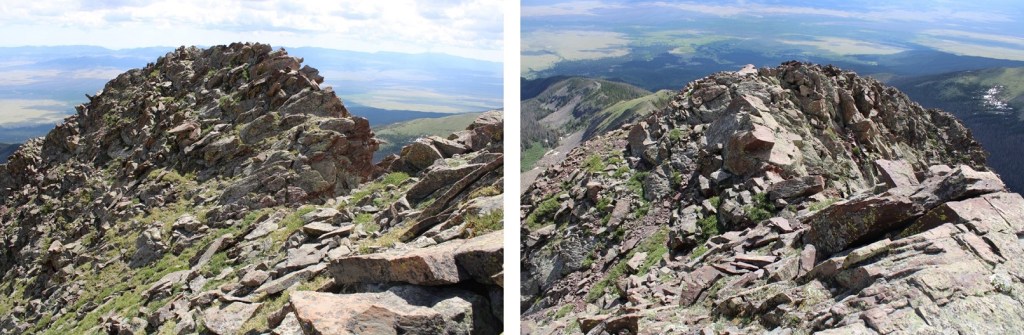
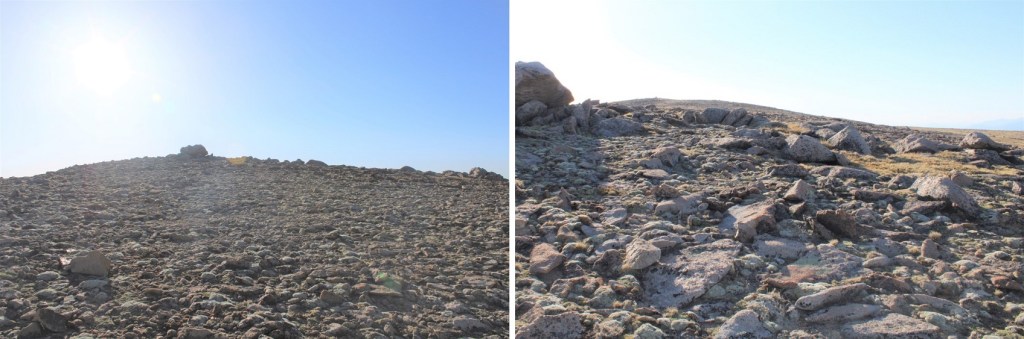
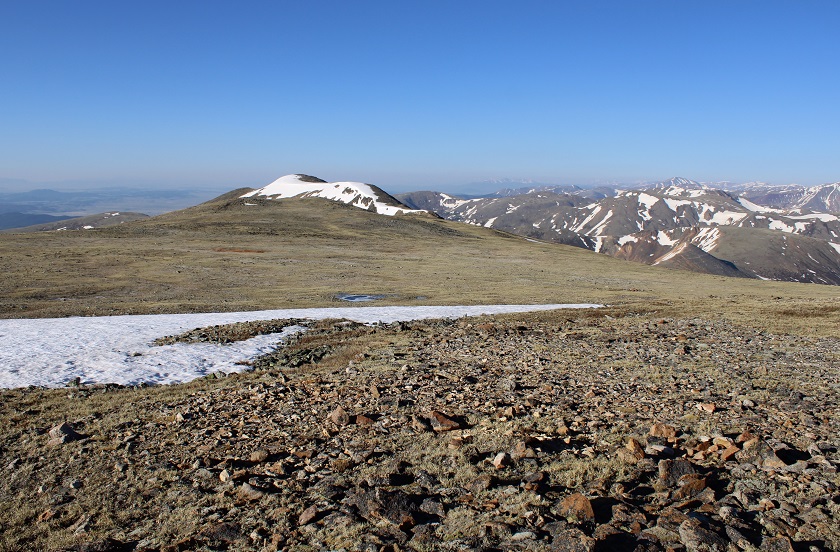
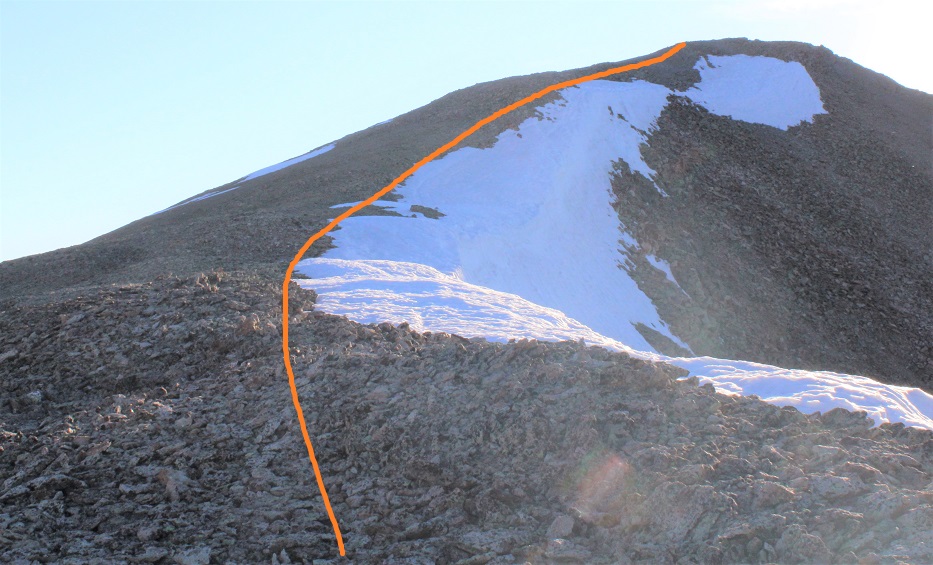
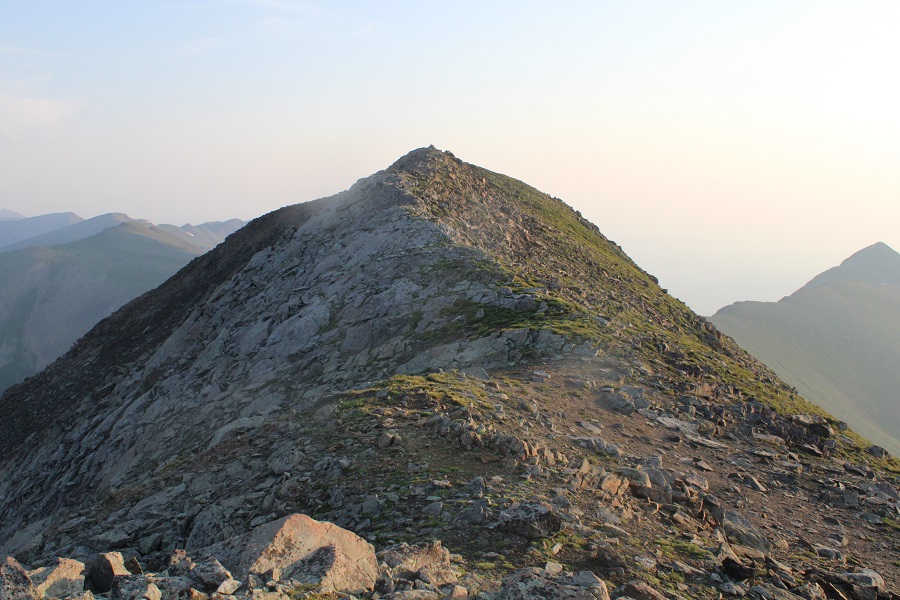
Once at Hermit Pass I chose the path of least resistance to the summit of Hermit Peak, making this a ridge hike.   The true summit is hard to determine, as both the east and west ‘highpoints’ look like the summit, and indeed, both have cairns.  CalTopo says the true summit is to the right (west).

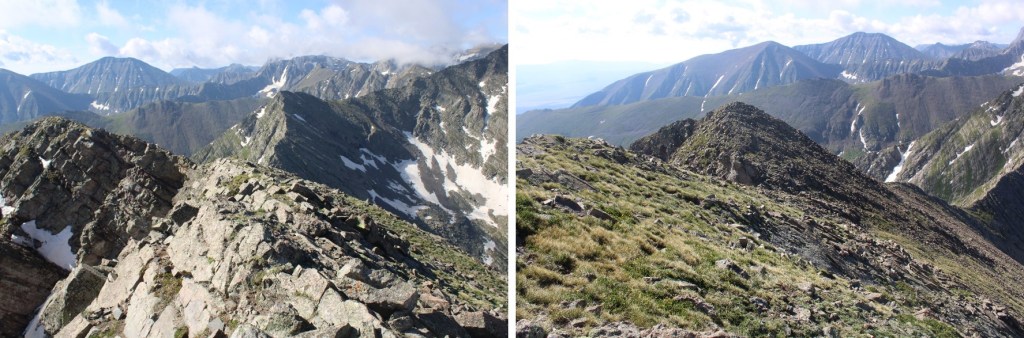
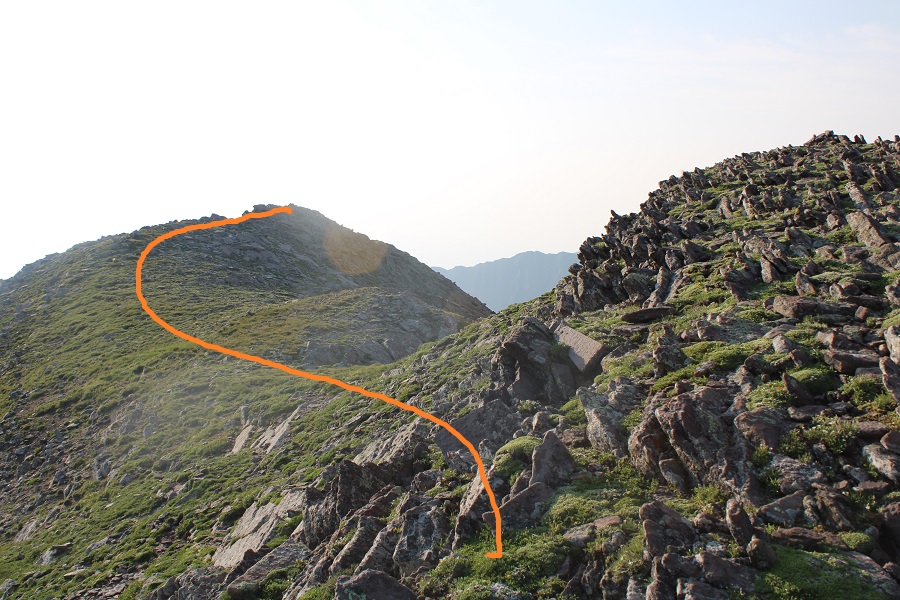
Here are some pictures of the ridge hike, mostly on tundra to the summit of Hermit Peak

I summited Hermit Peak at 7:40am

Hermit Peak:

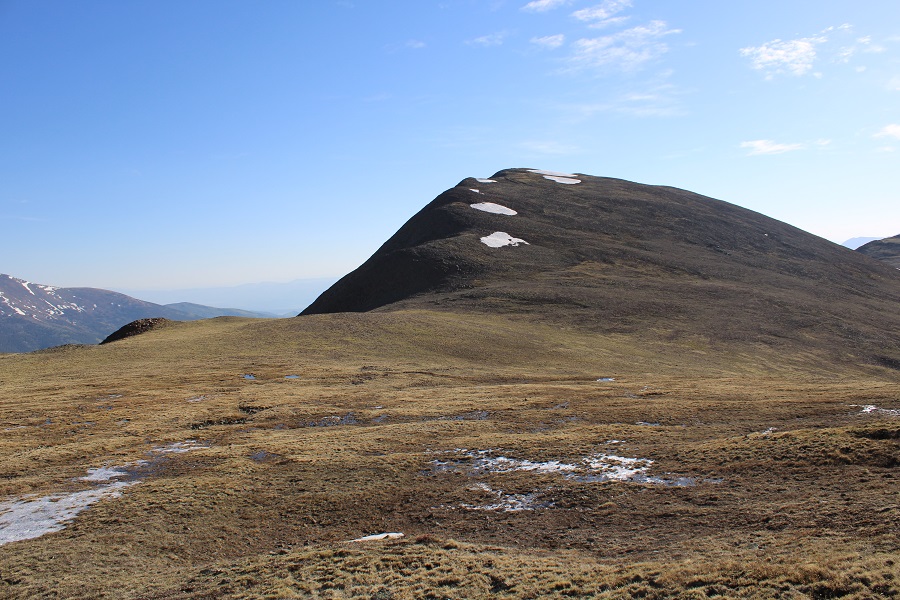
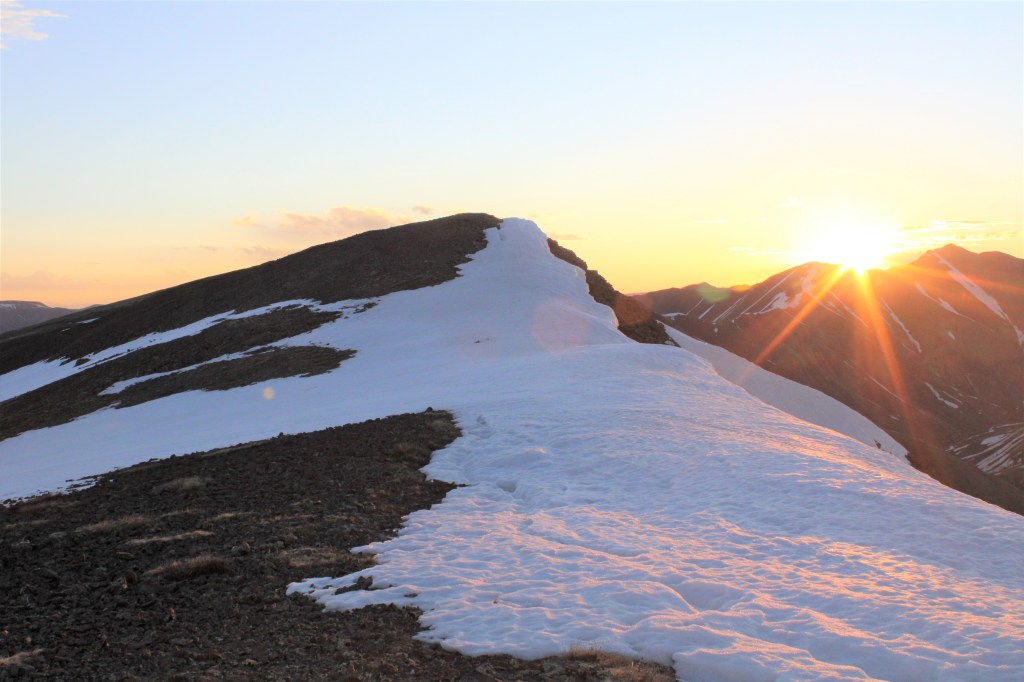
Here’s looking back at Rito Alto Peak

And now, on to Eureka.  I first crossed over to the east side of Hermit Peak (which also had a cairn)

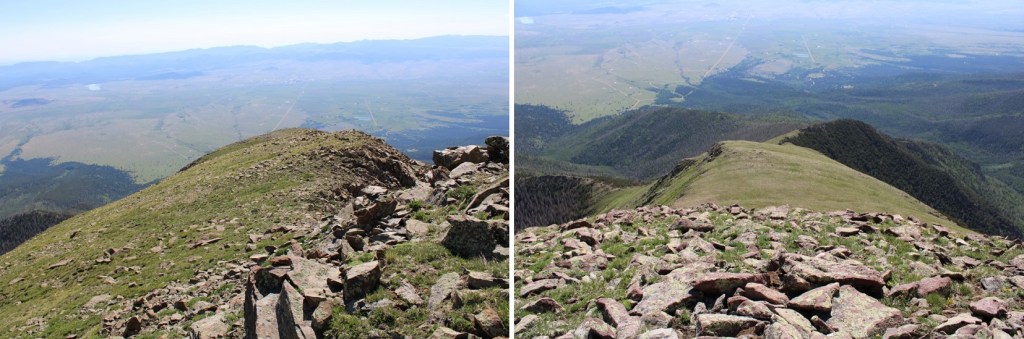
Here’s looking back at Hermit Peak from the cairn on the other side

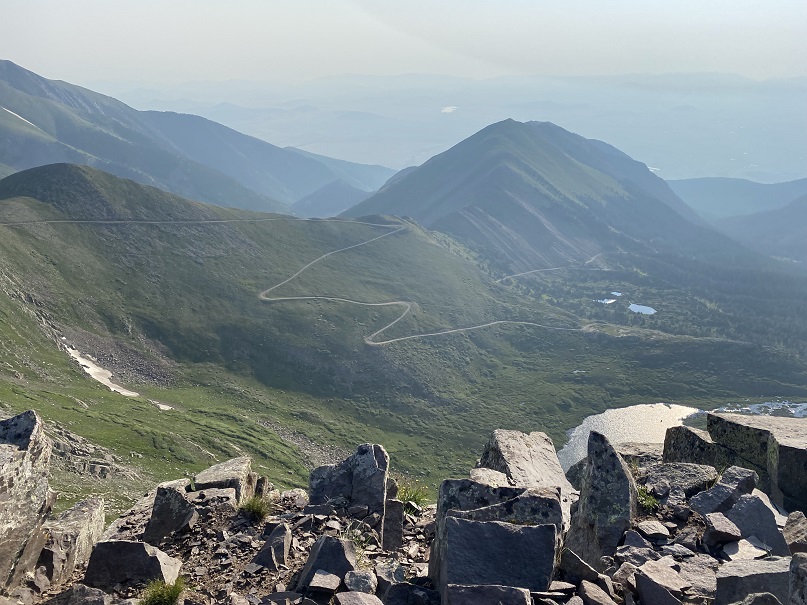
Here’s looking back from that point at the Hermit Pass Road I took hiking in

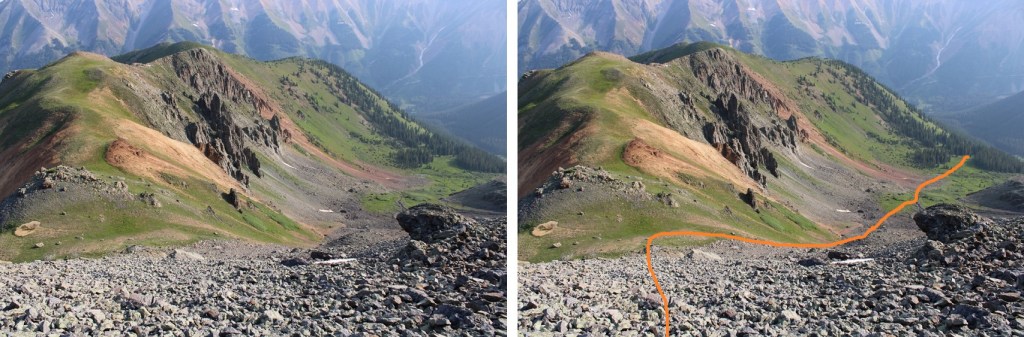
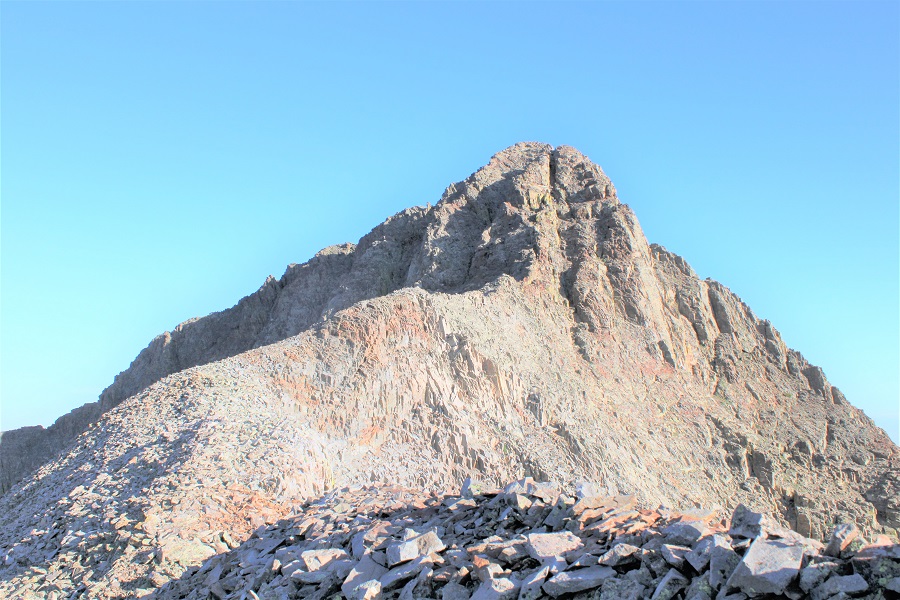
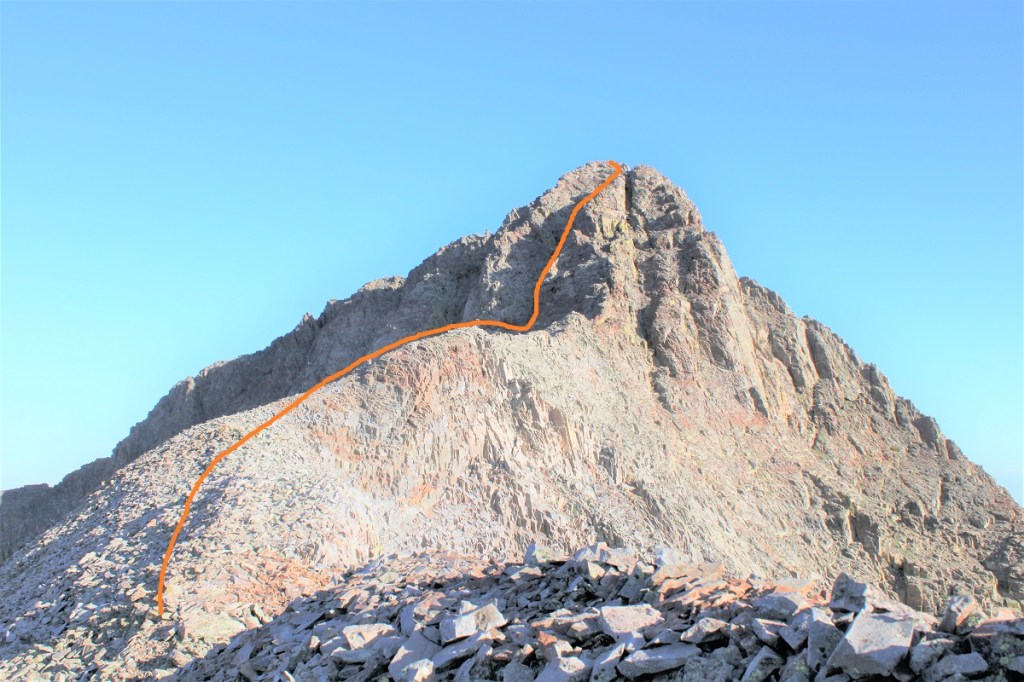
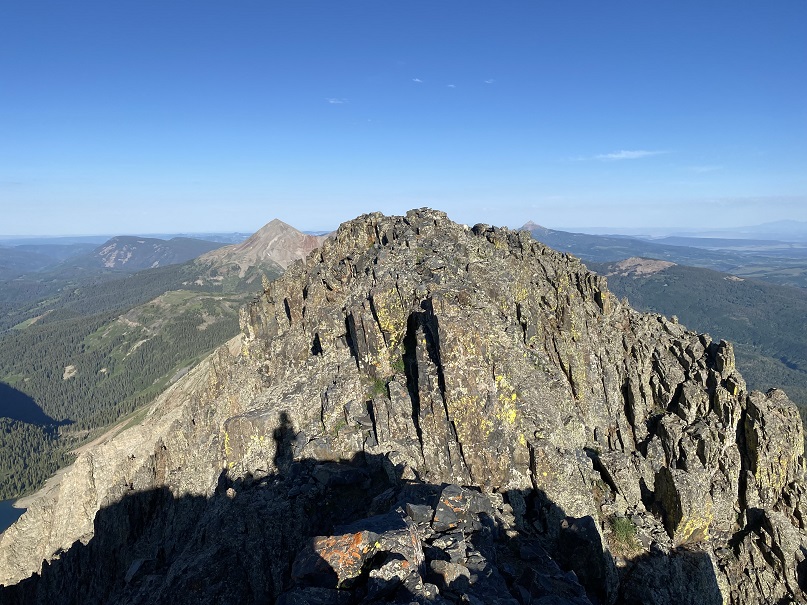
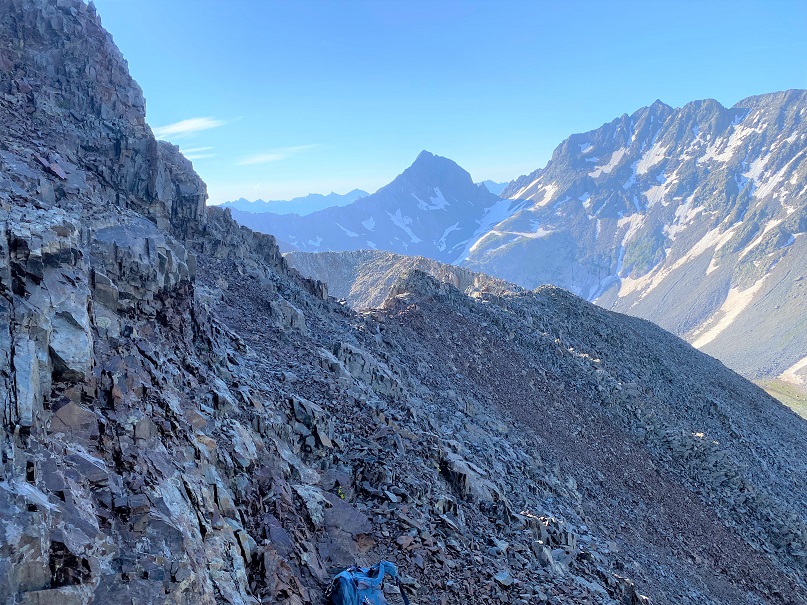
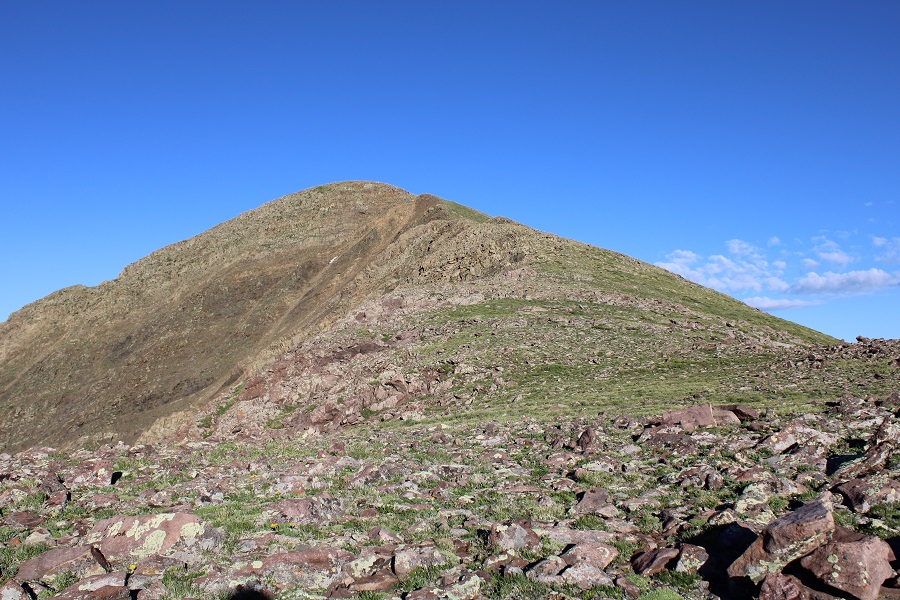
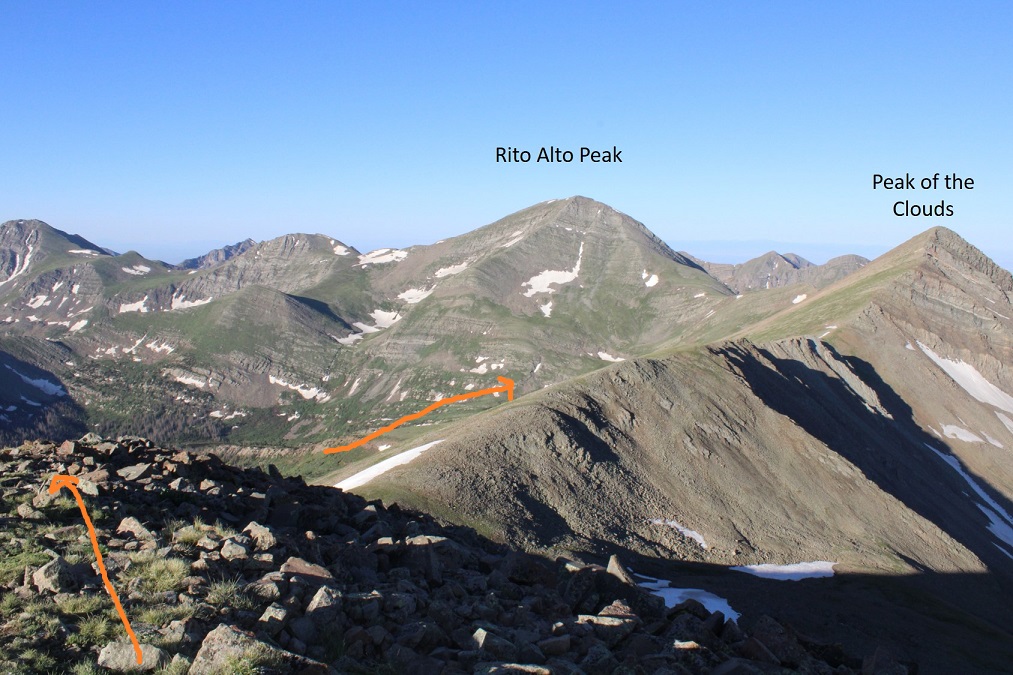
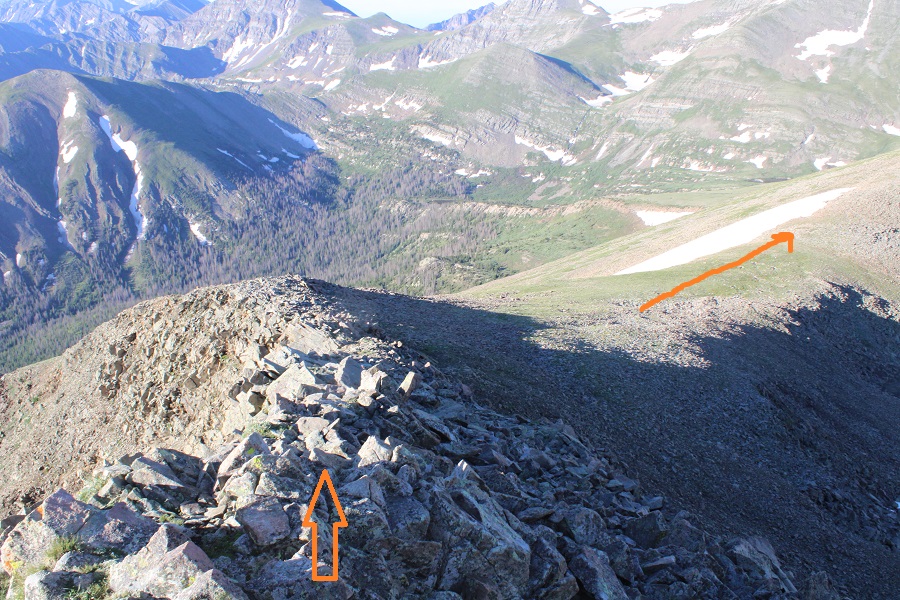
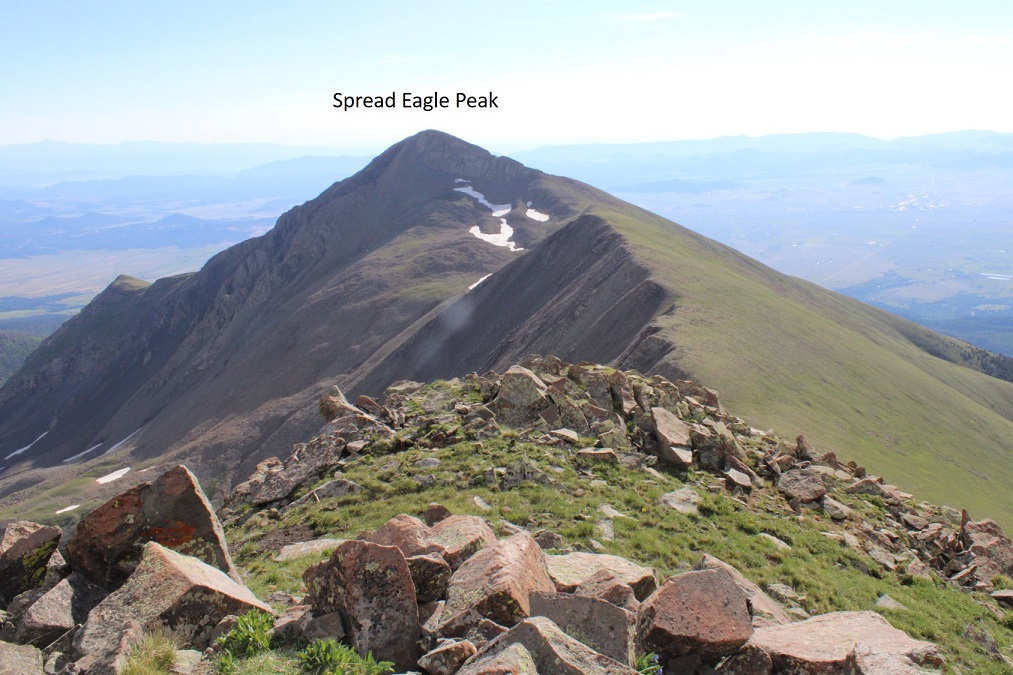
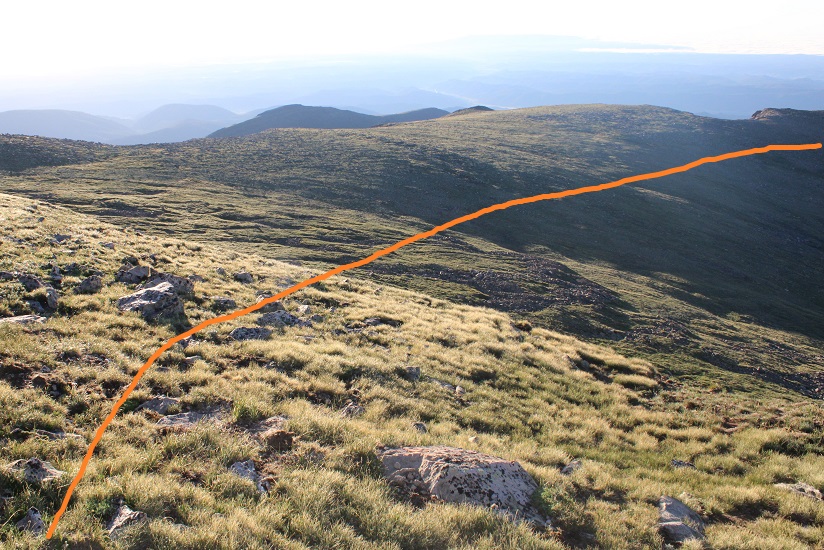
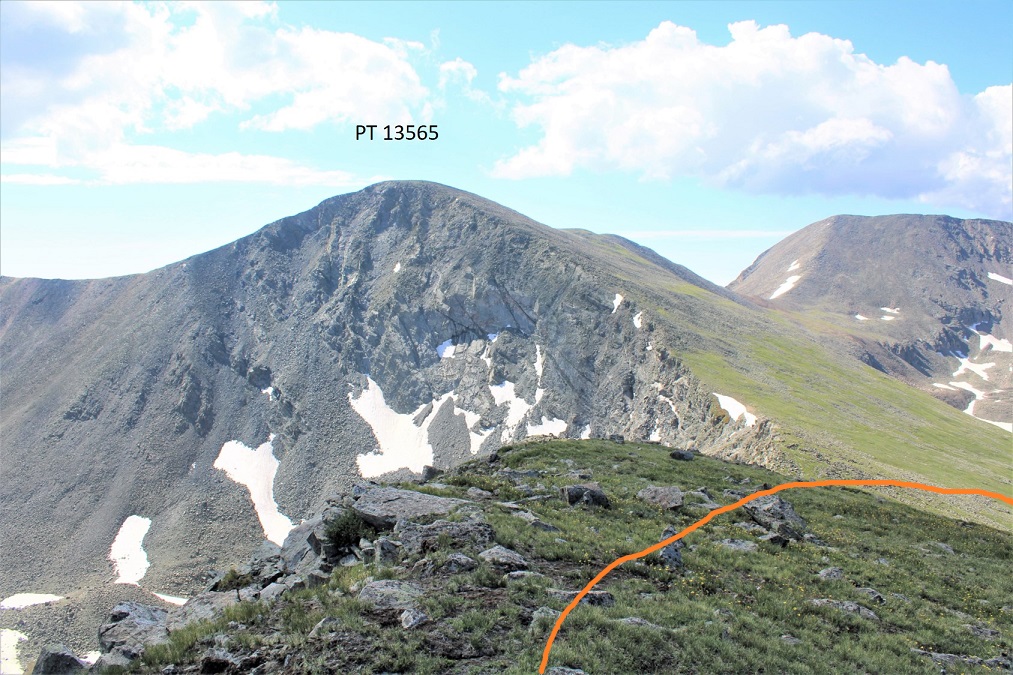
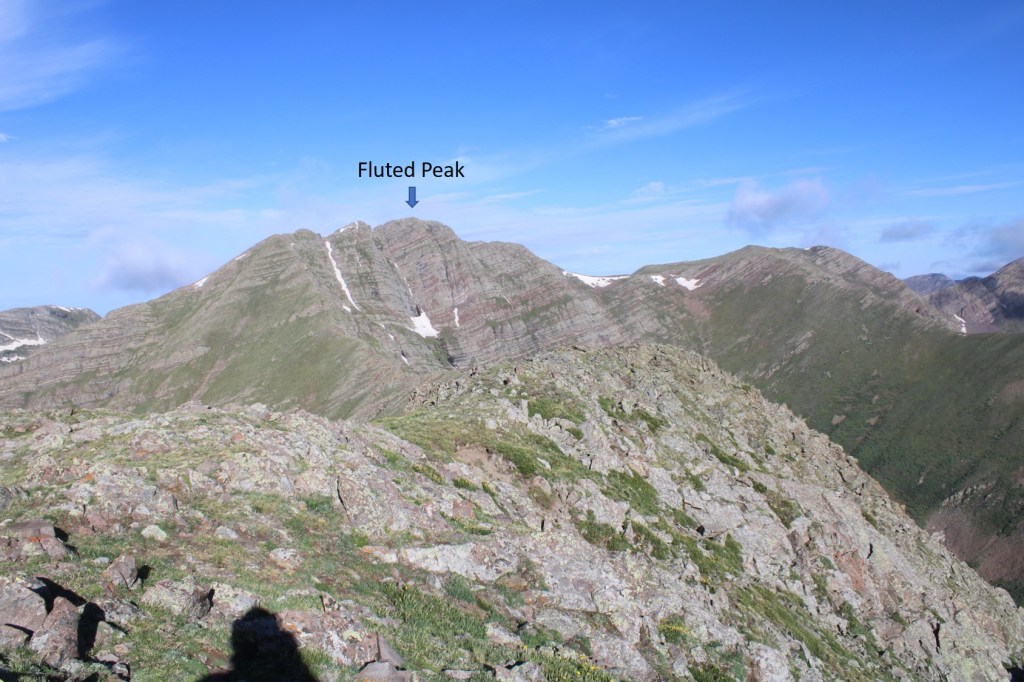
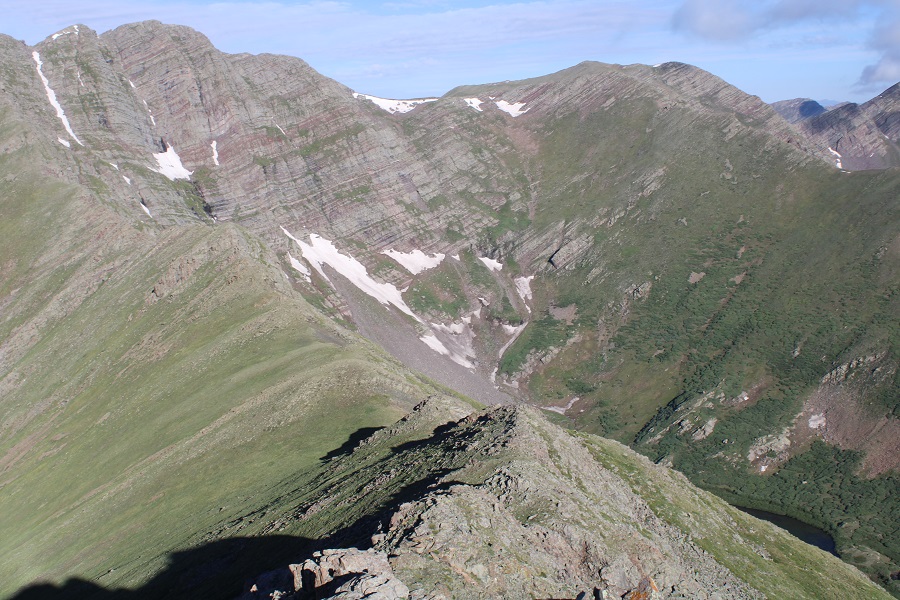
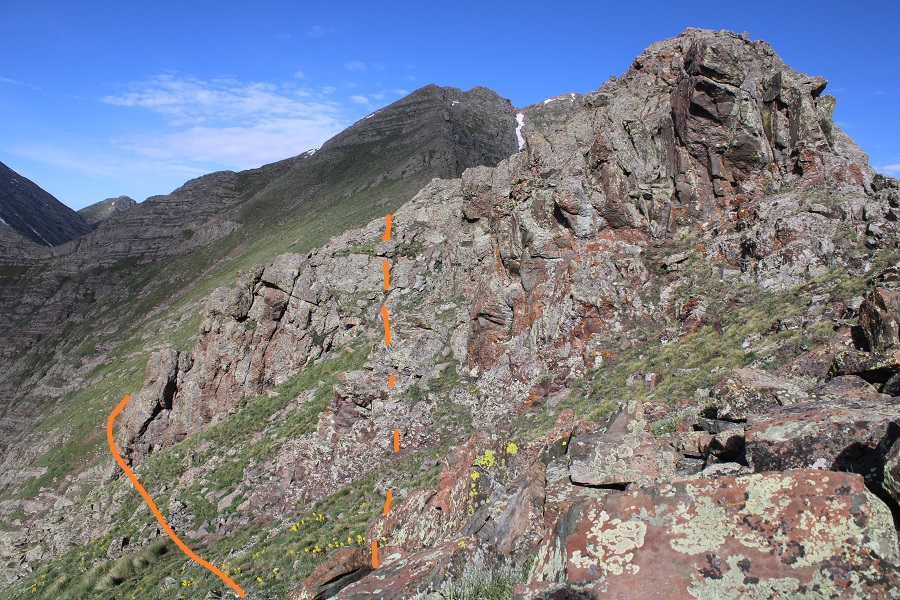
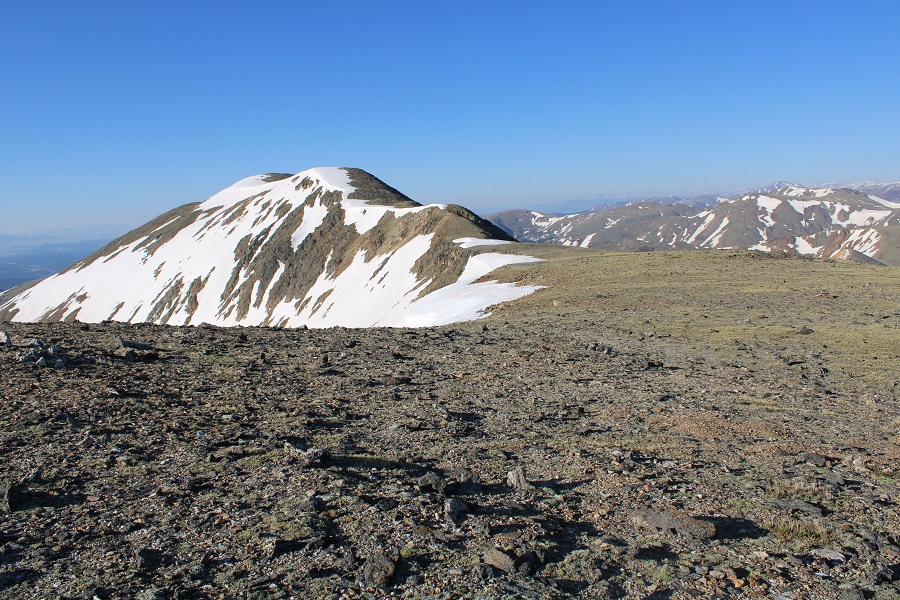
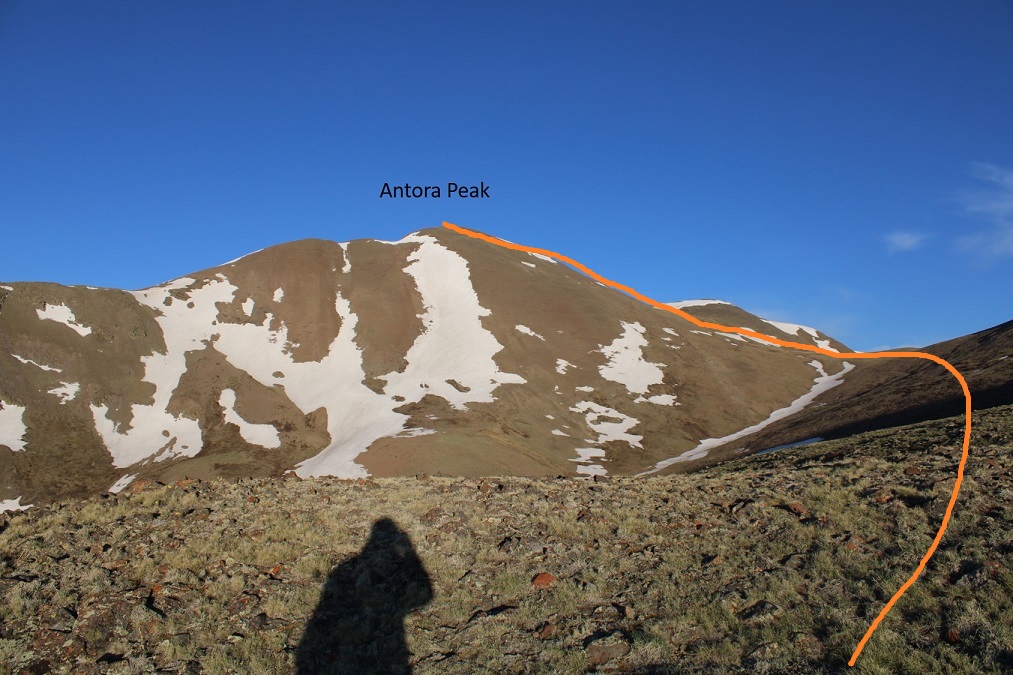
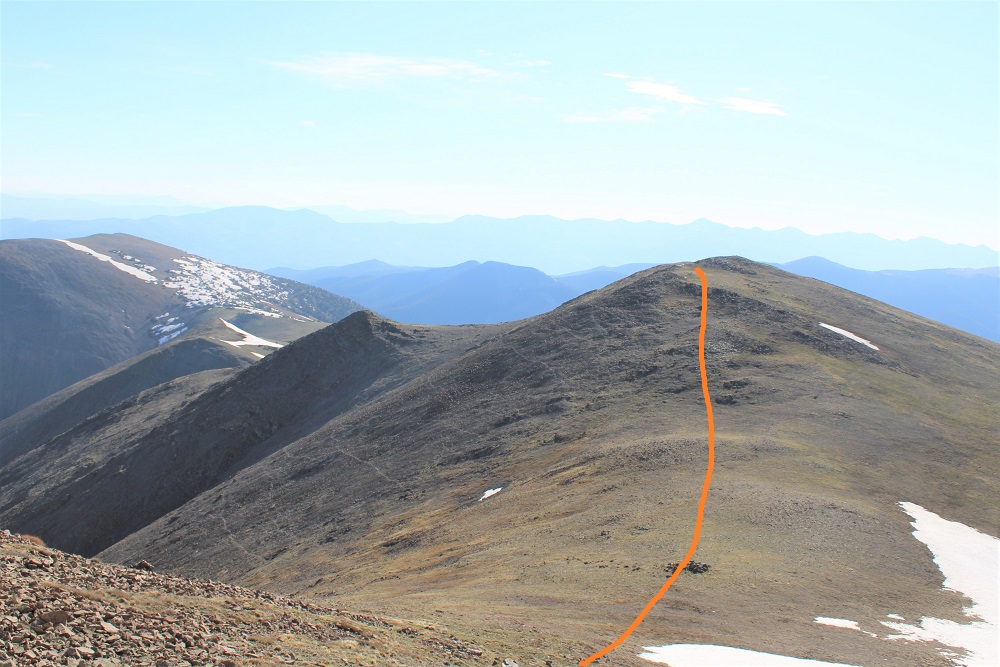
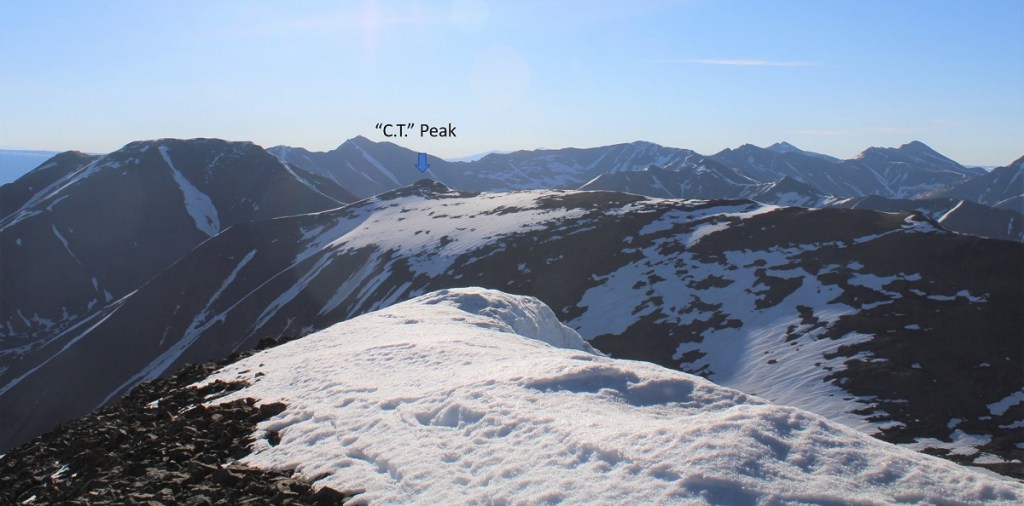
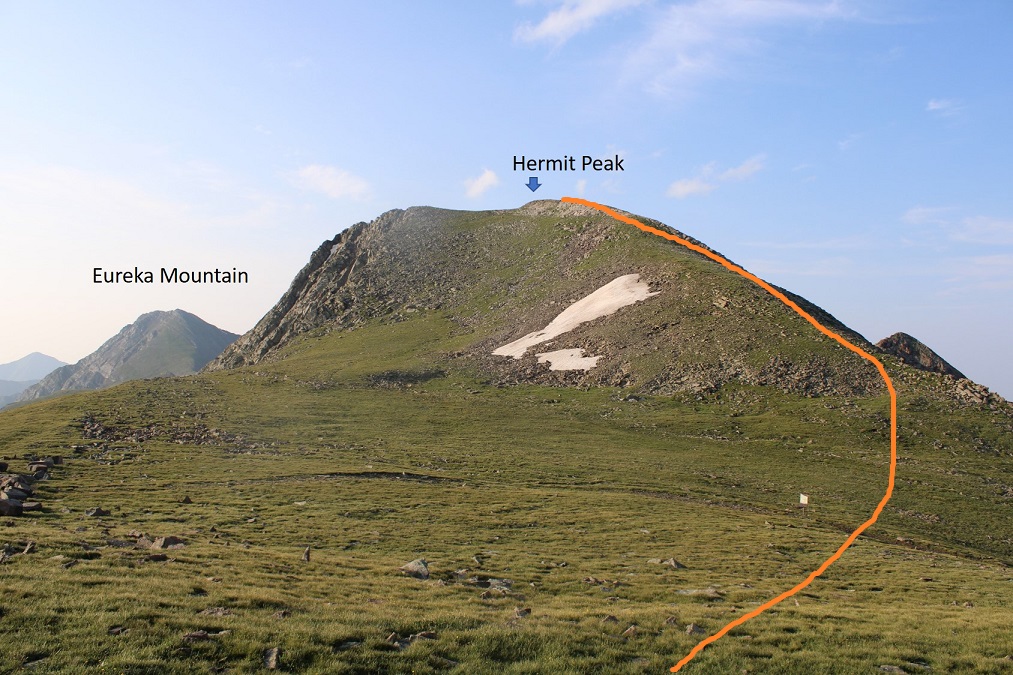
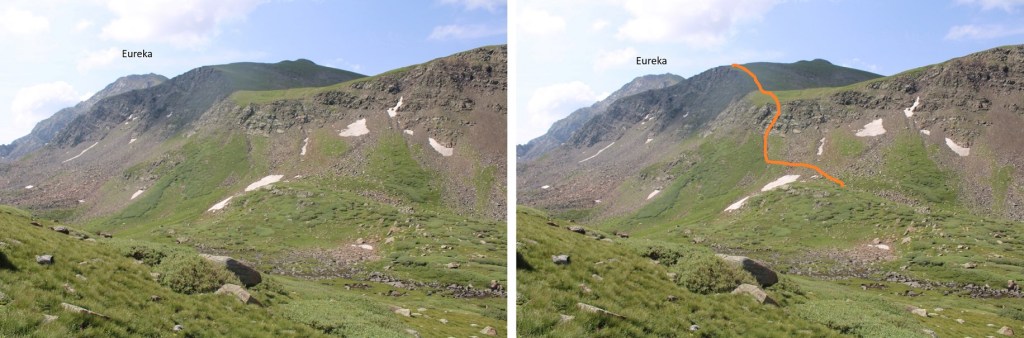
And from that point looking southwest to Eureka.  As you can see, this is another ridge hike

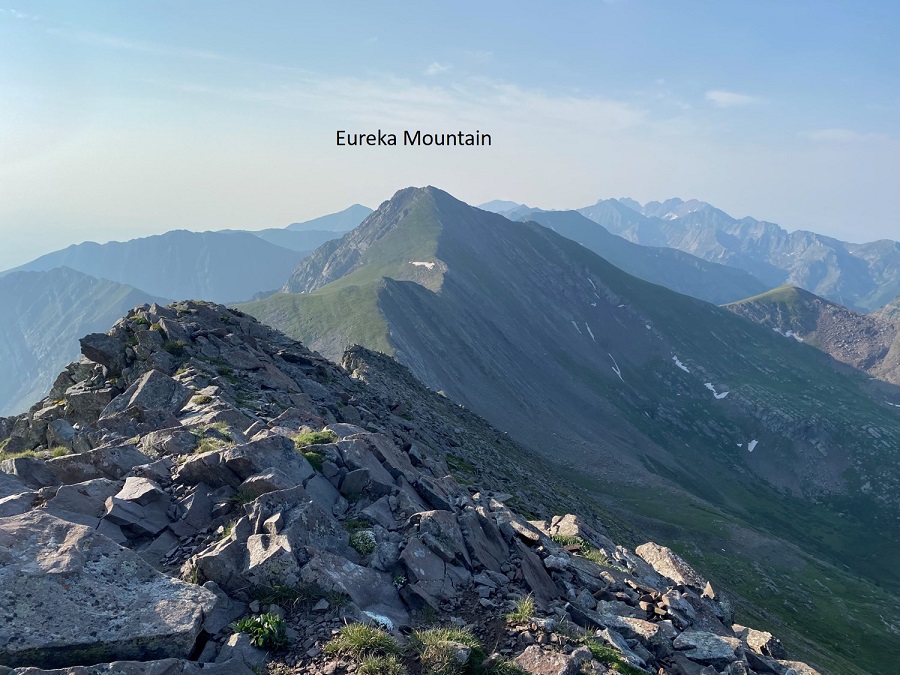
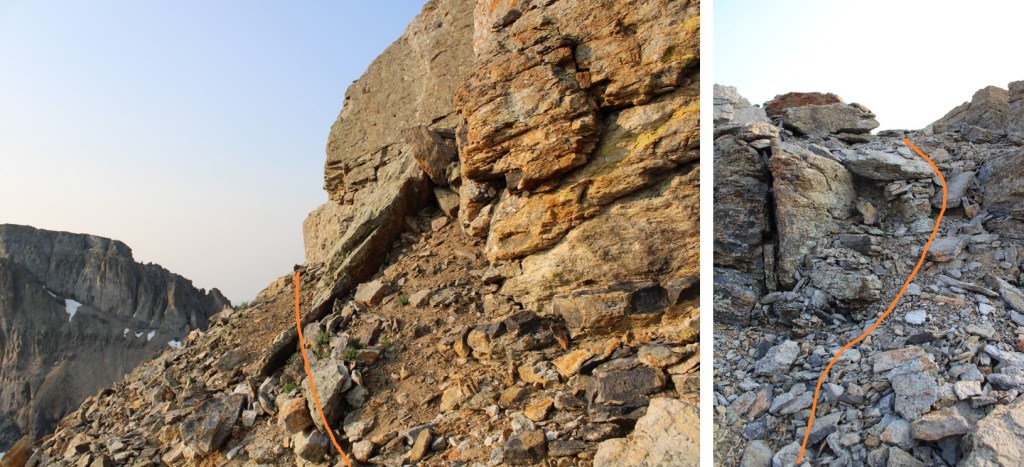
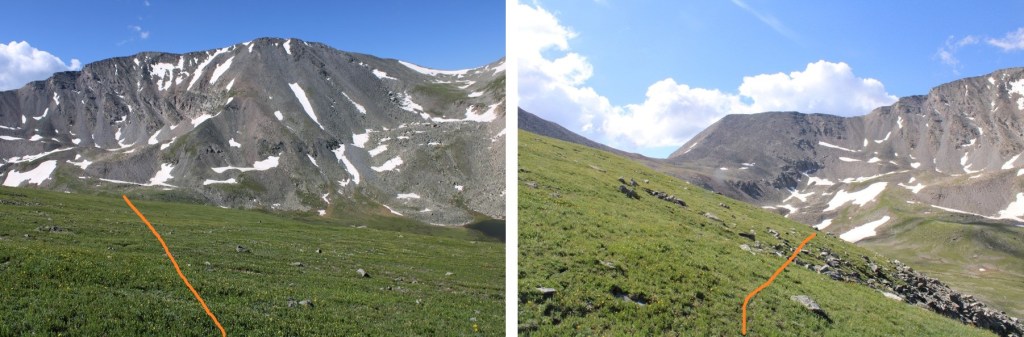
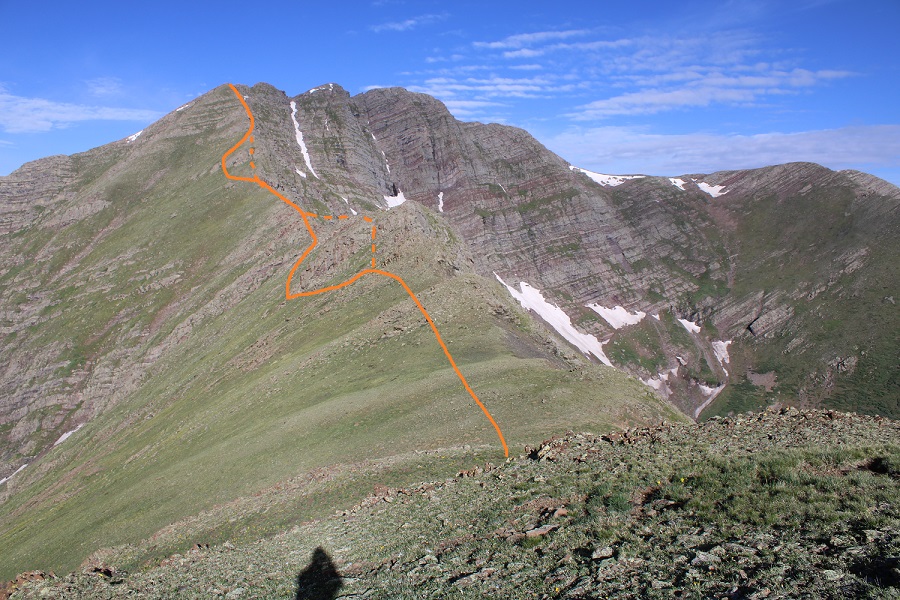
While it might look sketchy, this ridge stays at class 2. First, I descended about 650’ down the ridge

Then ascended 300’

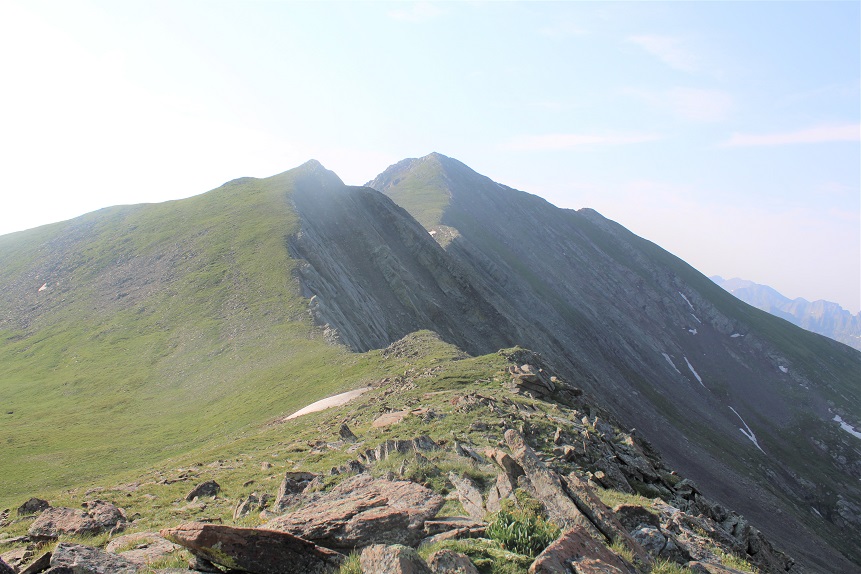
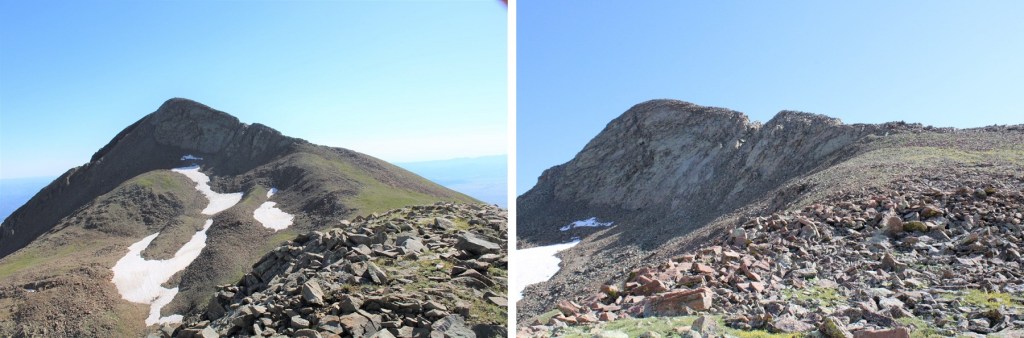
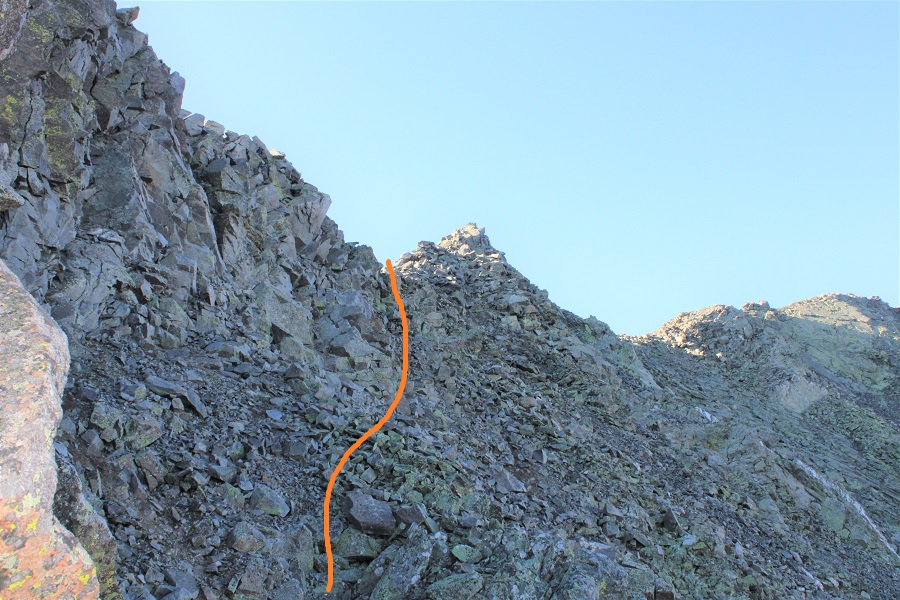
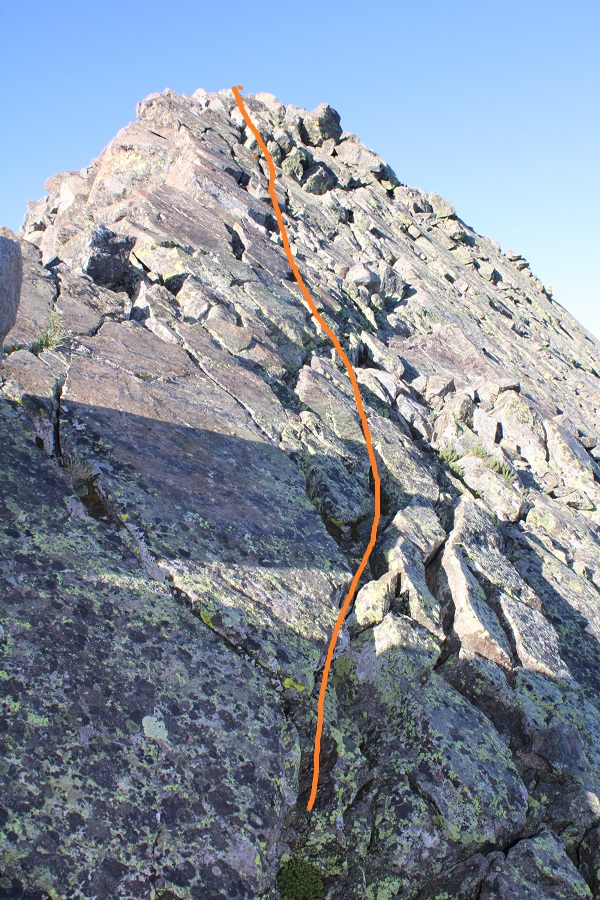
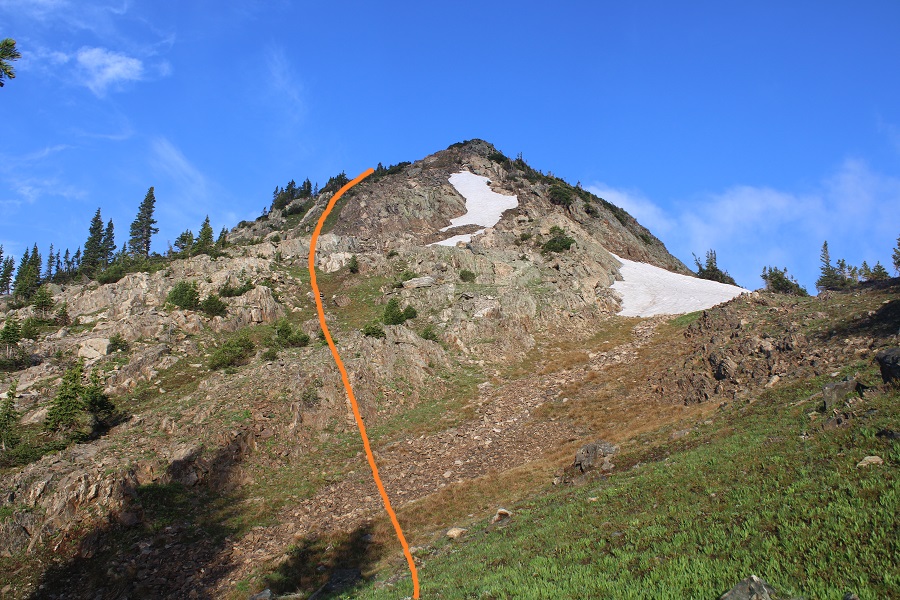
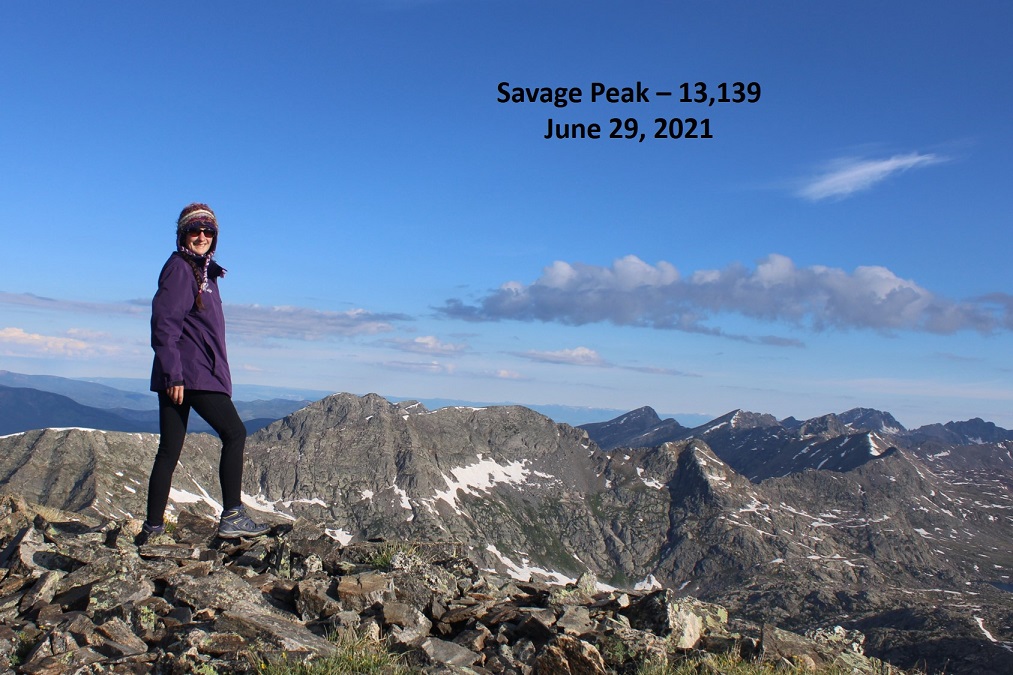
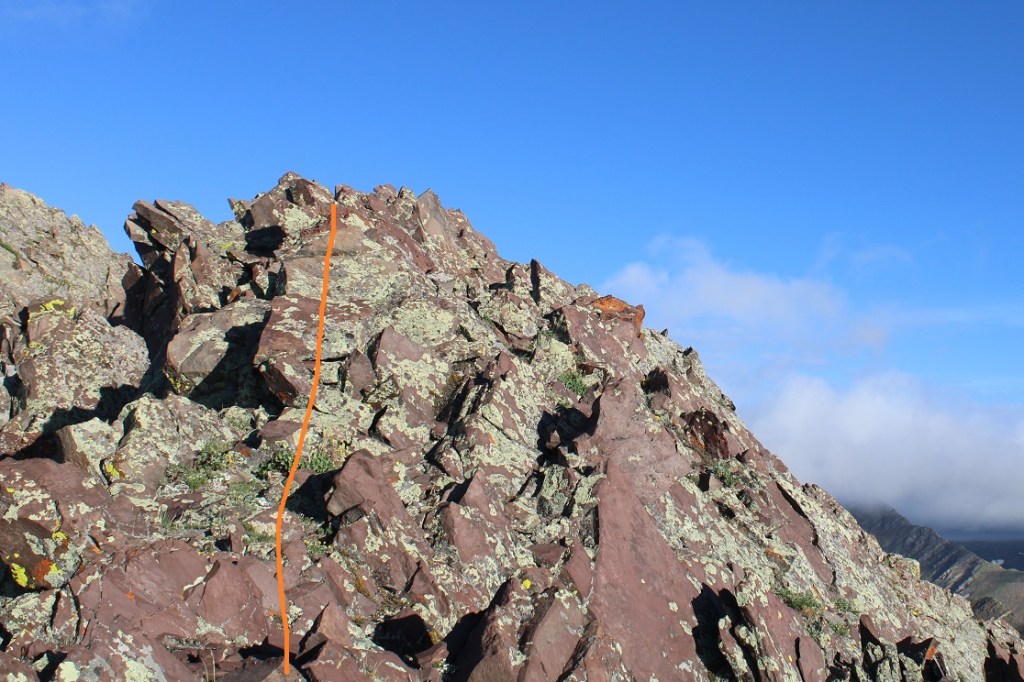
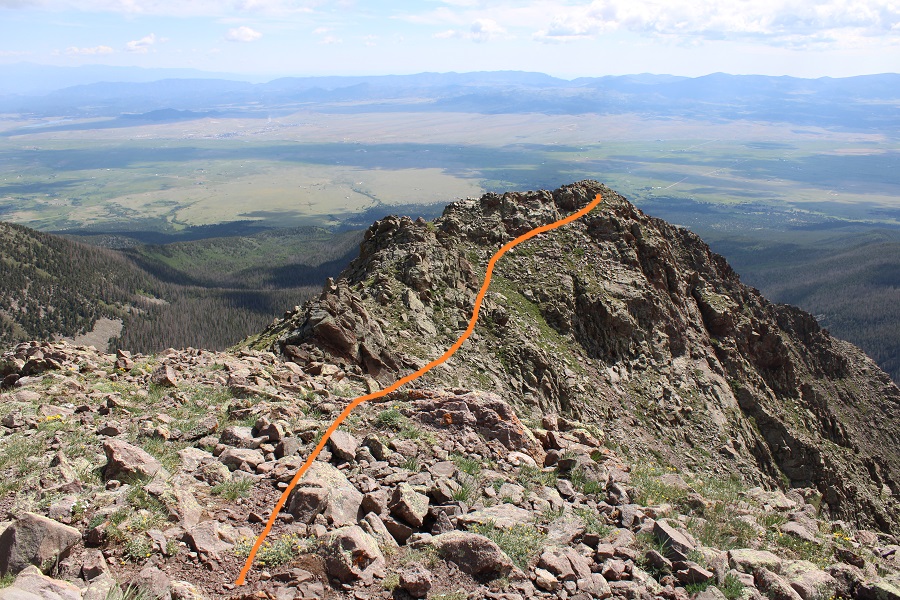
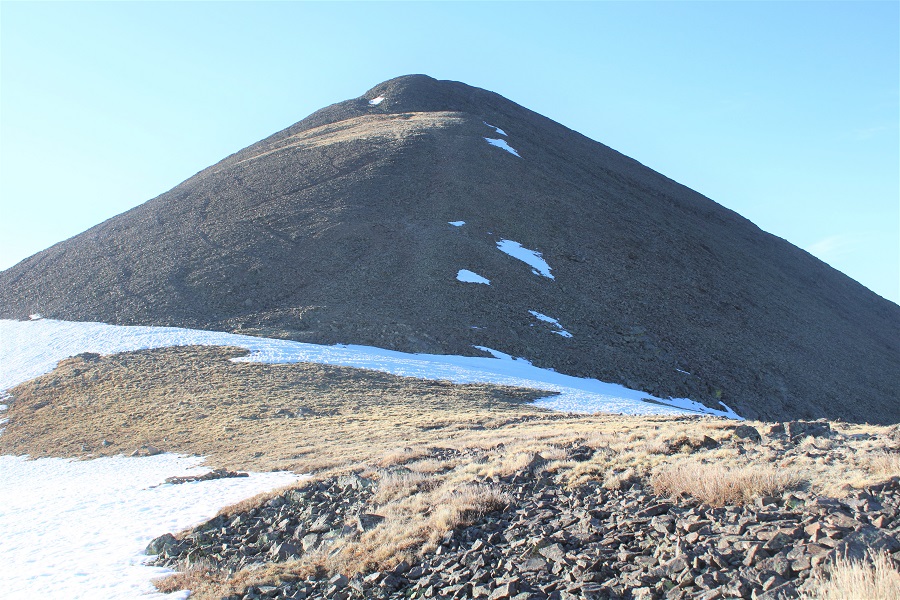
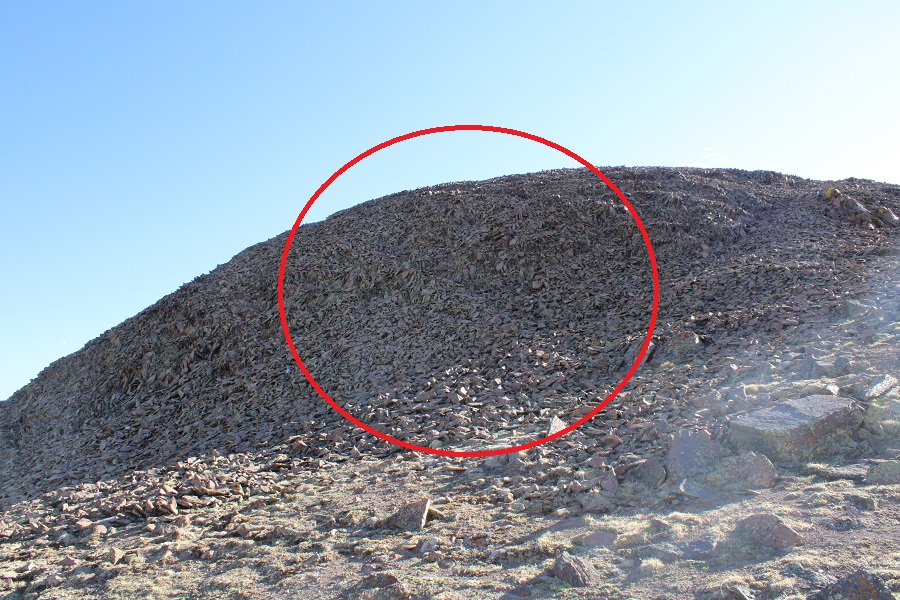
And descended another 150’ before gaining 550’ to reach the summit of Eureka Mountain.  Note the true summit here is also to the west (this will be hard to determine when you’re up there, as it looks like it should be the point further east). 

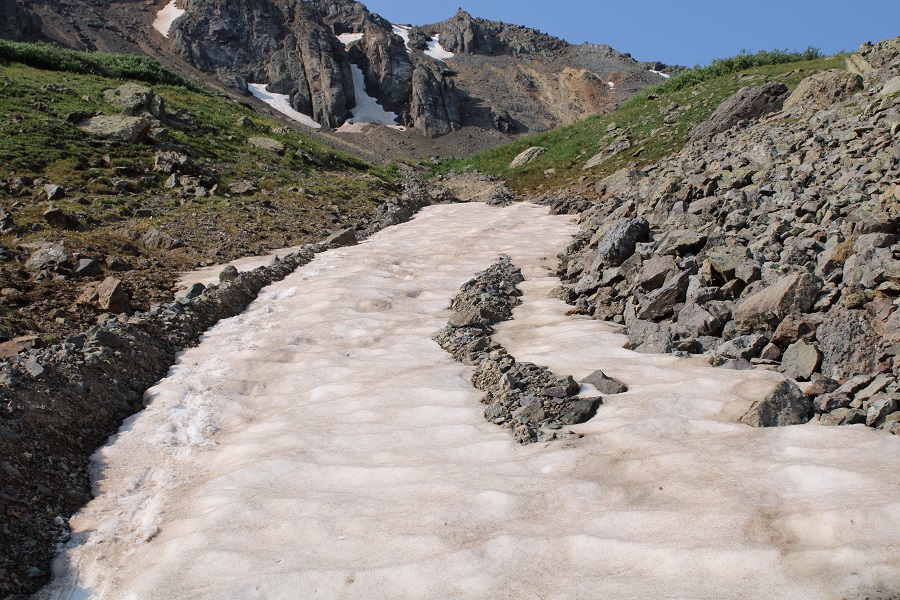
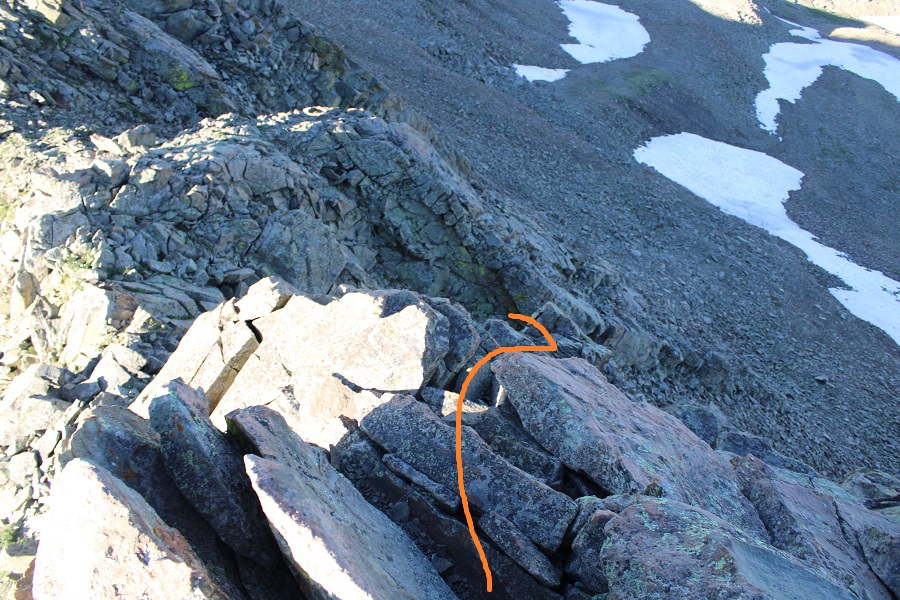
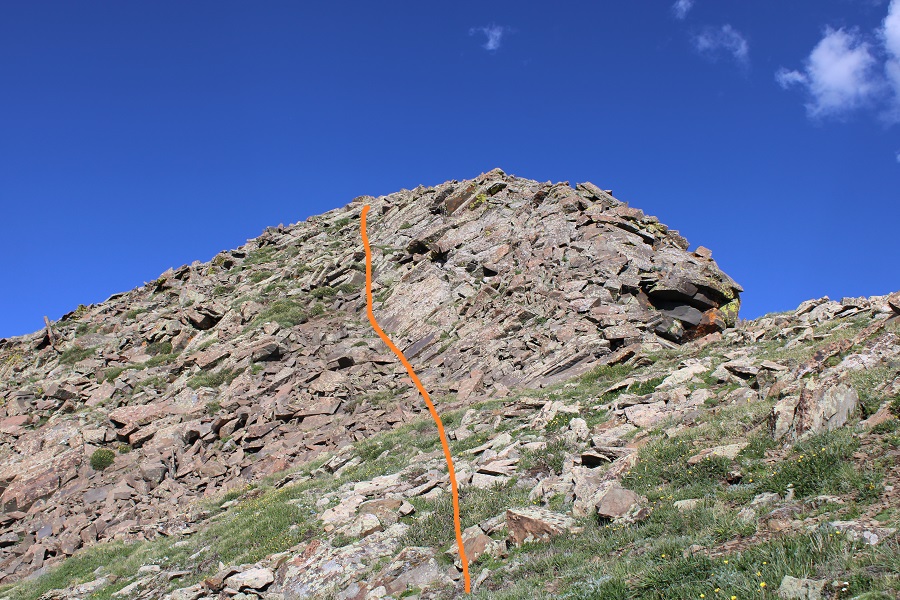
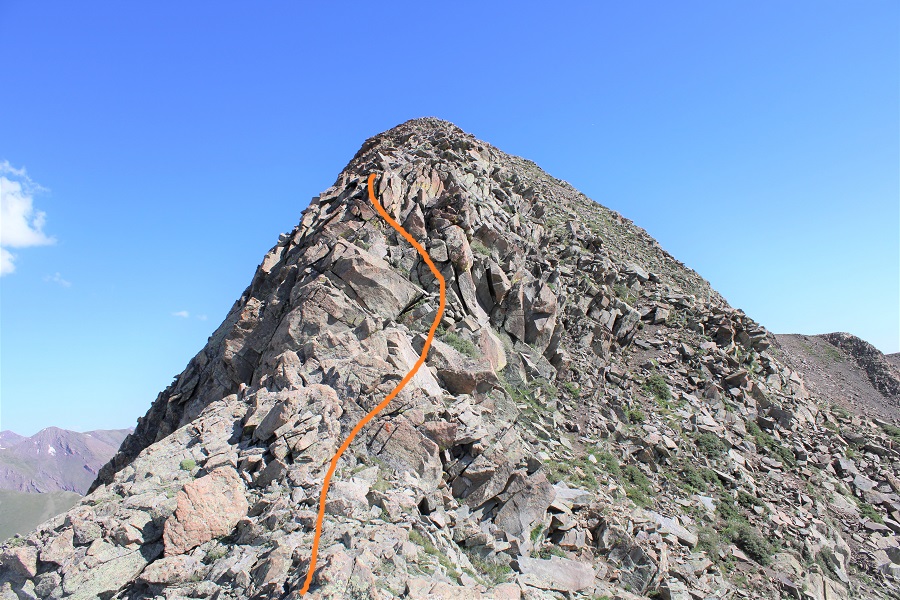
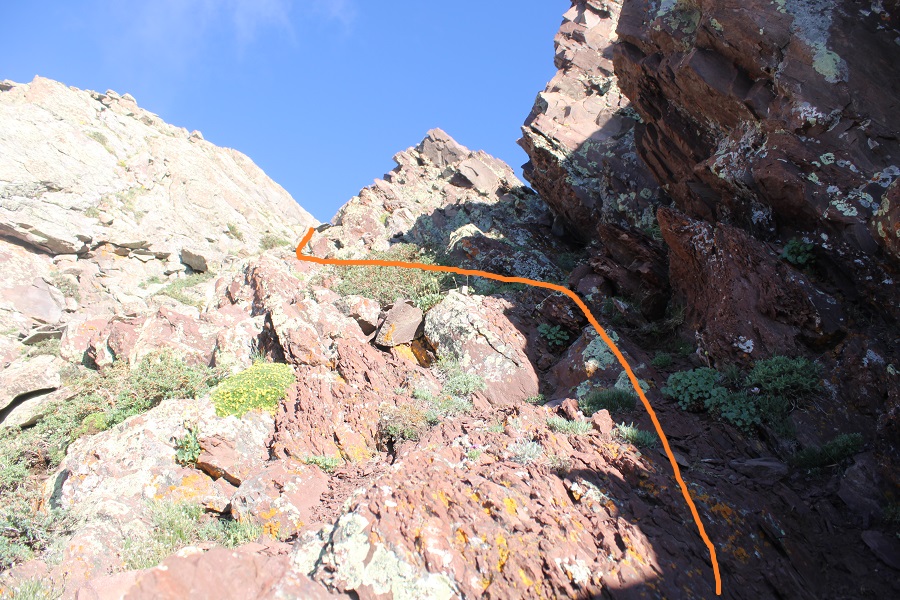
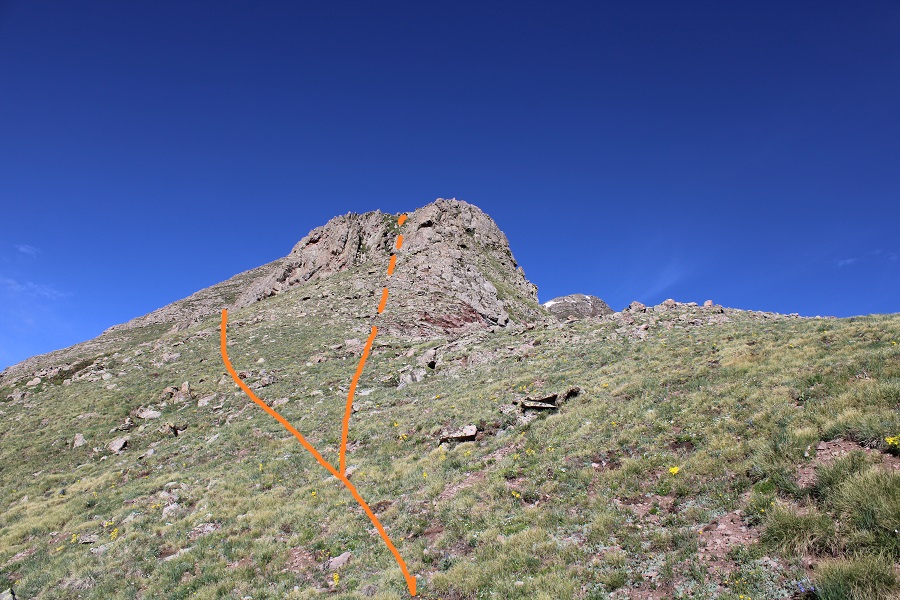
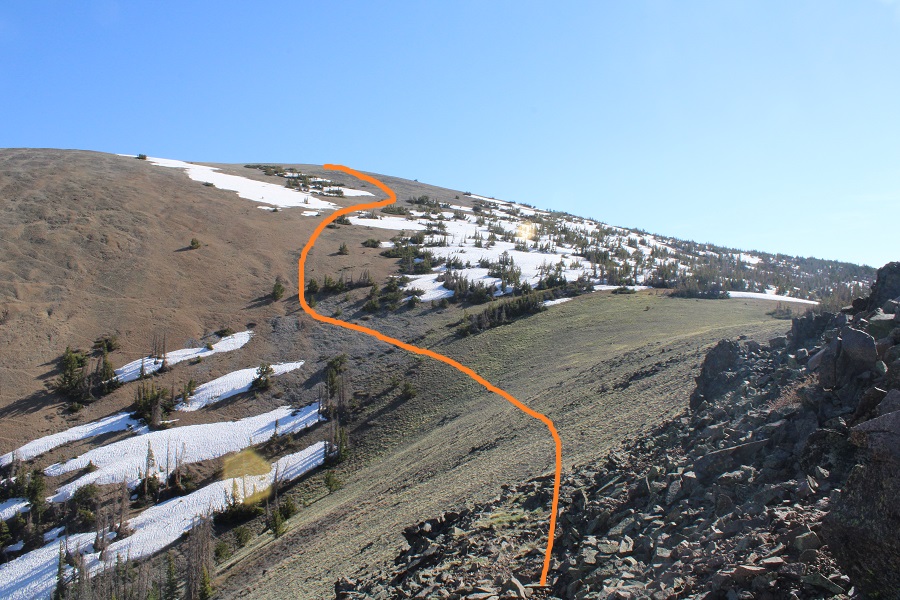
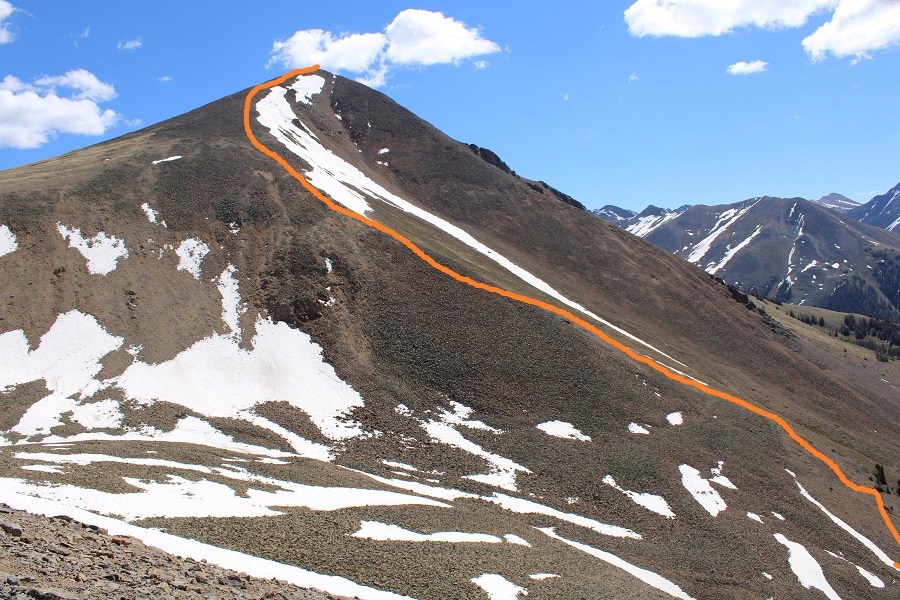
The hike is a tundra/rock ridge hike until the last 20 feet or so.  Here’s the route I took, staying above the snow but below a rock formation on the ridge.  You could also just go straight up the south face.

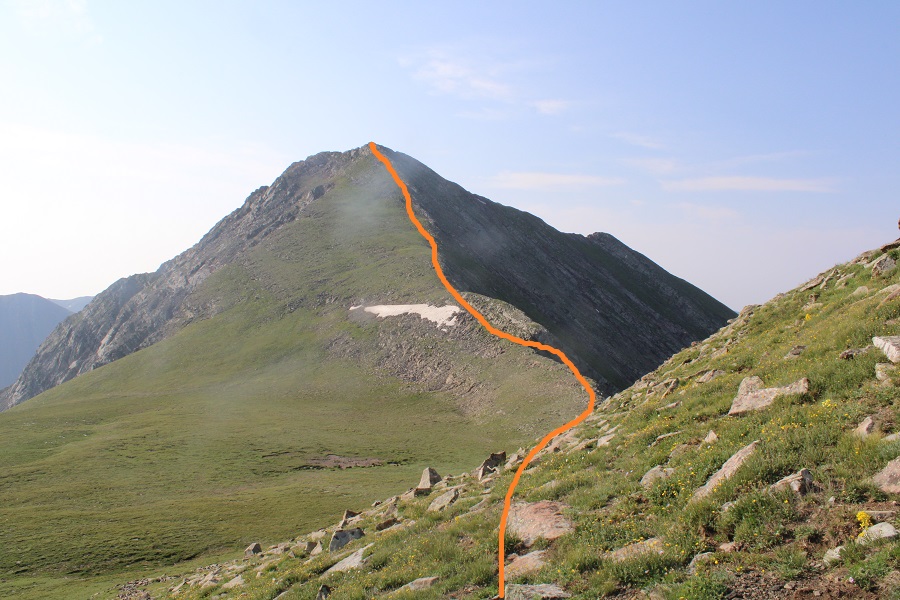
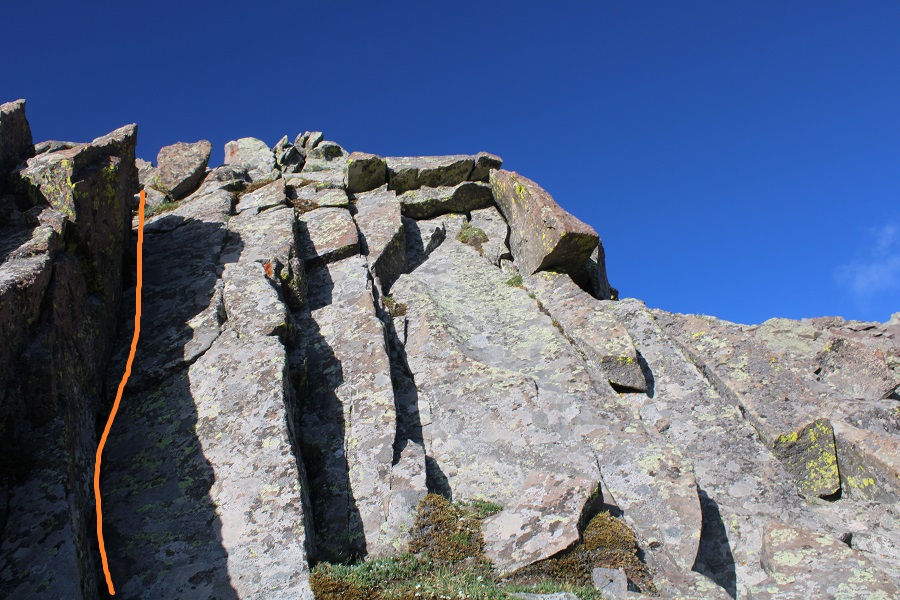
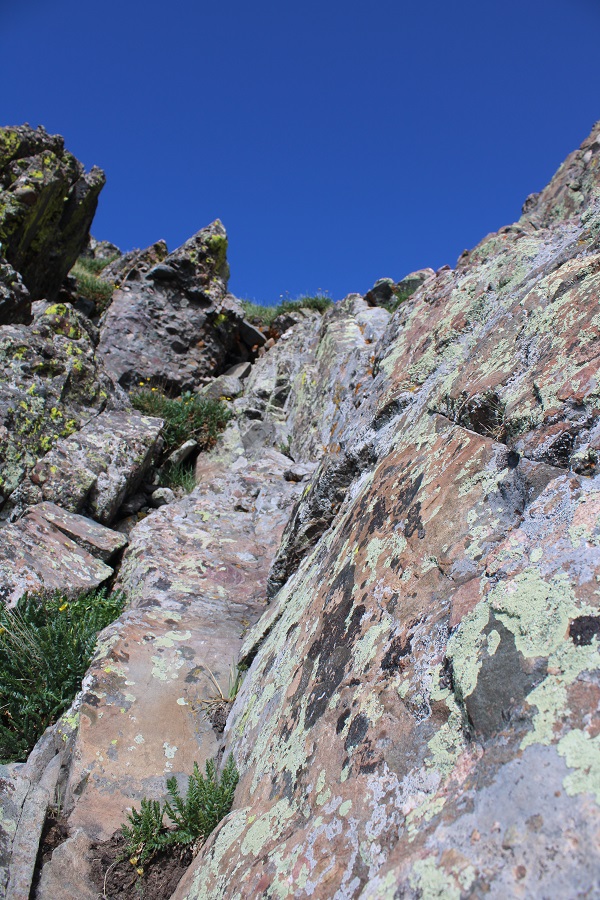
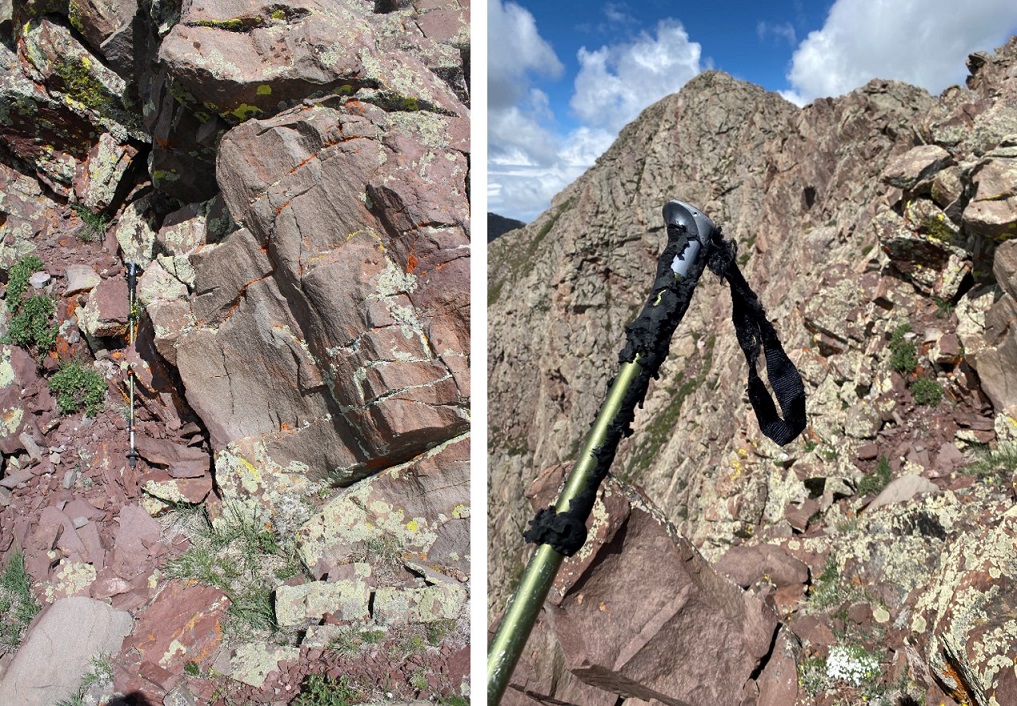
Just before the summit there was a little (very easy) scrambling

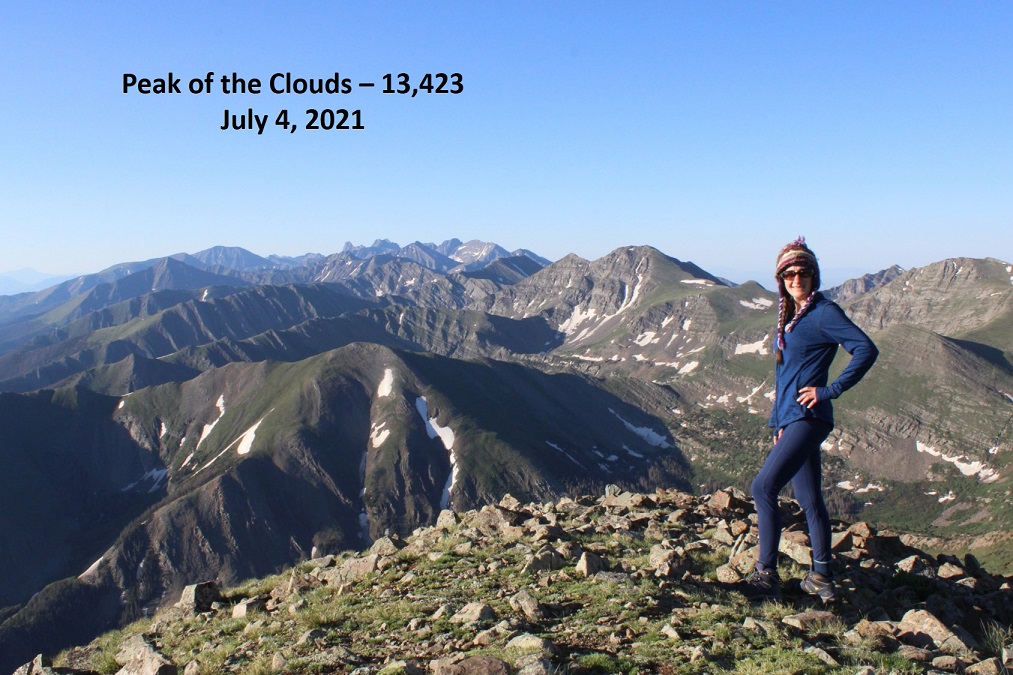
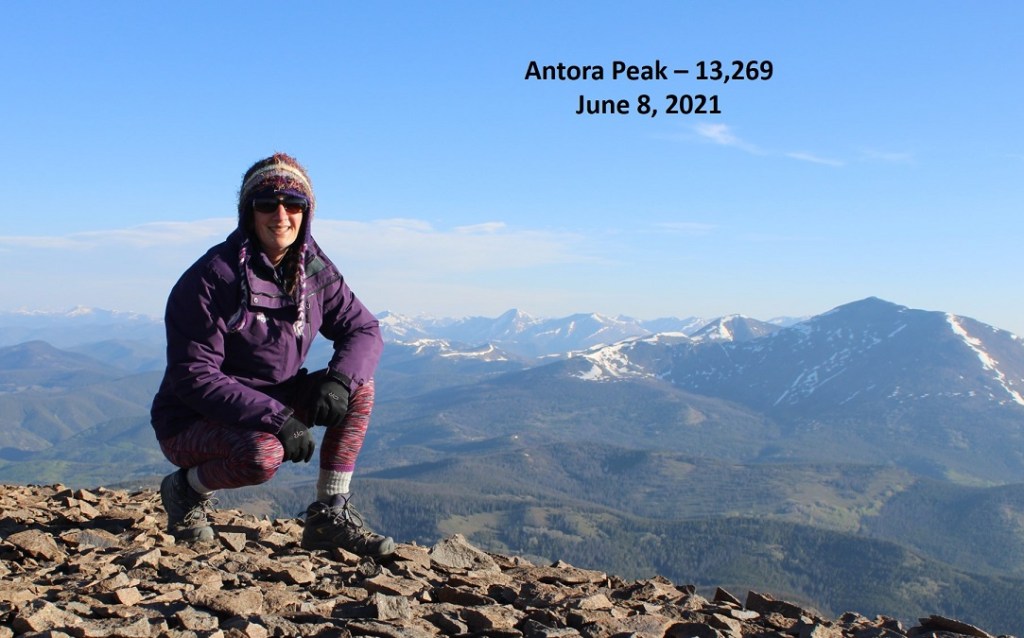
I summited Eureka Mountain at 9am.  It was a small summit, so I sat on it but didn’t stand.  I took a selfie instead of setting up my camera.

Eureka Mountain: 

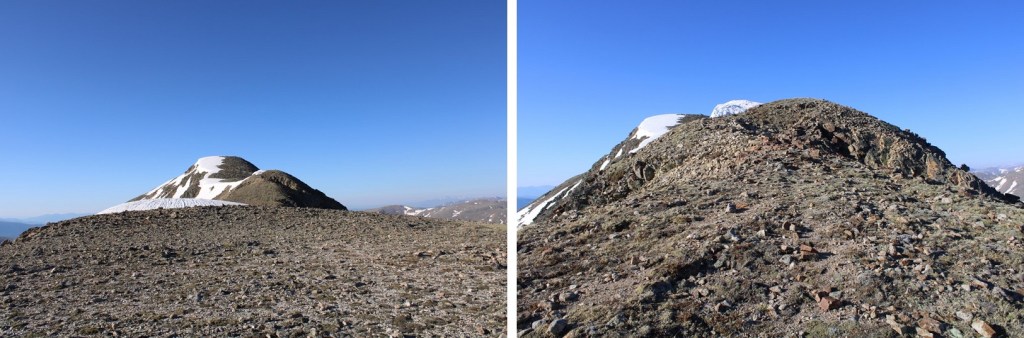
From here you can see, looking east, how it looks like that might be the summit. I wanted to be sure, so I hiked over there (sketchy class 2)

This area was actually lower, but gave me a good view of the true (small) summit of Eureka

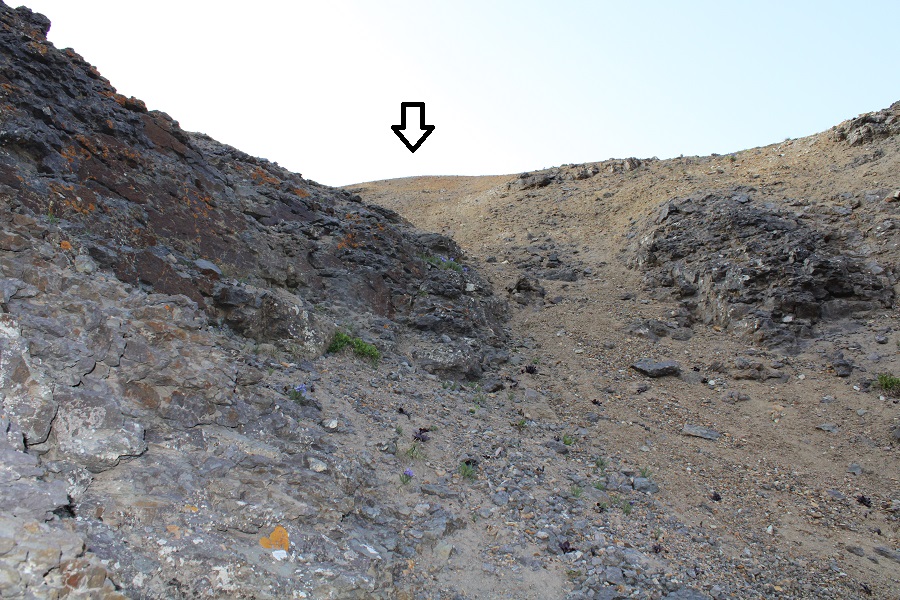
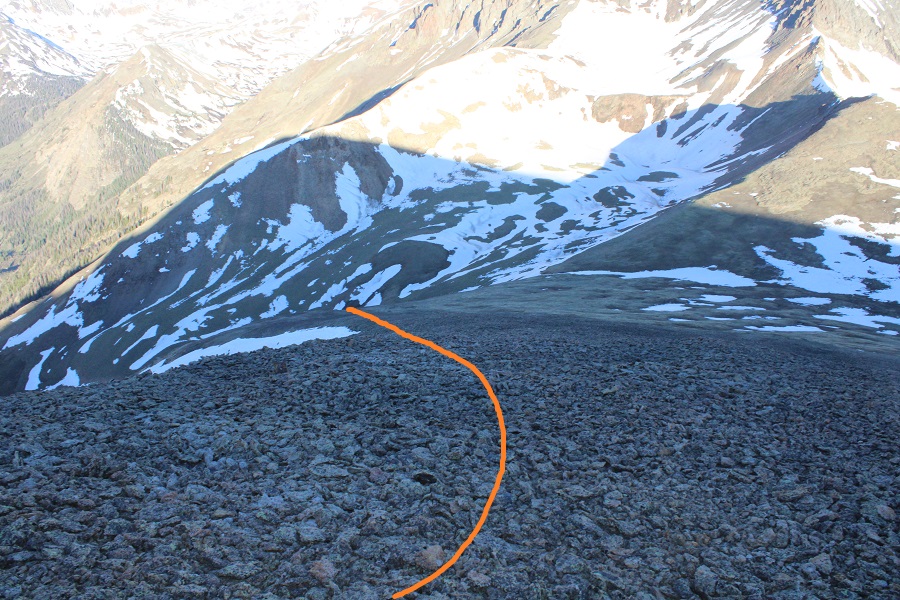
I made my way back to the true summit and headed back down the ridge the way I came, eventually heading towards the red arrow.

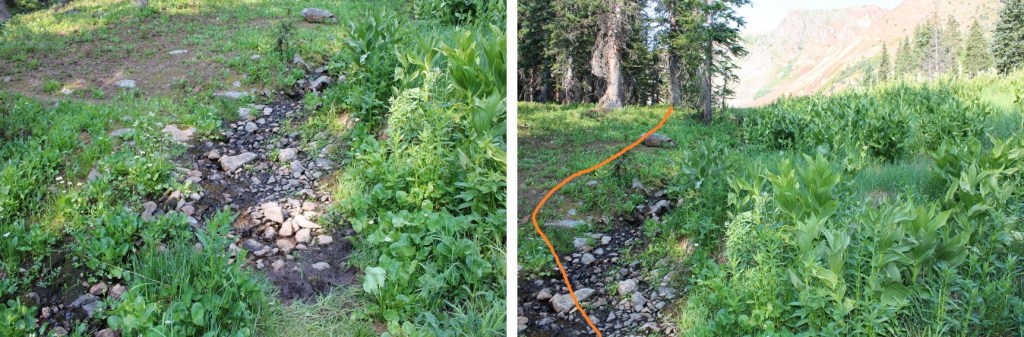
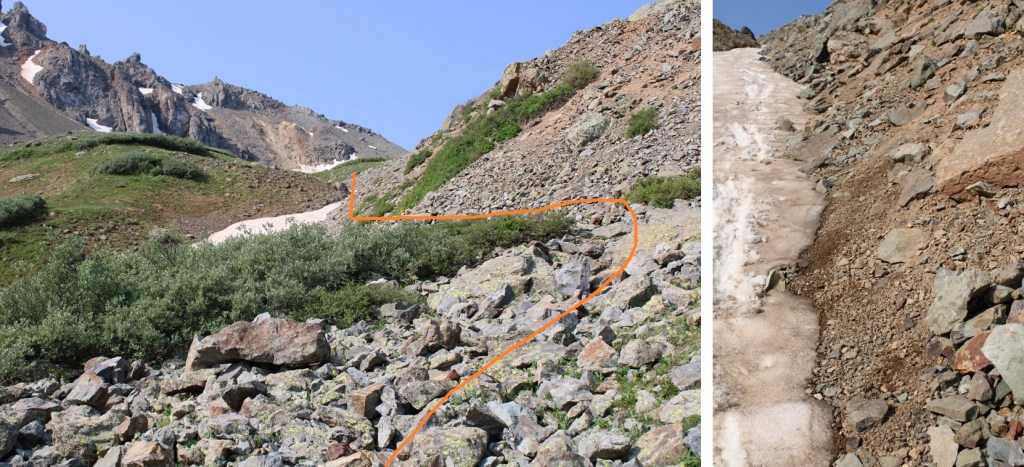
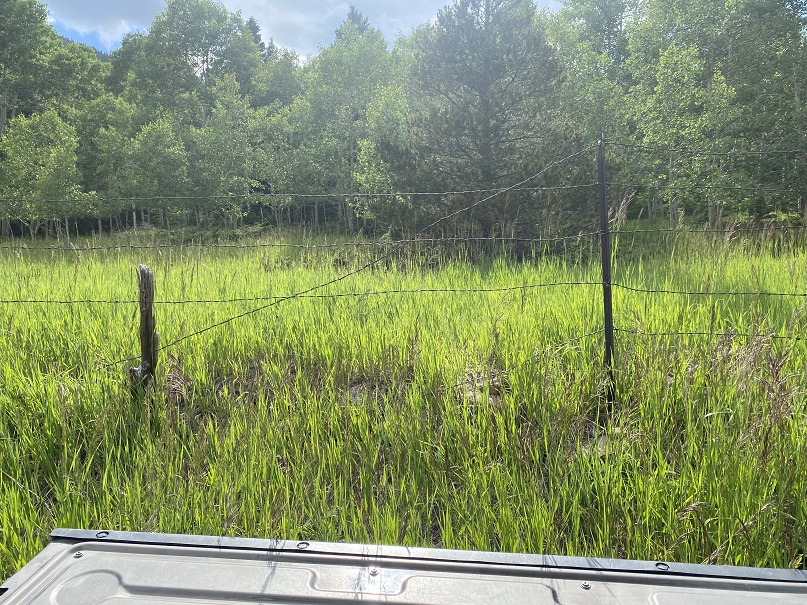
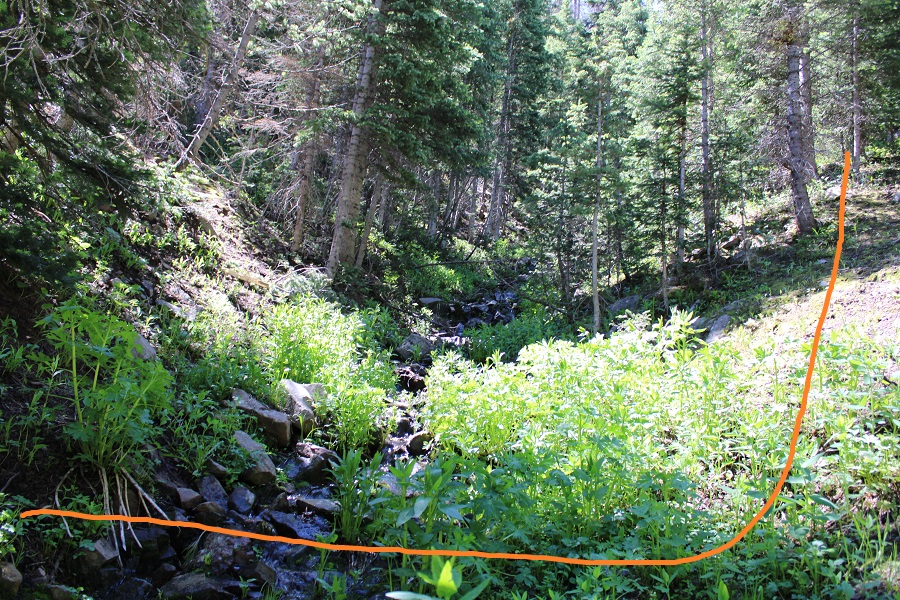
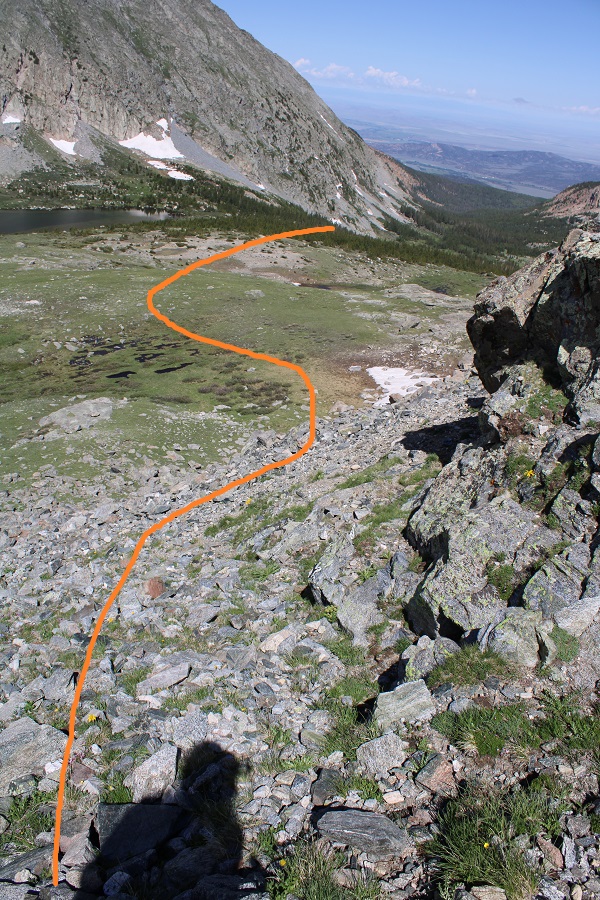
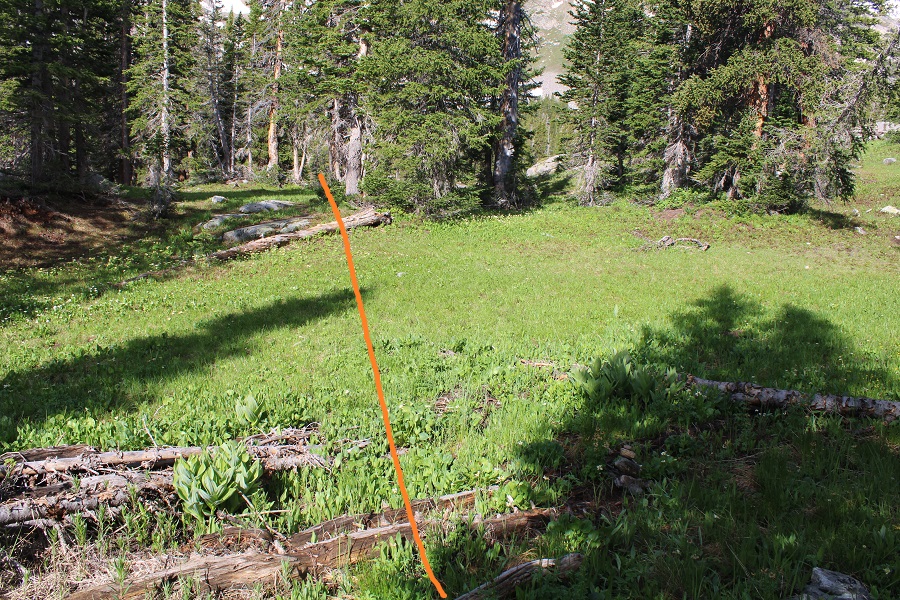
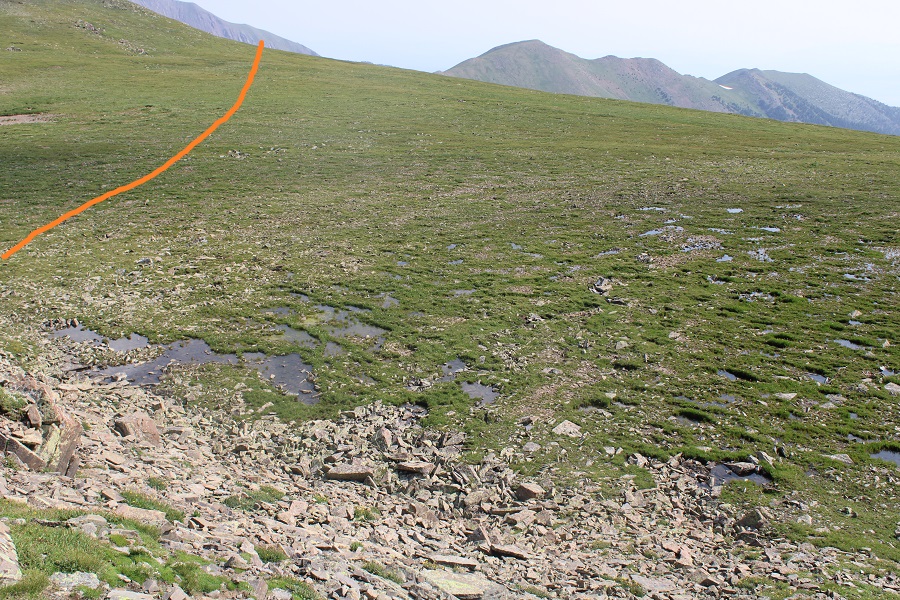
I stayed on the ridge to avoid the marshy area, which didn’t look like a fun time.  Once above the marshy area I cut across the tundra to the east side of the mountain

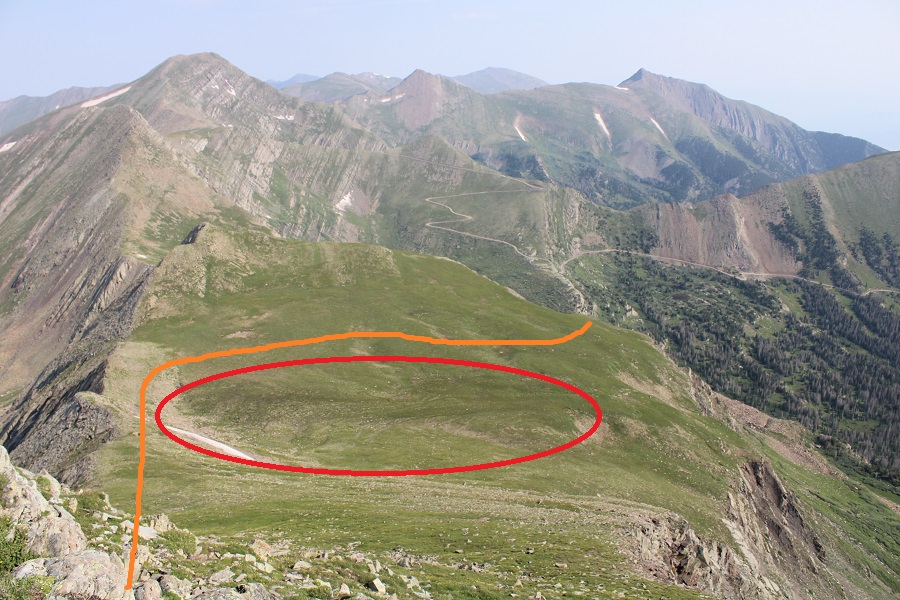
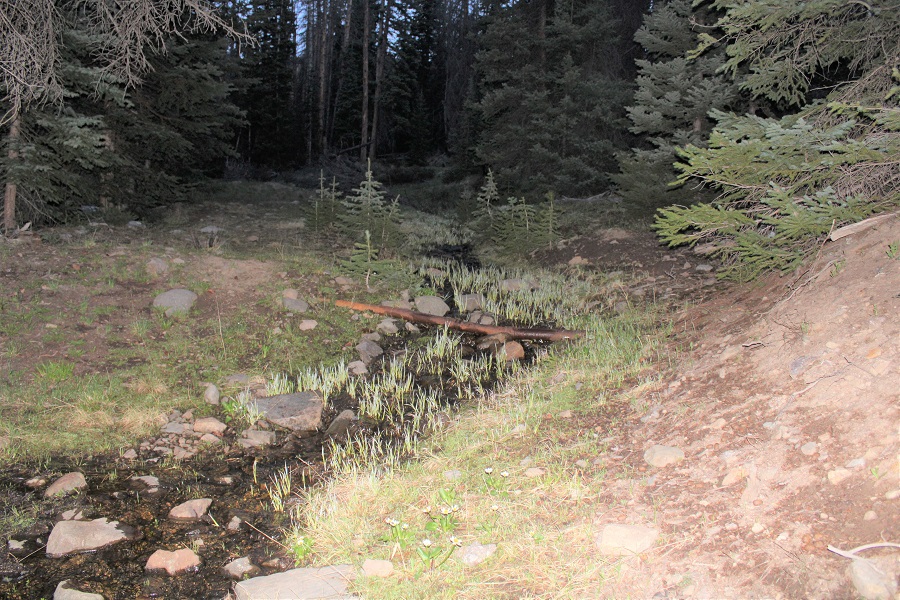
Here’s a closer look at the wet area, and my route across

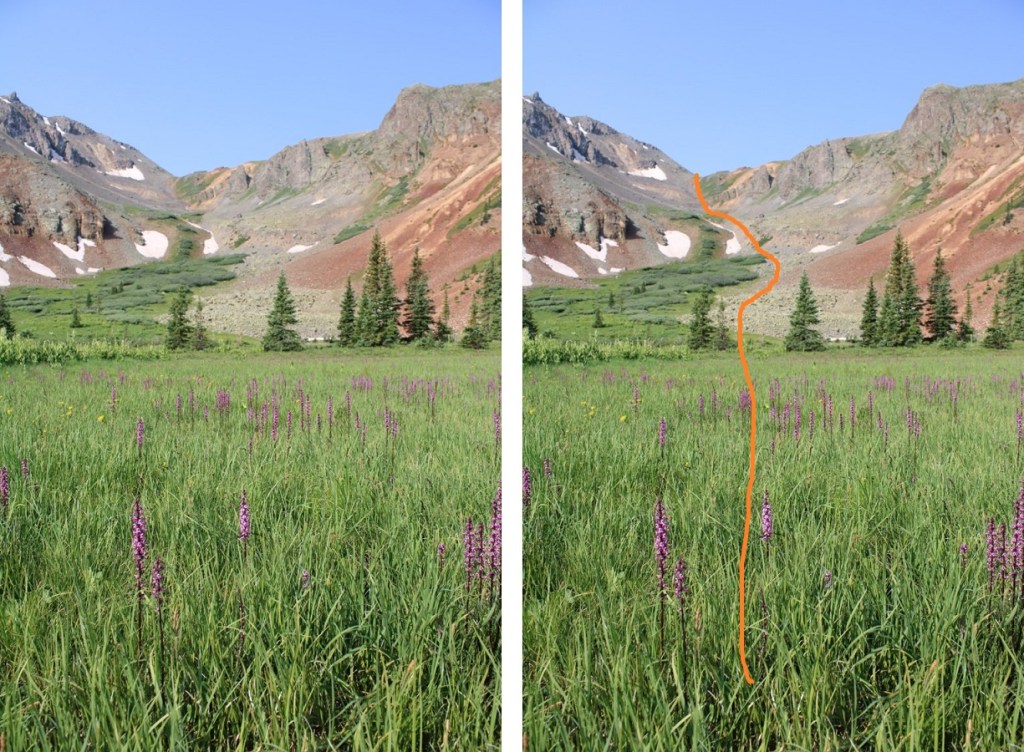
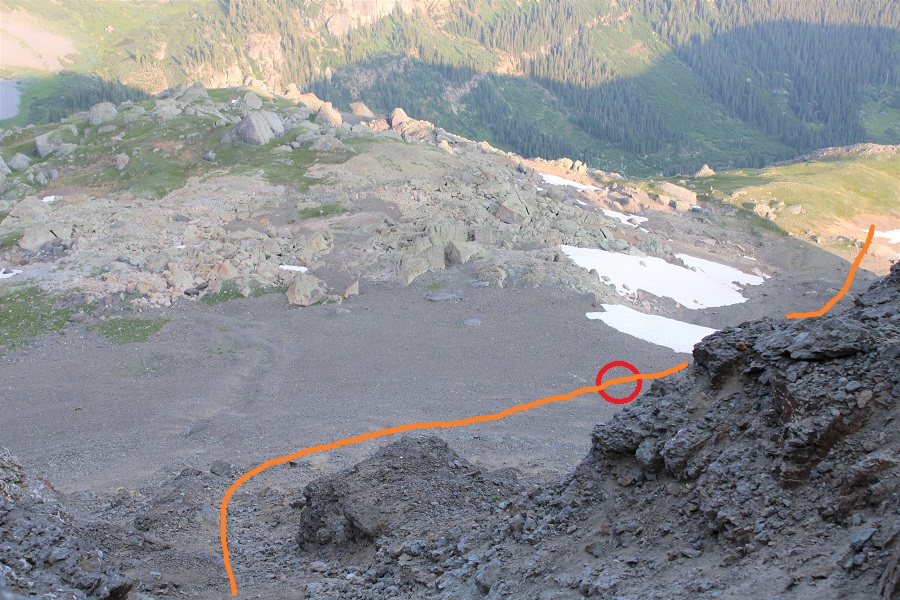
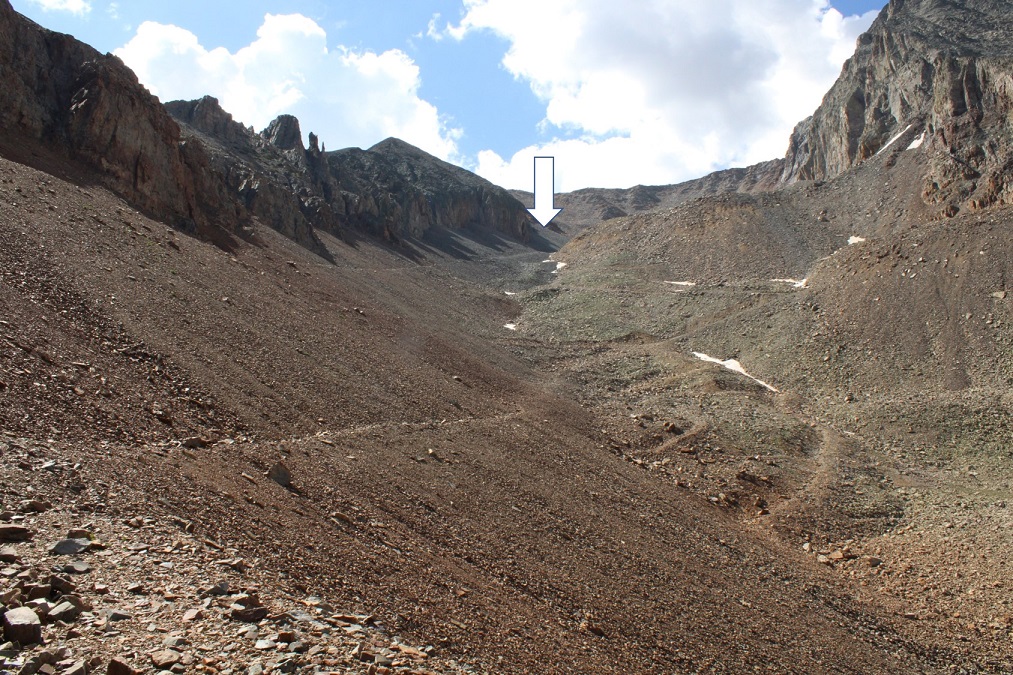
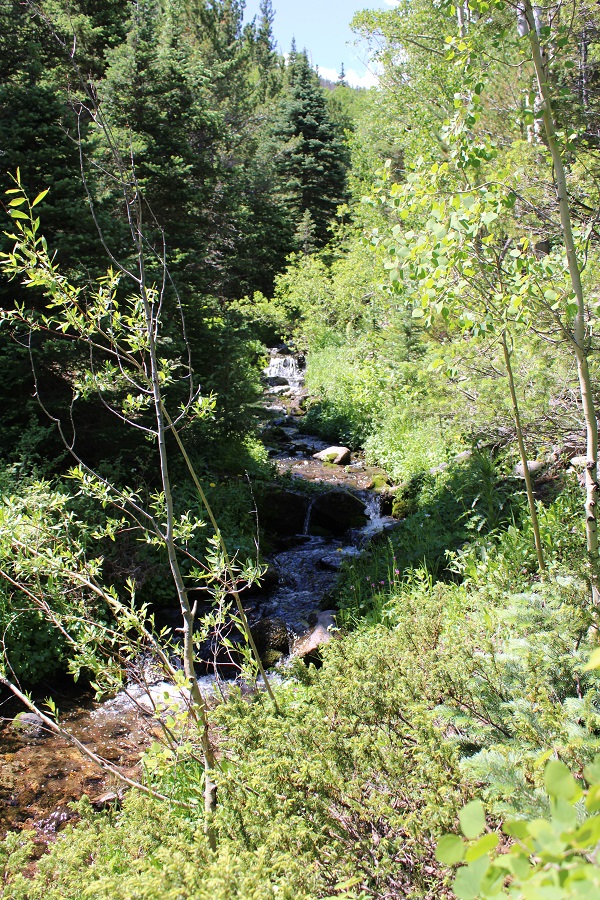
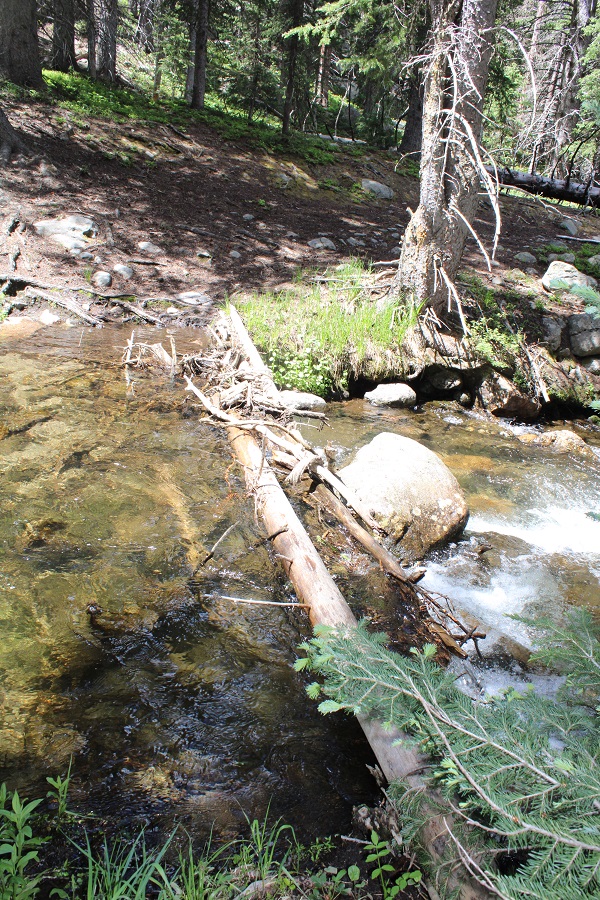
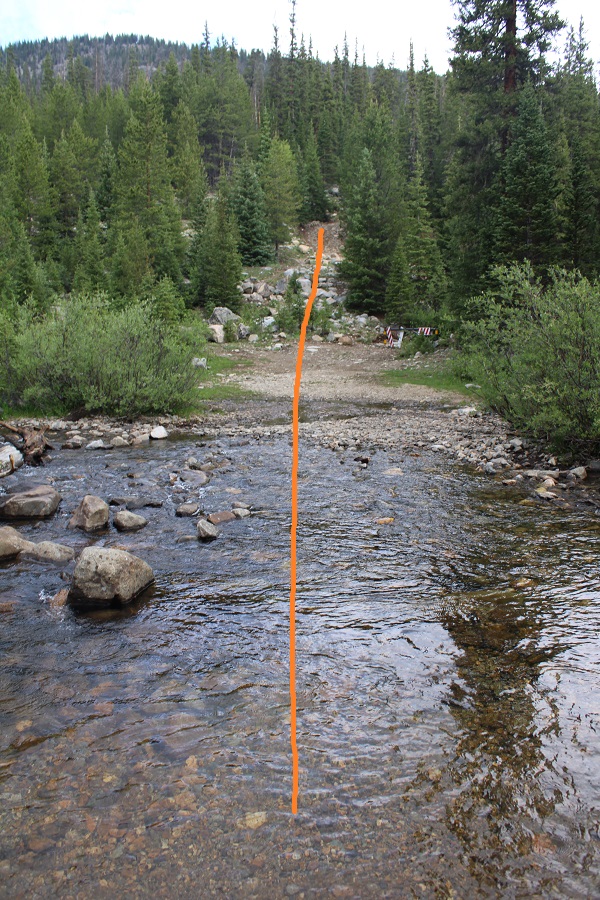
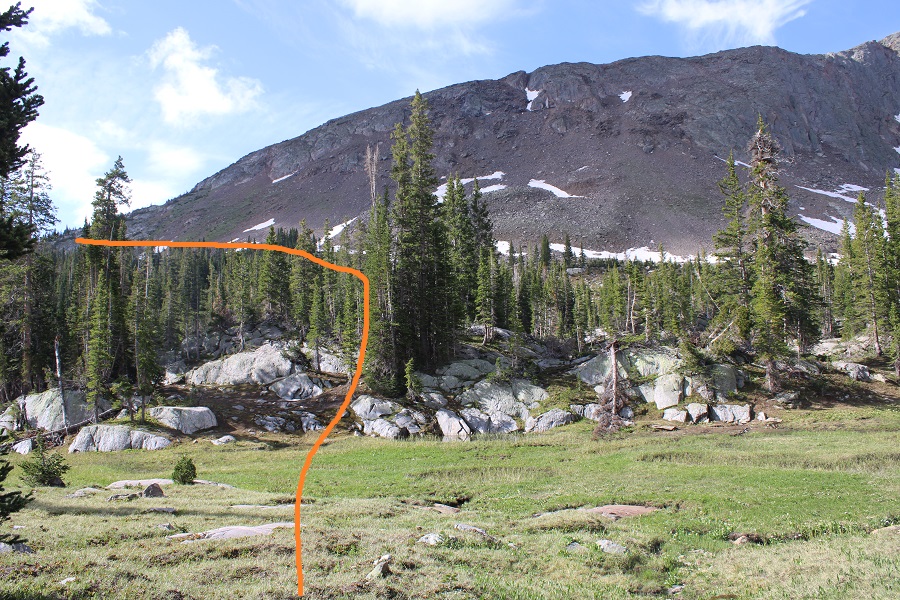
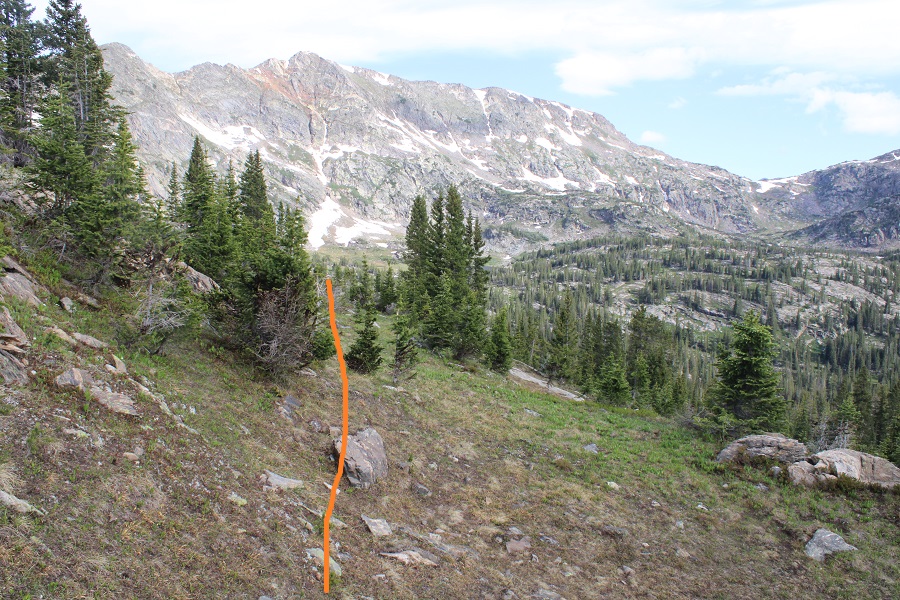
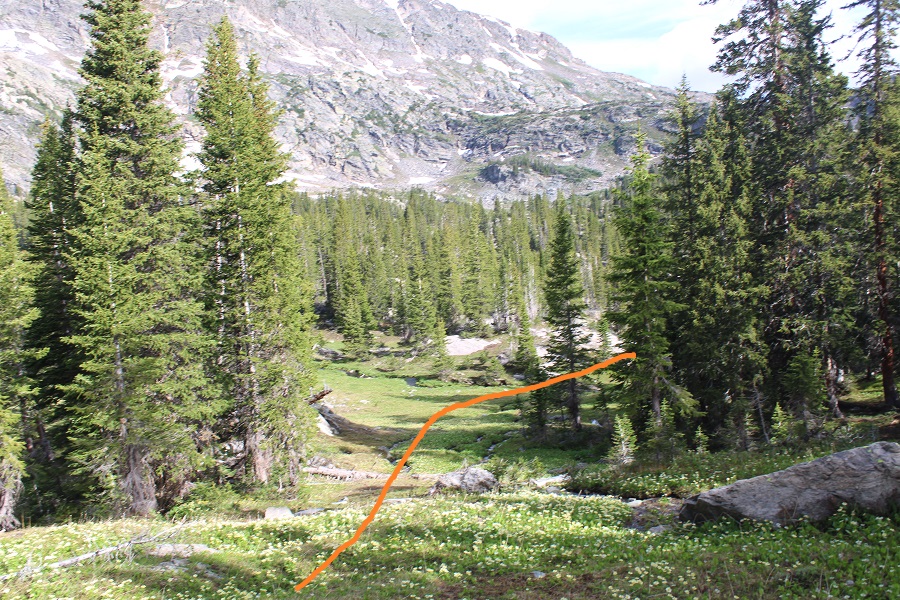
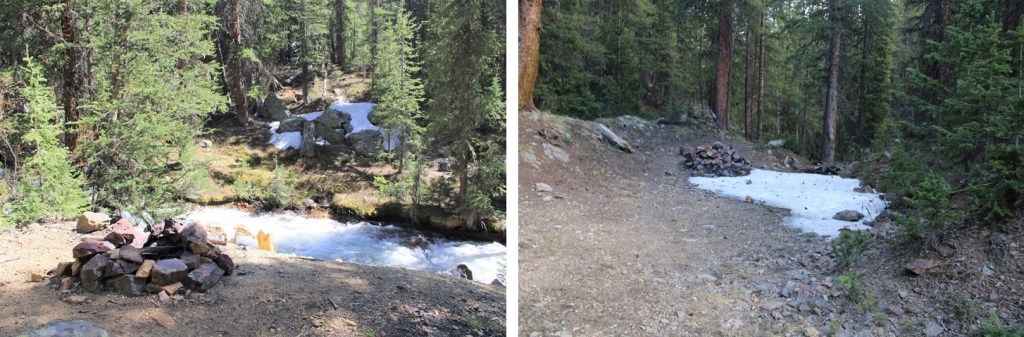
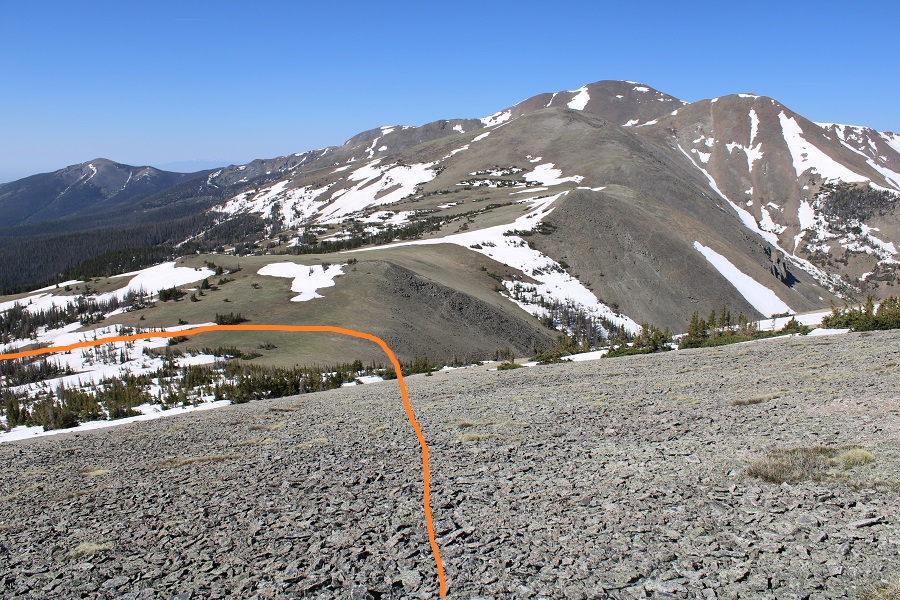
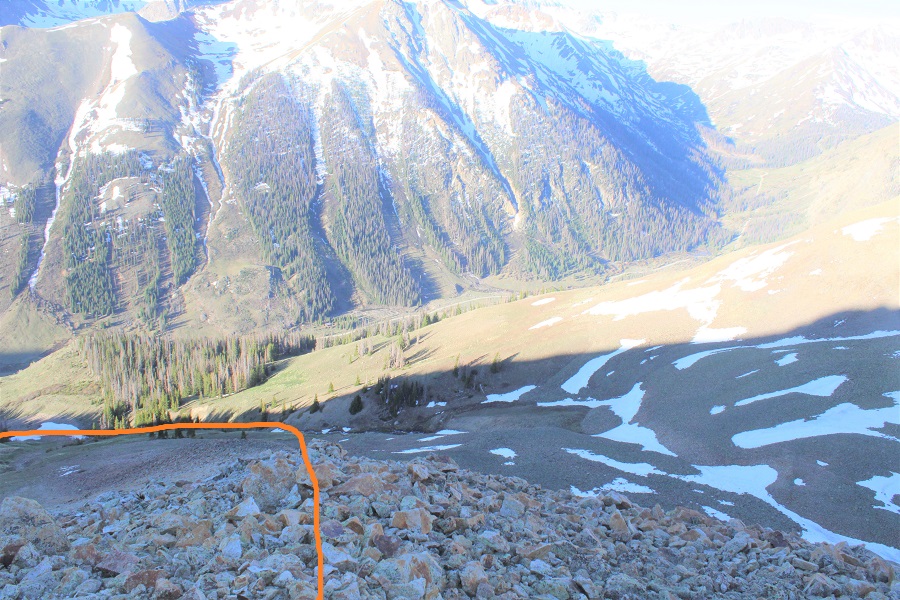
As I skirted the ridge, I could see my intended route back to the road.  I was aiming north, towards the smallest outlet of Horseshoe Lake.  Once I made it there I would cross the stream and I hike up the hillside, back to the road.

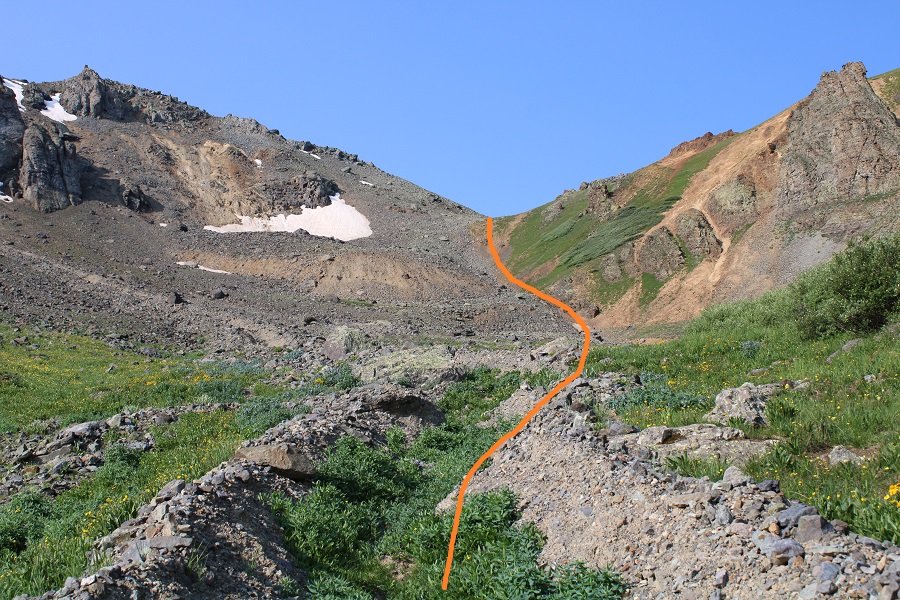
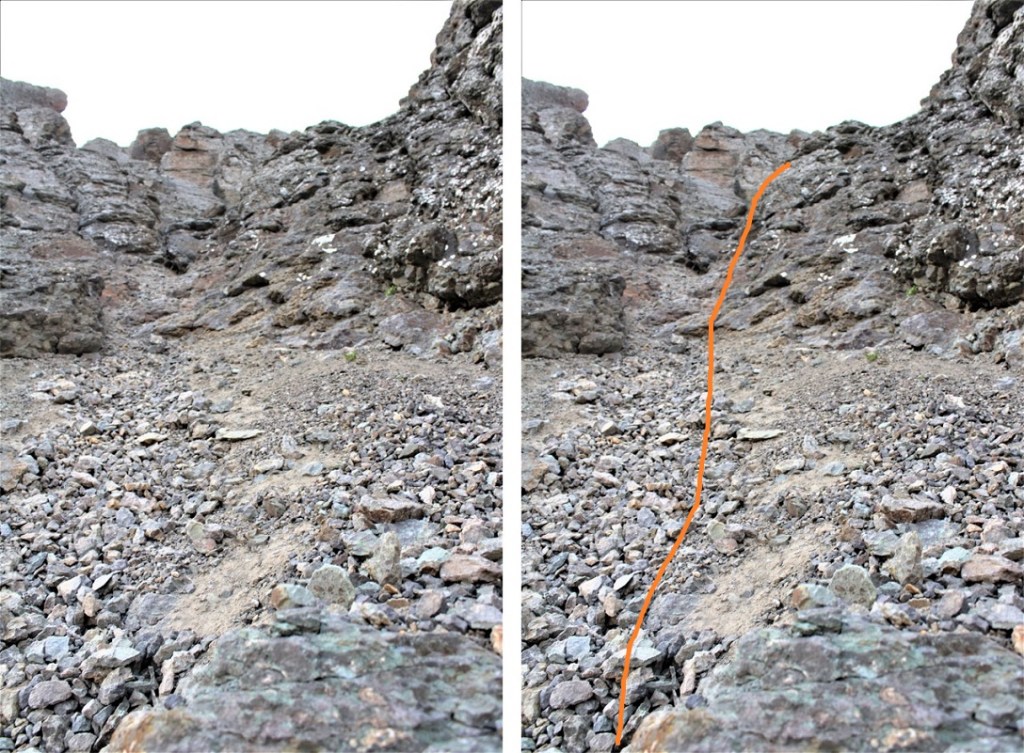
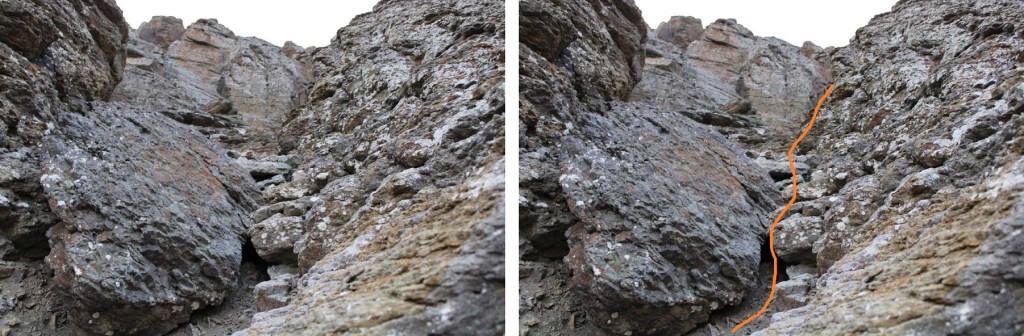
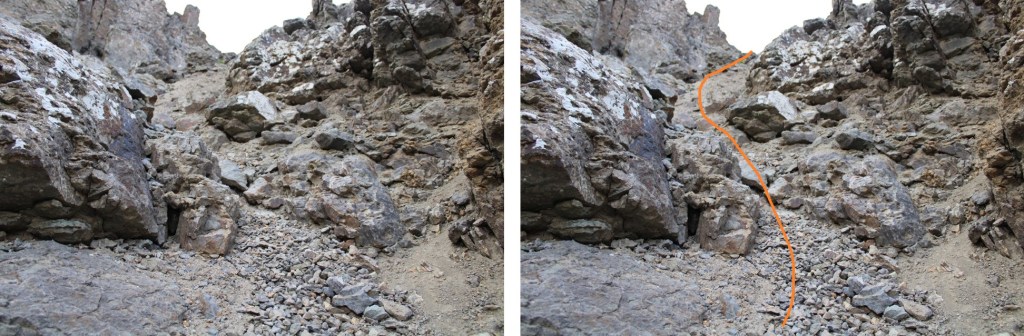
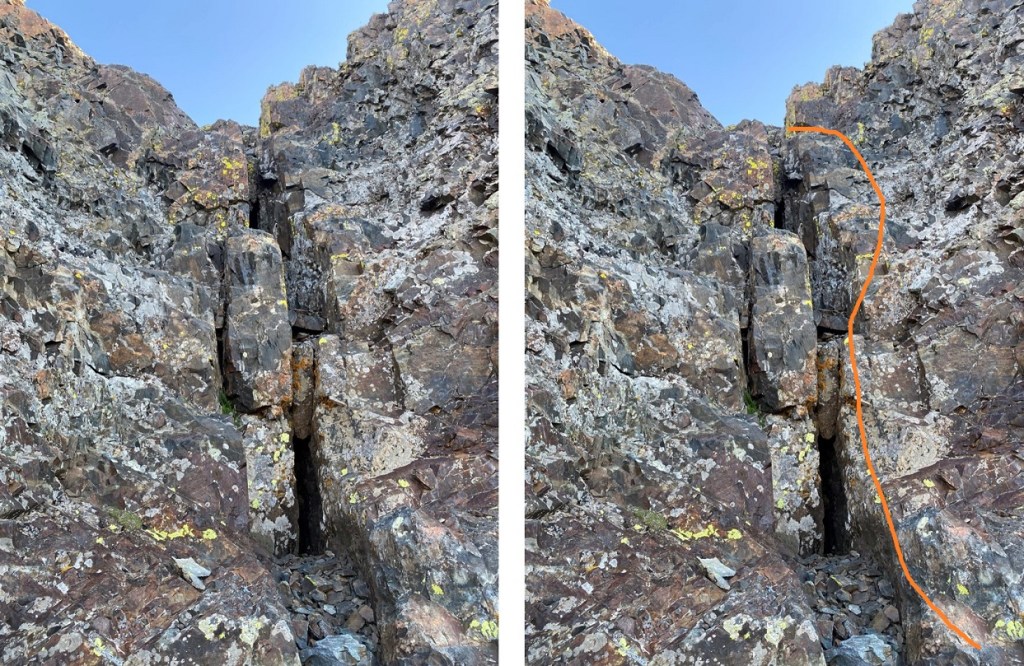
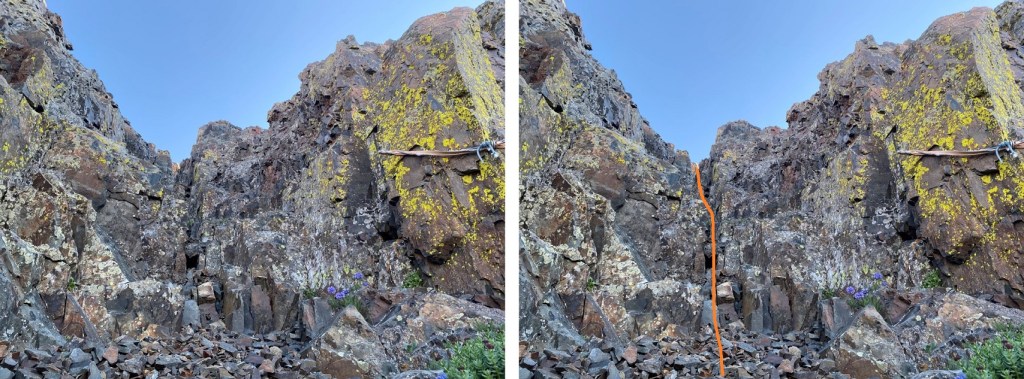
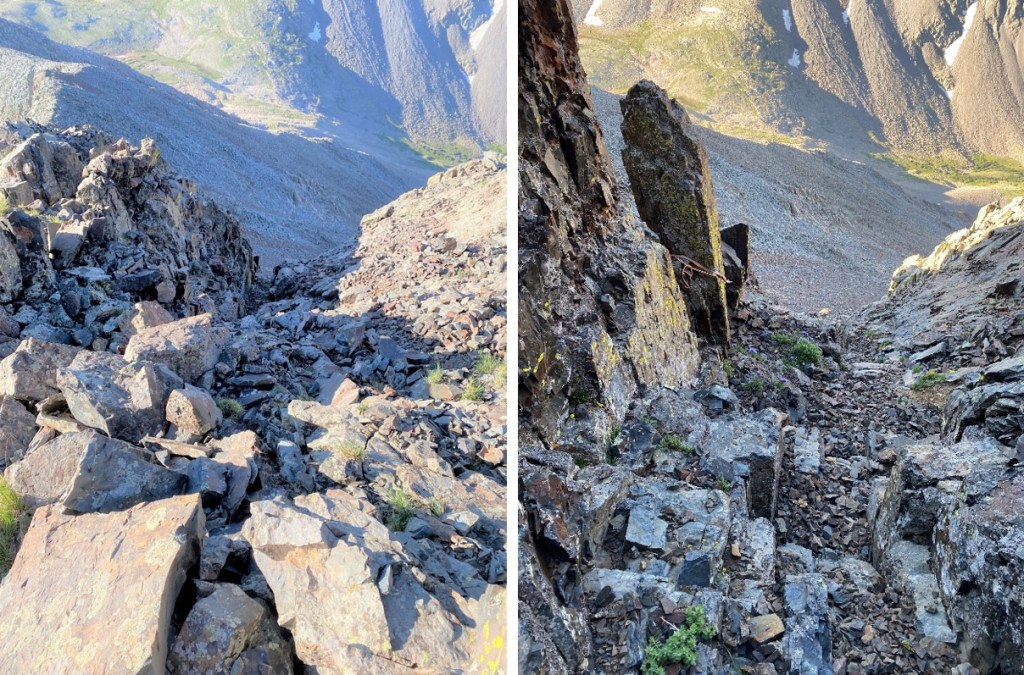
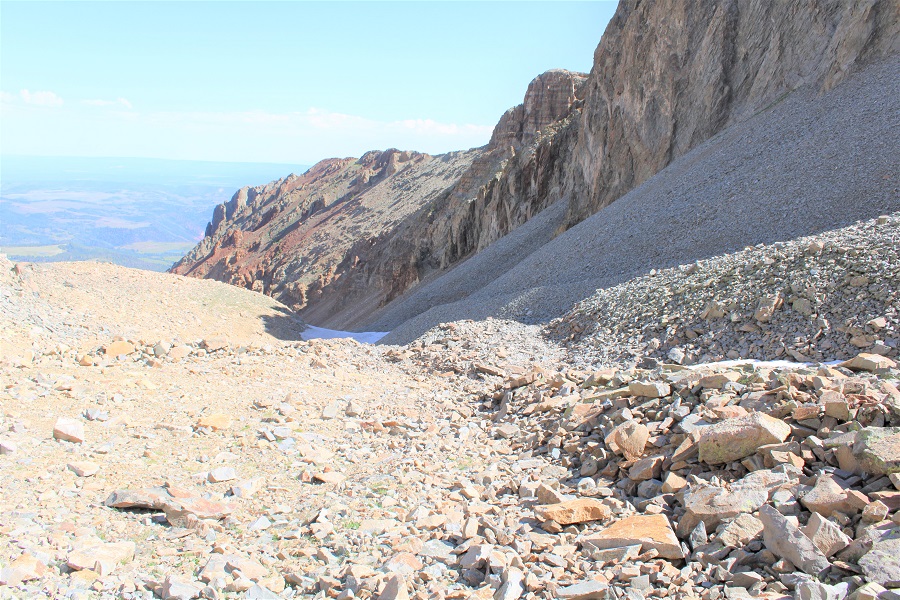
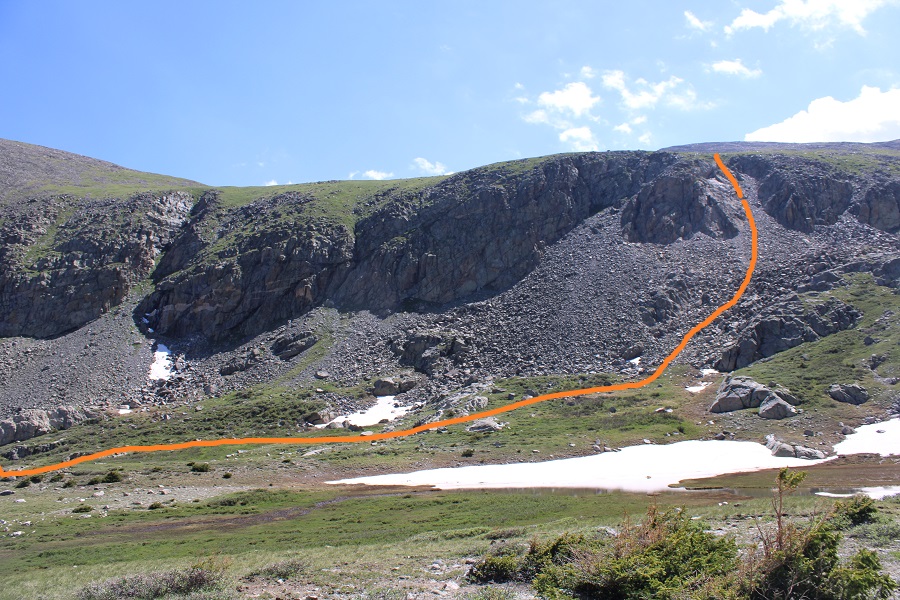
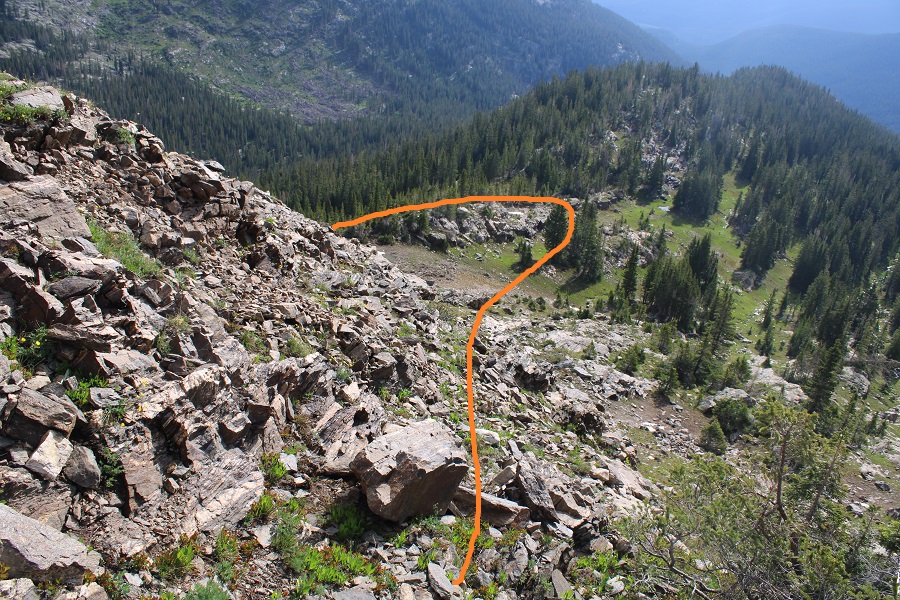
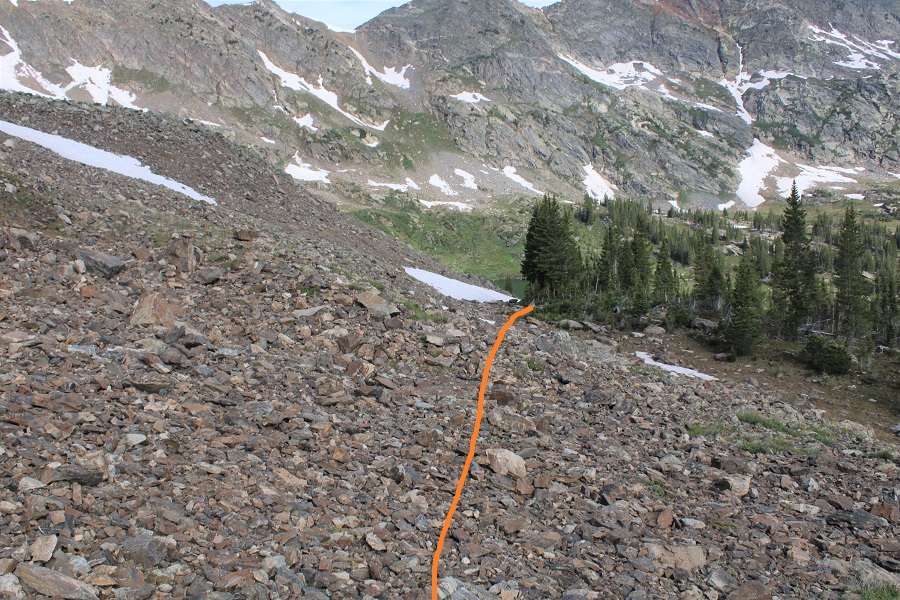
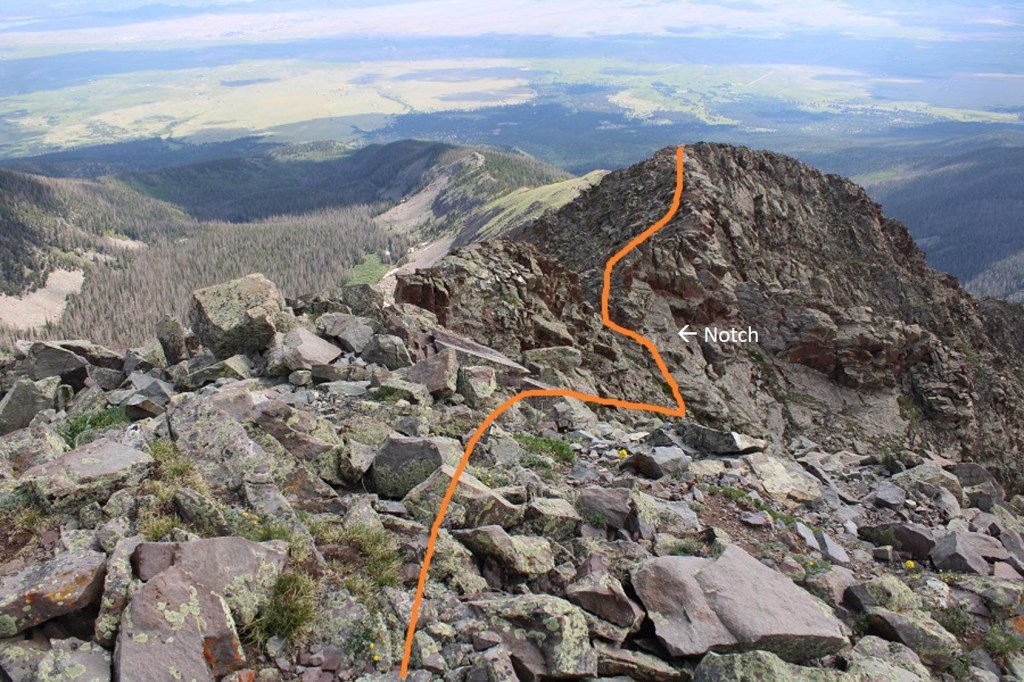
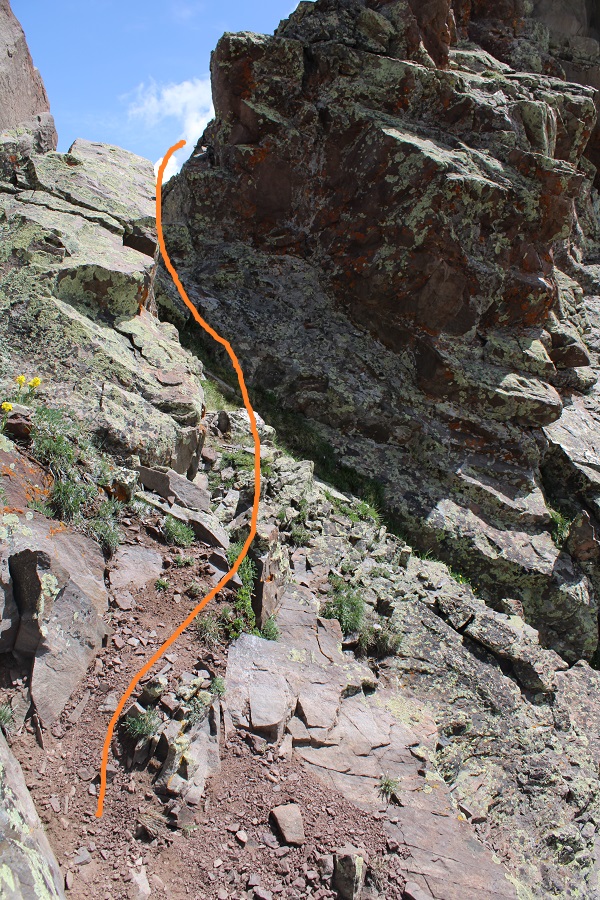
First, I had to descend a gully.  This was difficult class 2 at the hardest.  There will be pictures later:  make sure to descend the correct gully to make this easier.

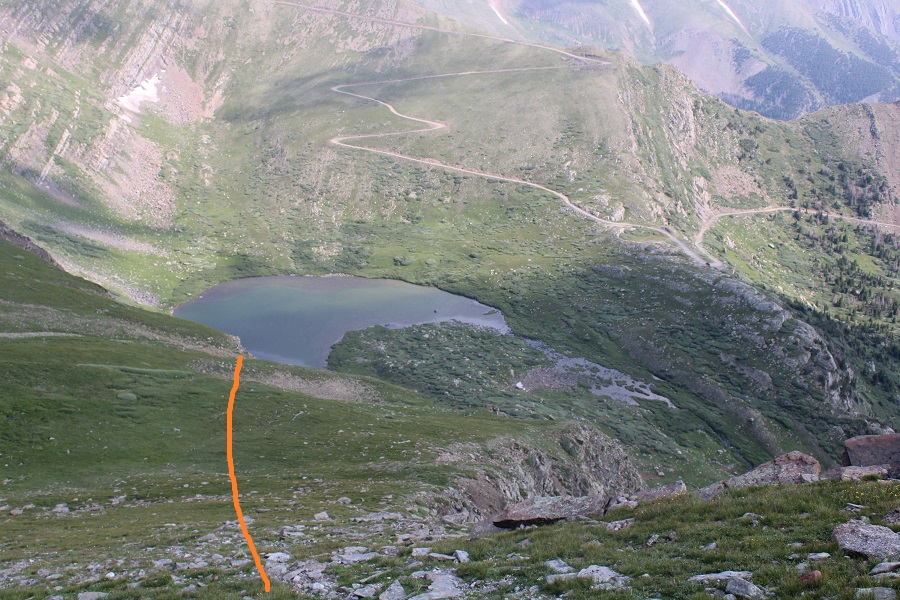
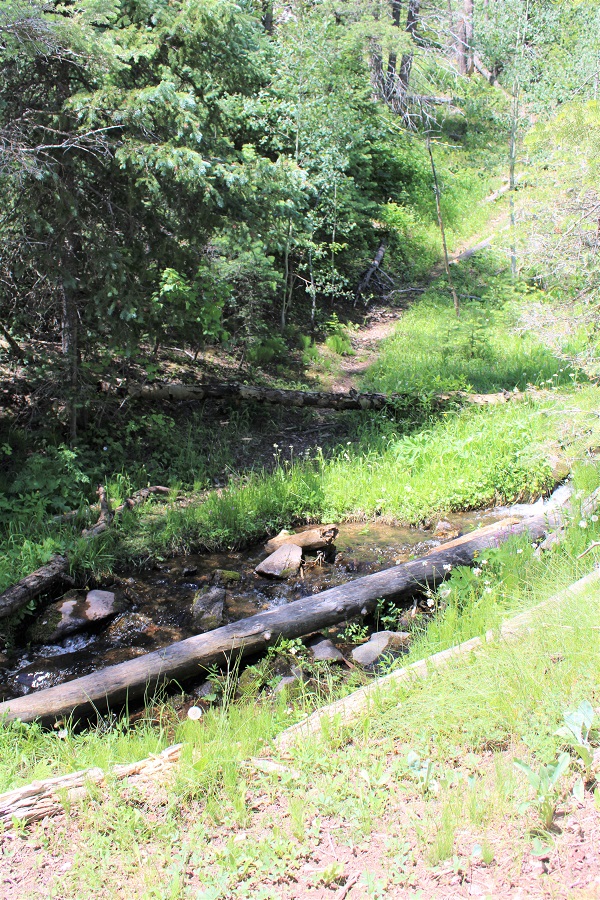
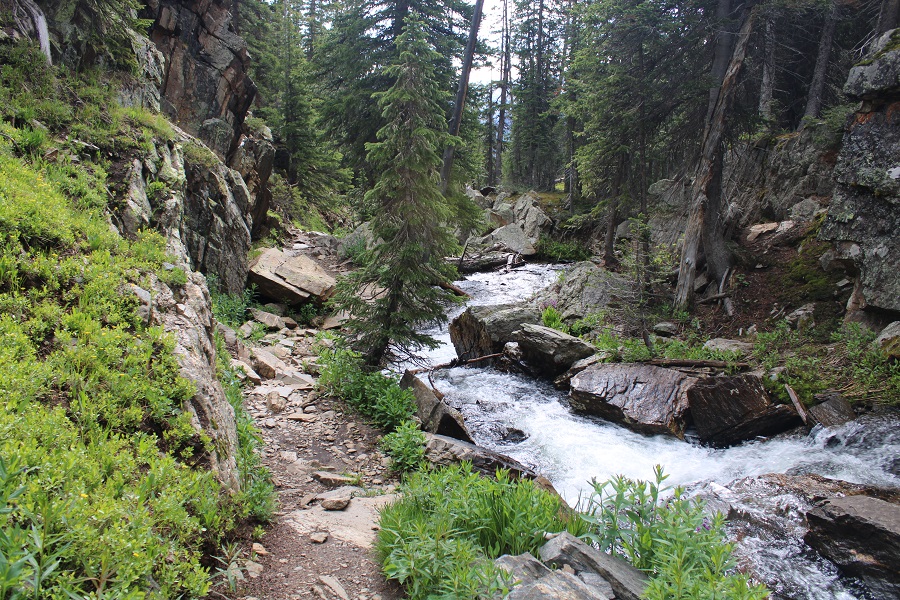
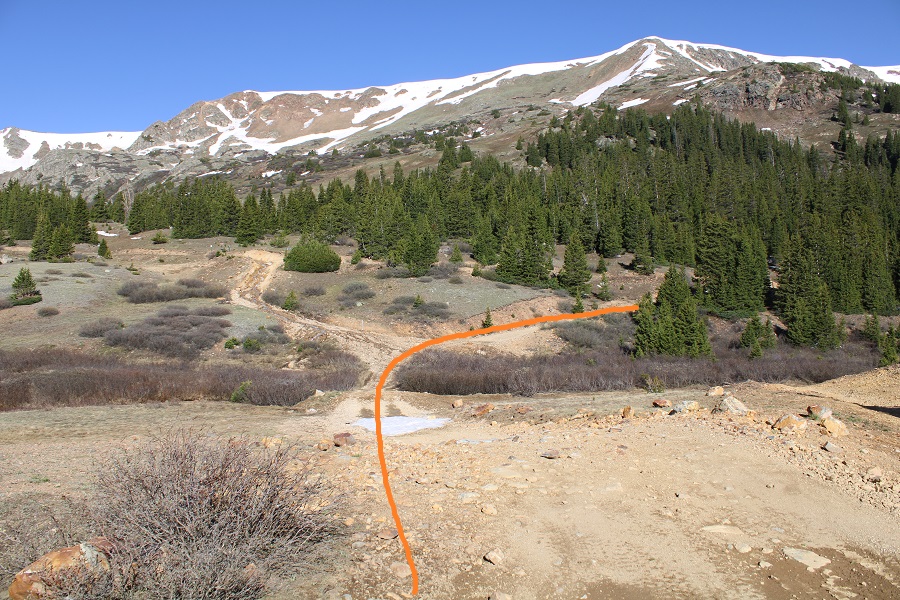
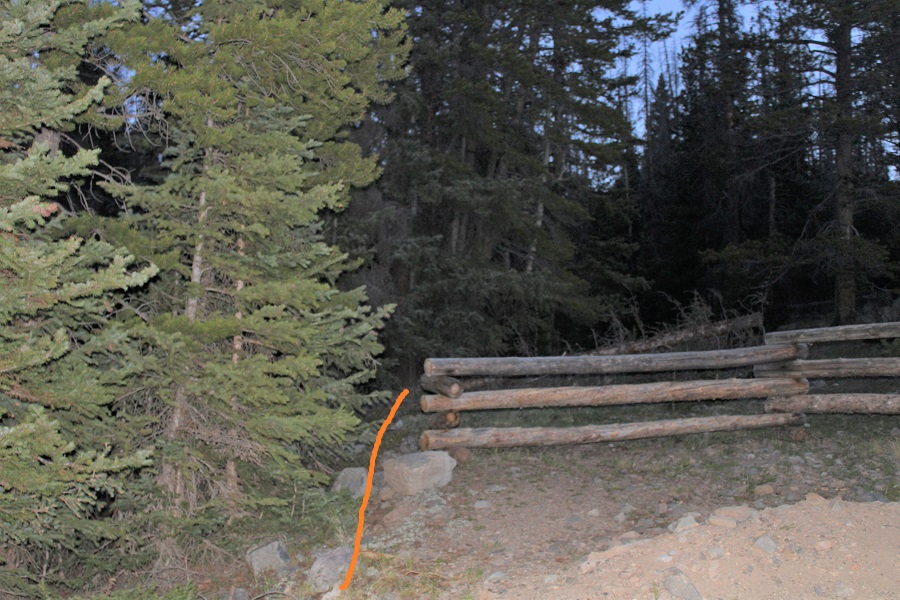
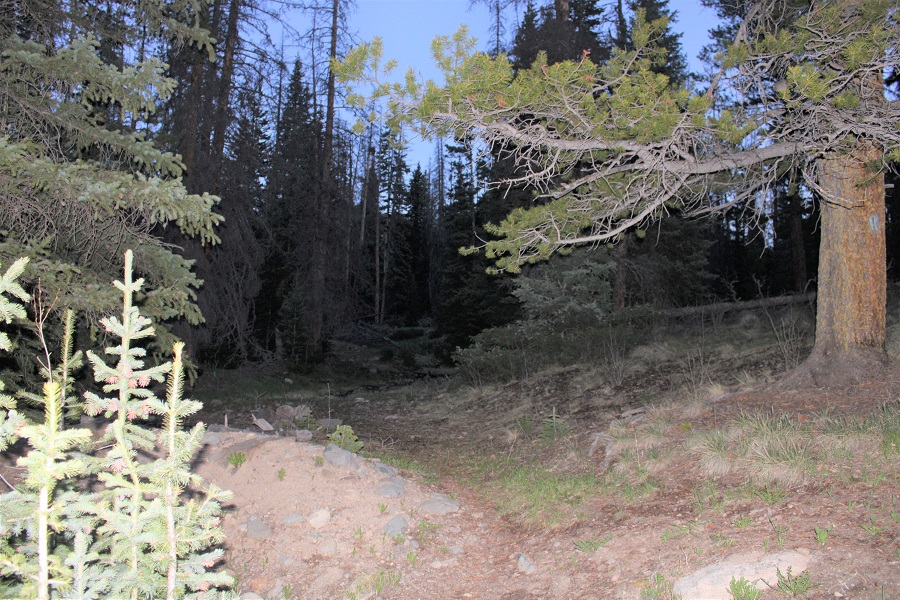
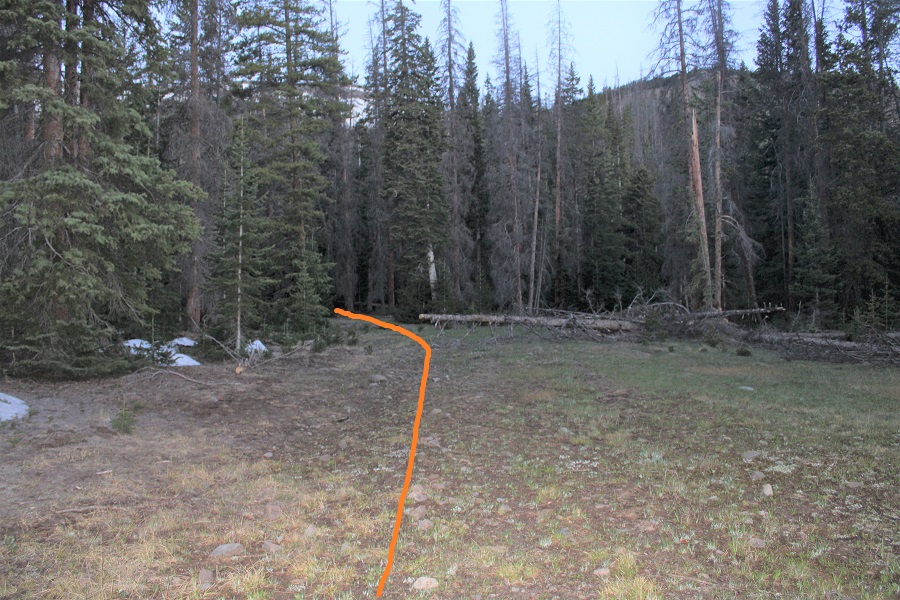
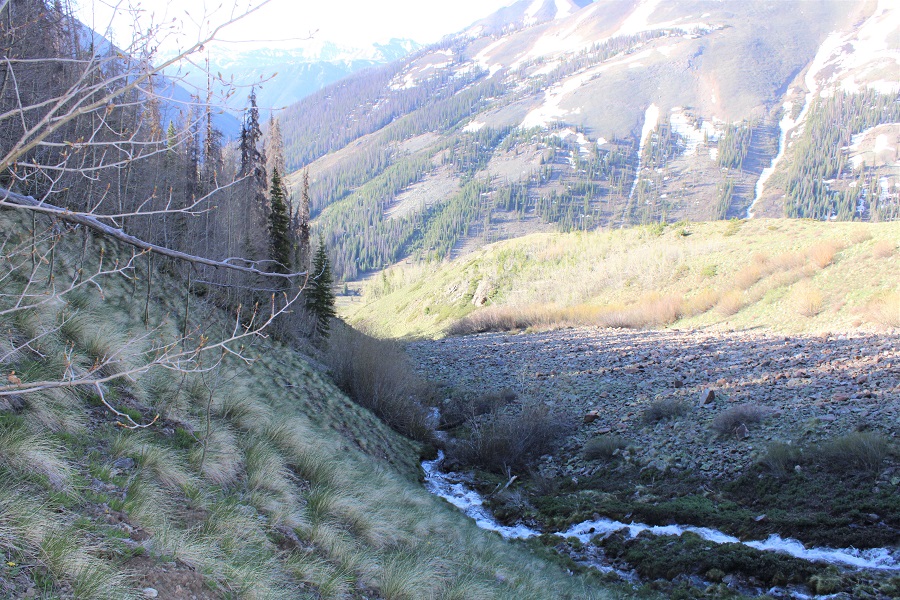
Here’s the route I took down the gully, towards Horseshoe Lake, and back to the road.  There were some willows to navigate near Horseshoe Lake, but once again, all class 2.

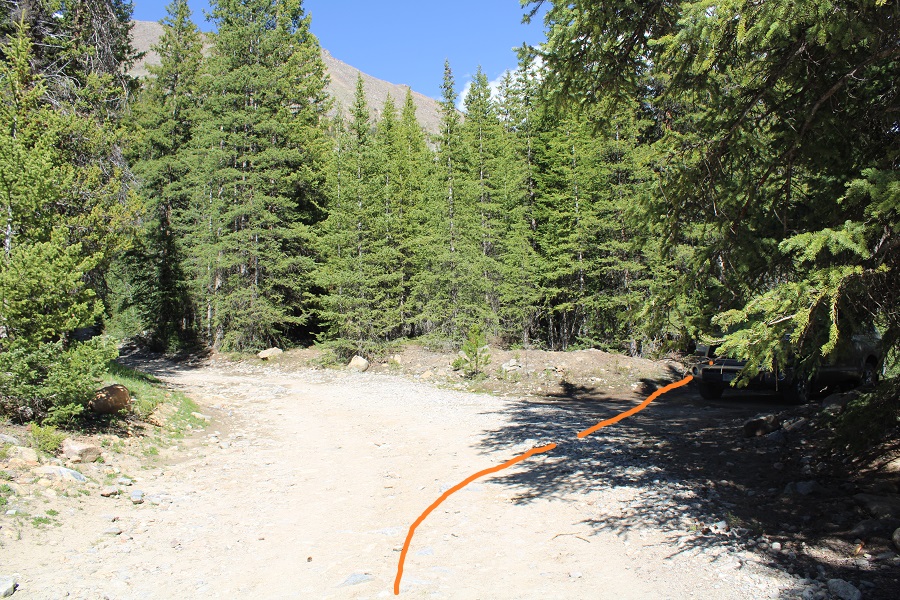
From the road, here’s a view of the path I took down the gully.  If it’s daylight when you’re hiking in, spend some time visually memorizing the route.

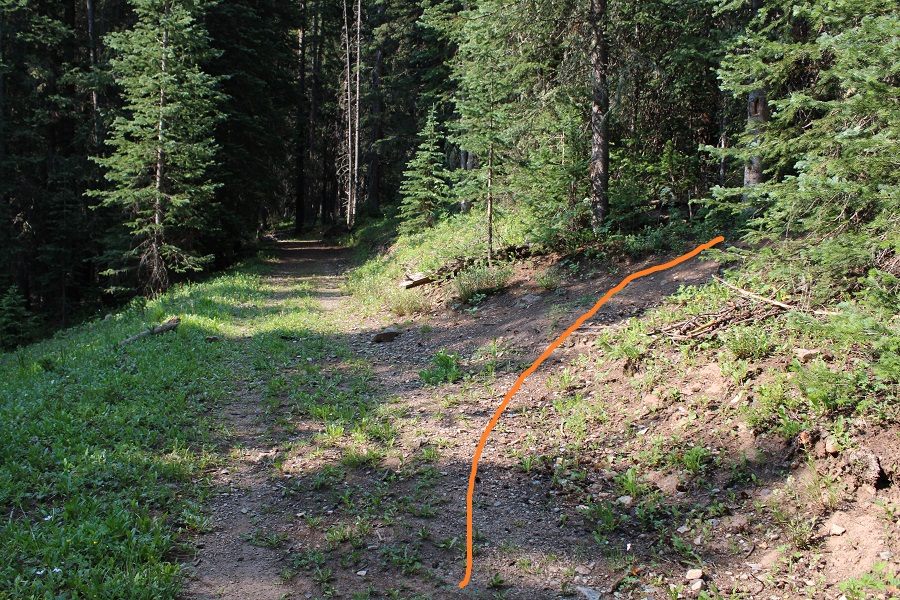
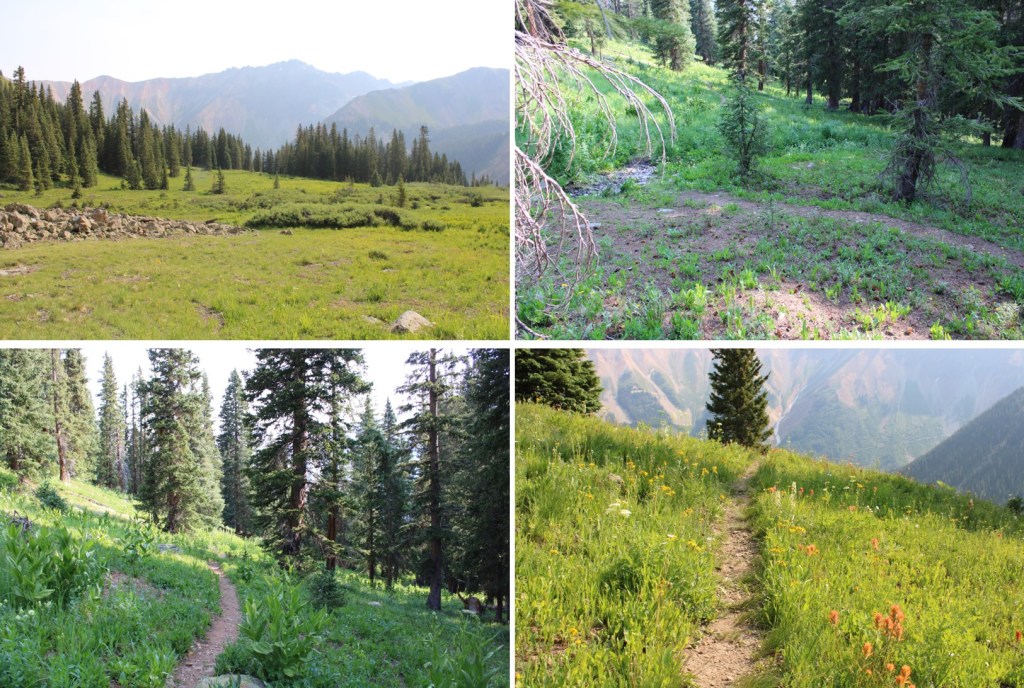
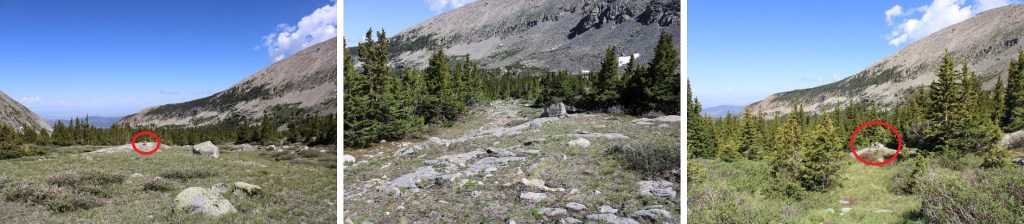
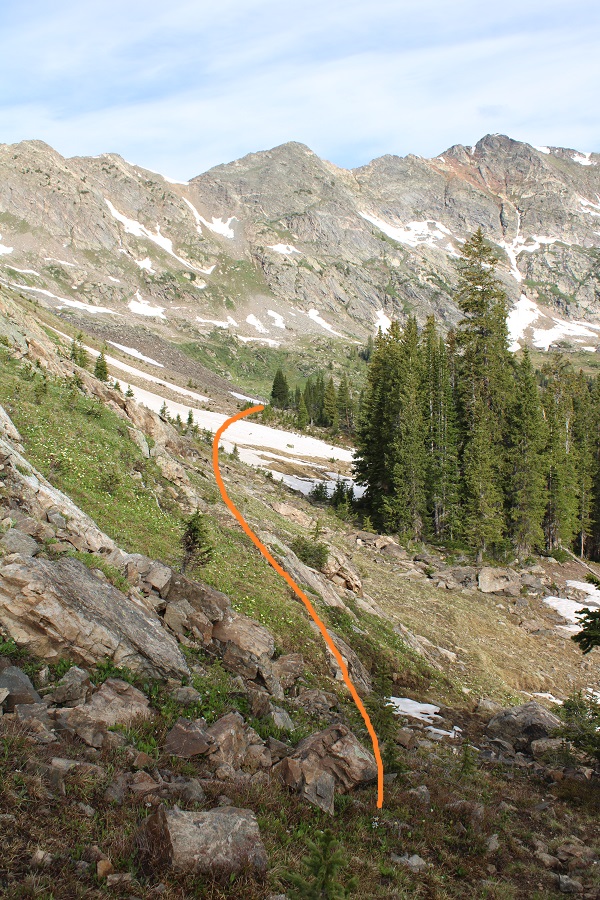
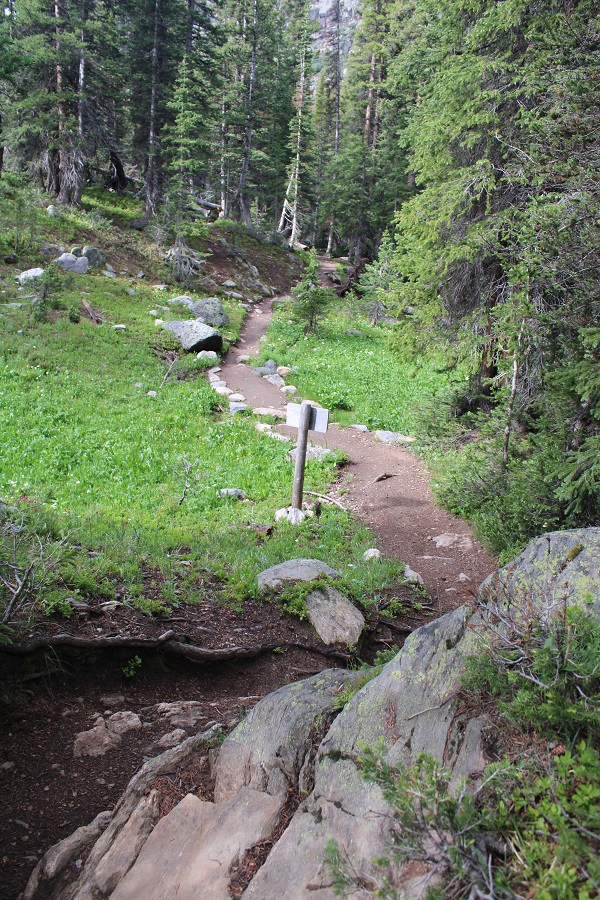
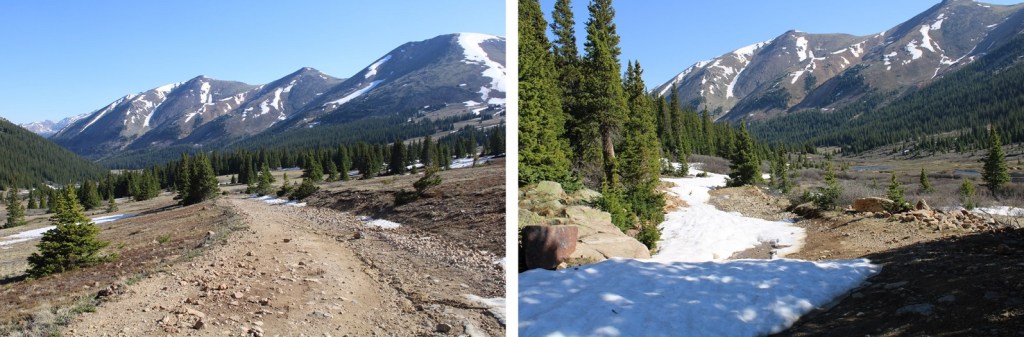
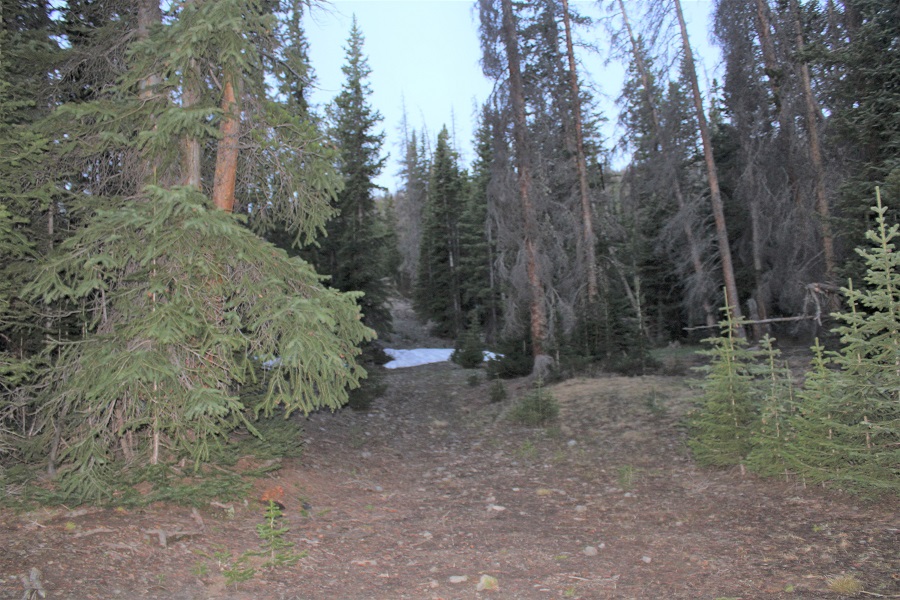
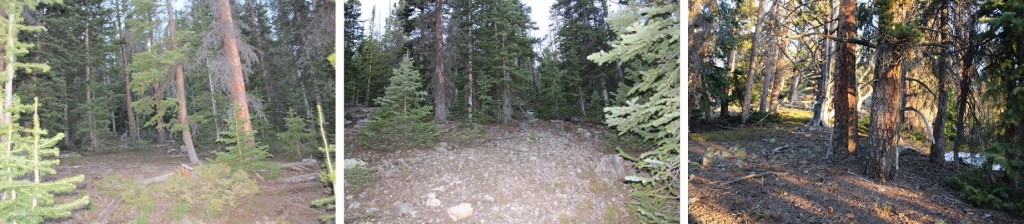
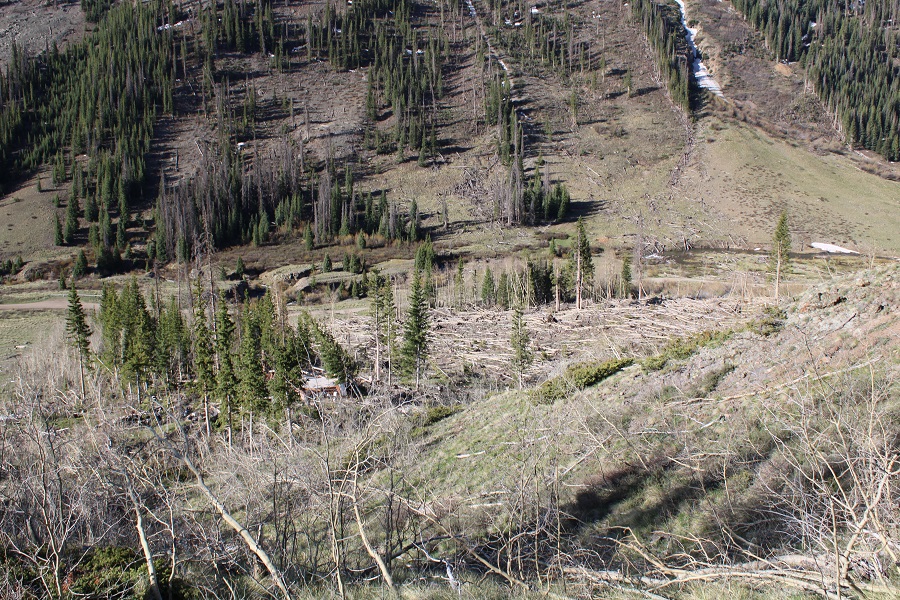
Back on Hermit Pass Road, I followed it east back to my truck

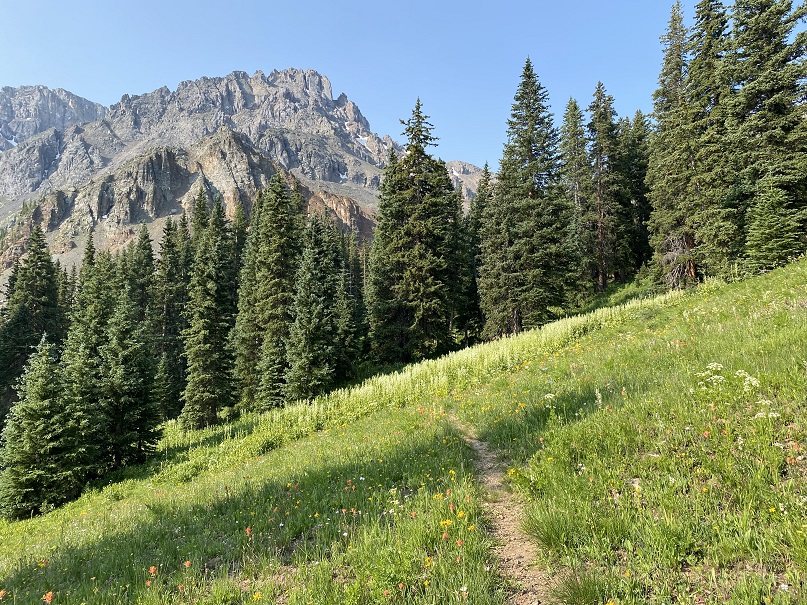
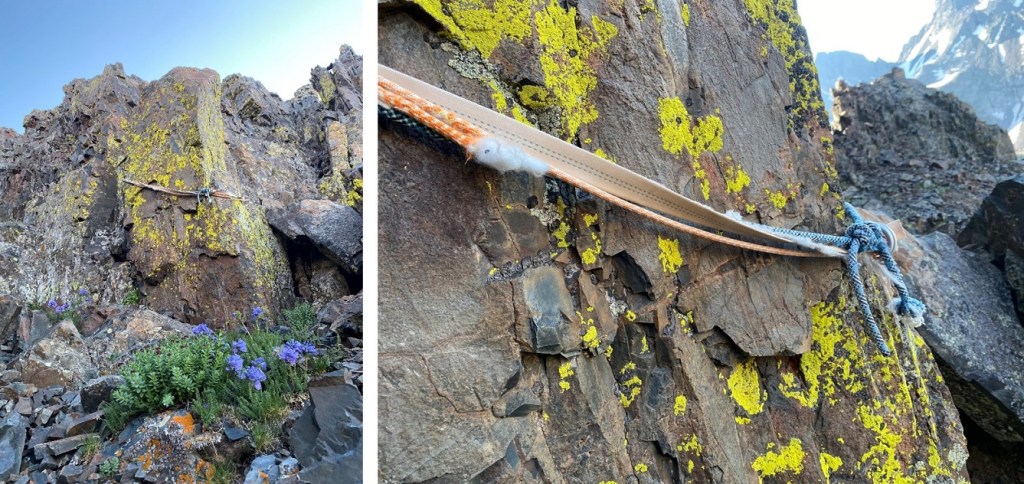
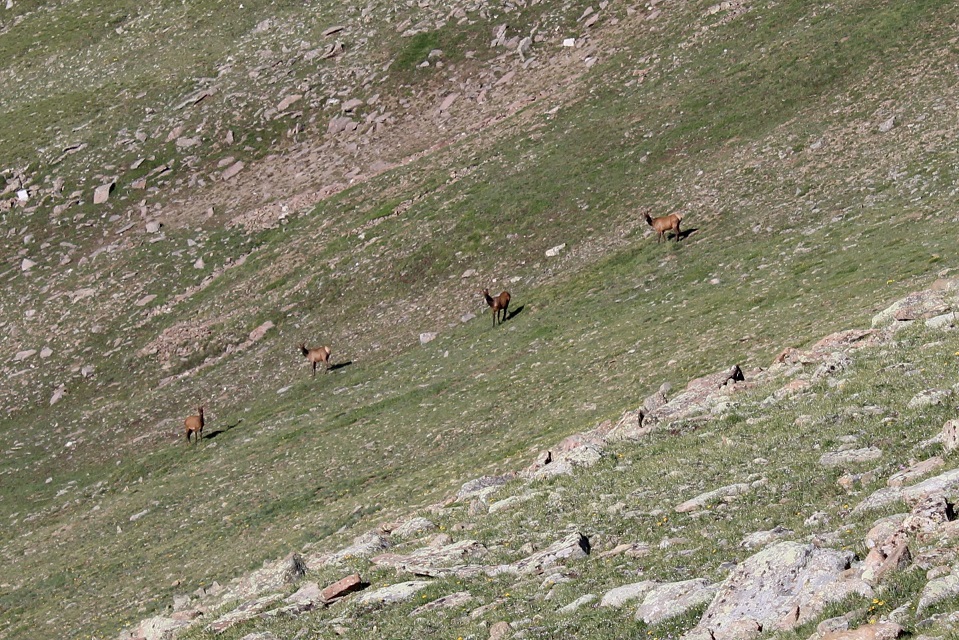
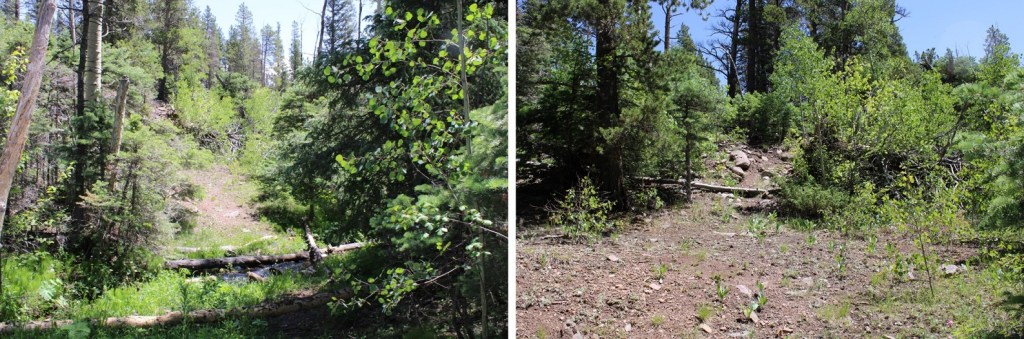
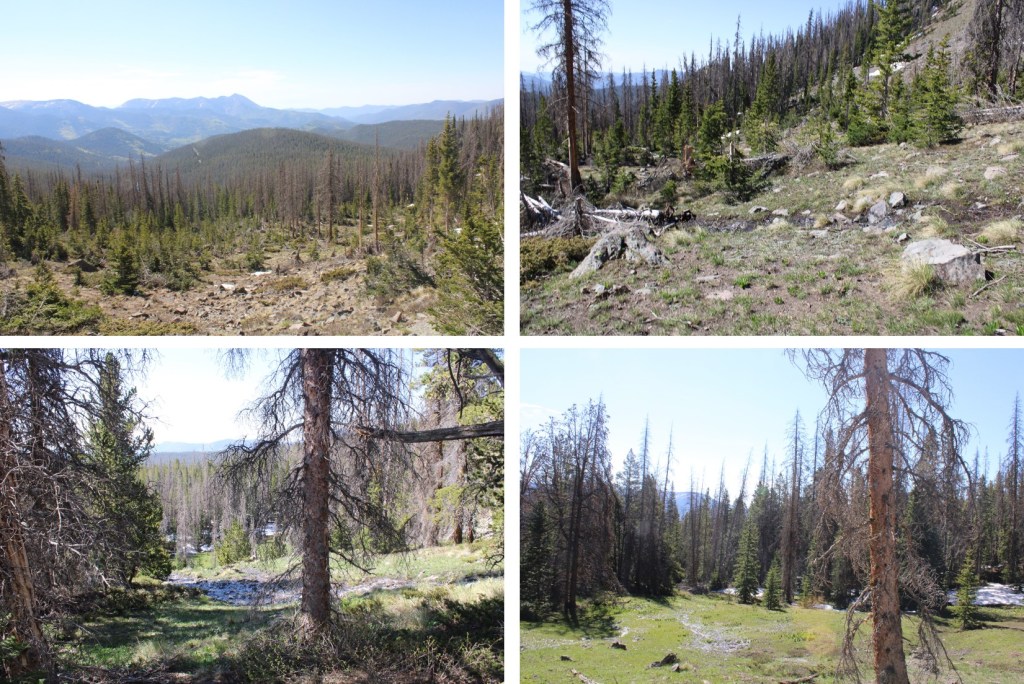
The wildflowers were on point

I made it back to my truck at 11:15am, making this a 12.2 mile hike with 4551’ of elevation gain in 6 hours, 45 min.

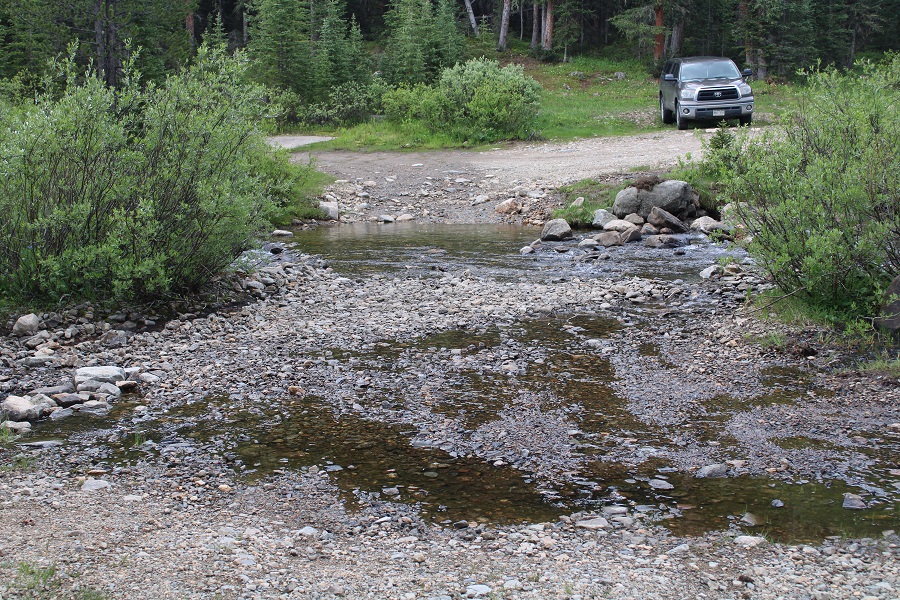
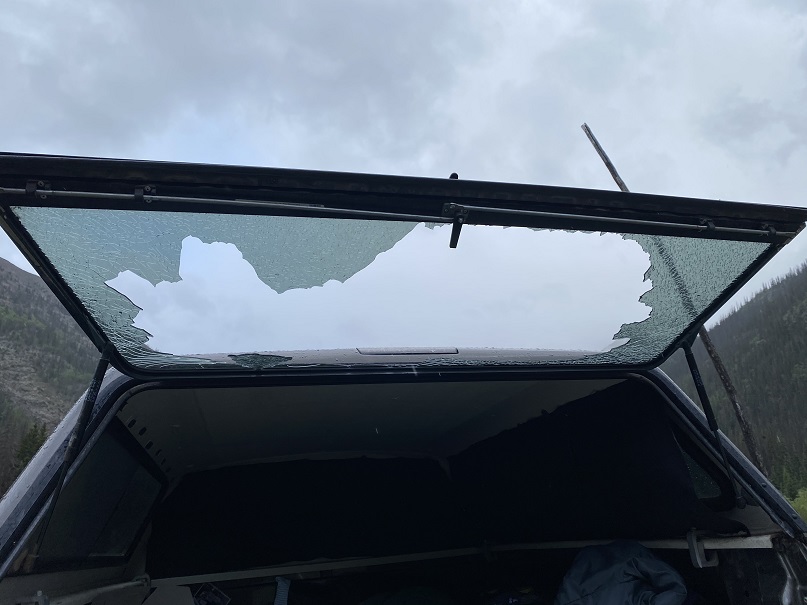
The drive down wasn’t any better than the drive up, but Miles got his first real 4WD workout, and had fun splashing through the mud!

V3 – 13,545

RT Length:  8.29 miles

Elevation Gain: 3542’

Ophir Pass Road is a serious 4WD road, but the trailhead for this peak can be accessed from the Ophir city side with just a high clearance vehicle.  There were a few small water crossings, but 4WD was never needed.

I parked in a parking area about 1.3 miles east of the town of Ophir, on Ophir Pass Road, in the Iron Spring area.  All the parking spots were taken but 1, and every vehicle was parked there overnight.  This is a popular spot to park to backpack/hike in the area. 

The mosquitoes were out here as well, so I made it an early night and got some sleep.  I was up and on the trail by 3:45am.  The trail starts on a blocked 4WD road to the south of the parking area.

I followed this road southeast and then south, through gates, aspen trees and two stream crossings with easily crossable bridges

After the second stream crossing, I passed below some power lines, turned left to follow the trail, and started gaining elevation.

The hike below treeline was nice, and the trails were class 1, but there were no trail signs or numbers, and several trail crossings.  I’ll do my best to describe the correct route.

I followed a well-defined path south.

At the first fork in the road, I turned right

At the second fork I turned right again, off the road and onto a trail (I’d hiked a total of 1.15 miles at this point)

I hiked west for a few yards, and then came across a trail junction.  I continued heading straight

I was now on the trail that heads south/southwest up the hillside.  This is also where I ran into a porcupine.  Porcupines don’t run, but we noticed each other while we were about 3 feet away from each other:  He quickly turned and waddled away in the dark, showing me his full backside of quills as he did so. 

I continued on this well defined trail

Here’s your first glimpse of V3.  Look carefully, the arrow points to the exact summit, which you won’t see again until you’re there.

After hiking for a total of 2.25 miles and 11350’ I came to a small water crossing over the trail, and a meadow to my right. I left the trail and headed through the meadow.  It was still dark, and there was a camper with a bright headlamp getting ready for the day.  He was confused why I was ‘off trail’ and tried to direct me back to the proper trail.  I assured him I was going in the right direction, apologized for walking so close to his campsite, and nicely told him I didn’t expect to find a trail to the summit.

I was now in a meadow and basin.  There were wildflowers I couldn’t yet see in the dark, and willows I kept encountering.  I found out the hard way to stay right to avoid the willows.  The path is obvious in the daylight.  Here’s the route I took.

And some step-by-step pictures of my way to the saddle, first hopping across a small stream

Staying right to avoid the willows and ascending a small gully that still had snow.  Microspikes were helpful here, both on the scree and snow.

At the top of the gully, I was now in a rocky upper basin.  I crossed a boulderfield and headed towards the saddle.

Here’s a look at the last bit of hiking to the saddle

Once on the saddle I turned left and followed the ridge southeast, staying to the left of the snow.

At the top of this area you can see the crux of the route.  Now is a good time to put on your microspikes and helmet, if you haven’t already.  It’s much steeper than it looks, and the scree isn’t manageable without microspikes (trust me on this one).

Here’s your intended route:

You’re aiming for this gully.  The scree here is steep; a 45 degree angle for an extended amount of time. 

Once at the base of the gully the class 4 climbing begins.  The route is obvious, curving around to the right.  There is really only one way to go:  follow the trail set out for you from the fallen scree.  Also note:  the scree and rocks here are loose. Very loose.  I wouldn’t attempt to upclimb or downclimb this area with another person:  take turns the entire way up and down.  You will be causing screevalanches on climbers below you. 

Here are some pictures from the inside of the gully. Pictures do not do the steepness justice (although the pictures down give you a better perspective).  When heading up, continue climbing southeast.

Here’s a look at the exit of the gully

At this point it became even steeper.  I did not have on my microspikes, lost grip, and slid on my stomach backwards for a full 12 feet.  I seriously thought I was going to slide all the way back down that gully.  I braced myself, and without taking off my pack located my microspikes in my backpack pocket and gingerly put them on while trying to balance without much traction. It was much easier to upclimb once I put on my spikes.  Here is where I aimed

I then turned right, and hiked south towards the summit block. 

I made it to the base of the summit block and was surprised to see a pine marten.  He sat there and looked at me.  I tried to get a picture, but he quickly turned around and all I got was a picture of his tail and backside.  Why are all of my wildlife pictures of animal butts?

Ok, now, don’t let this summit block scare you:  yes, you can upclimb it, but you can also skirt it to the left and follow it around and have a class 2 trek to the summit, which is what I did.

I summited V3 at 7:15am.  There was a lot of smoke in the air from far away fires this morning.

V3:

I was surprised there wasn’t a summit register, so I left one.  It was obvious this peak does not get a lot of visitors. 

I kept my microspikes on for the trek back down, which seemed easier than the trek up.  Here are some pictures of the way back down the gully.  Once again, do this one person at a time, and when you’re done, head far away from the gully, as the rocks will slide and they will pick up speed as they do so. 

Once out of the gully, the scree-surfing will begin.  It’s always fun when you can ride the same pile of rocks all the way down the hillside.

Scree Surfing:

Here’s where you’re aiming.  If you’re doing this with another person, you should be standing far away from the rockslide area while they’re ascending/descending.  I’ve circled a good place to stand out of the way.

And now to hike down the ridge to the saddle, and exit the basin.

I made it back to the meadow, marveled again the wildflowers, and saw the group of campers were almost done taking down camp (I guess the man I talked to this morning was part of a larger group).  I made it to the trail, turned left, and followed it back to the trailhead.

I made it back to my truck at 9:45am, making this an 8.29 mile hike with 3542’ of elevation gain in 6 hours. 

Fowler Peak – 13,498 and PT 13544

RT Length: 10.53 miles

Elevation Gain: 3985’

I’d already been away from home a few days before this trip, so I stopped at Ouray Hot Springs to get in a quick workout and a shower (they only charge $4 for a shower, which might be nice if you’re hiking around Ouray and want to freshen up every few days).  The only downside?  The parking was terrible, even on a weekday in the morning. 

After cleaning up I drove to the Rock of Ages Trailhead. The drive in was a bit bumpier than I remembered, but also fun, because I was seeing what Miles (my new Tacoma) can do.  He handled the stream crossing and ruts in the 4WD road without needing to be put into 4WD.

I made it to the trailhead and was the only one in the lot (another good thing about arriving on a Thursday). 

I walked around for a bit, and immediately realized the mosquitoes were going to be a problem.  I’ve ordered a topper for Miles, but it’ll take up to 3 months to get here, so until then I’m sleeping in the back seat of the cab  (It’s a tight fit but luckily I’m small).  I made the decision to get to bed as soon as possible.  I ended up waking up several times during the night because I was so warm, but at least waking up ended one of my nightmares:  a dream about sharks in a swimming pool swallowing children whole. 

Ok.  So, I woke up and was on the trail at 4:15am. The route starts at the south end of the parking area, and follows a well-defined trail south.

I quickly came to a gate, and walked around it.

Next, I saw this sign to my right, and continued on the trail

I followed the trail to treeline. 

Shortly after making it to treeline I came to the Elk Creek Trail junction. From here there are several options, but your main goal is to make it into the basin.  You can follow Elk Creek Trail and lose some elevation, then follow a faint road into the basin.  Or, you could continue along the Rock of Ages trail and eventually hook up with the 4WD road that enters the basin from above (a bit chossy, but I chose to take it on the way out).  On my way in it was dark, I couldn’t see any of these ‘routes’, and I chose to just head straight into the basin.

If you take the mining road, here’s what the entrance looks like from the Rock of Ages trail.  It’s about half a mile past the Elk Creek Trail junction, on your right.

If you take the upper road, this is what the junction from the trail to the road looks like

In any event, I made my way into the basin. Here are the routes.  To the left you can see the mining road, and to the right you can see the abandoned dirt road.  They both lead to the same place.  (On my way in I didn’t see either of these roads and just headed south through the basin).

Once in the upper basin you want to gain the ridge.  This sounds easier than it turned out to be. It’s “choose your own adventure”, and on the way up I chose wrong. I ended up getting into some class 4 scrambling, which was unnecessary.  It’s my advice to do PT 13540 first, and gain the ridge to the left (southeast).  However, all areas here ‘go’, if you’re willing to do some scrambling.  When I made it to the ridge I found thick wire cording going where the red line is (I’m guessing that could be used as leverage if needed:  it wasn’t moving anywhere). I ascended via the orange line.  The dotted orange line is probably a better route. The best route is my descent route (pictured later).

I’ll spare you the scree-y and large-loose-rocky gully details of ascending the ridge.  Once on the ridge I turned right and followed the ridge southwest towards Fowler.  The ridge was all class 2

If you haven’t already, now is a good time to put on your helmet.  Here’s a picture of that cable I was telling you about.  It goes up and over both sides of the saddle.

Here’s an overall view of the rest of the route to summit Fowler.

And step by step:  It started out chossy as I ascended the ridge

I made my way to the gully to the left/middle.  This area had more solid rock, but it was littered with scree/rubble.  At the base of the gully I took off my pack and decided to go up with just my cell phone (and a summit register in my pocket, just in case).

This is the class 4 part of the climb, and lasted for about 120 feet of vertical gain.  I started by going straight up the gully.  Here’s my route:

Step 1:  ascend the chimney.  I went to the right of the chimney, and found adequate hand/foot holds.

Step 2: Once above the chimney I stayed to the center of the gully.  This is also where I saw an anchor set up (circled in red).

If you decide to rappel here, bring a new anchor, as this one looks like it’s been here for a while, and what’s been added to it doesn’t look recent either.

Step 3: From the anchor I continued straight up the gully (still class 4)

Step 4: Here’s a view of the last bit of the gully, before topping out.  This felt class 3

At the top of the gully I turned left and headed towards the summit.  It was a bit of a false summit, but all class 2/easy 3

I summited Fowler Peak at 7:45am

Fowler Peak: 

I sat and enjoyed my views of the Wilson/El Diente Traverse for a few minutes before heading back.

There was a summit register, but it was one of those tube ones.  It hadn’t been closed properly and all the papers inside were wet, so I left it and also added a new register with dry paper to write on.  And a new pencil.  Here are some pictures of the trek back to the saddle

Back down the gully

To my stashed gear and back to the ridge.

I followed the ridge over to PT 13540.  This was a simple ridge hike, if a bit loose.  Lots of rocks here. I stuck mostly to the ridge the entire time, only dipping to the right a few times when necessary.

I summited PT 13540 at 9am

PT 13540:

I worked my way back towards the Fowler/PT 13540 saddle

Once at the saddle there was what looked to be a boarded-up mine.  In fact, it looked like everything here had been blown up at some point, except this area, which was strategically filled with large rocks (but may have been blown up too).  I passed it and headed northeast back to the old mining road

This area was steep, and I did some scree surfing, but it was much easier to navigate when compared to the route I took to ascend the ridge. I saw tons of mining trash here:  lots of old cans and pieces of mining equipment, most of which were in small pieces, all made out of cast iron.  This was the most intact item I came across

Here’s the route I took down from the ridge (I’d recommend ascending this way as well)

Once back on the road you once again have options to exit the basin.  You can stay high, to the right/east, and follow the old mining road, or you can stay low and left/west, and follow an old dirt road. 

Here’s a better look at both roads.  Both take you out of the basin, and back to Elk Creek Trail / Rock of Ages trail (If you take the mining road all the way to the Rock of Ages trail, turn left and follow it to the Elk Creek Trail junction, and then continue following the Rock of Ages trail).

Once back on the trail I followed it through the trees northwest, back to the trailhead. 

I made it back to my truck at 11:15am, making this a 10.53 mile hike with 3985’ of elevation gain in 7 hours.

It was still early, and quite warm, and the mosquitoes hadn’t magically disappeared overnight.  I had a friend meeting me here at 6pm to hike Wilson Peak tomorrow, so I’d planned on staying at the trailhead until he got there, then heading to bed.  I’d brought a lot of things to do, but they all required sitting down, and once I did that the mosquitoes swarmed me.  It was like one would find me and sing its song to its friends and there’d be dozens to shoo away. 

If I was outside I needed to have a jacket on, but it was hot! I tried sitting in my truck with the air conditioning on, but that wasn’t going to work for 7 hours straight.  It was kind of funny watching the mosquitoes (and flies!!!) swarm my truck:  they seemed to know I was in there with the air conditioning on. 

So, I entertained myself for the next 7 hours by reading.  I got out my current book (On the Road by Jack Kerouac) and read while steadily walking around the trailhead in circles.  Continuously moving seemed to keep the mosquitoes at bay.  Luckily, the trailhead has a large parking area and I was the only one there.  Every few hours I’d take a break in my truck, and then get out and read again.  I would have started a campfire to shoo the bugs away, but they’re currently banned.  I can’t wait to get the topper on my truck!  It would have solved the mosquito/heat problem.

Spread Eagle Peak – 13,423 and Peak of the Clouds – 13,524

RT Length:  11.05 miles

Elevation Gain:  5461’

This was my 4th attempt at Peak of the Clouds.  Not because it’s a difficult peak, but because every time I was in the area I was thwarted by the elements; snow conditions, or a fast-moving storm coming in.  Today had a great weather forecast, so I figured today was my day.

Unlike my previous stays at the Gibson Creek trailhead, this time it was packed.  Probably because it was a Saturday over 4th of July weekend.  There were RVs set up everywhere, and every parking space in the lot was taken.  Knowing I was going to spend the night in my truck I just waited for someone to leave and then backed into their spot. 

I was sitting at the trailhead, just appreciating the sounds of the birds chirping and insects humming, and then the sun comes out and lights up each individual blade of grass and all I can think is how lucky I am this is my life.  It was a perfect night, and the last one I’d be spending in this particular vehicle, as my new truck was waiting for me at the lot and I was picking it up Monday.  I wanted to enjoy tonight.

I’d been gone for a few days, and I also wanted to get back home to see my kids, so I made it an early morning.  I was on the trail at 3:45am.  The trail starts at the north end of the parking area, and follows trail 1456 west.

The trail starts out nicely defined.  Stay straight at the Rainbow Trail Crossing.  This sign has been broken for years.  I wonder if they’ll ever replace/fix it?

Here’s where it gets tricky.  After hiking for .4 miles, and at 9400’, leave the trail and cross Gibson Creek.  It looks like there used to be a good trail here at one time, but it’s no longer well defined.  In fact, someone placed a tree trunk over the way you’re supposed to go.

After crossing Gibson Creek, the trail picks up again. 

The trail goes through various conditions, from being well-defined, to being covered with downed trees, to barely being a trail at all.  It also crosses Gibson Creek several times. 

The main thing is to just keep following Gibson Creek west/southwest

I followed the trail for about 2 miles, to when the trail abruptly ended where a tree had fallen over the trail.  Here I crossed the creek one last time, and bushwhacked southwest, up the mountain.  It’s important to note here something the topo map doesn’t show:  Apparently, somewhere Gibson Creek was to my right, but a much larger creek was to my left (this creek is not shown on the topo map, and could just be an error in CalTopo, as the creek was always to the south of me, but on the map it’s shown as being north).  Gibson Creek pretty much fizzled out here, so keep the creek you can see to your left as you ascend the hillside. 

This is a steep hillside with some bushwhacking involved.  It seemed to go on forever.  I took a different way down than I did up, and I’d recommend taking the way I went up, directly aiming southwest towards the ridge, as it avoids the large section of willows to the northwest. 

I made it to the ridge as the sun was coming up

Once on the ridge, it’s a straightforward, class 2 ridge hike to the summit.

Here are some step-by-step pictures of the ridge

As I was nearing the summit, I looked towards the summit and thought I saw a bighorn sheep.  When I looked again I realized it was a coyote:  the biggest coyote I’ve ever seen!  He was chillin’ on the summit.

I summited Spread Eagle Peak at 7:15am.  The coyote was nowhere to be seen.

Spread Eagle Peak: 

It was an absolutely beautiful day!  I headed south, down the ridge to the Spread Eagle/Peak of the Clouds saddle.

This was a straightforward trek, with just one short class 3 move.  I stayed right and downclimbed this section.

Then followed the ridge to the saddle

It was a simple, class 2 ridge hike to the summit of Peak of the Clouds

Here are some step-by-step pictures

Here I saw some elk (they didn’t stay long)

Looking up at the ridge to Peak of the Clouds

As I was hiking up, a marmot rushed down past me.  I wonder where he was going?

The last part of the ridge was rocky.  I stayed to the left.

I summited Peak of the Cloud at 8:20am

Peak of the Clouds:

Here’s a look at the ridge to Rito Alto Peak (in case anyone is looking to do that one as well)

I sat for a minute and enjoyed my time on the summit.  It was a beautiful 4th of July in the Sangres!

I was making this an out and back trip today, so I turned and looked back at Spread Eagle Peak

Here are some step-by-step pictures back to the saddle

This is how I accessed the ridge

And then followed the ridge north

The short class 3 section was easier to upclimb than downclimb.

Then it was an easy ridge hike to the summit

I turned and headed east down the ridge, back to treeline.  I saw elk here as well.

Once near treeline I headed back toward Gibson Creek, but as I said before, I encountered a lot of willows and it was slow going.  I’d recommend following the ridge as it slopes up a bit and becomes treed, and then heading northeast.

Yes, there’s bushwhacking and route finding involved.

I made it back to the creek, and followed the trail back as it curved northeast towards the trailhead

I crossed Gibson Creek one last time, and was back on the well-marked trail.

I made it back to my truck at 11:45am, making this an 11.05 mile hike with 5461’ of elevation gain in 8 hours.  Now, time to drive home, wake up my daughters, and grill some steak!

De Anza B – 13333, Beaubien Peak – 13184, Francisco Peak – 13135, Lomo Liso Mountain – 13112, Miranda Peak – 13466, PT 13569, PT 13229

RT Length:  16.25 miles

Elevation Gain:  6102’

I am so glad this happened!  Everyone I met on this trip was highly competent, an avid mountaineer, and just a generally great person.  My only regrets are that we didn’t have more time to chat, and the group was split due to weather and all 15 of us couldn’t have met at the same time.  I’m looking forward to when we have gatherings again, as you are all my people!   

We had originally planned to hike these peaks last weekend, but the forecasted snow had us put off the trip for a week, and our group of 15 got split up into 3 groups.  6 of us arrived at the Whiskey Pass gate around 4pm and were escorted up to the Whiskey Pass campsite to be the first group of 2021 to hike the Northern Cielo Vista 13ers.  We left the two Subaru’s down low, but they could have made it up the 4WD road to the campsite (but not to where they shuttled our vehicle and we exited).  I never put my truck into 4WD on the way up.

Our campsite for the night was at 11,500’, and absolutely beautiful.  If was obvious no one had been up there in quite a while.  It was nice to put faces to names, and all of us chatted for a bit.  Some of us slept in our vehicles, and others set up tents.  We all had different ideas for what we wanted to accomplish on our hikes the next morning, and all got to bed relatively early so we could start early. 

I was unsure when I went to bed what time I’d start, but when I woke up without an alarm at 1:45am I knew it was time to get going.  I was on the trail by 2am.  I didn’t see anyone else up, which meant they were either already on the trail or starting later (both ended up being true).  I wanted to get De Anza peak first, so instead of going over Whiskey Pass I started out heading northeast.  Here’s a visual.  There’s actually a road up there I followed for a couple dozen yards before I circled around the side of the mountain and headed northeast for the De Anza/Whiskey Peak saddle. 

Sorry, but since it was so early in the morning, I don’t have pictures from the hike to De Anza or Whiskey Pass, so you’ll need to use the topo map as reference, but I believe it’s self-explanatory.  Also, the weather was terrible:  I was hiking in fog the entire time.  I’m not sure if you’ve ever hiked in fog in the dark, but flashlights are useless.  You can only see about 5 feet in front of you, and actually have a better visual turning your flashlight off for a second to see the terrain.

Hiking up to De Anza was easy, as all I had to do was keep hiking northeast and up and I knew I’d eventually make it to the summit. When I did, I thought to myself “that was too easy” and had to check my Peakbagger app to verify I was already at the summit.  I was, so I took a picture of my feet at the summit cairn, and headed back down. My advice on this peak:  If you’re already paying to hike here, hike De Anza as well.  I’m guessing it may have added half an hour total to my hiking time.  Totally worth it, and super easy, especially by avoiding Whiskey Pass on the way up, which meant less scree/talus to navigate:  it was all tundra for me.

Hiking back down the ridge was the tricky part.  It was still dark and foggy and I had no visual sense of direction.  At one point I encountered snow and knew I was going the wrong way because I hadn’t encountered snow on the way up.  At times I’d point my flashlight away just so I could see the terrain better.  I kept my compass in front of me and did my best to head southwest down the ridge. Hiking in the dark with fog is not ideal. 

Once again, no pictures here as I made my way to Whiskey Pass.  In the daylight this is probably easy to navigate, but in the dark I kept coming across large gaps in the ridge I had to maneuver around.  If you’re doing this in the daylight I’m sure the route is obvious.  If you’re doing it in the dark I’d say if you’re in doubt, stick to the right (west) when you encounter a chasm/drop off.  It’s all class 2, so if you feel it’s more difficult than that, re-assess your route. 

The hike from Whiskey Pass up to Beaubein Peak was a straightforward ridge hike.  It was still dark, but the sun was starting to rise as I kept heading south. 

Summit of Beaubien Peak

Beaubien Peak:

Here’s my view looking back at De Anza. 

It’s colder than it looks

Next, I continued following the ridge south.  The clouds didn’t seem to want to go away. I could see Culebra in the distance, and was just waiting for the fog to lift and the sun to rise

Here’s a look at Francisco Peak

Once again, I hiked through the fog to get there

From the summit, it looks as if the true summit of Francisco Peak is further southwest (where the cairn is), but it isn’t. It’s actually where I’m standing, taking this picture.

However, I didn’t realize this until I’d walked over to the other side, so you get a picture of me there, not at the actual summit… but close. 

Francisco Peak: 

Here’s looking back on the route so far.  Still colder than it looks

The clouds now behind me, I continued following the ridge south towards Lomo Liso Mountain.  This was an easy ridge walk on tundra

The summit was large and flat and it was again difficult to figure out where the ‘true’ summit was, so I went with where the cairn was located.  Side note:  all the summit registers on all of these peaks have been broken and are empty. 

Lomo Liso Mountain:

From the summit of Lomo Liso you can clearly see the rest of the route

From the summit of Lomo Liso I turned and headed northeast, and then followed the ridge southeast.  It’s really quite obvious the direction you should go.

There were some ups and downs to the ridge, but it was a simple tundra hike

This is also where I saw my first herd of elk for the day (I ended up seeing 3 herds total, but some were too far away to see in pictures, as they were down in the basins)

After the elk ran away from me I hiked up the north slope towards Miranda Peak

The last bit to Miranda is class 3 for a short distance.  Here’s the overall route.  If you’re in a large group you may want a helmet for the loose and rocky gully (but it’s relatively short, I’d suggest just taking turns ascending so you don’t kick rocks on the person below you).

Once in the gully, here’s how I ascended to the ridge

Once on the ridge I dipped to the left (east) to go around PT 13247, and then stayed on the ridge proper towards Miranda.  This area reminded me of the knife edge on Capitol, but with less exposure and better footing. I was able to put my feet in the cracks and walk across easily.

Miranda Peak: 

Miranda is unranked, so I didn’t take a summit selfie. From Miranda you can see Culebra, as well as the next ranked peak:  PT 13565.  As you can tell from the picture below, it’s a simple ridge hike.

The summit of PT 13565 was also flat, and the summit register was also broken with the information missing (hopefully the next group will bring new summit registers)

13565:

Here’s looking back at some of today’s peaks from PT 13565

Turning west, then following the ridge northwest, it was an easy hike to PT 13229

13229:

After summiting PT 13229 I returned to the 13565/13229 saddle and then turned right and headed south.

This is where it gets tricky.  There’s a large area where you can cliff out on your descent.  You’ll need to hike much further south than you want to so you can avoid the cliffs.  I looked for a break in the cliffs, and didn’t descend until about 12500’, down a gully.  Here’s what that looked like from above

Here’s what you’re trying to avoid, and a view of how I came down (from below)

Once in the basin, I headed northwest.  It’s important to stay between Cameros Lake and the smaller pond

Here I saw a herd of elk.  Of course, they didn’t stay long

As I exited the basin, I came upon two sets of cairns, which led to a very faint trail that eventually became a more pronounced trail and then an OHV track that led me out of the basin, and back to the 4WD road.

The trail stays to the north of Carneros Creek.

Once below treeline the hike seemed to take forever, as it was another 4 miles to where they’d shuttled our cars.  There were a lot of downed trees, and a lot of elk tracks.  I heard a few turkey, and I even startled some elk on the trail that ran away as I approached.  Eventually I crossed Carneros Creek on a few logs that had been placed for just such purpose. 

And made my way back to where they had shuttled our vehicles.  As I arrived, Carlos was just bringing the last of the vehicles up.  We chatted for a bit (they are seriously super nice:  every time I’m here they act as if all they care about is my happiness, which is appreciated, considering we pay quite a lot for the privilege of hiking there).

I’d really recommend having a GPX file for this route, if just to get out of the basin and back to the vehicles, as most of the rest of the hike above treeline is self explanatory.  Message me if you’d like mine (although I’ll admit it’s not perfect).  I’d assume if you’re hiking these peaks you have a good sense of direction, and that you have a lot of off route hiking experience, so you should do just fine.  Most of this hike is on tundra, and the gully/ridge section just before Miranda is quick and nothing to worry about.  I’d like to add the drive down was more difficult than the drive up, as we were now in a different area and the road had more divots and ruts to navigate.  I still didn’t need 4WD, but I couldn’t have done it without clearance.  Carlos did use spray paint on the grass/dirt to indicate which turns to take, which was helpful.

I made it back to my truck around 11:30am, making this a 16.25 mile hike with 6102’ of elevation gain in 9.5 hours.  On to the next trailhead!

Savage Peak – 13,139

RT Length:  9.24 miles

Elevation Gain: 3314’

The storms this week have put a damper on my hiking plans.  Most of the peaks on my immediate goal list are too long to complete before the storms hit, so when I saw the weather was good near Savage Peak I jumped on the chance to get in a quick weekday summit. I drove past the Missouri Lakes trailhead and drove the 4WD road to the stream crossing. I didn’t need to put my truck into 4WD (which was good, because it’s still not working).  There were some large puddles to splash through on the way in.

I parked at the stream crossing, and wore my sandals to cross the river and start the trail

The road curves around a bit, but you can just go straight up the hillside and pick up the road from there.  The stream was only a couple of inches deep.  You could drive across it, but it only saves you about 100 feet of hiking, so it’s not really worth it.

I followed the road for about half a mile to the diversion dam, where the road ended and the Missouri Lakes trail began.

This was a class 1 trail that followed Missouri Creek.  I loved how easy it was to follow up and into the basin, crossing the creek several times on sturdy bridges.

I followed the trail west.  At about 11,000’ I came upon avalanche debris.  The trail was well maintained and easy to follow through the debris.

This is also a good place to get a visual of the route.  This is where you’ll be aiming.

I continued following the well defined trail to 11330’, then left the trail to head south towards the ridge, aiming for a rocky ramp that hugged the side of the mountain. 

Once on the ramp, I followed it east to the base of the ridge.

At the base of the ridge I turned right, and followed the ridge west

Here’s the first good view of Savage Peak

This is a simple, class 2 ridge hike to the summit.

There is a small false summit just before the true summit

I summited Savage Peak at 7:40am

Savage Peak: 

There were some great views of Missouri Lakes

I left a summit register and headed back the way I’d come

Here’s a look down the ridge

Here’s how I exited the ridge

And headed back into the basin

Back in the basin I headed northeast until I linked back up with the Missouri Lakes Trail.

And followed the trail back through the landslide area and across the bridges

Once back on the 4WD road I followed it back down to the stream, and my truck on the other side.

I made it back to my truck at 10am, making this a 9.24 mile hike with 3314’ of elevation gain in 5 hours, just as the storms were rolling in.

Now, off to visit some Hot Springs and get that back window fixed. 

Little Horn Peak – 13,143 and Fluted Peak – 13,576

RT Length:  12.35 miles

Elevation Gain: 5504’

I parked at the Horn Creek Trailhead, the only vehicle in the lot.  I’m always surprised at how few people take advantage of the free dispersed camping sites we have in Colorado, especially ones like this with a bathroom.  Eager to summit and get back to treeline before the incoming storm, I gathered my gear and was on the trail at 4:30am.  The trail starts by following the Rainbow Trail southwest for just over half a mile

Then I turned right onto Horn Creek Trail

I followed Horn Creek Trail for a short distance, about a tenth of a mile, before turning left at the junction towards Horn Creek Lakes.  Here there’s a register, that looks to be kept up.

I stayed on this trail for half a mile, before leaving the trail at 9590’ and heading north and then west up the ridge.  There is no trail here.  I left a small cairn to indicate where I left the trail, but I don’t expect it to be there long, as it was small.

Route finding here can be a bit tricky, but the goal is to gain the ridge.  I did this by heading west, through the pine and aspen trees.  Every once in a while, I’d come across a game trail.  They all fizzled out however.  This area is easy to navigate, as there aren’t too many downed trees.  I was able to avoid most of them.

Once I was on the ridge, I followed it southwest to treeline.  This is a long ridge, and it seemed to take forever to make it to treeline.  Here’s my first glimpse of Little Horn Peak

Like I said, this is a long ridge

The class 3 fun starts at the top of the ridge, which is a false summit.  From here you can see Little Horn Peak’s true summit

My trekking pole isn’t collapsible, so I left it at the start of the class 3 section, put on my helmet, and started heading straight over the ridge.  The class 3 section is consistent for another half mile to the summit. 

Start out by going straight over the ridge.  There is some exposure here. 

Then you’ll dip down to the right.  Look for a notch, go through it, and now you’re on the left side of the ridge. 

Go up the gully and cross back over to the right side of the ridge

There’s a section of rock to upclimb.  This was difficult class 3 / easy class 4 (and much more difficult and committing on the way back down later in the day).  

From the top of this section I could see the summit.  I stayed on the left side of the ridge from this point on, staying on class 2 terrain.

I summited Little Horn Peak at 7:45am

Little Horn Peak: 

That was it for the class 3 section of the hike.  The ridge over to Fluted Peak is class 2 (with the option to go up a class 3 chimney, but it’s avoidable).  Here’s Fluted Peak to the west.

This was a simple ridge hike to the saddle.  You can’t see them very well in this photo, but there was a mama bighorn sheep with her baby walking up the ridge.  The baby couldn’t have been more than a month old.

From the saddle, here’s how you keep this a class 2 hike (dotted lines show the class 3 route)

Here’s the first obstacle (class 2 solid, class 3 dotted):

And the second (class 2 solid, class 3 chimney dotted):

Here’s that chimney up close

After the chimney, it’s straightforward class 2 to the top of the ridge to the first false summit. 

Fluted Peak is actually here

There are two quick false summits to go up and over

And then the final summit

I summited Fluted Peak at 9am

Fluted Peak: 

The clouds were coming in fast, so I decided to re-trace my steps and head back to Little Horn Peak (I’ve already summited Horn Peak, so there was no need to make this a loop today).  I headed back to the ridge

Here’s a picture of Little Horn Peak from the Fluted Peak Ridge

It all stayed class 2 until I made it to the summit of Little Horn Peak

From there It was class 3 again until I made it to the ridge.

Here’s a closer look at that notch

And the last bit of scrambling to the ridge

I made it to the ridge and looked around for my trekking pole.  It wasn’t where I’d left it.  Instead, it was about 15 feet away, at the entrance to a marmot burrow. I picked it up and found some marmot had turned it into a snack.  Just adding more photographic evidence to prove the case “Marmots can’t be trusted with trekking poles”.

I sighed, took off my helmet, and headed back down the ridge (yes, I brought the trekking pole down). 

Once back at treeline I turned back for a last view as it started raining. 

The rain quickly turned to hail and I had to put my camera away. Here are some pictures of below treeline, in-between bouts of rain/hail. I just kept descending northeast, and when the ridge ended I continued east towards Horn Creek Trail.  Once again, I’d pick up game trails and then lose them.   A little advice:  you should be able to hear Horn Creek flowing below you to your right if you’re going in the correct direction.

Back on the trail I followed it to the trailhead.

I made it back to the trailhead at 1pm, making this a 12.35 mile hike with 5504’ of elevation gain in 8.5 hours.  That had been a fun day of scrambling!

I dried off and headed to the next trailhead.  When I got there it was still raining, so I decided to make dinner inside the topper of my truck.  I finished, cleaned up, and was sitting down to write notes in my journal when I heard a loud “BANG!” 

I looked up, and the back window to my topper crumpled and broke into thousands of pieces.  I honestly thought I’d been shot at, and turned around but didn’t see a bullet hole anywhere.  Next, I gingerly opened the window, crawled out of the truck and took a look around:  no one in sight (but it was still raining). 

I assessed the damage, and realized I needed to take care of this asap, so I put on gloves and cleaned up all the broken glass I could, still getting some small slivers of glass embedded in my fingers.  Next, I drove to where I could get cell reception, and found the nearest place that would be open the next day to fix the broken glass was 5 minutes from my home, and 6 hours from where I was right now.  I sighed:  It looked like I had a long night ahead of me. 

It turned out the auto glass store couldn’t help me, and told me to go to where I’d originally bought the topper.  They couldn’t help me for another 4-6 weeks (and $600), but referred me to another glass shop that didn’t open until Monday.  So, a quick trip to Walmart to pick up some duct tape and a tarp and I was able to create a makeshift door that does nothing to keep animals/intruders out, but has done a decent job keeping out the rain.  I’m still not sure why the window broke:  I was told sometimes there’s just a flaw in the glass.  That sounds bogus, but I’m getting a new one soon anyway, and I’ve learned not to get windows in my next topper (I don’t use them anyway).  I’m actually more upset I lost out on two days of hiking. 

Geneva Peak – 13,266 and Landslide Peak – 13,238

RT Length: 9.84 miles

Elevation Gain: 2965’

It took me longer than anticipated to get to the trailhead due to an unexpected semi fire on I70.  At first it looked like the entire hillside was on fire, due to all the smoke, but as I got closer I realized it was a semi.  West bound wasn’t closed however, so I was able to get past it faster than those travelling east (which was closed).

When I finally made it to Montezuma, I turned left on 285 and followed it towards Webster Pass

This is a moderate 4WD road (which is good, since I still don’t have my new truck).  They are serious about ‘no parking’ on private land here, and let you know you’re not allowed to park in any available pullout.

I was able to drive the .7 miles to the gate, but when I got there the gate was closed.  Had it been open, I would have been able to drive all the way to 11000’.  It was closed to allow for spring runoff (I’d find the next day it’s going to be a while before it opens:  Webster Pass is still socked in and the 4WD roads have several feet of snow in some areas).

There were 3 places to park here, but none of them were very level, so I turned to drive my truck to a spot I’d seen on my way in, just about a dozen yards or so back down the road.  As I was doing so, I noticed 3 ATVs:  The drivers drove them through the woods, around the closed gate sign, and up the road.  On my hike the next day it was obvious theirs were the only tracks. I was mad they were breaking the rules, but also hoping maybe they were ‘official’ and checking to see if the trails had melted out?  They didn’t look very official.  They also looked like they’d had to turn around.

Here’s the camping spot I chose for the night:  a legal place to park at 10780’, next to the Snake River.

I got out and explored.  There are several fire pits behind the parking area, and what look like good places to put up a tent.

After exploring, I went back to my truck, made dinner, sipped some whiskey, and started reading a book I bought at a used bookstore in Arizona:  The Magnificent Mountain Women, Adventures in the Colorado Rockies by Janet Robertson (1990).  It’s about all the first women to summit various Colorado Mountains, mostly 14ers.  While I only made it about 50 pages in that night, so far it’s a great book, with a lot of good points and tons of background information on the lives of these women and their ascents.  Added bonus:  it includes pictures. 

After a few chapters I decided to make it an early night.  I had a lot of dental work done the day before and I was still sore.  I had a hummingbird come visit me inside the topper of my truck (that’s 5 times now that’s happened to me), cleaned up, and went to bed. 

I know the route I took is not the conventional route to Geneva/Landslide, but I did this on purpose:  I’m hiking the loop with a friend next week and I’m trying to keep my streak of summiting peaks solo before going with someone.  I hadn’t yet done Geneva, so I wanted to tick it off before we climbed it together next week, so I got a bit creative.

I was on the road at 5am, just before the sun rose.  I took a quick short-cut from my camping spot through the trees to the gate (saved me a total of about 5 yards of walking). It’s an obvious and well-travelled side trail. 

I passed the gate and continued along 285

I followed this road for .85 miles, until I came to a wide-open gulch.  This is probably where I would have parked if the gate had been open. My hike would take me on a loop back to this place.

Here’s an overview of my hike to treeline: 

There was a sign indicating a trail that intersected the road at 11045’.  It showed there was a trail heading southeast, and indeed, in the dark it looked like there was a trail.  I knew I wanted to head this way, so I started following the ‘trail’.

I’m thinking this was a snowshoeing trail.  But, in any event, it took me in the right direction.  The only problem?  It was under spring runout.  The entire area was marshy and I was sinking in the slush. Not fun.  I found if I stayed higher, more to the left, I was able to miss the brunt of it.  The ‘trail’ ended after about 200 feet. One thing I knew:  this was not going to be fun on my way back.  I decided to take the road down. I continued hugging the trees for three quarters of a mile, doing my best to avoid the willows

Then, at 11180’ I followed a small drainage into the trees, and headed east to treeline.

Once at treeline my route was obvious.  I just aimed for the drainage and followed it up.  Note:  This is the southeast face of Geneva Peak, and it’s pretty much all tundra.  I could have just gone up the ridge and ended up in the same spot, or followed the curve of the drainage all of the way right and done Landslide first.  Lots of choices here.

I chose to go up the drainage, straight to the small saddle between Geneva and Landslide.  This was nice and steady on tundra:  nothing unexpected.

Once at the saddle I turned left and headed towards Geneva Peak.  There was still a lot of snow here, but it was firm and I didn’t need microspikes.  I just followed the ridge northwest to the summit

The summit was covered in a cornice.

I walked a little further north to take my summit photos.  I summited Geneva Peak at 7am

Geneva Peak: 

Here’s a look at Geneva and Landslide from my picture spot.

Here are some other 13ers in the area:

I re-ascended Geneva, left a summit register on the cornice, and retraced my steps back to the Geneva/Landslide saddle. 

This was a quick and simple hike, following the ridge east.  The snow was avoidable if I were to dip down to the right, but at this time of day it was still firm and I didn’t even need microspikes to navigate.


There’s a bit of a false summit (if you could call it that) on the way

I summited Landslide Peak at 7:15am.  I’m jumping for joy because this is the 250th unique 13er in Colorado I’ve summited solo.  Woot!

Landslide Peak: 


Here’s looking back at Geneva

Since I didn’t want to drop back down into the basin and go through the marshy areas, I decided to hike the ridge south back to Webster Pass, then take the road back. Here’s the overall route along the ridge.

And some step-by-step pictures up and over this unranked point that is 13180’

This is easy class 2 up and over

Once at the top I made my way down to the 4WD dirt road.

At the road I turned right, and followed it west to Webster Pass.  As you can see from this picture, even in June, Webster Pass is impassible due to snow.

Here I had a great view of how I ascended Geneva Peak

At Webster Pass you can follow the 4WD road back, making this a loop

Here you can see the road, on the other side of the Snake River, and the path it leads out

Once on the road, there were varying conditions, from dry, to muddy, and eventually to snow covered.  The snow covered portions would have been difficult later in the day, but this early in the morning the snow was still (mostly) firm and I only postholed a couple of times

Just before making this a loop I came to a water crossing where Snake River meets 4WD road 285.  It was about 18 inches deep.  I took off my boots, rolled up my pants, and waded across, doing my best to avoid the stagnant area

Then I continued following 285 northwest, back to my truck

I made it back to my truck at 9:30am, making this a 9.84 mile hike with 2965’ of elevation gain in 4.5 hours. 

Now, off to the airport to pick up one of my Girl Scouts: We’re off to California for the week for their Senior trip to learn how to surf.  It’s our last trip before they all head off to college.  Maybe I’ll be able to find some good hikes along the beach? 

Antora Peak – 13,269, Sheep Mountain (UR) – 12860, and Sheep Mountain – 12,228

RT Length: 8.53 miles

Elevation Gain: 3562’

Boy, was that drive in fun!  I took LL56 to Bonanza, and then the 862 4WD road.  The road was clear to Bonanza, and then the fun began.  Notes about 862:  It’s narrow, making passing difficult.  It’s easy 4WD:  In fact, I didn’t put my truck into 4WD (because I couldn’t), but having decent ground clearance was nice.  The creek crossing looked more difficult than it was.  I’d say the water was 8-10 inches deep.

I parked at the junction of 862 and 8622D.  There’s a fence blocking off the road here, next to Kerber Creek.

The trail starts just behind the fence, and follows an old 4WD road and Kerber Creek for .3 miles

At this point the road comes to a ‘T’, and since I made this a loop, I ended up coming back to this spot on my way down.  Now however, I turned left, and continued to follow the road south.

I stayed on this road for another .3 miles, and then left the road to head west and bushwhack up to the ridge.  As far as bushwhacking goes, it wasn’t too bad:  Not a lot of downed trees, so heading west and staying west was easy.

At treeline, there’s a rock outcropping to skirt to the right

And then I followed the ridge northwest.                               

Once on the ridge I could see Antora Peak to my left

Here’s an overview of the rest of the route to the Antora Saddle.

And some step by step pictures.  There is no need to ascend Sheep Mountain at this point, but instead skirt it to the left, staying parallel with the saddle.

Once on the ridge I turned left and followed it southeast to the summit.  There were a bunch of game trails here, but I just went straight up the ridge.

I summited Antora Peak at 7:15am

Not sure why I called it Sheep Mountain in the video:  Probably because that was what I was viewing and it was in my head.  Oh well, this video is actually the view from Antora Peak.

Antora Peak:

There are fires in the area, so it was a hazy day.  I was making this a loop, with Sheep Mountain and Sheep Mountain Northeast.

I headed back towards the Antora/Sheep saddle

And then crossed the tundra and headed up Sheep Mountain.  I was glad it was still early and the water still (mostly) frozen on the tundra, otherwise this would have been a sloggy mess

There’s a game trail that goes up the side of Sheep Mountain. It can be hard to see initially, but it’s useful in getting through the initial mound of loose rocks.

Then it was up and over the ridge

The summit had a great view of Mt Ouray to the north

Sheep Mountain: 

Now to head over to Sheep Mountain Northeast

I hiked northeast, following the ridge

Here’s a look back at Antora Peak and Sheep Mountain

I was able to avoid most of the snow on the ridge towards Sheep Mountain Northeast.

Just before the final ascent I skirted the mountain to the left, following game trails

And then continued northeast to the summit

I walked all over the summit, trying to find the highpoint.  It looks like it’s further east than it really is (the first cairn you come to is the actual summit).  Here’s looking back at the route

To make this a loop, I hiked a third of a mile southwest, then cut across the tundra, heading east

This led me to a gully.  From here I could see Mosquito Lake.  I didn’t want to go to the lake, I wanted to find the trail that led back to the 4WD road.  Here’s the basic route:

I followed the gully down, crossed some small runoff streams, and kept heading south, looking for a trail. 

I actually found a trail, but kept losing and finding it again.  It hasn’t been used frequently in years, and there are a lot of game trails here.  I’m pretty sure it’s a ranching area as well.  At one time it looked like the trails were maintained:  they may even have been roads, but now they’re a mess.  I knew I was on the right track however, because I kept seeing tree stumps from sawed trees.

Continuing south, I eventually made it to the old road

This road led me back to the junction from earlier this morning.  I turned left onto 862 (no signage) and hiked the short distance back to my truck. This area is full of nice irrigation channels.

I made it back to my truck at 10am, making this an 8.53 mile hike with 3562’ of elevation gain in 4.5 hours. 

Now to drive out in the daylight.  Luckily, it was a Tuesday and I didn’t expect to encounter any other vehicles on the road.  I didn’t.  The Bonanza Mine was pretty cool.

“C.T.” Peak – 13,317

RT Length:  6.21 miles

Elevation Gain: 2925’

I’d been parked for a couple of days at Cooper Creek, dispersed camping and hiking.  I woke up to rain, so I decided to hit the snooze button on my alarm and just lie there in the bed of my truck and wait it out.  Within 15 minutes the rain stopped, and I was on my way.  This is a very straightforward hike, mostly above treeline, with little route finding (although there is some bushwhacking along Rock Creek).

I followed CR 30 for about a third of a mile, and then ascended Rock Creek, sticking to the right side of the creek

Just before making it to the basin, at after 1.5 miles and at around 11900’, I left the creek and started heading east, up the west ridge of the peak. 

While straightforward, this area was steep.  It started out with scree, then turned to rocks the size of microwaves, and then smaller rocks the size of softballs.  I just kept following the curve of the mountain as it climbed northeast.

Once I made it to the ridge, the elevation gain evened out.  I followed the ridge for .75 miles northeast, all the way to the end, to the summit.  95% of the snow was avoidable. 

I summited “C.T.” Peak at 6:15am

“C.T” Peak: 

There was a summit register.  It was still early, and it had been my intent to continue on to “Gudy Peak”, but the traverse was covered in snow, and I knew from yesterday’s hike how quickly the snow turned dangerous, so I opted to wait for it to thaw out and come back another time, knowing there’s be snow in the Cooper Lake Basin as well.  I turned and headed back the way I’d come.

Back down the ridge

Until I met up with Rock Creek and followed it back to CR 30

It was still really early in the morning, so I decided to spend some time investigating the avalanche site.  It looked recent (this winter?).  The house was scattered all over the area, with the roof several hundred feet from the closest level of the house (it looked like at least a 2-story house).  Beds were still made, but the fridge was empty, indicating the house had been closed up for the winter.  There were hiking boots in great condition, bed frames torn to pieces, propane tanks, wood burning stoves, and daily household items lying around, even a full bottle of laundry detergent.  There were camp chairs, still in good condition, folded and lying under fallen aspens next to what could have been a porch.

After abut a half hour of wandering around I made my way back to the road and followed it back to my truck.

I made it back to my truck at 8am, making this a 6.21 mile hike with 2925’ of elevation gain in 4.5 hours. 

Here’s a view of the ridge route from PT 13540

And a look up the ridge from the PT 13540 ridge

It was still early, so I decided to take a nap for a few hours.  I woke up, finished reading the book my daughter lent me, as well as a biography on Calamity Jane, and decided this finishing hikes early and just relaxing had its’ benefits.  I hiked around for a bit, started a campfire, sipped some whiskey, and thought how wonderful dispersed camping, and life in general, can be.