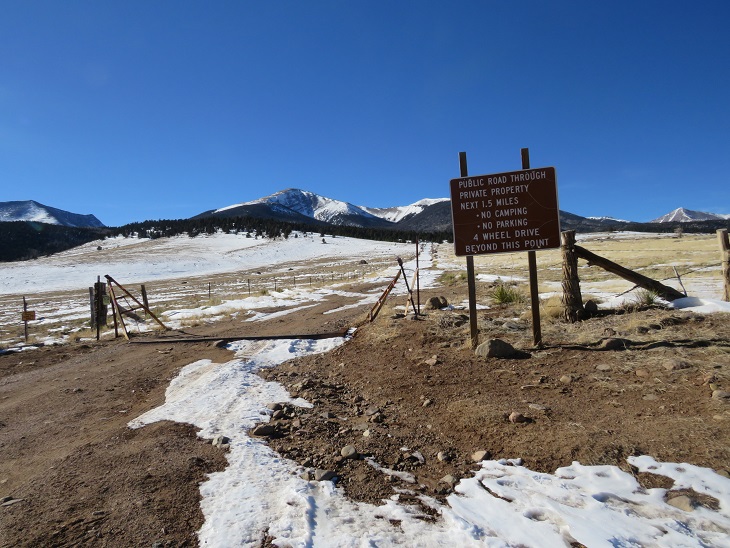
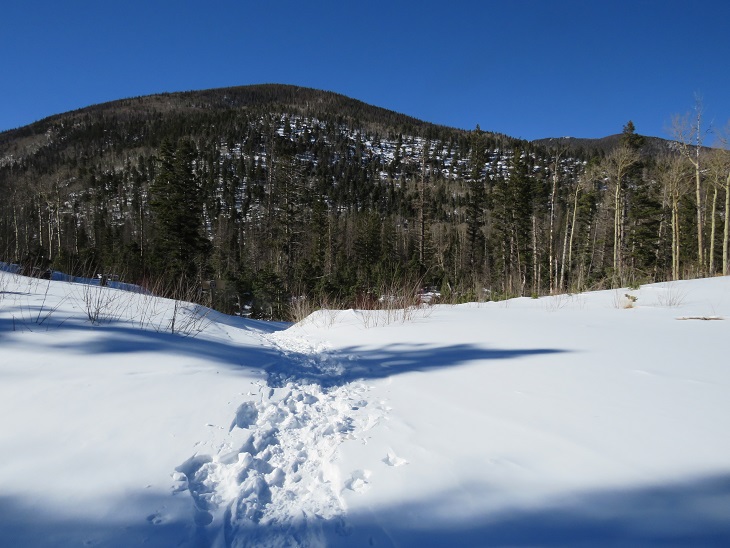
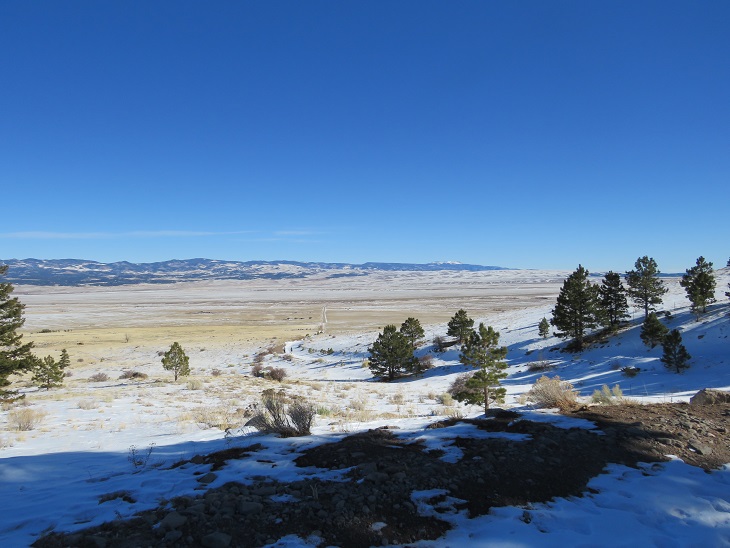
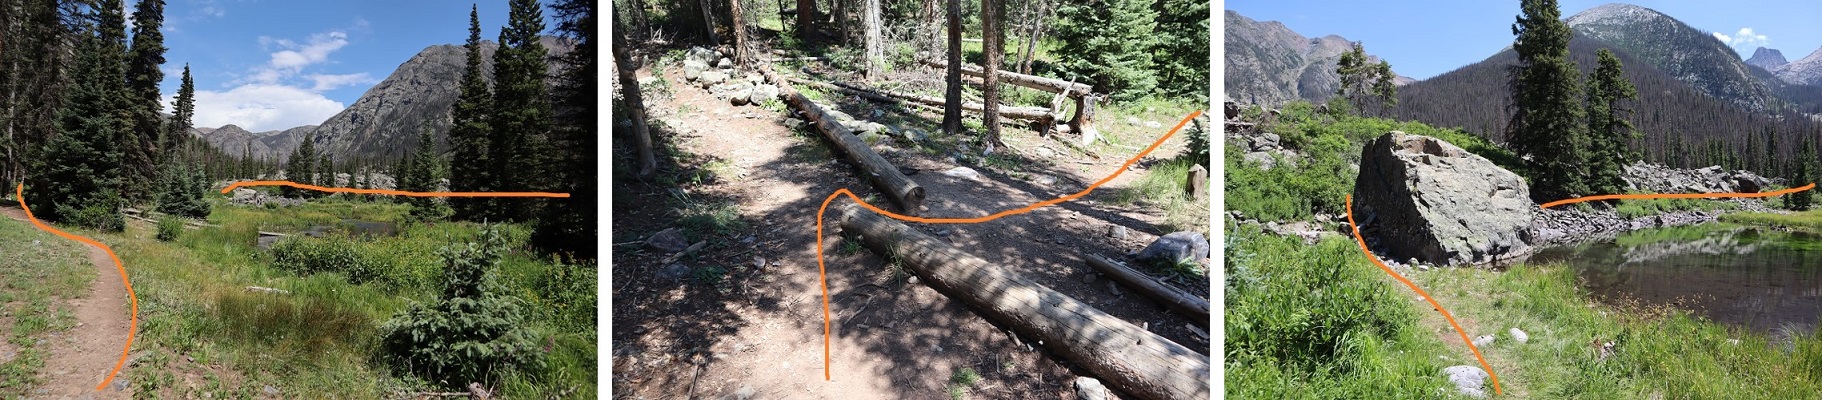
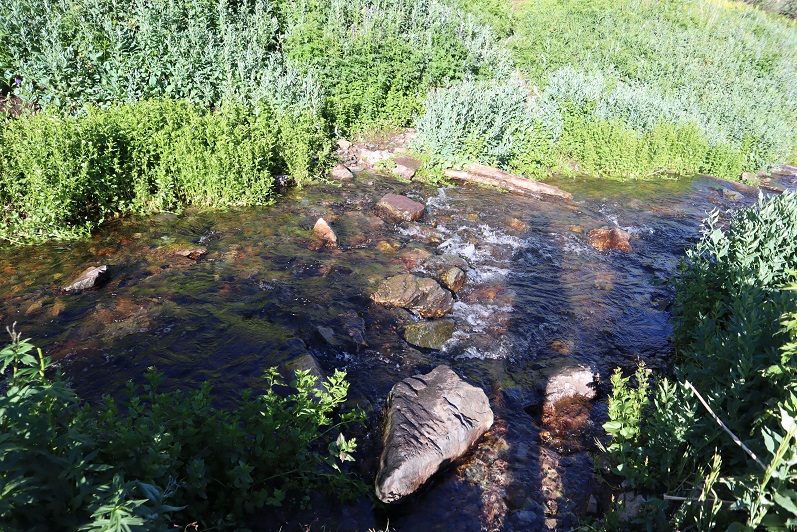
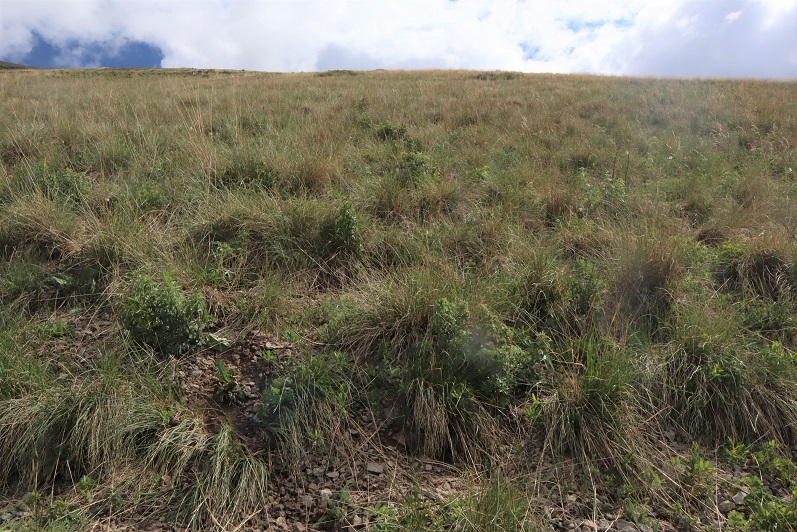
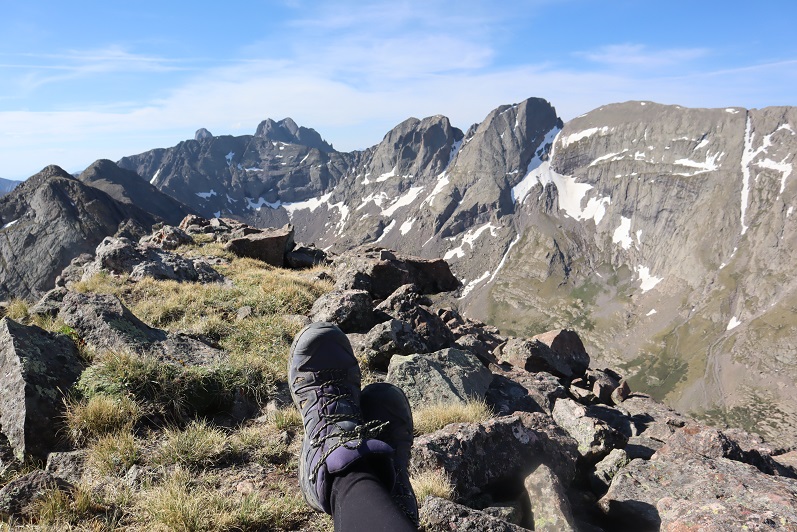
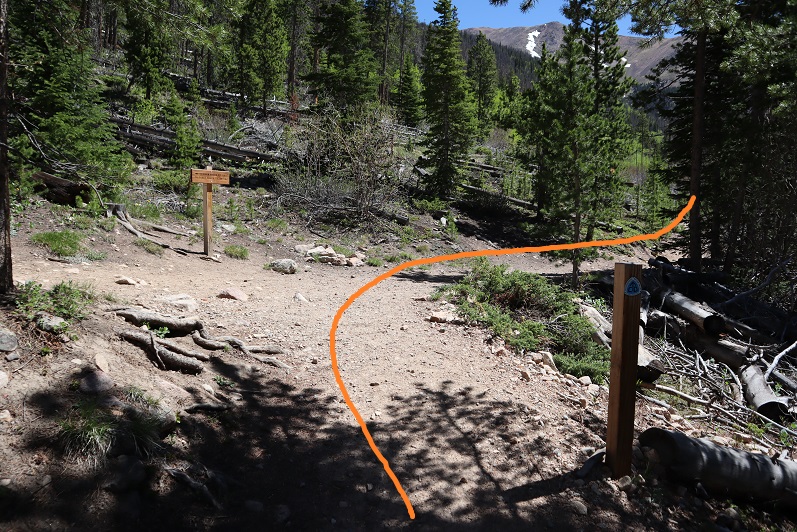
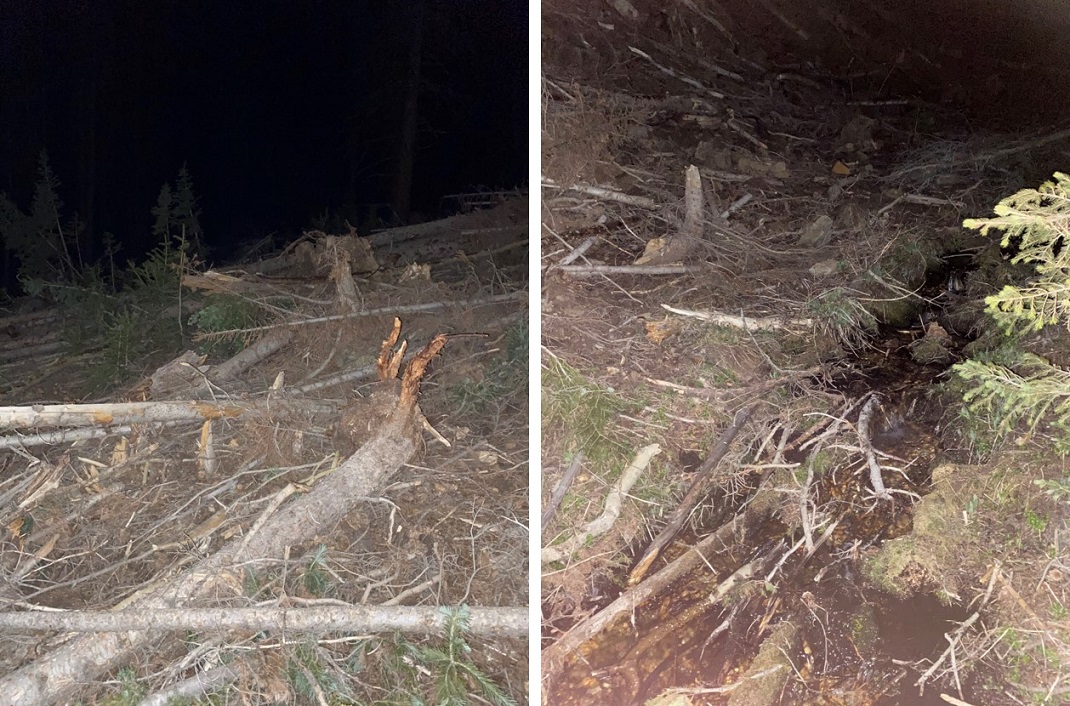
This was my third time hiking Humboldt, but my first time in calendar winter. The last time I was here there was a terrible wind that was causing the snow to become clouds, and I couldn’t see the summit when I arrived (or my own 2 feet). This time I was here for better pictures of the route, and to count it as an official snowflake. I arrived at the South Colony Lakes lower trailhead and was the only one in the lot when I parked my truck. I put on my gear, using only microspikes as my footwear, and was on the trail at 4:30am. As usual in winter, the snow started just past the 2WD parking area. I always find it amusing to see how far the tire tracks try to go up the road. This time, they didn’t go far.
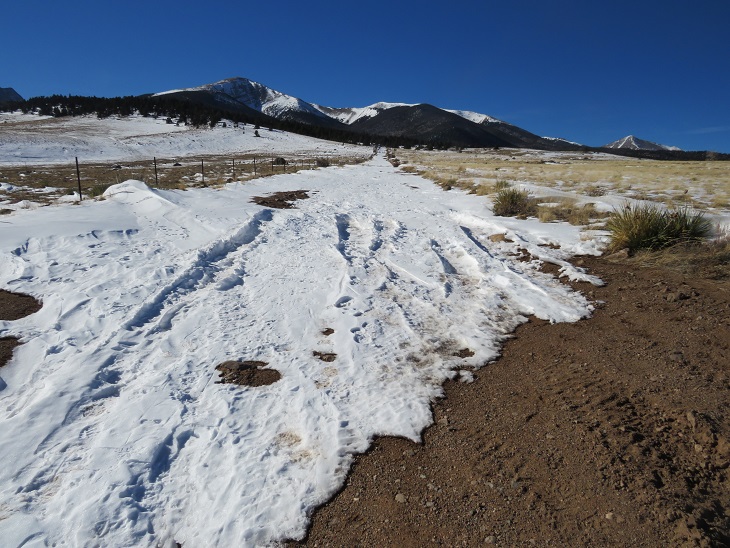
The snow on the road started right away, but there was a good trench. I followed the road for 2.3 miles to the junction with Rainbow Trail. It was still dark out, and as I rounded the last corner of the trail where I could still ‘see’ the trailhead I noticed there was another car parked there. It seems there would be hikers about a mile behind me today. Also, my flashlight started flickering. Time to change the batteries!
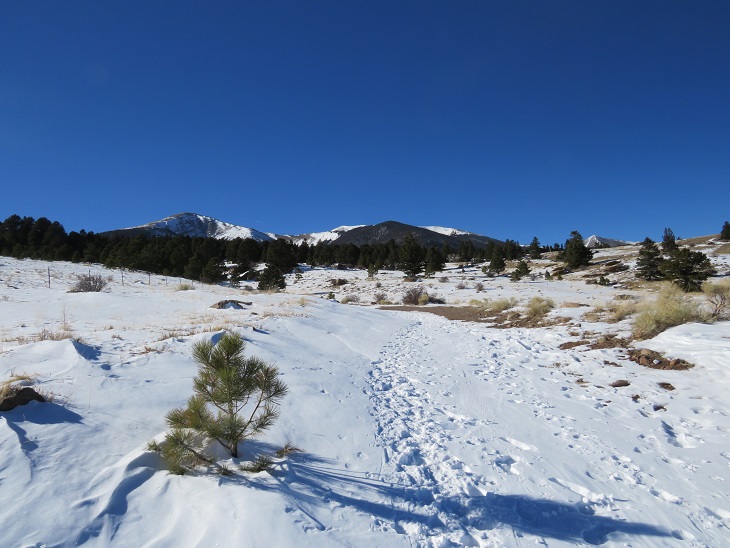
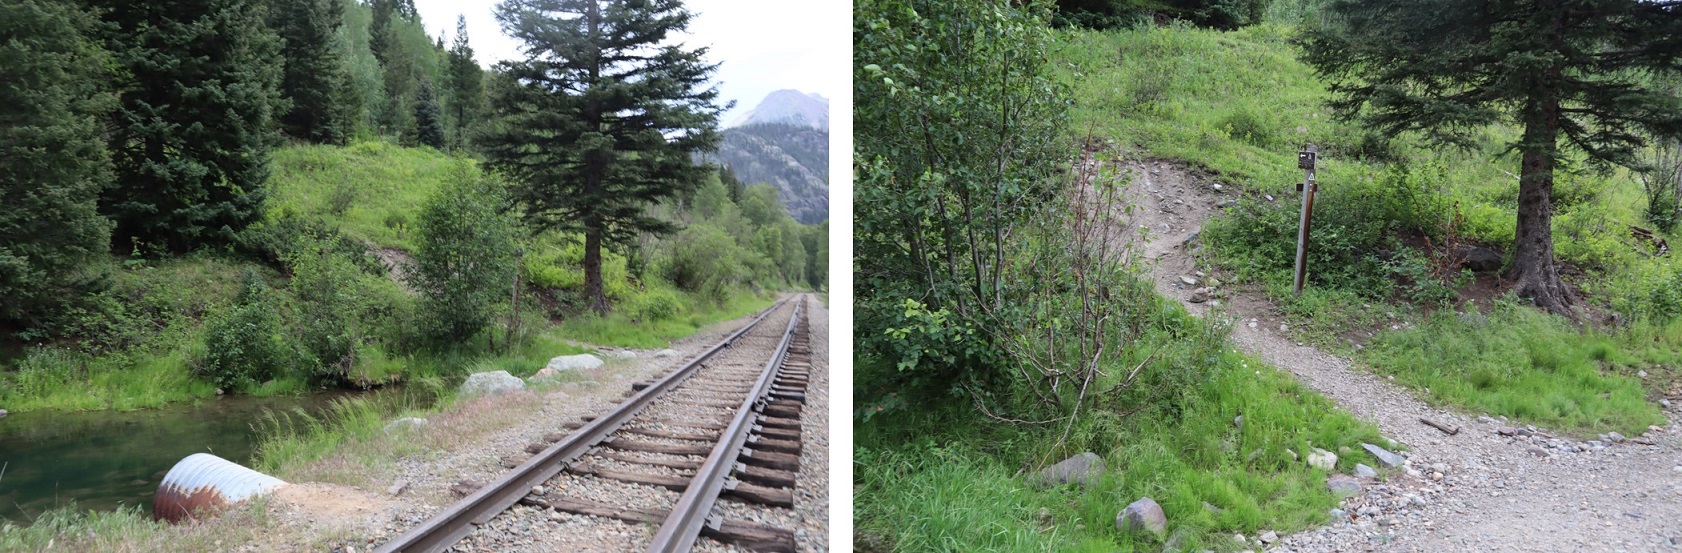
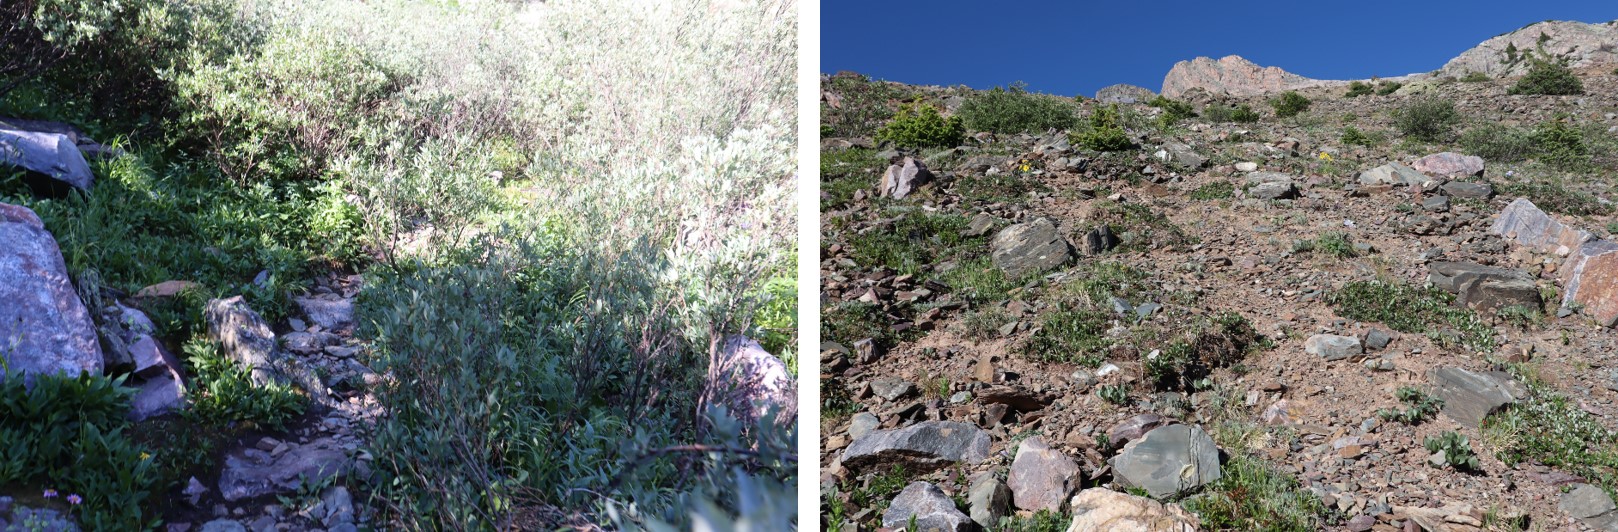
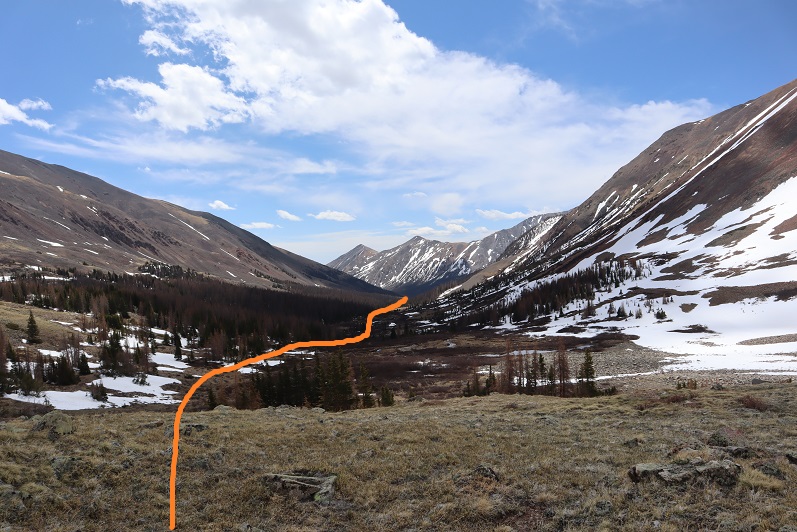
At Rainbow Trail the trench spiked, one side going towards Marble Mountain, the other towards Humboldt Peak’s East Ridge. There weren’t any tracks headed further down the road to South Colony Lakes. I turned right and followed Rainbow Trail for .5 miles.
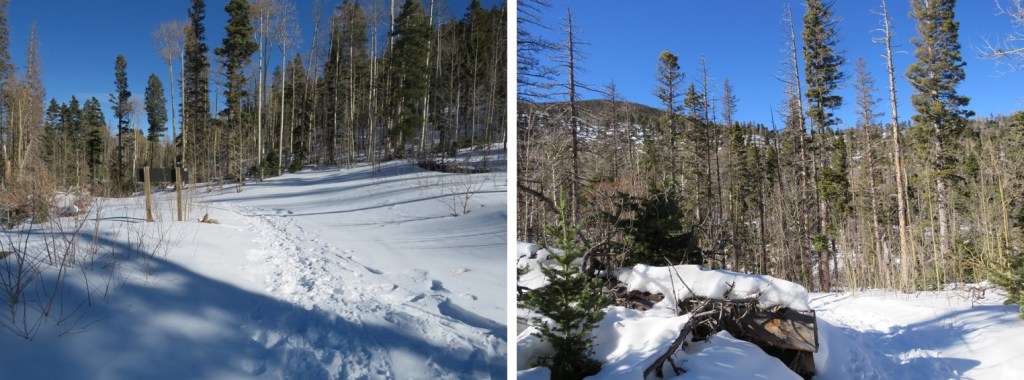
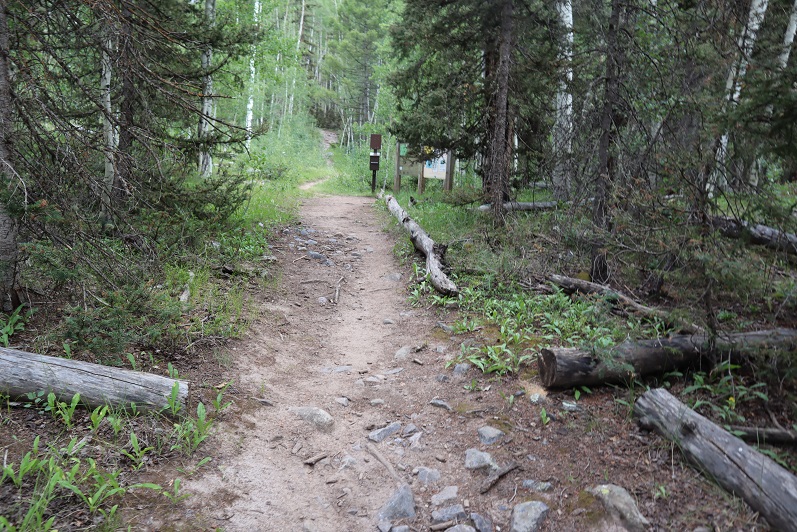
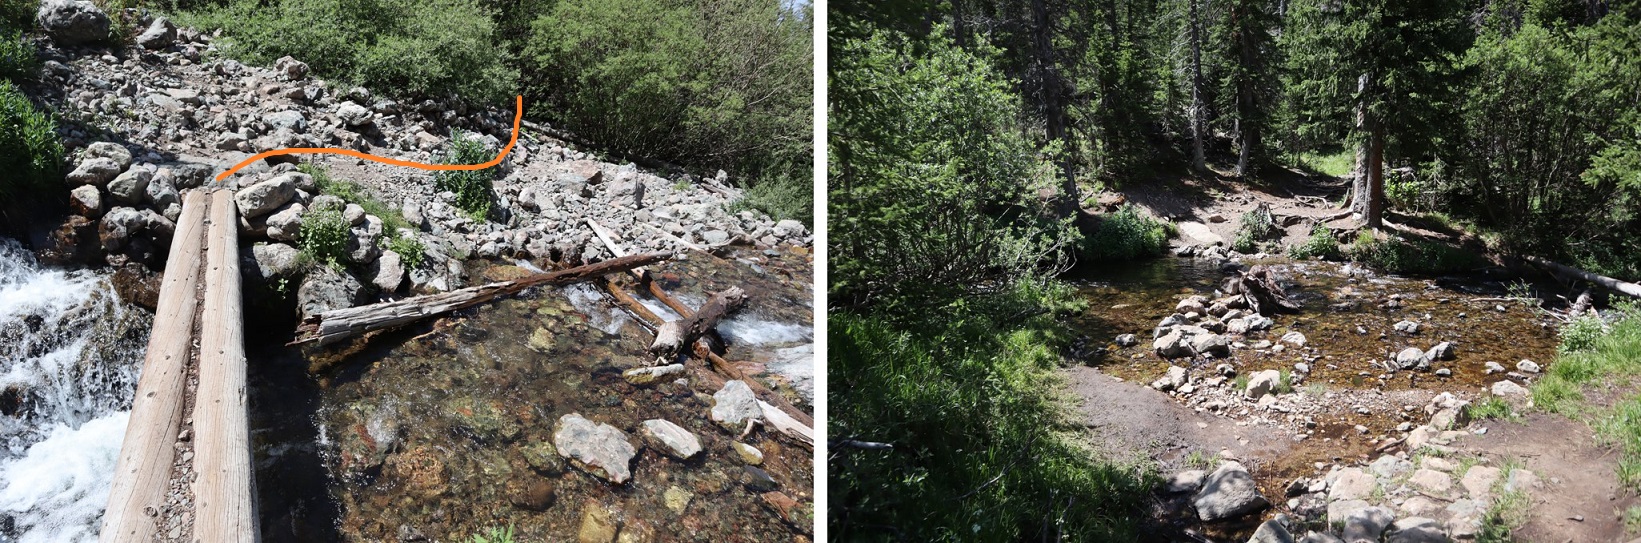
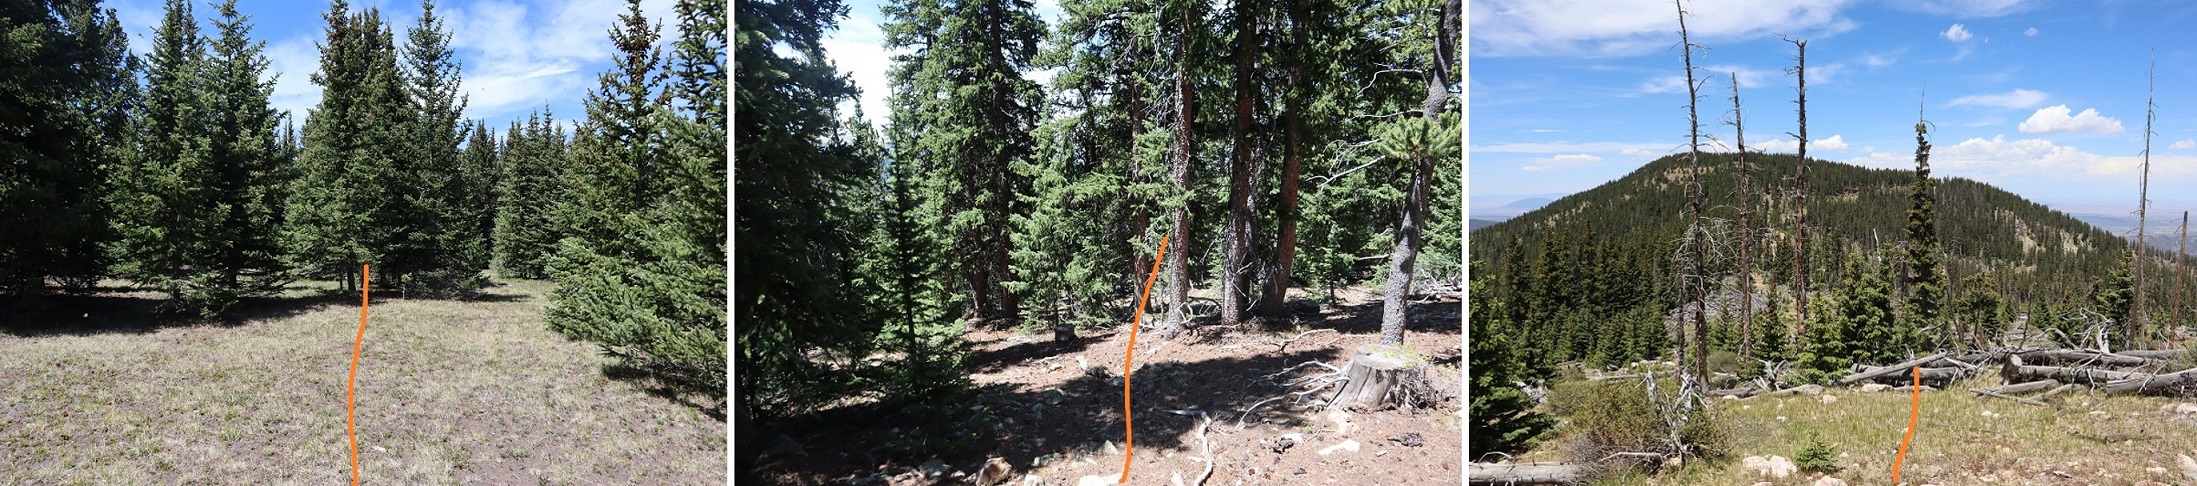
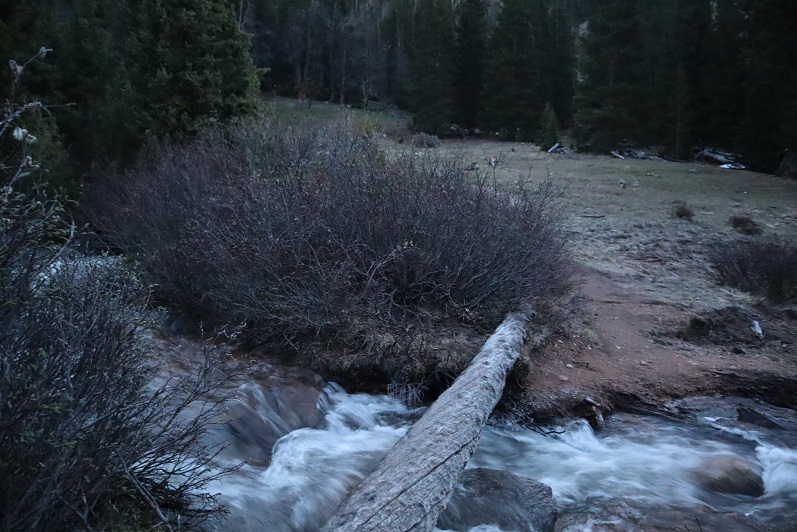
I quickly came to a bridge, then took the trail to the top of a slope
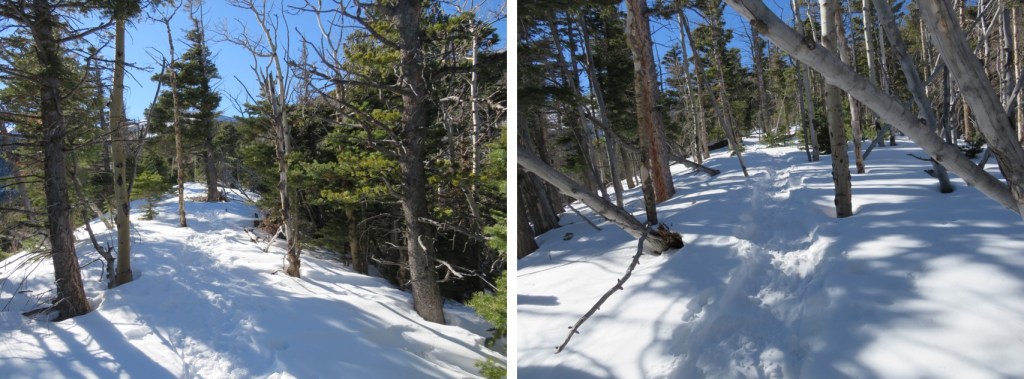
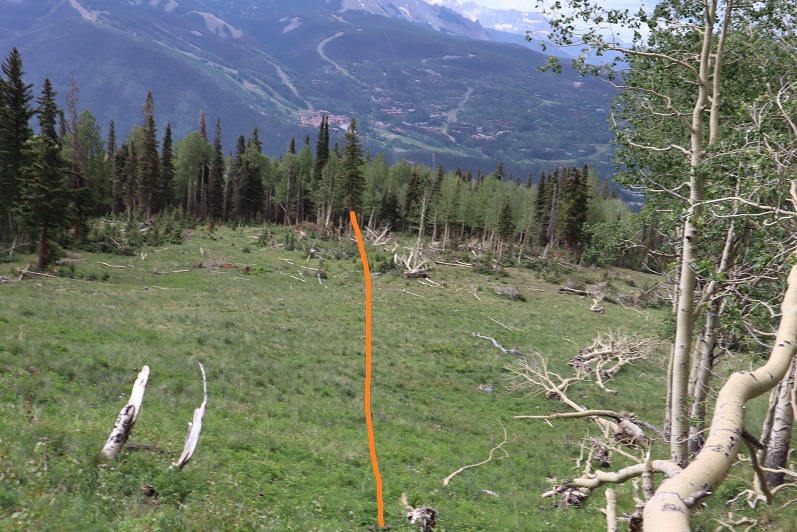
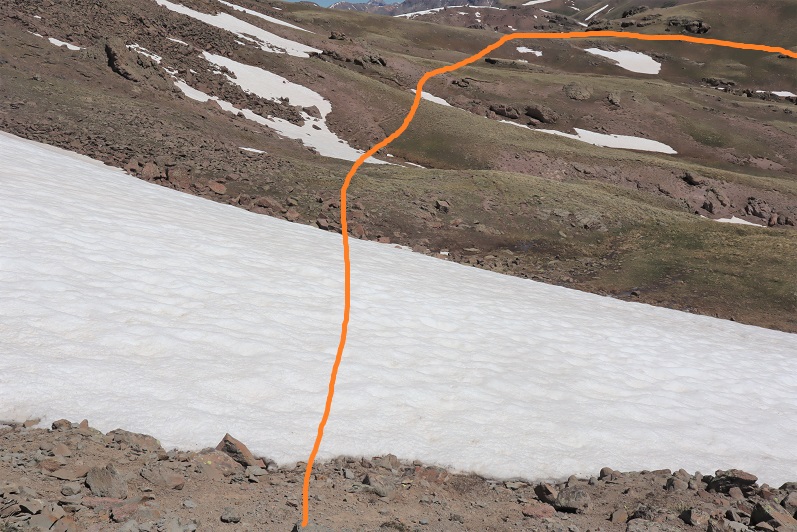
At the top of the slope I was thrilled to see there was a trench in place leading up the ridge. Last time I did this hike I’d had to trench it myself, and it had taken quite a bit of work. Today, I was going to poach someone else’s trench! Woot!
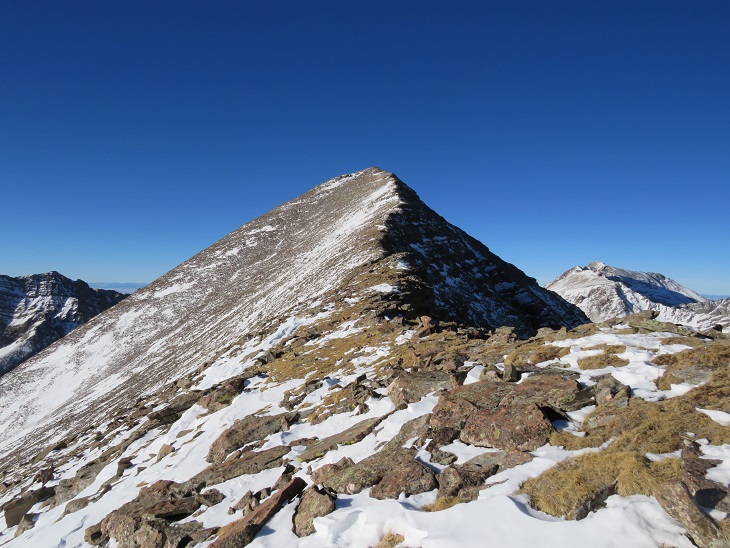
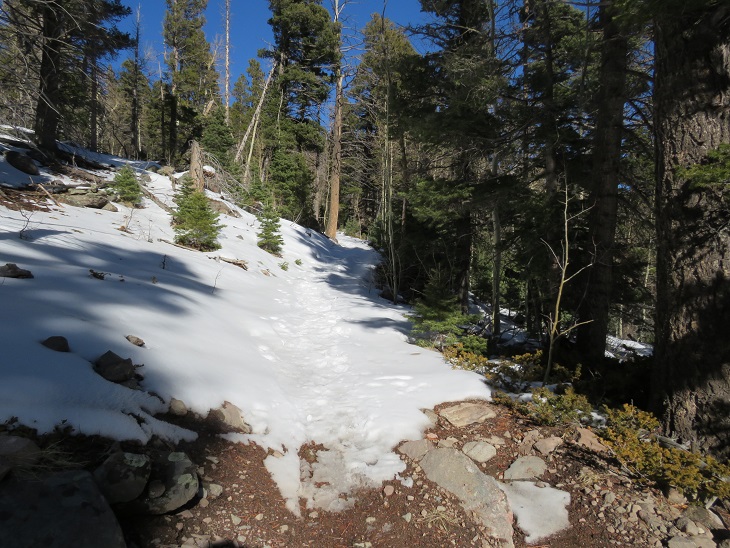
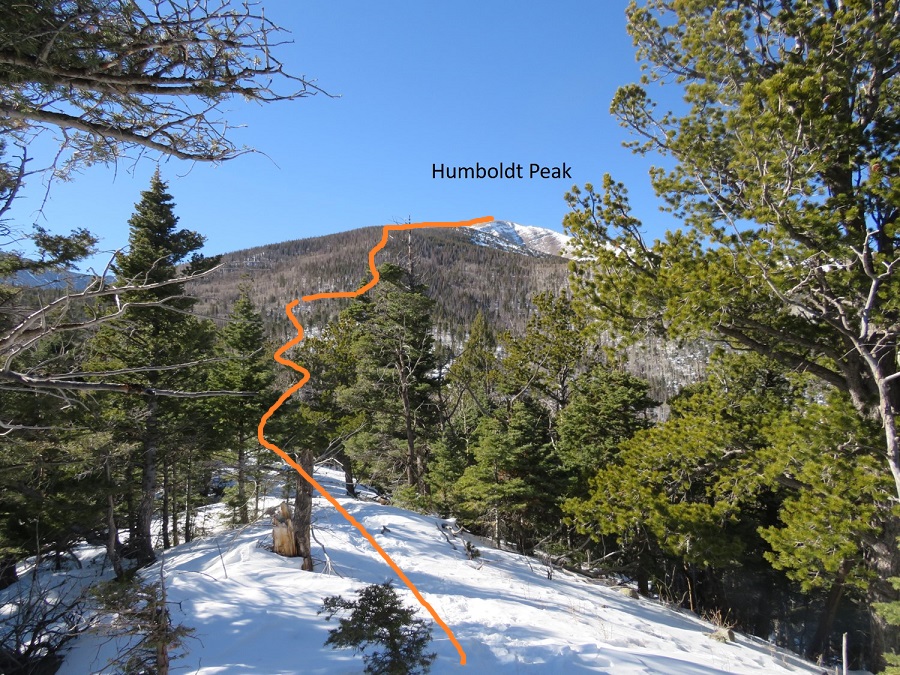
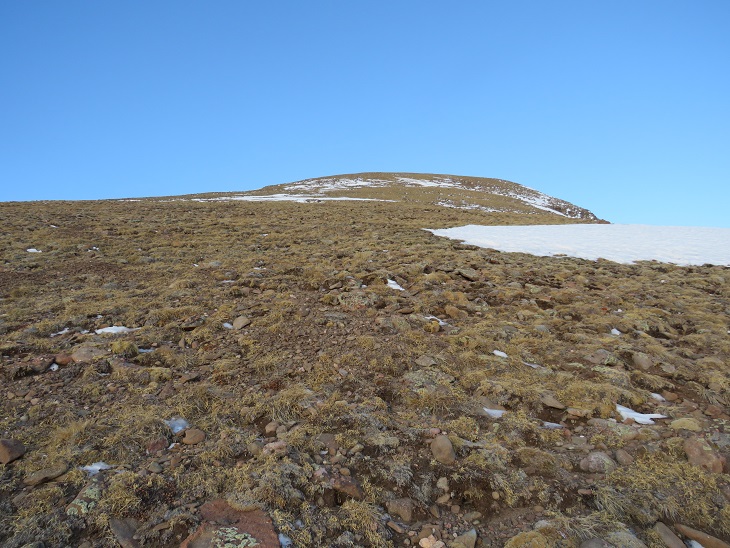
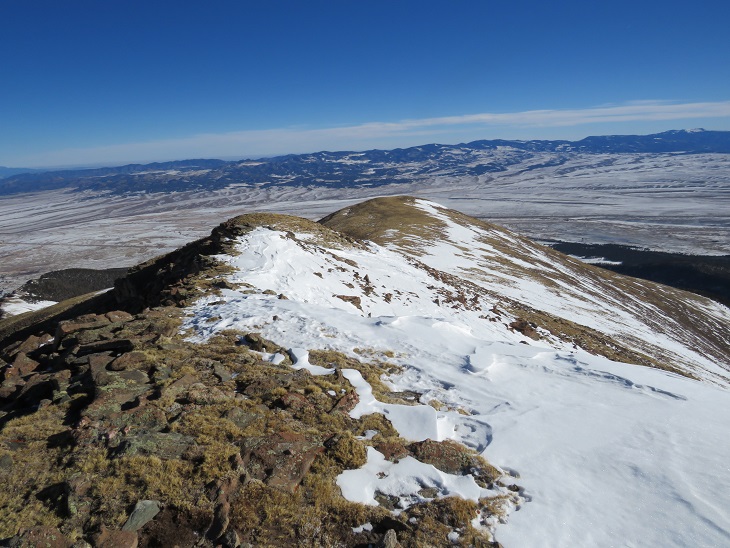
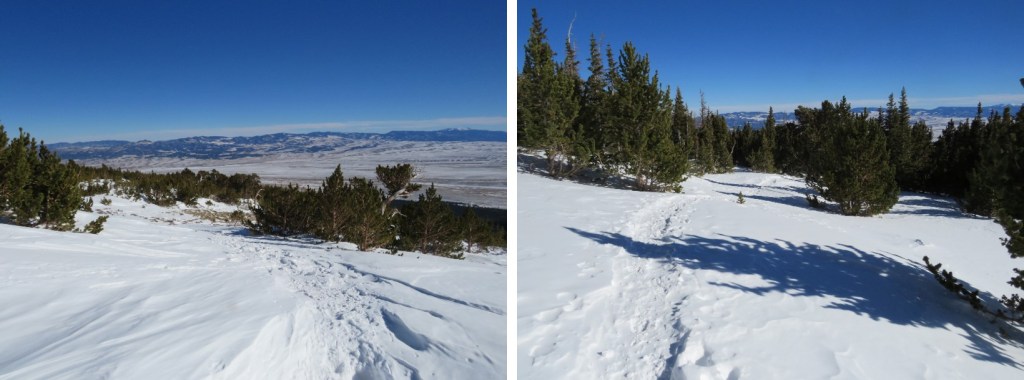
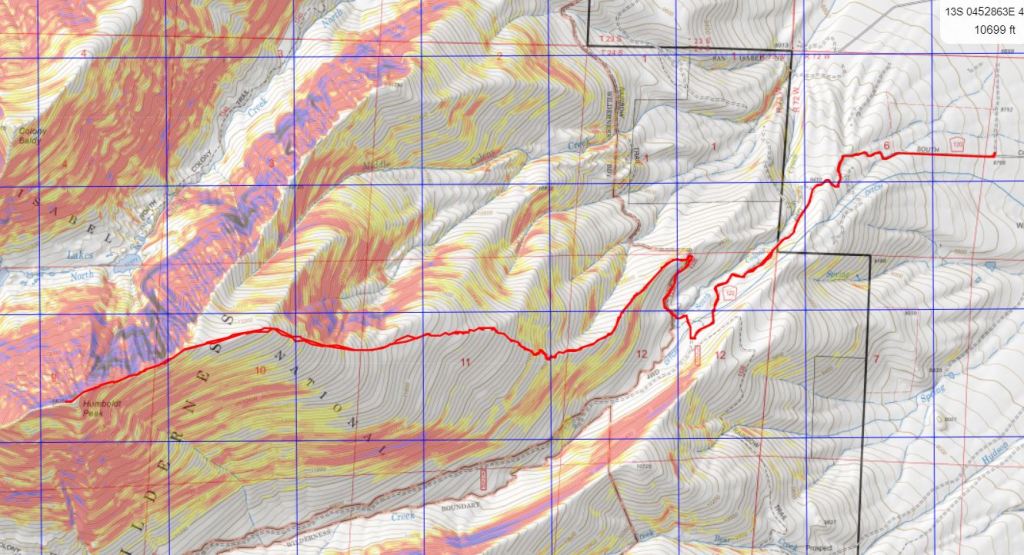
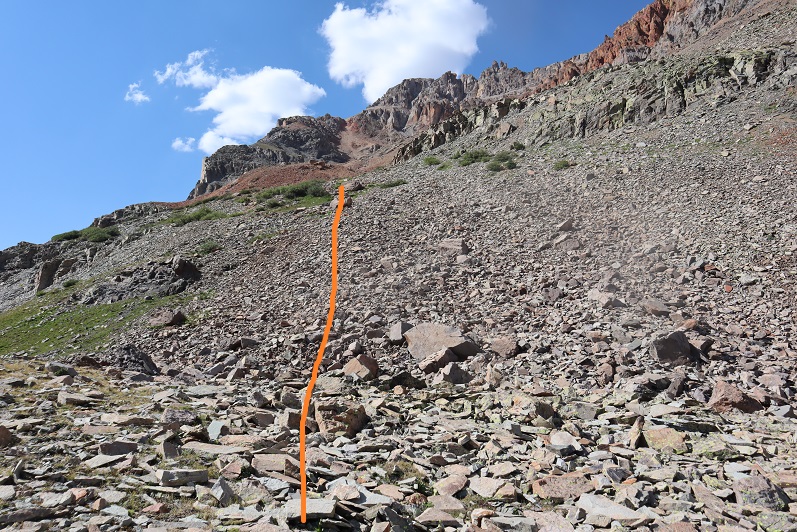
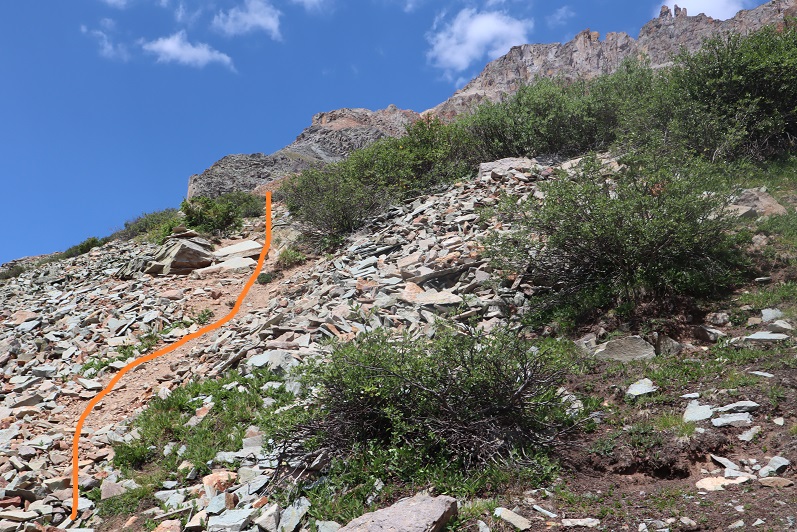
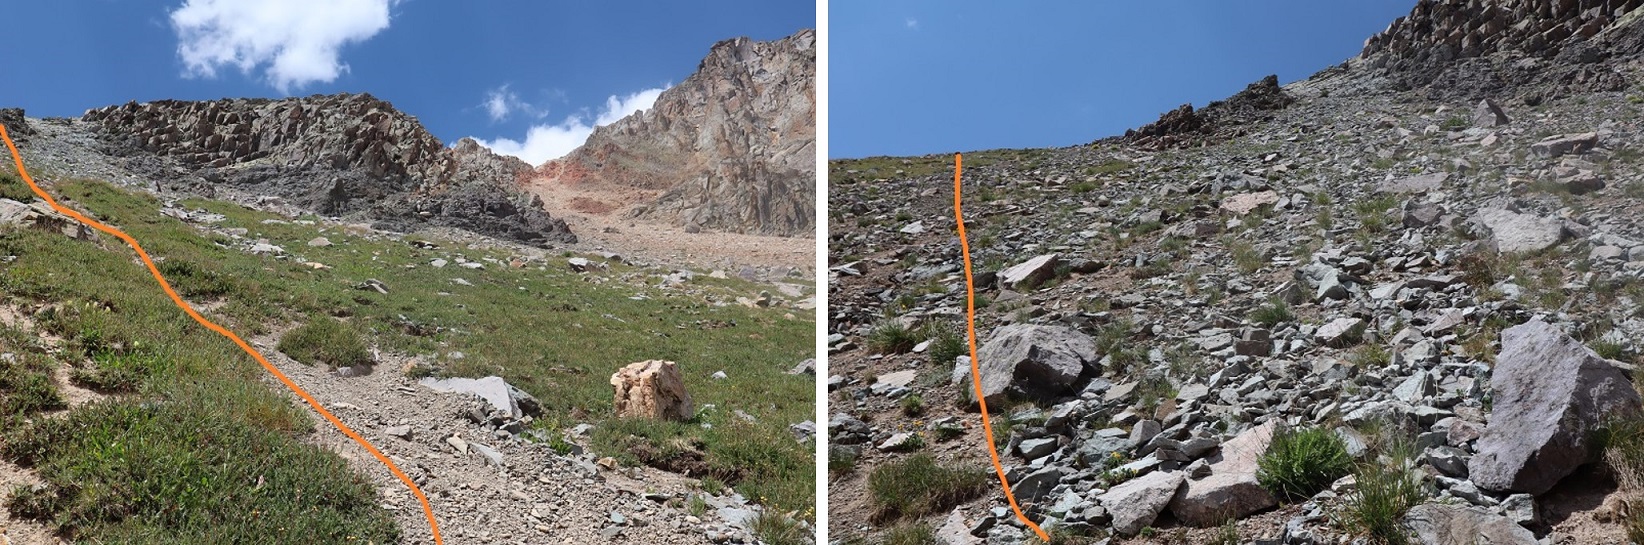
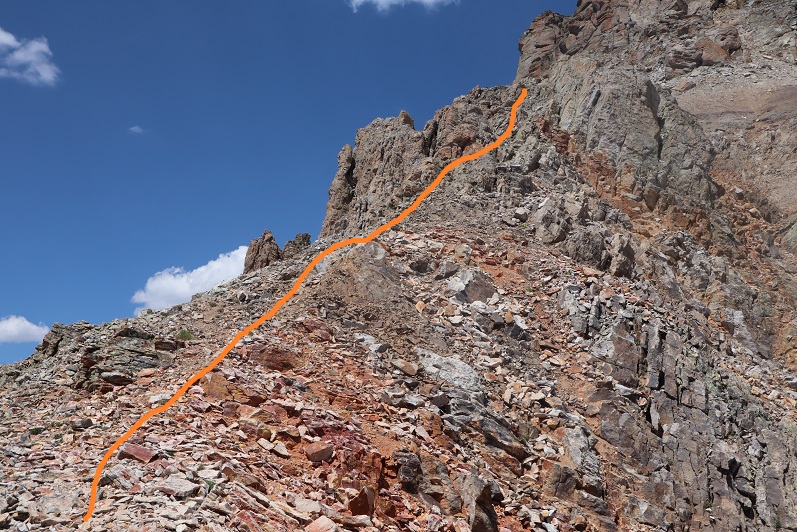
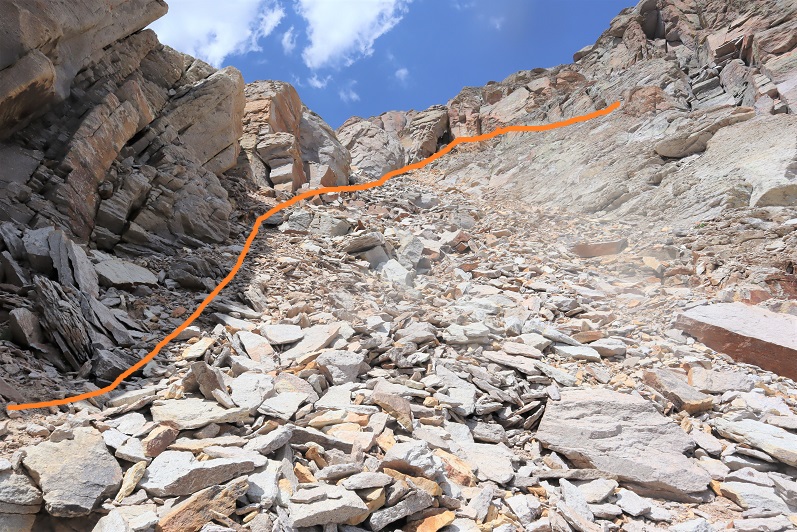
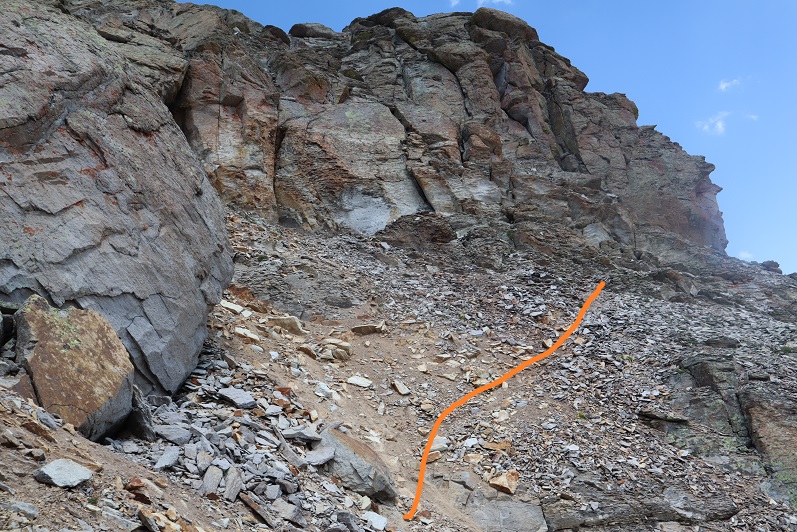
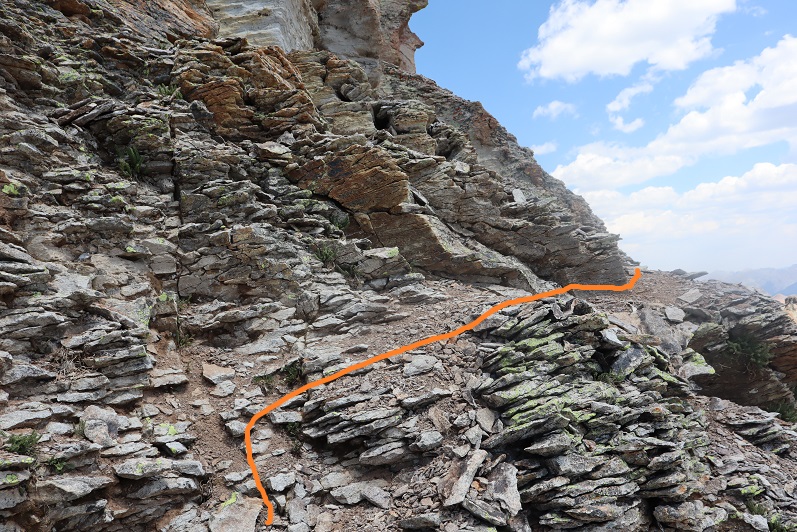
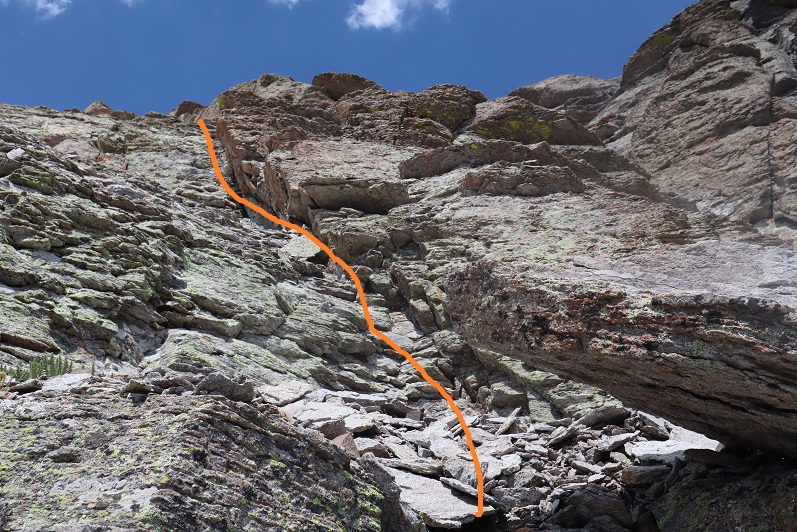
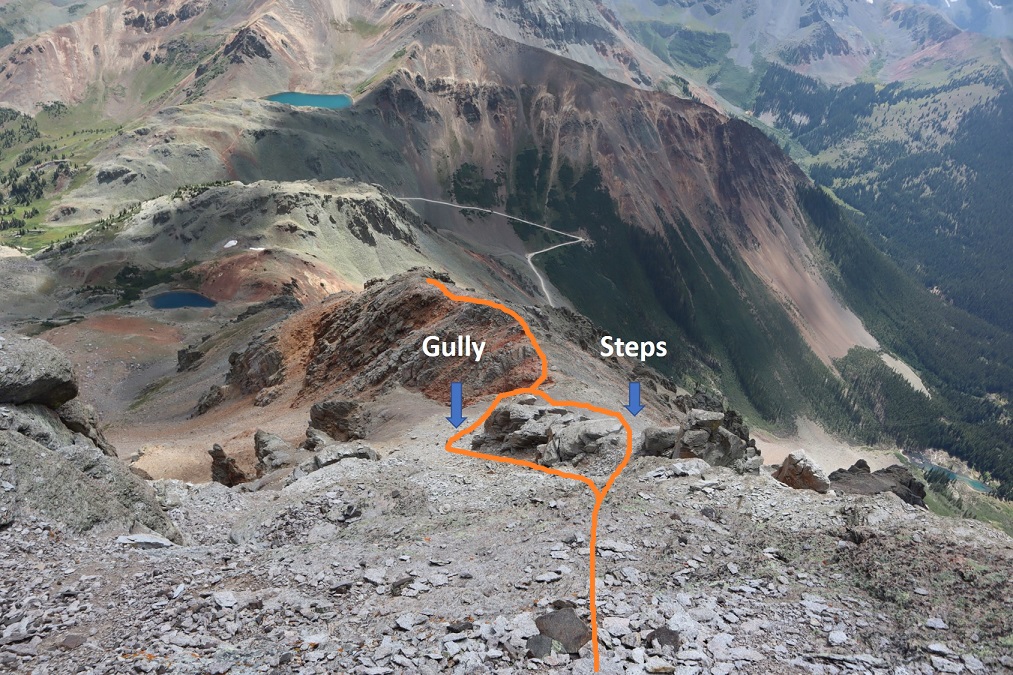
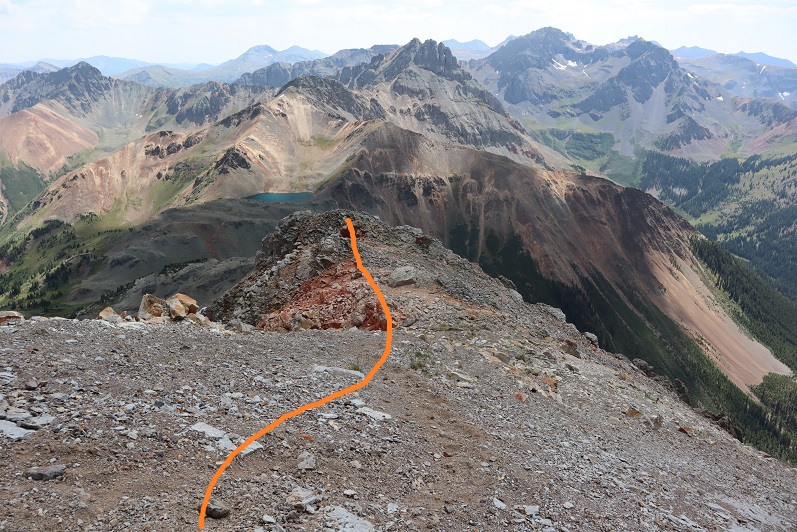
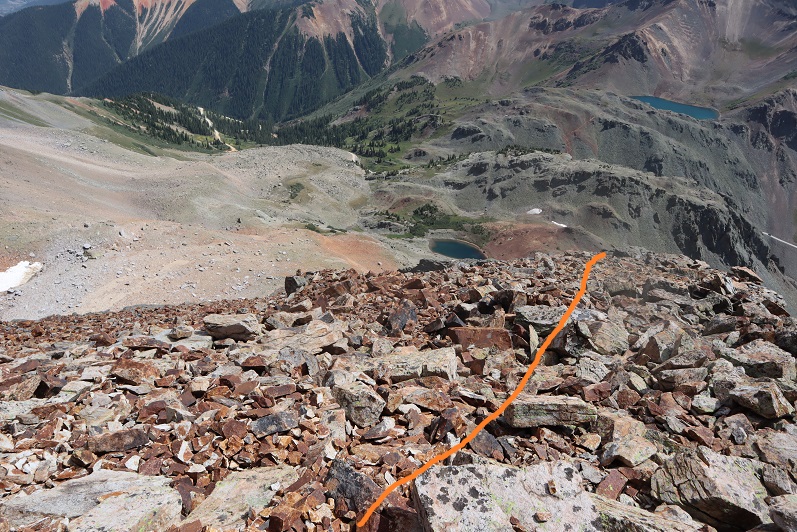
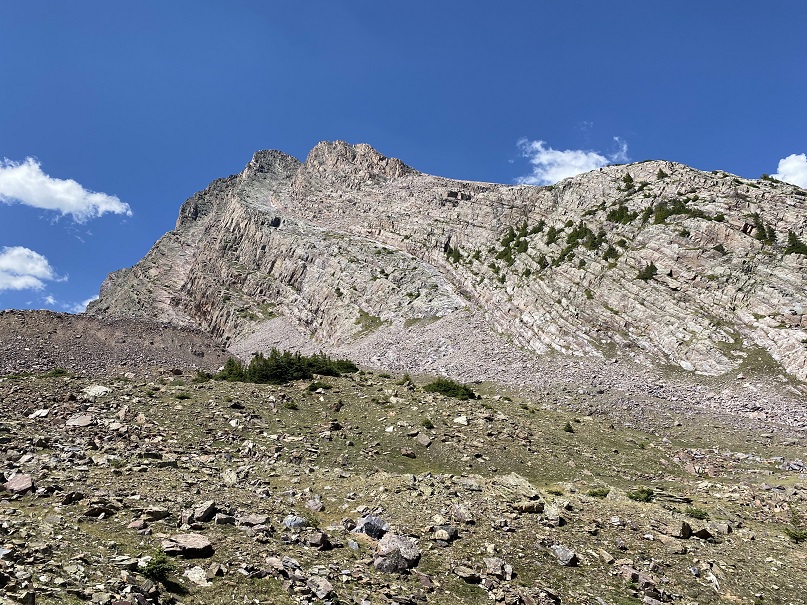
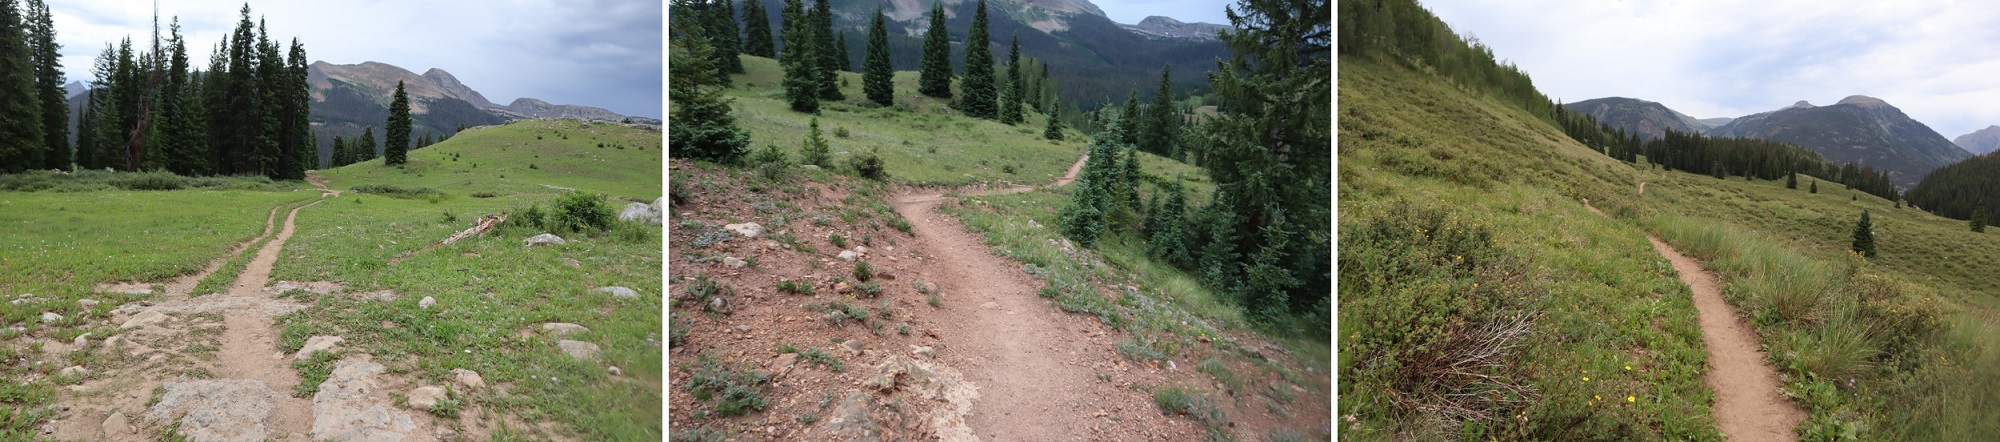
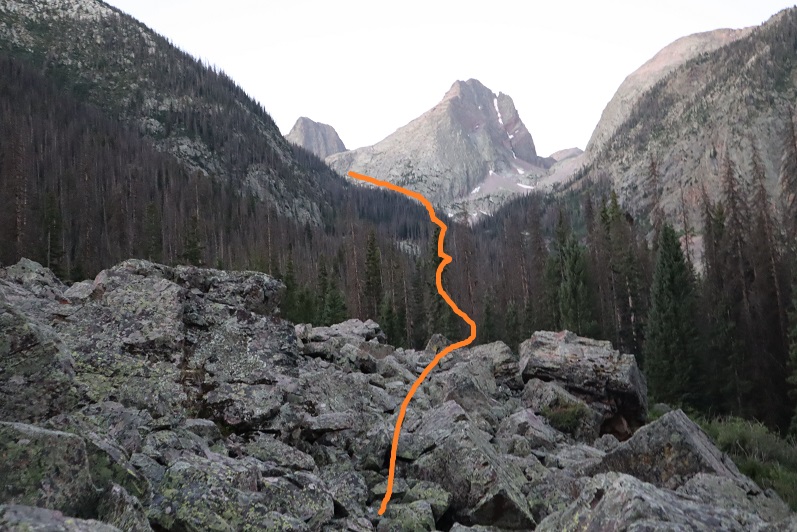
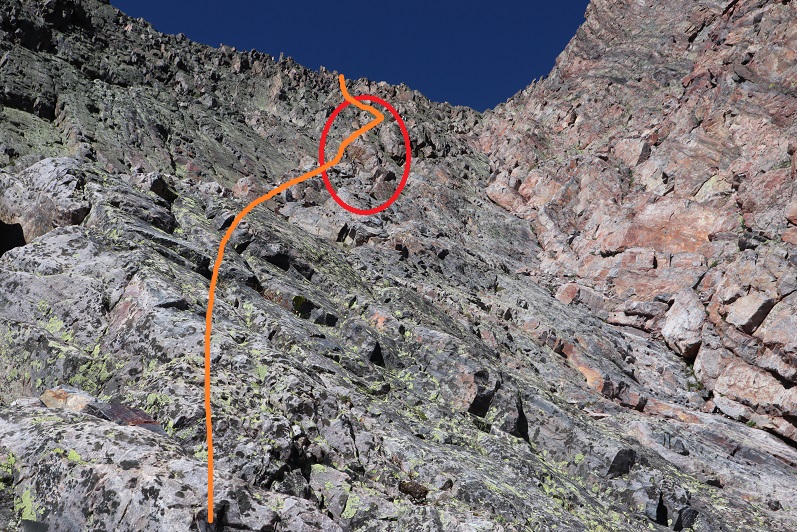
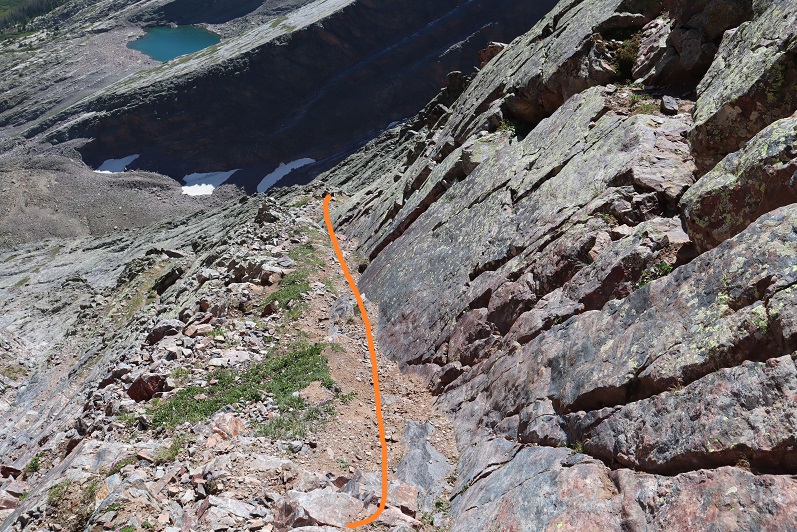
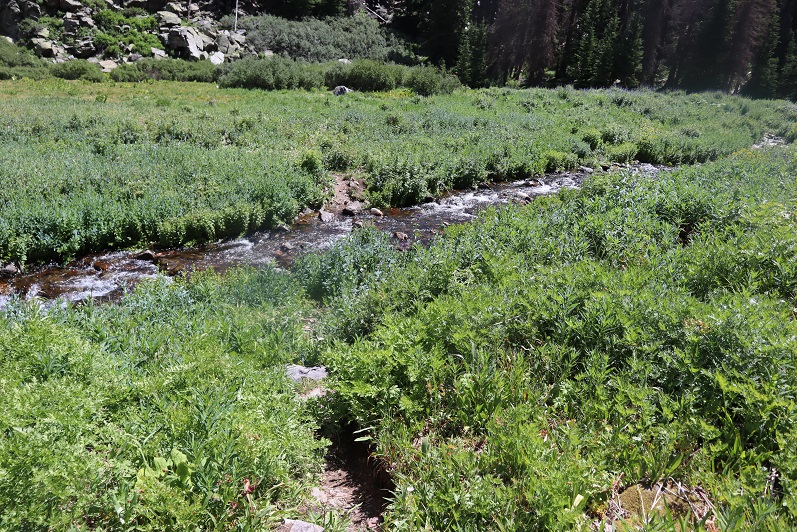
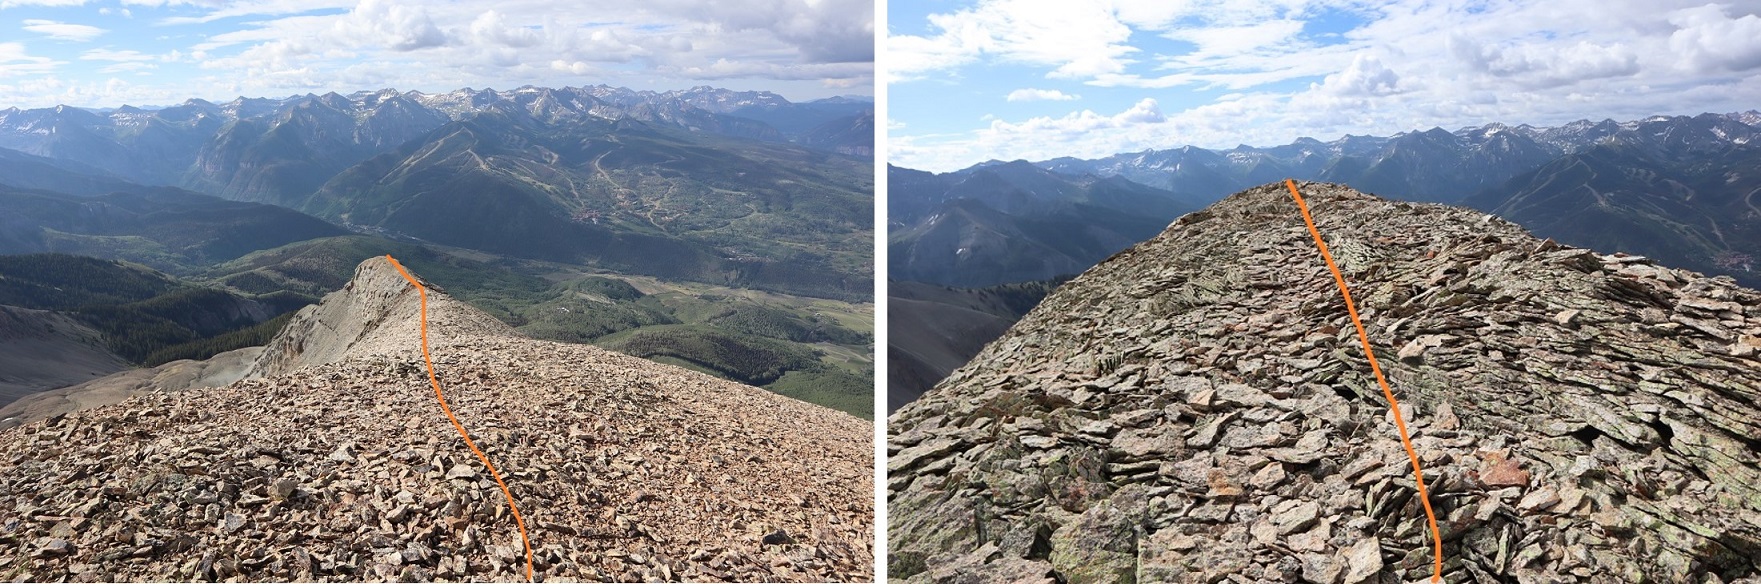
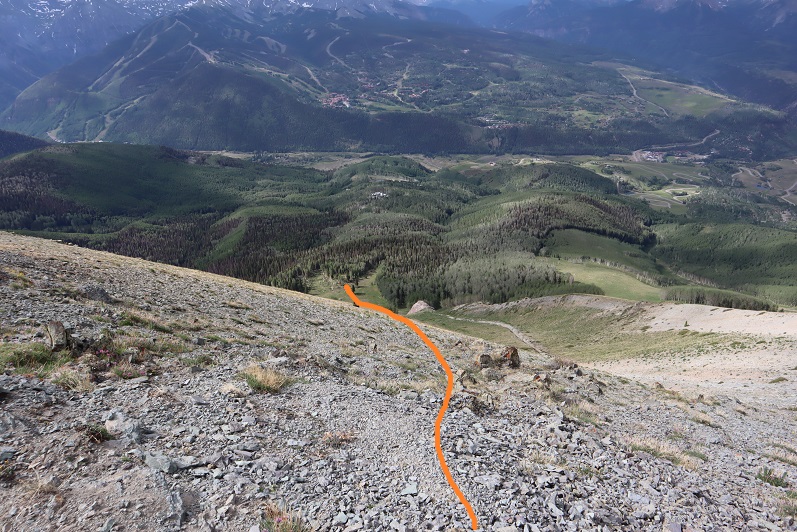
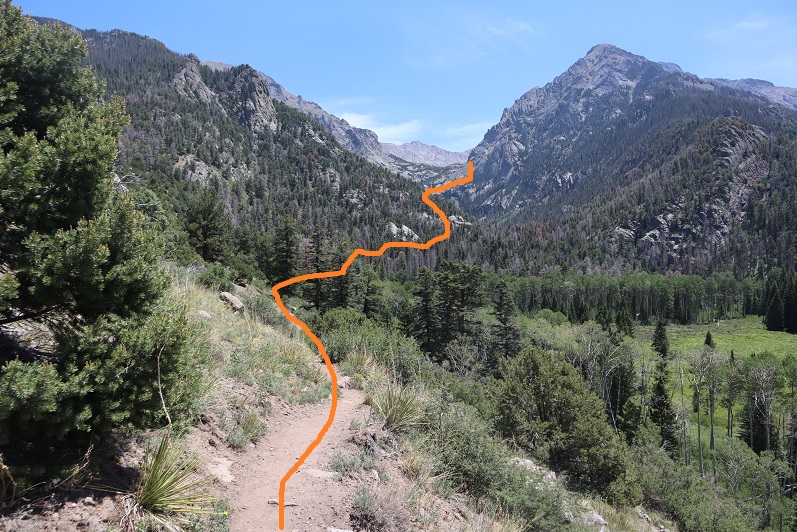
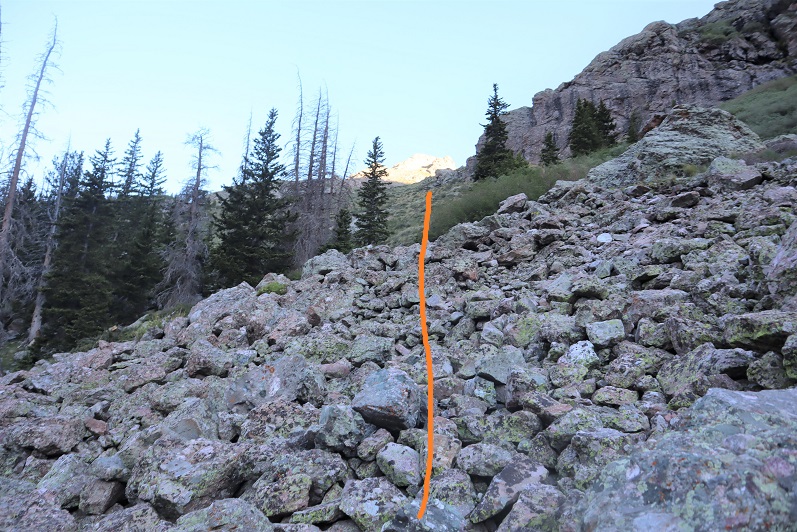
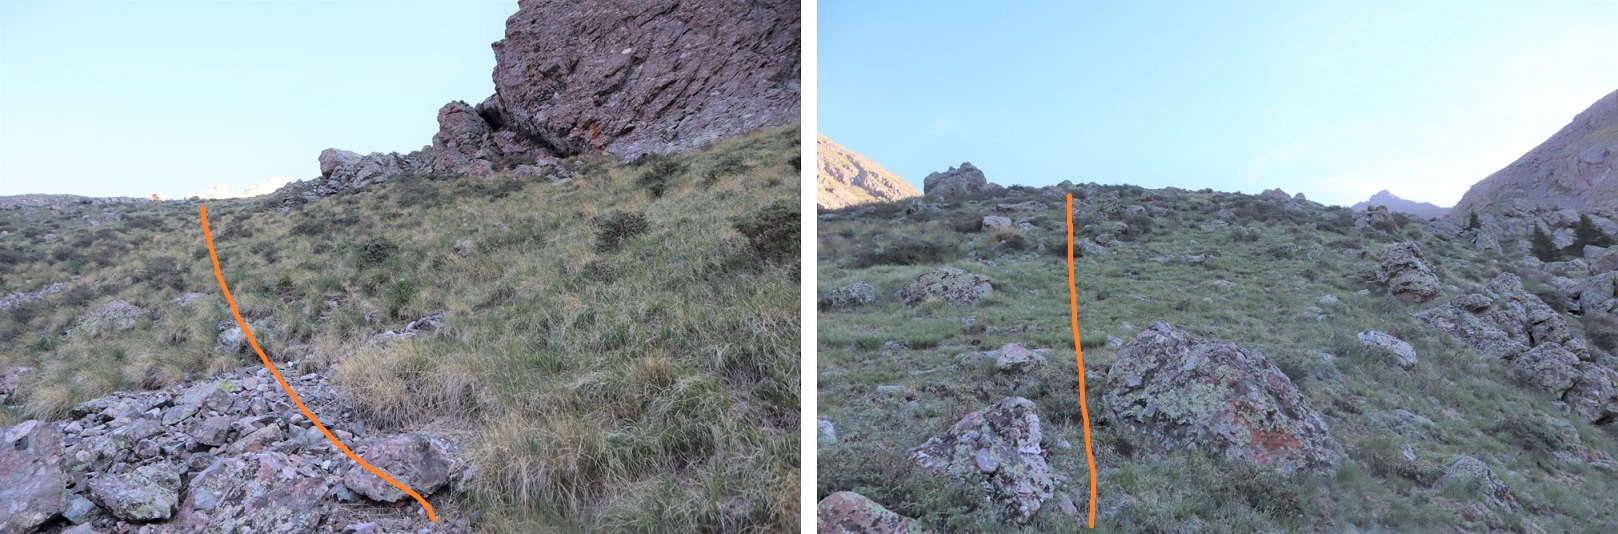
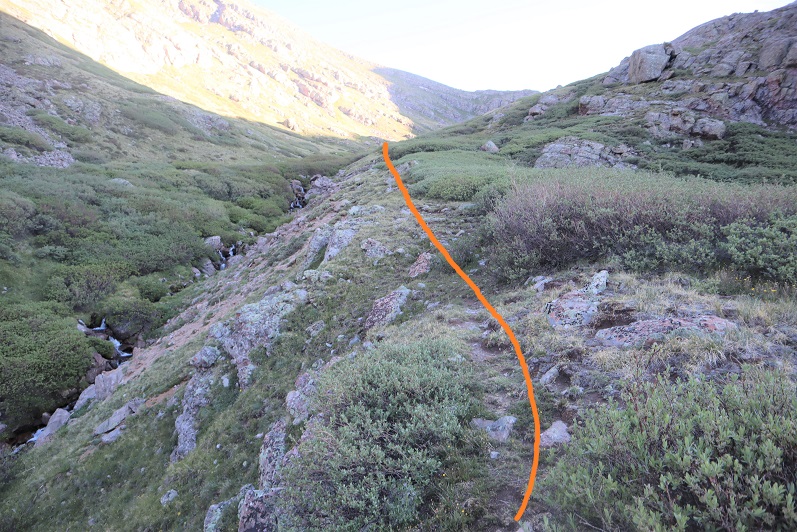
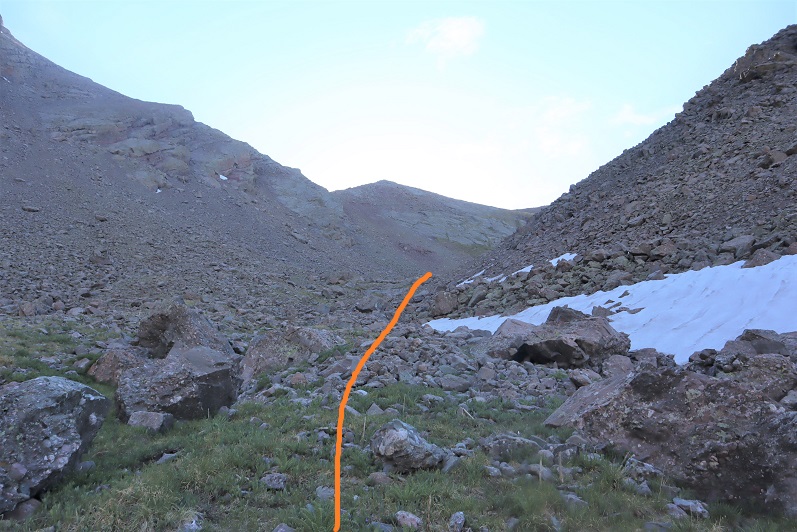
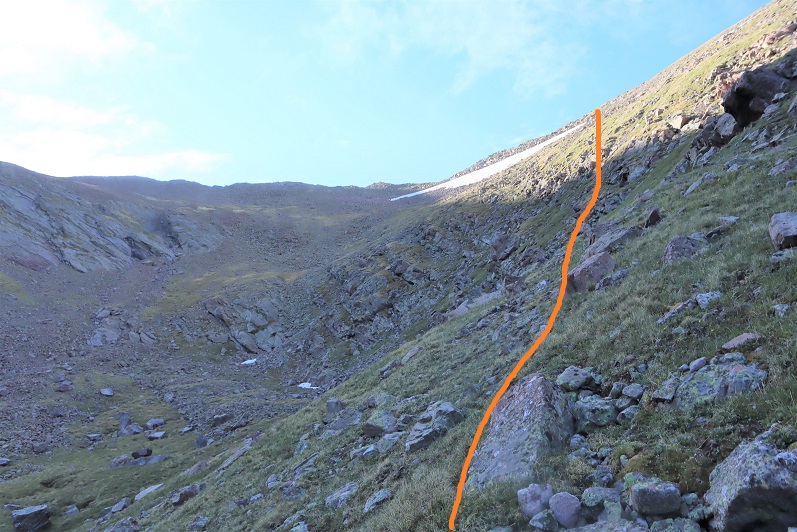
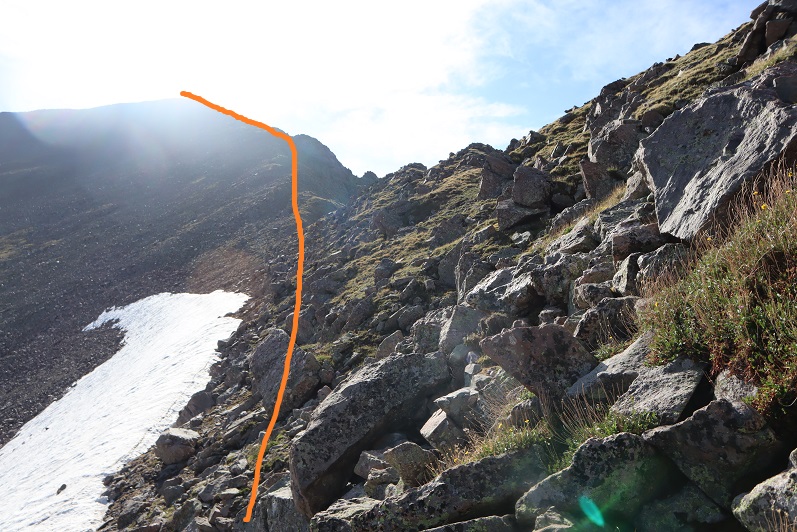
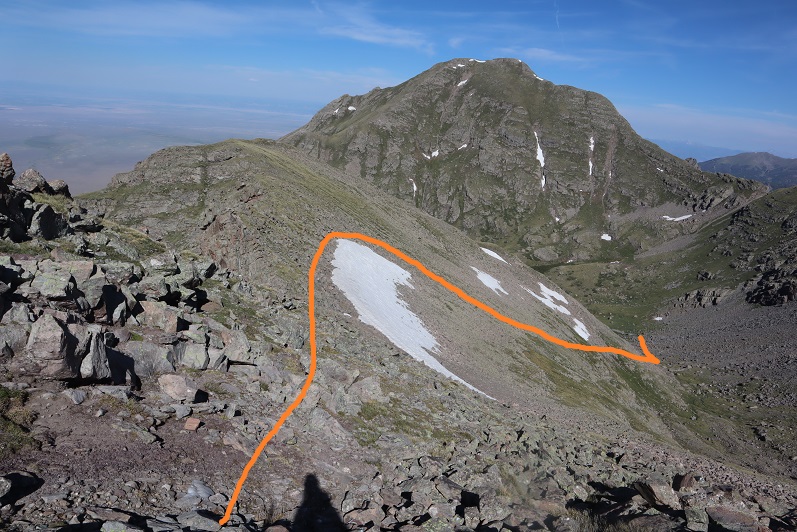
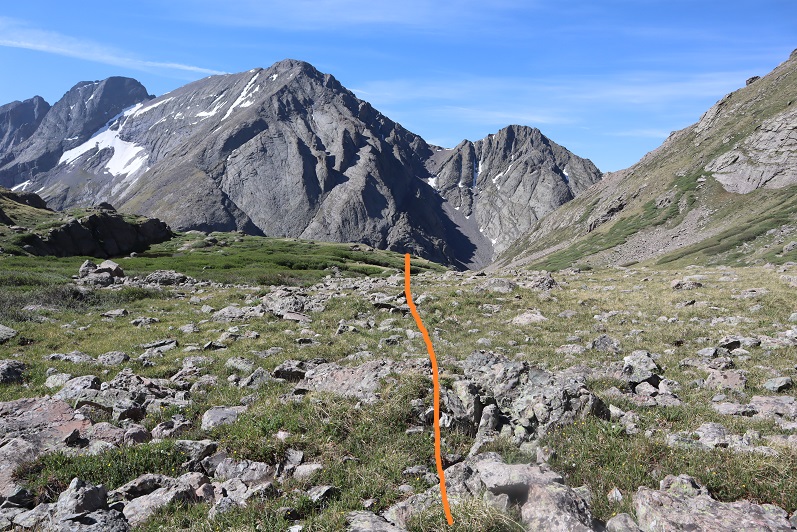
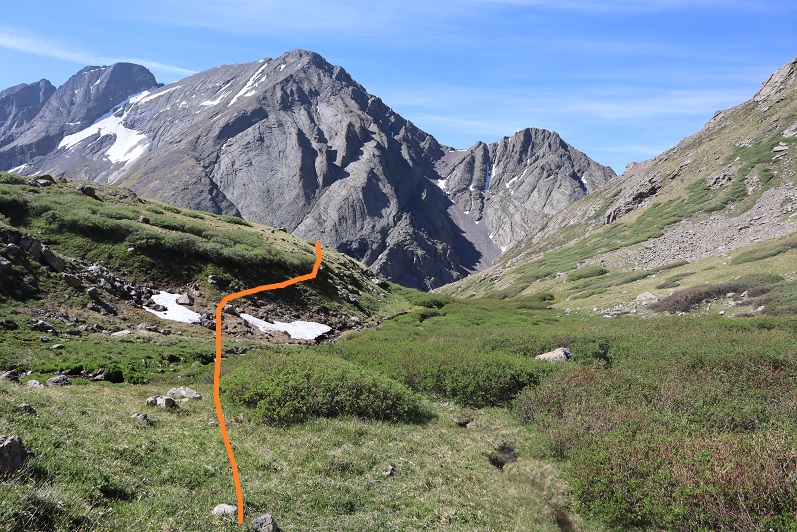
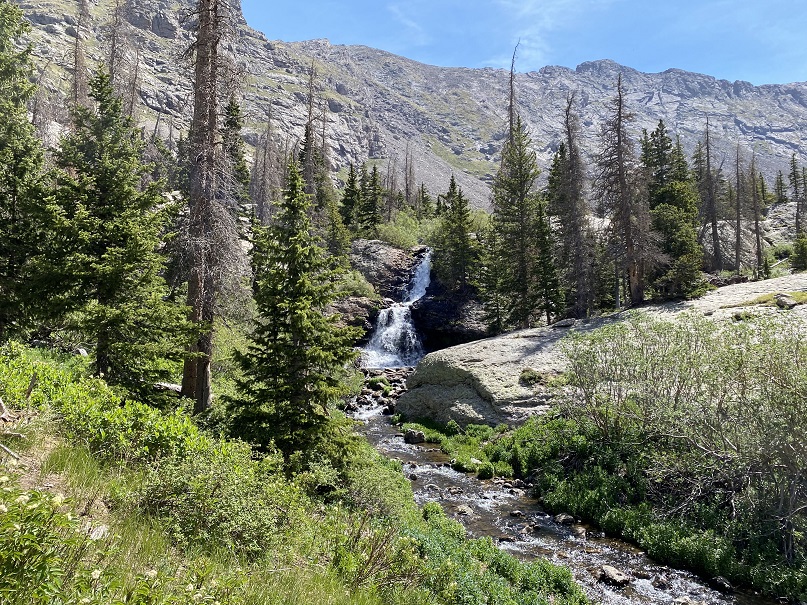
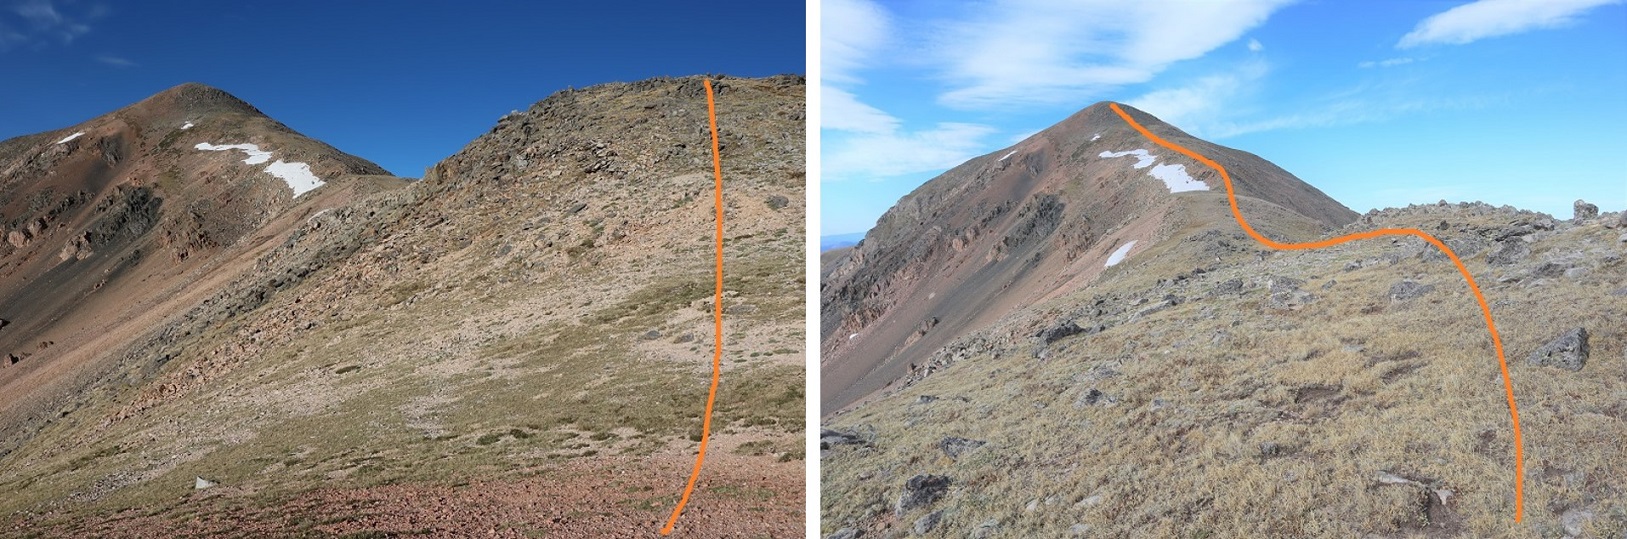
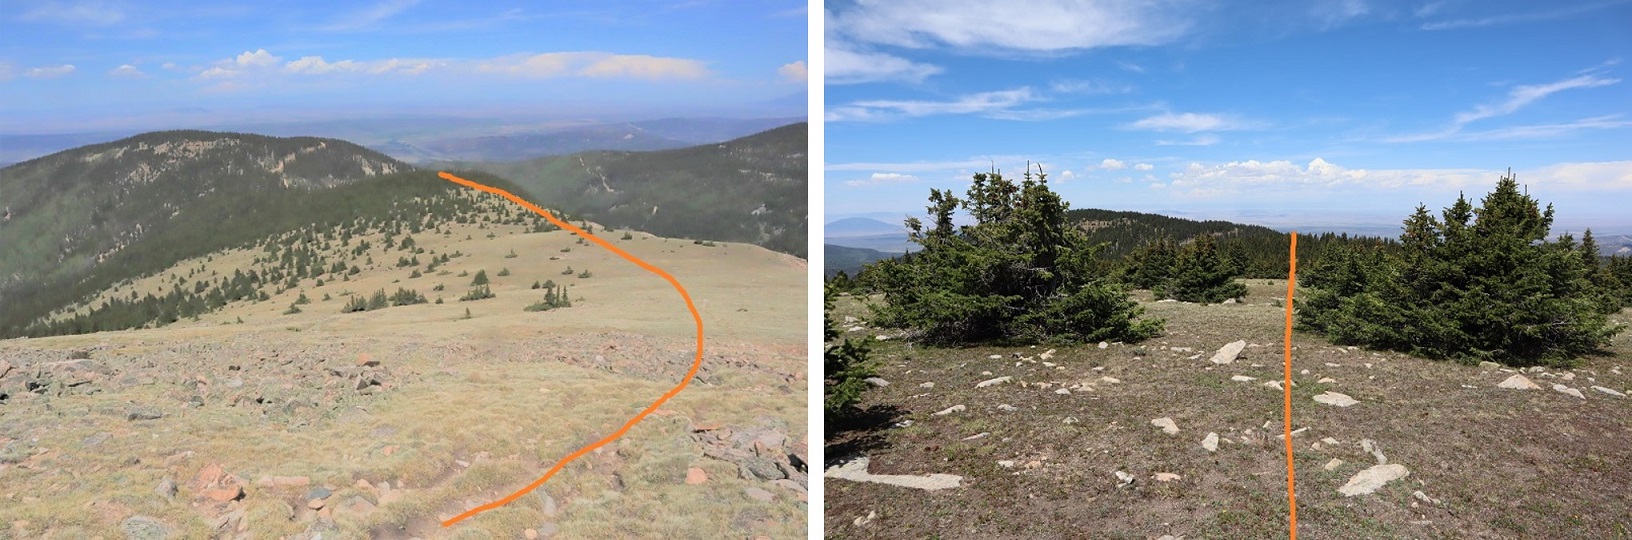
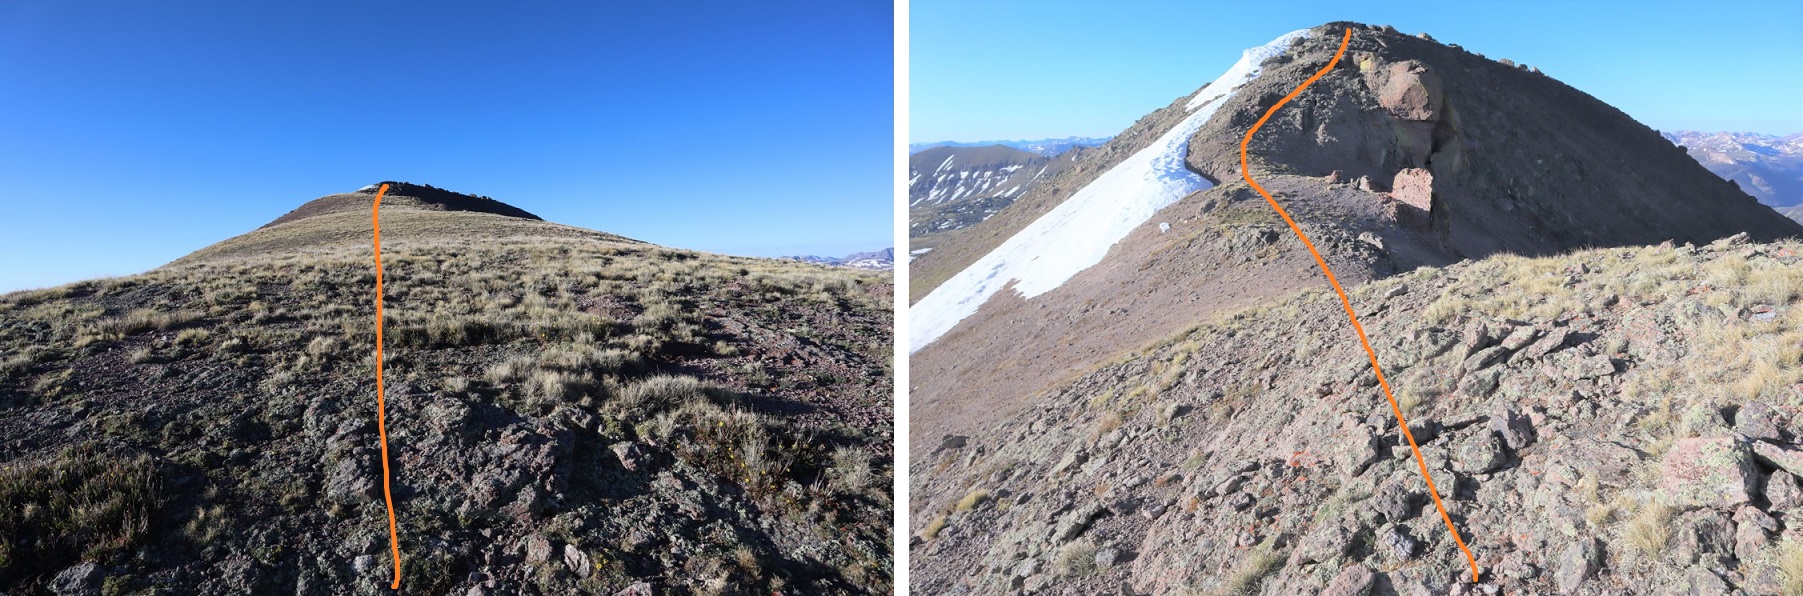
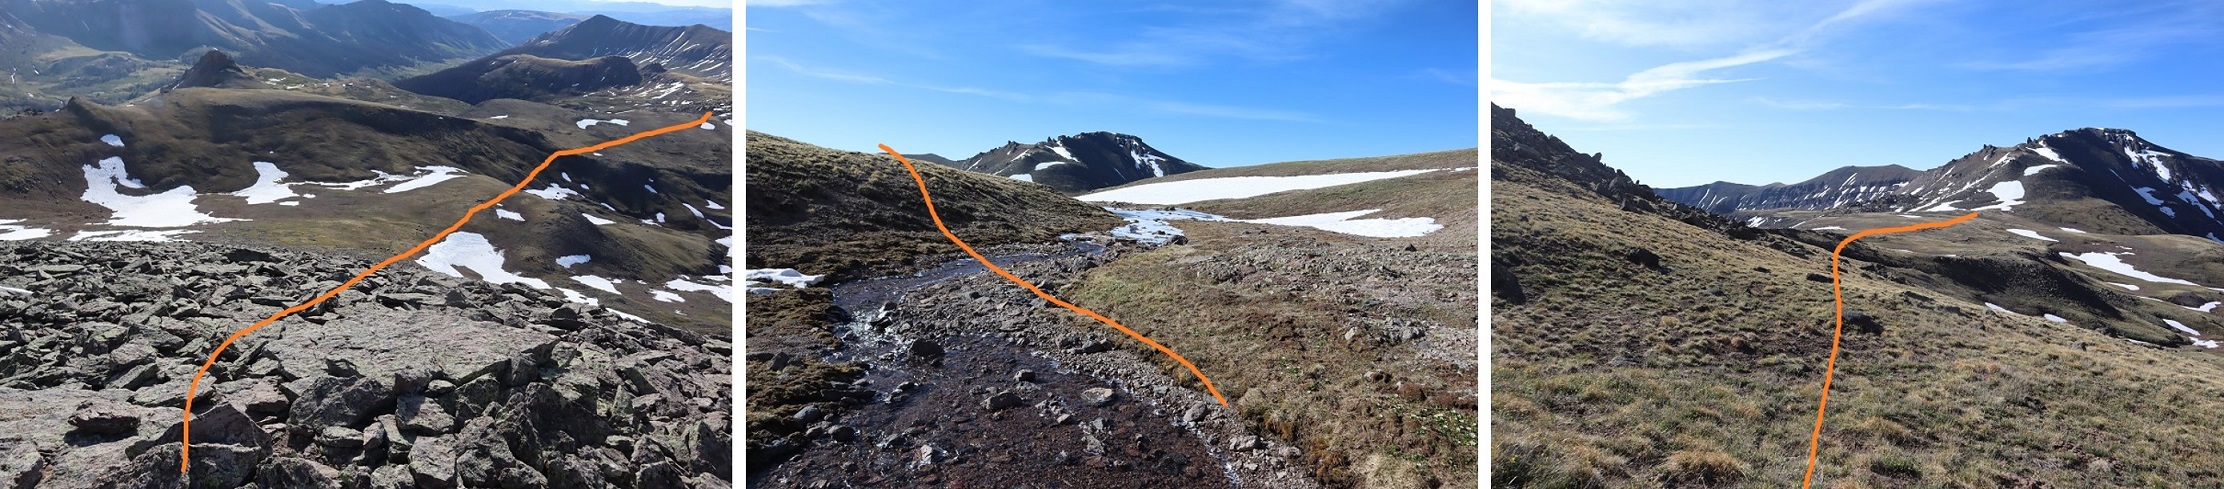
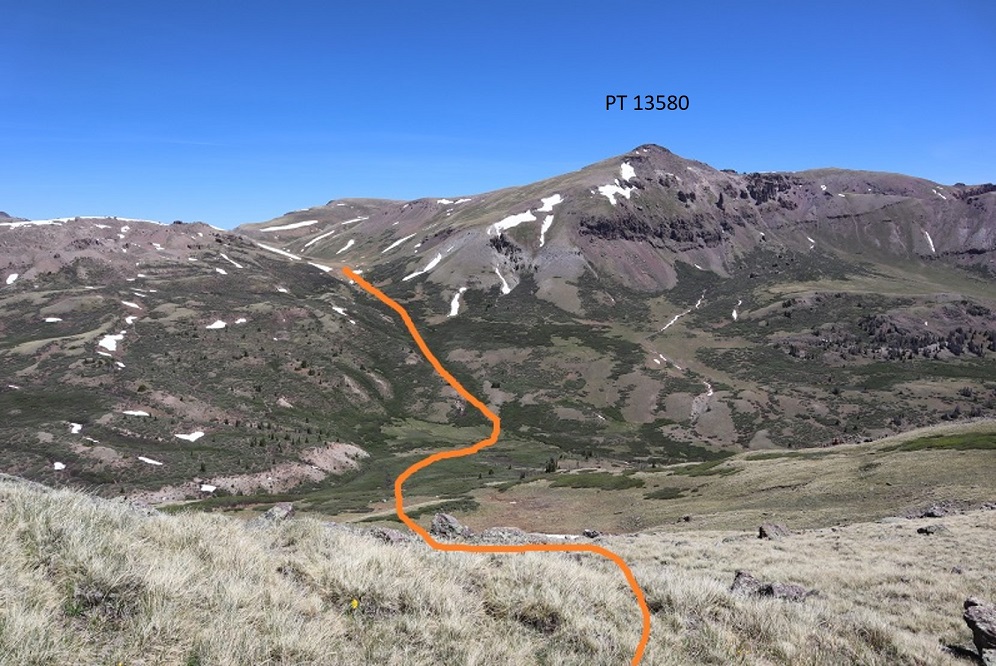
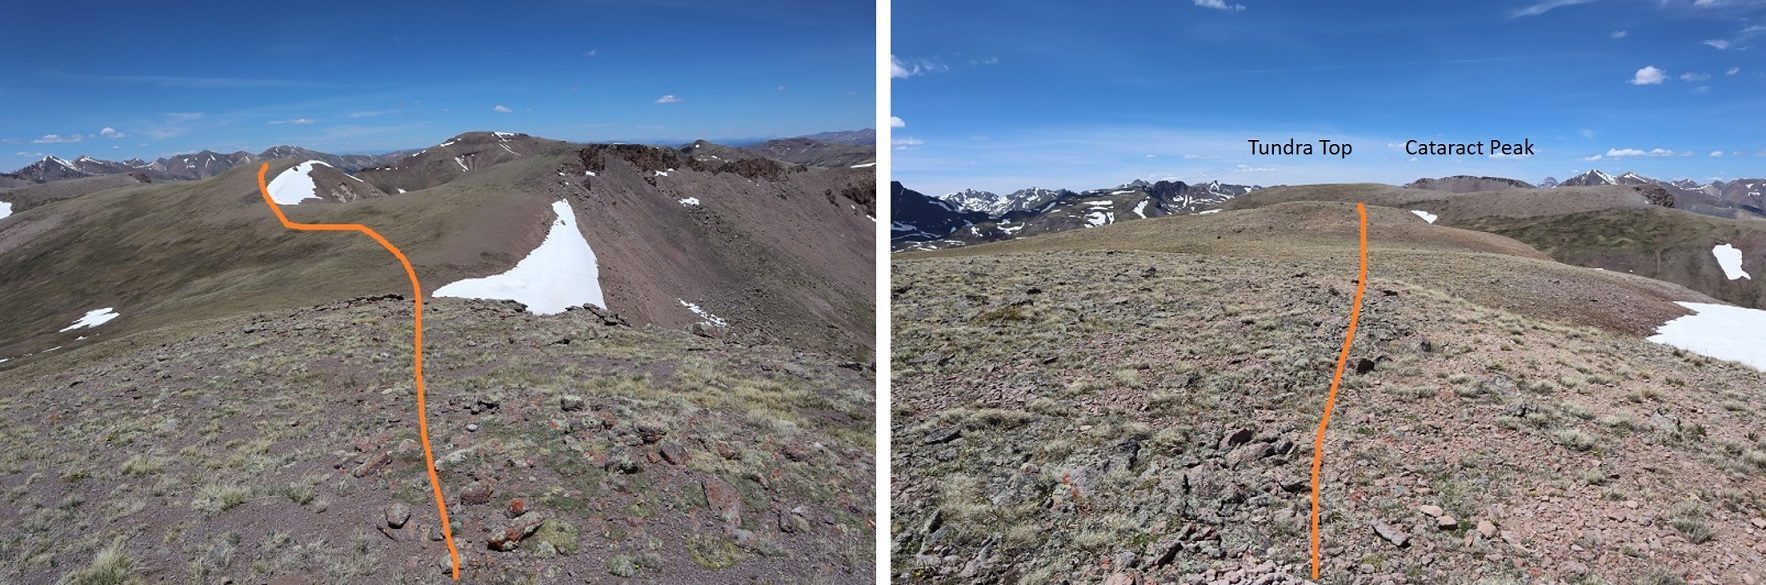
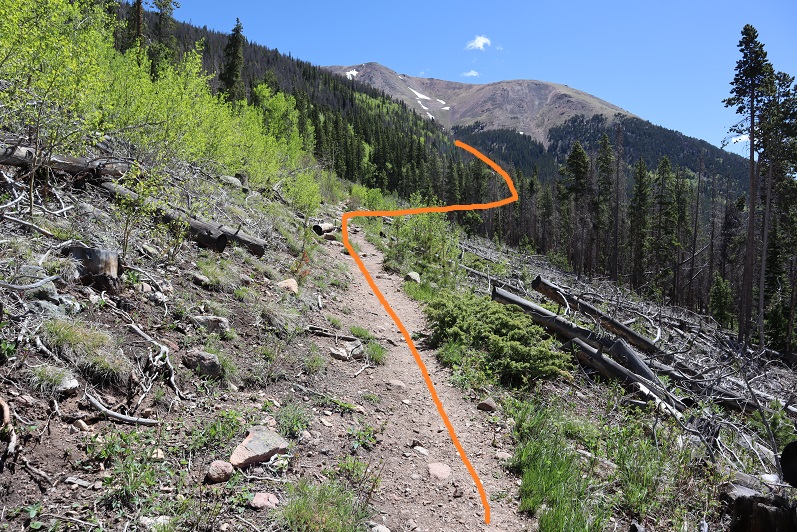
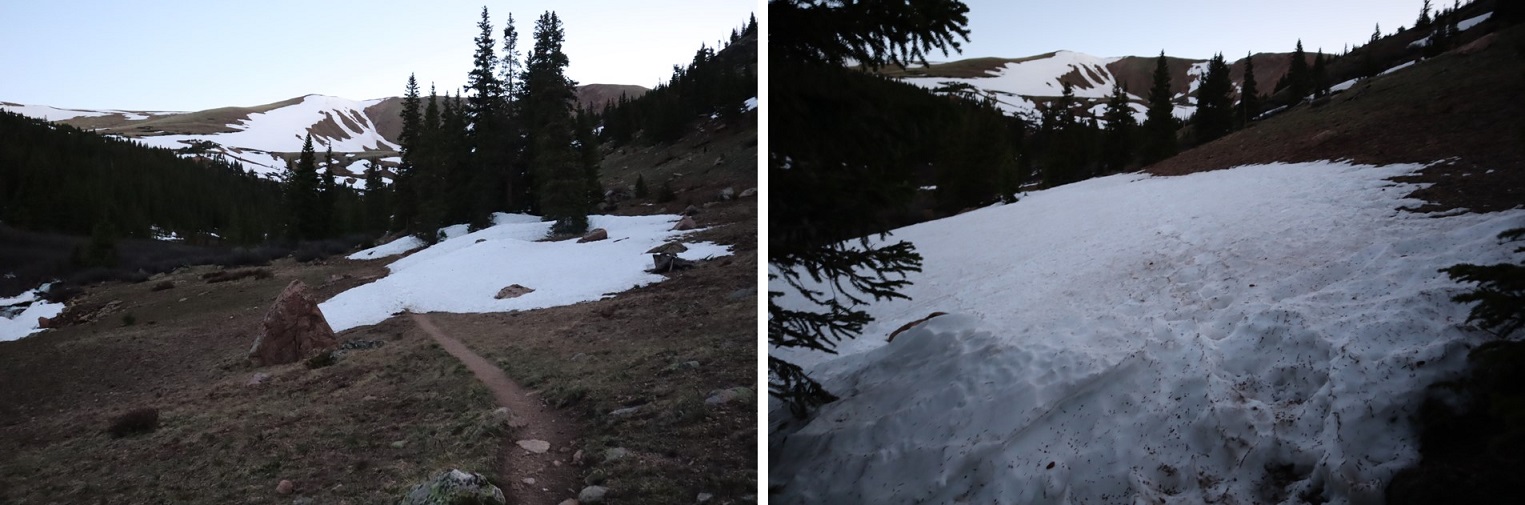
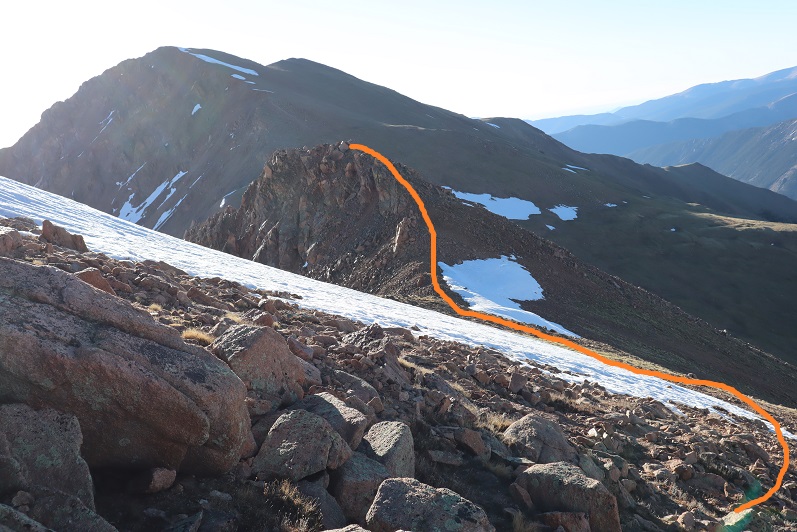
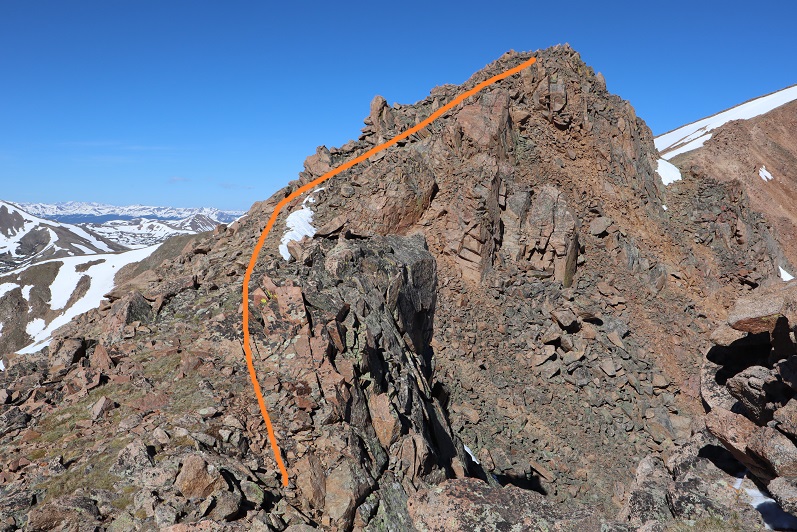
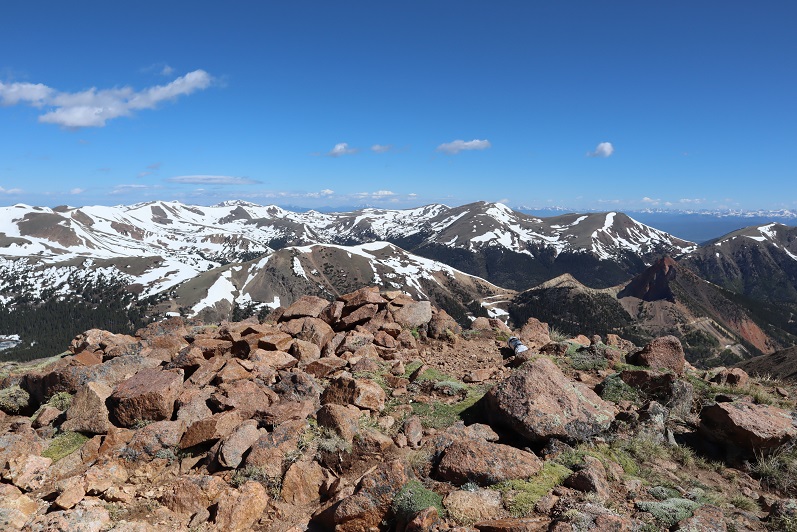
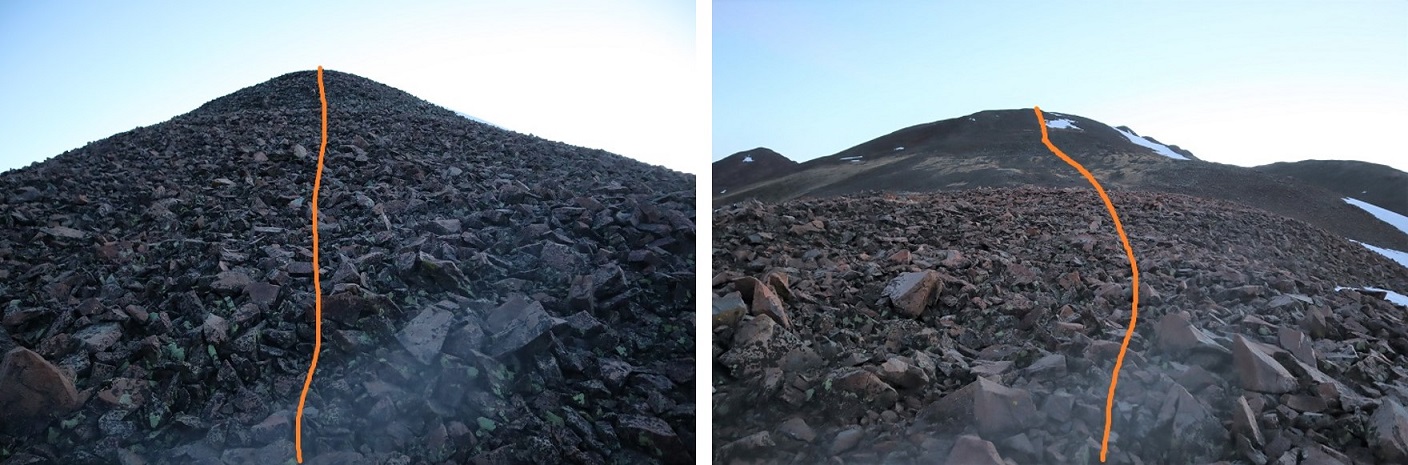
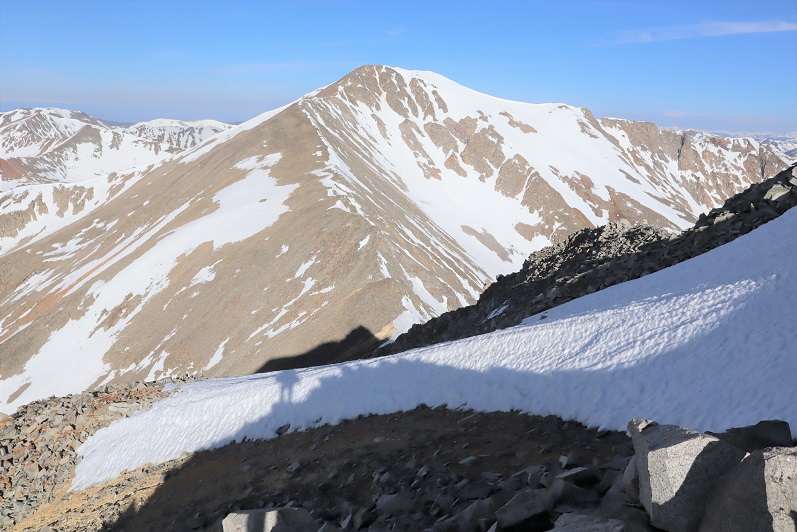
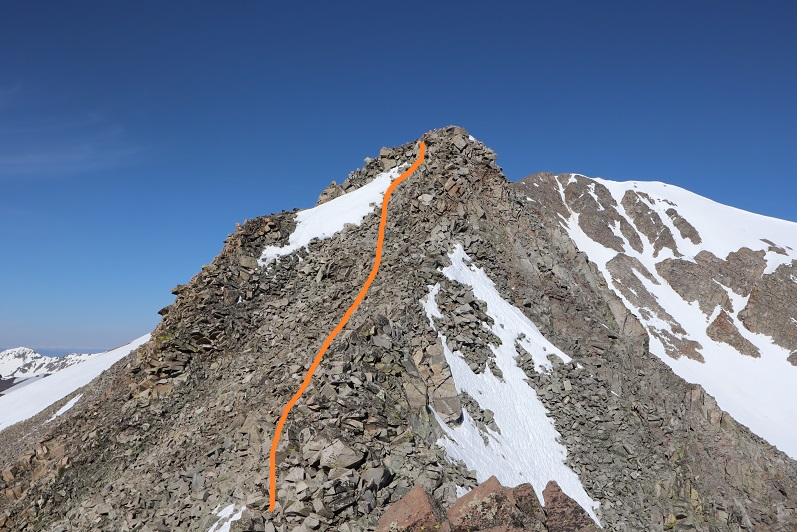
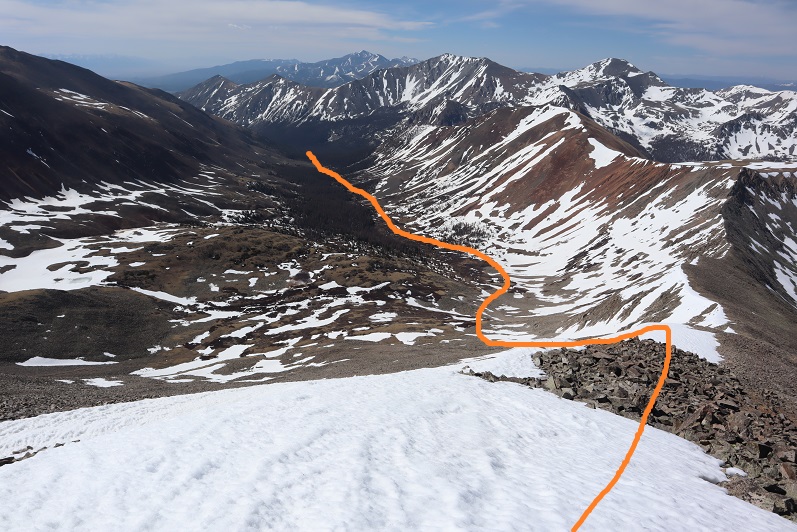
And what a trench it was! I followed it as it for 2 miles as it ascended the east side of the ridge, all the way to treeline. Here’s an overview of the route up to Humboldt Peak
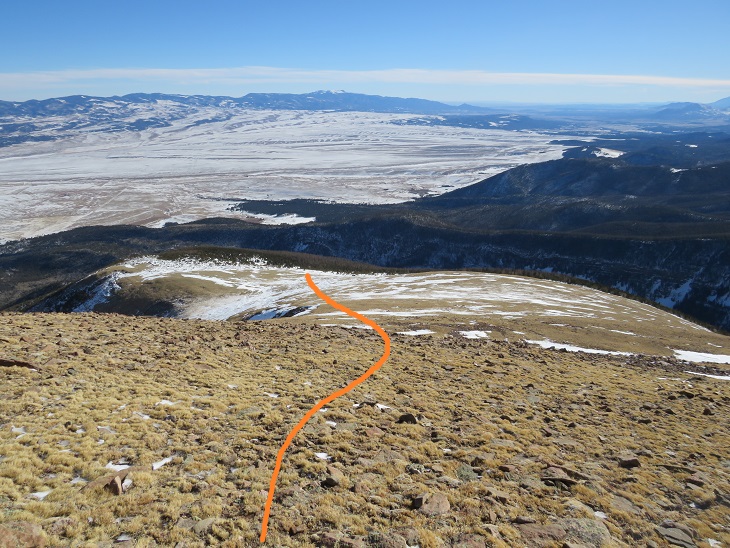
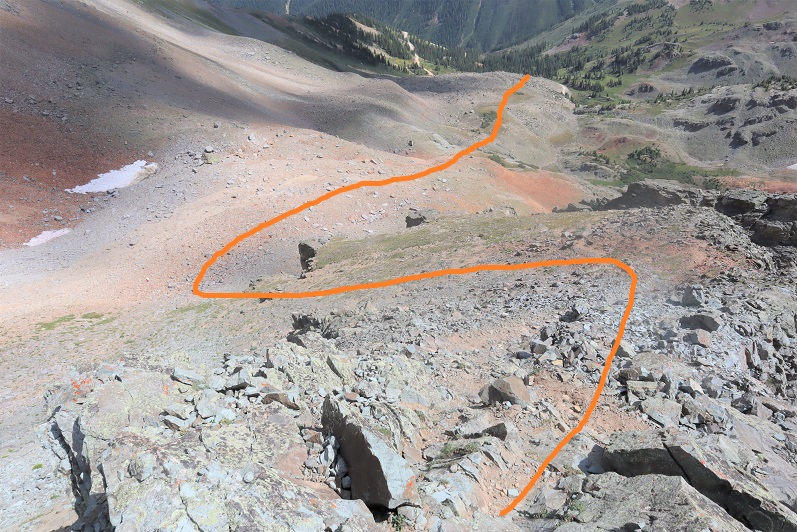
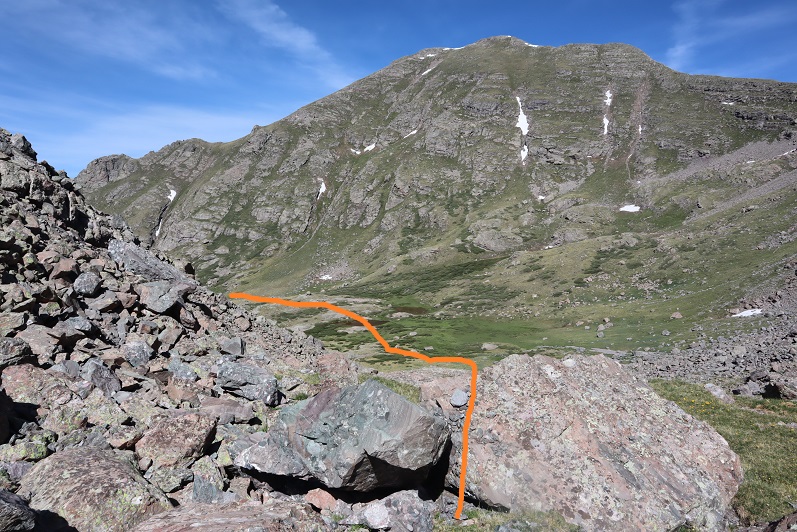
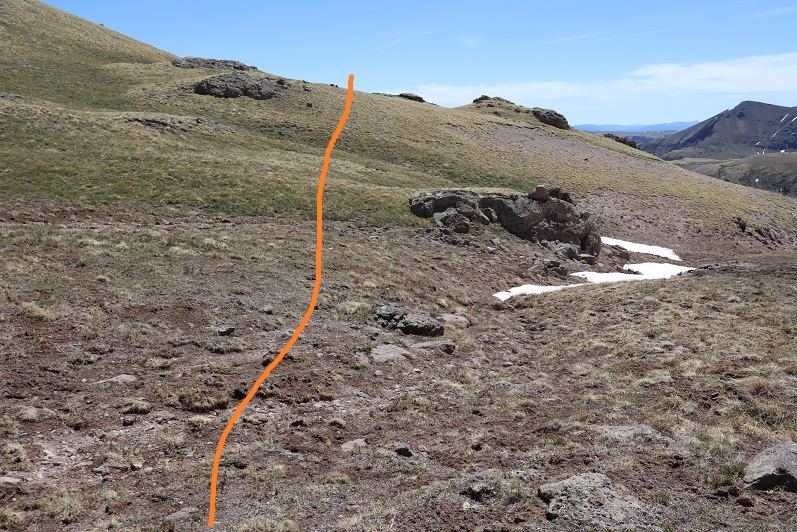
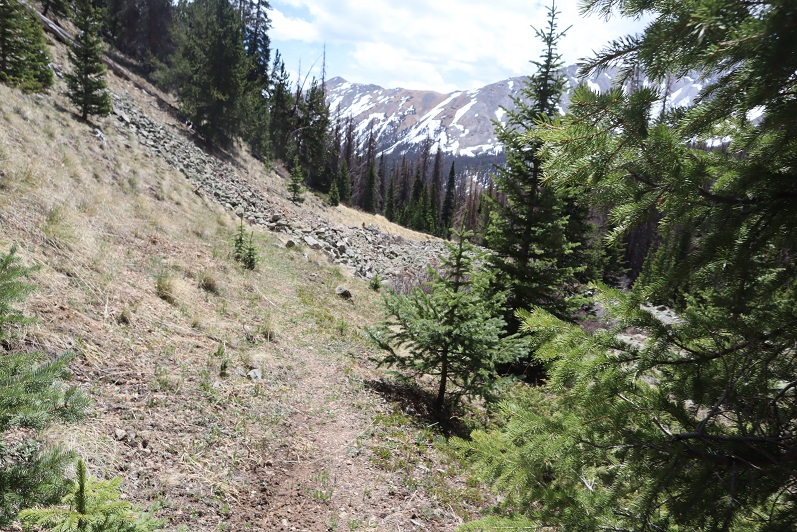
If you keep heading west and stick to the rib/ridge, it will take you to treeline. I could hear the wind above the trees, and got a bit anxious for the above treeline part of the hike.
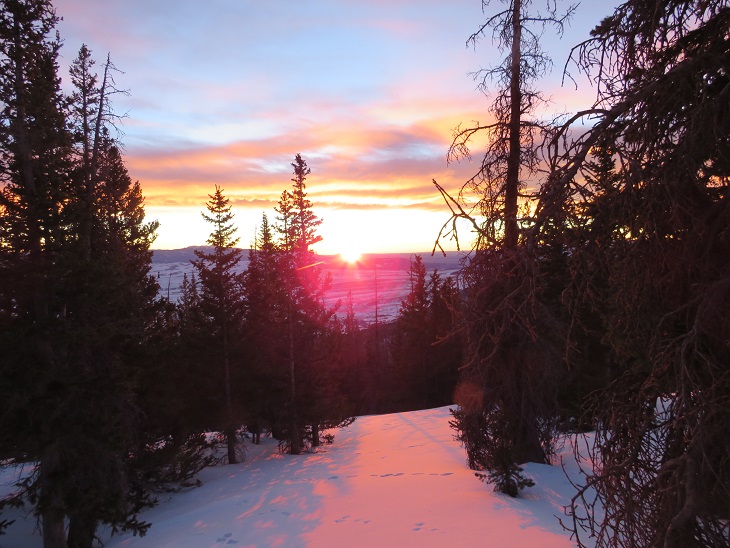
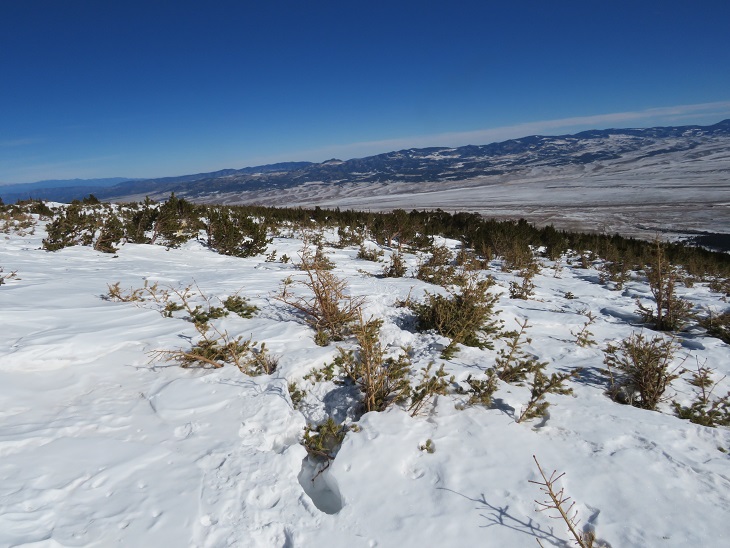
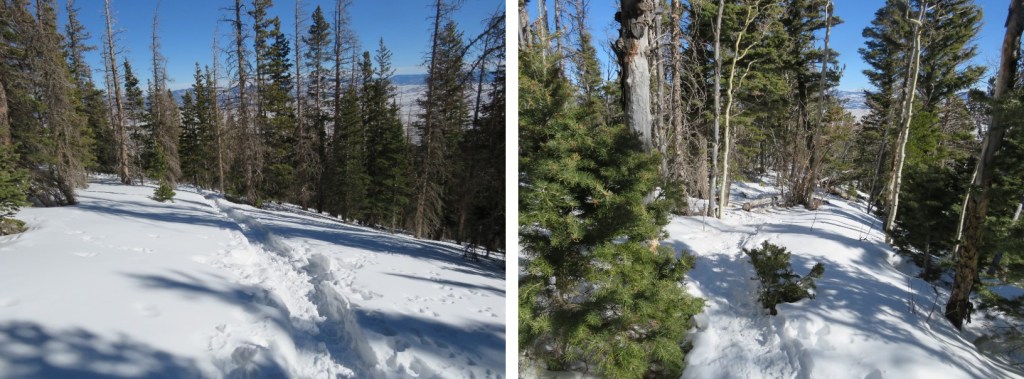
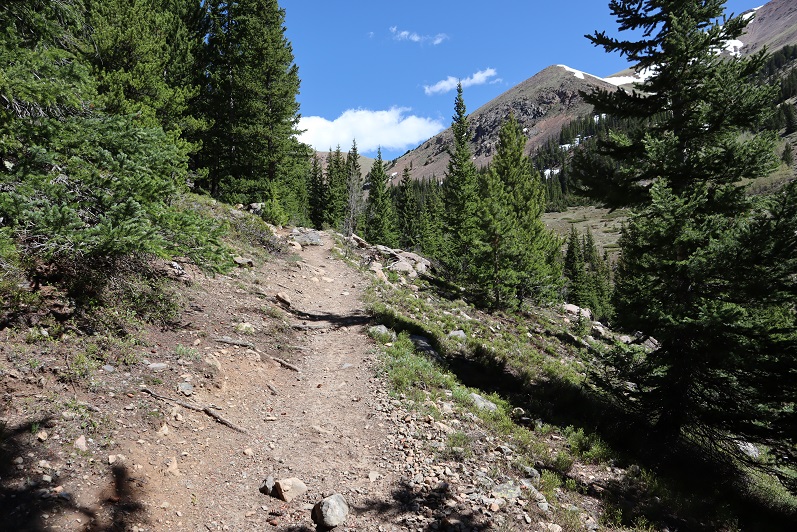
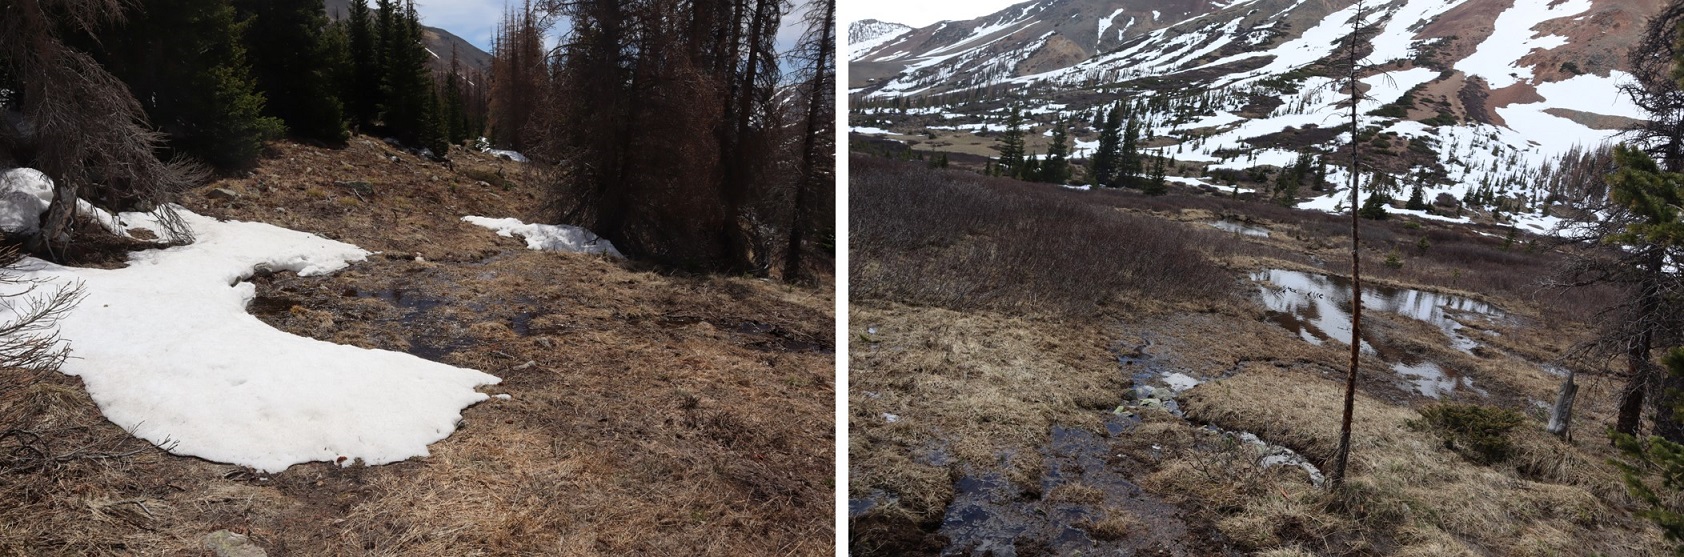
As I hit treeline the sun started to rise. I took a few minutes to enjoy the view. (side note: there were a lot of rabbit tracks here)
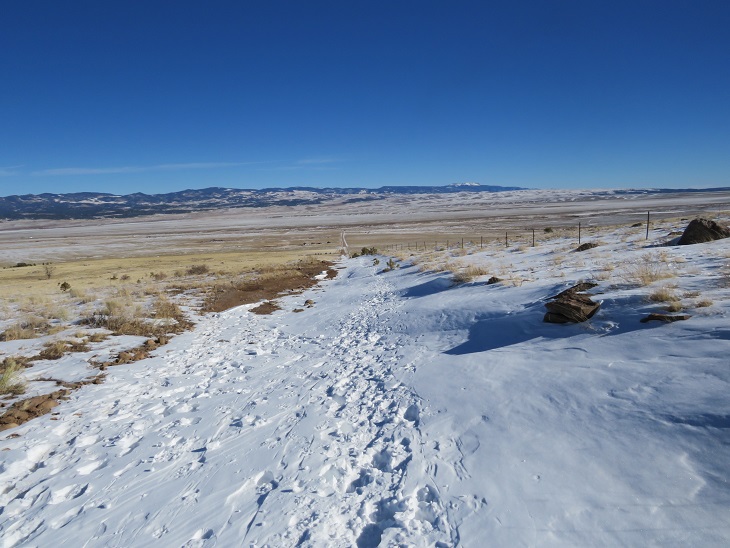
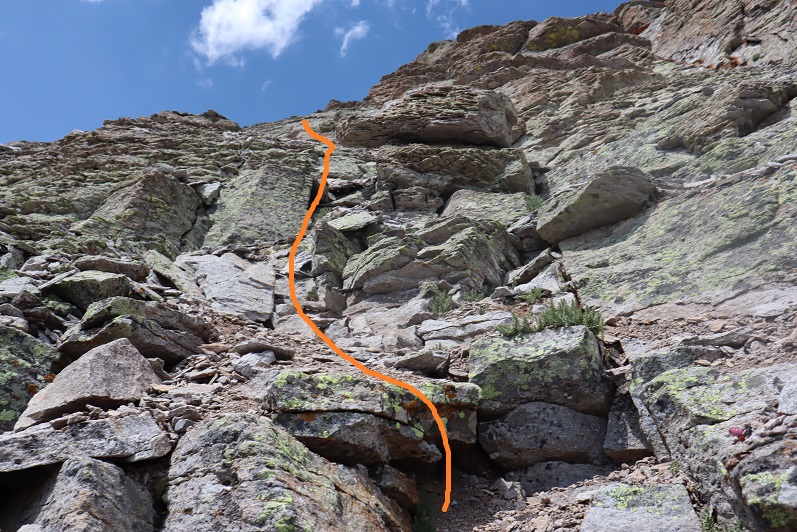
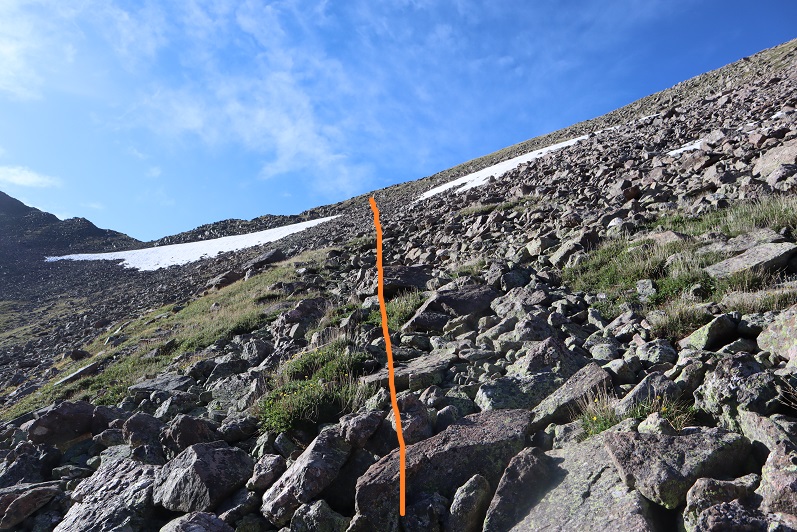
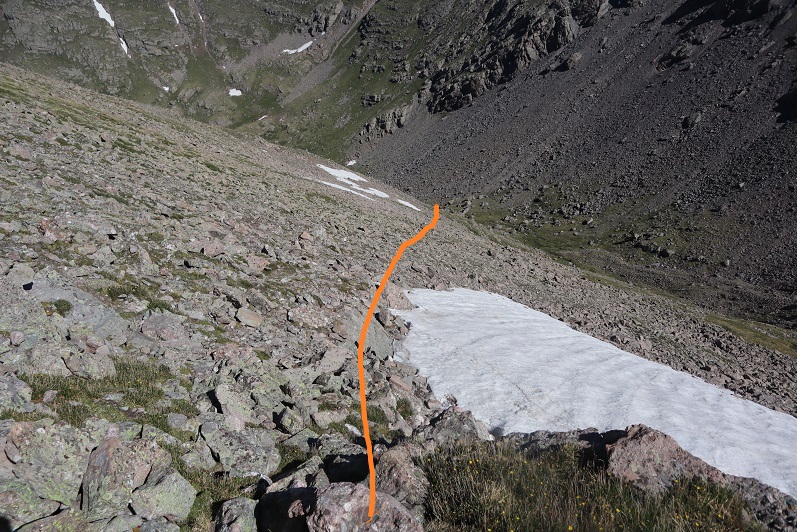
The trench ended near treeline. I could see where it was supposed to go, so I kind of re-trenched it as best I could wearing just spikes.
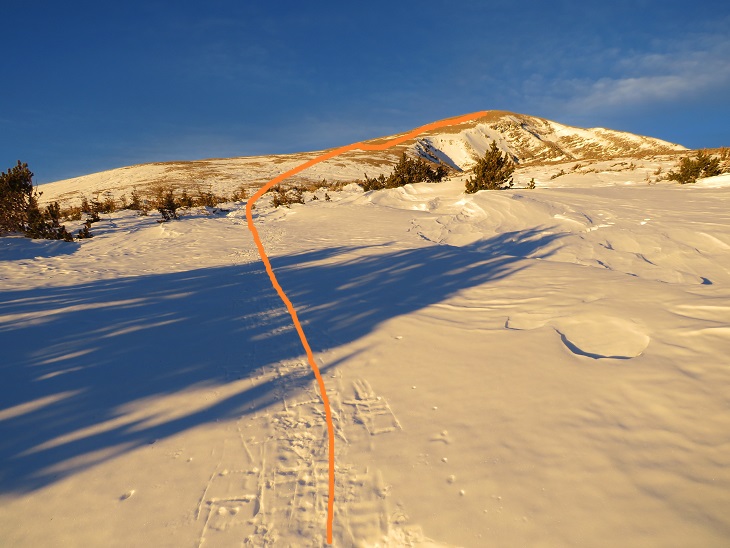
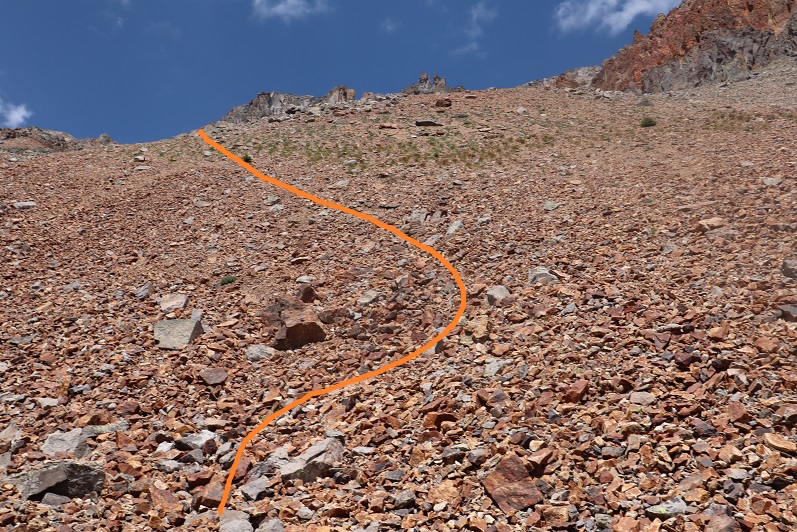
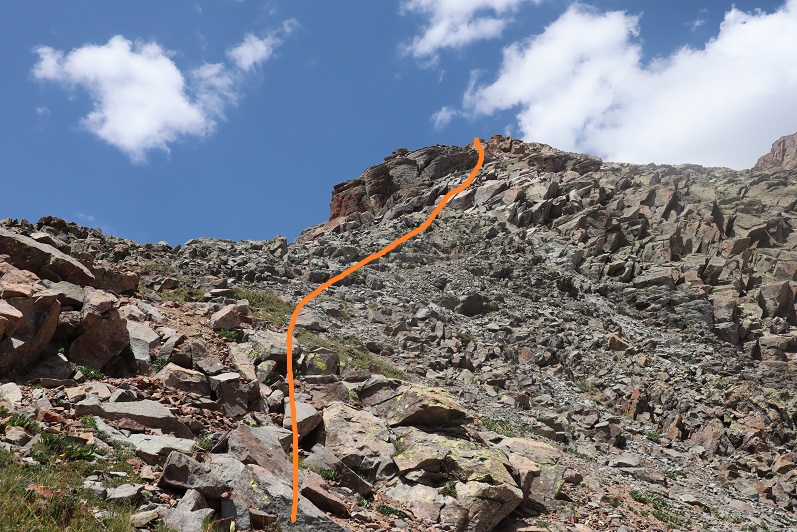
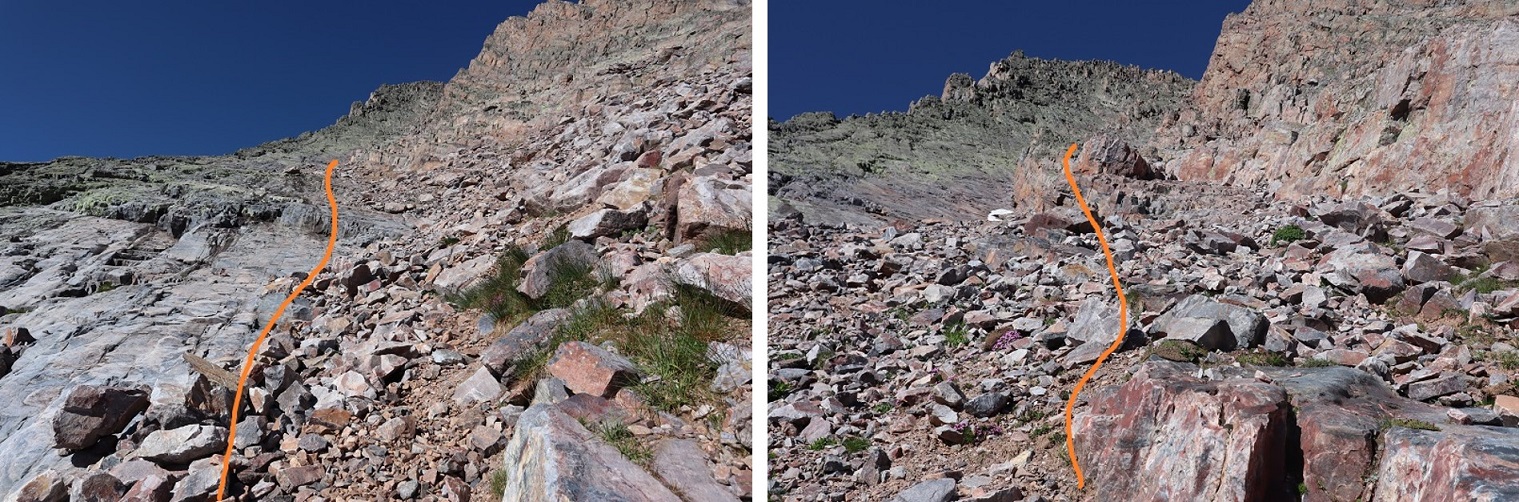
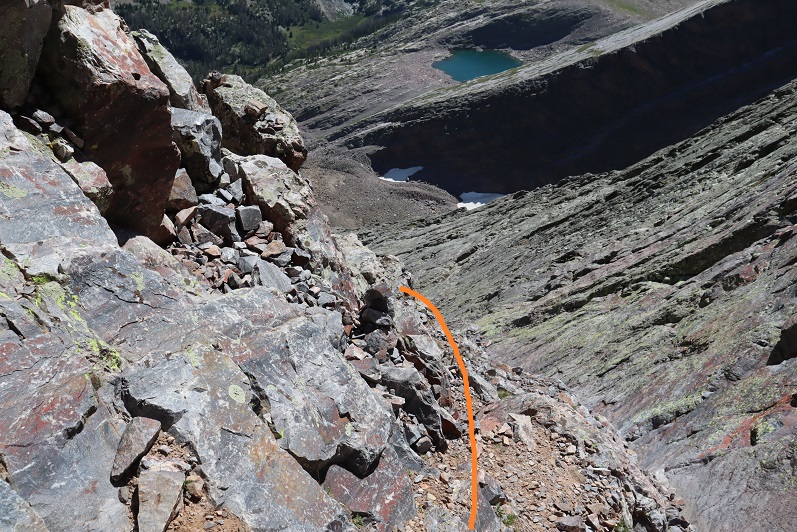
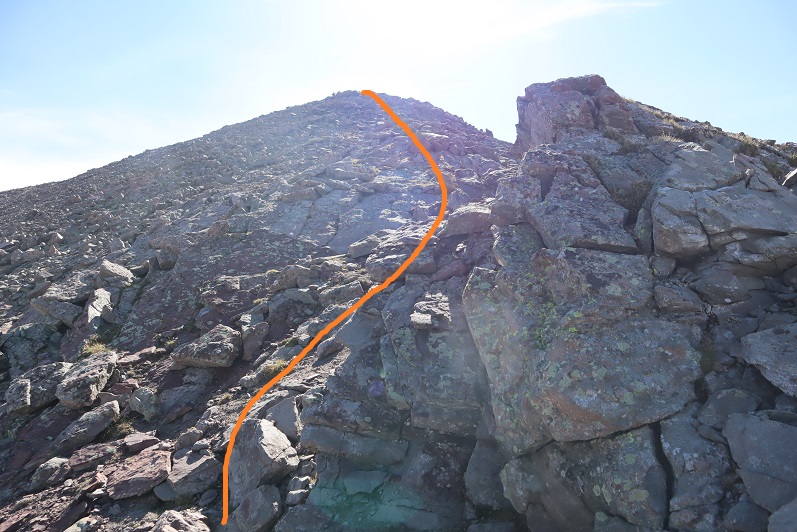
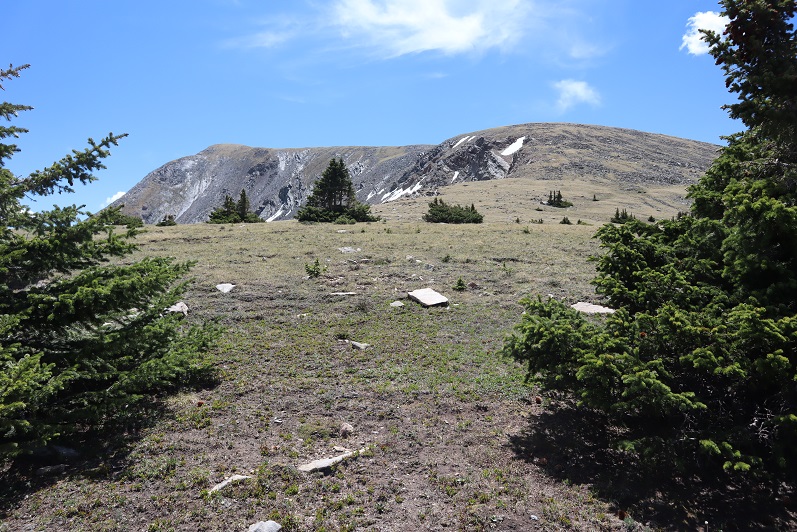
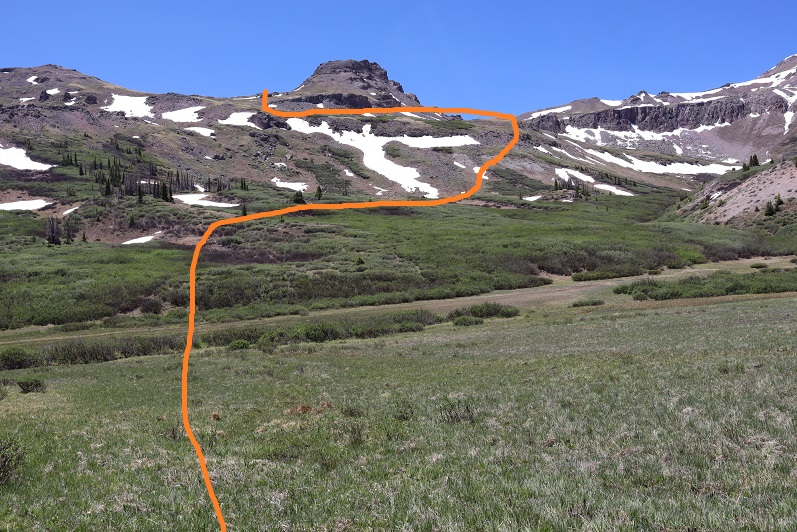
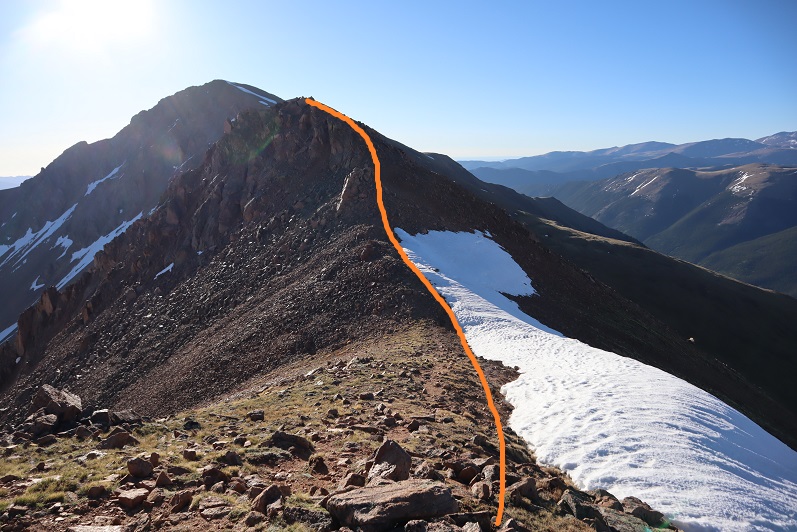
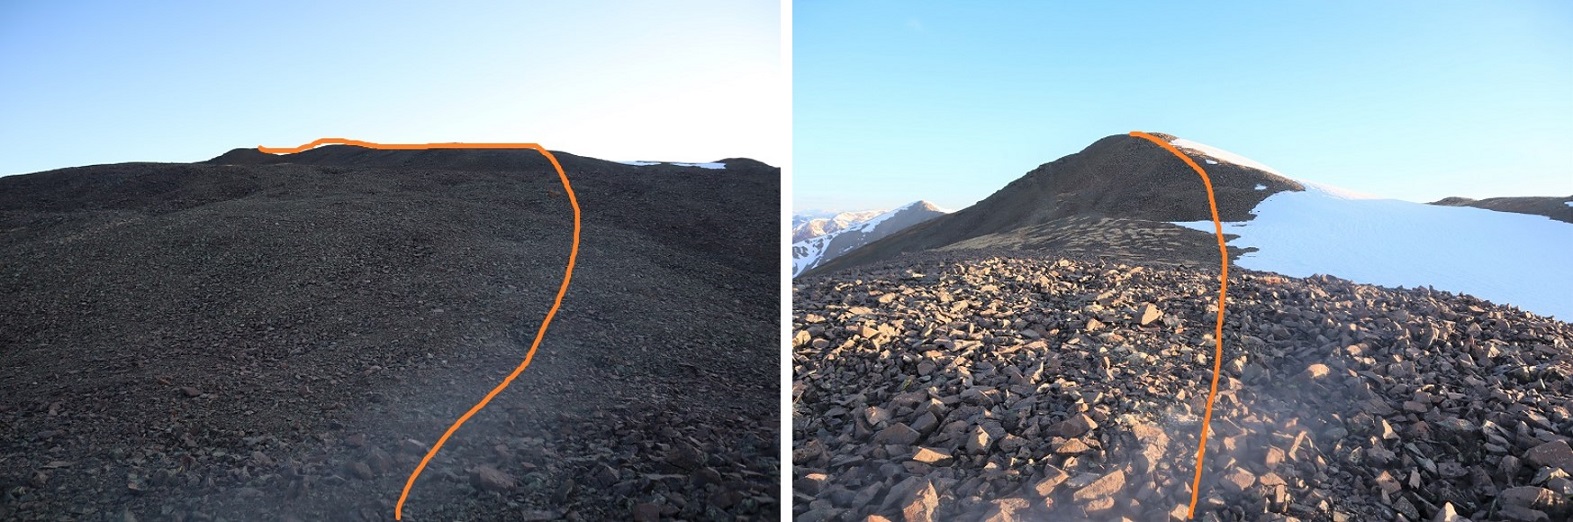
Here’s the general overview of my route up the ridge
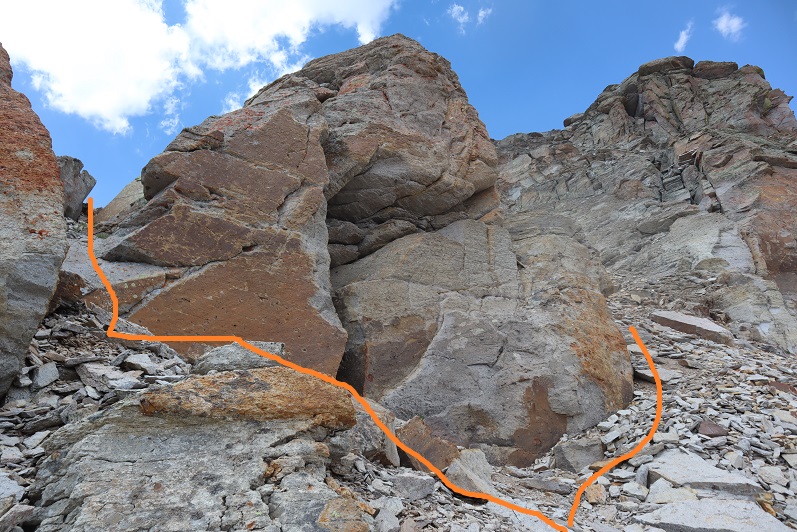
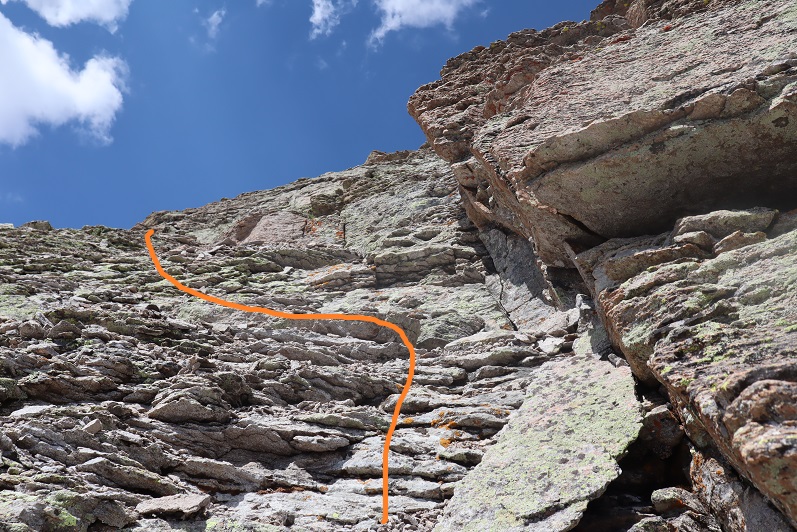
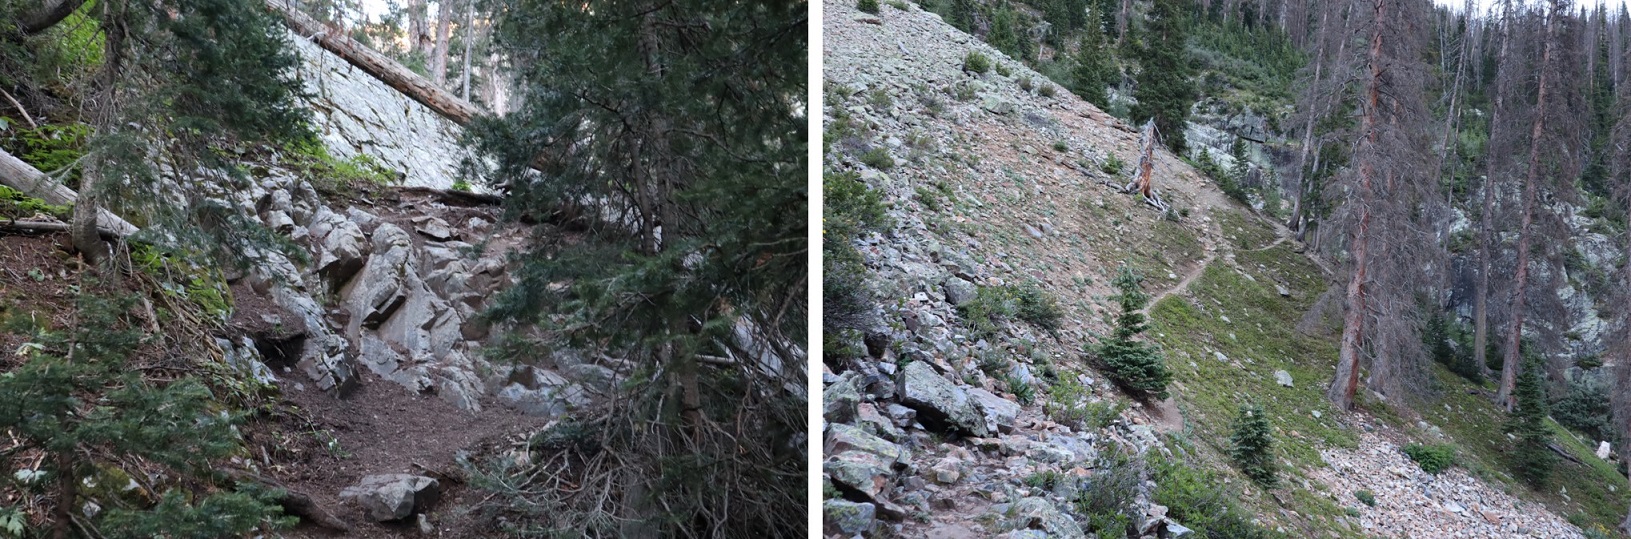
The wind had been intense all morning, but once I was above treeline it became difficult at times to even stay upright. So much for the forecased 11-17mph winds! I’d started early to avoid the most intense winds that were supposed to start around 11am, but it seems they started a little early. I had to hunker down at times and turn away from the wind, which turned the snowflakes into glass, and was side-stepping as I hiked just to stay in a straight line. I tried to take pictures, but unfortunately, wind is invisible. I kept my gloves on and was glad I’d put on my balaclava at the trailhead. Here are some pictures of the ridge.
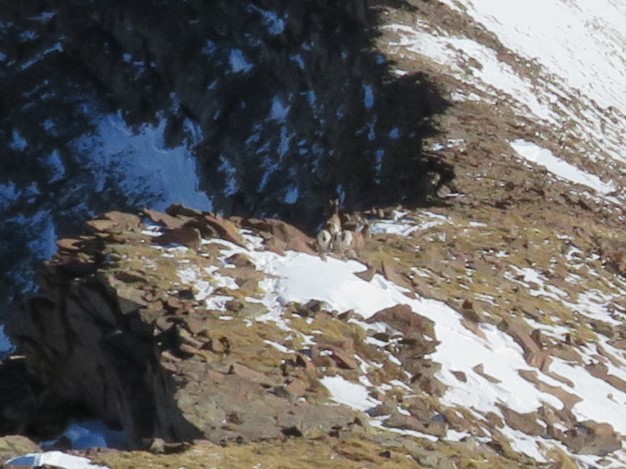
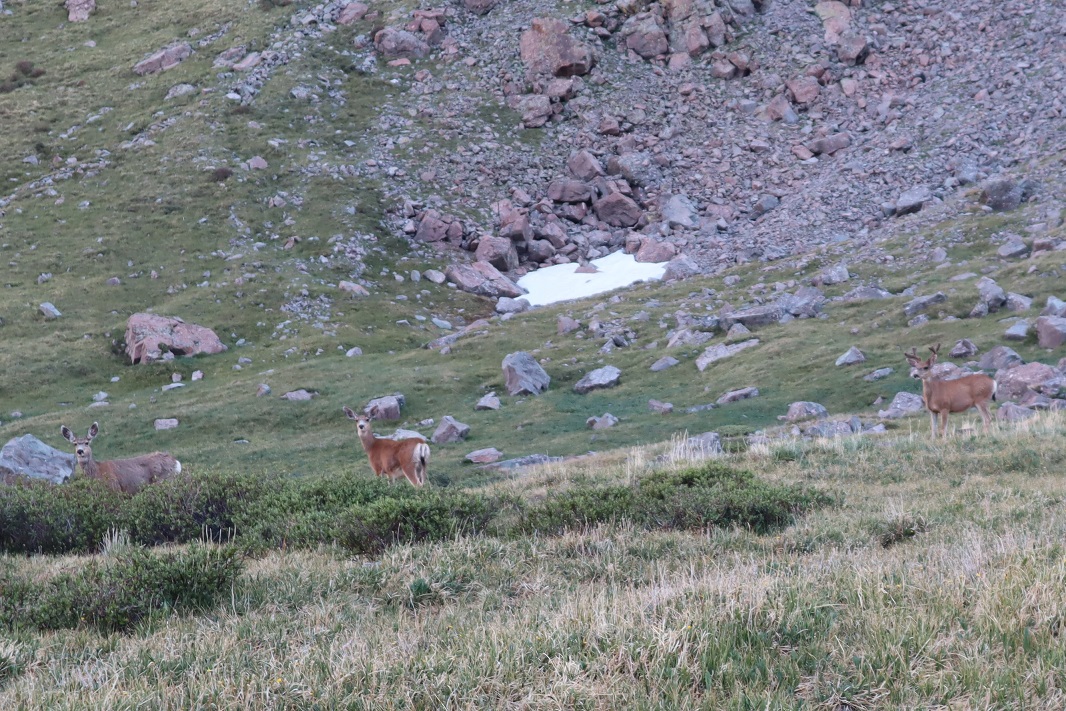
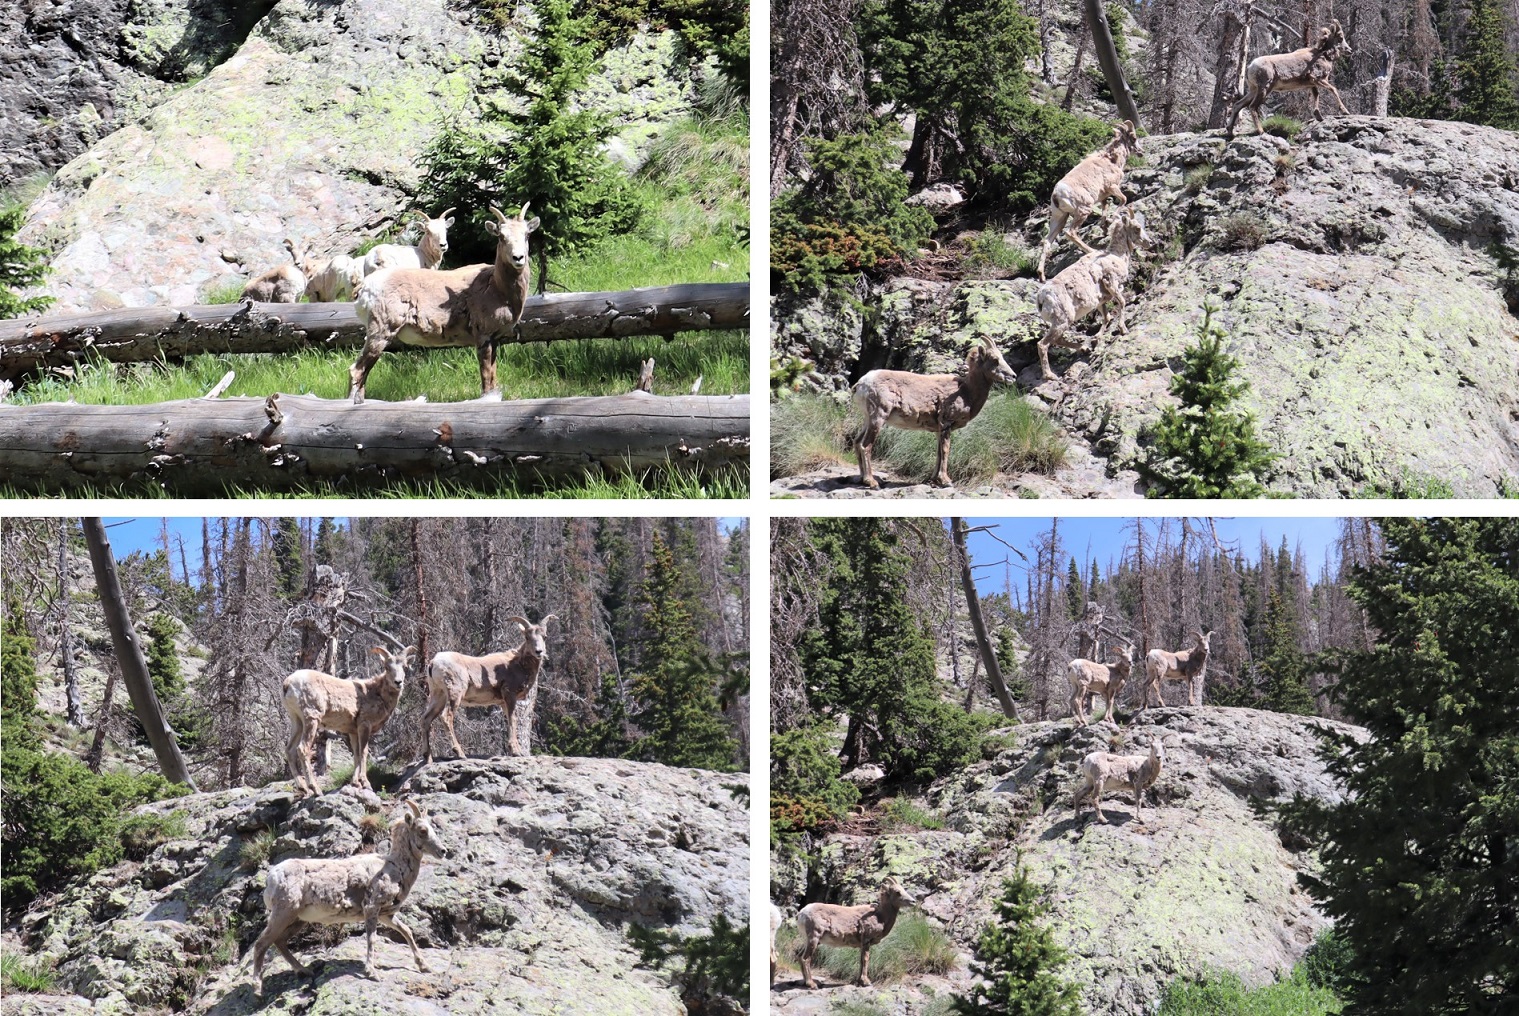
Here I noticed some bighorn sheep in the distance. They also noticed me and trotted off.
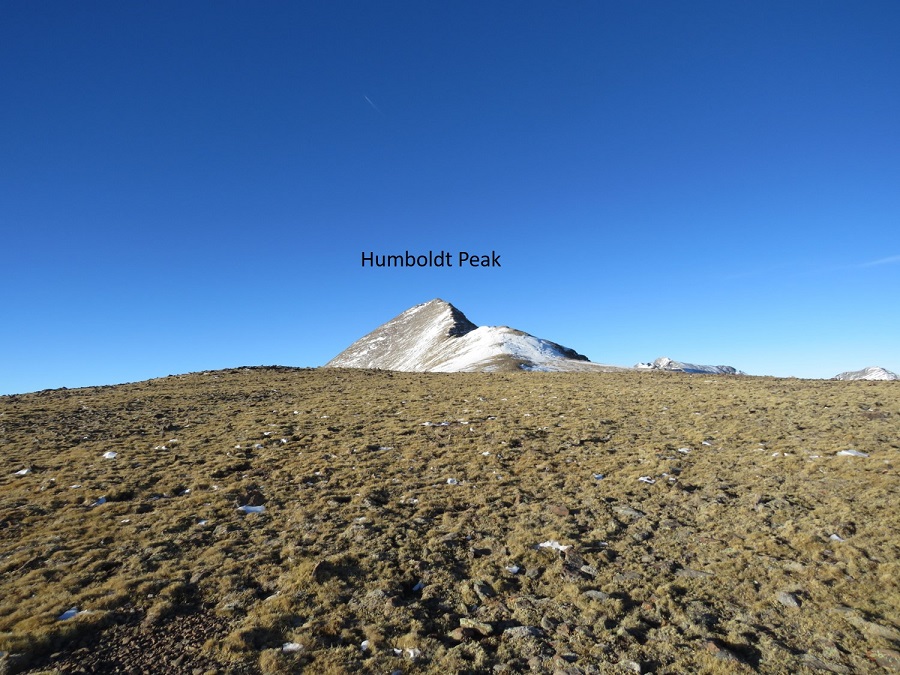
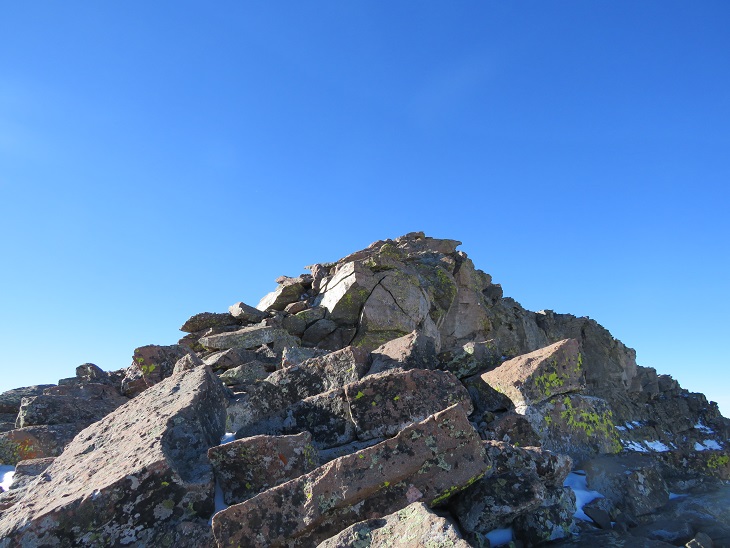
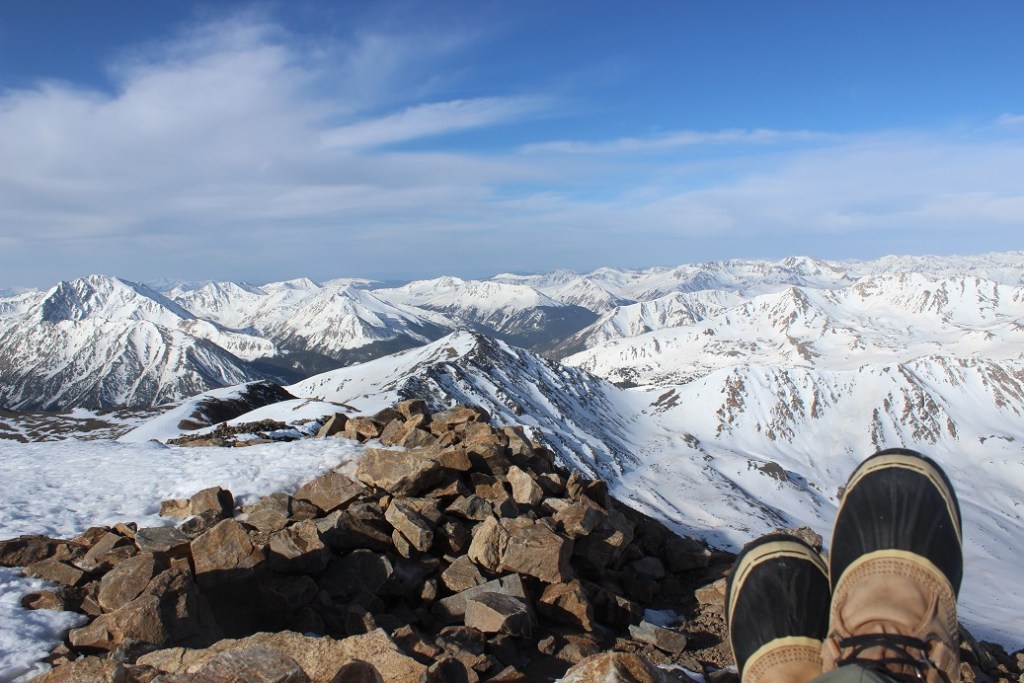
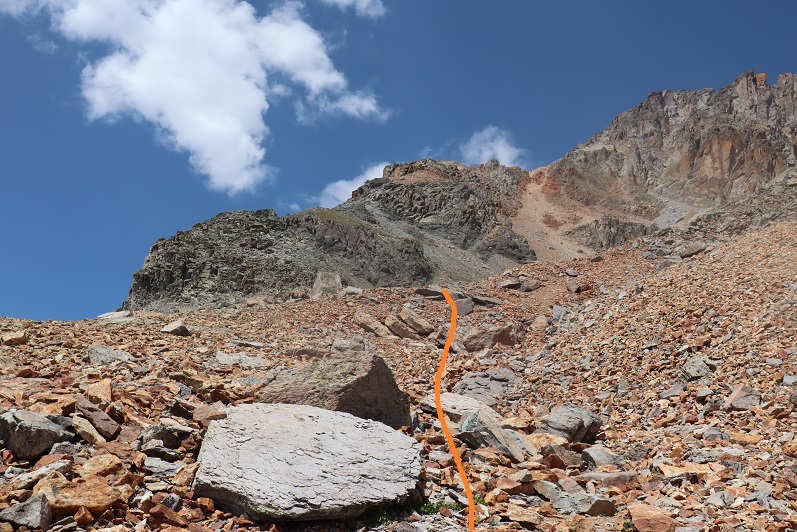
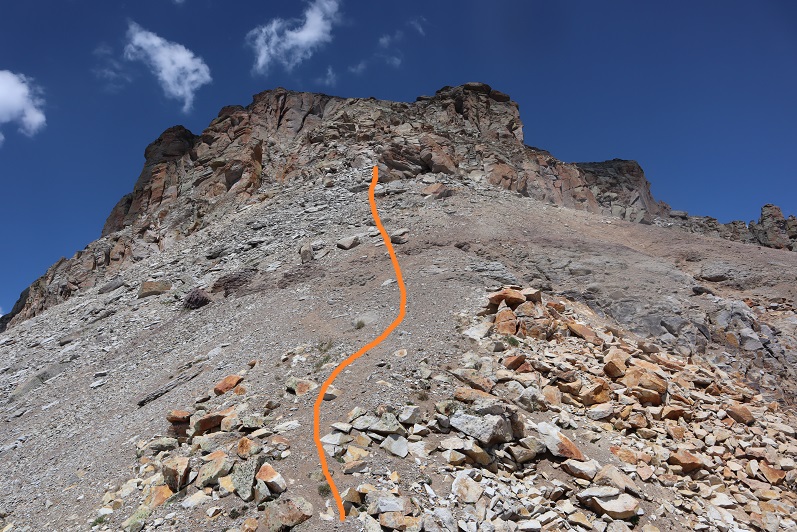
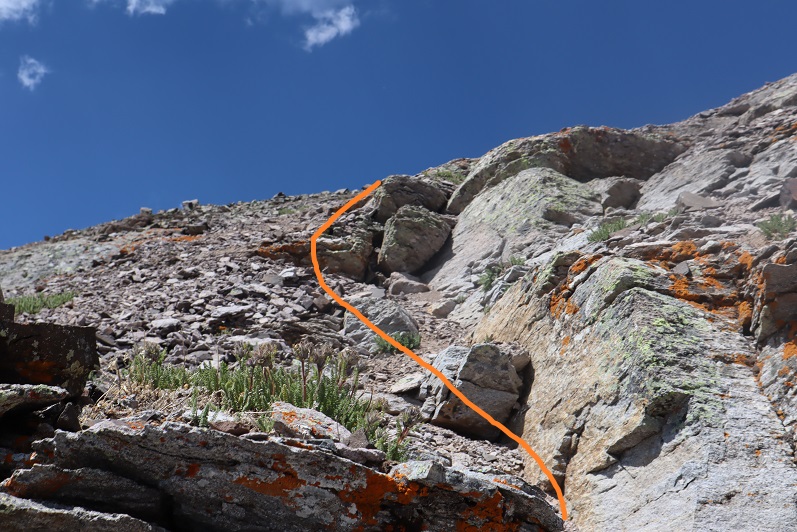
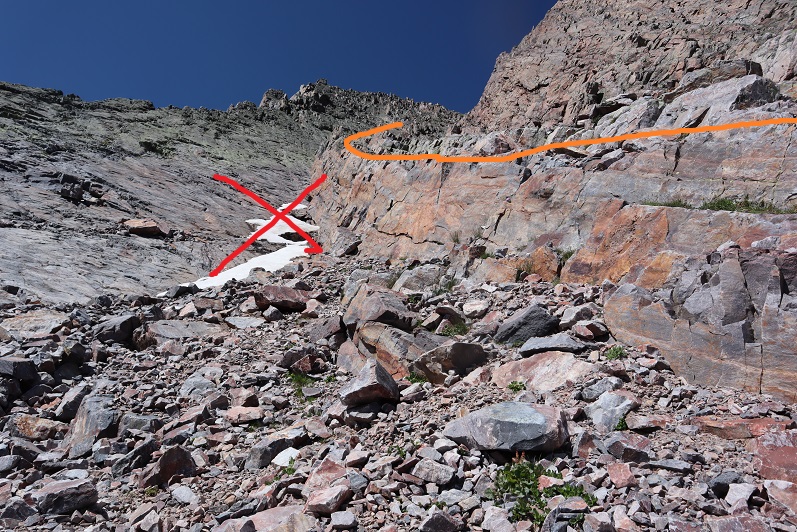
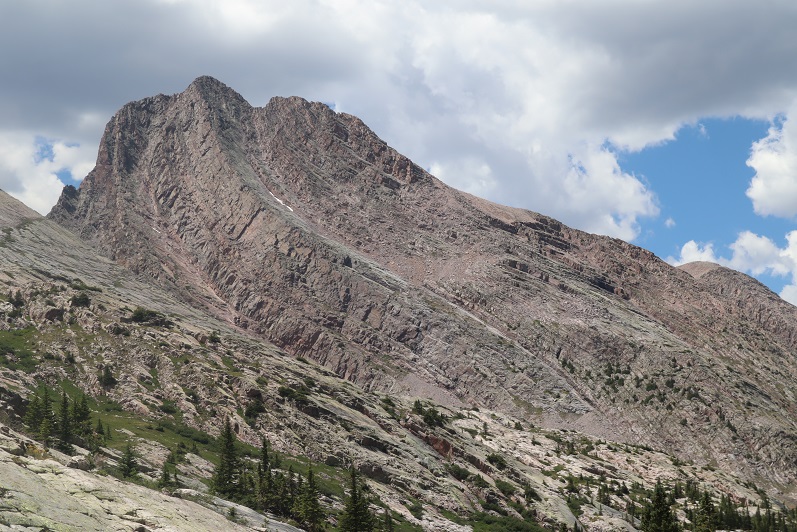
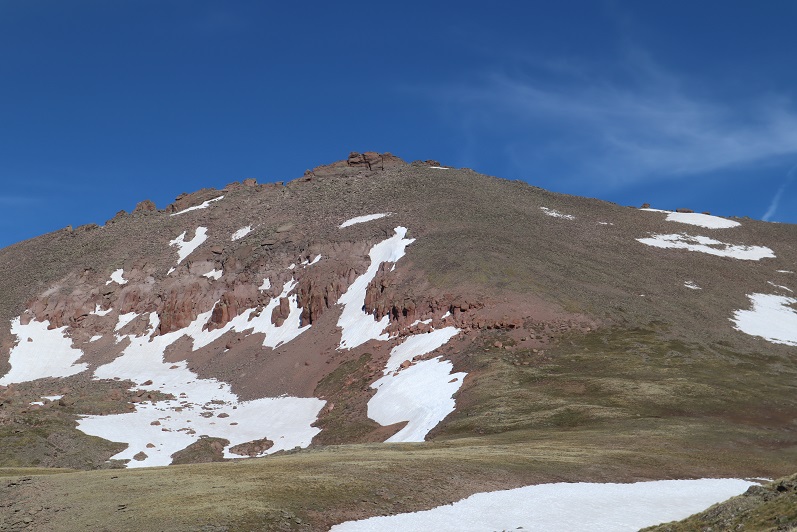
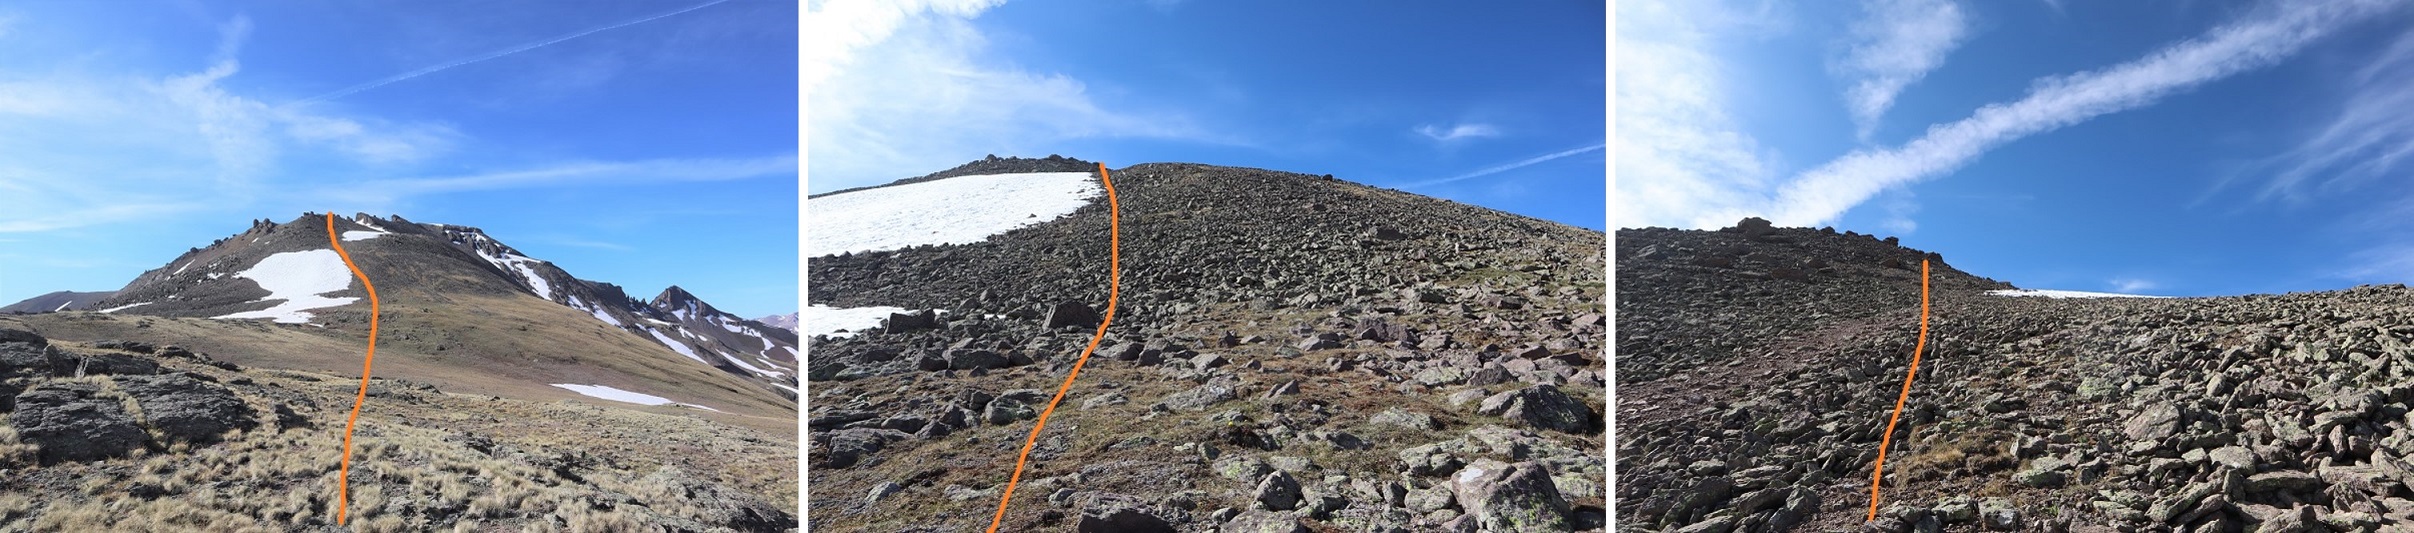
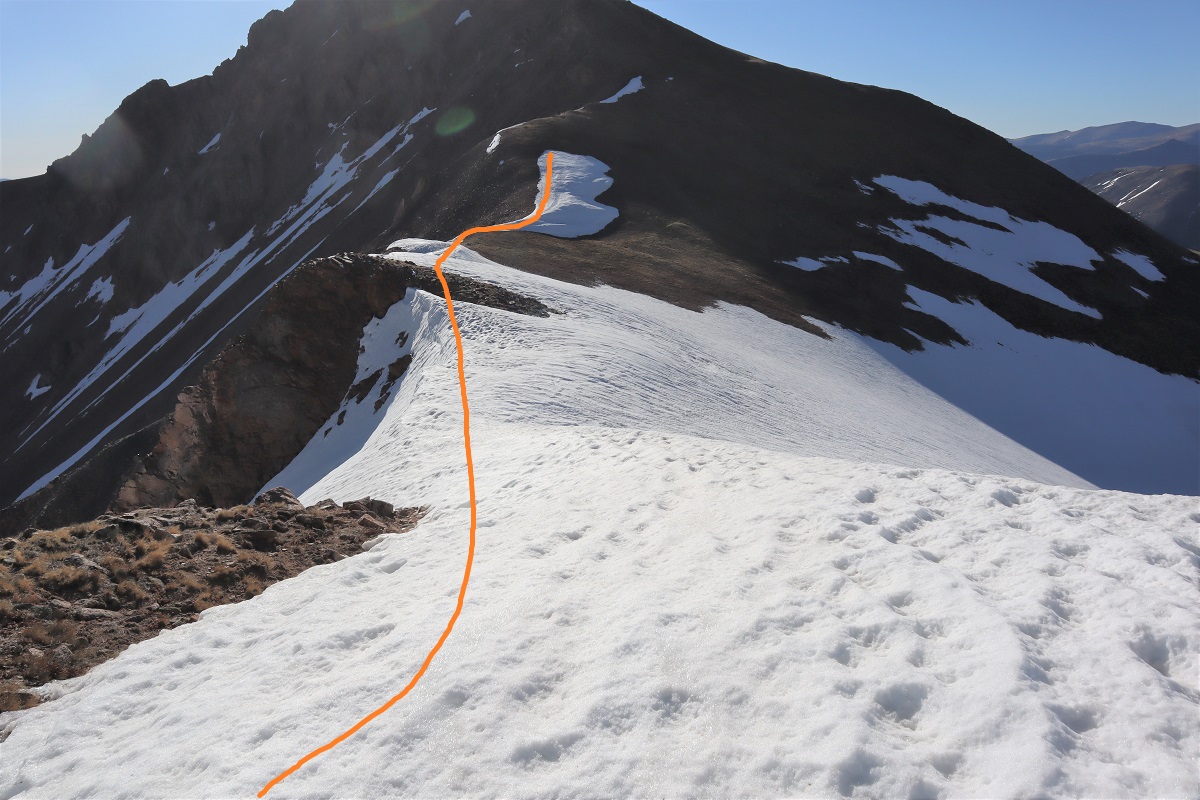
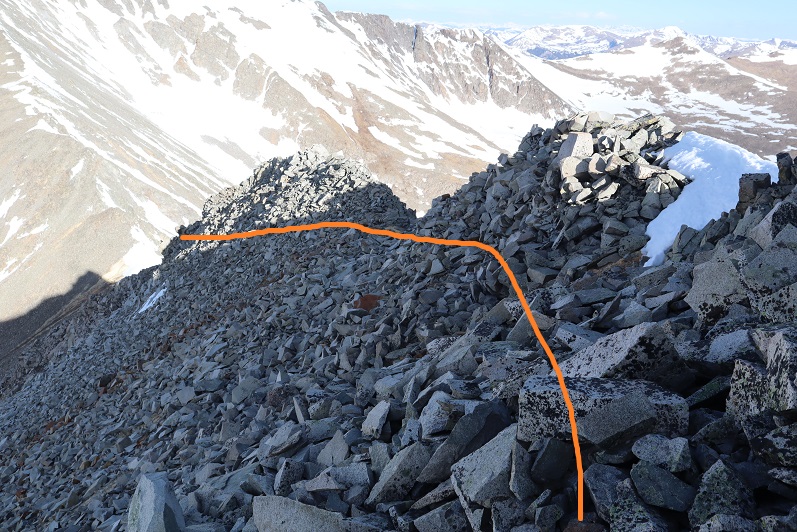
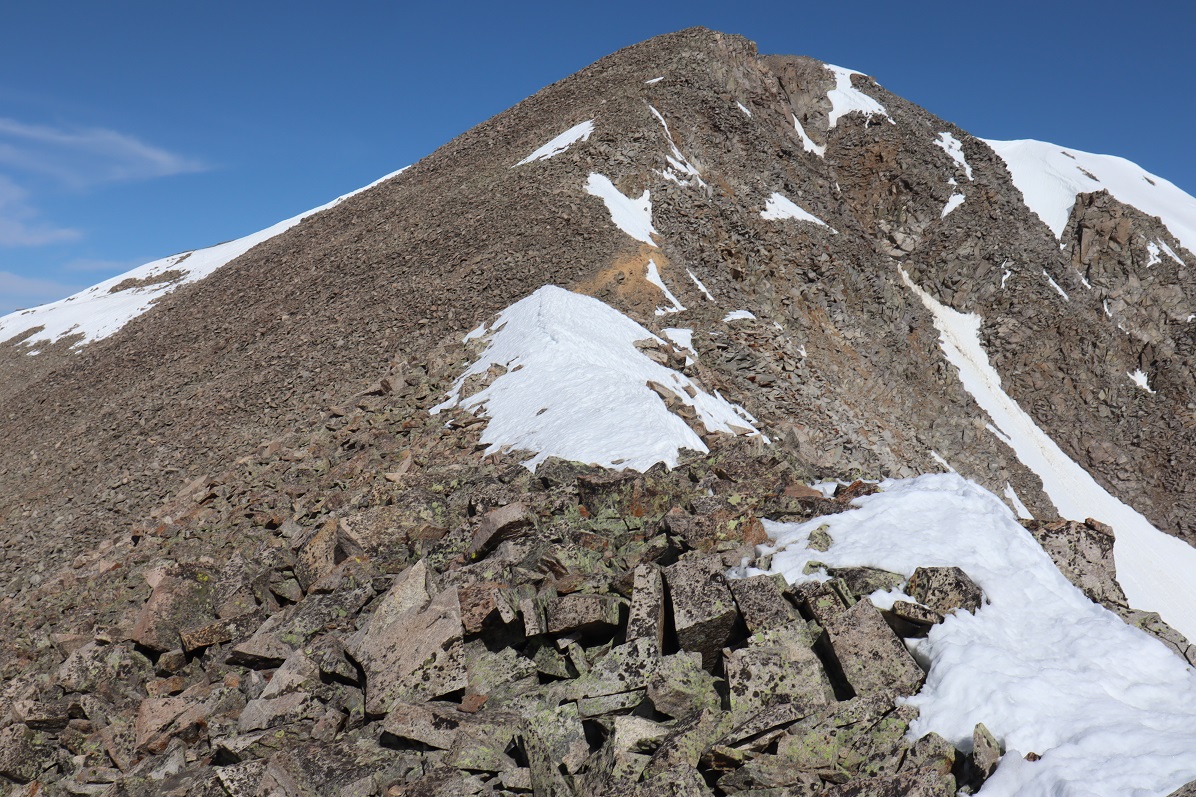
At the top of the ridge was another ridge, so this had been a false summit. Here’s the actual summit of Humboldt Peak. It’s a straightforward ridge hike to the summit, nothing above class 2.
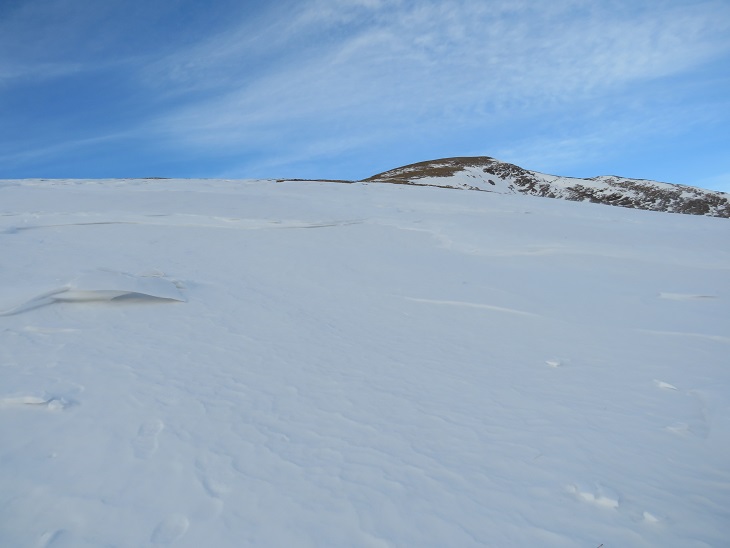
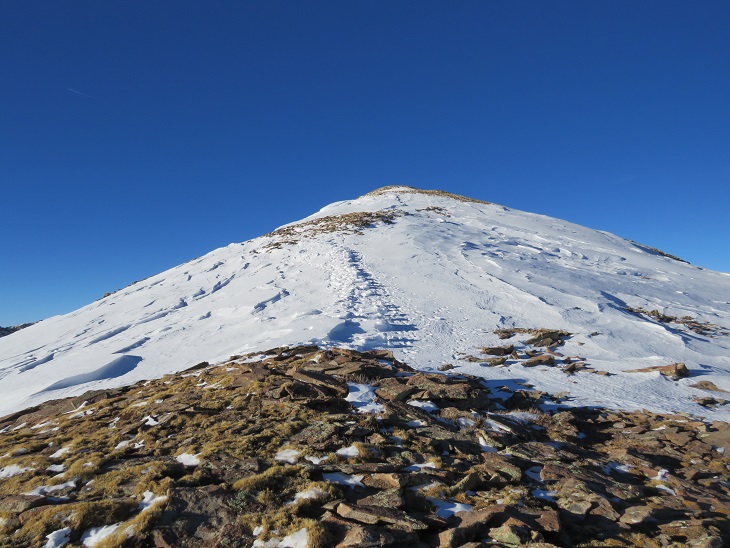
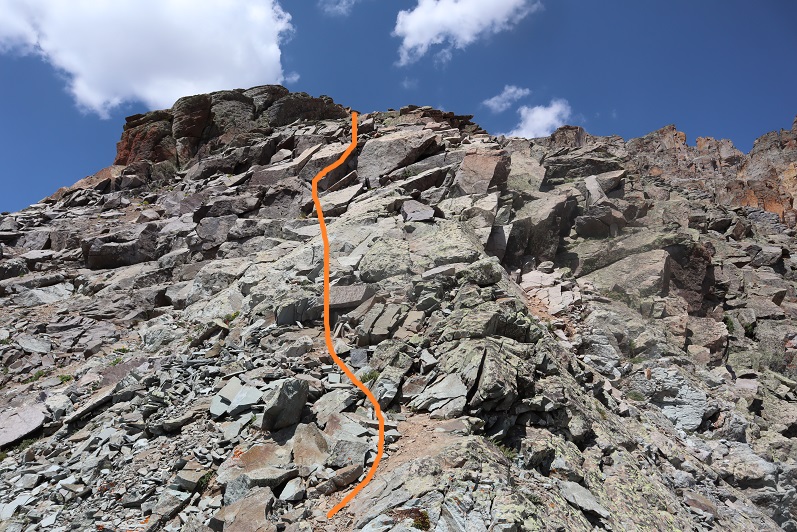
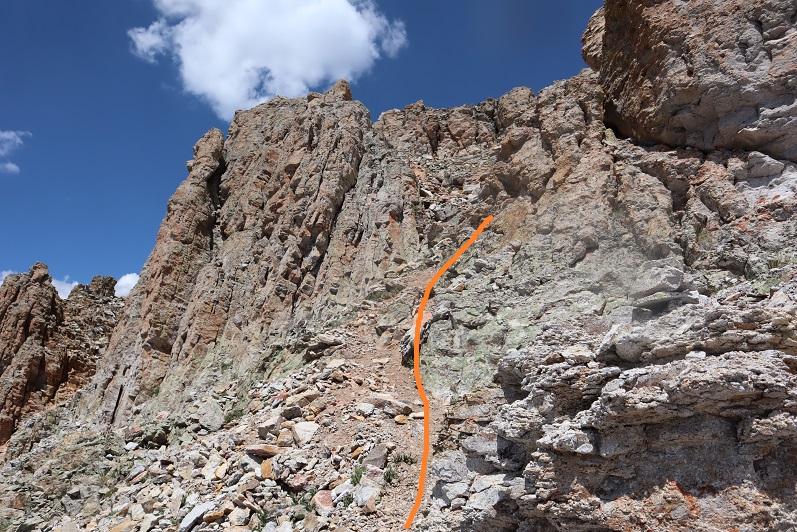
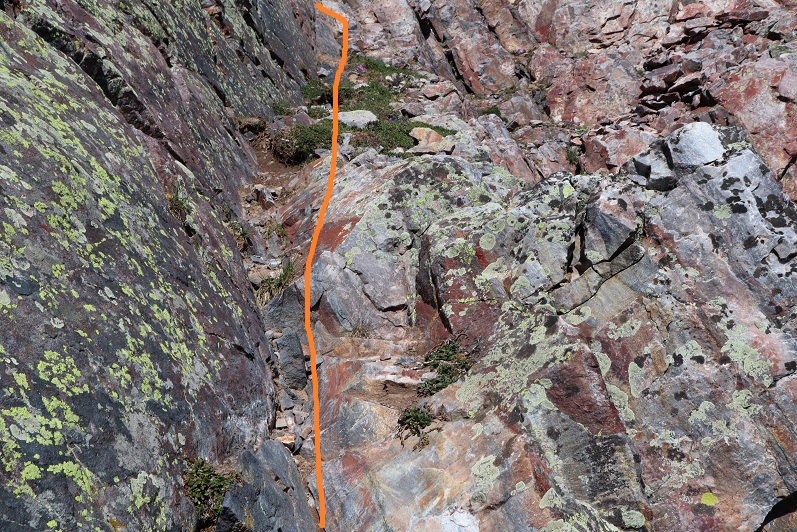
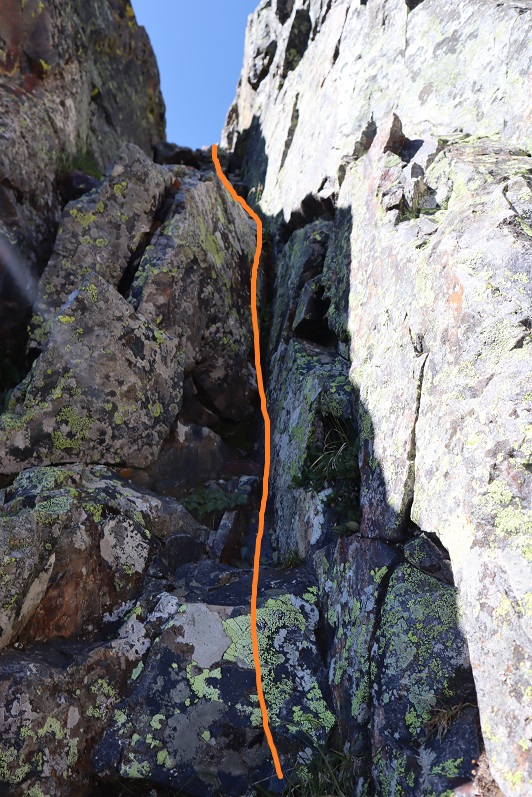
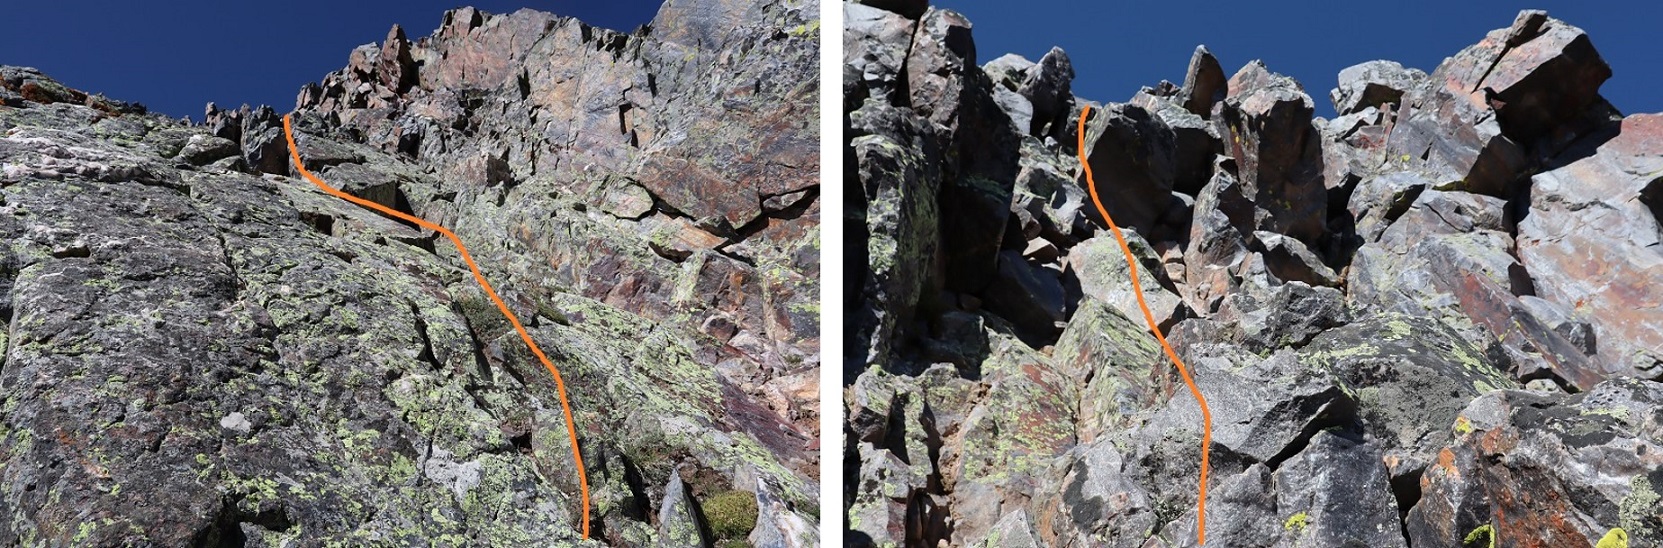
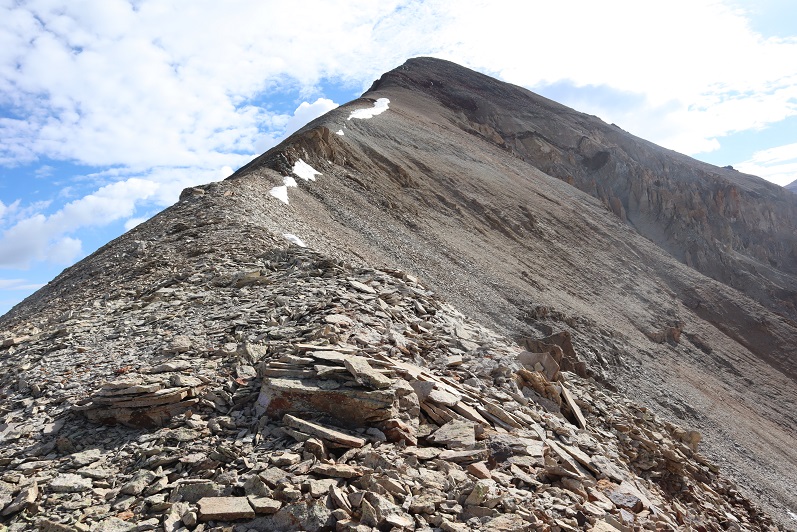
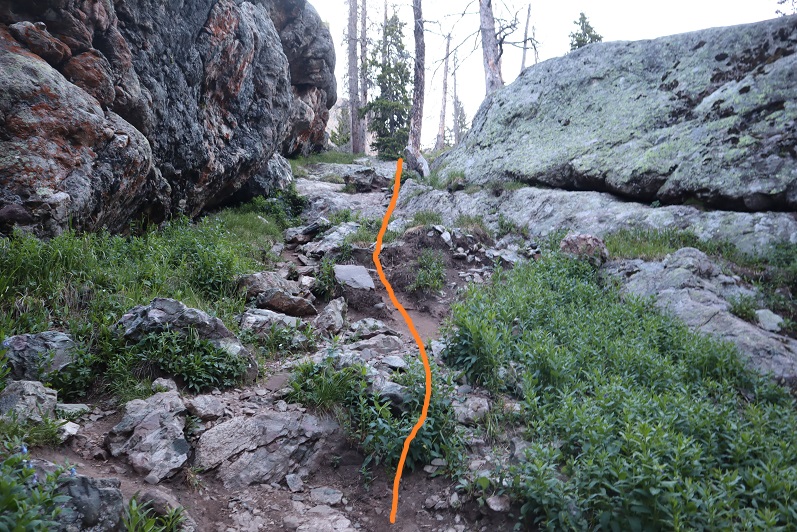
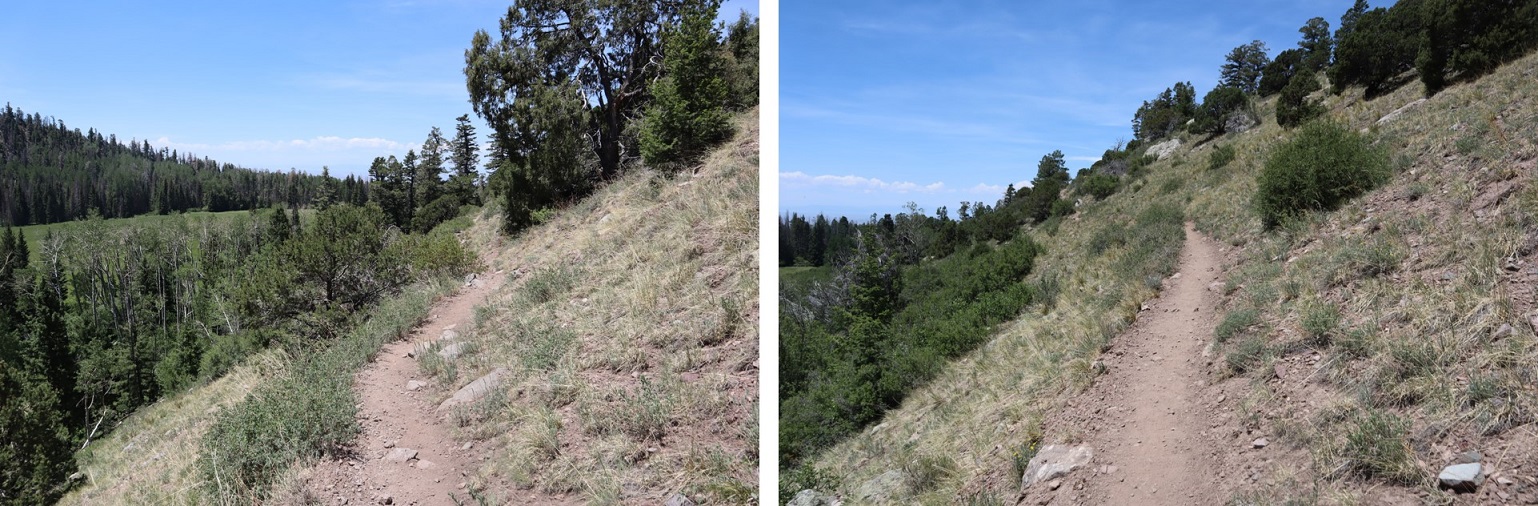
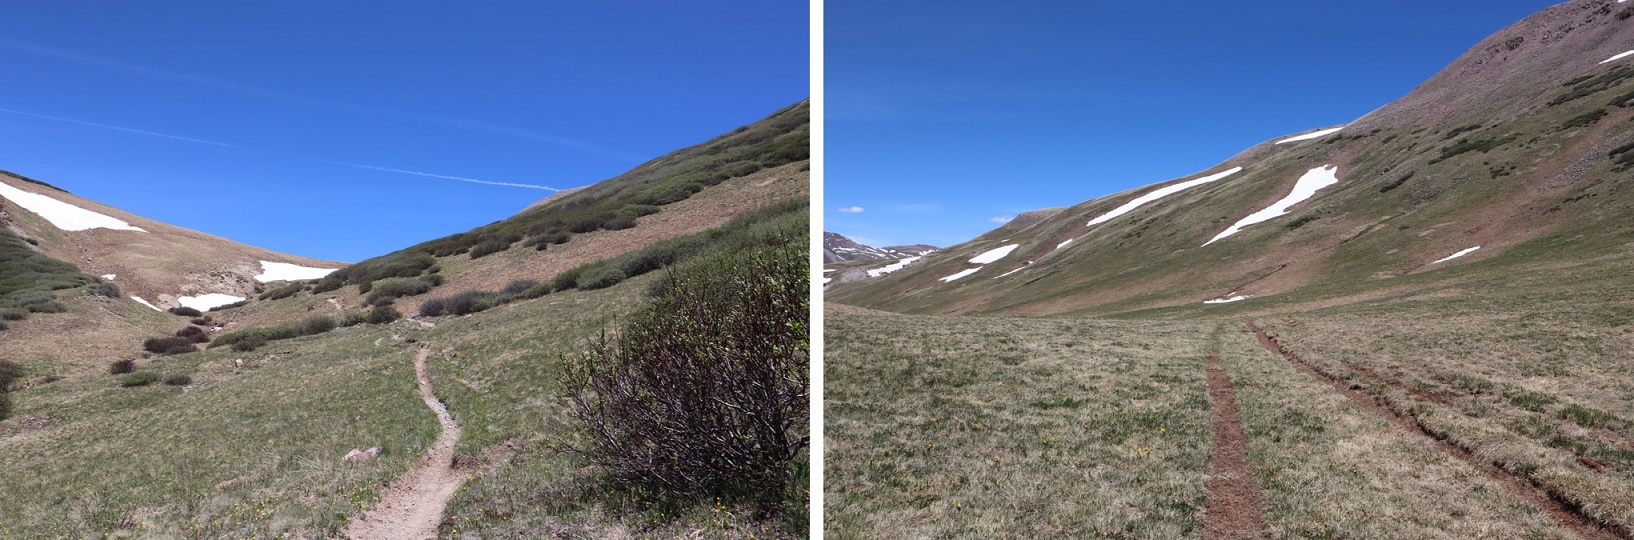
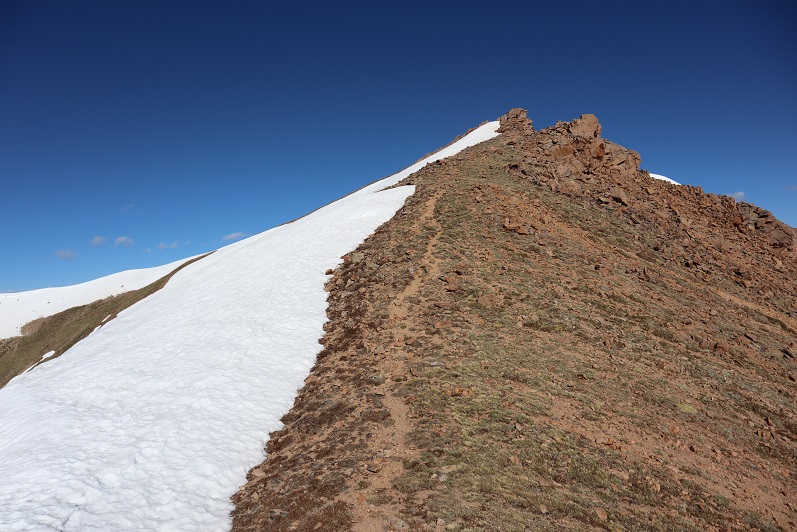
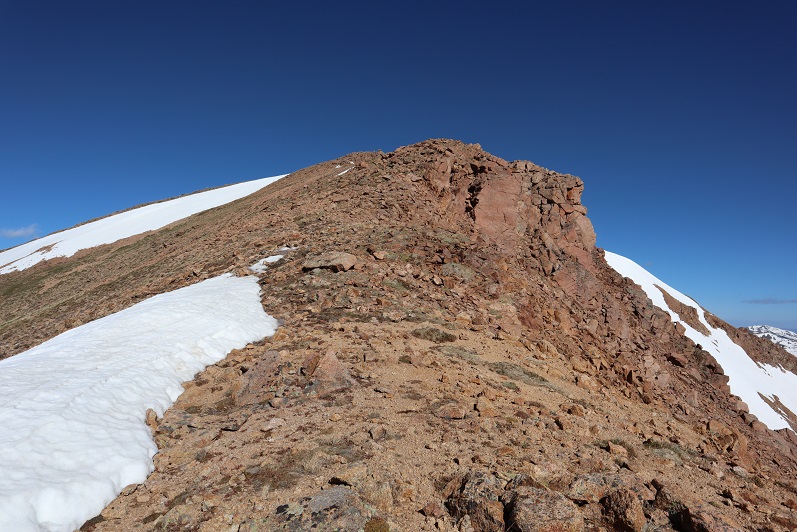
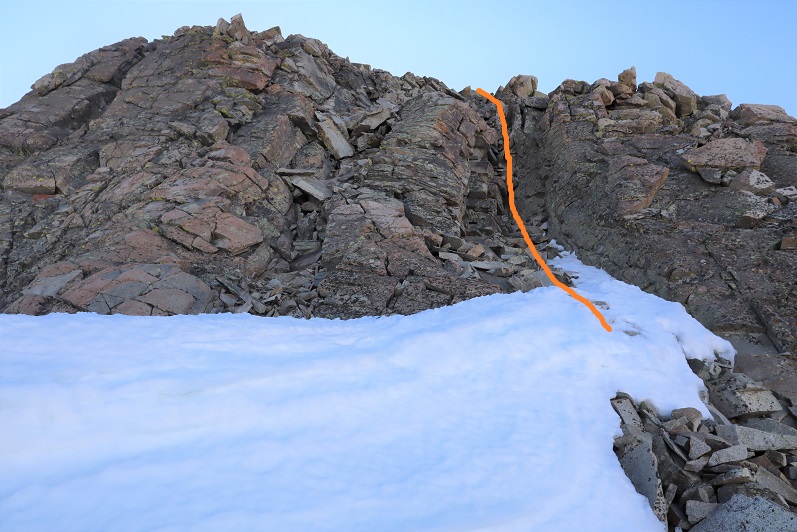
Here are some pictures of the ridge. There was some snow, but it was all firm enough not to need traction
On this part of the ridge the wind really picked up. I had to hide behind rock structures to get out of the brunt of it, and the noise it made as it came up and over the rocks was creepy. The balls of my feet were frozen at this point (due to Raynaud’s) and it felt like I was walking with large rocks in my shoes (I wasn’t, it was just the ball of my foot that had frozen). Several times I hunkered down to maintain my balance, but it was still a straightforward ridge hike.
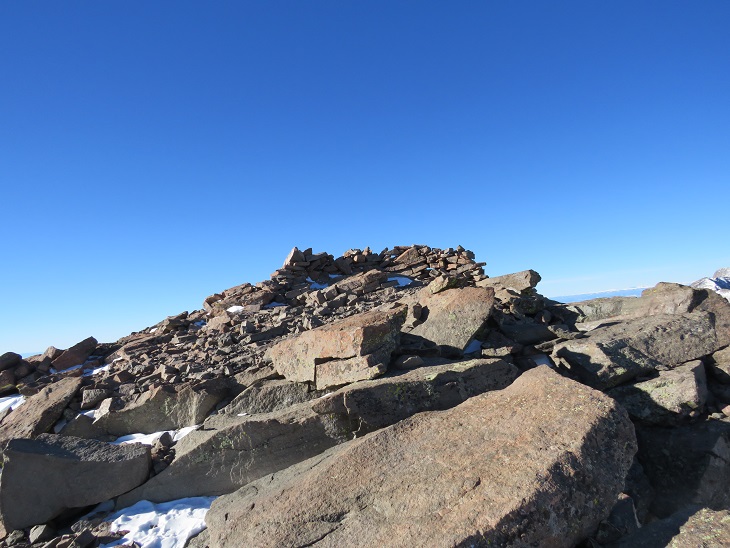
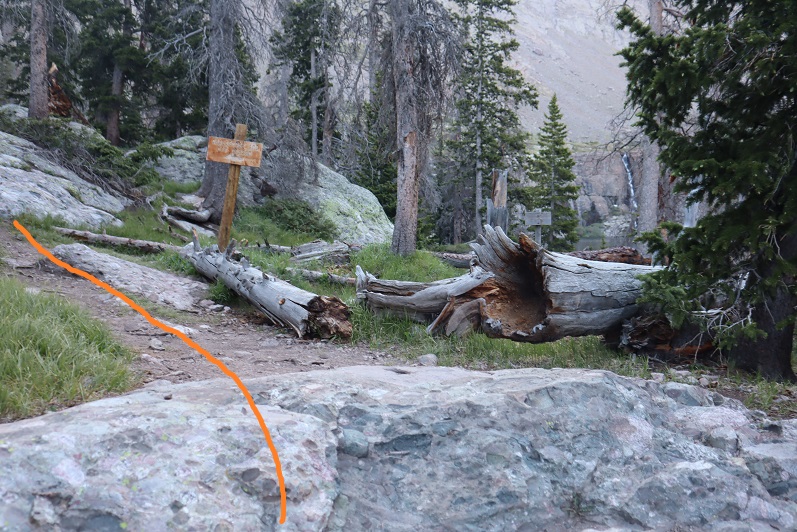
I knew I’d made it to the summit when I found the wind breaks. I never saw a summit marker, but I don’t think there’s one here?
I’ve summited Humboldt Peak twice before, so I knew I was at the summit at the first wind break, but I walked further west for better pictures.
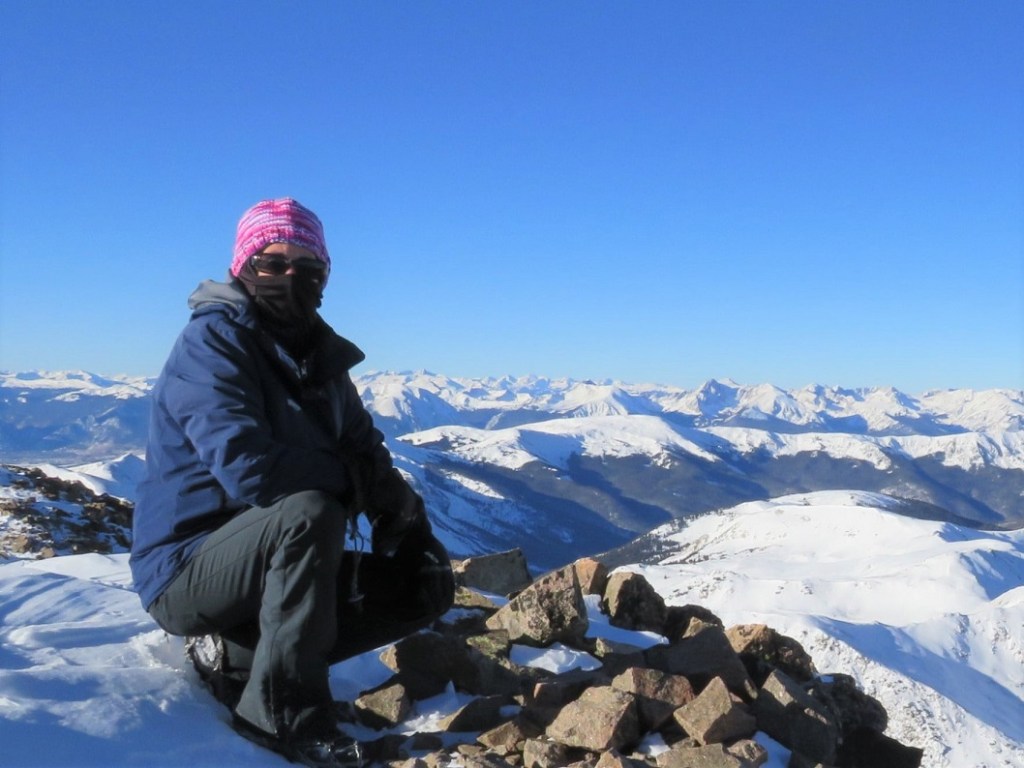
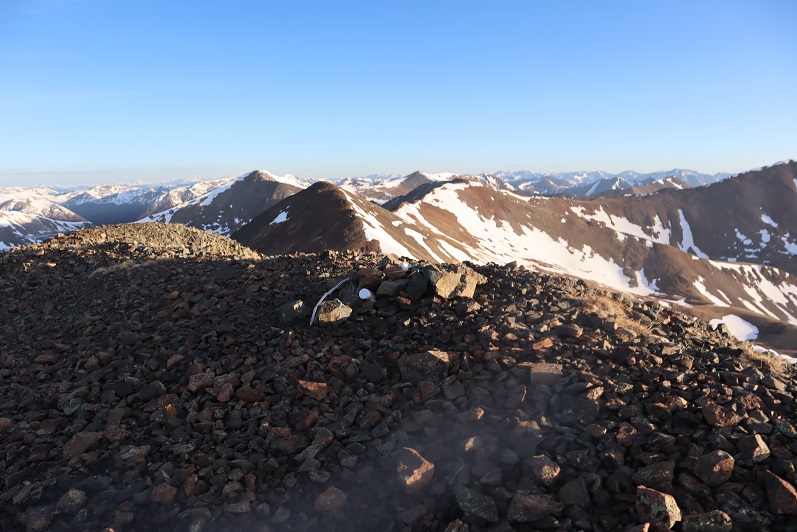
I summited Humboldt Peak at 9:45am
Humboldt Peak:
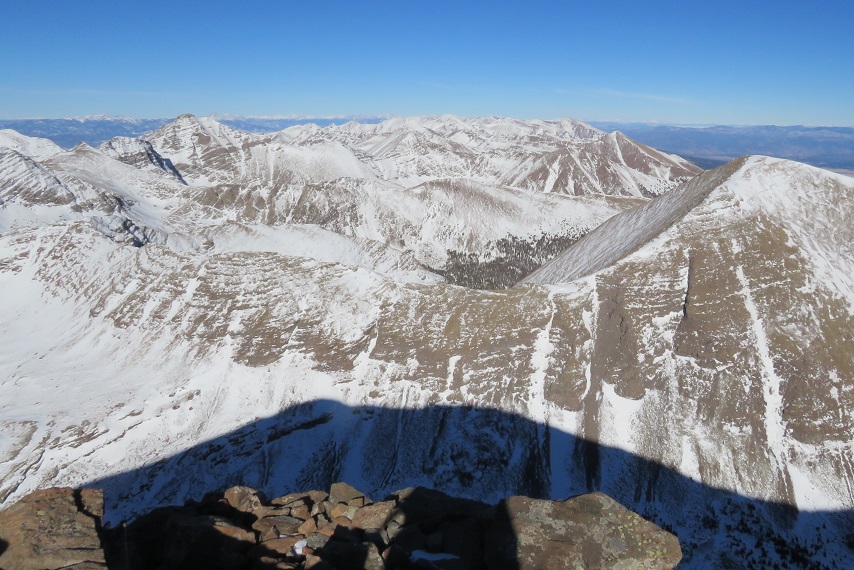
The views of the Crestones/Sange de Cristo range were beautiful!
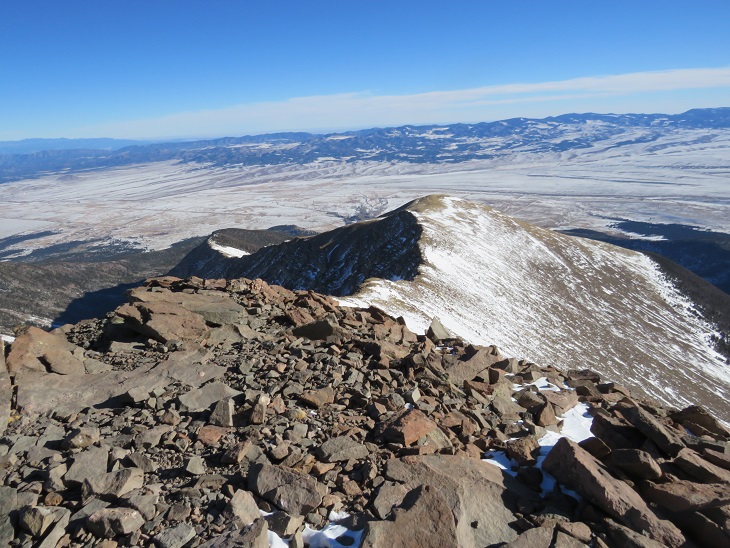
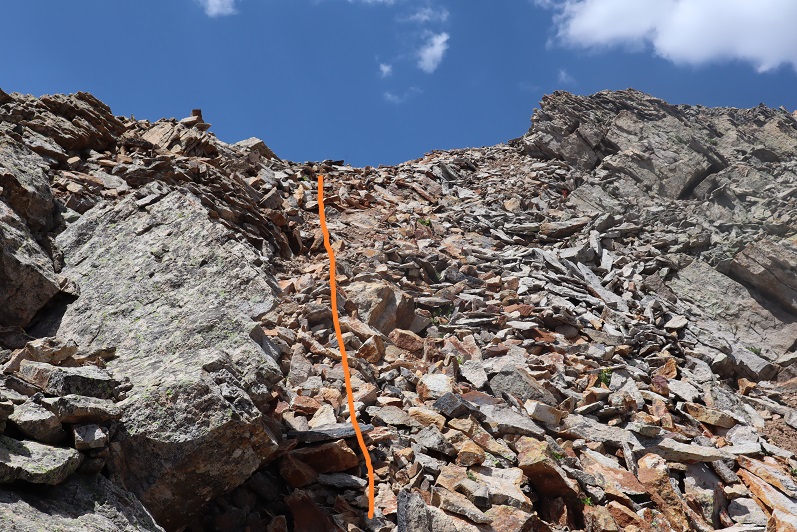
Time to head back down the ridge
The wind was still fierce, and I was worried I was getting a nasty windburn in all the areas my balaclava didn’t cover. The wind speeds weren’t supposed to be this high, so I’d left my goggles at my truck. Note to self: next time, bring the goggles. On my way back down the ridge I saw the Bighorn Sheep again. They quickly turned when they saw me and headed over the mountainside. There was a big drop on the other side, and I was surprised I couldn’t see them again when I passed.
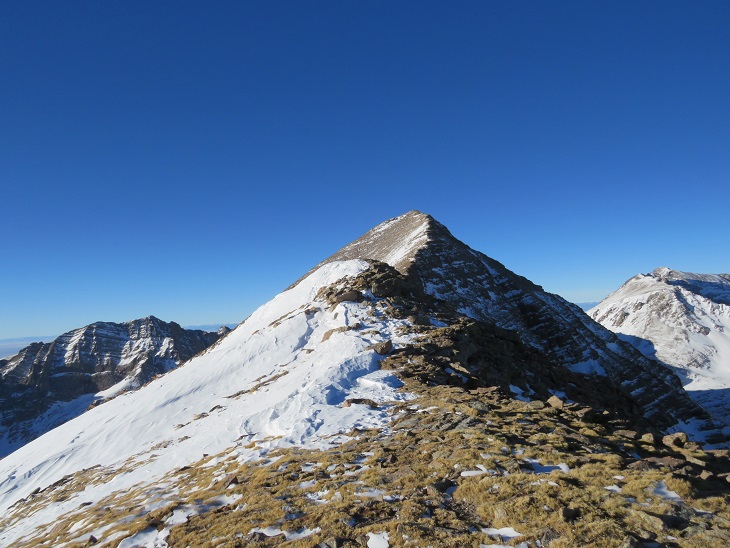
This was a simple ridge stroll, or, it would have been, without the wind
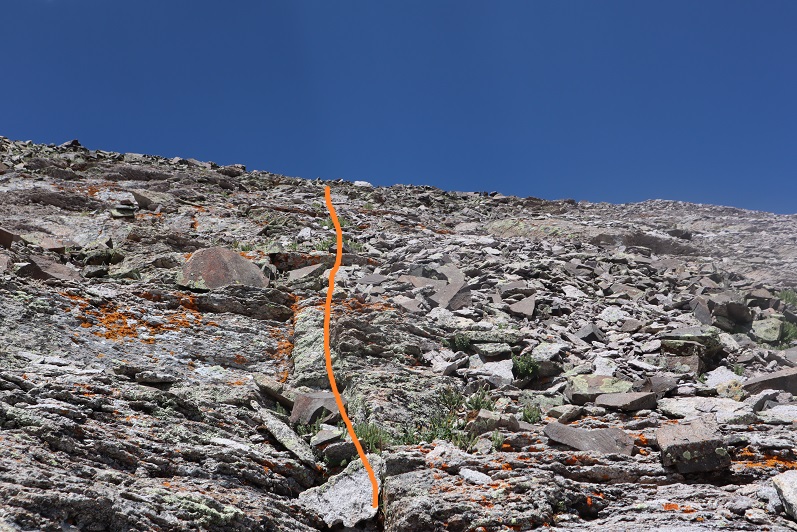
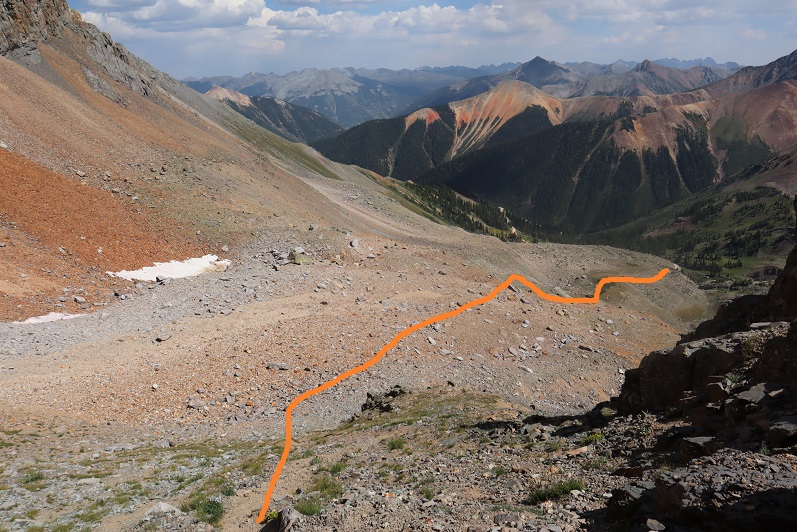
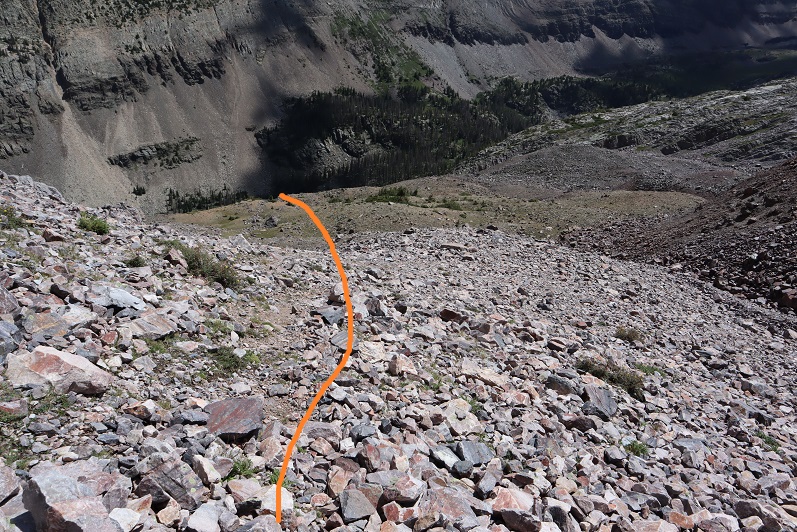
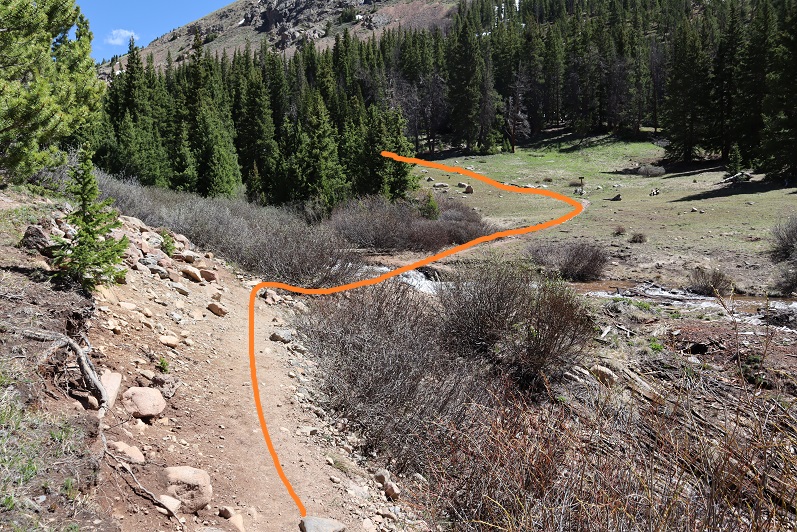
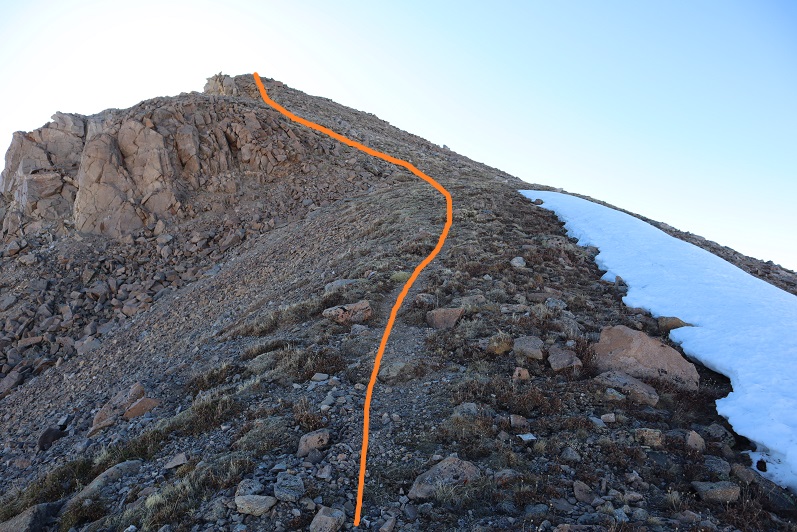
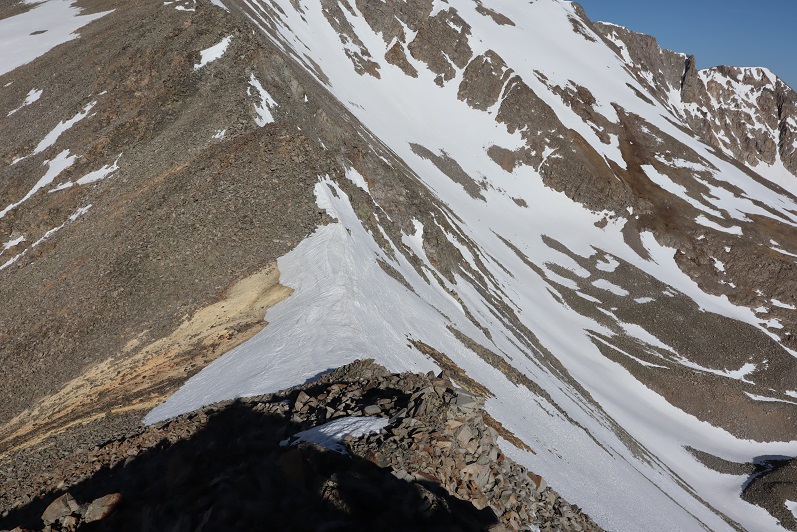
Here’s looking at my route back down the ridge to treeline
Here I met some hikers heading up. The wind had died down considerably by this point, so I figured they had the better weather of the day (I found out later it picked back up again, and they said their summit was just as windy as mine). My feet started to de-thaw, and I had a minor Raynaud’s attack: think insane pins and needles as the blood started flowing again. It lasted about 30 minutes, and to combat it I just kept hiking. On a positive note, I could feel my toes! Finding my tracks back to the trail was a bit of a challenge, but I came across them eventually.
Then I followed the trench back to Rainbow Trail. I should have put on snowshoes here, as I postholed ever 30 feet or so, but I really didn’t want to stop. I was just glad I’d started early enough in the day not to need snowshoes (spikes worked just fine). Anyone heading back down later than me would need snowshoes.
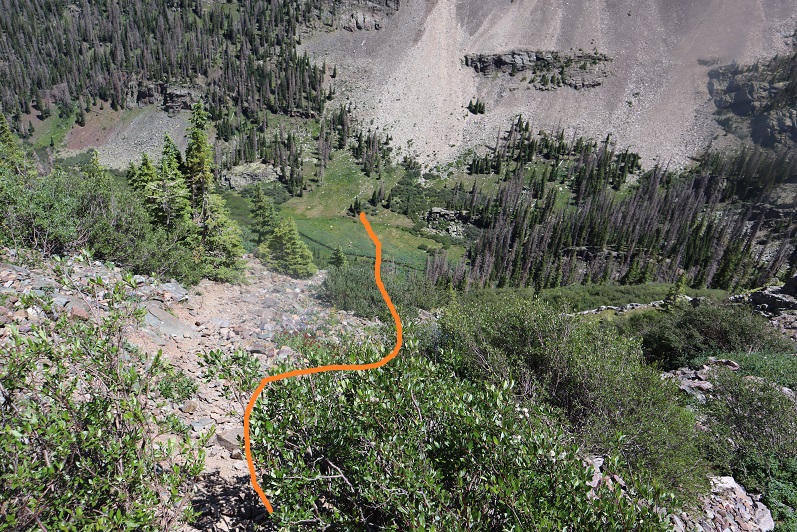
Once back at the trail I followed it a half mile to South Colony Lakes Road
Once on the road I hiked the 2.3 miles back to the trailhead, noticing a lot of dog tracks along the way. As I neared the trailhead I saw a couple walking with two beautiful dogs. It seems they were out on a day hike, and I thought this was a great idea, as it was a beautiful day below treeline.
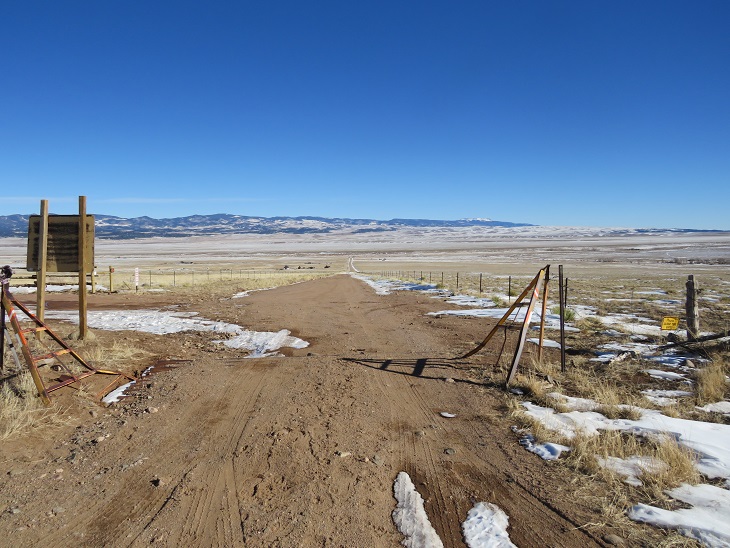
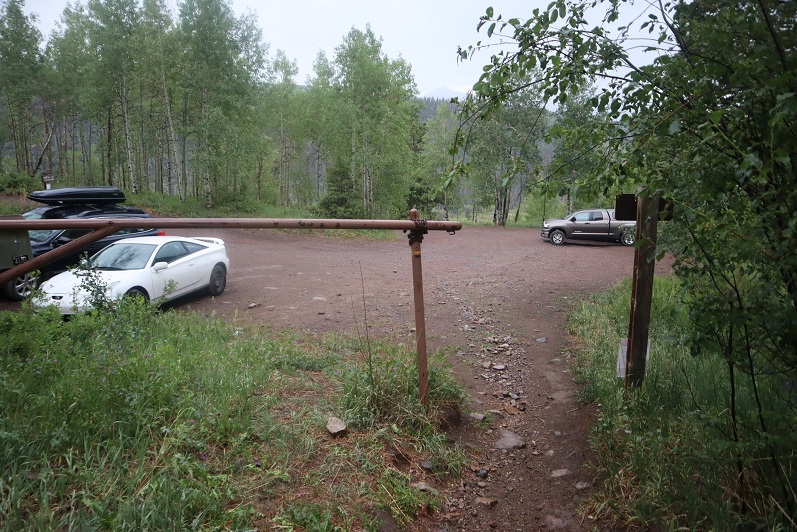
Here’s a look at the trailhead on my way back. Easily 2WD accessible.
I made it back to my truck at 1pm, making this a 14.02 mile hike with 5563’ of elevation gain in 8.5 hours.
Unfortunately, when I made it back to my truck I could hear the conversation the couple with the dogs were having. The man kept cussing at his female companion, and the dogs, over simple things like an overturned water bowl. To me there’s no need for vulgar words, and he was using multiple ones in each sentence he uttered. I felt the urge to say something, but no one else in his party seemed to mind his behavior, so I kept it to myself. I’m not sure why women allow themselves to be treated that way?
The Humboldt Peak Summit Sticker can be bought here
My trail name is Wild Wanderer, I’m a mountaineer, and I have Raynaud’s. So far this year I’ve summited over 160 peaks above treeline, many of them in winter conditions, and I haven’t had a single Raynaud’s attack this year. With the cold weather approaching (or already here!) I’ve been asked to put together some tips on how I successfully mountaineer in the winter and manage my Raynaud’s. I believe these tips can help all cold weather hikers and adventurers.
Disclaimer: These tips in no way all inclusive or a substitute for the education you should receive before entering the backcountry in winter. Please consider taking classes in alpinism, orienteering, avalanche awareness, and wilderness first aid before entering the backcountry, especially in winter.
Raynaud’s causes some areas of your body — such as your fingers and toes — to feel numb and cold in response to cold temperatures or stress. In Raynaud’s disease, smaller arteries that supply blood to your skin become narrow, limiting blood flow to affected areas (vasospasm). This can happen even in warm weather.
This picture was taken of my fingers while camping on a 70 degree day.These are my feet having an attack while I was at work, sitting at my desk
During an attack of Raynaud’s, affected areas of your skin usually first turn white. Then, they often turn blue and feel cold and numb. As you warm and your circulation improves, the affected areas may turn red, throb, tingle or swell. This can be a very painful experience. Many people mistake it for frostbite. This time I’d earned my blue toes, as I’d been snow-shoeing without the proper gear
Winter hiking is a wonderful experience. There’s a special reverence and tranquility to a winter mountain landscape. The trails are less crowded, the views are amazing, the wildlife easier to spot, and with this comes a unique sense of achievement to summiting a mountain covered in snow and ice. However, the cold and wind can be a barrier to this sport. I’ve been a mountaineer for 6 years now, and I’ve learned quite a few tips and tricks to keeping myself (and my digits) warm and attack free. It all comes down to prevention and preparedness.
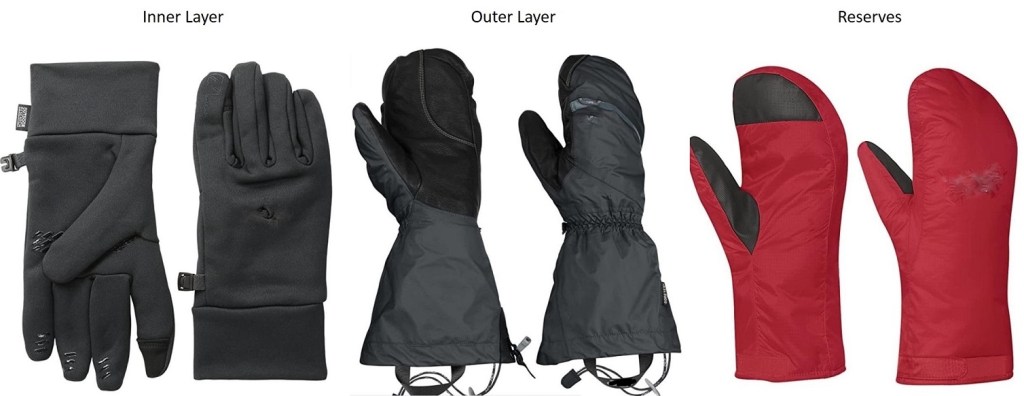
What Wild Wanderer Wears
I usually wear the same outfit when I mountaineer, emphasizing moisture wicking layers and fleece. It’s kind of boring and predictable, but it keeps me warm.
Here’s what I wear, from head to toe (scroll down for detailed information)
Knit/Wool Hat
Balaclava
Sunglasses / Snow Goggles
Sports Bra
Moisture wicking tank
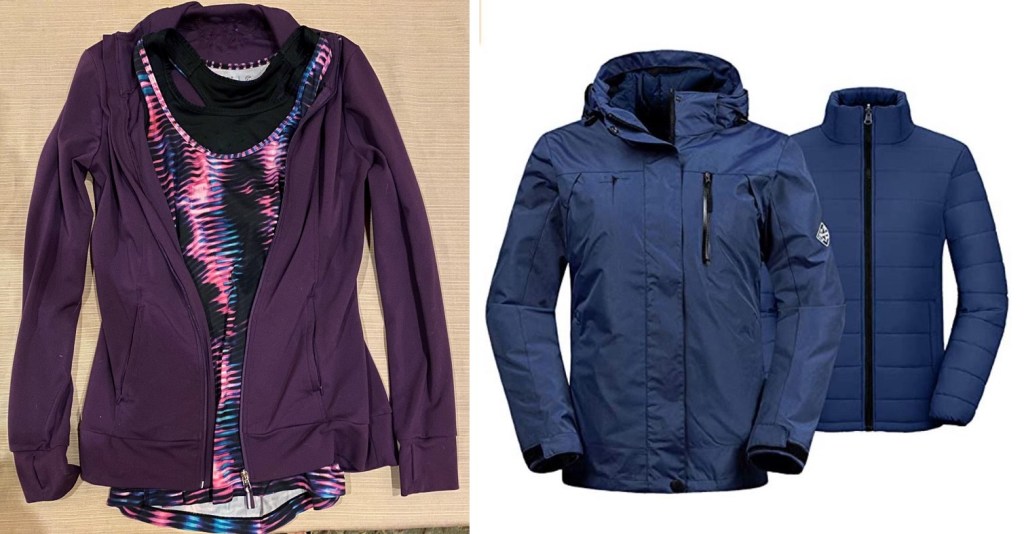
Moisture wicking jacket
Puffy Jacket
Jacket Shell
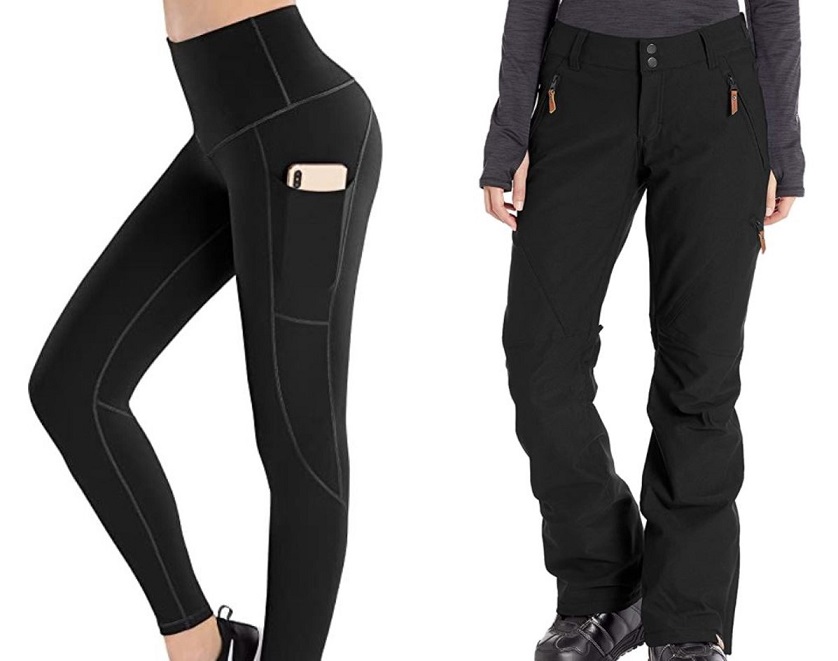
Yoga Pants
Snowboarding Pants
Wool Socks
Mountaineering Boots
Gloves
Bandana
Extra Gear (depending on weather/conditions)
Snowshoes
Microspikes
Ice Axe
Crampons
Knit/Wool Hat: I knit hats and donate them to an outdoor school for 4th graders. These kids are outside all winter long, and their heads need to stay warm. I make hundreds of these hats a year, and I always wear a different one each time I go hiking. When I get back, I wash the hat and donate it. The kids get a kick out of seeing me wearing their hat on top of a mountain. Wool is a great material, just don’t buy a cotton hat: cotton kills (more on this later).
Balaclava: If it’s windy you’re going to want one of these. Make sure it covers your whole face and nose, is made out of a breathable fabric (polyester works) and covers your neck and is long enough to be tucked underneath your inner layers.
Sunglasses / Snow Goggles: The snow can be blinding, and you’d be surprised how a good pair of goggles cuts down on the cold the wind can bring. I put my sunglasses in my jacket pocket before setting out, so they’re easily accessible.
Upper Layers: I rarely take layers off during a hike, as I’d rather be too hot than too cold. With Raynaud’s it’s easy to cool off when hot, but difficult to warm up once cold. I wear a moisture wicking sports bra, tank, and jacket all the time, no matter what. On top of that I have a puffy and a shell (the shell doubles as a rain jacket). The shell has a hood, which I have prepped to fit my head if needed to block out the wind.
Bottom Layers: To prevent chaffing, I like to wear form fitting yoga pants (polyester/spandex) under fleece lined snowboarding pants. These snowboarding pants will get torn up from crampons, microspikes and snowshoes, so I reserve a pair primarily for mountaineering. NOTE: Ski bibs are a terrible idea, as you need to take off unnecessary layers to use the restroom. Make sure your pants are just that: pants.
Wool Socks: Not cotton. Not too snug. You want your feet to be able to breathe and circulation to flow. Also, this is an instance where two is not better than one: only wear one pair of socks.
Mountaineering Boots: This is going to be a highly personal choice. I go through 4 pairs of boots a year, but to be fair I put a lot of miles in a year – around 2500 and over a million feet of elevation gain. What’s important here is to buy a pair a size larger than you’d normally wear, and, unless you have extremely narrow feet, get them in a wide size. This is because your feet will swell above treeline and you want them to have room to do so freely. A constricted foot is a cold foot. You don’t want to wear anything too constricting on your hands or feet. The footwear should also be waterproof, have a good tread, be flexible, and feel comfortable. Go to an outdoor recreation store and try on a few pair to see what works best for you before buying.
Gloves: Unfortunately, hand warmers have never worked for me (not the chemical ones, the battery-operated ones, or the ones that use fuel). Note: If you have Raynaud’s you can never take off all your gloves while winter hiking. Never. The cold will zap the heat out of your hands instantly, and regaining that heat is difficult.
I bring along 3 pairs of gloves: I wear two at a time, and have the third in reserve in case I loose one I’m wearing: The wind above treeline can be ferocious, and I’ve seen gloves blow away in the wind. If you have Raynaud’s and you lose a glove above treeline it’s quite possible you’ll be losing fingers with it. I buy all gloves one size bigger than I normally wear. This allows for my hands to swell at altitude and makes them easier to put on/take off as needed.
The first pair I wear is made of a 95% polyester, breathable, wicking, quick drying fabric with 300-weight fleece and a 100 weight fleece liner. I always have a glove with fingers as the base layer so I can move my fingers to perform tasks that require dexterity with a layer still on, protecting my hands from the elements. I never take these gloves off. Ever. (See stylus information below).
The second pair I wear is a shell. They’re waterproof, breathable, windproof, wicking, fully seam-taped with a water-resistant leather palm. These do a great job keeping out the wind, and are easy to take on and off. It’s important the outer layer are mittens and not gloves because my fingers and hands stay warmer in a mitten.
My reserve pair is also a pair of mittens. They’re fleece lined and come with the outer mitts. I keep these as a back-up in case I lose one of my other gloves.
Bandana: This is very important! I tie one to a carabineer and put it on the side of my pack so I have easy access to blow my nose. My nose drips like a faucet above treeline, and it’s nice to have something readily available to wipe my nose. (Yes, learning how to clog one nostril and blow is helpful, but not practical with large mountaineering gloves). The bandana should be made of polyester so it dries out fast. If you buy a cotton one it will freeze faster, get stiff, and be unusable until it melts. It becomes frozen snot.
Snowshoes: When it comes to snowshoes, you most likely won’t be putting these on at the trailhead, but later in your hike. Thus, ease of use is very important: you want to be able to put them on without taking off your inner glove. The three things I look for in a snowshoe are that they’re made of steel (not aluminum), have heel risers, and ratchet bindings. Ratchet bindings are the most important feature: I climbed all of Colorado’s 58 peaks over 14,000’ in a cheap pair of snowshoes, but I wouldn’t have been able to accomplish this if they hadn’t had the ratchet bindings.
Microspikes: Don’t spend a lot of money on these. A cheap, $7 pair will last you a long time. I use them year-round (they work great on scree for stability) and would never pay more than $10 for a pair. My advice here is if there’s any ice at the trailhead to put them on while you’re still in your vehicle, keeping your hands warm while doing so. I’ve worn microspikes for miles when they weren’t needed, and it didn’t damage them. It did however keep my fingers from getting needlessly cold putting them on. (Remember, when it comes to the cold, prevention is key). Microspikes can also be worn with snowshoes: There’s no need to take microspikes off to put snowshoes on.
Ice Axe: These are usually made of stainless steel/aluminum, which gets cold. I have an ice axe with a rubber grip (which is moderately warmer) and a leash. The leash goes around my wrist, under my outer glove but on top of my shell. I try to hold the ice axe by the leash when it’s not necessary to hold the shaft for safety purposes. Another way to avoid the cold here is to put a bandana around the shaft while gripping it.
Crampons: Make sure they’re made of steel and not aluminum (aluminum bends) and have front facing spikes for traction. Learn how to use these before trying them in the elements for the first time, as they can be tricky to put on correctly, especially while wearing gloves.
Keep Your Pack Packed
Unfortunately, those of us with Raynaud’s don’t have the luxury of packing light: we need to be prepared for all types of weather, and due to the possibility some of our gear might fail/get lost, we need backups. I like to keep all my gear in my backpack when not in use. When I get back from a hike, I usually wash my bandana, refill my water bottle, wash my sunscreen compact, and put them all back in my pack. I don’t forget important gear at home, as it’s always in my pack. In addition to the 10 essentials, I carry the following items (scroll down for detailed information):
Carabiners
Jetboil
16oz water bottle (in addition to my regular water bottle)
Stylus
Vaseline
Sunscreen
Camera
Collapsible trekking pole
Carabiners: Carabiners are your friend! The larger the better, so they’re easier to manipulate while wearing gloves. I use them to attach my water bottle to my pack, as well as my ice axe, bandana, and any other gear I want easily accessible.
Jetboil and 16oz Water Bottle: Jetboils are a useful tool, as they are relatively lightweight and can boil water very, very quickly. I have one in my pack during the winter, along with a 16oz Nalgene. Before the hike I warm up water, put it in the Nalgene, and keep this smaller water bottle close to my skin as I hike (sometimes in a pocket, or the waist of my pants, etc.) This helps keep me warm. I also start my hike with warm water in my drinking water bottle to help prevent it from freezing. Keeping the water bottle close to my body (and not in my pack) helps to keep the water from becoming frozen during the hike. The Jetboil comes along with me, and if needed I can warm up the water again, or, if the water is frozen, I can quickly heat up snow.
Stylus: These are so helpful to people suffering from Raynaud’s! Our fingers don’t register well on touch screen devices, including ATMs, gas station machines, phones, and tablets. A stylus is cheap (I bought 12 in a pack from Amazon for $4) and solves the problem of using our fingers on screens. A stylus while hiking has the added benefit of reducing the need to take off your gloves to use your phone or GPS device to take pictures or find direction. I keep a stylus attached to all my devices that require touch to operate.
Vaseline: I’m in love with Vaseline/Petroleum Jelly. Movie stars have sworn by its beauty effects (wear it to bed to keep skin soft and younger looking), it helps wounds heal faster, restores moisture after wind burn, and when you’re a mountaineer, it keeps your nose from freezing. Before hitting the trailhead I slather a generous layer of Vaseline on my nose to keep my nose warm. It works wonders!
Sunscreen: OK, so it’s cold above treeline, but due to the reflection of the sun on the snow sunscreen is still needed. This can be problematic because a tube of sunscreen freezes in the winter above treeline. Using an aerosol spray isn’t practical for obvious reasons (wind) and the sunscreen that comes in a deodorant-like stick doesn’t apply evenly/melt when frozen. To combat this, I went to the dollar store and bought a compact, took out the powder, cleaned the compact out, and filled it with my favorite sunscreen. Then I placed a new compact sponge over it (30 sponges for $1 at the dollar store) and let the sponge absorb the sunscreen.
I keep the compact in my pocket as I’m hiking (inside of a plastic ziplock bag) and when the sun comes up, I take out the compact and apply the sunscreen. The first time I did this I was surprised at how well it worked: The sunscreen doesn’t freeze this way, and is easy to apply. The only downside is the set-up needs to be washed/replaced every time you use it.
Camera: Of course, you’ll want to bring a camera, and the specific kind is up to you. Did you know cameras get cold too? The batteries freeze and they stop working. To combat this, I put my camera on a strap around my neck, and in between snapping photos keep the camera between my puffy and outer layer. This keeps the battery from freezing.
Collapsible Trekking Pole: These are indispensable for a variety of reasons at all times of the year. In the winter they are used for probing the snow to measure snow depth, determining the stability of ice at frozen stream/river crossings, and to whack snow off trees bent over with snow and blocking the trail. Make sure the handle is made of cork or plastic (not metal/aluminum) and easy to manipulate while wearing gloves. When not in use because you’re using your ice axe, collapse and attach to your pack with a carabiner. Also, a trekking pole is your first line of defense against 2 and 4 legged animals.
Trail Tips and Tricks:
Get dressed in your vehicle: It’s cumbersome to drive to the trailhead wearing all my winter gear, so when I arrive at a trailhead I tend to get dressed in the car. I do so with the heat on high, and put all my gear on without opening the car door (this includes snowshoes). It takes a little maneuvering, but I start the hike warm.
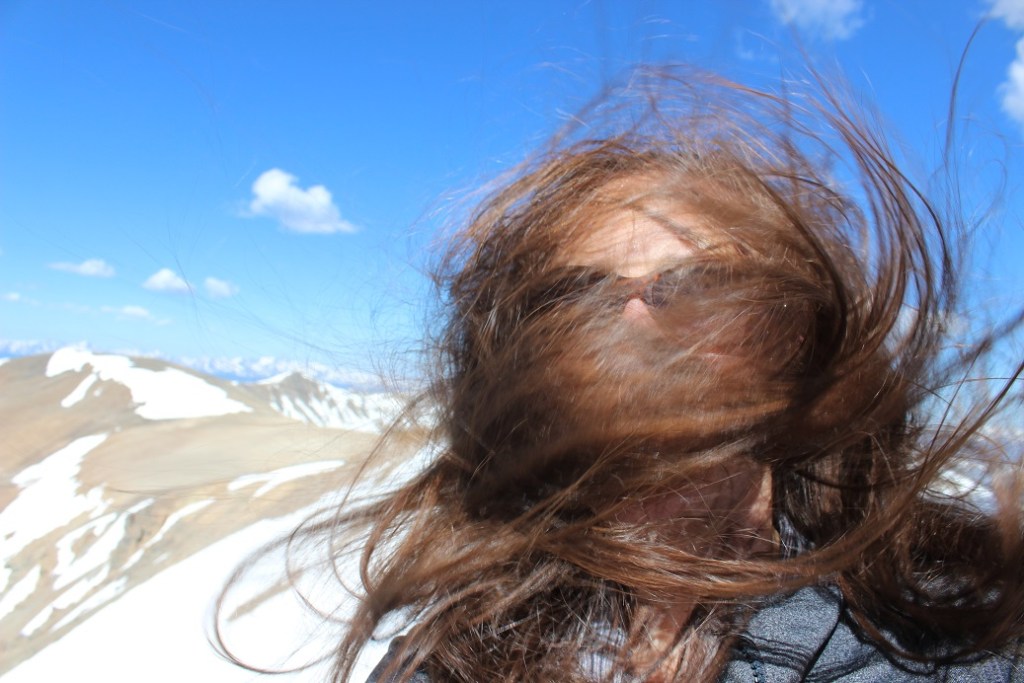
Tie your hair back: Here I believe a picture is worth 1000 words. I now braid my hair before a climb.
Don’t Wear Cotton: Cotton is heavy, takes a long time to dry, adds to rapid body heat loss, and absorbs too much moisture. That means you stay wet/cold for a long time. This includes jeans and that cool ‘It’s another half-mile or so’ t-shirt. Instead, pick a synthetic fiber such as polyester, nylon, fleece, or merino wool.
Add string to your zippers: Yes, wearing lobster-claw gloves is great for keeping your hands warm, but it makes manipulating your fingers and doing ordinary tasks, such as unzipping a zipper, difficult. I’ve added string to my zippers so they’re easier to grab while wearing bulky gloves. Note: don’t make the string too long, as it will flap in the wind and hurt when it hits you in the face at high speeds. 6 inches of string is best.
Pee Before Treeline: Wind intensifies at treeline, and stripping off layers in these conditions is not a good idea. If you’ll need to use the facilities (always assume you will), do so under the cover and protection of the trees.
Never Leave Gear Stashed: It’s tempting to leave your snowshoes stashed somewhere when no longer needed to pick up on your way back, but I’ve learned it’s important to carry all gear you’ll need to get down the mountain for your entire hike. I’ve had gear taken (either stolen or someone brought it down to the trailhead, thinking I’d lost it) and it’s easy to forget where you’ve placed the items. If you needed the gear to climb up the mountain, keep it with you so you’ll absolutely have it to get back down.
Keep Moving: There are times when rest is necessary, but resting can quickly lead to frigid body temperatures. Never allow your feet to stop moving, as this is when they cool down. If you’re taking a sip of water or rearranging gear, keep your feet engaged, moving them up and down (marching in place) as you do so. This will help prevent cold toes. Pump your fingers back and forth inside your gloves to keep the circulation going.
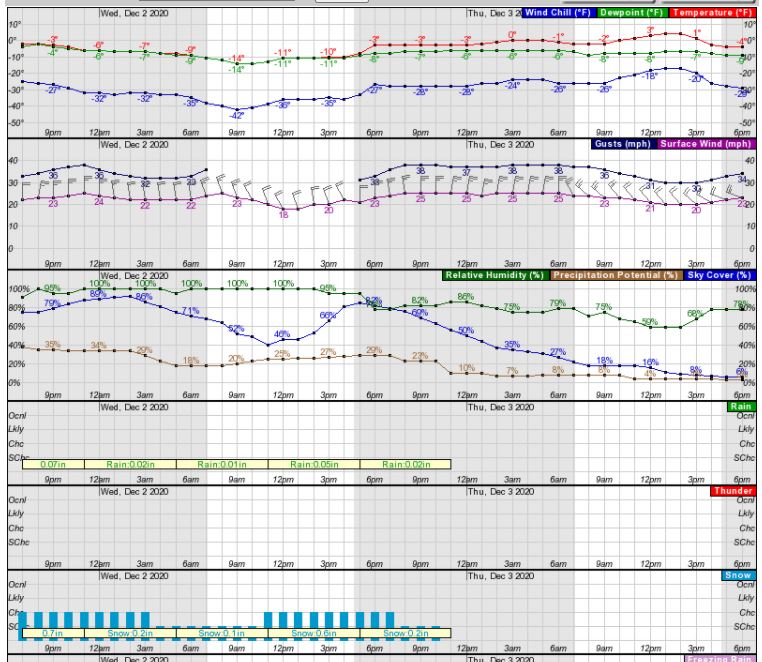
Become a Hobby Meteorologist: In winter the days are shorter, so daylight hiking time is less than in summer. Always check the forecast, but remember forecasts are often wrong and change during the day. Learn how to read weather forecasts and know how they relate to timing, topo maps, and geographic features. I’d recommend spending time learning how to navigate the NOAA weather forecasting site, particularly as it pertains to hourly weather forecasts for specific regions/peaks. You’ll gain information such as temperature, wind speeds, wind gusts, sky cover, potential precipitation, lightning, etc. in an hourly forecast. What you see may look daunting at first, but a few minutes studying and it’s mostly self-explanatory picture of the day’s conditions, letting you know the best times to climb, or if you should climb at all.
Windy Weather: When reading forecasts, know wind speeds/gusts are often much more important than how cold it is outside. Hiking in 20 degree weather is actually quite nice when prepared, wearing proper gear and the sun is shining, but add in windchill and it can quickly become hazardous. I’ve mountaineered in winds up to 80mph, and from personal experience, if the wind is predicted to be above 20mph I choose a different area to mountaineer or stay below treeline.
Learn how to read the forecasts to see which way the wind is coming from, and then you can plan your route to avoid ridges where there will be more wind, or at minimum design a route that avoids the brunt of the wind for as long as possible by staying below treeline for a longer period or in the shelter of the side of the mountain with less wind.
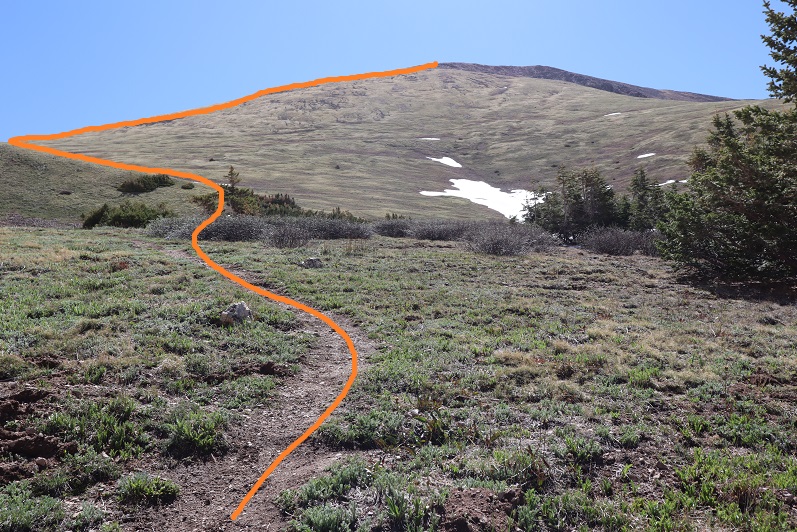
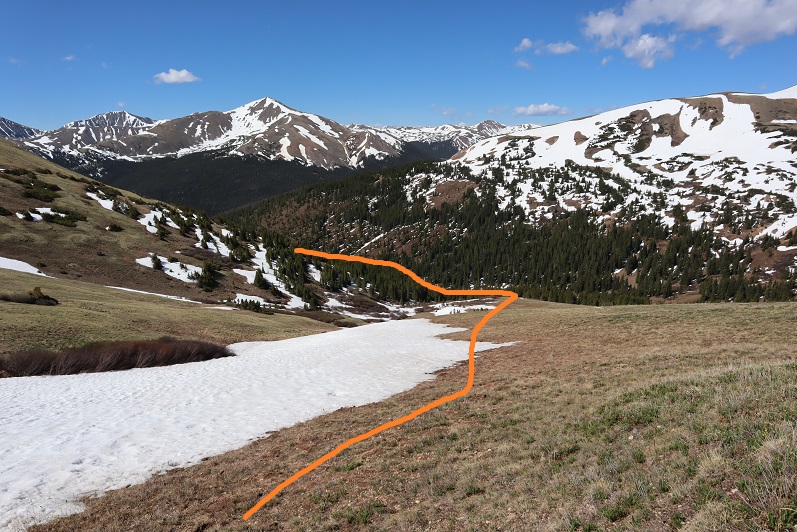
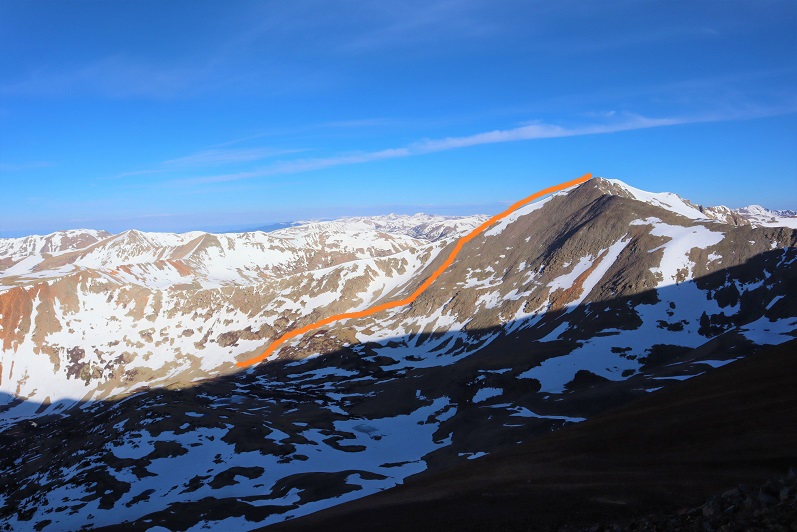
For example, in the picture below, if the normal route is in red, but there are winds coming from the north or west that day, you could avoid most of the wind by taking the black route instead, limiting your exposure time on the ridge.
The summit is only halfway: Know your limits, and realize when to turn back. People with Raynaud’s experience cold much more intensely than other people, with quicker and more drastic effects. Summiting is optional, making it back to the trailhead is mandatory. Preferably with all your digits intact. Know when to turn back.
Prevention is key: A Raynaud’s attack, once triggered, is very painful and can take a while to recover from, even after the affected area has been re-warmed. Doing as much as you can to prevent an attack is never wasted: Dress warmly, wear a wind barrier (outer shell), never take off your inner gloves, keep all your gear easily accessible, and bring along warm water. Start with short winter hikes and work your way up to longer, more technical climbs.
I hope this article has been helpful for those of you with Raynaud’s, as well as those of you who may not have Raynaud’s but are interested in staying warm while winter hiking. I’d love to hear from you! Do you have any advice for winter hiking? Comments? Questions? Is there a topic you’d like me to discuss? Contact Wild Wanderer here
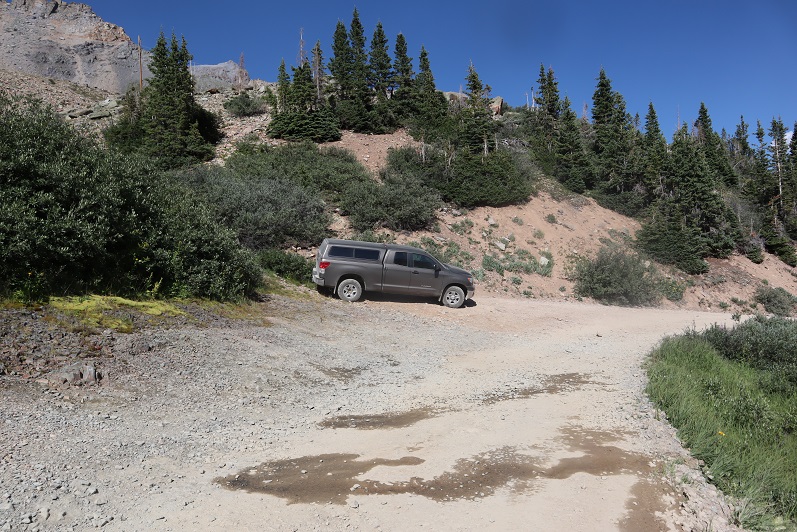
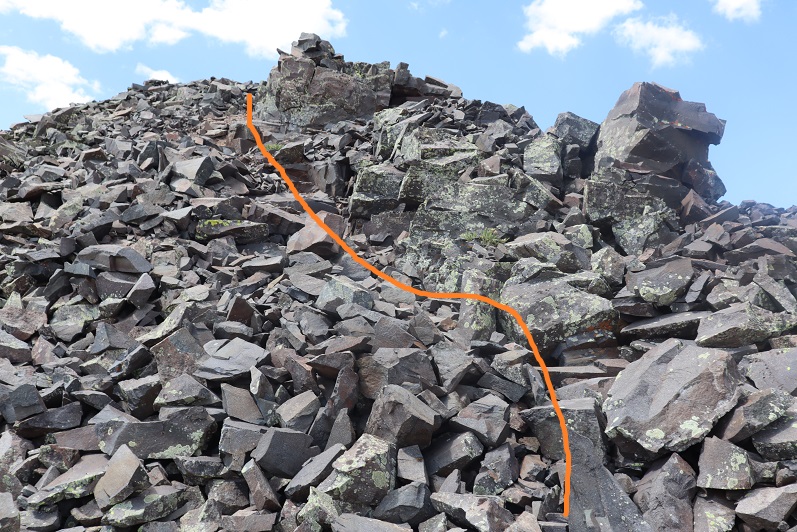
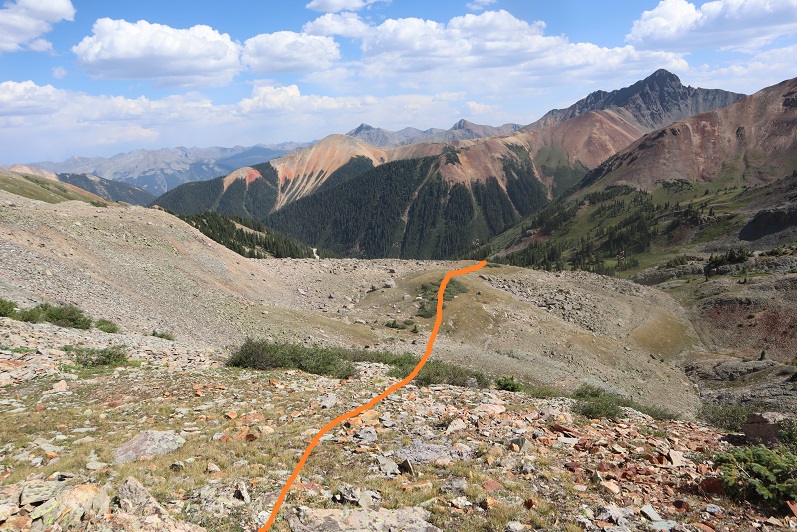
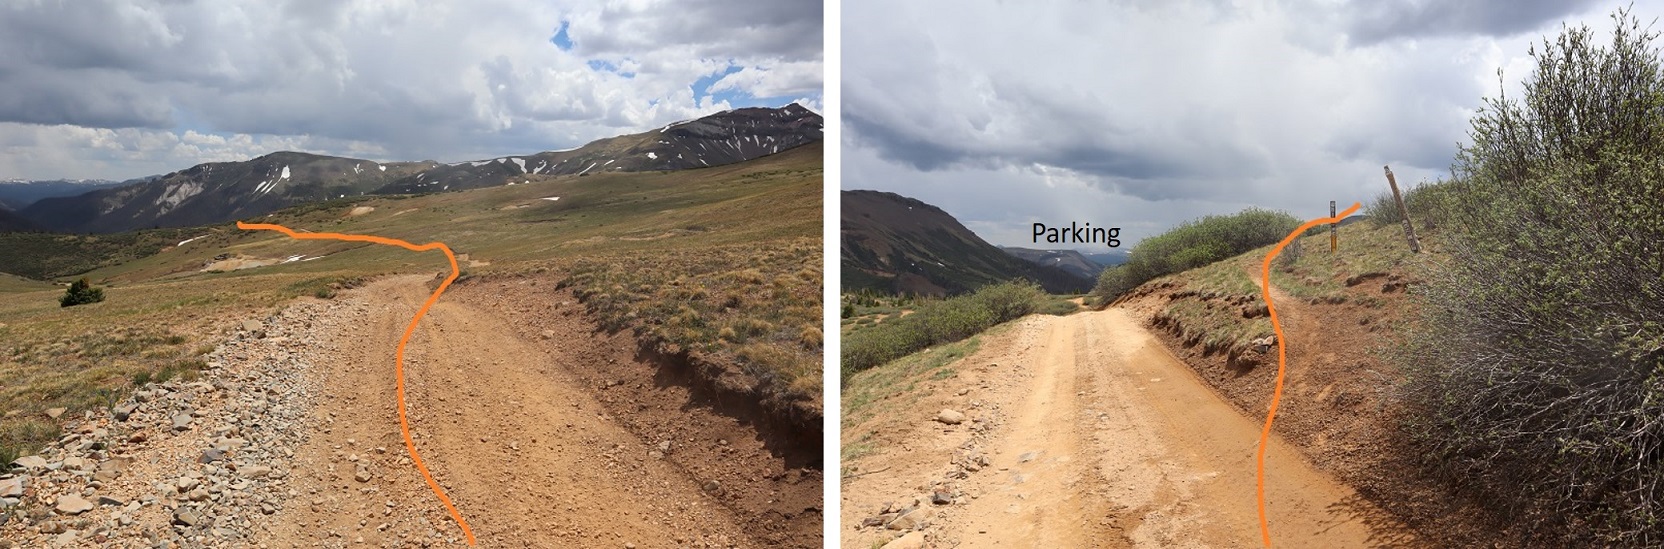
After summiting San Miguel Peak I still had some energy and I could make Ophir Pass be on the way home, so I decided to head over and hike Lookout Peak. Word of advice: if you plan on hiking this peak drive in from the 550 side, not the Ophir City side. You can make it to the trailhead in a 2WD from 550, but there’s some serious exposure/4WD needed on the Ophir City side. My truck handled it, but there were times I was scared it wouldn’t. Also, seeing a vehicle that had fallen/rolled a few hundred feet down the shelf road didn’t make me feel any better (it looked like it had been there a while).
The trailhead is located just to the east of Ophir Pass, and can fit 2 cars if you squeeze in tight.
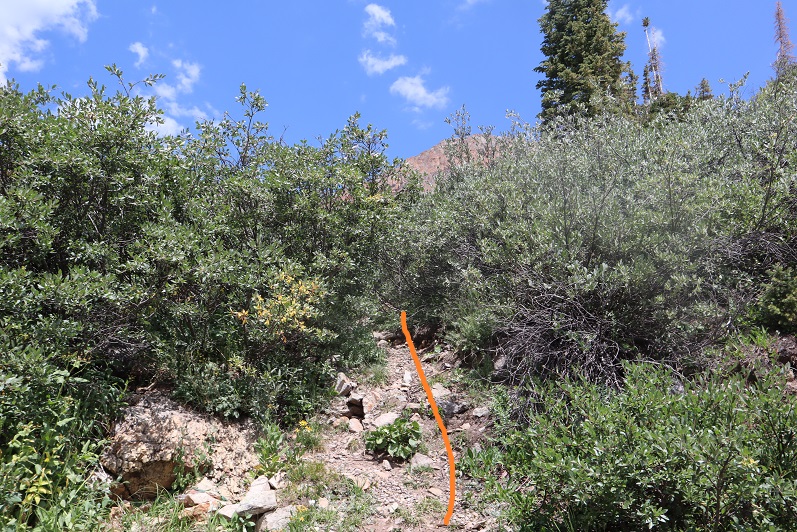
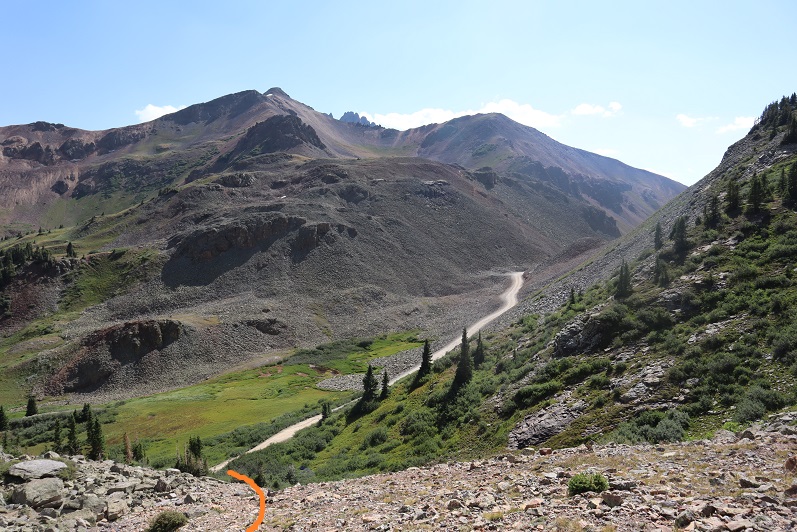
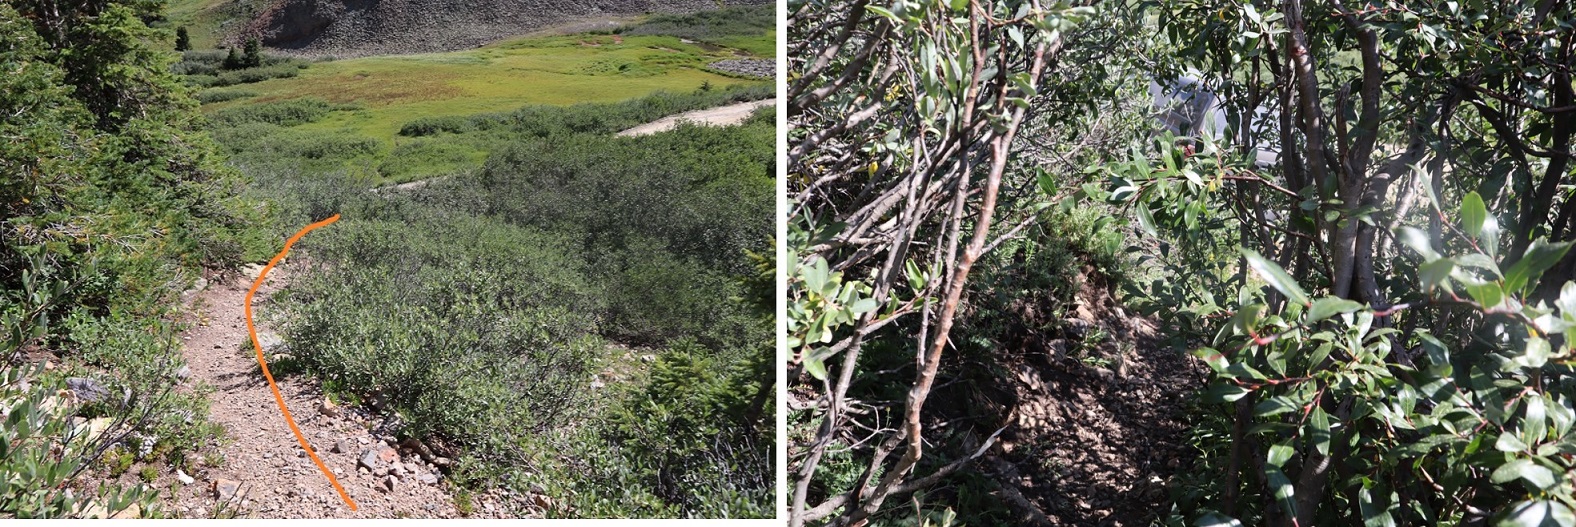
I tried to leave as much room as possible so other vehicles could pass each other at this point if needed. The trail starts just behind where I parked my truck. You can see a faint trail through the willows. It also looks like people use this area to pee (there were old wipes/tp littering the area).
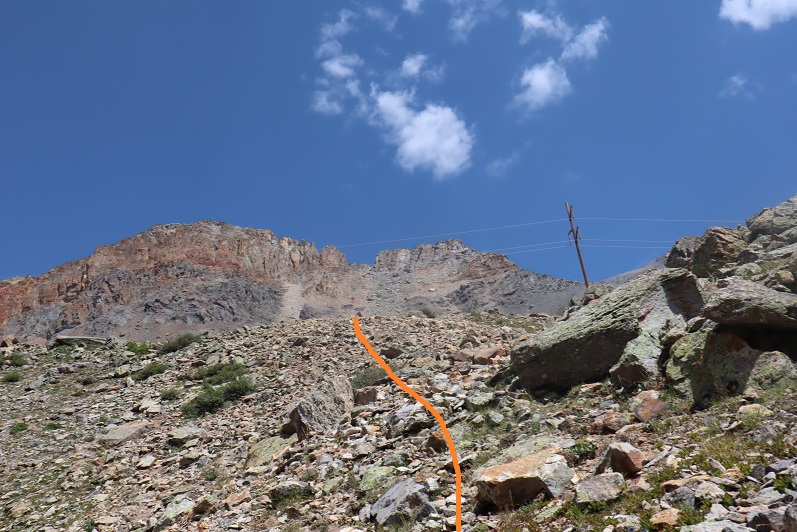
The willows don’t last long (a few yards or so) and then I aimed for the power lines, heading north.
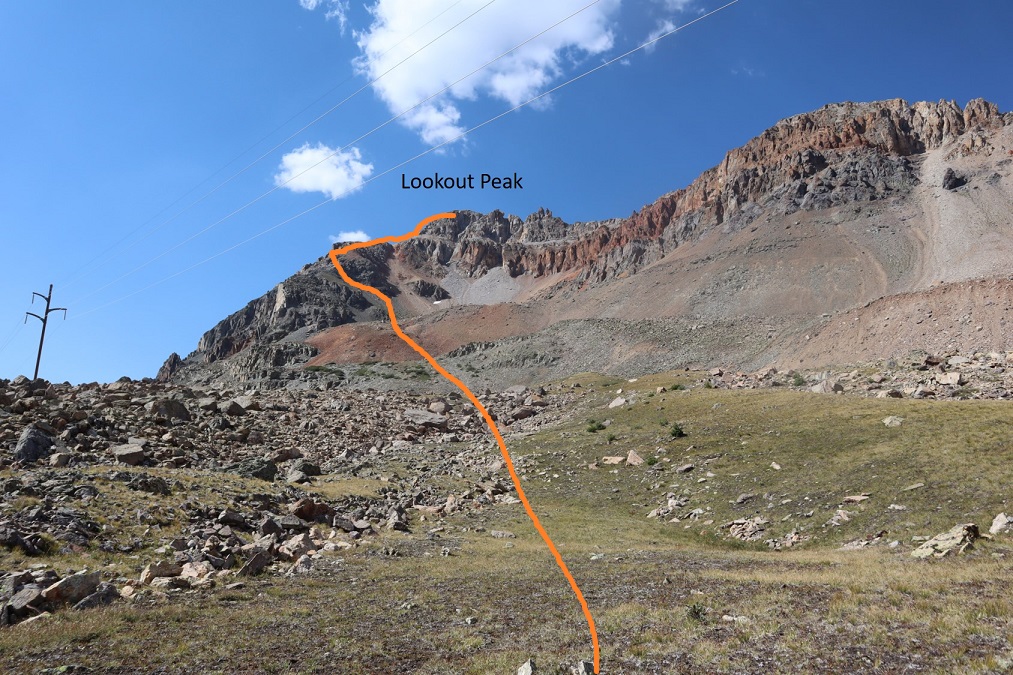
Once at the power lines I had a good view of the entire route up to Lookout Peak
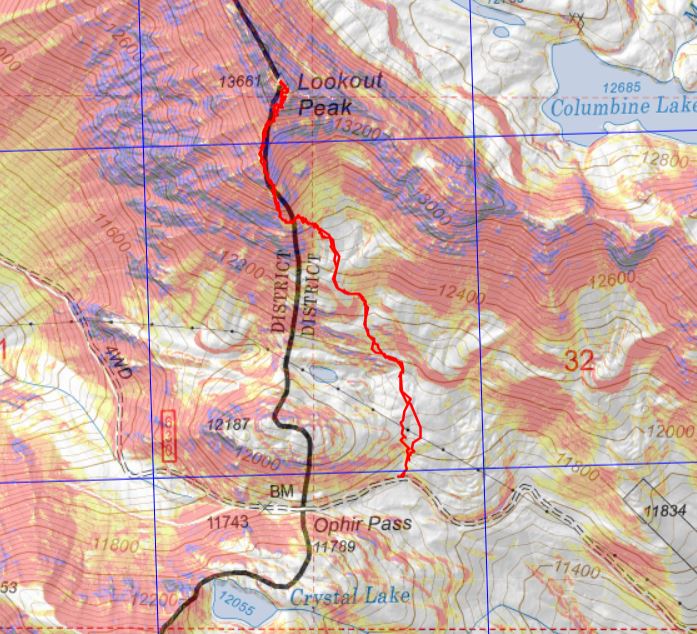
From here the route is especially well cairned. I’m thinking someone a) had a really slow hiking partner, b) wanted to be very helpful to future hikers, or c) has a cairn fetish, because there were cairns placed no more than 50 feet apart for the entire route. If you don’t see a cairn on this hike, you’re off route. I fixed a couple of downed cairns for fun, just because I felt if they were there they should be there properly.
The first goal is to gain the ridge, and this is done by following the cairns northwest. At times there is a faint trail here, but there were a lot of cairns
Once on the ridge I turned right and followed it north
This boulder area looks tricky, but was all class 2
I kept following the ridge and the cairns
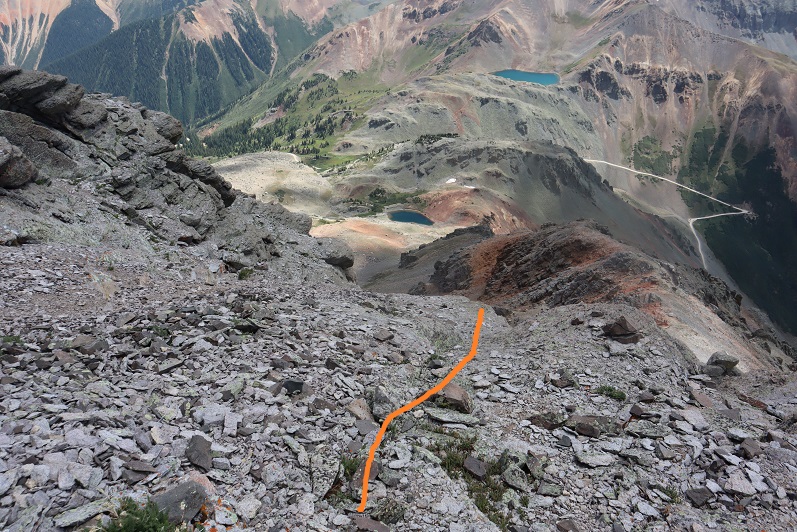
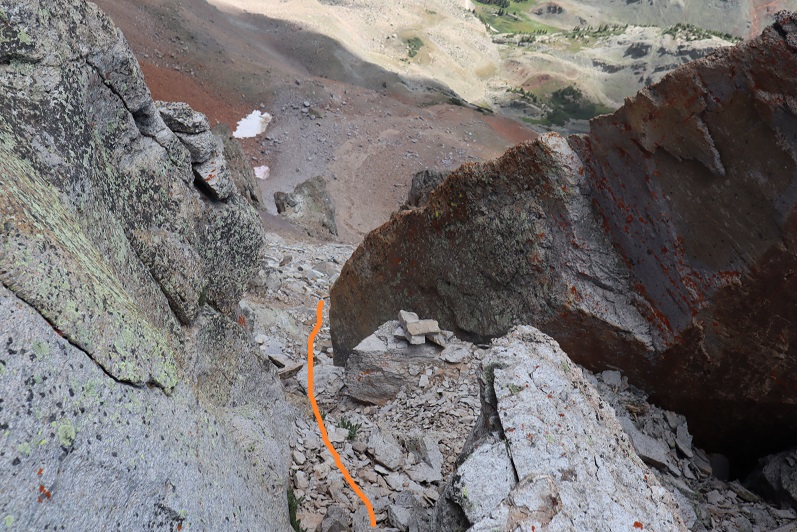
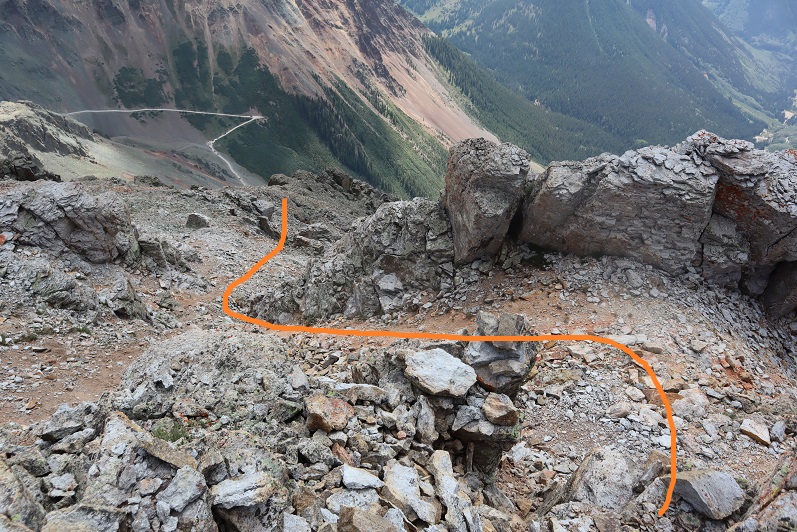
At 13380’ I came to a rock formation that looked like it went either way (it did). I went east on the way up, west on the way down, and both went. The east side has a slippery gully though, so I’d recommend staying west and taking the steps.
At the top of the gully I turned right and followed the faint trail and cairns northeast
At 13475’ I put on my helmet and did some class 3 scrambling to the summit. This looks much more difficult than it actually was. The scrambling was easy, but the little rocks covering the boulders were a little annoying. I ditched my trekking pole and followed the cairns north.
This would be a good introduction to class 3 climbing for someone looking for a quick summit to practice on. At the top of the short class 3 section it became class 2 to the summit
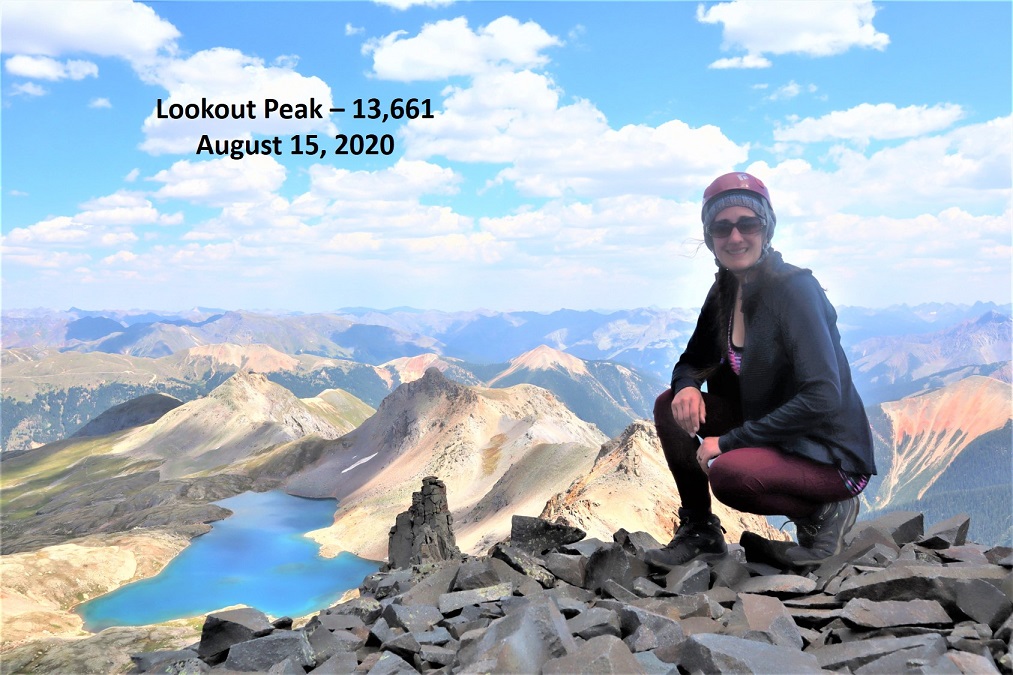
I summited Lookout Peak at 2:30pm
Lookout Peak:
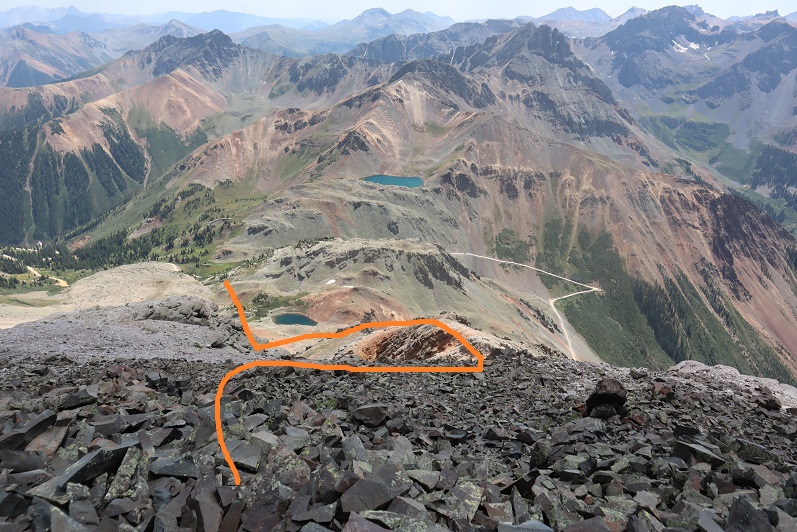
Here’s what the route looked like on the way back down:
I took the steps on the way back down instead of the gully
And then followed the ridge back to the basin
And from the basin, aimed for the power lines and Ophir Pass road and my truck
I made it back to my truck at 4pm, making this a 4 mile hike with 2060’ of elevation gain in 3 hours, 20 minutes.
I drove home and didn’t get to bed until past midnight. When I woke up my first thought was “Wow! I didn’t get woken up at all last night due to wind/wildlife!” Then I realized I was sleeping in my own bed and not in the bed of my truck…
* I did this as part of a 2 day hike, so my mileage and elevation gain aren’t included here. CalTopo says my mileage to the top of Arrow Peak was 15.23 miles.
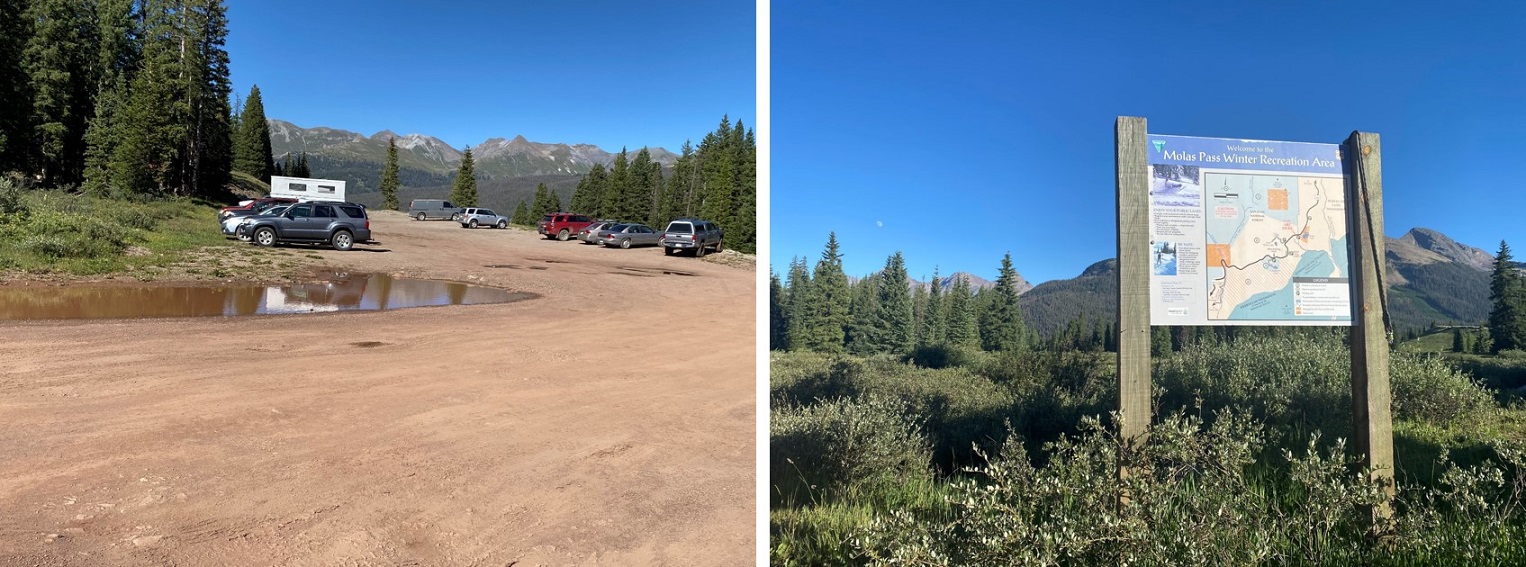
My son is in the Air Force and came home for some unexpected leave. I haven’t seen him in over a year, so I was thrilled to spend the past couple of weeks with him. This also meant it’d been a few weeks since I’d done any serious hiking, so it was so nice to get out hiking again this weekend. I drove to the Molas Pass trailhead and parked the night before the hike so I could start early the next morning. I’ve done this approach before for Vestal Peak, so I already knew what to expect. I drove in, parked, and walked around a bit to stretch my legs after that 6.5 hour drive. It was a beautiful day, and I kind of wished I could just start hiking now.
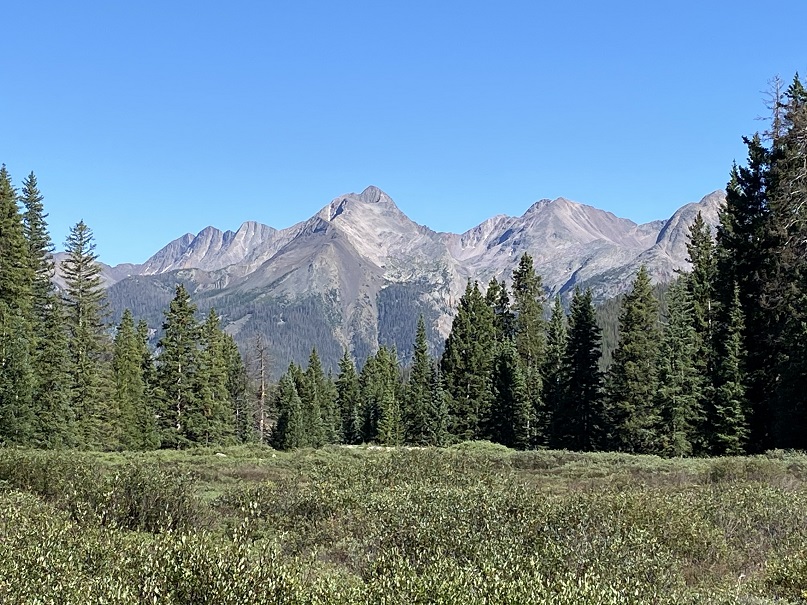
Here’s a look at the peaks from the trailhead
There’s limited cell service at the Molas Pass Trailhead. Unfortunately, I saw evidence of two separate vehicles having their windows smashed.
I spent an hour or two in the back of my truck relaxing, looking at topo maps, and eating dinner. I saw another hummingbird fly by, so the record held of seeing a hummingbird at every trailhead I’ve slept at so far this year. I went to bed and was up and on the trail by 2am. The trail starts at the south end of the parking area.
From there the trail is easy class 1 all the way down the 4 miles and 1700’ to the Animas river, and back up to Vestal Basin (9.6 miles total).
Just before the river there’s a creek crossing
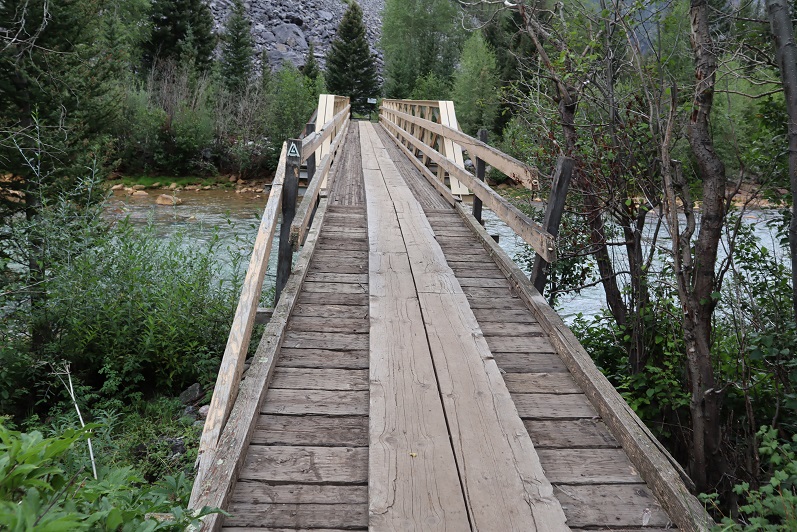
Then a solid bridge across the Animas River
Then I followed the train tracks (very briefly) and took the obvious trail up to the Vestal Basin.
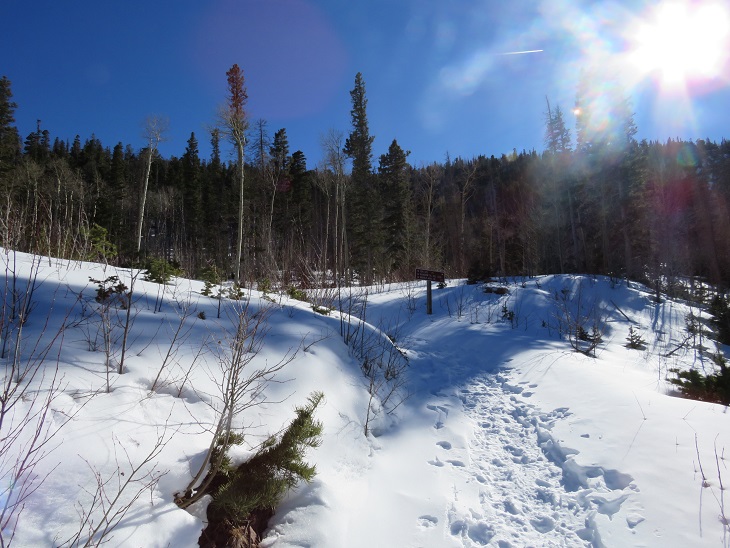
At 4.7 miles there’s a trail register (a trail register that’s legit: it actually looks like they track the pages here)
Note: I crossed this area in the dark, and it seemed as if I needed to use the log to make this part of the trek. In the dark the rocks didn’t look close enough together to cross. So instead of taking the rocks across I sat down and scooted across the log until I made it back to the trail. On my way back I realized I was wrong: take the rocks 😊
The avalanche area was much easier to pass this year than last year: there are triple the amount of surveyors’ tape markings in the area. However, I still managed get off track at the last and final crossing. I wanted to stay high on the ridge and in the dark couldn’t locate any more tape. I should have stayed lower.
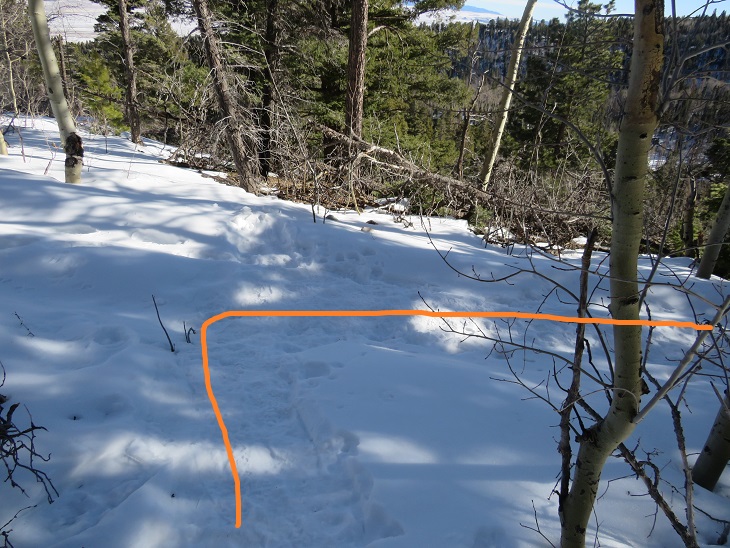
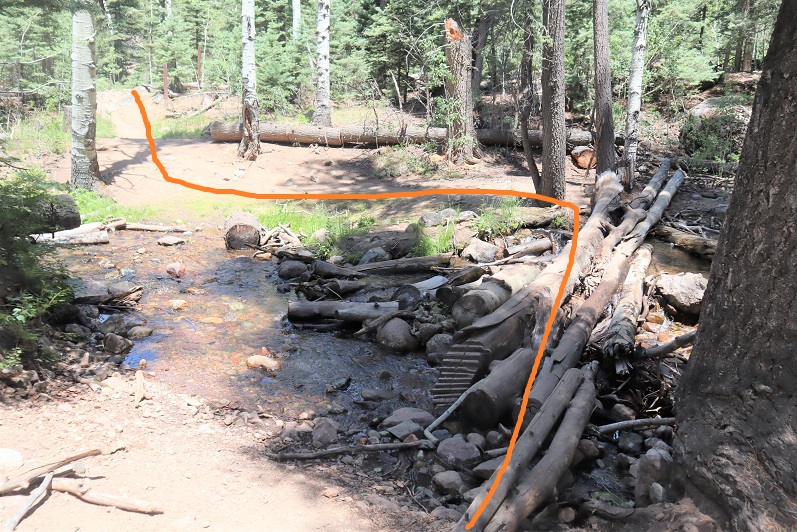
At the beaver ponds I took a right behind the boulder by first going through two logs onto an unmarked trail (it seems counter intuitive, but it’s the correct path), and followed the rocks until I once again caught up with the trail.
I followed the class 1 trail up to Vestal Basin.
There are willows to contend with here, and water, which equals mud. Prepare for your shoes to get muddy (or throw rocks/sticks down to walk over the muddy areas)
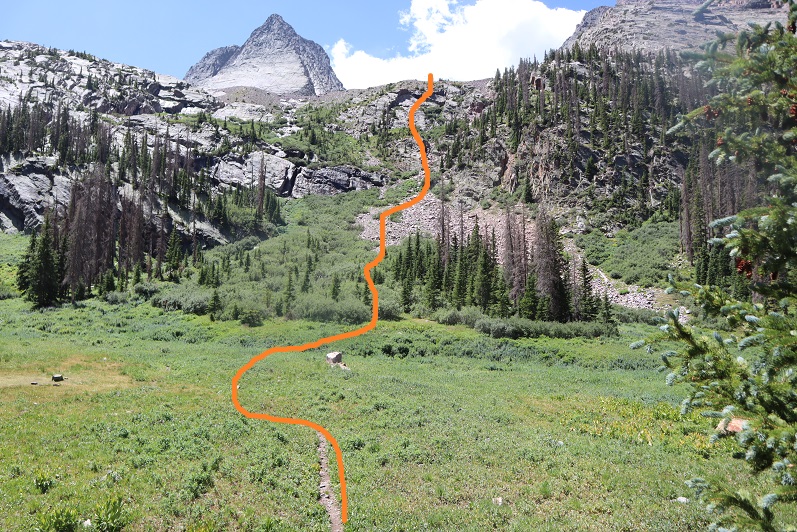
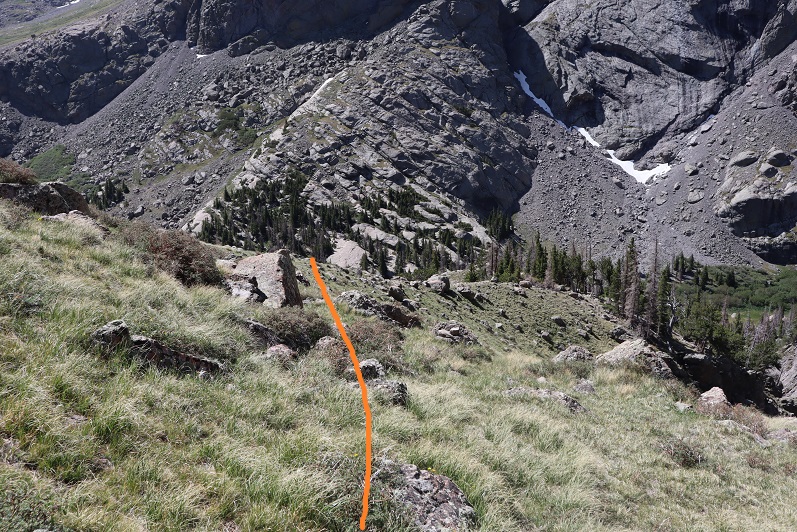
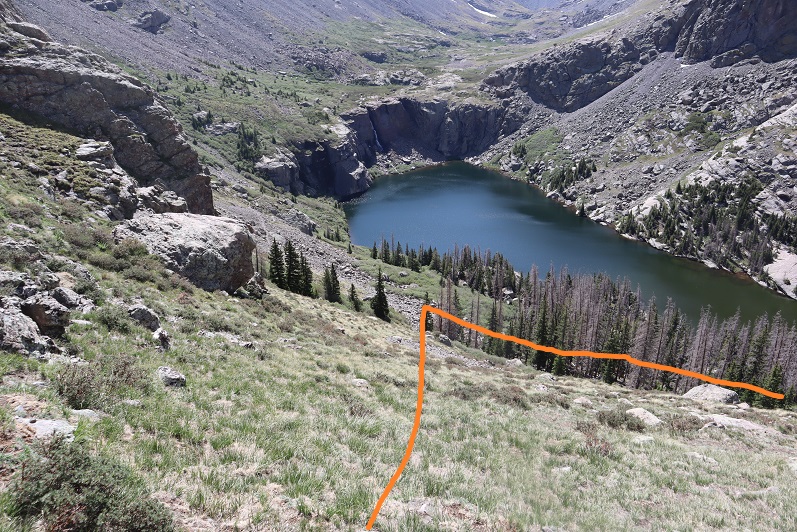
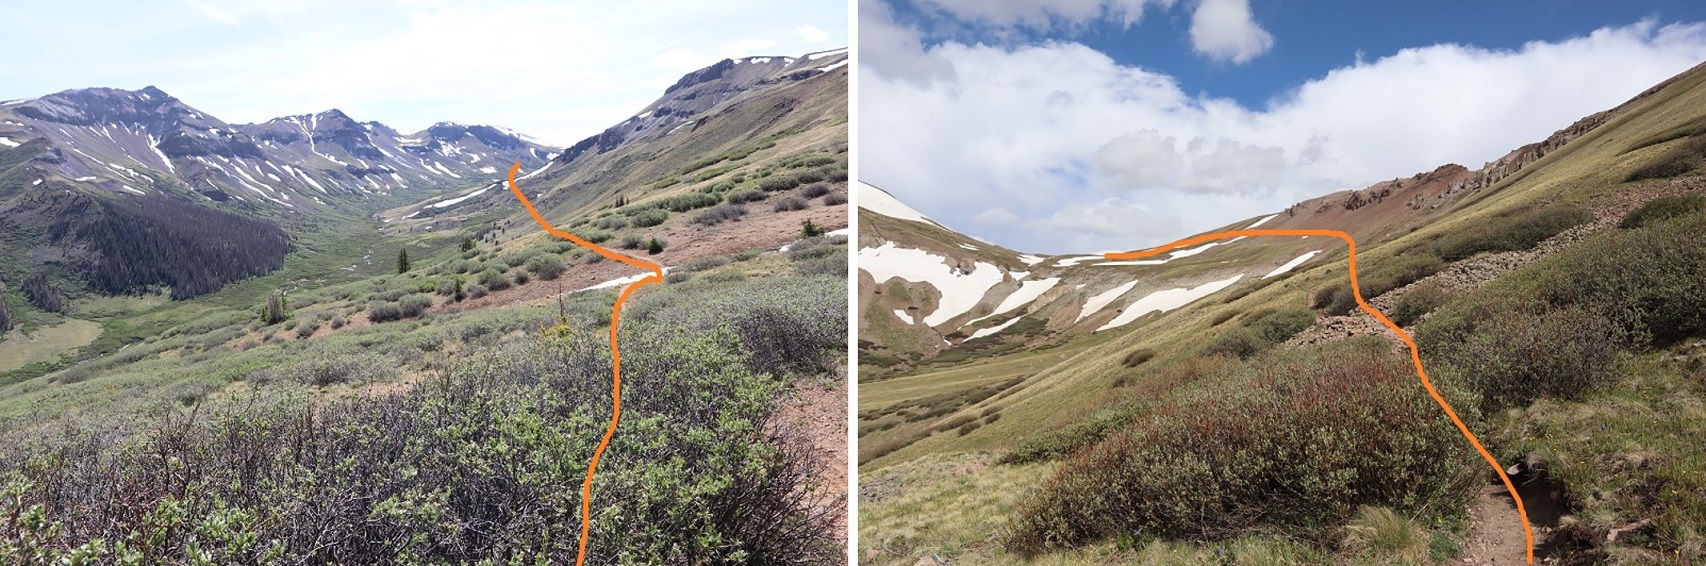
There is a really good campsite in the Vestal Basin, just where you turn off to hike both Vestal and Arrow Peak. I stashed my pack here behind a tree, filtered some water, and packed only what I needed in a small sack before heading up and tackling Arrow Peak. Here’s the route to the upper basin
The creek crossing was easy. I took off my shoes but didn’t need sandals
There’s a semi-well defined trail to the upper basin, through willows to begin with, and then scree.
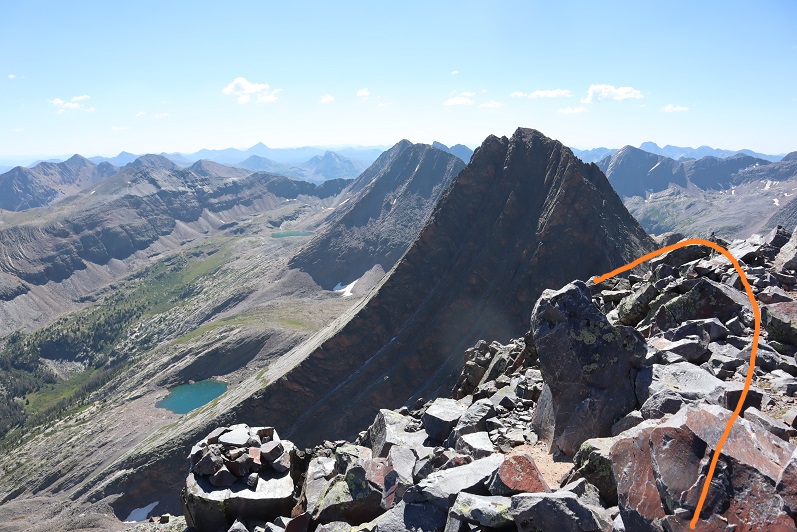
In the willows I lost one of my gloves. I realized it about 50 feet after I’d lost it, but wasn’t in the mood to go back and get it (I didn’t want to re-gain any elevation today if it wasn’t absolutely necessary). I hoped it would be there when I went back. There’s a cairn at the top to indicate the upper basin. Here’s an overview of the route from there.
Note: For some reason I thought Arrow Peak was class 2, so I didn’t do much research on this peak. Luckily, I’d brought my helmet, because this is definitely class 3 and requires some route finding. The first objective is to find the access area to the rib that will lead you most of the way up. There’s a cairn indicating the way. Aim for the greenery, head up and right, then left. I stashed my trekking pole at the entry point and headed up, as it was obvious I’d be doing scrambling from this point on and a pole would just get in my way.
It looks more difficult than it is. The rock is solid and grips nicely. Be sure to pick the largest rib (it’s obvious and is a good 50+ feet wide)
I followed the rib as is ascended
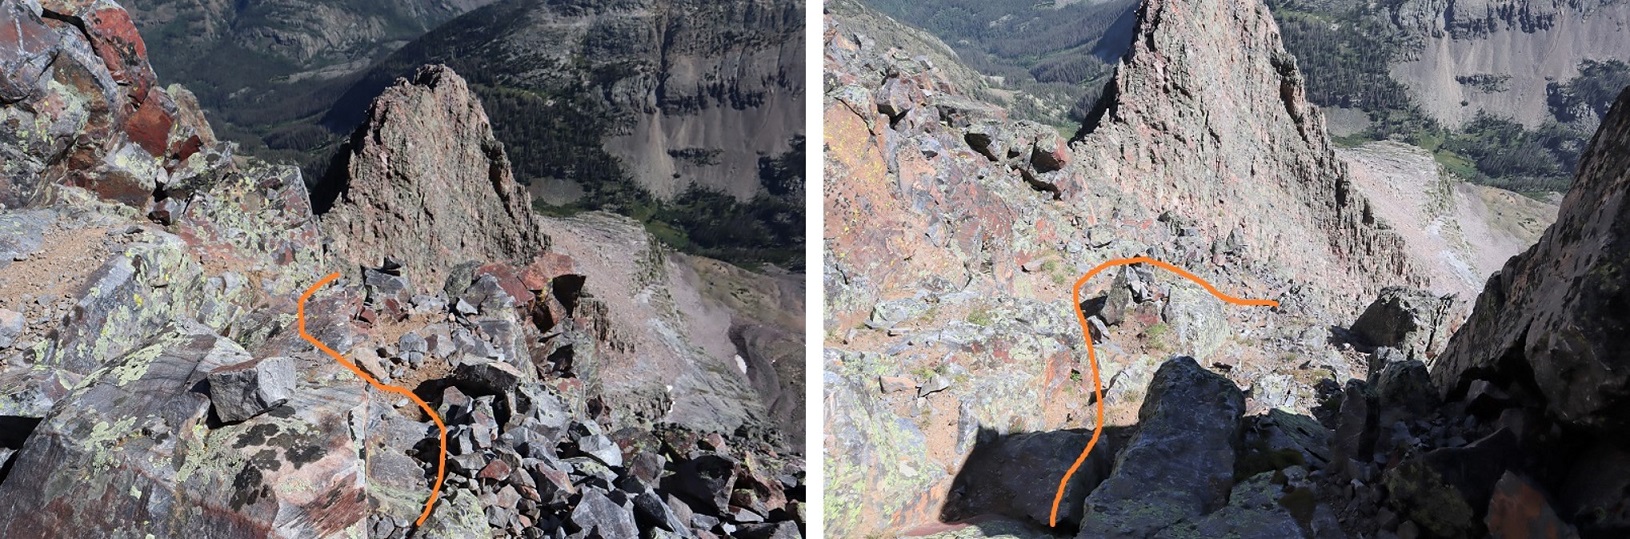
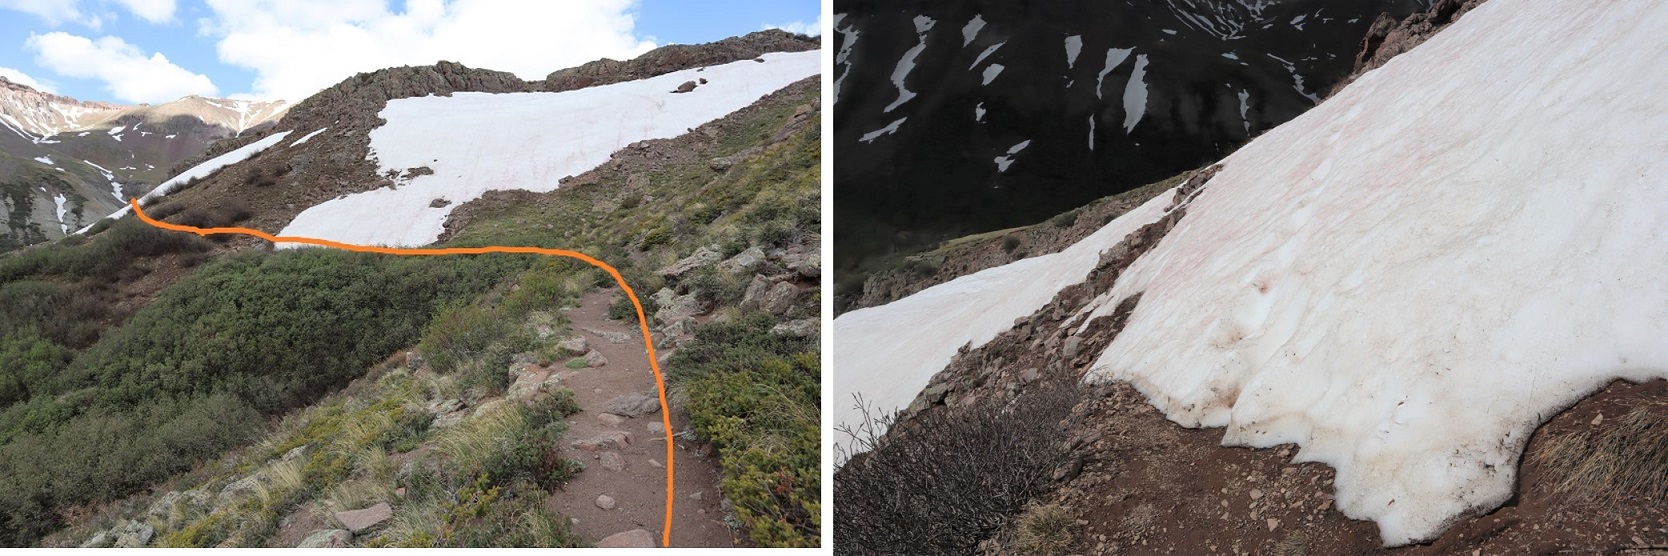
There will be a point where the rib will become more prominent. Stay right. It looks like going left may be doable to go left later in the year, but at this point (July 31st) I opted to go right and that worked well (avoiding the snow).
It’s hard to tell in the picture below, but I’m following the rib. There’s a point where it’s hard to tell if you go left or right (circled in red), but you go left here and then right. If you look closely you’ll find cairns here indicating the way (they’ll be above you).
Going left you’ll see a gully on your left. It looks doable (and probably is) but it’s easier to ascend by going right. This is pretty well cairned.
Going right will lead you to a short ledge
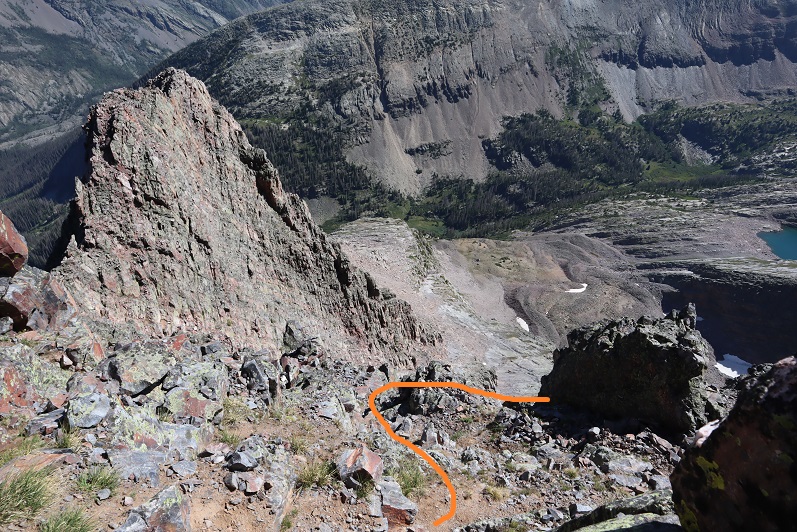
at the end of the ledge go left (following the cairns) and then head northwest up some serious class 3-4 climbing to the summit.
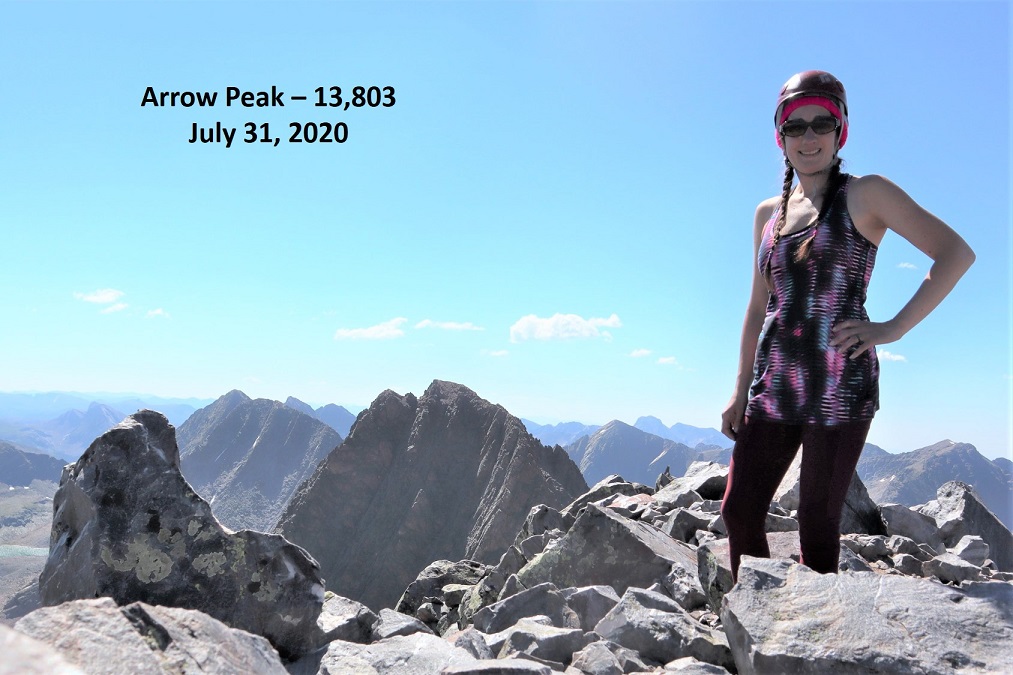
I reached the summit at 10:15am, after 15.27 miles and just over 8 hours of hiking
Arrow Peak:
The trek down was much easier than the trek up, as it was easier to see the cairns and I already knew which direction I was headed. Here are the basic highlights:
Back down to the ledge, then following it to the right and then left (the cairns are very helpful here)
And then following the ridge back to the basin, sticking to the solid rock whenever possible because the scree was slippery and the rock was stable (but would have been slippery in the rain)
I made it back down to the basin, and check it out: someone (or a marmot) stole my trekking pole! I looked all around for it and was unable to find it. I had passed about 10 people on the way up/down, so it could have been one of them, but that would’ve been poor form and not cool, especially since I talked with all of them and they seemed super nice, so I’m assuming it was an animal. From the basin there’s a trail back down to the camping area
Someone had found my glove and made it super easy to find by sticking it on a branch right in the middle of the trail. Thank you!!! (they’re expensive gloves…). Then it was a quick creek crossing and I was back at my gear.
Total mileage will be with my Trinities Report, but the mileage from Molas Pass, up to Arrow, and back to the camping area where I’d stashed my pack was 17.71 miles according to CalTopo, 12.7 miles according to Strava (to be discussed in my next trip report: gotta love app discrepancies). Here’s a picture of the route from my camping area the next day (without route markings)
Here’s the CalTopo of the entire route, including the hike the next day up the Trinities.
After climbing Mt Emma I drove from Yankee Boy Basin to Telluride and parked at the Eiler Creek Trailhead. There were already a few cars there when I arrived, and two more drove up and parked before the day was out. This was a busy 4th of July weekend!
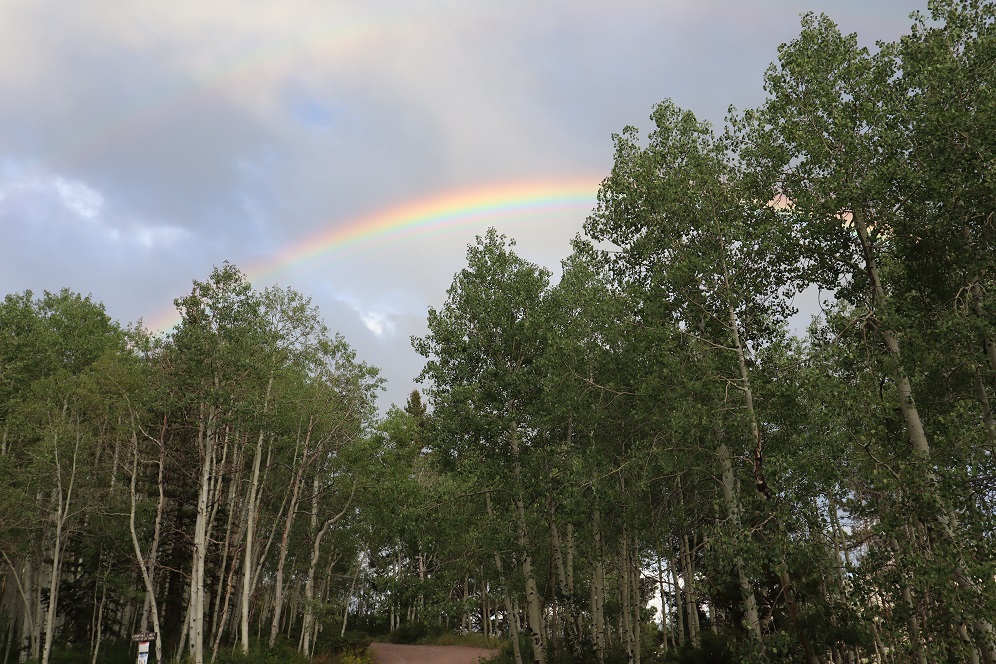
After today’s hike and lightning scare I decided to check the weather again for tomorrow’s hike. The forecast indicated a slight chance of rain beginning at 10am, with thunder beginning at 1pm. OK, so I needed to be below treeline by 10am to avoid the rain. Thunder/Lightning shouldn’t be a problem. I set my alarm for 3:30am. As I was going over topo maps for tomorrow’s hike my friends from yesterday drove by. I waved, they stopped, and we talked for a bit about our days adventures under a nice rainbow.
They had tents to set up and I needed to get to bed early so we said our goodbyes, I ate the rest of my sandwich for dinner, and after a glass of Skrewball I went soundly to bed. I was on the trail at 4am. The Eider Creek Trailhead is located at the north end of the parking area, and immediately splits into two trails. Take the trail to the left.
Just after this split is a nice camping spot, no more than a few yards from the parking area
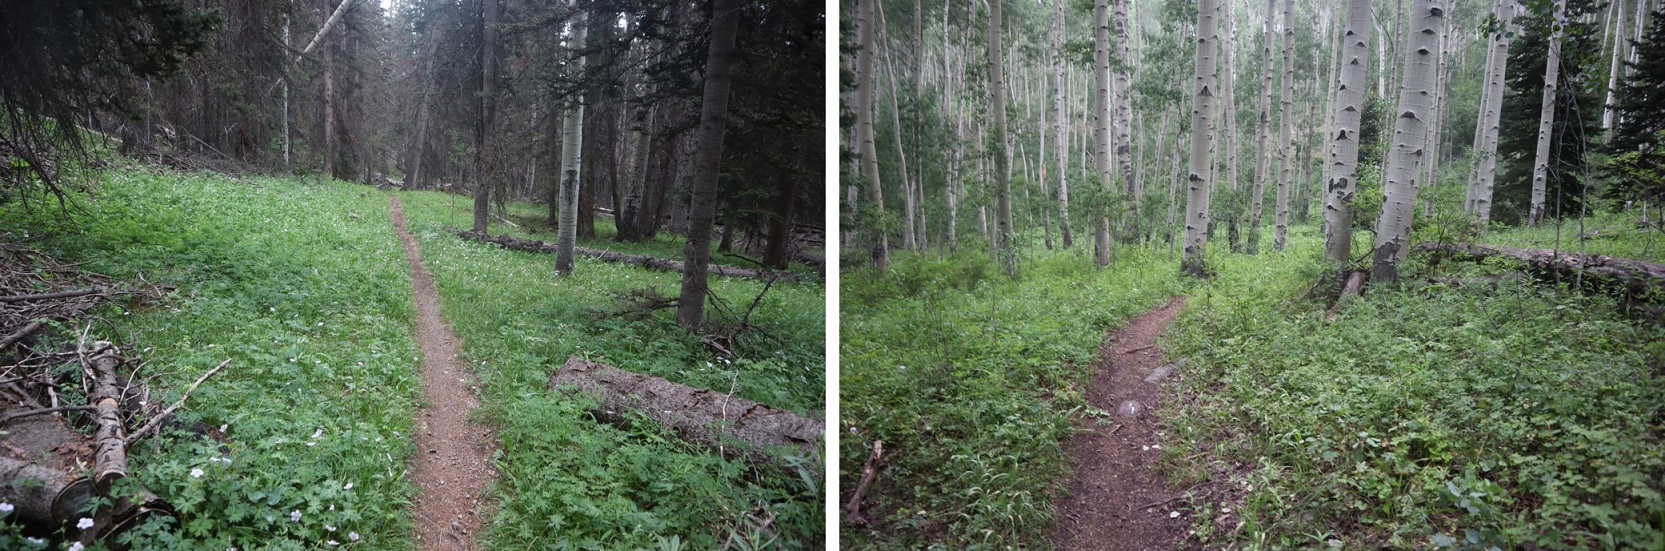
I followed the class 1 Eider Creek Trail, staying right at the first junction
And left at the second to stay on the Eider Creek Trail.
This trail was very easy to follow and well marked with signs.
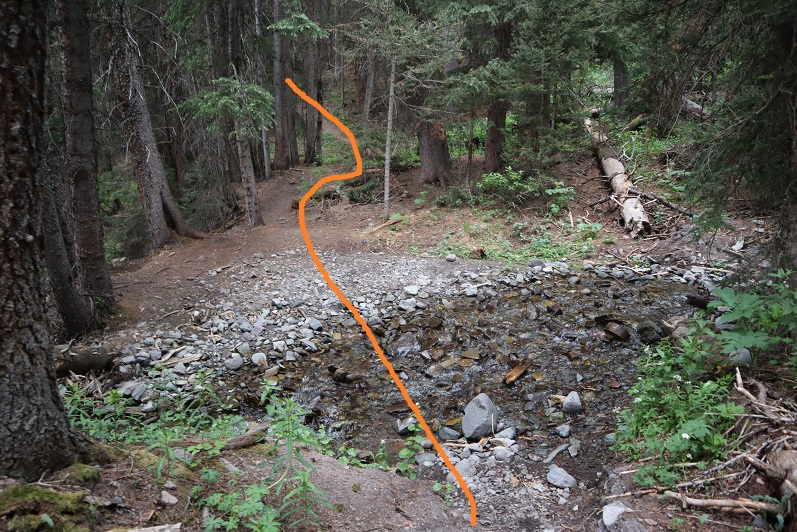
There was one creek crossing that was easy to rock hop across (and a rather large tree you could traverse if you preferred, but I thought it overkill).
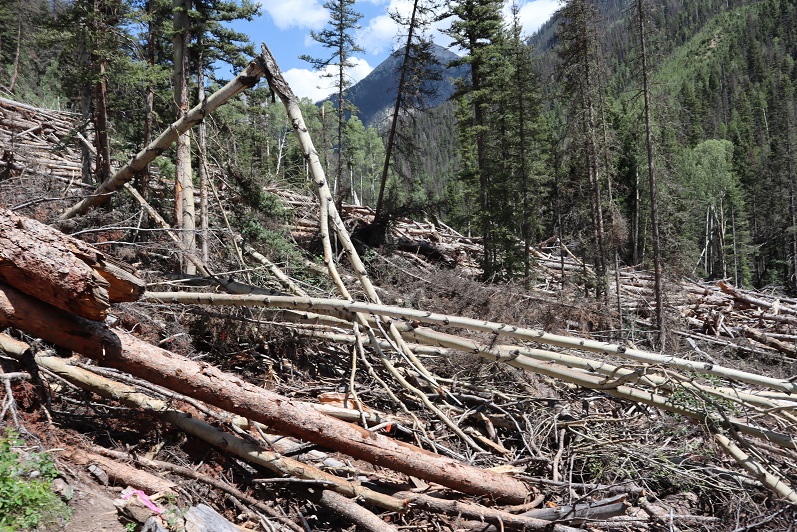
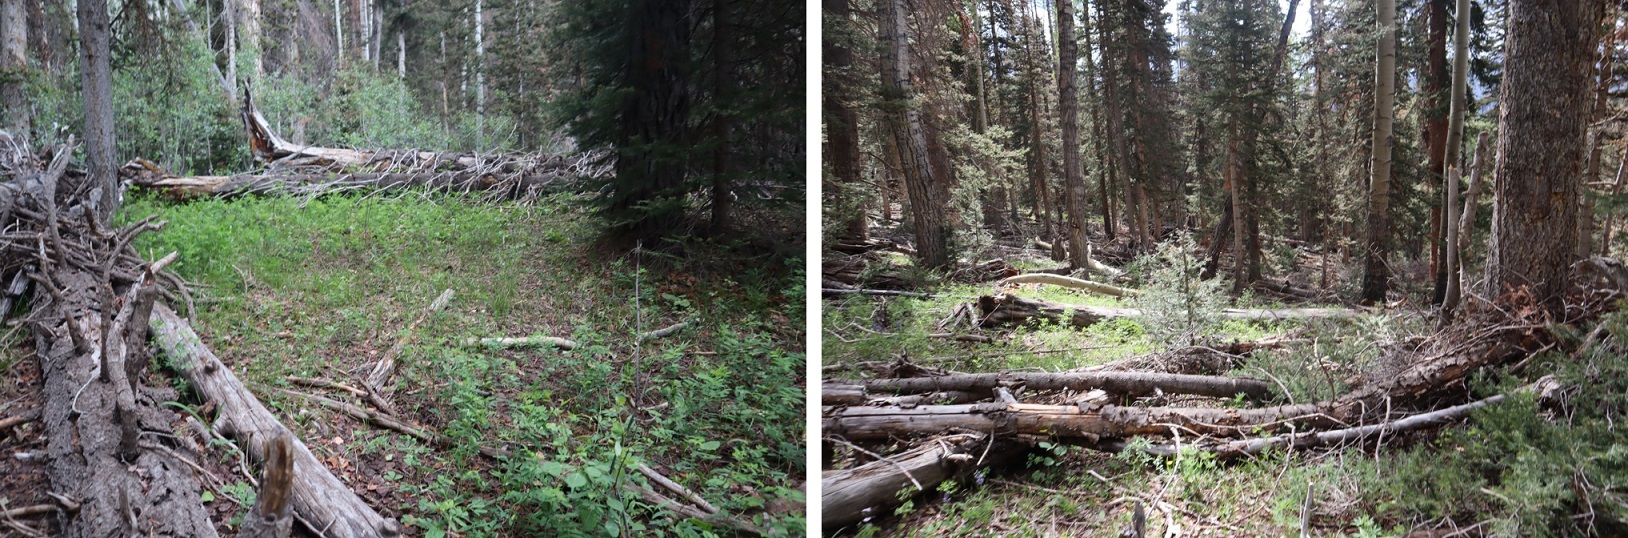
I stayed on the Eider Creek Trail for 3 miles and then left the trail, turned right and headed north through an area filled with downed trees. This was tons of fun to navigate in the dark.
Luckily this area was short, only lasting about 100 yards, before I came to a clearing.
From the clearing I needed to gain the ridge. There are several ways to do this, and both the gully on the left and the gully on the right ‘go’. I took the one on the left, hugging the aspen trees and then ascending via tundra and clumps of bunch grass. This was by far the most difficult part of the hike: the terrain is much steeper than it looks, gaining 1650’ in less than 2 miles. It seemed never-ending.
Once on the ridge I turned left and followed the ridge northwest
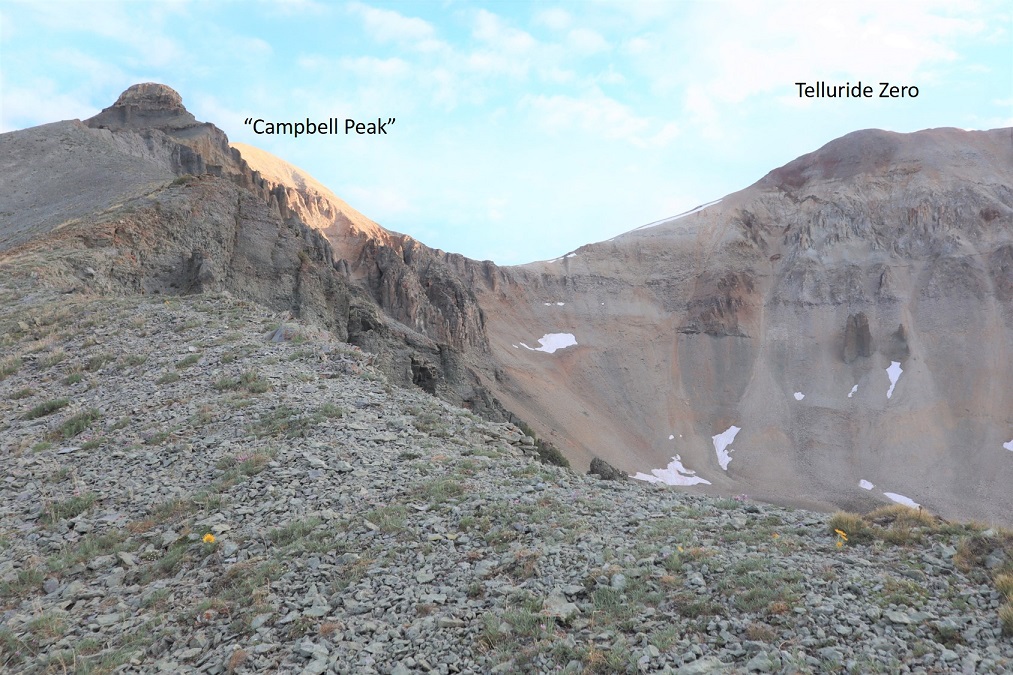
From the ridge you can see both Campbell Peak (behind the obstacle) and Telluride Zero Peak
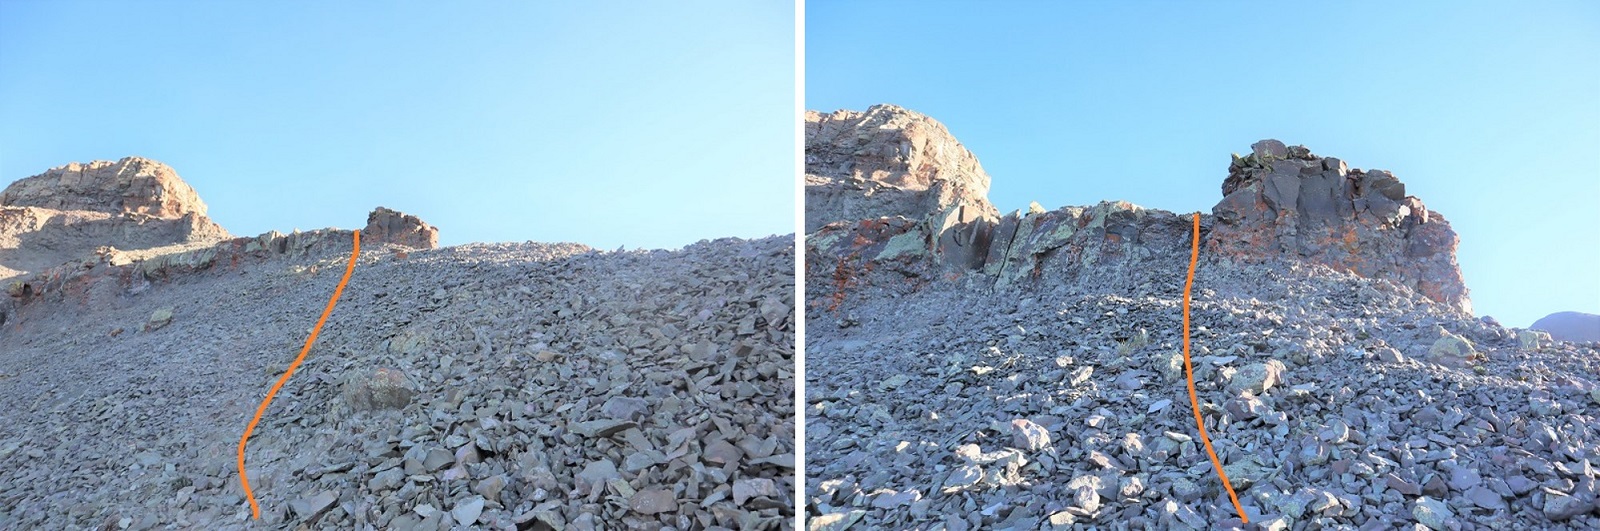
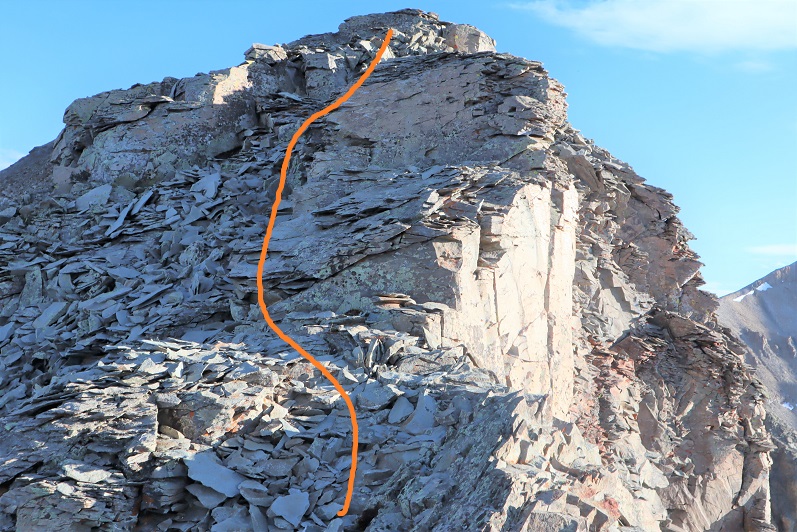
The obstacle took a little bit of maneuvering. Yes, you go right over the top, and this is class 3. I put on my helmet. These are the steps I took:
After ascending this little wall I was greeted with the crux of the route. Here’s how I climbed this point, first going to the right, and then left up the center. I placed some cairns here in key areas
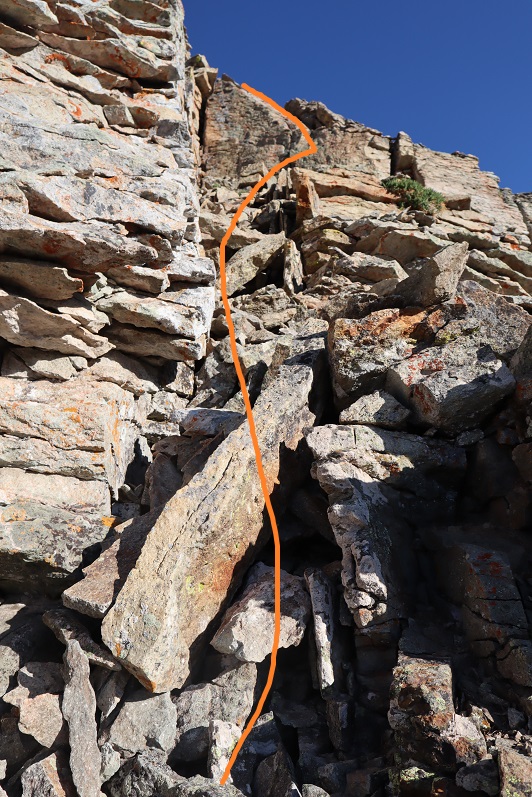
The chimney has a lot of hand/foot holds, but beware: most of them are loose.
Once on top of the chimney I could see Campbell Peak. The rocks were loose but this was class 2 all the way to Campbell Peak
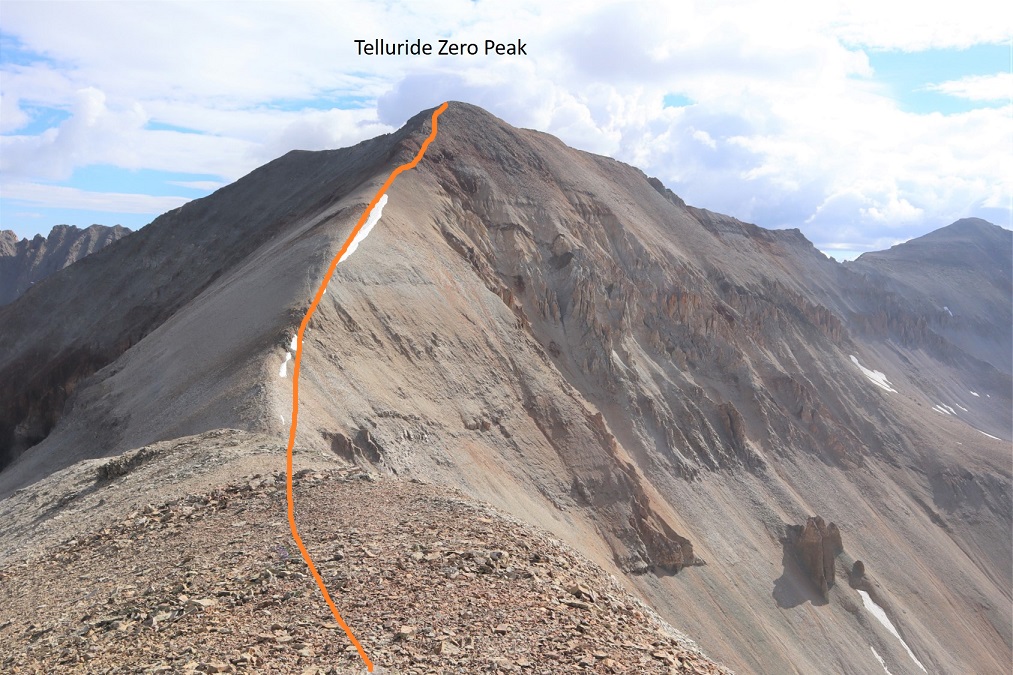
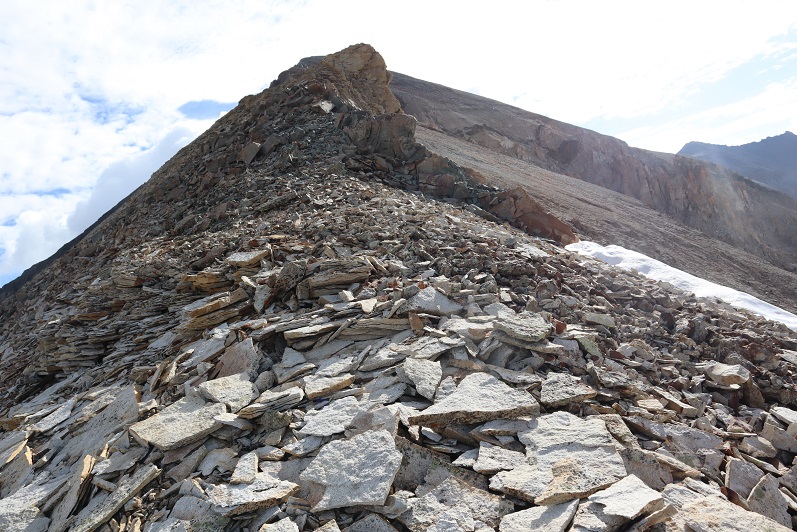
From Campbell Peak it’s an easy ridge hike to Telluride Zero, losing 200’ of elevation and gaining 750’ in just under a mile
This was a simple ridge hike, if a bit chossy. I stayed on the ridge direct for 95% of this part, and only dipped down when obvious to the right.
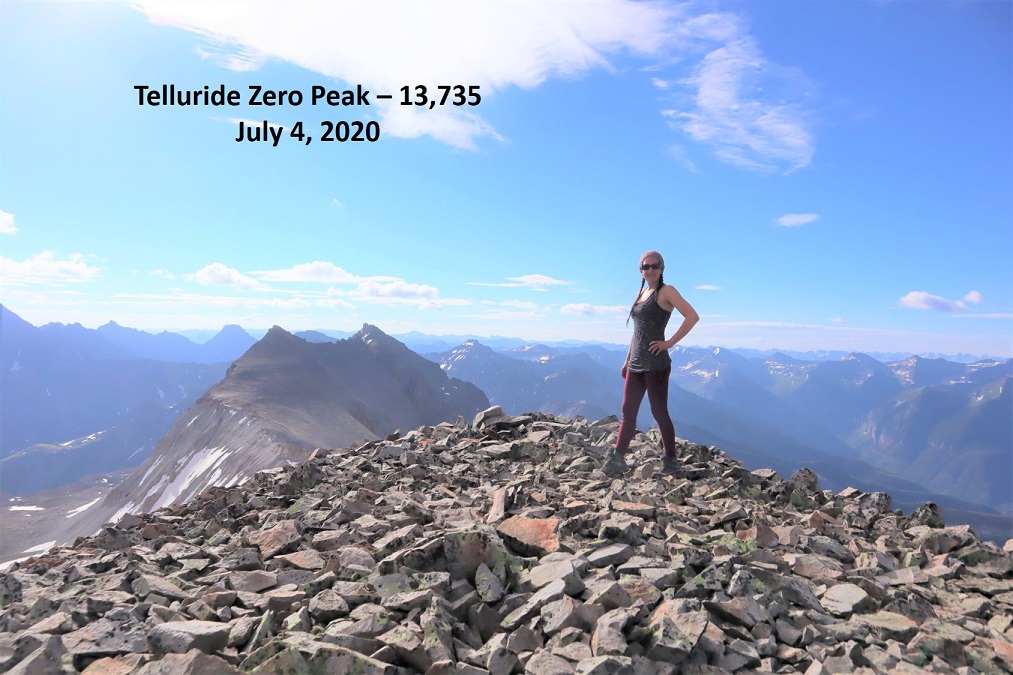
I summited Tellurize Zero Peak at 8:15am
Telluride Zero Peak:
It was a beautiful morning, so I stayed a little longer than usual on the summit, taking in the views.
Here’s the route back to Campbell Peak
And then down to the class 3 section. To get there, aim for the area that looks like a dropoff. I placed a few cairns here as well.
Here’s how to work your way back down the chimney. Here I threw my trekking pole down so I could use both hands to downclimb.
Once down the chimney I hiked down the little wall and followed the ridge to the gully. There are several gullies here: be sure to take the right one. I remembered the gully I took in because of the large rock outcropping on the other side of some aspen trees.
I was about a quarter of the way down the gully when I heard it: a loud clap of thunder to my right. I turned my head and saw a dark skies where just minutes ago there’d been blue, a flash of lightning, and heard another clap.
Where had that come from? It had been nice and sunny all morning. This storm must have built up on the other side of the ridge as I’d been hiking down the gully. I looked at my watch: 9:30am. Seriously? A thunderstorm at 9:30am? Rain had been forecasted as a possibility after 10am, but thunder wasn’t supposed to be a possibility until well after noon. This was just great. Another lesson from mother nature: mountains make their own weather. The storm looked close, and it looked to be building fast. There was nowhere for me to hide above treeline so I made a beeline for the trees.
This took an agonizing amount of time, as the storm kept getting fiercer and the terrain kept getting steeper. I could see the thunderclouds developing before my eyes. I had to be careful with each step not to twist an ankle, but wanted to get out of there as fast as possible. I made it to the end of the gully and sprinted through an open field towards the nearest trees I could find as thunder rolled all around me. Yes, I know how dumb that sounds in an electrical storm but that was my best option at the time: to get under the relative safety of the trees.
I made it to the trees, hiked about 10 yards into them for good measure, and stopped to catch my breath as the skies opened up and I started getting rained on.
I was now ‘safely’ in the trees, but had entered in a different area than I’d exited. I got out my map and compass and decided to head SSE through the deadfall, towards where the trail should be. I was thrilled when I finally stumbled upon the trail.
The trail was easy to follow back to the trailhead. The only downside? It rained the entire time. The thunder sounded kind of cool though. I felt bad for my friends attempting Dallas: this storm wasn’t giving up and I was fairly sure it would have been a miracle for them to have summited before it hit.
I made it back to my truck at 11:15am, making this a 12.06 mile hike with 5417’ of elevation gain in 7 hours, 15 minutes. Here’s a topo map of my route
As I drove back through Telluride I saw a herd of about 75 elk grazing in a soccer field. Colorado is so cool! I drove the 6.5 hours home and made my kids hamburgers for the 4th of July and watched the city fireworks from our front porch. It rained the entire way.
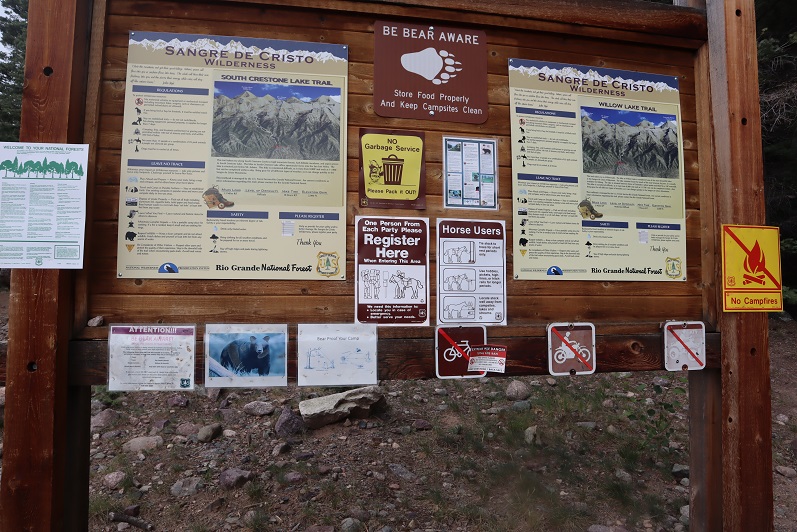
I chose this peak for today because it was the closest one on my list of unfinished bicentennials to Cielo Vista Ranch, where I’d just spent the morning hiking. I drove to the Willow Creek Trailhead and backed into the only available parking space. Vehicles were parked and double parked in each space, as well as several hundred feet down the road on the drive in. This is a popular trailhead and it was a Saturday afternoon.
It was raining a bit as I got out and looked around. There is an open and stocked bathroom here, and lots of signage.
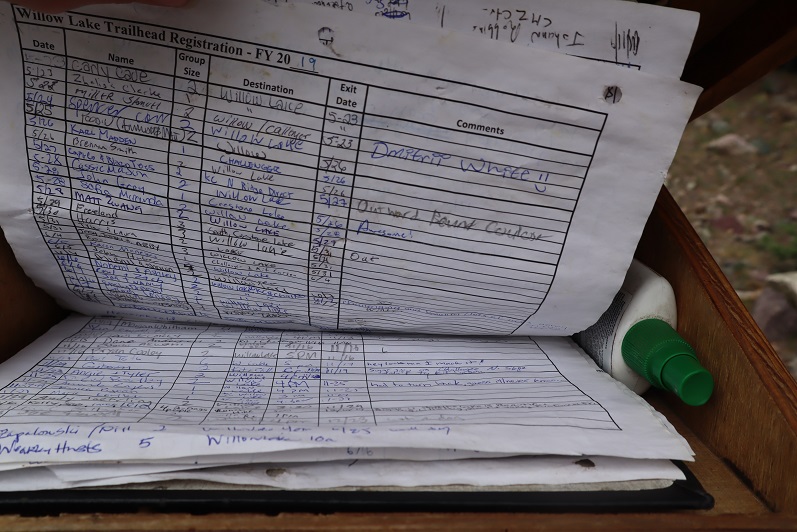
I opened the trail register container and was disappointed to find another full register. Every page was so full people were just writing in the margins of past pages. This one is from 2019. There were probably 7 pages total, which could probably get filled up here in a week. How are these useful when they aren’t kept up to date? Signing these seems useless.
I went back to my truck and got my stuff ready for the hike tomorrow. I didn’t have a flashlight so I decided to use my phone’s flashlight app. That meant conserving battery, so I put it in airplane mode. Then I people watched. There was a man hiking with a small dog in a basket, a group of about 20 high school aged backpackers returning from what looked like their first outdoor experience, and two men hiking in to Willow Lake to summit Challenger and Kit Carson tomorrow. I spent a good 30 minutes watching a man trying to turn his pulled trailer around in the parking lot. He must’ve been looking for a dispersed camping spot and wasn’t able to find one before the trailhead. Turning his rig around in the parking lot of the Willow Lake trailhead was his only option, and it took dozens of attempts. His rig was loud and he set off several car alarms in the process. It was all quite entertaining.
When the mosquitoes came out I decided to call it a night and went to bed early. I woke up at 2:30am, decided I was way too comfortable, and went back to sleep. The only bad thing about having a bed in the back of my truck is I don’t seem to want to get up in the mornings. I was on the trail by 4am.
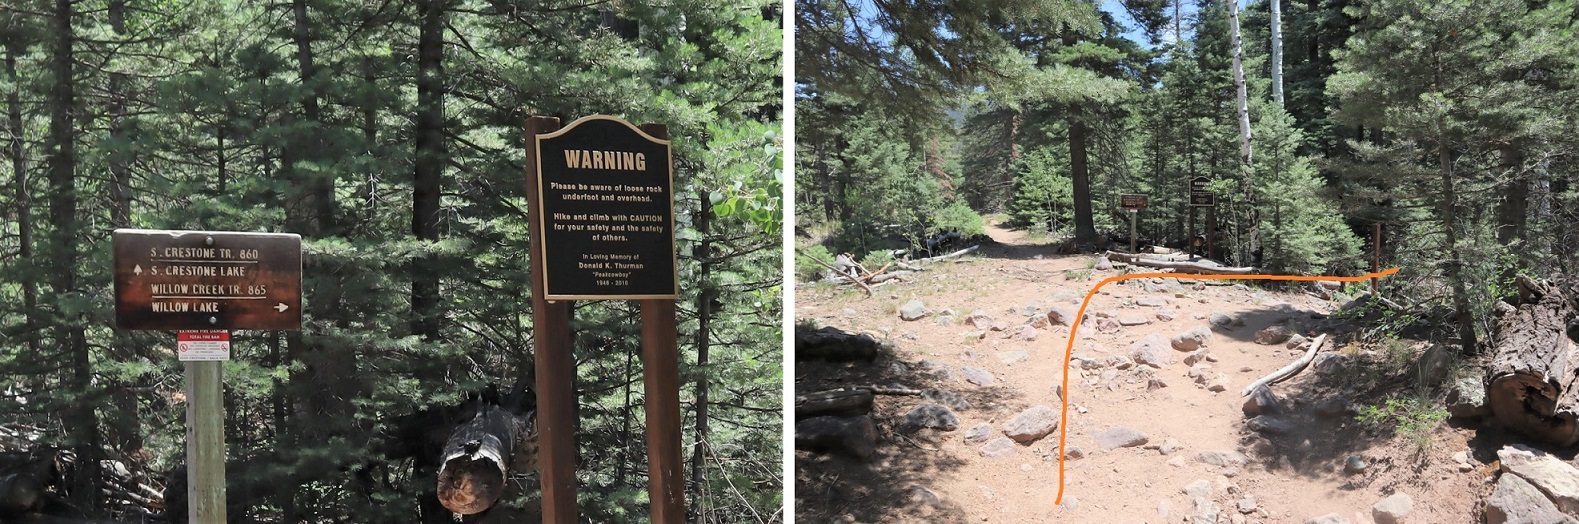
The trail starts at the east end of the parking lot and almost immediately comes to a junction. I turned right here, crossed a creek, and continued on a sandy trail.
During the first mile of this hike, as I was hiking in the dark, I kept hearing chirping. It sounded like one of those bird boxes that’s put in the middle of nowhere to monitor birds and chirps every few seconds was out there somewhere, and broken. It wasn’t chirping on my way back, so it either ran out of battery or was an actual bird going crazy at 4am. The Willow Creek Trail is a class 1 trail that switchbacks all the way up to Willow Lake. Here’s an overview
And some pictures of the trail
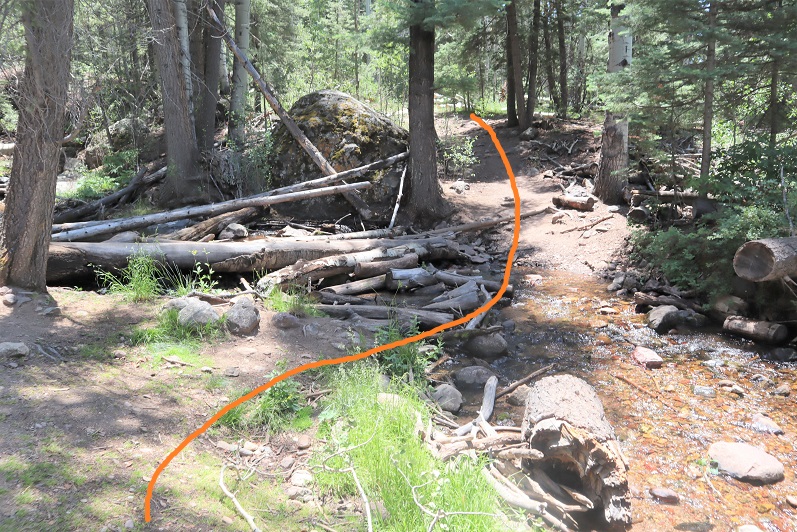
There are a couple of streams to cross, each with bridges/rocks
Before making it to the lake there’s a camping area. Someone has set up communal bear bag hanging areas, which I think was a brilliant idea. What’s even better is people actually seem to be using them. I saw two such areas, but there may be more.
After the camping area it’s a short distance to Willow Lake. I went up this rocky area
And was greeted by this sign and the lake. I turned left at the sign
I made it to Willow Lake after 5 miles of hiking
I continued following the trail until just before the boulder field. At this point I left the trail, turned left and continued north/north west up the hillside
There is no trail, but the route is easy to follow, as after I gained this small ridge I kept the creek to my left and willows to my right and continued north up to the basin.
It’s important to try to stay as much in the center here as possible, as to the right there are willows and shallow ponds to contend with. (I made this mistake on my way in, but was able to avoid it on my way out. I scared several deer out from willows in the process.). At the end of the basin you turn right and head east
This area was a bit mushy, so I went to the right around this rock/water to avoid getting wet, and then entered another basin
There were a lot of friendly deer here who didn’t seem to mind my hiking past them. I gave them room, but they let me get within 20 feet of them with no problem.
I headed east into the second basin, which was full of large rocks
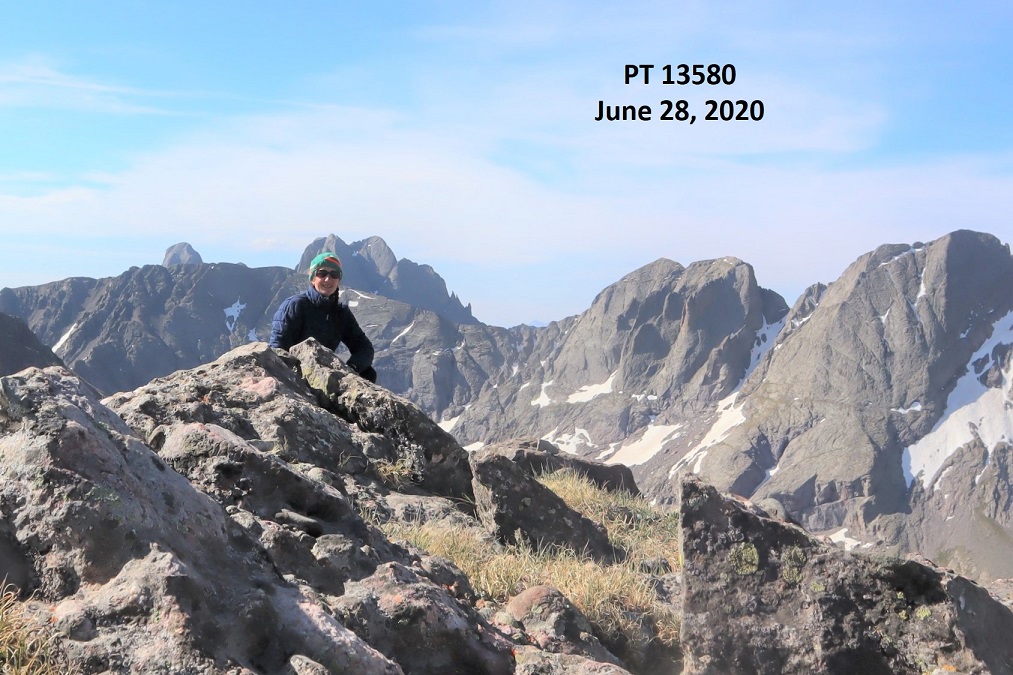
There are a lot of ways to summit this point. I decided to gain the ridge and follow it to the summit of PT 13580
Once on the ridge it was an easy hike to the summit. The only problem was the sun was rising directly in front of me as I was hiking and I couldn’t see anything due to the glare. These pictures are from the way back down. While hiking up this ridge I heard someone from over on the Kit Carson/Challenger side yell “rock!” every couple of minutes. It’s amazing how sound carries out here.
I summited PT 13580 at 8:45am, after 6.8 miles of hiking
13580:
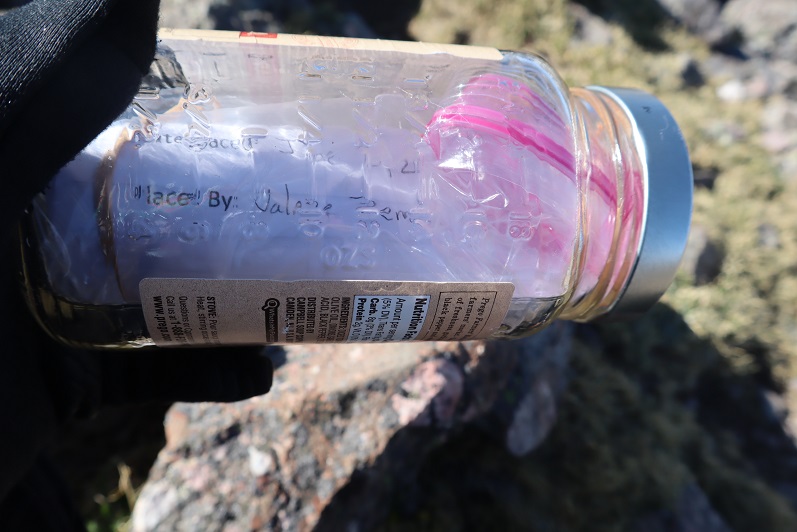
There was a summit cairn at the top, as well as a summit register. I didn’t open it, but I could read through the glass it was recently placed there (6/20/2020?)
It was a beautiful day and I stayed for a long time on the summit, enjoying the views
When it was time to go I retraced my steps back down the ridge into the basin. Here’s an overview, with Willow Lake to the south
And step by step…
Staying higher and dryer this time in the lower basin
It was easier this time to avoid both the willows and the creek
Once Willow Lake was in view it was easy to make my way back down to the trail
There are some beautiful waterfalls here
I made it to the camping area and was startled to see bighorn sheep just off the trail. The camping area was full of tents but the hikers were all out hiking. It seems while everyone is out hiking for the day the sheep came to play. They posed for me while I took a few pictures. Yes, they were a little unkempt, but friendly enough.
Here are some shots of the class 1 trail back down to the trailhead
I made it back to my truck at 12:30pm, making this a 13.38 mile hike with 4934’ of elevation gain in 8.5 hours. Here’s a topo map of my route. Oh, and just for reference, using my iPhone’s flashlight took up 66% of it’s battery in 2 hours (while on airplane mode).
I drove back home, cleaned up, and noticed I was full of mosquito bites. Curiously, they were only on the left side of my body.
First of all, I’d like to recommend doing this hike backwards from the way I took the hike: Route finding is easier and it’s much more straightforward; You’re above treeline almost immediately and have great visuals of all the peaks/route.
Secondly, Cielo Vista Ranch makes special arrangements for people to hike these southern peaks and because of this they require you to hike (or at least drive in and camp) as a group. They wouldn’t give me a reservation to go solo, so every month since December I emailed Carlos asking if anyone else was hiking and if I could tag along. I’d get a response saying he’s “look into it” and then he’d go silent. Thank you Rose for putting the ask out there and letting me tag along on your reservation!
We all met at a special entrance to the ranch and around 5:30pm. Carlos met us at the gate and had one of his guys drive us 7 miles up a dirt road to our campsite. This is a 4WD dirt road, and while 4WD wasn’t necessary the entire drive it did come in handy once or twice. Carlos gave us each his business card and asked that we text him when we exited the property the next day. At this point I view Carlos as a celebrity. I mean this in a positive way. Yes, he’s charging us all out the nose, but at least he’s nice about it. Also, he’s known by his first name.
Here’s a topo of the road we took. These roads are not shown on maps (CalTopo). I made a GPX file on the way back, which came in handy because there aren’t many ways to get lost on this road but I always seem to find them (I backtracked twice). We’d noticed on the way in the GPX file(s) we had were correct, but the road they took us on switched back and forth between the two files (apparently some of the roads are now washed out and impassable). Also, TONS of moths. Like, Biblical plague amounts. We had our Miller Moth season last month: Cielo Vista is experiencing it now.
Here’s a picture of where we parked our vehicles and camped for the night, around 11,750’
We all sat and chatted for a bit. I kept thinking to myself I should go look at the route I’d intended to start out on while it was still daylight, but I had a couple glasses of whiskey and I fear I was a bit too chatty. You see, I’m used to drinking alone (that sounded bad) but what I mean by that is when I usually hike/camp/etc. alone I have a few drinks, scope out the beginning of the route or at minimum where the trail starts, and call it a night. Early. Instead here I was, talking to people at camp. It was so nice to have like-minded people to talk to: we understood and appreciated each other’s mountaineering experiences and goals. That’s so much more refreshing than my mom freaking out every time I bring up hiking because she thinks I’m going to die. We discussed our intended routes for tomorrow and I decided to take the opposite route as the others so I’d be able to do it solo. I didn’t get to bed until a little after 9:30pm, and I never got a good look at the route I intended to take.
I woke up at 3:30am and decided I wasn’t ready to get up yet so I slept a bit more. I was way too comfortable. The third time my alarm went off I figured I’d better get going. I woke up, gathered my gear, and was off. My plan was to head northeast around the mountain and pick up a trail in the basin to the north of Purgatoire. After hiking for about a quarter mile I came to a rocky area that didn’t look passable in the dark. Well, it might have been, but at that moment my flashlight went out and I couldn’t see a thing (I later confirmed on the hike both visually and after talking with others telling me they’d turned around there as well that that route’s not passable). I decided to retrace my steps and try again.
Back at my truck I saw the others getting ready; their headlamps glowing inside their tents/trucks. I got a new flashlight from my truck (a headlamp: I’m not fond of headlamps as they make me dizzy but it was better than nothing). I restarted my tracker and was on my way, following the 4WD dirt road as it wound around the mountainside, losing about 450’ of elevation in the process (which was what I’d been trying to avoid by going around the mountainside first. Oh well).
After about a half mile my headlamp gave out. Great. Two flashlights out in the same hour. Who would have guessed? At least I was just following a dirt road and the sun would be rising soon. I’d just make a lot of noise to scare the larger critters who may be hiking with me this morning away.
I heard a loud noise ahead of me. An animal had been startled by the noise I’d made, ran through the deadfall for about 20 feet and then stopped. Knowing some animal was standing still ahead I made a lot of noise with my trekking pole. It didn’t budge. I slowly hiked forward and noticed whatever I’d scared into bolting for a little bit I’d scared pretty badly: I could tell by the smell.
The animal was still there, and now I could hear it breathing. I made noises again but it didn’t move. I was worried it may be an injured animal and wanted to know what it was, and obviously I didn’t feel comfortable turning my back to it. In the dark I got out my phone and decided to take a picture (thinking the flash would go off and I’d be able to see what it was, even if the photo didn’t turn out. Note: Later in my hike I realized I could have used the flashlight app on my phone, but since I’d never used it before the thought didn’t come to mind until later).
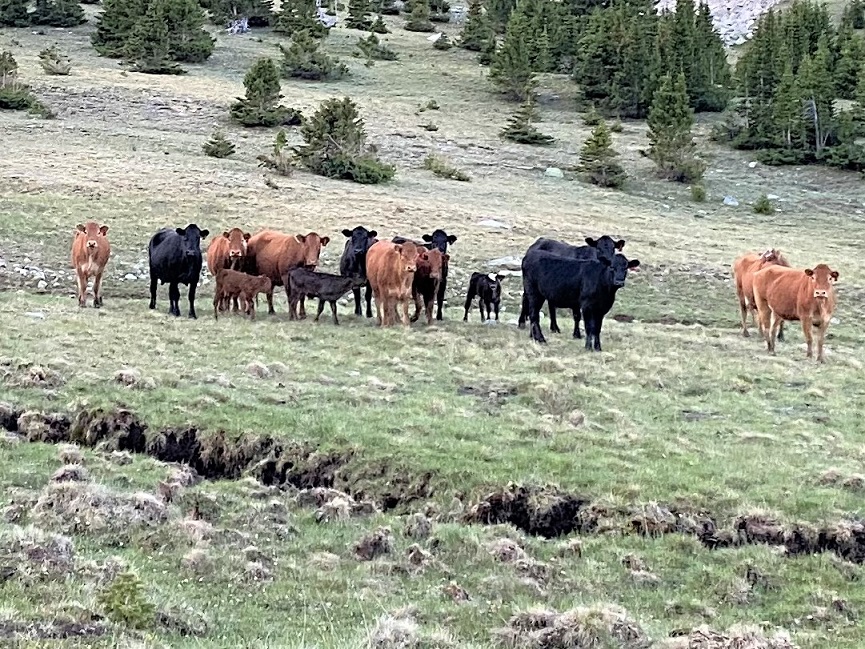
I took a picture and the beast in front of me was…. a cow. Yep, a cow, and the first of many I’d see today.
Well, that was anticlimactic! I’ve raised cows before (both dairy and beef) and I know how to handle them. I clapped my hands, waved and shouted “Move on!” held my walking stick parallel to the ground and advanced forward. The cow turned, moved out of my way, and I continued on. I saw about 10 more cows before it got light, but knowing what they were I didn’t have a problem with them anymore.
I followed the dirt road for about 1.25 miles until it came to a 3 way divergence. I randomly took the middle road as it looked to be heading in the direction I wanted to go and it turned out to be the right one.
I continued east through the trees, encountering more cows, until I made it to the basin. The sun was now up and my anxiety level dropped. There were still tons of cows, but now I could see them, as well as cow trails and ATV trails. I followed the ones that went east.
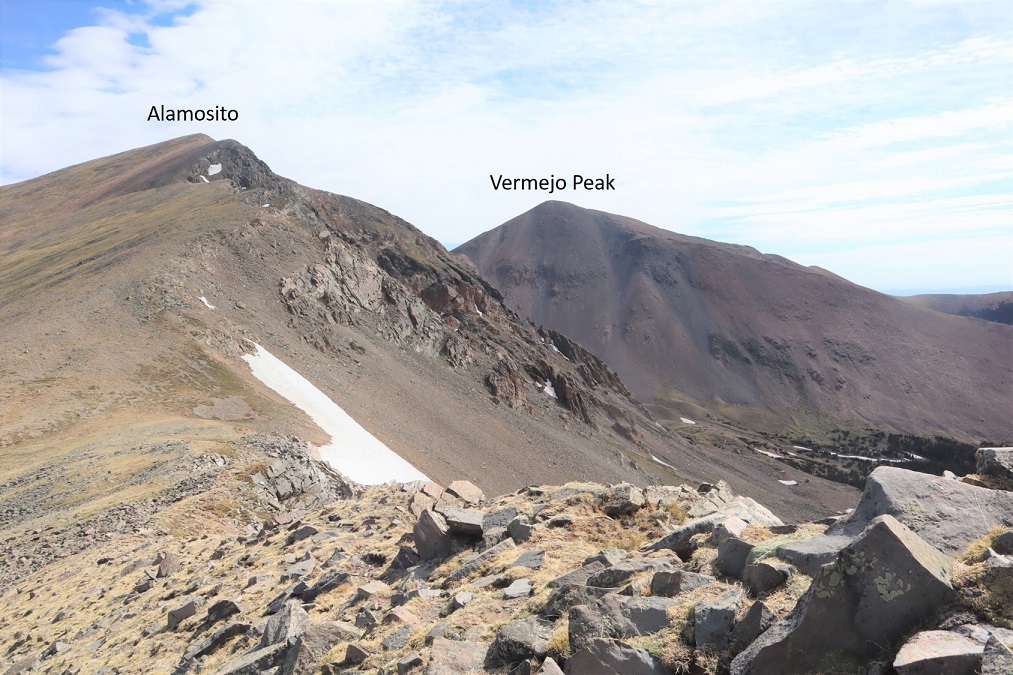
Once out of the trees I could easily see the path I wanted to take to summit Alamosito. (Note, some routes tell you to take the saddle and drop down into another basin and then gain another saddle, summiting Vermejo first then backtracking to Alamosito. The way I went just made more sense to me, but several routes all ‘go’. Alternately you could gain the Alamosito/Purgatoire saddle and summit from there as well).
This was straightforward, except for these cows who didn’t seem to want me to pass. I made noise and told them to “get along” they just stared at me. One even lifted its hind foot and stomped a few times, kicking up dust. I got the impression they were expecting something from me. Even the calves had ear tags, so they’re used to humans (at least in some part). I passed them to their left and they went back to grazing.
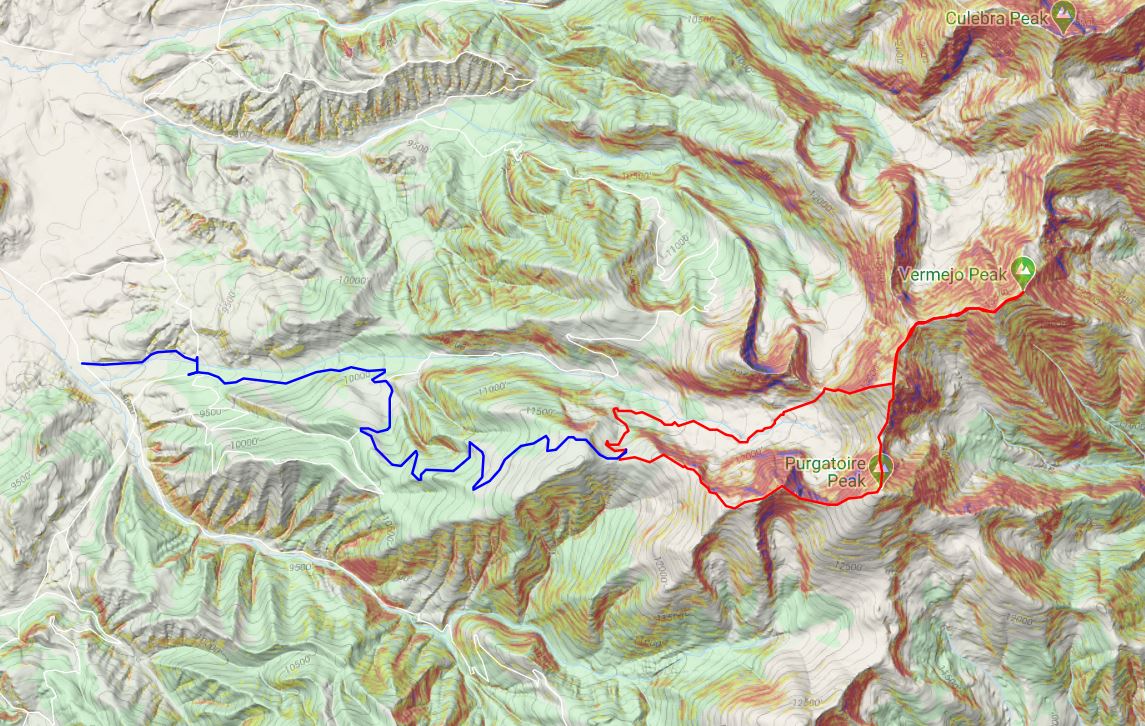
Here’s a look back from the saddle. I’ve circled the campsite in red, and the area that cliffed out in yellow. Note: Everyone else just went straight up the ridge to start (a better choice to begin). My route to the saddle is in orange.
From the saddle I turned right and headed east. This was a very straightforward ridge hike. In fact, they all were today.
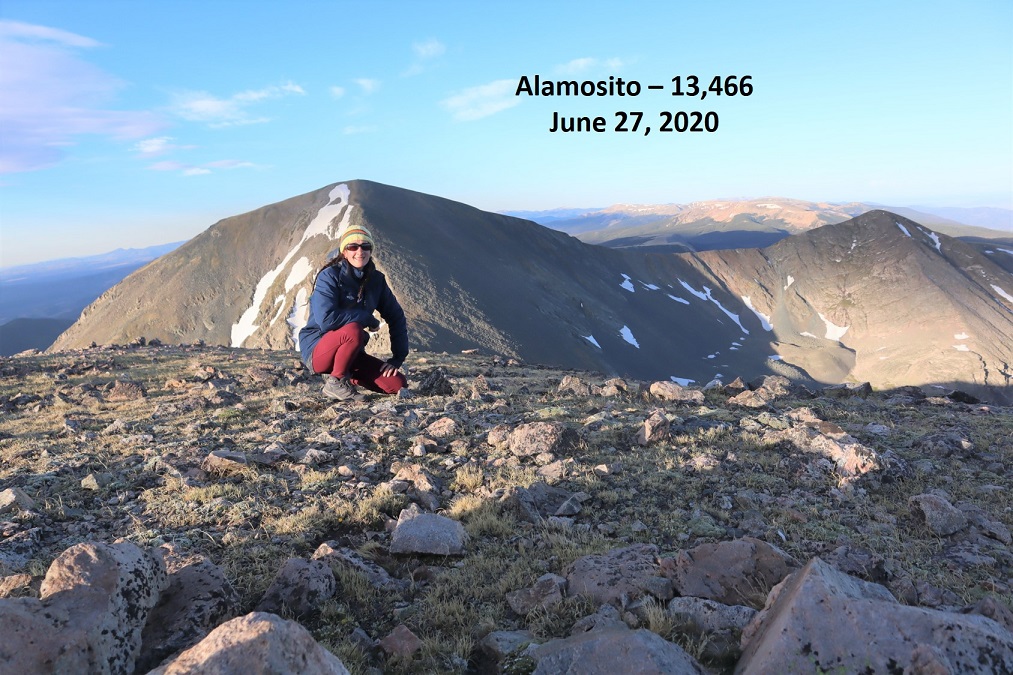
I summited Alamosito at 6:45am, after 2 hours and 3.3 miles of hiking. There was a summit register in a glass jar buried in the cairn.
Alamosito:
I turned north and headed down the ridge to the Alamosito/Vermejo saddle
There was some rubble to contend with on the way down, but all class 2
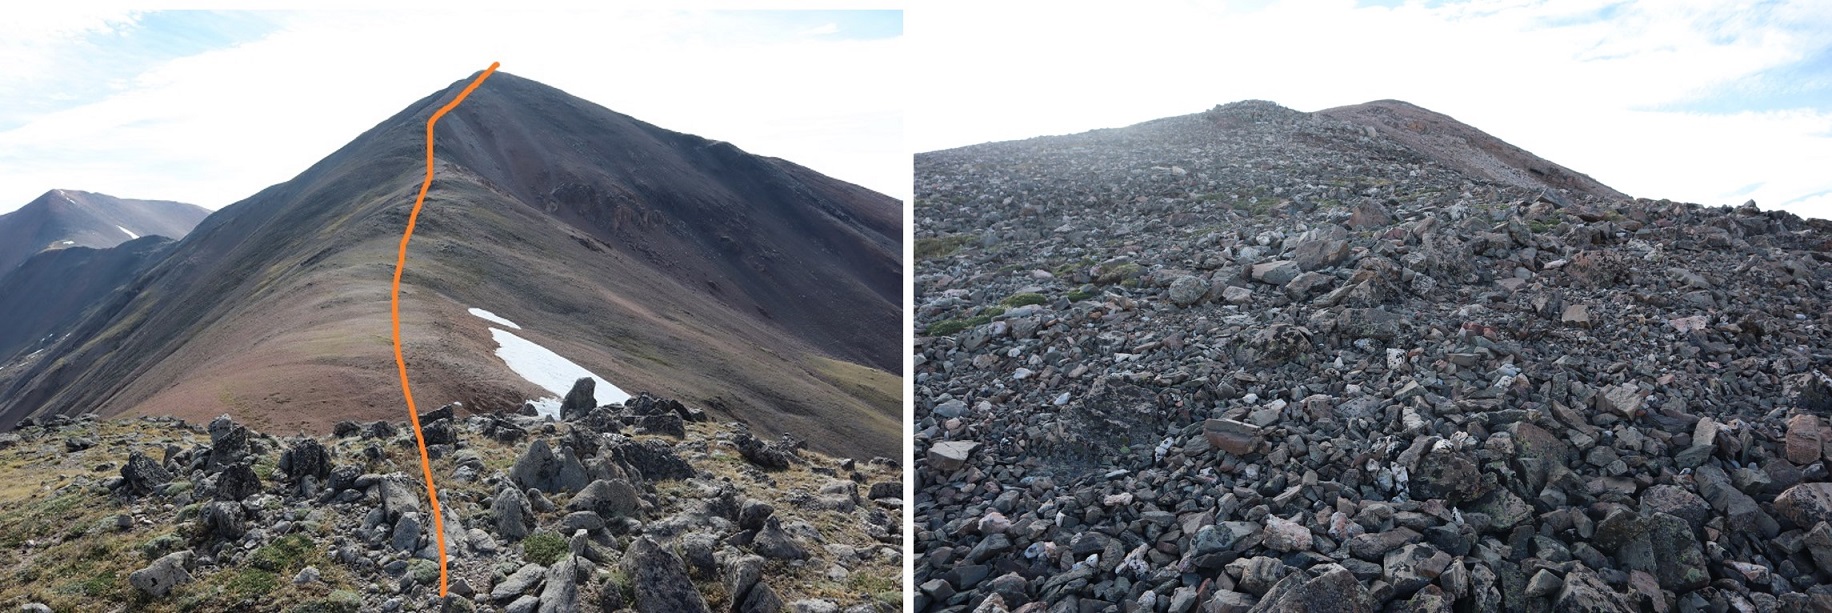
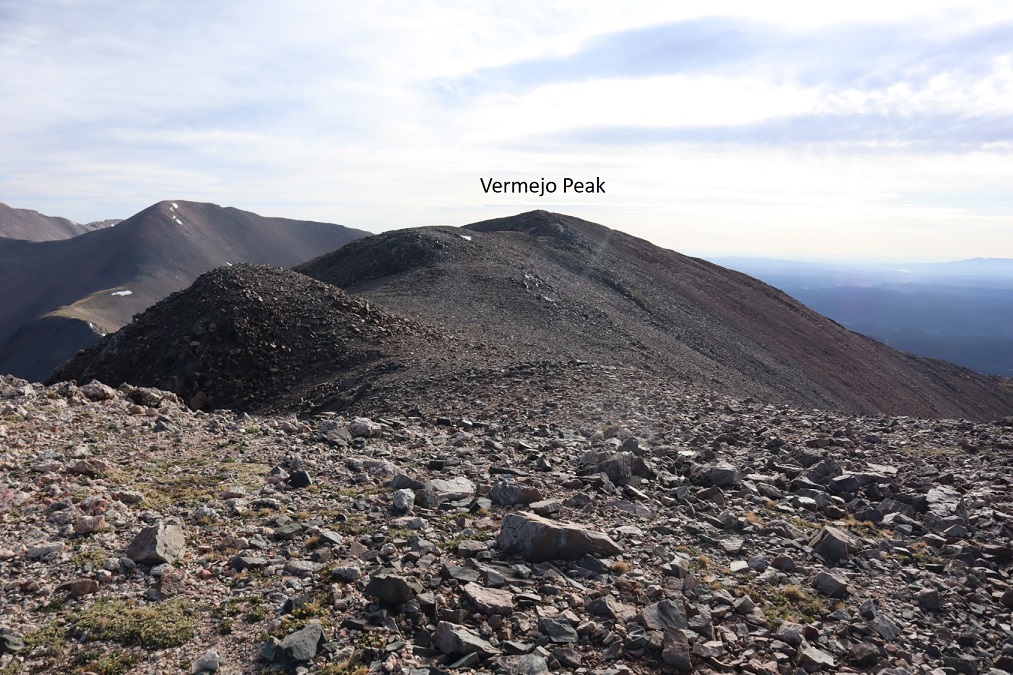
From the saddle I turned right and headed east up to the summit of Vermejo Peak (that’s a false summit you’re looking at here). There was some rubble here as well
At the top of this easy ridge walk there was another .3 miles to go before making it to the summit, also an easy trek that reminded me of Ireland: the tundra was green and there were lots of black and white rocks. The picture doesn’t do that justice.
I summited Vermejo Peak at 7:45am. From Alamosito to Vermejo it’s just over a mile and a half of hiking. There was a summit register here as well (one of the pipe ones I can never open because: Raynauds).
Vermejo Peak:
There were great views of Red Mountain A and Culebra from the summit
I turned and headed back the way I came, towards the saddle and back up to Alamosito
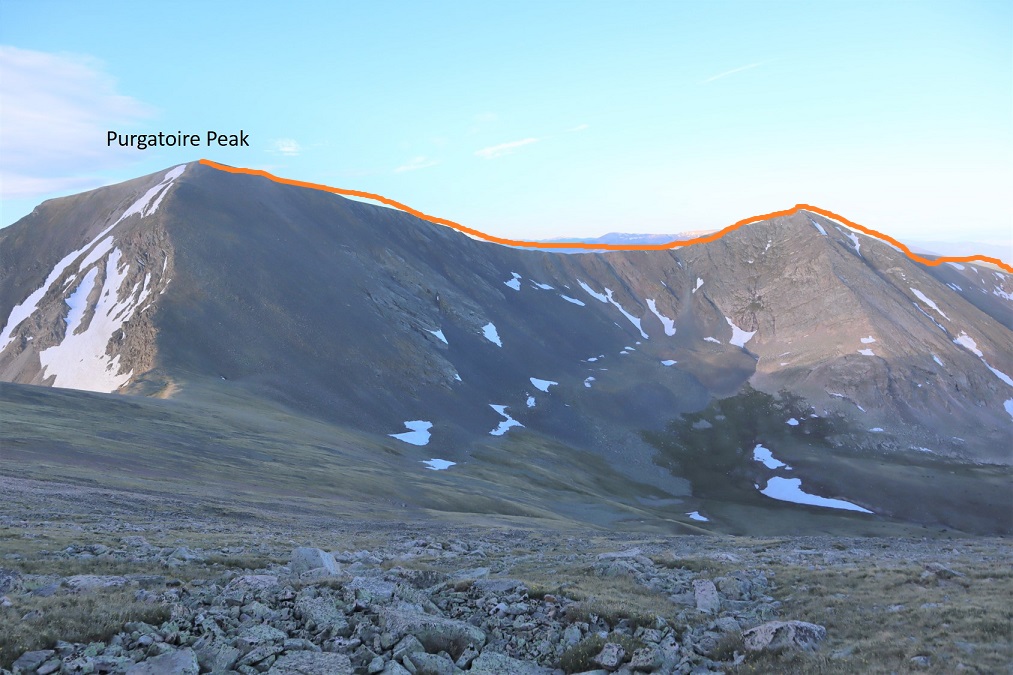
From the saddle there’s a great view of both Purgatoire and Alamosito
From the saddle I made my way back up to summit Alamosito
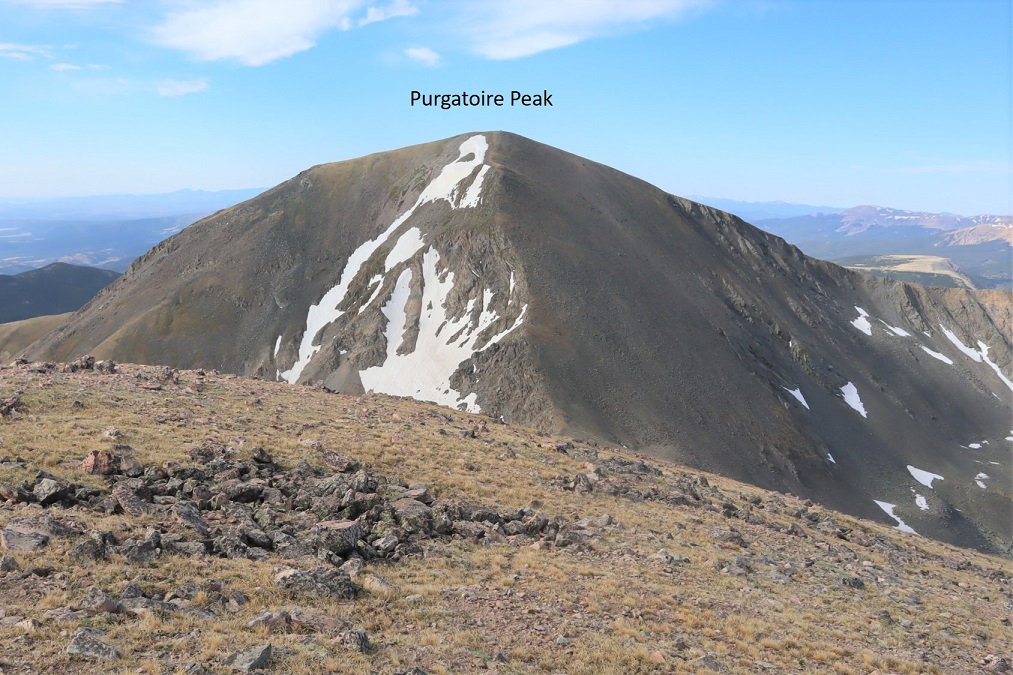
I re-summited Alamosito at 9am and looked over at Purgatoire Peak
This was another easy ridge walk. Rubble turned to tundra as I made my way towards the saddle
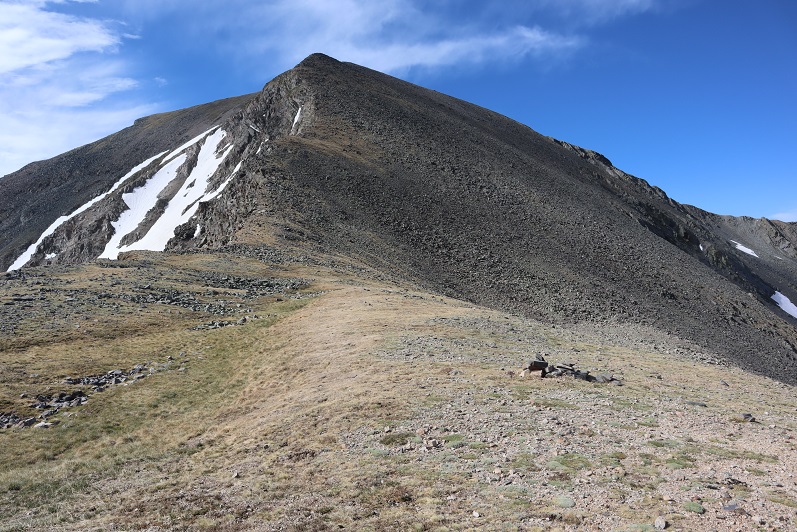
Here’s looking back at Alamosito and Vermejo Peak from the Alamosito/Purgatoire saddle
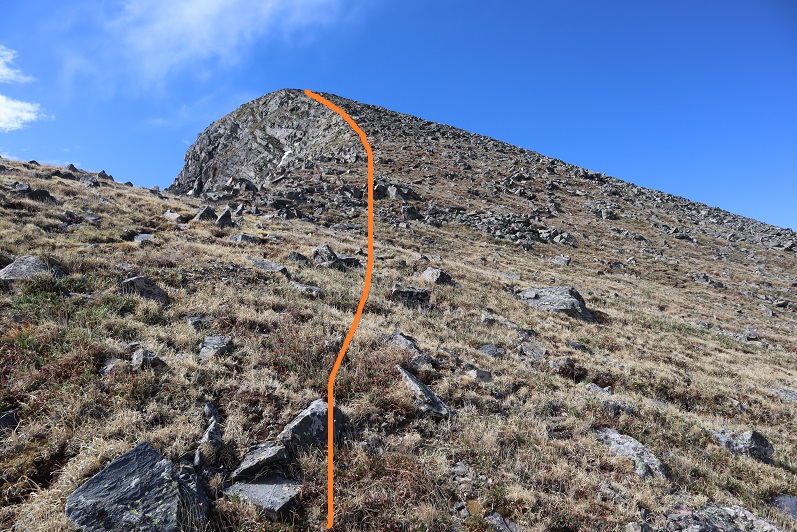
The rest of the ridge to the summit of Purgatoire was straightforward
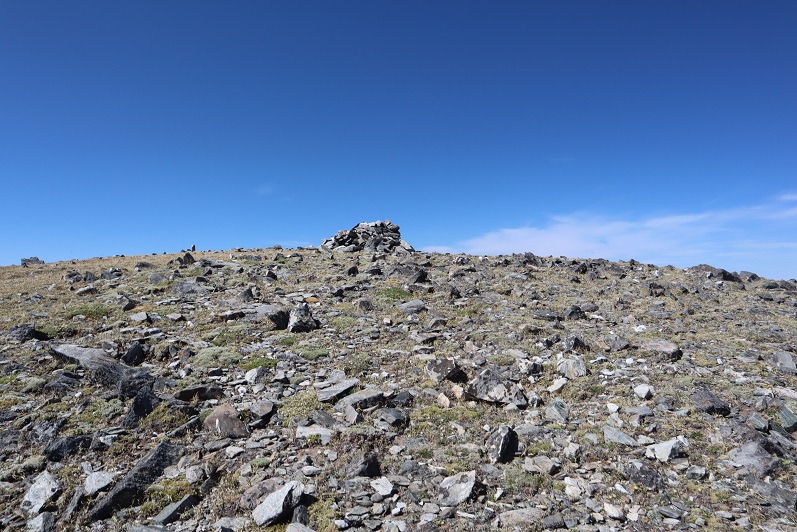
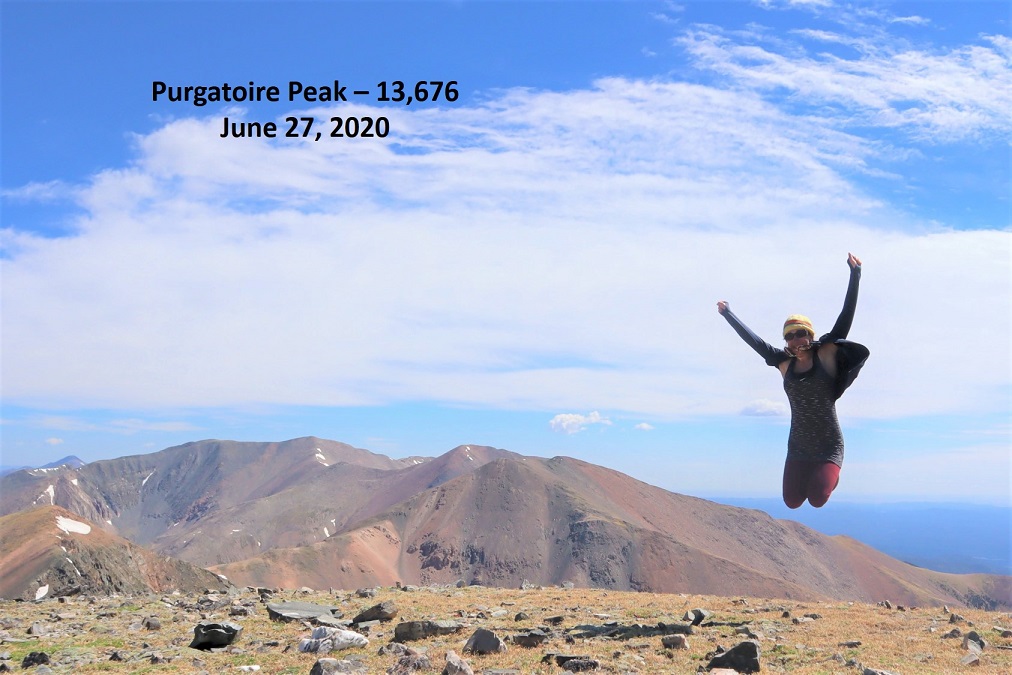
I summited Purgatoire Peak at 10am
Purgatoire Peak:
There was a summit cairn, and also this thing. I’m not sure what it is? I could probably look it up, but, thoughts?
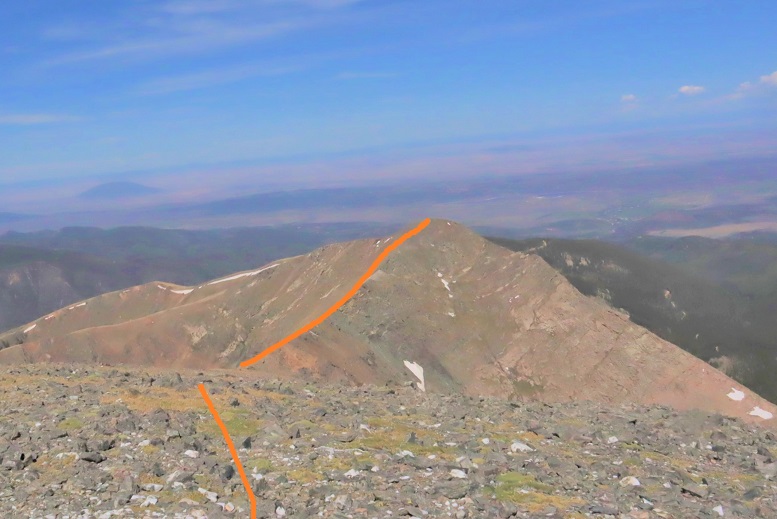
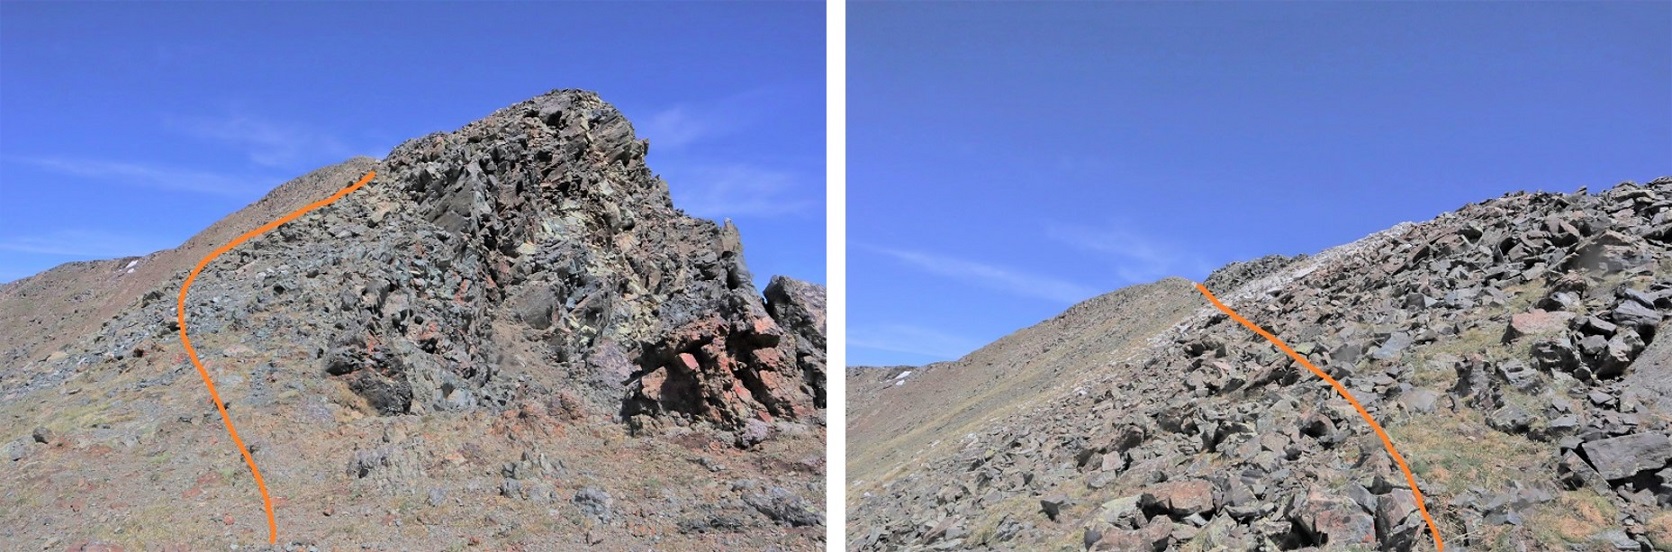
I turned west to head down the way I should have headed up, back over this unnamed point (which has about 260’ of elevation gain from the saddle, and tops out at well over 13K)
Here’s looking at the route from the morning when I was hiking up Alamosito
It starts out as a simple ridge walk on tundra, dotted with rocks the size of toasters, and once at the saddle it looked like there may be some scrambling involved, but there’s actually a game trail to the left of the ridge that makes the ridge easy to follow
Here’s a look at the route from the saddle towards Purgatoire Peak
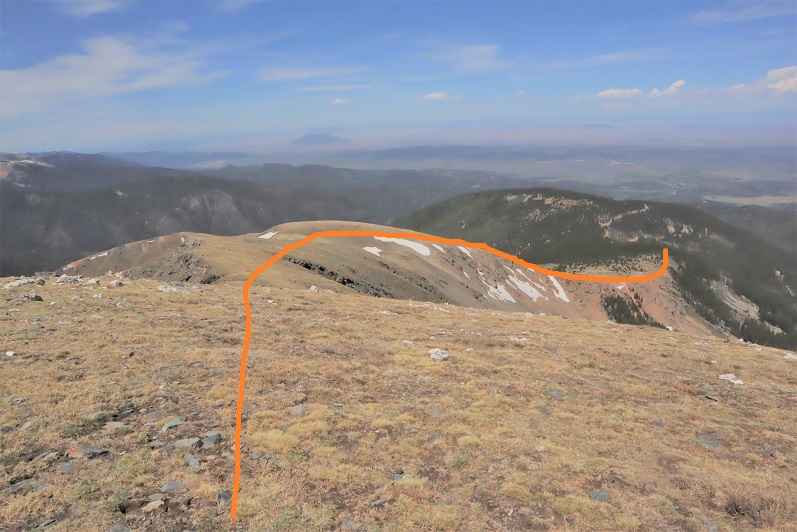
From the top of the point there’s a tundra ridge to walk down, and just a little bit of forest to go through before reaching the road. As long as you aim for the road you’ll be fine, as you can follow it to the campsite. Yes, I should have hiked the couple hundred feet up this last night: it would have made the entire route more obvious.
Here’s a look back from treeline on the point you need to ascend if heading this way
Once you’re in the trees navigation can be a little difficult. Just keep aiming west and you’ll hit the road. Oh, and you can’t see them in these pictures, but there were moths everywhere! Thousands of them swarming around. They apparently appreciate the elevation / pines today.
I made it back to the 4WD road we drove in on and followed it back to my truck. I arrived back at my truck at 11:45am, making this a 9.74 mile hike with 4828’ of elevation gain in 7 hours (not counting my early morning false start).
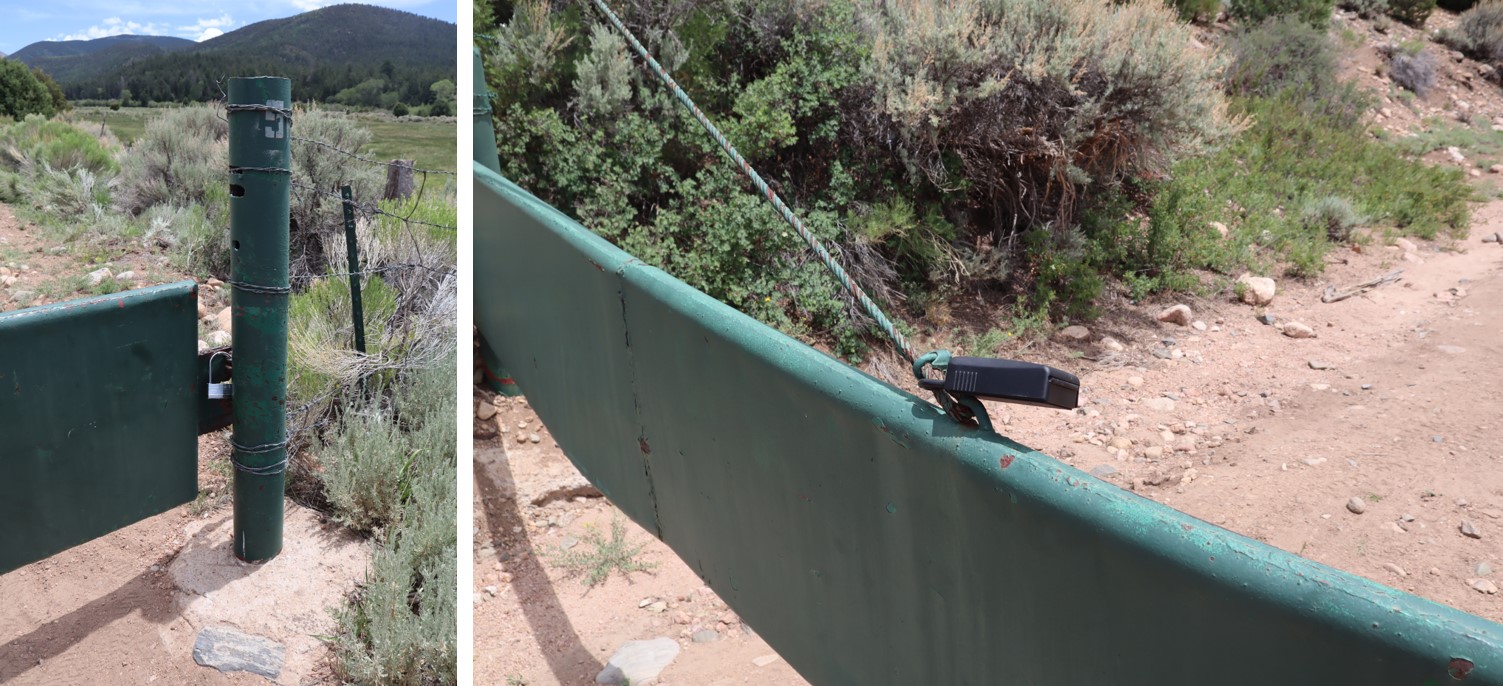
I got back in my truck and followed the road back to the gate. The route was much easier on the way down than on the way up. I unlocked the gate, re-locked it, drove through, and text Carlos to let him know I’d exited the property. Also, the lock was much easier to figure out than the one that was there when I hiked Culebra (but to be fair, it was also the first day they’d implemented that system).
Here’s a topo map of my route, as well as the drive in.
It was still early in the day. I ate a sandwich as I drove the 3 hours to the next trailhead during a thunderstorm.
I woke up before my alarm again today, but not because I was well rested: I was cold! As I turned on a light I realized I only had half of my blankets covering me. There wasn’t any wind last night, and when I looked outside I could see tons of stars. The clear skies had made for a cold night. I jumped in the cab of my truck to warm up and get ready for the day, noticing it was 32 degrees outside (as compared to yesterday morning’s 43). It was amazing what difference a few degrees makes.
I turned the truck on to turn on the heat and was once again disappointed to notice my ABS and Traction lights were still on, as well as my 4WD light still blinking. That was going to haunt me all day.
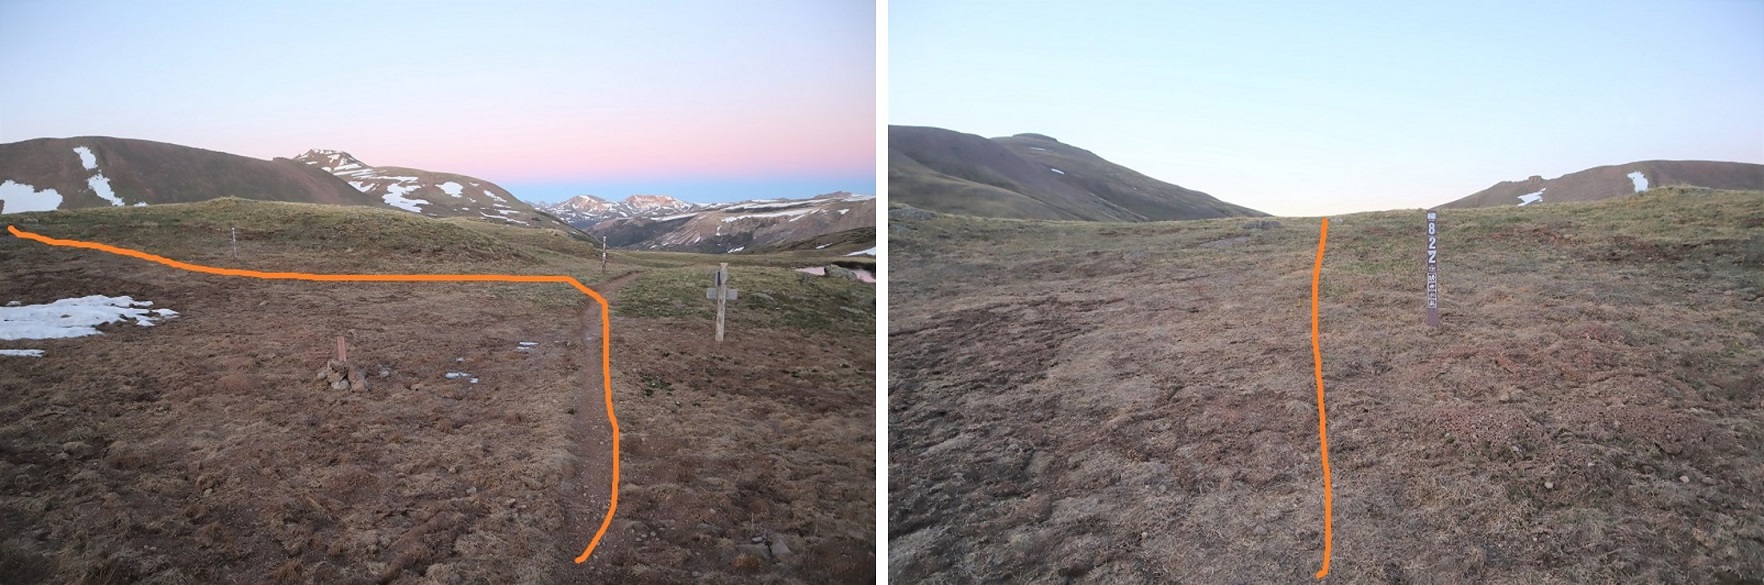
I was on the trail by 3:30am, and it was so cold I turned back at one point, intent on sitting in my truck a little longer, but I immediately turned back again: I’d knew I’d warm up a bit once I started moving. The weather forecast was better for today, but I still wanted to get an early start. I followed the 4WD dirt road 821 to the class 1 Trail 813 as it lost a total of 400’ as it wound down the canyon, and then gained almost 1000’ to the top of the pass.
There was one small section of snow to cross, but luckily the elk had already done a great job blazing the trail.
Once at the top of the pass I continued along the trail, dipping down into the basin, losing another 700’ of elevation.
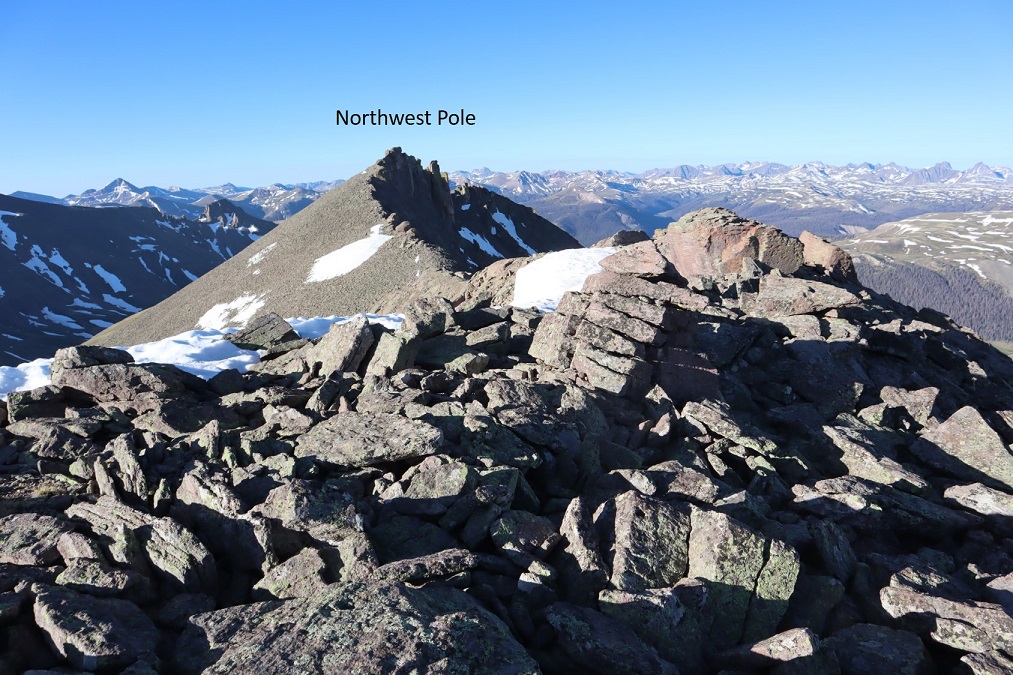
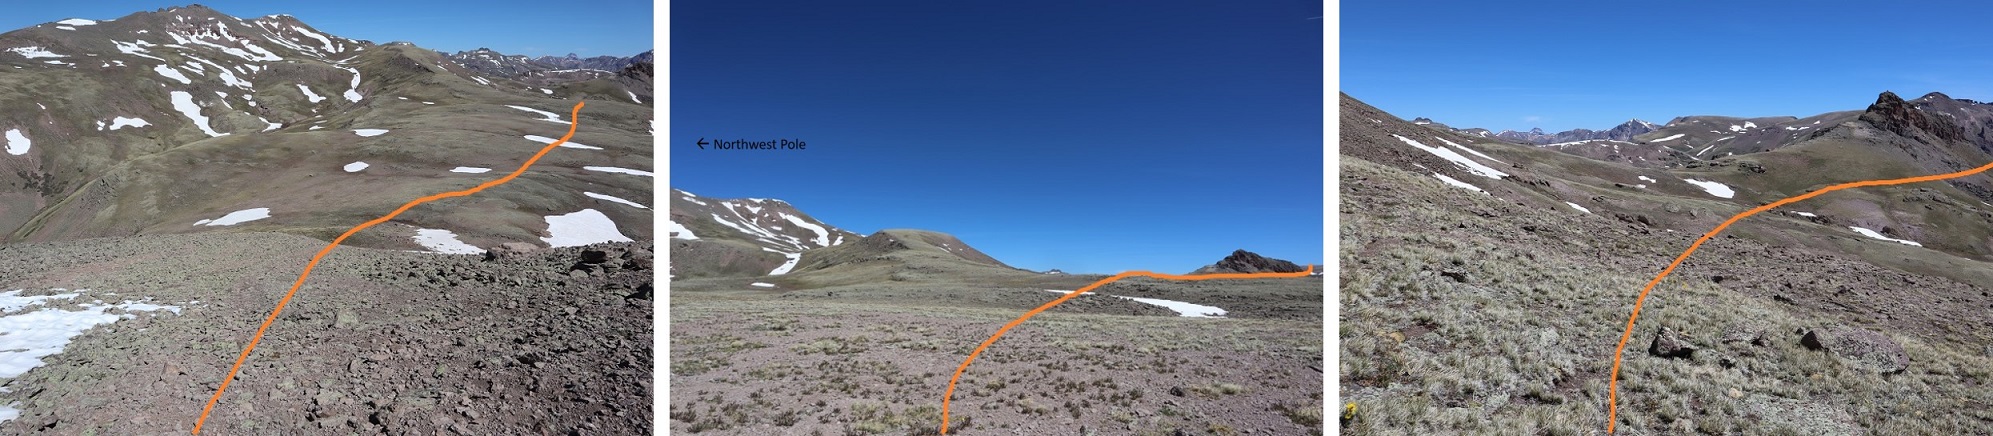
After hiking for a total of 5 miles at this junction I turned and followed 822 southwest to the base of the Northwest Pole Ridge.
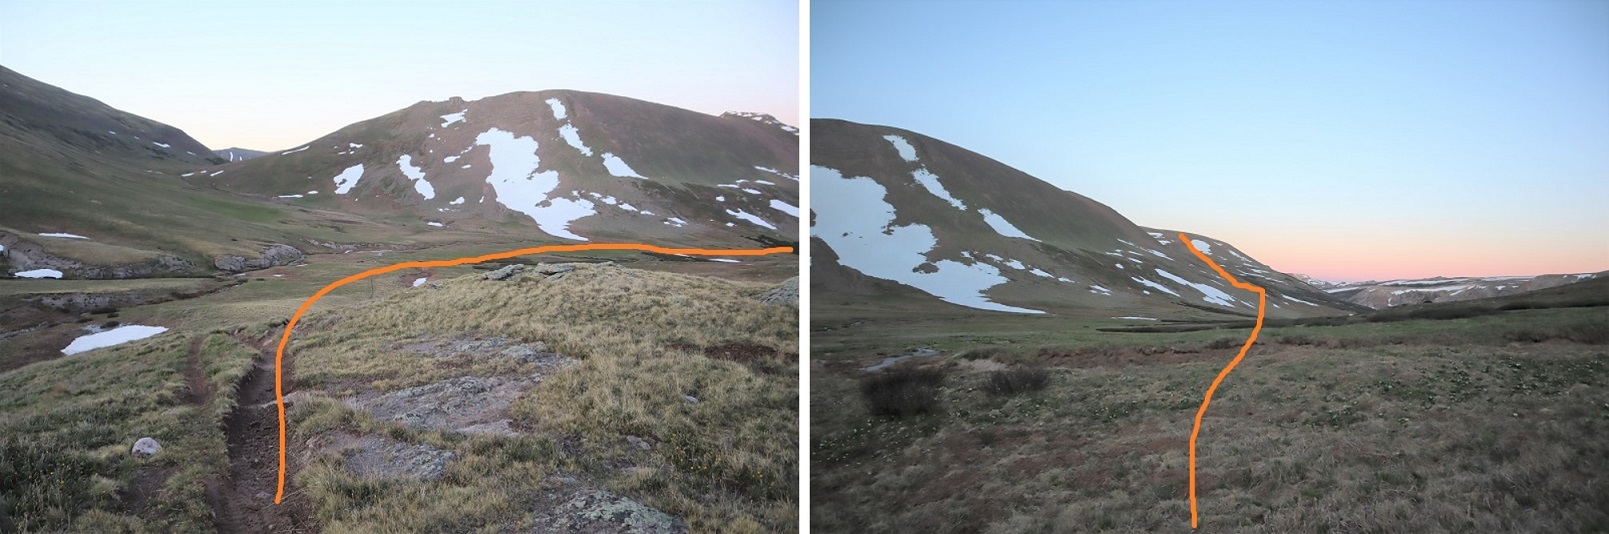
In the basin I left the trail and headed for the Northwest Pole Ridge
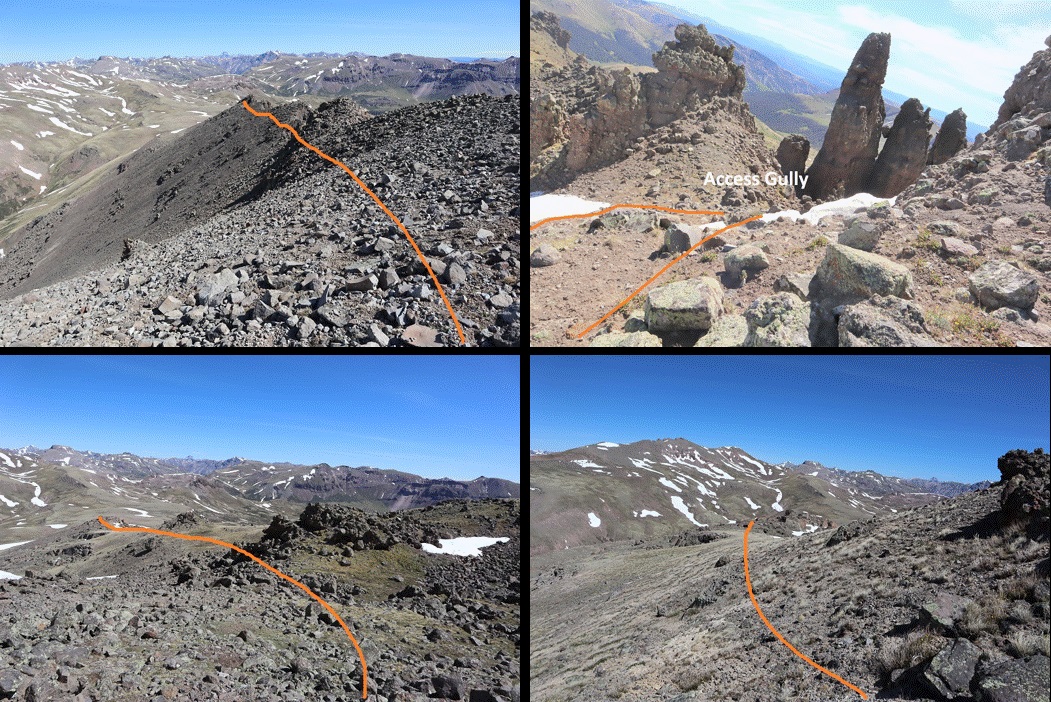
My goal here was to gain the ridge and follow it to the summit of Northwest Pole. Here’s an overview of the route:
And what it looks like gaining the ridge (yes, tons of elk out there today). Also, the basin was marshy, but since it was so cold and early in the morning it was frozen and crunchy. There were ribbons of water that I hopped across. I wouldn’t want to pass this area when it’s soggy and wet.
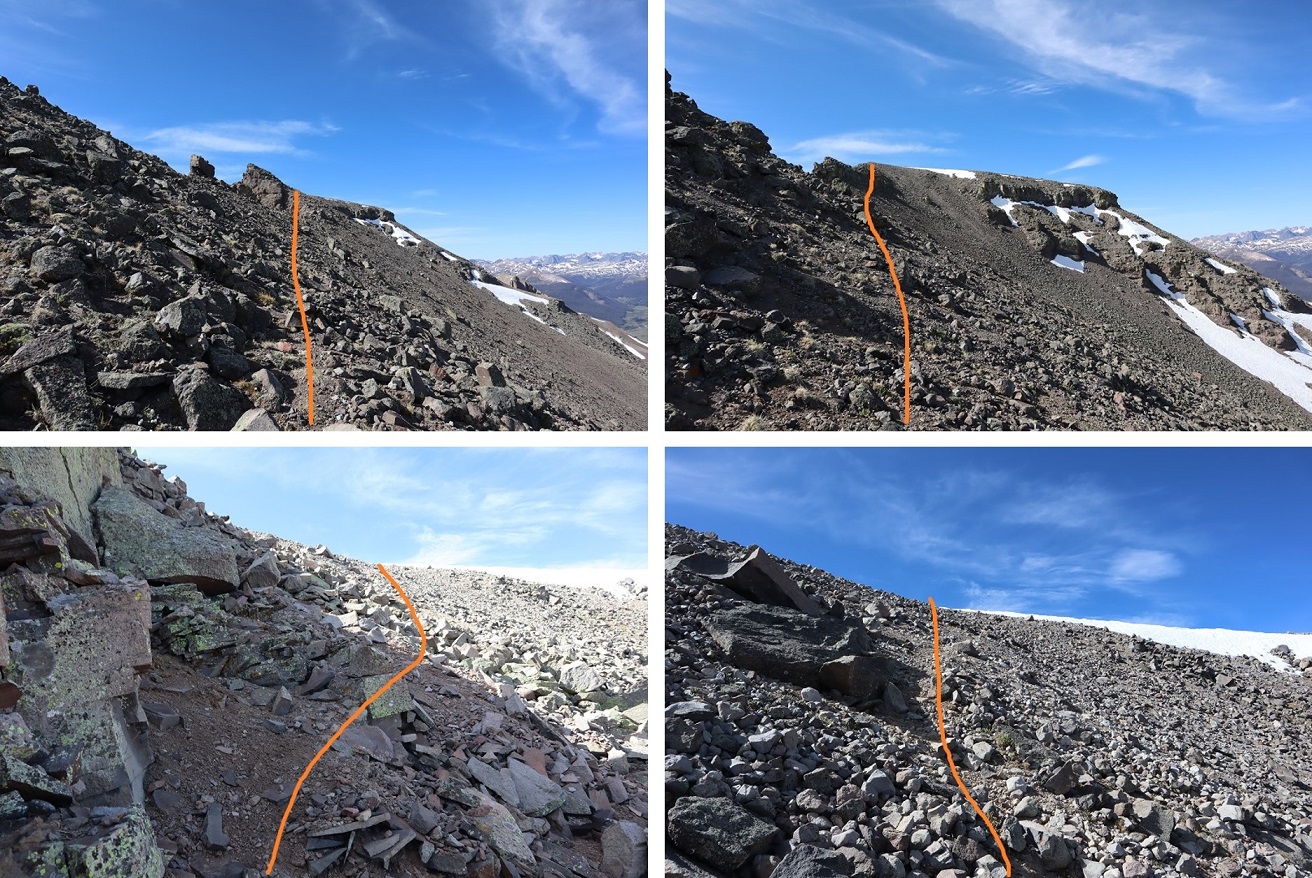
Once on the ridge it’s easy to see the snow free path to follow, all on tundra. This is all easy class 2
From the top of the ridge you dip down a little bit and then back up on loose rock
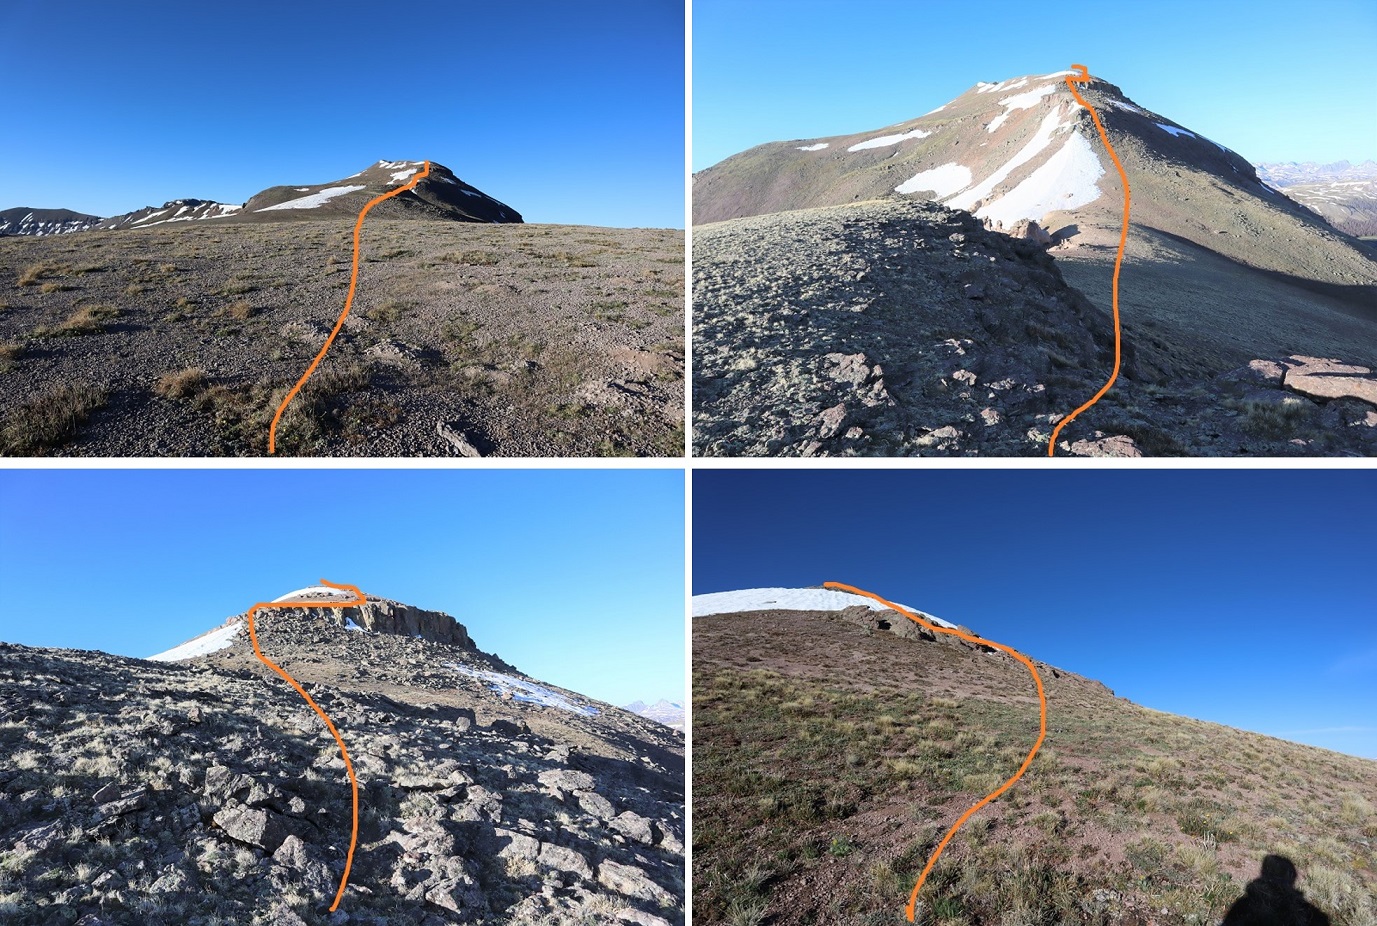
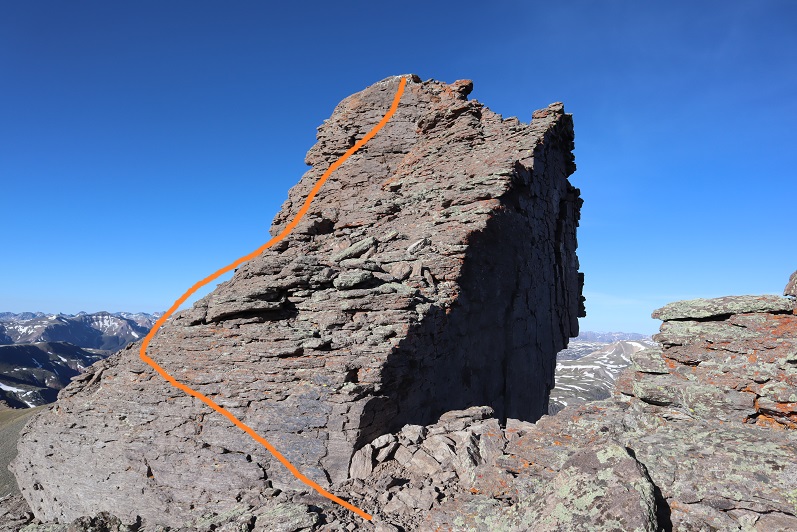
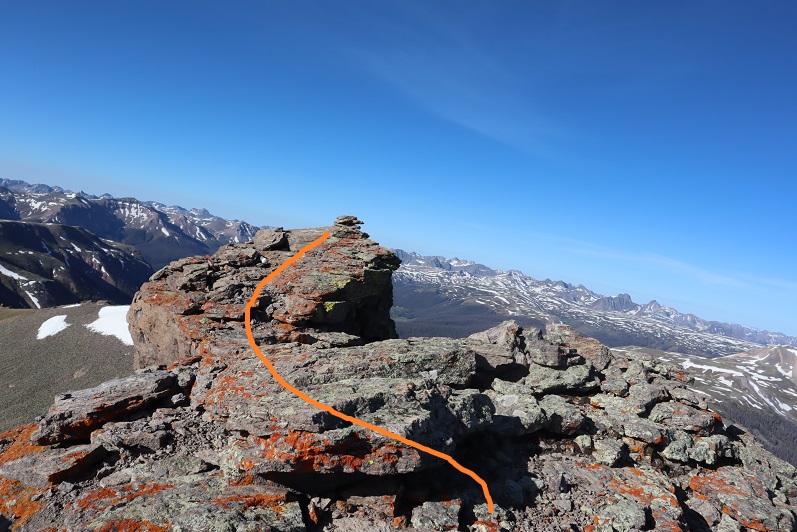
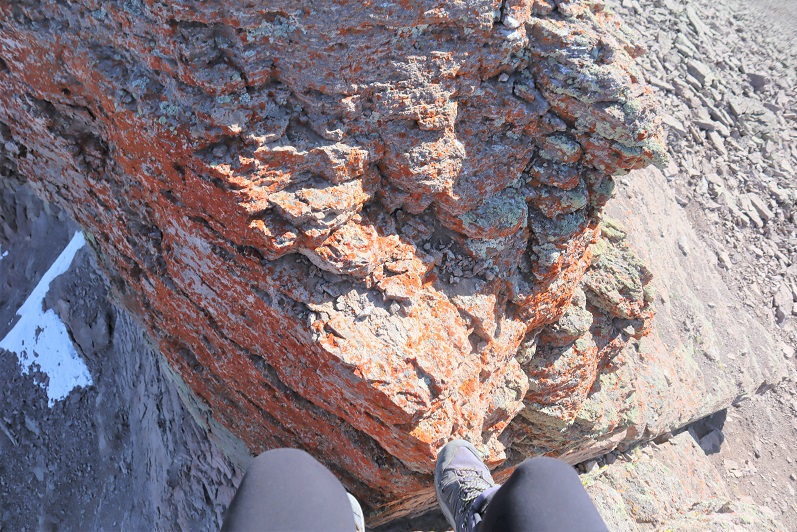
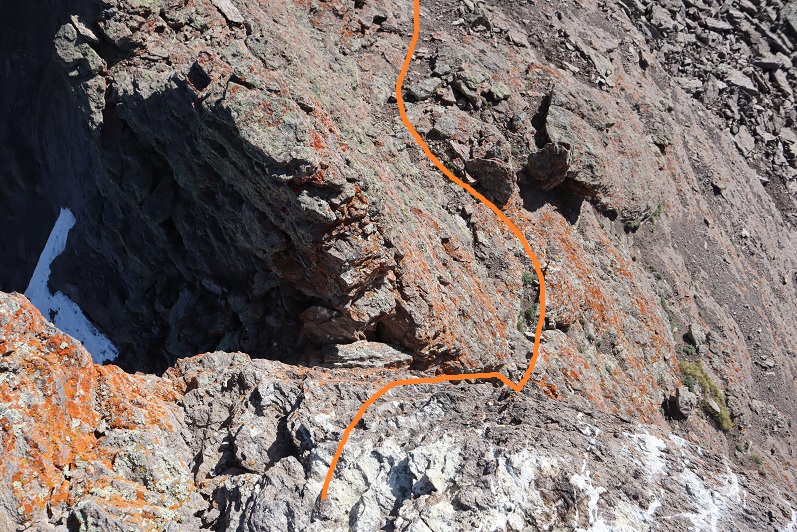
The crux of this climb comes at the very end. I spent some time trying to figure out how I wanted to summit. At first I tried to gain the block at the area where all the bird droppings were, but it didn’t look like it was the easiest way. Next I tried summiting up a chimney, but about halfway up I knew I’d need rope to get back down (I’m short) so I stopped and looked for another route. In the end I was able to summit by going up the area with all the bird droppings, just from a different angle. There is a lot of exposure here and small scree on the rocks, making it slippery and a fall dangerous.
Here’s the route I took:
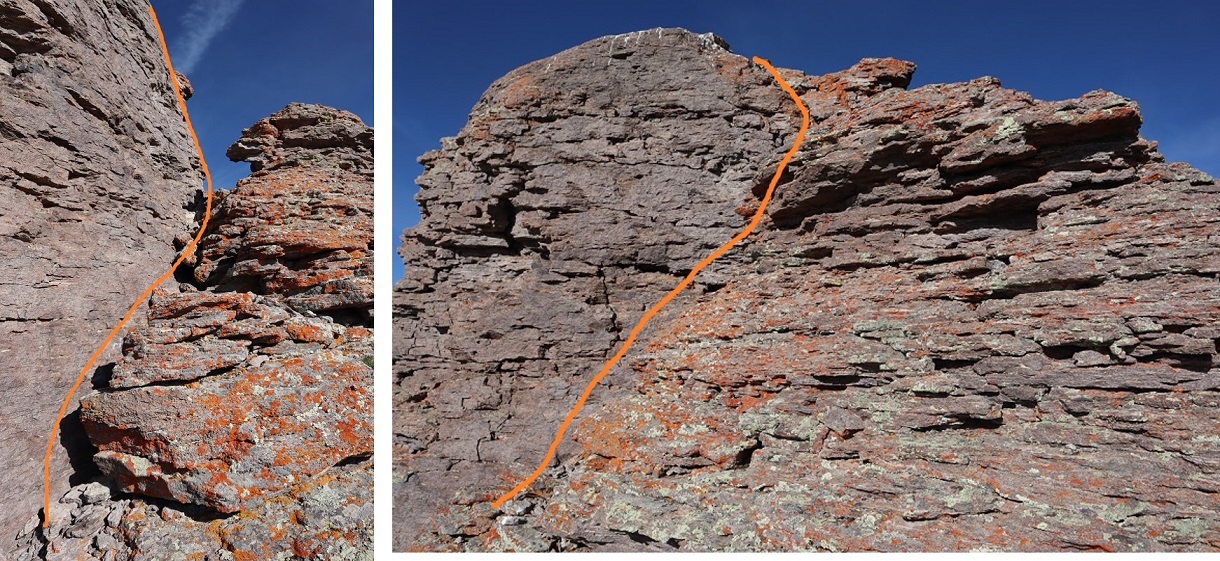
I aimed for the bird droppings. Here’s what that looked like from a couple of different angles.
From there I traversed along the exposed edge towards the summit.
It looks easy, but this is the exposure, and yes, it included a trust jump (once again, I’m short, it could have been more of a long lean for someone over 6 feet tall, but I had to jump). Here’s looking back on the jump area (it’s too difficult to see in a picture coming from the other way, but this picture offers a good look back on the ridge too)
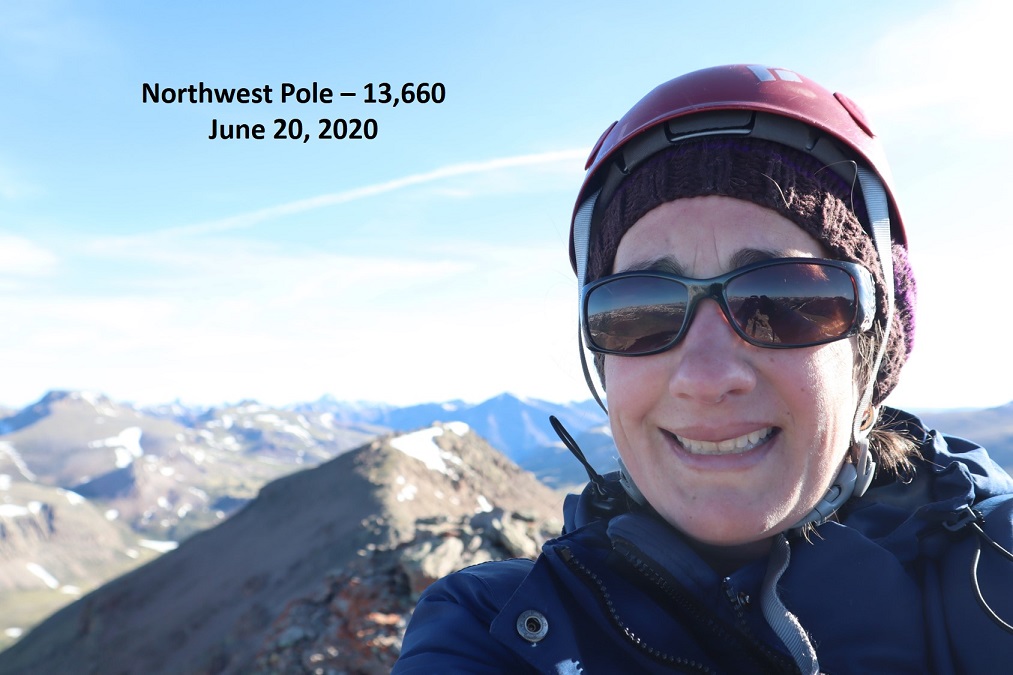
I summited at 9:45am
Northwest Pole:
Here I am getting ready to jump the area on the way back.
And from the top where the bird droppings are back down. Yes, it’s as steep as it looks
Back on solid ground I took a picture of the summit block and how I traversed it. I circled where I jumped.
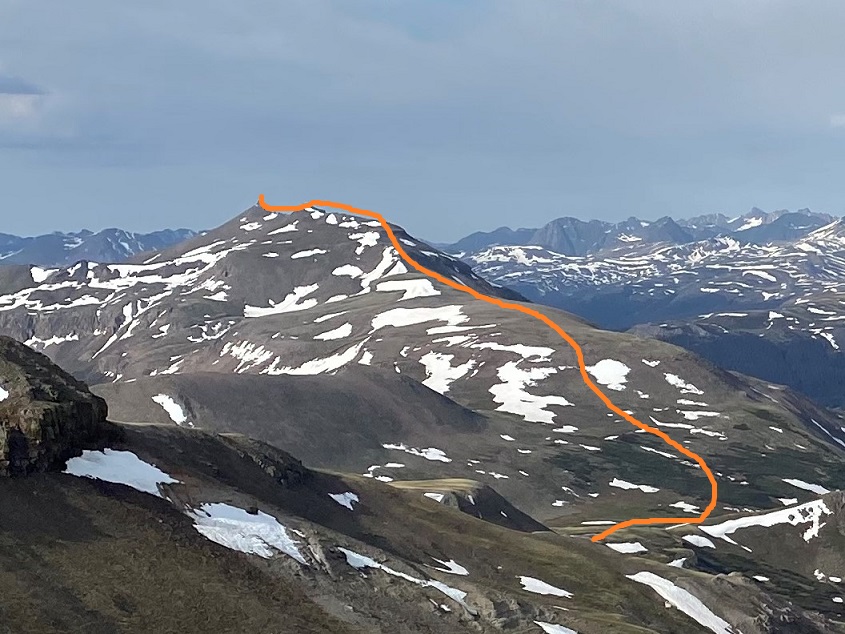
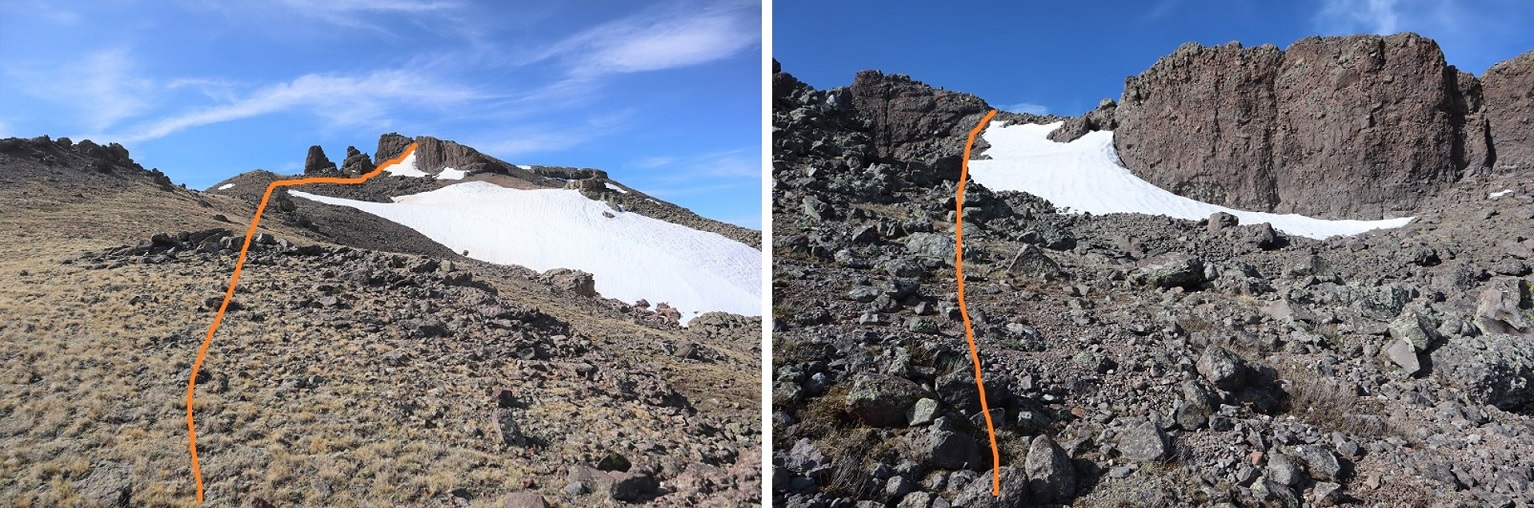
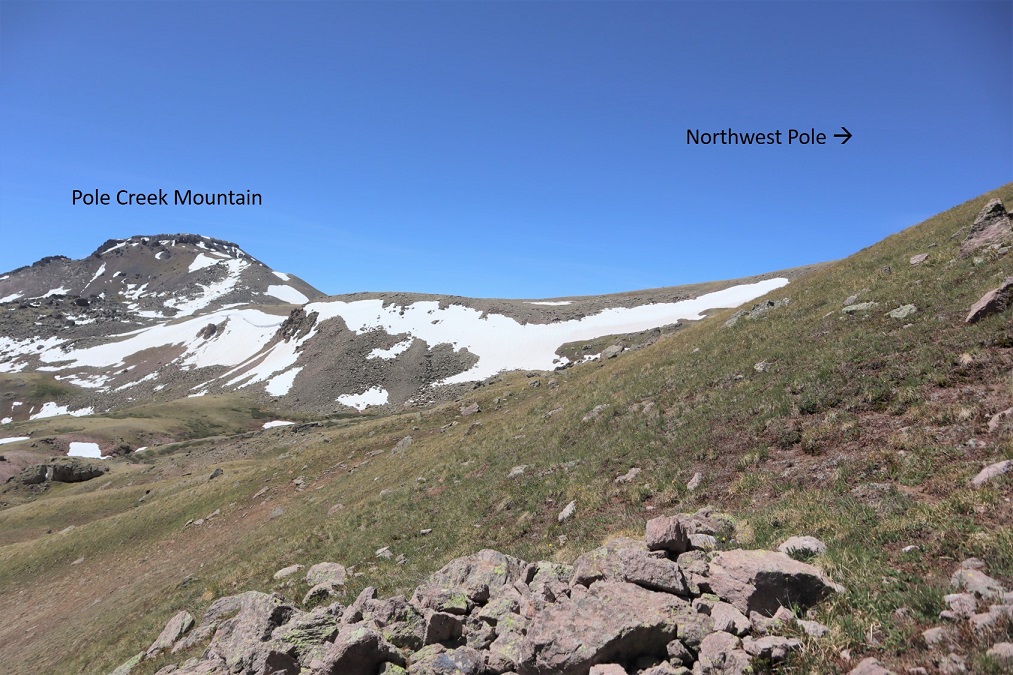
Time to head over to Pole Creek Mountain. Here’s an overview of the route from Northwest Pole
I descended east towards the basin, first on loose rock that gave way to tundra, losing 850’ of elevation, crossing a stream, and heading back up towards Pole Creek Mountain.
Here’s looking back at Northwest Pole
I continued southeast towards Pole Creek Mountain. Here’s how I ascended; the snow was easy to avoid, and I used it to track where I wanted to go:
After ascending the ridge I aimed for the access gully, which had snow but enough dry areas to pass easily without traction
Then I just followed the ridge south towards the summit
I summited Pole Creek Mountain at 9:45am, after almost 10 miles of hiking
Pole Creek Mountain:
I headed back the same way I’d come in, following the ridge and then going back down the small access gully. Everything looked totally different on my way back and I second guessed myself a few times, but keeping Northwest Pole in sight helped.
Once back down in the basin between Pole Creek Mountain and Northwest Pole I wanted to stay high on my way back out to avoid the snow below Pole Creek Mountain to the east
I headed north, and then east around this small peak.
There was some snow here, but elk in the area make a great trail and traction wasn’t needed
I rounded the east side of the small peak
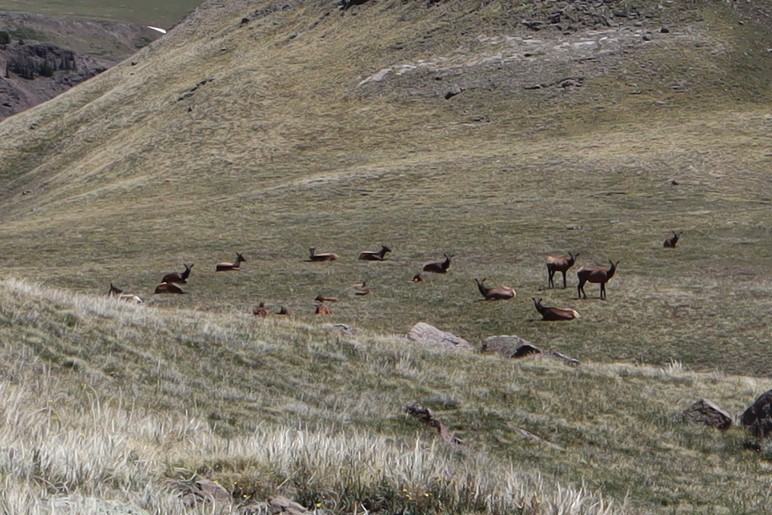
And unexpectedly came across a small herd of elk! This was so cool! I’ve heard of elk doing this, but I’d never actually seen it before: the mama elk were laying in a circle, with the babies laying down inside and two sentries standing guard. I saw them a split second before they saw me (the wind was blowing towards me, so they hadn’t heard/smelled me) and I was able to get a picture before they took off
As soon as one of the elk standing guard saw me I could almost hear him say:
“See? This is why we always employ the safety circle! Always! This is not a drill! Move! Move! Move!”
And they were off and down the hillside, out of sight.
Well, that had certainly been a neat experience! I continued rounding the peak and then made my way down the hillside, all the way to the basin floor. Here’s an overview of the route I took
And looking back, here’s the route I took down into the basin. For obvious reasons I’m now referring to this as “dementor ridge”
Once in the basin I was at the lowest elevation I’d be at all day, and still had a lot of hiking left to do. I aimed northeast until I hit a trail, and then followed it up. This was trail 822 that would bring me back to Trail 813 (if I chose to go that route). This was actually easier than it looks because there are a lot of good elk trails in the area, passing through the willows.
I followed the trail to a sort of a saddle, and stopped to think
From here the trail obviously dipped down once again, losing several hundred feet of elevation before reconnecting with Trail 813 and gaining the pass, then dipping back down into the basin and up again out. Here I was, sitting directly below PT 13580, a ranked 13er that I’d want to hike sometime in the near future, but in which I dreaded that drive into Carson Pass that would be necessary again next time. It was still early in the day and the weather was great. I decided to just summit PT 13580 now while I was in the area. I’d done some scouting yesterday and today, and I was sure the route from the summit of 13580 back to the pass ‘went’ easily and would be snow free. I turned right and headed east up the mountainside. This was a very straightforward hike up tundra
At the top the tundra turned to rock, all class 2 and easy to navigate
At the top of this rocky area was the summit. I summited at 2:15pm
PT 13,580:
Here’s a look back at the route
Now I decided to stay high on the ridge and aimed north, following the ridge towards the peaks I’d climbed yesterday
And then back down to the pass and trail 813
The hike out was uneventful. It was a beautiful day and I just followed the class 1 trail back. Oh, and I saw the moose again, in the same spot as yesterday.
I made it back to my truck at 4:15pm, making this a 19.67 mile hike with 5926’ of elevation gain in 12 hours, 45 minutes. Here’s a topo map of my route:
When I made it back to my truck I noticed a marmot running out from underneath. Great. I decided it would be best to try to drive my truck down today in the daylight in case I got stuck, but because I also didn’t want to encounter other vehicles (if possible) I decided to eat dinner first and take my time. Also, I wasn’t even sure yet my truck would drive.
When it was time to go I was able to get the truck to move and tried to see if I could get 4WD to engage by driving the truck around for a bit, but that didn’t work. So I decided to just go for it and head back down the road, going as slow as possible. I probably maxed out at 2mph. When I got to about a mile from the end of the 4WD road I saw another vehicle turning around. It took them 20 minutes to do so, and by this point I was feeling pretty confident about my truck.
I made it back to the 36, kept trying different things to get my 4WD light to stop flashing and realized it was hopeless. I drove home and the first thing the next morning went to the dealership. The diagnosis: rodent damage. One of those darn marmots, chipmunks, pikas (etc.) had bitten through the wiring. Luckily it was fixable, and I was out of there within a few hours. They put rat tape over the wires to hopefully prevent this from happening again. I’d never heard of rat tape before, but it sounds like it should be on all wires.
I consider myself lucky: after years of leaving my truck in the backcountry this is the first time I’ve ever had this issue where it’s caused concern. I’ve chased some porcupine’s out from underneath my truck before, but that was before any damage was done.
I’ve done some serious thinking about the issue, and I think a physical barrier is the only way I’m going to keep rodents out. So here’s my idea: tomorrow I’m going to Home Depot and buying a large tarp and some bungee cords. When I park at the next trailhead I’m going to lay out the tarp, drive over it, and then secure it around my truck with bungee cords to prevent critters from getting underneath.
This is just a thought at this point, but something I hope to implement and test soon.
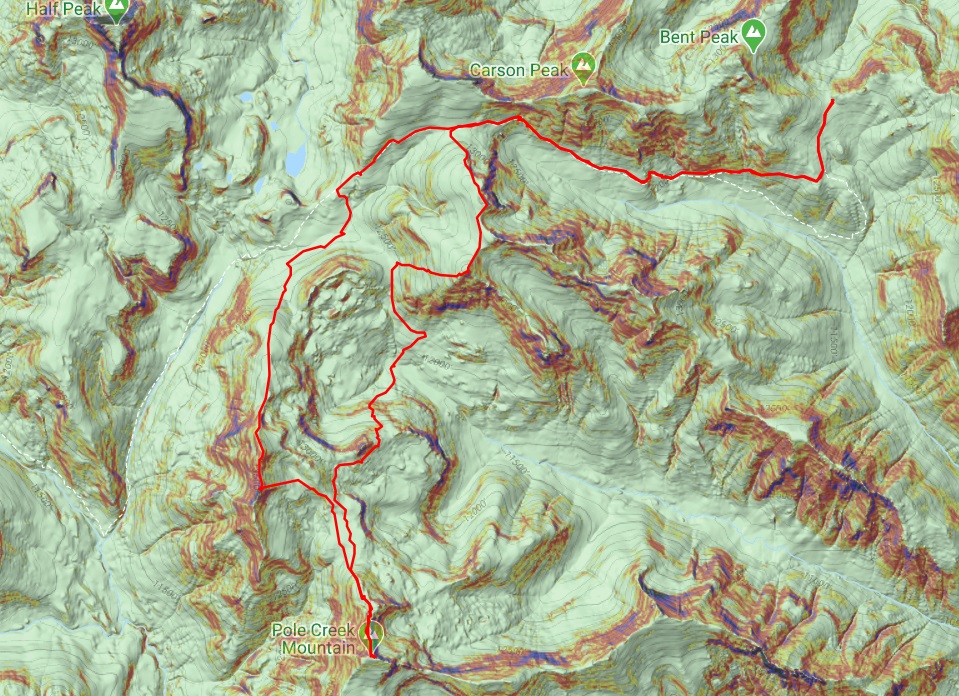
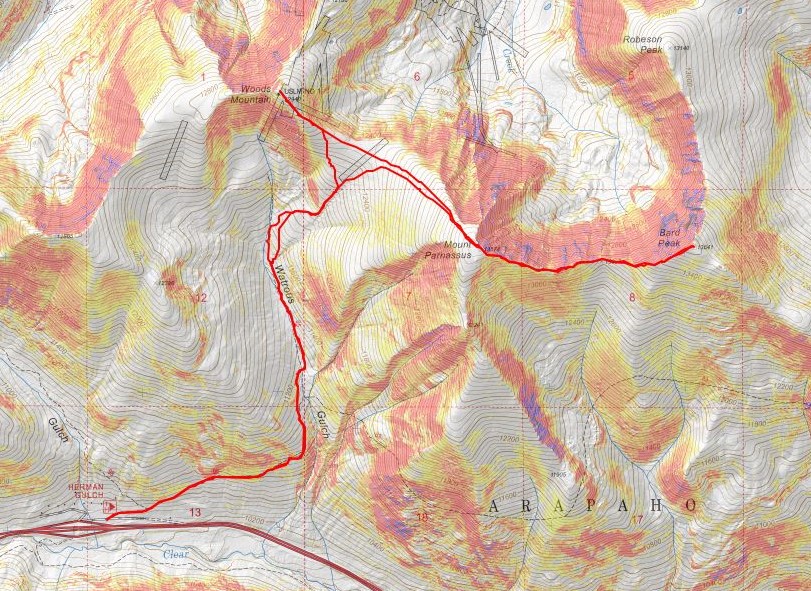
This was my third attempt going for Bard Peak. The first time I made it as far as Parnassus, but the wind and cold temperatures (and Raynaud’s) prevented me from going any further. My second attempt was from the Berthoud Falls area, and the snow just wasn’t cooperating. Imagine my surprise when I found out today this is actually an easy trail when not in full winter conditions!
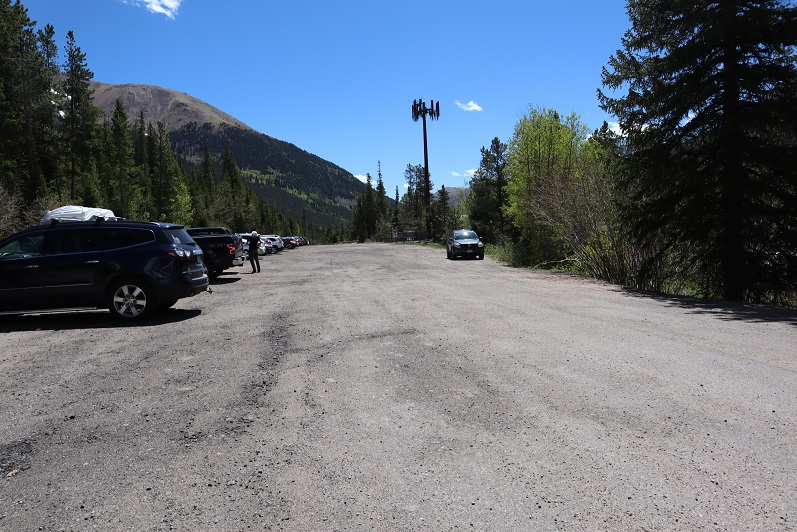
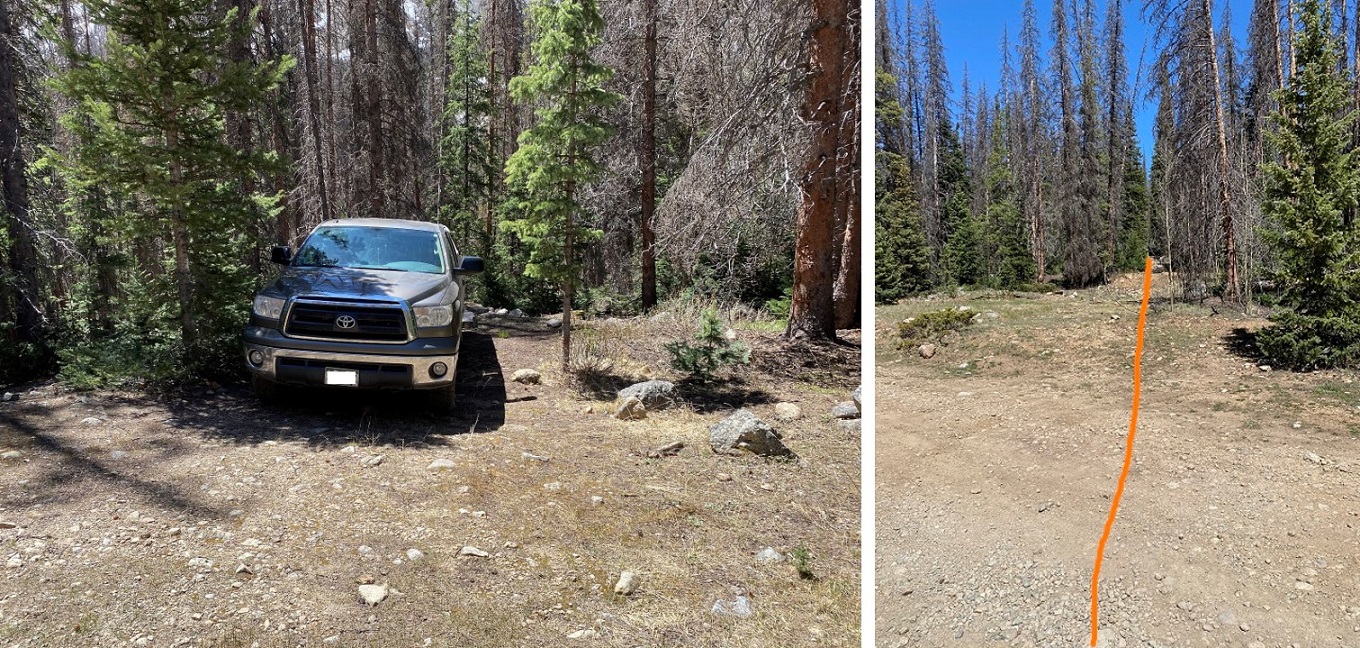
I parked at the Herman Gulch trailhead and was on the trail by 4:30am. This trailhead has tons of parking, but beware: it fills up fast. There was a full moon and I could see by looking at the mountains I wouldn’t be needing snowshoes today, so I left them in my truck.
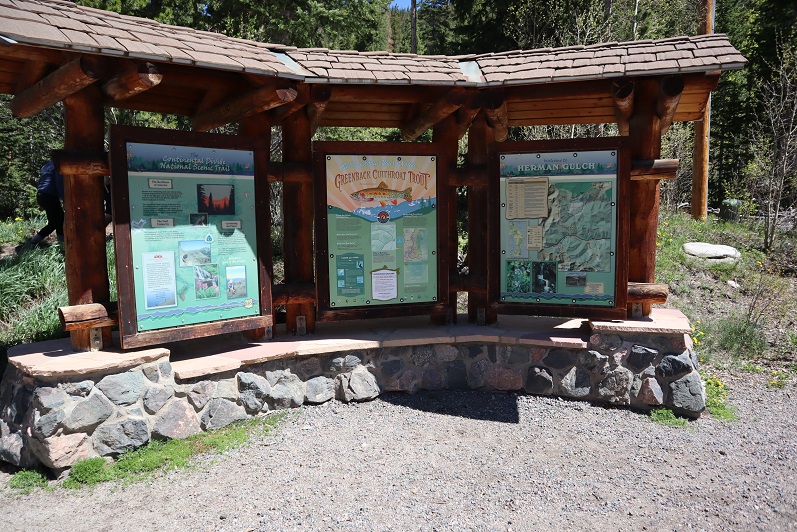
The trail starts in the middle of the parking area. I took the Herman Gulch trail to begin, which is just behind the information signs.
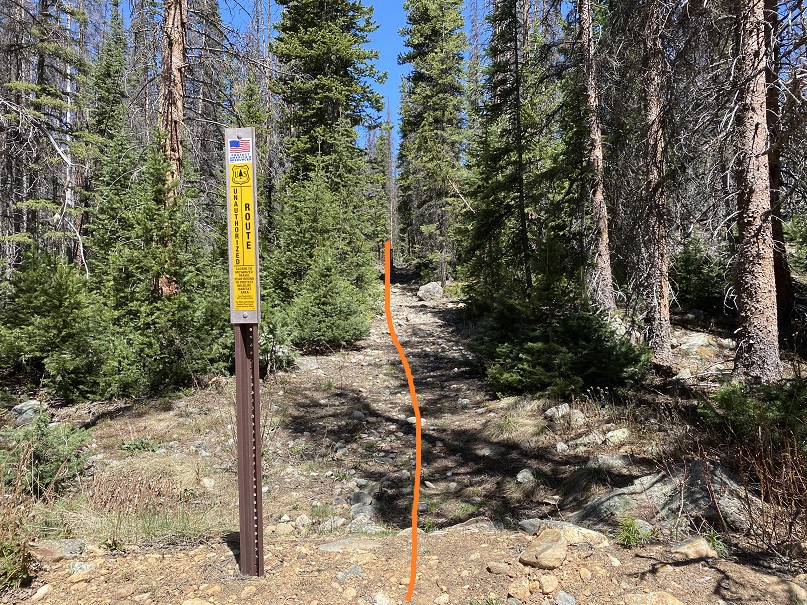
After hiking .2 miles I turned right (east) at this junction to follow the Waterous Gulch Trail.
This trail is an easy, class 1 trail all the way to the basin. Last time I was here the area was covered in snow and I had no idea there was a trail that went that far. Today the hike was easy! No real route finding below treeline.
After hiking for about 1.5 miles I came to a creek crossing in Waterous Gulch, crossed the creek on an icy log by sitting down, straddling the log, and shimmying across (due to the ice I would definitely have slipped if I’d tried to cross standing up). I turned left and headed north through the gulch on a great trail (still the Waterous Gulch Trail).
Starting here there was snow on the trail, but just enough to be annoying: I could still figure out where the trail went
I crossed a small stream and continued on the trail. Note: You can also choose to go right and not cross the stream here and take a parallel trail that leads you to the exact same place as the Waterous Gulch trail. I stayed straight here and continued to the end of the gulch on the way in and took the parallel trail on the way out. They were similar, but the one that follows the gulch also follows the stream, which was nice.
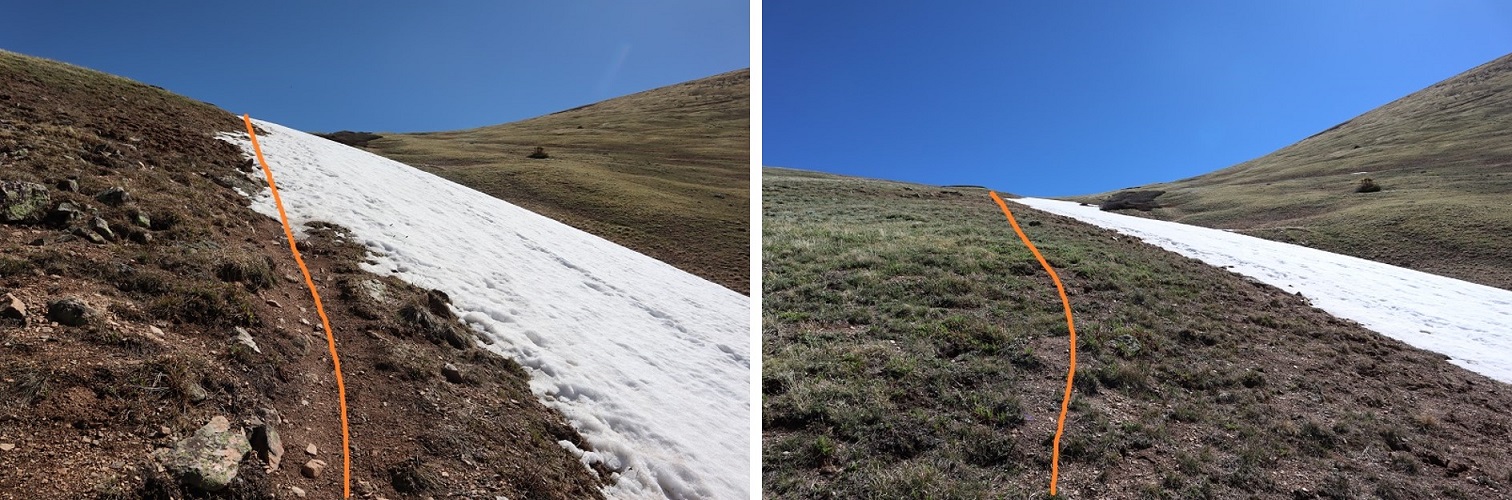
I followed the class 1 trail to the end of the gulch, and after 2.2 miles of hiking turned right and continued following the trail up to the saddle of Woods/Parnassus. There are a lot of ways to gain the summit of Parnassus. Last time I hiked further south, avoiding the saddle, and I would not recommend that route. Instead, take the easy gully and aim for the saddle and go as far as you can before turning right and heading southeast towards the summit. This is where the intense wind started and didn’t stop. Forecasted winds were 17-24mph, but those winds don’t knock you over. For the rest of this hike I was using my trekking pole for stability, hiking sideways into the wind.
The trail stopped here somewhere under the snow. I paralleled the snow to the saddle
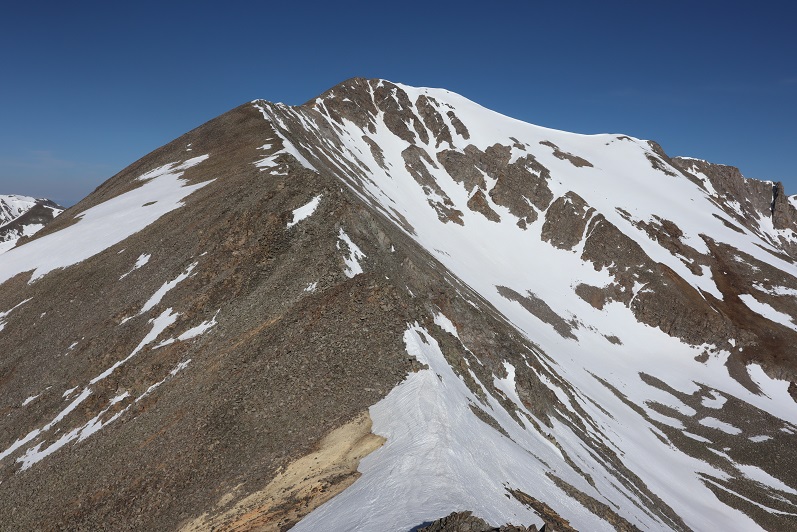
At the saddle I turned right and headed southeast towards the summit of Mt Parnassus. This is an easy hike on tundra.
The terrain gets a bit rockier near the top.
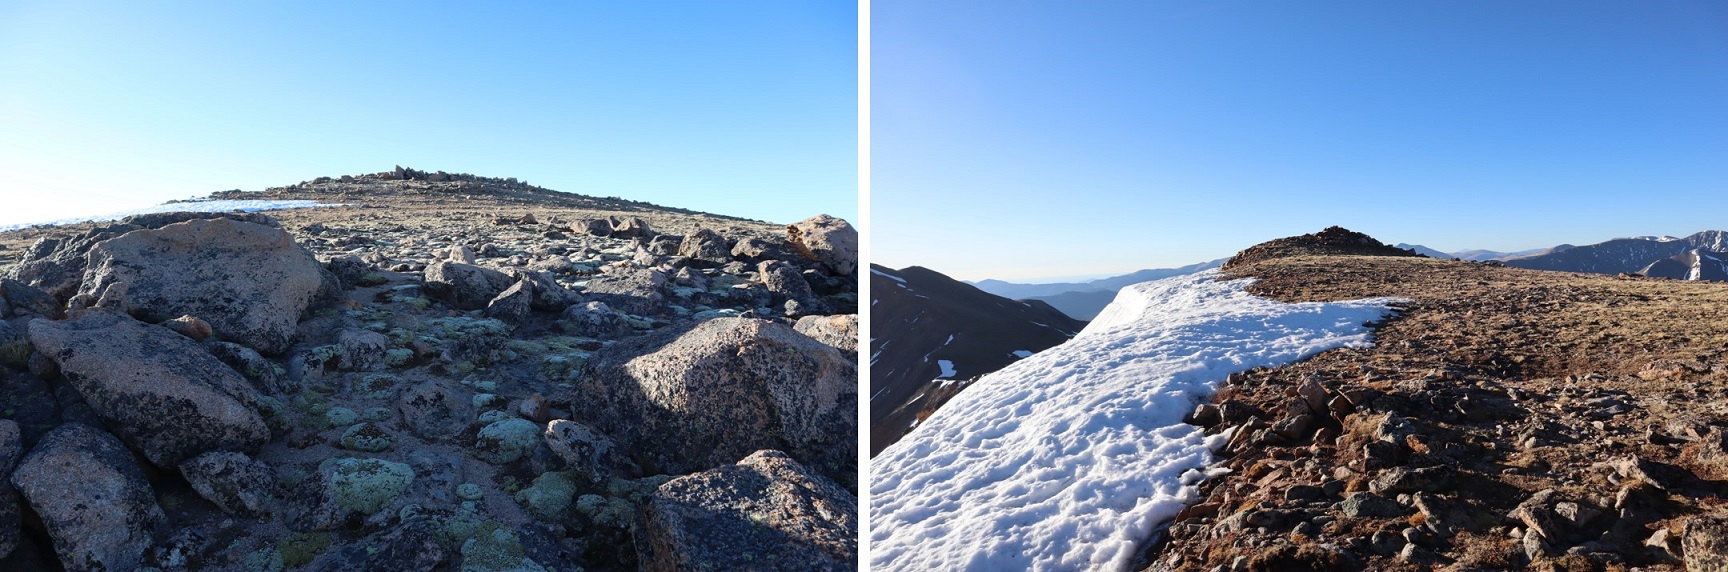
The summit is relatively flat. I summited Mt Parnassus at 6:40am, after just over 3.5 miles and 2 hours of hiking. Since this is my second summit of Mt Parnassus I’ll spare you the selfie and let you watch the summit video instead.
Mt Parnassus:
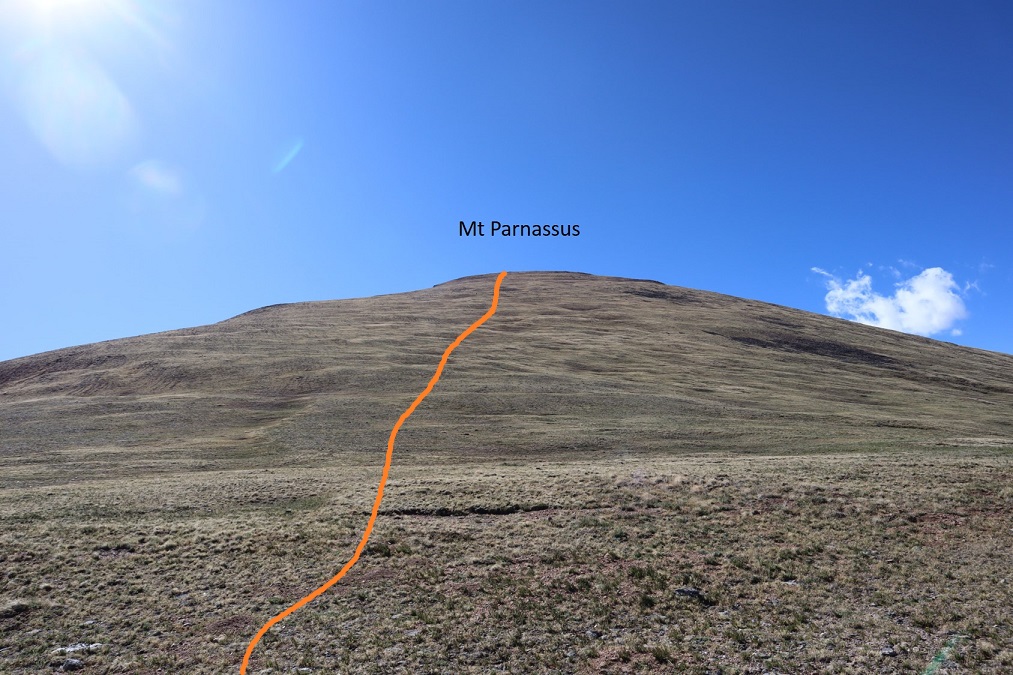
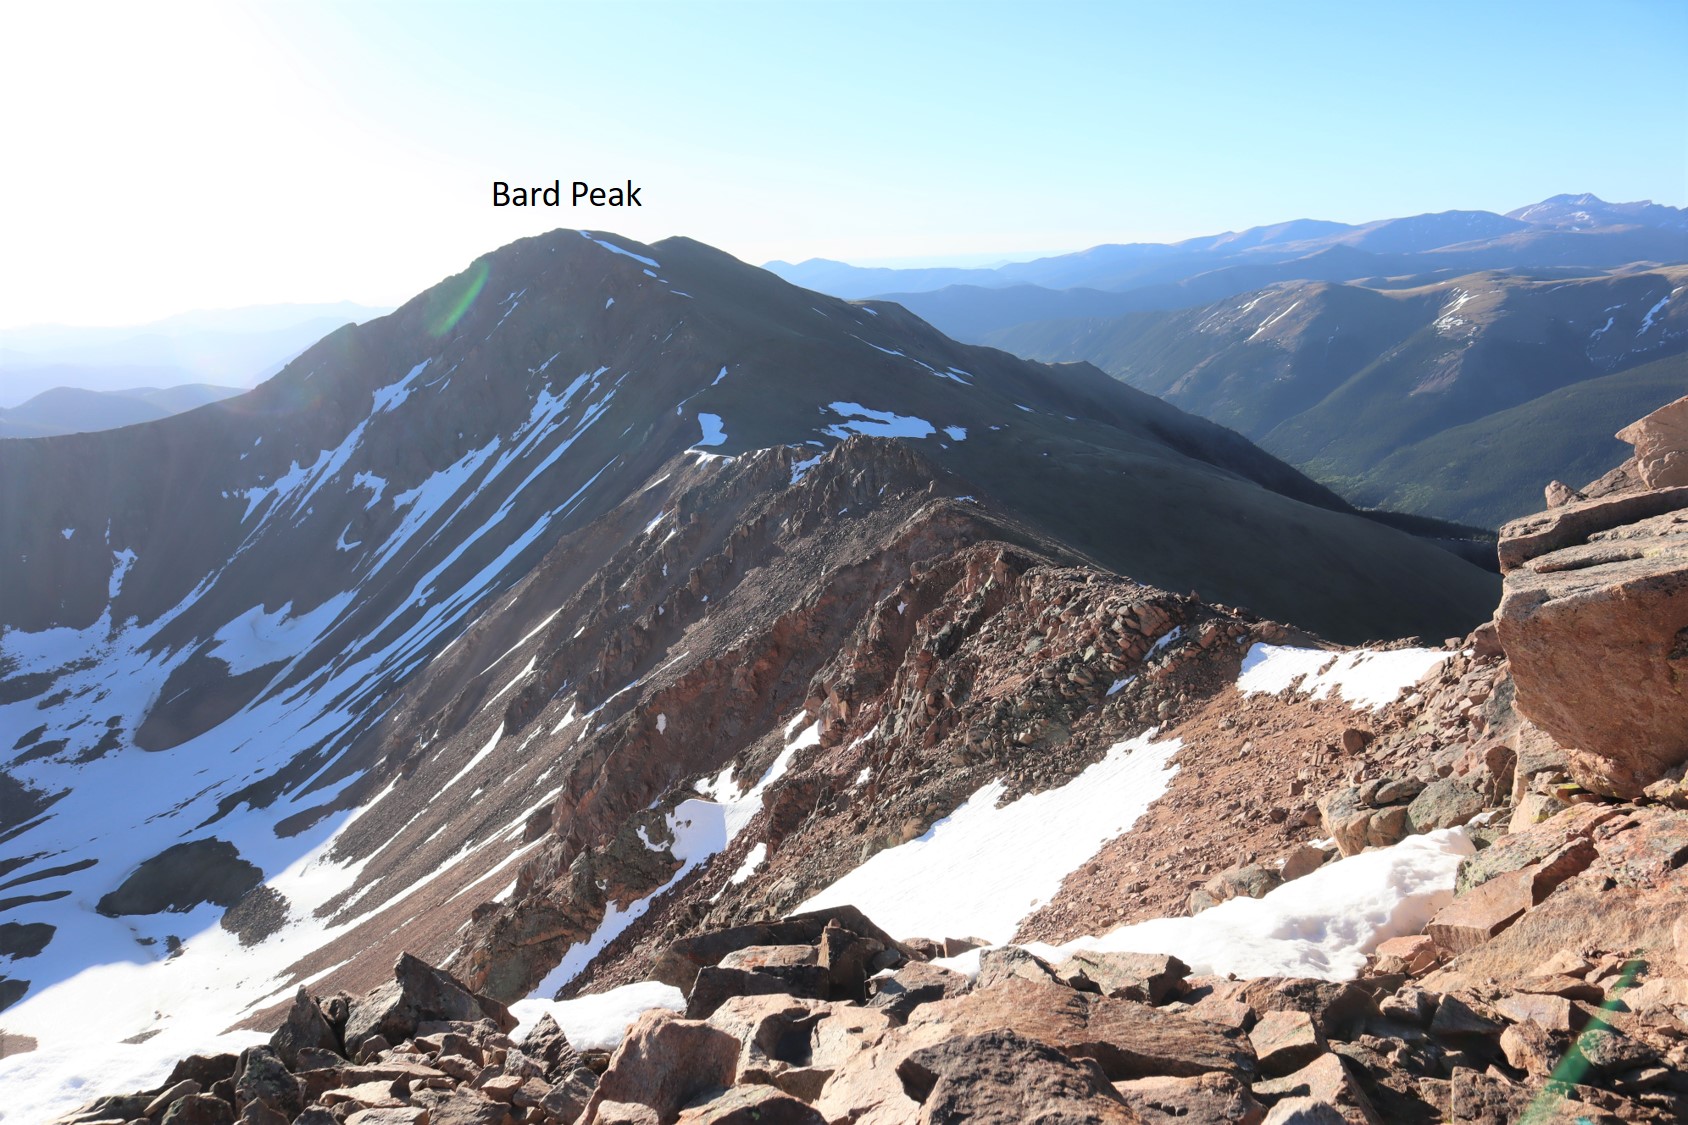
Bard Peak is just over a mile east of Mt Parnassus.
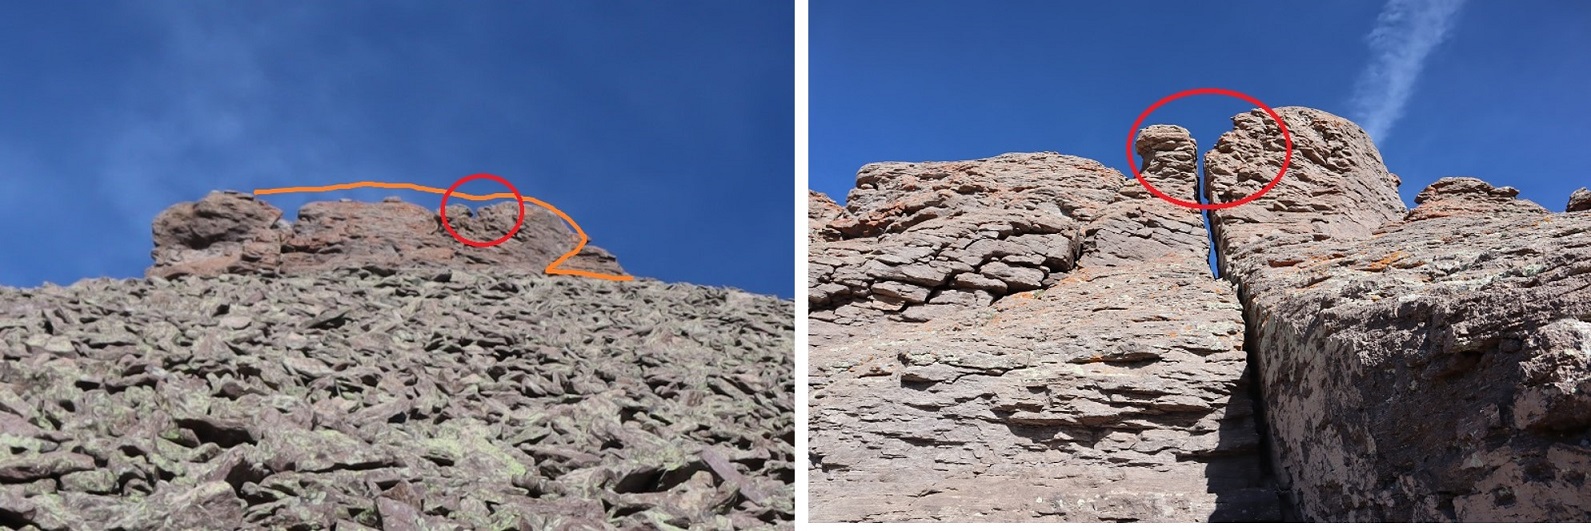
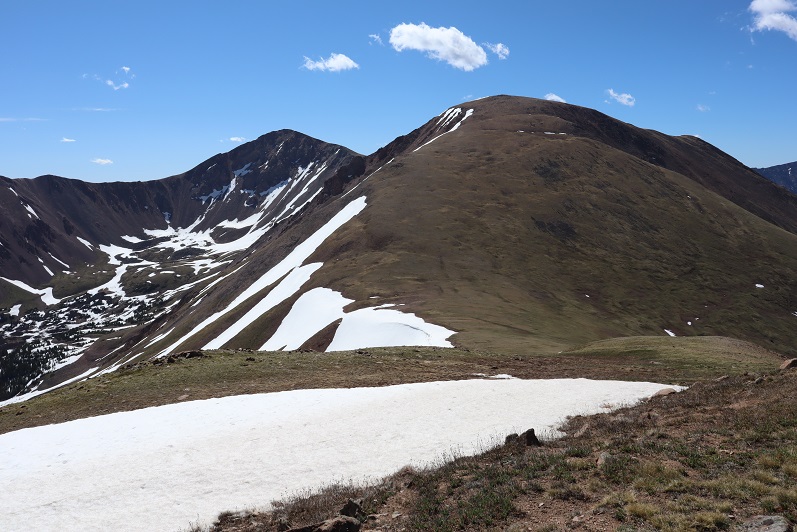
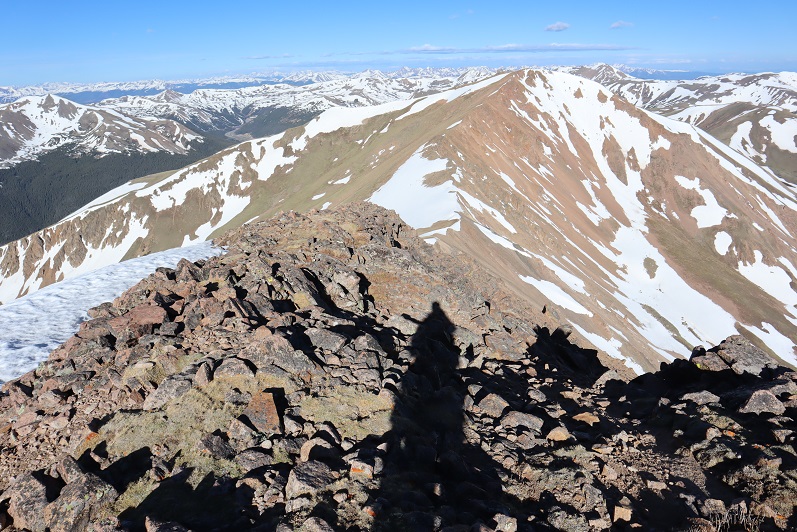
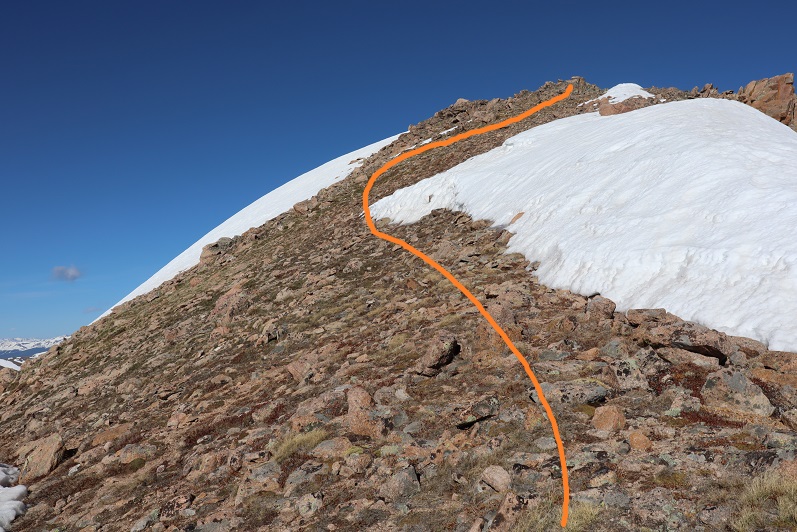
There’s a bit of a trail from Parnassus to Bard. I followed it where I could. It was faint, so sometimes I lost it, but mostly followed the ridge. It’s important to follow the ridge when snow is present. This ridge is easy class 2 ‘scrambling’. Just watch for loose rocks. I could see a faint trail go to the right of the ridge (south), but it became covered in snow and would have been difficult to cross. Here’s an overview of my route
And some close-ups in order:
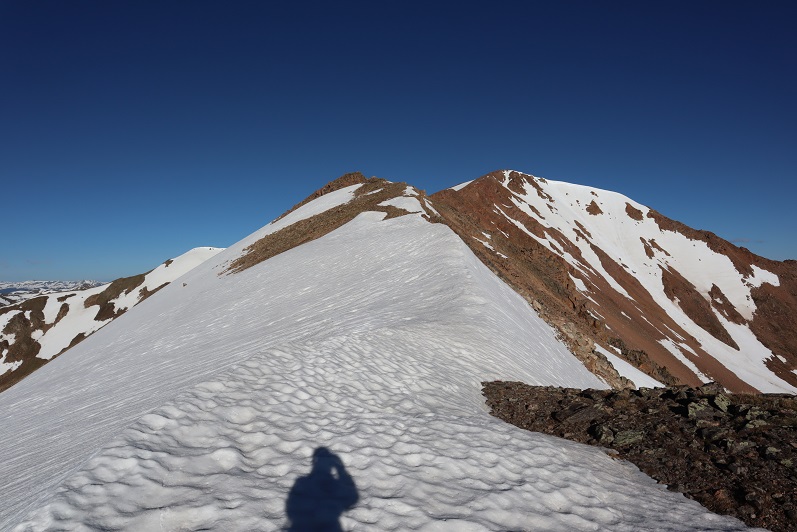
When I got to this section I did not feel comfortable traversing without crampons and my ice axe (luckily I had both). I sat down, strapped on my crampons, and crossed the snow. The snow was slippery at this time in the morning (not mushy, more like icy). You could probably traverse this section with just microspikes if you were here at the right time of the day.
Because I could I kept the crampons on until the last of the snow.
Here’s looking back on the section you want to avoid, and the reason I stuck to the ridge. You can also see a slip here would take you a ways.
After taking off my crampons and putting them away I headed up to the summit of Bard Peak, keeping close to the ridge
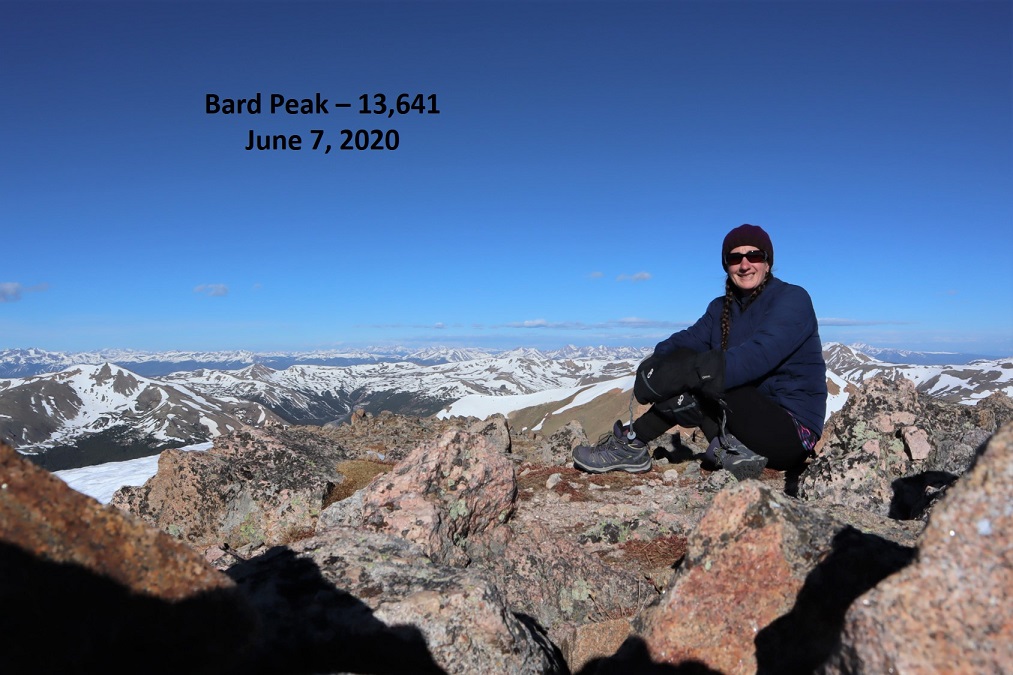
I summited Bard Peak at 7:50am, after 4.7 miles of hiking.
Bard Peak:
There was a broken summit register and a benchmark on the summit
Now to head back to Mt Parnassus. I backtracked down to the saddle, put on my crampons again, got out my ice axe, and crossed the snow.
It was easy to avoid the snow on the rest of the way back to Parnassus
From the summit of Mt Parnassus I descended the way I’d summited, back down to the Woods/Parnassus saddle
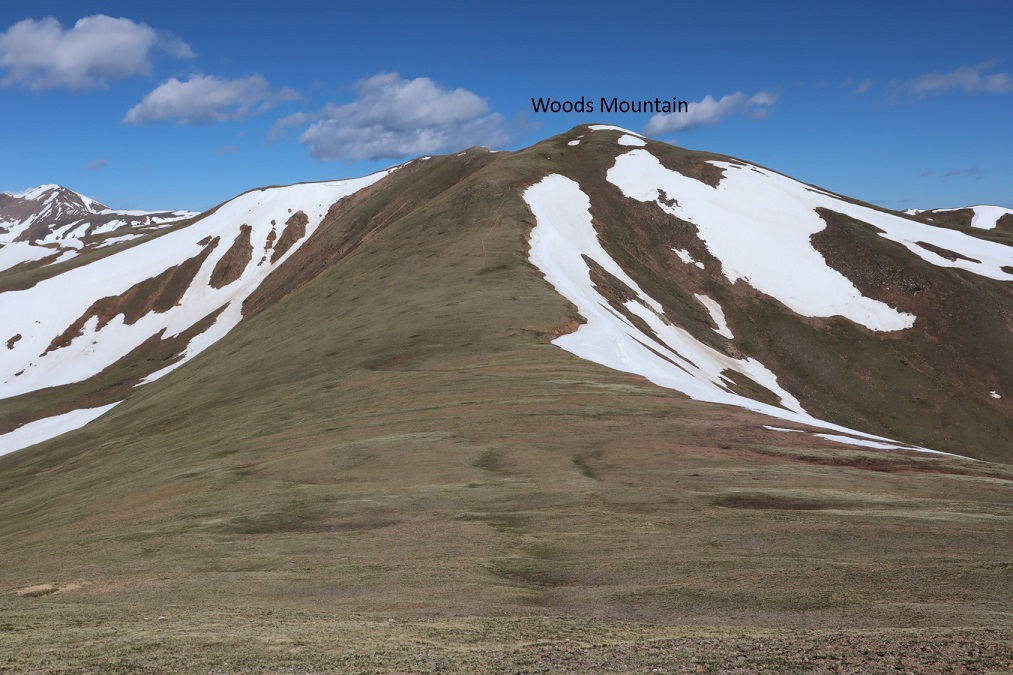
When I made it to the saddle I still wasn’t tired so I decided to summit 12er Woods Mountain as well. This summit doesn’t require much guidance: it’s an easy tundra stroll to the top. This added 460’ of elevation gain to the hike. This is where the wind became the most intense (yes, it was still blowing). It was so windy I was hiking sideways with each step, and had to over-compensate each step to stay in a straight line, crisscrossing my steps as I went.
I reached the summit of Woods Mountain at 9:40am. I’ll spare you the selfie of this one as well, since I’ve already summited this peak. Here’s the summit register and a video
Woods Mountain:
This wind was insane! Time to head back down to the saddle and back down to the gulch
I followed the trail back down the gulch, over the log bridge, and back to the trailhead. This is where I started seeing a lot of other hikers. When I made it to the trailhead the large parking area was completely full.
I made it back to my truck at 11am, making this a 10.25 mile hike with 4965’ of elevation gain in 6.5 hours. Here’s a topo map of the route:
I felt really good about the hike today: The weather had been warm, no clouds, not much route finding, and when I made it back to my truck I wasn’t even tired yet. The only thing that could have been better was the wind. It’s amazing how good conditions can change the outcome of a hike!
I made it to the 1 vehicle trailhead early the day before after hiking another peak in the area. I had a lot of time to kill before heading to bed for the night and enjoyed every minute. The Cyclone Creek Trailhead is located at 10750’, where the Cyclone Creek and CR 240 meet. It’s located 8.25 miles after turning onto CR 240 from HWY 50. The road is 4WD (not too rough, any stock 4WD should be able to make it).
Since I made it here early I decided to check out the area. The trail starts just on the other side of the road, but isn’t marked well. In fact, the sign just says “closed to motorized vehicles”
I woke up at 2:45am and was on the trail by 3am. The trail started out decent, but quickly deteriorated and became difficult to follow.
After hiking for about half a mile I turned right (east) and headed up the side of the mountain. There was no trail here and it was dark so route finding was tricky, especially in the avalanche area (11,150’). I found a small stream and followed it until it went away, right at about treeline
Here the terrain became very, very steep (scree) and at times I crawled to continue moving forward. The wind was intense and cold, cold, cold. My nose started dripping like a faucet and yes, that’s snot you see on the lens at the bottom of the next few pictures. The scree gave way to some of the loosest talus/rubble I’ve ever experienced as I made my way towards the ridge thinking “there has to be a better way to ascend the ridge than what I’m doing, there just has to”. I probably would have altered my course a bit if it were daylight and I could see.
This ridge seemed to last forever, with a few small false summits
I’m not sure I’d ascend Carbonate this way again: I’d instead ascend the ridge to the right (start ascending directly from where I parked my truck). Here’s looking back at the way I ascended. The dotted line is how I’d do it if I were to do this again.
I summited Carbonate Mountain A to frigid winds that just wouldn’t quit. There was a summit register, but I didn’t even try to open it.
I couldn’t feel my lips or fingers and decided I’d just take a quick selfie with my camera and not stop to set the camera up for a better shot. This is also when I noticed the snot on my camera lens and cleaned it off…
I needed to keep moving and I needed the sun to warm things up and the wind to die down. The only thing I could control was my pace, so I kept moving. I followed the ridge north to Cyclone. The terrain was full of loose rocks but was straightforward
This was easier than it looked and didn’t take much time. Here’s looking back at the decent off Carbonate Mountain, and the ascent route up Cyclone Mountain
Somewhere along this route I stopped to put on my balaclava, and things immediately warmed up a bit. Here’s the talus filled final push up Cyclone
There was a summit register but it was open and empty. The wind hadn’t stopped but I was a tad bit warmer. I set up the camera, but only took one shot. This is what I got
Here’s the route to Grizzly Mountain. I was especially concerned with the area circled in red, as that’s the scrambling section and I was worried it had some snow I couldn’t see from my view atop Mt Aetna yesterday.
It looked good from this angle. I kept going, looking for possible bail out routes should I need one. I descended Cyclone Mountain, which was once again composed of steep and loose rubble
The rest of the trek was on more stable ground as I headed towards the traverse.
Here’s looking back on Carbonate and Cyclone
From the beginning the traverse over to Grizzly Mountain doesn’t seem that intimidating
But as soon as you round the first corner things get interesting. I began by sticking to the ridge
But that quickly became impossible. The rock here is very, very loose, large, and ready to fall. There are tons of rock-filled gullies and route finding can be tricky. I stayed to the left of the ridge the entire time because the right side was full of varying amounts of snow. I definitely experienced some class 4 sections. Here’s the way I went:
Here things got spicy, as I encountered a gully with several options for descent. There seemed to be three possible lines. I felt the safest route was the middle route and aimed for the snow
It’s steeper than it looks. Here’s looking back at the route I took. I’m thinking it was about 35 feet of downclimbing
I continued to make my way down towards the snow filled saddle. Luckily it was firm and easy to cross. I breathed a big sigh of relief when I made it here, but the dangerous part wasn’t over yet
Here’s an overview of my way to the saddle (looking back on my route)
The rock was still loose and I had to be careful to triple check every hold so as not to dislodge a rock. I went slowly here, carefully choosing my route.
Here’s the final route up Grizzly. The terrain became more stable as I continued, but the rocks were always loose
I summited Grizzly Mountain at 9:30am.
Grizzly Mountain Summit:
Here’s a look back at the ridge traverse as seen from the summit of Grizzly Mountain
While on the traverse I’d studied my intended route down. I was able to avoid most of the snow to head down into the basin.
While avoiding the snow I instead descended on scree and loose rock: I wasn’t sure which was worse, the ascent up Carbonate or the descent down Grizzly. I took it slow to avoid rolling an ankle and headed towards the basin. Here’s the route out:
I did have a little snow to contend with, but only for about 100 feet or so. The conditions were perfect to cross without traction.
Here’s a look at the rubble
And a look back at my descent route.
Once in the basin I knew I wanted to stay just to the right of the trees and follow the creek back to my truck. There was supposed to be a trail here, but I was unable to see it from above. Either that or it was under one of the dozens of small streams of water. What I hadn’t known until I’d made it down into the basin was the ‘dry’ area between the trees and the creek was actually a boggy mess! The mountains were melting out. It was impossible not to get my feet wet. For a while I tried hiking in the trees but the snow was just soft enough to make postholing miserable and snowshoes overkill. So I stayed in the marshy area, following game trails through the willows. I even saw two elk bounding away from me as I sloshed along.
I passed an avalanche area (not the same one as in the morning) and rounded a small boulder field, always keeping the creek to my right
In this area I was almost done with the hike but somehow I came across an actual trail and followed it back to my truck.
I made it back to my truck at 1pm, making this an 8.75 mile hike with 4090’ of elevation gain in 10 hours.
Looking from Mt Aetna, here’s an overview of the route